Ravioli Lasagna…

Ravioli Lasagna

My part-time job at Crate and Barrel requires me to work longer than normal hours over the holidays. No worries, I love the hustle and bustle of the holidays and there’s no better place to experience that than working retail. The challenge for me is how to plan dinners that don’t consist of take-out, pizza or soup and sandwiches. That menu faire gets boring rather quickly. I found one solution in a Costco cookbook – that’s right a Costco cookbook!
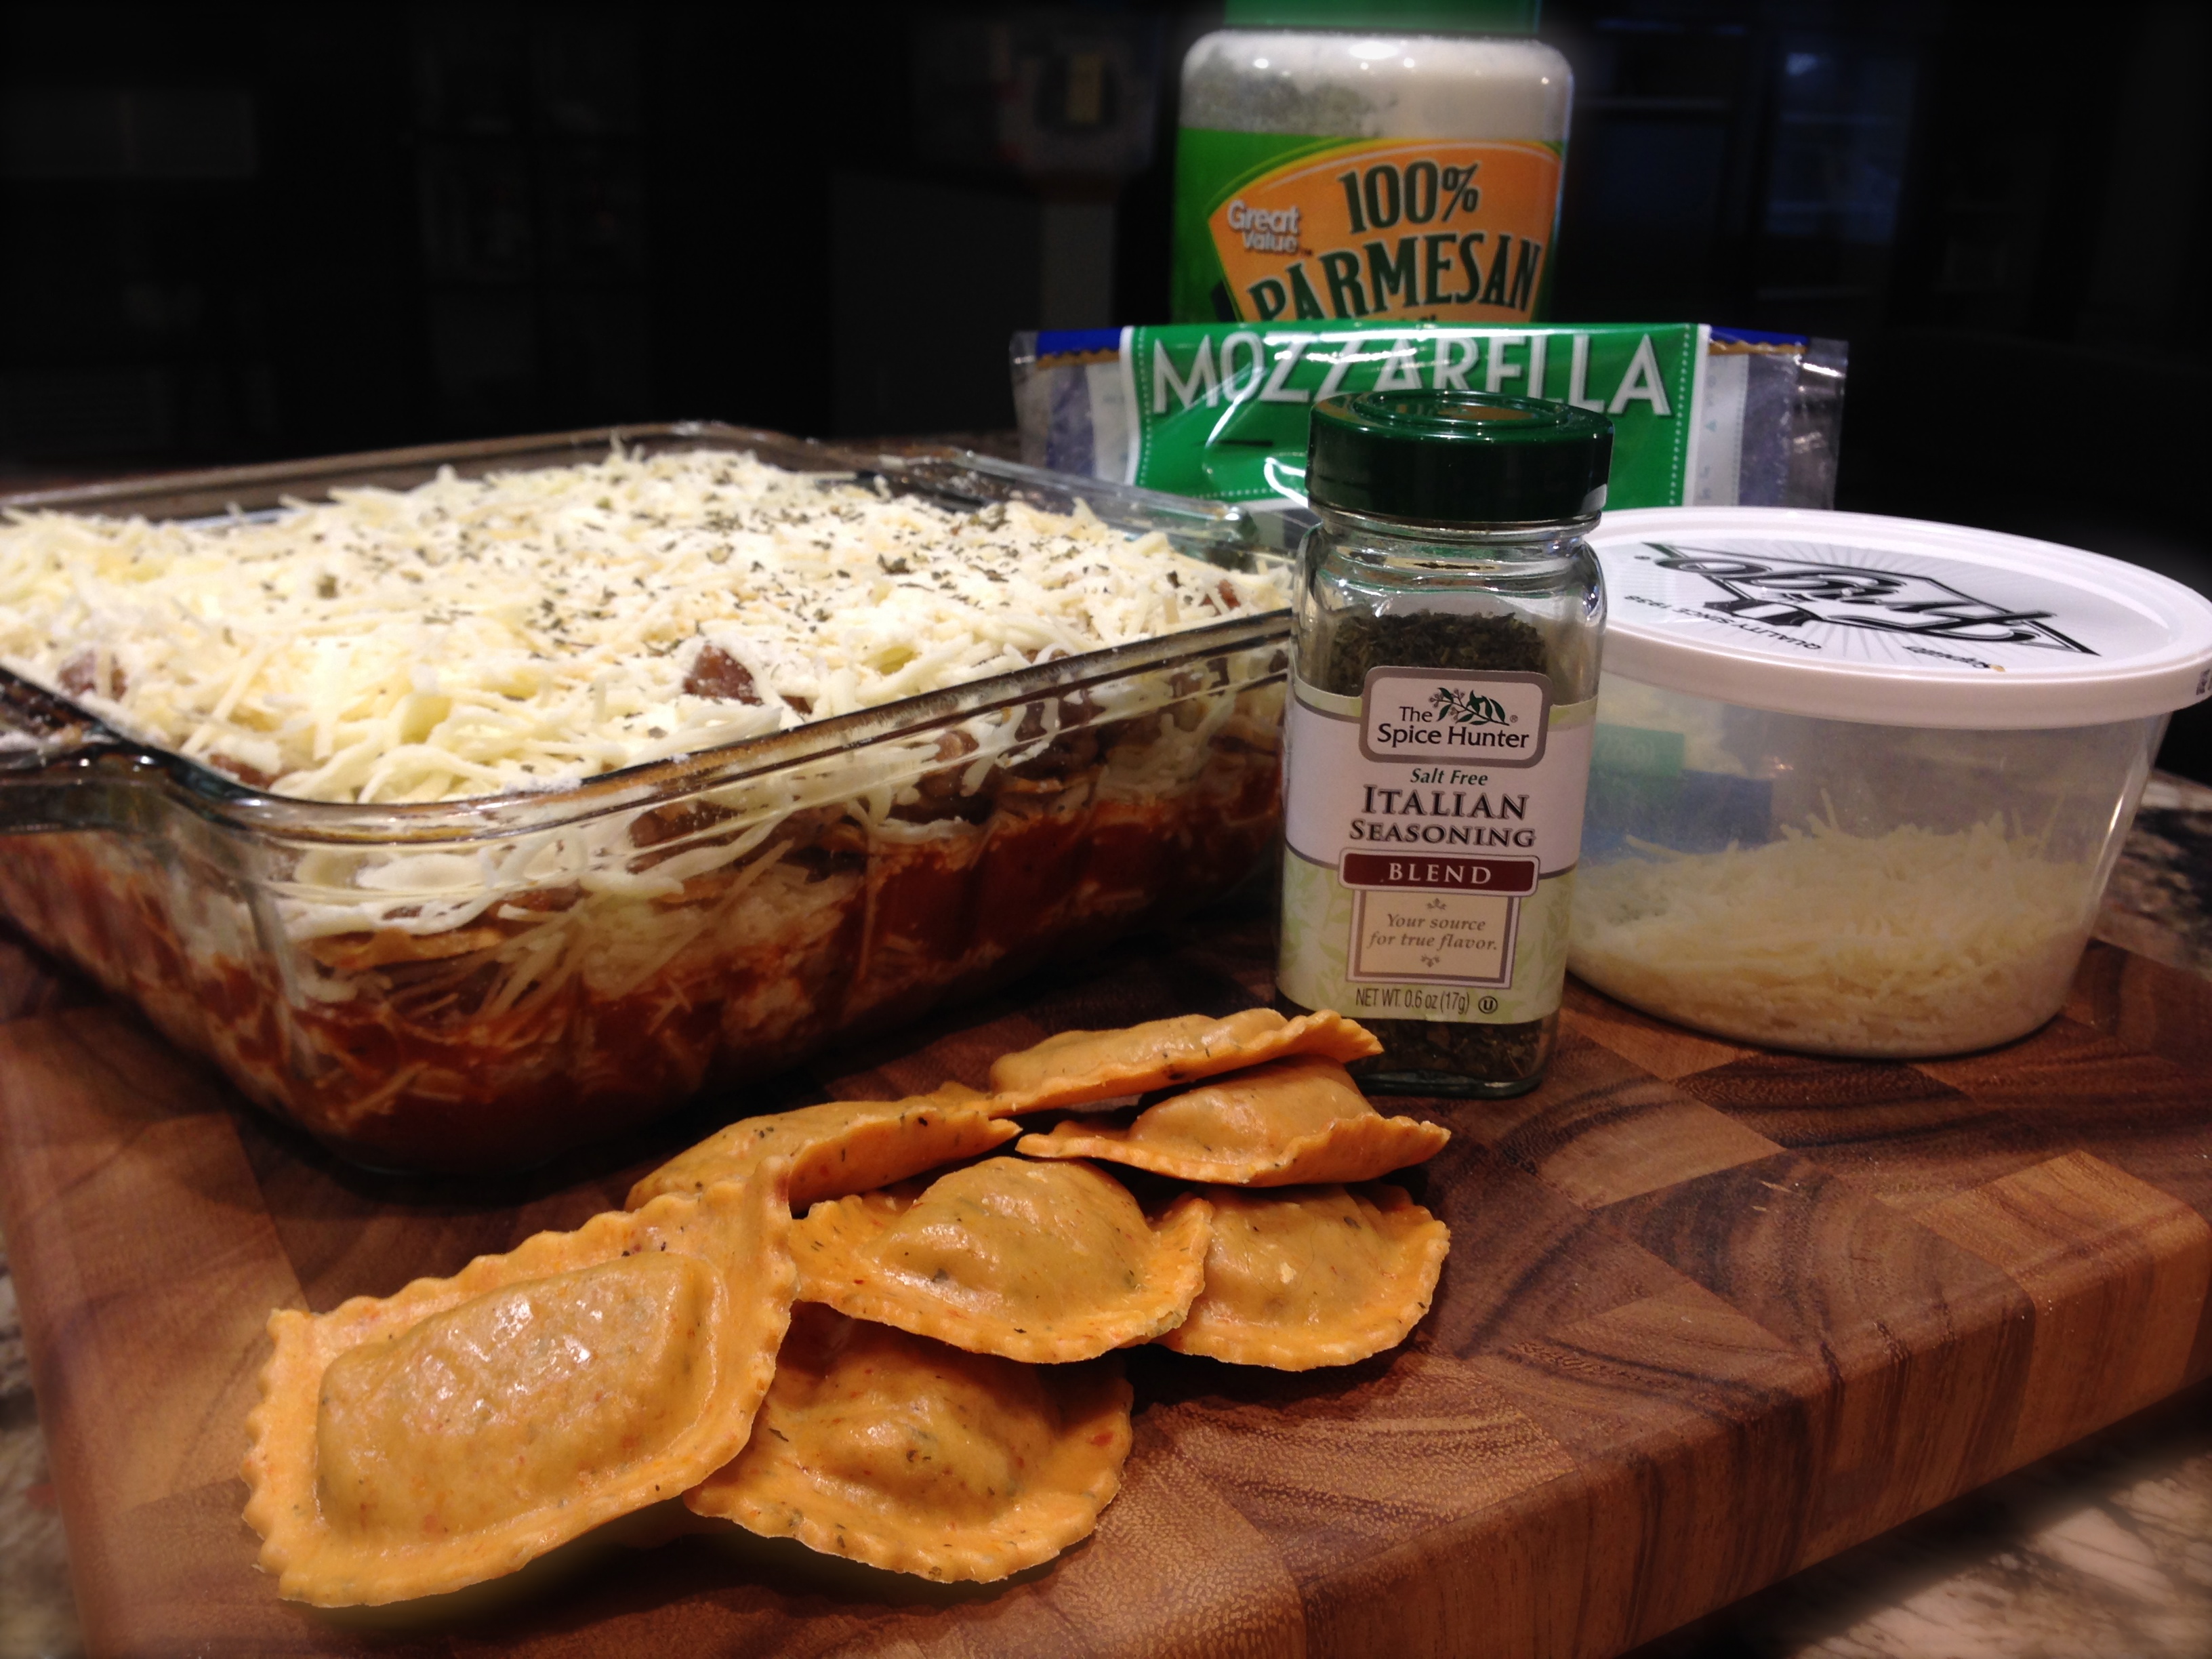
Ingredients

Ingredients

If you are a Costco shopper you know that every year they give away a pretty substantive cookbook. The recipes in the book are designed to use the products they sell, but all in all there are some pretty decent recipes included. Over the years they’ve even featured recipes by prominent celebrity chefs such as Ina Garten, Sandra Lee, Ree Drummond and Michael Symon. What I like about the cookbook is that every recipe has a picture of the finished product. I am not a big fan of recipe books that don’t have pictures. I need something visual to help me understand what I am trying to achieve. The books provide a myriad of recipes from appetizers, main courses, celebrity chef favorites, desserts and beverages. And the fact that it is free is just icing on the cake. They usually give the books away at holiday time, so be on the look out for them. This year they started giving them away on Black Friday and continued as long as quantities lasted. I made my husband make a special trip to get ours as every year I have been able to glean a couple of family favorites from each of them.

The recipe I’m going to share comes from a book they produced three years ago. The title of the book is always the same, “Creative Cooking the Costco Way,” and this recipe is called Baked Ravioli (Lasagna Style). I like this recipe because it is simple, it can be adapted in a variety of ways, and it’s one that can be made a day ahead so it’s perfect for those nights when you want something more for dinner without a lot of thought or effort. I’ve been making a version of this for over three years now so I’ve got this one down pat. Here is my rating and lessons learned:

Rating: A – a great go to recipe, can be adapted in a variety of ways, easy to prepare and definitely something your better half can start while you’re still at work (with my husband I write the directions on a post-it and put it on the door of the microwave so it’s there in plain view for him to see).

Lesson learned 1: Don’t be afraid to play with this recipe. You can basically use any type of ravioli you like. I first started out using Bertoli four cheese ravioli and then branched off into some of the more gourmet-type blends. The ravioli used in the pictures in this blog were half-moon mushroom and cheese ravioli, but you can use any kind you want. This time I also added some additional left over mushrooms that I partially sauteed as well as some partially cooked italian sausage that I crumbled, cooked and put in the layers. No need to cook your additional ingredients completely through as the dish will bake in the oven for at least an hour. Depending on the ingredients you use, this dish can also be meatless.
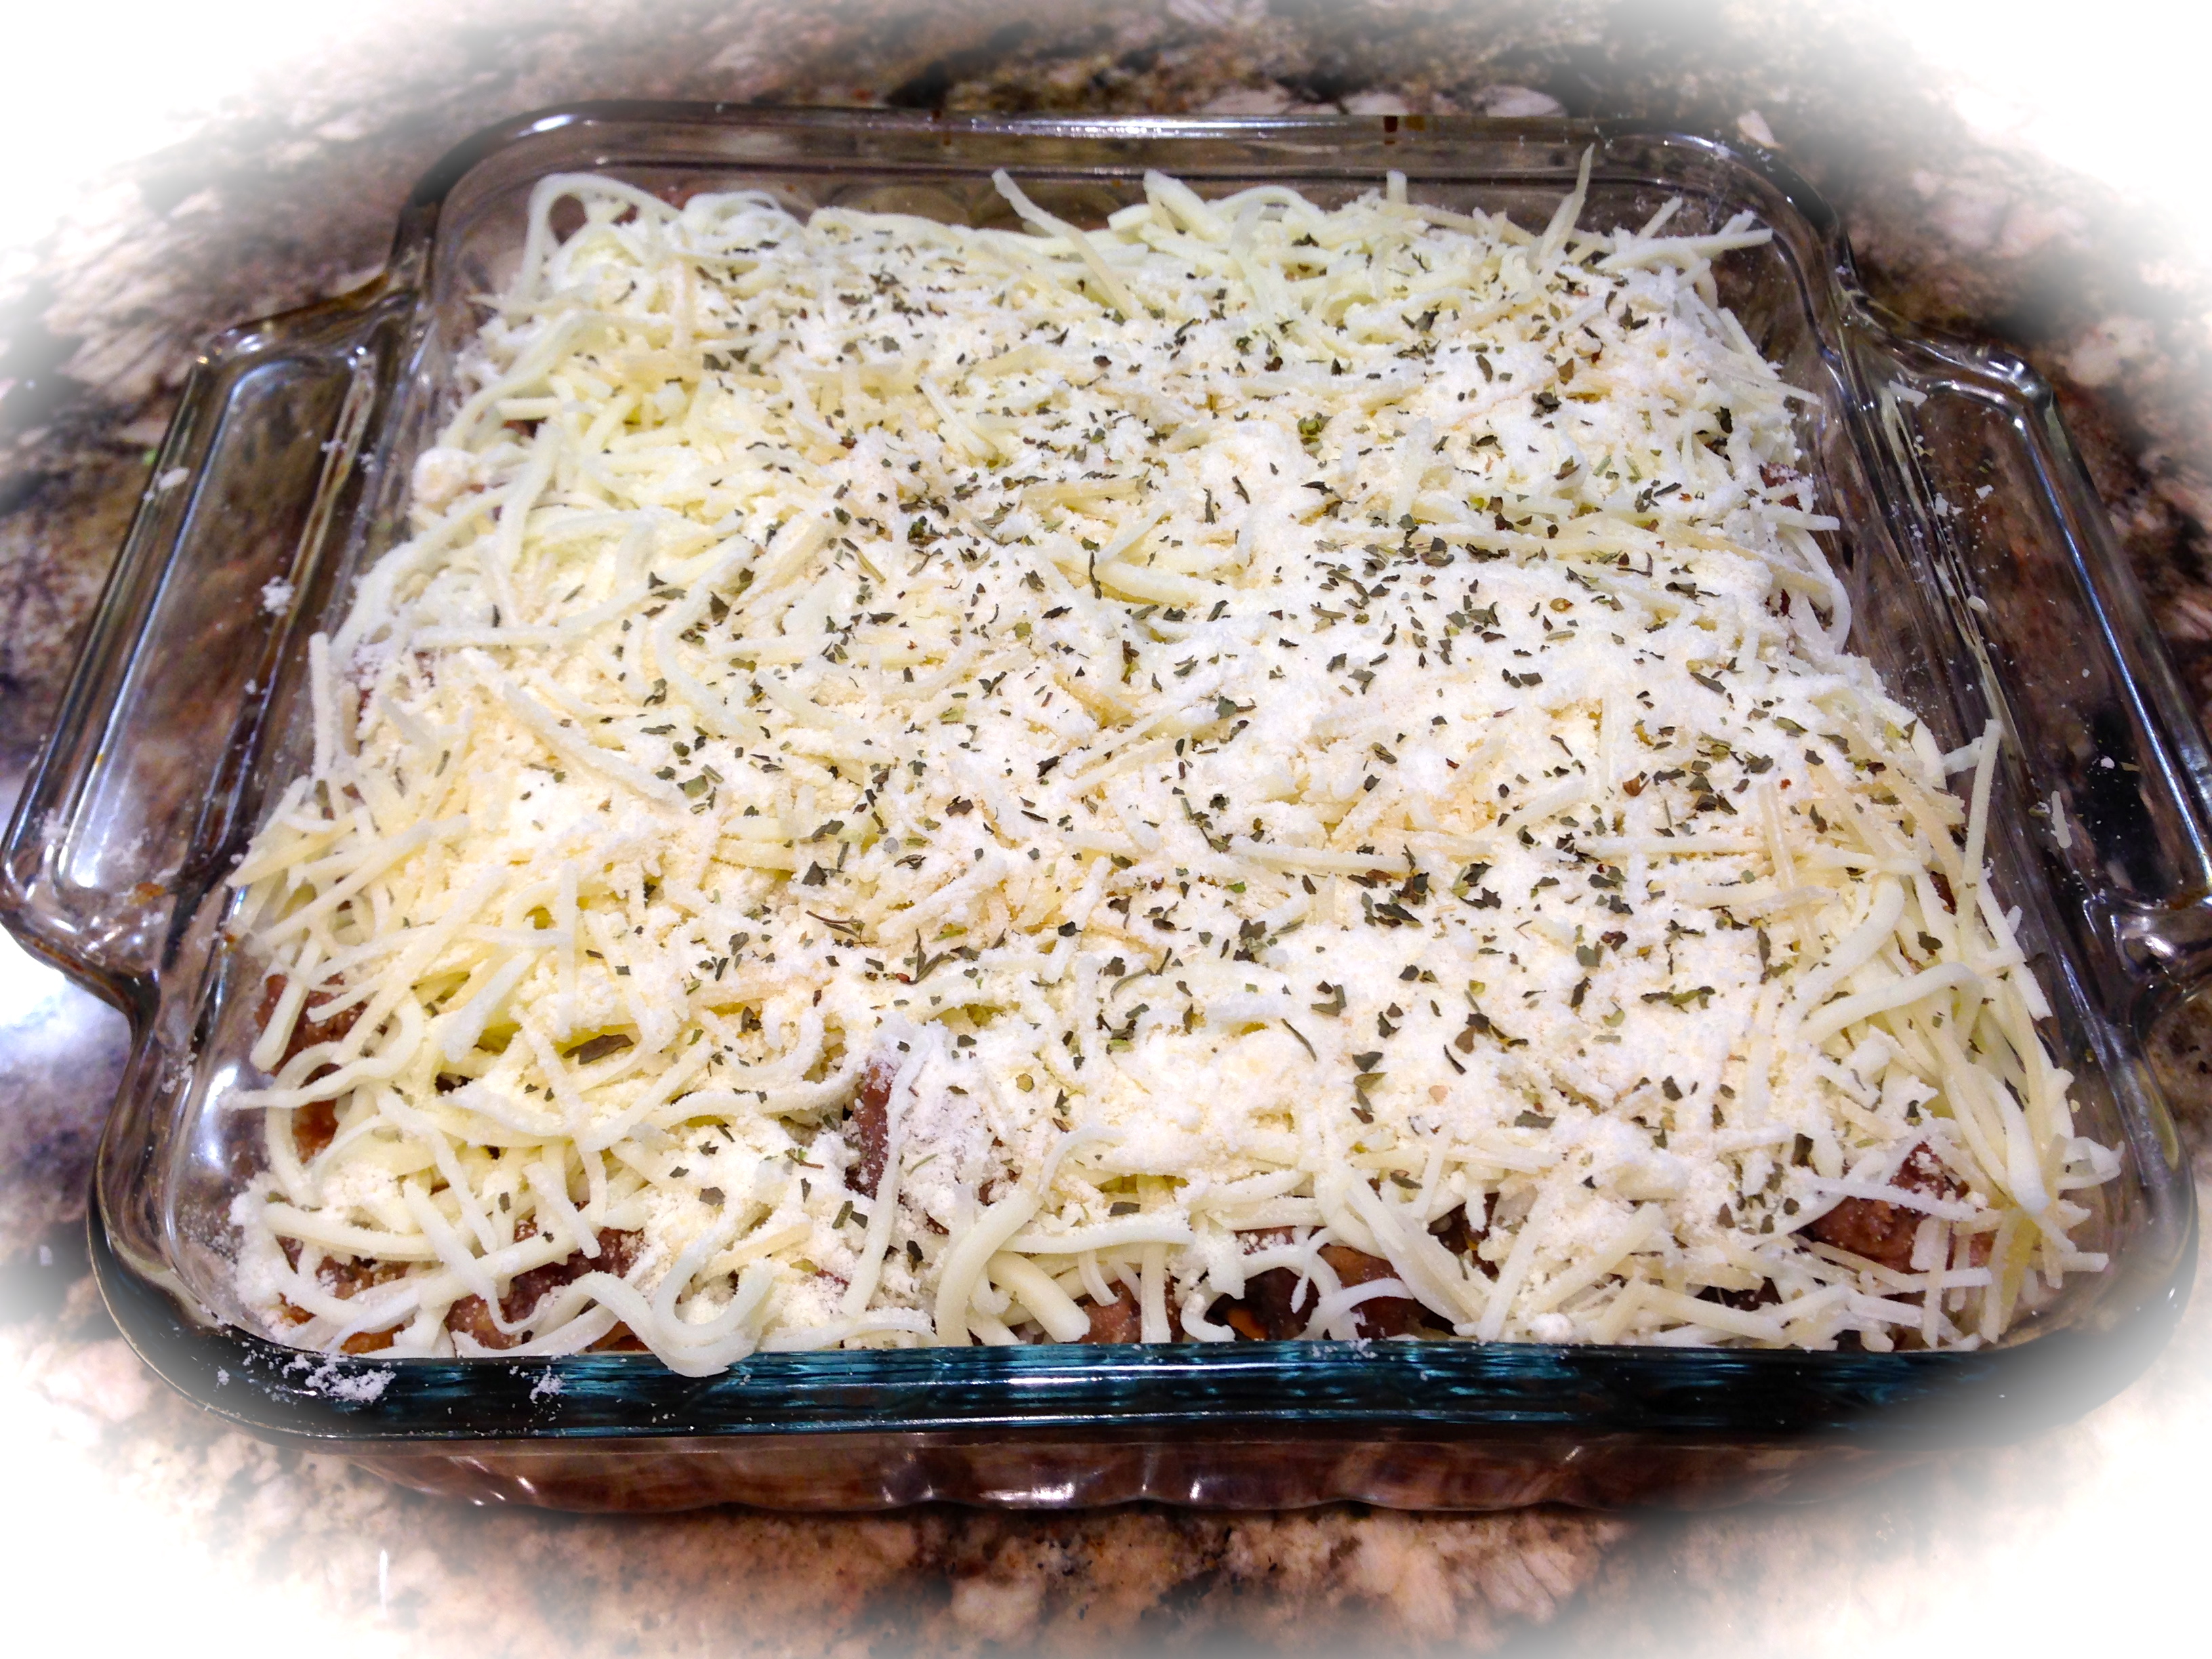
Before baking...

Before baking…

Lesson Learned 2: If you are making it the day before, make sure you take it out of the refrigerator and let it sit on your counter for at least an hour and a half before baking it. If you don’t it will take much longer to bake and will not cook evenly.

Lesson Learned 3: I like to make sure that my oven is not only preheated but at the desired temperature for at least 10-15 minutes. That way I feel I have a true temperature. My oven takes about 15 minutes to get to 400 so I usually plan on a preheat time of 25 minutes.

Lesson Learned 4: Don’t forget to use a little bit of cooking oil and sauce to cover the bottom of the pan before doing the layering. If you don’t you won’t be able to get the finished product cleanly out of the pan.

Lesson Learned 5: I like to make sure that the ravioli is positioned tightly together, even with a slight overlap. That way you have a nice firm layer when it’s cooked.

Lesson Learned 6: Make sure to tent the foil over the dish for at least the first 50 minutes of the cooking process. After that, remove the foil so that the cheese can become golden brown.

You can make this recipe as simple or as intricate as you want. All of the work goes in to putting it together. Once that is done it’s simply a matter of popping it in the oven, baking it and enjoying it. Serve this with some garlic bread and a salad and you’ve got a delicious and easy meal. Try this one – I guarantee you will use this as a go-to recipe just like I do!

Ravioli Lasagna...

  • Servings: 4-6
  • Difficulty: Easy
  • Print

THE INGREDIENTS:

Cooking oil (I use olive oil) – just enough to very lightly grease the bottom of your pan

1 – 29 ounce jar of a red sauce of your choice

1 large package of ravioli (again your choice, the ingredients and shape – square or half moon – do not matter)

Italian sausage or meatballs (again the amount your choice, depending on how much you want in the recipe. I normally take two sausage links, crumble and partially cook the meat, drain it on paper towels and then put it over the ravioli when I make the layers).

Other ingredients to taste – (I often add partially sauteed mushrooms or peppers. No need to cook them through, just give them a good start).

Mozzarella, Parmesan and Romano Cheeses

Italian seasoning

DIRECTIONS:

Preheat oven to 400 degrees. Grease the bottom of your pan (for the two of us I use an 8 inch square pan) and spread a layer of sauce over the bottom. (You don’t need a lot, just enough to lightly coat it). Put down a layer of ravioli flat side up on the sauce. Position the ravioli close together, even with a slight overlap. Add any additional ingredients you have prepared (I did mushrooms and italian sausage on this one). Put another layer of sauce on top and then add a layer of mozzarella, romano and parmesan. Sprinkle with italian seasoning and pat the layer down lightly. Repeat the layering. Pat down again and cover with tented aluminum foil. (If you are making ahead, just cover with foil and put in the refrigerator. Just don’t forget to tent the foil before putting it in the oven as you don’t want all the cheese to stick to the foil).

Bake for one hour or until completely heated through. For the last 10 minutes of the baking process, remove the foil so that the cheese can brown. Let stand for five minutes before serving.

Ravioli Lasagna

Ravioli Lasagna

So This Is Christmas…

Oh Christmas Tree...

Oh Christmas Tree…

Christmas Day 2013 and lots to reflect upon. On this day more than any other you think about the many things for which you are grateful as well as precious times past. Those thoughts can bring both smiles and tears as you revel in the holiday spirit but miss those that can no longer share it with you. For me, Christmas is the time to reflect on the past year, the good, the bad and the ugly and to begin the process of creating the hopes and dreams for the upcoming year. So here goes:

All in all, 2013 was a pretty good year. It started out rocky but is ending up positively. In January I began feeling pain and numbness in my legs that took me on a health roller coaster of doctors, vein procedures, physical therapy and finally a diagnosis of spinal stenosis. Scary as it may sound, finally getting the diagnosis and having an operation to fix it is what I am most grateful for this year. Not having pain in my legs and the feeling of having “my old legs” back is a gift I am not taking for granted. I laughed when a friend told me that I basically had a “roto-router” procedure on my spine but call it whatever you want, it did the trick. So this year I am looking forward to being physically able to work on a healthier life style without experiencing pain in the process.

Holiday Decorations

Holiday Decorations

I am also grateful for being retired and now just working on things that I choose to and that I love. Who would have ever thought that I would love working part-time in retail? Not me, that’s for sure. And I am sure that working retail in general could never be something that I would enjoy, but working at Crate and Barrel has been a blast. A great company, great people and working in customer service has really, for all intents and purposes, “cranked my switch”. I have just enough hours to effectively learn the business (I am so enjoying learning the ins and outs of corporate America) but not too many that it prevents me from pursuing my other interests. So it is a win-win situation and as long as it continues to be fun I will do it. And working on the two NRPA schools is really a joy for me. My first love was always teaching and to be able to work on schools that attract the best of the best in the field of Parks and Recreation is a gift I treasure.

I am also so grateful for my friends and to be able to have regular contact with them either the “old fashioned” way, by telephone, or the more popular ways by texting, emailing (although this is becoming less popular these days) and through social media. I love seeing what is happening in their lives and sharing what is happening in mine. To be able to maintain contact with people that I taught some 30+ years ago, colleagues from work days long gone by and new friends made along the way brings untold joy into my life.

The Christmas Village

The Christmas Village

Having had the opportunity this year to vacation with some old friends was the best. True friendship exists when you can spend time apart but, when finally together, pick up right where you left off without regret or awkwardness. We laughed so hard we cried, and we enjoyed each other for who we are now as well as for our past connections. Those friendships last a lifetime and I am so grateful to have those kinds of friends in my life.

I am particularly grateful for a special surprise gift I got this year from a former student. Nothing like getting some Lou Malnati’s pizza and popcorn to bring you back to the good ole’ Chicago days. The gift was totally unexpected and brought about tears of joy, the best kind of tears. This gift was a great reminder to me that it is the small things, the unexpected kindnesses in life, that truly matter the most.

Paying it forward by performing random acts of kindness, that is becoming a tradition for me during the holidays and really should be a year-long tradition. Buying an unsuspecting person their Starbuck’s order and looking at the smile on their face when they were told – that was a good one for me this year. But I think I am going to try to spread this out during the rest of the upcoming year as well. It makes you feel so good to do something for someone, just because, with no expectation in return. That is the true act of giving and what I’ve learned along the way is that giving is just as rewarding, if not more so, than receiving.

Me and My Dad By The Tree...

Me and My Dad By The Tree…

I can’t escape thinking about my parents at the holidays. They were the ones who always went out of their way to make my holidays special. The annual downtown Chicago shopping trips, consisting of a march up and down State Street (always ending at Marshall Fields), coffee and a treat at the Walgreens buffet (yes they used to have one), several walking trips back to the car (my dad’s job) to drop of the myriad of packages and dinner at Millers Pub (always their lamb chops for me). I remember one year my mother having too many of a drink called a “Tom and Jerry”, that was one of the more memorable dinners! We always did our trip on the first Saturday in December and even as an adult I would look forward to doing this with them. These are special, special memories. Needless to say I now miss my parents terribly at this time of year, but I know they would want me to be happy and the best way to honor their memory is to work through the sadness and revel in the joys of the past and look to the future with unrelenting optimism.

The scamp, Cody...

The scamp, Cody…

This was the second year we did not put up a Christmas tree. I can tell you the reason in one word, Cody. Cody is our orange tabby that we adopted in 2012. He is a big boy, tipping the scales at 12 pounds, and he is very rambunctious. We knew if we put a tree that it would wind up on the ground. We were hoping this might be the year we could put it up, but he is still in full blown scamp mode and so we decided against it. Next year there will be a tree for sure, whether it stands or lies down.

And as always there is the holiday baking ritual. This year was an enormous success with two new recipes (caramel butter bars and frosted cinnamon chip cookies) leading the way. I try to make at least one new recipe a year but now I am at the point were I make eight different cookie recipes, all articulated favorites, so it will be interesting to see if next year I’ll have the courage to discontinue one in order to try a new one. There are only so many types of cookies a girl can make before she becomes tuckered out! But seeing the joy in the eyes of my neighbors and co-workers when the cookies come-a-callin’ is worth all the time and energy. This year a plate even made it to a Christmas Eve dinner at the Denver Children’s hospital. I am sure those attending that dinner more than appreciated something made with such love during a difficult time in their lives.

Holiday Cookie Platter

Holiday Cookie Platter

And last but not least, there is always the sojourn to some sort of holiday theatrical production. One year it was to see the Radio City Rockettes perform their holiday extravaganza, another time it was to see a production of my favorite story, A Christmas Carol and last year I saw the stage version of “White Christmas”.

A Holiday Performance...

A Holiday Performance…

This year it was front row seats to see the Denver Ballet perform The Nutcracker. My theatre going friend had never seen The Nutcracker before, so it was an extra special treat. Seeing a holiday production always gets you in the holiday spirit. This has become a tradition that I really enjoy and plan on continuing.

So this was Christmas, 2013. All in all a pretty good one. Can’t say that every year but happy when I can. And as I reflect upon this year, I can only hope that yours had more joy than sorrow, more ups than downs, more successes than failures and was filled with friendship and love. Merry Christmas and to quote Tiny Tim, “God Bless Us, Everyone.”

Cranberry Oatmeal Cookies…

Cranberry oatmeal cookies have been a staple in our family for the last five years. I was looking for something completely different from what I traditionally made for the holidays and found this recipe in the 2008 Taste of Home Best Loved Cookies and Bars holiday magazine. At the time the magazine cost me $9.99 and I thought that was pretty pricey. But I can now without hesitation say that it was the best money I ever spent. That magazine is my go to place for holiday cookie ideas and it has a wealth of cookie recipes, many that have become our holiday favorites and many still needing to be tried. The magazine is a compilation of recipes from different people around the country and the editors did an excellent job of choosing fabulous recipes.

Cranberry Oatmeal Cookies

Cranberry Oatmeal Cookies

Initially I made these cookies just because I liked the way the picture looked in the magazine. I was not prepared for how delicious they would be. A co-worker recently described their flavor as being close to a Starbuck’s cranberry orange scone with a bonus of white chocolate chips. I think she hit it on the head. Not only are they easy to make but they look colorful on a dessert tray. Here is my rating and lessons learned making these cookies.

Rating: A+++++ – once again this cookie is one of our all time holiday favorites. How could I rate it any less?

Lesson Learned 1: Use golden raisins in this recipe. The recipe does not specify what type of raisins to use but I found the dark raisins create a less colorful and vibrant looking cookie, and after all you eat first with your eyes, remember? Make sure the raisins are fresh. Don’t use the box that’s been sitting in your pantry for six months. As with any ingredient, the fresher the better but especially with raisins.

Lesson Learned 2: Put in a healthy tablespoonful of grated orange peel. I used the grated peel of two large oranges. Don’t skimp on this. The flavor of the orange peel so compliments the tartness of the cranberry and the sweetness of the white chocolate. Use more than less.

Lesson Learned 3: These cookies keep well both in the refrigerator and the freezer so these are great make ahead cookies.

I guarantee that you will love these cookies. They are easy to make, easy to store and add a nice colorful holiday flair to your cookie assortment.

Cranberry Oatmeal Cookies

  • Servings: 4 dozen
  • Difficulty: Easy
  • Print

INGREDIENTS:

1 cup unsalted butter softened

1 1/2 cups sugar

2 eggs

1 tsp. vanilla

2 cups flour

1 tsp. baking powder

1/2 tsp. salt

1/4 tsp. baking soda

2 cups quick cooking oats

1 cup raisins

1 cup coarsely chopped cranberries (you can you frozen ones but I prefer fresh)

1 TBS. grated orange peel

1 package (12 ounces) white chocolate chips

DIRECTIONS:

Preheat the oven to 375.

In a mixing bowl cream butter and sugar. Add the eggs one at a time beating until well combined. Beat in the vanilla. Combine flour, baking powder, salt and baking soda; add to the creamed mixture. Stir in the oats, raisins, cranberries and orange peel. Add the white chocolate chips.

Drop by rounded teaspoonfuls (I use a cookie scoop) 2 inches apart onto an ungreased baking sheet. Bake for 10-12 minutes or until the edges are lightly browned. Remove to wire racks to cool. Enjoy!

Cranberry Oatmeal Cookies

Cranberry Oatmeal Cookies

Iced Cinnamon Chip Cookies

If you have been following my recent holiday cookie recipe posts you know by now that every year I try at least one new cookie recipe. This year I tried two, Salted Caramel Butter Bars and the one I am going to share in this post the Iced Cinnamon Chip Cookies. The Caramel Bars were a huge hit with my husband but my favorite was the cinnamon chip cookies.

First of all, did you even know that cinnamon chips existed? I didn’t until I saw the recipe and decided to do some hunting at the grocery store. Lo and behold, right next the semi-sweet chocolate morsels were the cinnamon chips. I had never seen them before but I guess I just wasn’t looking for them. They were there in plain sight.

Cinnamon Chip Cookies

Cinnamon Chip Cookies

At first I was a little hesitant about making this cookie – the recipe was very similar to a chocolate chip cookie recipe but I wanted to make an iced cookie this year and thought a hearty cookie like this would stand up well to icing. I found the recipe in my trusty 2008 Taste of Home Best Loved Cookies and Bars magazine (the magazine that has supplied quite a few a my holiday cookie recipes over the years). The one thing that I did not like about the recipe was the frosting ingredients (they seemed bland to me, just the usual milk and confectioners sugar combination) so I went online to research a cinnamon cream cheese frosting recipe. I found one that was part of a soft pumpkin cookie recipe and decided to try it. I’m so glad I did. I’m sure it complimented the cookie much better than the original frosting recipe. So now my recipe rating and lessons learned.

Rating: A++++++  I absolutely LOVE this cookie recipe. The cinnamon chips provide a delightful unique flavor and the frosting highly compliments the cookie and makes it an absolutely tasty delight. If you try any cookie this year, I would recommend this one. It is easy to make and soooooo good!

Lesson Learned 1: I am providing you the recipe as it is in the magazine. I had to adjust it for high altitude. Please note the adjustments in the recipe. If you are at high altitude it is important to make them, otherwise the cookies will not bake correctly and will be inedible.

Lesson Learned 2: Storing an iced cookie can be a challenge. I recommend making the icing, refrigerating it and putting it on the cookie before serving or giving away. That way the cookies are easier to store.

Lesson Learned 3: These cookies are so easy to make that there are no more words of wisdom I can depart regarding making them or storing them. Just make them and enjoy them.

Iced Cinnamon Chip Cookies

  • Servings: 4 dozen
  • Difficulty: Easy
  • Print

INGREDIENTS:

Cookies:

1 cup unsalted butter, softened

3/4 cup packed brown sugar (2/3 cup high altitude)

3/4 cup sugar (2/3 cup high altitude)

2 eggs

1 tsp. vanilla

3 cups flour (3 1/4 cups high altitude)

1 tsp. baking soda

1 tsp. salt

1 package (10 ounces) cinnamon baking chips

Frosting:

8 oz. cream cheese, softened

4 TBS softened butter

2 1/4 cups powdered sugar

1/2 tsp. cinnamon

1 tsp. vanilla

DIRECTIONS:

Preheat oven to 350.

In a large mixing bowl cream butter and sugars. Beat in eggs and add vanilla. Combine flour, baking soda and salt; gradually add to creamed mixture and mix well. Fold in the cinnamon chips.

Drop by rounded tablespoonfuls (I use a cookie scoop) 2 inches apart onto an ungreased cookie sheet. Bake for 10-12 minutes or until golden brown. Remove to wire rack to cool.

Frosting: In a mixing bowl cream butter and cream cheese. Add powdered sugar and mix until combined. Add cinnamon and vanilla. Store in refrigerator until ready to use.


IMG_2216 2


IMG_8894

Iced Cinnamon Chip Cookies

Iced Cinnamon Chip Cookies

Salted Caramel Butter Bars…

Holiday Cookie Platter

Holiday Cookie Platter

Today I am going to a neighbor’s house for a holiday party and am bringing a platter of my holiday cookies. This year I made eight different kinds and along the way have posted updates of my baking endeavors on Facebook and Pinterest. The cookie recipe that I am going to share with you today stole the show in terms of favorable comments and requests for the recipe.

As part of my holiday baking tradition I always try at least one new recipe. This year I tried two, salted caramel butter bars and iced cinnamon chip cookies. Both turned out fabulously and will probably become future holiday staples. At some point I will have to pick and choose since eight different types are about all I can handle in one holiday season.

The salted caramel butter bars were a big hit when I posted a picture of the finished product on FB. What I like about them, besides the fabulous flavor, is that they are relatively easy to make. My husband gave them two thumbs up which is a real vote of confidence for a new holiday cookie and although the iced cinnamon chip cookies topped my list of the new recipes (that recipe to be posted in the near future) these certainly will wind up a keeper. So here is my rating and lessons learned making this recipe.

Rating: A – hard to top a cookie that not only looks bone chilling delicious but is easy to make and tastes as good as it looks!

Lesson Learned 1: The recipe calls for one bag of caramel candies or 50 individual pieces. The bag I bought was 11 ounces and had 40 pieces in it. I bought two bags. In my estimation you need the 50 pieces to have enough caramel filling to spread so buy either a 14 ounce bag or two 11 ounce bags.

Lesson Learned 2: The most labor intensive part of this recipe is unwrapping the individually wrapped pieces of caramel. It took me about 7 minutes just to do that. If you can buy a slab of caramel that would definitely be easier, just make sure you have a sufficient amount to spread over a 9×13 pan.

Lesson Learned 3: The ingredients to make the crust call for a whole pound of butter. Although I used that, I am wondering if that couldn’t be cut down just a little bit. When I cut the bars the bottoms appeared to be a little greasy. Next time I make these I may experiment with using a little less butter. But beware, you have to be careful when experimenting with cookie recipes as the amounts need to be more exact than they do when you are just cooking something.

Lesson Learned 4: This recipe makes a lot of dough. The instructions call for using 1/3 of the dough for the base. I used more than that and still had a lot of dough to dot the top with a lot left over. Next time I make this I may reduce the portions by twenty-five percent. That still should provide plenty of dough for the crust and the top.

Lesson Learned 5: I had to make these a little earlier in the month and put refrigerate them to keep them fresh. If you do that, pull them out of the refrigerator and let them get to room temperature before serving. They are very hard when taken immediately from the fridge and you don’t want anyone cracking a tooth on them.

Lesson Learned 6: I made this recipe without the sea salt but next time I am going to try it with the salt. Either way the bars were still delicious.

I cannot take credit for this recipe. I found it posted on Facebook and discovered it comes from the website http://www.cleverhousewife.com. I will still post the recipe here so you don’t have to link to the site but I want to give credit where credit is due. Enjoy this recipe. I am sure it will become a holiday staple for you as well!

Salted Caramel Butter Bars

Salted Caramel Butter Bars

Salted Caramel Butter Bars

  • Servings: 2 dozen
  • Difficulty: Easy
  • Print

INGREDIENTS:

Crust:

1 lb. salted butter at room temperature

1 cup sugar

1 1/2 cups powdered sugar

2 TBS. vanilla

4 cups flour

Filling:

1 bag caramel candies (you will need a 14 ounce bag) or about 50 pieces

1/4 cup milk or cream

1/2 tsp. vanilla

1 TBS. sea salt (optional)

DIRECTIONS:

Preheat the oven to 325 and grease a 9×13 pan (or use cooking spray).

In a large bowl combine the butter and sugars and beat until creamy. Add the vanilla and beat until combined. Add the flour and mix until a smooth dough forms.

Press one third of the dough evenly into the pan. Wrap the remaining dough in plastic wrap and refrigerate. Bake the crust approximately 20 minutes or until firm and the edges are lightly browned. Transfer the dish to a wire rack and cool for 15 minutes.

While the crust is baking make the caramel filling. Place the unwrapped caramels and cream in a microwave safe bowl and cook on high for 1 minutes. Stir and continue to cook for 30 second intervals until the mixture is combined and smooth. Once the caramel is melted add the vanilla and stir until combined. Pour and smooth the caramel filling over the somewhat cooled crust. If you are going to use sea salt, now is the time to add it on top of the caramel. Take the remaining chilled dough and crumble it over the entire top.

Return the pan to the oven and bake until the filling is bubbly and the crumbled topping is firm and lightly golden, about 25 – 30 minutes.  Let cool before cutting into squares.

Triple Chocolate Brownie Cookies…

The second favorite cookie in my recent posts on Facebook was the Triple Chocolate Brownie Cookie. I’ve been making this cookie for the past six years and it has risen to the list of the big three must-bake every year holiday cookies (the other two being chocolate chip cookies and the chocolate dipped sugar cookies, soon to be featured in future blogs). I like this particular cookie for several reasons: one it is easy to make, two it has three kinds of chocolate in it and three it has a great consistency that leaves you asking the question am I eating a cookie or a brownie.

Triple Chocolate Brownie Cookies

Triple Chocolate Brownie Cookies

The recipe comes from a magazine I purchased in 2008 called “Taste of Home Best Loved Cookies & Bars.” This magazine was definitely worth the money because it also provided the recipe for another one of my holiday staples, the cranberry oatmeal cookie (also to be featured in a later blog). I like this recipe because not only does the finished product look and taste so darn good but it keeps well in the freezer so it is a great make-ahead cookie. That being said, let’s move on to my rating and lessons learned.

RATING: A++++++++++++ This cookie is one of my big three holiday must-bake recipes so I will give you a clue and tell you that all three will have the same rating. Easy to make, great visual appeal and leaves you wondering whether you’ve just had a cookie or a brownie. Top that off with three different types of chocolate used in the recipe and tell me, how can you go wrong?

Lesson Learned 1: Make sure you cool the melted butter and unsweetened chocolate before beating it with the sugar and eggs. If you don’t you will wind up with scrambled eggs.

Lesson Learned 2: Use a cookie scoop (a small ice-cream scoop) to portion out the cookie dough. That way you have the same amount and don’t have to worry about having some cookies baking faster than others. Spray the inside of the scoop with some non-stick spray when you first start out and then wash it out after every completed baking sheet. That way you won’t struggle as much with getting the batter out of the scoop. It will stick somewhat, but having even amounts of batter on the cookie sheet is worth it.

Lesson Learned 3: Don’t over-bake the cookies. The cookies will be robust in the center and they are supposed to be that way. The cookies are done when the edges are set and the tops are slightly cracked. They are designed to have a doughy consistency.

Lesson Learned 4: You don’t need any special utensil to drizzle the chocolate over the cookies. Use an ordinary quart-sized plastic bag, insert it into a tall drinking glass, pour the melted chocolate and shortening mixture into the bag and squeeze it down to one of the tips of the bag. Twist the top portion of the bag and snip a very, very small portion of the tip. Then just drizzle what comes out free-armed over the cookies. As you can see from the pictures, the back and forth pattern really gives a professional finishing touch to the cookies.

Just like the Raspberry Walnut Bars from my previous blog, this recipe is so easy to make and produces a professional looking end product. I like this recipe because of the consistency of the finished product that often has people asking if they are eating a cookie or a brownie. Plus it really appeals to the chocolate lovers out there and tell me, how many non-chocolate lovers do you know? Try making these cookies during this holiday season and see if it doesn’t quickly becoming one of your holiday must-bake traditions.

Triple Chocolate Brownie Cookies

  • Servings: 3 dozen
  • Difficulty: Easy
  • Print

INGREDIENTS:

3/4 cup butter cubed

4 squares (1 ounce each) unsweetened chocolate

2 cups sugar

4 eggs

1 1/2 cups all-purpose flour

1/2 cup baking cocoa

2 tsp. baking powder

1/2 teaspoon salt

2 cups (12 ounces) semisweet chocolate chips, divided

2 teaspoons shortening

DIRECTIONS:

Preheat your oven to 350. In a small saucepan over low heat melt the butter and unsweetened chocolate; cool. Transfer to a large mixing bowl; add sugar and eggs. Beat until smooth. Combine the flour, cocoa, baking powder and salt; gradually add to the chocolate mixture. Stir in 1 1/2 cups of chocolate chips. Cover and refrigerate for 2 hours or until the dough is easy to handle.

Drop by tablespoonfuls 2 inches apart onto greased baking sheets (or you can line your baking sheets with parchment paper). Bake for 7-9 minutes or until the edges are set and tops are slightly cracked. Cool for 2 minutes before removing from pans to wire racks to cool completely.

In a microwave-safe bowl, heat shortening and remaining chocolate chips on high for 1 minute or until chips are melted; stir until smooth. Drizzle over cookies. Let stand for 30 minutes (or pop them in the freezer for about 5 minutes) until the chocolate is set. Store in an airtight container. These cookies freeze well so they are a great make-ahead cookie.

Triple Chocolate Brownie Cookies

Triple Chocolate Brownie Cookies

Raspberry Walnut Bars…

I made three holiday cookies recipes yesterday and posted pictures of the final results on Facebook. Without a doubt two of the three were big hits with my friends. (The third, chocolate chip cookies, are such a traditional favorite that they did not get much attention). The biggest hit as determined by the number of recipe requests I received were the Raspberry Walnut Bars followed by the Triple Chocolate Brownie Cookies. The latter will be the subject of an ensuing blog, but today we’re focusing on the media favorite.

Raspberry Walnut Bars

Raspberry Walnut Bars

There’s a lot of reasons for this recipe being so popular. First, and probably foremost, it looks so darn delicious. Second, and not known by those requesting the recipe, it is sinfully easy to make. And third, the recipe turns out perfect first time, every time. I can’t take credit for the recipe, it was one I found a few years ago, I simply can’t remember where I found it. So up front I apologize to whomever I am not giving credit to for the actual recipe. And, as with all the recipes I make these days, I will give it may rating and share my lessons learned making it.

Recipe Rating: A++++++++++ (get the message)? I just can’t say enough about this recipe. I remember the first time I saw a picture of it. It looked so good but I thought it would be hard to make. Was I ever wrong. This recipe couldn’t be simpler and it has turned out perfectly every time I’ve made it, including the first time. And it’s not all that often that a recipe turns out picture perfect the first time you make it. So you definitely have to try this one. You will love it.

Lesson Learned 1: Perhaps the hardest thing about this recipe is preparing the pan. The recipe calls for lining a 8 inch square pan with parchment paper allowing some overhang on both sides. Trying to keep parchment paper from popping back out of the pan when you allow for overhang can be tricky. I found the easiest way to make the parchment paper behave is to take two heavy cans of anything and weigh down the paper in the pan while making the dough. That way when it’s time to spread the dough out on the bottom the paper has been somewhat trained and doesn’t jump around as much.

Lesson Learned 2: It is important to follow the directions of using the parchment paper, having the overhang and spraying the parchment paper with cooking spray. I can’t image what you would wind up with if you didn’t. But if you take the time to do it, it comes out of the pan easily and absolutely nothing sticks to the parchment paper.

Lesson Learned 3: This recipe gives you plenty of dough so don’t worry about using it to fill up the bottom. It says to use two thirds of the dough for the crust and one third to dot the top. I found that gave me way too much dough for the top. You need a lot less dough to dot the top then you think, so don’t be afraid to use more than two thirds of the dough for the crust.

Lesson Learned 4: Avoid the temptation to use too much raspberry jam. A nice even thin coat is all you need. Stick to the amount called for in the recipe.

Lesson Learned 5: Depending on how many bars you want to give out, you may have to make this recipe a couple of times. You can make the bars big or small, but the most you’ll probably get out of this recipe is 24 small bars.

I guarantee these bars will be a hit with your family and friends. You simply must try them!

Raspberry Walnut Bars

  • Servings: 2 dozen
  • Difficulty: Easy
  • Print

INGREDIENTS:

Non stick baking spray

1 3/4 cups flour

1/2 tsp. kosher salt

1/2 tsp. ground cinnamon

1/8 tsp. nutmeg

3/4 cup unsalted butter, room temperature

1 cup sugar

2 large egg yolks

1 tsp. vanilla

2/3 cup raspberry jam

1 cup chopped walnuts

DIRECTIONS:

Preheat oven to 350. Line an 8 inch square baking pan with parchment paper leaving an overhang on both sides. Spray the parchment paper with cooking spray. (I do this right before I am ready to put the dough into the pan).

In a medium bowl whisk the flour, salt, cinnamon and nutmeg. Set aside. Beat the butter and sugar until fluffy. (This does take a little time, most people do not do this thoroughly enough so make sure to take the time to make the mixture fluffy). Beat in the egg yolks and vanilla. Gradually add the flour mixture until combined. Do not over mix. Transfer two thirds of the dough into the prepared pan and press down evenly. Spread the jam on top. Crumble the remaining dough and dot it over the jam. Sprinkle the top with the walnuts. Bake until golden 35-45 minutes. Cool completely in the pan. (this is very important).

Holding both sides of the parchment paper, lift out of the pan, transfer to a cutting board and cut into rectangles. Store in an airtight container at room temperature for up to 5 days.

Raspberry Walnut Bars

Raspberry Walnut Bars

The Elves Are In The Kitchen…

Cranberry Oatmeal Cookies

Cranberry Oatmeal Cookies

It’s December 3rd. There’s a winter storm warning, clouds are ominously thickening overhead, the temperature is dropping and so naturally my thoughts are turning toward holiday baking. Making holiday baked goodies is something I’ve done since I was in college. It started out as somewhat of a lark and has now turned into a hard-and-fast holiday tradition. The cookies have to be made somewhat early these days as a batch needs to be shipped to my aunt in Chicago, but making and freezing cookies is just as good as having them fresh. The challenge is deciding what the 2013 cookie menu will be?

There are a few things I know I cannot fool around with, these cookies must be made every year – no questions asked. Namely they are the chocolate dipped sugar cookies, the chocolate chip cookies and the triple chocolate brownie cookies. Over the past couple of years another cookie has almost worked it’s way into must-have tradition status, the cranberry oatmeal cookie.  It is quickly becoming a real favorite with family and friends. My personal favorite has not quite yet  caught on, that is the raspberry walnut bars but I’m sure before long it will become a holiday staple as well. And every year there is an unwritten law that at least one new cookie recipe must be attempted. That’s the law and it must be obeyed!

So with the weather promising that tomorrow will be a day indoors, it’s time to start baking – but before that comes the planning. What will the cookie gift plates consist of this year? At this point a preliminary list has been developed. It is always up for adjusting, except for the big must-have three, but it provides a starting point for the cookie onslaught. So here it is, the unveiling of the preliminary 2013 holiday cookie list (with more additions or exclusions to follow):

Chocolate Dipped Sugar Cookies

Chocolate Dipped Sugar Cookies

THE BIG THREE: (can you see a chocolate theme going on here?)

THE PRELIMINARY MENU:

THE ON-THE-FENCE MENU:

  • Peanut Butter Blossom Cookies
  • Spritz Cookies
  • Any Other Cookie Recipe I See As I Skim Pinterest or Facebook

So there you have it.  It took me two hours and two different grocery stores to amass all of the ingredients I’ll need but at least I have a solid plan for tomorrow, snow or no snow.  As I continue on my holiday baking journey I will post pictures of the cookies along with the recipes and any lessons I’ve learned along the way while making them. Up to this point, the biggest lessons I’ve learned deal with how to adjust these cookie recipes for high altitude. I won’t share those tips unless you ask for them. With over 30 years of making some of these cookies I’d say I have many of them down pat. Some I personally like more than others and I’ll share those opinions along the way. One thing never changes, though, and that is the joy of this time of year and the fun that I have making holiday cookies.

Raspberry Walnut Bars

Raspberry Walnut Bars