Blueberry Cream Cheese Coffee Cake…

My life has been chaotic for the last six months and now that the dust has started to settle I’m trying to get myself back on track. One of the ways I see myself doing that is trying to post more often on my blog. I missed not doing my regular posts but dealing with health care issues was so much more important. Now I am trying to put one foot in front of the other in an attempt to establish my new normal and begin to incorporate some of the things that brought joy into my life before everything started. This blog is certainly one what to do that.

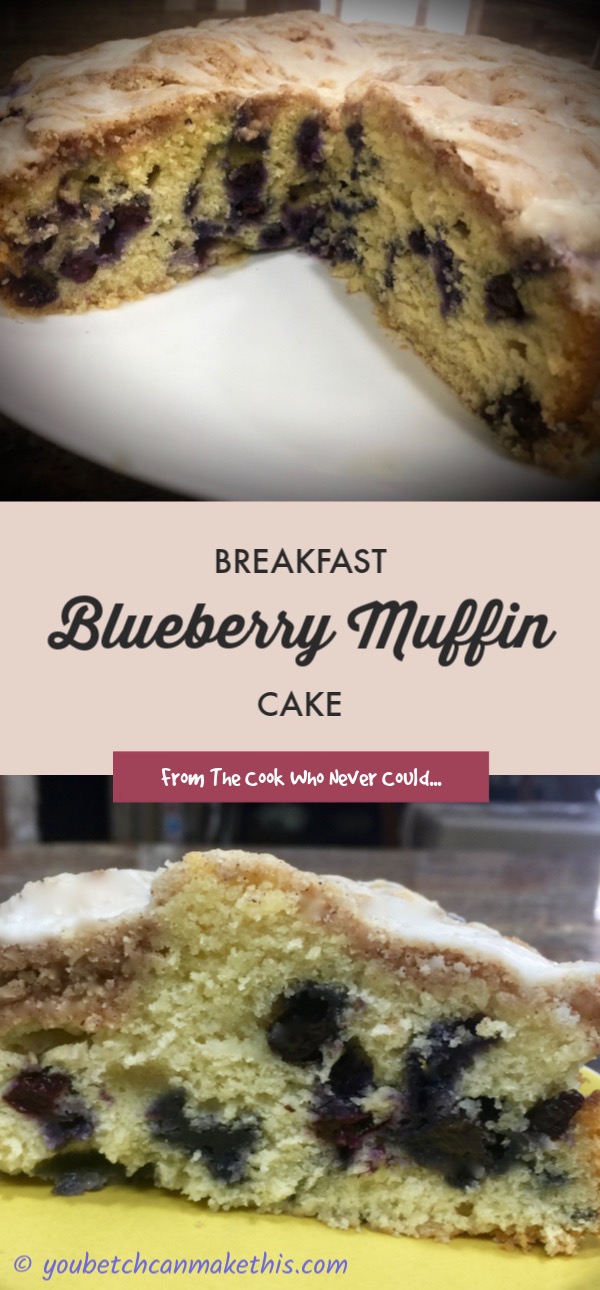
I made this recipe the other day and posted some pictures on Instagram and Facebook and got so many comments about sharing the recipe that I felt compelled to blog it faster than I thought I would. I made this recipe mainly because I had a ton of blueberries that I needed to use (Lord only knows why I bought so many) and I also had several bars of cream cheese.

I have to say that I was more than pleasantly surprised at the outcome. What I liked the best about this coffee cake is the addition of the cream cheese layer. It provides a nice moistness to the cake and really kicks the cake over the top. So let’s talk blueberry cream cheese coffee cake…

Lesson Learned 1 – This cake requires you to be organized: This cake has 3 separate processes, that being making the cream cheese filling, making the cake batter and making the streusel topping. It requires a little more equipment to get the coffee cake put together. I recommend you use a separate hand mixer and bowl to make the cream cheese filling. Then I recommend making the streusel topping so you are ready to top the cake once you’ve assembled the layers. Use your stand mixer to make the cake batter. Try to measure everything out for all three processes before you begin. That way the processes will run smoothly. It really isn’t a hard cake to make. It just has a few more steps than most.

Lesson Learned 2 – The cake batter is thick: This batter creates a nicely dense cake that is balanced out by the cream cheese layer. But a dense batter can be a challenge to spread around when it comes time to put it in a pan. I’ve learned over time that when you work with a dense batter it’s better to drop it in the pan in spoonfuls all around the pan. That way when it comes time to spread the layer most of the batter is already in place and you can spread the batter around more easily.

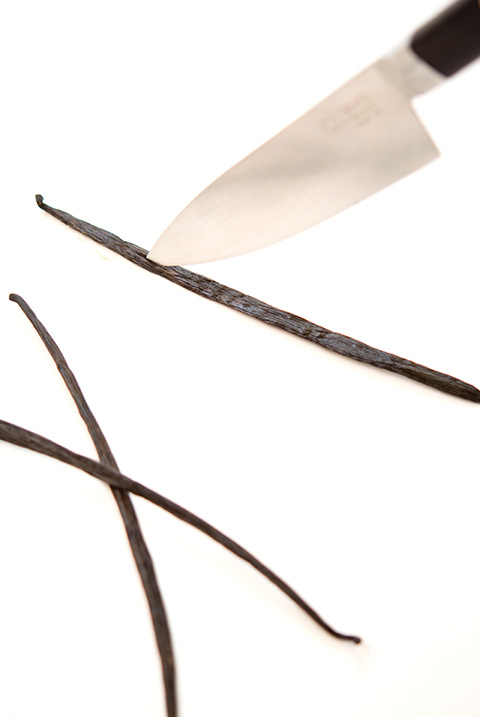
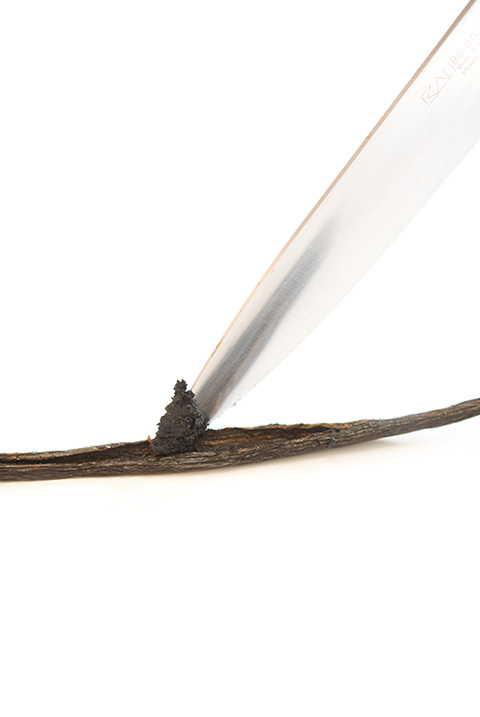
Lesson Learned 3 – Vanilla bean paste versus vanilla extract: When I’m making a recipe where I want to really kick up the vanilla flavor I use vanilla bean paste. The paste has a syrup-like consistency and it measures out the same way as vanilla extract. Vanilla bean paste is richer and more flavorful. It is also much more expensive. But if you can afford it I highly recommend using it. But only use it for special recipes. Using it in things like cookies doesn’t really make a difference. But using it in something like this recipe or a creme brulee really enhances the flavor of the dish.

Lesson Learned 4 – Arranging the blueberries in the layers: This cake requires two blueberry layers, one on top of the cake batter layer and one on top of the cream cheese layer. When putting in both layers be careful to not let any of the blueberries touch the sides of your spring form pan. If you do you’ll find it difficult to clean the sides of the pan after baking. If you don’t you can still clean the sides of your pan, it’s just a little more difficult even though the pan has been greased.

Lesson Learned 5 – Depending upon your oven, you may have to cook the cake longer than the allotted time: Now as you know I live in high altitude so everything tends to have to cook for longer periods of time and/or higher temperatures. This recipe calls for the cake to cook for 45 minutes. I had to cook mine for 1 hour. Just keep an eye on it after 45 minutes and you should be fine.

Lesson Learned 6 – Someone asked me if you could substitute raspberries for blueberries: I don’t see why not. Raspberries tend to cook just like blueberries. They release their juices in a similar way. So try it with raspberries. I bet it will be delicious.

And that’s it. I guarantee you will love this cake. Try it and let me know what you think…

Cake Layer

First Layer Of Blueberries

Cream Cheese Layer

Second Layer of Blueberries

Cake With Streusel Topping

Blueberry Cream Cheese Coffee Cake...

  • Servings: 10-12
  • Difficulty: Medium
  • Print

INGREDIENTS:

Cream Cheese Filling:

1/4 sugar

8 oz. cream cheese, room temperature

1 egg white

1/2 tsp. vanilla bean paste (you can substitute vanilla extract)

1 1/4 cup blueberries, divided

Coffee Cake:

1 1/2 cups flour

1/2 tsp. baking powder

1/2 tsp. baking soda

1/4 tsp. table salt

5 1/2 Tbs. unsalted butter, room temperature

1/4 cup sugar

1 egg

1 egg yolk

3/4 cup sour cream

1 tsp. vanilla bean paste

Streusel Topping:

1/3 cup sugar

1/2 cup flour

3 Tbs. butter, very cold and cut into chunks

DIRECTIONS:

Preheat your oven for 350. Line the bottom of a 9 inch spring form pan with parchment paper and grease the sides of pan. Set the pan aside.

Mix together the cream cheese, sugar, and vanilla on medium speed until creamy. Add egg white and mix just until combined. Set aside.

For the streusel topping combine sugar, flour and chilled butter in a bowl. Cut the butter in with a pastry blender until the mixture is crumbly and and the crumbles are pea sized. Set aside.

For the cake batter, stir together the flour, baking powder, soda and salt. Set aside. In a stand mixer cream together the butter and sugar. Add egg, egg yolk, sour cream and vanilla and mix until combined. Slowly combine the two mixtures beginning with part of the flour mixture alternating it with the sour cream mixture, then the flour mixture followed by the sour cream mixture finishing with the flour mixture. Take a spoon and transfer this batter in spoonfuls around the base of the pan. Smooth the batter around the bottom of the pan with a spatula. Sprinkle 1/3 cup of blueberries over the batter. Spread the cream cheese filling on top of the blueberries (drop in spoonfuls just like the cake batter and spread) and top with the remaining blueberries. Sprinkle the streusel on top of the blueberries. Bake for 40-45 minutes or until a toothpick inserted in the center comes out clean. If the top starts browning too quickly cover the pan with aluminum foil.

Put the pan on a cooling rack and run a knife around the sides of the pan. Let the cake cool for 15 minutes and then loosen the ring of the spring form pan. Remove the ring and let the cake continue to cool.

Serve warm or at room temperature. Store in remaining cake in the refrigerator.


Lemon Ricotta Cake…

No one will deny that we are currently living in unprecedented times. With the country being ravaged by the coronavirus and people scrambling to figure out how to shelter at home without losing their minds, it comes as no surprise that many people are turning to cooking. Cooking (and eating) has always been associated with comfort. And at this point in time we need all the comfort we can get.

We are under a stay at home order here in Colorado so venturing outside can only be done for essential things, like going to the grocery store. When I last visited my grocery store I found it fascinating that the baking isles were heavily picked over. It was hard to find flour or eggs. I laughed when I saw there were hardly any boxed cake mixes on the shelves. And try to find flour tortillas – well I guess people are indulging their taste for Mexican food during quarantine.

I’ve been trying to limit my trips to the store as much as possible so sometimes I buy larger containers of things that will last a longer period of time. The other day I was planning on making some stuffed shells (that recipe soon to be posted) and so I purchased a large container of ricotta cheese. I did not anticipate the amount I would have left and began thinking about how I could use the remaining ricotta. And this is how I used it…

So let’s talk lemon ricotta cake…

Lesson Learned 1 – Beat the ricotta into the butter/sugar mixture really well: Ricotta is rather thick and when using it in baking it can cause lumps unless you beat it well. I found that using whole milk ricotta is the best for this cake. Make sure you beat the mixture for at least 3 minutes or until you see the mixture is smooth and creamy. Also make sure you scrape the sides and bottom of the the mixing bowl. I found when using a stand mixer that a very small portion of ingredients tends to clump right at the very base of the beater. Don’t forget to scrape there as well.

What the ricotta batter should look like

Well Mixed Ricotta Batter

Lesson Learned 2 – Grease the sides and bottom of a spring form pan with butter and dust it with powdered sugar: I read about this trick online and it is a great way to add some additional sweetness to the outside of the cake. Even though you use 1 1/2 cups of sugar in this recipe the cake does not taste overly sweet. The lemon juice and zest balance out the sweetness quite nicely.

Lesson Learned 3 – Don’t make the mistake I made: Every cook makes mistakes, even the most adept ones. I went about making this cake the way I normally bake or cook, prepping all of the ingredients first and then following the process. I did really well until I put the batter in the prepared pan and then realized I didn’t incorporate the baking soda into the batter. UGHHH!

In my mind I had three choices – 1: Start all over again (which I did not want to do) 2: Bake the cake without the baking soda (baking soda is a leavening agent that makes the cake rise so I didn’t want to do that) or 3: Figure out a way to incorporate the baking soda (it was only a half of a teaspoon so I sprinkled it all over the top of the batter and mixed it in with a spoon stirring it well but being careful not to touch the sides or bottom of the prepared pan. To my amazement it worked beautifully). So keep in mind that even the best of cooks need to improvise when they make a mistake. Not all fixes turn out as well as this one did. I was lucky this time.

Lesson Learned 4 – Try using vanilla bean paste: I was made aware of vanilla bean paste during a cooking class and I love it. I don’t use it all the time as a jar can be quite expensive ($20 or so) but in dishes where I want a richer vanilla flavor I use the paste. I wouldn’t use it for making cookies but for cakes or custards it adds much more depth of flavor. It measures just like vanilla extract (a teaspoon for a teaspoon) but it gives a much richer vanilla flavor than extract. If you can afford it try it sometime.

And that’s it. Making the cake is very easy. The cake is creamy and not overly sweet. It’s great as a dessert or a breakfast treat. I know you will enjoy this one…

Lemon Ricotta Cake...

  • Servings: 8-10
  • Difficulty: Easy
  • Print

INGREDIENTS:

3/4 cup butter, room temperature

1 1/2 cups sugar

15 ounces whole milk ricotta cheese

3 large eggs, room temperature

1 tsp. vanilla bean paste (or vanilla extract)

1 large lemon, juiced and zested

1/2 tsp. baking soda

1/2 tsp. salt

1 1/2 cups flour

Powdered sugar for dusting the pan and the top of the cake

DIRECTIONS:

Preheat oven to 350 degrees. Grease a spring form pan with butter and dust the bottom and sides with powdered sugar. Set aside.

Using a stand mixer (you can use a hand mixer) cream together the butter and sugar until light and fluffy, about 3 minutes. Add the ricotta cheese and mix until smooth and creamy, at least 3 minutes or more.

Mix the eggs in one at a time. Add the vanilla, lemon zest and lemon juice. Mix to combine. Stir in the baking soda and salt. Add the flour and mix until just combined (you can add all the flour in at once).

Pour the batter into the prepared pan. Bake for 45-50 minutes or until a toothpick inserted in the center of the cake comes out clean. Let the cake cool in the pan for at least 15 minutes before removing it from the pan. Let the cake cool completely before dusting it with powdered sugar.

Right Out Of The Oven

Slow Cooker Lemon Garlic Butter Chicken…

I saw a version of this recipe online and it intrigued me. First of all I love my slow cooker. It has become a more versatile tool than it was years ago when you’d put in some meat and veggies, make some concoction usually comprised of some sort of cream soup and let it cook for hours until you had a tasteless soggy mess. Slow cookers can produce some great meals but you have to know how to use them. And just like your oven, no two brands of slow cookers are alike so you need to know your slow cooker.

I have two All-Clad slow cookers, a 7 quart and a 5 quart. For smaller meals when I cook for one or two I prefer the 5 quart, plus it has the versatility of browning food in its own sleeve which is very convenient. I find the All-Clad slow cookers to have a nice moderate temperature. Some slow cookers boil your food, even on low. I don’t find that to be the case with mine. I get a nice even slow cooking process and so if I gauge my cooking times correctly I do not wind up with dried out tasteless food.

Enough about slow cookers, let’s talk about slow cooker lemon garlic butter chicken…

Lesson Learned 1 – Recipes are designed to be guides, not gospel: The instructor in one of my more recent cooking classes said this and it really struck home with me. When you are making something savory, make the recipe your own. You don’t have to follow the recipe exactly ingredient by ingredient. Now mind you, this is not the case when you’re baking – you need to be precise with those recipes. But savory recipes can take on a life of their own depending upon your likes and dislikes. So feel free to experiment. Some of my most popular recipes were a result of doing just that.

The version I worked from called for 1/3 teaspoon of red pepper flakes. I did not want the heat so I eliminated that ingredient. I also added less butter and more lemon zest than recommended in the recipe and I added some carrots to the slow cooker which served as a base for the chicken thighs.

Lesson Learned 2 – Avoid the common mistake of long cooking times with your slow cooker: This is all a part of knowing your slow cooker as I mentioned above. I find, mostly where chicken recipes are concerned, that slow cooker recipes have cooking times that are too long. The recipe that I based this on called for 4 hours on high or 6-8 hours on low. I cooked my chicken for 5 hours on low and the result was perfect. Normally with beef recipes I find the recommended cooking times to be more accurate. But be careful with chicken in a slow cooker. You can really dry it out by cooking it too long. If you’re not sure if your chicken is done take its internal temperature. The safe internal temperature for cooked chicken is 165 degrees.

Lesson Learned 3 – Yes, you must brown your chicken first to get it to look like my pictures: The one drawback of a slow cooker is that it does not brown meat when it is slow cooking. The good news is there are now slow cookers on the market where you can brown your meat in its own sleeve and place the sleeve back in the slow cooker to finish the rest. These slow cookers tend to be a little more expensive but are a great convenience.

I browned my chicken thighs for about 4 minutes with the skin side down. I just browned them on one side and drained them on paper towels before adding them to the slow cooker. Some people don’t care if their meat looks grey and skip the browning process. But it you want your chicken thighs to look like mine, you’ll need to brown them first.

Lesson Learned 4 – I prefer using chicken thighs in a slow cooker: I find chicken thighs to be more forgiving, especially if you overcook them in a slow cooker. So if you feel it absolutely necessary to cook them for 6 hours on low use chicken thighs. The result will be much better.

Lesson Learned 5 – Slice the garlic in thin slices and place the slices on top of the chicken: I found that to be the best way to infuse the garlic into the meat. If you want you can also put some garlic slices under the meat as well. Once the chicken was done I removed the garlic slices and disposed of them. But you can serve them as well. I’m just not a big fan of eating garlic that way. You can also just mince the garlic and sprinkle it on top of the chicken. The choice is yours.

Lesson Learned 6 – Baste the chicken in the drippings before serving: This recipe makes a great lemon butter sauce. Baste the chicken thighs in that sauce before plating them. You’ll be glad you did.

And that’s it. This is a very basic recipe with a minimal amount of ingredients. You can skip adding the carrots if you want, or you can add some onions under the chicken as well. The choice is yours. I definitely enjoyed this recipe and will make it again. Let me know what you think!

Slow Cooker Lemon Garlic Butter Chicken...

  • Servings: 2-4
  • Difficulty: Easy
  • Print

INGREDIENTS:

4 chicken thighs with skin on

1 Tbs. vegetable oil

1 tsp. butter

1 tsp. garlic powder

1 tsp. onion powder

1/2 tsp. paprika

1 tsp. Italian seasoning

4 garlic cloves sliced thin

1/2 stick of butter diced

The zest of one medium size lemon (or two small)

The juice of one medium size lemon (or two small)

1/3 cup low sodium chicken broth

Salt and pepper to taste

4 carrots, peeled and cut into chunks

Chopped fresh flat leaf parsley for garnish, optional

Lemon slices for garnish, optional

DIRECTIONS:

Heat the vegetable oil and butter in a pan on the stove. Brown the chicken thighs skin side down for approximately 4-5 minutes. Remove the chicken thighs and drain on a paper towel. Set them aside.

Place carrots in the bottom of the slow cooker. Combine the chicken broth, lemon juice and zest. Place thighs on top of the carrots and pour the chicken broth mixture over them.

In a small bowl combine the Italian seasoning, onion powder, garlic powder, and paprika with some salt and pepper. Sprinkle the spice mixture over the chicken thighs. Top them with the garlic and dot them with the diced butter.

Cook on low for 5 hours. Baste the chicken thighs with the lemon butter sauce before removing them from the slow cooker. Garnish with lemon slices and parsley.


Pinwheels, Pinwheels, Pinwheels…

Just call me queen of the pinwheels! Whenever I am expected to bring an appetizer to an event and I want something simple, easy and impressive I make pinwheels. Your imagination can soar when concocting these tasty bite size morsels and I always look for new ways to put a delightful spin on a pretty basic recipe.

The holidays are quickly approaching and with that holiday parties and of course lots and lots of food. And since I think there can be a pinwheel for just about any occasion, the holidays are not exception. This particular recipe will be a hit on any holiday table and it couldn’t be easier to make.

So lets talk Cranberry Feta and Chive Pinwheels…

This recipe follows the same basic format for making pinwheels that being softened cream cheese, the ingredients of your choice, and flour tortillas – couldn’t be easier. This particular variation adds the warmth of the basic holiday colors, red and green, and boasts of a spectacular sweet and savory flavor. I have posted two other pinwheels recipes since writing this blog.

The first, and one of my all time popular recipes judging by the number of hits it gets on a regular basis, is my Cream Cheese, Spinach, Bacon and Scallion Pinwheels:

I never in a million years could have guessed this recipe would be so popular.

The second pinwheel recipe I published was my Bacon Turkey Ranch Pinwheels:

This was also a hit with the slightly different twist of adding a cherry tomato on top – great finger food.

With this particular post I thought I might provide a one stop shop for the pinwheel recipes I’ve published with my latest edition being my Cranberry Feta and Chive Pinwheels:

Normally I include some lessons learned making a particular recipe. Since this recipe follows the basic formula for making pinwheels, I suggest you look at the other two recipes if you feel you need additional support in being successful making these. The only caveat I will add is to make sure not to skimp on the chives. The chives provide that nice counterbalance to the sweetness of the cranberries so minimally use 1/3 cup of chives and even more if you want. The choice is yours.

Cranberry Feta And Chive Pinwheels...

  • Servings: 30-35
  • Difficulty: Easy
  • Print

INGREDIENTS:

8 oz. cream cheese, room temperature

1 cup crumbled feta cheese

1/3 cup chopped chives (can do more if desired)

1 Tbs. garlic powder

1 1/2 cups dried cranberries

4 flour tortillas (10 inch)

DIRECTIONS:

In a medium sized bowl, beat cream cheese until light and fluffy. Stir in the remaining ingredients. Mix well. Spread mixture evenly on a tortilla leaving a 1/4 inch open all the way around. Tightly roll each tortilla to form a log. Wrap the logs in plastic wrap and chill for at least one hour. Slice into 3/4 inch rounds and serve.

I want to take this opportunity to inform my readers that I may not be posting as regularly in the near future. I am dealing with a debilitating family illness that is taking up the greater majority of my time. Rest assured that once my life gets more on an even keel I will post more regularly. Until then I ask for your patience. In the meantime check out my recipe index for my many years of posts which should satisfy your desire for recipes in the interim. And when I can I will check in. Thanks for your understanding!

Cider Braised Chicken With Bacon and Apples…

Finally Fall is in the air. I don’t know what it’s been like where you live, but here in Colorado it was unusually hot all summer long with 90 degree days still happening well into September. But now it’s starting to look like the weather is becoming more Fall-like and I couldn’t be happier.

This is my favorite time of year for a variety of reasons – the leaves begin to change into an array of gorgeous colors, the air is crisp and clean, and it’s finally time to think about Fall comfort food, of which this recipe is an absolutely perfect example.

Not only does this recipe scream comfort food but it’s also extremely easy to make. So let’s talk cider braised chicken with bacon and apples…

Lesson Learned 1 – Remove the fatty parts on the chicken thighs: I used boneless skinless chicken thighs in this recipe but even with that you’ll find pieces of fat are still on the meat. Make sure you use a sharp knife and remove, as much as you can, the fatty pieces. If you leave a little bit that’s fine. That will help flavor the sauce.

Lesson Learned 2 – You can choose whether you want to peel your apples or not: I made this recipe with the skins on but you can peel them if you prefer. Some people have a difficult time digesting the skins. The good thing is it doesn’t make any difference whether or not the apples are peeled.

Lesson Learned 3 – Make sure you reduce the sauce by half twice: Once you add the brandy you’ll need to reduce the mixture to half. Then when you add the cider you’ll need to reduce it again by half. This leaves you with a rich, luscious sauce. And if you don’t have apple brandy it’s no big deal. Just add an additional half cup of apple cider instead. Doing it that way will only require you to reduce the liquid once.  You can see by the pictures below that the reduced braising liquid is thicker and the ingredients much more visible.

The non-reduced braising liquid

The reduced braising liquid

Lesson Learned 4 – You don’t have to use a lot of dishes to make this meal: Once the chicken and apples have been cooked just lay them out on a sheet pan, making sure they are separated.  Then when the braising liquid is done put the meat back into the pot first. The apples will be added back a little later. (I recommend using an enamel coated cast iron dutch oven for this recipe). Combine all the ingredients after you simmered the chicken in the sauce for about 5 minutes and you’re basically done. You can also serve this family style in the cast iron dutch oven you used to make everything. That will give serving a nice rustic touch and it’s perfect for a Fall party or family meal. Just make sure you let your family or guests know that the pan will be very hot.

I just love this recipe. It is so flavorful and screams Fall comfort food. Try this one and let me know what you think…

Cider Braised Chicken With Bacon And Apples...

  • Servings: 4
  • Difficulty: Easy
  • Print

INGREDIENTS

2 Tbs. vegetable oil

1 1/2 pounds boneless skinless chicken thighs

3 Granny Smith apples cored and peeled (peeling is optional)

5 slices of thick cut bacon sliced into 1/4 inch lardons

1 yellow onion diced thick

1 large or 2 small cloves of garlic, minced

1/2 cup apple brandy

2 cups apple cider

2 Tbs. whole grain mustard

1/4 cup heavy whipping cream

1 Tbs. finely chopped sage

Kosher salt and freshly cracked pepper to taste

DIRECTIONS:

Put the vegetable oil in a large dutch oven that has warmed over medium heat. Pat the chicken dry and generously season with salt and pepper. Add the chicken to the pan and cook until browned on both sides, about 5 minutes on each side. Once you’ve placed the chicken in the pan do not move it until it is ready to flip over. Place the chicken on a sheet pan.

Add the apples to the dutch oven and saute, stirring frequently until just softened and caramelized, about 5-7 minutes. Put the apples on the same sheet pan as the chicken, keeping the two separated

Add the bacon and onions to the pan stirring occasionally until the onions are tender and the bacon fat has rendered, but the bacon is not crisp. Add the garlic and cook until fragrant, about 1 minute.  Stir in the brandy and reduce the mixture by half. Stir in the apple cider and scrape the bottom of the dutch oven with a wooden spoon the de-glaze the pan. Bring to a boil and continue to cook until the mixture is reduced by half. Add the chicken into the pan, stir and cover. Simmer for about 5 minutes. Stir in the mustard, cream, sauteed apples and sage. Simmer uncovered for about 10 minutes. Taste and adjust seasoning if needed.

Serve in the dutch oven but make sure you family or guests know that the dutch oven will be very hot. Or, divide the braised chicken and apples among 4 plates and serve immediately.


Marinated Tomatoes With Herbs and Mozzarella…

It’s the season for tomatoes, and if you planted any in your yard or on your patio you probably have a bunch sitting around right now. I just love this time of year. There is nothing, and I mean absolutely nothing, like a home grown tomato. The kicker is they all ripen at the same time and you’re faced with what to do with all of them.

My patio tomatoes

I used to grow tomatoes in my yard and on my deck, but since we moved to a condo I can only plant a couple of pots of patio tomato plants. This year, much to my surprise, my two little plants are producing like crazy! So above and beyond putting them in a salad or serving them with a generous dollop of tuna salad or making salsa or pasta sauce, I wanted to try something a little different. Hence this recipe…

I like this recipe for a variety of reasons. First the finished product is out of this world but also it’s so quick and easy to put together and after that you just let your tomatoes marinate on the kitchen counter for a couple of hours and you’ve got something very special. Second if you plant a pot of herbs like I do it is a great way to use them. The recipe couldn’t be cleaner and the end result is divine. So let’s talk marinated tomatoes with herbs and mozzarella.

Lesson Learned 1 – Cut the tomatoes at least 1/2 inch thick: The marinating process will break the tomatoes down slightly so if you cut them too thin you’ll wind up with mush. Make sure to cut them thick to avoid that. Also make sure you don’t layer them but rather put them in a single layer. That way you’ll be able to get the full effect of the marinade.

Lesson Learned 2 – There is a trick to how long you marinate the tomatoes: As I mentioned earlier, the marinade will slightly break down the fibers in the tomatoes so if you plan to marinate them on the counter only do it for a couple of hours. If you plan on marinating them longer put them in the refrigerator. I know, the cardinal rule is never to put tomatoes in the refrigerator but this time you can if you need to marinate them for a longer period of time.  If you put them in the refrigerator take them out in plenty of time to bring them back to room temperature. That way you won’t be left with cold, mushy tomatoes.

Lesson Learned 3 – Make sure to finely mince the garlic: You’re using raw garlic in the marinade so you’ll want to finely mince the garlic or crush it. That way you’ll get the benefit of the garlic without having to worry about taking a big bite of raw garlic which is not very flavorful.

Lesson Learned 4 – Feel free to vary the amount of balsamic vinegar to taste: The general rule of thumb when making a vinaigrette is one part vinegar to three parts oil. I like more tang, so whenever I combine vinegar and oil I always add more vinegar than called for. Make sure to taste your marinade before you pour it on the tomatoes and if you like more tang don’t be afraid to add more balsamic vinegar. It’s always better to start off on the safe side and add more from there. Most of the recipes I looked at used less than what I’ve listed here but I think using less makes the marinade taste too oily tasting.

Lesson Learned 5 – Turn the tomatoes over mid-way through the marinating process: When you pour on the marinade all of the herbs will be on top of your tomatoes. Mid way through marinating them turn the tomatoes over and spoon some of the liquid with the herbs on top. That way you’ll get the full effect of the marinade on both sides.

So basically you slice the tomatoes, make the marinade and let them bathe in it and throw the mozzarella in at the end. What could be simpler? And the result is fabulous – try it and see!

Marinated Tomatoes With Herbs and Mozzarella...

  • Servings: 4-6
  • Difficulty: Easy
  • Print

INGREDIENTS:

4 large tomatoes sliced 1/2 inch thick

1/3 cup olive oil

3 Tbs. balsamic vinegar

1 Tbs. honey

2 Tbs. finely chopped red onion

1 large clove of garlic, finely minced

1 Tbs. flat leaf parsley, finely minced

1 Tbs. fresh basil, finely minced

1/4 ball of mozzarella, sliced and then cubed (again you can add more if you like)

Kosher salt and freshly ground black pepper to taste

DIRECTIONS:

Cut the tomatoes into thick 1/2 inch slices. Arrange them in single layer in a large shallow dish. In a mason jar combine the oil, vinegar, honey, onion, garlic, parsley, basil, salt and pepper. Put the lid on the jar and shake the mixture vigorously to combine. Pour the mixture over the tomatoes.

Cover the tomatoes with plastic wrap and let marinate for two hours on the counter, or if longer in the refrigerator. (If refrigerated bring the tomatoes back to room temperature before serving.) Half way through the marinating process turn the tomatoes over and spoon the marinade back on top. Before serving, garnish with mozzarella and spoon the marinade over the mozzarella.

Party Time Pico de Gallo…

It’s getting to be that time of year where our gardens are producing faster than we can use everything they produce. It’s a great problem to have. One solution to this problem is to share with some of your neighbors who don’t have gardens (I can’t tell you how many times I found zucchinis on my door step). But another solution may be to combine what you have into something very versatile, like pico de gallo.

Pico de gallo is something that can be served as an appetizer with tortilla chips, crackers, or even toasted bread. It can also be used as an enhancement to a main dish like chicken or fish. Just put it on top and it will send your protein over the moon. It can also be eaten as a salad substitute. And it is a great way to use your garden bounty.

There are many recipes for pico, and they are all very easy to make. I made mine based on various recipes and what was available in my garden. And you can do the same. So I’ll share my recipe but know that you can adjust it to what you have on hand and the level of heat that you want.

So let’s talk pico de gallo…

Lesson Learned 1 – I recommend prepping the tomatoes first: There’s a good reason for this. Tomatoes are filled with moisture and you want to give them an opportunity to release some of that moisture before you mix them with the other ingredients. You don’t want soggy pico de gallo. I chopped my tomatoes into small bite size squares and placed them in a strainer over a bowl. That way I could drain off their excess water. With the amount of tomatoes I used, I had about a quarter of a cup of liquid drain out of them. That’s quite a bit. And every once in a while I would stir them to release more water.  Don’t worry if you don’t get all of the liquid out. You’ll get most of it out and that will be good enough.

I also recommend using either roma or campari tomatoes if you’re not using tomatoes from your garden. I find them to be a little less watery and more conducive to holding up in this recipe. But in a few weeks my patio tomatoes will be ripe (they are already starting to turn red) and I will use them in this recipe. Use what you have – you can always drain the water from them no matter what kind you use.

Lesson Learned 2 – Determine how much heat you want in your pico: Most recipes I saw suggested using one jalapeno pepper. I am growing banana peppers in my patio garden and I wanted to use those. Banana peppers have heat, but not as much as a jalapeno, so I used two of them and the pico had a nice but mild bite to it. Remember to scrape away the seeds on the inside of these peppers. That’s where you’ll find the highest concentration of heat. Here again you can choose what type of pepper you want to use depending on how much kick you want or can handle.

My banana pepper plant…

Lesson Learned 3 – For extra flavor add an avocado: Most recipes I looked at didn’t use avocados but I thought they added a nice smooth texture to the pico. If you plan on making your pico ahead of time (and I would not recommend making it more than two hours ahead in order to retain all of its freshness) do not add the avocado until you’re ready to serve it. Dice the avocado into small squares and fold it in with the other ingredients at the very end. Then add the juice of half a lime on top to prevent any oxidation. Give it a final mix and you’re ready to go.

Lesson Learned 4 – Choosing the right kind of onion: I used a white onion for my pico. It was an onion that I got at our local farmers market and it was mild and not overly pungent. Sometimes white onions can be too overpowering, especially if they make you cry when you peel them. This onion did not. So you might want to be careful in choosing the type of onion you’ll use. If a white onion is too pungent, use a sweet vadalia onion instead. Again the choice is yours.

And the rest is just a matter of chopping and dicing, two of my favorite things to do. Mix everything together, add some fresh lime juice, garnish and you’re ready to go. Try this one and see what you think!

Party Time Pico de Gallo...

  • Servings: Enough For A Crowd
  • Difficulty: Easy
  • Print

INGREDIENTS

2 cups tomatoes, chopped small

2 cups white onion, chopped small

1 1/2 cups fresh cilantro, chopped

2 banana peppers, seeded and diced

1 large avocado, chopped small

2 limes

Salt and pepper to taste

DIRECTIONS

Drain the tomatoes in a colander over a bowl while preparing the other ingredients. Stir together the tomatoes, onion, cilantro and banana peppers. Squeeze the juice of one lime over the ingredients and stir until well combined.

Right before serving, add the avocado. Squeeze the juice of half a lime over the top. Gently fold the avocado into the other ingredients. Put the ingredients into a serving bowl and garnish with a couple of slices of lime and some cilantro leaves. Serve immediately.


Cream Cheese And Pineapple Stuffed Celery

I bet you’ve been wondering where I’ve been? All I can say is this Summer has been crazy and I never anticipated having so little time to think about my blog. I’ve had very little time for recipe experimentation but I promise by the Fall I will be posting more regularly.

But with that in mind, I have a quick, down and dirty and outrageously simple appetizer that you can bring to your next Summer get together. This particular recipe was my mother’s and when you see how simple it actually is you’ll know that everything I’ve been telling you about how she was not the creative or adventurous cook is completely true. But, that being said, it is also really delicious.

My memory of this recipe does not come from Summer parties but rather holiday parties. Every Christmas and Easter (but especially Christmas) she would make these and have them on the table. I hadn’t thought about them in a long, long time until last week when I was charged with bringing an appetizer to an event but literally had no time to make anything. This recipe came to the rescue and it was a big hit!

I also think this was my mother’s way of getting her kids to eat celery – and it worked! For such an easy recipe, it is perfect to serve when time is limited and you want something fun and delicious to put on the table as an appetizer or snack.

So let’s talk cream cheese and pineapple stuffed celery…

Lesson Learned 1 – Pre-cut celery is a great time saver: My grocery store cells pre-cut celery. The stalks are approximately three inches in size and packed in water. That’s the perfect size for this recipe. The only thing I needed to do to prepare the celery was take a small slice off each end to freshen the ends up. I was able to pat them dry and stuff them right away. But you can also buy celery and wash and slice it on your own. But I loved the convenience of having all that work done for me ahead of time.

Lesson Learned 2 – It is important to use BOTH a can of crushed and chunked pineapple: Initially I tried it with just one can of crushed and found that the pineapple flavor was being overpowered by the cream cheese. When I added the chunked pineapple it gave a nice balance of flavor and you could visually see some pineapple, which was not very visible when I just used the crushed. I also recommend dicing the pineapple chunks out of the jar and before adding them to the cream cheese. That way the chunks are the perfect size. Fold the diced chunks in at the end so as not to overly crush them in the mixing process.

Make sure you drain both the crushed and chunked pineapple so that the cream cheese mixture doesn’t become too runny.

Lesson Learned 3 – If you can, chill the stalks before serving: If you have time refrigerate the stuffed celery stalks before serving. I found that at a Summer party serving them that way makes them even more refreshing. But if you can’t you can always serve them right away.

Lesson Learned 4 – This is a very versatile dish: There are different ways of using this cream cheese mixture. It would be delightful on a toasted bagel. You can serve it as part of a crudite platter. You can also serve it as a dip on a veggie plate with radishes, celery, sweet baby peppers, snap peas, and carrots or you can serve it with some crackers and grapes. I like serving it with celery as it’s easy to pick up and go.

Lesson Learned 5 – Why not just buy this pre-made at the store? That’s a good question but the answer is very simple – this takes no time to make and you control exactly what ingredients go into it, which is always a good thing.

It couldn’t be easier! Sometimes I shy away from posting these very rudimentary recipes as I think my readers will consider them too simple. But I’ve found that any new recipe idea, easy or otherwise, tends to be very much appreciated. So make this one and tell me what you think!

Cream Cheese and Pineapple Stuffed Celery

  • Servings: 20-30 Three Inch Stalks
  • Difficulty: Very Easy
  • Print

INGREDIENTS:

1 – 8 ounce package of cream cheese, softened

Celery stalks, washed, dried and cut into 3 inch pieces

1- 8 ounce can of crushed pineapple, drained

1 – 8 ounce can of pineapple chunks, drained and diced in smaller pieces

DIRECTIONS:

Cut off a small slice on each end of the celery stalks and discard. Wash and dry the celery if not pre-washed. Combine the cream cheese with the drained crushed pineapple. Mix thoroughly. Fold in the drained diced pineapple.

Over-stuff each stalk with the cream cheese mixture. If possible, refrigerate for at least one hour, although this also can be served immediately.


Honey Teriyaki Baked Cod…

I know, I know I haven’t written in a while. Summer seems to have gotten a hold of my priorities and I’ve had a lot less time to spend in the kitchen. But I will try to be as faithful to my posting goals as I can – just be aware there may be a little more time between posts during the summer. After all, summer is the time to be out and about, right? So be patient with me and I promise to continue to deliver some great, no nonsense recipes.

And speaking of great, no nonsense recipes – this is definitely one of them. I recently read an article that talked about how Americans are still eating too much processed meats and should make an effort to add more fish to their diets. I know that’s something that my husband and I have been trying to do. Neither one of us grew up eating a lot of fish – it was just either too expensive or not something that was a regular part of the diets in our families.

My doctor told me there is a lot of research regarding when you were born, the diets that existed at the time and how that has affected your weight and health as you age. I grew up in a household where carbs were king, bread and potatoes mostly, and we know now the affects of too many carbs on weight and health. So my doctor said the same thing – try eating more fish. And you know what, it’s been quite pleasant actually.

I guarantee you this recipe will have you eating more fish. It is so simple to make and so flavorful you’ll wonder why you waited so long to bring more fish to the table. So let’s talk honey teriyaki baked cod…

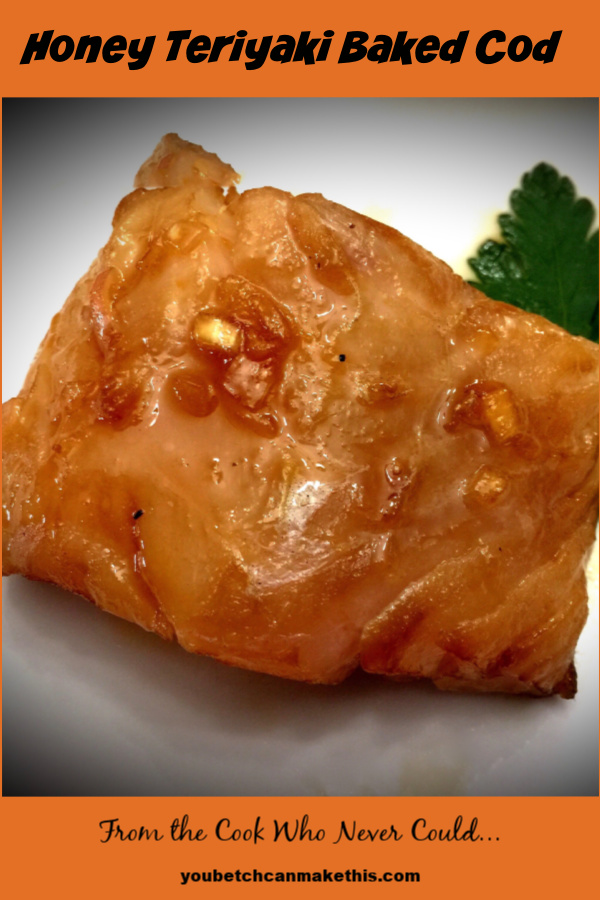
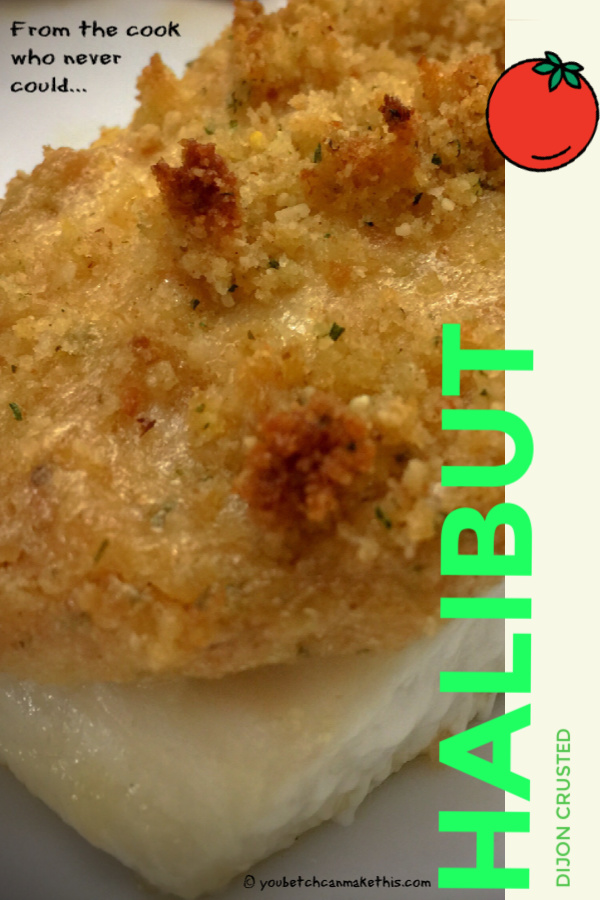
Lesson Learned 1 – All fish are not created equal when it comes to cooking them: I think that’s the part of cooking fish that makes people shy away from doing it. So it’s important, if possible, to cut your fish into equal sized portions to determine a somewhat standard cooking time for it. I usually cut 4 to 6 ounce portions. That way I am relatively sure how long to cook my fish.

Keep in mind that portion size is only one factor. The type of fish also contributes to the equation. I’ve found that a 6 ounce portion of salmon has a different cooking time than a 6 ounce portion of cod. Cod cooks in less time. The main thing to remember is you can always put the fish back in the oven or pan if it is not cooked well enough, but once it dries out you’re stuck – you can’t take it back. So err on the side of caution and I guarantee you’ll get the hang of it. I’ve been doing it so often now that I can tell when fish is done by how it looks – but that took a lot of time, so be patient with yourself.

Lesson Learned 2 – The longer you marinate the cod in this recipe, the better: I marinated mine for about 7 hours but you can go up to 24 hours on this one. I may try that next time if I have the time, but it was quite flavorful after being marinated for 7 hours. I wouldn’t marinate it for less than 6 hours – I don’t think the fish will absorb the flavors of the marinade that well if you only marinate it for a short while. And don’t forget to turn the bag over every once in a while to make sure both sides of the fish are getting the marinade.

Marinade Ingredients

Lesson Learned 3 – Working with fresh ginger: I know a lot of people use fresh ginger quite regularly but I’m not one of them. But there is no substitute for it when you need it. What I learned is that you can freeze the ginger root. I put mine in a vacuum sealed bag and freeze it. That way when I need it, it’s as fresh as it can be. And I don’t have to buy ginger root every time I need it. It keeps beautifully in the freezer. So use what you need and freeze the rest. You’ll increase the lifetime of the ginger root substantially.

Lesson Learned 4 – Avoiding a big mess when baking this fish: Something important to remember is there is honey in this marinade – and honey will burn in the oven. So whenever I cook fish with a honey based marinade I put the fish on a foil lined pan and spray the pan with cooking spray before I lay out the fish. That way you eliminate or greatly minimize any sticking and the pan is easy to clean with no burnt on mess.

This recipe is extremely simple – the only challenge initially may be feeling comfortable with how to cook it correctly. If you use my directions you’ll be fine, or at least you will not overcook your fish and can judge if you need a little extra time. I doubt that you will need a lot more, but it’s always good to err on the safe side. All you need to remember is that the fish is done if you can flake it with a fork. Just test the edges if you’re not sure. Enjoy this one – it’s a keeper!

Honey Teriyaki Baked Cod...

  • Servings: 4
  • Difficulty: Easy
  • Print

INGREDIENTS

4 – six ounce pieces of fresh cod

3/4 cup honey

1/2 cup soy sauce

1/3 cup sesame oil

1/3 cup apple cider vinegar

1 small shallot, minced

1 tsp. fresh ginger

1/2 tsp. freshly cracked black pepper

Cooking spray

Lemon wedge, for garnish, optional

DIRECTIONS

In a small bowl mix the honey, soy sauce, sesame oil, cider vinegar, shallot, ginger and black pepper. Place the cod filets in a gallon size resealable plastic bag. Pour the marinade over the cod (use a spatula to scrape in any remaining honey from the bowl). Seal the bag and marinate the fish in the refrigerator from 6 – 24 hours, turning the bag over every once in a while.

Preheat the oven to 375 degrees. Place the marinated cod on a foil line baking sheet sprayed with cooking spray. Spoon a little of the marinade on top of each piece. Bake for 10-12 minutes. Serve immediately.

Smoked Salmon And Herb Cheese Cucumber Bites…

Ok, I know I’ve said a lot of my recipes were over the top, but this one is really over the top! Not only does this appetizer have flavor that’s off the charts, but it looks equally impressive and it couldn’t be easier to make. And that’s what I like – something that’s pleasing to the eye and loaded with flavor.

If you’re anything like me you like to play with food. I loved all aspects of putting these bites together from making the cheese mixture, to rolling the salmon, to adding the little frawns of dill to smelling the aroma of cucumbers. Putting these appetizer bites together was a pleasure from start to finish!

So let’s talk smoked salmon cucumber bites…

Lesson Learned 1 – Peel stripes on the cucumber for some extra flair: If you take a peeler and peel 3-4 stripes lengthwise on an English cucumber you get a nice contrast in color along the peel. Make sure you use an English cucumber (or you can use baby cucumbers but they are more time consuming to handle) as the skin is edible in comparison to plain old regular cucumbers that have a thicker and less palatable skin. Adding the strips adds to the visual wow factor of the appetizer.

Lesson Learned 2 – Peel the smoked salmon into bite-sized chunks: The smoked salmon is sliced razor thin so all you need do is tear off a small piece, roll it and you’re ready to put it on top of the cheese. You only need a little bit for each appetizer.

Lesson Learned 3 – Pierce the salmon with the decorative pick first: You may need to push a little to get the salmon on the pick. You don’t want to do that at the same time you are putting the salmon on top of the cheese – the cheese will squirt out everywhere. Pierce the salmon first and then put the pick through the cheese and cucumber. That way it will all layer correctly.

Keep in mind you only need a small amount of the cheese mixture as well – I’d say about a well rounded teaspoon. I used the smaller side of a melon baller to scoop the cheese onto the cucumber. It worked perfectly.

This is an appetizer you’ll want to make and serve shortly afterwards. It tastes the best and freshest that way.  I know you’ll find these little bites not only delicious but also fun to make and of course, eat! Try them and let me know what you think.

Smoke Salmon And Herb Cheese Cucumber Bites...

  • Servings: 20-25
  • Difficulty: Easy
  • Print

INGREDIENTS:

1 5.2 oz. Boursin garlic and fine herb gournay cheese (or any similar spreadable cheese)

1 English cucumber sliced in 1/2 inch rounds

8 oz. smoked salmon

3 Tbs. fresh dill, chopped

2 Tbs. creamy horseradish

1 tsp. onion powder

Small fresh dill frawns for garnish

Decorative picks

DIRECTIONS:

Mix together the cheese, onion powder, chopped dill and horseradish until well combined. Set aside.

Peel 3-4 stripes lengthwise down the sides of the cucumber. Slice the cucumber into 1/2 rounds. Place the cucumbers on a serving dish.

Put a teaspoon of the cheese mixture on top of each cucumber. Peel off bite sized pieces of the smoked salmon. Roll each piece and pierce it with the decorative pick. Place the pick through the cheese and cucumber.

Garnish with a small frawn of dill on top of each appetizer bite. Serve immediately.

The Ingredients

Slow Cooker Stuffed Shells…

It never ceases to amaze me what you can do with a slow cooker. Years ago it was just a tool you used to put in some meat, vegetables, some liquid (mainly canned soup) and let it cook for 8 hours or more. And generally that resulted in bland, dried out food. Well not anymore.

The slow cooker has not become a versatile tool for making a wide variety of things. Years ago I would never have thought about cooking pasta in a slow cooker and would never have thought to use the cooker for only three hours. My, how times have changed!

This recipe is insanely delicious. The combination of ricotta, cottage cheese and pesto makes a delightful creamy filling for the shells. And it also is fabulous as leftovers – so minimally you can get more than one dinner out of this recipe.

So let’s talk slow cooker stuffed shells…

Lesson Learned 1 – Cook the shells for one minute less than it says on the box directions: You boil the shells to get them somewhat softer and easier to stuff. There is no need to cook them through because they will still cook for another 3 hours in the slow cooker. So don’t boil them on the stove top for the recommended amount of time. If you do, by the time you’re ready to serve you shells will be mushy.

Lesson Learned 2 – You can add some additional veggies to the cheese mixture: I had some sweet red pepper in my refrigerator and so I decided to dot the top the cheese mixture with some sweet pepper morsels. But you could easily just mix the peppers in with the cheese – just make sure to dice the peppers small. Chopped mushrooms would also work well in the cheese mixture. Or you could slice the mushrooms and mix it with the tomato sauce and just let them cook that way. You could also add frozen spinach to the cheese mixture. Just make sure it is completely thawed and squeeze out all the water from the spinach so the cheese mixture doesn’t get soggy.

Lesson Learned 3 – Don’t precook the sausage all the way through: I suggest you cook the sausage in a skillet and when there still is some pink left in the meat, take the sausage out of the skillet and drain it on paper towels. The sausage will be cooking another 3 hours in the slow cooker so no need to cook it through on the stove top.

Lesson Learned  4 – Make sure you spray your slow cooker crock with cooking spray and line the bottom with a little tomato sauce: That way the shells won’t stick to the crock and clean up will be a breeze.

And that’s it – it’s basically soften the shells, stuff them, place them in the slow cooker and let the slow cooker do all of the work. What more could you ask? Enjoy!

Slow Cooker Stuffed Shells...

  • Servings: 6
  • Difficulty: Easy
  • Print

INGREDIENTS

15 large pasta shells, cooked 1 minute less than package directions

1 large jar of tomato sauce

2 links of Italian sausage, skin removed, partially cooked, crumbled, divided

12 ounces whole milk ricotta cheese

6 ounces cottage cheese

1/4 cup Parmesan cheese

1/3 cup pesto

1/4 cup sweet pepper, diced small

2 tsp. of Italian seasoning, divided

1 cup mozzarella cheese, shredded

salt and pepper to taste

olive oil cooking spray

Chopped or sliced mushrooms, optional

Frozen spinach, optional

DIRECTIONS

Cook the pasta shells one minute less than the package instructions. Drain and set aside to cool.

In a skillet, cook the Italian sausage, breaking it up while you cook it, leaving some pink color in the sausage. Do not cook the sausage completely through. Drain the sausage on paper towels and set aside.

In a medium size bowl mix together cheeses, pesto, sweet pepper and 1 tsp of Italian seasoning. Generously stuff each shell with the cheese mixture and set aside. Dot the top of each with pieces of sweet red pepper or combine the red pepper into the cheese mixture before stuffing the shells.

Spray the slow cooker crock with cooking spray. Lightly cover the bottom of the crock with a layer of tomato sauce. Sprinkle half the sausage on top of the sauce. Place the stuffed shells on top of the sausage and sauce. Pour the remaining sauce over the shells and sprinkle the remaining sausage on top of the sauce.

Sprinkle the mozzarella all over the top of the shells meat and sauce. Sprinkle the remaining teaspoon of Italian seasoning over the mozzarella.

Cover and cook for no longer than 3 hours.

NOTE: You can chop mushrooms small and add them to the cheese mixture or you can take mushroom slices and place them in the sauce lining the bottom of the slow cooker and then place the shells on top of them. A small box of frozen spinach can be added to the cheese mixture as well. Make sure it is thawed and all the liquid is squeezed out of it.


Add some meat and sauce to the bottom of the slow cooker…

Add the stuffed shells…

Cover with remaining sauce and meat…

Top with mozzarella and Italian seasoning…

After three hours you have…


Bacon Turkey Ranch Pinwheels…

There is a method to my madness. By that I mean I have a process for trying to maintain my goal of posting one new recipe every week. I start by finding a day I know I’ll want to stay at home, usually a bad weather day (you know the kind – where you’d just like to just stay in bed with a good book) and that’s when I do a test kitchen. That way I can play with 2-3 recipes and build up a queue from which to publish.  And if I challenge myself to play with one new recipe a week after that I am assured of always staying ahead of the game.  So you see, I do have a plan.

And normally I don’t take the most recent recipe I’ve played with and shoot it to the top of the publishing list. But I couldn’t help it with this one. This is one heck of a great appetizer and with graduation season coming up and all those parties I wanted to share this right away so you could make it if you so desire. I made this one yesterday and it was so good and so easy. I just know your party guests will be impressed.

So let’s talk bacon turkey ranch pinwheels…

Lesson Learned 1 – Make the wraps the day before: Substantively there is nothing difficult about this recipe. You basically mix all the ingredients together, layer the turkey on a large tortilla, slather the cream cheese mixture over the meat, roll it up, cut it into rounds and add the decorative tomato. Probably the most time consuming thing is getting the cream cheese to room temperature. So reduce your stress and make the pinwheels the day before. Whenever you make pinwheels you need to chill the rolled up tortilla before slicing anyway. So why not wrap the rolls tightly in plastic wrap and let them sit over night. I think the flavors will get even better acquainted that way. Then the next day all you do is slice them and add the tomato. It couldn’t be easier.

Lesson Learned 2 – Get store bought bacon pieces for extra added convenience: I’ve made pinwheels both by frying and chopping up bacon strips and by using bacon bits out of a bag. I can’t tell the difference. I know how hectic preparing for parties can be so do yourself a favor and use the bacon bits in the bag. It’s a great time saver.

I also recommend using about 1/2 half of a 3 oz. bag – but see what you think. If you think your cream cheese mixture doesn’t look like it has enough bacon, don’t be afraid to add more. And lastly, I recommend adding the bacon bits at the end and folding them in by hand versus using your hand mixer. That way the pieces won’t get broken up and they’ll stay nice and chunky, and that’s what you want.

Lesson Learned 3 – You don’t need a lot of spinach for this recipe: I’m recommending using what I call a small handful of spinach. You don’t want to overdo – and only use fresh spinach not frozen. I’ve been buying my spinach at our local farmers market and it’s fabulous. But keep in mind, fresh spinach can also have long stems. You want to remove those stems before mixing the spinach in with all of the other ingredients.

You can just add the spinach leaves to the bowl with your cream cheese and seasonings. The hand mixer will break it up during the mixing process. But start your hand mixer on low until some of the leaves start to break down. Otherwise you might have an unanticipated mess on your hands.

Lesson Learned 4 – I used shallots in this recipe but you can also use green onions: I find shallots give the filling a little more zing but if you don’t have them on hand finely mince the white parts of two scallions and that will work as well.

Lesson Learned 5 – This recipe makes 3 large tortilla wraps: You can use any kind of tortilla. I used a traditional one but you can use spinach tortillas or any specialty tortilla you like. Keep in mind you’ll need to gauge how much turkey you’ll need. When I got my turkey, I got large thin slices so I only needed two slices per tortilla. That amounted to a little over a half pound. If you’re using smaller slices you obviously will need more. Just make sure the turkey is sliced thin.

Lesson Learned 6 – Make sure you don’t spread your filling all the way to the edges of the tortilla: As you roll up the tortilla the filling will spread. If you don’t leave some room around the edges you’ll have a bunch of filling oozing out of the sides. Leave some room around the edges and you won’t waste any filling. And no matter what you do the ends of your tortilla will never be completely filled. So just cut them off when you begin slicing the rounds. They will have some filling in them, so if you want to taste test your creation, eating the scraps is the perfect way to do it.

Lesson Learned 7 – Working with the cherry tomatoes: I found the easiest way to attach the cherry tomatoes to the rounds is to first pierce them with your decorative pick and slide the tomato up the pick leaving about an inch of the pick exposed. Then insert that end of the pick into the tortilla. If you try to do this process by placing the tomato on top of the round and then piercing it you’ll probably flatten your rounds. It’s best to insert the tomato onto the pick first and then insert the pick into the round. Just a little tip to make assembly easier.

And that’s it. When I brought these to a get together someone said, “You always make such nice looking appetizers” and that’s great because remember, you eat with your eyes first. I guarantee your party guests will be impressed with how they look but more importantly their taste buds will be equally as delighted. Enjoy!

Bacon Turkey Ranch Pinwheels...

  • Servings: 30-36
  • Difficulty: Easy
  • Print
INGREDIENTS:

1 –  8 oz. package of cream cheese, softened

1 package ranch dressing mix

1 tsp. garlic powder

1/2 shallot, minced

1 small handful of fresh spinach, stems removed

3/4 pound of thinly sliced turkey

1/2 package (3 oz) of bacon bits

3 large tortillas

cherry tomatoes, one for each pinwheel

decorative picks

DIRECTIONS:

In a medium size bowl with a hand mixer combine cream cheese, ranch dressing mix, garlic powder, shallots, and spinach. Fold in the bacon bits by hand. Divide the mixture into three equal portions.

Layer each tortilla with turkey. Spread the cream cheese mixture over the turkey making sure to leave a 1/2 inch edge on all sides. Roll the tortillas tightly. Wrap all the rolled tortillas in plastic food wrap and refrigerate for 3-4 hours at a minimum.

Trim the ends off of each tortilla. Slice the tortillas into 1/2 inch rounds. Pierce a cherry tomato down the center with a decorative pick leaving at least an inch of the pick exposed at the bottom. Insert the pick with a tomato into each tortilla.


Blueberry Muffin Breakfast Cake…

I had a large container of blueberries just sitting in my refrigerator. Isn’t it funny how what we have in our refrigerators and don’t want to waste often drives what we make? I had blueberries and I had to find a way to put them to great use.

I don’t know about you but I find making cakes in springform pans to be much easier. I like the idea that once the cake first begins to cool you can simply unhook the pan and the cake is released. I also like the fact that you can firmly attach a piece of parchment paper to the bottom of the pan before you add the batter and once the cake has cooled you simply pull the paper out from under the cake and it is safely on whatever plate you want it to be. I find this all very convenient.

But above and beyond the convenience of a springform pan, this cake is delightful and I can tell you having a piece of it with your morning coffee is utter heaven. So let’s talk blueberry muffin breakfast cake…

Lesson Learned 1 – My quest for the perfect crumble: I have to admit I’ve struggled with making a crumble that I truly enjoyed. I found most suggestions for making crumbles to be, for lack of a better term, yucky. More often than not I’ve felt that the crumble tasted too much like dried out lumps of flour. Have you experienced that as well? Well, no more. This combination for a crumble topping is the best yet. In my mind it balances the right amount of fat, sugar, flavoring and flour to give a sweet, but not overly sweet, topping for the cake that in no way tastes like flour. I suggest you use it on other cakes that you make with crumble toppings. I think I’ve finally found the right combination of ingredients for a crumble.

Lesson Learned 2 – The secret to making glaze: The secret to making glaze is there is no secret. I was watching the Pioneer Woman the other day and she and while she was making a glaze she admitted that there is no hard and fast recipe for one. It’s all done by eyeballing and consistency. The important thing to keep in mind is you can’t ruin glaze. Just remember if the glaze is too thick you add a little more liquid and if the glaze is too thin you add a little more powdered sugar. For this particular recipe I opted for a somewhat thicker glaze.

The other thing to remember with glaze is there is no correct consistency. There may be times when you want a thinner glaze and there may be times you want it thicker. And you can control that by adding less liquid for a thick glaze or more for a thin one. It’s as simple as that. So don’t fret over making glaze. It’s probably one of the most forgiving things you can make in the baking world!

Other than these few tips this recipe is pretty standard but it makes an over the top breakfast cake. Try it and let me know what you think…

Blueberry Muffin Breakfast Cake...

  • Servings: 10-12
  • Difficulty: Easy
  • Print

INGREDIENTS

Cake:

1 stick unsalted butter, room temperature

3/4 cup sugar

1 extra large egg, room temperature

1 tsp. vanilla

2 cups flour

2 1/4 tsp. baking powder

1/2 tsp. salt

3/4 cup whole milk

2 cups blueberries (approximately 1 pint)

Baking spray

Crumble Topping:

1 stick unsalted butter, room temperature

1/2 cup sugar

1 tsp. cinnamon

1/2 cup flour

1/4 tsp. salt

Glaze

1/2 cup powdered sugar

2 tsp. heavy cream or whole milk

1/4 tsp. vanilla

DIRECTIONS:

Preheat the oven to 350. Line the bottom of a 9 inch springform pan with parchment paper and clasp the top part of the pan shut. Set aside.

In a medium size bowl, put in all the crumble ingredients and cut together with a pastry cutter until the mixture is all combined and resembles clumps of sand. Set aside.

In a separate bowl whisk together the flour, baking powder and salt. Set aside.

In a stand mixer, cream together the butter and sugar. Add the egg and combine. Add the vanilla and combine. Add one half of the flour mixture and combine. Add the milk and combine. Add the remainder of the flour mixture and combine until totally incorporated. Gently fold in the blueberries making sure they are evenly distributed throughout the batter.

Spray the springform pan with baking spray including the bottom with the parchment paper (I use the one with flour). Pour the batter into the springform pan. Sprinkle the crumble all over the top of the batter. Use all of the crumble.

Bake for 40-45 minutes until golden brown and until a toothpick inserted in center comes out clean (it may have some blueberry on it, but that’s ok). Remove from the oven and let cool for 15 minutes. (Some of the crumble may seem a little wet due to the amount of butter in the crumble. That’s ok).

After it has cooled for 15 minutes, slide a knife around the edge of the pan and remove the outside of the springform pan. Allow the cake to cool completely before removing the parchment paper underneath the cake.

When the cake is completely cooled you can remove the bottom parchment paper and slide the cake onto a serving plate. Combine all of the glaze ingredients together and drizzle the glaze over the top of the cake.

Serve or store in an air tight container.


Stuffed Baby Peppers…

I don’t often think about a certain type of food as being cute, but I have to admit the thought crossed my mind when I first laid eyes on baby peppers. The next thought was how can I use these in a recipe and appetizer jumped out at me.

These little darlings make the perfect grab and go appetizer and I’ve found people tend to like the simplicity of that the most. The peppers are also very tender and sweet and a perfect compliment to a wide variety of cheese concoctions.

For this particular recipe I used a combination of a spreadable garlic and herb cheese, Boursin brand, and added some green onion and dill to boost the flavor of the cheese. It couldn’t have been easier. And when I served it at a gathering, the entire plate of peppers disappeared!

So let’s talk stuffed baby peppers…

Lesson Learned 1 – Sometimes the simplest things are the best: I used to think that recipes had to be complicated and flashy to merit writing about. And I’ve been proven wrong over and over again. The best example I can give is my cream cheese, spinach, bacon and scallion pinwheels. After I made them I hesitated to post the recipe because I thought it was so rudimentary and people would laugh at it. Boy was I wrong. To this day that recipe is one of the most popular recipes on my blog – and I would never have dreamed it to be when I wrote it.

This recipe, in my mind, falls in the same genre. It basically takes a pre-made spreadable cheese embellished with a couple of simple ingredients and some baby peppers and voila, a simple but great appetizer! This kind of appetizer is perfect for when you have to throw something together quickly. It’s super tasty, looks divine, and disappears in a snap. What could be better? So, bottom line, don’t shy away from what’s incredibly easy. In the end, it may be one of the most popular things you’ll make.

Lesson Learned 2 – Working with baby peppers: First let me suggest that you get a bag of multi-colored baby peppers. The array of colors on a plate makes for an easy but effective presentation. Second, baby peppers are incredibly easy to work with. They don’t have a lot of seeds or the strips of white pith inside so they are easy to cut and prepare. Just take your knife and cut the pepper in half from top to bottom, remove the few seeds you may find and if you have a little pith just take your knife and scrape it away. In no time flat you have a tasty bite size little boat to hold your cheese concoction.

Probably the biggest challenge with this recipe is stuffing the peppers – but you really don’t have to worry about being overly neat with the cheese stuffing. I used a melon baller, the smaller side, and just scooped some of the cheese into a pepper and spread it over the top. You wind up garnishing the peppers with some paprika and the remaining minced green onions and that gives them a decorative flair.

And that’s it. Now I chose to “beef up” the spreadable cheese I used, but you don’t even need to do that if you don’t have the time or ingredients. If you get a flavorful spreadable cheese, that can be sufficient. Just make sure you use a spreadable cheese, otherwise stuffing the peppers will definitely become a chore. Enjoy these tasty little morsels. You’ll have fun making them and you’ll have fun eating them!

Stuffed Baby Peppers...

  • Servings: 24
  • Difficulty: Easy
  • Print

INGREDIENTS:

1 5 oz. package of Boursin garlic and fine herb spreadable cheese

12 multi colored baby peppers, halved

1 Tbs. sour cream

2 green onions, chopped fine and divided

2 tsp. fresh dill, chopped fine

paprika, for garnish, optional

Fresh dill spears for garnish, optional

DIRECTIONS:

Cut the peppers in half from top to bottom. Remove any seeds and white pith.

In a small bowl combine the spreadable cheese, sour cream, about 2/3 of the chopped green onions, and all the chopped dill.

Using a small spoon or the smaller side of a melon baller, scoop some cheese inside a pepper and smooth it out to cover the entire upper surface of the pepper. Repeat until all peppers have been stuffed.

Sprinkle the tops of the peppers lightly with the remaining green onions and paprika. Plate (you can garnish the plate with fresh dill spears, optional) and serve.


Raspberry Riccota Coffee Cake…

Rasberry Cheese Coffee Cake

There’s nothing like the taste of a good coffee cake with your morning cup of Jo, or at least that’s how I feel. And I am particularly fond of baking with raspberries. Not only are they colorful but I also like their tartness which I feel balances the sweetness of a cake batter beautifully.

My husband is a sweets fanatic. He’s one of those that can eat sweets and not put on a pound, although I have to say he’s also very good at moderating what he eats. So I guess I can’t fault him for being good about what he eats and still including sweets in his diet.

Because of his sweet tooth, I like experimenting with things I bake to see what will interest him the most. This recipe got a thumbs up from him (with qualifications regarding the amount of raspberries which I will explain in lessons learned) and will definitely be something that I make again and again.

So let’s talk Raspberry Ricotta Coffee Cake…

Lesson Learned 1 – The batter in this recipe is thick: And I mean VERY THICK. I have to say I was a little surprised at how thick the batter was. I feared the cake would be a dried out mess, but I was wrong. I think the ricotta cheese, the cheese used in this recipe, makes the batter thicker but also makes the cake light and moist. I was pleasantly surprised.

The Thick Batter

Working with batter like this can be a challenge. This is the kind of recipe where you layer part of the batter in the pan, add the raspberries and then cover them with the remaining batter. I recommend you make this division close to half and half and here’s why. I had a hard time smoothing out the batter, especially the top layer. You will need as much batter as possible to get the job done. Dividing the batter in half did the trick.

I recommend taking the batter for the top layer and putting it in clumps all over as seen in the picture below:

That way it will help in the spreading out process. But even with this, spreading was still a little bit of a challenge. The raspberries underneath did not want to stay in place while I was attempting to smooth out the batter. Finally I just decided to wash my hands thoroughly and use my hands to press the batter down and out. That seemed to work a little better. Once the top was sufficiently covered I used my frosting spreader tool and smoothed out the top as seen below:

It really helped to start off with the clumps of batter spread out as much as possible over the top. I highly recommend you do that. Although getting it spread out was a little bit of a challenge it was much easier with the batter in various places versus trying to work from just one place.

Also make sure you use a stand mixer for the recipe. A hand mixer won’t work with the thickness of this batter. And mix the batter on low, otherwise you might face burning out the motor on your mixer. Yes, the batter is that thick, but no problem when you mix it on low.

Lesson Learned 2 – Really cover the center of the cake with raspberries: The recipe I based this on called for a heaping cup of raspberries, using 2/3 for the center and 1/3 for the top. In doing that the center of the cake looked like the picture below:

The Center Of The Cake

This was not nearly enough raspberries. Once the cake was baked it seemed like there were only a few raspberries in the center. Some slices did have a few more, but some seemed to have hardly any. Next time I make this I will add even more raspberries – so at this point I will recommend a heaping cup and quarter of raspberries with the greater majority being placed in the middle layer of the cake. The raspberries are what give the cake a special taste – that great balance of tart and sweet –  and I felt they should be more predominant in the cake. Baking it this way the cake turned out fine – but I will definitely add more raspberries the next time.

Lesson Learned 3 – Try adding a dollop of Cool Whip on the cake: My husband discovered this on his own. He thought the Cool Whip was a great addition to the cake. And yes, of course, you could always make some fresh whipped cream, but if you’re in a hurry a little Cool Whip will do just fine and will send the flavor over the top.

Lesson Learned 4 – The valuable lessons I’ve learned: Since the very beginning of writing this blog I’ve used the tag line “From The Cook Who Never Could…” and that, for a long time time, was so very true of me. I never had success in the kitchen because, first of all, I had no frame of reference. My mother was not a cook. Her idea of a meal was to overcook meat, have some kind of potato with it and open a can of corn or peas. Mind you, I am not knocking my mother here. She was a working mom at a time when most women were still staying at home and she had to figure out how to balance a job on the night shift with a husband and two children at a time when hardly anyone else was doing it. My dad helped a little, but his specialty was making bacon and eggs and oatmeal (he normally was in charge of the breakfast detail). So there was not a lot of opportunities for me to learn about cooking at home.

Once I became interested in cooking I found the hardest thing for me was bouncing back after my failures. I always expected things to turn out perfectly the first time and when they didn’t I blamed it on my lack of skills and became very disheartened. It’s only as I got older and began to really learn about the art and science of cooking and baking that I became much more forgiving of myself when things did not turn out as planned.

There is always something you can learn when you cook or bake something. And I hope you know that even the best of cooks don’t always get it perfect the first time around. That’s a lesson I learned the hard way.  So even with this recipe, when the concentration of raspberries was not what I would have wanted, I realized the cake in itself was still quite good and not a failure. It just needed, in my estimation, a little improvement.

Don’t make my mistake and blame yourself or your skills if something does not turn out the way you planned the first time.  And certainly don’t give up on yourself. Use what you learn and continue to improve your skills. It’s all part of the process.

So I hope you make this one – and I will write the recipe adding more raspberries. It’s a lesson I learned making this cake – one of many lessons I am sure I’ll continue to learn in the future. Enjoy!

Raspberry Ricotta Coffee Cake...

  • Servings: 10-12
  • Difficulty: Medium
  • Print

INGREDIENTS:

Coffee Cake:

1/2 cup unsalted butter, room temperature

3/4 cup granulated sugar

2 eggs, room temperature

1 tsp. vanilla

2 cups flour

2 tsp. baking powder (1 tsp for high altitude)

1/2 tsp. salt

1/2 tsp. baking soda

1 1/4 heaping cups of frozen raspberries

15 oz. whole milk ricotta cheese

Baking spray with flour

Glaze:

1/2 cup powdered sugar

1 tsp. almond extract

1 – 2 Tbs. milk or water

DIRECTIONS:

Preheat oven to 325  (350 for high altitude). Line the bottom of an 8 inch springform pan with parchment paper. Set aside.

In a small bowl combine the flour, baking powder, salt and baking soda. Whisk to combine. Set aside.

Using a stand mixer, beat the butter and sugar until light and fluffy (several minutes). Add the eggs one at a time and beat until well incorporated. Add the vanilla and beat to combine.

Add 1/3 of the flour mixture and beat on low until incorporated. Add 1/2 of the ricotta and blend until smooth. Add another 1/3 of the flour and beat on low until incorporated (due to the thickness of the batter it is important to only beat this on low). Add the remaining ricotta and blend until combined. Beat in the remaining flour on low until incorporated. Make sure the batter is well mixed.

Spray the springform pan with the baking spray. Pour in 1/2 of the batter and smooth out around the pan. Add 1 heaping cup of frozen raspberries and arrange evenly over the top. (If the top doesn’t look sufficiently full of raspberries add a little more from what you have remaining).

Spoon out the remaining batter in clumps over the top of the raspberries. Spread the batter out to cover the top. (NOTE: If using a spreader becomes too difficult, thoroughly wash your hands and use them to press the batter down and out). Smooth out the batter to evenly cover the top of the pan.

Take the remaining frozen raspberries and using your hands press them down across the batter on top.

Bake for 60-75 minutes or until the top is lightly browned and a toothpick inserted in the center comes out clean.

Cool at least 20 minutes before removing the cake from the pan.

Once cooled drizzle the glaze over the top. Make the glaze by combining the powdered sugar with the almond extract and milk or water. Use one tablespoon of liquid initially and check the consistency of the glaze. If the glaze it too thick add more liquid.

Cake Right Out Of The Oven

Rasberry Cheese Coffee Cake


Dijon Crusted Halibut…

Although we try to eat a lot of fish, I don’t usually buy halibut because it can be quite pricey. But the other day when I was at the grocery store they had just cut some fresh halibut and it looked so good I had to buy some.

I’m always a little nervous about making halibut because I don’t want to overcook it. It’s somehow easier for me to rationalize making a mistake with salmon (although I have that pretty much down to a science) than with halibut. But I just couldn’t resist how good and fresh the halibut looked and decided to try this recipe for making it.

So let’s talk Dijon crusted halibut…

Lesson Learned 1 – Do you leave the skin on or not: That is the perennial question, isn’t it? I prefer removing the skin but you can certainly leave it on. Some think that by leaving the skin on the fish tends to be more moist. In my experience I don’t know that to be the case. So the decision is up to you. I prefer removing the skin but the choice is up to you. Either way, it doesn’t seem to affect the overall cooking time of the fish.

Lesson Learned 2 – The hardest thing about this recipe is determining when the fish is done: The best way to determine that is to take a fork and try flaking off a small piece on the end of the fish. If it flakes off, it is done. The only advice I can give with cooking fish is it takes time and practice to perfect that skill. Basically you have to get to know the type of of fish you’re using and how your oven functions. I realize that may be little comfort where a more expensive fish like halibut is concerned, but once you’ve got the hang of it, you’ve got it!

The end of the fish is flaky – the fish is done.

Always cook the fish for the least amount of time that a recipe calls for and go from there. You can always put the fish back in the oven but you can’t change things when it’s overcooked. I know in my oven a 4-5 ounce salmon filet is cooked the way we like it at 375 for 20 minutes. (keep in mind I am at high altitude and cooking temperatures on average can be 15-25 degrees higher than on any given recipe designed for sea level).

Also, the cooking process determines the oven temperature and cooking times. This particular recipe is done entirely in the oven. Sometimes I make fish (and you can certainly do this with halibut) where I lightly brown the fish on both sides in a skillet on top of the stove and finish off the cooking process in the oven. Doing that normally changes the oven temperature and cooking time. So the cooking process will determine what temperature and how long you cook the fish.

This particular recipe is done entirely in the oven. When I made the fish I cooked it at 365 for 15 minutes and it turned out great. Again, keep in mind I am at high altitude and most recipes are not written that way so for my sea level friends I recommend baking the fish at 350 for 15-18 minutes. If you are unsure for any reason check the fish at 15 minutes. You should be just fine if you do.

And that’s it. Just a few last thoughts – I’m writing this recipe for 2 people put you can certainly make it for more.  Just increase the crust ingredients proportionately. Also, the combination of mayo, horseradish and lemon creates a wonderfully flavorful crust for the halibut. Once you make this, I’m sure you’ll want to make it again. It’s just that good! And guess what – the crust works equally as well on cod so you have a less expensive choice as well. Enjoy!

Dijon Crusted Halibut...

  • Servings: 2
  • Difficulty: Medium
  • Print

INGREDIENTS

1/8 cup mayonnaise

1 tsp. Dijon mustard

1 tsp. prepared horseradish

1 tsp. fresh lemon juice

1/4 cup bread crumbs, separated

2 tsp. grated Parmesan, separated

2 4-5 ounce halibut filets

1 Tbs. butter, melted

Olive oil cooking spray

DIRECTIONS:

Preheat oven to 350 degrees (365 for high altitude). Line a baking sheet with foil. Set aside.

In a small bowl mix together the mayo, mustard, horseradish and lemon juice. Stir in 1/8 cup (half) of the bread crumbs and 1 tsp. (half) of the Parmesan cheese. Spray the foil lined baking sheet with cooking spray. Arrange the filets on the baking sheet and spread the mayo/crumb mixture on top of them.

In a small bowl mix together the remaining bread crumbs, Parmesan and melted butter until thoroughly combined. Sprinkle this coating on top of the halibut filets.

Bake for 15-18 minutes, checking the filets at 15. The fish is done when it flakes easily off the end of the fish with a fork.

Coat The Fish With The Mayo/Bread Crumb Mixture

Add The Buttered Bread Crumbs On Top And Bake


Cauliflower And Carrot Soup…

Take it from me, if you’ve not been in the habit of making homemade soups you’re missing out on something special. I don’t know why it took me so long to get with the program, but now I’m a homemade soup junkie! I guess I never realized how incredibly easy it is to make homemade soup. Plus you can control everything that goes into it and I am a big fan of that.

Let me give you a little backstory regarding how I came about making this particular soup. A little while back, here in Colorado, we were forecast to have a blizzard. We were being told we could get anywhere from 4 inches to a foot of snow with blustery winds. As the day got closer it looked like we might be spared the heavy stuff. So at first I wasn’t overly concerned.  In my mind 4 inches of snow could hardly constitute a blizzard. But I was wrong.

I found out an interesting piece of information regarding blizzards. Blizzards are not forecast due to the amount of snow that falls. They are forecast due to heavy winds that accompany a snowfall. When you think about it, that makes sense. Regardless of the amount of snow if the winds cause white out conditions that is extremely dangerous. And so, a blizzard we did get with wind gusts up to 80 miles an hour but only 4 inches of snow. Some areas got almost two feet!

So, knowing that I would be home bound for at least a day made me go into full test kitchen mode. What a great way to test some recipes and get them in the queue for publishing. And that’s exactly what I did – and cauliflower soup was one of the recipes I played with on that day.

So let’s talk Cauliflower and Carrot Soup:

Lesson Learned 1- The cut size of the vegetables is key: I used a 2 1/2 pound head of cauliflower and two cups of sliced carrots. It is important to cut up the cauliflower into small florets. If you don’t they won’t cook in time. I also took baby carrots and sliced them thinly on the diagonal. I wanted to make sure the carrot pieces were not overly thick so they would also cook in the allotted time. The picture below gives you some idea of the cut sized I used. They cooked perfectly in the time allotted.

Carrots Onions And Roasted Garlic

Lesson Learned 2 – Take the time and roast the garlic: Have you ever roasted a head of garlic before? It’s really quite easy and the result is fabulously sweet, flavorful garlic. The process is extremely simple. Cut off the top of the entire garlic bulb about 1/4 – 1/2 inch down, place the bulb in foil (do not remove the skins), drizzle the top of the bulb with olive oil, cover it with foil (I recommend adding an additional layer of foil to protect against oil leaking out of the wrapper) and roast at 400 degrees for 45 minutes to one hour. When you take the garlic out of the oven you want the individual garlic cloves to be fork tender – that’s how you know it’s done.

I roasted my garlic in the toaster oven and put it on a foil lined sheet as extra protection from leaking oil. Once the garlic cooled I merely turned the cut side down and squeezed. The soft delicious cloves popped right out. I then coarsely chopped them and added them to the cauliflower and carrots. Preparing the garlic this way versus sauteing them raw with the onions gives the soup a much richer flavor. It is worth the extra step. But, if for some reason you don’t have the time, mince two large cloves of garlic and add them to the onions once they’ve caramelized. Continue to saute for about a minute or until the garlic is fragrant. Then add the vegetables and follow the recipe from that point.

Cut The Top Off The Garlic Bulb

Place In Foil And Drizzle With Olive Oil

Roasted Garlic Cloves

Lesson Learned 3 – Take the time to cook the onions to a golden brown: Onions are more flavorful when you take the time to caramelize them. So do yourself a favor and take that time. Just be aware that it can take about 20 minutes to get them to that beautifully warm color. But in the end, it also makes a big difference in the flavor of the soup.

Lightly Caramelized Onions

The rest of the process is pretty basic and within about 40 minutes or so you have this delicious homemade soup. Give it a try and tell me what you think. I’d love to hear how you did with this recipe.

Cauliflower And Carrot Soup...

  • Servings: 6-8
  • Difficulty: Easy
  • Print

INGREDIENTS:

2 1/2 pound head of cauliflower, cut up into small florets

2 cups thinly sliced baby carrots (sliced on the bias)

1 sweet onion, chopped

1 head of roasted garlic cloves, chopped (or two raw cloves, diced)

3 Tbs. flour

4 cups of chicken or vegetable stock

1/4 cup heavy cream

6 oz. of grated white cheddar cheese

Salt and Pepper To Taste

Olive Oil for roasting the garlic and sauteing the onions

DIRECTIONS:

Preheat oven to 400 degrees. Cut off the top of a bulb of garlic. Place the bulb in foil and drizzle with olive oil (approximately one tablespoon). Wrap the garlic in foil (I recommend wrapping it twice) and let it cook for 45 minutes to one hour or until the cloves are fork tender. Unwrap the bulb and set it aside to cool. Once cool, turn the cut side down and squeeze the bulb from the sides until the cloves pop out. If a few a the cloves are stubborn, don’t worry. What pops out will be sufficient for the soup. (If you do not have time for this step simply mince two raw cloves of garlic and saute them with the onions after they have caramelized. Once the garlic is fragrant you can add the vegetables and proceed from there.)

Preheat a dutch oven over medium heat and add about 1 tablespoon of olive oil. Add the diced onions and saute until they are golden brown, about 15-20 minutes. While the onions are sauteing, prepare the carrots and cauliflower florets. (If you roast the garlic, chop the cloves and mix them with the vegetables.)

When the onions have caramelized, add the vegetables to the onions and saute for a few minutes. (You can add a little more olive oil, if needed). Sprinkle the vegetables with the flour and mix well. Add the chicken stock while stirring the vegetables.

Cover the dutch oven with a lid, leaving a small crack for the steam to escape. Cook for approximately 20 minutes, stirring occasionally. Test the vegetables for desired consistency. If need be, let them cook for a little while longer until the desired consistency is achieved.

Stir in the heavy cream and cheese. Stir until thoroughly combined. Take off the heat and serve. (Optional: You can garnish with some croutons and some shredded Romano or Parmesan cheese).


Lemon Crumble Cupcakes…

Recently we experienced quite a blizzard here in Colorado. Knowing that this storm was coming I decided to use the day I would be trapped in my house to get some serious cooking and baking done. I did three recipes in my test kitchen that day, and this was one of them.

I always like to have a few draft recipes in the queue so that I can maintain my goal for posting a new recipe every week – sometimes every other week but no longer than that. So this recipe was one I had in the back of my mind that I was waiting to try. After I made it my only thought was what the heck was I waiting for?

There are two main reasons why I really like this recipe. First and foremost the cupcakes taste divine – and isn’t that always the best reason The sour cream gives these cupcakes a luxurious texture. Second and equally as important to me, this is a smaller portion recipe yielding approximately 8 cupcakes and since there is only my husband and myself, I like recipes that cater to smaller portions – less waste, if any.

So let’s talk lemon crumble cupcakes…

Lesson Learned 1: Making the crumble: I’ve found that many recipes really overdo it when it comes to the amount of flour used in making a crumble. In my opinion, when there is too much flour it overpowers the sugar and butter and you’re left with a flavorless crumble. So when I make a crumble I tend to err on the side of a little less flour. So keep in mind that’s what I am including in this recipe. So if you’re anything like me, my advice is don’t mess with the flour proportion – it has already been adjusted to the lighter side.

Lesson Learned 2 – Don’t expect the crumble to get overly browned: You want a nice beige color to the crumble. If it gets too brown the crumble gets too hard. The picture below shows the way the crumble should look when you take the cupcakes out of the oven.

Lesson learned 3 – Always used fresh squeezed lemon juice when you’re baking: If a recipe calls for lemon juice, please freshly squeeze it. There is a noticeable difference in flavor between the juice of a fresh lemon and lemon juice you get in a bottle. Take a few extra seconds and get your juice from fresh lemons. In a pinch you can always used the bottled stuff, but I believe in using clean ingredients as much as possible when I cook and bake. It pays off in flavor, and in the long run it pays off in your health. And don’t forget to zest the lemon before getting the juice.

Other than these few tips this recipe is pretty standard. But I can assure you, there is nothing standard about the taste of these cupcakes. And if you want more than eight, simply double the recipe. Anyway you make them they will be a hit!

Lemon Crumble Cupcakes...

  • Servings: 8
  • Difficulty: Easy
  • Print

INGREDIENTS:

Crumble

1/4 cup unsalted butter, melted

1/2 cup flour

2 Tbs. sugar

2 Tbs. brown sugar

Cupcakes

1/4 cup butter, room temperature

1/2 cup sugar

1 large egg

1/2 tsp. vanilla

1 lemon, zested

1 Tbs. fresh lemon juice

1/4 tsp. salt

1 1/2 tsp. baking powder (1 tsp. high altitude)

1 cup flour

1/2 cup sour cream

Glaze

6 Tbs. powdered sugar

1 – 2 Tbs. fresh lemon juice

DIRECTIONS:

Preheat the oven to 350 (365 for high altitude). Line a cupcake pan with 8 liners and set aside.

Make the crumble by first melting the butter. Whisk together the dry ingredients and add the melted butter. Use a fork to blend together until small pieces remain. Set aside.

In a large bowl, cream together the butter and sugar until light and fluffy. (I recommend using a hand mixture for such a small amount but if you double the recipe you can certainly use a stand mixer). Add the egg and fully combine. Add the vanilla, lemon zest and juice and mix until fully combined.

In another bowl whisk together the flour, salt and baking powder. Add the flour mixture to the butter/sugar mixture and mix until thoroughly combined. By hand, fold in the sour cream until no streaks of sour cream can be seen.

Fill each cupcake liner 3/4 full with the batter. Generously coat the top of each cupcake with the crumble.

Bake for 18-20 minutes. Cupcakes are done when a toothpick inserted in the center comes out clean. Cool muffins in the pan for about 10 minutes and transfer them to a wire rack to cool completely. Once the cupcakes are cool, make the glaze by combining the powdered sugar and lemon juice. Start with 1 tablespoon of lemon juice and determine from there if more juice is needed. You want your glaze to be on the thicker side.

Store the cupcakes not immediately eaten in a airtight container.

Fill the cupcake liners 3/4 full

Generously cover each cupcake with crumble

Chicken, Carrot and Fried Onion Casserole

I just love casseroles. During the winter months there’s nothing better than having a casserole baking away in the oven. The smells, the hot and bubbly goodness and the combination of flavors is simply comfort food heaven. And, if you know me, you know I also love chicken. So what can be better than a chicken casserole? Well, there is one thing and that’s a chicken casserole topped with fried onions – yummo!

I really do try to balance what I eat and so I’ll warn you up front this recipe has the potential to be an artery clogger. But I also know that the key to good living is moderation so every once in a while you can walk on the wild side with something like this. Plus this recipe is versatile, especially where adding vegetables is concerned. And making this is a good way to get come of those vegetables into your children – they are beautifully masked in the deliciousness of the casserole and fried onions.

So let’s talk chicken, carrot and fried onion casserole

Sauteed Carrots

Lesson Learned 1: I used carrots but you can be creative where the vegetables in this recipe are concerned: My husband prefers eating carrots, butternut squash, acorn squash and cauliflower – that’s why you’ll see me using a lot of them in my recipes. But you can use a variety of vegetables.

I chose fresh baby carrots and chopped them into 1/4 inch coins. You can add them to this recipe as is, but I chose to saute mine in butter before adding them to the other ingredients as my husband likes his carrots soft. The cooking time for this recipe will not achieve soft carrots (they will be crisp tender) so I had to give the carrots a head start. But if you like your carrots crisp tender just add them to the other ingredients and skip the sauteing part. The key is cutting them small enough so they’re not rock hard when the casserole is done baking.

You can also use frozen vegetables. Using frozen carrots or frozen mixed vegetables would work very well with this recipe in the allotted cook time. So do what your family loves or what you want your family to eat.

Shredded Chicken

Lesson Learned 2: This is a great recipe for using precooked chicken: Whether you’re trying to think about how to use some of your leftover cooked chicken, or buying a rotisserie chicken at the grocery store, using precooked chicken makes this recipe a breeze. My grocery store actually sells portions of precooked white meat chicken and I used that a lot in my recipes. You can either cut up the chicken into bite size pieces or shred it like I did. Either way will work.

For a quick and delicious week night meal you can’t beat this recipe. You can even assemble it the night before or before going to work and pop it in the oven when you get home. If you do that, I would recommend taking the casserole out of the refrigerator asap and letting it sit on the counter for about a half an hour before putting it into the oven. That will remove some of the chill. You’ll have a better chance of cooking the casserole in the allotted time if it’s not ice cold when you put it in the oven.

Ready For The Oven

Enjoy this one. It’s a keeper!

Chicken Carrot And Fried Onion Casserole...

  • Servings: 6
  • Difficulty: Easy
  • Print

INGREDIENTS:

4 cups cooked shredded chicken

2 cups sliced carrots (cut into 1/4 inch coins)

1 cup shredded cheddar cheese

1 cup sour cream

1 cup mayonnaise

1 can cream of chicken soup

1-6oz. can of french fried onions

1 Tbs. butter, melted

Salt and pepper to taste

Cooking spray

DIRECTIONS:

Preheat oven to 350 (365 high altitude)

In a large skillet melt the butter and saute the carrots for about 10 minutes, flipping them at regular intervals. Remove them from heat and set aside.

While the carrots are sauteing, mix together in a large bowl the cheese, sour cream, chicken soup and mayonnaise. Once the carrots are cooked and slightly cooled fold them into the sour cream mixture along with the chicken until combined. Taste and add any salt and pepper as needed.

Spray a 9 inch square pan with cooking spray. Add the mixture to the pan and bake for 35-45 minutes. Once the casserole is hot and bubbly add the fried onions on top and continue to bake for an additional 10 minutes.

Let the casserole stand for 5 minutes and serve.

The Cooked Casserole

Homemade Strawberry Jam…

Being that there are only two of us in my household I often get frustrated when I go grocery shopping and see the portion sizes of certain items. There seems to be so many things I want but I know neither my husband and I will be able finish before it goes bad or my husband doesn’t like what I like and I am faced with trying to finish something unrealistically large for one person.  The result is often throwing food away. And more and more you read about how much food American’s throw away each year when so many people are going hungry.  Does this predicament sound familiar to you?

Case in point – I love strawberries and my husband doesn’t eat them. So when I buy strawberries at the store the smallest size available is in a one pound plastic container (you can get them in smaller portions pre-cut but they are insanely expensive and I am not a big fan of frozen strawberries). In order to finish all of them before they go bad I am either faced with buying strawberries that are barely ripened so they last longer or not buying strawberries at all. Both options are unacceptable to me.

So just last week as I was bemoaning the fact that my strawberries were becoming soft and mushy. I decided to google how to use strawberries that were becoming soft and mushy. A suggestion popped up about making strawberry jam.  Bingo!

I had only eaten about one quarter pound of my strawberries and decided that I would try to make some jam out of what was remaining. It was a stroke of genius. I added two weeks to the lifetime of my strawberries and the homemade strawberry jam was to die for.

So let’s talk homemade strawberry jam…

Lesson Learned 1 – You probably will have to adjust this recipe especially where the sugar is concerned: This recipe is for a full pound of fresh strawberries. I had only approximately 3/4 of a pound (and I was guessing by eyeballing what I had left) and so I wanted to make sure I wasn’t going to make the jam too sweet. A full pound of strawberries calls for 2/3 cup sugar. I only used 1/3 cup sugar and after making the jam felt I could’ve reduced that amount to a light 1/3 cup and still be ok. But I am not one who likes things too sugary sweet. So what I am saying here is play around with the amount of sugar you use keeping in mind that the strawberries have natural sugars as well. Even if you’re using a full pound of strawberries for your jam try a light 2/3 cup to start out. Now I know this must be “frying” the brains of those of you who feel you need exact measurements. My advice is to take a leap of faith and go with a little less on the sugar. After you make this a few times you will get a feel for exactly how much sugar you want in your jam.

The Amount Of Strawberries I Had

Lesson Learned 2 – Use the juice of half of lemon: I lot of recipes I saw called for 1 Tbs. of lemon juice. I used the juice of 1/2 of a large lemon. The lemon helps to balance out the sugar and the combination of flavors is absolutely delicious.

Lesson Learned 3 – Why a granny smith apple: Jams need pectin in order to thicken. And although you can buy pectin at the grocery store it comes naturally in the granny smith apple. So you are using a natural source of pectin to thicken your jam. Also, the tartness of the granny smith helps to balance out the sugar in the jam as well. And even though I did not make this recipe with a full pound of strawberries I still used the entire grated apple.  It made a wonderful addition to the jam.

The Main Ingredients

Lesson Learned 4 – You may need to simmer the jam longer than you think: Many recipes I saw said to simmer the jam ingredients for approximately 10-15 minutes. I had to simmer my jam for 1/2 hour. Now keep in mind I’m at high altitude and I don’t know whether that was a factor or not. Just make sure your jam is not runny and the liquid noticeably thick before you quit simmering it.

Simmer for 15-30 Minutes

It couldn’t be simpler. And you extend the life of your strawberries by at least a couple of weeks. I can tell you first hand that this jam on some crusty bread with a cup of coffee is over the moon delicious. So try it, and tell me what you think.

Homemade Strawberry Jam...

  • Servings: 12-14
  • Difficulty: Easy
  • Print

INGREDIENTS:

1 pound fresh strawberries, hulled and quartered

2/3 cup of sugar (err on the side of making it a light 2/3 cup)

1 Granny Smith apple, peeled and grated

1/2 medium to large lemon, juiced

DIRECTIONS:

Combine the strawberries and sugar into a medium size saucepan. Stir in the grated granny smith apple. Cook over medium heat, breaking up the strawberries with a spoon until the sugar dissolves. Once the sugar has dissolved, simmer the mixture until the jam has noticeably thickened (can be anywhere from 15 – 30 minutes).

Take off the heat and stir in the lemon juice. Transfer the mixture to a bowl and let cool. Cover and chill for at least two hours. Jam keeps best in a mason jar type container.


Smoked Salmon Bites…

Oh man… (yep that’s all I can say) oh man, this is a phenomenal appetizer! I served it at a recent get-together we had in our condo and it was gone in less than 20 minutes. To say it is out of this world is an understatement. I can’t tell you how many of my guests asked for the recipe.

But with all good things there is always a catch and this recipe is no exception. Although it is phenomenal, it is also expensive. You need 16 ounces of the key ingredient, the smoked salmon, and that comes at a cost. I was able to buy a 16 ounce package at my local grocery store and it was on sale at $19.95 from $22.95. That’s a pretty hefty price tag for about 35-40 appetizers. For 40 squares it amounts to approximately sixty cents per square – so definitely much more in the pricey range. But as an infrequent splurge you just can’t beat it. Everyone at my party raved over this. So on that special occasion when you want to make a significant impression, this is the recipe for you!

Smoked Salmon Bites Ingredients

So with that in mind, let’s talk smoked salmon bites…

Lesson Learned 1 – The process for making these bites is important to follow: The process for putting these together in itself is not difficult. It is very similar to making appetizer pinwheels. But there are a few variations that you need to keep in mind. This recipe calls for using 3 large tortillas. Within those tortillas you need to create a square of cream cheese mixture and smoked salmon in order to cut the bites into square pieces. That is not that difficult as you can see by the pictures below (not a perfect square by any means but that is still ok). The key is to make the largest square possible inside the round tortilla leaving only minimal areas at the rounded edges that will eventually be discarded.

Once the three layers have been completed, it is also important to take something like a cutting board and place it on top of the tortillas and press down slightly to ensure that the filling is evenly distributed within the square before your refrigerate it. I also learned a tip from another very similar recipe. If you lightly butter (and I mean very lightly) the second and third tortilla before you place it on top of the smoked salmon it will help keep the tortillas in place when you cut them. The butter clings to the smoked salmon which in turn secures the tortilla.

It is also important that this appetizer be given sufficient time to chill so that it can be cut easily. I recommend at least 4 hours and preferably overnight. That’s another great aspect of this appetizer, it can easily be made the day ahead and cut right before you intend to serve it. So all the heavy lifting is done in advance. As a matter of fact you can even make it two days in advance but don’t go beyond that.

Lesson Learned 2 – Use a serrated knife to cut the bites: If you use a serrated knife to cut the bites and use a back and forth cutting motion less filling, if any,  will come out the sides. The cutting process will be a whole lot faster and easier.

First Layer Of Smoked Salmon Bites

Layer The Salmon On The Spread

Lightly Butter The Underside Of The Second And Third Tortilla

We had about 20 people over at the party when I served this and I was so happy with not only  how well it was received but also how easy it was to cut and serve the day of the party. Any host will appreciate not having to labor over a dish they are serving and rather spend more time with their guests and so the ability to make this ahead of time was very appealing to me. I certainly hope that you try this recipe at some point. I know I will be thoughtful about when to serve this, especially due to the cost, but I will definitely make this again.

Smoked Salmon Bites

  • Servings: 40
  • Difficulty: Easy
  • Print

INGREDIENTS:

8 oz. cream cheese, room temperature

1/2 cup sour cream

2-3 scallions, chopped fine

1/2 tsp. garlic powder

1 medium to large lemon, zested

1/2 tsp. salt

1/4 cup dill + sprigs for presentation (sprigs optional)

3 large soft tortillas

16 oz. of smoked salmon sliced thin

small amount of softened butter

Lemon slices for garnish (optional)

DIRECTIONS:

Mix cream cheese, sour cream, scallions, garlic powder, lemon zest, salt and dill. Lay out a tortilla and spread half of the cream cheese mixture into a large square inside the tortilla, making as large of a square as possible. Top with half of the smoked salmon.

Take the second tortilla and butter it lightly. Put the buttered side down on top of the smoked salmon. Spread the remaining cream cheese mixture in the shape of a large square on top of the tortilla. Top the cream cheese mixture with the remaining smoked salmon.

Take the third tortilla and butter it lightly. Place the buttered side on top of the smoke salmon and press down lightly. Using a cutting board or a frying pan, press down on the tortillas to ensure the filling is equally distributed. Keep the tortillas flat and wrap them tightly in plastic wrap. Chill for a minimum of 4 hours, overnight is preferable.

Remove the plastic wrap when ready to cut. Cut off all four rounded edges to create a square. Cut the tortillas into 1 inch strips lengthwise and then cut each strip into 1 inch squares. Place a toothpick in the center of each square and transfer to a serving plate. Garnish with dill sprigs and lemon slices if so desired. Serve.


Slow Cooker Whole Roasted Chicken…

I’m not sure why I’m always surprised when I try something totally new and it works out perfectly the first time. That is what happened with this recipe. I never in a million years thought about making a whole chicken in my slow cooker. I’m not sure why but it just never occurred to me. Until the other day…

I was planning some meals, perusing slow cooker recipes on Pinterest and all of a sudden came across a couple of recipes for making a whole chicken in a slow cooker. I was intrigued. What I found was making a whole chicken in a slow cooker couldn’t be any easier and the result is a really moist chicken with hardly any work. If you’ve never made a whole chicken in your slow cooker you simply have to try it. You won’t believe how good it is.

So let’s talk a slow cooker whole roasted chicken…

Lesson Learned 1 – The chicken needs to be elevated in the slow cooker: This was an interesting fact I learned. I saw some recipes that suggested wadding up pieces of foil into balls, placing them on the bottom of the slow cooker and then placing the chicken on top. I thought that was a little odd and wondered why. I found out that the chicken will give off a lot of juice in the slow cooker and if you don’t elevate it you’ll braise the chicken and it will fall apart when you try to get it out.

When I made it I was surprised by the amount of juice the chicken produced. But I chose not to perch my chicken on a bed of foil balls. Instead I used my vegetables as the base to elevate my chicken. Now this time I only used baby carrots, but I can see making this with potatoes and onions as well. I simply poured a very small amount of chicken broth on the bottom to prevent the carrots from sticking until the chicken produced its juices (the broth hardly even came up the sides of the carrots). But even with just carrots and a little chicken broth as the base, that did the trick and the carrots were even more flavorful having been cooked in broth and chicken juices for such a long period of time. Just remember that you need to season every layer in a slow cooker so make sure you sprinkle whatever you use as a base with salt, pepper, and in this case I used thyme as the herb.

If you choose to just use foil to elevate the chicken you can use the juices in the bottom of the slow cooker to make gravy. You’ll have plenty of liquid to provide a solid base for it.

Lesson Learned 2 – Add some aromatics to the cavity of the chicken: Another way to boost the flavor of the chicken is to add aromatics to its cavity. I put together a combination of garlic, lemon, and a shallot but you can use onions, fresh herbs (like thyme or rosemary), and you can even stuff the neck end of the bird with a sausage and herb mixture. If you do, just make sure you truss the neck skin with a skewer so the sausage cooks inside the bird and doesn’t pop out during the cooking process. And truss the legs together with cooking twine to keep the aromatics inside the cavity of the chicken.

Aromatics For The Chicken Cavity

I also made a rub for the chicken consisting of salt, pepper, cayenne pepper, thyme, minced garlic and a little olive oil. That also lent great flavor to the chicken.

Rub For the Chicken

Lesson Learned 3 – Use your broiler if you want crispy skin: The choice is up to you. Obviously the skin does not come out of the slow cooker crispy but if want it all you need do is put the chicken under the broiler for a couple of minutes once you’ve taken it out of the slow cooker. You’ll have the crispy skin you desire. Since this was just for me and my husband (and we don’t eat the skin anyway) I didn’t put the chicken under the broiler. The chicken was still juicy and delicious! I served my chicken with the carrots, some “Stove Top” stuffing for chicken and a salad. It was a great meal.

The major lesson I learned was making a whole chicken in a slow cooker is so unbelievably easy I wondered why I’d never done it before. But I guarantee you one thing, I will be making it again – and often!

Slow Cooker Whole Roasted Chicken...

  • Servings: 6
  • Difficulty: Super Easy
  • Print

INGREDIENTS

1- 4.5 – 5 pound chicken

1 – 1 lb. bag of peeled and scrubbed baby carrots

1/2 cup chicken broth

Olive oil cooking spray

The Aromatics:

4 cloves of garlic, peeled but left whole

1/2 of a lemon

1 medium size shallot, peeled but left whole

The Rub:

2 tsp. of salt + 1/2 tsp. to season the carrots

1/4 tsp. black pepper + 1/4 tsp. to season the carrots

2 tsp. paprika

1 tsp. dried thyme + 1 tsp. to season the carrots

3 Tbs. finely minced garlic

1 Tbs. olive oil

DIRECTIONS:

Remove the chicken from its packaging, rinse it inside and out, removing any parts that may have been left inside. Pat the chicken as dry as you can. Insert the garlic, lemon and shallot into the cavity. Truss the legs together with cooking twine to hold the aromatics in place.

Combine the salt, pepper, cayenne pepper, paprika, garlic and thyme. Add the the olive oil and combine until the ingredients are lightly moistened. Spread the rub generously all over the chicken.

Spray the crock of the slow cooker with olive oil cooking spray. Pour the chicken broth into the crock. Place the baby carrots on top of the broth. Season with salt, pepper and thyme. Place the chicken on top of the carrots.

Cook on high for 1 hour and 7 hours on low. Remove the chicken and place under the broiler for crispy skin if desired. Let the chicken stand covered in foil for 10 minutes before carving.

Prep The Chicken And Truss It

Put The Carrots In First And Season Them

Put The Chicken On Top of The Carrots

Cook For 8 Hours

Double Chocolate Sour Cream Sheet Cake…

What can I say – my husband loves chocolate. Whether it be truffles, cookies, pies, cheese cake or simply semi-sweet morsels right out of the bag, if something contains chocolate chances are he’ll love it. So that means I’m always looking for variations on chocolate sweets, especially cakes and sweet breads.

So here is another chocolate cake recipe. I like this recipe for a variety of reasons. First it’s very simple and quick to make. Second adding the semi sweet morsels sends the cake over the top. Third the frosting is not overly sweet and so it compliments the cake beautifully.

So let’s talk double chocolate sour cream cheese cake…

Lesson Learned 1 – Never stray from the basics on this: By that I mean a couple of things. First, make sure whenever you bake your eggs are at room temperature. The reason is simple. Room temperature eggs blend more completely in the batter which results in a better texture for the cake. Don’t have the time to do this? Oh yes, you do – just follow my simple tips and tricks. Second, coat the semi-sweet morsels with a teaspoon of flour. By that I mean put the morsels in a bowl, pour the flour on top and mix the flour into the morsels until they are all lightly coated. When you add chocolate morsels or fruit like blueberries to cake batter they all sink to the bottom of the cake when it is baking. This little trick will help you get your morsels more evenly distributed throughout the batter.

Lesson Learned 2 – Less is more when making the frosting: Always be aware that if you add too much liquid up front when making frosting it can become too runny. With this recipe I would add 1 Tbs. of milk at a time until you get the desired consistency. Be aware that you will really need to mix this frosting well after you add any liquid. I used a stiff whisk and at first I did not think the frosting would achieve the consistency I wanted. But as I kept whisking I found that it turned out great. I only used 2 Tbs. of milk but with frosting you never know. The main point here is to make sure you mix the frosting ingredients thoroughly before adding any additional milk.

Ready To Go Into The Oven

I wish I could say I had a ton of lessons learned about this recipe but bottom line it’s a very traditional method of making a sheet cake so other than following the basics as I’ve listed above the rest is just a matter for following the directions.

Out Of The Oven

This is a great cake to make when you need something quick. It’s easy but totally decadent. You can serve it with sliced strawberries or if you really want to take it over the top add a little whipped cream or ice cream. This is a great cake to make for a party or just simply for the family. If you’re like me and want a go-to cake recipe, this is the one for you. Try it and tell me what you think…

Double Chocolate Sour Cream Sheet Cake...

  • Servings: 15
  • Difficulty: Easy
  • Print

INGREDIENTS

CAKE:

3/4 cup unsalted butter

2/3 cup dark cocoa powder

3/4 cup water

1 3/4 cups sugar

1 tsp. vanilla

2 eggs, room temperature

1 3/4 cups flour + 1 tsp.

1 1/4 tsp. baking soda (1 tsp. high altitude)

1/4 tsp. salt

3/4 cup sour cream

1 cup semi-sweet chocolate morsels

FROSTING:

6 Tbs. unsalted butter

1/4 cup dark cocoa powder

1 1/2 cups powdered sugar

2 – 3 Tbs. milk

Baking spray

DIRECTIONS:

Preheat the oven to 350 degrees. Put the butter, cocoa and water into a medium size saucepan over medium heat and whisk until the cocoa is dissolved and the butter melted. Pour into a mixing bowl and let it cool slightly.

Once slightly cooled mix in the sugar, the eggs (one at a time) and the vanilla. In a small bowl combine the flour, baking soda and salt. With your mixer (you can use a hand mixer) on low beat in the flour mixture until combined. Do not over mix.

Fold in the sour cream and chocolate morsels by hand.

Spray a 9 x 13 pan with baking spray (the one with flour). Pour the batter into the prepared pan. Bake for 35 minutes (check the cake at 30 minutes). The cake is done when a toothpick inserted in the center comes out clean.

Frosting: In a small saucepan melt together the cocoa powder and butter. Pour the mixture into a small bowl and let it cool slightly. Beat in the powdered sugar 1/2 cup at a time, alternating with a tablespoon of milk until the desired consistency is reached. Frost the cooled cake.


Parmesan And Garlic Herb Baked Cod…

Fish has become a staple in our household. Years ago I hardly ever made fish – I was too afraid of it and frankly not all that enamored with it. But now it has become a mainstay in our diet. Not only is it good for you but there are also a variety of ways to cook fish that make it super delicious. This recipe is one of those.

I’ve mostly cooked cod, red snapper, halibut, tilapia, trout, swordfish, and salmon. The main kind of fish I cook for me and my husband is salmon. I’ve got cooking salmon down to such a science that if I prepare it a certain way it always comes out perfect. This is a recipe for cod and I am still perfecting my cod prowess. But I made this the other night and it turned out wonderful so now I have a baseline to work from.

So let’s talk Parmesan and garlic herb baked cod…

Lesson Learned 1 – Cod is plentiful, easy to find and a great choice for this type of recipe: Whenever I go to the grocery store I can always get salmon, tilapia (although lately I’ve shied away from this because of everything that has been written about it) or cod. Finding other fish can be iffy for me. Trout is somewhat plentiful, halibut and red snapper are iffy (and halibut is very expensive) and swordfish I normally can only find frozen. But I’m in Colorado and not near the ocean so I’m sure in various parts of the country availability of various types of fish is much different.

I’d like to stop for a moment here and talk about frozen fish. Years ago frozen fish was not very good. The freezing process tended to dry out the fish and so you basically started out with dry fish once it was thawed – not good. Today the flash freezing methods they use keep the fish extremely fresh which makes frozen fish rival fresh fish and at a much better price. So don’t be afraid of frozen fish anymore.

The Herb Mixture

I also found that thawing frozen fish matters. I’ve been in a hurry and just put the frozen fish on the counter to thaw. That tends not to be a recommended process but when you’re in a hurry you do what you can do. But I found that if I thaw the fish in the refrigerator overnight the fish tends not to dry out in the baking process. Now I’m not sure if that’s true or if it’s just me, but I recommend thawing your fish overnight in the refrigerator if you can.

I found a package of six flash frozen 4-5 ounce cod pieces at Whole Foods at a great price. But cod is easy to find just about anywhere and often you can find it fresh. And no matter what way you make it, cod is the type of fish that easily takes on any flavor palate you choose. That’s what makes it so versatile.

One last point – don’t be afraid to let the fish sit outside of the refrigerator a bit before you bake it. I normally let my fish sit out for about one half hour. That way some of the chill is taken out of the fish. I find it bakes better that way.

Lesson Learned 2 – The art of cooking fish: As I mentioned earlier, I used to shy away from fish and one of the main reasons why was the fear of over or under cooking it. And when you have two pieces of halibut that cost over $20 you really don’t want to mess up. But even if you pay much less, cooking fish can be tricky and if you have enough failures you may just say enough is enough. But don’t do that. Once you get the hang of it, you’ll make great fish meals more and more.

If you’re really nervous just keep in mind that baked cod should be cooked to an internal temperature of 155 degrees. To test the temperature just use a food thermometer and stick it in the thickest part of the fish keeping the tip near the center of the filet. I’ve cooked fish enough that I’ve learned to eyeball it by either looking at the sides to see how opaque the color of the fish is or by sticking a fork on the edge to see if it’s flaky. But that skill comes with time and I recommend using a food thermometer if you’re new at it.

And while we’re talking food thermometer I would recommend getting a good one. The more inexpensive ones can work but they can register temperatures incorrectly, especially over time. Invest in a good food thermometer and it will become you’re best friend.

Ready To Go Into The Oven

Lesson Learned 3 – Grate your own Parmesan for this recipe: There is a BIG difference between jarred Parmesan cheese and grating your own. First the quality of the cheese can be much better as you choose what kind of Parmesan wedge you’ll use. Second the consistency is different. Homemade grated Parmesan tends to have slightly bigger pieces, tastes more robust and stands up better to the melting process in the oven. Now I know it takes a little extra time to do it but it is so worth it. I just zip out my little mini food processor, cut my Parmesan into small pieces and let the food processor do the rest. It’s so easy really and so worth it. I always make more than I need and use it for other things. Once you grate your own you may find that you’ve become a Parmesan snob and always grate your own versus buying it in the jar. It wouldn’t surprise me.

And that’s basically it. The recipe I am sharing is for two but you can certainly make more – just increase the amounts for the mayonnaise mixture. Also if you use larger sized filets you’ll need to increase the baking time. I served this with my cinnamon roasted butternut squash, a side salad and some garlic knots. It was a fantastic meal. Try it and tell me what you think!

Parmesan And Garlic Herb Baked Cod...

  • Servings: 2
  • Difficulty: Easy
  • Print

INGREDIENTS:

2 four to five ounce cod filets

1/2 cup mayonnaise

1/2 cup freshly grated Parmesan

1 scallion chopped, including the green parts (you can substitute 2 Tbs. shallots)

1 garlic clove, grated

1 Tablespoon fresh Italian parsley, chopped

DIRECTIONS:

Preheat oven to 375 degrees. Line a baking sheet with foil and spray the foil with cooking spray. Place the cod filets on the foil and set aside.

In a small bowl mix together the remaining ingredients. Spread the mixture evenly over the top of the fish. Bake for 8-10 minutes or until the fish starts to look opaque and will flake.

If you desire the topping to be more browned, at 8 minutes switch the oven to broiler and brown the tops of the fish until lightly golden (not longer than 2 minutes). Remove from oven and serve.


Homemade Chicken Salad…

You may have noticed over the years that I love chicken. I could eat chicken every day of the week and am always looking at either new recipes or how to perfect old ones. This is the latter. I used to make a very basic chicken salad with grapes, green onions, mayo, salt and pepper and although it wasn’t bad it wasn’t the kind that was over the top in flavor. This recipe is, and I am so excited to share it.

It is not unusual for me to have leftover chicken in the house but this time I made it as the main event and not as a way to use leftovers. But either way, these combination of ingredients makes a chicken salad that you’ll make again and again.

So let’s talk homemade chicken salad…

Chicken Salad Ingredients

Lesson Learned 1 – Use this recipe as a base for what the amount of chicken you have: The recipe I am providing produces enough chicken salad to feed 8 people but can be adjusted for use with lesser amounts of leftover chicken. Just reduce the ingredients according to the percentage of chicken you may have on hand. To make the entire recipe I recommend using a 3 – 4 pound rotisserie chicken, cut up. When I made it initially I had about 2 pounds of cooked chicken pieces, so I reduced the ingredients slightly (remember this is not baking and so it’s ok to fiddle with the amounts) and it came out perfectly. You may have to step out of your comfort zone a little if you decide to adjust the ingredients, but frankly I can’t see that you’ll hurt the chicken salad doing whatever you choose as long as you are somewhat mindful of the overall portions in relation to the full recipe.

Lesson Learned 2 – No matter how much you want to eat it immediately, let the chicken salad sit in the refrigerator for at least an hour and, if you can, overnight: Once the chicken salad is made it looks so good you’ll want to eat it on the spot. I remember I tasted it right away and wasn’t all that enamored with it. But I know from experience that recipes like this require the ingredients to get acquainted in order to fully develop their flavors and so I let it sit overnight. The next day I couldn’t believe the difference in the taste. I was mostly struck by the flavor of the dill which I could hardly taste when I first made it but could really taste after the chicken salad rested overnight.

It wasn’t only the dill flavor that was different – the combination of flavors fully developed and complimented one another to the point that I felt I could eat the whole bowl right on the spot. So please, when you make this, give the ingredients a chance to fully develop. You won’t be sorry you did!

Lesson Learned 3 – You can also add slivered almonds to this recipe: Many recipes I researched included thinly sliced almonds as one of the ingredients. You can certainly add them to this recipe. I did not use them because my husband has a hard time with them – but I wanted to let you know that they are certainly an option for you.

Not a lot of lessons learned on this one as you basically combine all the ingredients and let them sit for a period of time. But this is a great recipe and I’m sure if you try it it’ll be your go-to chicken salad recipe…

Homemade Chicken Salad...

  • Servings: 8
  • Difficulty: Easy
  • Print

INGREDIENTS:

3 – 4 lb. rotisserie chicken, cut into bite size pieces

3/4 cup seedless red grapes, halved

2 celery ribs, diced

3-4 scallions, chopped (including the green parts)

2 Tbs. fresh dill, chopped

1 Tbs. fresh flat leaf parsley, chopped

1 cup mayonnaise

1 lemon, juiced

1 Tbs. Dijon mustard

Salt and pepper to taste

DIRECTIONS:

In a large bowl combine the chicken, grapes, celery, scallions, dill and parsley. In another bowl combine the mayonnaise, lemon juice and mustard. Add the mayo mixture to the chicken mixture and carefully stir until mixed. Taste and season with salt and pepper as desired.

Cover with plastic wrap and refrigerator for minimally an hour and preferably over night. Great for sandwiches and salads.


Creamy Chicken And Cauliflower Casserole…

I love casseroles, especially during the winter time. I find them to be the true definition of comfort food. And this particular recipe is definitely a throw back. It features all of the ingredients your grandma used to make a quick but delicious meal. And this meal is versatile – you can serve it with pasta or as the main feature in a loaded baked potato or even with rice.  Anyway you look at it, if you want something fast and delicious this is the recipe for you!

What I particularly like about this recipe is that it’s quick to throw together and it’s a great way to use leftover chicken, and there always seems to be a lot of that in my refrigerator. As a matter of fact, I bet you already have all of the ingredients in this casserole in your pantry.

So let’s talk Creamy Chicken And Cauliflower Casserole…

Lesson Learned 1: The ingredients in this casserole are not written in stone: Not only is this casserole easy to put together but it can be made with a wide variety of ingredients. Think of the recipe I’m providing as a base for your imagination. But you can certainly add other things.  You can add some sliced mushrooms if you like. You can substitute frozen broccoli for cauliflower or include a little of both. Frozen peas and carrots would be a great addition as well. Wherever your imagination and pantry take you – this will always be a scrumptious comfort food casserole.

Lesson Learned 2 – If using frozen cauliflower (or broccoli) make sure it is slightly (or completely) thawed. You only bake this for 35-45 minutes and you want to make sure your vegetables are warmed all the way through. Smaller frozen vegetables such as pearl onions or peas and carrots can be added frozen. They will cook through within the allotted time. And if you used frozen chopped cauliflower or broccoli you can simply add them as well since the pieces will be smaller.

Lesson Learned 3 – Use more chicken than you think: I will suggest a certain amount in the recipe since I found that after I made mine I wound up adding more chicken to the leftovers. I initially used a pound and a half of cooked chicken pieces that I got at my local grocery store. But I felt the recipe needed more. I am going to recommend getting a rotisserie chicken from your grocery store and shredding the whole chicken for this recipe. You want to be able to see and taste chicken as the main ingredient and when you shred chicken it just seems to be a lot less for some reason.  If you don’t use a rotisserie chicken then I recommend using 3 large chicken breasts.

There are not a lot of lessons learned to impart on this one as this recipe is super easy. And the extra added bonus is the leftovers are equally scrumptious. You can’t go wrong with this one. Enjoy this easy to make winter comfort food!

Creamy Chicken And Cauliflower Casserole...

  • Servings: 6-8
  • Difficulty: Super Easy
  • Print

INGREDIENTS

1 store bought rotisserie chicken, cut up and shredded

2 cans cream of chicken and mushroom soup

1 cup mayonnaise

1 cup cheddar cheese, shredded

1 cup colby and monterey jack cheese, shredded

1 1/2 cups frozen cauliflower, thawed

1 cup frozen pearl onions

Salt and pepper to taste

DIRECTIONS

Preheat oven to 375 degrees.

Mix all the ingredients (chicken, soup, mayo, cheeses, cauliflower and onions) together. Add salt and pepper as needed.

Transfer the ingredients to a lightly greased 2-3 quart casserole dish. Bake for 35-45 minutes or until the casserole is bubbly.  Serve.

Lemon Blueberry Quick Bread…

My husband has an insatiable sweet tooth and lucky for him he can eat sweets and stay thin. So I’m always looking to make something for him, and there are times I just don’t want a lot of fuss getting it done. When that happens, this recipe allows me to make him something fresh without a lot of work on my part. And oh, did I happen to mention – it tastes divine!

I love baking with blueberries. When they get hot enough they burst and release sweet juices into whatever it is you’re making. This particular quick bread is loaded with them and when you add the lemon zest to the batter and frost it with lemon glaze, the combination of flavors are to die for.

So not only is this a great tasting sweet loaf, it’s quick and utterly delicious. So let’s talk lemon blueberry quick bread…

Lesson Learned 1 – Be careful when baking with blueberries: Blueberries can be tricky and believe me I’ve had my failures where blueberries are concerned. You have to coat them with a small amount of flour before you put them in the batter. If you don’t they’ll all sink to the bottom of your bread and you’ll have a blueberry mess on your hands.

It’s very important that you coat with blueberries thoroughly with the amount indicated in the recipe. I’ve also made the mistake of thinking they were fully coated and pouring them into the batter only to find that there was still a bunch of flour on the bottom of the bowl. I recommend that you place your blueberries in a small cereal bowl and stir them from the bottom of the bowl up. That way you’ll know that you’re using all the flour. Check the bottom of the bowl for any residual flour. If there is some, scoop it on top of the blueberries and continue to stir until there’s no flour on the bottom of the bowl when you pour the blueberries into the batter.

This quick bread was so good I made it twice within the span of a week. The second time I tried a few tweaks and I liked the way the bread turned out even better. One of the tweaks I did was change the amount of blueberries. Originally I used 1 cup of blueberries in the recipe and the bread was loaded with blueberries. Don’t get me wrong, that was fine, but I felt the blueberries were a tad overpowering. The second time I only used 3/4 cup of blueberries and I liked that ratio of blueberries to batter much better. So I recommend using only 3/4 cup of blueberries.

Another trick I used to avoid having the blueberries sink to the bottom of the cake – once the batter was in the baking pan I used a small spoon, dipped it into the batter and scooped some of the blueberries up to the top. I went about half way down in the batter and did a few scoops to make sure all the blueberries didn’t settle in one place. Doing a few scoops with the spoon and making sure the blueberries were completely coated in the flour gave a good distribution of blueberries in the batter.

Lesson Learned 2 – High altitude baking: I live in the Denver area which is 5,000 feet above sea level. When you live in high altitude it affects your baking and you need to make adjustments in order to get your desired results. If you don’t make adjustments your cakes and sweet breads will wind up sinking in the middle with the edges being more than done. It’s frustrating. And it takes some time to get used to high altitude baking.

The main difference between high altitude and sea level baking is air pressure. The higher the altitude the lower the air pressure, and lower air pressure plays havoc with baking. The King Arthur Flour’s website has an excellent article explaining why adjustments need to be made with high altitude baking and recommended adjustments for cakes, cookies and the like. If you’re in high altitude I highly recommend you check it out. I will write out the recipe with sea level ingredients and put in parenthesis the high altitude adjustments. Keep in mind my adjustments are for 5,000 feet. If you’re at 3,000 or 7,000 the adjustments change. The article gives specific adjustments for those altitudes as well. And if you’re at sea level (which I was for many years) just follow the recipe as is. You’ve got nothing to worry about. The link to the article is directly below:

https://www.kingarthurflour.com/learn/high-altitude-baking.html

Other than how to work with blueberries and how to adjust for high altitude this quick bread is super simple to make and super delicious. Try it out and tell me what you think…

Lemon Blueberry Quick Bread...

  • Servings: 10-12
  • Difficulty: Easy
  • Print

INGREDIENTS:

Quick Bread

1 1/2 cups flour + 1 tsp., divided

2 tsp. baking powder (1 1/2 tsp. for high altitude)

1/4 tsp. salt

1/3 cup sugar

Zest of one medium size lemon, plus the juice for the glaze (see below)

3/4 cup whole milk (+ 1 Tbs. for high altitude)

1 egg, beaten

2 Tbsp. canola oil

3/4 cup fresh blueberries

Baking spray

Glaze

1 cup confectioners sugar

1-2 Tbs. fresh squeezed lemon juice

DIRECTIONS:

Preheat oven to 350 (365 for high altitude).

In a large bowl combine the flour, baking soda and salt. Whisk until thoroughly combined. Stir in the sugar and lemon zest. Set aside.

In a medium size bowl whisk together the egg, milk and canola oil. Pour the wet ingredients into the dry ingredients and stir until just combined.

Use the remaining teaspoon of flour and coat the blueberries with the flour. Add the blueberries to the batter and gently fold them in.

Coat an 8 x 4 inch loaf pan with baking spray. (I used the one that also includes flour). Pour the batter into the pan. Place a small spoon into the batter (about half way down) and scoop some of the blueberries up to the top. (repeat this two or three times).

Bake for 40-50 minutes (mine was done in 40 minutes). Remove the pan from the oven. Move a rounded edged knife along all sides of the pan. Let the pan cool for 15 minutes, then remove the quick bread from the pan and let it continue to cool.

Once the bread is completely cooled mix together the glaze ingredients. Start with 1 Tbs. lemon juice and add more to achieve your desired thickness (I used 2 Tbs.). Drizzle the glaze over the top of the bread before serving. Store any leftovers in an air tight container.


Tortellini White Bean And Sausage Soup…

Happy New Year! I hope you had a great holiday season. I had a fabulous one. We went back home to Illinois to spend Christmas with our family. Seven kids, eight dogs and assorted adults all led to a busy and memorable time. It was so much fun until I got home and came down with a cold. I haven’t had one in a very long time and I attribute it to the sniffling, sneezing children that I was around for an entire week. Don’t get me wrong, I wouldn’t have changed it for the world. And I’m glad to be back on my feet and in the world of the living.

Perhaps this little health hiccup inspired my next recipe. I don’t know about you but when I have a cold or am not feeling up to par I immediately think of soup. Mostly I think of chicken soup, but this time I wanted something different hence this particular recipe. There’s something about a warm bowl of soup when you’re not feeling well that’s very comforting, like a soft warm blanket. It somehow just seems to make you feel better.

I never really got into making homemade soups until the last couple of years. I’d just open a can and warm up whatever I bought at the grocery store. What I’ve learned over time is homemade soup is very easy to make, doesn’t take a lot of time plus you control what goes into it, especially the salt, which tends to loom large in canned soups. So I’ve been venturing more into making homemade soups and truly enjoying it. And for the novice cook, this is a way to look very impressive without a lot of hard work. So don’t shy away from making soup.

Let’s talk Tortellini White Bean and Sausage Soup

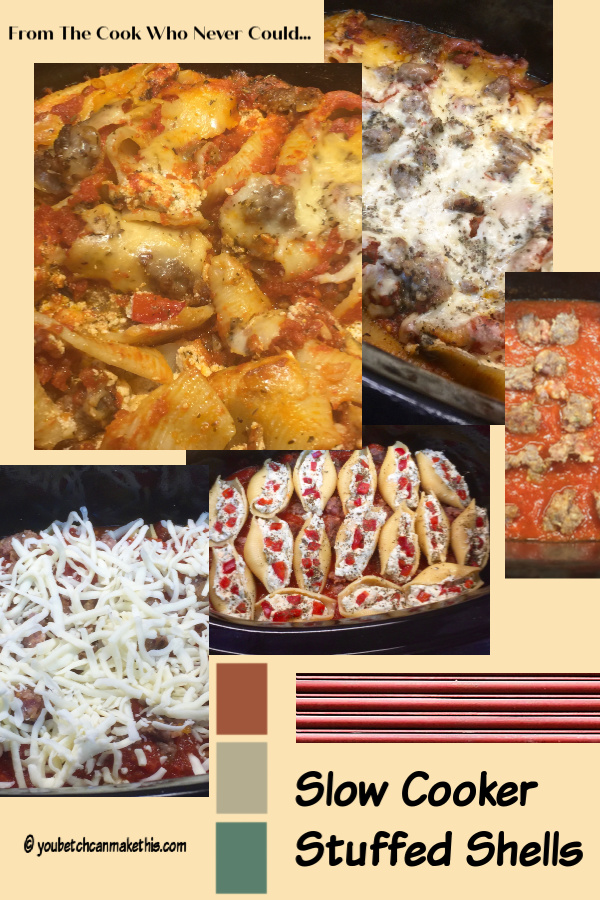
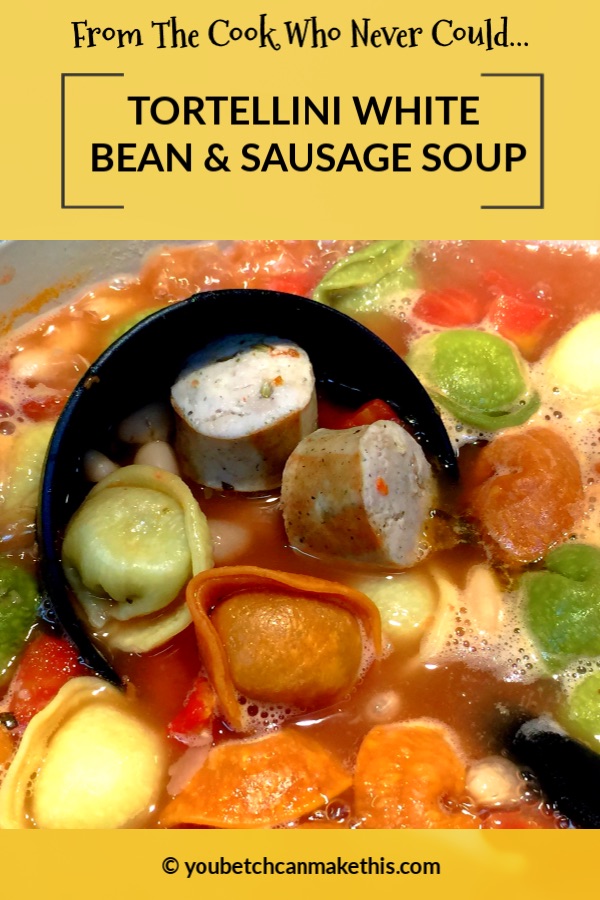
Lesson Learned 1 – I learned the beauty of chicken sausage: When researching various recipes I came across one that used chicken Italian sausage. I never tried that before, and sometimes I am leery of the flavor of chicken and turkey substitutes for beef or pork but decided to give it a go in this recipe. I was glad I did. It was divine!

The important thing to note is that you must cook the sausage before putting it into the soup. You do this for a couple of reasons. First and foremost the soup does not cook long enough for the sausage to be fully cooked by the time the soup is finished. Second, by cooking it ahead of time you get that nice browning on the casing which you wouldn’t get if you simply boiled the sausage. So remember to cook the sausage first because once you add it to the soup you are basically just heating it through.

Lesson Learned 2 – I added tomato paste to thicken the soup: I noticed when I was making the soup the broth seemed a little lackluster – kind of thin and unexciting (if broth can be unexciting). I decided to add a 6 ounce can of tomato paste and was glad I did. The paste made the broth thicker and more luxurious. You can choose to leave it out if you like but I would recommend adding it to the recipe.

Lesson Learned 3 – Slightly mash the white beans: After you rinse the beans and before you add them to the soup give them a slight mash with a hand masher. You don’t want to do too much, just a little. This along with the tomato paste helps thicken the broth.

Lesson Learned 4 – Kale versus Spinach: A lot of similar recipes I researched recommended adding kale to this type of soup and you can certainly do so. I don’t know about you but I’m not a big fan of kale – it just tastes funky to me no matter how it’s prepared. So I opted for spinach and it was great. The choice is yours – you can certainly use kale if you like but if you’re like me and not a big fan, spinach is a wonderful substitute.

Lesson Learned 5 – Don’t be afraid to improvise: A recipe like this is ripe for improvisation. I used a tri-color three cheese tortellini but you an certainly choose any kind you like. I used chicken Italian sausage but if you’re skeptical a more traditional sweet Italian sausage will work. Or you can make sausage meatballs. If you want to spice it up a bit you can always add a little red pepper flakes or some cayenne pepper. When I warm up my leftovers I’m going to put some parmesan shavings on top. Even if you’re a novice cook, don’t be afraid to add your own touches or adjust the ingredients to your taste. Cooking is not like baking, you don’t need to be exact. Step out of your comfort zone and try a few things. You’ll be happy you did.

Tortellini White Bean and Sausage Soup

  • Servings: 4-6
  • Difficulty: Easy
  • Print

INGREDIENTS

4 cups low sodium chicken stock

1 cup water

1 – 14.5 oz. can of Italian style diced tomatoes

1 – 6 oz. can of tomato paste

1 package (13.5) oz. refrigerated tortellini (I used tri-color three cheese)

1 pkg. (4 links) Italian chicken sausage, fully cooked

2 cans 15 oz. cannellini beans, drained, thoroughly rinsed and lightly mashed

4 cups fresh baby spinach

DIRECTIONS:

In a large saucepan combine stock, water and tomatoes. Bring to a boil. Add the tomato paste and stir until completely incorporated. Add the tortellini and cook on a gentle boil for approximately two minutes. Add the sausage and beans. Bring to a low simmer and cook for about 10 minutes. Add the spinach. Cook for approximately two minutes or until the spinach is completely wilted. Serve with a salad and crusty bread. Refrigerate any leftovers.


Balsamic Cranberry And Brie Crostinis…

Well, it’s just about 2019 – can you believe it? I can’t believe that I’ve been writing this blog for over 5 years with over 450 posts and am still going strong. It’s been quite a journey for me as I truly was (and to some degree still am) the cook who never could. But over the past five years I’ve learned so much and have become so much more confident in the kitchen – something I never would’ve believed early on.

Don’t get me wrong, I still make mistakes and sometimes my instincts aren’t as good as others. But when I get feedback from readers telling me that what I’m showing in pictures looks hard, I know that there are so many others out there like me who were never mentored in the kitchen and are looking to learn. Because, believe me, most of what I post is very easy.

So I will continue on with this theme, which in my mind is endless – there will always be someone who needs to learn something regarding cooking or baking. And I will continue to learn and share my lessons learned so when you make one of my recipes you can escape some potential pitfalls and be successful right out of the box.

It’s time to post the last recipe of 2018. Some of you may be aware that’s I’ve posted a lot of appetizer recipes this year. That’s because my condo association hosts a happy hour every week during the summer and bi-weekly over the winter and although no one is expected to bring anything, I always feel compelled to do so. And one of our members is a caterer and so my competitive nature kicks into gear to see if I can, at least every once in a while, outshine the professional. And in my mind, this particular recipe does. It looks so festive and is pretty easy to make – the vast majority of the work is the assembly and that certainly isn’t difficult.

So let’s talk Balsamic Cranberry and Brie Crostinis…

Lesson Learned 1 – This appetizer can be served warm or cold: I opted for cold and here’s why – I’ve found that unless you are personally hosting a party hot appetizers can be tricky, especially if they are at their best when they are hot. How to time it to get to another location with the appetizer still warm, the paraphernalia you may need to bring with you to keep it warm, timing how you bake it to ensure the quickest oven to table possible – all of this just seems like too much for me.  Even though you can serve this warm, I decided to make the cranberries ahead of time and baked the baguette closer to the time of the party and the crostinis turned out great.

I also found that when I took the bread out of the oven and placed the cheese on top the cheese slightly adhered to the bread because it was warm. So that worked out well. Nothing wound up falling off the bread because the cheese was secure.

Lesson Learned 2 – Preparing the cranberries: I’ve always cooked cranberries on the stove top but this recipe calls for them to be cooked in the oven. So here’s a couple of tips that will save you a lot of aggravation:

  • Use a lipped baking sheet because the cranberries will let out their juices and you want to keep them in the pan and not all over your oven
  • Line your sheet with parchments paper – the cranberry mixture will be quite sticky and will be a nightmare to clean if you don’t protect the baking sheet
  • Spray the sides of the baking sheet with cooking spray – although you’re using parchment paper juices will run to the sides and stick to the sides and that can be difficult to clean
  • Clean your baking sheet asap – even with using these precautions some of the cranberry mixture will stick and the longer you let it sit the more difficult the clean-up will be

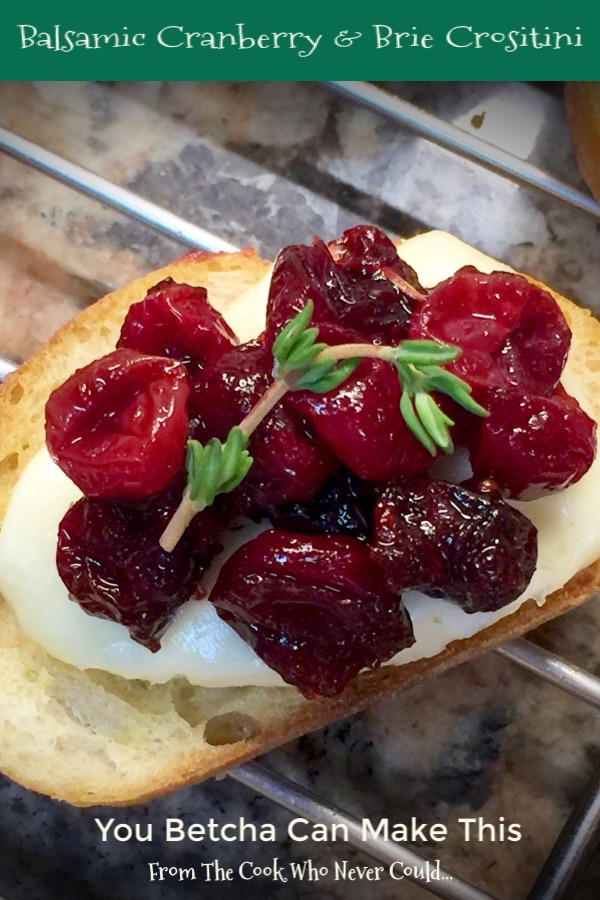
Lesson Learned 3 – Working with brie:  I love brie but it can be a pain in the butt to deal with, especially if you’re not fond of the outer skin and want to remove it. Brie is not easy to slice because it is so soft. Make sure you have a really sharp knife and watch out for your fingers.

You’ll want to cut the brie in small pieces – and for this you’ll have to use your judgment in terms of what that means. I cut the brie in squares and after putting some on the bread I could tell just how much I needed. I wound up making some of my pieces smaller or adding on to some of them. Don’t fret about this. After you top a couple of the pieces of bread you’ll get the feel for it.

I also used my fingers to spread the brie on the bread slices. That way I could push the brie down into the warm slices and spread it out with my fingers. You can also use a knife, but I had a better feel for it with my fingers. If you chose to use the finger method – make sure you have clean hands! I washed them before and once during the process. Your hands can be your best tools in the kitchen but if you use them they must be really clean.

Lesson Learned 4 – The original recipe called for 1 Tablespoon of rosemary: I thought that was way too much (I used dried rosemary since the grocery store did not have any good looking fresh rosemary). I wound up picking bits of rosemary out of the cranberries as I felt it was too overpowering. So I recommend a teaspoon of fresh rosemary chopped very fine, or 1/2 tsp. of dried rosemary, crushed. The rosemary does enhance the flavor of the cranberries – you just don’t want it to overpower the mixture. I would err on the side of caution – you an always add more if you need to but take my word for it, it’s a big pain trying to pick out the pieces of rosemary after the fact.

And the rest is just basic assembly – toast the bread in the oven, put the cheese on the bread, the cranberries on top of the cheese and for some extra flair add a small sprig of fresh thyme on top. This appetizer is delicious. I had people taking it home in doggie bags. So make this for your New Years celebration. You won’t regret it.

Happy New Year and all the best in 2019!

Balsamic Cranberry And Brie Crostinis...

  • Servings: Approx. 30
  • Difficulty: Easy
  • Print

INGREDIENTS:

2 Tbs. butter, melted

2 Tbs. garlic infused olive oil

1 french baguette, sliced thin

12 ounces fresh cranberries

2 Tbs. good balsamic vinegar

1/2 cup sugar

1 tsp. fresh rosemary, diced fine (or 1/2 tsp. dried and crushed fine)

6 ounces triple cream brie cheese

Fresh thyme, cut into small sprigs for garnish, optional

DIRECTIONS:

Preheat oven to 425. Cover a large lipped baking sheet with parchment paper. Spray the sides with cooking spray. Set aside. Take another baking sheet and line it with parchment paper. Set aside.

In a medium bowl combine cranberries, balsamic vinegar, sugar and rosemary. Spread the mixture onto the prepared baking sheet. Roast for 15 minutes. Remove from the oven. Transfer the cranberries into a bowl. Clean the baking sheet as soon as possible.

In a small pan, heat the butter and olive oil until the butter is melted. Stir to combine. Slice the bread into thin slices, about 1/8 inch thick. Brush the butter/oil on both sides of each slice and place them on the baking sheet. Bake in the oven for 6 minutes. Take the baking sheet out of the oven and turn over all of the slices of bread. Put them back in the oven and bake for an additional 4 minutes.

Transfer the slices of bread to a cooling rack. Take a small amount of brie and press it into each slice of bread, spreading the cheese with your fingers until it just about covers the bread. Take a teaspoon full of the cranberry mixture and place it on top of the cheese.

Decorate the tops of each with a small sprig of fresh thyme. Serve.


Best Ever Shrimp Dip (No Lie)…

I know, there are so many shrimp dip recipes out there and to me they all seem to taste the same. Well I’ve officially broken that mold. True, in order to achieve star status for this dip you have to do a little more work but it’s not that hard and it’s so worth it!

What’s the key? Well the combination of flavors for sure creates this great shrimp dip. But one of main differences I think is I prepared the shrimp from scratch. It all started with having most of a 16 ounce bag of uncooked jumbo shrimp in the freezer that I wanted to use. So instead of buying cooked shrimp or using mini cocktail shrimp (I found a lot of dip recipes call for them) I prepared the shrimp by hand.

In my mind that was the key. It gave the shrimp so much more flavor and the texture was much more robust. You could tell and taste that there was shrimp in the dip. Don’t get me wrong, the ingredients in total played a significant role in the dip’s flavor, but preparing and cooking the shrimp by hand was, for me, the key.

So let’s talk the best ever shrimp dip…

Lesson Learned 1 – This is MAJOR – prepare the shrimp from scratch: Don’t use precooked shrimp. Now of course if you have precooked shrimp on hand you can use it. But the flavor is so much more intense when you cook the shrimp and rough chop it yourself. I used frozen uncooked jumbo shrimp. The shrimp was already de-veined but there were still a few remnants of shell on the flesh. Once the shrimp was defrosted I removed the shells, cut off the small tails and cooked them before chopping them up. I seasoned the shrimp with Old Bay seasoning and garlic infused olive oil.

Shrimp Dip Ingredients

The result was flavorful, meaty chunks of shrimp in the dip. That combined with the other seasonings set the dip over the top. And once you let the dip sit (I made mine the day before) the flavors become more fully developed and the dip is out of this world. I remember tasting it the next day and then going back for a couple more spoonfuls because it was so delicious.

Lesson Learned 2 – Shrimp cooks really fast: Once I put the shrimp in the pan I cooked them on medium high heat for 2 minutes on one side and about 2 minutes on the second side. Now remember I was using jumbo shrimp. If you use smaller shrimp the cook time may be a little less.

When the shrimp is cooked it will be loosely curled. If the shrimp is tightly curled you’ve overcooked it and it will be tough. Shrimp is like calamari – it gets tough when you overcook it. So don’t let it worry you if you think the cooking time is short. If the shrimp has a nice light coral color and is loosely curled you’ve cooked it perfectly.

Lesson Learned 3 – This recipe tastes the best when it’s made the day before: When I made this dip I tasted it right after I made it and it was good. But when I tasted it the next day I thought the flavor was over the top. I actually saved some of this dip and made a sandwich out of it, it was that good. And it disappeared quickly at the gathering where I served it. So do yourself a favor – let this one sit for a day. You won’t regret it!

Lesson Learned 4 – Another key factor in the flavor is pimento cheese: If you’ve never had pimento cheese you’ll see it has a slight kick to it. That combined with the horseradish gives the dip some zip. The zip is ever so slight so don’t worry about people not being able to eat it because it’s too spicy. You could also use a sharp cheddar, but I don’t think it will provide the depth of flavor that the pimento cheese does. I found it in the specialty cheese section in my local supermarket. If you don’t see it, ask for it. I’ll bet it’s there you just never noticed it.

Preparing, seasoning and cooking the shrimp from scratch makes all the difference in this recipe. I am anxious to hear your thoughts on this one. Make it and let me know what you think. You won’t be disappointed.

The Best Ever Shrimp Dip (No Lie)...

  • Servings: Party Size
  • Difficulty: Easy
  • Print

INGREDIENTS:

1 – 16 ounce bag frozen raw peeled and de-veined large/jumbo shrimp, thawed

1 -2 Tbs. garlic infused olive oil

1/4 tsp. Old Bay seasoning

1 – 8 ounce package of cream cheese, softened

1 heaping Tbs. horseradish

1 Tbs. shallots, minced

1 cup pimento cheese

1 Tbs. chopped Italian parsley for garnish, optional

DIRECTIONS:

Thaw the shrimp. Remove any remaining shells on the flesh of the shrimp. Cut the tails off (or you can keep it on, basically it’s your choice). In a medium sized bowl combine the shrimp, olive oil and Old Bay seasoning. Stir to make sure all of the shrimp is coated with the oil and seasoning.

On medium heat cook the shrimp for 2 minutes on one side and 1 1/2 -2 minutes on the other. The shrimp is done when it gets a soft coral color and is loosely curled. Cool the shrimp and cut it into small chunks.

In a separate bowl combine the cream cheese, horse radish, shallots, and pimento cheese. Add the shrimp. Stir until well combined. Refrigerate overnight. (you can serve immediately or chill for a short period of time but overnight is the ideal). Garnish and serve with crackers, chips or veggies.


Glazed Almond Cookies…

Every year when I bake cookies for the holidays I try one new recipe. I’ve been making cookies for so many years and have countless choices but I always like to experiment with at least one new recipe while I decide what others in my arsenal to make. A few recipes I make every year because they are just my classics. But there are others I switch out or switch around and I always add one new variety to the bunch. This is my new cookie for 2018.

Most of the cookies I make are pretty traditional with straightforward processes. This one varied a little and tested my ability to problem solve. But once I figured it out I was good to go. So I recommend you read my lessons learned carefully   because if you do you’ll be successful right out of the gate. And just in case you’re wondering these cookies taste divine and are well worth the little extra attention you need to pay to them.

So let’s talk glazed almond cookies…

Lesson Learned 1 – This recipe does not use any eggs: I know, I thought it was strange too but don’t worry the combination of ingredients works. You’ll find the dough looks a little different than most cookie dough – sort of like mashed potatoes (see the picture below). That’s ok – that’s what the dough needs to look like.

Lesson Learned 2 – You MUST use parchment paper on your cookie sheet: I have a professional grade non stick cookie sheet and found I still needed to use parchment paper. The cookies did not stick to the sheet, that’s not why parchment paper was necessary. The challenge arose when I tried to place the sliced almonds on top which I will address in another lesson learned. Just make sure you use parchment paper regardless of whether you’re using a non-stick sheet or not.

Lesson Learned 3 – I discovered the best process for prepping the cookies to go in the oven: With this recipe you roll the dough into small balls and then flatten the balls. I found the easiest way to do this was to roll the cookies all at once and then flatten them with the bottom of a tumbler glass. By doing this I was able to not only have a smooth flowing process but also was able to make the cookies a uniform size by using the bottom of the glass as a guide for pressing out the dough. Keep in mind that you’ll need a little bit of flour on hand to dust the bottom of the glass. I placed about 1/4 cup of flour on a small plate and dusted the bottom of the glass regularly. Sometimes the cookies stuck to the bottom of the glass but I was able to peel them off easily because of the flour. Once I had the cookies all flattened I dusted off any residual flour that was on them with a pastry brush.

Lesson Learned 4 – How to make the almond slices stick to the cookies: This is the rub! It’s not as easy as you might think… I found the best way to make the almonds stay on the cookies is to put them directly on the dough the very second they came out of the oven and before transferring them to a wire cooling rack. If you wait any longer they won’t stick. So as soon as you take these cookies out of the oven have the almonds ready. Place them on top of the cookie and gently press them into the cookie. That way as the cookie cools it bonds around the almond slices.

That is also why you want to have your cookie sheets lined with parchment paper. The first batch I made I took the cookies off the sheet, transferred them to a cooling rack and then tried to put on the almond slices. As I pressed them down into the cookie, the bottom of the cookie went slightly through the gaps in the cooling rack so when I took the cookies off the rack they no longer had flat bottoms and the cookies wobbled. Also by that time the cookies had cooled enough that the almonds did not stick. Ugh… When you press the almonds onto the cookie while they’re still on the baking sheet they are still warm enough, the parchment paper prevents them from sticking to the sheet as you press down and you still maintain a flat bottom.  It took me my first failed batch to figure this out.

Also I found if some of the slices were a little loose or did not want to stick, when I applied the glaze and let the glaze set on the cookie, the glaze acted as a binder and the almonds stayed on the cookie. So you really have two ways to secure the almonds. But first try putting them on while the cookies are still hot. That’s the best way.

Lesson Learned 5 – Glaze the cookies on a wax paper lined cookie sheet: Place your cookies on the lined cookie sheet and then with a teaspoon drizzle the glaze over the top of the almonds. Not only does it create a rustic look but also helps to secure the almonds on top of the cookie. Once the cookies are glazed put the baking sheet in the refrigerator for about 10-15 minutes to let the glaze harden. Then you can serve them or freeze them. The glaze has a wonderful almond flavor that accentuates the almond flavoring in the cookie. In the end you have one delicious and festive looking cookie!

Glazed Almond Cookies...

  • Servings: Approximately 3 Dozen
  • Difficulty: Medium
  • Print

INGREDIENTS:

Cookie Dough

1 cup unsalted butter

3/4 cup sugar

1 tsp. almond extract

2 cups flour

1/2 tsp. baking powder

1/4 tsp. salt

Glaze

1/2 cup confectioners sugar

1 tsp. almond extract

3 teaspoons water

DIRECTIONS:

Preheat the oven to 400 degrees. Line cookie sheets with parchment paper. Set aside

In a stand mixer, mix together well the butter, sugar and almond extract.

In a separate bowl combine the flour, baking soda and salt. Whisk to combine.

Add the flour mixture to the butter mixture only a couple tablespoons at a time until fully incorporated before adding more.  Otherwise the flour will not incorporate fully into the dough.

Roll the dough into small one inch balls. Dust the bottom of a glass tumbler with flour and flatten each ball. (You will need to dust the bottom of the glass frequently). Bake for 7 minutes only . Although the cookie may not look done, it is. Do not remove the cookies from the baking sheet and immediately take a few sliced almonds and press them into each cookie. Once you’ve finished putting the almonds on top of the cookies transfer them to a wire cooling rack to cool.

After the cookies have cooled mix the glaze ingredients together. With a teaspoon, drizzle the glaze over the cookies. Put the cookies in the refrigerator for about 10-15 minutes to allow the glaze to set. Serve or freeze.


Cranberry Upside Down Cake…

There’s nothing that screams the holidays like cranberries. Did you know that 20% of cranberries grown are consumed over the holidays? The fresh ones are only around this time of year and their bright red color makes you want to burst into a Christmas song. And because I love them so much, I’m always looking for new ways to cook or bake with them. This particular recipe hits the jackpot as far as I’m concerned.

I’ve seen various iterations of upside down cakes but this one, in my estimation, surpasses them all. It is so much fun to take this cake out of the oven, let it cool for 10 minutes, and then turn it over and see this gorgeous burst of holiday color decorating the top of the cake. This cake will stand out on any holiday dessert table. And besides looking fabulous, it tastes fabulous! And it isn’t that difficult to make. You just need to follow a few tips and the cake will turn out perfectly. This is the very first time I made this cake and just look at it – holiday perfection! So let’s talk cranberry upside down cake…

Lesson Learned 1 – Grease the bottom and sides of the pan generously: If you don’t do this you’re dead in the water. The cake will never come out clean. Now by generously I don’t mean you need a build up of grease in the pan.  Just make sure your pan (and this recipe calls for one 9 inch round cake pan) is thoroughly greased on the bottom and the sides. And make sure you only use butter to grease the pan, nothing else.

Lesson Learned 2 – Can you make this in an 8 inch round pan: The answer is yes and no. This recipe makes a lot of batter and really calls for a 9 inch pan that is at least two inches high up the sides. Once you put the cranberries in the entire batter will come close to the top if you use it all. I wound up leaving a small amount of batter out as I was afraid the cake would spill over the sides of the pan. I left a little less than 1/2 inch of space along the sides.

I’m glad I did. The picture below shows what the cake looked like right out of the oven. You can see the cake is all the way up to the top of the sides of the pan. Next time I make the cake I may add a few less cranberries (the original recipe called for 12 ounces of cranberries – I did not use that either. I used about 10 ounces of the 12 ounce bag). The key to getting a nice top is making sure the cranberries are evenly spread over the brown sugar and butter base. Piling the cranberries slightly on top of each other also results in a few cranberries rising with the cake and creating some nice color throughout the cake, which I liked.

I think you could use an 8 inch pan but keep in mind you will need less cranberries and you will have more batter left over. Either way, leave yourself a little less than 1/2 inch of space along the sides so your cake does not flow over the sides of the pan.

Lesson Learned 3 – Don’t let the cake cool in the pan longer than 10 minutes: You want the cake to rest for a short time when it comes out of the oven. But you also want to make sure you can get the cake out of the pan. Remember what you have on the bottom is really sticky. Cool the cake for no longer than 10 minutes. Then take a butter knife and run it all along the sides of the pan. If you do this, your cake will come out easily. Mine did and it looked gorgeous. Let the cake cool in it’s “upside down” form.

If you follow these simple lessons you should have no problem making this cake. And as always I will include sea level and high altitude amounts for the baking powder. I know you will love this one!

Cranberry Upside Down Cake...

  • Servings: 10
  • Difficulty: Medium
  • Print

INGREDIENTS:

Base:

3/4 cup packed brown sugar

4 Tbs. unsalted butter

10 ounces of fresh cranberries (you will not use an entire 12 ounce bag)

Cake:

1 3/4 cups flour

2 tsp. baking powder (1 tsp. for high altitude)

1/2 tsp. salt

1/2 tsp. ground ginger

1/4 tsp. ground cinnamon

Very small pinch of ground cloves

1/2 cup unsalted butter, room temperature

1 1/2 cups sugar

3 eggs, room temperature

1 Tbs. orange zest (the zest of a large orange)

1/2 cup sour cream

1/4 cup milk

DIRECTIONS:

Preheat the oven to 350 degrees. Generously butter the bottom and sides of a 9 inch round cake pan. Set aside.

In a small saucepan, melt together the butter and brown sugar for the base. Make sure they are mixed well. Pour this mixture into the bottom of the cake pan.

Spread the cranberries evenly over the butter/brown sugar mixture. Set aside.

Whisk together the flour, baking powder, salt, cinnamon, ginger and cloves.

In another bowl beat the butter for the cake until it is light and fluffy. Add the sugar and mix thoroughly. Add the eggs in one at a time and mix until combined. Stir in the orange zest.

Mix 1/3 of the dry ingredients into the butter/egg mixture. Once combined beat in 1/2 of the sour cream until combined. Beat in the next third of the dry mixture until combined. Add the remaining half of the sour cream and beat until combined. Add the last third of the dry ingredients and beat until combined. Finally add the milk and beat until combined.

Pour the batter over the cranberries making making sure to leave a little less than 1/2 inch of room from the top of the pan.

Place in preheated oven and lower the temperature to 325 degrees. Bake anywhere from 55 minutes to 70 minutes. (mine took 70 minutes – it will depend on your oven and your altitude). Cake is done when a toothpick inserted in the center comes out clean.

Cool the pan on a wire rack for 10 minutes. Run a butter knife all around the edges of the pan. Place a plate on top of the pan and invert it. Let the inverted cake cool on the plate.


Easy Homemade Pizza…

If you’re anything like me, pizza is something you either eat at a restaurant or order for delivery. I never really thought about making homemade pizza until recently. I was wandering around Trader Joes, saw some pizza dough in a bag and thought I should give this a try. So I bought some. After leaving it in the refrigerator for a few days I decided to use it before it went bad. And the rest was just pure joy.

Pizza is pretty elementary. It consists of the dough for your crust, your sauce, your toppings and cheese – yep, that’s pretty much it. But not really. How thinly do you roll out the dough? How much sauce and toppings do you put on? At what temperature do you bake it so the bottom crust gets done before the sides get too brown? What I found is there are some basic things to keep in mind when making pizza so your results will be perfect. So let’s talk making homemade pizza…

Lesson Learned 1 – Tips for working with pizza dough: Pizza dough, like most other types of dough, likes to rest before you roll it out. One common mistake with using store bought pizza dough is to take it out of the refrigerator and immediately start working with it. Doing that will result in a tough crust. Let the dough rest on your counter for about 20 minutes before you begin rolling it out. That way the glutens in your dough won’t get overworked and you won’t have a tough crust.

The dough that I bought made a 12 inch round pizza about 1/8 inch thick. That’s probably the thinnest you want to go with the crust. I rolled it out on a silpat non stick silicone mat. My mat gives me circular as well as linear dimensions that helps when I’m working with dough that needs to be rolled out to certain specifications. If I have a cookie recipe that says I need to create a 9 inch roll, I can measure that on this mat. I was also able to roll out my pizza dough to a perfect 12 inch round. And even though the mat is considered non-stick, you still need to use flour when working with bread/pizza dough. Most of the time you don’t need it for cookie dough.

Pizza Crisper

Lesson Learned 2 – If at all possible, use a pizza stone or crisper: Pizza stones are designed to bake pizzas in commercial brick ovens although they also can be used at home. Pizza crispers are designed for “regular” ovens. They are perforated to let air circulate under the crust to cook the bottom of the pizza more evenly. Being that I don’t make homemade pizza on a regular basis I just bought an aluminum pizza crisper at the grocery store. It worked beautifully. Plus I can reuse it a few times before having to get another one. Use either a pizza stone or crisper if you want to ensure that the bottom of your crust is not soggy when the rest of your pizza is fully cooked.

Also when using an aluminum pizza crisper (as shown in the picture) you should lightly oil it  before putting the dough on it. I recommend using canola oil because it has a very high smoke point. I also recommend that after you brush on the oil to take a paper towel and go over the crisper and remove any excess. I am very serious about only lightly oiling the bottom. I’d start with about an 1/8 of a teaspoon and go from there. That amount of oil and a paper towel to spread it and soak up any excess should be more than sufficient. You don’t want the bottom of your pizza to be greasy. You just don’t want the dough to stick to the crisper.

Lesson Learned 3 – Don’t drench the pizza with sauce: I used the smallest jar of marinara I could find, 14 ounces, and I still didn’t use all of it. Now you may ask should I use pizza sauce or pasta sauce. I don’t think it really matters. Some make pizzas with alfredo sauce. I don’t think there is a hard fast rule. It’s really all up to you. What’s more important is to make sure you don’t drown your dough in sauce. Just spread it on to lightly and evenly cover it. You don’t want to create soggy dough.

Lesson Learned 4 – Should toppings be put on cooked or raw: That depends. If you want to have Italian sausage on your pizza definitely cook it beforehand. I cooked mine about 75% done (just a little pink – see below) knowing that the time the pizza cooked in the oven would cover the rest. I did not cook my green peppers ahead of time, but I did cut them into smaller diced pieces. Same thing with my mushrooms. They went on raw but I sliced them thin and they were cooked perfectly in the time allotted. I also put on some pepperoni slices, as is, since they can be eaten right out of the package.

Partially Cooked Italian Sausage

Another mistake common in making homemade pizza putting the toppings on too thick. Now don’t get me wrong, I like lots of toppings on my pizza. Just be careful not to create a huge mound. What happens when putting too much toppings on is the crust will get done before your toppings are cooked or even warmed through. You don’t want that.

Lesson Learned 5 – Cook your pizza at a high heat: I looked over many different pizza recipes and saw a wide variety of recommended cooking temperatures. One recipe even called for the pizza to be cooked at 350 degrees. With the research I did I found the prevailing thought to be that pizza should be baked at higher temperatures. I baked mine at 450 degrees. It was done in 15 minutes and the crust was perfect. Our local take-and-bake pizza store recommends you bake their pizzas at 425 degrees. You could probably do that as well but it will take a little longer for your pizza to cook. If you pile on your toppings it might be better to bake your pizza at 425 to give more time for the toppings to bake. I would guess baking at 425 might add on an additional 5-10 minutes, depending on your oven. The choice is yours, but I would not go under 425 degrees.

It sounds like a lot but it’s actually pretty simple. If you keep these tips in mind you should have a perfect pizza the very first time. This was my first time making it and it turned out perfectly. And how often can you say that about a recipe you’ve tried only once? I really like the fact that I can control what goes on my pizza and so I will definitely make a homemade pizza again. Try this and let me know what you think…

Easy Homemade Pizza...

  • Servings: 4
  • Difficulty: Easy
  • Print

INGREDIENTS:

1 bag of pizza dough (I got mine from Trader Joes – Whole Foods also has them)

1 14 ounce jar of pasta or pizza sauce (there will be some leftover)

1/2 pound sweet Italian sausage cooked almost through and crumbled

pepperoni slices, as desired

1/3 cup green pepper, diced small

2-3 medium sized cremini mushrooms, sliced thin

Mozzarella cheese

Parmesan cheese

1/4 tsp. Italian seasoning (you can add more if you like)

1/8 tsp. canola oil

Flour for dough preparation

DIRECTIONS:

Preheat the oven to 450. Take a large pizza crisper and lightly oil the bottom. Remove any excess with a paper towel.

Flour your surface for working the dough.  Roll the dough to a 12 inch circle. Wrap the dough around your rolling pin and transfer it to the crisper. Cover the surface of the dough with pizza sauce leaving about a half inch around the edges uncovered. Arrange the pepperoni slices on the dough. Arrange the Italian sausage crumbles on the dough.

Sprinkle the meats with mozzarella and Parmesan cheese. Arrange the mushroom slices and green pepper pieces on the dough. Top them with more mozzarella and Parmesan cheese.  Sprinkle the Italian seasoning over the top.

Bake for 15 minutes or until the crust cooked and the cheese is gold brown and bubbly. Slice and serve.


Scrumptious Cranberry Nut Bread…

It’s that time of year again. I know this sounds silly but I get a little wave of excitement every time I see bags of cranberries in the grocery store for the first time. To me it’s heralding the holiday season, my favorite time of year.

Immediately my thoughts go to making a cranberry bread. It’s tradition, sort of like making Christmas cookies every year. And each year I fiddle with the recipe a little but I think I’ve got it down to something I really like.

I love the tartness of cranberries and when you combine them with orange juice, orange zest, nuts and all the other regular cast of characters you have in a sweet bread loaf that’s simply heaven. So let’s talk cranberry nut bread…

Lesson Learned 1 – Process the cranberries in a mini food processor: In my estimation this is the quickest way to get the job done with minimal mess. I pulse the cranberries so that I can get some nice sized chunks. You don’t want to pulverize them, that would defeat the purpose of the bread. The pictures below show how I processed them.

Lesson Learned 2 – Use the zest of 1 medium sized orange: I’ve seen different amounts of zest called for in various recipes and I just made it easy and said use the zest of one medium sized orange. That will render a generous table spoon which noticeably adds flavor to the bread. Quit fooling around with measuring spoons on this one. Just use one orange!

Lesson Learned 3 – I adjusted the leavening in my recipe: Again after looking at several recipes I adjusted the leavening (baking powder and soda) for high altitude. I will give you the amounts I used and also the recommended amounts that I saw on various recipes for sea level. As you can see from the pictures my bread turned out great with no cave-in in the middle (which is a result of too much leavening at high altitude). Those of you at sea level – just use the “normal” amounts I listed.

And that’s it. This is one of my all-time Fall classics. I make it every year when cranberries arrive at the grocery store. I hope you enjoy it and please, let me know what you think…

Scrumptious Cranberry Nut Bread...

  • Servings: 1 Loaf
  • Difficulty: Easy
  • Print

INGREDIENTS:

2 cups flour

1 cup sugar

1 1/2 tsp. baking powder (1 tsp. high altitude)

1/2 tsp. baking soda (1/4 tsp. high altitude)

1 tsp. salt

3/4 cup orange juice

2 Tbs. vegetable oil

Zest of one medium sized orange

1 egg, room temperature, beaten

1 1/2 cups fresh cranberries, coarsely chopped

1/2 cup chopped pecans

Baking spray

DIRECTIONS:

Preheat oven to 350. Spray an 8 x 4 inch loaf pan. In a medium bowl combine flour, sugar, baking powder, salt and baking powder. Set aside.

In another bowl combine orange juice, oil, zest and egg. Pour into the flour mixture and stir until combined. Fold in the cranberries and nuts until they are all throughout the batter.

Bake for 55 minutes or until a toothpick inserted in the center comes out clean. Let the loaf cool in the pan for 15 minutes. Remove the loaf from the pan and cool completely.


The Best Sausage And Onion Quiche…

I only started making home made quiches recently. Normally I would just pick one up at the grocery store and heat it for either breakfast or dinner. But I found that not only could I control what goes into the quiche, but also the texture and flavor of the quiche is so much better when I make it.  And it really isn’t all that hard if you know a simple few tricks which I will share.

The best thing about quiche is it can be a great dumping ground for leftovers. And there isn’t just one way to make one or only certain ingredients you can use. Making quiche is like painting on a blank canvas – create what you want and it will all be good.

This recipe is about as basic as you can make it. But even with that, my husband said that my homemade quiche is so much better than the fancier ones I’ve been buying at the store. So, I think it’s pretty much home made quiche from now on. But that doesn’t bother me because it really is so simple to make.  So let’s talk easy sausage and onion quiche…

Lesson Learned 1 – Frozen pie crust shells work perfectly for this recipe: Now I’m not saying that you can’t make crust from scratch but why go through all that work when the frozen shells work equally as well. But you definitely have the choice. You can make your crust from scratch, or use the packaged pie crust rounds or get the pie crust shells that are pre-made and frozen. All will work.

Lesson Learned 2 – Cook the breakfast sausage until you see only a little light pink: Remember the quiche is going to bake for an hour so the sausage will continue to cook during that time. I like to cook my sausage first, mix it with the cream cheese and let it sit a little before I put it in the pie crust. I normally use that time to put the egg mixture together.

An 8 oz. tube of breakfast sausage is more than enough. You can go a little lighter on the sausage and only use 4 ounces at a time. We like a lot of sausage in our quiche so I prepare the whole tube and use the leftovers to put in my scrambled eggs for breakfast during the week. But just a warning, if you cook all 8 ounces there will be leftovers.

Also, make sure you drain the sausage on paper towels to get all the grease out before adding it to the quiche. It’s important that the sausage is as dry as possible.

Lesson Learned 3 – Beat the eggs really well: I found if you want the fluffiest quiche you need to beat the egg mixture until it foams. This may take a couple of minutes but it is definitely worth it. When the eggs are that light and airy, so is the quiche.

Lesson Learned 4 – Use a good melting cheese: You can use a wide variety of melting cheeses in a quiche. I like this particular recipe because it pairs a little cream cheese with another melting cheese. I used muenster in this recipe but you can also use cheddar, gruyere, swiss, or mozzarella. That’s the beauty of making a quiche. The choice is yours!

Lesson Learned 5 – I used pearl onions for an extra pop of flavor: You can definitely chop and saute some onions and add it to the quiche. I prefer using frozen pearl onions. You can drop them in frozen and they give a noticeable pop of flavor when you bit into one. Pearl onions are quick and easy.

Lesson Learned 6 – Let the quiche stand for 10 minutes when it comes out of the oven: For ease of cutting you need the quiche to set before you serve. Once you take the quiche out of the oven cover it with foil and let it sit for 10 minutes. The consistency will be perfect and cutting the quiche will be a breeze!

And that’s it. Pretty simple actually – simple but oh so good! Try it and let me know what you think.

The Best Sausage & Onion Quiche

  • Servings: 6
  • Difficulty: Easy
  • Print

INGREDIENTS:

1 9 inch frozen pie crust

1 – 8 oz. tube of breakfast sausage (I used Jimmy Dean)

1/2 cup frozen pearl onions

4 oz. of cream cheese, room temperature

1 cup shredded melting cheese (I used muenster), divided

4 eggs

1 cup heavy cream

2 Tbs. sour cream

DIRECTIONS:

Preheat the oven to 350. In a skillet, cook the sausage until only slightly pink breaking up the sausage as you cook it. Drain the sausage thoroughly. Combine the sausage and cream cheese. Set aside.

In a medium size bowl beat the eggs, sour cream and heavy cream thoroughly (at least a minute).

Place the sausage and pearl onions in the bottom of the pie plate. Cover with 1/2 of the cheese. Pour the egg mixture over the sausage, onions and cheese. Add the remaining cheese on top.

Bake for 1 hour. Check the quiche about half way through to make sure the cheese on top is not getting too brown. If it is, loosely cover the quiche in foil for the remainder of the cooking process.

IMPORTANT: Allow the quiche to rest covered in foil for 10 minutes before serving.


Garlic and Rosemary Balsamic Roasted Pork Loin and Potatoes…

The one thing I really love about Fall is cranking up the oven again. I do a lot of grilling over the Summer and I love that too. But those smells in the house when something is roasting in the oven just can’t be beat. It makes a house a home.

So I decided to crank up the oven the other day. I haven’t had pork in a while and I thought I’d try that. More often than not when I make a pork roast I use a pork loin. The meat is so tender and I perfected roasting it so that it’s cooked but not dried out. And if you want my secret for roasting a perfect pork loin every time just click on my blog’s tips and tricks post and you’ll never have a dry pork loin roast again.

But although pork loin is moist I find it always needs a little help in the flavor department. And whether you marinate it or use some sort of rub, that’s usually enough to up the flavor factor. And that’s exactly what this recipe does.

I also like this recipe because for all intents and purposes it is a one pot meal. You can also make your potatoes and carrots in the same roasting pan and I’ve always liked that convenience. You just have to follow a couple of tips in order to make sure they cook properly.

So let’s talk garlic and rosemary balsamic roasted pork loin and potatoes…

Lesson Learned 1: Slightly par boil your potatoes before roasting them: I don’t know about you but I’ve found that roasting potatoes can be tricky. I usually wind up with hard or semi hard potatoes that are not cooked through. In this recipe it is important to cut the potatoes as evenly as possible (mine were approximately one inch squares). Once I do that I put them in a pot with water, bring the water to a boil and boil the potatoes for about 5 minutes or just until they start to turn tender around the edges. Then I drain the potatoes and let me cool slightly in the strainer. I’ve found when I do this my potatoes come out perfectly when making this recipe. After I strain off the water I transfer them into a bowl so that I can coat them with the balsamic mixture before putting them in the roasting pan. It’s a little extra work, but definitely worth it.

The same rule applies for when I use sliced potatoes in a casserole. I used my mandolin slicer to get even slices. Then I par boil them just for a couple of minutes before adding them to a casserole dish that is ready to go into the oven. Try this little trick and you’ll have beautifully roasted potatoes all the time.

Lesson Learned 2 – This recipe roasts the carrots to crisp tender: Carrots are also tricky to cook and although I prefer mine to be crisp tender, some people prefer their carrots to be soft. If soft is your preference roasting them this way will not give you that consistency unless you either cut them into thin rounds or use small baby carrots. I cut my carrots into about 2 inch chunks, cut each chunk into half and then half again. This produced a somewhat softened crisp tender carrot, which I love.

You can also do the par boiling trick described above for larger carrots if you want them to be soft. That might be a little too much muss and fuss for one recipe. But it’s totally up to you. Just something to think about…

Lesson Learned 3 – Browning the pork loin is totally your preference: Some recipes call for browning your pork loin before roasting it. It helps to seal in the juices. The reason I say this is totally your preference is that if you cook your pork loin according to my directions you will always get a juicy pork loin without browning it ahead of time. Plus when you add the balsamic mixture you cannot tell if the roast has been browned or not. So why bother. The choice is yours.

Lesson Learned 4 – Make the balsamic mixture in your mini food processor: This is really the easiest way to ensure all the ingredients are well combined. Combine them in the processor until the mixture becomes paste-like as seen below. Then you’re ready to go…

And that’s it. This recipe is a Fall classic. Try it and tell me what you think…

Garlic & Rosemary Balsamic Roasted Pork Loin & Potatoes...

  • Servings: 6
  • Difficulty: Medium
  • Print

INGREDIENTS:

1 1/2 pound boneless pork loin

3 large russet potatoes, peeled and diced into 1 inch square pieces (can also use 2 pounds of baby reds)

3-4 large carrots cut into chunks, then halved and halved again (or 1 bag of small baby carrots not cut)

1/4 cup good olive oil, plus 1 Tb. for the carrots

3 Tbs. balsamic vinegar

5 large garlic cloves (or 10 small), smashed

1/2 cup fresh rosemary leaves

Kosher salt and freshly cracked black pepper to taste

1 tsp. Herbs De Provence

Cooking spray

DIRECTIONS:

Preheat the oven to 375. Peel, chop and par boil the potatoes for 5 minutes. Drain and set aside.

Combine olive oil, vinegar, garlic, rosemary, salt and pepper in a food processor until it forms a paste.

Coat the pork loin on all sides with the balsamic mixture. (You will have some left over for the potatoes). Lightly grease a large roasting pan with cooking spray. Place the pork loin in the center of the roasting pan. Coat the potatoes with the remaining balsamic mixture. Place them on one side of the pork loin.

Coat the carrots with olive oil and season them with salt and pepper and Herbs De Provence. Place the carrots on the other side of the pork loin.

Roast for 1 hour. Remove from the oven and cover with foil for 5 minutes. Transfer the roast to a cutting board, slice and serve with the potatoes and carrots.


Cheddar Bacon Ranch Cheese Ball…

Want something quick and easy to bring to your next get together? This recipe is the one for you. I like this recipe for a wide variety of reasons. First, it is very easy to assemble. Second, and this is perhaps my favorite reason, it’s small enough to minimize waste but large enough so that everyone can have some of it.

I think that has been my bug-a-boo about most cheese balls. A lot of recipes make a cheese ball that is big enough to feed an army. And what always seems to happen is a lot left overs. So, with good intentions you wrap it up and put it back in the fridge. The problem is I don’t know a lot of people who eat cheese balls outside of a party venue. So the remainder sits in your refrigerator until you wind up throwing it away. But not with this one. It’s just the right size. And if you need a bigger cheese ball, just double the recipe. But my experience has been that when there are lot of appetizers to choose from, making an appetizer that is smaller in size eliminates a great deal of waste.

So let’s talk cheddar bacon ranch cheese ball…

Lesson Learned 1: I found a great shortcut for adding bacon to recipes. The last time I was at the grocery store I noticed a package of Boar’s Head fully cooked bacon. It comes in a box and is not refrigerated. Inside there are two vacuumed sealed packages of cooked bacon with approximately 6 pieces per pack. One pack was perfect for this recipe. I avoided all of the grease and clean up associated with cooking bacon. Since then I’ve used it on salads and in other recipes. I love the taste and convenience of it. You may want to try some. It really makes putting together this cheese ball a snap.

Lesson Learned 2 – Grate your own cheese versus using the packaged kind. Although I just touted the convenience of using precooked bacon, I don’t recommend using the grated cheese you get in a bag in any recipe. It may take a few seconds more to grate your own cheese but for flavor and  health reasons I strongly recommend it.

First, grating your own cheese is less wasteful less expensive and it tastes so much better. But the main reason I grate my own cheese is an additive put in bags of grated cheese know as cellulose. Cellulose is actually derived from wood pulp, yes wood pulp, and is added to packages of grated cheese to prevent the cheese from clumping together. Now I don’t know about you, but I’m not a big fan of adding wood pulp to my diet if I can avoid it. So next time, take the couple of extra seconds and grate your own cheese. Your body will thank you for it.

This recipe couldn’t be any easier, is perfect in size and is tasty as all get out. So try it and let me know what you think…

Cheddar Bacon Ranch Cheese Ball

  • Servings: 25
  • Difficulty: Easy
  • Print

INGREDIENTS:

1- 8 ounce package of cream cheese, room temperature

1/2 cup sharp cheddar cheese, shredded

5-6 pieces of cooked bacon, chopped

1/2 package of ranch dressing mix (you can add more to taste if you like)

1/8 cup fresh chives, chopped

1 cup chopped pecans

DIRECTIONS:

In a medium bowl combine all of the ingredients except the chopped pecans. Mix well and form into a ball.

Roll the cheese ball in the chopped pecans until the ball is completely covered. Cover the ball with plastic wrap and refrigerate for at least 1 hour before serving.

Mixed Ingredients

Roll Into A Ball And Place On Top Of Chopped Pecans

Completely Cover With Pecans


Cranberry Orange Cake Topped With Fresh Plums…

Those of you who followed my blog over the years know that early on in my cooking/baking days I was heavily influenced by the Food Network. The early shows they produced were more about learning to cook and less about cooking contests and road shows. I miss those days. Remember Semi-Homemade with Sandra Lee? I really liked that show. I felt Sandra showed people how to take a few simple ingredients, add it to something store bought and make it into something special without all the muss and fuss. In today’s world that is such a gift for the busy cook.

Well, that is what this recipe is all about. I wish I could take credit for this but I can’t. I was at the grocery store looking for something to make, like a quick bread or muffins and I picked up this box of Krusteaz Cranberry Orange Muffin Mix. I looked on the back of the box to see if I could use this to make a quick bread and lo and behold on the bottom right hand corner was the recipe for this cake. All it required was a few extra ingredients, namely almond extract and fresh plums. The picture of the cake looked so good I just had to try it. Needless to say, it was fabulous and very easy to make so I felt I had to share it with all of you. Nobody has to know that this cake is semi-homemade.

So let’s talk Cranberry Orange Cake Topped With Fresh Plums…

Lesson Learned 1 – Pick plums that are not overly ripe: You want plums that are hard. Hard plums are easier to slice and cook beautifully in the oven. It’s very difficult to get good slices with soft plums, even if you have a very sharp knife. The pieces tend to get mushy. So be aware of that.

Also when you cut the plums, cut them like you would an avocado. I found it very hard to get the stones out of the plums. But if you cut the plum all around at the center and twist the two halves in the opposite direction, just like you do with an avocado, the plum halves will separate easily. You may have to dig a little with a sharp knife to get the stone out of the one half (be careful) but the harder the plum the easier that will be.

Lesson Learned 2 – Create the plum arrangement you want on top of the cake on a paper plate first: I found I had to play with the plums a little to create the arrangement I wanted. You don’t want to be doing that on top of the batter. I took a dinner size paper plate and created my plum arrangement on that. When it came time to put the plums on top of the batter I simply moved them from the plate to the cake just like I arranged them. It was a piece of cake, no pun intended!

Lesson Learned 3 – You could also add chopped nuts to this recipe: I did not make it with nuts this time but you could add 1/2 cup chopped nuts to this cake as well. It’s all up to you!

And the rest is easy. Just follow the directions on the box. I’ll write out the recipe here just in case the packaging gets changed. This is a quick, impressive and delicious semi-homemade recipe. I will definitely make this one again. Enjoy!

Cranberry Orange Cake Topped With Fresh Plums...

  • Servings: 12
  • Difficulty: Easy
  • Print

INGREDIENTS:

1 box Krusteaz Cranberry Orange Muffin Mix

2 eggs, room temperature

1/2 cup water (plus 2 Tbs for high altitude)

1/2 cup vegetable oil

1/2 tsp. almond extract

1 can cranberries (included in the box), undrained

2 under ripe plums, sliced

baking spray

DIRECTIONS:

Heat oven to 350. Mix well the muffin mix, eggs, water, vegetable oil and almond extract. Fold in the cranberries.

Spray a 9 inch springform pan with baking spray. Spoon the batter into the pan. Arrange the plum slices evenly over the batter.

Bake for 45 minutes or until a toothpick inserted in the center comes out clean. Let cool in pan for 15 minutes before removing.


Beefy Tater Tot Casserole…

Be careful when you send your husband to pick up something at the grocery store. You might be surprised at what he brings home. The other day I asked my husband to pick up a bag of tater tots for dinner. I thought he would go to the local grocery store but his brilliant idea was to go to Sam’s Club. He brought home tater tots all right – an 8 pound bag of them! What the heck was I going to do with all those tater tots? We’ve been systematically using them over time, but we were starting to get tired of them as simply a side. So I thought I’d try making a tater tot casserole.

This particular recipe is very easy and guaranteed to be a family favorite. If you have kids, I’m sure they will enjoy this. I mean ground beef, cheese and tater tots – what’s not to like? So let’s talk beefy tater tot casserole…

Lesson Learned 1 – This recipe serves 4 people: But don’t despair. You can easily change the ingredients for larger crowds – just double or triple the amounts depending upon what you need.

Lesson Learned 2 – Make sure you put the dish under the broiler for the last few minutes to get the tater tots crispy: The taters tots are cooking on top of bubbly beef and melted cheese so they will be slightly soggy at the end. Simply put the broiler on and keep the dish under the broiler for a few minutes and you’ll get your desired crispiness for the tater tots.

Lesson Learned 3 – Feel free to experiment with this recipe: Add ingredients to the ground beef that you and your family like. If you don’t like mushrooms, don’t use them. If you like sweet peppers, dice them up and use them. If you’re not a big fan of spicy don’t use the hot sauce. But if you want some real tang add some crushed red pepper to the beef. If you prefer pearl onions, add them. You can use cheddar cheese instead of muenster cheese (I find cheddar cheese to be somewhat greasy) or any melting cheese you prefer. The beauty is this recipe can be very versatile to include anything you enjoy.

The process for this recipe is pretty straightforward and I know it will be a family favorite. Try it and let me know what you think…

Beefy Tater Tot Casserole...

  • Servings: 4
  • Difficulty: Easy
  • Print

INGREDIENTS:

2 Tbs. olive oil, divided

1 1/2 pounds ground beef, 93% lean

1/4 cup brown sugar

2 heaping tsp. tomato paste

2 cloves garlic, minced

1/2 cup beef broth

1 medium onion, diced

2 Tbs. Worcestershire sauce

Muenster cheese slices – 4-6 depending on the dish you use

1 small bag of tater tots – you may have some leftover

2 dashes hot sauce

salt and pepper to taste

cooking spray

DIRECTIONS:

Preheat the oven to 375.

Over medium heat, add one tablespoon of olive oil to a large skillet. Add the onions and cook until translucent. Remove the onions and add the mushrooms. If you need more oil add it. Brown the mushrooms and remove them from the skillet.

Add the ground beef and cook until browned, breaking up the beef into crumbles while cooking it. Add the garlic and cook until fragrant, approximately 1 minute.

Add the Worcestershire sauce, brown sugar, tomato paste, hot sauce, beef broth and salt and pepper.  Cook until combined. Fold in the onions and mushrooms. Taste for seasoning and add more salt and/or pepper as needed.

Place the meat mixture into a 1 1/2 – 2 quart casserole dish sprayed with cooking spray. Cover the meat with the cheese slices. Take the tater tots out of the freezer and cover the top of the casserole with tater tots.

Bake in the oven for 30-40 minutes. Once nice and bubbly, turn on the broiler and place the dish under the broiler for approximately 3-5 minutes to crisp up the tater tots.

Serve and enjoy!

Luscious Zucchini Bread…

I know, I know, by now everyone has their own zucchini bread recipe. I mean, it’s a must especially if you grow zucchini or have access to a farmers market. It is definitely zucchini time of year, that glorious time when you are so grateful to have your first harvest but by the end of the season are looking for ways either to use them or get rid of them.

Fortunately (or unfortunately) for me, now that I live in a condo I can’t grow zucchini so I can control the amount of zucchini I am willing to use. So last week when I went to the farmers market I got a couple of them and used one as a vegetable side dish and the other to make a couple of loaves of zucchini bread.

So what makes this recipe better than most. A secret ingredient that I use to up the flavor factor. So let’s talk luscious zucchini bread…

Lesson Learned 1 – The secret ingredient is vanilla bean caviar: Most zucchini bread recipes call for vanilla, as does mine. But I decided to try adding the caviar from the inside of a vanilla bean to try to enhance the flavor. And let me tell you, it really ramped up the taste factor. That’s why I call this zucchini bread luscious.

These days you can buy vanilla beans at your local grocery store but not so long ago you had to go to a specialty spice store to get them. The picture below shows you what a vanilla bean looks like.

Step 1: The shaft of the bean is quite small and kind of hard so you’ll need a very sharp knife to extract the caviar from the pod. First you need to straighten out the pod.

Step 2: Using a sharp knife, cut a slit all the way up and down the bean pod


Step 3: Pry the slit open with your hands and scrape the tip of the knife up and down the open shaft of the pod making sure to get as much of the caviar out of the inside as you can.

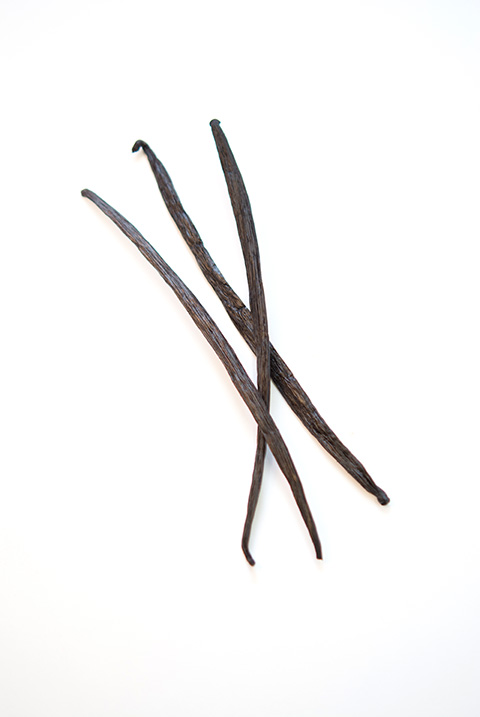
A whole vanilla bean will give you the equivalent of approximately one teaspoon of vanilla extract. Adding this to the two teaspoons of vanilla already in the recipe and it gives a wonderful but not over powering vanilla flavor to the zucchini bread. And that’s what makes it so luscious.

Now can you make this without the caviar? Of course… but I compare this to adding some espresso powder to a chocolate recipe. The recipe would be good without it but with it there is a fuller, richer flavor. Now I will warn you, vanilla beans are expensive, but they are worth it.

Lesson Learned 2 – Use a food processor to shred the zucchini: Although you can use a box grater, a food processor is a faster and easier way to shred the zucchini for this recipe. One medium to medium-large size zucchini will give you the two cups needed to make the bread. The food processor shreds the zucchini to just the right size so there are small strands in the bread. You don’t want to the zucchini shreds to be too big. They are designed to add moisture to the cake without providing any noticeable flavor. Also, make sure to pat down the zucchini shreds in your measuring cup. You want them slightly compacted.

Lesson Learned 3 – You can use shredded carrots in this recipe as well: I chose not to use carrots this time but you can add them as well. Just substitute one cup of shredded zucchini for one cup of shredded carrots. You can also add one cup of semi-sweet chocolate chips to this recipe. Try it a variety of ways and see what you think.

Try this version of zucchini bread and compare it to yours. I’d love to know what you think!

Luscious Zucchini Bread...

  • Servings: 8 Slices Per Loaf
  • Difficulty: Easy
  • Print

INGREDIENTS:

1/2 cup plus 2 Tbs. orange juice

1/2 cup canola oil

1/2 cup unsweetened applesauce

3 eggs, slightly beaten

1 tsp. vanilla bean caviar (the caviar from one pod)

2 tsp. vanilla

3 cups flour

2 cups sugar

5 tsp. ground cinnamon

1 1/4 tsp. baking powder (1 tsp. for high altitude)

1/2 tsp. baking soda  (1/4 high altitude)

1 tsp. salt

2 cups shredded zucchini, lightly packed

1 cup chopped pecans, optional

Cooking spray

DIRECTIONS:

Preheat oven to 350. In a large bowel combine orange juice, oil, applesauce, eggs, vanilla extract and vanilla caviar. In another bowl combine flour, sugar, cinnamon, baking powder, baking soda and salt. Mix to combine. Fold the wet ingredients into the dry ingredients. Stir to combine. Do not over mix.

Fold in the zucchini and pecans.

Pour the mixture into two 8 x 4 inch loaf pan coating with cooking spray. Check loaves at 45 minutes. Depending on your oven they may need to bake anywhere from 45 – 55 minutes. Loaves are done when a toothpick inserted in the center of a loaf comes out clean.

Let cool  in the loaf pan for 15 minutes. Remove loaves from the pans and let cool on a wire rack.

Zucchini Bread Batter


No Bake Pizza Bites…

It’s been really hot here recently, averaging temperatures in the upper eighties and lower nineties. The one good thing about living in this part of the country is there is relatively little humidity so even though the days are hot the mornings and evenings tend to be gorgeous. But even with that I find that often I look for ways to make things that won’t heat up the kitchen or the house.

As I’ve mentioned in previous blogs, we have a group of residents that get together every Thursday for happy hour. We meet in our outdoor pavilion, bring what we want to drink and many people bring appetizers or finger food. We drink, eat, talk and have a grand old time.

I try to bring some kind of new nibble for people to enjoy each week. I have to admit there are times when I just don’t have the energy to make something and so I’ll buy some chips and salsa or something like that. But there are also times I like to try something new and see if it works so that I can blog about it. This particular recipe came into my mind out of the blue and it went over very very well.

With weather this hot you really don’t want to be eating anything too hot, especially when you’re eating outdoors. It just doesn’t seem to work. But even in the hot sticky weather you still get a taste for something like pizza. You just don’t want to heat up your house making it. So how to you get around that?

Most people like cold pizza, right? It’s the combination of flavors and not necessarily the melting cheese that makes a pizza special. So I put together an appetizer that brings together all the flavors of pizza without being hot and all on a bite size cracker. I knew I succeeded when a little girl ate one of them and said, “Wow, pizza!”

And making these couldn’t be any easier. So let’s talk no bake pizza bites…

Lesson Learned 1 – Go ahead and be creative with this recipe: I had some leftover pepperoni in the refrigerator that I wanted to use. The rest I put together as I walked through the specialty cheese section of my grocery store. You can vary the meat (or not use it at all), the cheese, the crackers – whatever you want. You’ll still come up with a great little appetizer.

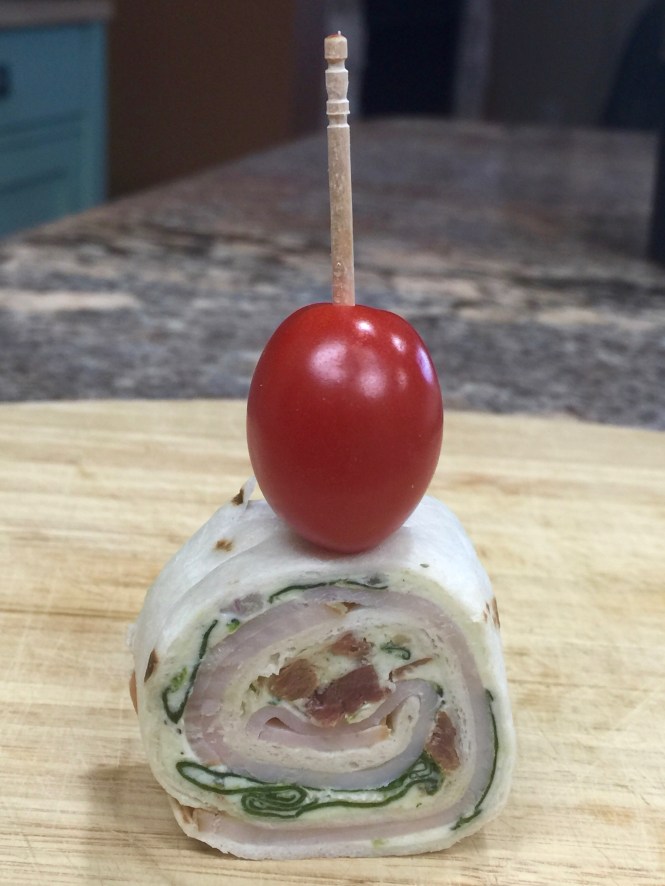
Lesson Learned 2 – I used pre-made roasted tomatoes: In the specialty cheese section I found some roasted tomatoes marinated in garlic olive oil. Bingo! The package had about 7 ounces of roasted tomatoes that I diced up and put on top of the pepperoni. It was fabulous. If you can’t find them pre-made you can roast tomatoes yourself and then let them marinate in some olive oil. You’ll still get the same result. But this was a whole lot less work and gave the bites a great flavor!

Lesson Learned 3 – I used a specialty feta cheese: You can certainly use plain feta cheese but I found a roasted pepper and basil feta cheese and I decided to use that. What I liked about this choice was that it added the flavor of basil to the appetizer without having to use basil leaves. You could certainly use basil leaves as well. If you do I would put the basil leaf on top of the pepperoni and then put the tomatoes on top of that. That way the leaf is secured. The great thing about this appetizer is that you can be creative and it will still be fabulous!

Lesson Learned 4 – Right before serving drizzle the bites with some garlic infused olive oil: This is the finishing touch that adds so much. You don’t need a lot, just a slight drizzle over them and the olive oil just adds that special touch that rounds out all the flavors. You can also use the oil that the roasted tomatoes were packed in, but that may not be enough for all the rounds. I had to use both the oil from the tomatoes and some garlic olive oil to drizzle over all the rounds.

And that’s it. Layer the ingredients, drizzle them with some olive oil before serving and watch them disappear. Enjoy!

No Bake Pizza Bites...

  • Servings: Approximately 30 Rounds
  • Difficulty: Easy
  • Print

INGREDIENTS

1 box crackers, preferably round and not overly thin

Pepperoni, pre-packaged or a log you can cut into rounds

1 container of fire roasted tomatoes approx. 7 ounces

Feta cheese (I used a roasted red pepper and basil feta)

Garlic infused olive oil, for drizzling.

DIRECTIONS:

Dice the fire roasted tomatoes into small pieces. Lay out the crackers on a large plate or 9 x 13 baking sheet. Place a slice of pepperoni on each cracker. Top the pepperoni with some of the fire roasted tomatoes. Crumble the feta cheese and sprinkle pieces over each round.

Right before serving drizzle with oil. You could used the oil that was used to pack the tomatoes. If that is not enough, drizzle the remaining with the garlic infused olive oil.

Cover Each Cracker With A Piece Of Pepperoni

Put Some Diced Roasted Tomatoes Over The Pepperoni

Sprinkle Each Round With Feta

No Bake Pizza Bites


Skewered Italian Appetizer Bites…

Sorry I’m a little off my game this week. I was waylaid by a bug bite that gave me an allergic reaction and I’ve been fighting this itching rash. Needless to say I’ve not been a happy camper. The meds I take for itching make me groggy and so it’s been hard to sit down at my computer and crank out my blog. But I’m thinking I’m on the mend, although still not itch free after almost 5 days. But I have noticed improvement and so that’s what I’m focusing on.

This weeks recipe is so darn simple and great for your backyard parties. In the warmer weather, the last thing you want to do is heat up the kitchen. Dishes that are cooler like potato salad and cole slaw seem to be more in demand. Also finger foods are more popular, especially when eating outdoors. You don’t have to mess around with a lot of utensils, just take the food and pop it in your mouth. Which is exactly what this recipe is all about.

So let’s talk skewered Italian bites…

Lesson Learned 1 – This is a great way to use some of the homemade pesto you’ve made from growing basil: pesto is what adds zip to this recipe and homemade pesto is the best. If you don’t have your favorite go-to pesto recipe feel free to use mine. But pesto gives these morsels just the kick they need.

Some things to keep in mind when dredging the mozzarella balls in pesto – my mozzarella balls were in a small plastic container stored in liquid. I bought a small container that had about 20 balls. I put the balls in a strainer and drained the liquid into another dish (just in case I had some balls leftover, I wanted to store them back in the same liquid). I then drained the balls on a paper towel.

This time I did not have fresh pesto on hand so I bought a small 6 oz. jar of traditional pesto. I spooned half to it into a small wide rimmed bowl and dropped some of the balls in the pesto. I rolled them around with a spoon and then skewered them on my decorative pics. Couldn’t be easier.

Lesson Learned 2 – If you want to serve these standing up versus lying down you will need to cut a flat surface on the bottom of each mozzarella ball: I learned this lesson the hard way. I started assembling the skewers and found that they would not stand straight. The round bottom of the ball prevented them from doing so. I tried pushing the bottom flat but that didn’t seem to work so I started cutting the bottoms off the balls and then figured out that I liked the presentation of the skewers better with the skewers lying on their sides. So I opted to serve them lying on one side versus standing up. There is no right way to serve these, but I found that serving them on their side created quite an impressive looking appetizer as you can see from the picture below…

And that’s it really. As I’ve said many times before sometimes the simplest of recipes are the most impressive. This will be a great recipe to use when you harvest your basil and cherry tomatoes. It’s an easy, pop in your mouth bite that will disappear off your party table in no time.

Skewered Italian Appetizer Bites...

  • Servings: Approx. 20
  • Difficulty: Easy
  • Print

INGREDIENTS:

1 small container of cherry tomatoes

1 – 6 oz. jar of basil pesto (or make your own)

1 – 4 oz. package of sliced pepperoni (you will have some leftovers)

1 – 12 oz. container of mozzarella balls

Garlic infused olive oil

decorative picks for skewers

DIRECTIONS:

Put the basil pesto in a wide rimmed bowl. If using jarred pesto, start with half the jar and add more as needed to the bowl.

Strain the mozzarella balls making sure to save the liquid in case you need to store any leftover balls.  Place a few mozzarella balls in the pesto and roll them around with a spoon until they are covered with pesto (you will need to repeat this process a few times).

Assemble the skewers in the following manner – first skewer the tomatoes. Then add a pepperoni slice to each skewer. Lastly add the basil covered mozzarella ball and plate the skewers.

Store tightly wrapped in the refrigerator for a couple of hours or serve immediately. Drizzle with garlic infused olive oil right before serving.

SaveSave

SaveSave

SaveSave

SaveSave

SaveSave

SaveSave

SaveSave

SaveSave

SaveSave

SaveSave

SaveSave

SaveSave

SaveSave

SaveSave

SaveSave

SaveSave

SaveSave

SaveSave

SaveSave

SaveSave

SaveSave

SaveSave

SaveSave

SaveSave

SaveSave

SaveSave

SaveSave

SaveSave

SaveSave

Shrimp Dip…

Graduation parties and summer cookouts boast of fun and food. And if you’re in the position to be hosting one, you’re probably thinking about what you can do that is delicious but easy to make. That way you can spend more time with your guests and less time in the kitchen.

This recipe fits the bill. It’s a really easy dip that takes no time to make and is loaded with flavor. Serve it with a combination of chips, pretzels and crackers for an appetizer that looks casual but tastes decadent.

So let’s talk shrimp dip…

Lesson Learned 1 – Use LOTS of shrimp: I used a 12 oz. bag of frozen cooked and deveined shrimp. I thawed the shrimp in the refrigerator overnight and then chopped it up into small bite sized pieces. I kept a couple of shrimp to garnish the top of the dip (of course you don’t have to do that) and all the rest went into the dip. My point being this is a shrimp dip – the more shrimp the better.

If you’re lucky like I was you can catch the shrimp on sale. The twelve ounce bag only cost me $7.99 so I got a deal. Keep a look out for sales on the frozen shrimp if you’re looking to keep the cost down on this dip. I already had all the other ingredients in my refrigerator and pantry except the celery so I was able to splurge a little with the shrimp.

Lesson Learned 2 – If your celery stalks still have the green leaves on them use them as well: For this particular recipe all you really need is one medium sized celery stalk chopped. Normally you can buy individual stalks at the grocery store instead of buying a whole head of celery. When I only need a little celery I always try to buy a stalk that has some leaves on it. Those leaves chopped up and put into the dip add additional depth of flavor. So don’t be afraid to use them as well.

Lesson Learned 3 – If you can, make this recipe the day before: Like almost any dish, the more the ingredients are acquainted directly relates to upping the wow factor of the flavor. So it is with this dish. It is such an easy dish to make that it shouldn’t be too difficult to make it the day before and let it sit overnight in the refrigerator. But if you’re in a rush and need something quick, you can serve this the same day and it will still be very good.

The recipe itself is very straightforward so there’s not a lot of lessons learned to share with it. Just follow the directions, use some creativity in your presentation (you can dress it up with a combination of chips, pretzels and crackers) and watch it disappear. This one is a no brainer. Try it and tell me what you think.

Shrimp Dip...

  • Servings: Multiple
  • Difficulty: Easy
  • Print

INGREDIENTS:

1 – 8 oz. package of cream cheese, room temperature

1 – 12 oz. package of frozen cooked and deveined medium sized shrimp, thawed and chopped

1/2 cup mayonnaise

1/4 tsp. garlic fleur de sel (you can substitute garlic salt)

juice of 1/2 lemon

1 lemon slice for garnish, optional

1/4 cup celery, chopped (one medium sized stalk)

1/4 cup scallions, chopped

1/8 tsp. paprika, for garnish, optional (you can also use some sprigs of fresh herbs like thyme)

Crackers, potato chips and/or pretzels for serving

DIRECTIONS:

With an electric mixer, beat the cream cheese until fluffy. Add the mayo, lemon juice and fleur de sel. Mix to thoroughly combine. With a wooden spoon stir in the shrimp, celery and scallions.

Place mixture in a serving dish. Garnish with paprika and a lemon slice or some sprigs of lemon thyme. Serve with pretzels, chips and/or crackers. (If making the day before wait to garnish the dip until you’re ready to serve.)

cut shrimp into small bite sized chunks

serving suggestion with fresh thyme sprigs as garnish


SaveSave

SaveSave

SaveSave

SaveSave

SaveSave

SaveSave

SaveSave

SaveSave

SaveSave

SaveSave

SaveSave

SaveSave

SaveSave

SaveSave

SaveSave

SaveSave

SaveSave

SaveSave

SaveSave

SaveSave

SaveSave

SaveSave

SaveSave

SaveSave

SaveSave

SaveSave

SaveSave

Skillet Irish Soda Bread…

There’s no doubt about it, the recipes that are handed down from generation to generation are the best. And sometimes that’s an impossible task as the old fashioned cooks would simply say, “Oh I just eyeballed what I needed and used a pinch of this and a little of that” leaving you to try to assimilate the exact ingredients to recreate the recipe.

This recipe is one of those handed down gems. A neighbor of mine served it at her St. Patrick’s Day party and the rest is history. I remember looking at all the wonderful things she laid out on her table but only eating the soda bread with some fresh Irish butter. It was heaven. I found out later it was her Mother’s recipe and she had been making this for years!

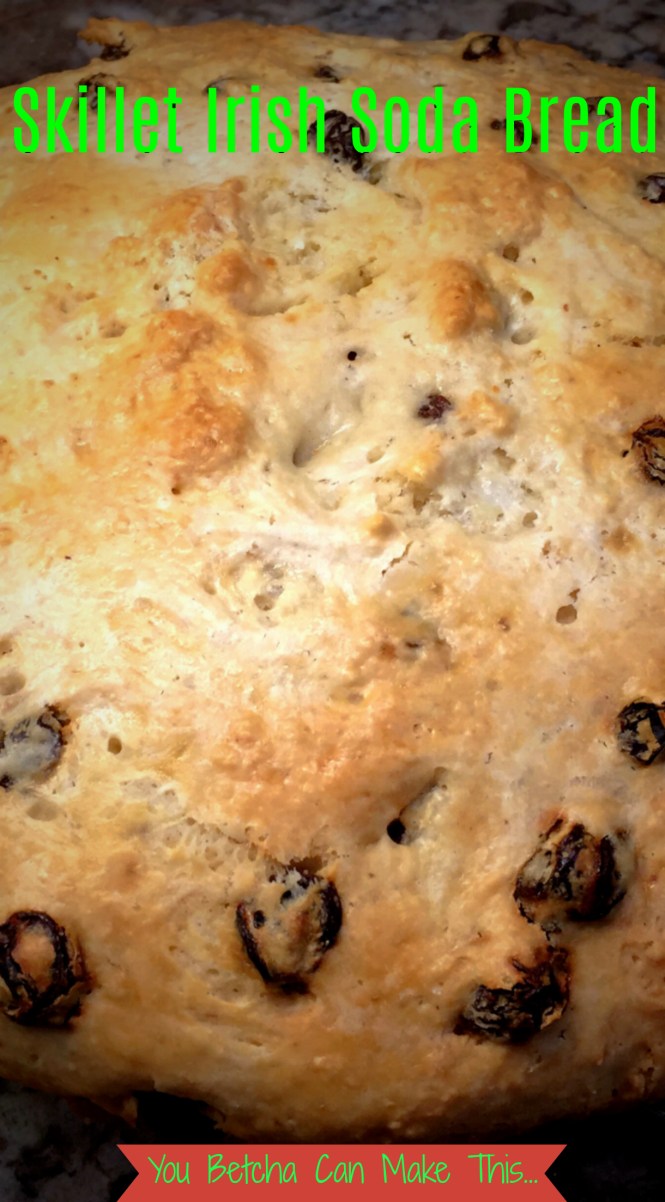
I’ve tasted many iterations of soda bread over the years and, to be honest, most of them were less than stellar. There was only one other time that I can remember having fabulous soda bread. That was when I was working at the Chicago Park District and one of my co-workers, Carol Diver, brought some to work. Carol was Irish through and through with an infectious laugh and a heart as big as all outdoors. And her soda bread was to die for. Unfortunately Carol is not longer with us and I’d never asked her for her soda bread recipe. But from then on, her soda bread was the standard to which I held all others. As time went on none would ever compare, until now.

So this time I made sure to get the recipe and with permission I am sharing it with you. I made it the other night and it was just as fabulous as I remember, moist with just the right amount of sweetness. I hope you enjoy this recipe and make it often.

So let’s talk Irish Soda Bread…

The dough did not reach the sides of a 10 inch skillet

Lesson Learned 1 – The size cast iron skillet you use is important:  The recipe I got said it made two loaves and my neighbor said she used a 10 inch skillet to bake the bread. But once I made the dough and put it in my 10 inch cast iron skillet I knew that couldn’t be the case. The only way there would be enough dough for two loaves is if you used a smaller cast iron skillet – probably an 8 inch skillet. With a 10 inch skillet there is only enough dough for one loaf.

With using a larger skillet it will take longer to cook, approximately 1 1/4 to 1 1/2 hours. If you use a smaller skillet I would begin checking it at 45 minutes. You want a nice gold brown on the top. Once you see that you know the bread is done.

Don’t get me wrong, the bread turned out beautifully and was so delicious as you can see from the pictures in this blog.  I just think the directions I got were for a smaller pan than what I used.

Lesson Learned 2 – Do not use self rising flour in this recipe: The second time I made this I decided to experiment and use self rising flour – BIG MISTAKE! The bread did not rise and the top of it looked like a battle had been fought on it, all lumpy and messy looking. And although I baked it for the correct amount of time, it did not cook through and was gooey inside. So take a tip from me, stick with regular flour and you’ll be just fine.

That’s the only advice I have for making this as the recipe is pretty straightforward. And let me reiterate, this is the best Irish Soda bread I have ever tasted since I had my friend’s, Carol Diver’s, bread all those years ago. I know you will enjoy this one!

Skillet Irish Soda Bread...

  • Servings: 12-14
  • Difficulty: Easy
  • Print

INGREDIENTS:

4 cups all purpose flour

1 cup sugar

1 tsp. salt

1 tsp. baking soda

2 Tbs. cold butter

1 1/2 cup raisins

1 1/2 cup buttermilk (you may need to add a little more)

Shortening, to grease the skillet

DIRECTIONS:

Preheat oven to 325.

Whisk together the flour, sugar salt and baking soda until well combined. Cut in the butter. Add raisins and buttermilk and mix until moist. (You may need to add more buttermilk. I found I needed to add about a 1/4 cup more to get all the ingredients moist).

Lightly grease a cast iron skillet with shortening (use a 10 inch skillet for one large loaf or an 8 inch skillet for two loaves). Transfer dough to the skillet. Brush the top of the dough with a light coating of buttermilk. If desired, cut a cross on the dough.

Bake for 45 minutes for the smaller loaves and 75 minutes for a large loaf. Check the loaves at 45 minutes and 60 minutes respectively to see if you need to add extra time.

Let bread sit in skillet for about 5 minutes after taking it out of the oven. Remove the bread from the skillet and let it cool on a wire rack.

Serve with Irish butter for a delectable treat!

SaveSave

SaveSave

SaveSave

SaveSave

SaveSave

SaveSave

SaveSave

SaveSave

SaveSave

SaveSave

SaveSave

SaveSave

SaveSave

SaveSave

SaveSave

SaveSave

SaveSave

SaveSave

SaveSave

SaveSave

SaveSave

SaveSave

SaveSave

SaveSave

SaveSave

SaveSave

SaveSave

SaveSave

SaveSave

SaveSave

SaveSave

SaveSave

SaveSave

SaveSave

SaveSave

SaveSave

SaveSave

SaveSave

SaveSave

SaveSave

Easy Chocolate Ganache…

My husband has an incurable sweet tooth. The other day he informed me we had nothing sweet in the house to eat and I was not in the mood to whip up something from scratch. I looked in the pantry and found a box of Duncan Hines decadent chocolate cake mix and told him I would make that. Unfortunately I opened my mouth before carefully reading the outside of the box. Staring me right in the face in clear letters on the front of the box were the words “frosting not included”. Now what… Luckily I thought I might have the ingredients for making chocolate ganache (which I did) so I thought ok, now’s the time to tackle your fears and make it. I had not other choice.

I’m not quite sure why I was afraid to make ganache but I always thought it was difficult and tricky. To my surprise it was unbelievably easy. So I thought I would dedicate this blog to a very simple way of making ganache that turns out silky, luscious and ever so decadent looking, not to mention absolutely incredibly delicious.

So let’s talk making chocolate ganache…

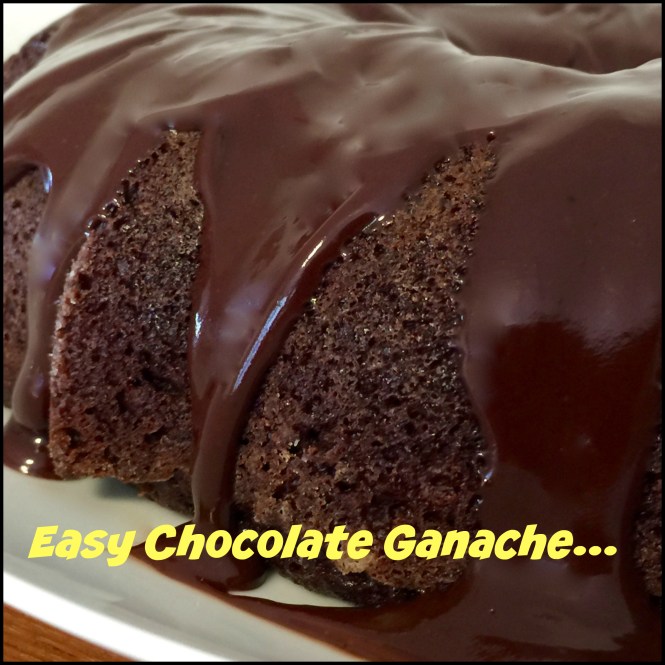
Lesson Learned 1 – There are many ways to make ganache: I am going to share with you the simplest way. The ratio is easy to remember 1:1. Use as many ounces of heavy cream as semi-sweet chocolate. It couldn’t be easier.

Lesson Learned 2 – Cut the chocolate squares into very small pieces: I used a 4 ounce box of Bakers semi-sweet chocolate. With my chef’s knife I cut off pieces and chopped them into small bits. If you decide to go the chip route, I would use the mini semi-sweet chips. You need the hot cream to melt the chocolate and if the pieces are too big that won’t happen.

Chocolate Covered In Hot Heavy Cream

Lesson Learned 2 – You can warm your heavy cream in the microwave: In order to get the desired consistency of the ganache, the cream has to melt the chocolate. So you have to get the cream hot enough to do that but you don’t want to scald the cream. That won’t work either.

Many recipes that I looked at recommended warming the cream on the stove. You can certainly do that especially since it gives you slightly more control in determining when the cream is hot enough. And you can certainly do that with this recipe, although I didn’t. I heated my cream (4 ounces) in the microwave for 45 seconds. After that time I found it still wasn’t hot enough. I heated it for an additional 15 seconds and it was bubbling. I was worried that I’d scalded the cream but I think what happened was the cream had just started to bubble, so I was still ok. The next time I think I’ll just nuke it for 50 seconds straight and go from there.

If you use a larger 1:1 ratio you will need to nuke the cream for a longer period of time. With this you’ll simply have to keep checking it. With 4 ounces I recommend 50 seconds. For larger amounts I would start checking at 1 minute and go from there.

Lesson Learned 3 – Let the chocolate and heavy cream sit for at least 3 minutes: Once you add the hot heavy cream you may be tempted to start whisking the mixture right away. Don’t. The cream has to melt the chocolate in order for you to get the desired consistency of the ganache. Be patient and let the cream do it’s work. I guarantee you it’s worth it.

This recipe makes enough to generously frost one bundt cake, one 9 x 13 sheet cake or one 9 inch round layer cake. So next time you need some frosting try this instead of buying the canned stuff. It looks impressive and it tastes divine!

Easy Chocolate Ganache...

  • Servings: 1 Bundt Cake
  • Difficulty: Easy
  • Print

INGREDIENTS:

4 ounces semi-sweet chocolate squares cut into small pieces

4 ounces heavy cream, heated

DIRECTIONS

Chop up the chocolate into very small pieces. Heat the heavy cream in a microwave safe dish for approximately 50 seconds. Test with your finger to make sure it is sufficiently hot to melt the chocolate. If not, microwave at additional 5 second intervals until cream is hot but not scalded.

Pour cream over chocolate pieces. Let the hot mixture sit for at least 3 minutes. Whisk mixture until cream is incorporated and the chocolate is dark and smooth. Drizzle the chocolate over the top of your bundt cake. Let ganache set for at least 15 minutes before serving.


SaveSave

SaveSave

SaveSave

SaveSave

SaveSave

SaveSave

SaveSave

SaveSave

SaveSave

SaveSave

SaveSave

SaveSave

SaveSave

SaveSave

SaveSave

SaveSave

SaveSave

SaveSave

SaveSave

Home Fries…

I love my cast iron skillet. It only cost me about $20 and it’s one of the best skillets I have. But there’s a reason for that. Cast iron produces even, sustained heat and that’s the best for cooking just about anything. The only drawback to cast iron is it’s so darn heavy. But I just think of it as an upper body workout and move on from there.

This recipe uses the features of a cast iron skillet to produce the tastiest home fries. And making home fries is not all that complicated. The flavor of homemade sure beats the taste of the frozen kind.

So without further adieu, let’s talk home fries…

Lesson Learned 1 – Make sure to cut the potatoes to the correct size: For the purposes of this recipe you need to keep the pieces close in size (approx. 3/4 inch pieces). Here’s a little trick to help you achieve that. Using your chef’s knife cut a thin slice off of one of the longer sides of a peeled potato. Set the potato on the cut side and slice crosswise into even planks. Stack several planks and cut crosswise. Then rotate and cut crosswise again. This will give you evenly sliced potatoes.

Lesson Learned 2 – You can cook the pieces of potatoes two different ways, on the stovetop or in the microwave: (I will include both methods in the recipe printout). I chose to cook them on the stove. The process is not much different than making mashed potatoes. The only difference is you want to monitor the potatoes as they boil to make sure they don’t get overly soft, otherwise they’ll break apart. You want them to hold their shape. I would boil them for about 7-10 minutes and check their consistency. If they are still hard, check every couple of minutes until they are just becoming fork tender.

Lesson Learned 3 – If you choose to boil your potatoes first, let them cool a little in the strainer so they are as dry as possible when you put them in the cast iron skillet: In order to get your potatoes nice and brown you want them to be as free from water as possible. I would boil the potatoes first, strain them and let them sit in the strainer while you saute the onions and garlic. That way most of the moisture will drain off before you put them in the skillet.

Lesson Learned 4 – Once you saute the onions and garlic remove them from the pan and set them aside. The first time I made this recipe I kept them in the cast iron pan while I was browning the potatoes. Big mistake! They didn’t stand up very well through the browning process and wound up getting burned. Once you saute the mixture remove it from the pan and add it back in at the last minute just to get it warmed through again. That way you won’t get browned potatoes and blackened onions and garlic. Lessons learned from the cook who never could…

Lesson Learned 5 – Don’t continuously move the potatoes once they are in the skillet: In order to get the potatoes nice and brown you have to let them sit for a while in the skillet. The whole browning process can take about 20 minutes and you don’t want to be flipping the potatoes continuously during that time. If you want to check to see if they are ready to flip, turn one of the pieces or look on the sides of the pieces to see if the bottoms have started to to turn color. You’ll get a much better result if you are patient during the browning process.

And that’s it, couldn’t be any easier. I like these so much better than the frozen kind. Try them and see if you agree!

Home Fries...

  • Servings: 4
  • Difficulty: Easy
  • Print

INGREDIENTS:

2 large russet potatoes, peeled and sliced into 3/4 inch cubes

2 – 3 Tbs. vegetable oil

1 small-medium size onion, chopped

2 garlic cloves, minced

1 Tbs. fresh chives

Salt and pepper, to taste

DIRECTIONS:

In a high rimmed pot, boil the potatoes until they just fork tender. Drain the potatoes and set aside. (NOTE: you can also microwave the potatoes. Put 1 Tbs. oil, 1/2 tsp. salt and 1/2 tsp. pepper in a covered microwave safe bowl along with the potatoes. Stir. Cook 7-10 minutes stirring occasionally. Drain the potatoes well).

Heat a cast iron skillet over medium heat for about 3-4 minutes. Start with 2 Tbs. of oil (you may or may not need to add more later) added to the skillet and heated until shimmering. Add the onions and cook until lightly browned. Salt and pepper the onions. Add the garlic and cook until fragrant. Remove the mixture from the pan and set aside.

If needed, add the remaining oil to the pan. Add the potatoes and gently pack them into the skillet using the back end of a spatula. Cook, without moving for 7-10 minutes or until they begin to brown.

Flip the potatoes and lightly repack them into the skillet. (check to see if you need to add oil during this process). Continue flipping process until the potatoes are browned on all sides. Add the onions and garlic back to the pan, mix with the potatoes and heat until warmed through.

Season with salt and pepper, garnish with chives and serve immediately.

Potatoes during the browning process


SaveSave

SaveSave

SaveSave

SaveSave

SaveSave

SaveSave

SaveSave

SaveSave

SaveSave

SaveSave

SaveSave

SaveSave

SaveSave

SaveSave

SaveSave

SaveSave

Asparagus Soup…

Ingredients

Last Saturday I visited our local farmers market. I love going there on Saturday mornings. Our famers market has a wide variety of vendors selling vegetables, meats and baked goods. There is also a guy who sharpens knives (I love that) and food and crafts vendors. It’s easy to spend a couple of hours meandering the site, sampling the goodies, listening to live music and going home with in season farm-to-table goodies.

This week the farmers stands were inundated with chives and asparagus. There was asparagus as far as the eye could see. I couldn’t resist buying some (along with some cranberry walnut bread and some cheddar brats). I’ve had a craving for soup lately and thought I’d try my hand at making some asparagus soup. And the rest is history… I could’t believe how easy it was to make but even better than that how delicious it was. I’ll probably head back next Saturday for another batch.

But let’s talk asparagus soup…

Lesson Learned 1 – Learn what parts of the asparagus spears you can use: Quite often you’ll see on television the way to trim asparagus is to bend it and where it breaks off is where you should trim your bunch. I’ve found that sometimes that wastes too much asparagus especially if you’re making soup. I learned early on that even with a very sharp knife, there can be a part of the spear that will very hard to cut – you almost always have to use two hands pressing down on the knife to cut it. That is the part you want to throw out. That still leaves some of the tougher parts of the asparagus, but as long as a knife will go through it without a lot of force you can use it in the soup. Keep in mind that soup is designed to use as much of the asparagus spear as you possibly can so don’t be afraid to use some of the tougher parts of the spear. As long as you can cut through it without a lot of force it will be perfectly fine for the soup.

Lesson Learned 2 – Be careful when using an immersion blender: I recommend using an immersion blender for this recipe. Some recipes have you blend the soup in batches in a regular blender. That’s a lot more work than is actually necessary. But, be careful when you use an immersion blender. If you lift the blade up over the top of the soup you’ll have soup splattered all over the place. (I know, I’ve done this!) Move the blender around slowly in the soup and don’t lift if above the top of the soup. If you have to lift it up higher, turn it off first. Just a little tip to save you a lot of aggravation.

Lesson Learned 3 – You can make this soup and store it: This soup will keep it’s freshness for a couple of days. If you decide not to serve it immediately hold off on stirring in the last tablespoon of butter and lemon juice. I made my soup in the morning, refrigerated it and served it for dinner. Right before I served it I stirred in the butter and lemon juice. It gives the soup that that final finishing touch and freshness.

This recipe is so simple and easy. Most of the work is in the prep of the ingredients. I also like this recipe because it makes a manageable amount of soup, servings for four. That way you don’t have a lot of waste. But if you want more, just double the recipe and it’ll turn out just as good.

This recipe is so good I plan on going to the farmers market again this Saturday and buying more asparagus to make some more soup. It’s so much better than the canned stuff. Enjoy!

Asparagus Soup...

  • Servings: 4
  • Difficulty: Easy
  • Print

INGREDIENTS:

3 Tbs. butter, separated

1 medium sized onion, diced

2 cloves garlic, minced

1 pound fresh asparagus, cut into 1/2 inch slices

2 Tbs. flour

3 cups low sodium chicken broth (you can use vegetable broth as well)

1/4 cup creme fraiche (you can use sour cream)

1/2 lemon, juiced

salt and pepper to taste

DIRECTIONS:

Take the tough bottoms off the asparagus spears. Remove a couple asparagus tips and set aside for garnish. (you can slightly steam them or leave them as is for a bit of crunch). Cut spears into 1/2 inch pieces. Place in a small bowl and set aside.

In a medium size high sided pot melt 2 Tbs. of butter. Add the onions and cook until translucent, approximately 5 minutes. Salt and pepper the onions while cooking.

Add the asparagus pieces to the onions and cook over low/medium heat for five minutes. Salt and pepper the asparagus. Add the garlic and cook until the garlic is fragrant, approximately 1 minute. Sprinkle the flour over the asparagus, stir and cook for about 2 minutes.

Add the chicken stock and bring the mixture to a low boil. Turn down the heat, cover and simmer for 25-30 minutes.

Turn off the heat. Use an immersion blender to blend the asparagus into the soup. Continue until there are no evidence of remaining spears. After a few minutes, if any parts of spears remain remove them – they are probably too tough to be broken down. Add the creme fraiche and stir to thoroughly combine.

At this point you can cool the soup and store it for a couple of days if you like. If you plan to serve it immediately stir in the remaining tablespoon of butter and the juice from the lemon. If you plan on serving it later, warm the soup and at that time and add the butter and lemon juice right before you serve.


SaveSave

SaveSave

SaveSave

SaveSave

SaveSave

SaveSave

SaveSave

SaveSave

SaveSave

SaveSave

Cinnamon Roasted Butternut Squash…

One of my favorite vegetables is butternut squash. It is a versatile vegetable capable of being made in a variety of ways but my favorite is roasted butternut squash (with a close second butternut squash soup).

I stumbled on a version of this recipe a while back and have been making my version regularly ever since. But it dawned on me that I never posted this recipe so I will now. There are only a few ingredients in this recipe but they compliment the squash so perfectly and give a gentle sweetness to its flavor.

So let’s talk cinnamon roasted butternut squash…

Lesson Learned 1 – The size of the squash pieces matters: If you cut the squash too large it will remain hard. Conversely if you cut it too small it will turn into mush. For this particular recipe you want to cut your squash into 3/4 – 1 inch thick pieces. I recommend that you cook the squash at 375 for 30-35 minutes. Cutting the squash into those sized chunks results in the pieces being cooked through without being overly mushy and with a nice caramelization on the outside. Don’t get worried if all your pieces are not exactly the same size. Make them close enough in size as you possibly can.

Lesson Learned 2 – Only use coconut oil in this recipe: If you use olive oil you simply will not get the same flavor. The coconut oil renders a subtle sweetness that, along with the cinnamon, makes the squash taste so good. Now, can you use olive oil if you don’t have coconut oil – of course you can. But I wouldn’t recommend using cinnamon with olive oil. I don’t think the flavors would compliment each other as much.

I’ve been roasting squash for years and my go-to recipe was using a garlic flavored olive oil with some dried thyme – and that’s a great combination as well. But I’ve found when I use coconut it not only enhances the flavor but the squash roasts more evenly, if that makes any sense. When I roasted the squash with olive oil sometimes I would get pieces that did not cook through and were somewhat hard even though the only major change was the oil I used. That never happens with coconut oil. Funny, isn’t it?

Lesson Learned 3 – Be careful how much cinnamon you add: In this recipe it is important for the oil and cinnamon to balance each other out in order to get the correct flavor and sweetness. For that to happen the correct proportions need to be used.

Cinnamon on its own without the benefit of sugar can be quite pungent and not very good tasting. Think about it, when do you ever see cinnamon used without some sort of sweetener? I wouldn’t add any more than a teaspoonful in order the get the correct mixture of both the oil and the cinnamon. If done correctly the combination is heavenly. If not, you’ll wind up throwing the squash out.

Lesson Learned 4 – Don’t crowd the pieces of squash when roasting them: Did you ever see the movie “Julie and Julia” about a woman from New York who blogged about cooking her way through Julia Childs’ cookbook? There is a scene in the movie where Amy Grant, who plays Julie, is cooking mushrooms on the stove and says that Julia noted in her book not to crowd the mushrooms – they won’t brown. Well the same thing applies to the squash. You want the squash to roast so you need to give the pieces room. If you don’t they’ll steam instead of roast and you won’t get the benefit of the wonderful caramelization that so enhances the flavor of the squash.

There could not be a recipe any simpler than this that produces such a flavorful, elegant side dish. I make this at least once a week now and can guarantee that you will make it often once you try it. Enjoy!

Cinnamon Roasted Butternut Squash...

  • Servings: 4
  • Difficulty: Easy
  • Print

INGREDIENTS:

3 cups butternut squash cut into 3/4 – 1 inch pieces

1 Tbs. coconut oil, melted

1 tsp. cinnamon

Salt and pepper to taste

DIRECTIONS:

Preheat oven to 375 degrees. Cover a 9x 13 pan with foil. Set aside.

In a medium sized bowl combine the squash, coconut oil and cinnamon. Combine until all pieces are thoroughly coated.

Transfer the squash to the prepared pan making sure the pieces are not crowded in the pan. Salt and pepper to taste. (I’d go easy on both – you could always add more when you serve).

Roast for 30-35 minutes turning over the pieces of squash at the half way point. Serve.

Squash & Cinnamon

Thoroughly Combine Squash, Coconut Oil & Cinnamon

Don’t Crowd The Squash In The Pan


SaveSave

SaveSave

SaveSave

SaveSave

SaveSave

SaveSave

SaveSave

SaveSave

SaveSave

SaveSave

SaveSave

SaveSave

SaveSave

SaveSave

SaveSave

SaveSave

SaveSave

SaveSave

Salmon Casserole For Two…

No lie, my first taste of this casserole all I could say was “Oh My God”! It was unreal how good it was. My husband, who is a little less dramatic, said, “This is very good” which is high praise from him.

Over the years we’ve been eating more and more fish and so every once in a while I like to try to shake things up with my fish recipes. Well, I hit the jackpot this time. This is one of my best recipes ever and I don’t even hesitate to say that the non-fish lover in your home will like this as well. It’s a very versatile dish and can be amended in a variety of ways but for now I’ll share what I did and talk more about versatility in lessons learned.

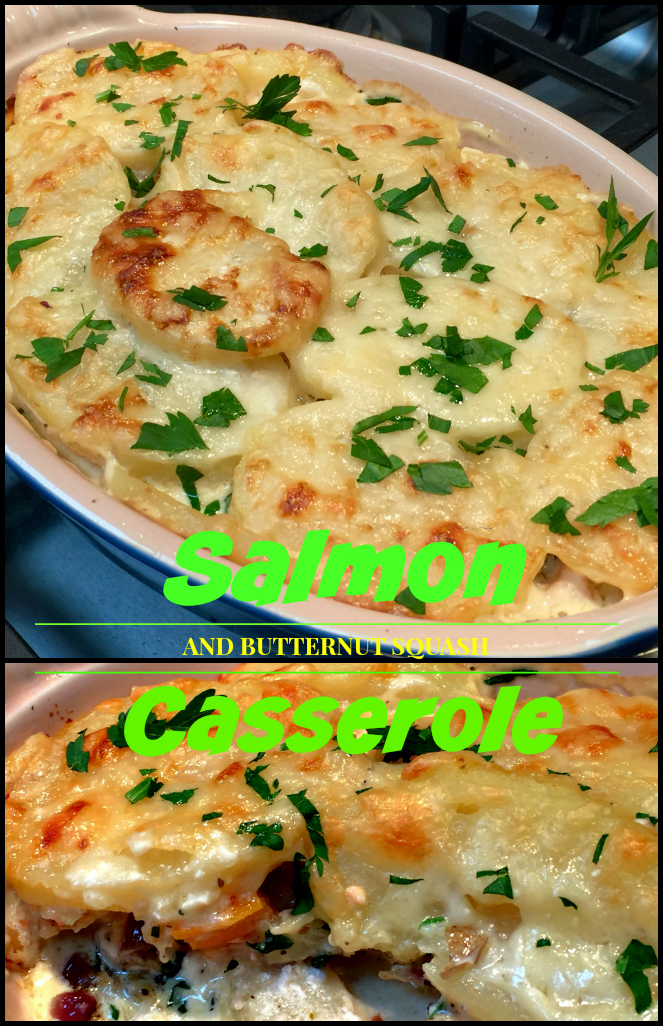
One more note… from time to time I will also focus on making recipes for two. It’s just my husband and I that I cook for now unless we are having a party and sometimes I find if I make too much we either throw stuff out or eat leftovers. And some recipes are more conducive to leftovers than others. These days it is hard to cook for two since grocery stores seem to sell bigger portions. But I found this particular recipe can be adapted in many ways and one of them is the amount you make. So I am writing this recipe for two people but keep in mind you can increase the ingredients proportionally  to serve more.

So let’s talk salmon casserole…

(NOTE: All meals pictured in this video can be found in the recipe index on this site)

Lesson learned 1 – Choose your salmon wisely: I’ve found that the salmon filets you buy at the grocery store can vary in thickness. For this recipe you’re going to want to get the thickest piece you can find. Normally what you’ll see is a piece that is about one inch thick at its widest part. Since this cooks for about 35-40 minutes you’re going to want to have a thicker piece so the salmon doesn’t dry out.

Most if not all prepackaged salmon pieces still have the skin on. You’ll need to remove that as well. I cut the salmon into approximately one inch chunks. They turned out perfectly. So keep in mind the thicker the piece the better. But don’t be afraid to also use the thinner part of your salmon filet. Because it is cooked in cream the salmon does retain its moistness.

I only used an 8 ounce salmon filet. Normally that is about enough for both of us. If you want a little more in your casserole, don’t be afraid to add it.

Lesson Learned 2 – Adapting this recipe: I originally wanted to use some spinach in this recipe but didn’t have it on hand and didn’t feel like going to the grocery store to buy some. But I did have some flat leaf parsley and so I used that. If you use spinach just saute it with the onions and only use a couple of handfuls. The spinach should act as the accompaniment to the recipe and shouldn’t overpower it. The same applies to flat leaf parsley. I only used a little more than a tablespoon (and of course I used some for garnish), just enough to enhance the flavor.

I also added butternut squash. The key to using that is to make sure you cut the pieces small, otherwise they won’t cook. I cut mine into about 1/8 inch cubes. But even cutting it that small a couple of pieces turned out a little more al dente than I would have liked but all the rest were perfect.

You can easily add peas to this, or carrots. If you add carrots I suggest you precook them until they start getting soft. You can do that while sauteing the onions. If you want to add cauliflower then I would steam them until they start turning soft. Or you can simply add a frozen vegetable medley and it should cook through during that time period. I prefer adding fresh vegetables but it can work either way.

Lesson Learned 3 – Those tricky potatoes: I don’t know about you but, for me, potatoes are tricky when using them in a casserole, specifically sliced potatoes. I’ve experienced many instances where they were hard and not cooked through. This time they turned out perfectly. This is what I did. I used two medium sized yukon gold potatoes and boiled them with their skins on until I could easily stick a fork in them. Then I put them in a colander and let them cool. It is important to let them cool. If you try to cut them when they’re hot they’ll fall apart. Once they cool you can easily peel and slice them. Can you leave the peel on? Of course you can. My husband prefers them with the peel off. I sliced potatoes into half inch thick rounds and they were delicious. One of the first things my husband said when he took is first bite was, “the potatoes are good”. Success!!

You can boil your potatoes early in the day or even the night before and leave them with the skins on in the refrigerator until you’re ready to use them. It doesn’t have to be a big deal or overly time consuming.

Lesson Learned 4 – The seasoning is so important: This recipe doesn’t have a lot of ingredients so the seasoning is very important. Once again this part lends to the adaptability of this recipe. Once you layer the fish and squash make sure you salt and pepper them. Once you add the onions and parsley then sprinkle your fish seasoning on top. You can use any type of seasoning that works well with fish. I used a tuscan garlic seasoning blend that includes onion, garlic, red bell pepper and lemon peel. I use this seasoning a lot when I bake salmon filets so I knew it would work well with the salmon. Just be careful not to overdo the seasoning. About a quarter of a teaspoon should do the trick, at least for the first time you make this dish. You can adjust as you fine tune your dish.

I was so pleased with how this recipe turned out and will definitely make it again. Try it and and let me know what you think.

Salmon Casserole For Two...

  • Servings: 2
  • Difficulty: Easy
  • Print

INGREDIENTS

2 medium sized yukon gold potatoes, pre-boiled

1 Tbs. garlic infused olive oil

1/2 red onion, diced

1 generous Tbs. flat leaf parsley, minced

1 Tbs. flour

1 thick 6-8 ounce salmon filet, cubed

1 cup butternut squash, cubed small

1/4 tsp. tuscan garlic seasoning

3/4 cup heavy cream

1 cup shredded gruyere

kosher salt

freshly cracked pepper

olive oil cooking spray

DIRECTIONS:

Preheat oven to 375 degrees. Saute the onions in olive oil for about 5 minutes. Add the flat leaf parsley and cook for another minute. Stir in the flour and cook for 1 – 2 minutes. Set the mixture aside.

Slice the potatoes into 1/2 inch rounds. Spray a 1 quart casserole dish with cooking spray. Put a layer of potatoes on the bottom of the dish. Put the salmon and squash on top of the potato layer. Put the onion/parsley mixture on top of the salmon and squash. Season with salt, pepper and tuscan garlic seasoning.

Put another layer of potato rounds on top. Pour the cream over the top of the potatoes. Sprinkle the top with the gruyere cheese.

Bake for 35-40 minutes until golden and bubbly.

Ready To Go Into The Oven


SaveSave

SaveSave

SaveSave

SaveSave

SaveSave

SaveSave

SaveSave

SaveSave

SaveSave

SaveSave

SaveSave

SaveSave

SaveSave

SaveSave

SaveSaveSaveSaveSaveSave

SaveSave

SaveSave

SaveSaveSaveSave

SaveSave

SaveSave

SaveSave

SaveSave

SaveSave

SaveSave

SaveSave

SaveSave

SaveSave

Mini Cherry Cheese Danishes…

This recipe was born out of leftovers I had from making my Chocolate Cherry Cream Cheese Cake. I still had some of the cream cheese mixture and cherry pie filling leftover and really didn’t want to just throw them out. I searched online to see if I could get some ideas and found something similar to this and thought, I’ll make some mini cheese danishes.

Apparently a lot of people are using refrigerated dough to makes these types of recipes. I was surprised to find crescent dough “rounds”. I’d never seen them before. I was thinking I might have to take the traditional crescent dough and pinch the seams in order to get the rounds I needed. I was delighted that I did not have to do that work, that it was already done for me.

So let’s talk mini cherry cheese danishes…

Lesson Learned 1 – Working with the refrigerator dough: Using this kind of dough is very convenient but you do have to work it a little bit. I cut the pieces along the pre-perforated edges as best I could (I wound up with 9 rounds and  I should have only had 8 if I followed the perforations exactly – oh well…) and  rolled each piece into a ball. I flattened each piece with my hand and then used my thumbs to create a crater inside the dough. The crater is important because that’s where you put the cream cheese and cherries. Making the crater as deep as possible helps to prevent the cherries from falling off. But don’t worry, if they do once you pull them out of the oven just use a small spoon to push them back on top. Once they cool they will stay put.

Lesson Learned 2 – The cream cheese filling: This recipe was inspired by the cream cheese filling and canned cherries I had left over from making a Chocolate Cherry Cream Cheese Cake. After I made the cake I had enough filling and cherries left over that I really didn’t want to just throw out. This recipe is designed for that type of leftover. You can make the filling for this recipe versus using leftovers, and I will include the the recipe for the filling I used, but any type of cream cheese filling will do. Plus if you make the filling from scratch you will definitely have too much filling. There have been many times I’ve had filling like this left over and I just trashed it. But even if I didn’t have any leftover canned cherries, another type of fruit could be substituted, like left over apple sauce or apple pie filling. This recipe is a very easy way to use your baking leftovers.

Lesson Learned 3 – The Glaze: As I’ve shared before the formula for glaze is quite simple – a cup of confectioners sugar and 1 – 2 tbs. of liquid (water, milk, heavy cream) and a little flavoring like an extract, juice, and/or zest. For this recipe I used 1/8 tsp. of almond extract and the glaze was perfect.

My husband really liked these tasty little bites. Cover them with plastic wrap or put them in an air tight container and they’ll stay fresh for 3 days, if they even last that long. I know mine didn’t. Enjoy!

Mini Cherry Cream Cheese Danishes

  • Servings: 9
  • Difficulty: Easy
  • Print

INGREDIENTS

1 can of crescent rounds, I used Pillsbury

Leftover cream cheese filling (note recipe below was the filling I used but if made from scratch is too much for this recipe)


2 – 8oz. packages cream cheese, softened

1/2 cup + 2 Tbsp. sugar

1 tsp. vanilla extract

3 Tbs. flour

1 egg, room temperature


Leftover fruit  – I used leftover canned cherry pie filling

GLAZE:

I cup confectioners sugar

1 – 2 tsp milk

1/8 tsp almond extract

DIRECTIONS:

Preheat oven to 375. Line a 9 x 13 pan with parchment paper and set aside.

Open the can of refrigerator dough and cut the dough rounds using the perforations as a guide. Roll each into a ball. Flatten each ball with the palm of your hands and create a crater in the center of each with your thumbs.

Place a half teaspoon of cream cheese filling and 2-3 cherries inside each crater.

Bake for 10 – 12 minutes.

Remove each danish onto a wire rack and let cool. If any cherries have fallen off during the baking process, spoon them back on top before placing on the wire rack.

Once cooled, make the glaze and drizzle over the danishes. Serve or place in an air tight container. Danishes will stay fresh for approximately 3 days.

Ready To Go Into The Oven

SaveSave

SaveSave

SaveSave

SaveSave

SaveSave

SaveSave

SaveSave

SaveSave

SaveSave

SaveSave

SaveSave

SaveSave

SaveSave

SaveSave

SaveSave

SaveSave

SaveSave

SaveSave