Bruschetta Chicken…

Lately I’ve  been trying to reduce my carb consumption and so I’ve been experimenting with recipes that do so. And, if you’ve been following my blog for any amount of time, you know that I am a chicken lover. I could eat chicken seven days a week. So when I came across the idea for this recipe I thought it was a win-win!

This recipe couldn’t be any easier to make and it’s as flavorful as it looks. I am writing this recipe for two people but you can easily double it for a family of four. Serve it with spinach salad and, if you want to add carbs, some crusty bread and you’ll have a delicious meal.

So let’s talk Bruschetta Chicken…

Lesson Learned 1 – mix the marinade first: You’re going to want the chicken to sit in the marinade for at least a few minutes. You can even make the marinade ahead of time and let the chicken marinate for about an hour in the refrigerator. Remove the chicken from the marinade and place it on a surface that has been sprayed with an olive oil cooking spray. Make sure you don’t put any of the marinade liquid on the baking sheet. It will burn if you do so.

Chicken Marinade

Lesson Learned 2 – Once you put the chicken in the oven, assemble the ingredients for the bruschetta topping. That way it will be ready when it’s time to put it on the chicken. The bruschetta mixture will only be in the oven for about 5 minutes, just enough time to warm through the tomatoes. Make sure you finely dice the onions and garlic since they’ll be in the oven for a very short period of time.

Bruschetta Mixture

Not any additional wisdom to share on this one because it’s so easy to make. I have to say I really enjoyed this recipe and will definitely serve it again. I hope you enjoy it as much as I did.

Bruschetta Chicken...

  • Servings: 2
  • Difficulty: Easy
  • Print

INGREDIENTS:

2 boneless skinless chicken breasts, about 6 ounces each

4 Tbs. olive oil

4 Tbs. white balsamic vinegar

2 cloves garlic, finely minced

1 tsp. Italian seasoning

1/2 tsp. salt

Shredded mozzarella

Bruschetta Topping:

4 compari tomatoes, halved (you can substitute cherry tomatoes, using about 6-8 of them)

2 cloves garlic, finely minced

1/2 small red onion, finely minced

1 tsp. white balsamic vinegar

1 tsp. olive oil

1/4 cup chopped fresh basil

1/2 tsp. salt

DIRECTIONS:

You can make the marinade for the chicken ahead of time and let the chicken marinate for an hour in the refrigerator. If you don’t have the time, mix together all of the ingredients for the marinade, place the marinade in a plastic bag along with the chicken. Then start preheating your oven to 375 and allow the chicken to marinate until the oven reaches the desired temperature.

Remove the chicken from the marinade and place the breasts on a high rimmed baking sheet covered with foil and sprayed with cooking spray. Cook the chicken for 25 minutes (the internal temperature should be close to 165).

While the chicken is baking mix together all of the ingredients for the bruschetta topping. Set aside.

Remove the chicken from the oven and top with mozzarella (as much as you want). Pour the bruschetta mixture on top of the mozzarella and place the chicken back in the oven for about 4-5 minutes, until the tomatoes are warmed through.

Serve with desired sides.

To Meal Kit Or Not To Meal Kit… (Chicken Marsala With Broccoli And Mushrooms)

We are more and more becoming a society of extreme convenience – one click Amazon shopping, car vending machines, online ride booking, online grocery shopping and of course to go along with that the ever popular meal kits. You see meal kits advertised a lot online and now the grocery stores have thrown their hats into ring to grab a corner of that market. Personally I suggest trying one from the grocery store so that you can get a feel for them without being locked in to some sort of package deal and discover at the onset that you are not a fan and have a full month of  meal kits to plow through.

Meal kits have their benefits. For me since my life has been anything but normal these past few months meal kits helped me force myself not to eat fast food or meals loaded with carbs. So when I finally saw one in the grocery store I decided to try it. I realize I normally post recipes but since meal kits give you just about everything you need to prepare a specific meal (things not included are basically salt, pepper, olive oil…) I decided to write a review of a meal kit I tried and the lessons I learned in the process.

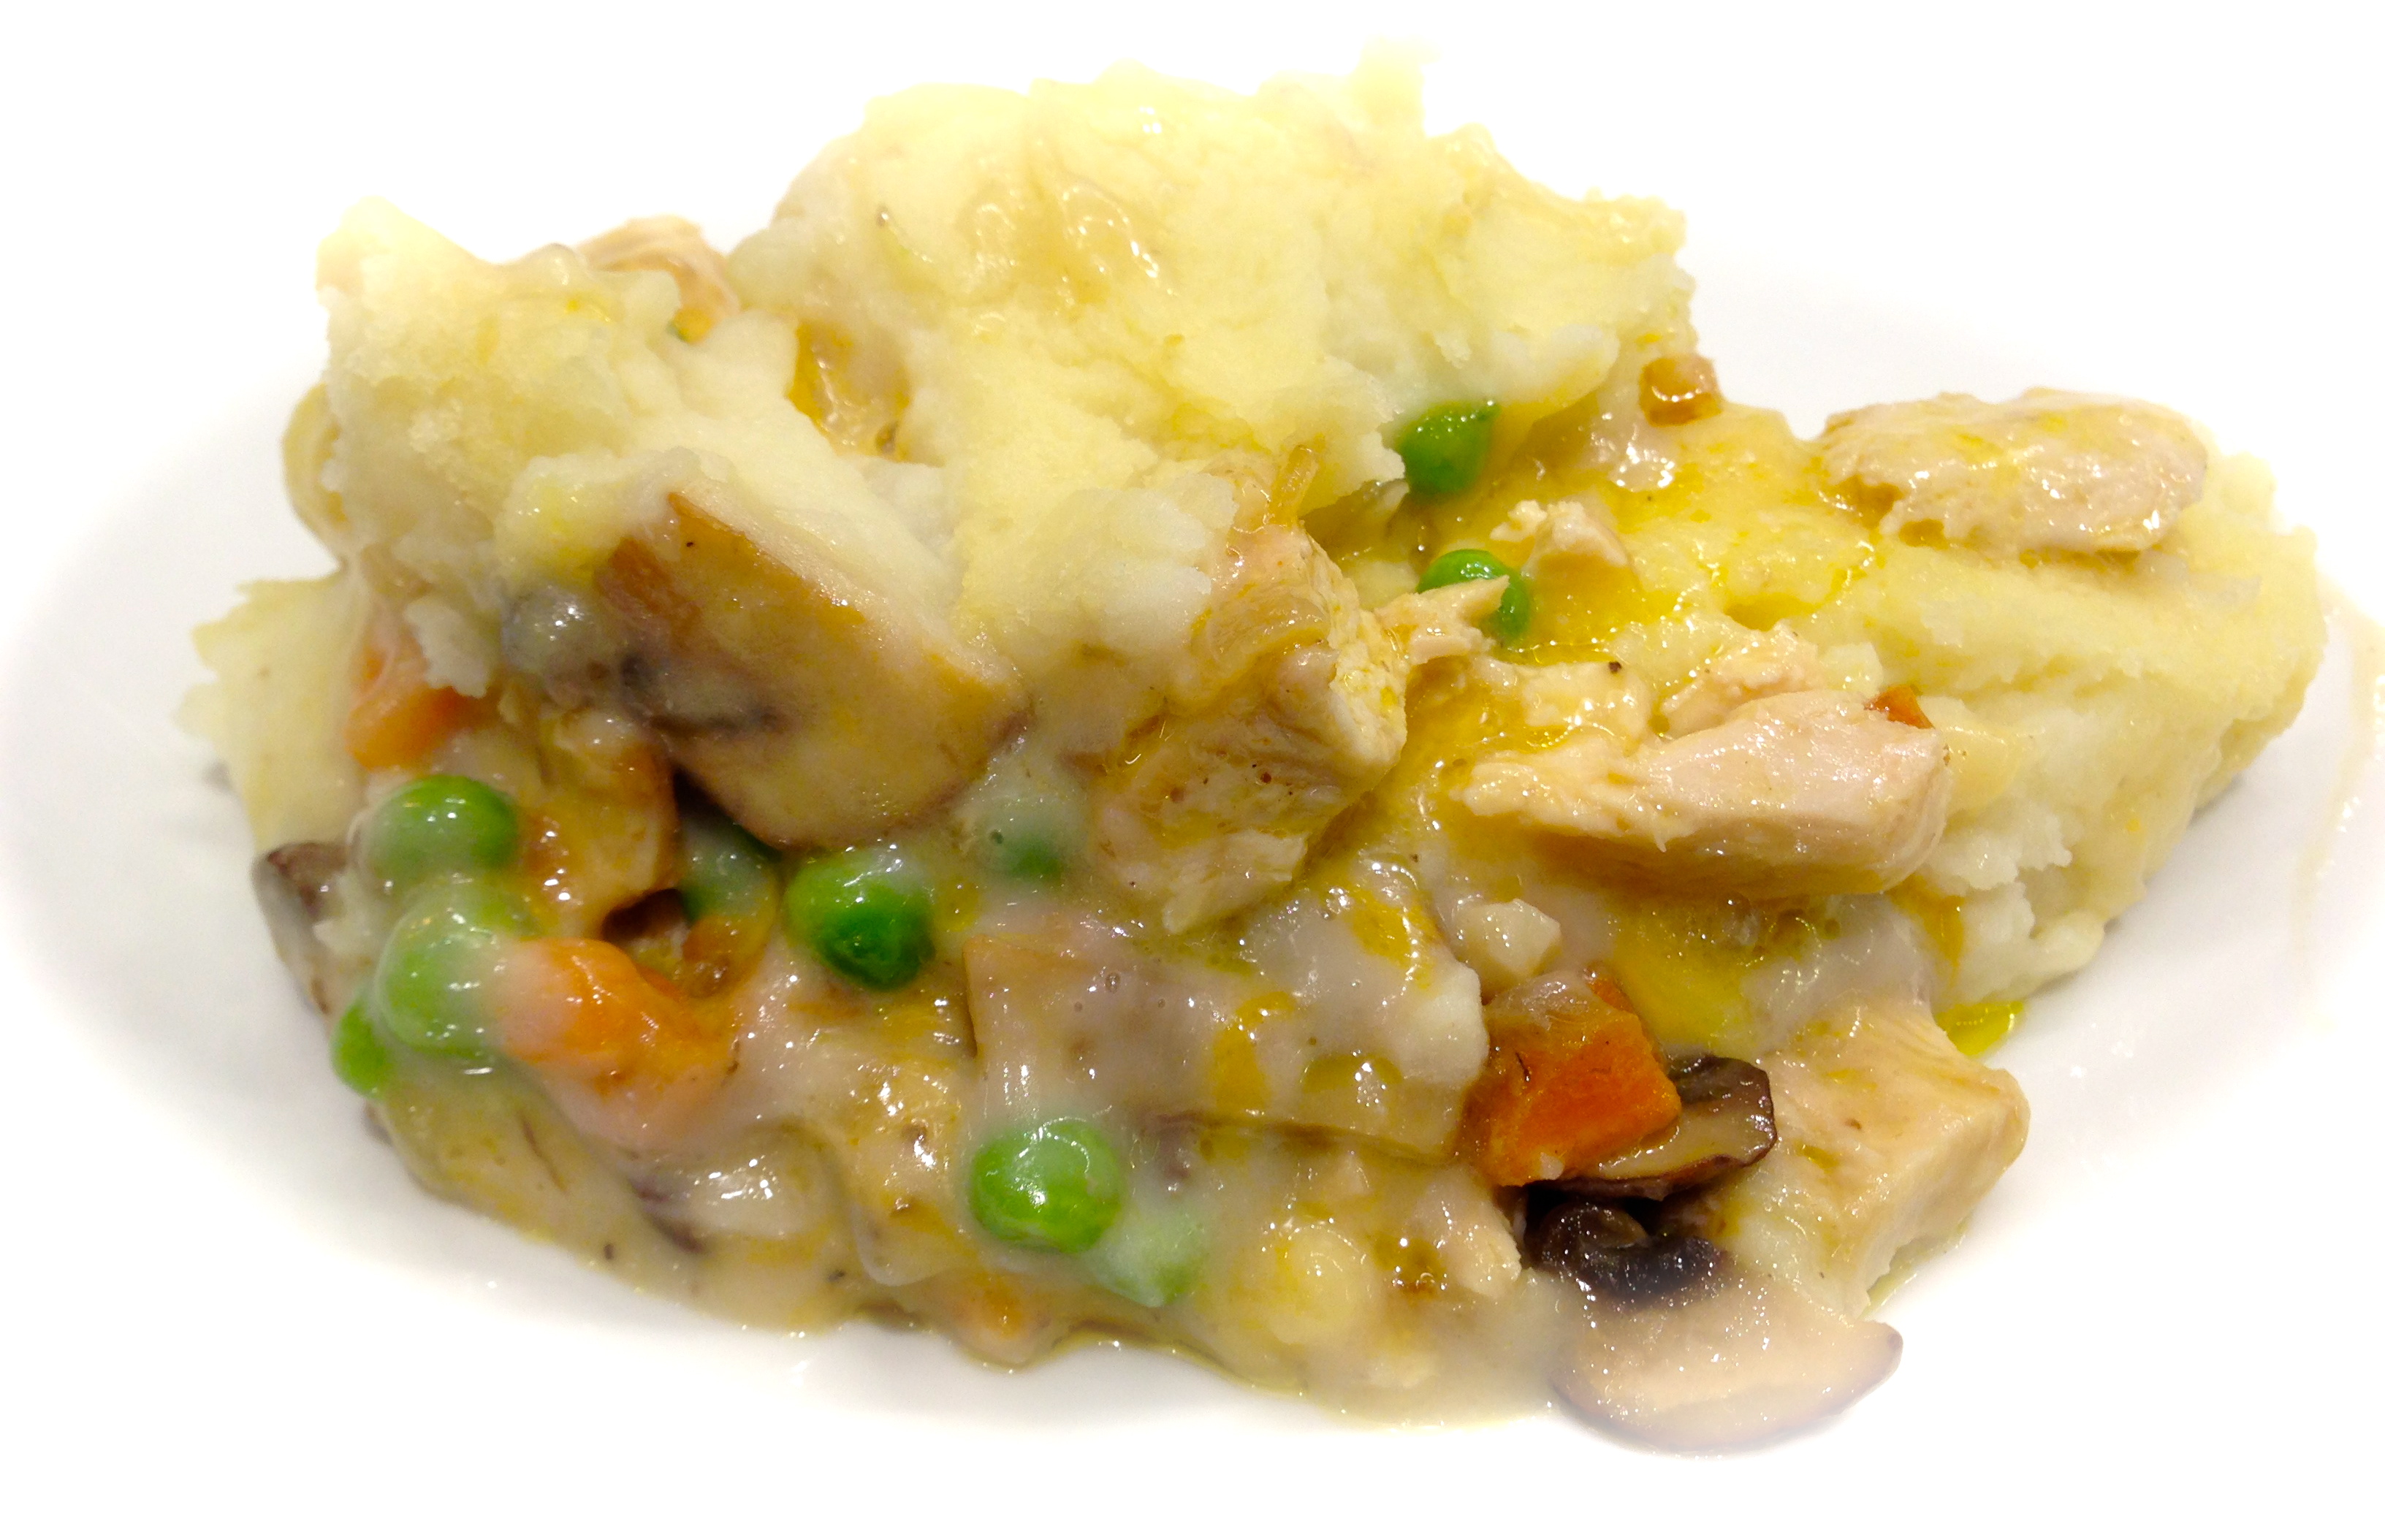
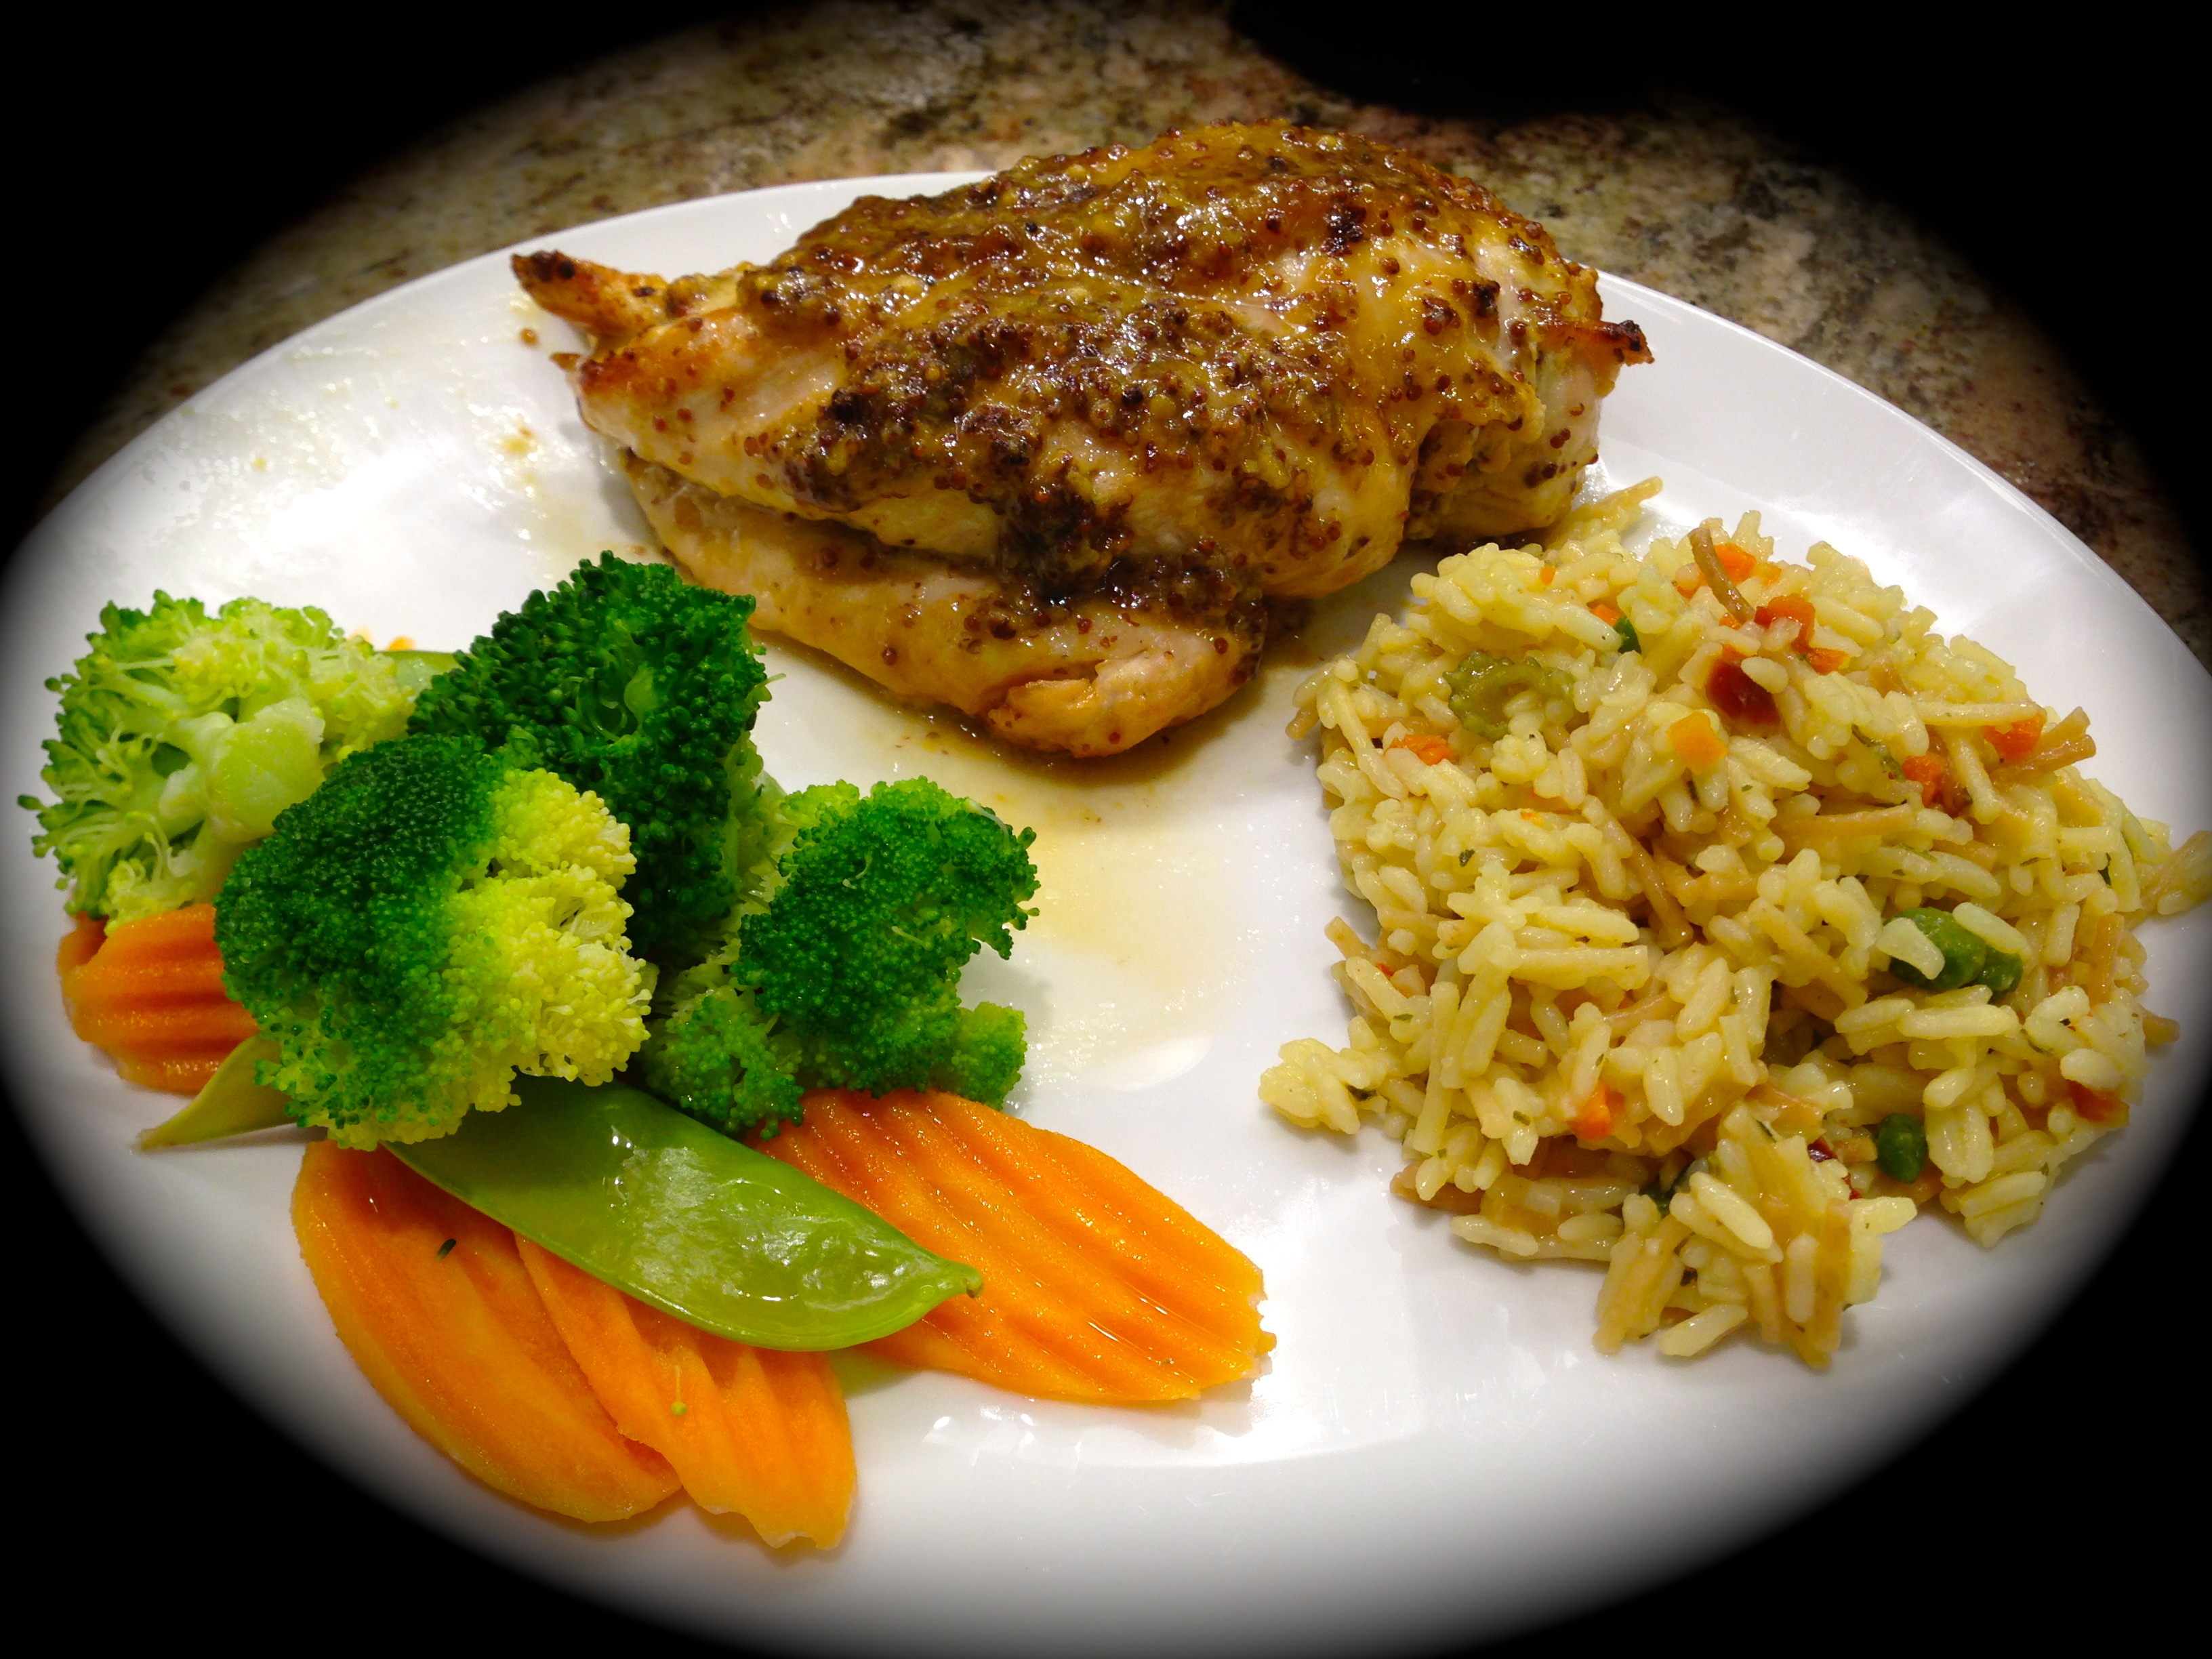
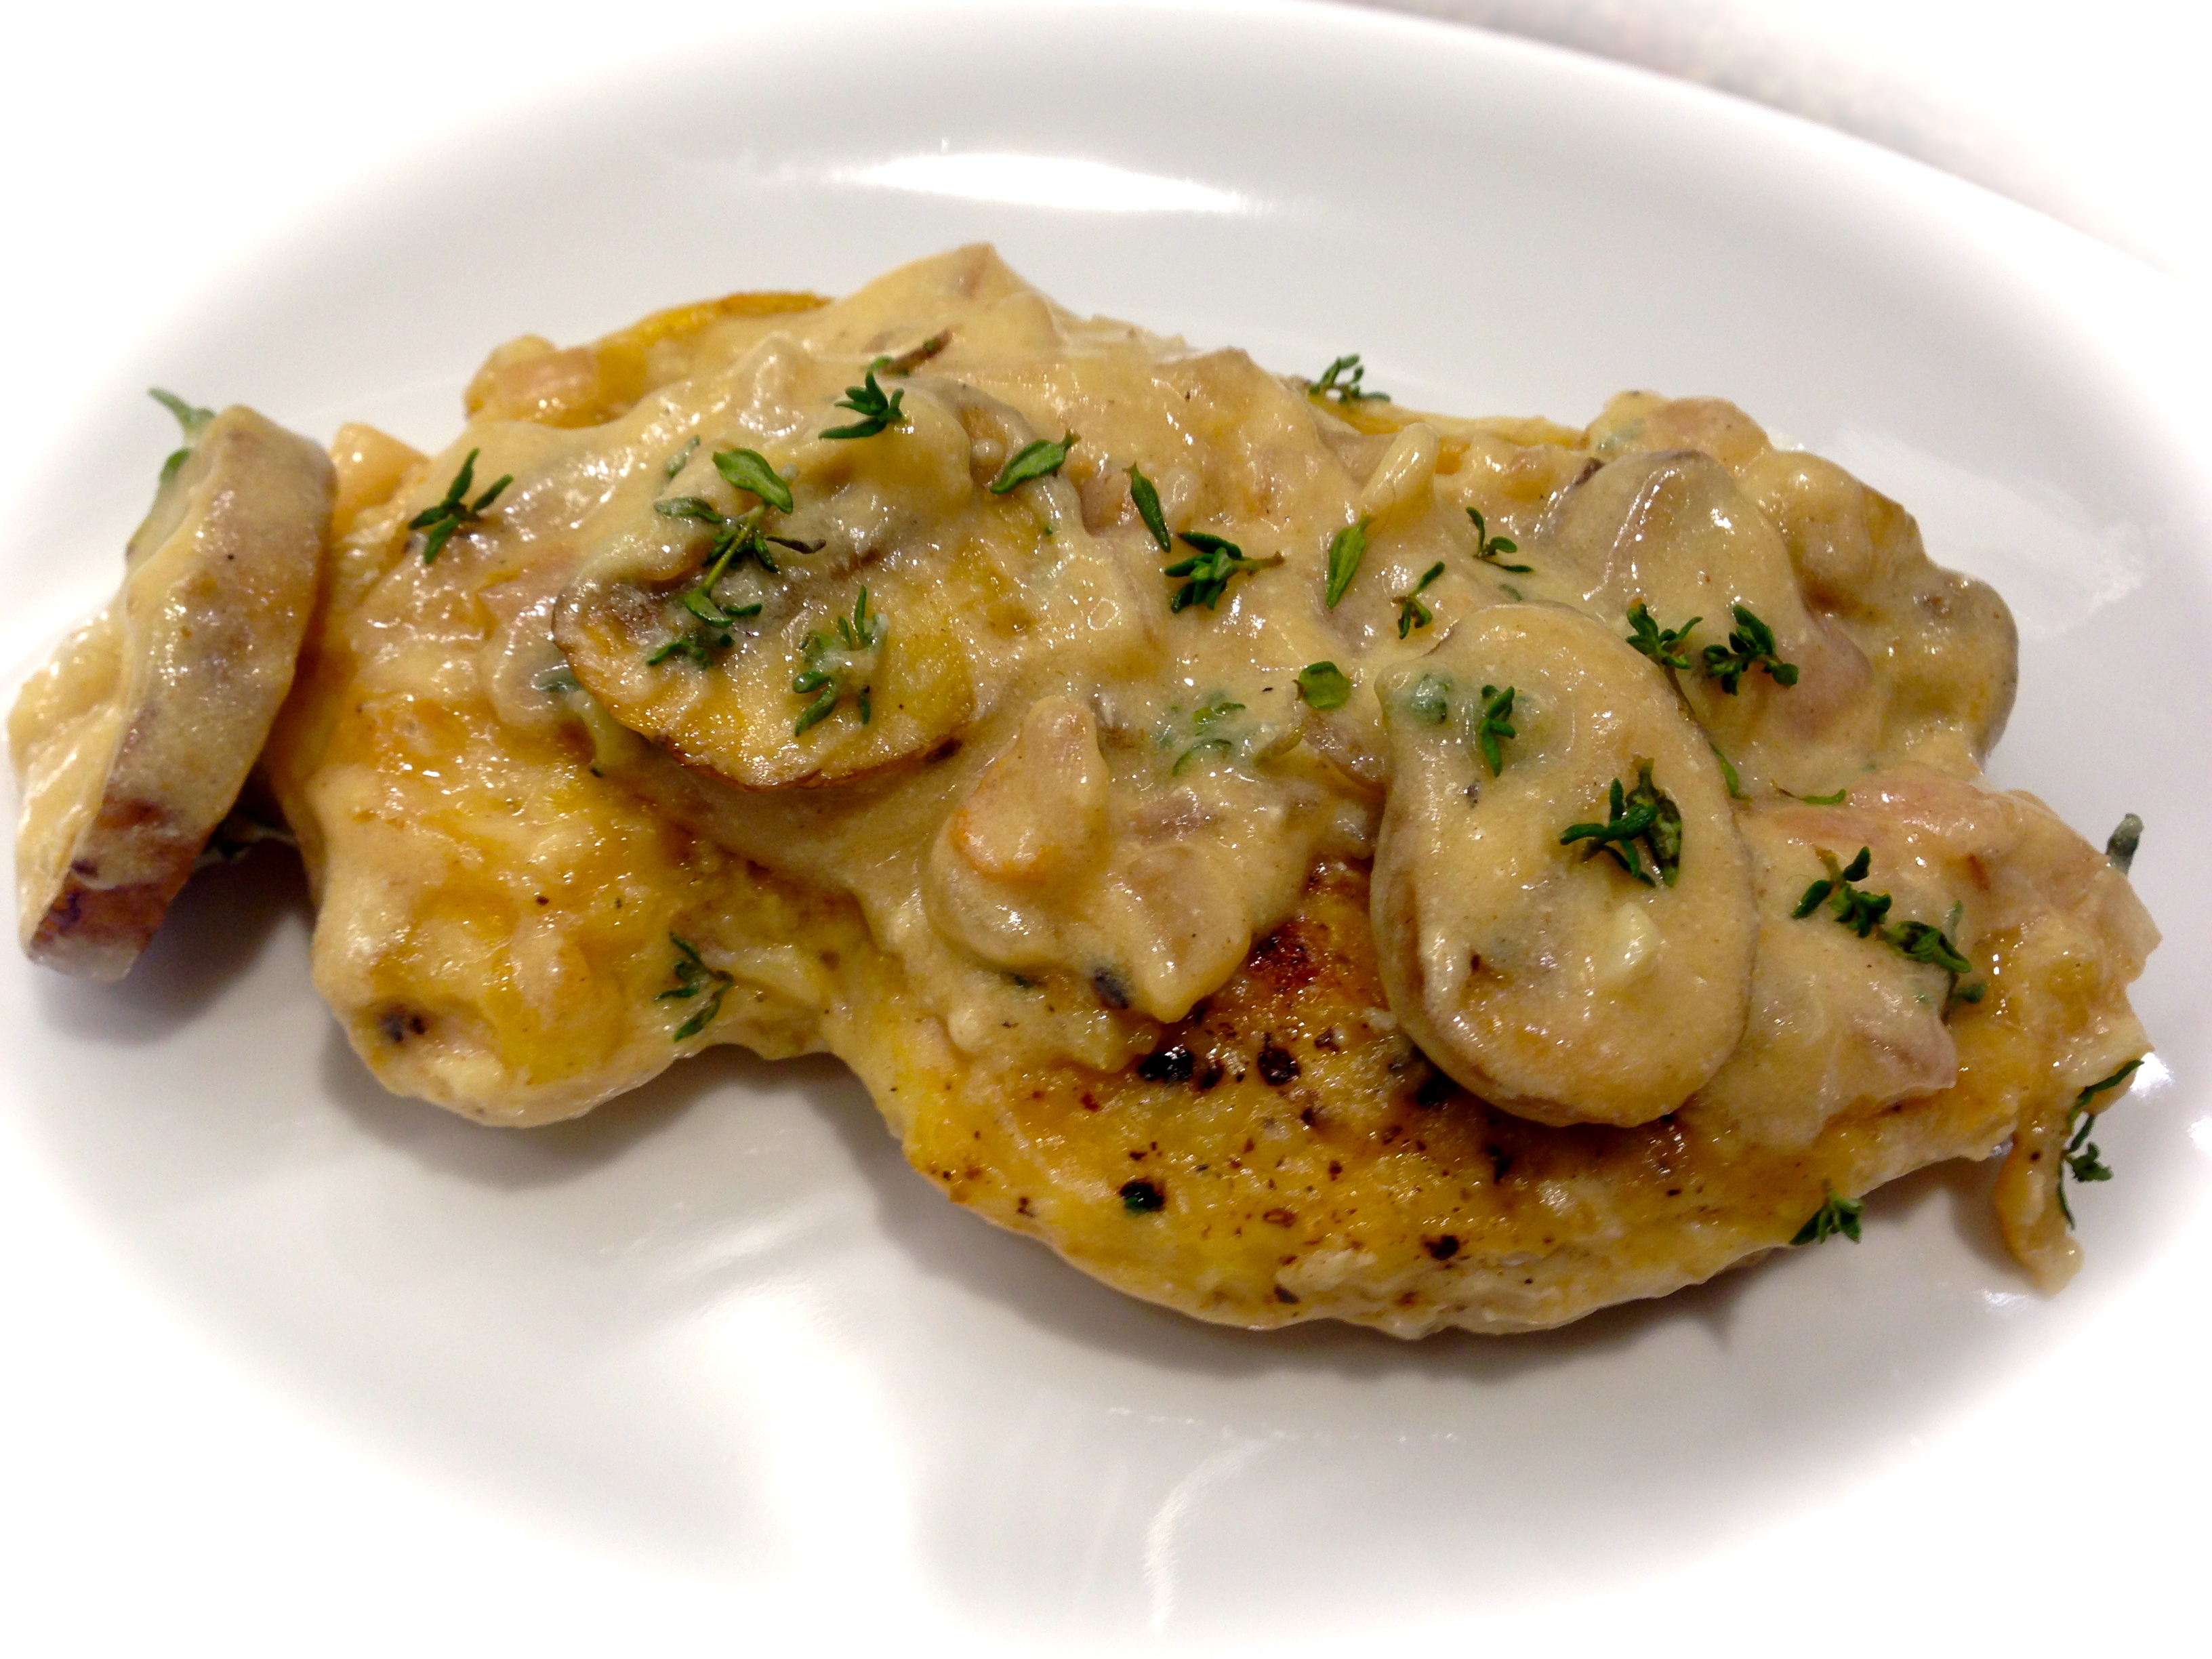
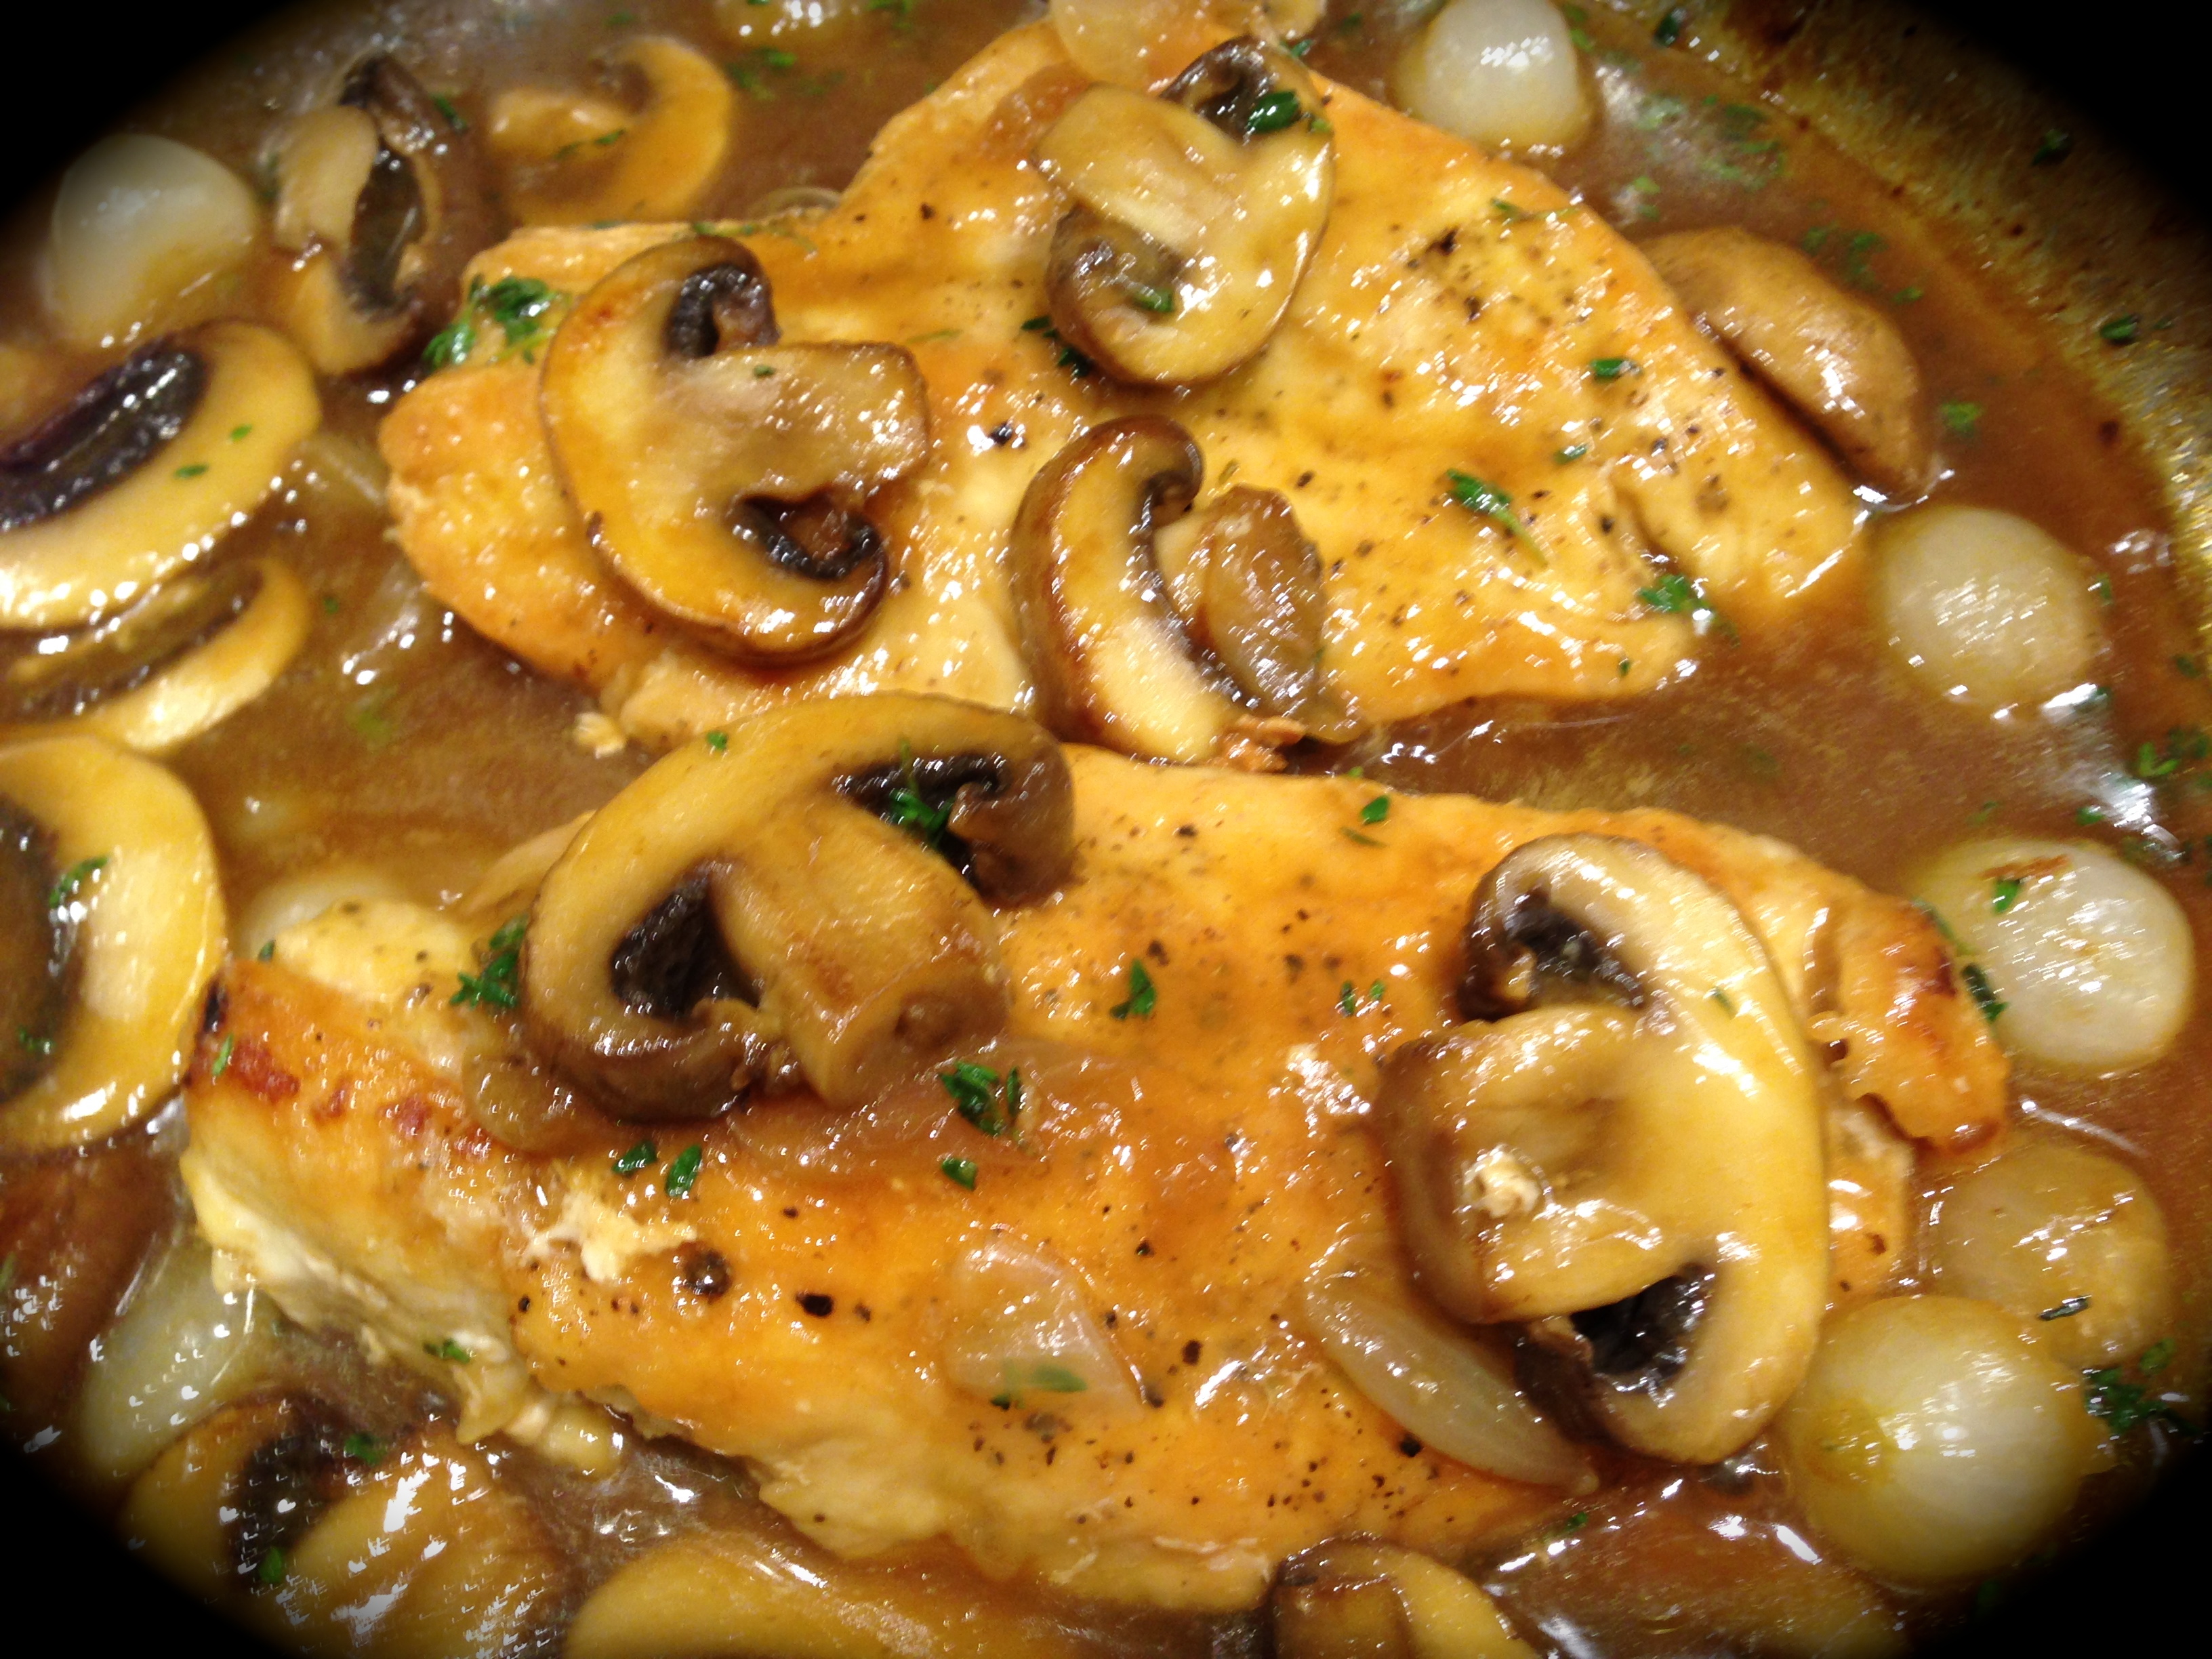
So, the other day I bought a meal kit from King Soopers (Colorado’s Kroger) that sounded like something I might enjoy – Chicken Marsala with Broccoli and Mushrooms (although it included peas as well).

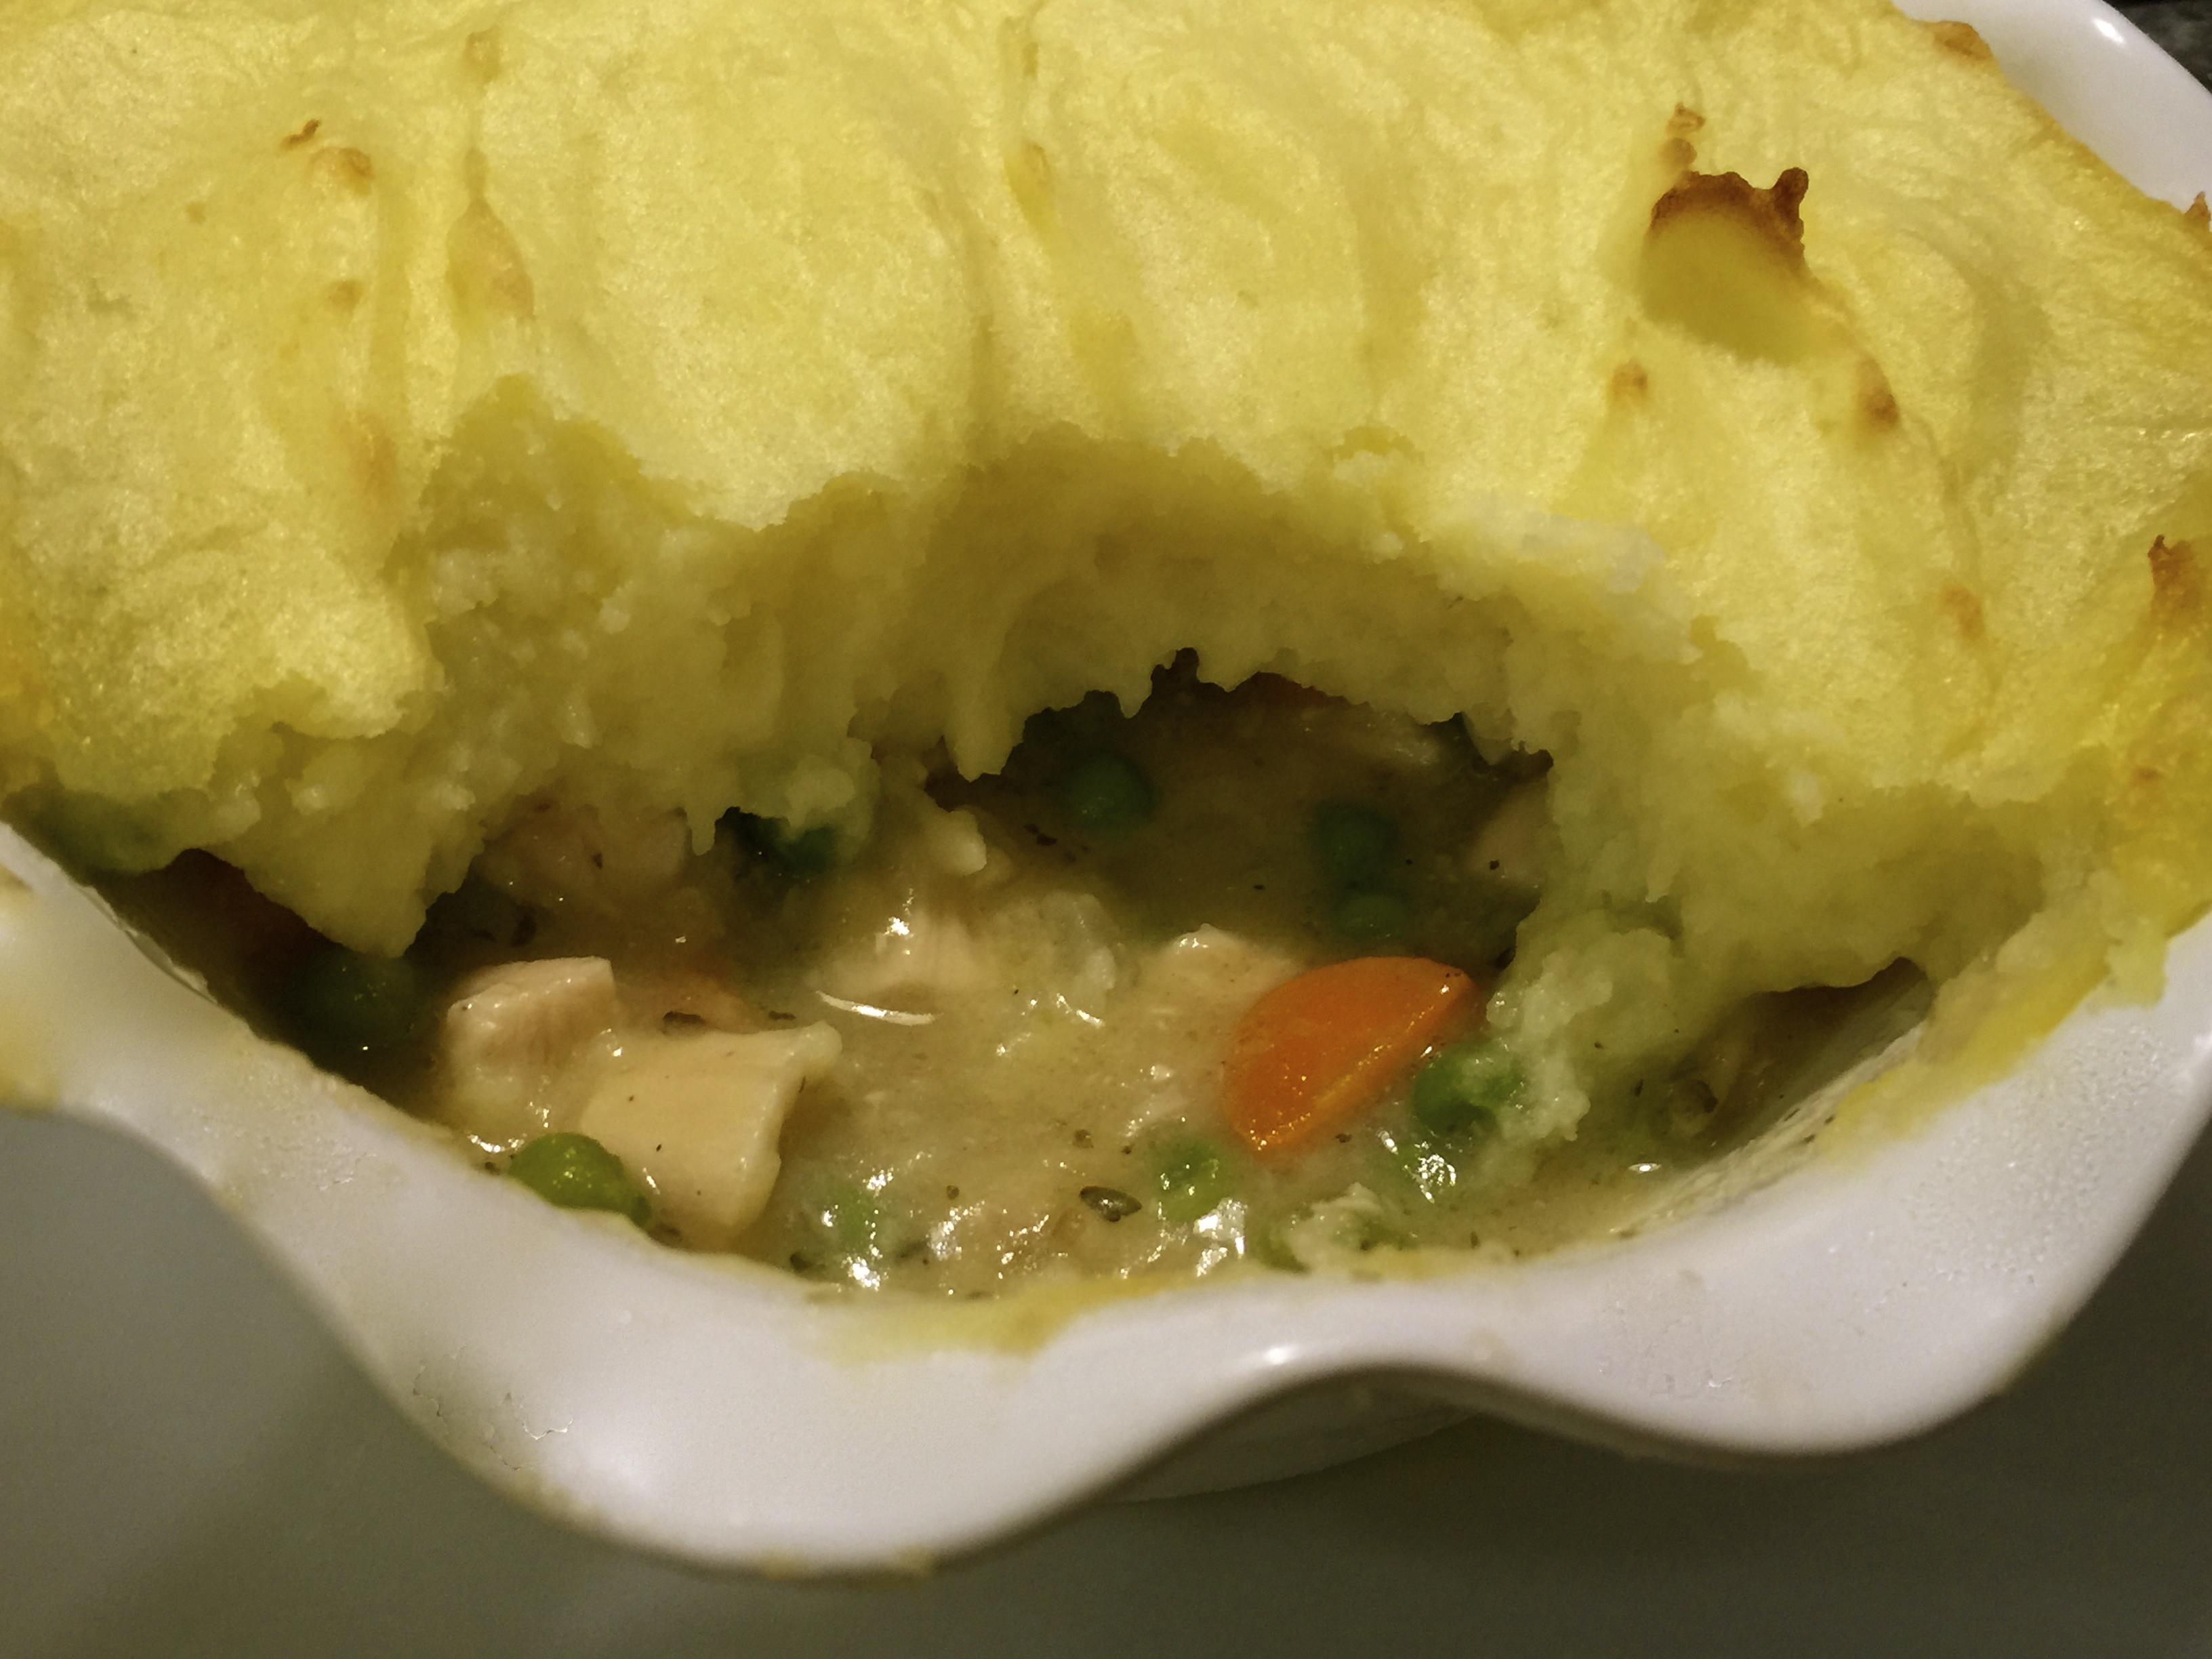
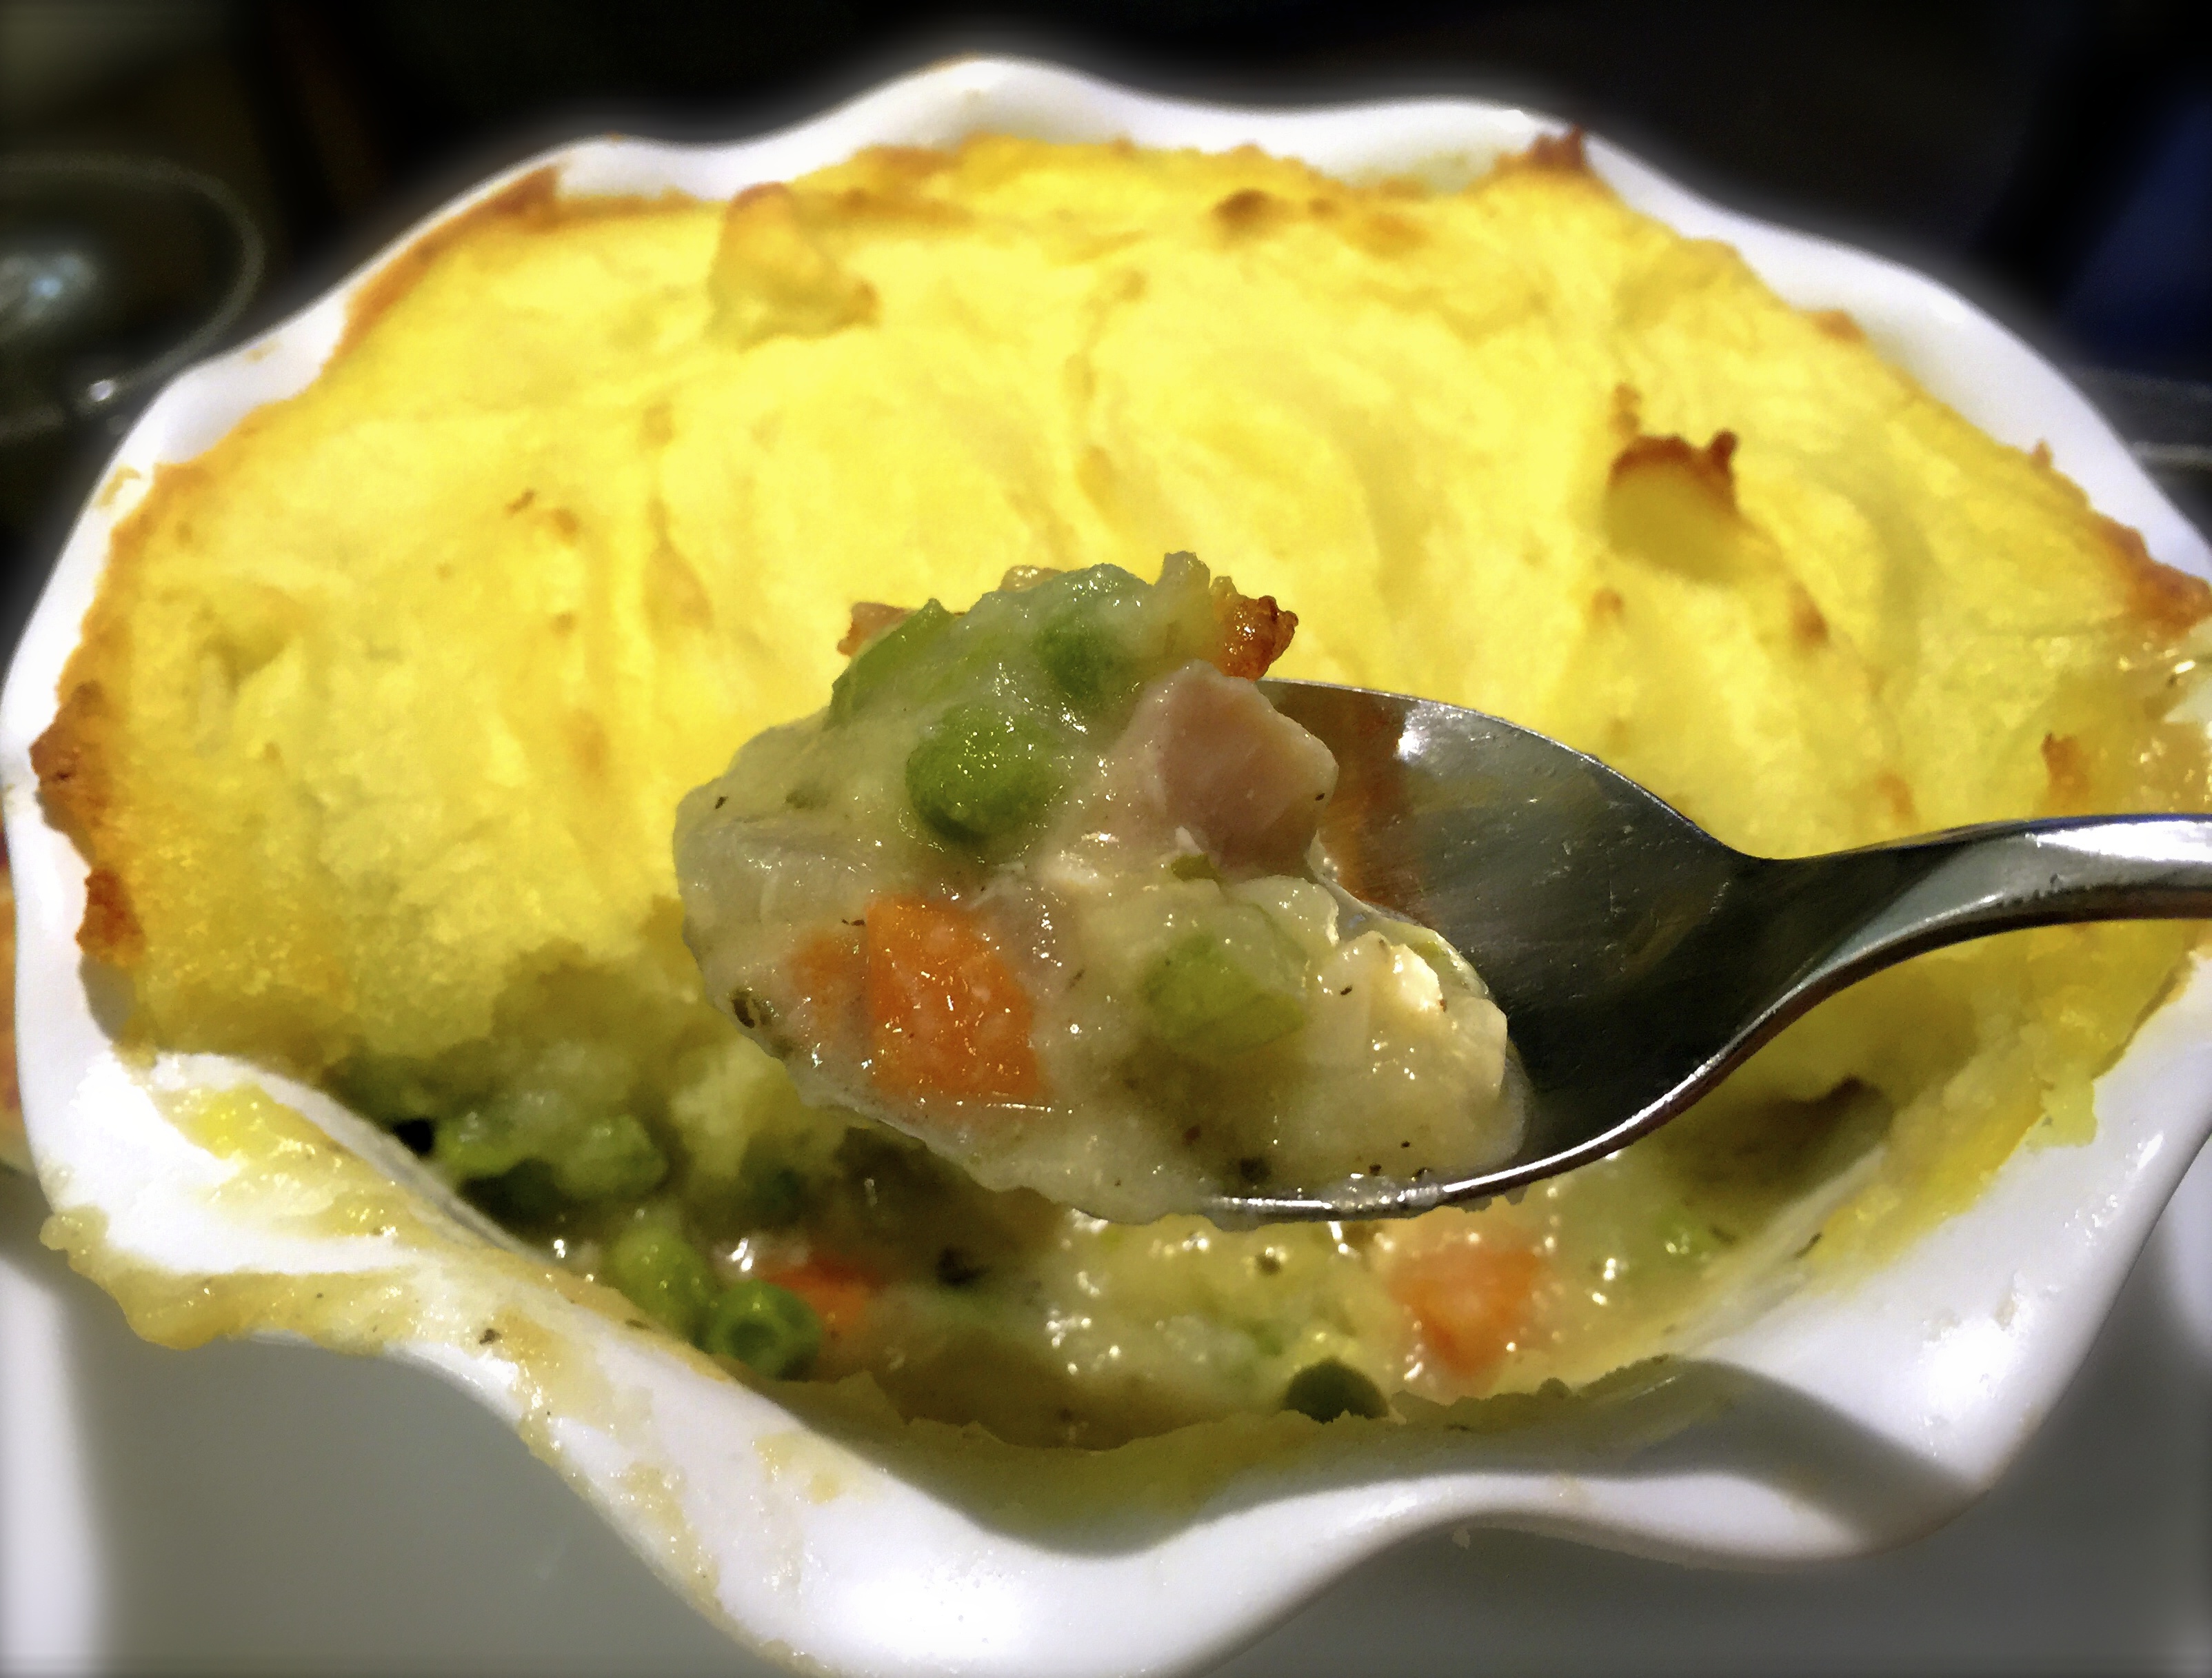
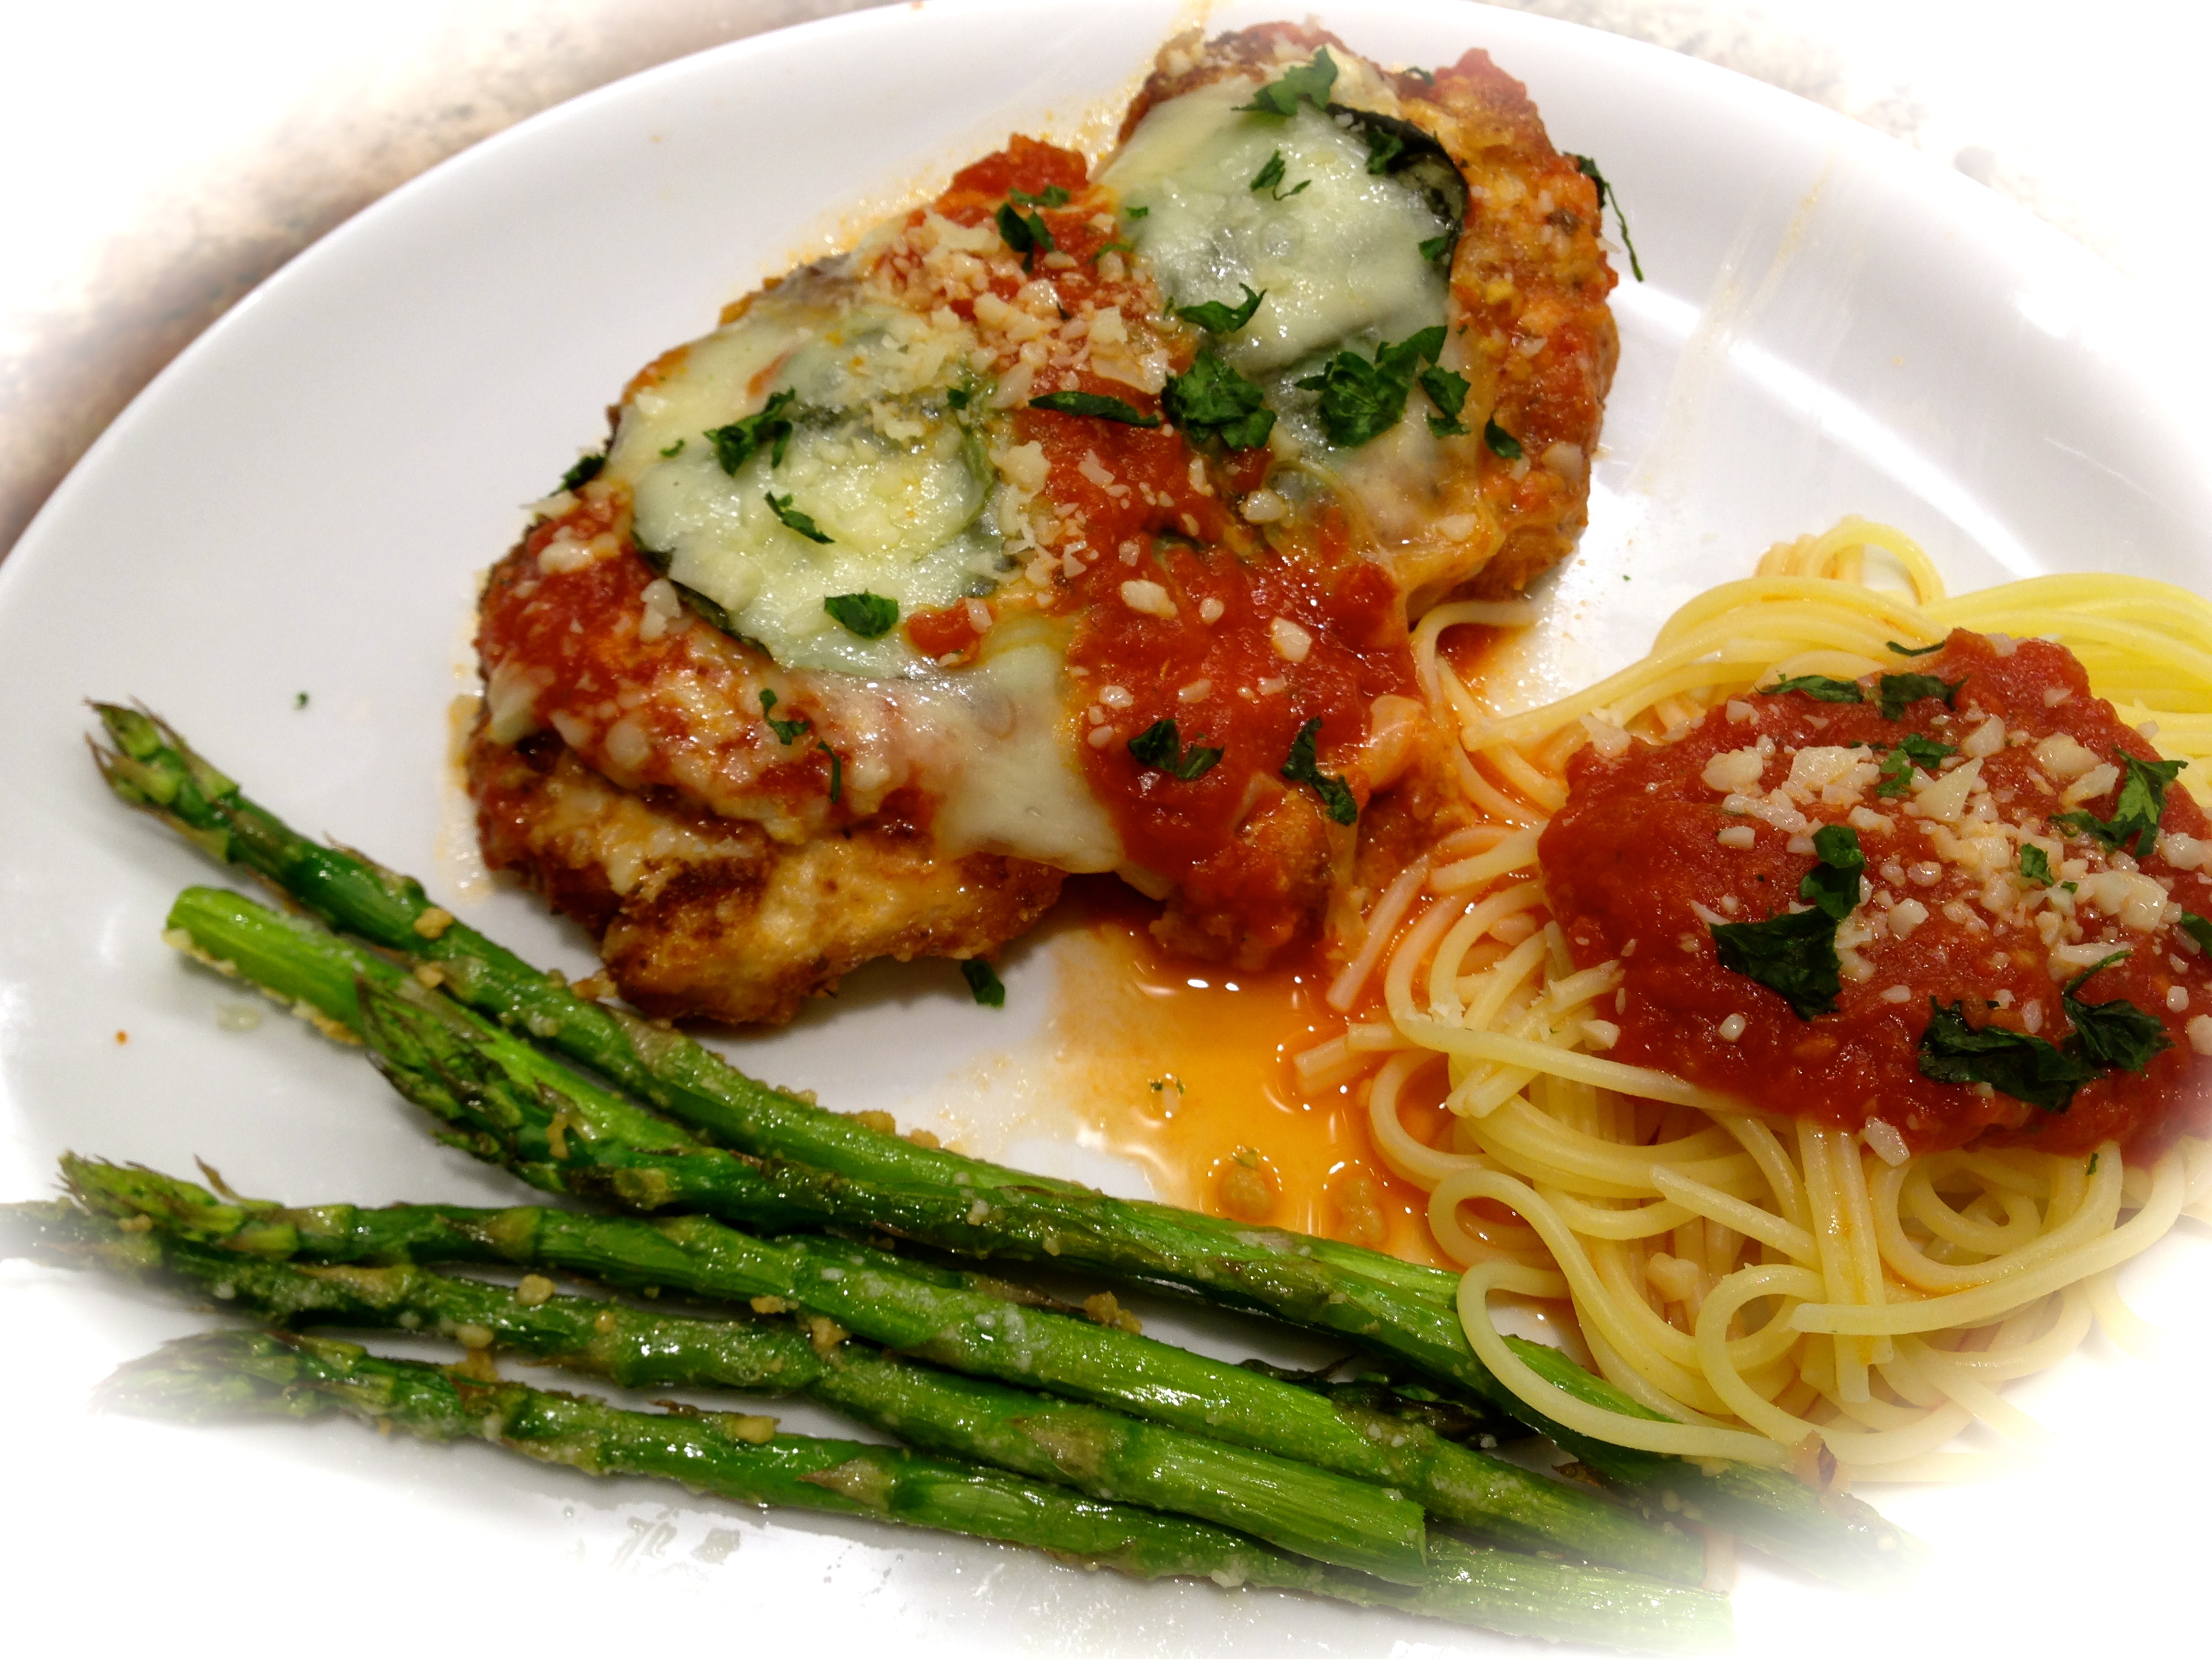
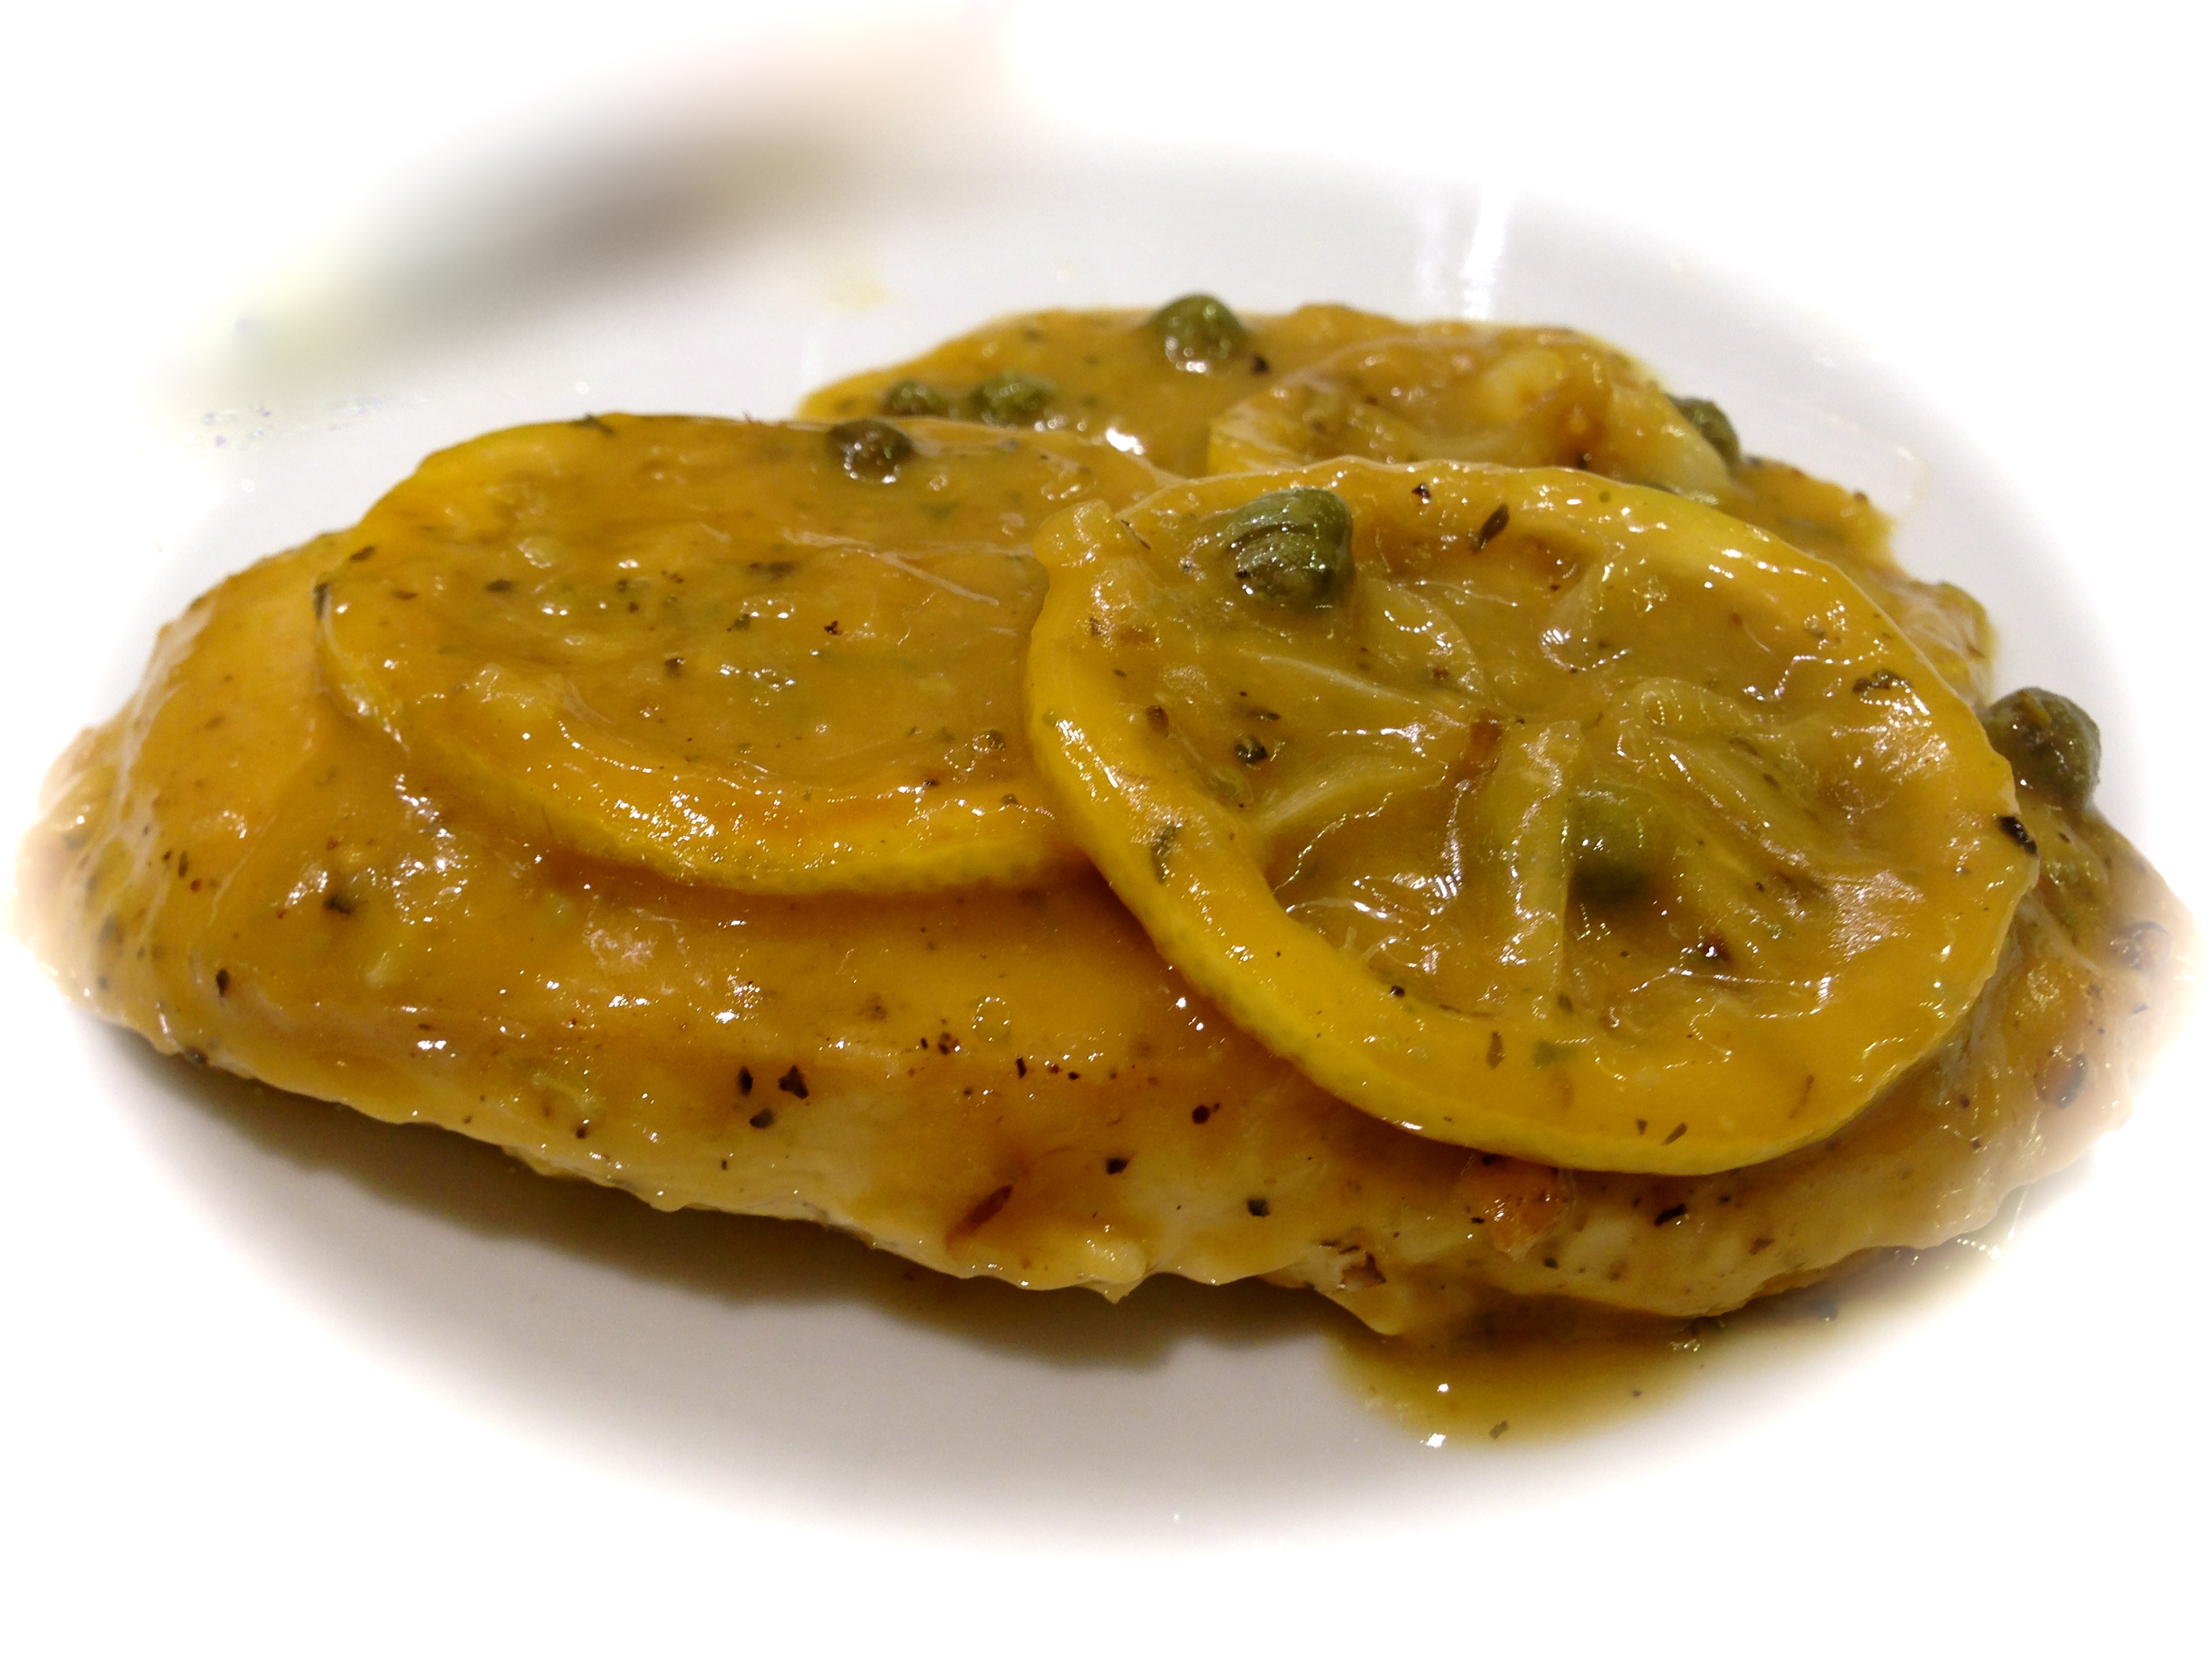
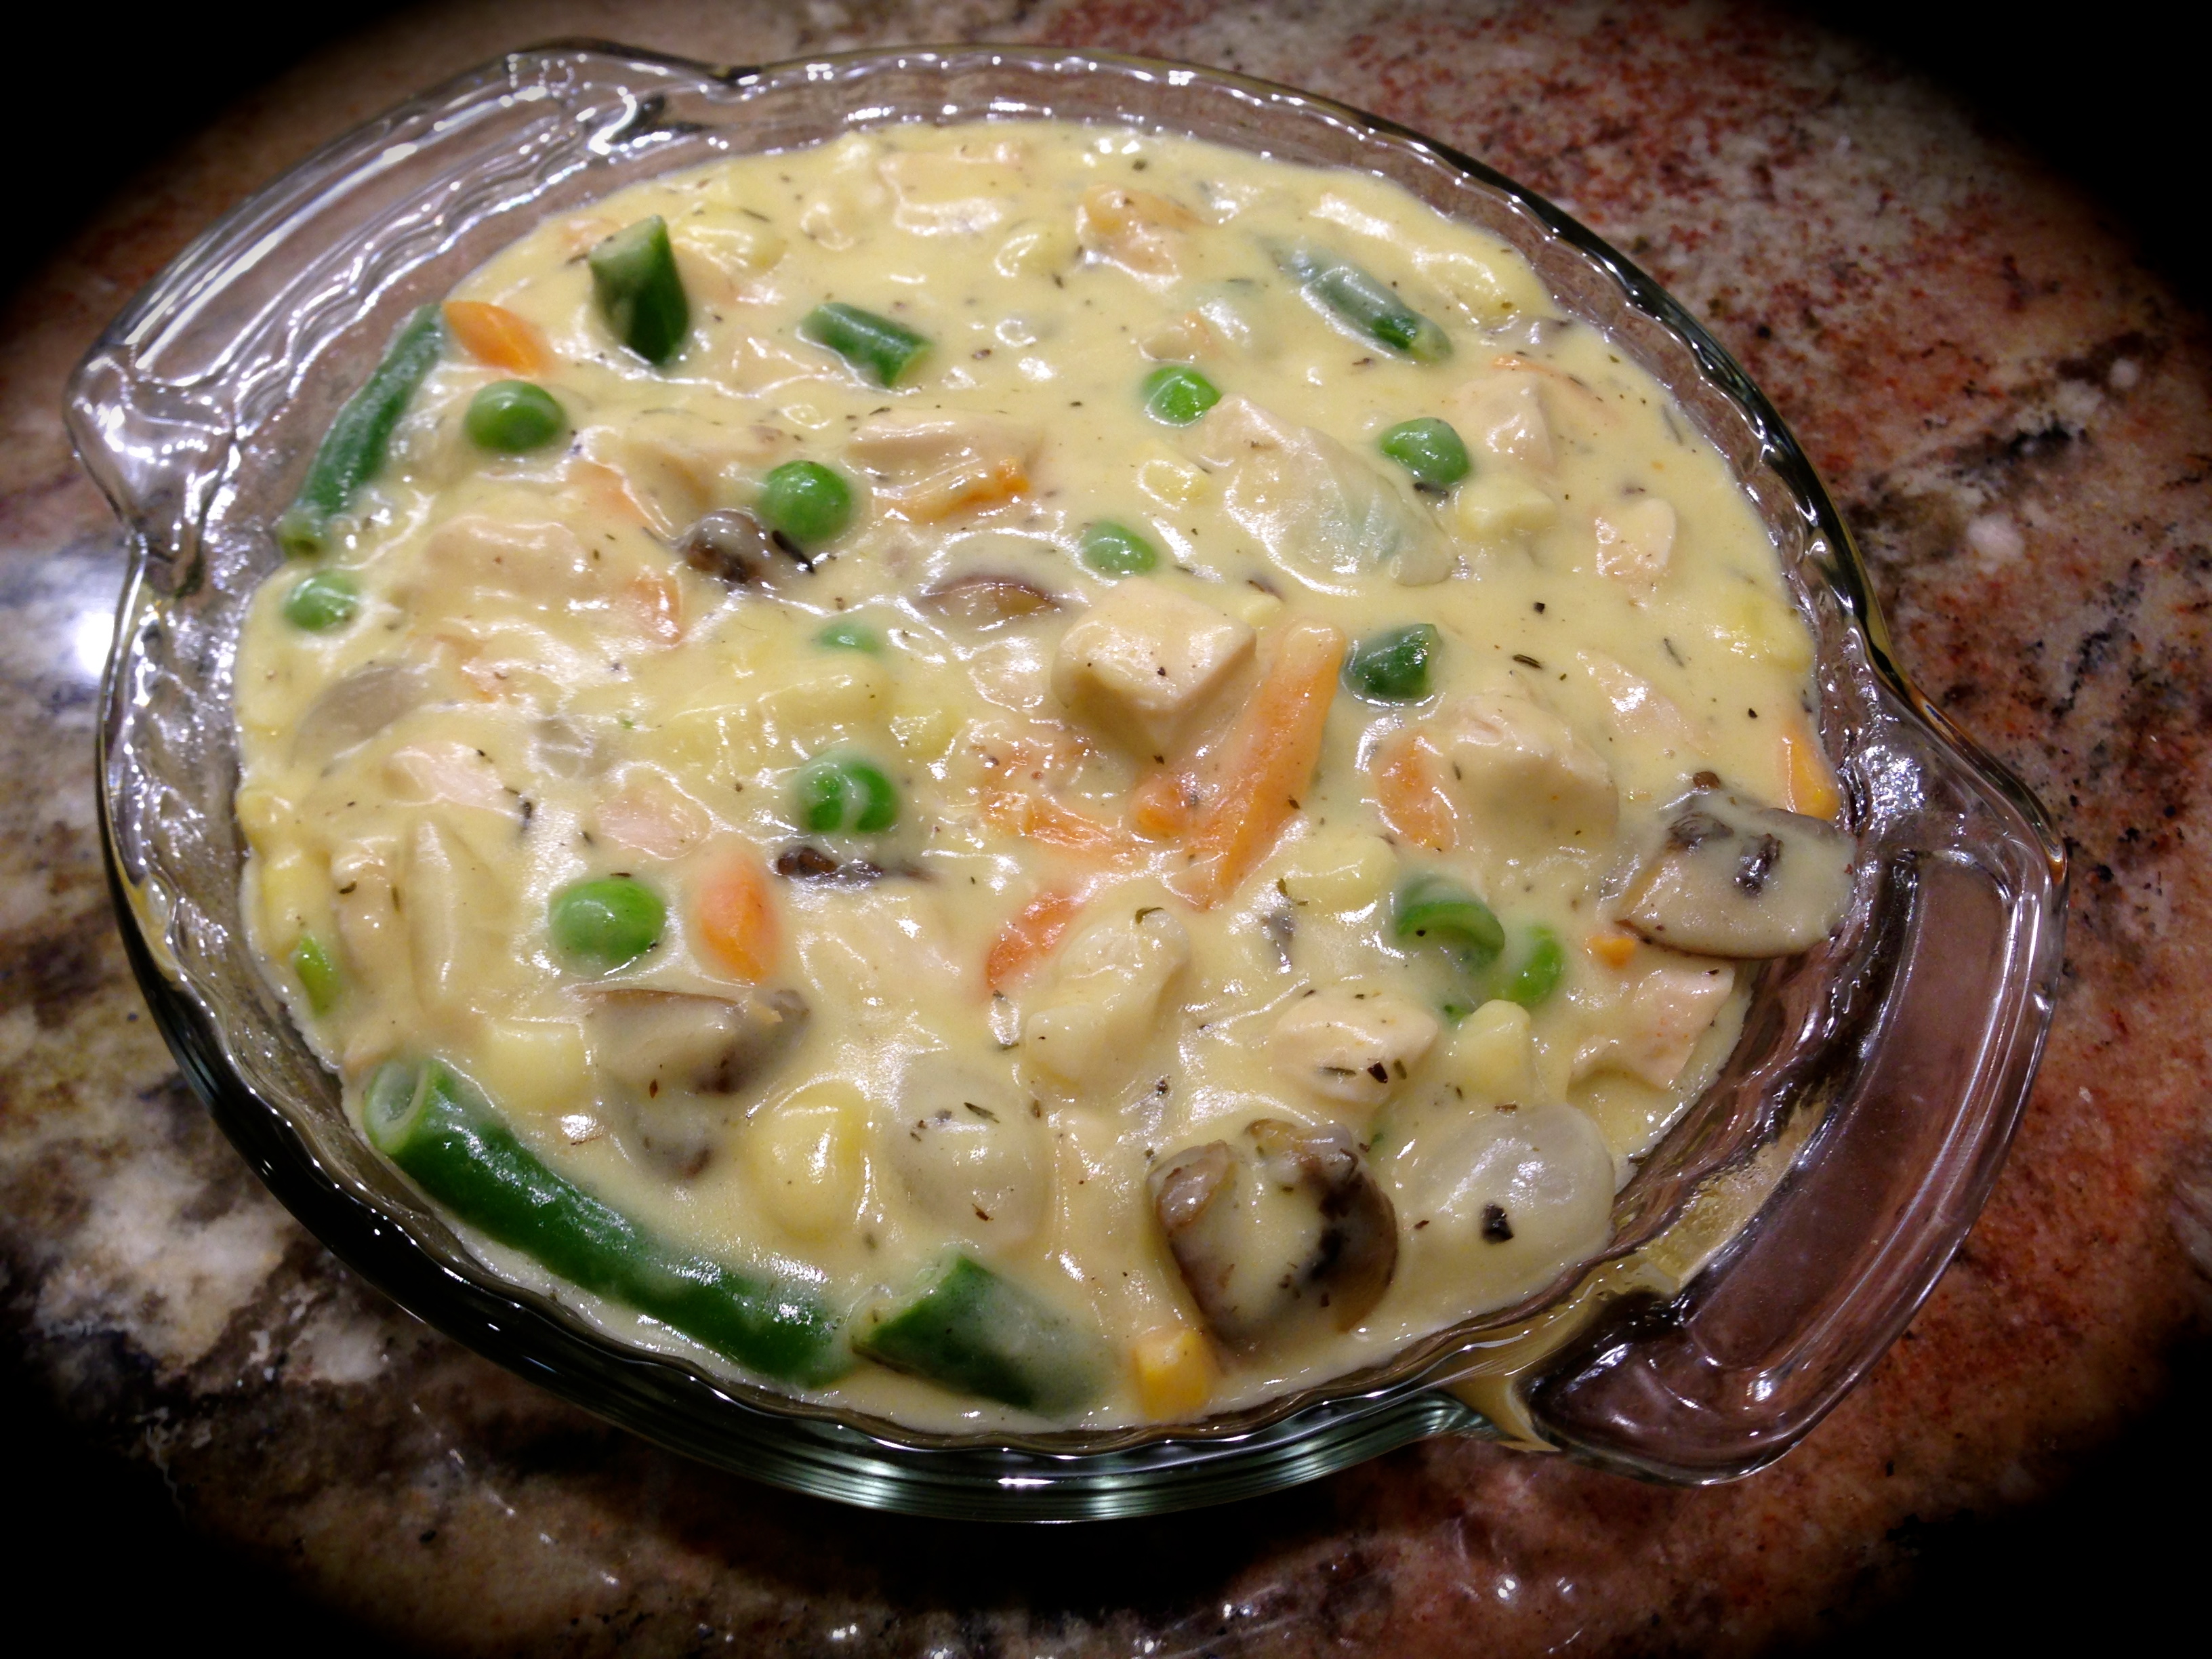
You have to admit the picture looks enticing and so I ventured into this current fad of preparing quick but more upscale meals with great anticipation.

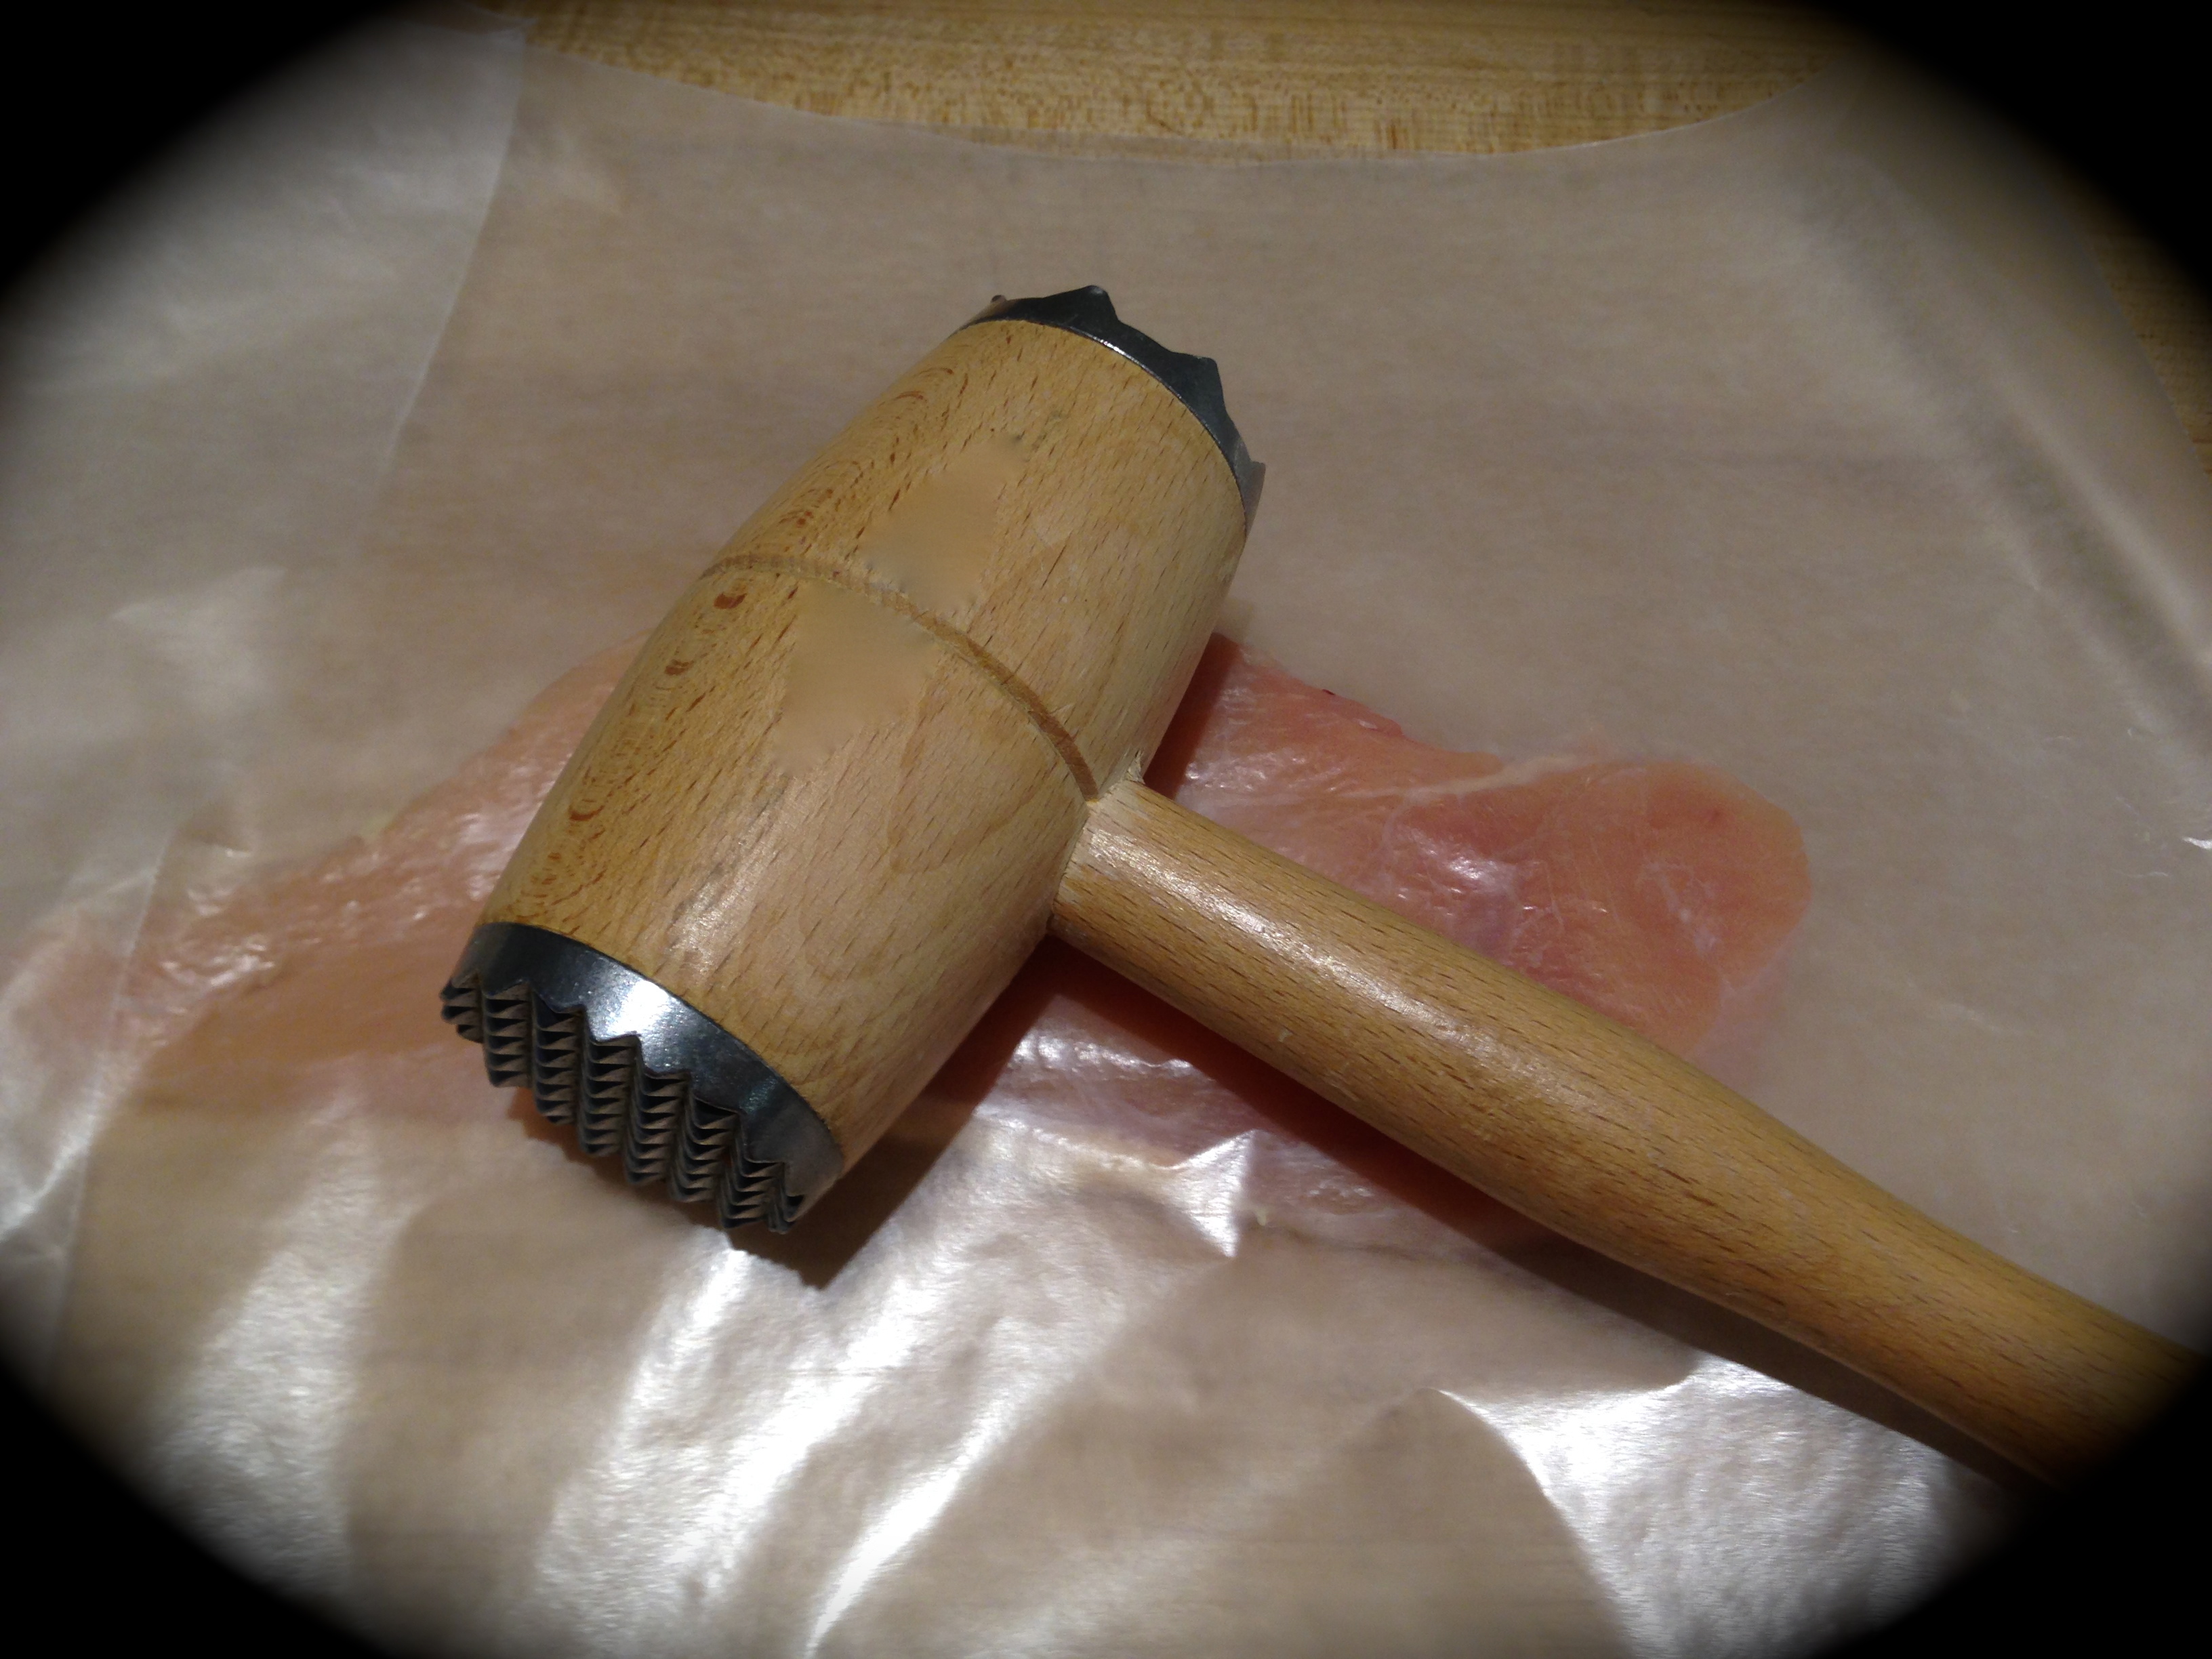
Upon first glance you will notice that there is no chopping. Now to some this may be a godsend but to me I find meal prep very relaxing. But that’s just me and so I bit the bullet and let that pleasurable part of cooking  process take a back seat to convenience.

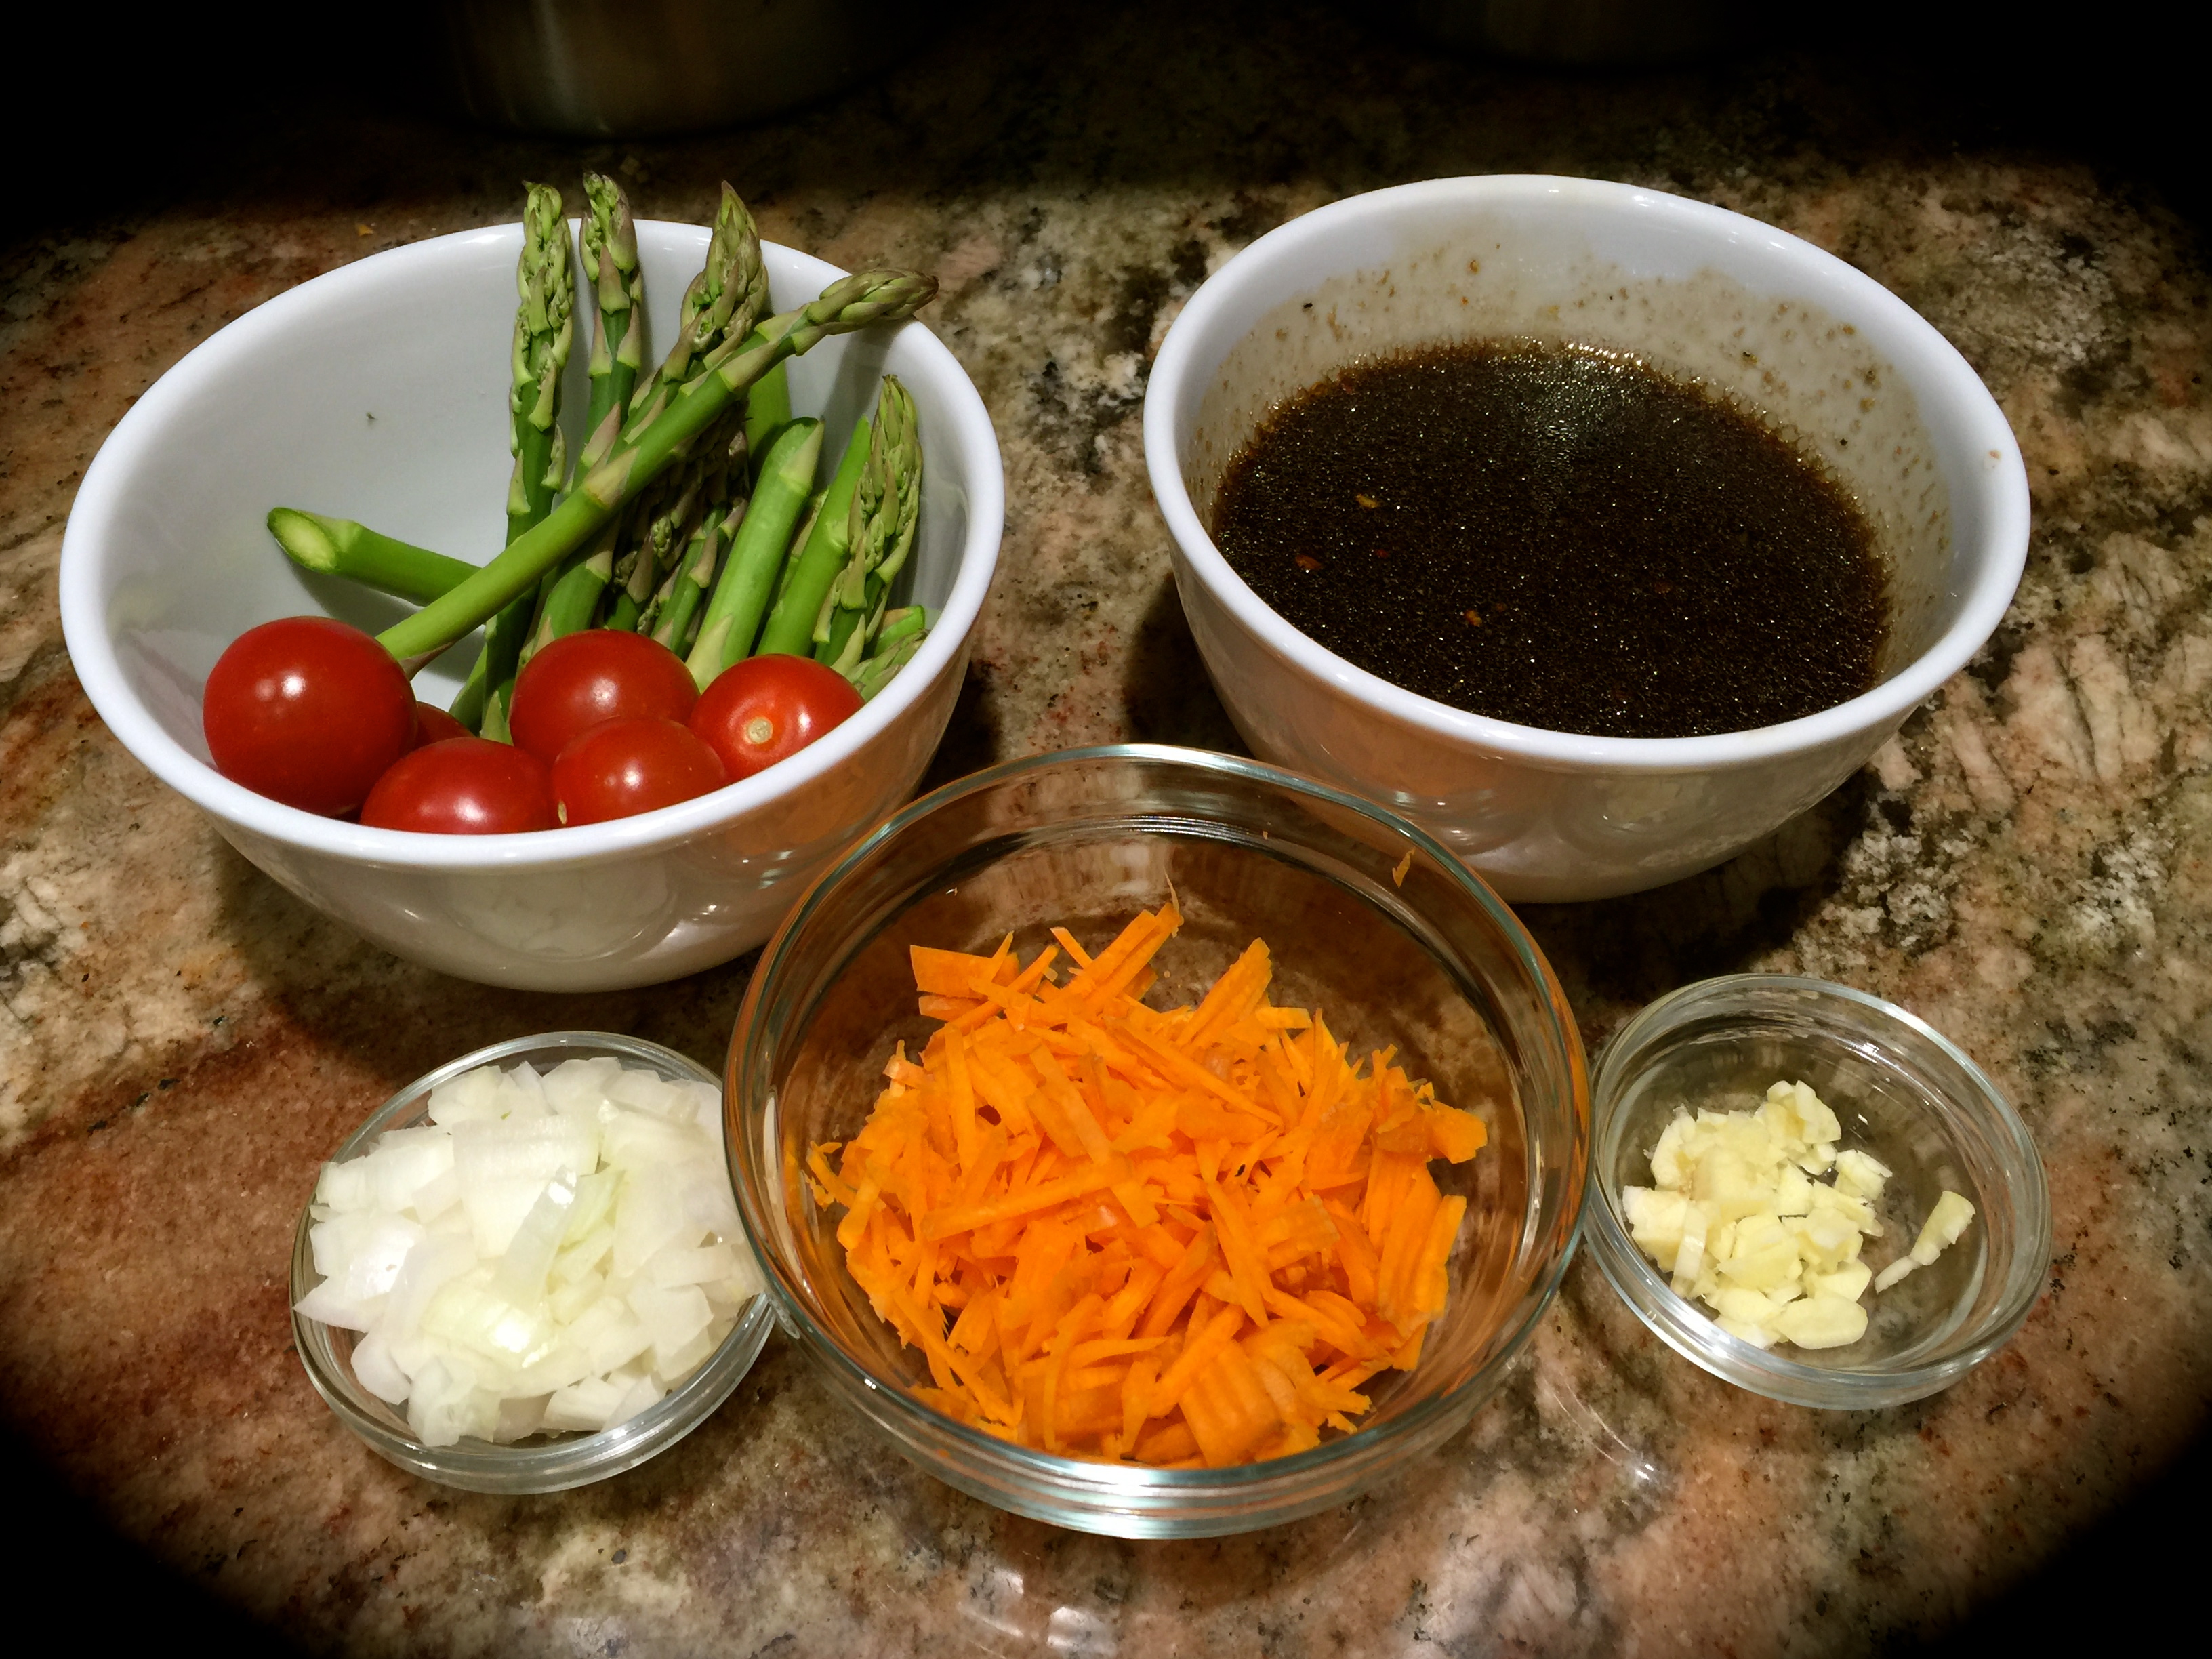
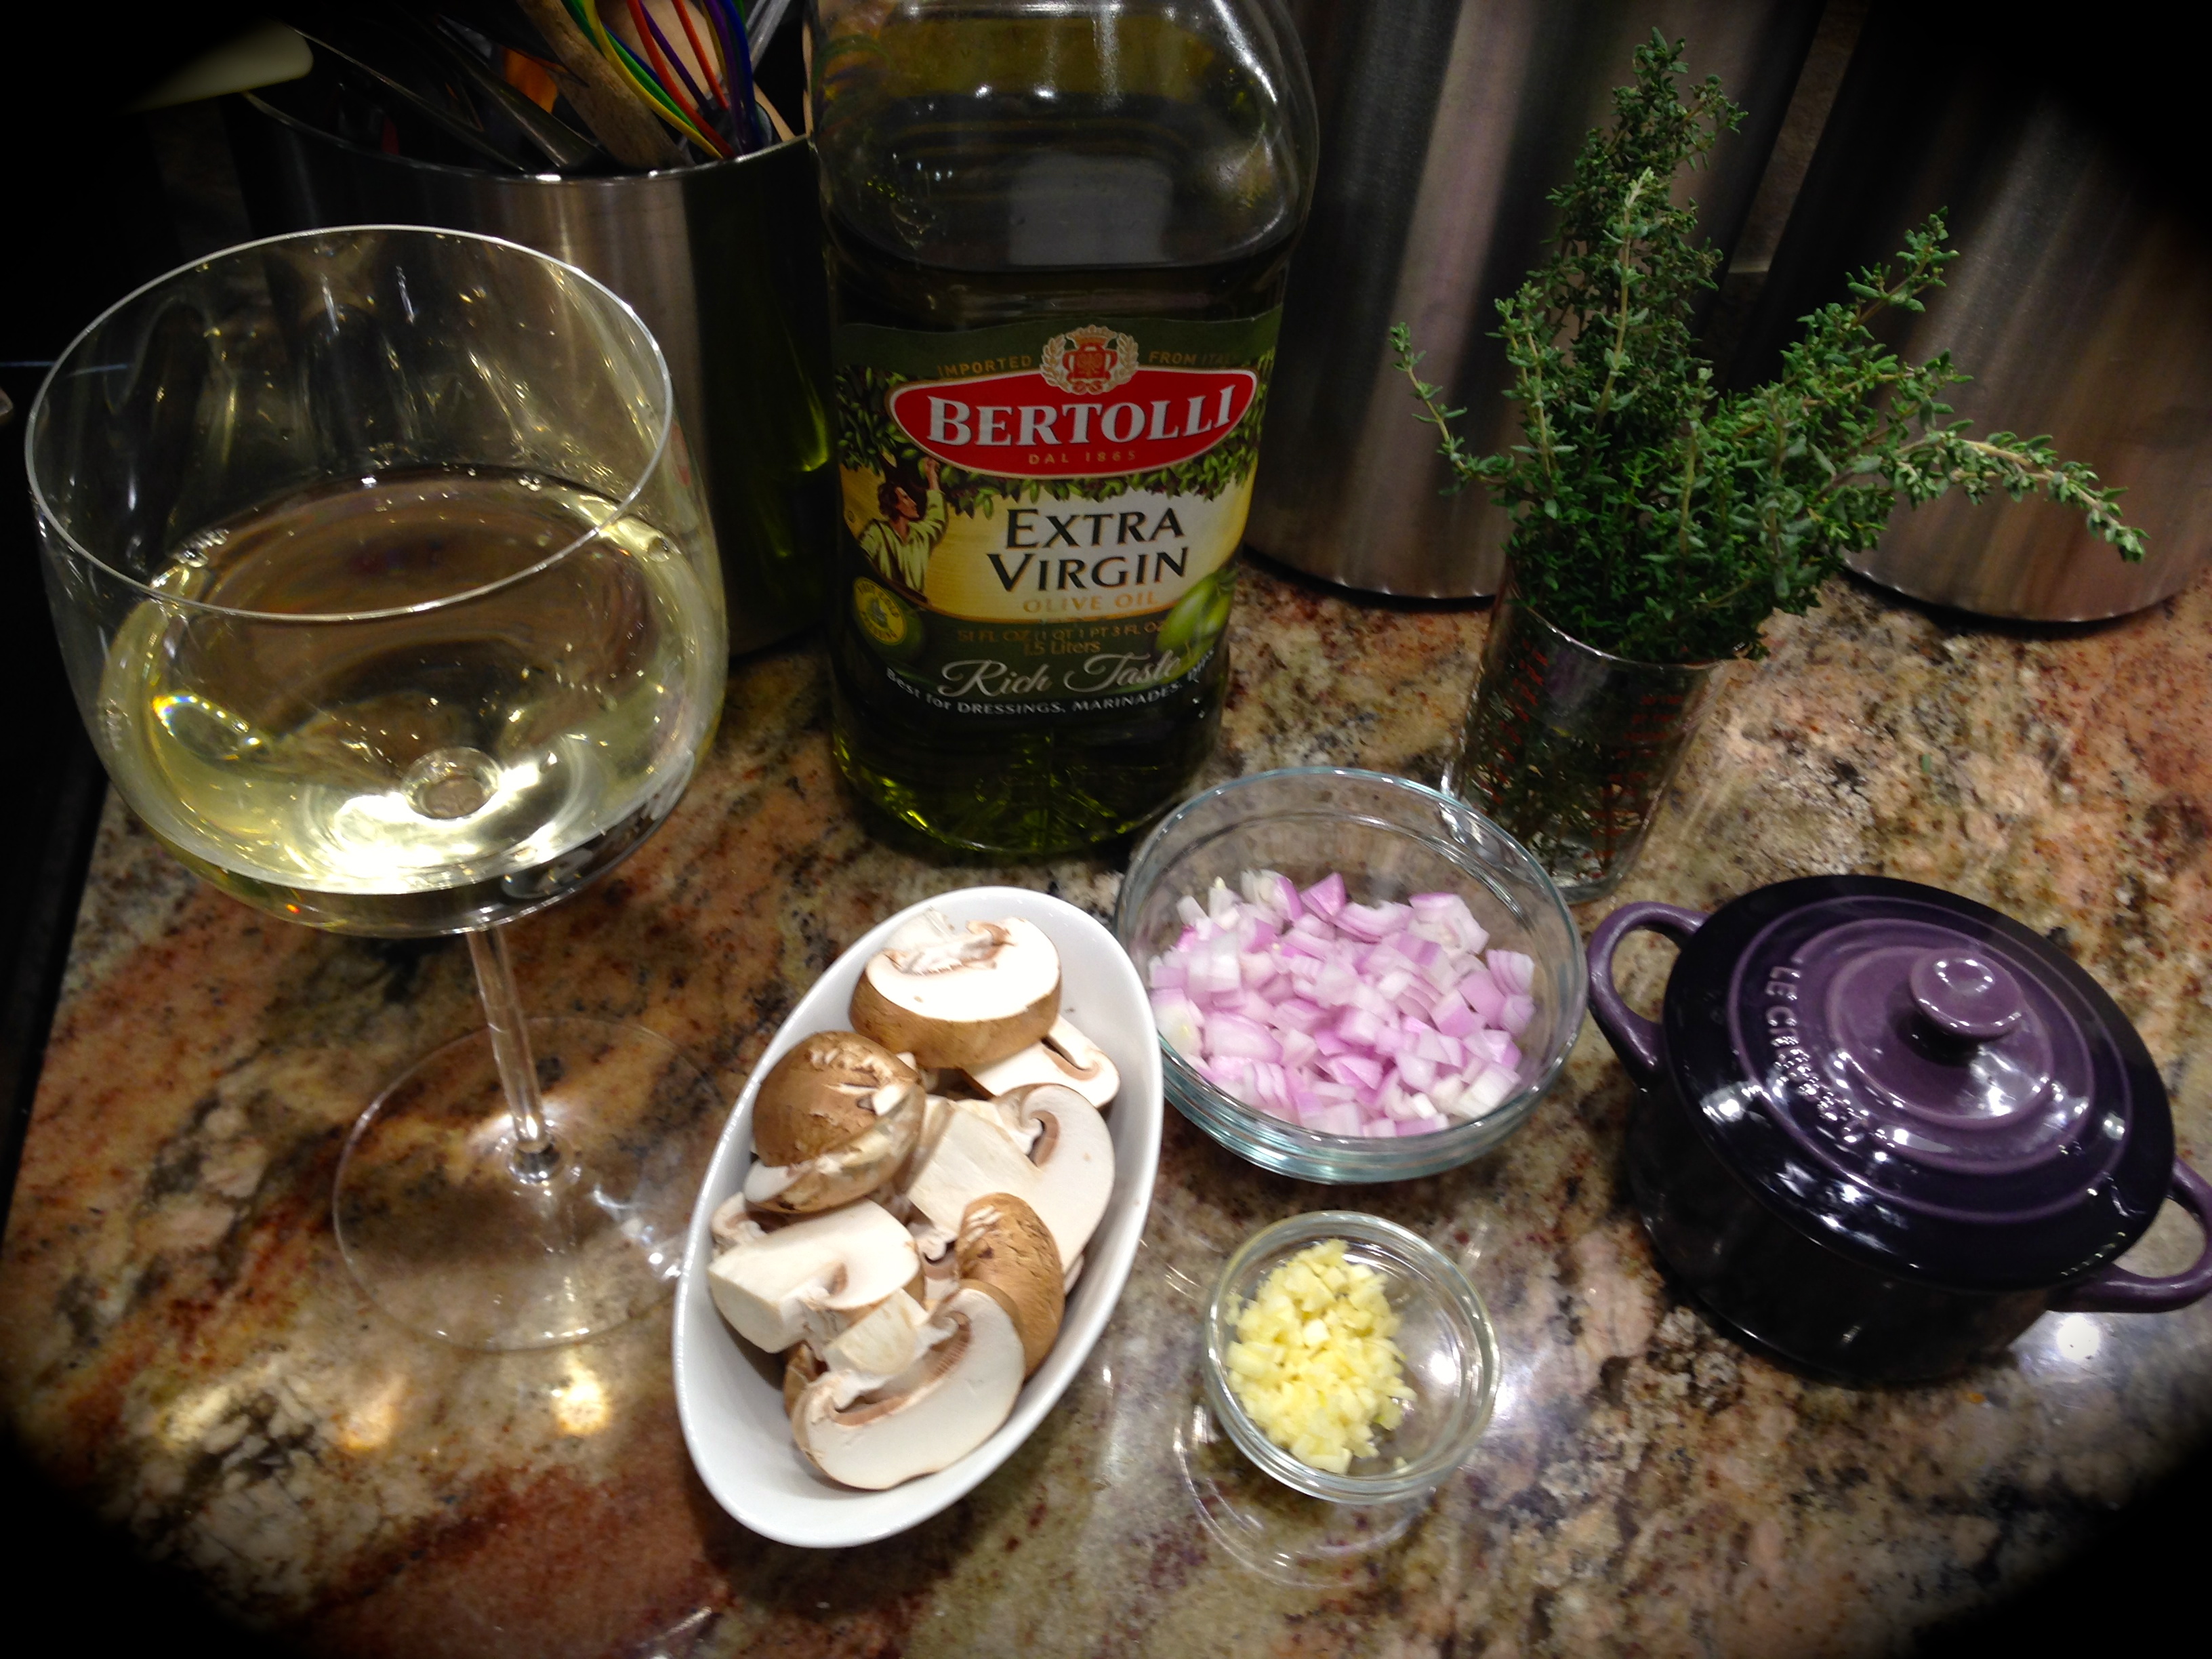
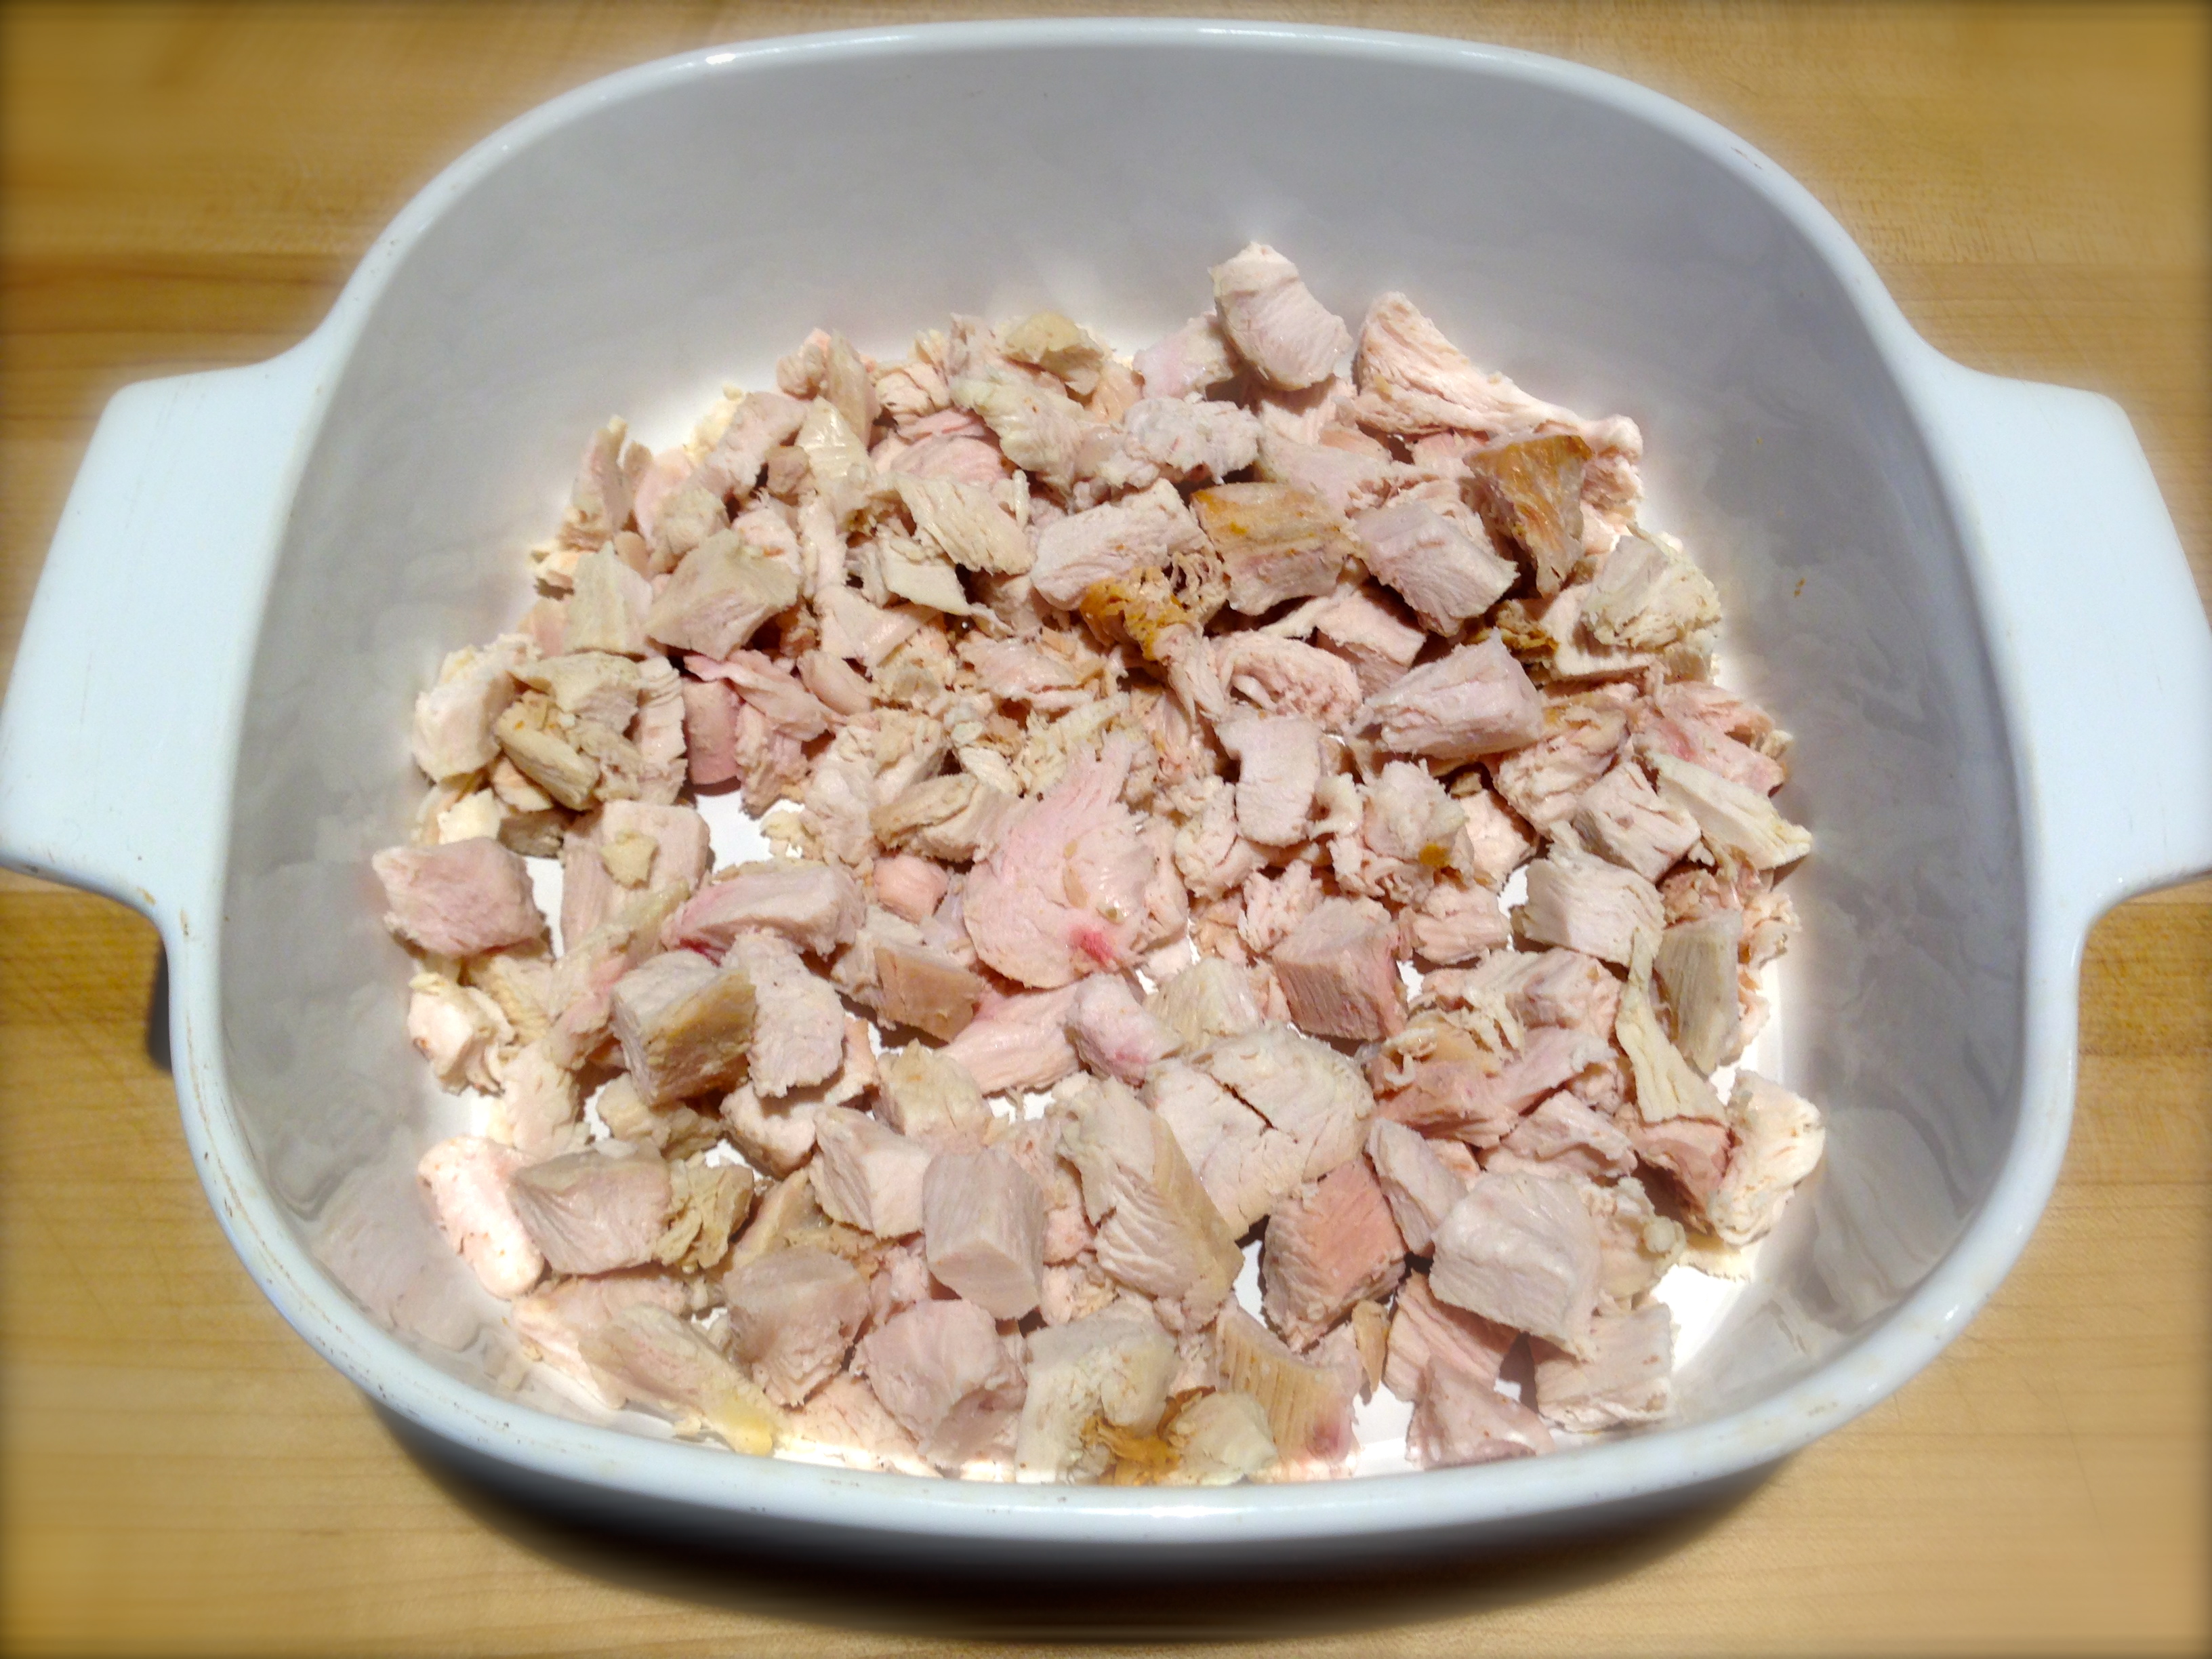
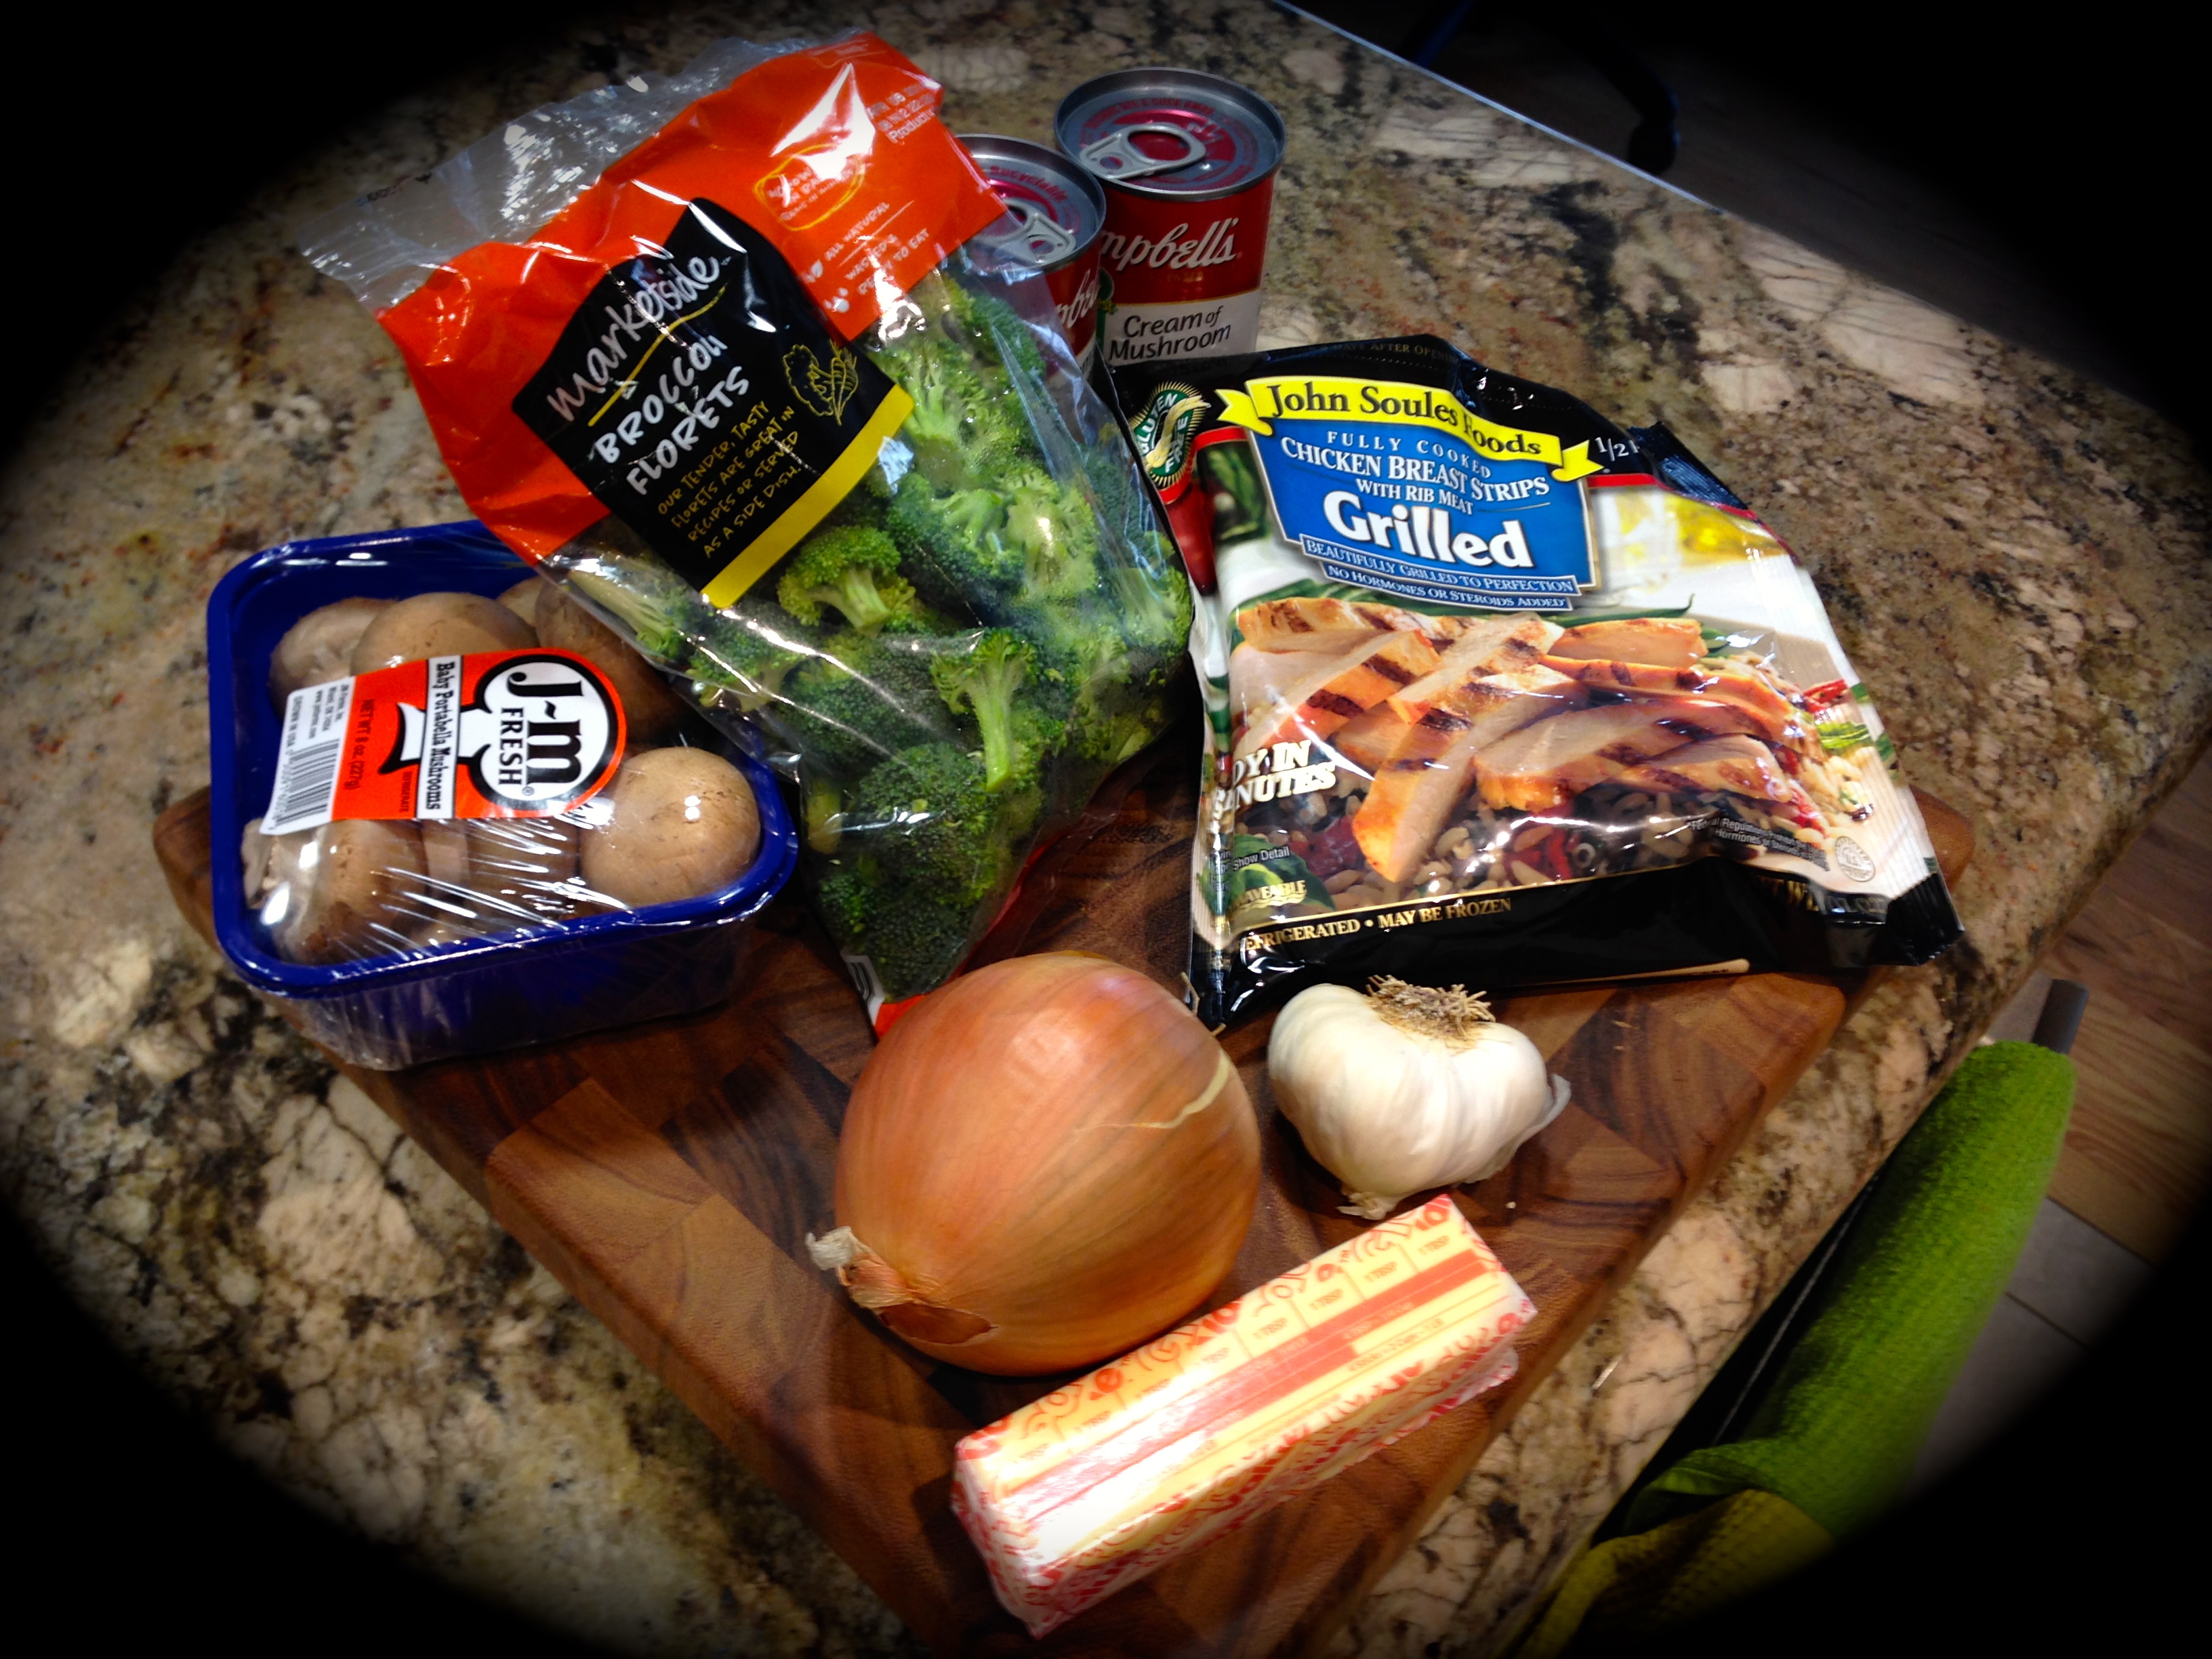
When I opened the meal kit this is what was inside…

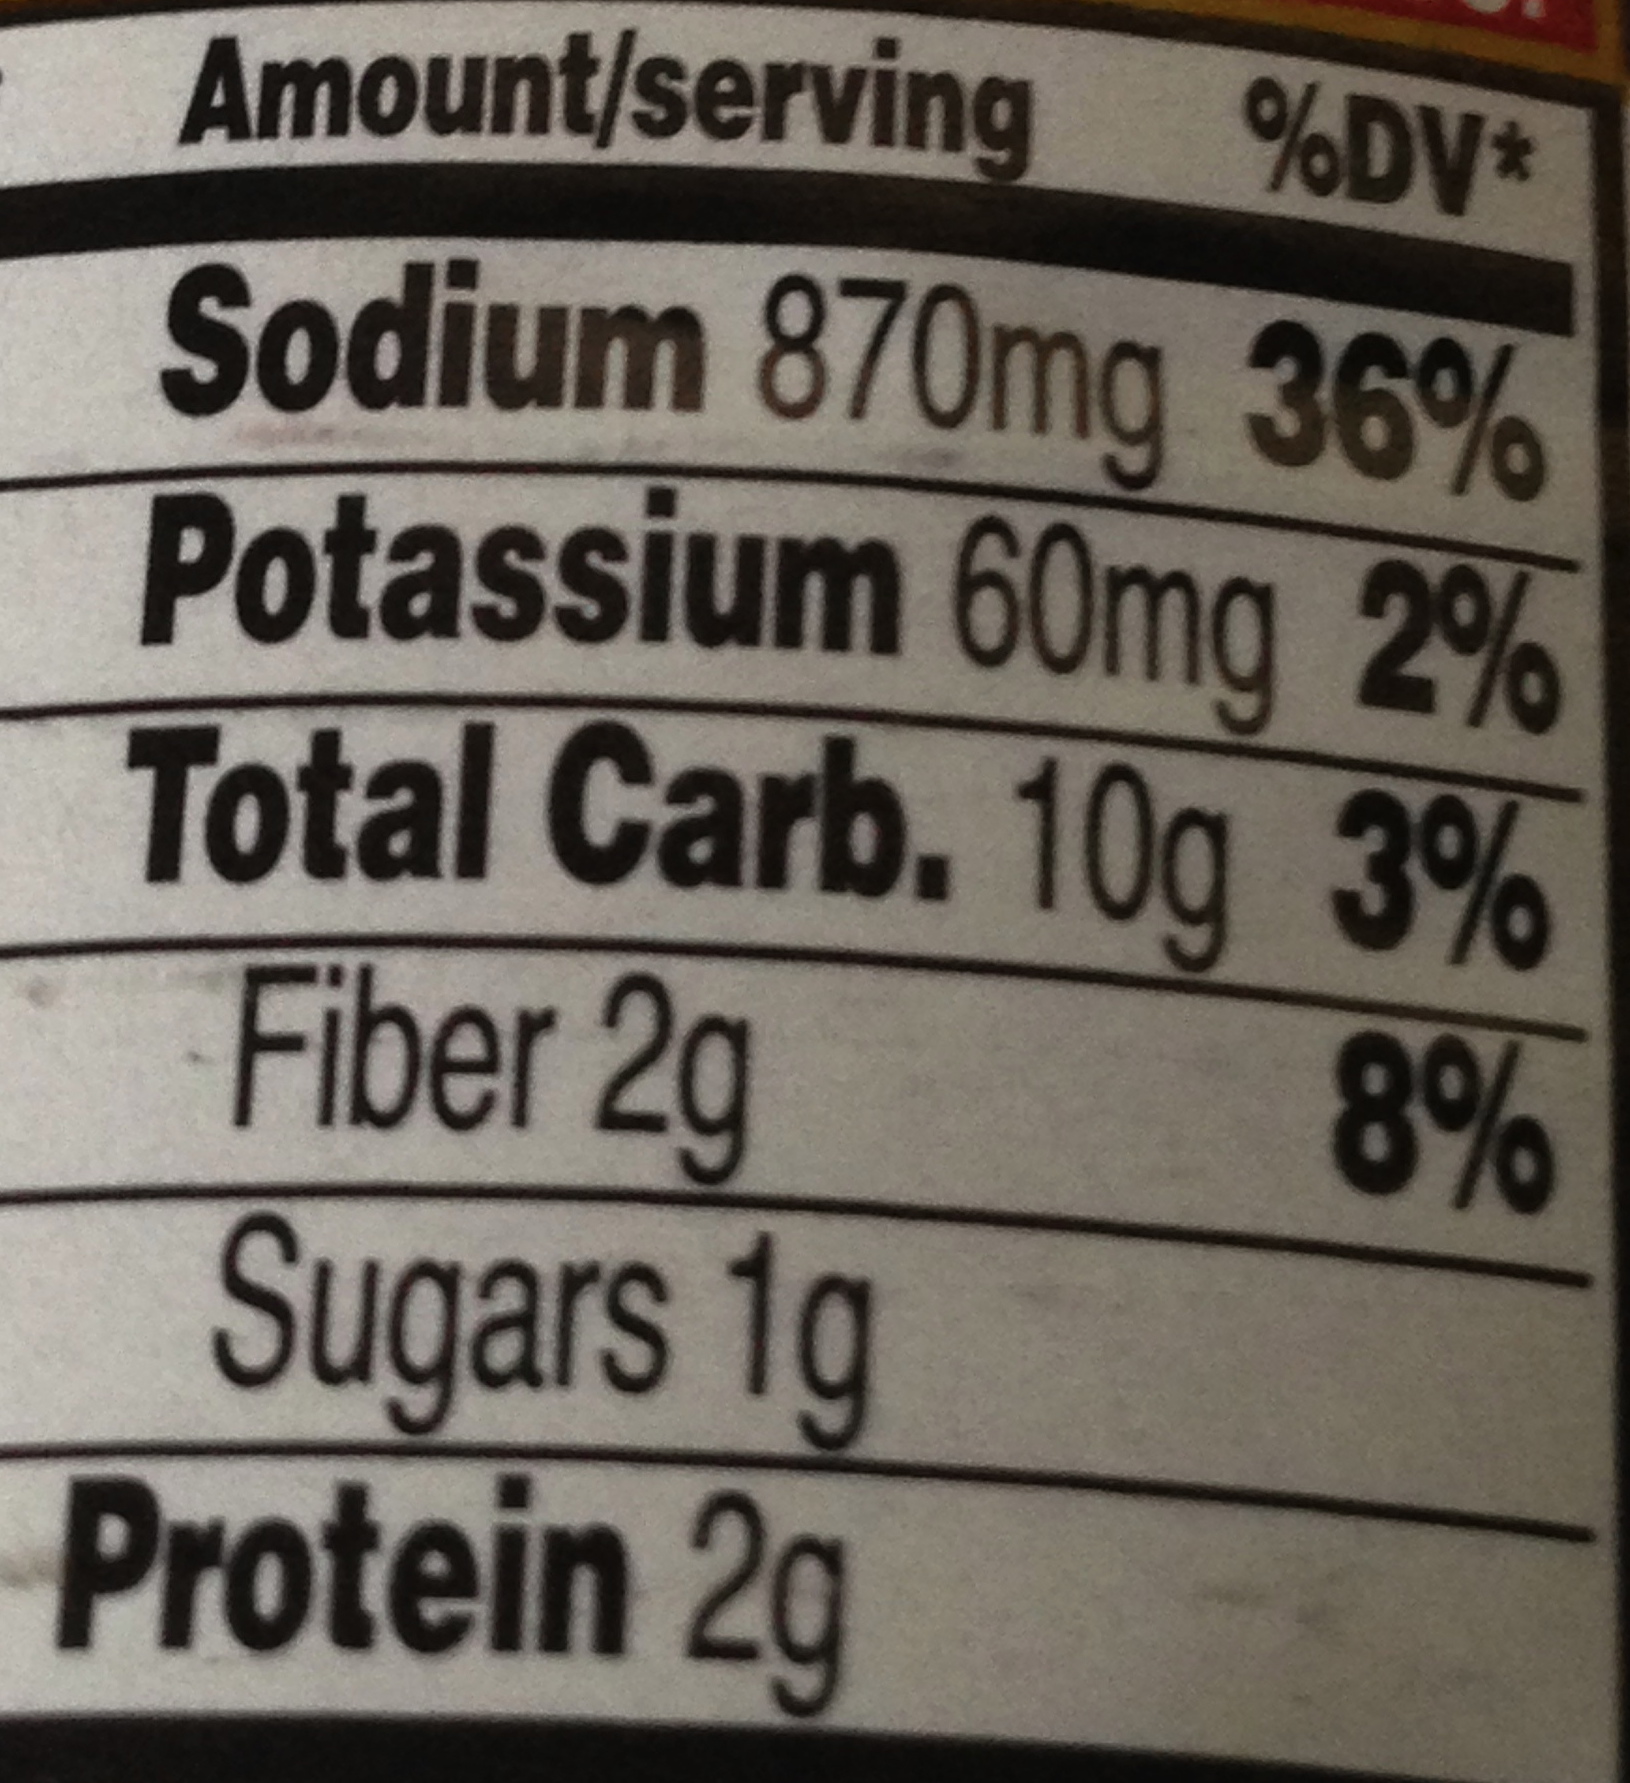
This is a meal for two and it included two six ounce boneless skinless chicken breasts, broccoli, enough mushrooms to feed an army (luckily I really like mushrooms) a small package of peas and three one ounce containers of low fat cream cheese and two small packages of something called chicken demi glace concentrate that contains milk and sulfites…

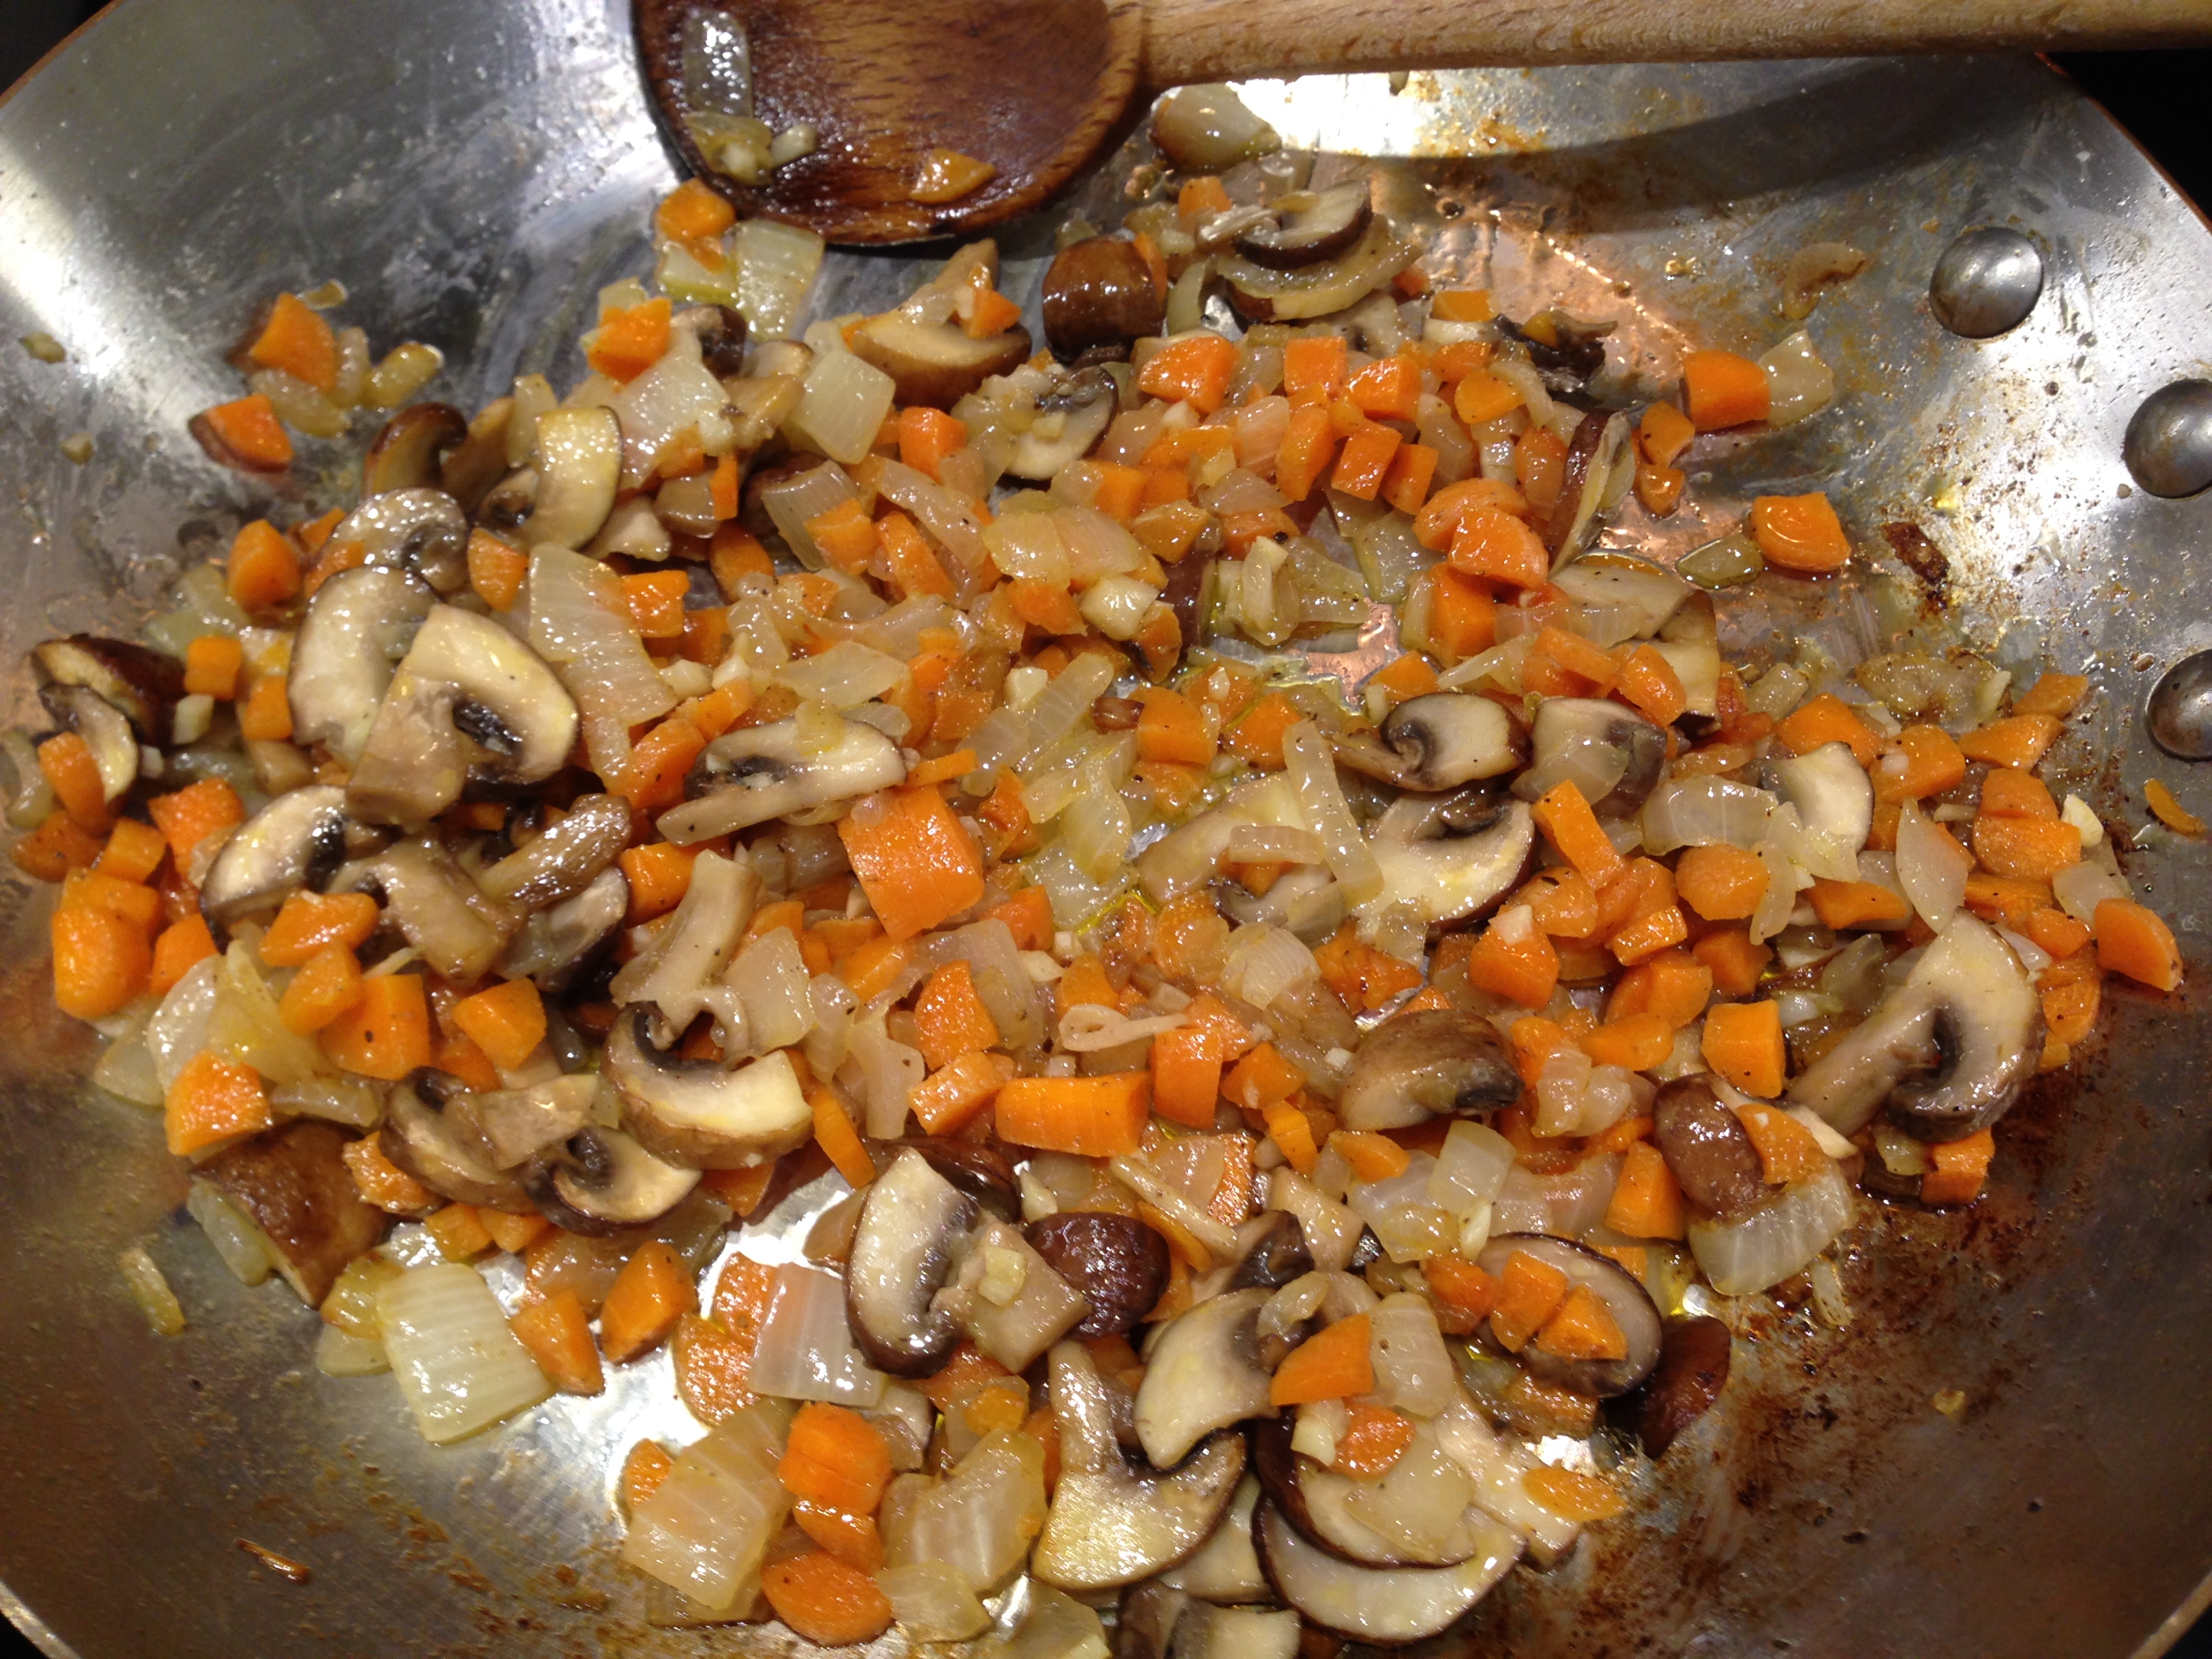
These particular meal kits are designed to be one pan meals where you cook everything in the pan provided. Prep was very minimal, it was recommended to rinse the vegetables and pat them dry before cooking them, then mixing them with some olive oil and salt and pepper. The directions did not state that the mushrooms should not be washed and for any novice cook that could have resulted in overly mushy mushrooms. I think the directions should have specifically stated just to rinse the broccoli. But that’s me.

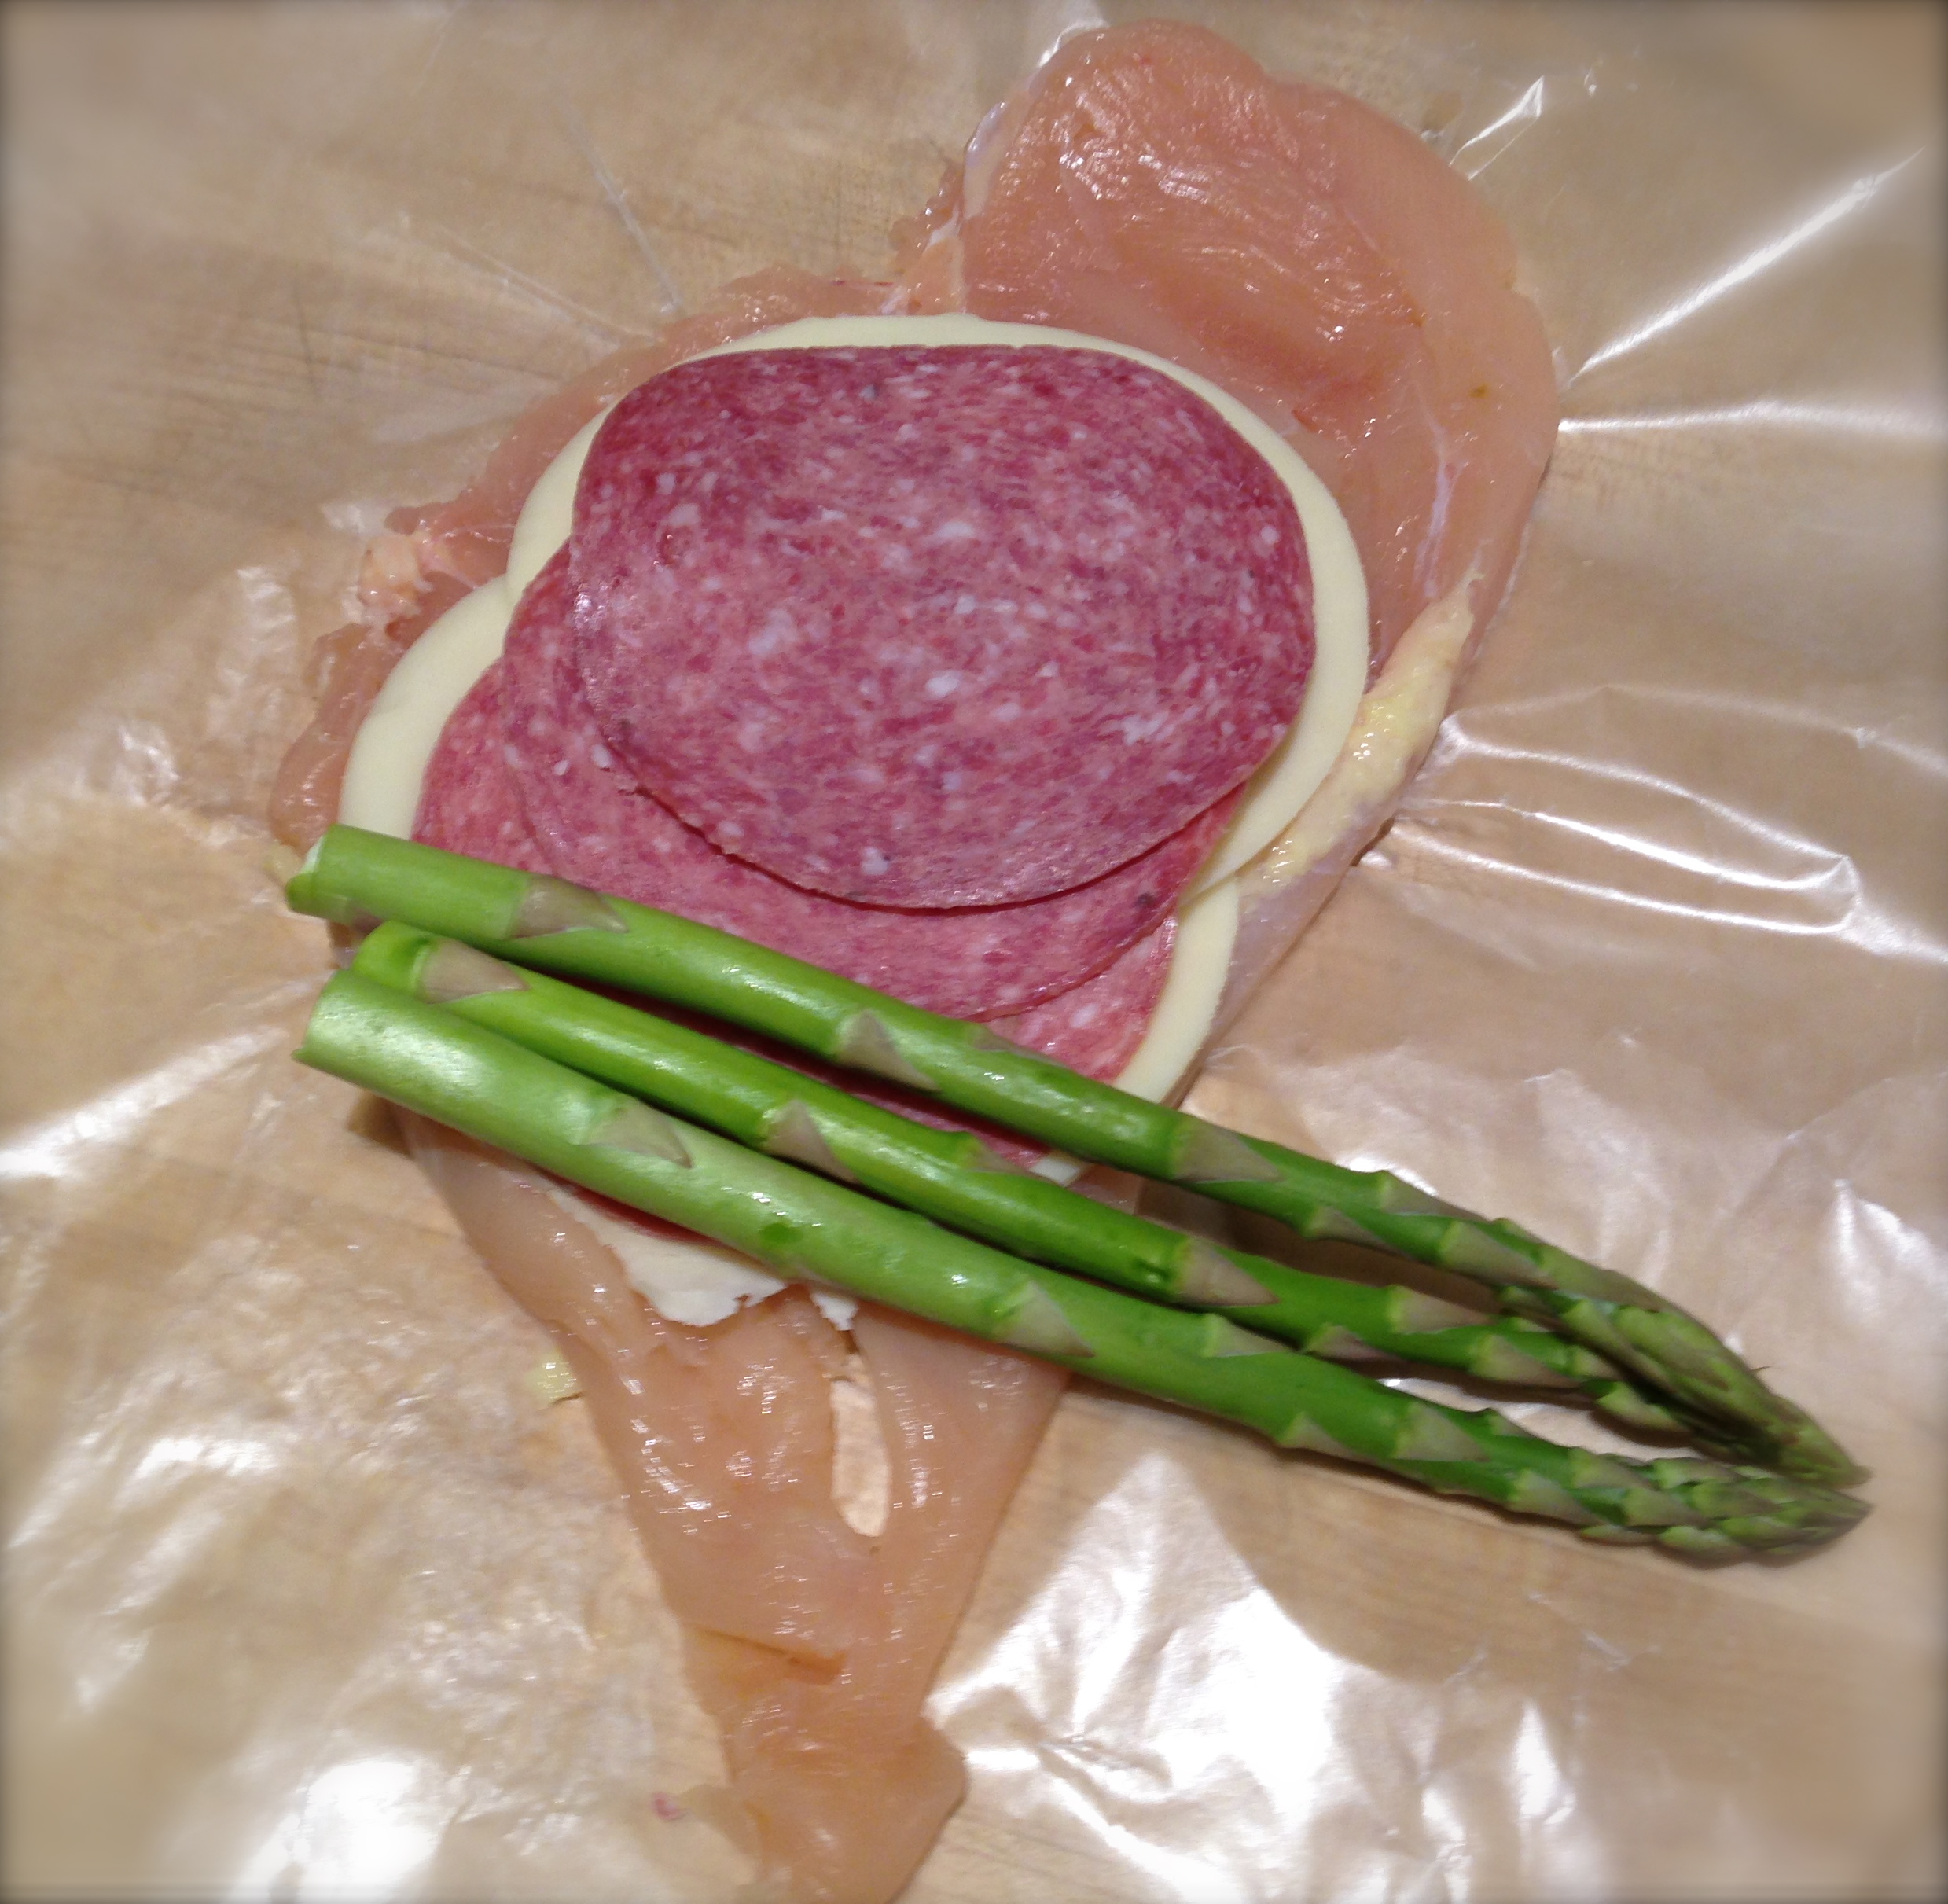
After you rinse the broccoli, pat it dry and mix the broccoli, mushrooms and peas together with some olive oil and salt and pepper (the instructions said to use one tablespoon of olive oil but I used two as one was not nearly enough to coat all of the vegetables evenly) you pile them onto one side of the pan leaving the other side for the chicken breasts.

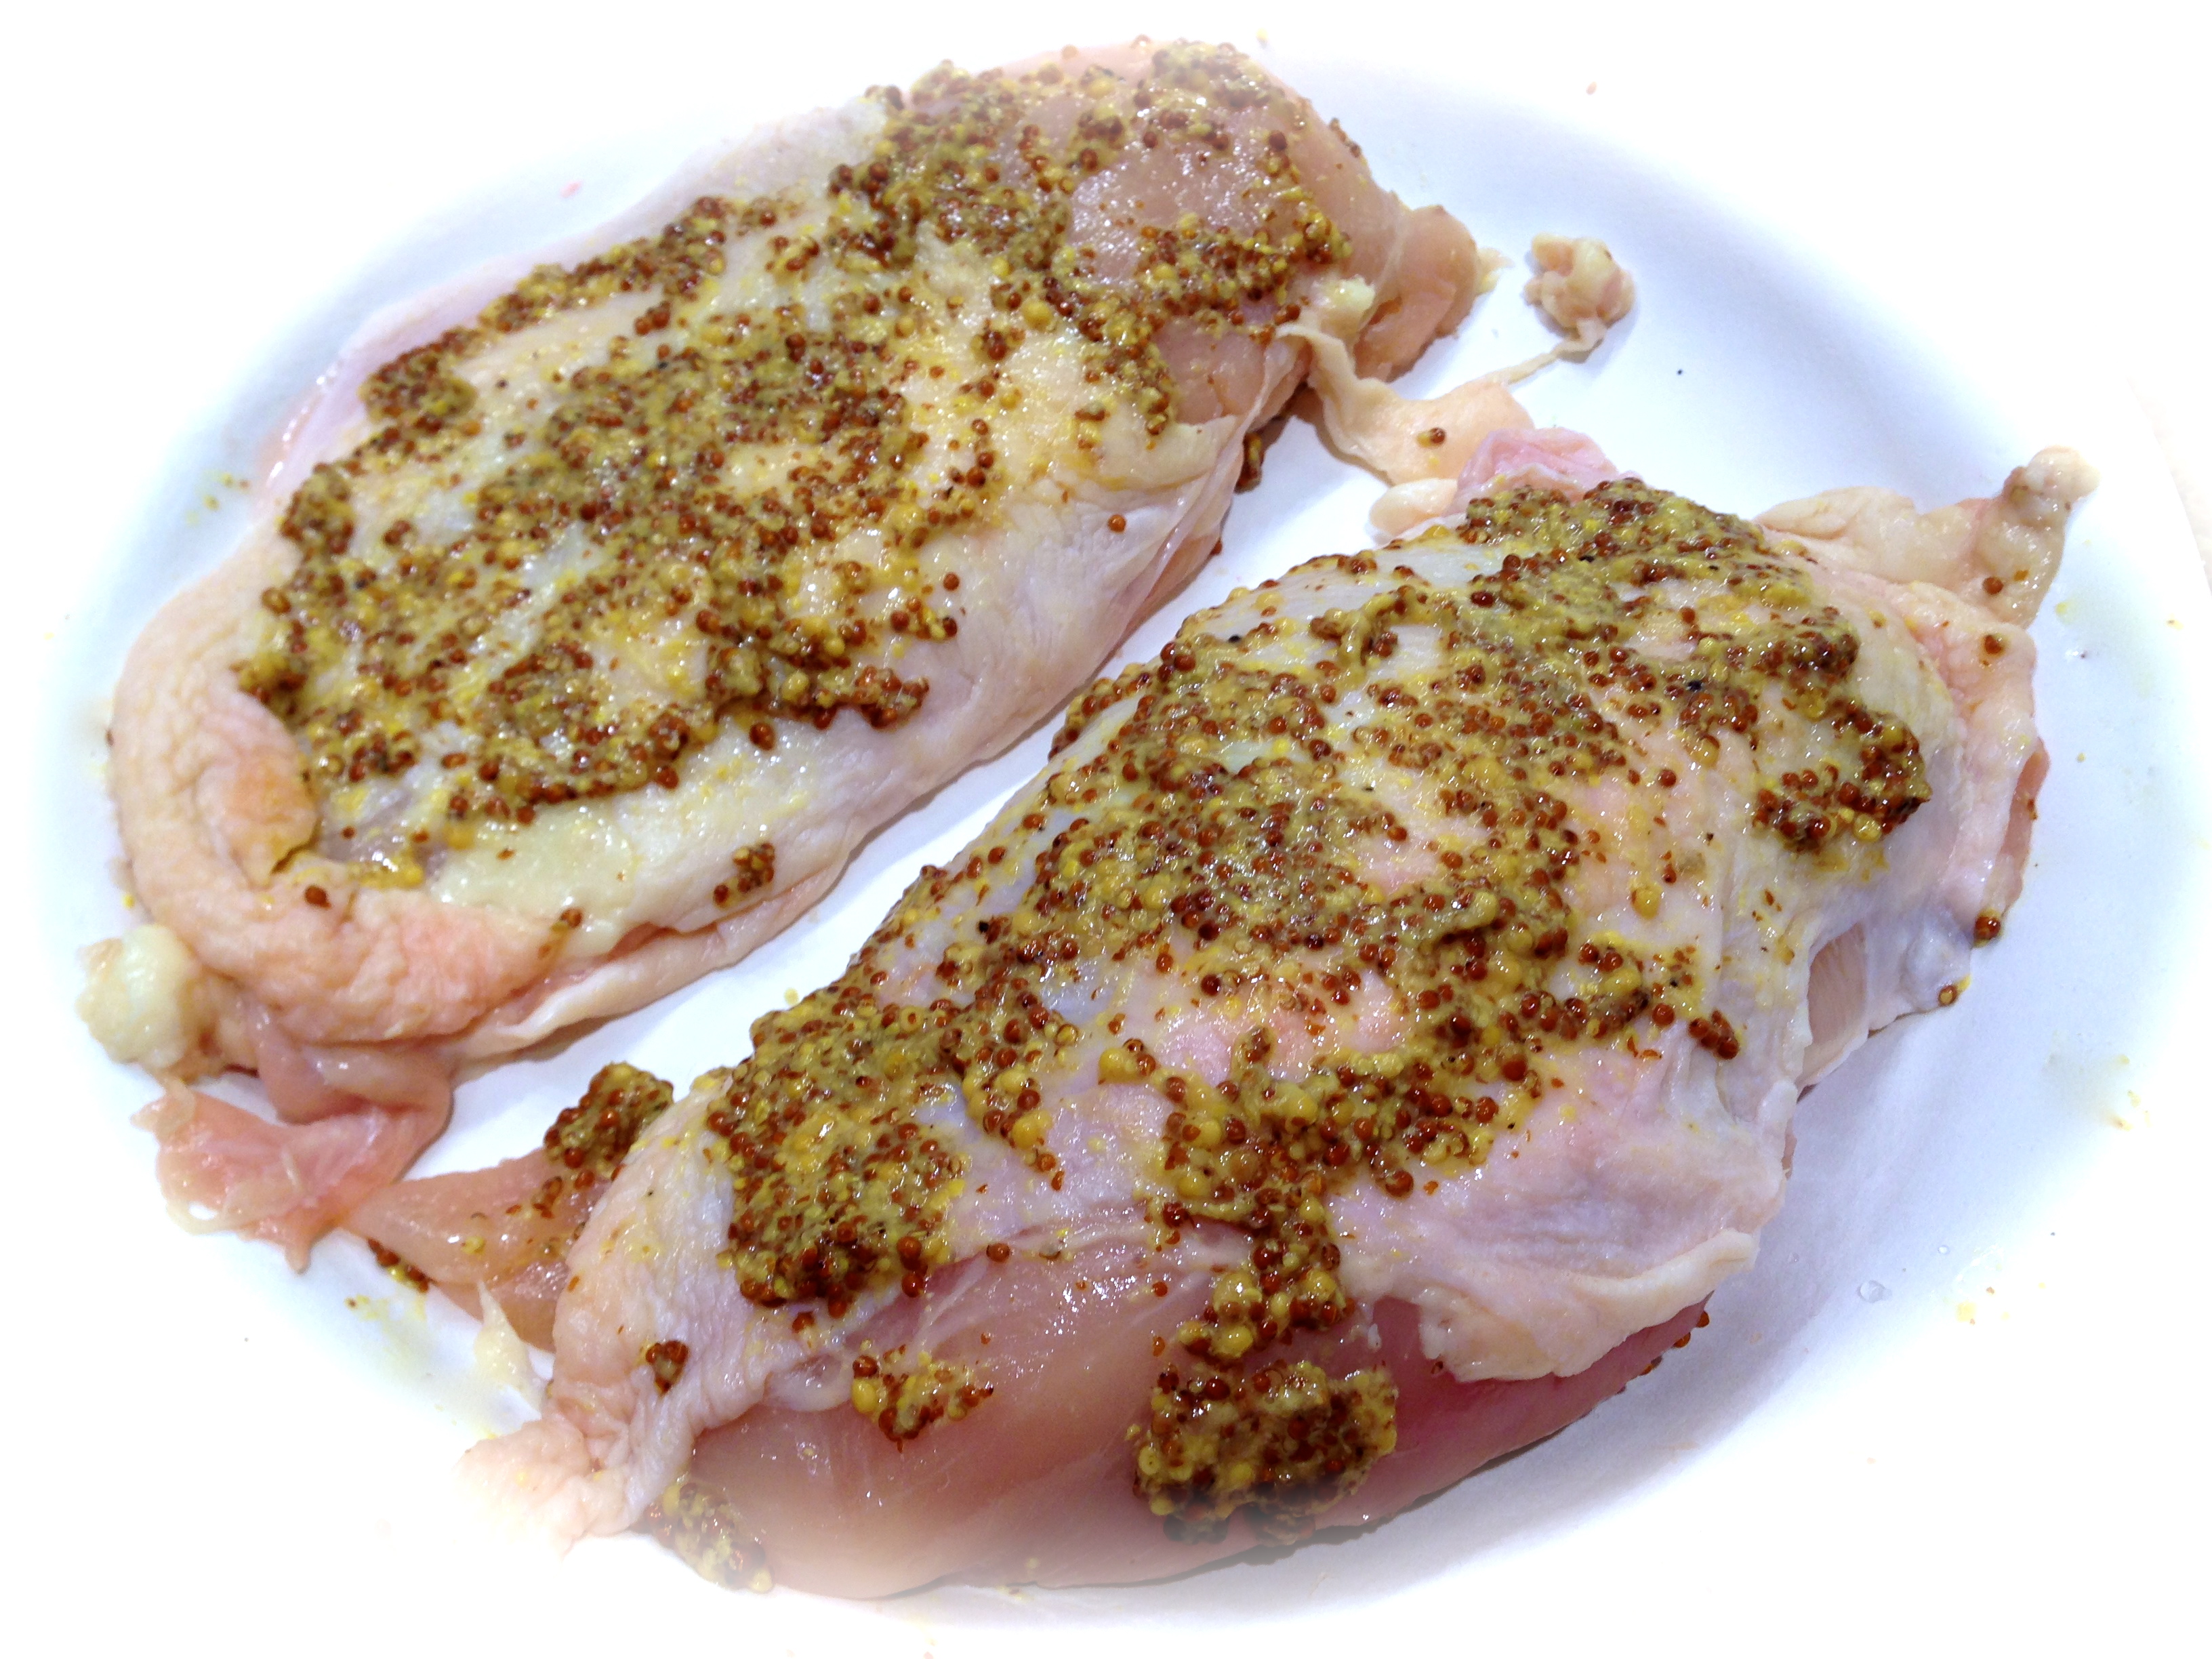
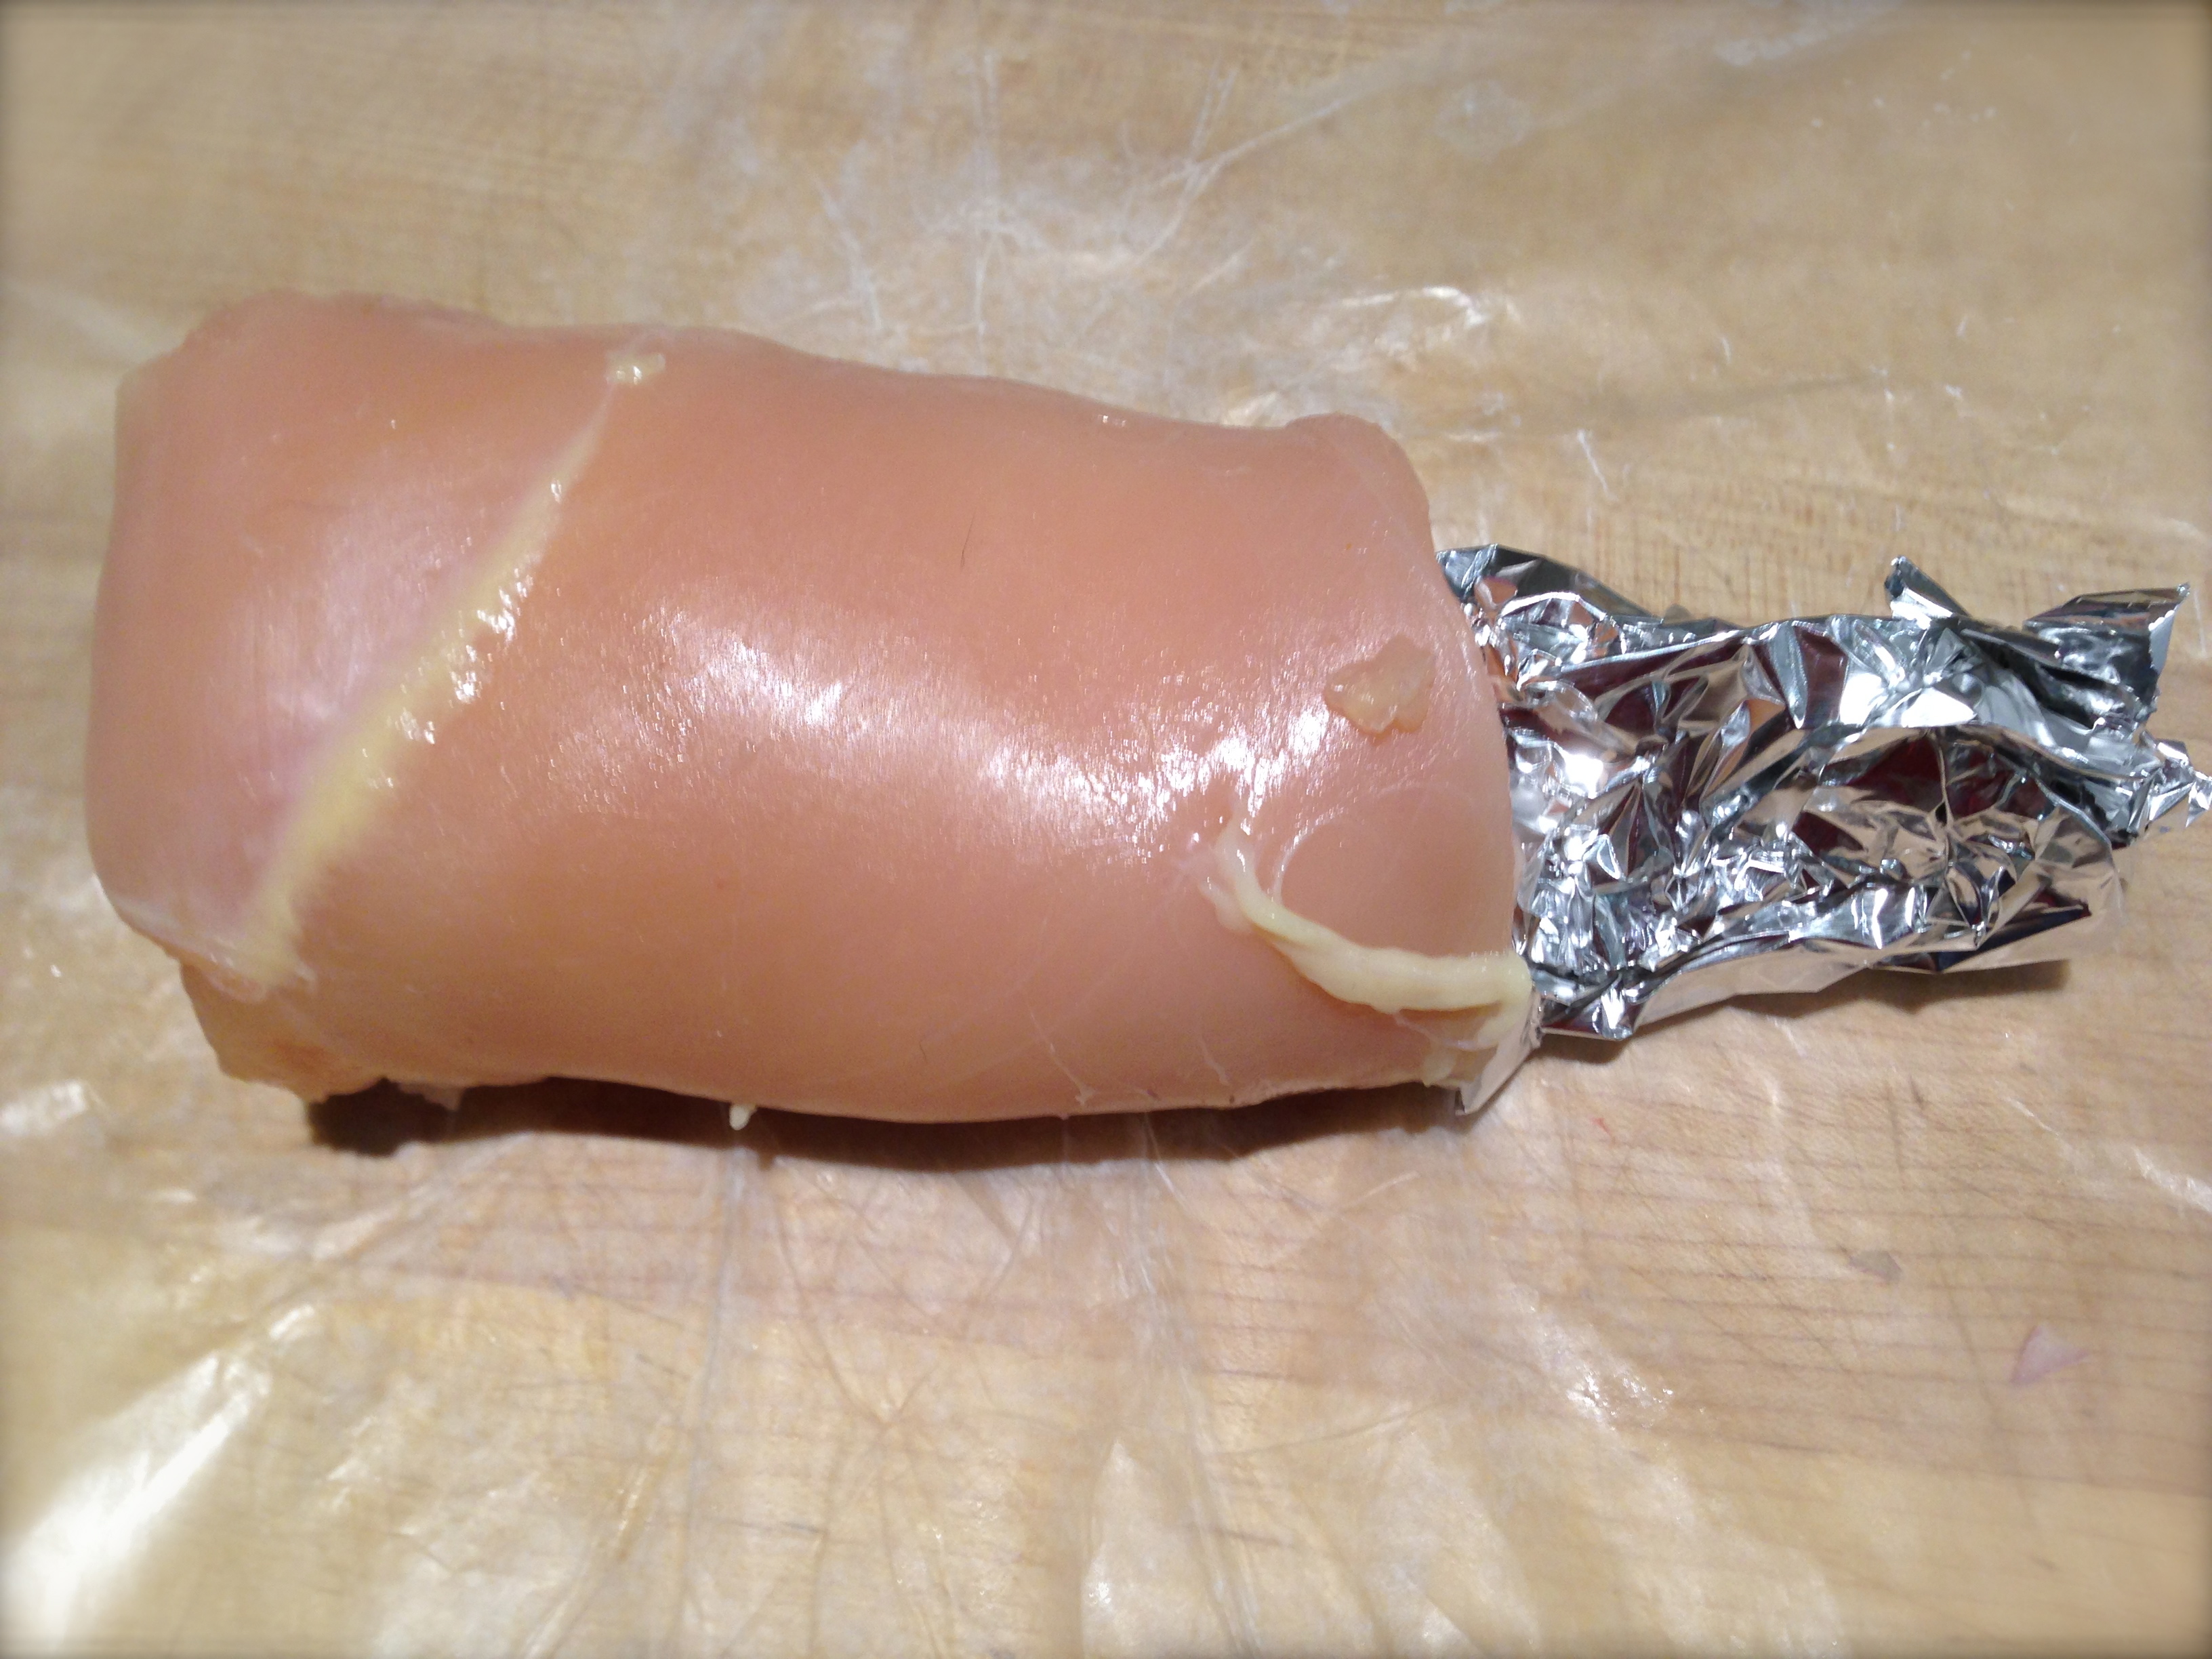
The chicken breasts are packed in their own juices and so I patted them dry before putting them in the pan but first the recipe states to open the cream cheese and spread it on the bottom of the side of the pan you intend to place the chicken. Then place the chicken on top…

Then top the chicken with the demi glace…

And spread it on top of the chicken breasts…

Then pop the pan into a 425 degree oven for 25-30 minutes or until the chicken reaches an internal temperature of 165 degrees.

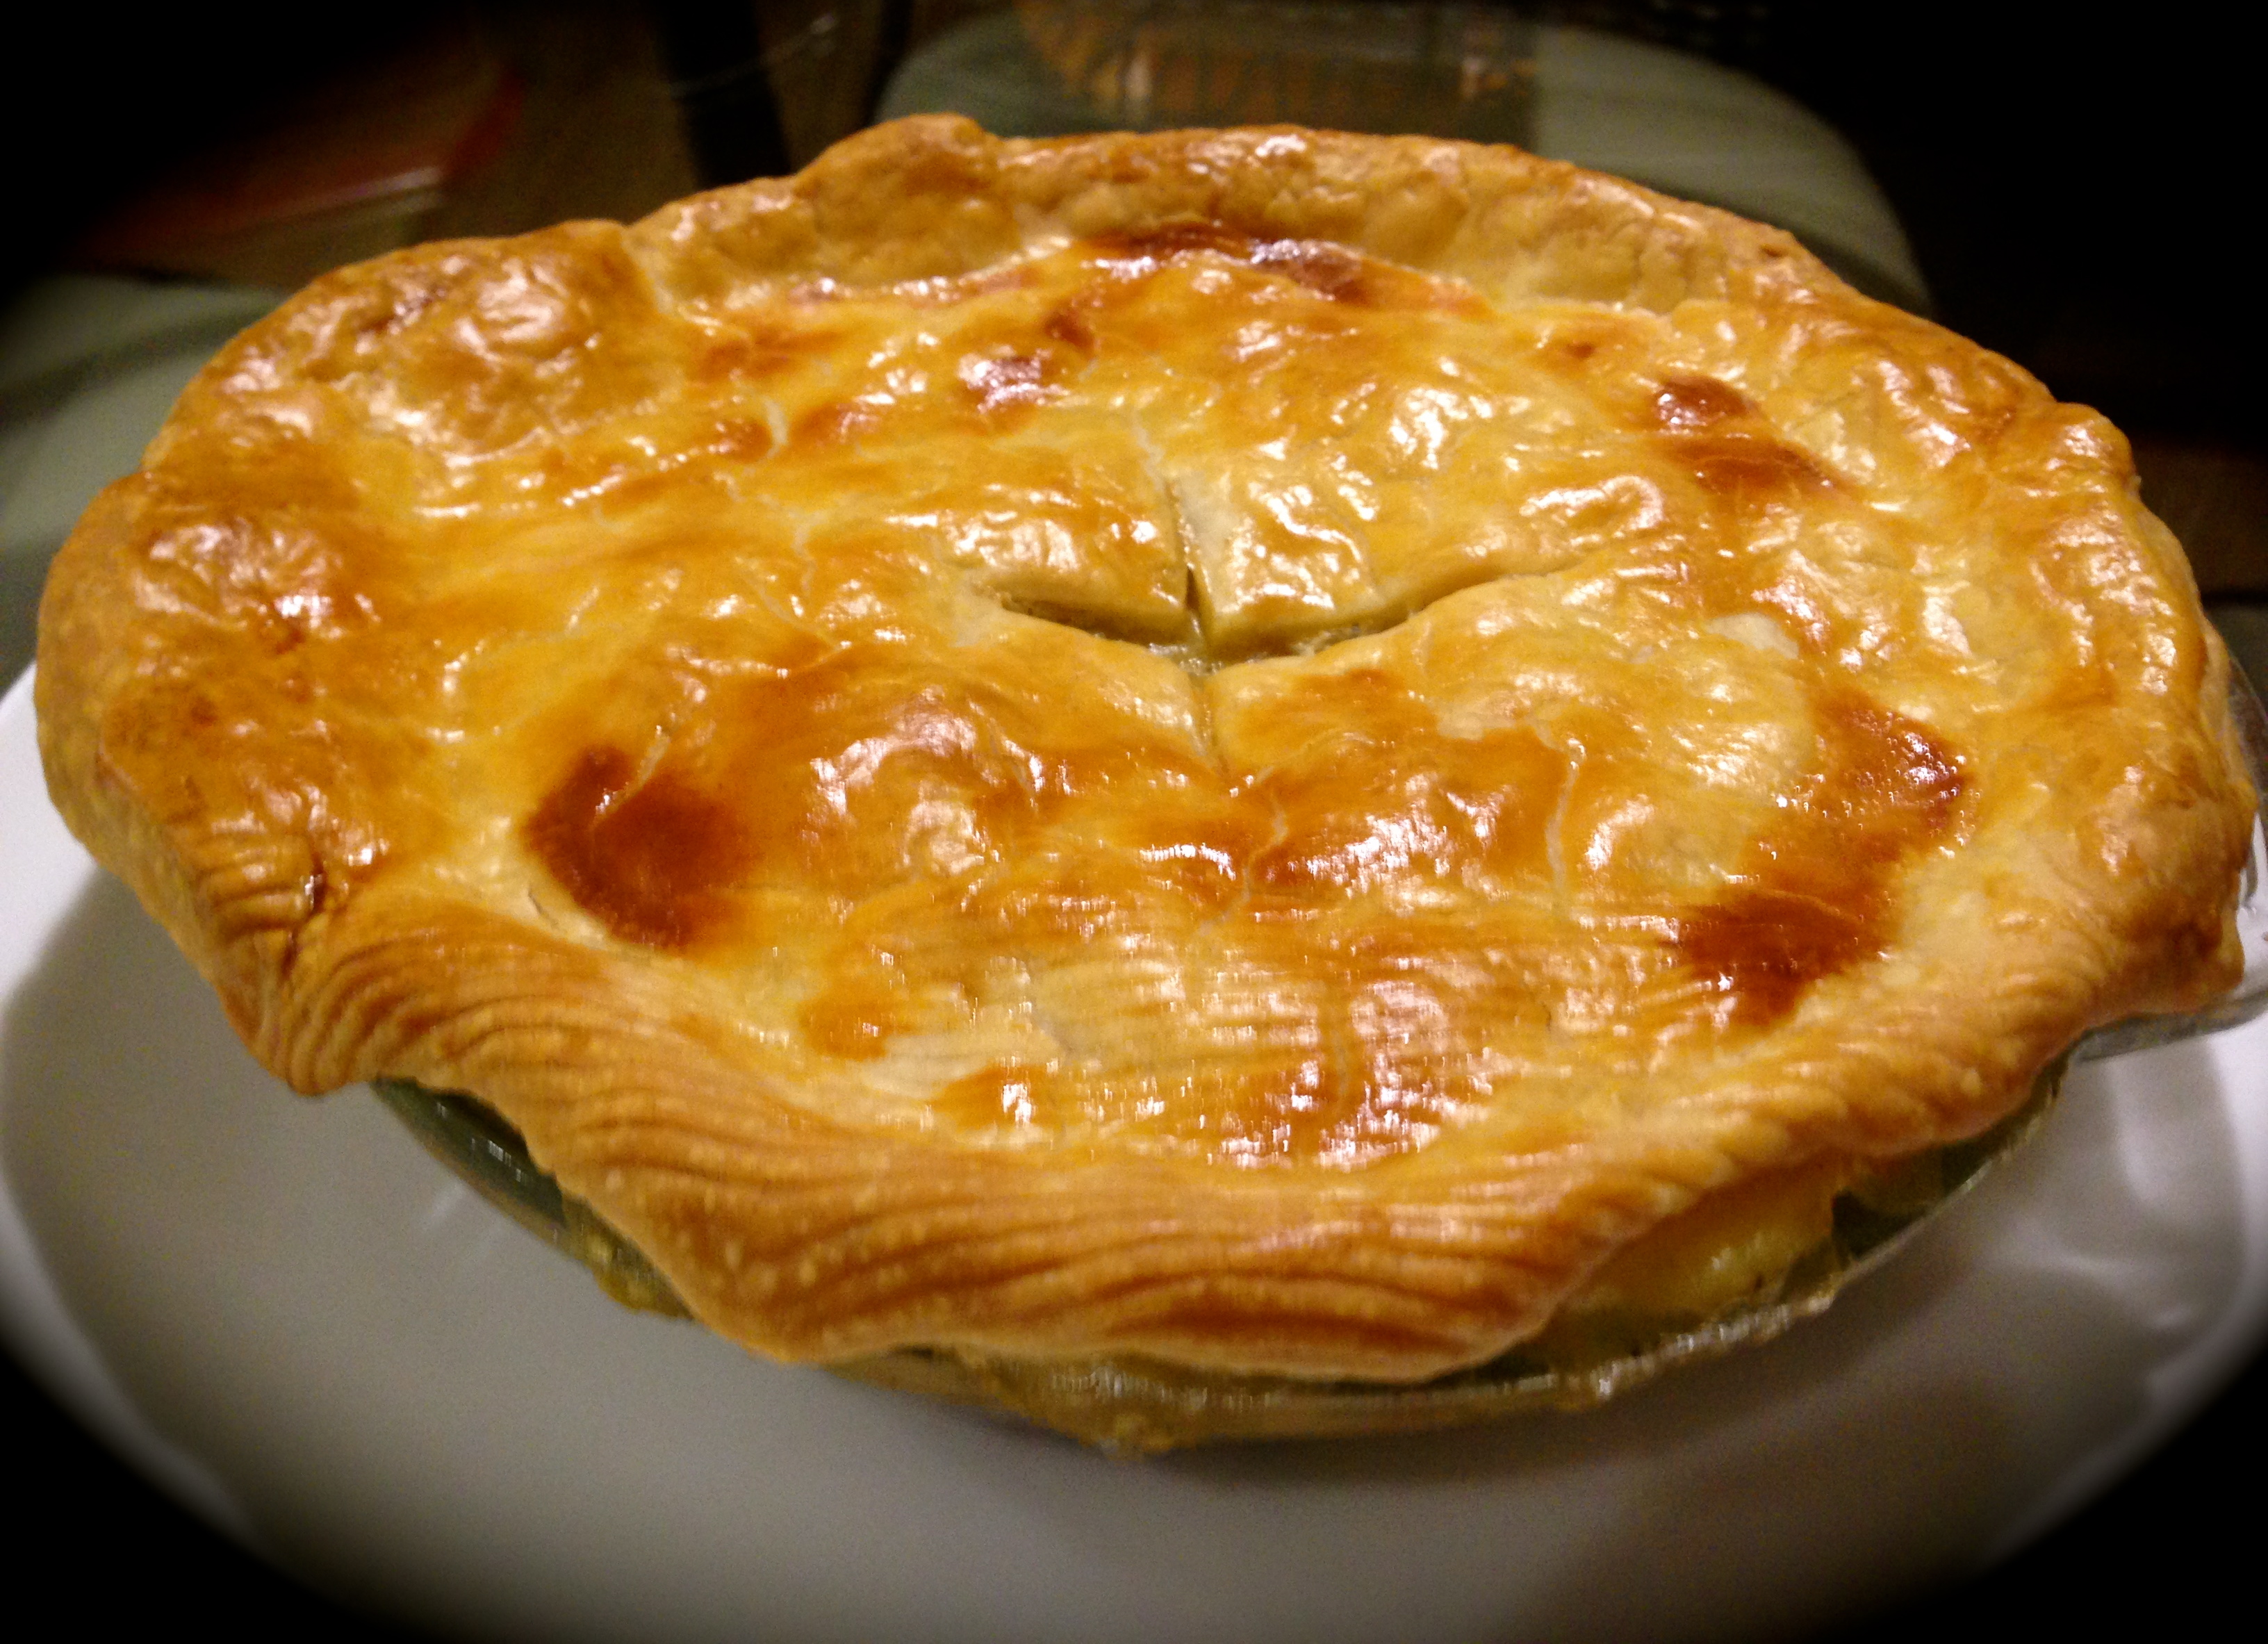
And that’s it – you have your meal! Or is that really it? Things are not always as simple as they seem so let me share my lessons learned making this dish. I think you’ll find them interesting.

Lesson Learned One – Regardless of what the recipe may say use your own good judgment: I know I’ve said many times in this blog that recipes are designed to be guidelines not gospel and you need to know what works and doesn’t work in your oven. The same applies to meal kits. Although the recipe called for cooking the chicken breasts at 425 for 25-20 minutes I knew that temperature for that amount of time would incinerate those small breasts.

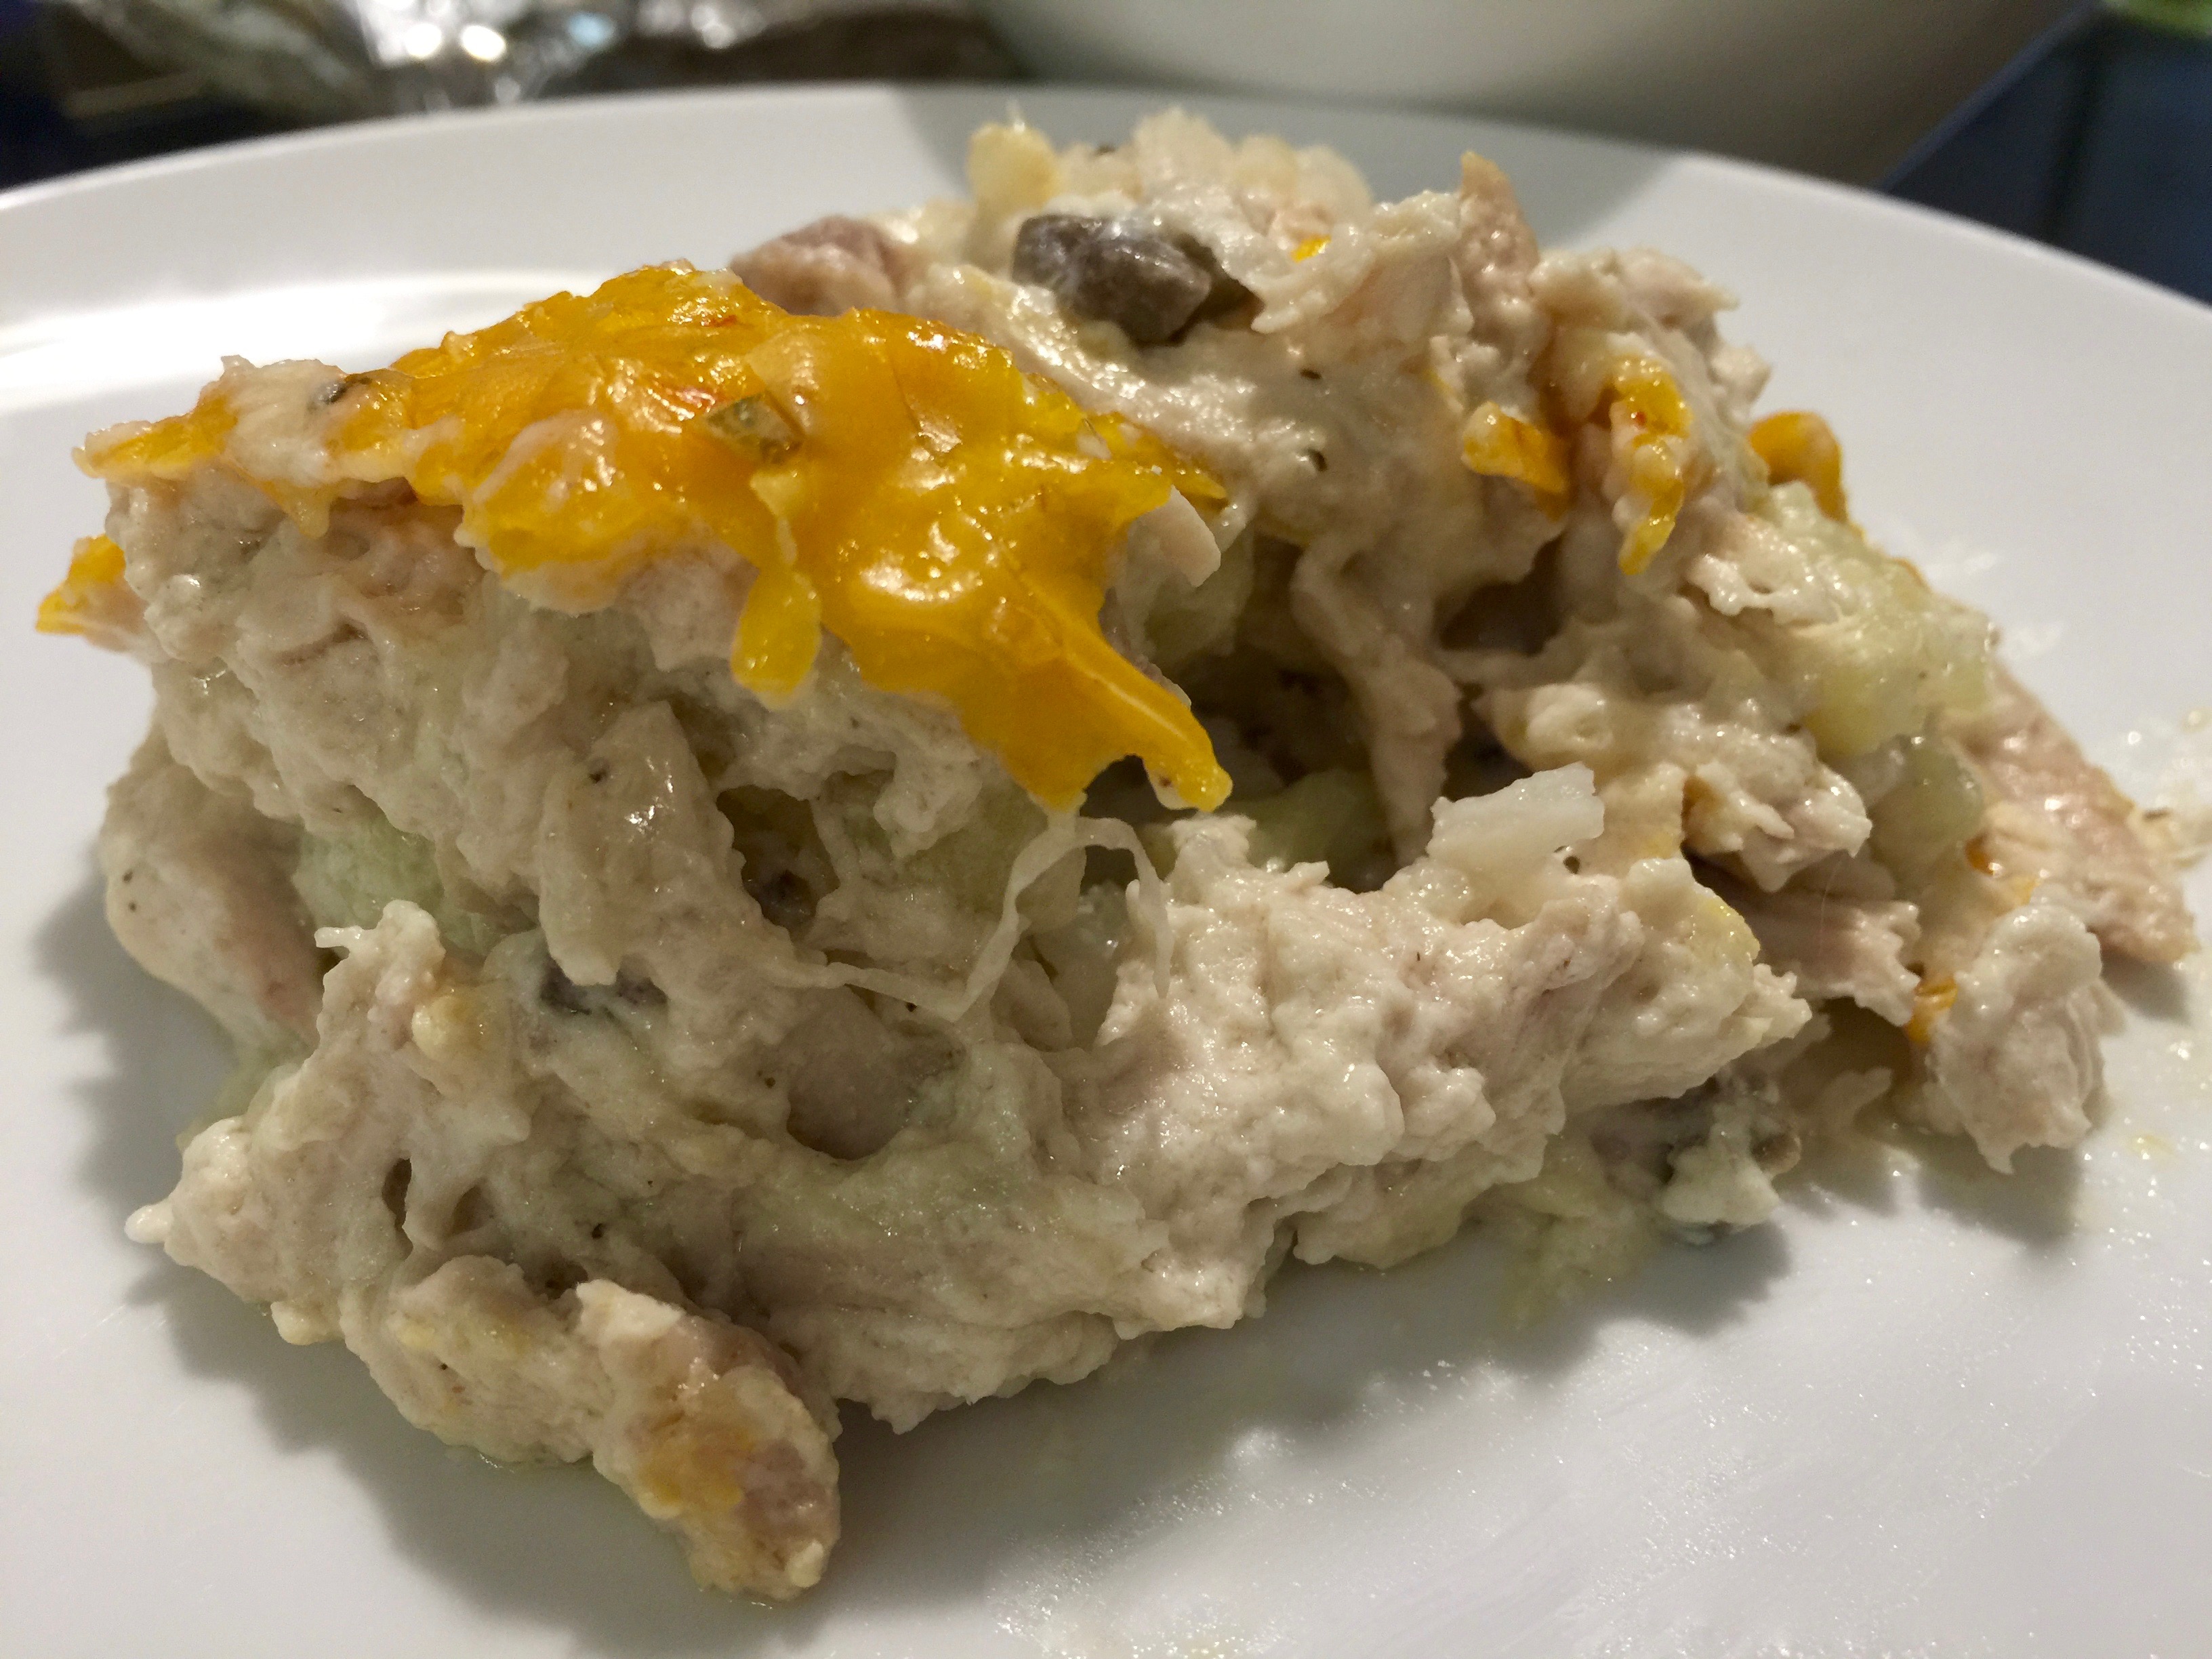
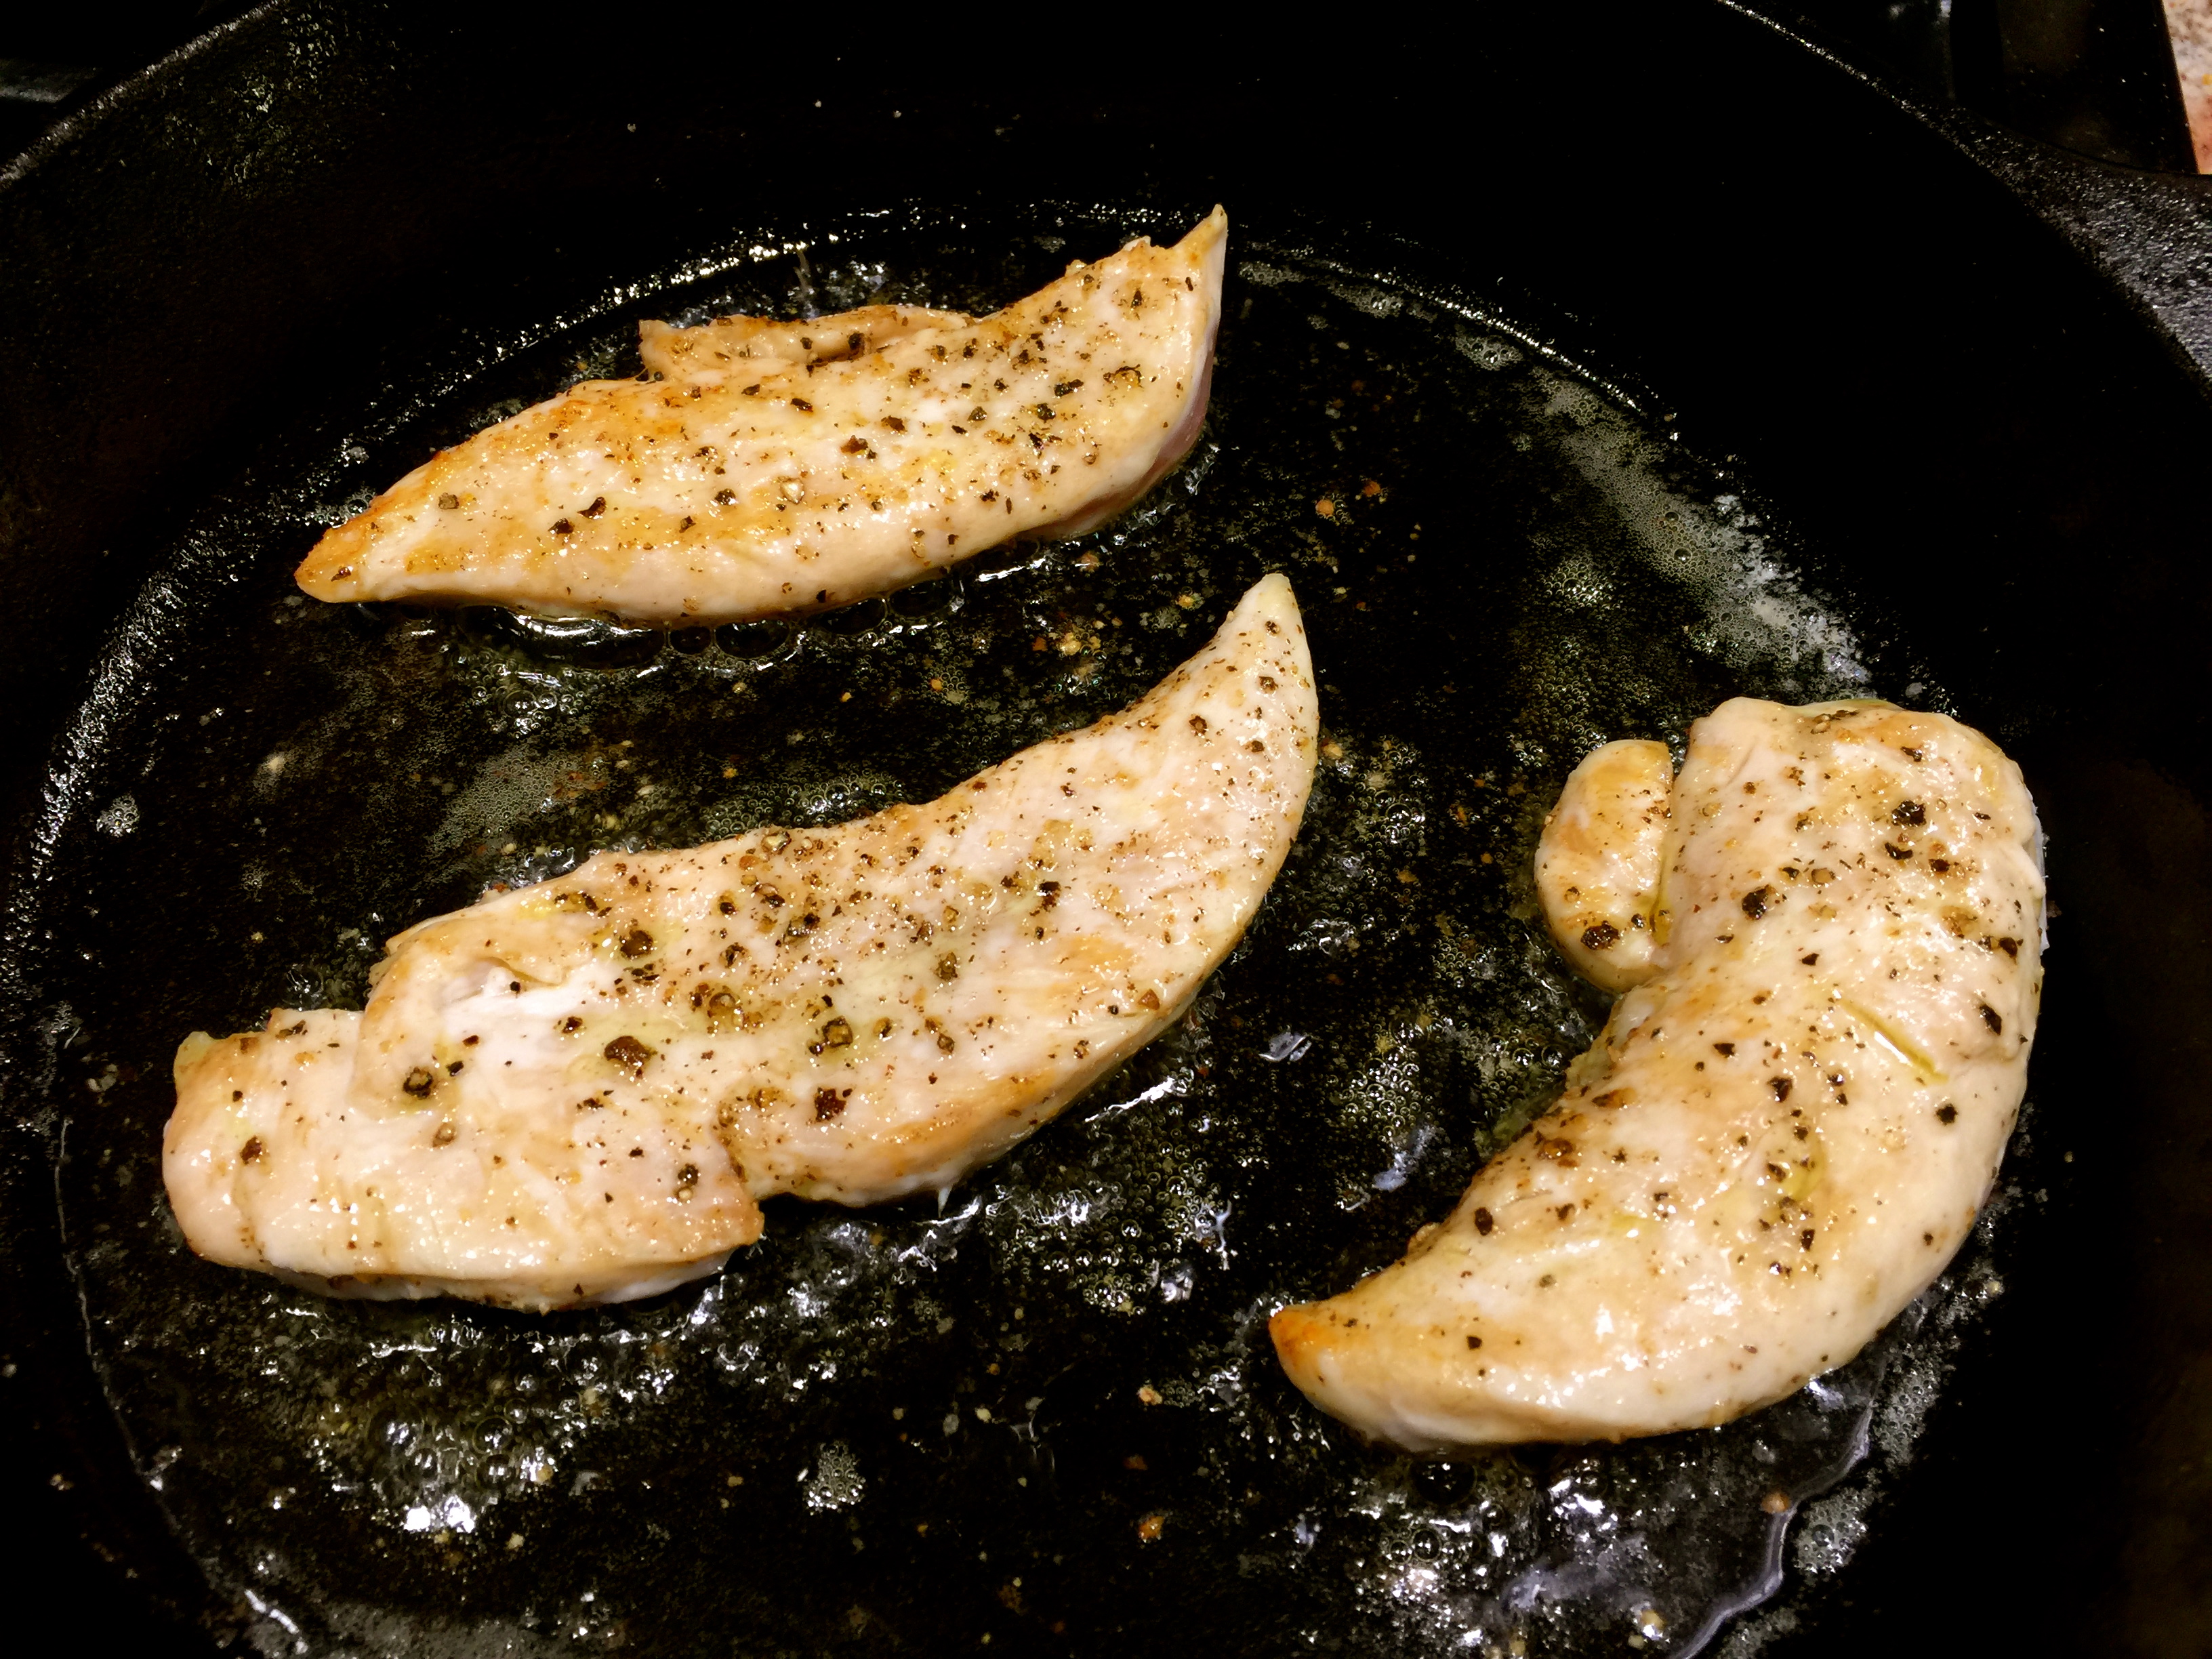
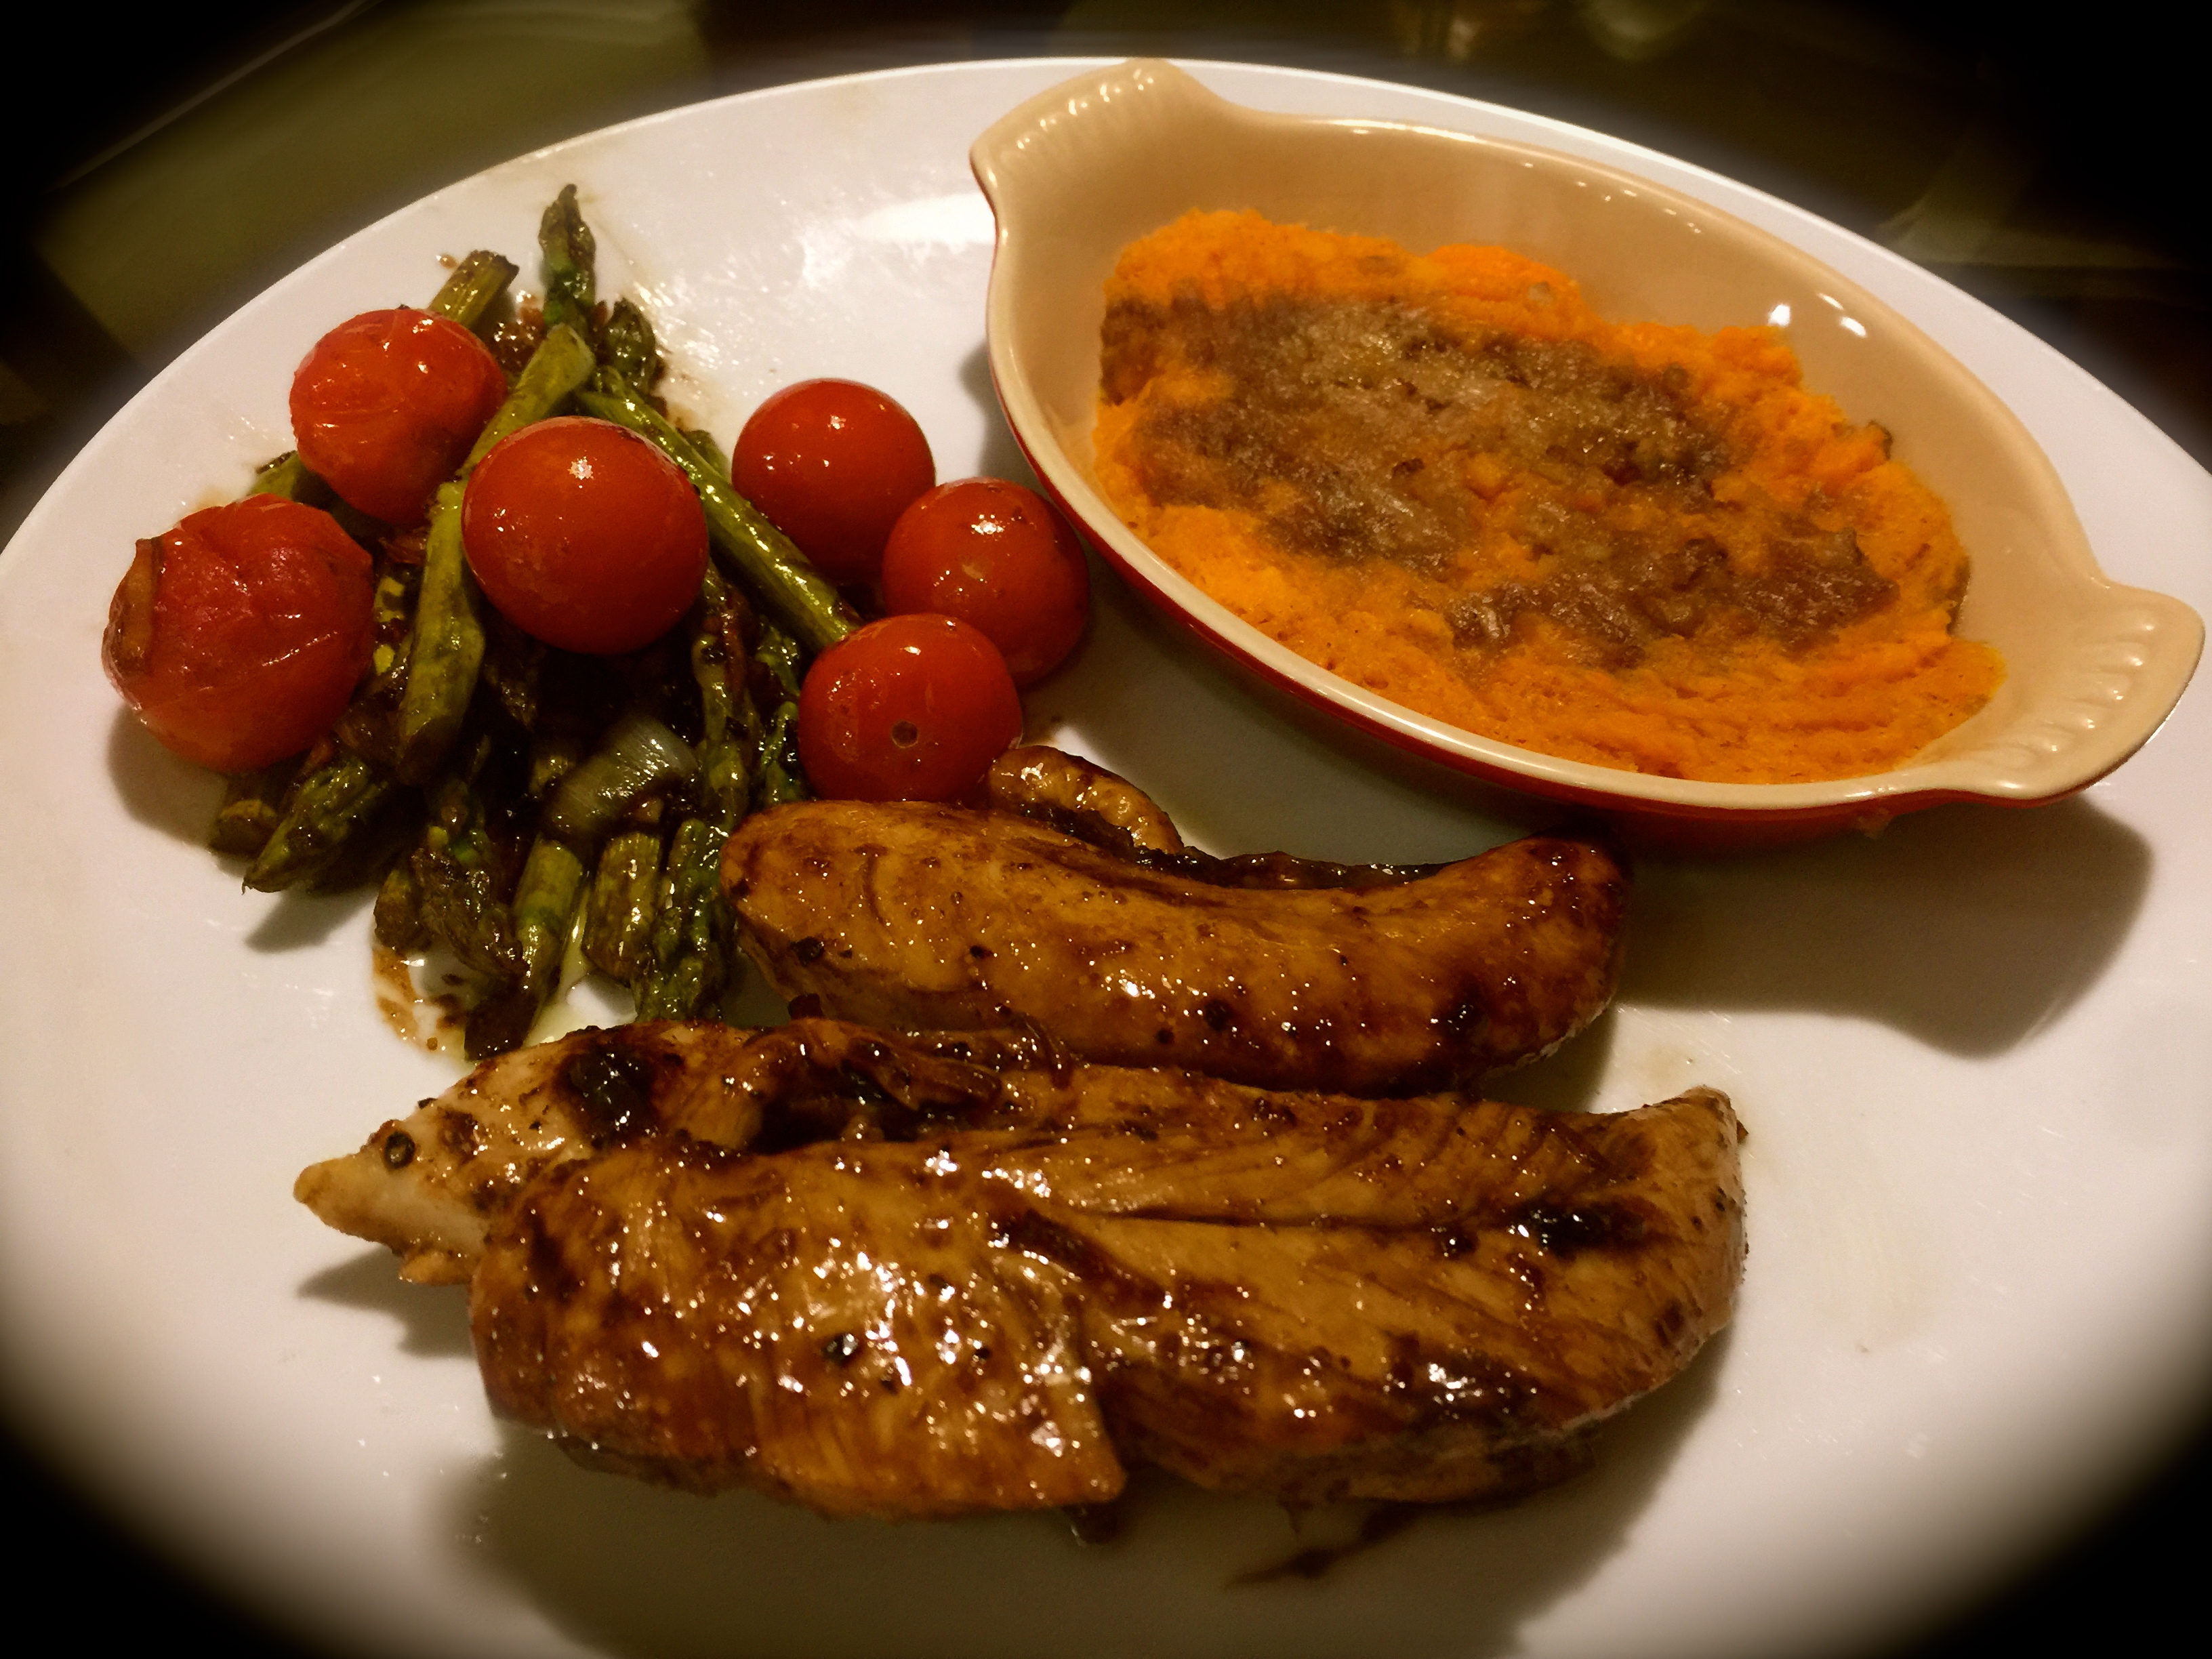
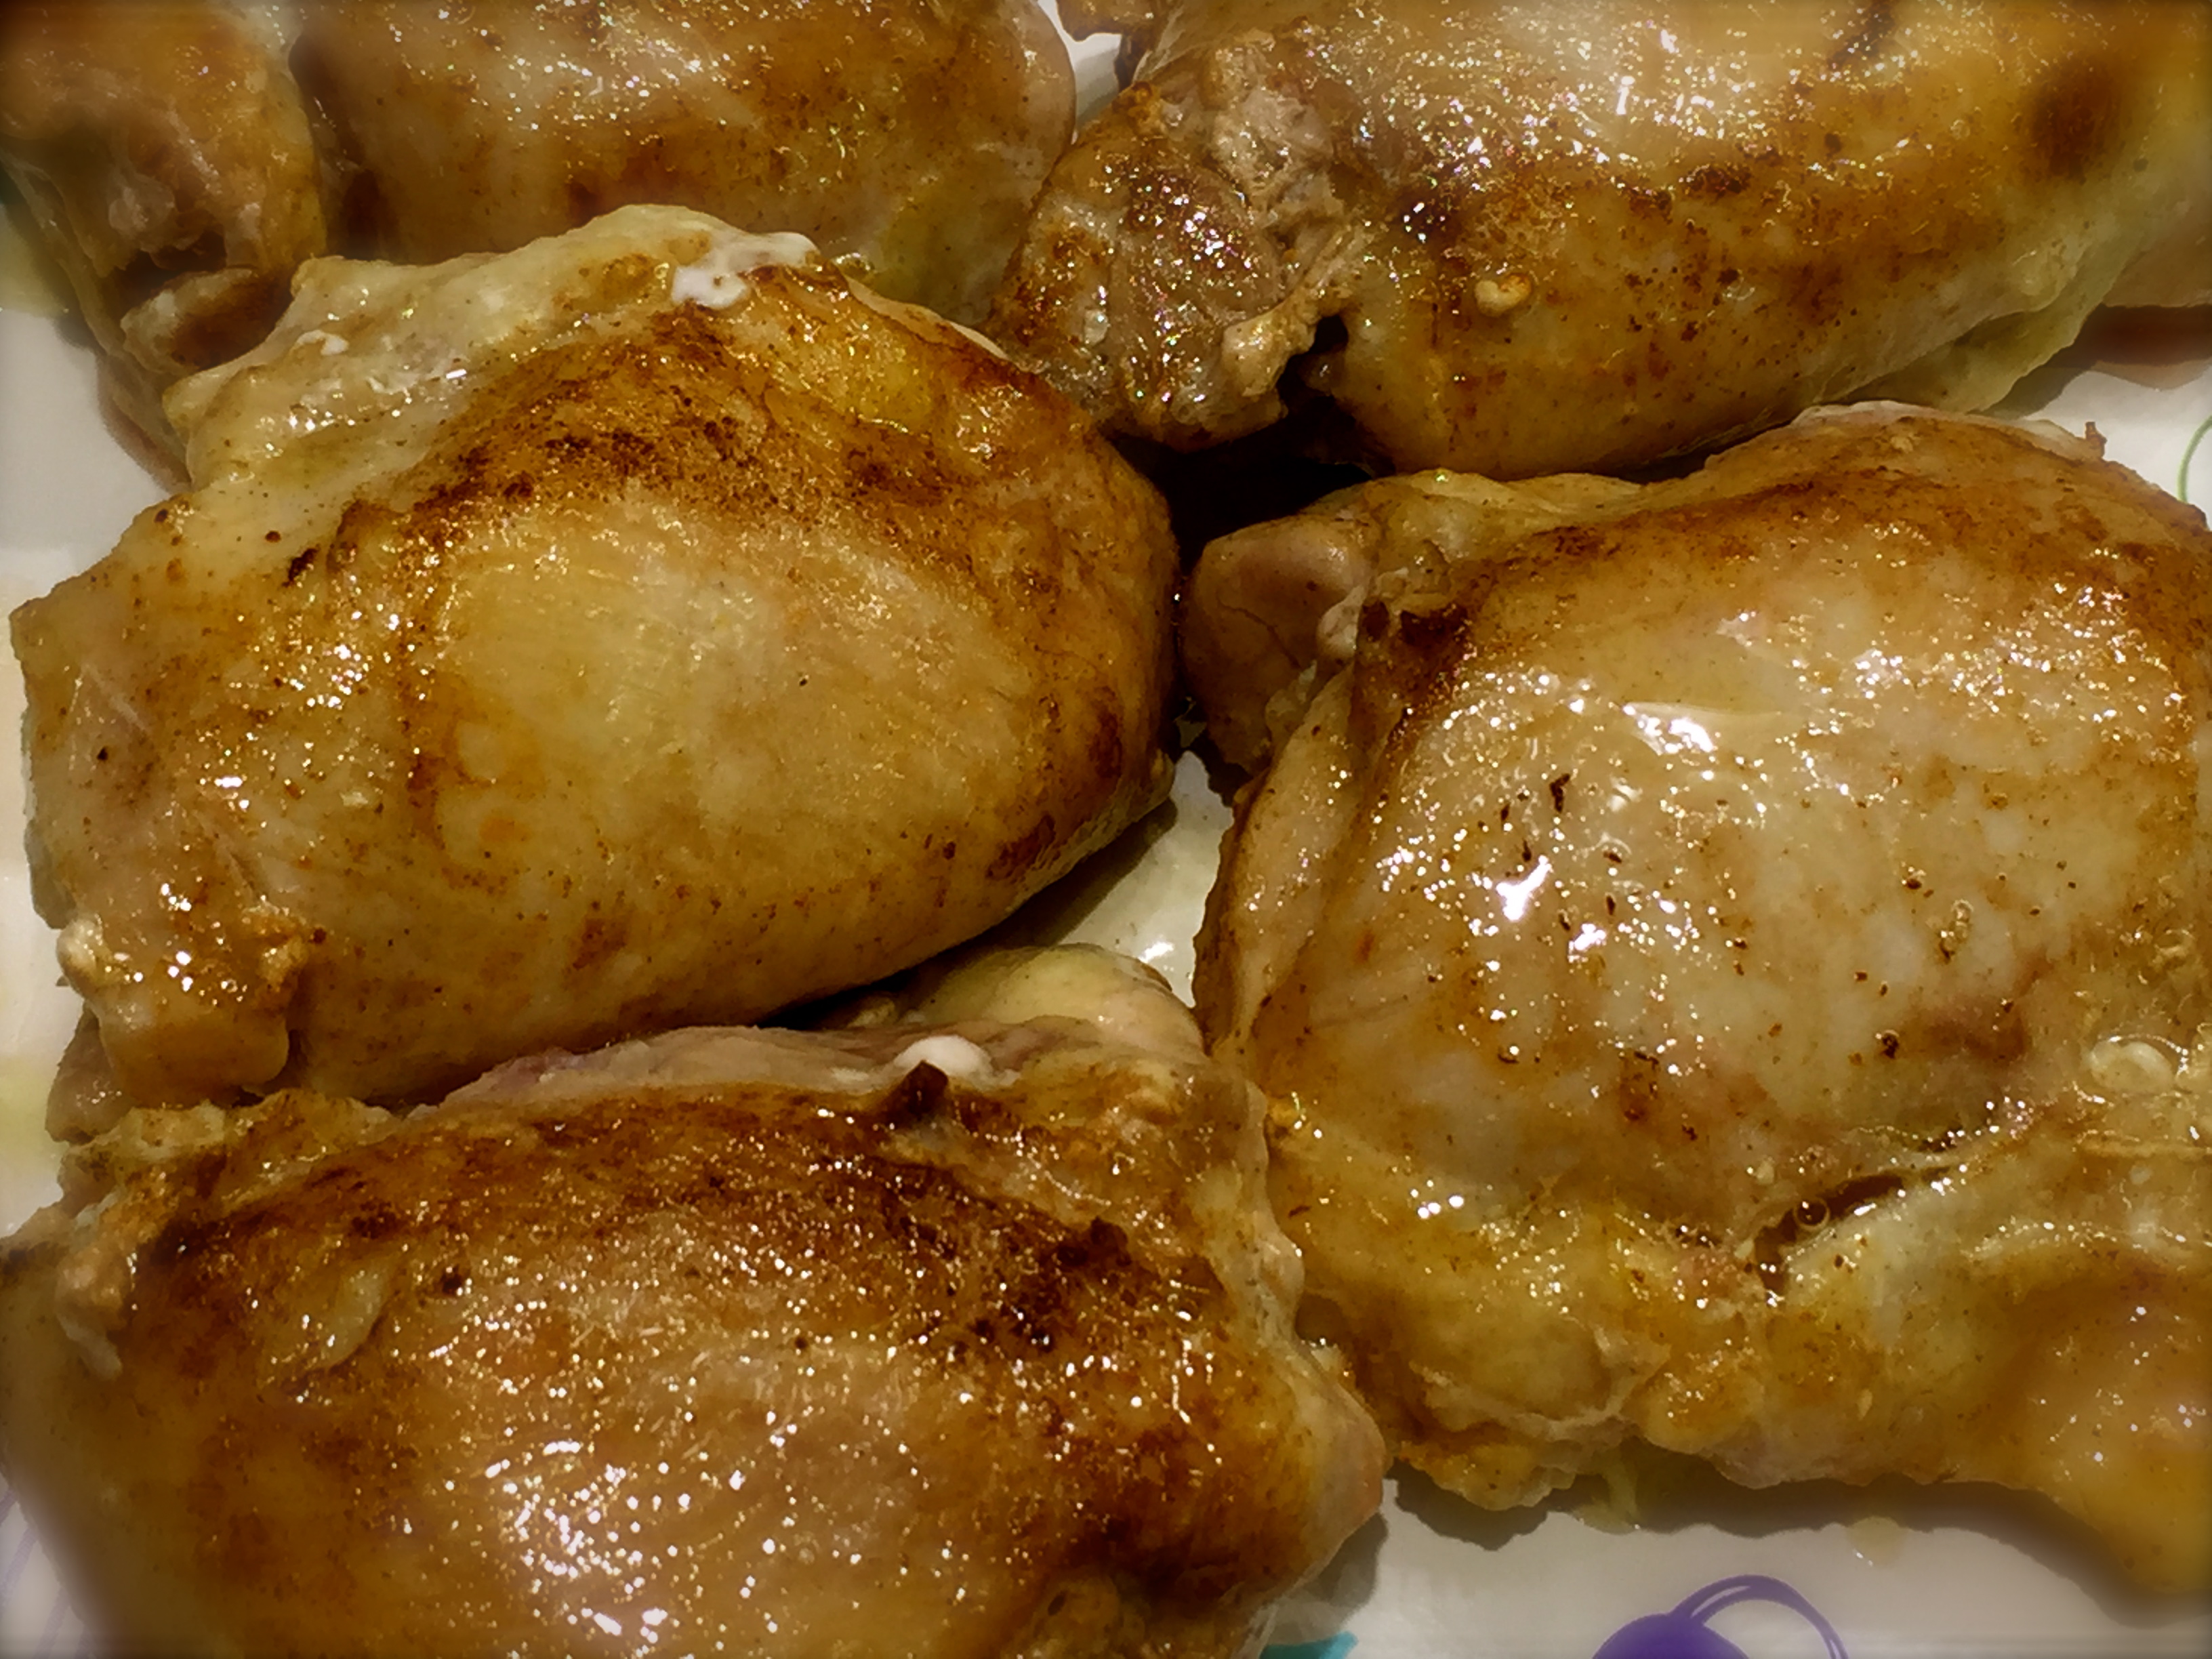
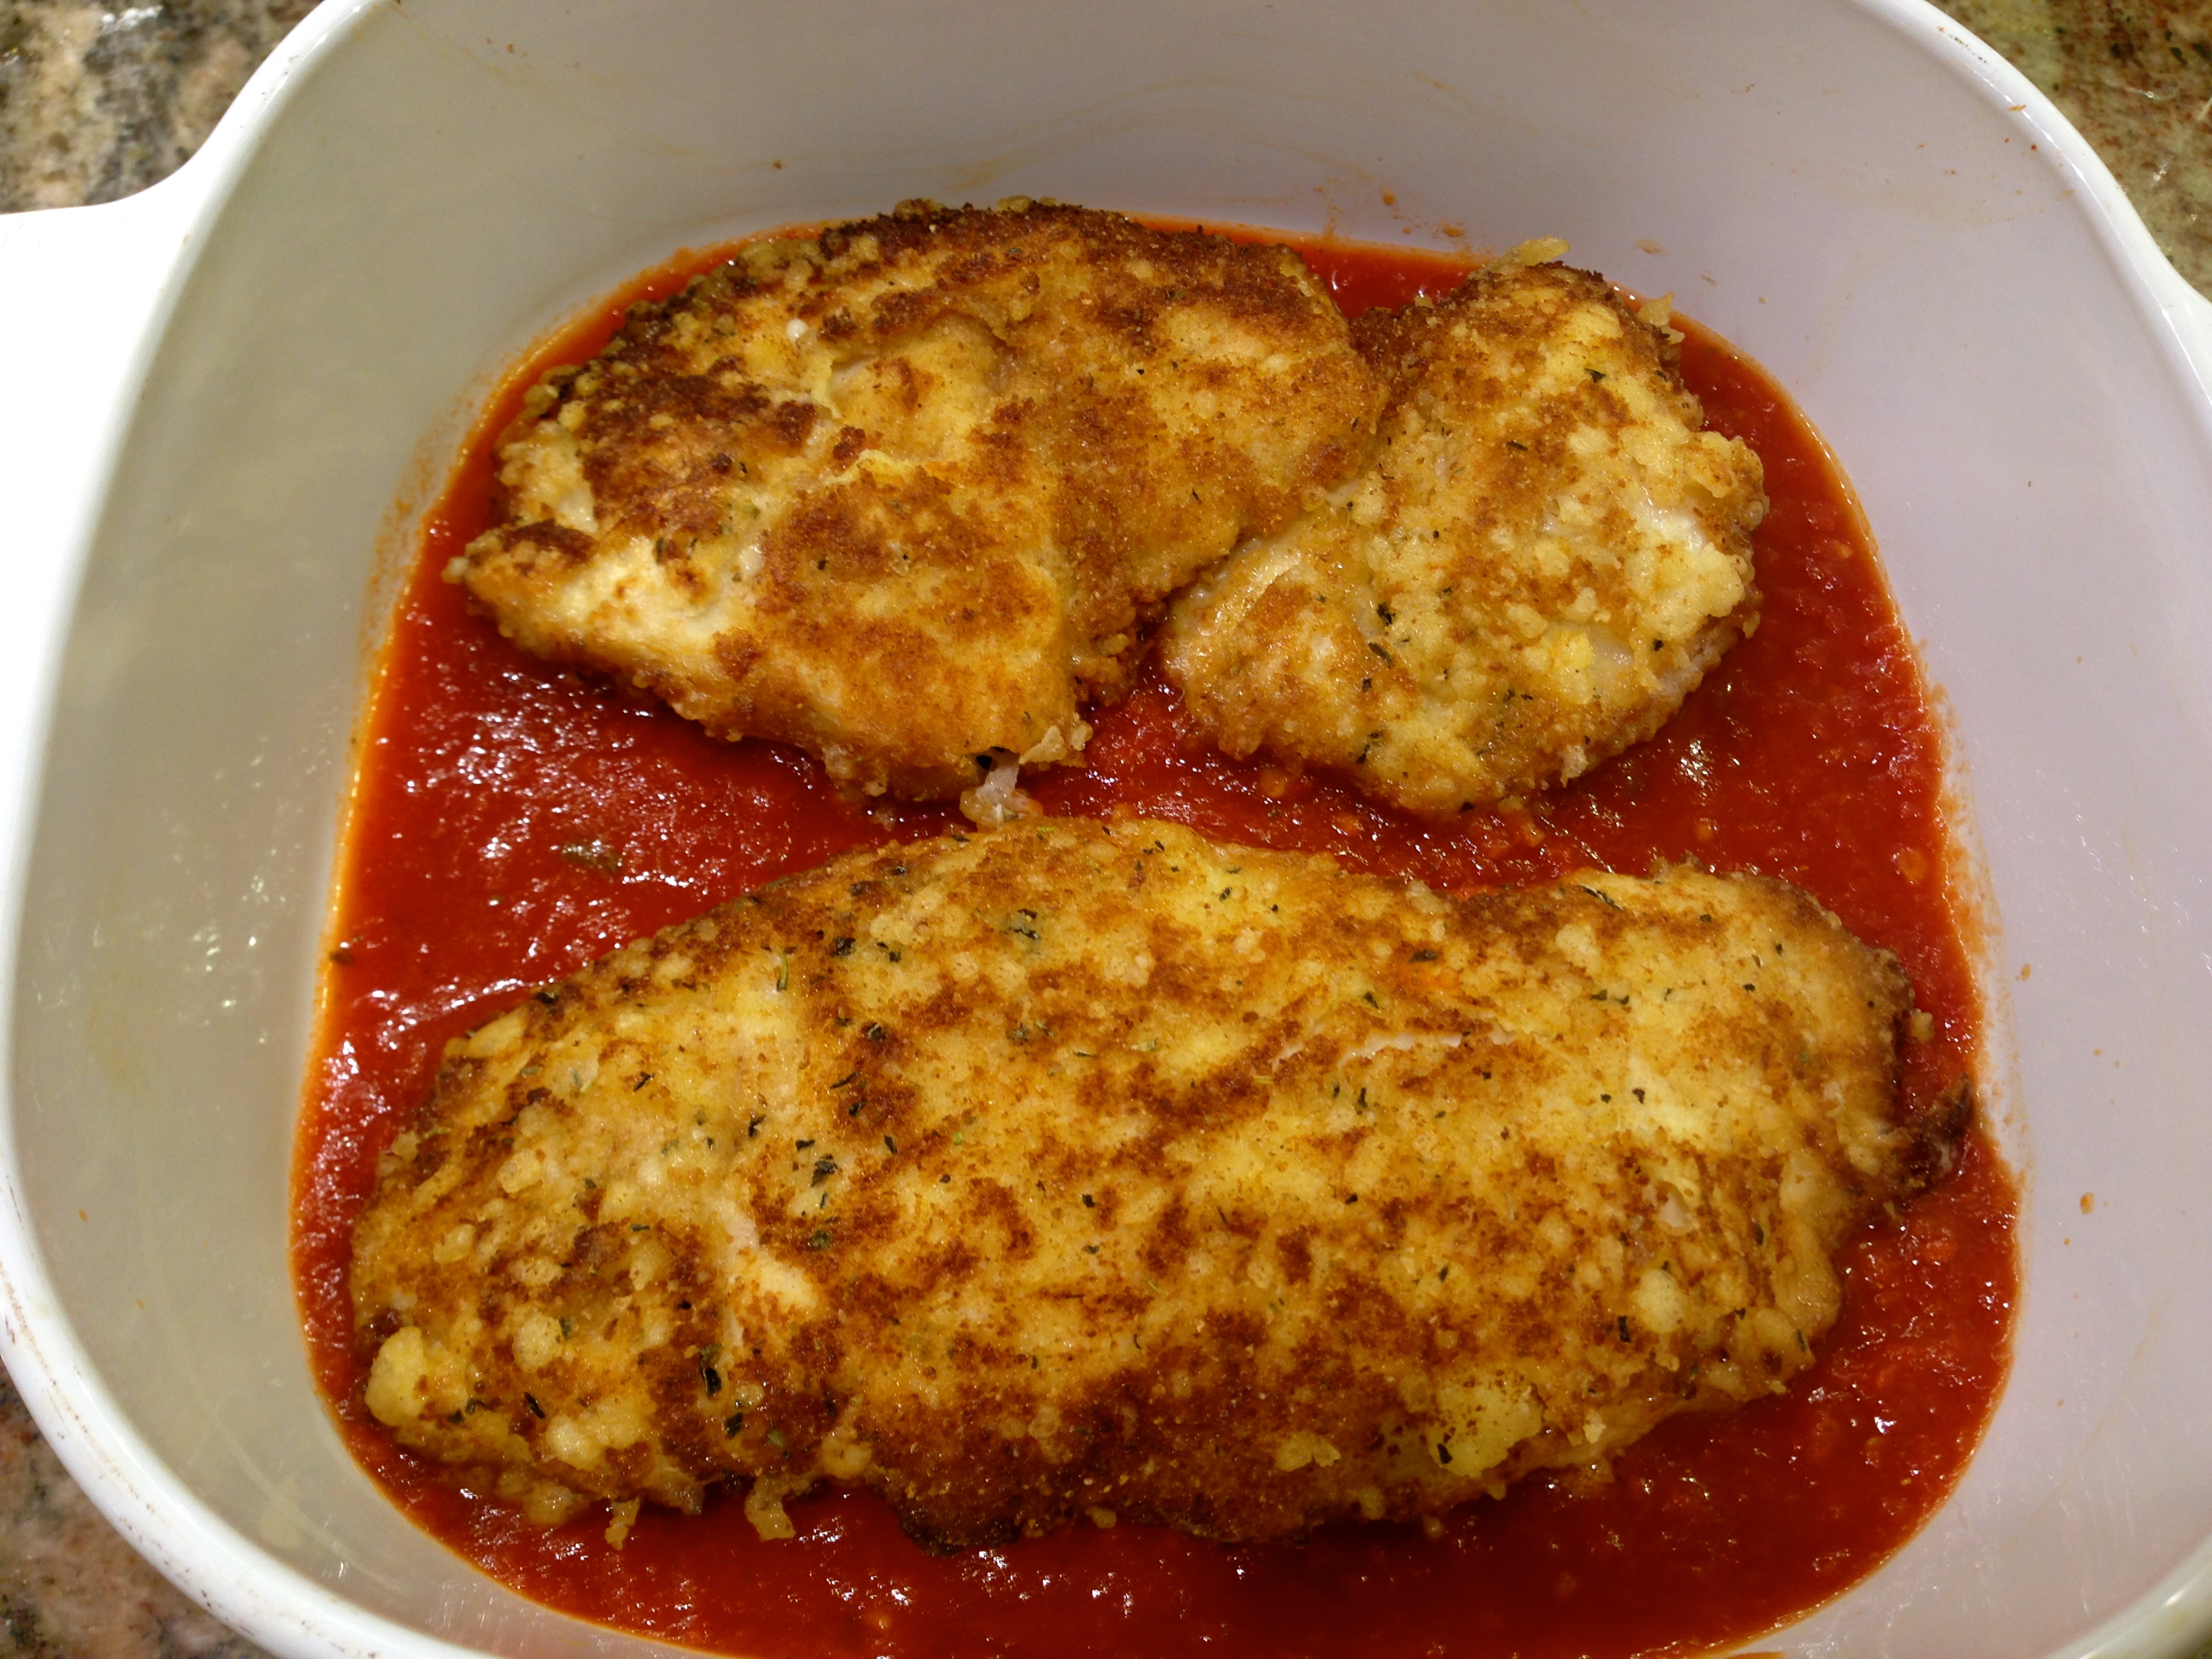
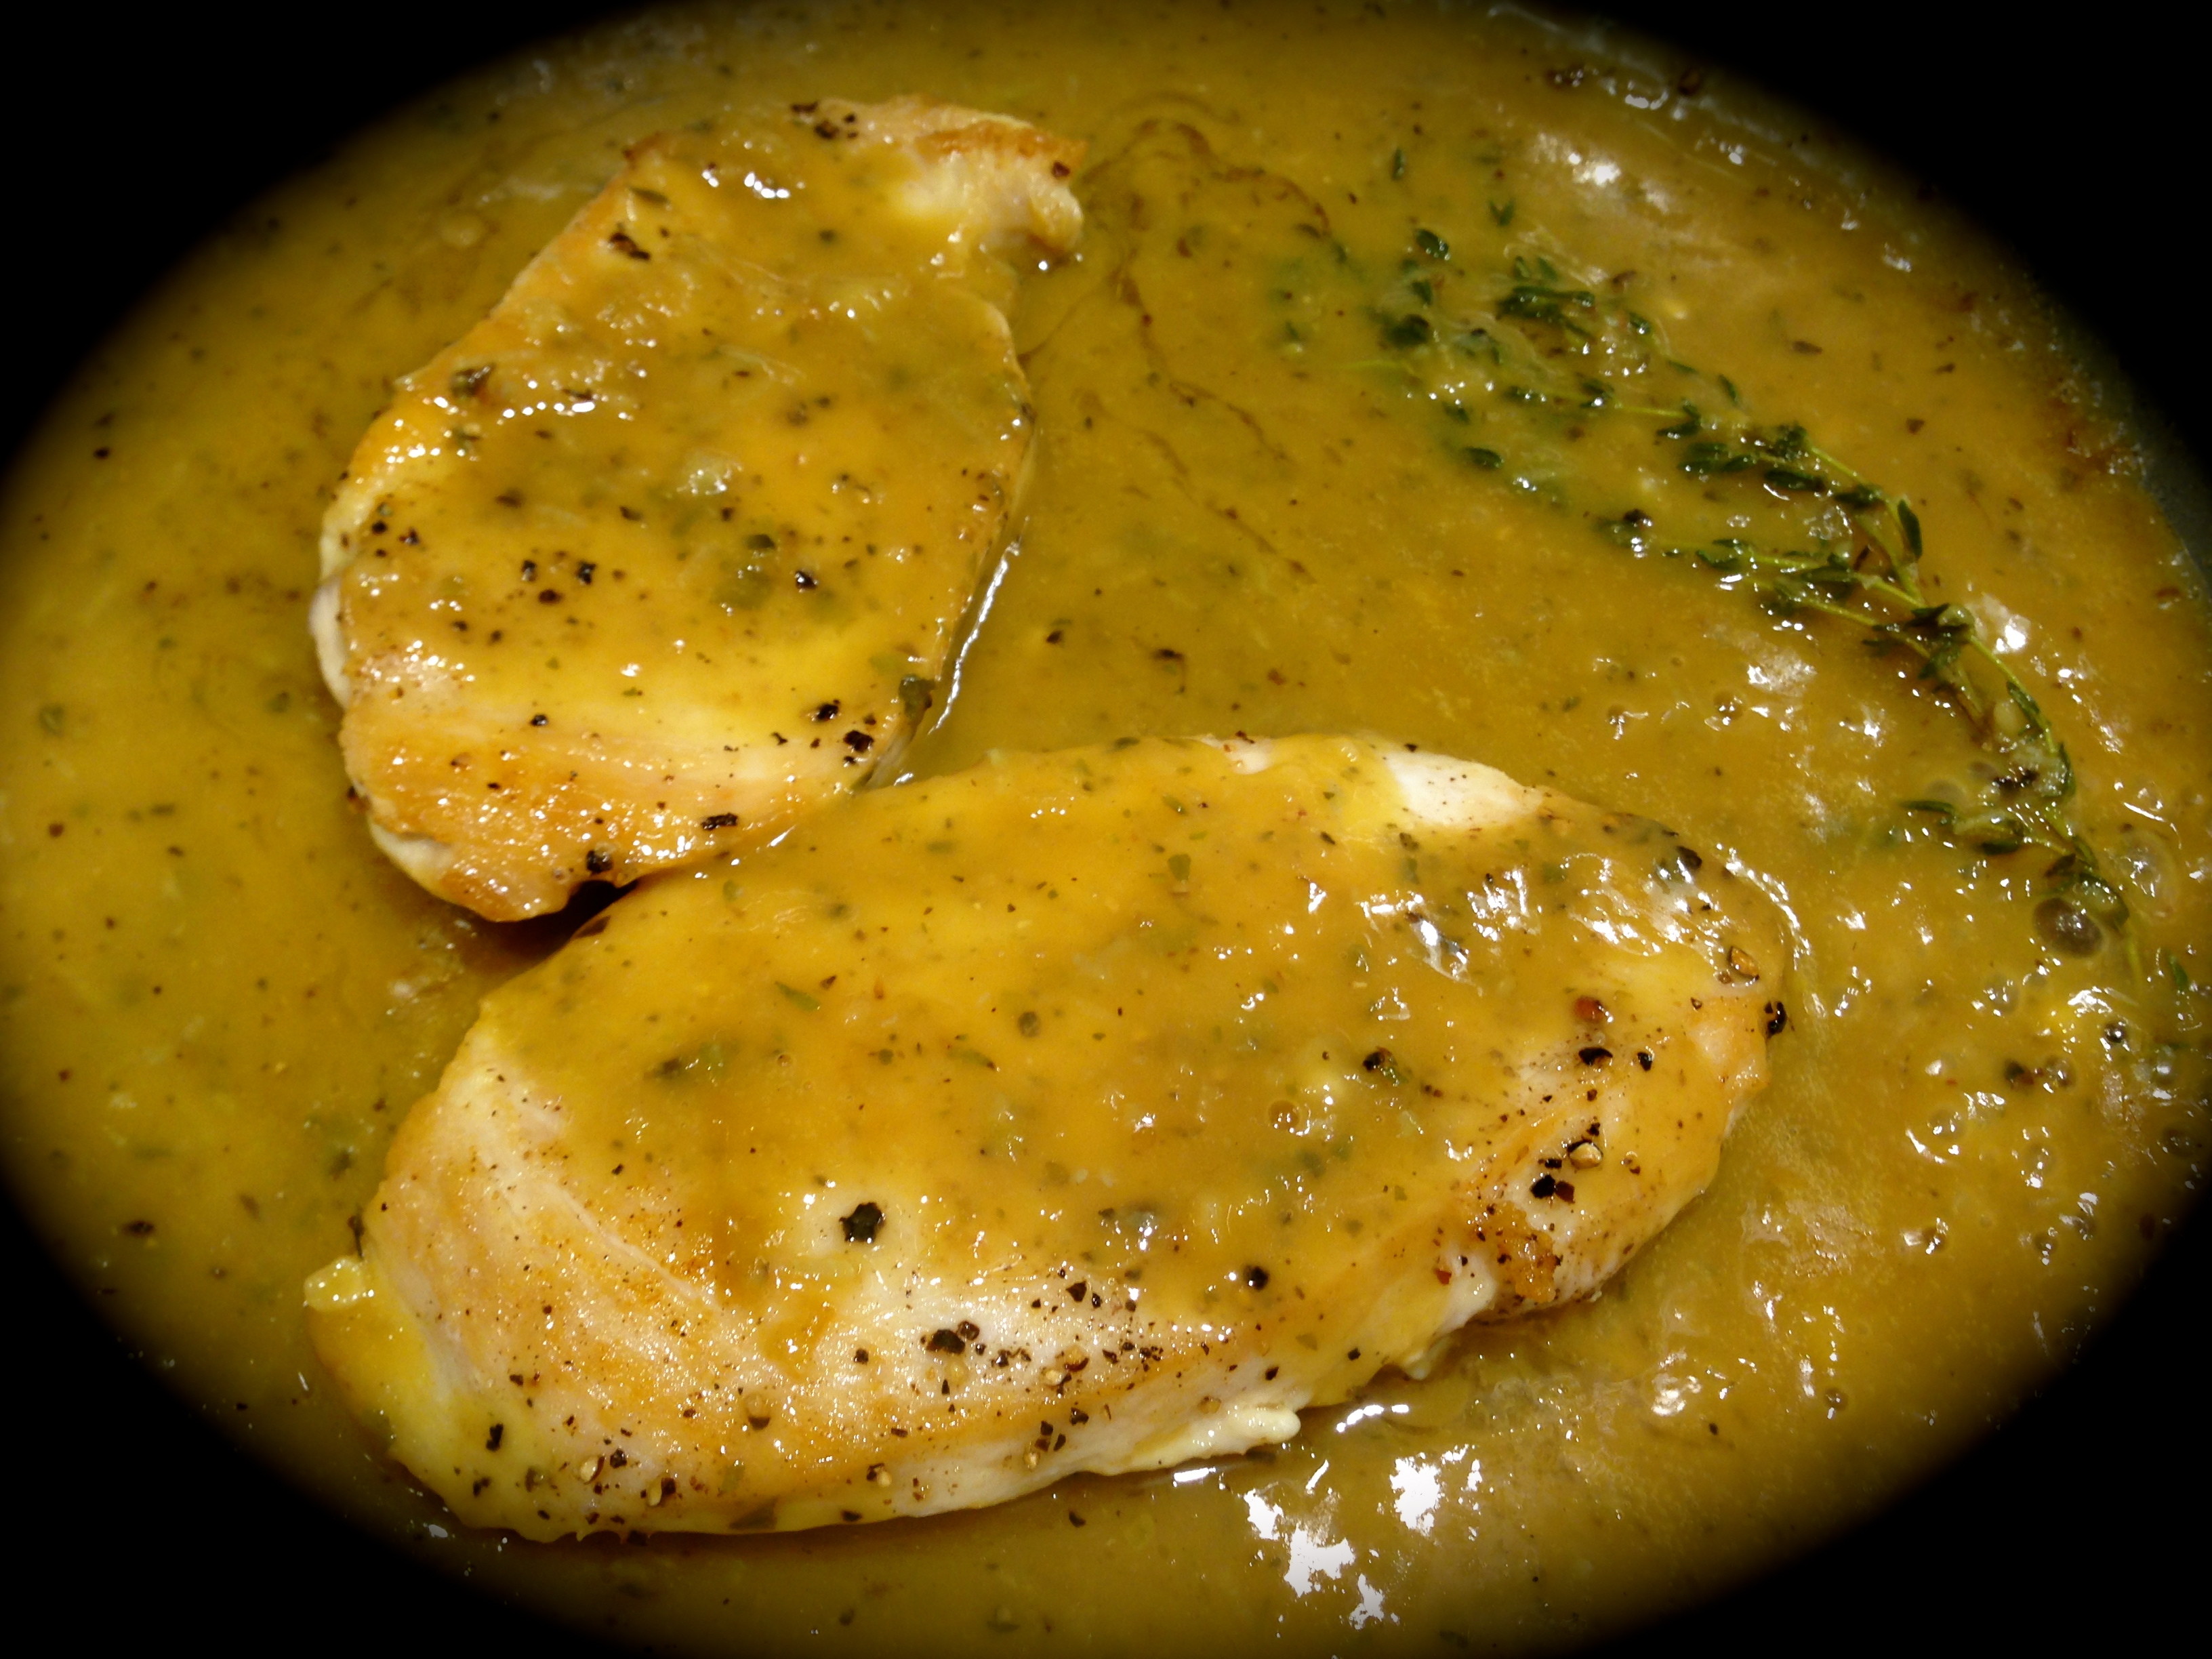
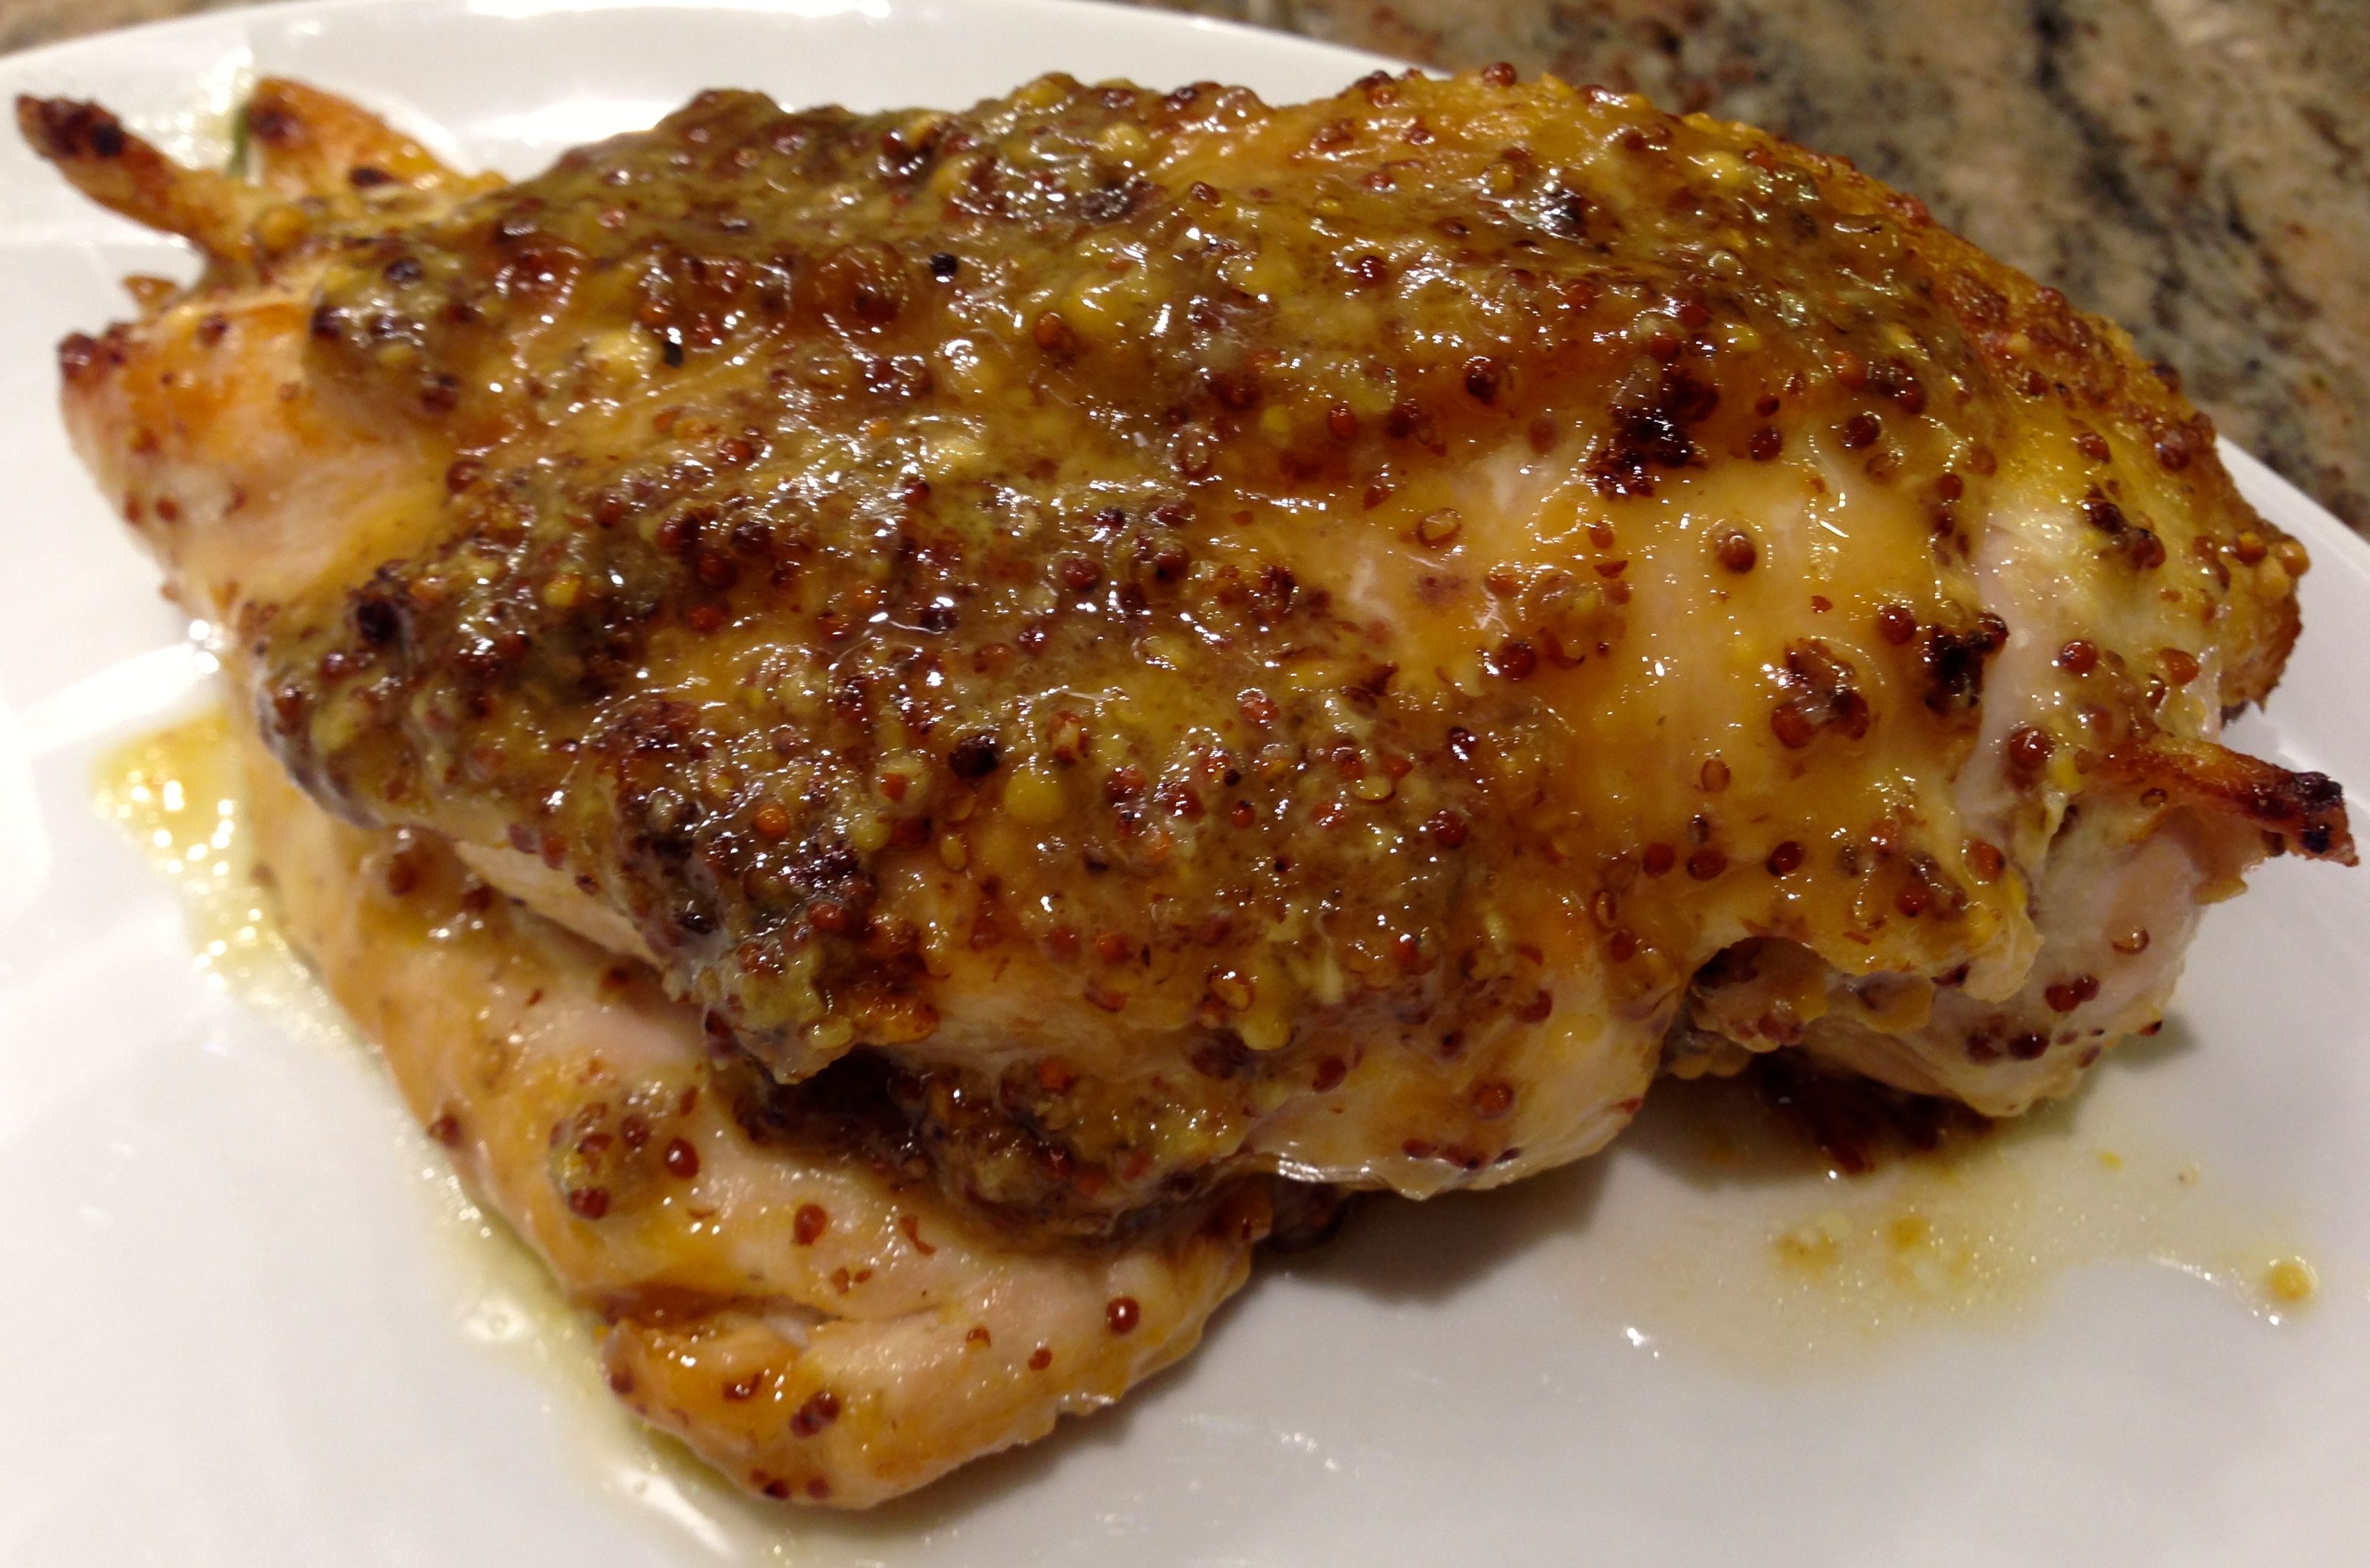
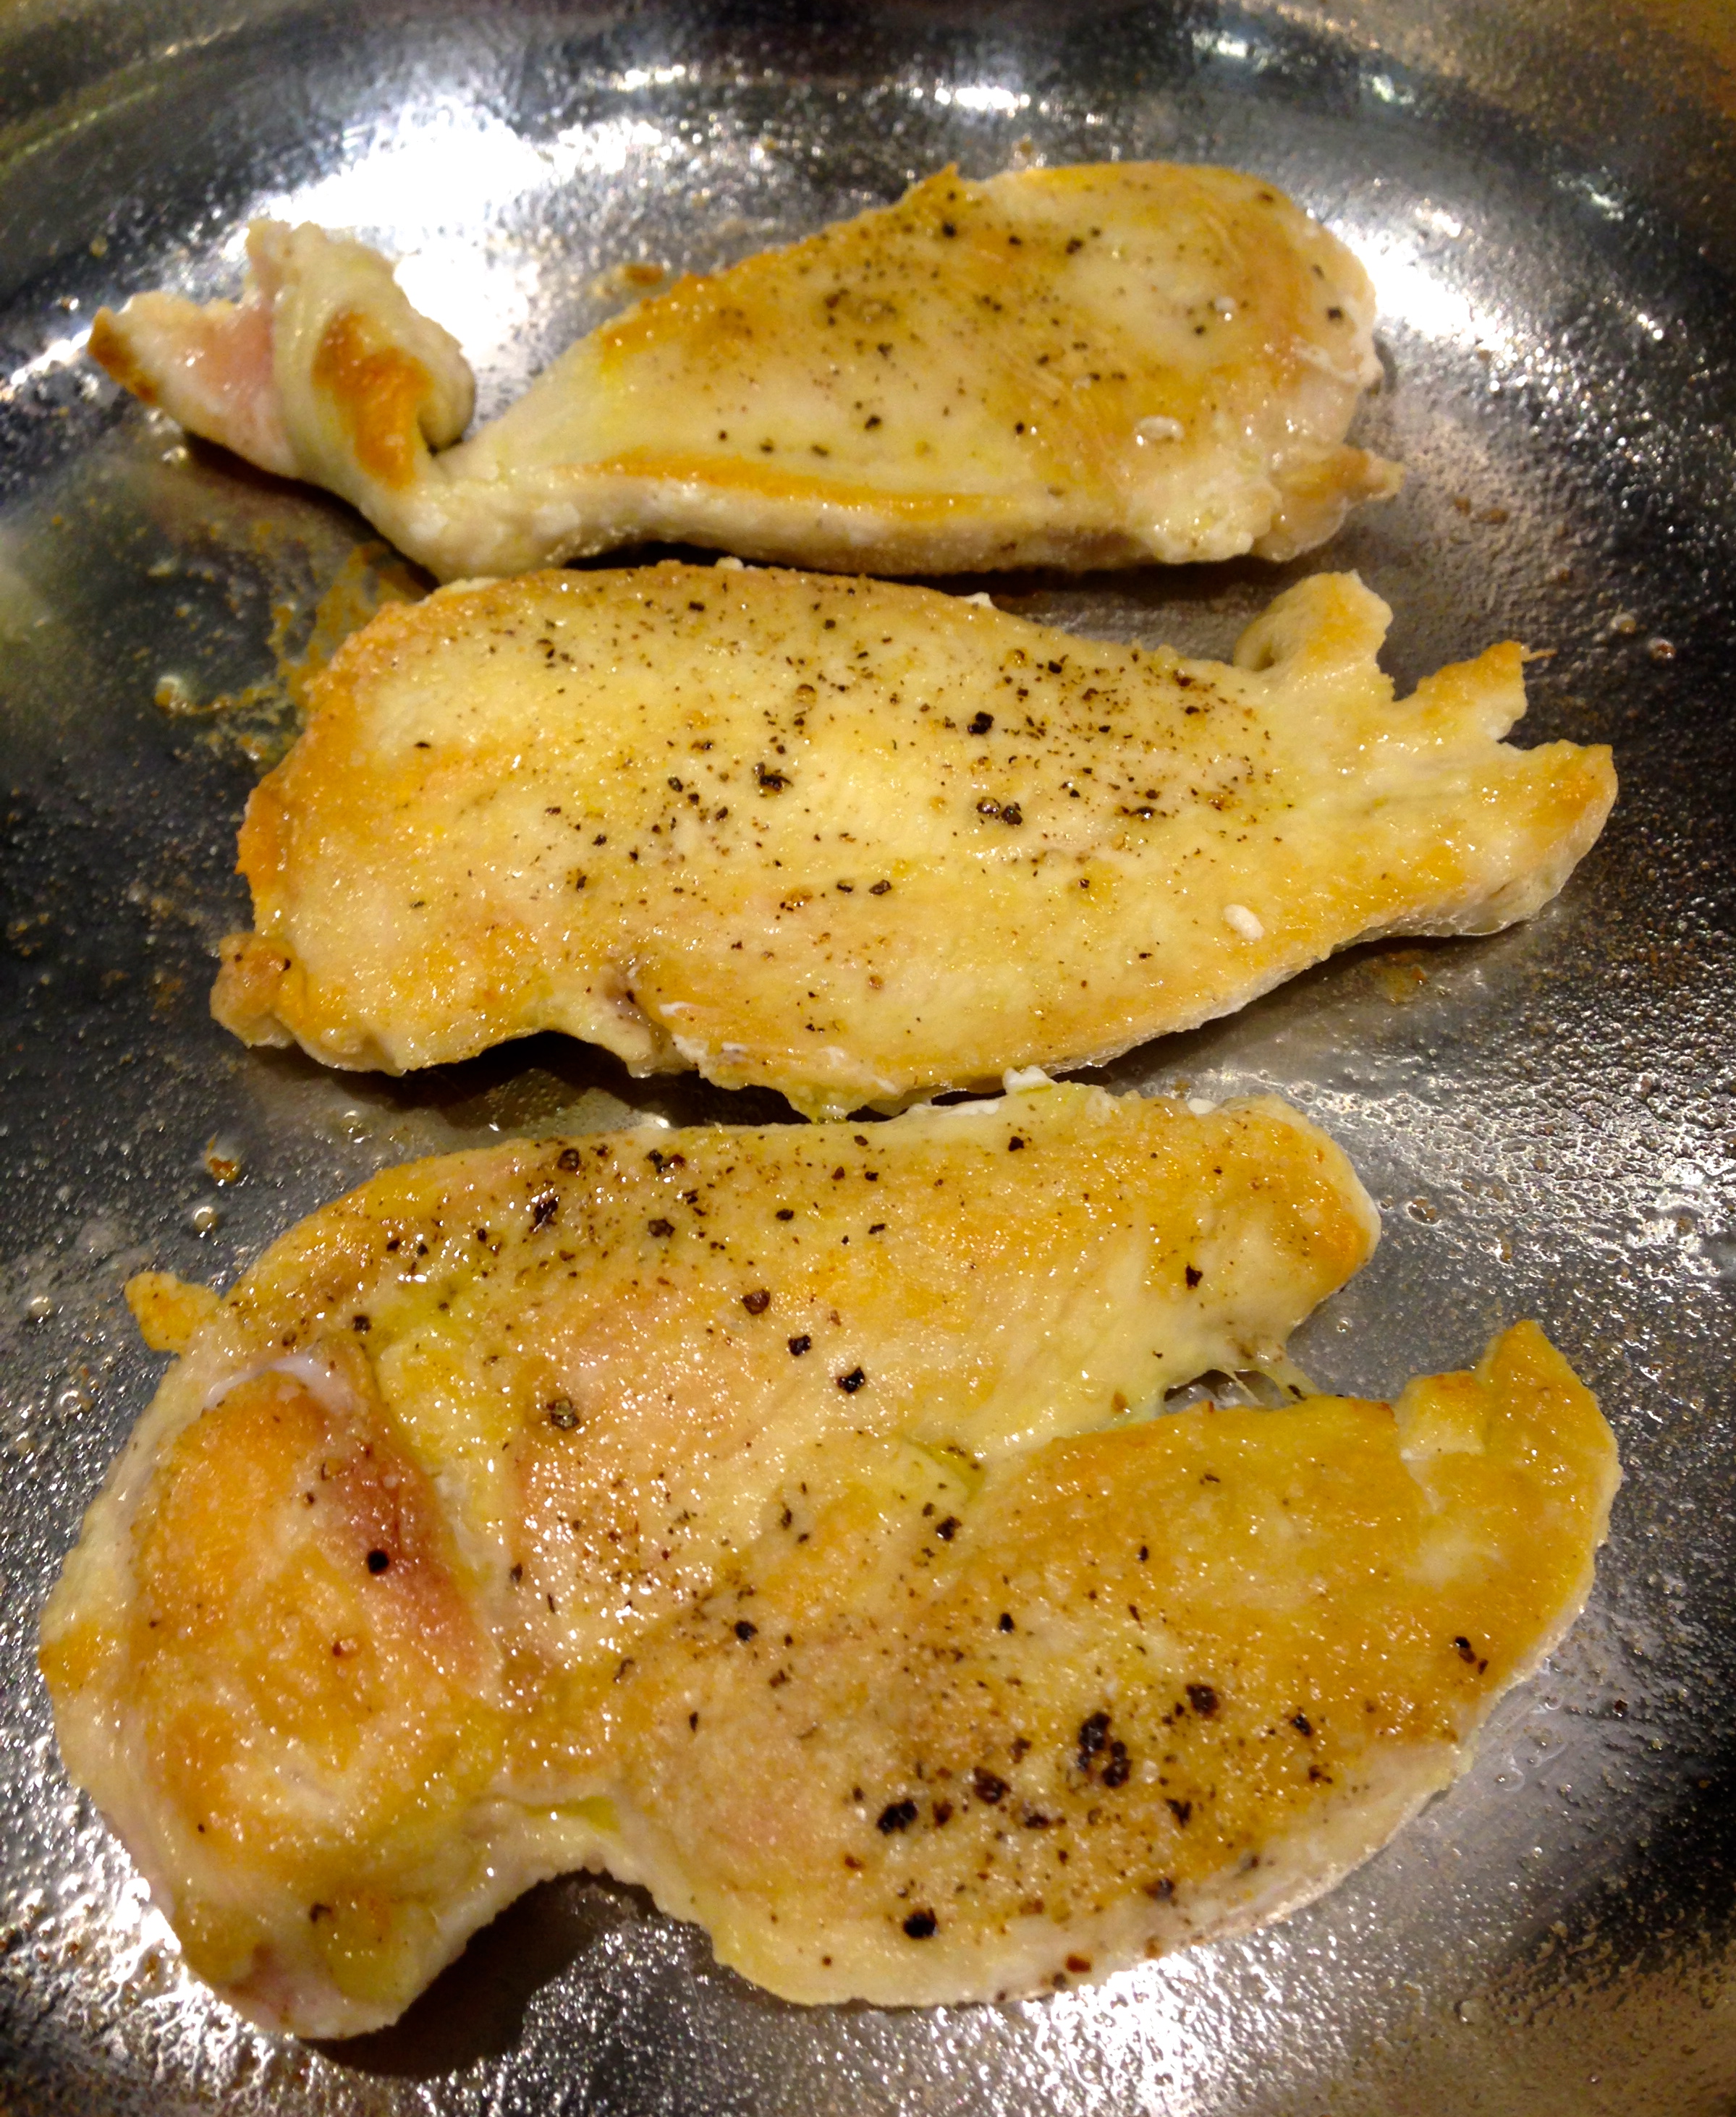
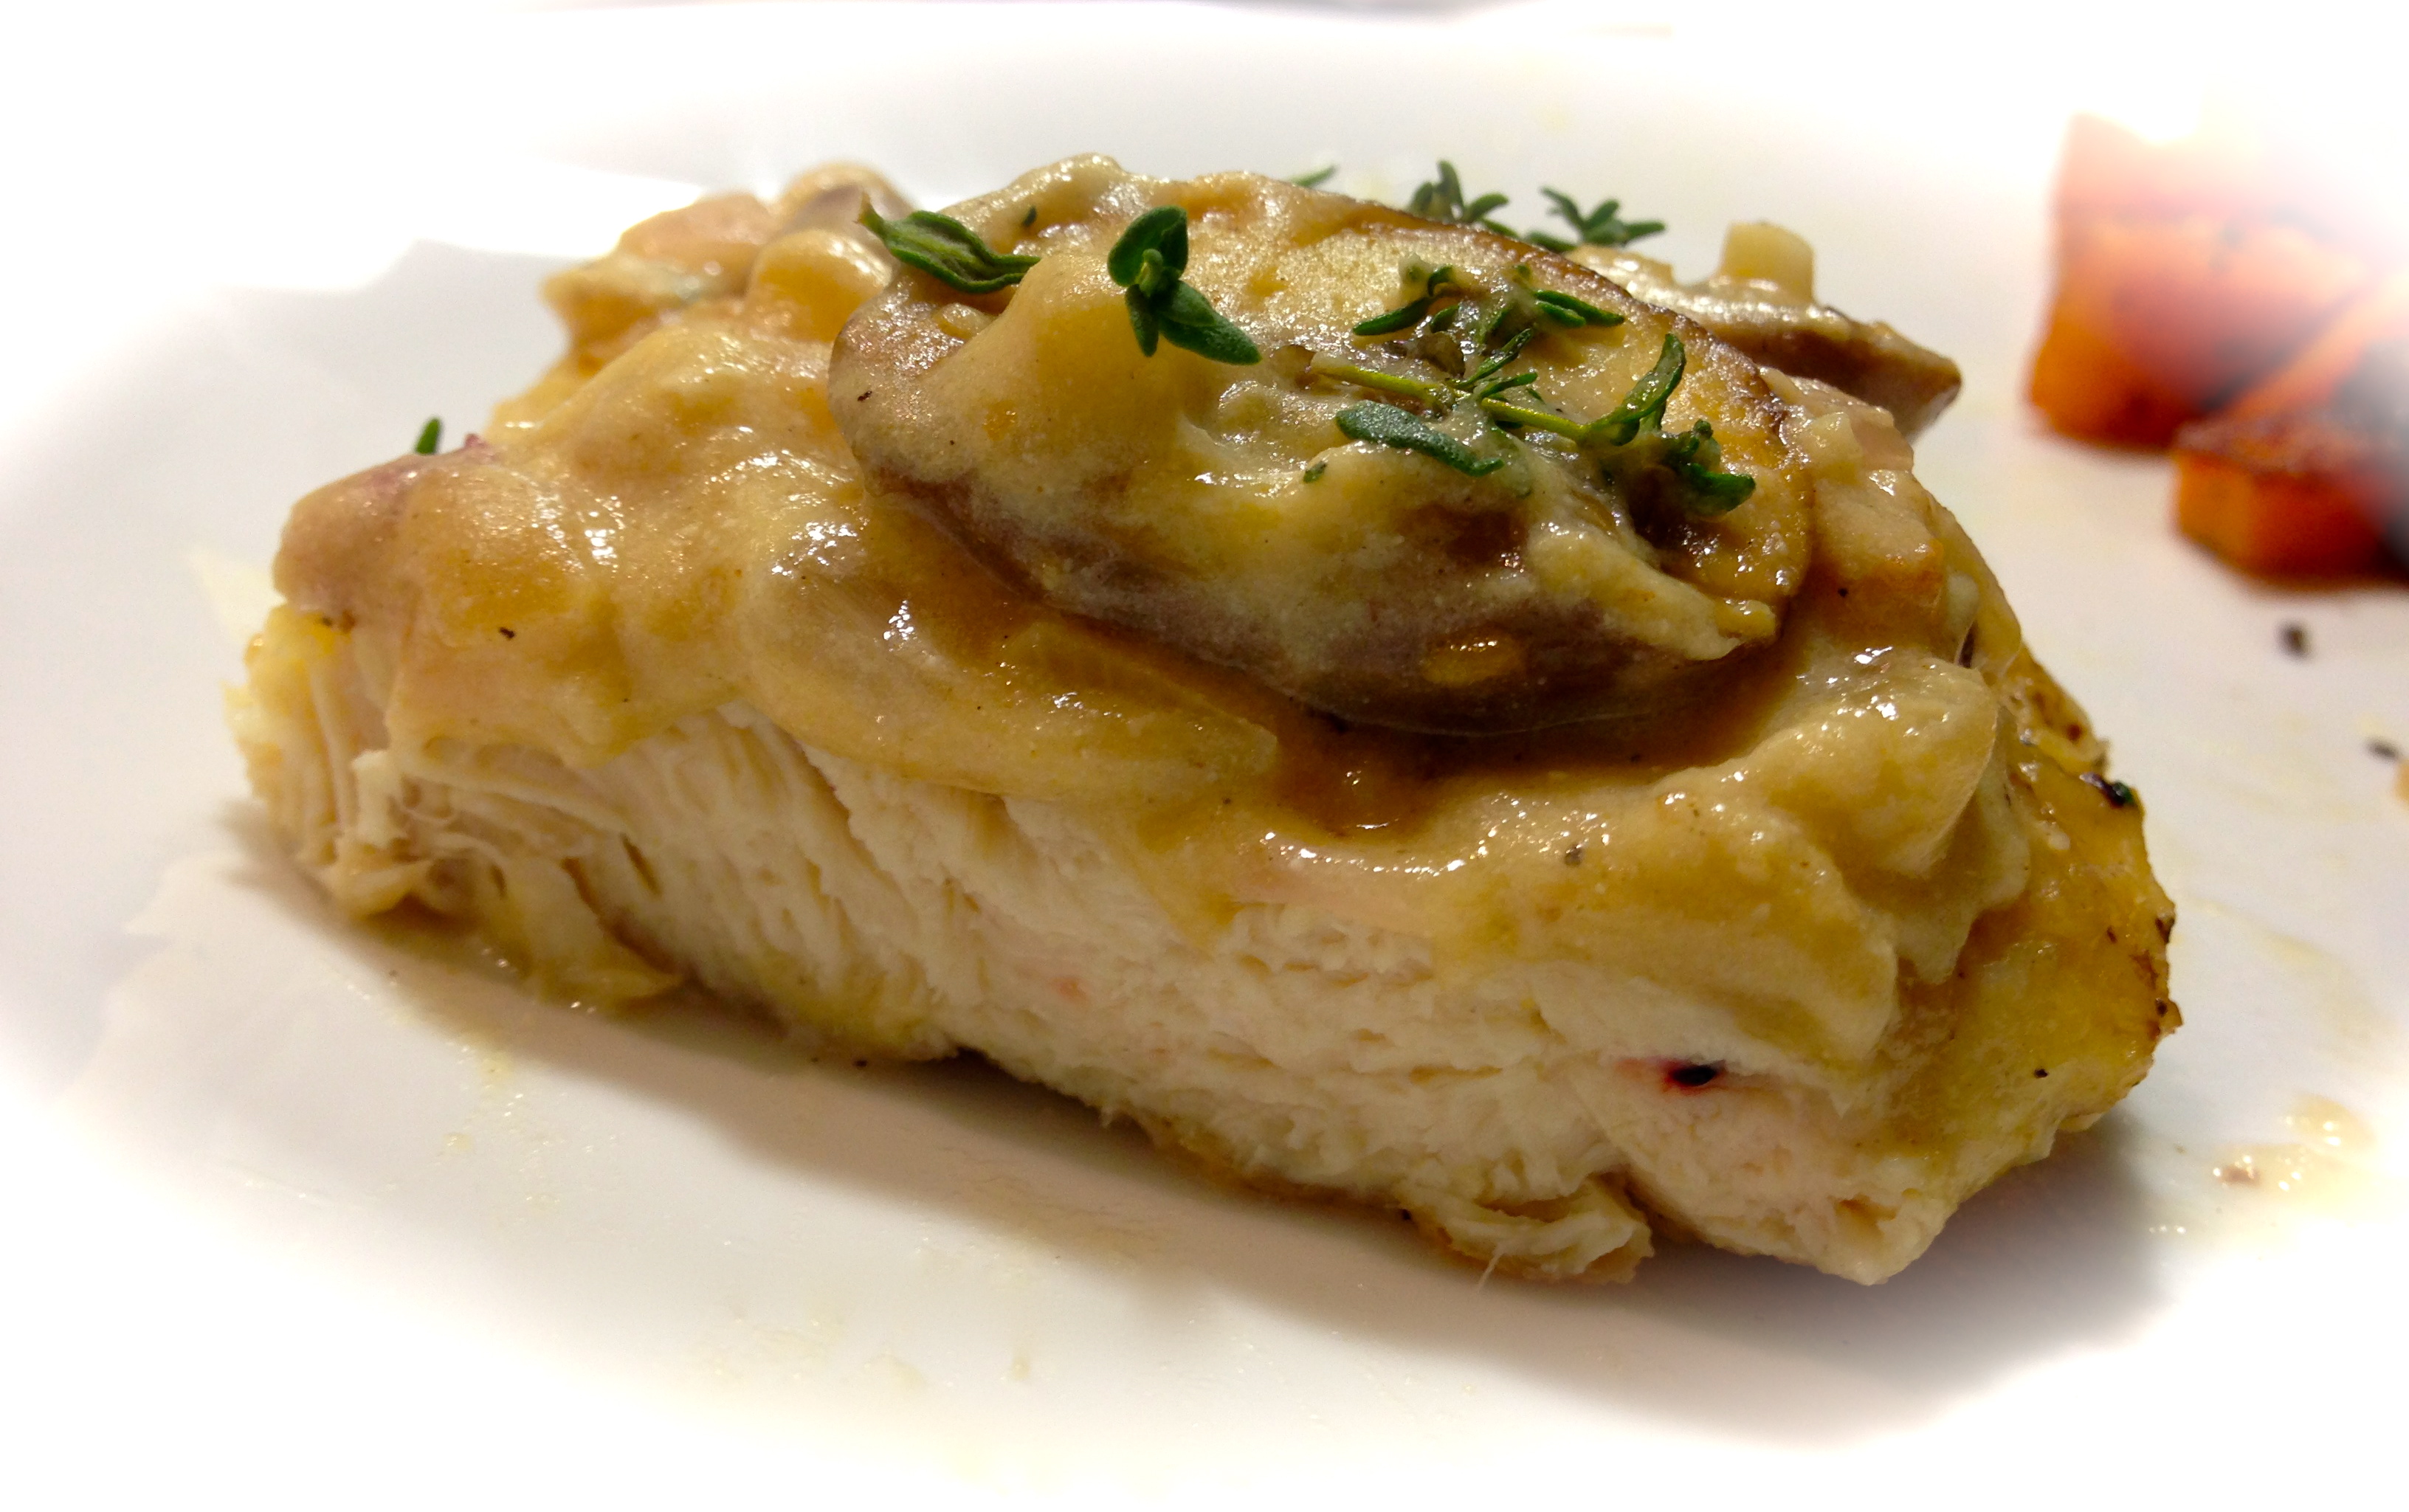
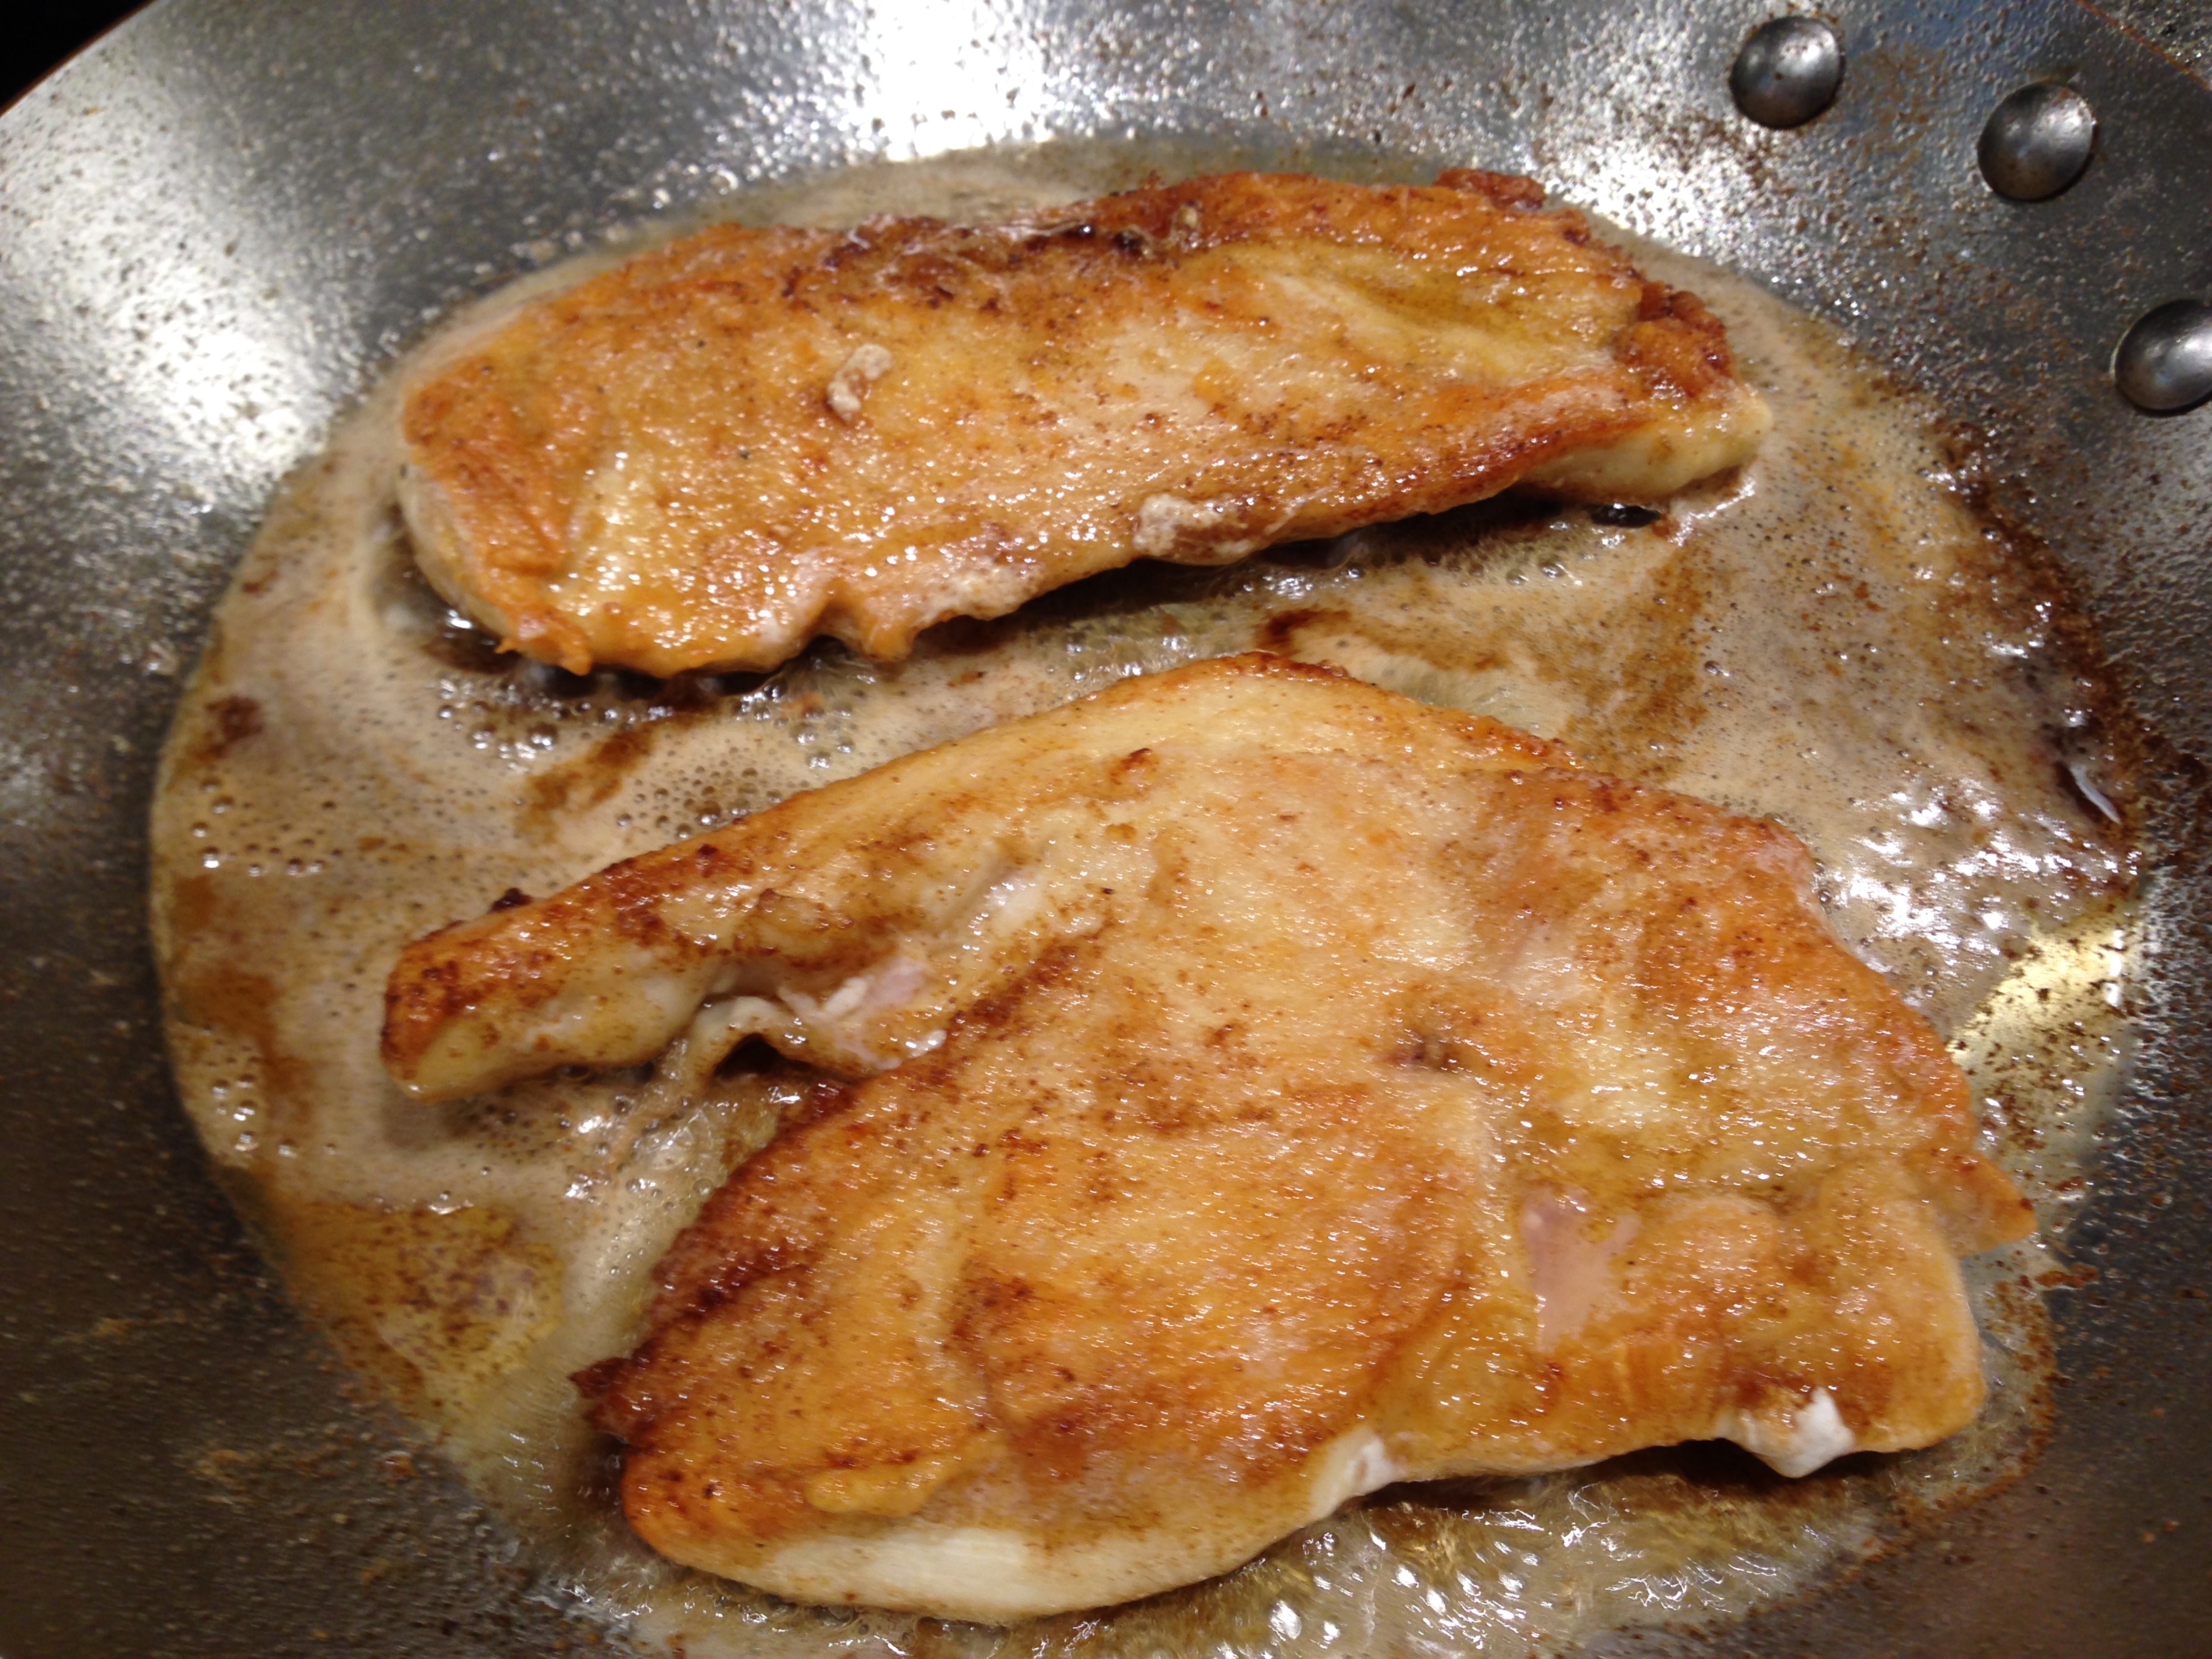
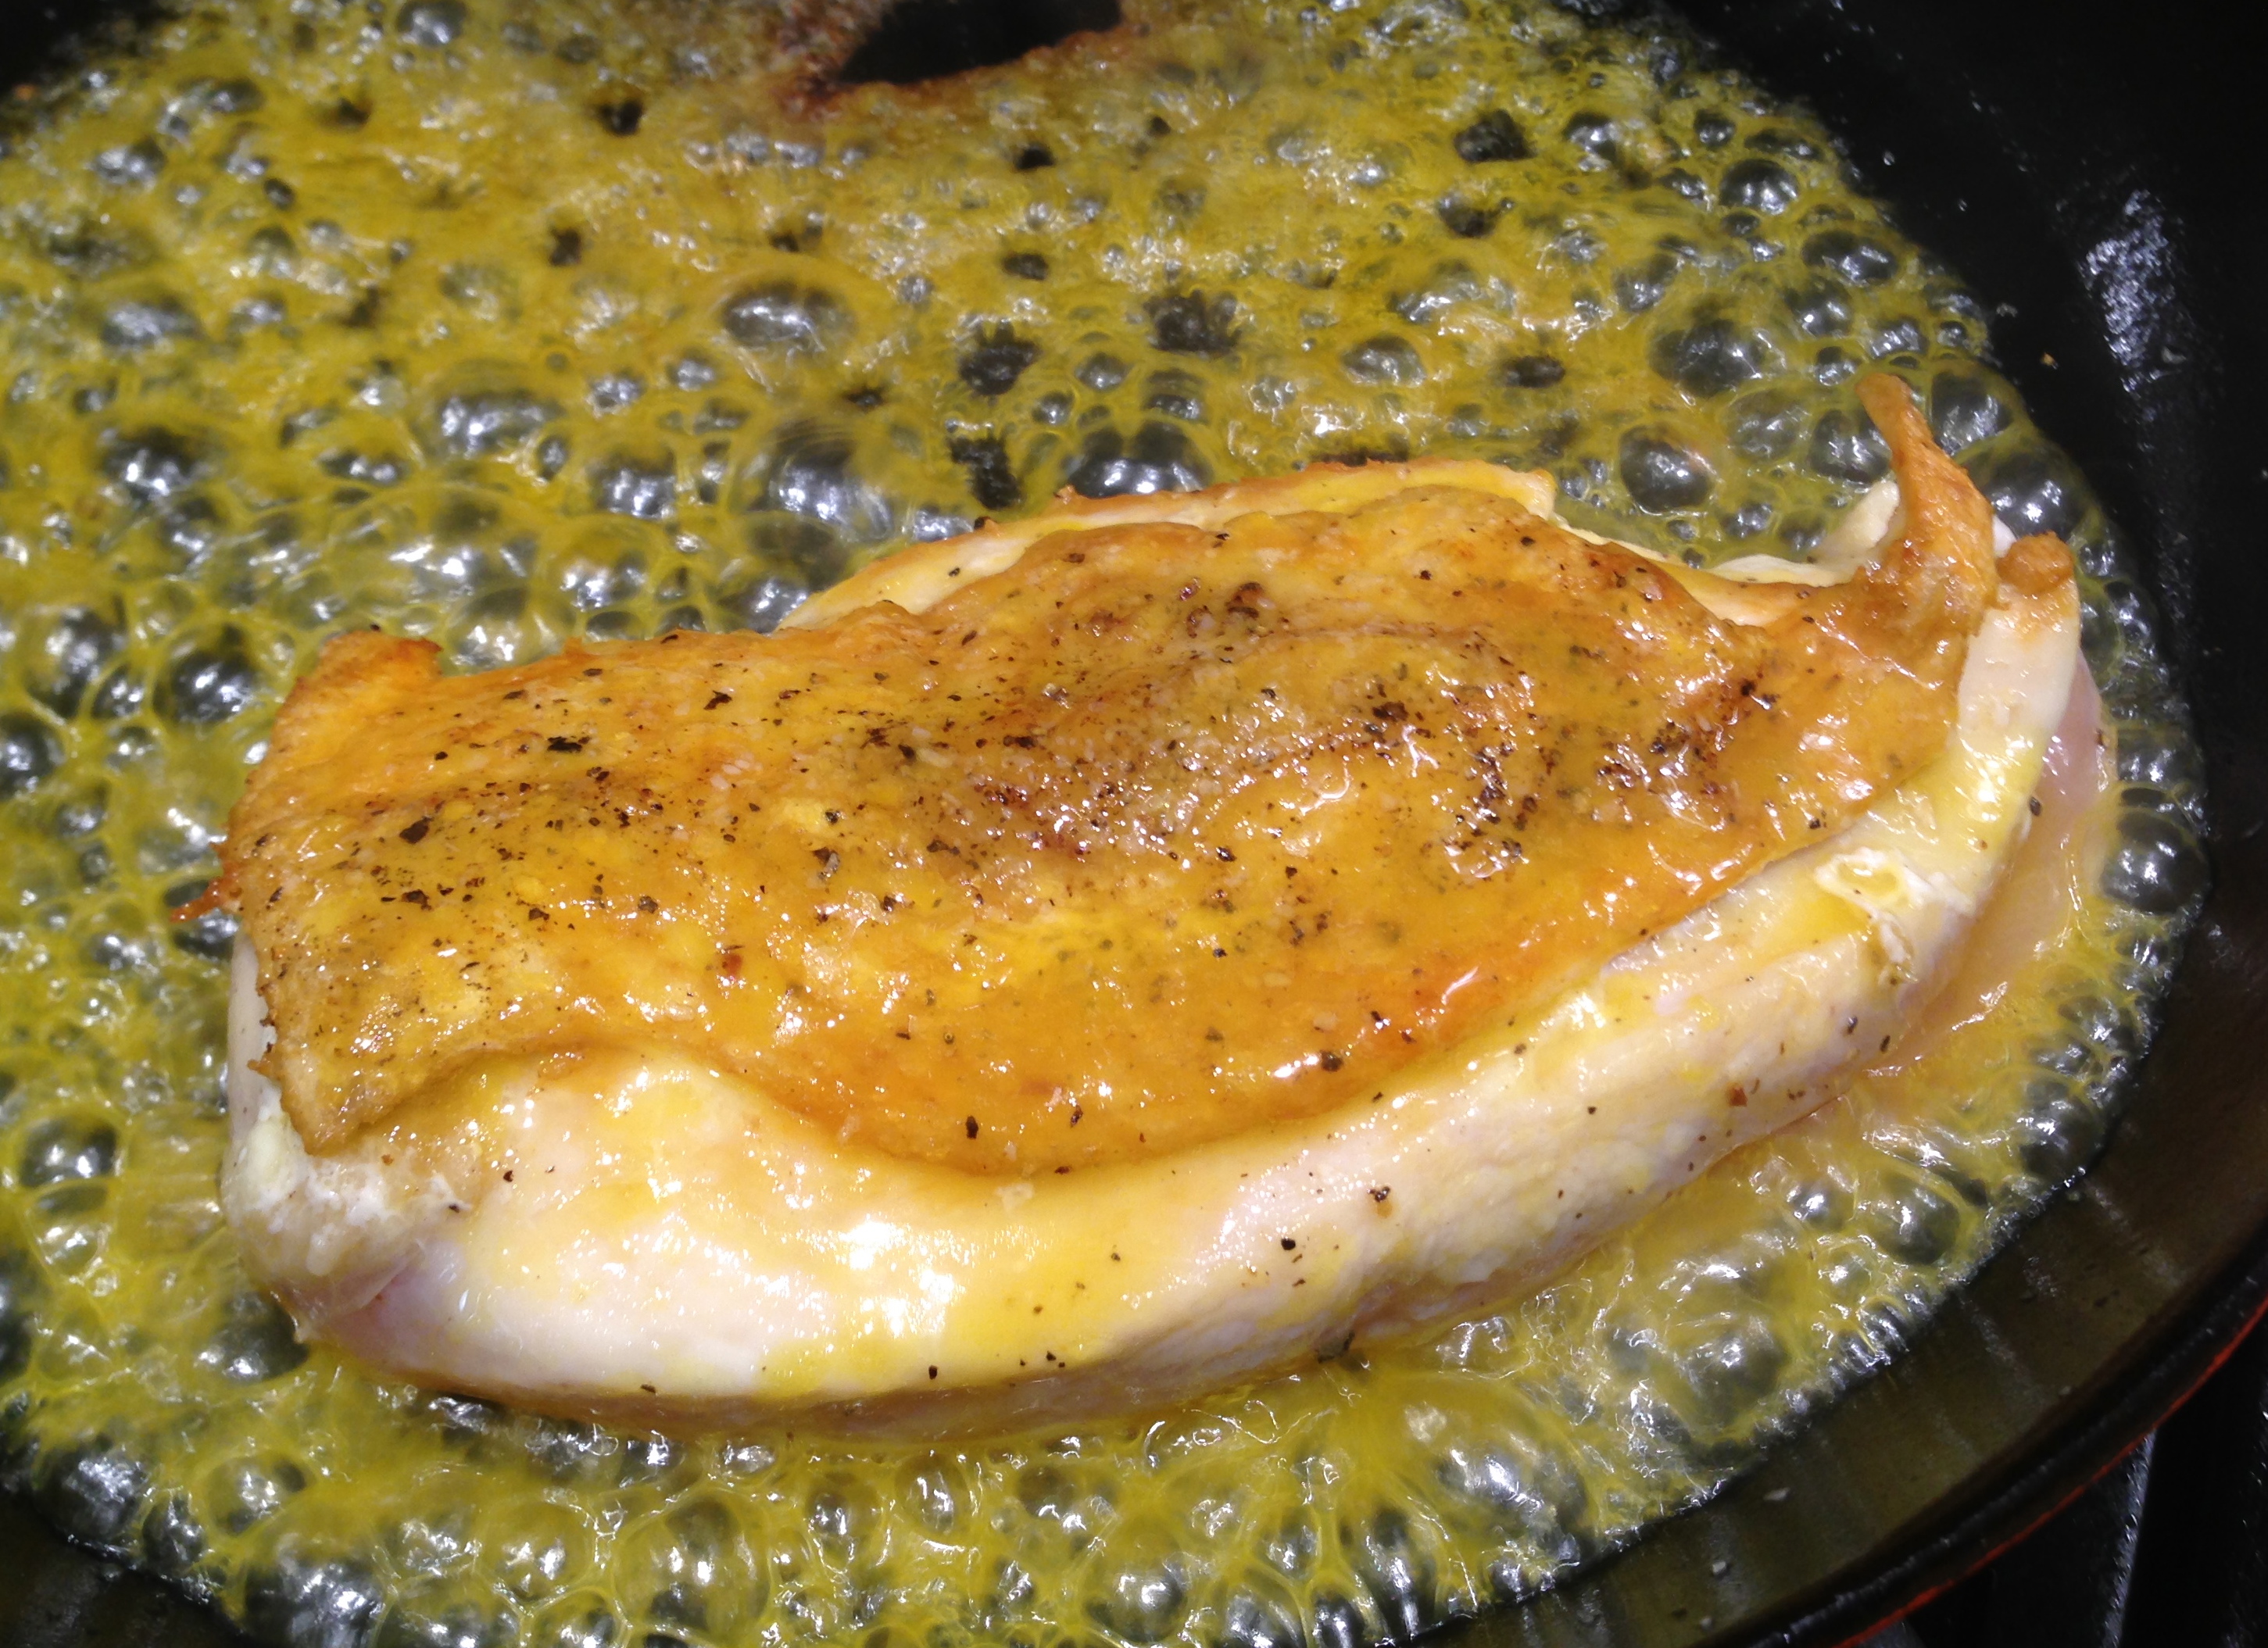
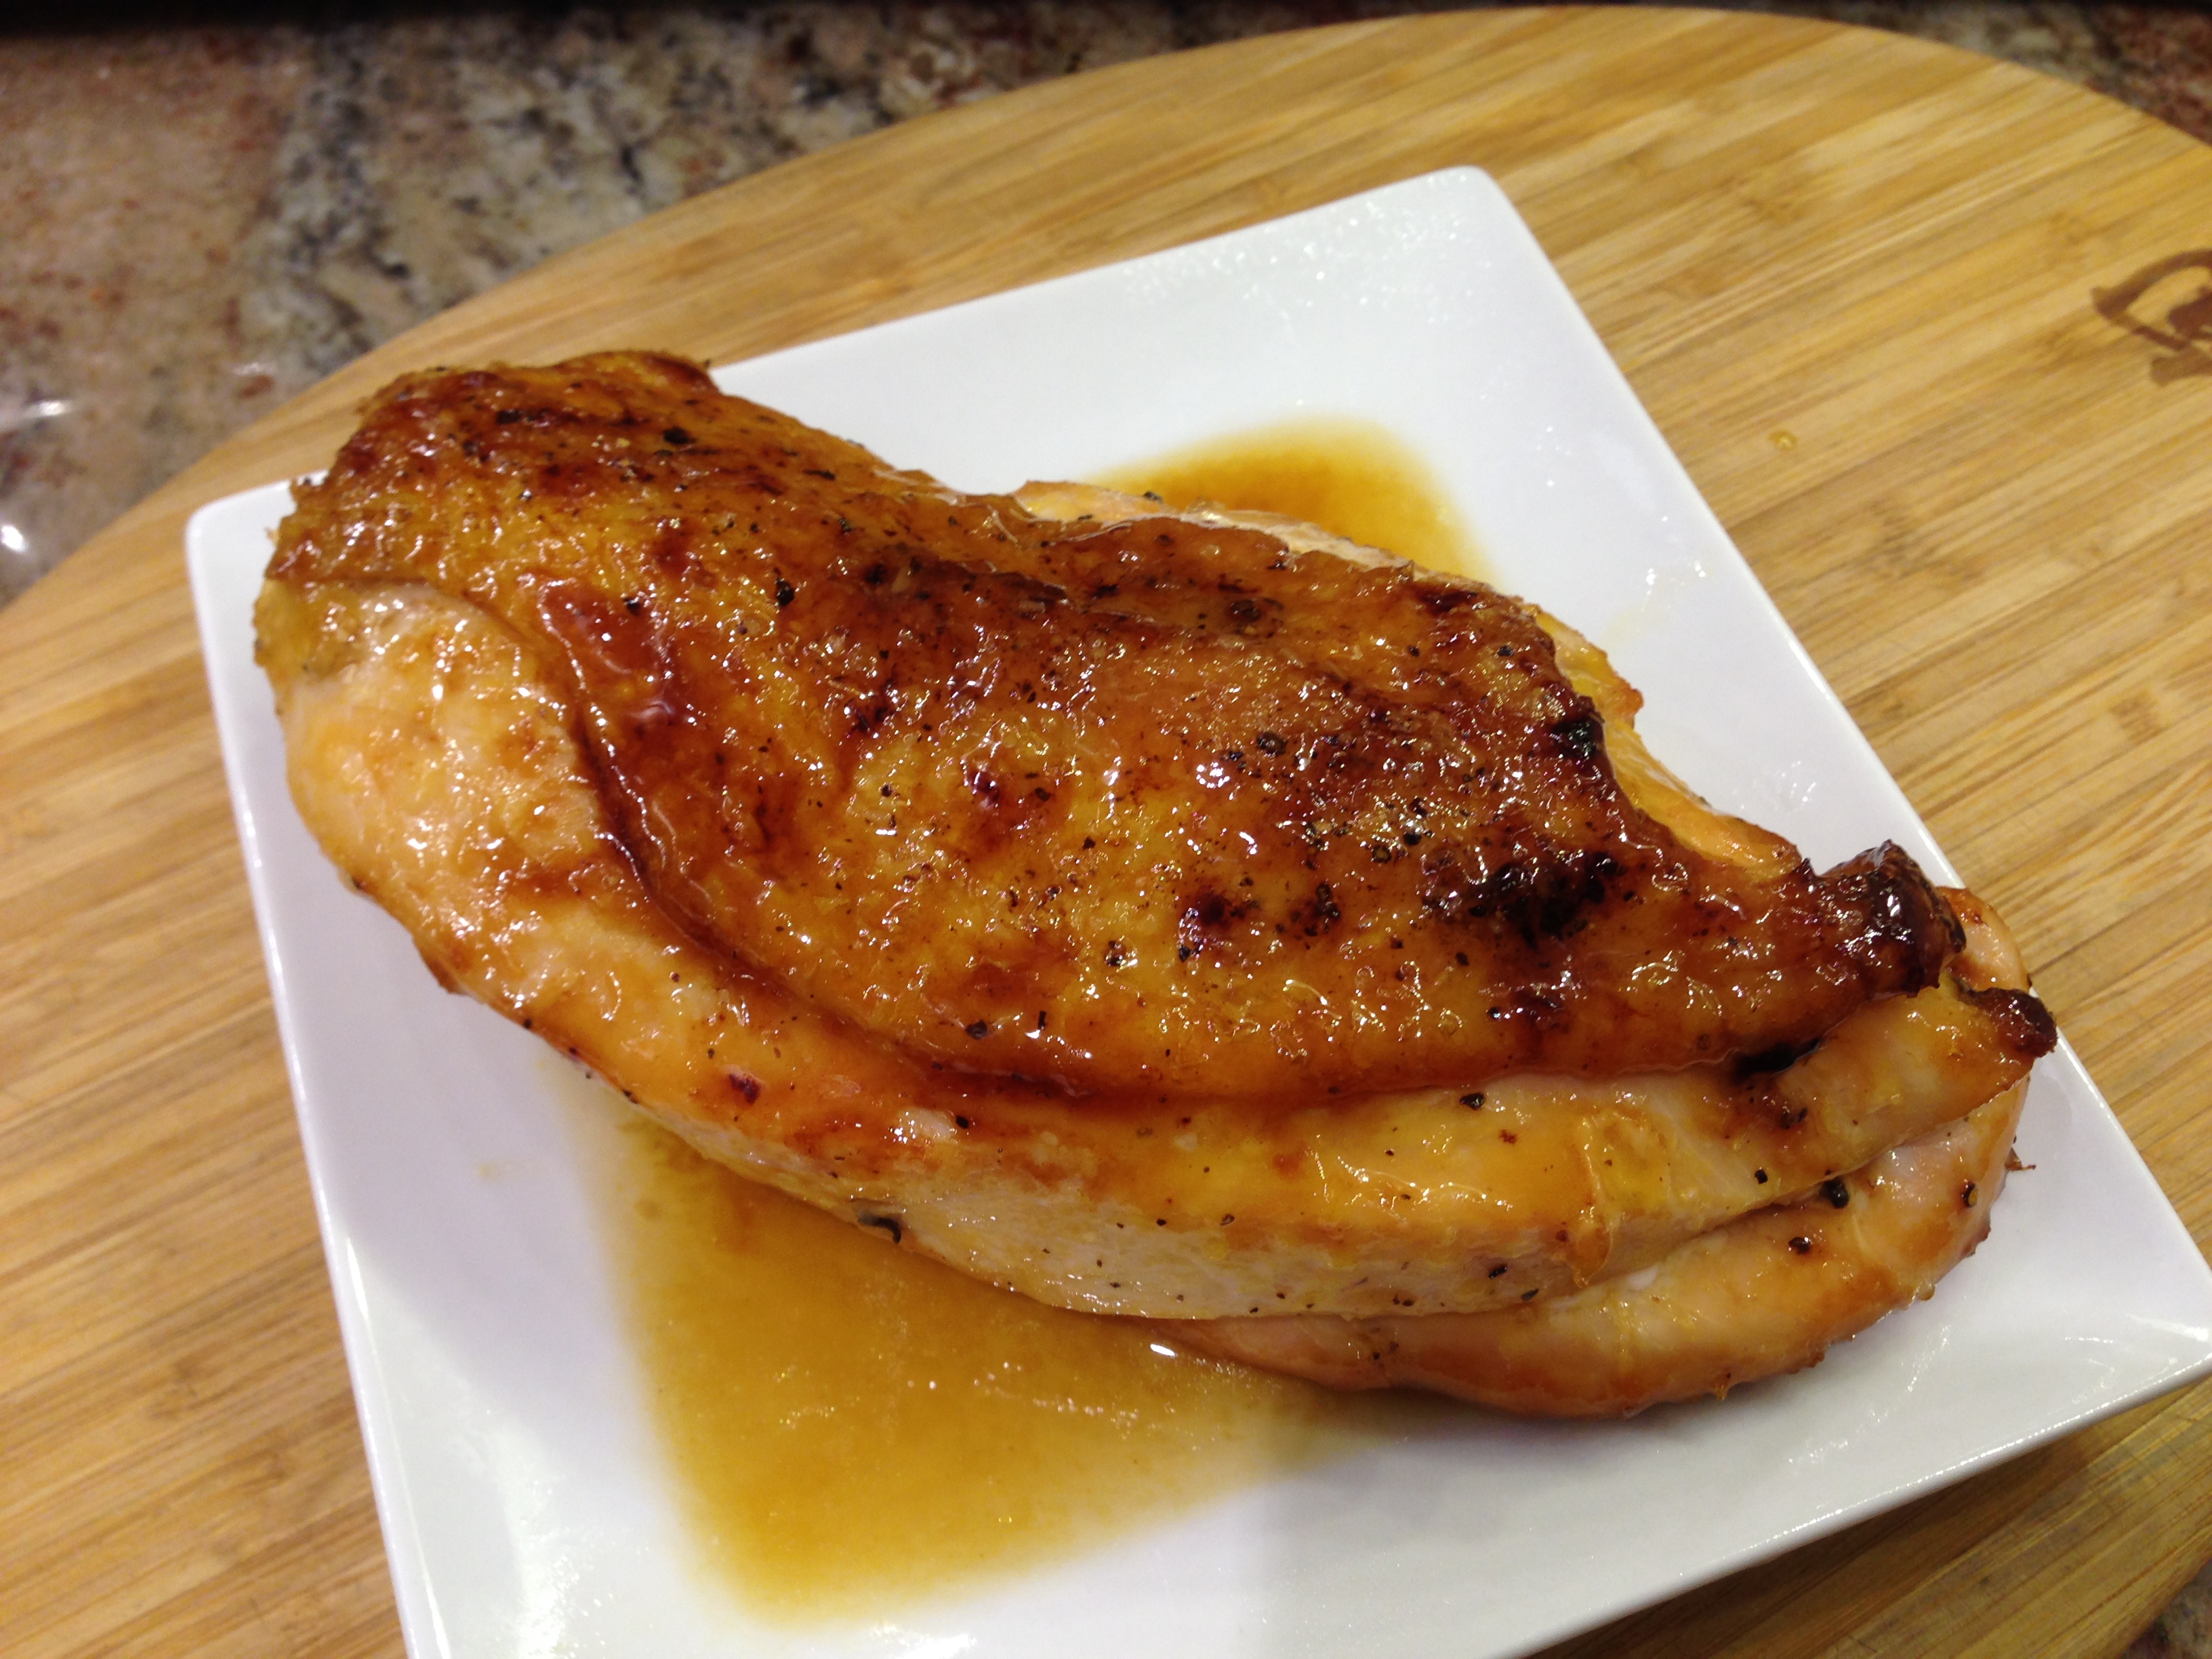
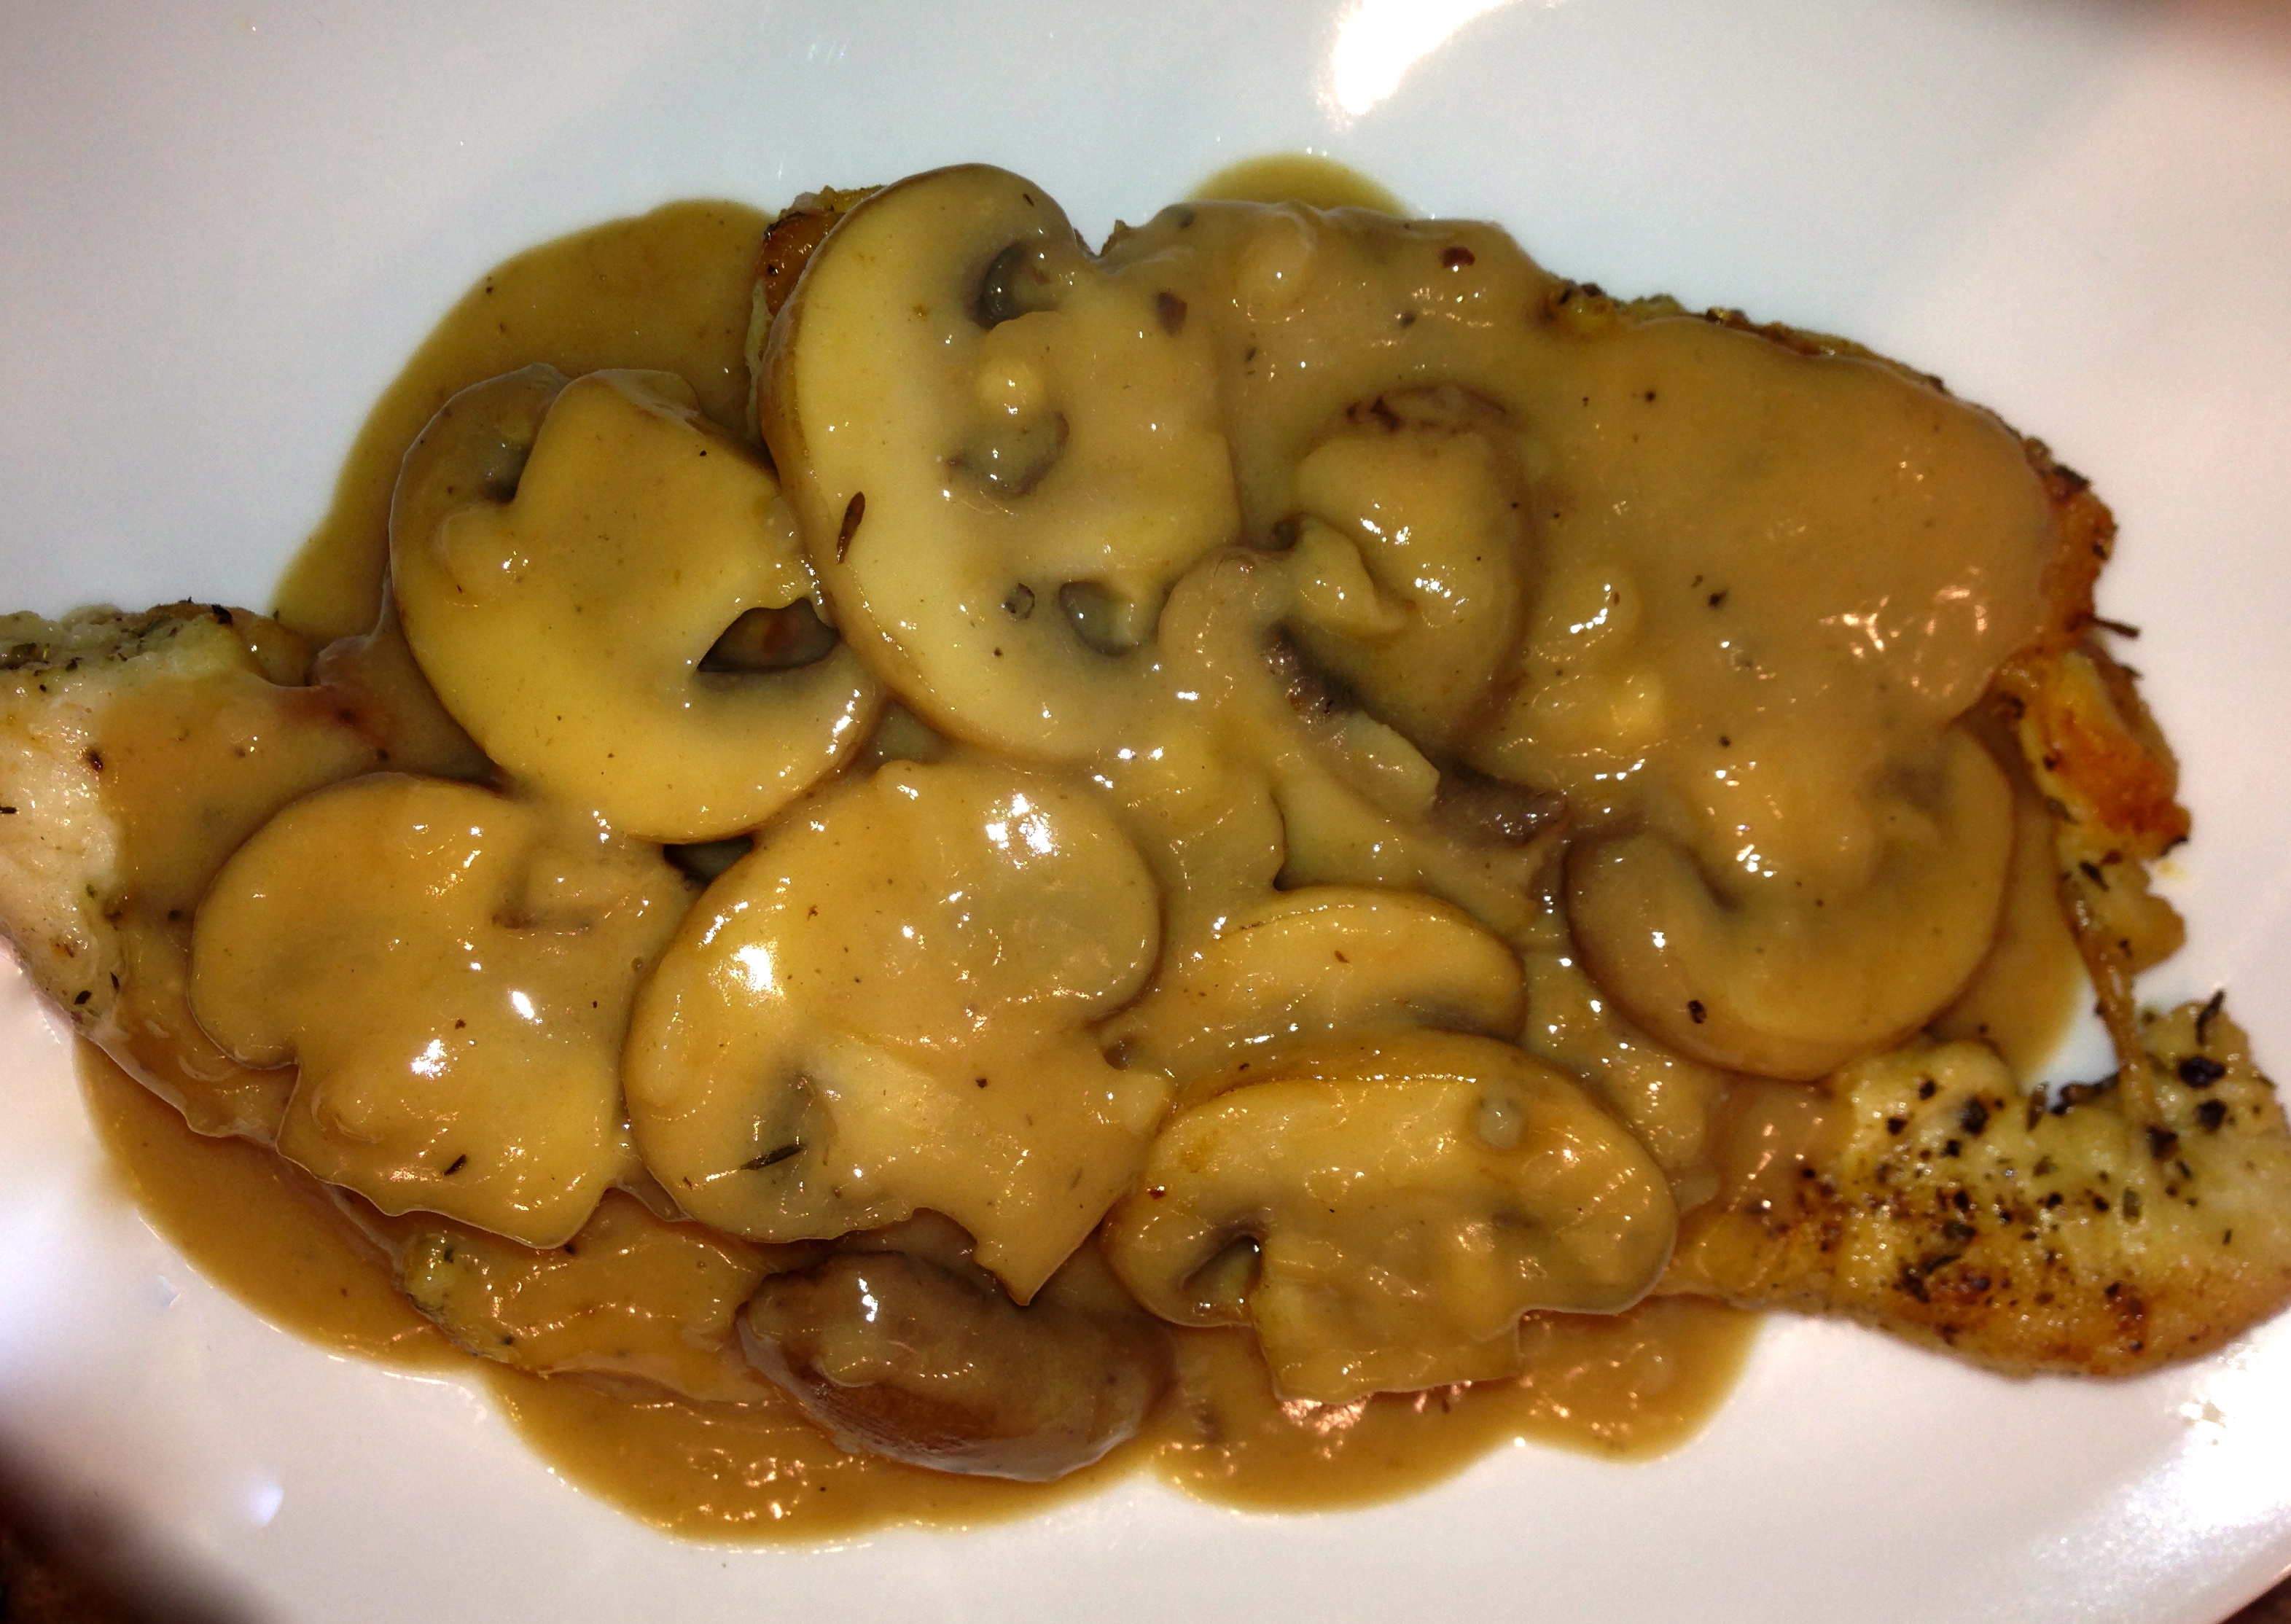
Boneless skinless chicken breast are quite healthy but so many people tend to overcook them. When they are overcooked they are dry and tasteless, like eating cardboard. Look at the picture below and see how wonderfully juicy my chicken breasts turned out.

I cooked the meal at 375 for 25 minutes. I’ve pretty much perfected cooking boneless skinless breasts and I knew 425 degrees was way too high to cook them in my oven. So don’t necessarily follow the directions on these kits to a tee – use your own good judgement when making them.

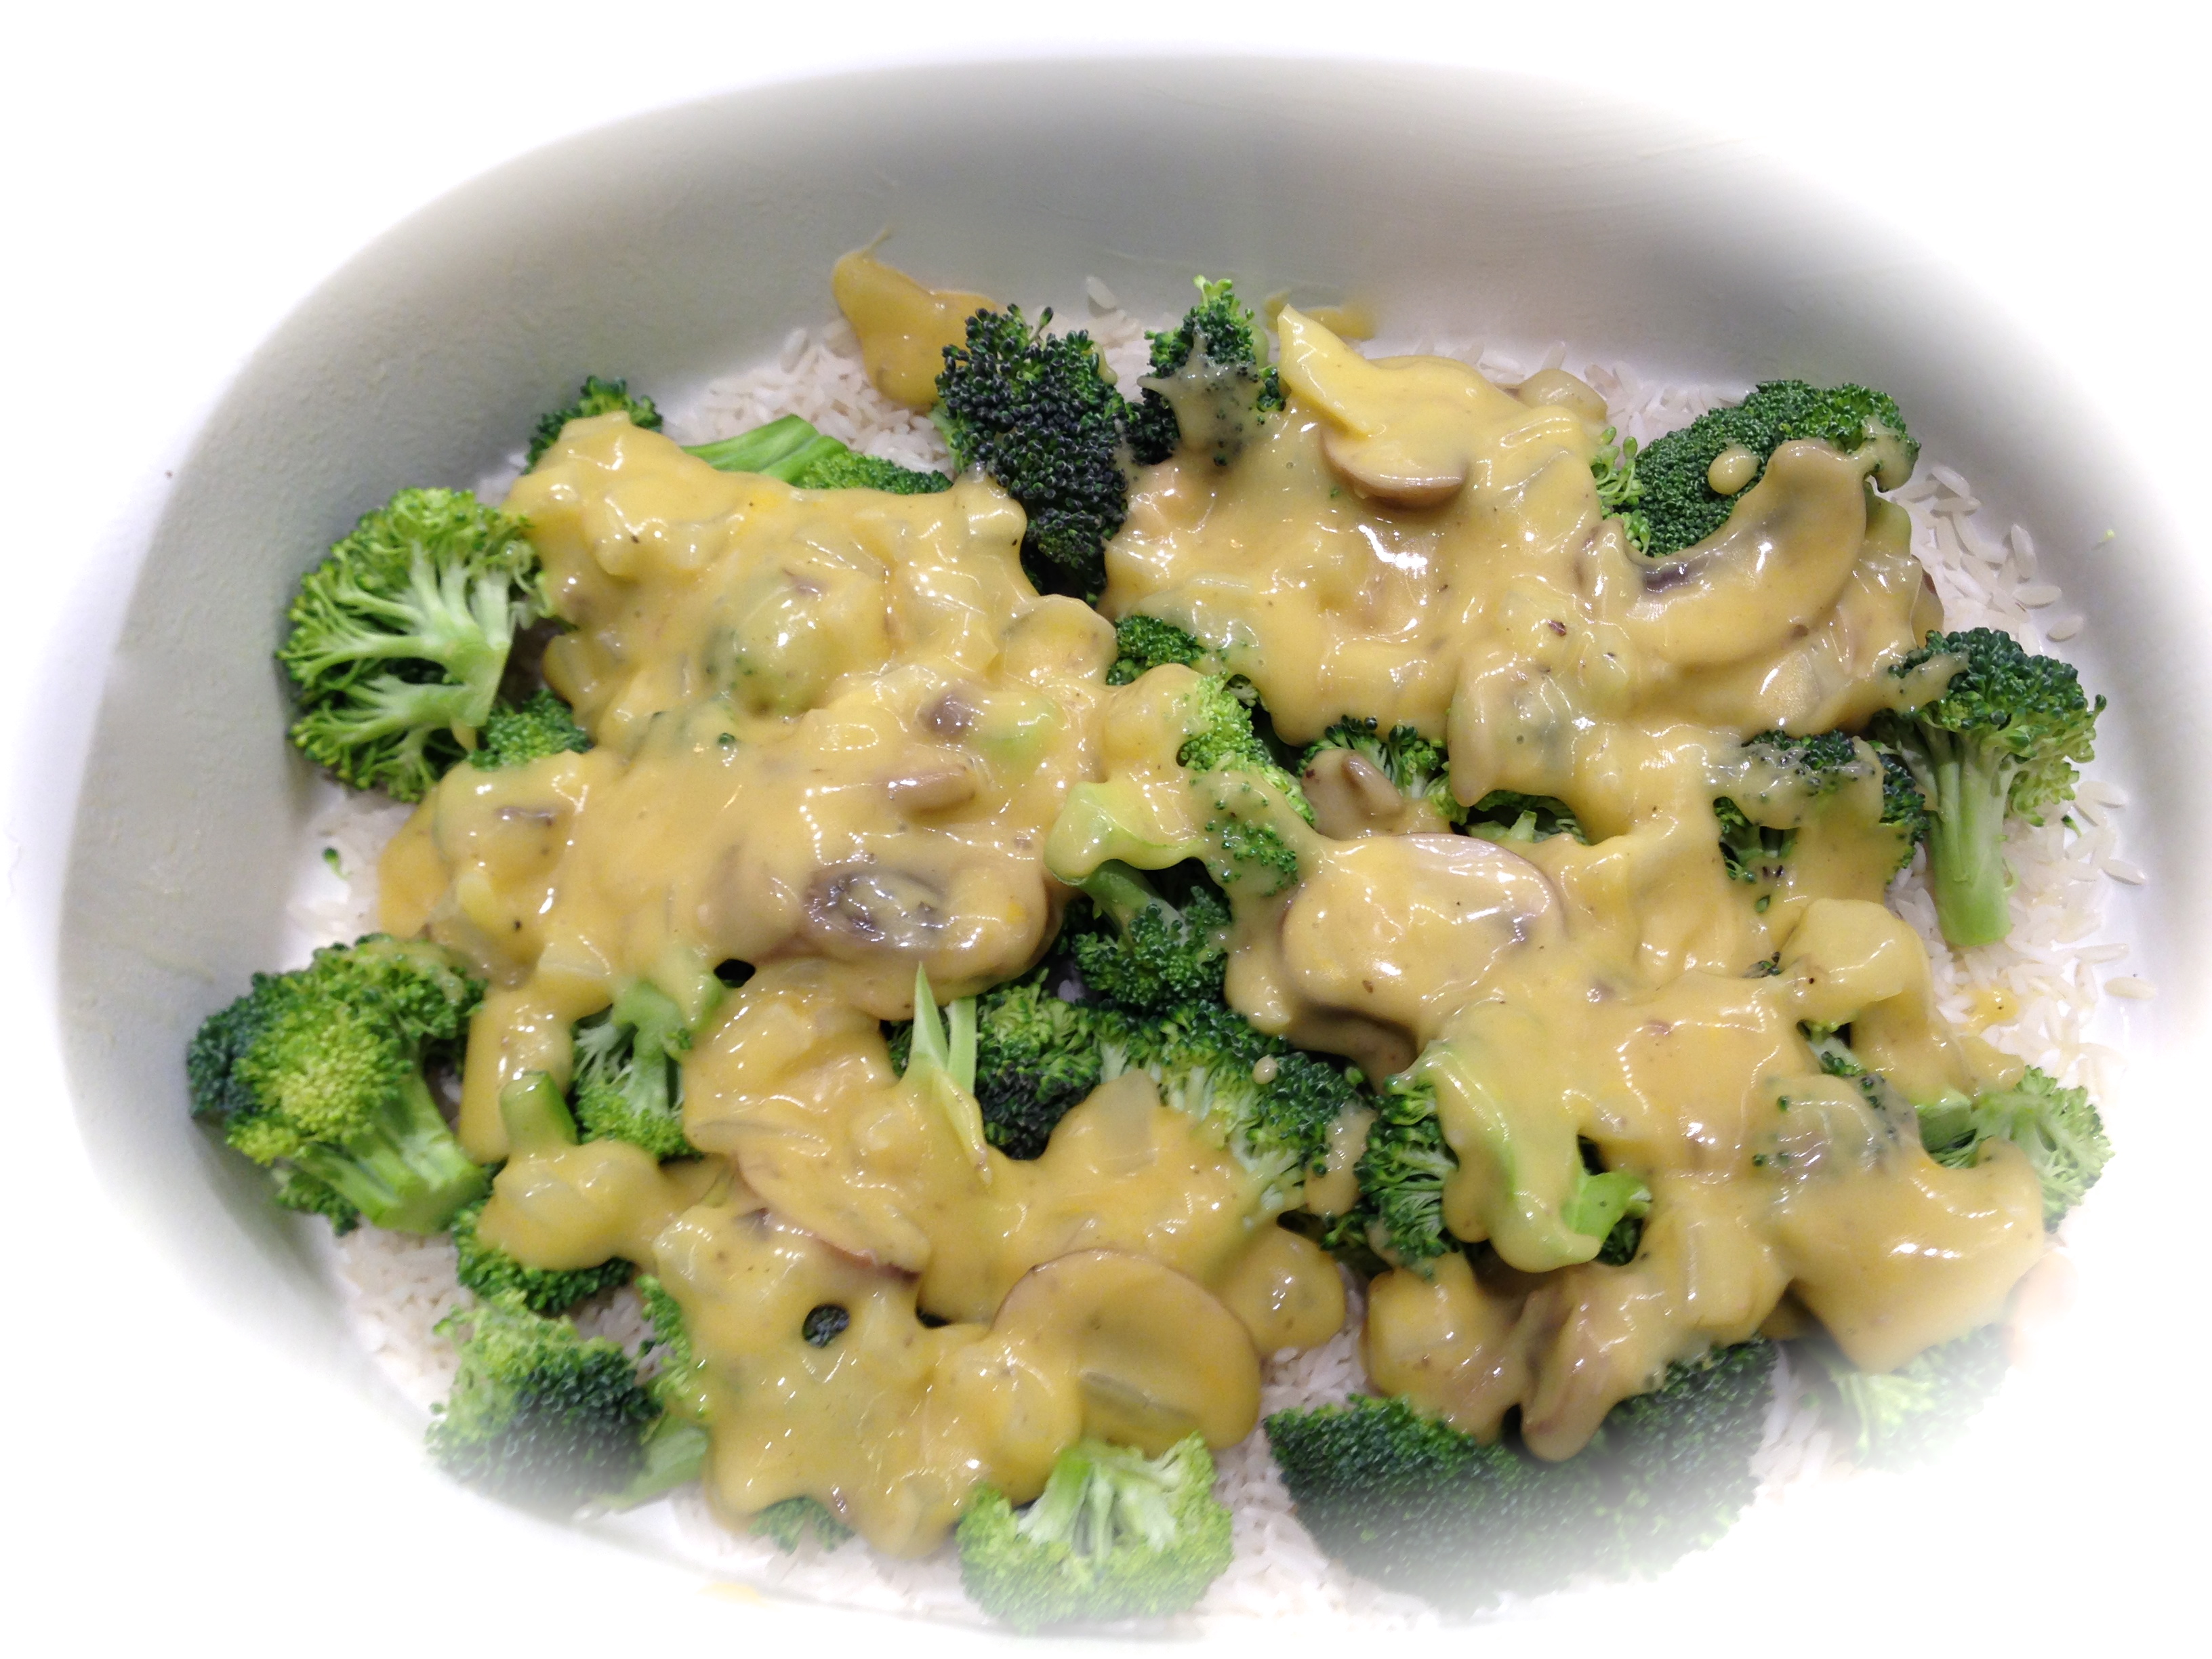
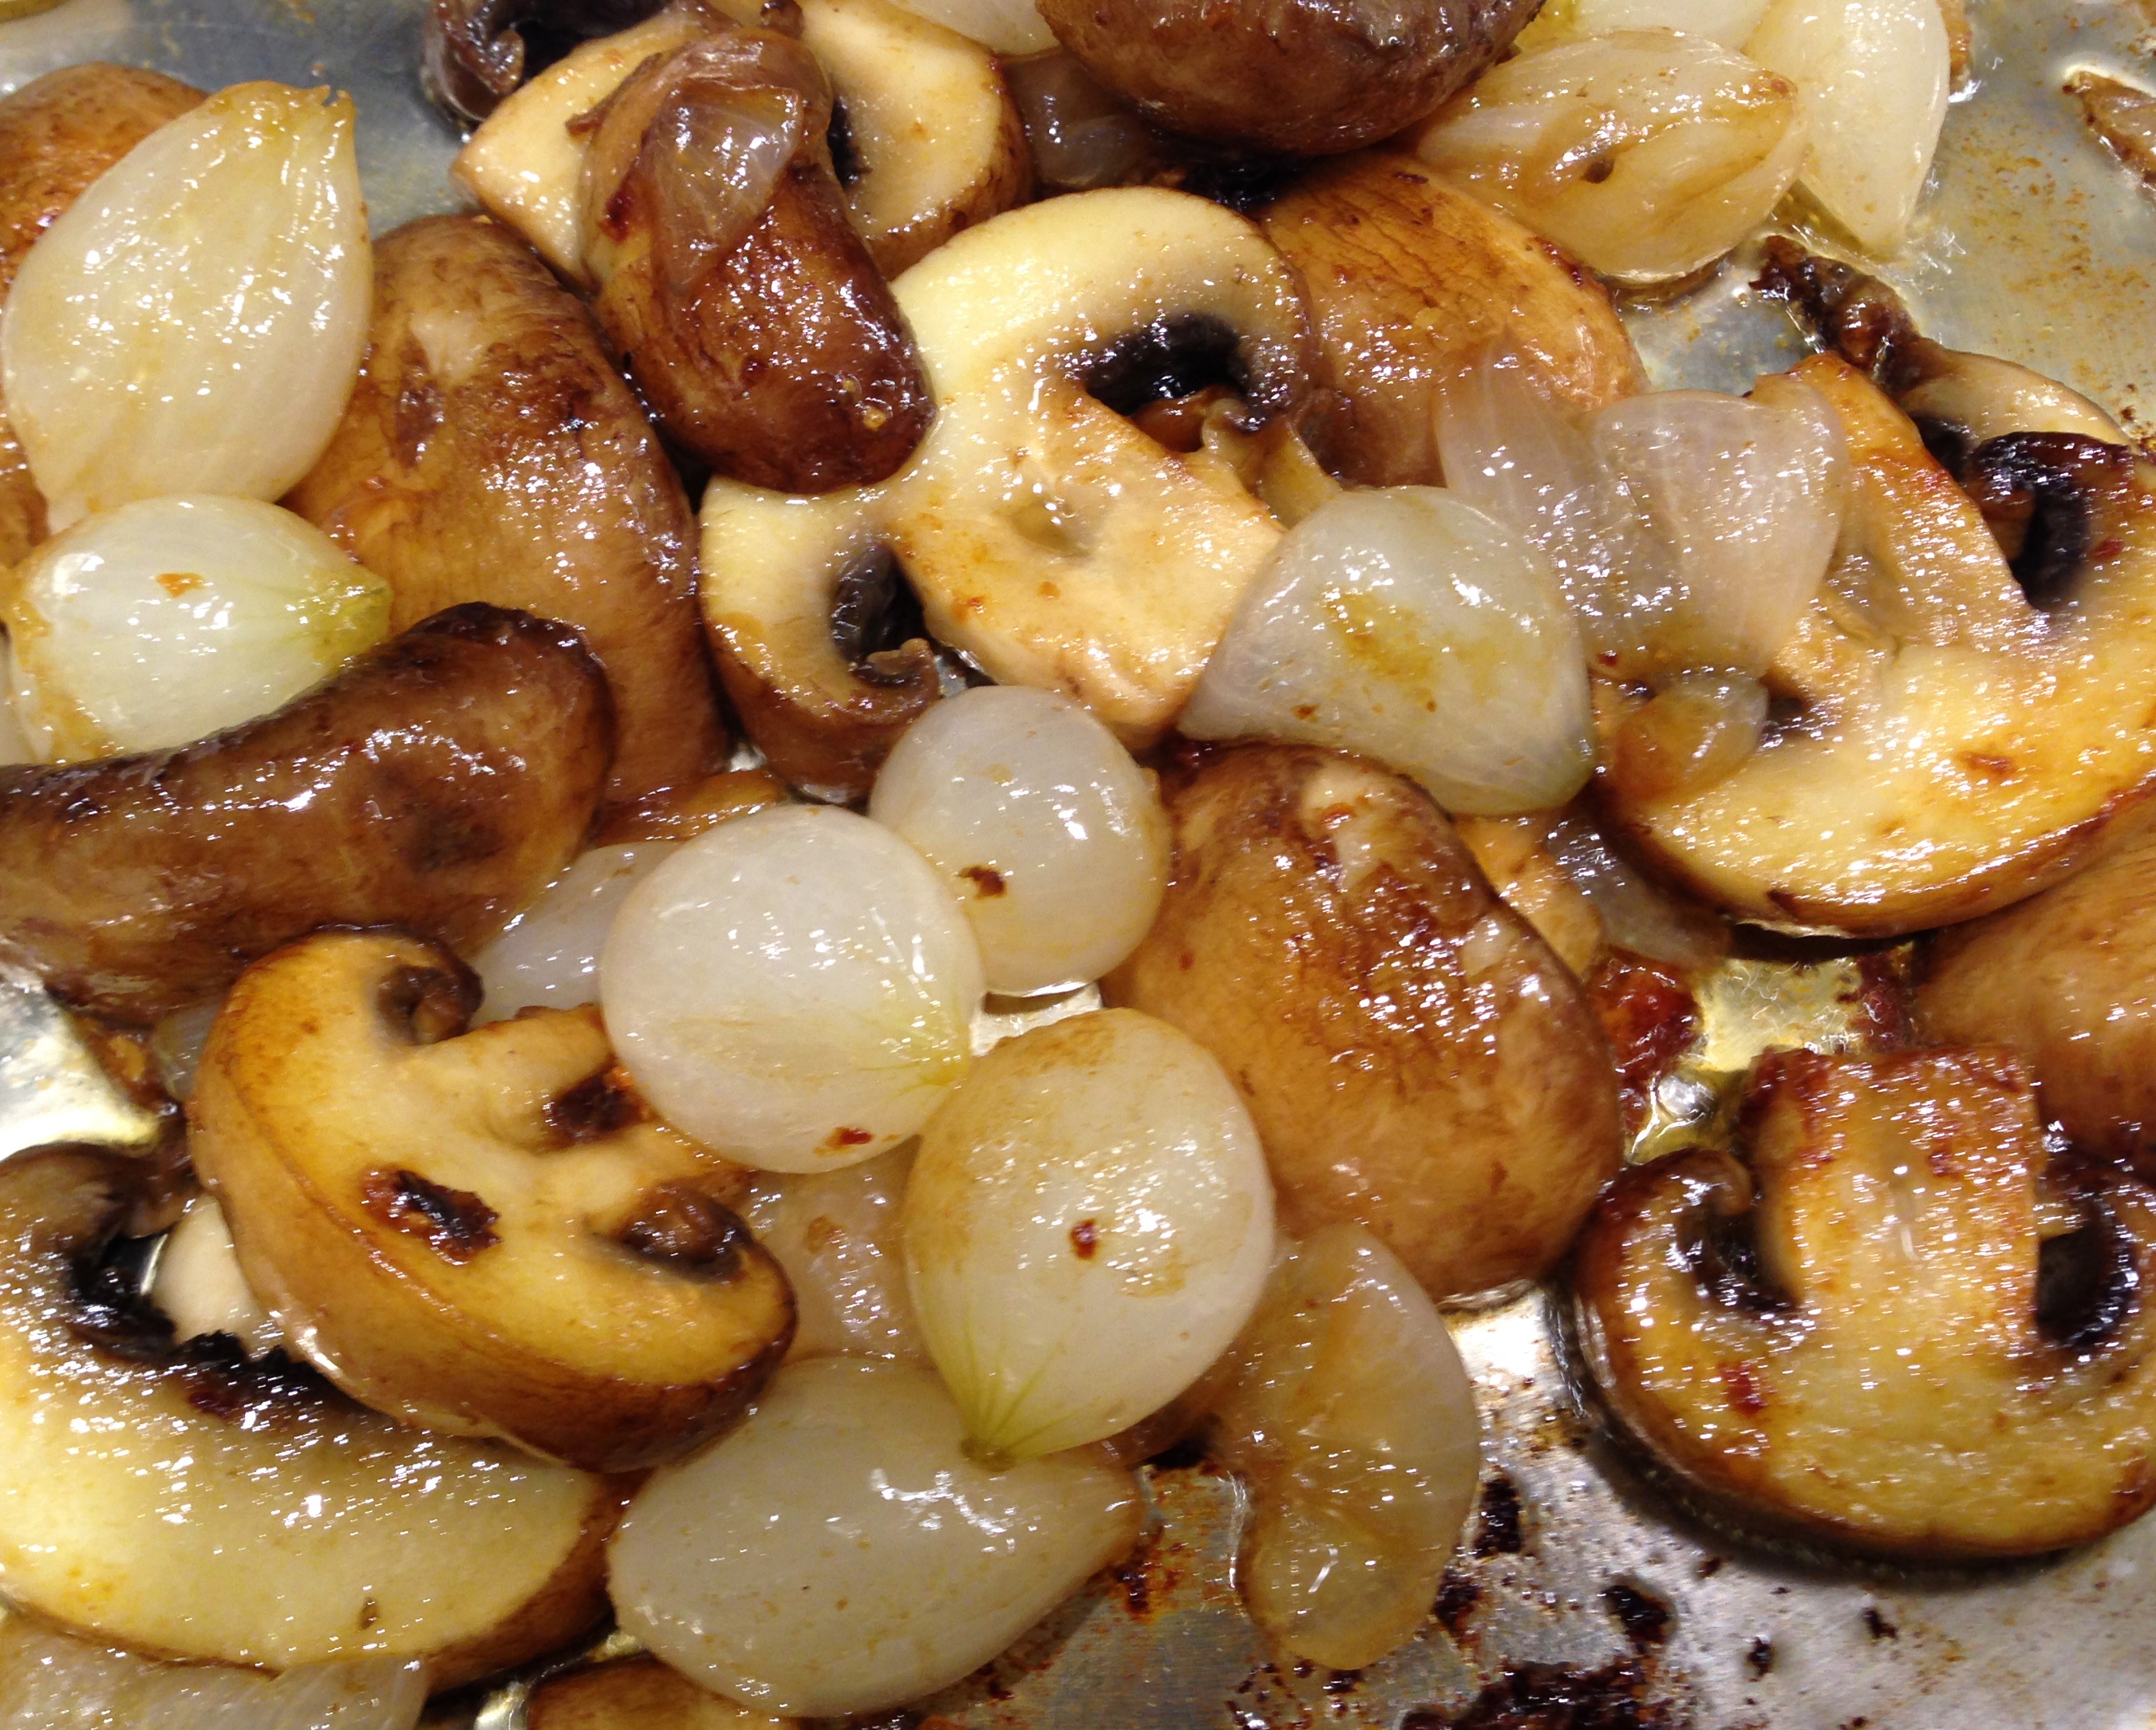
Lesson Learned 2 – There were far too many vegetables for such a small pan: I had a rather tall pile of vegetables on one side of the pan. From experience I know that piling them up that way has an affect on how they cook. In this case, the mushrooms and the peas turned out fine but the broccoli was hard. Don’t get me wrong, I am not a fan of mushy broccoli. As a matter of fact I like it crisp tender. In this case, the broccoli florets on top of the pile were slightly scorched and the rest of the broccoli stems were rock hard. I think for a better result using one of my sheet pans versus the small pan that was provided would have given a better result. It would allow for the vegetables to be more spread out and cook more evenly.

The broccoli was also chopped into fairly large pieces. Perhaps cutting back some of the large stalks and cutting the florets into smaller sizes may have helped. I think doing that and using a larger pan might have solved the problem.

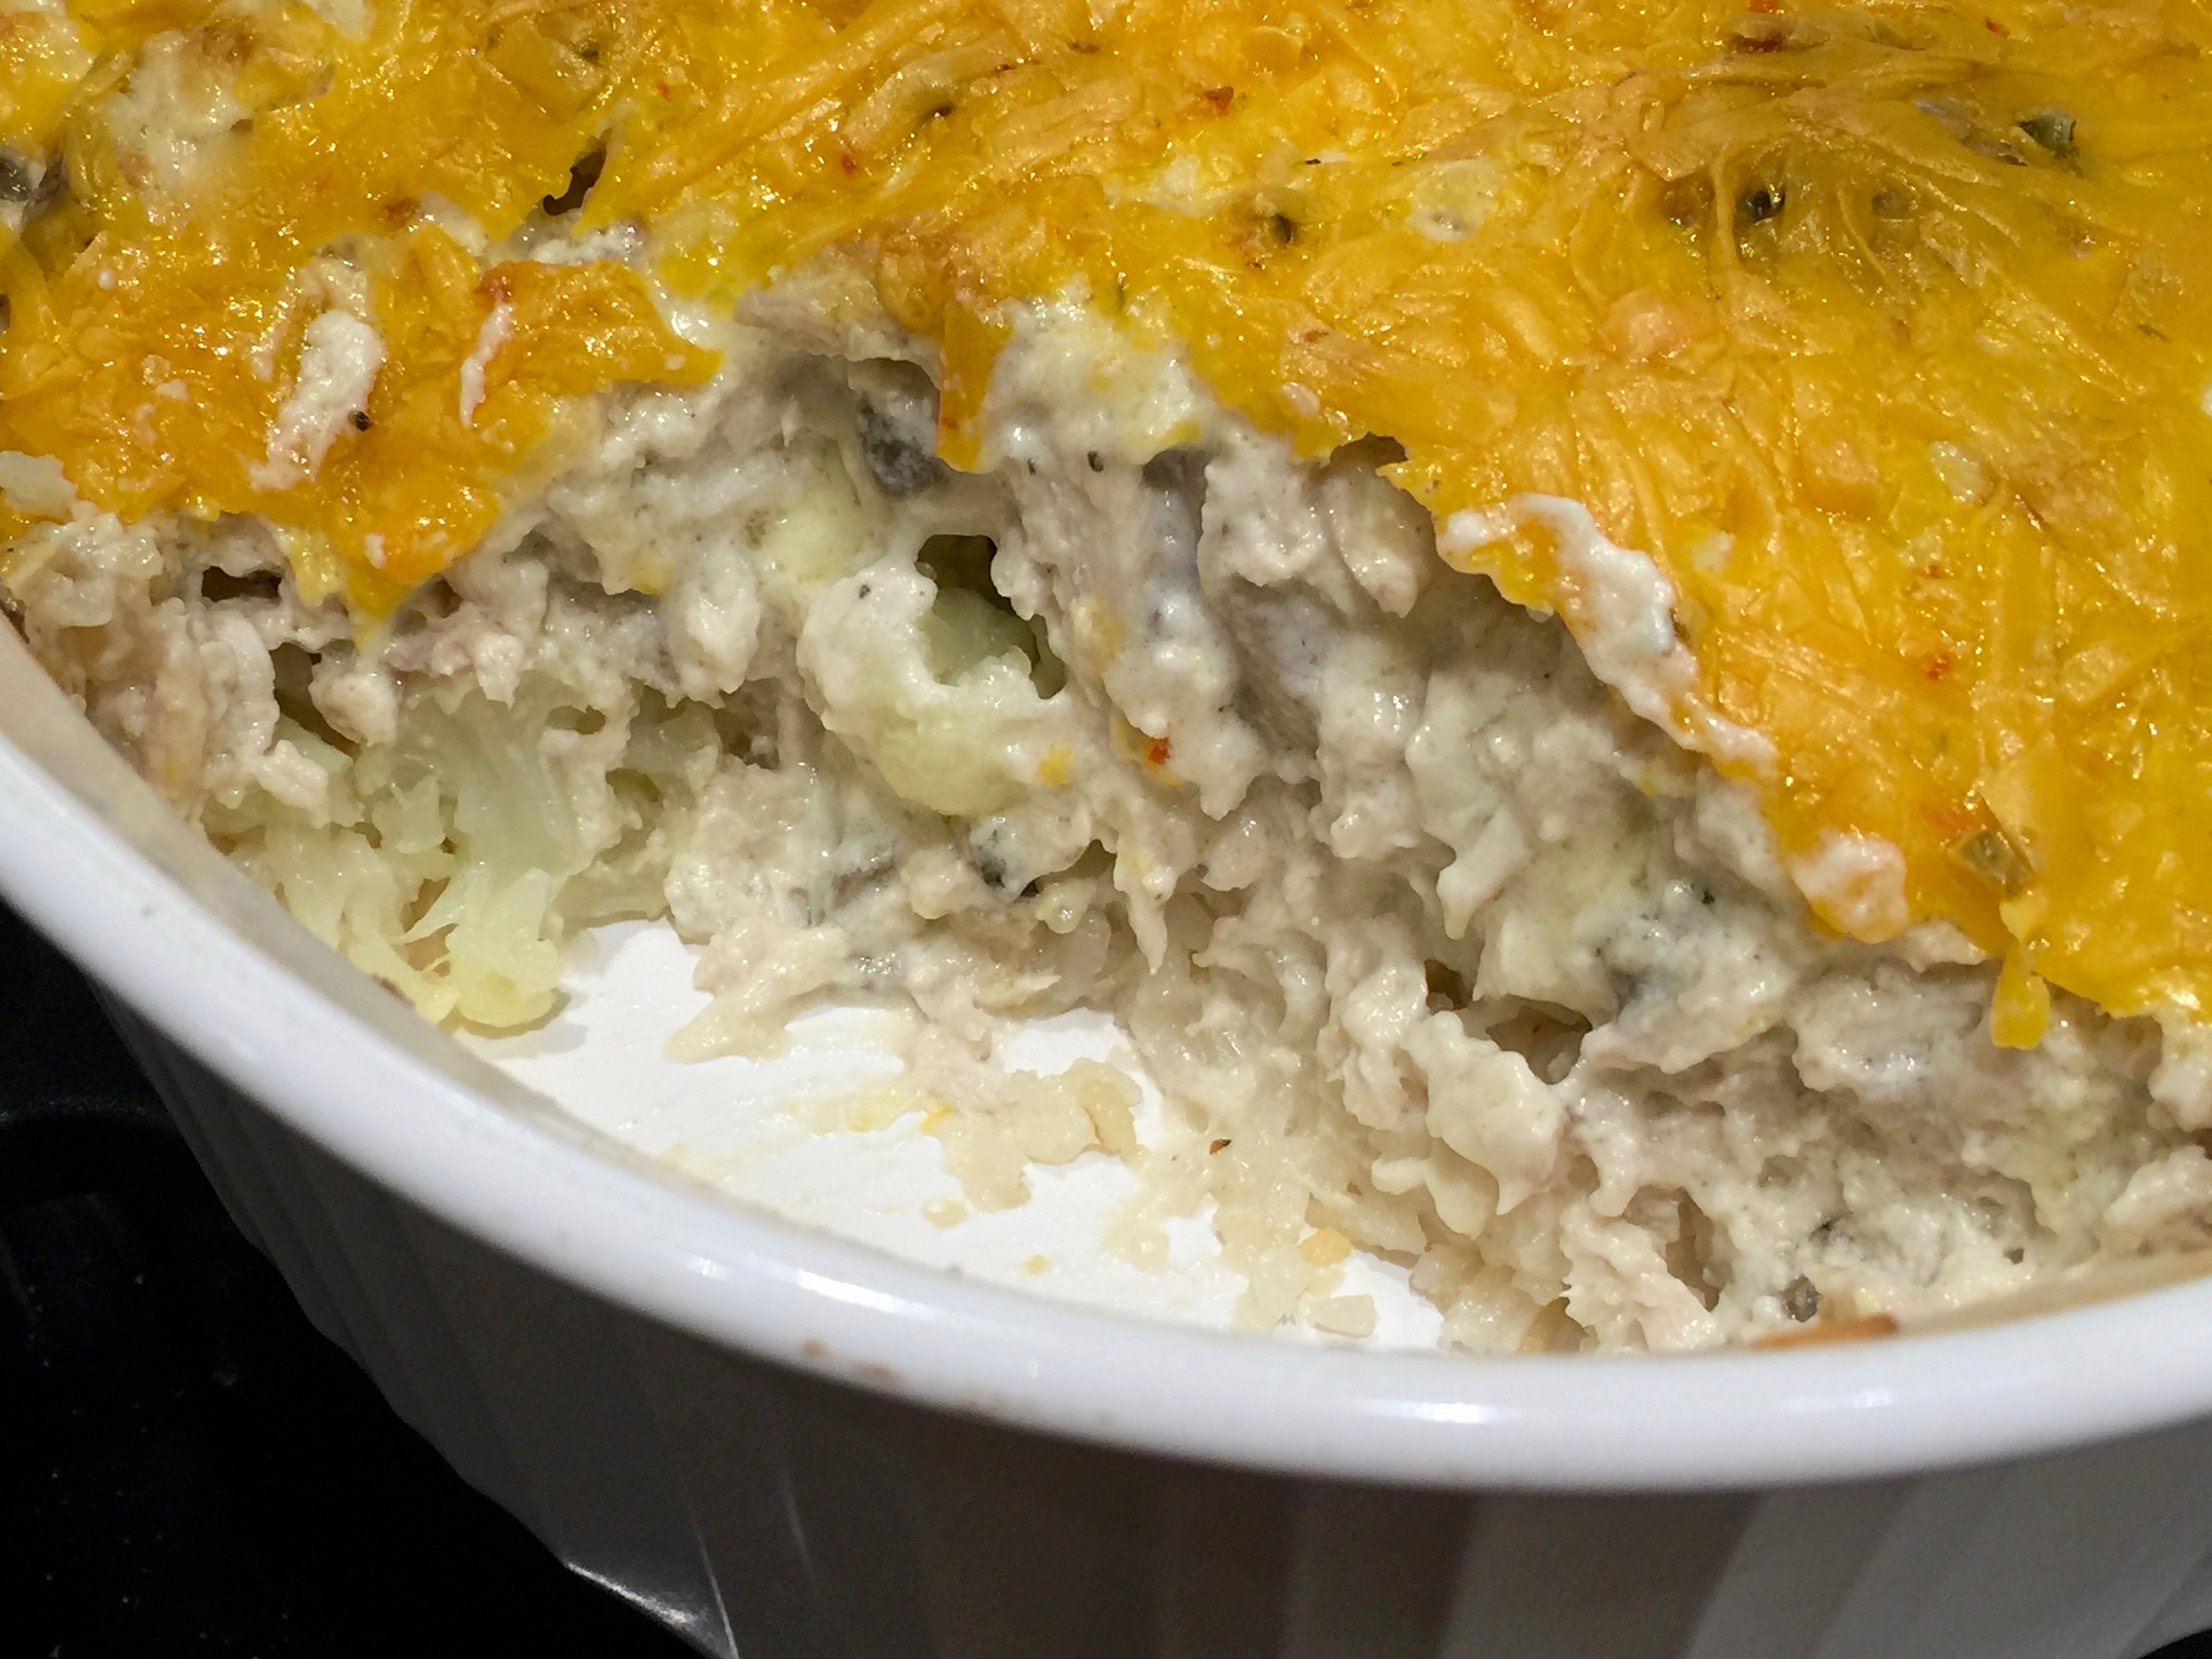
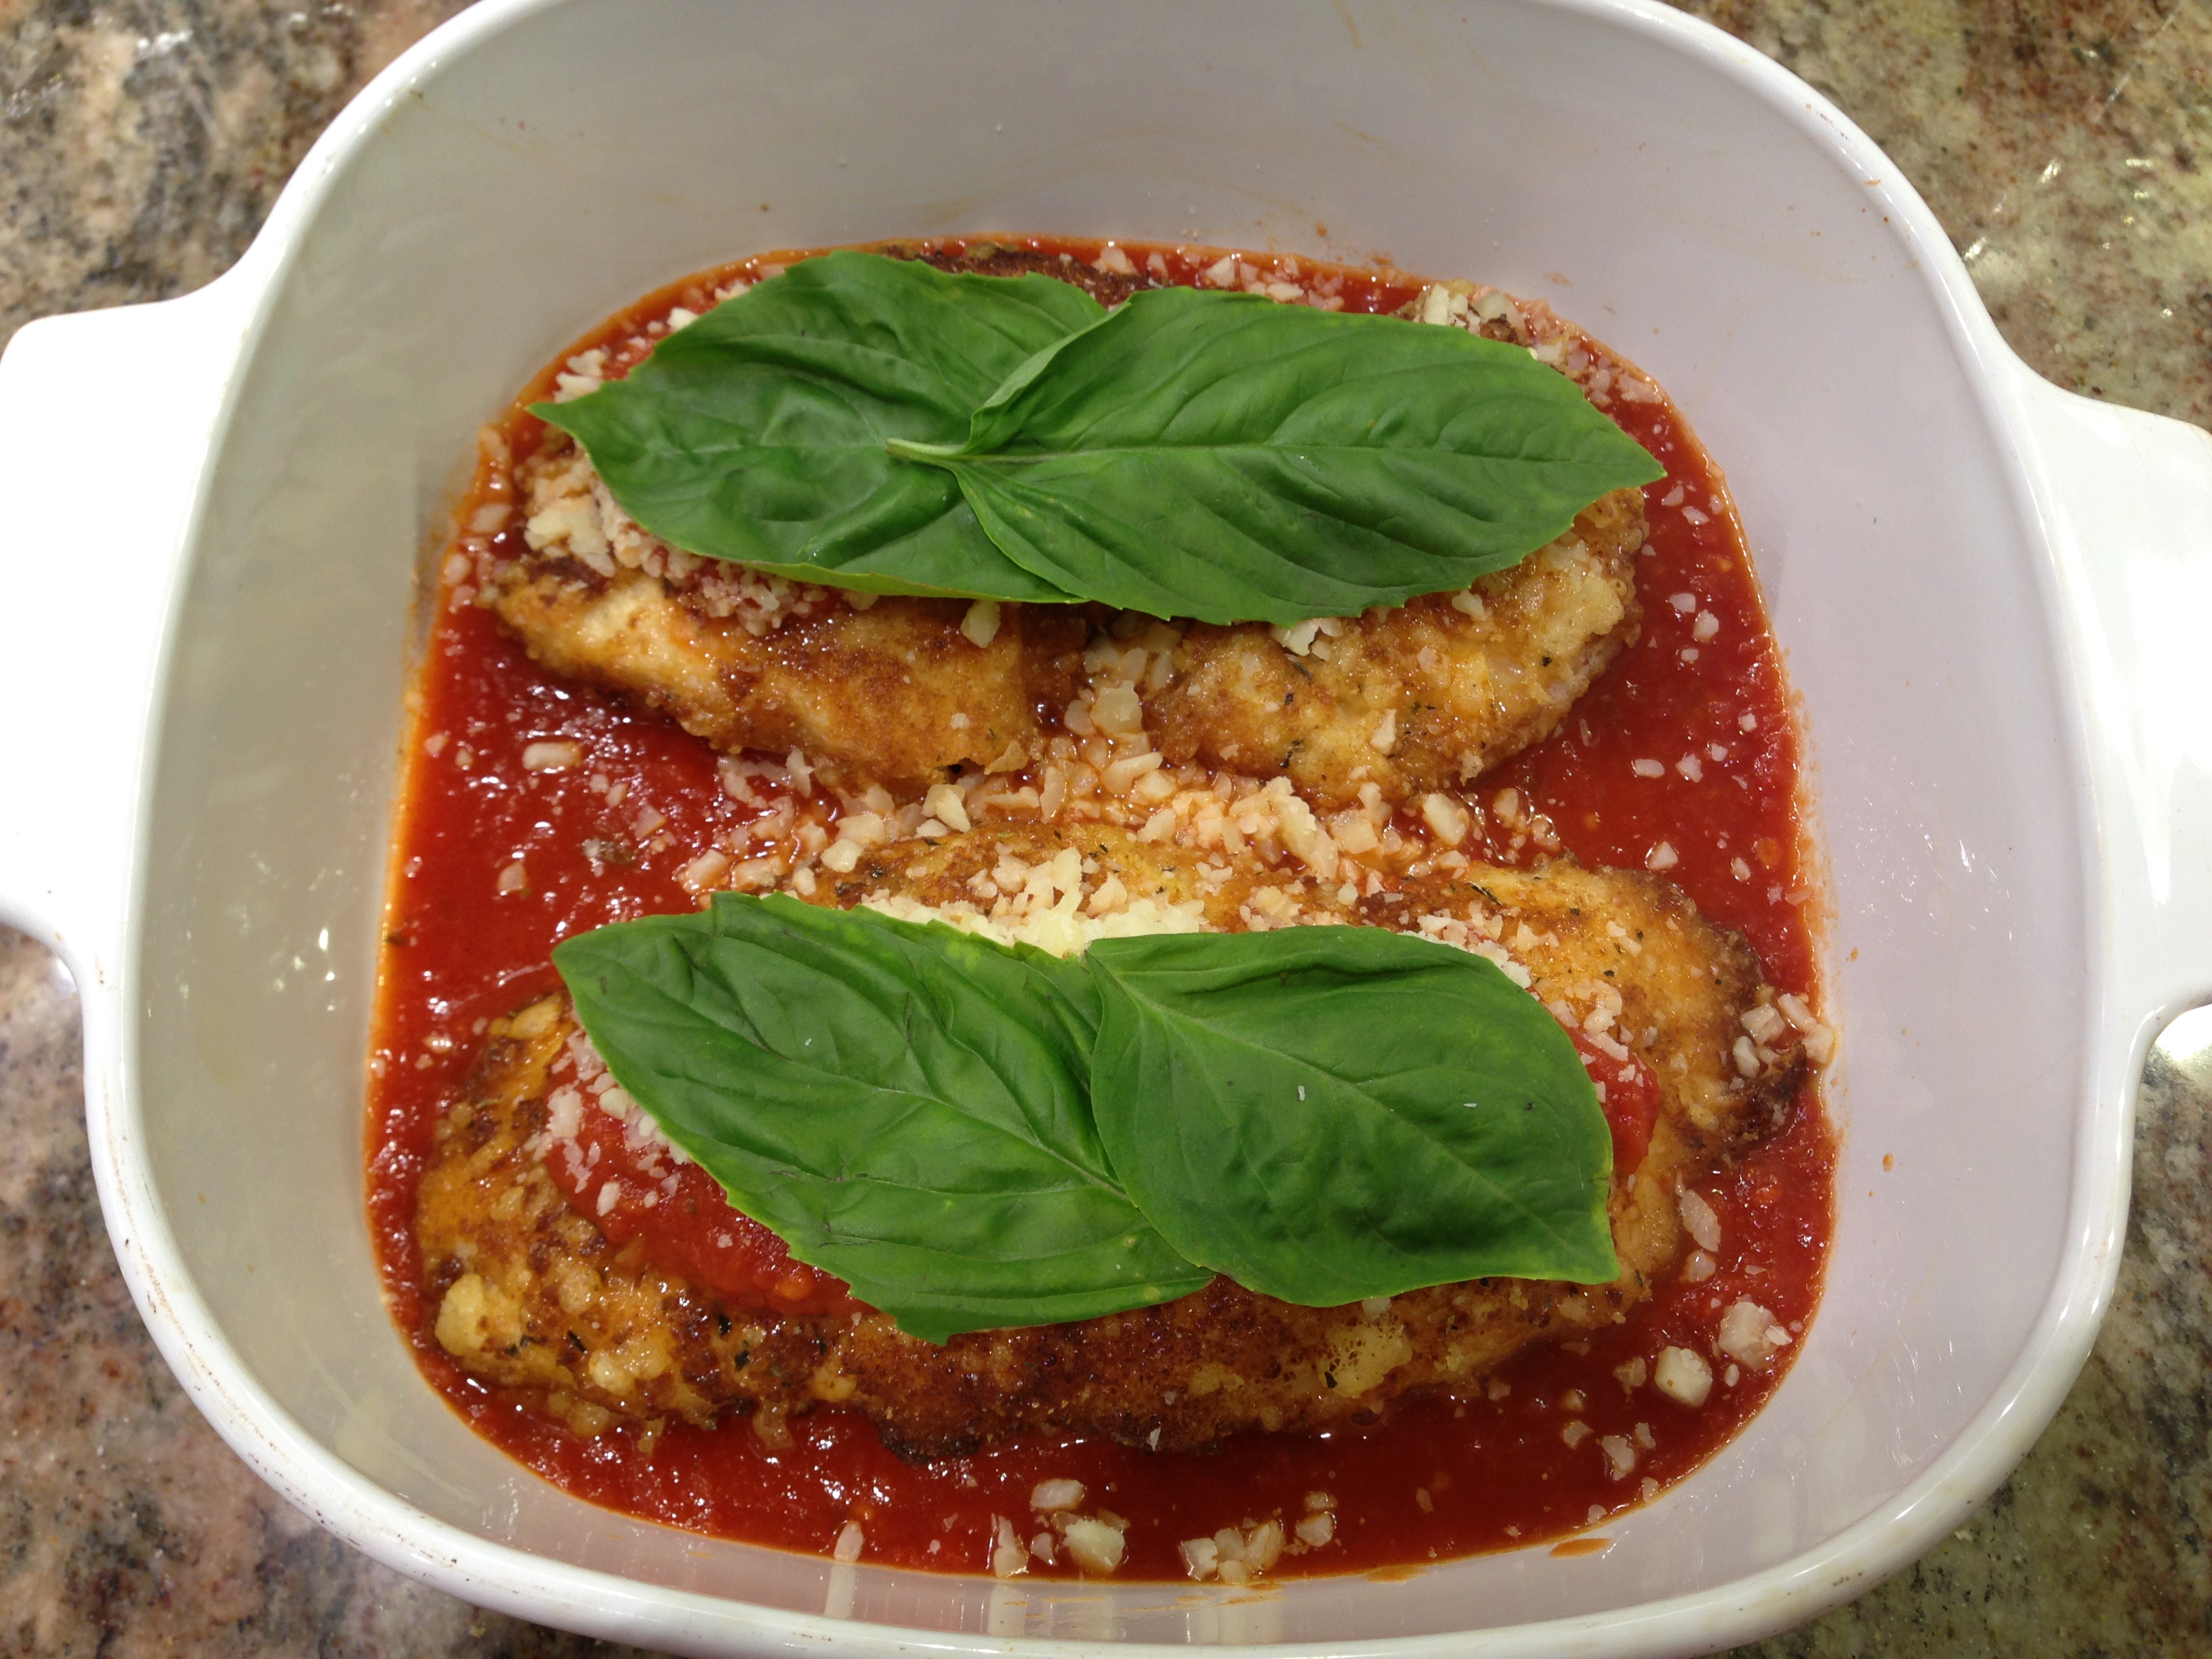
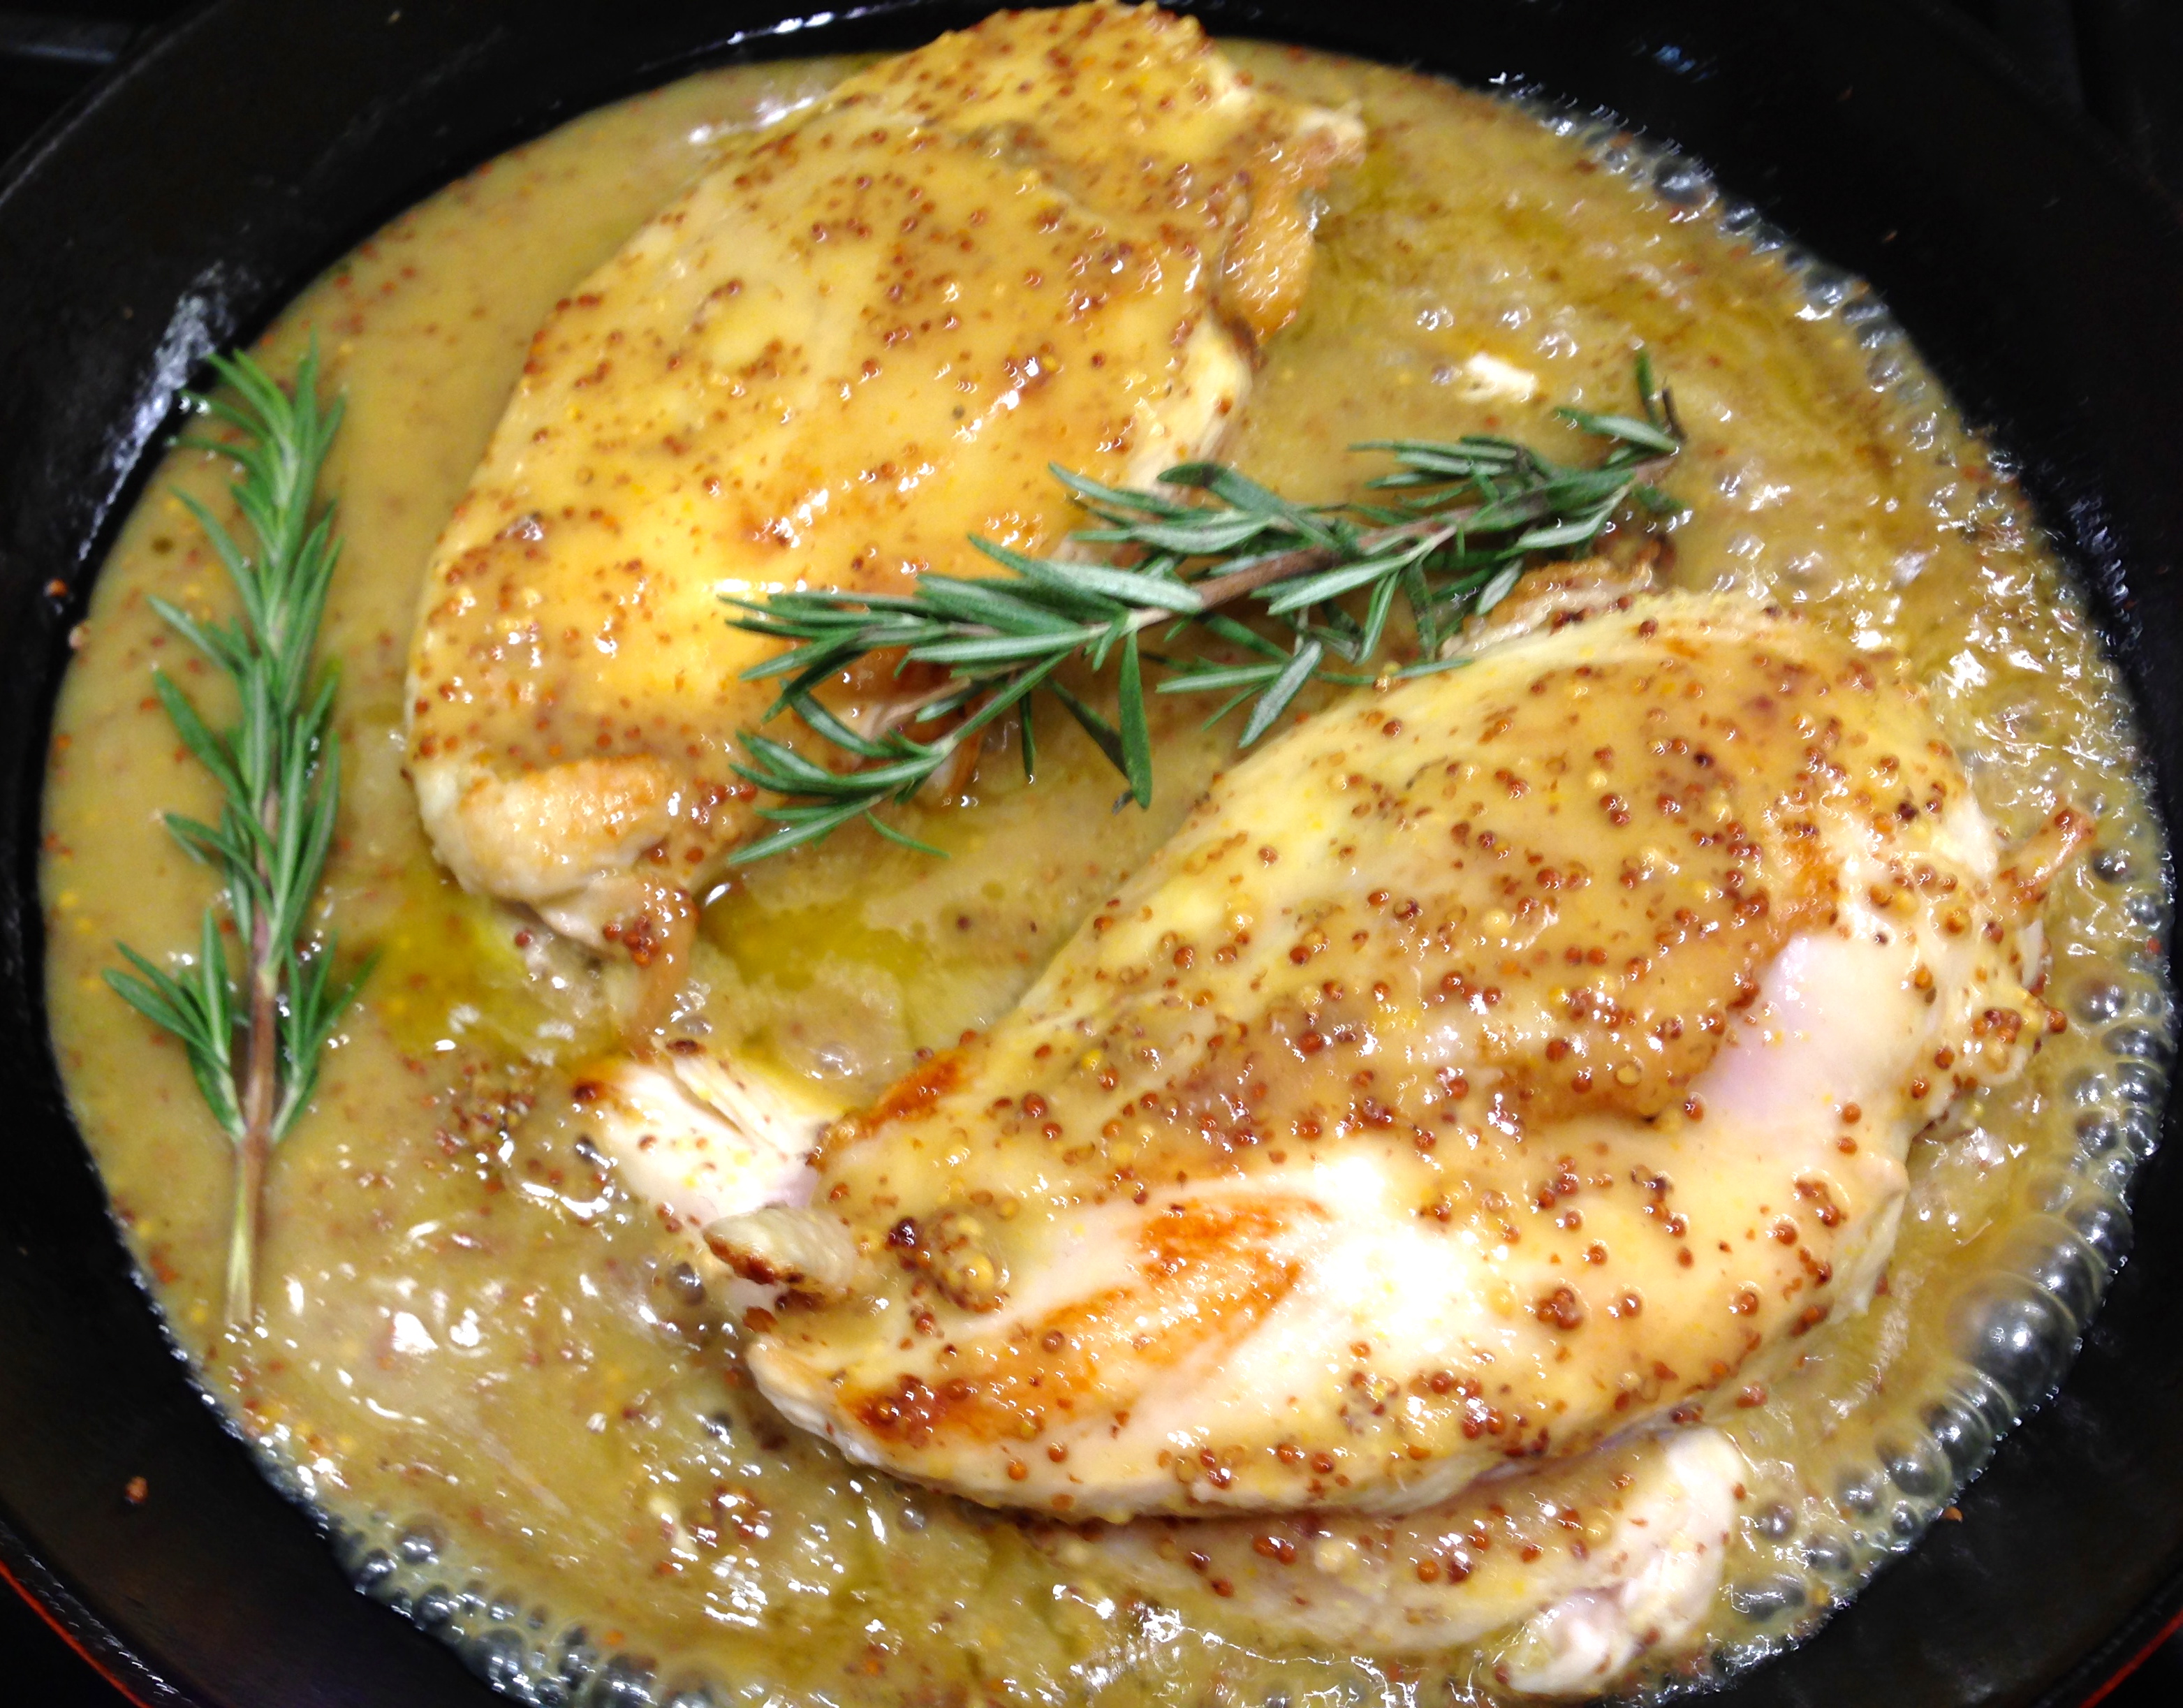
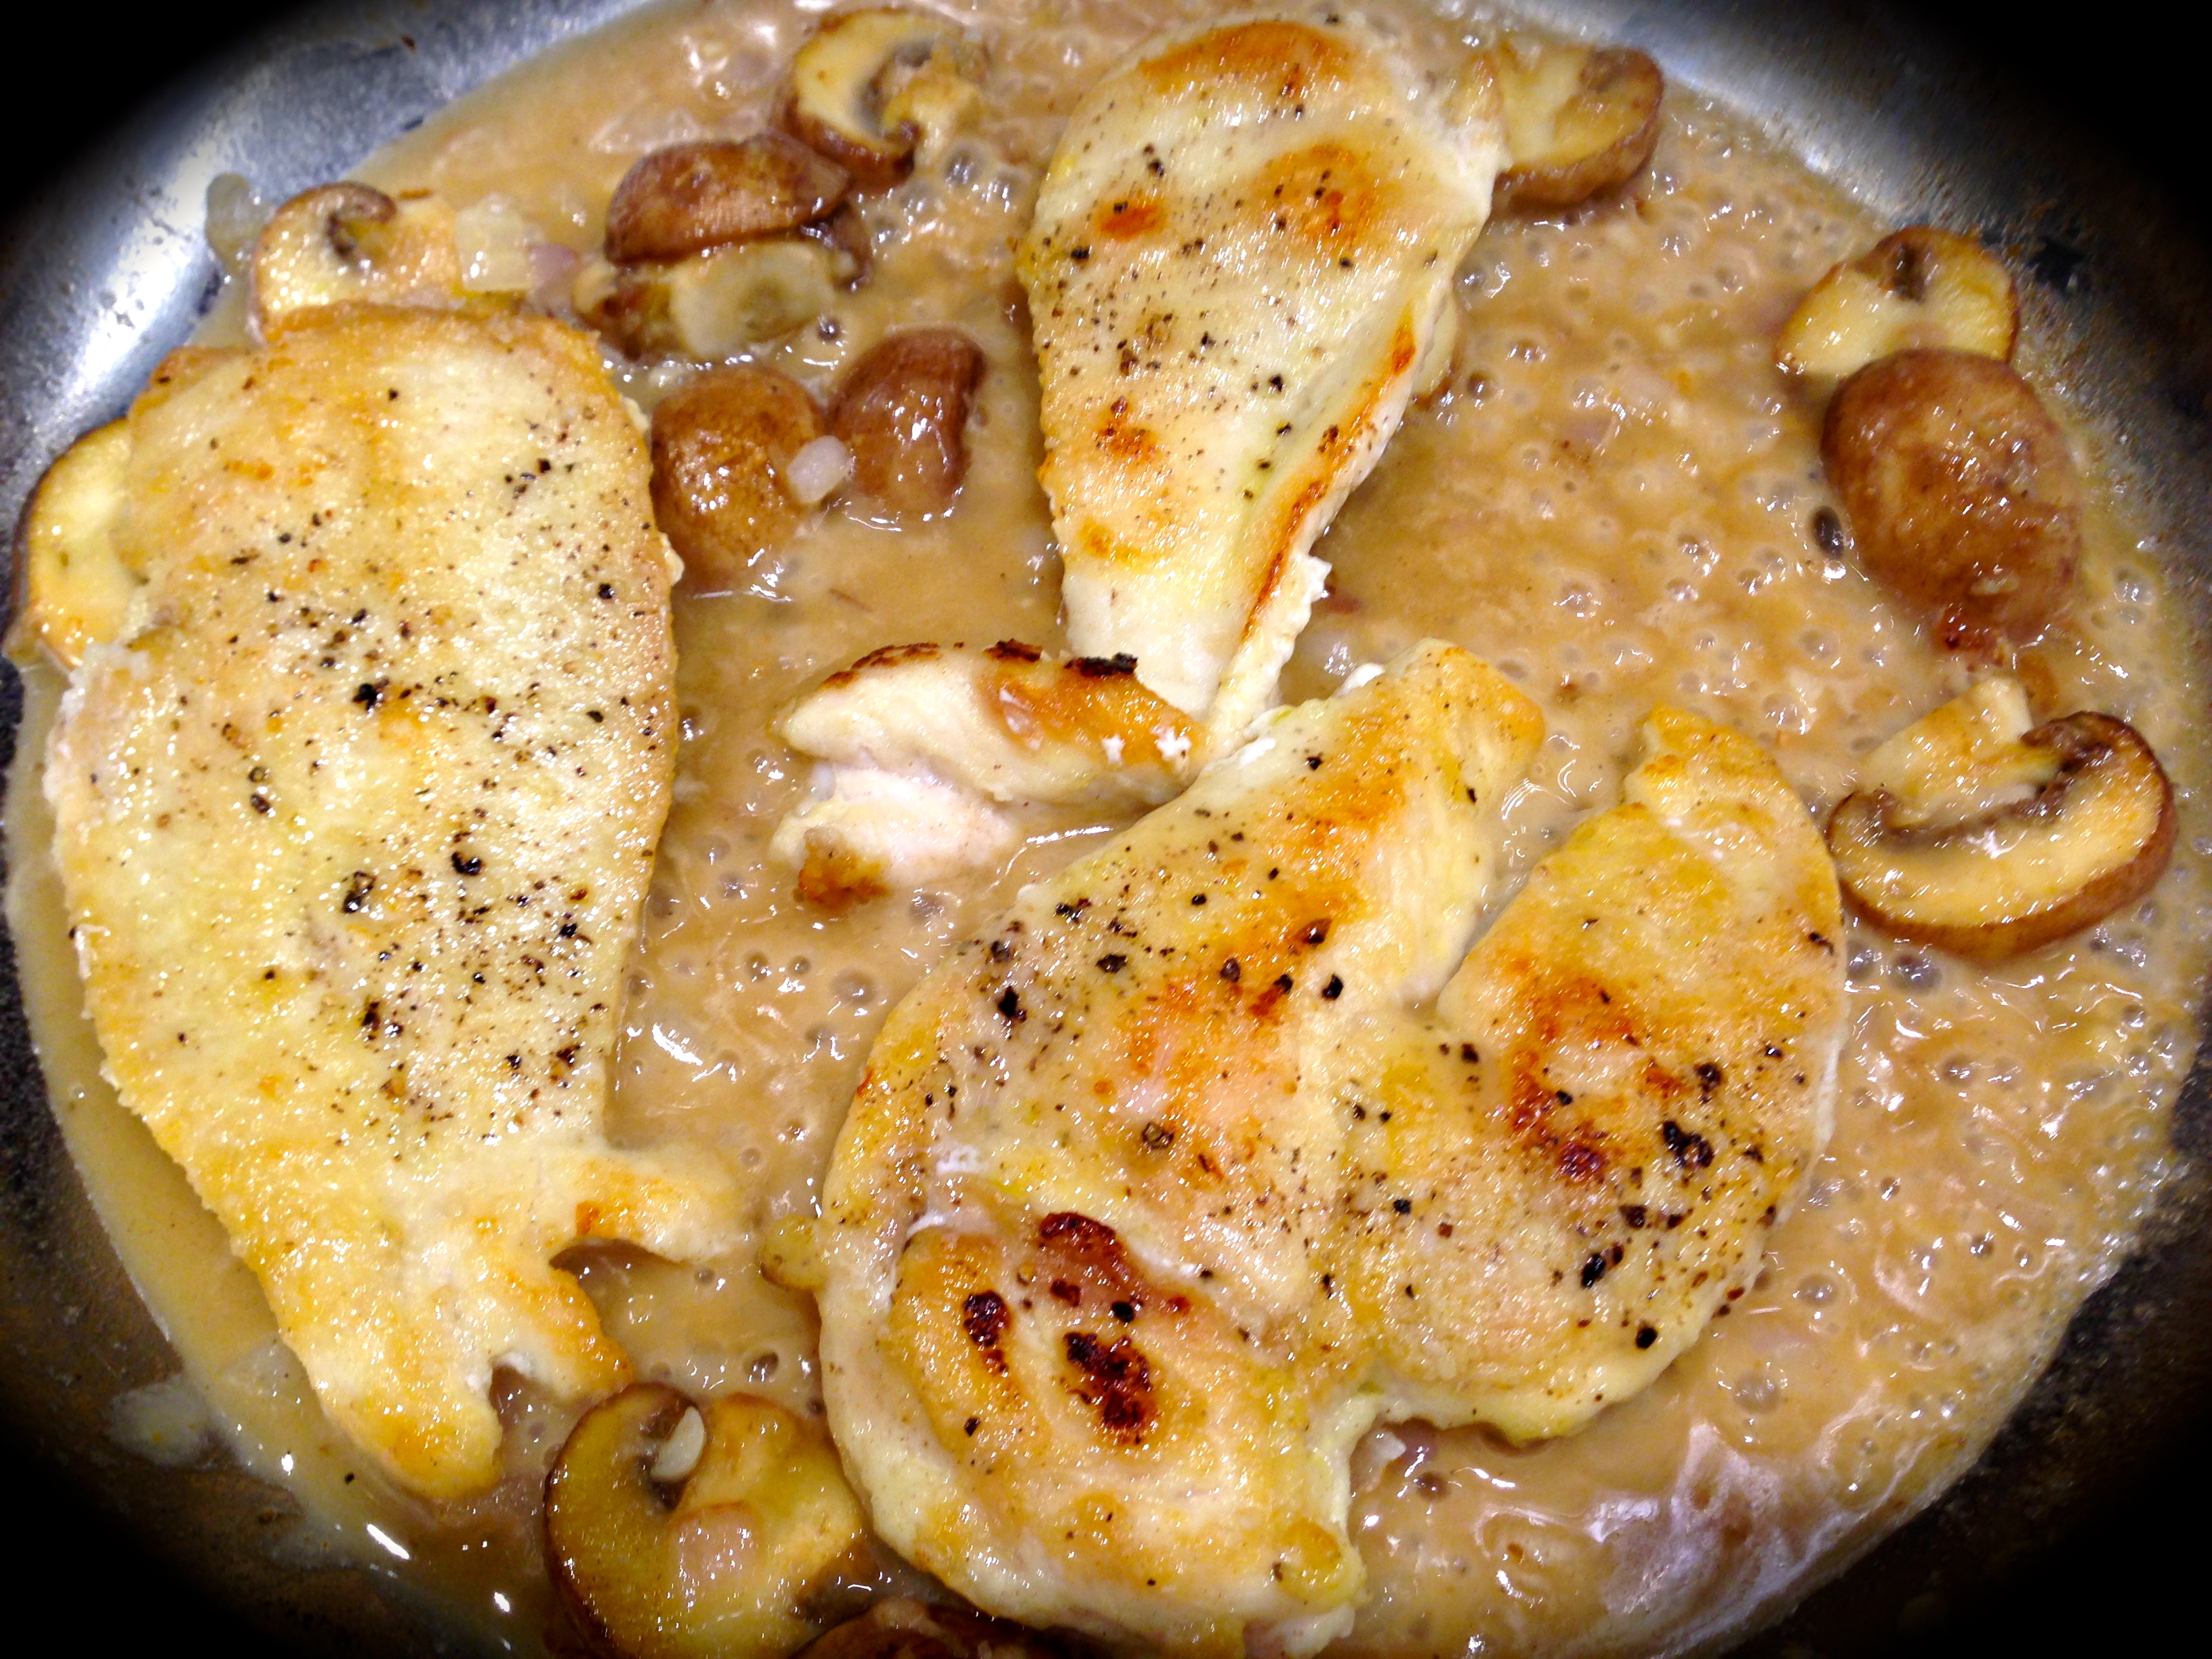
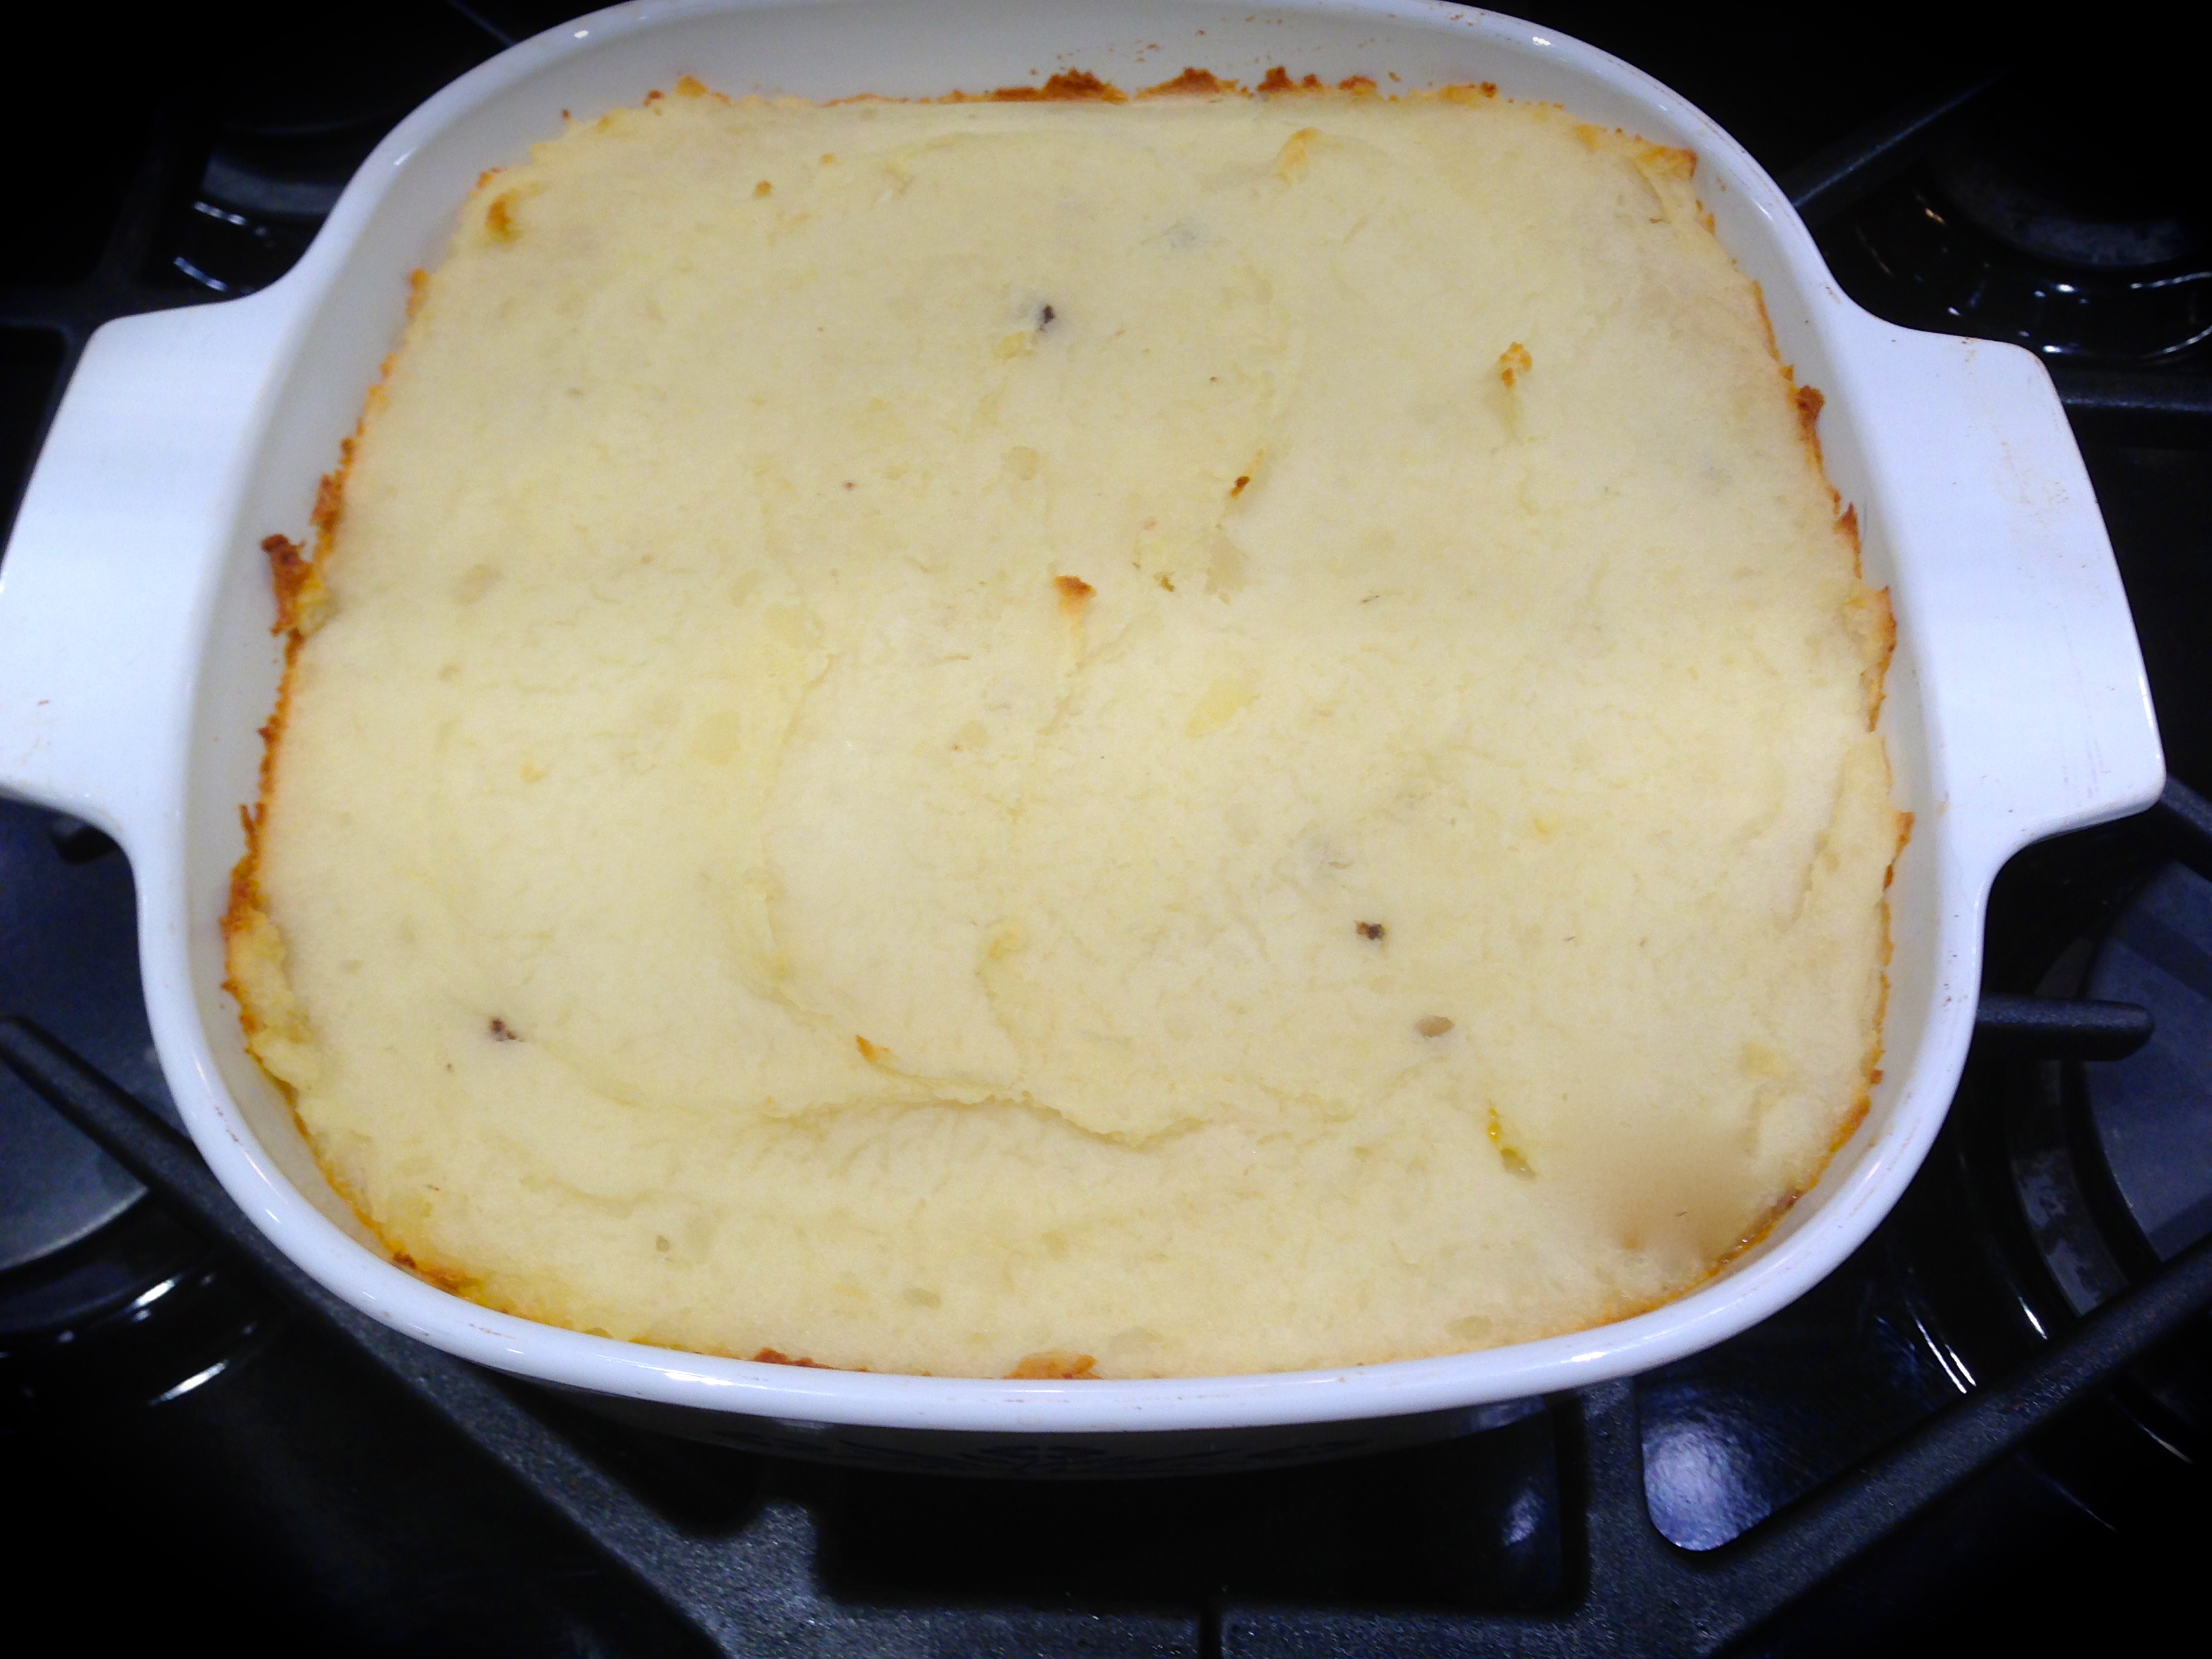
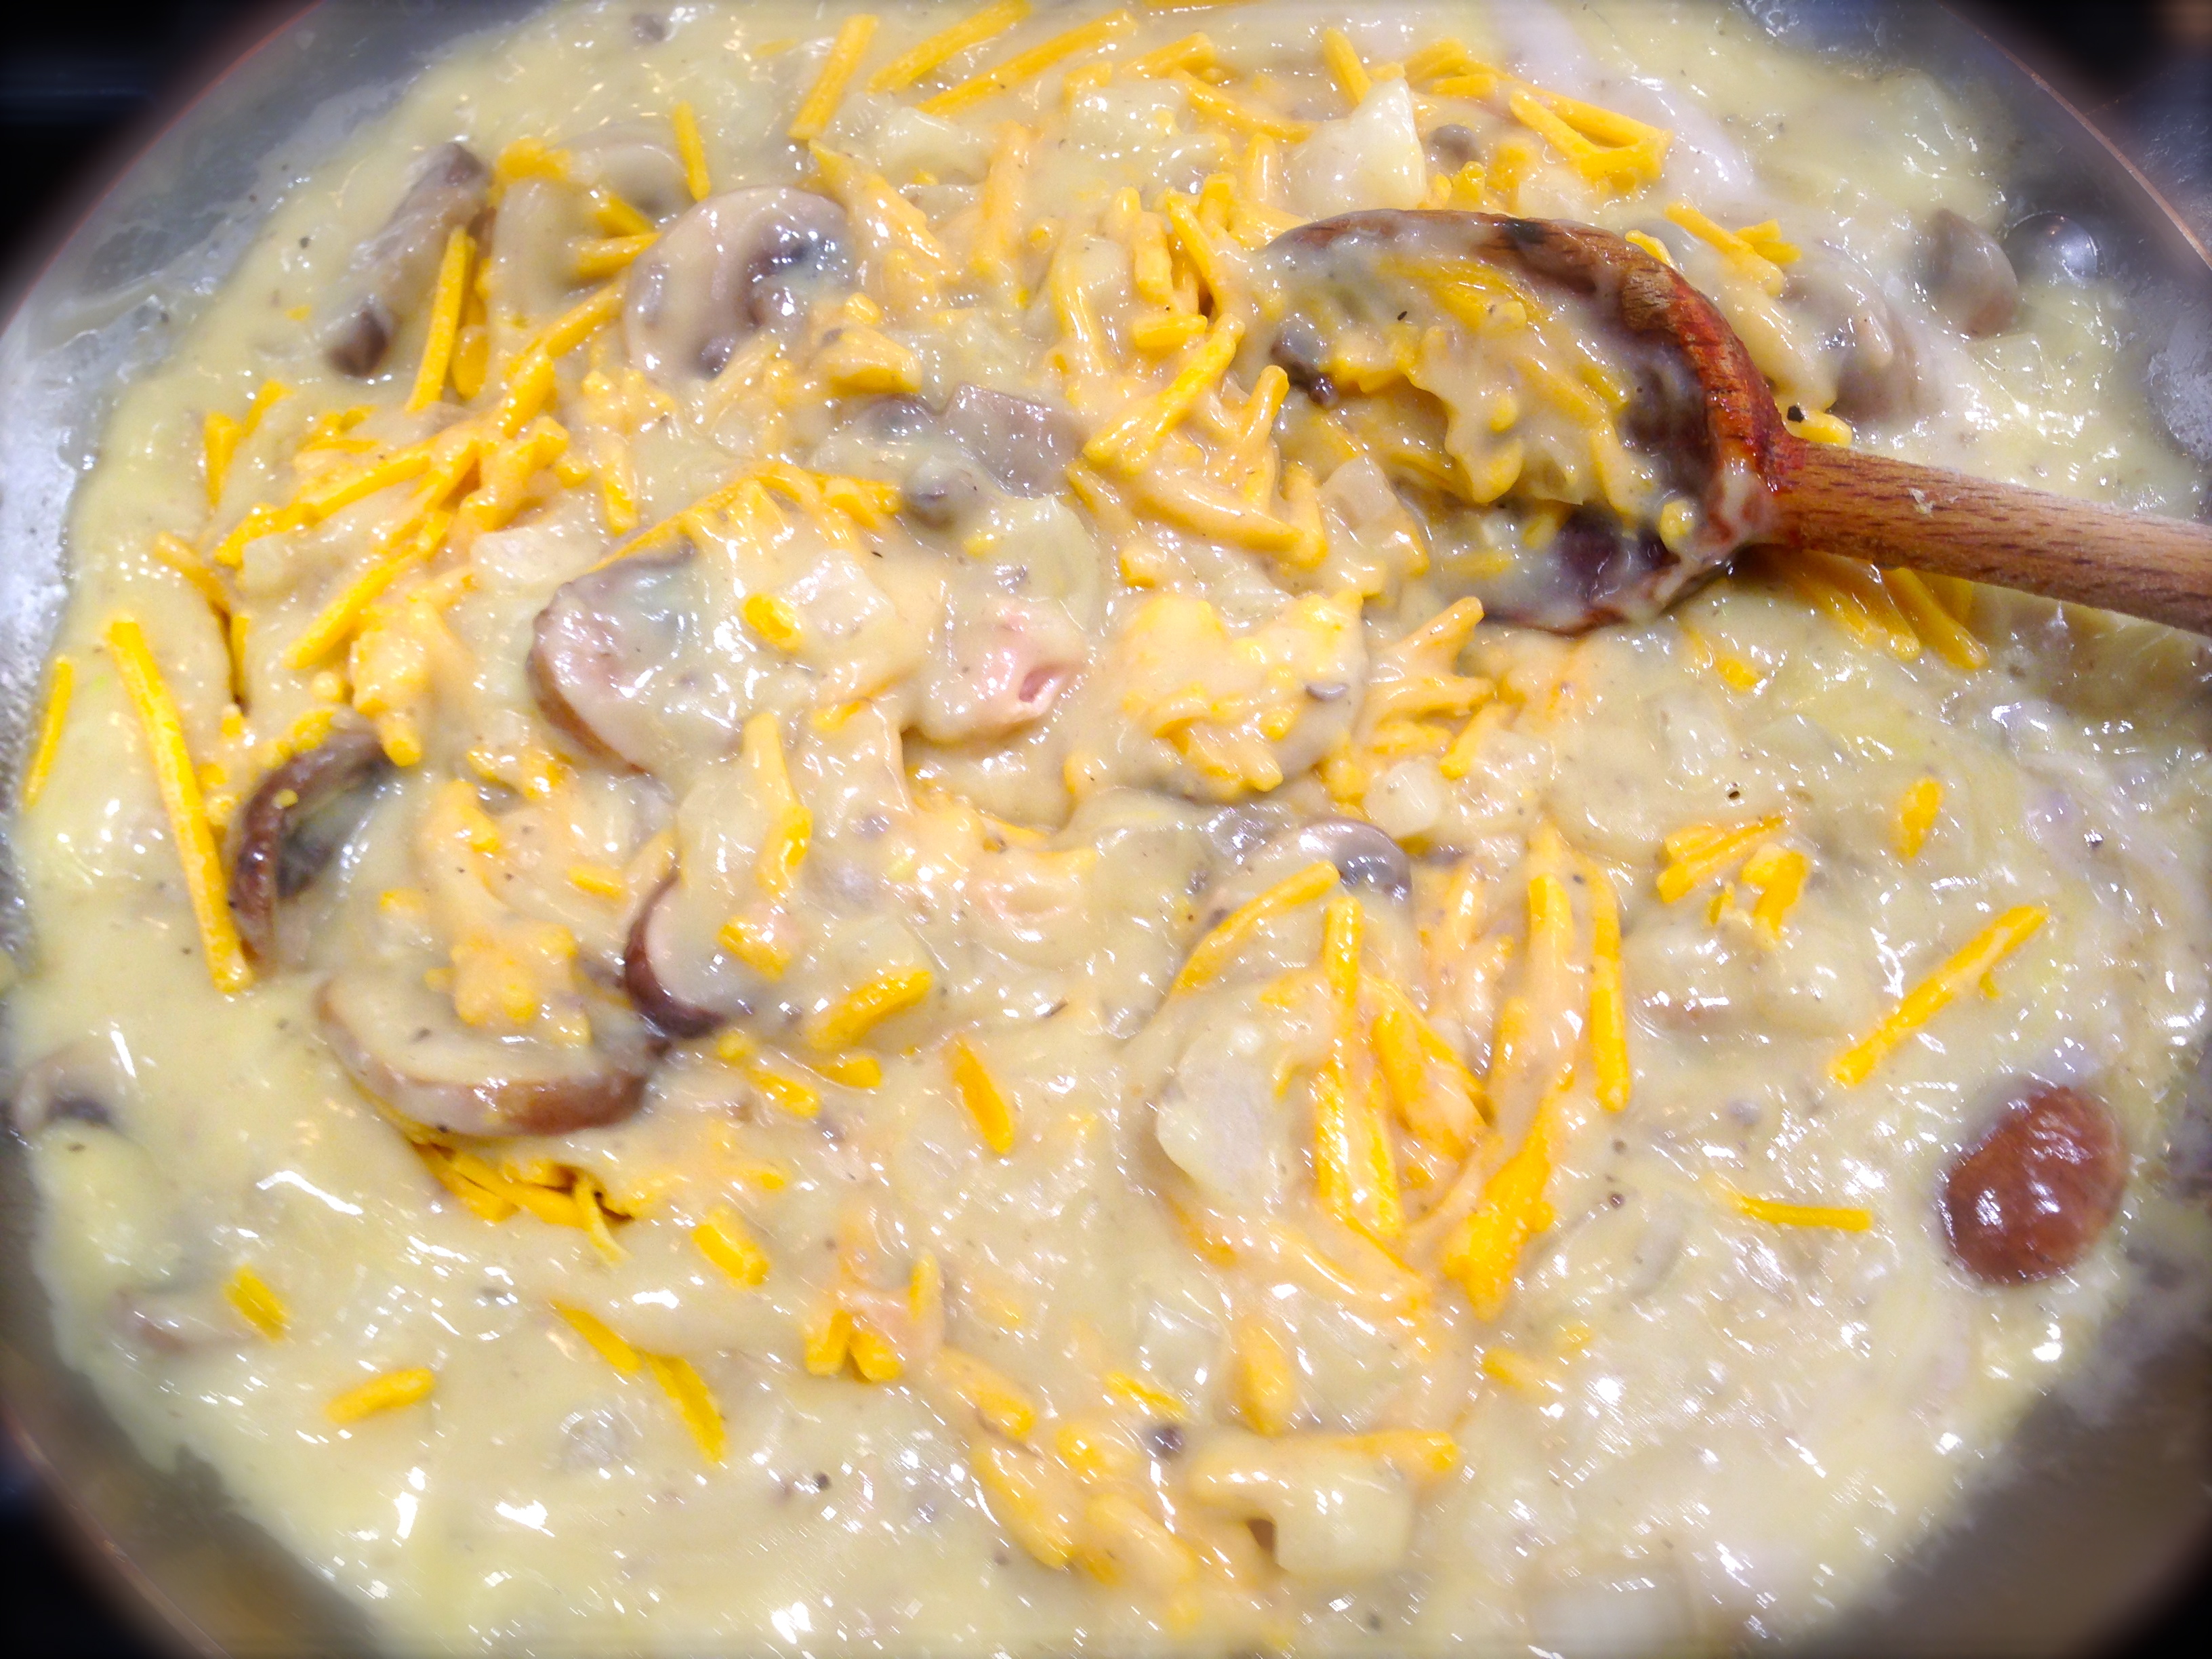
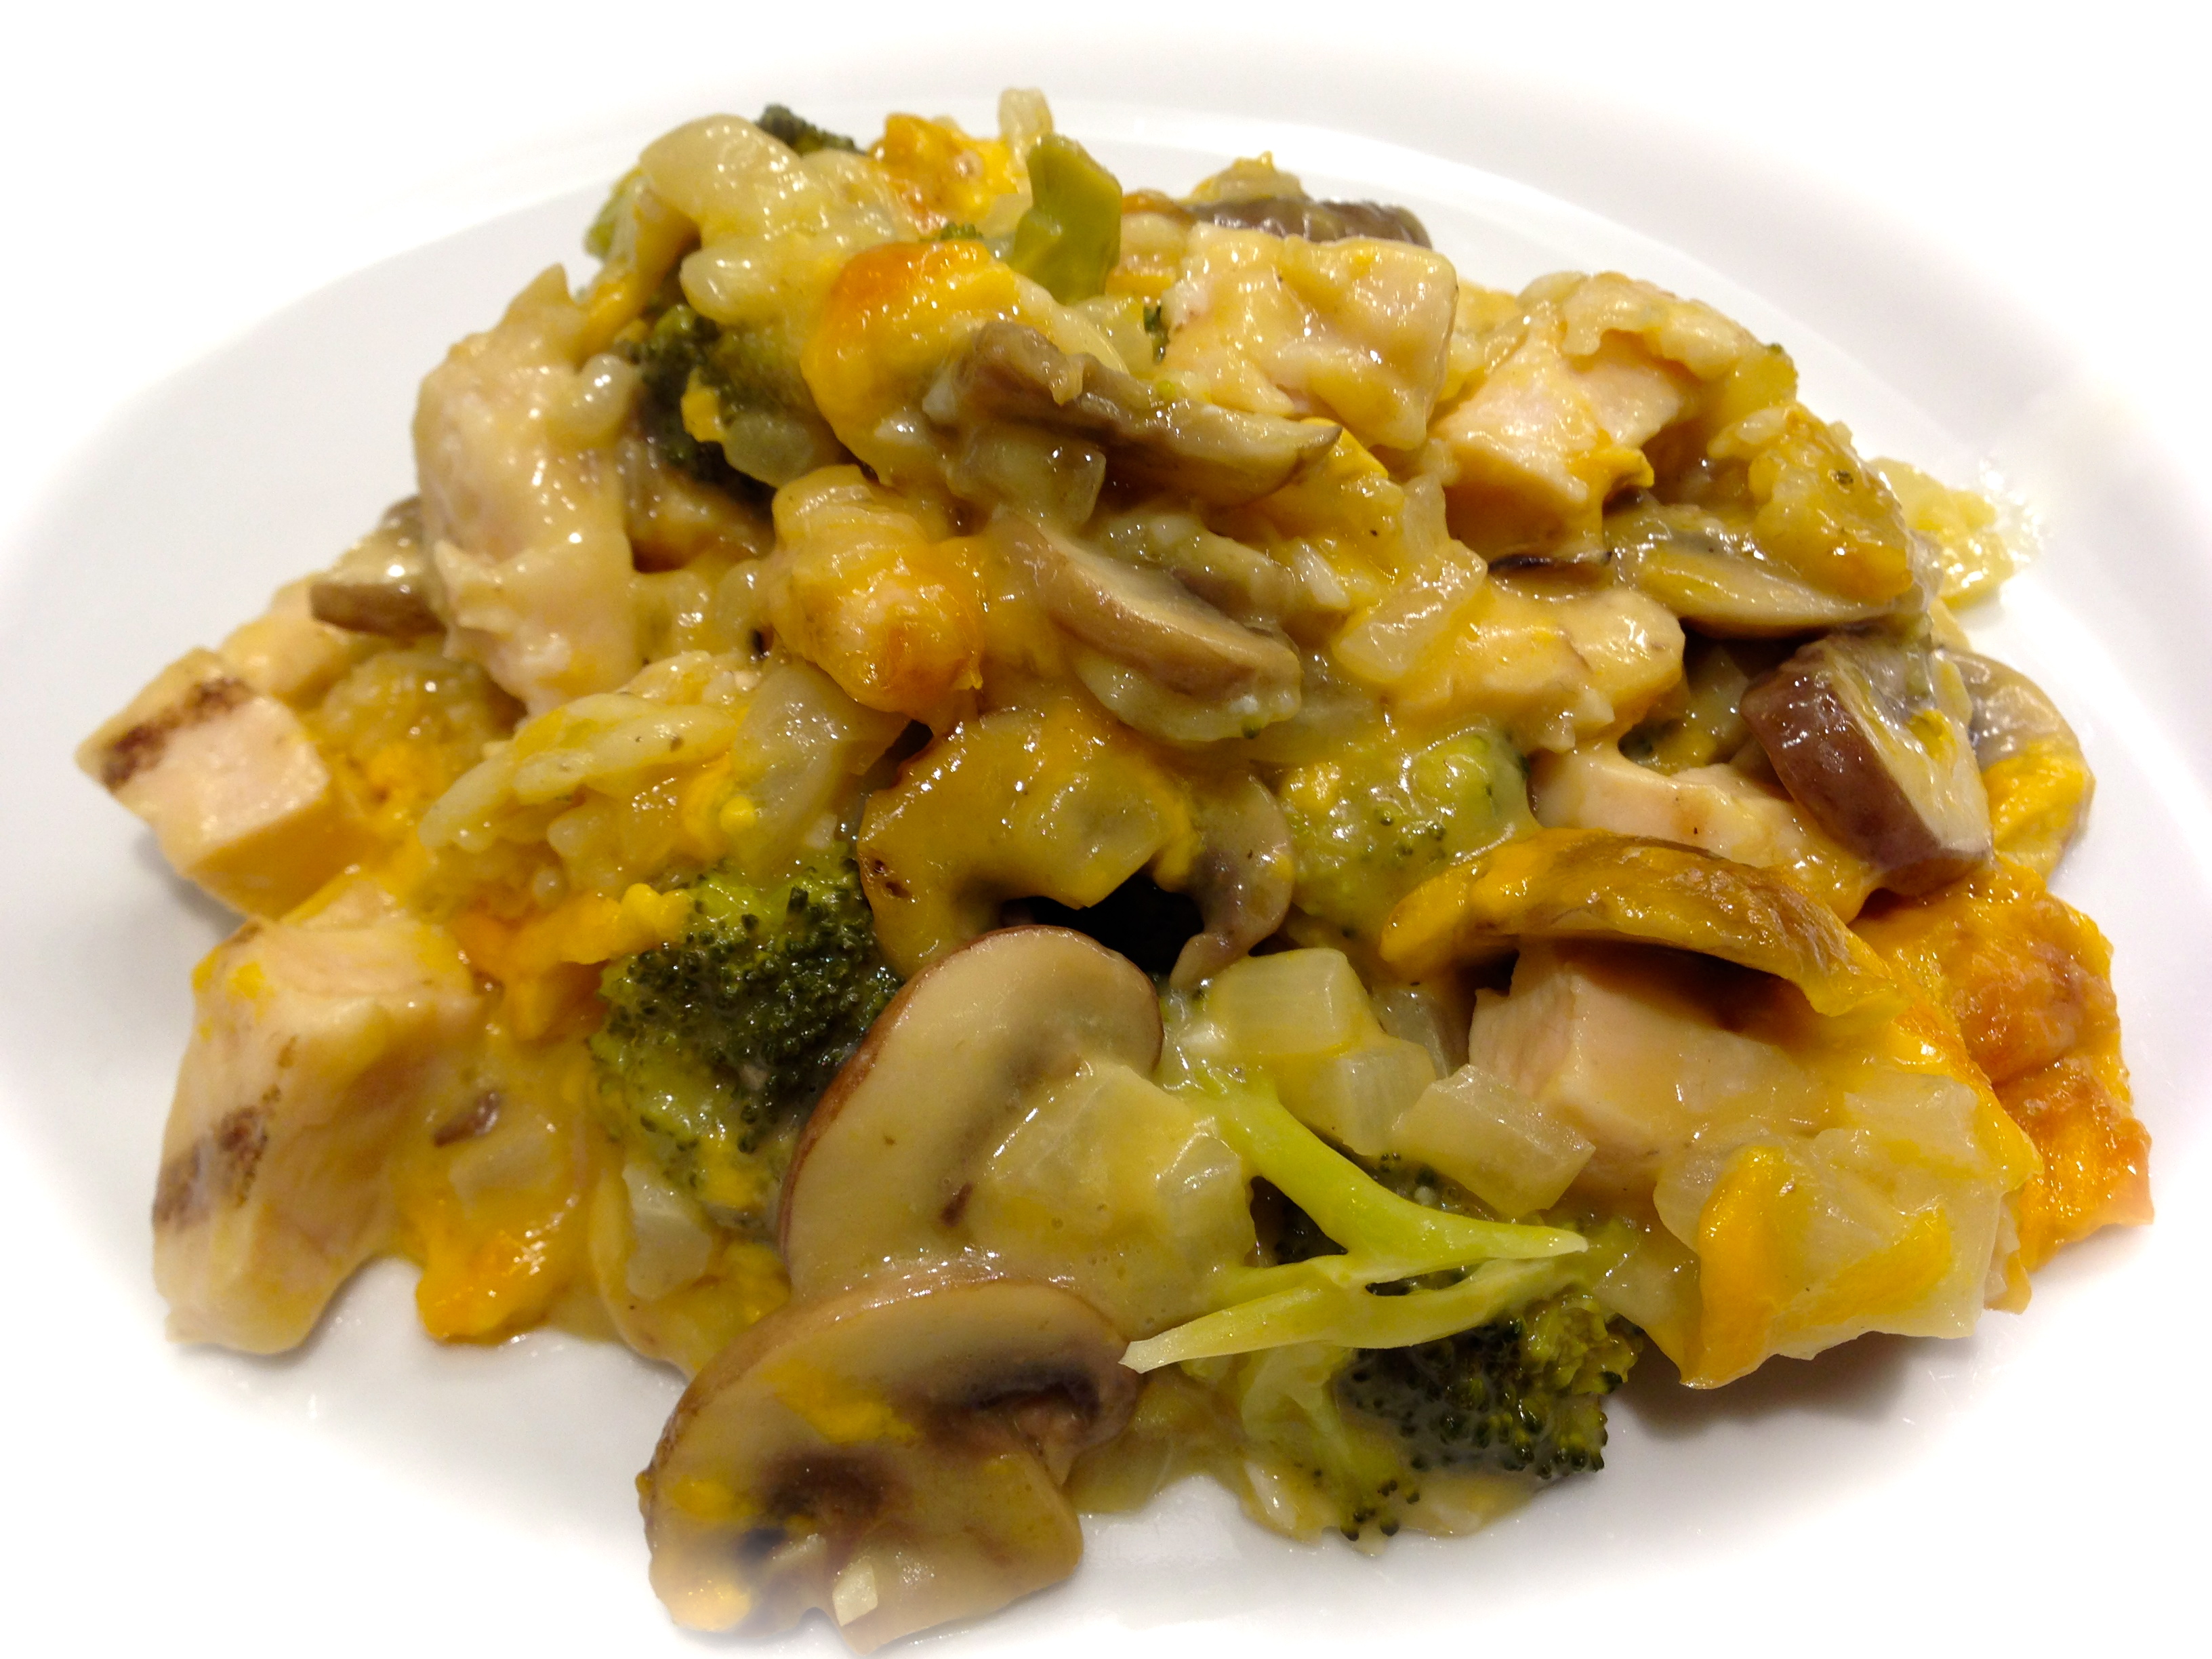
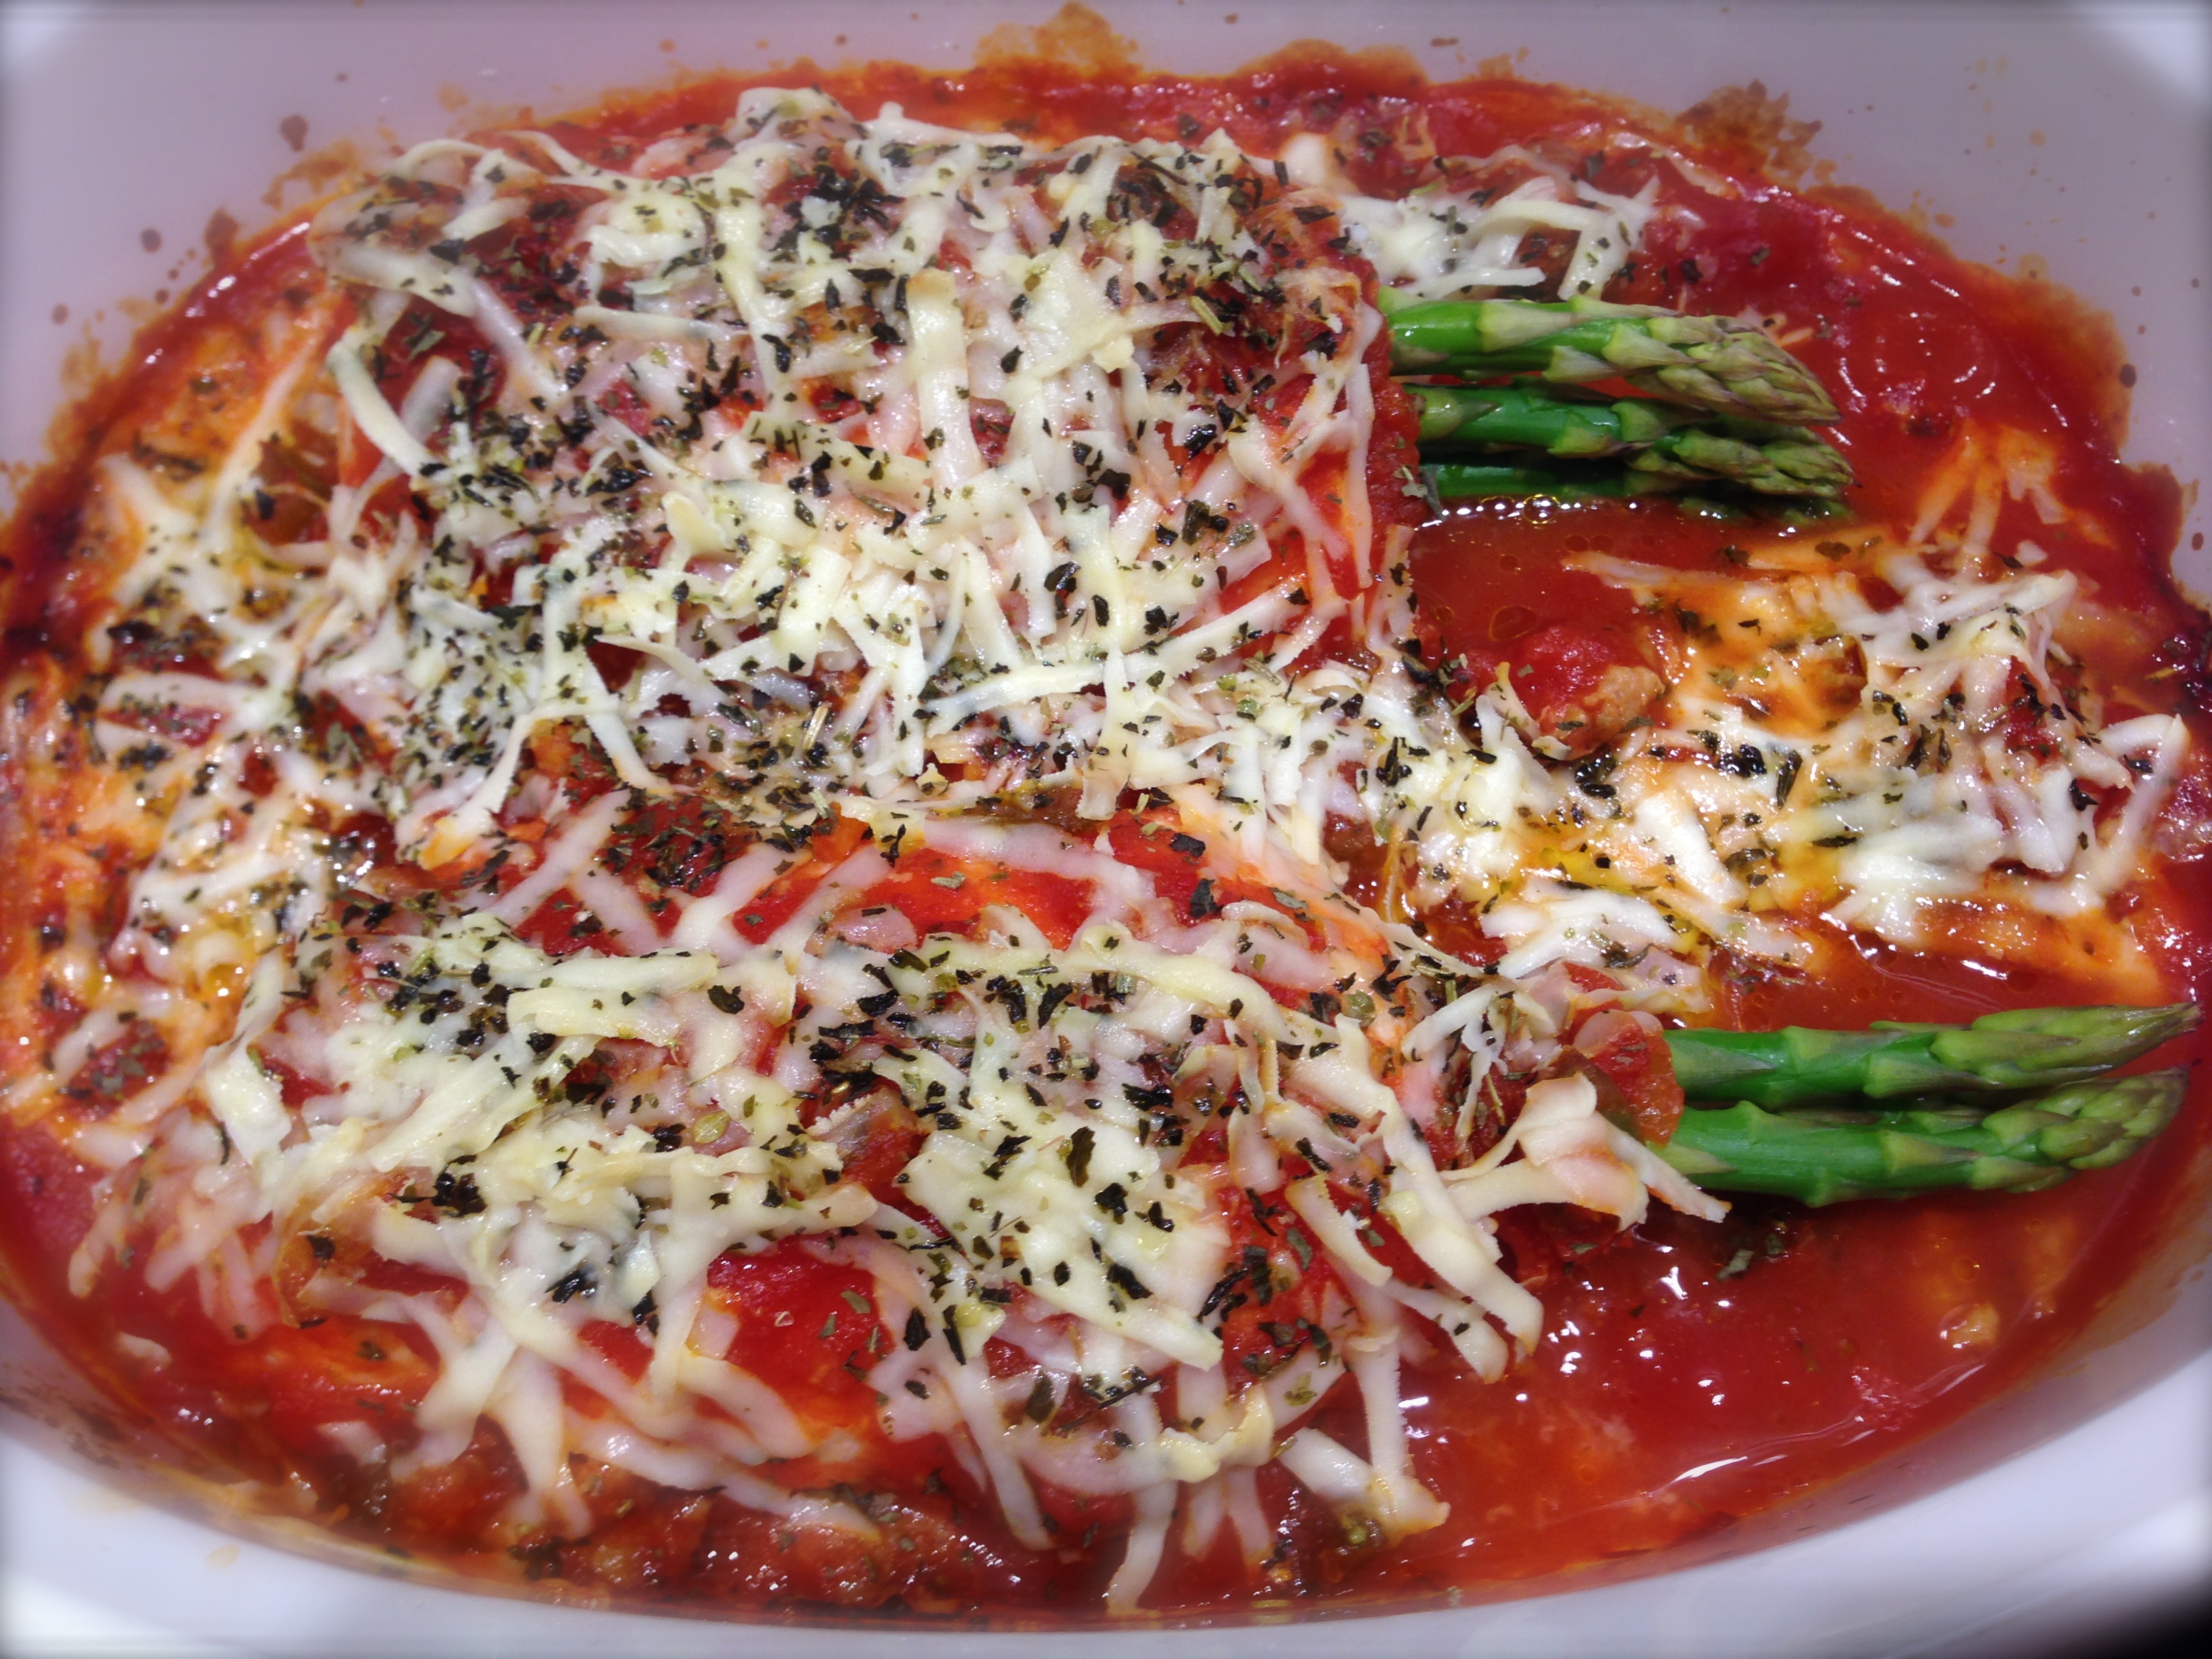
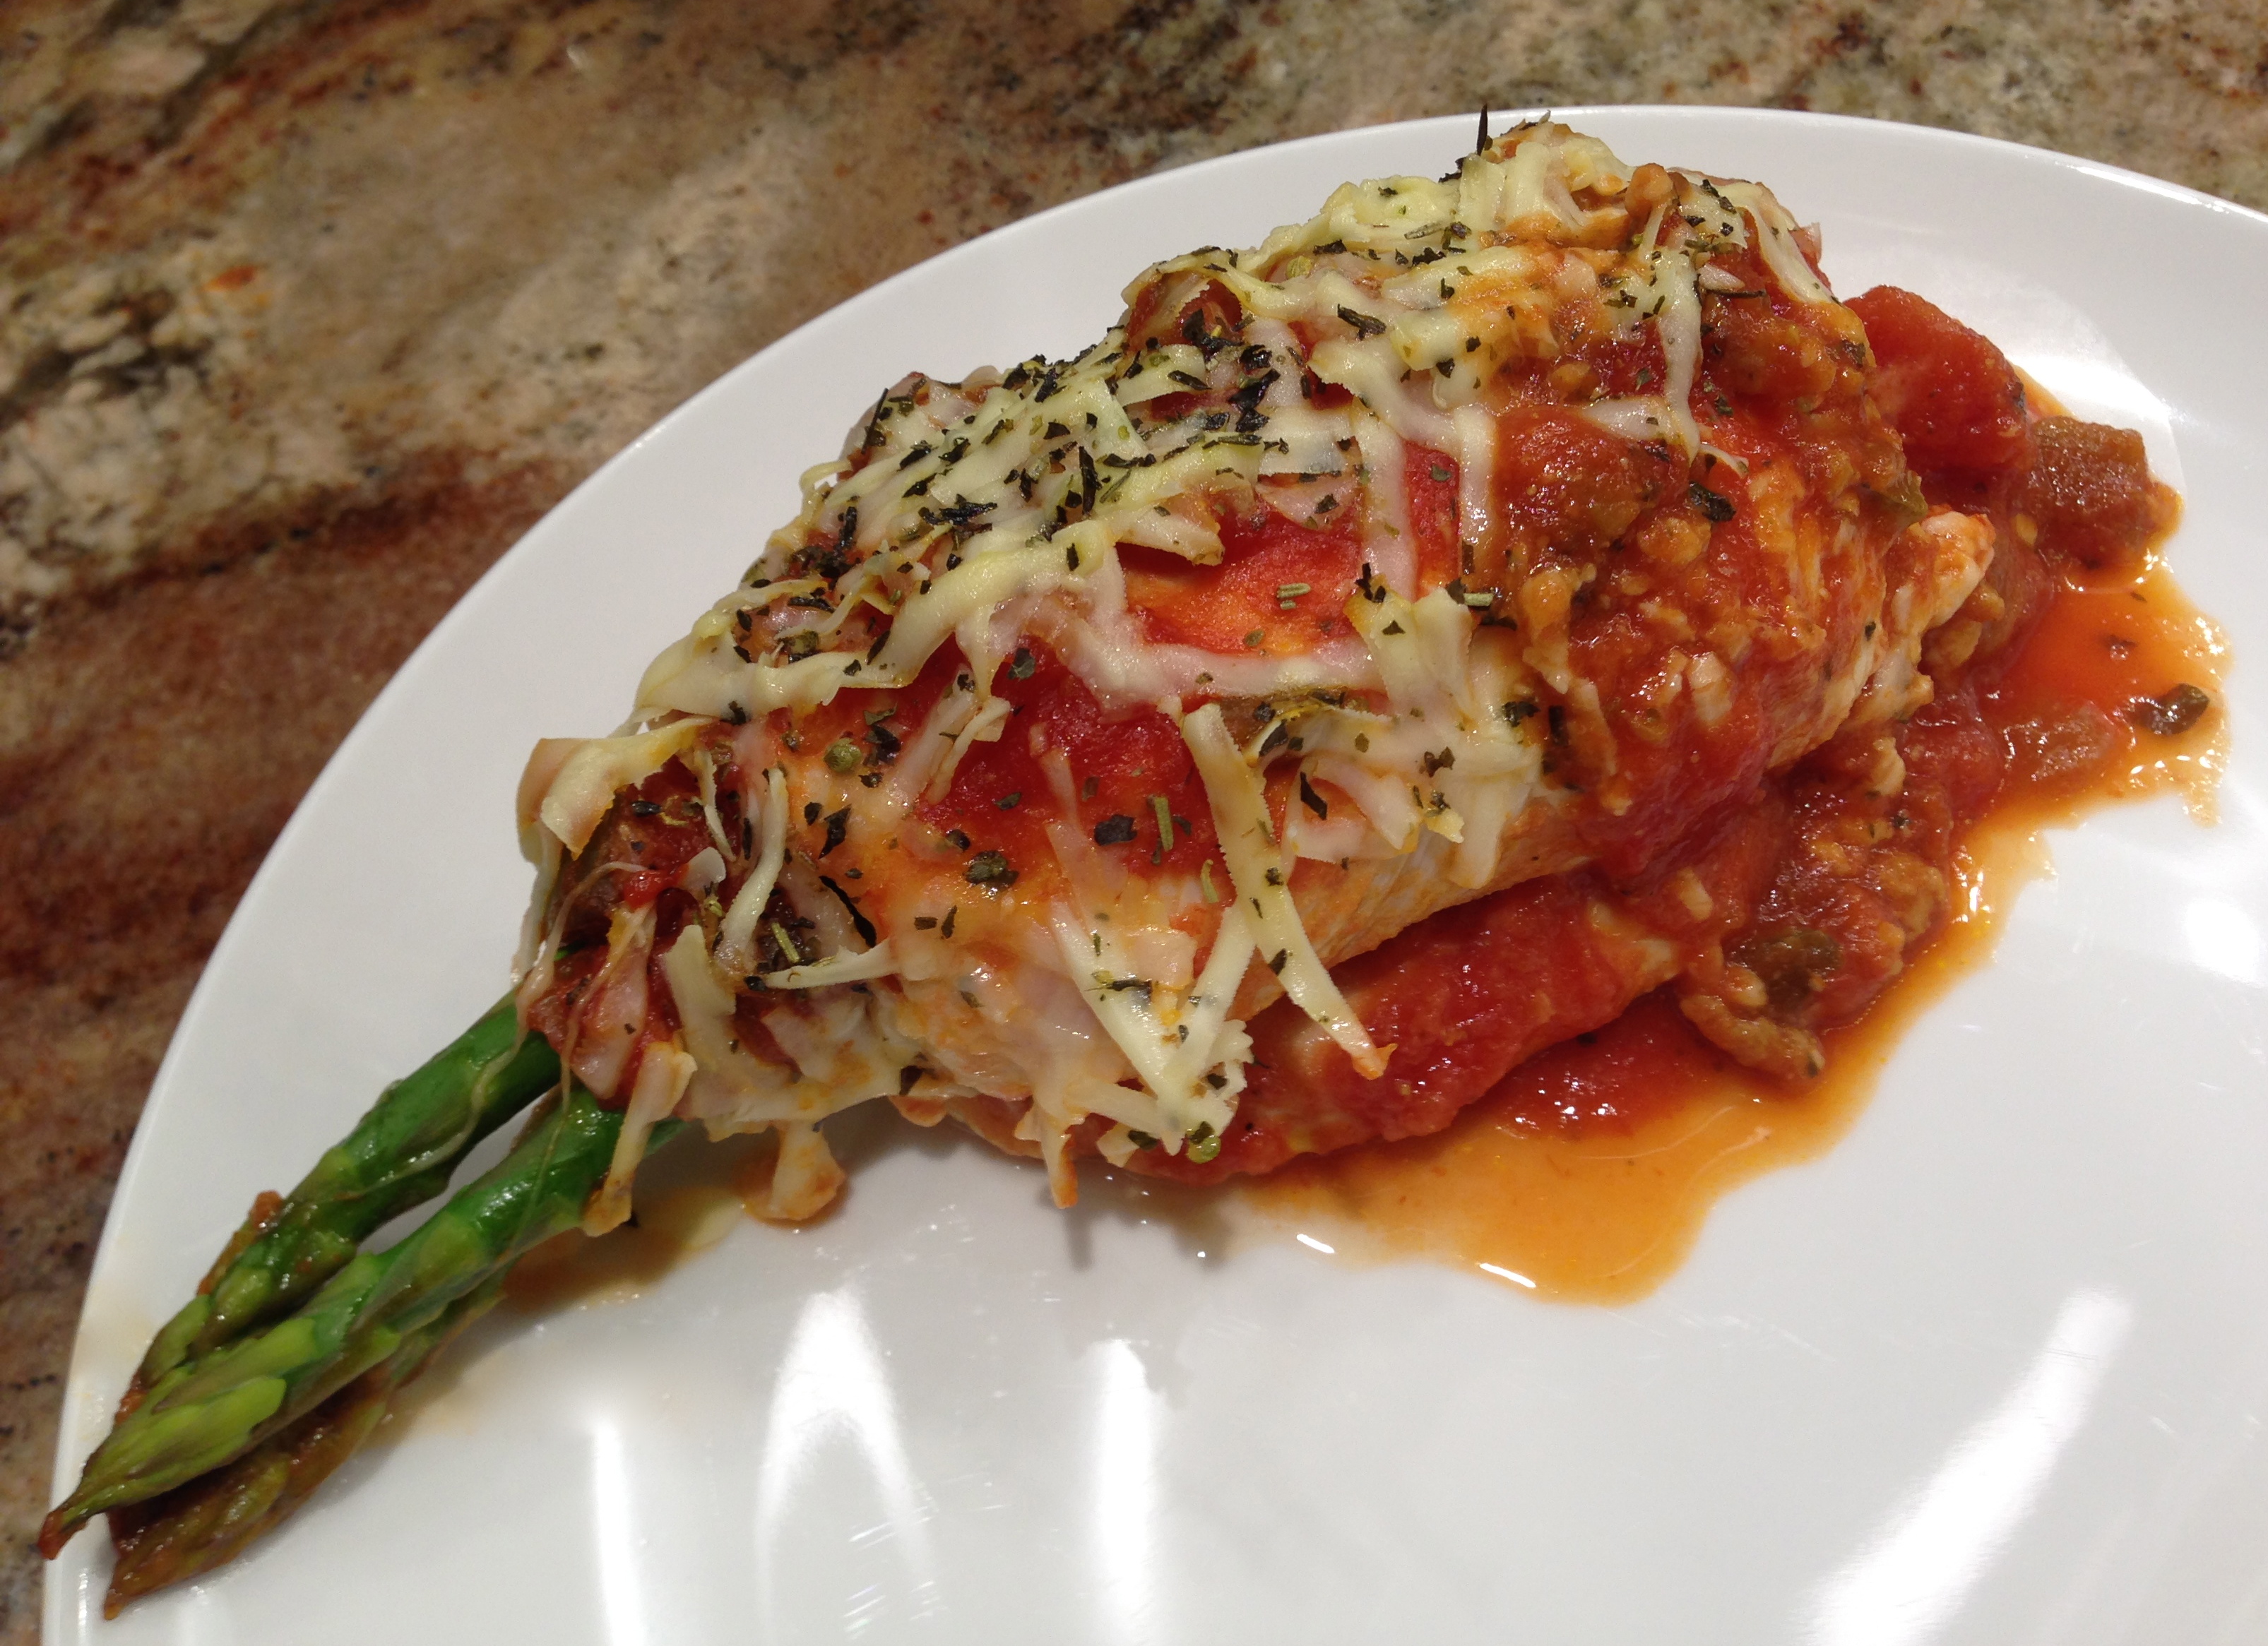
Lesson Learned 3 – The cream cheese never melted into the sauce pictured on the meal kit container: The cream cheese was still rather firm as you can see from the picture below.

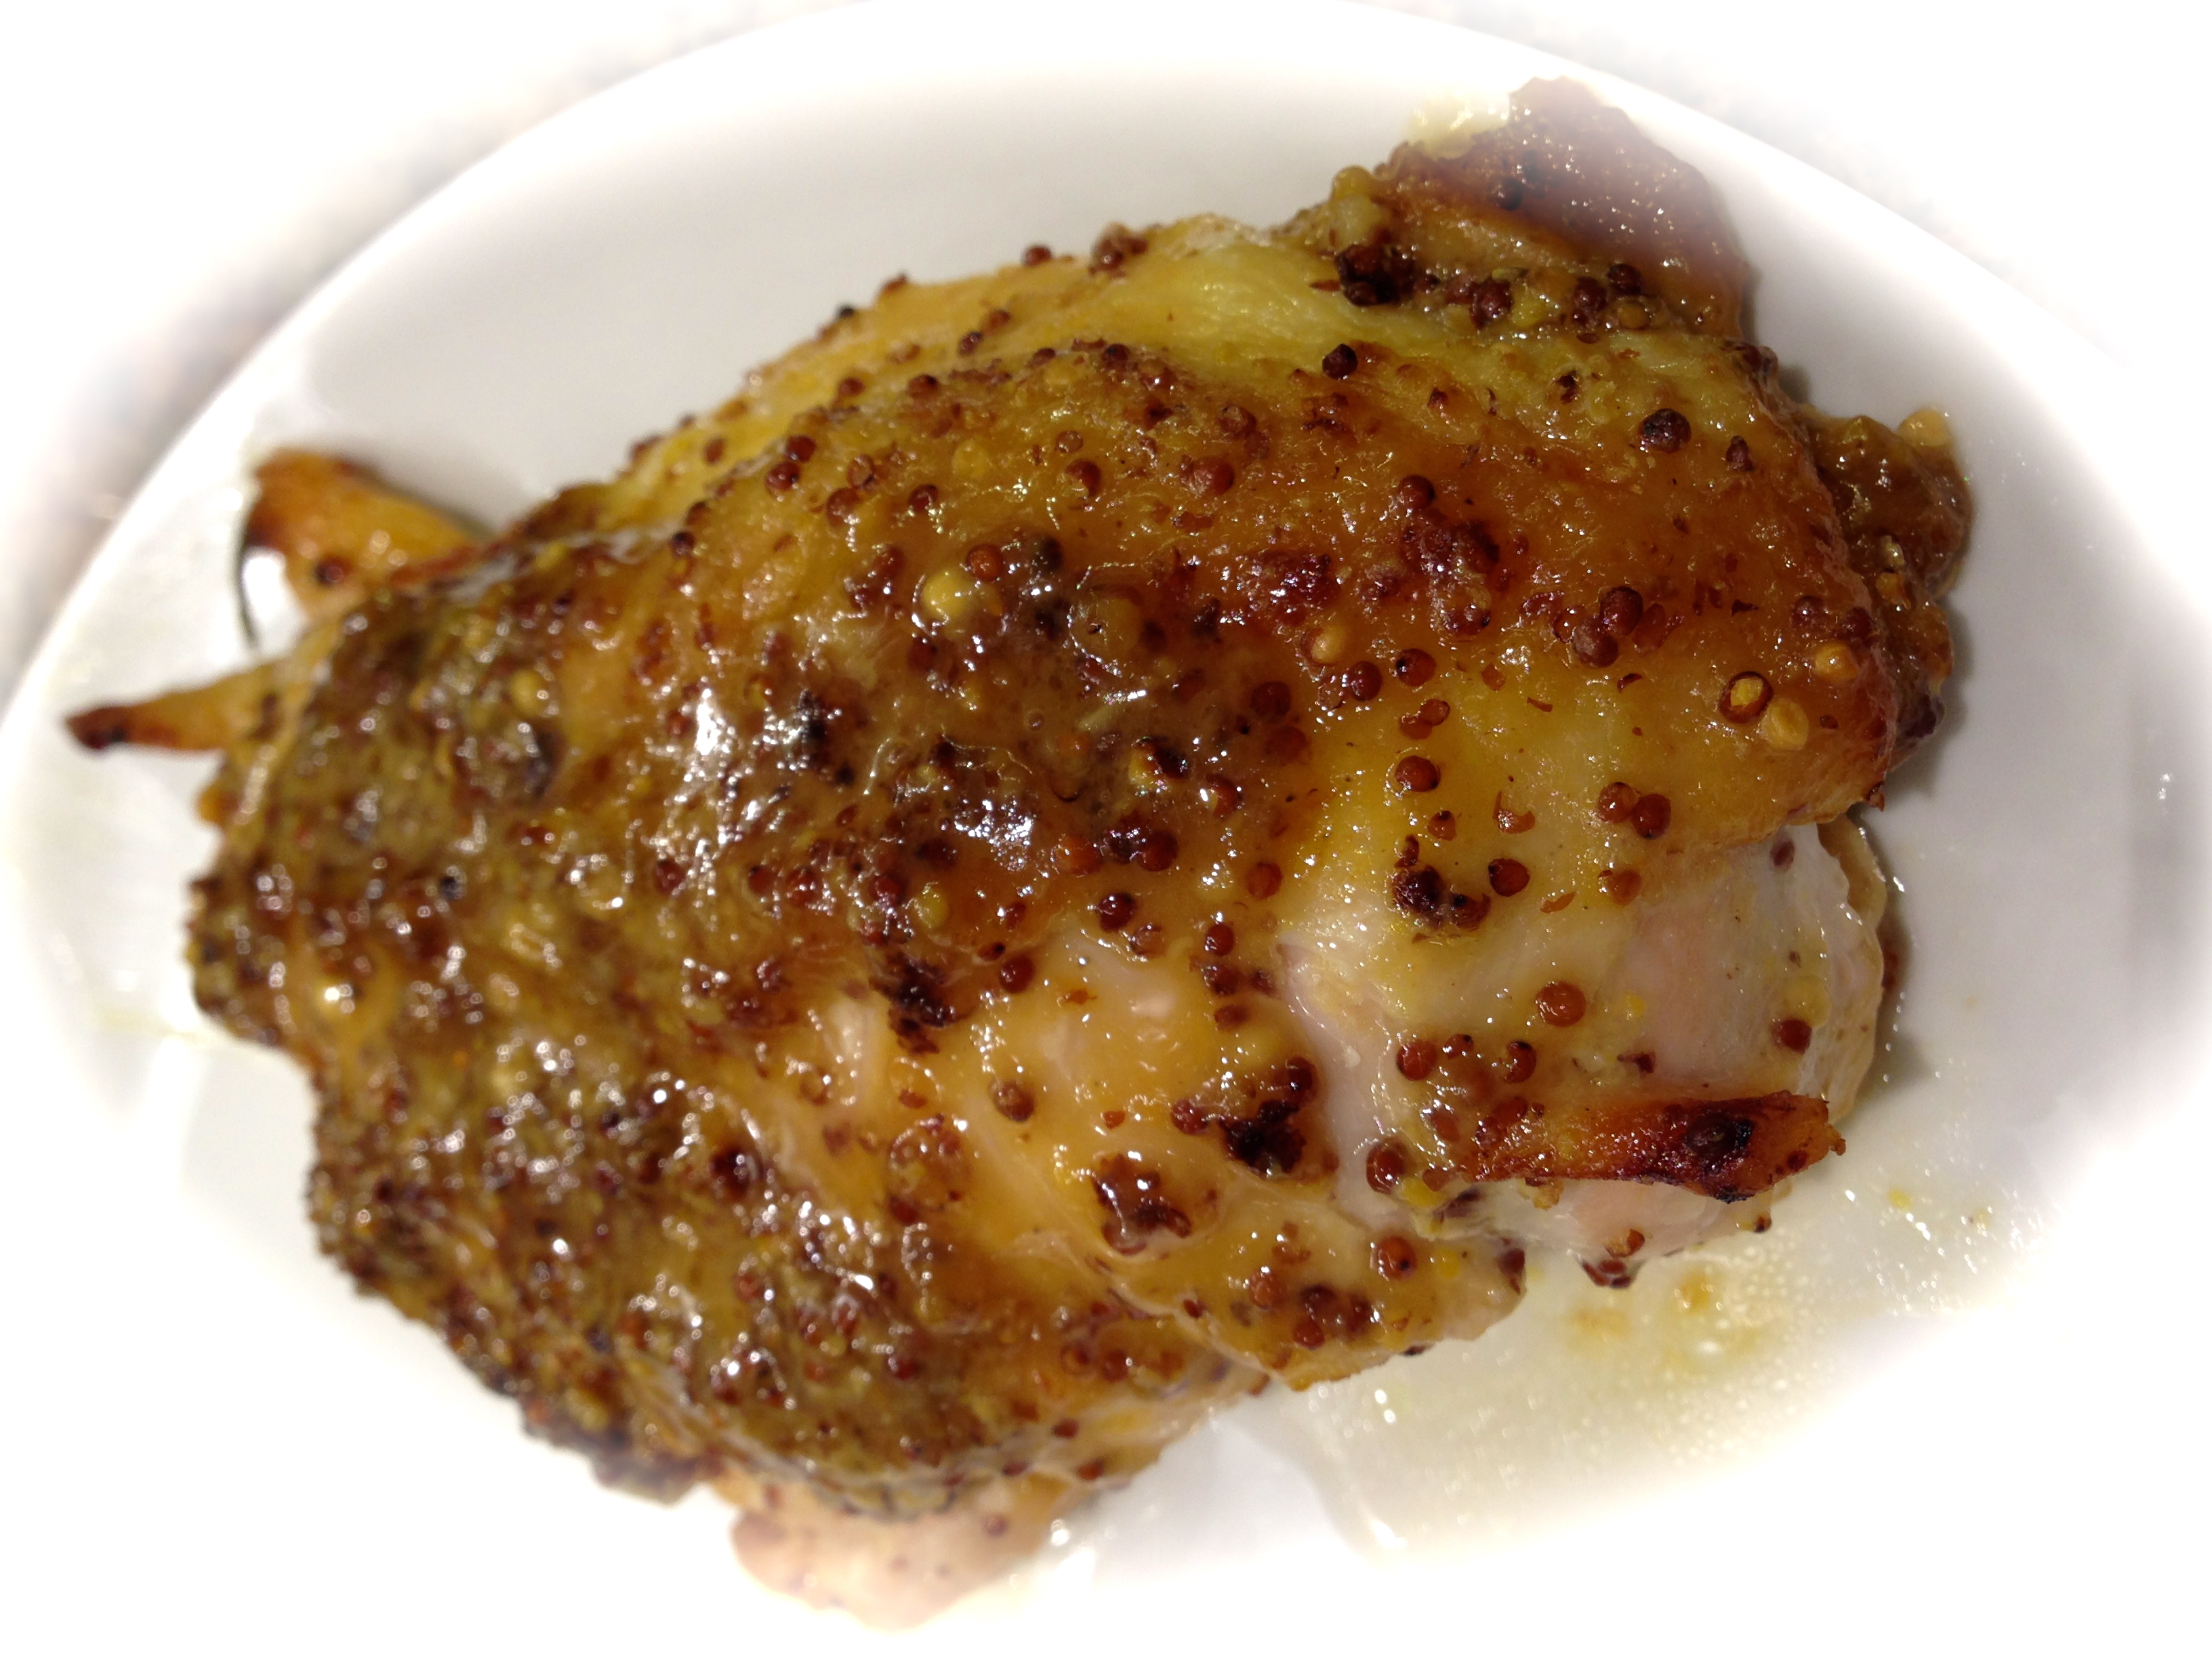
I topped it with some of the “marsala” juices for some additional flavor. It wasn’t horrible but it certainly wasn’t the end result I expected. Perhaps me changing the cooking temperature caused this. But why create a meal kit that will cook some of the ingredients beautifully but annihilate others. If 425 degrees will create a sauce but render a dry tasteless chicken breast then I would err on the side of the chicken breast.

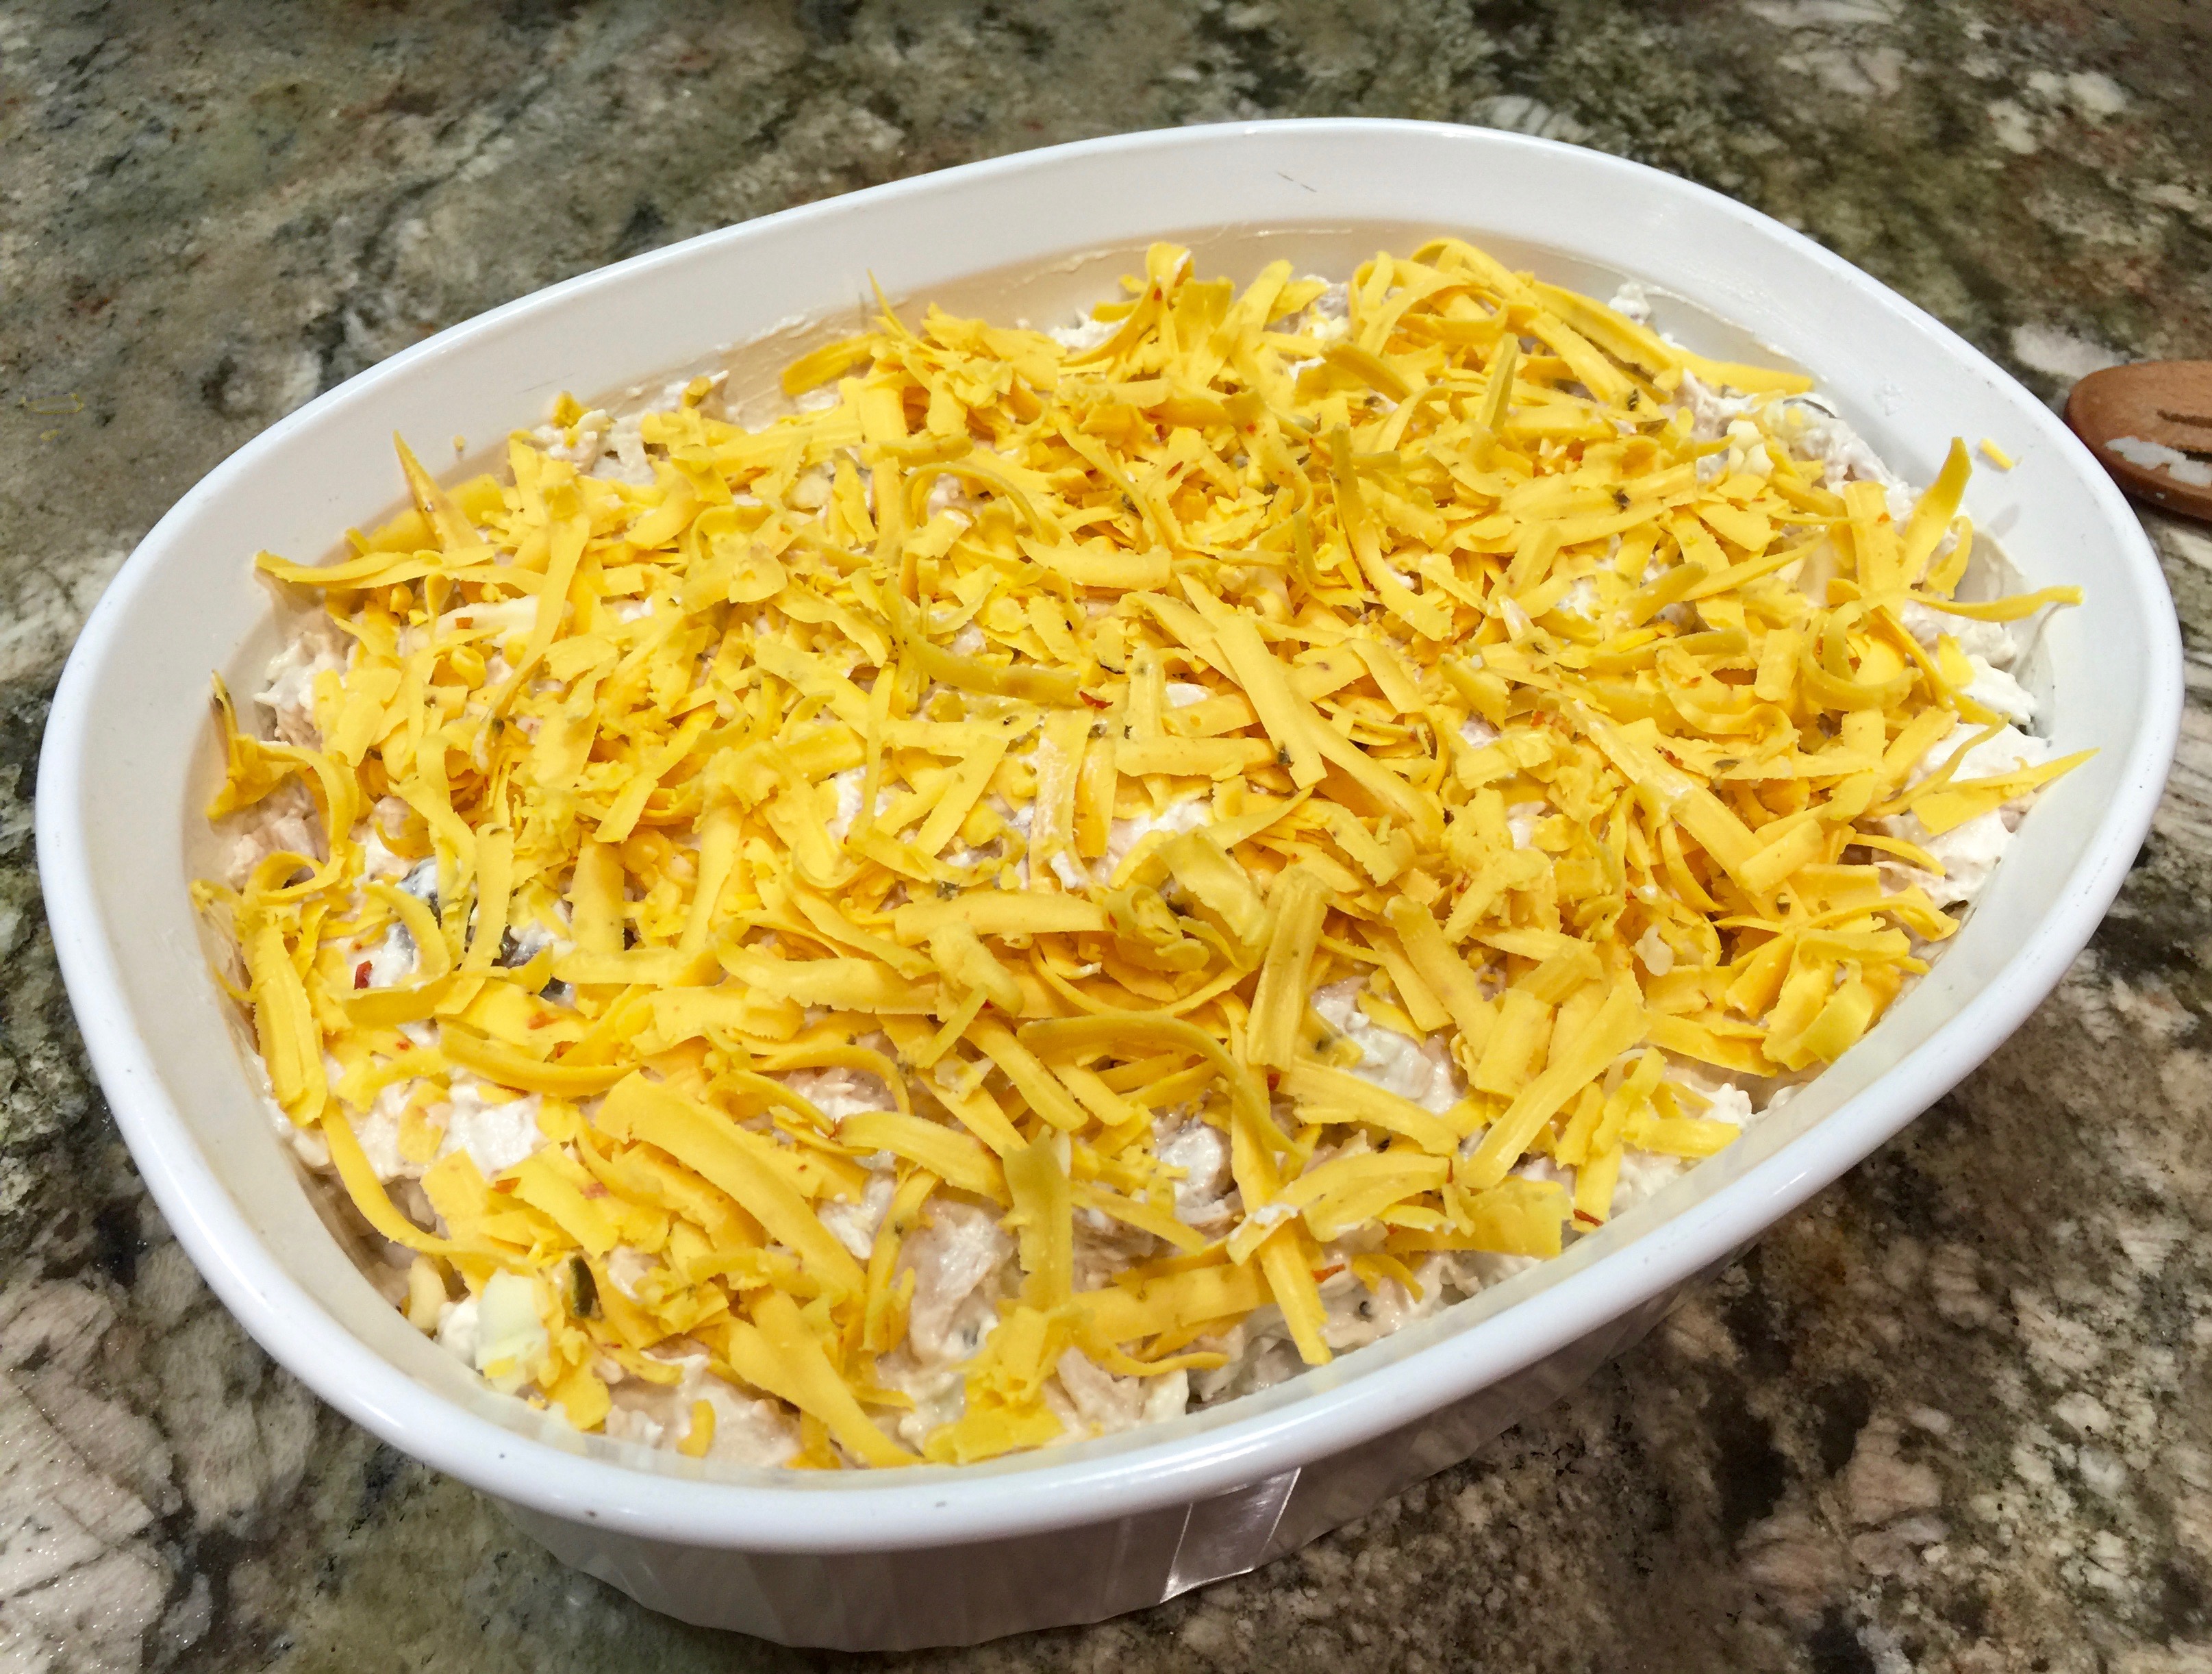
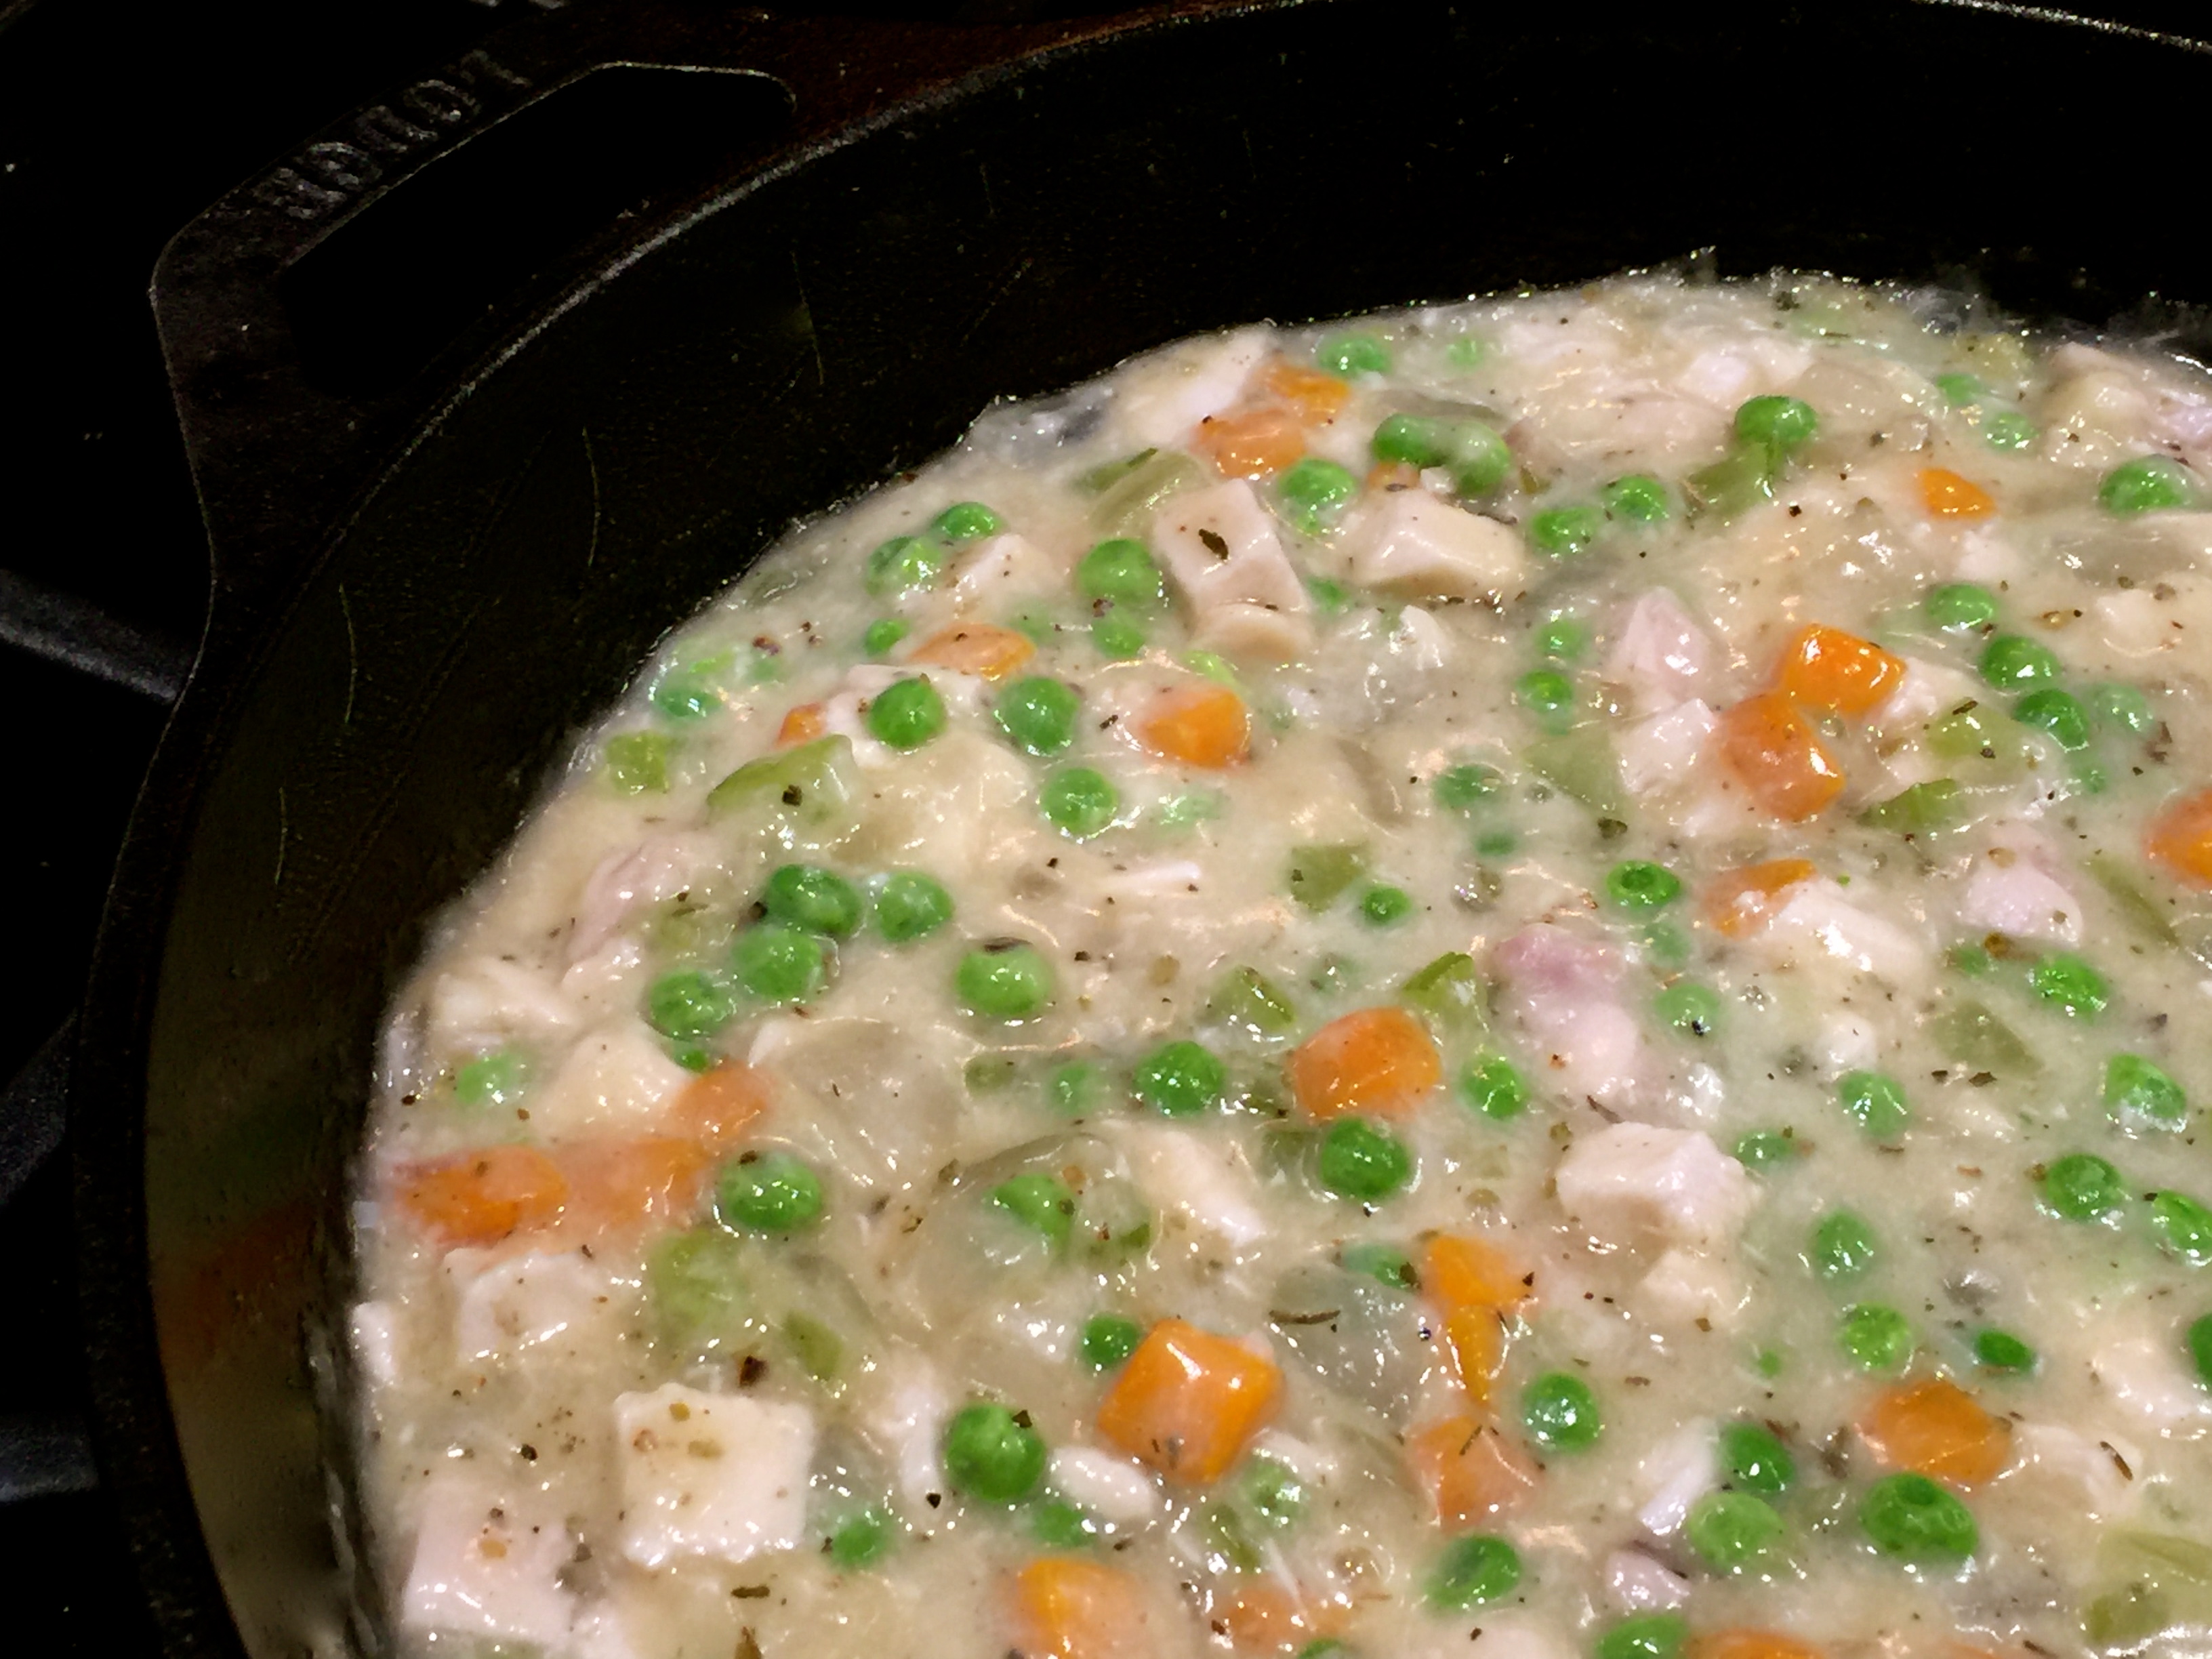
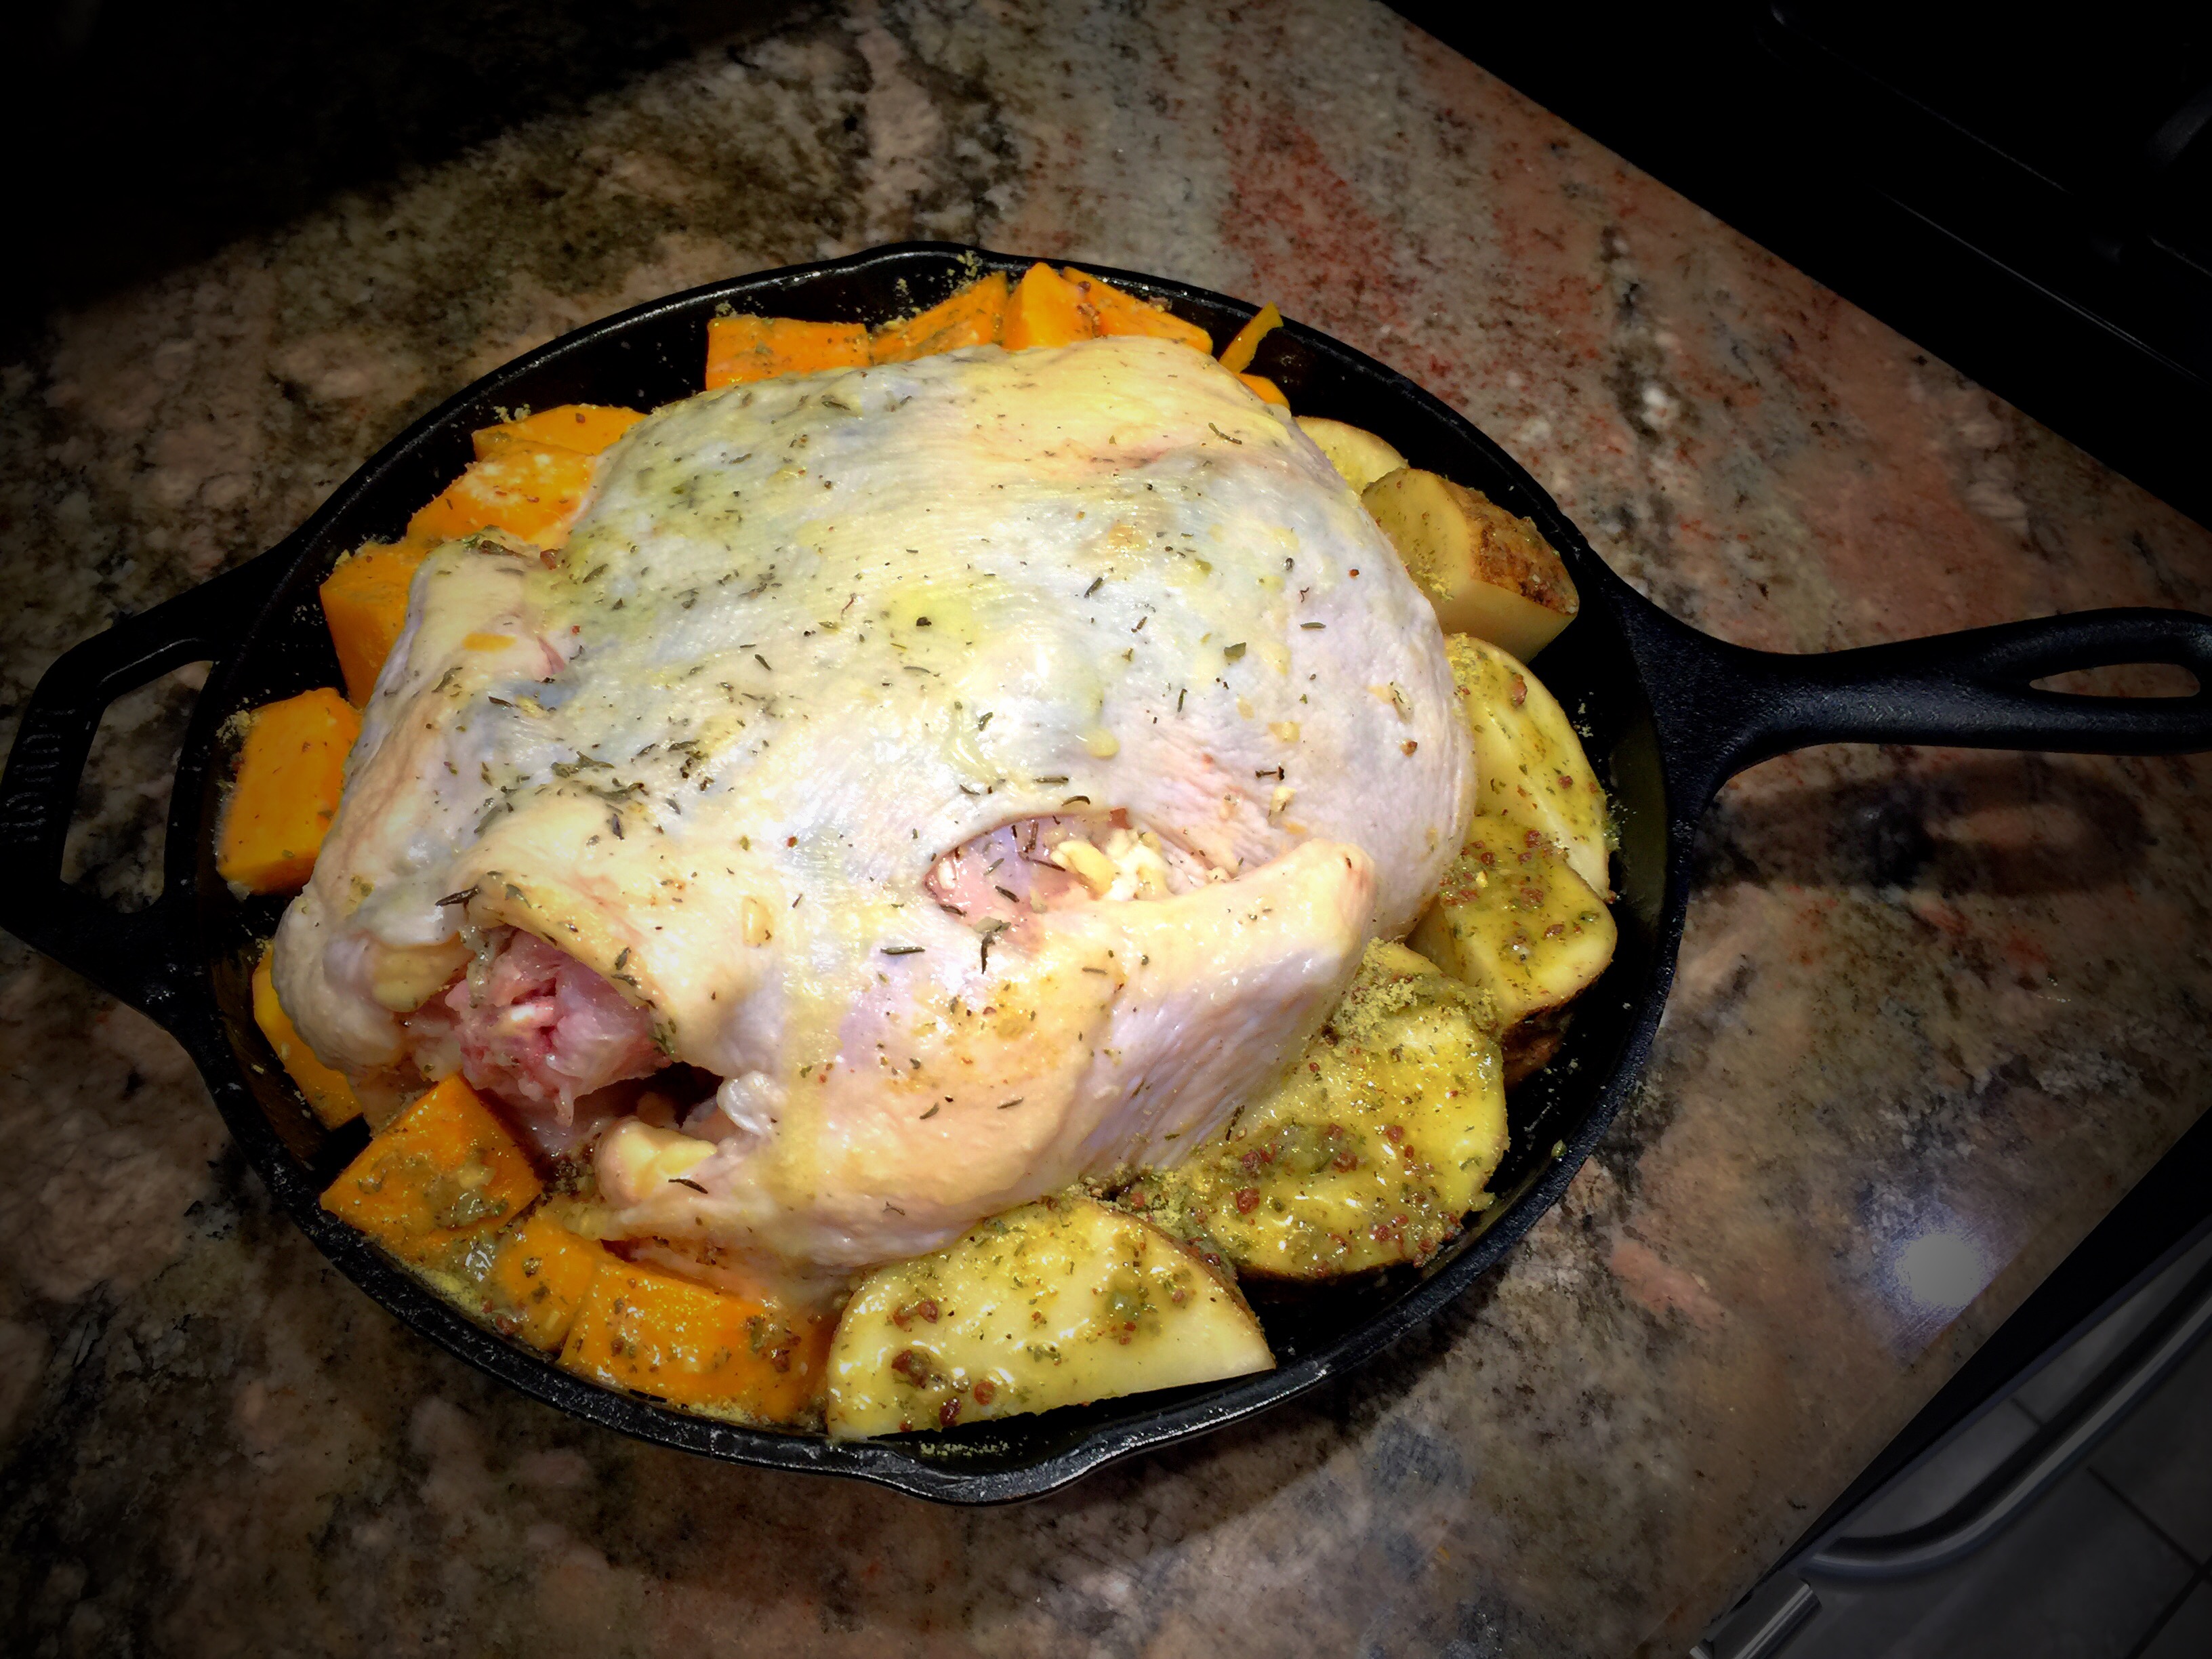
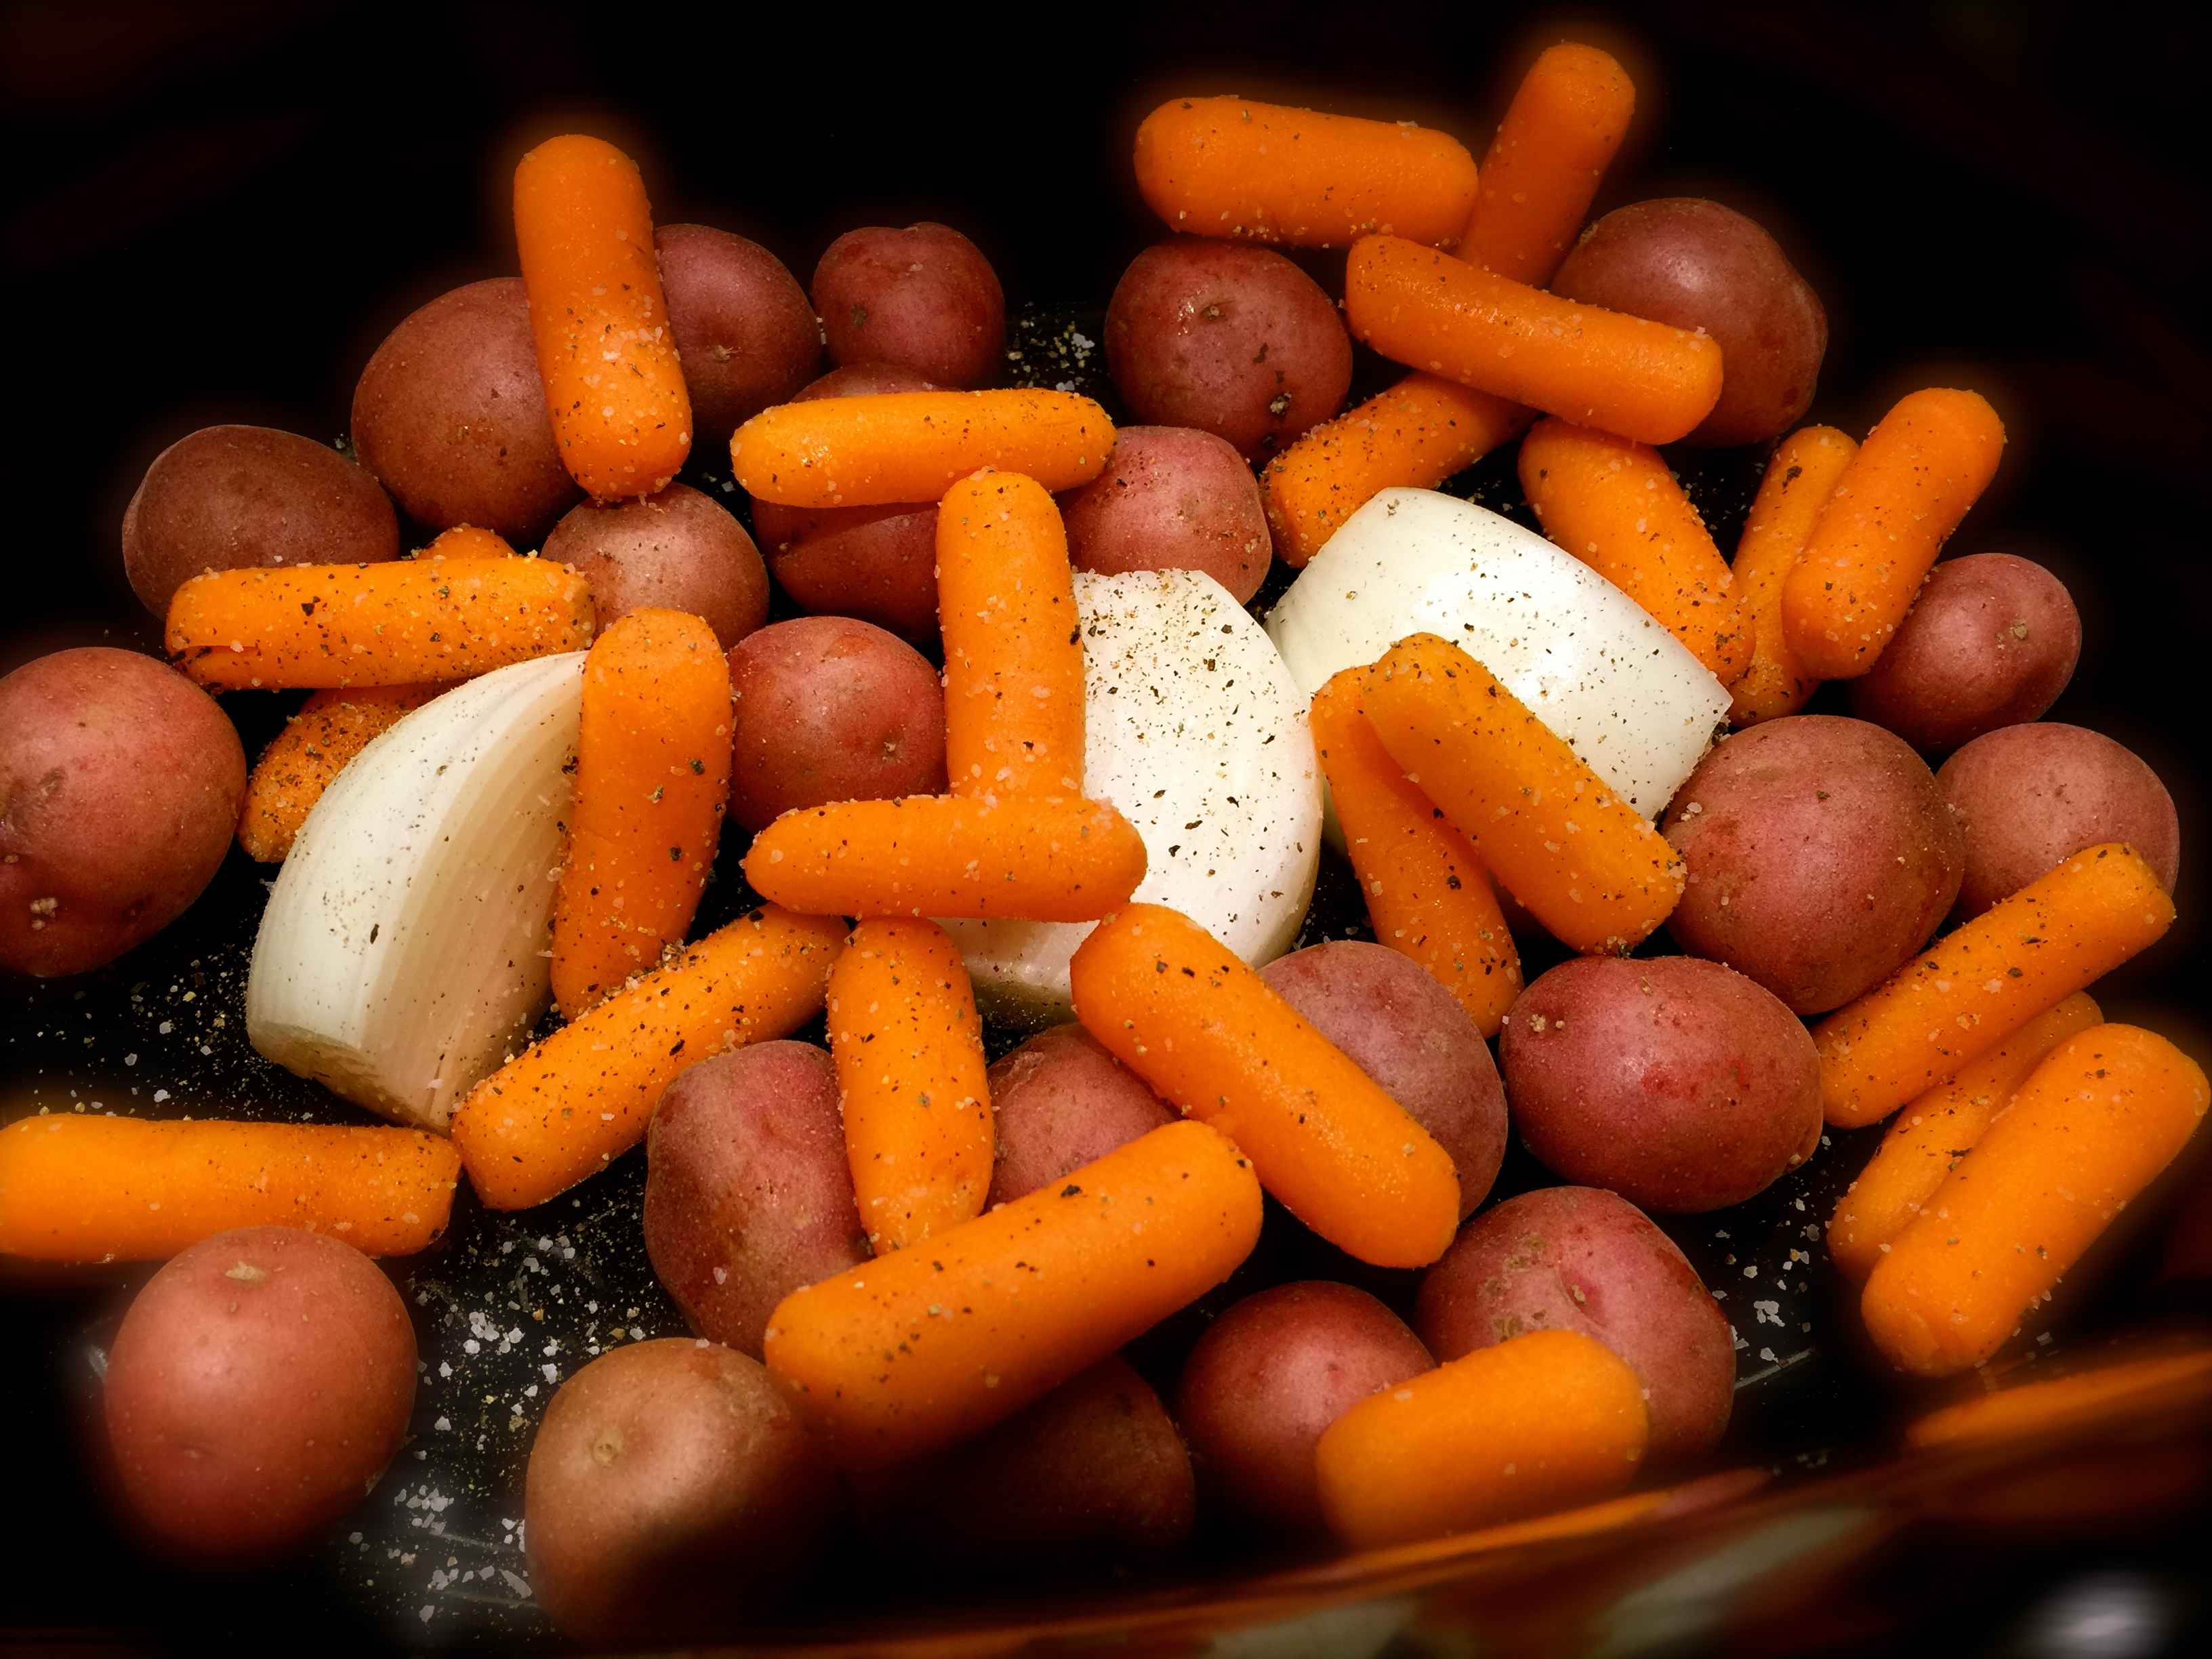
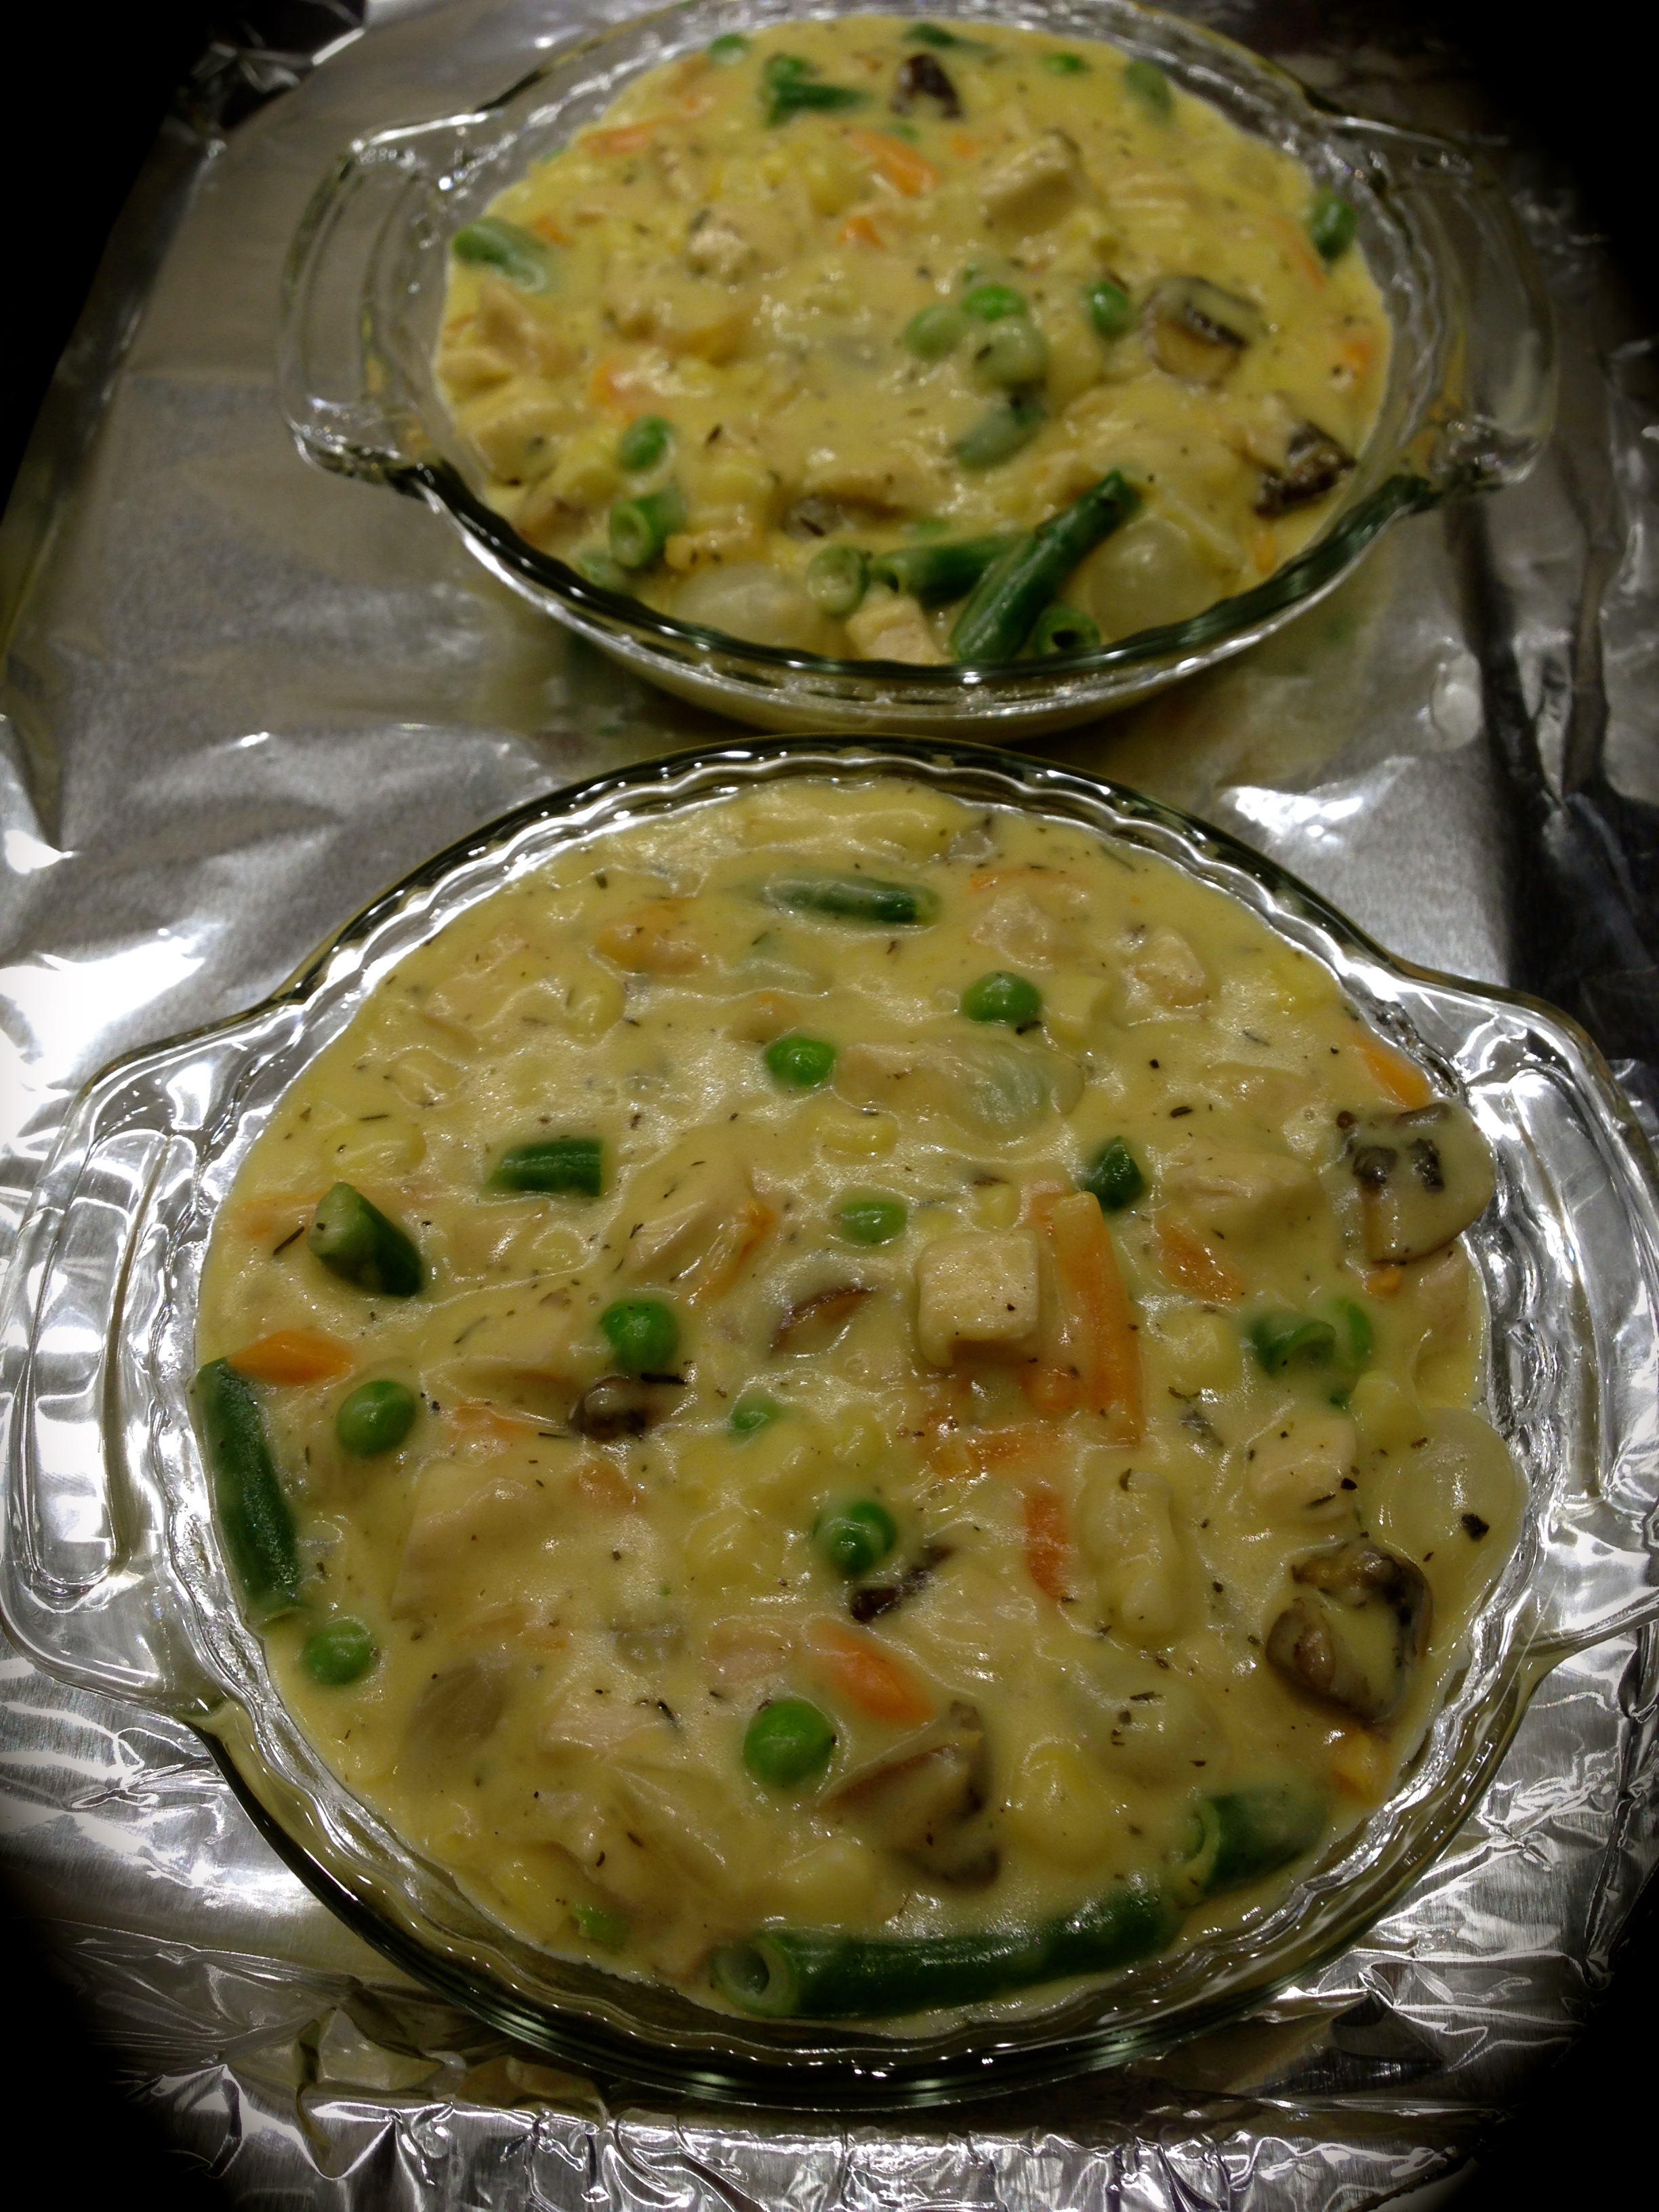
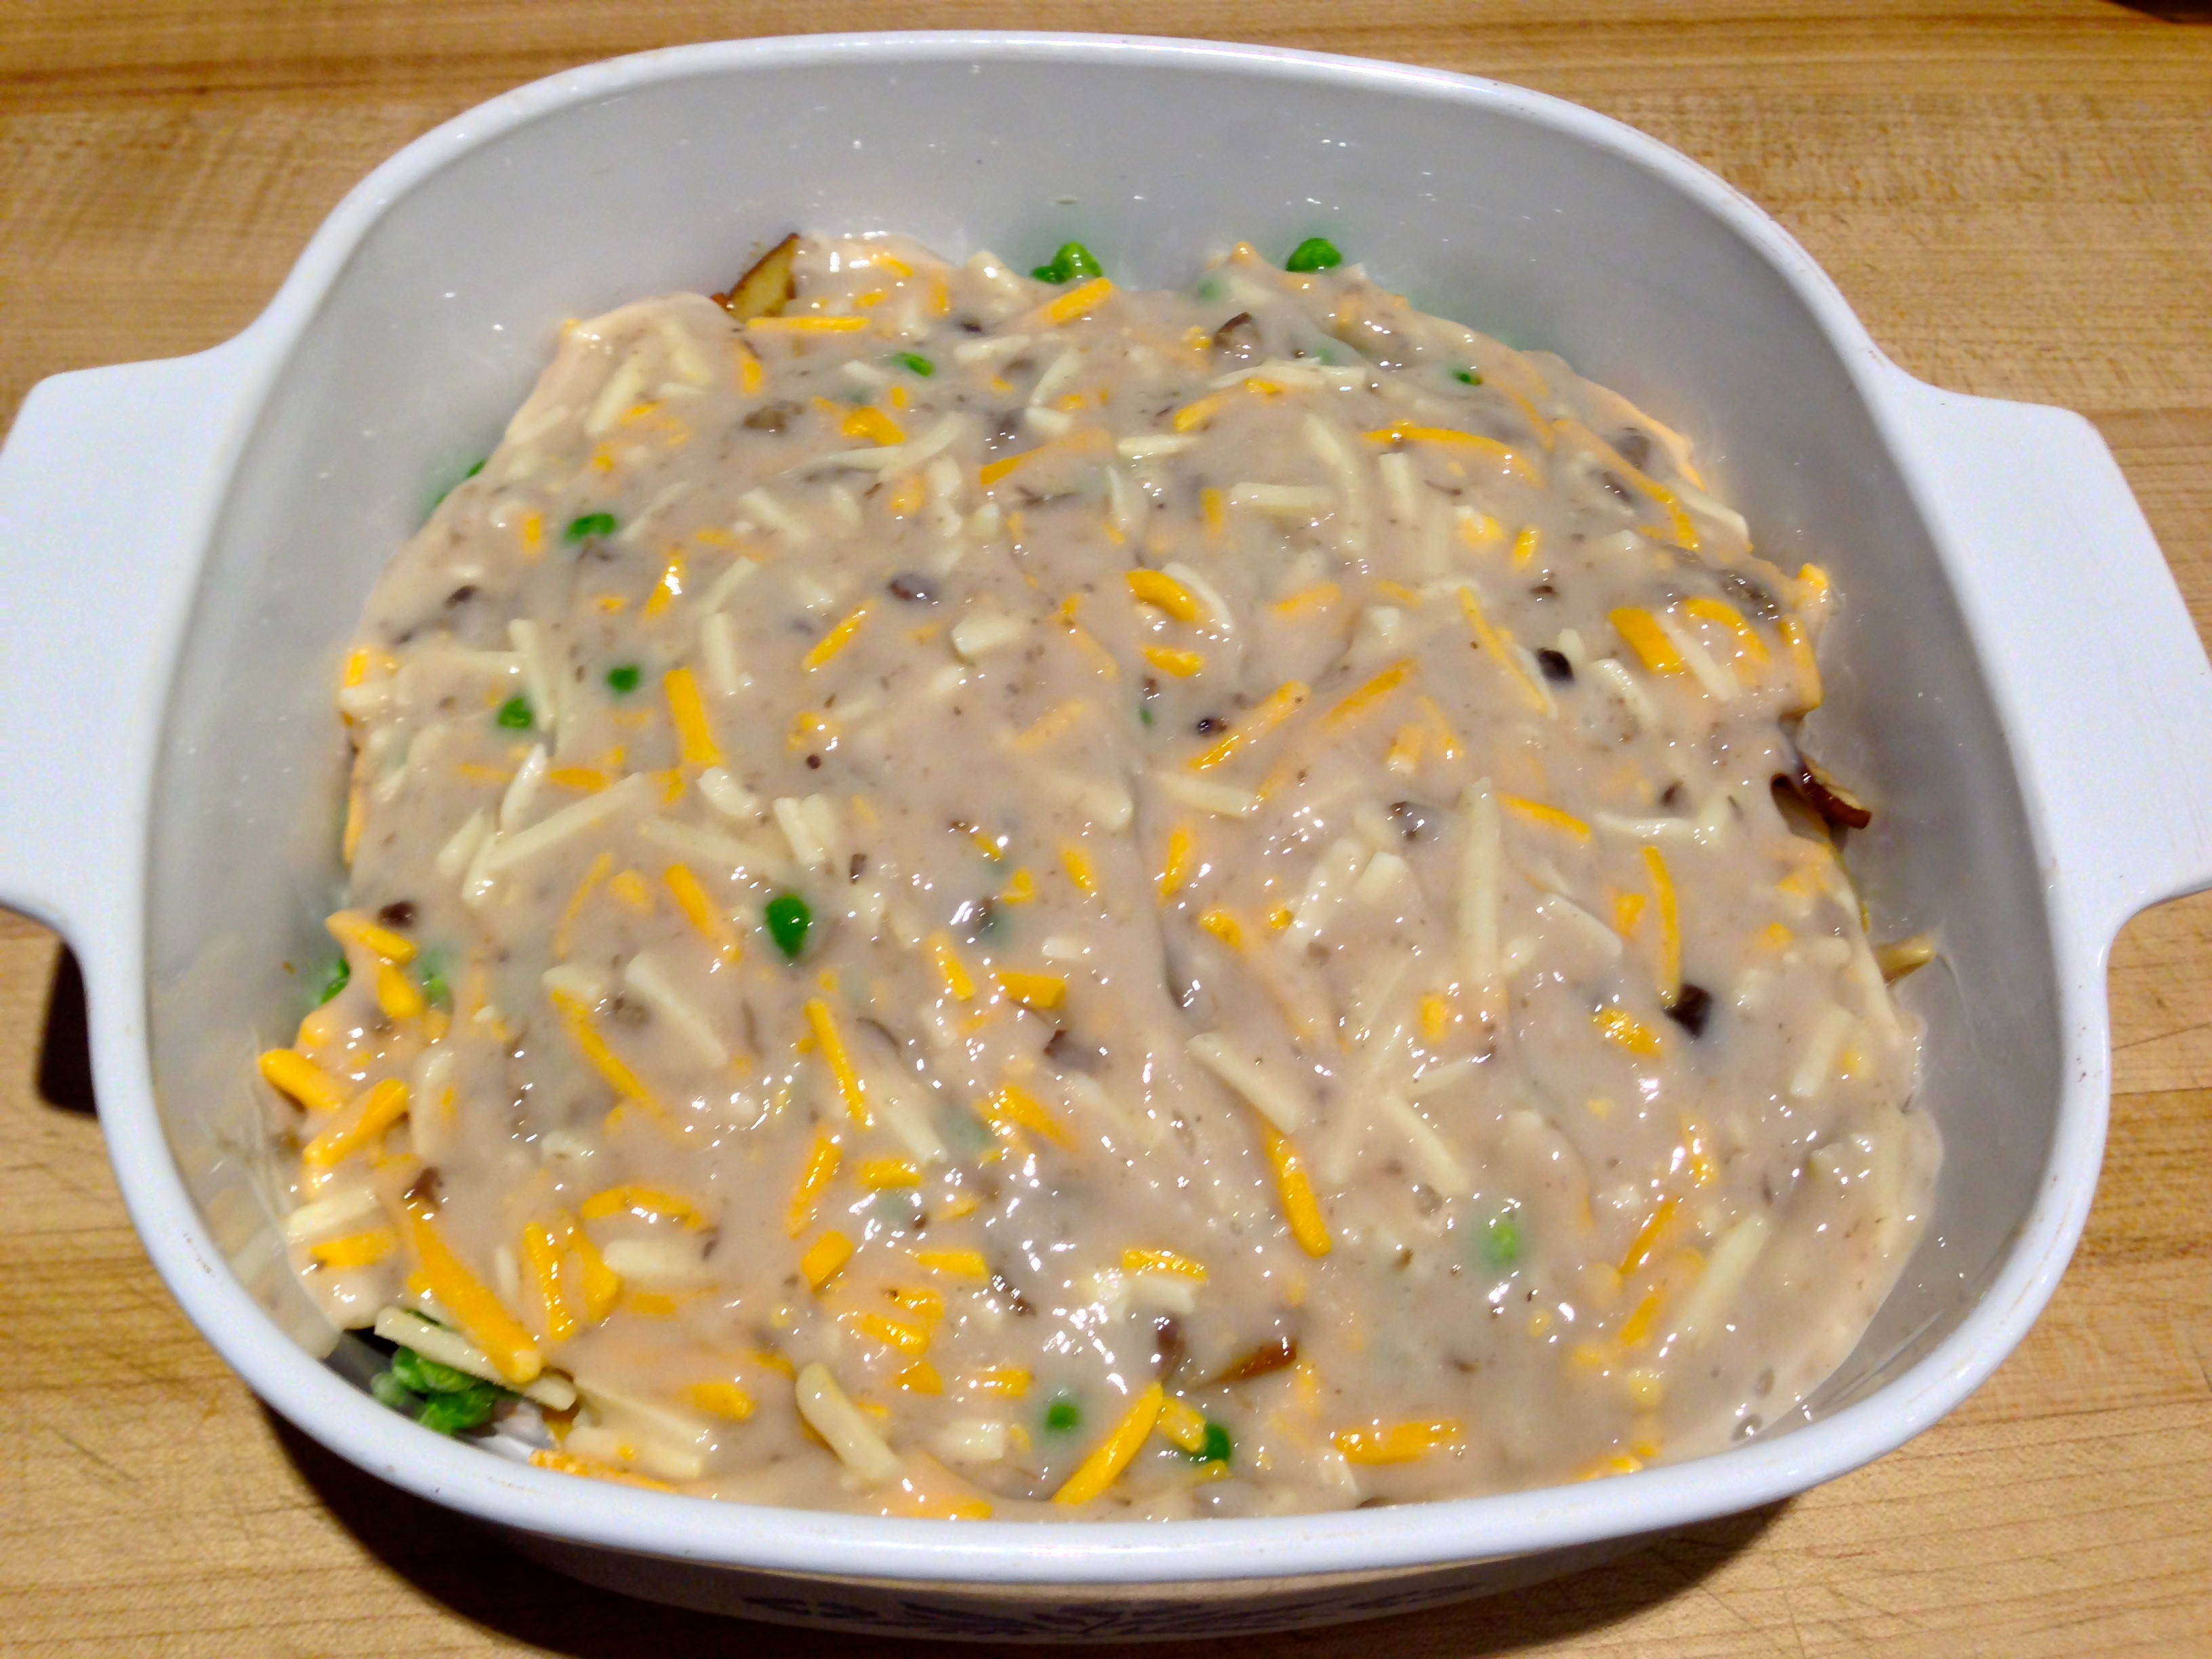
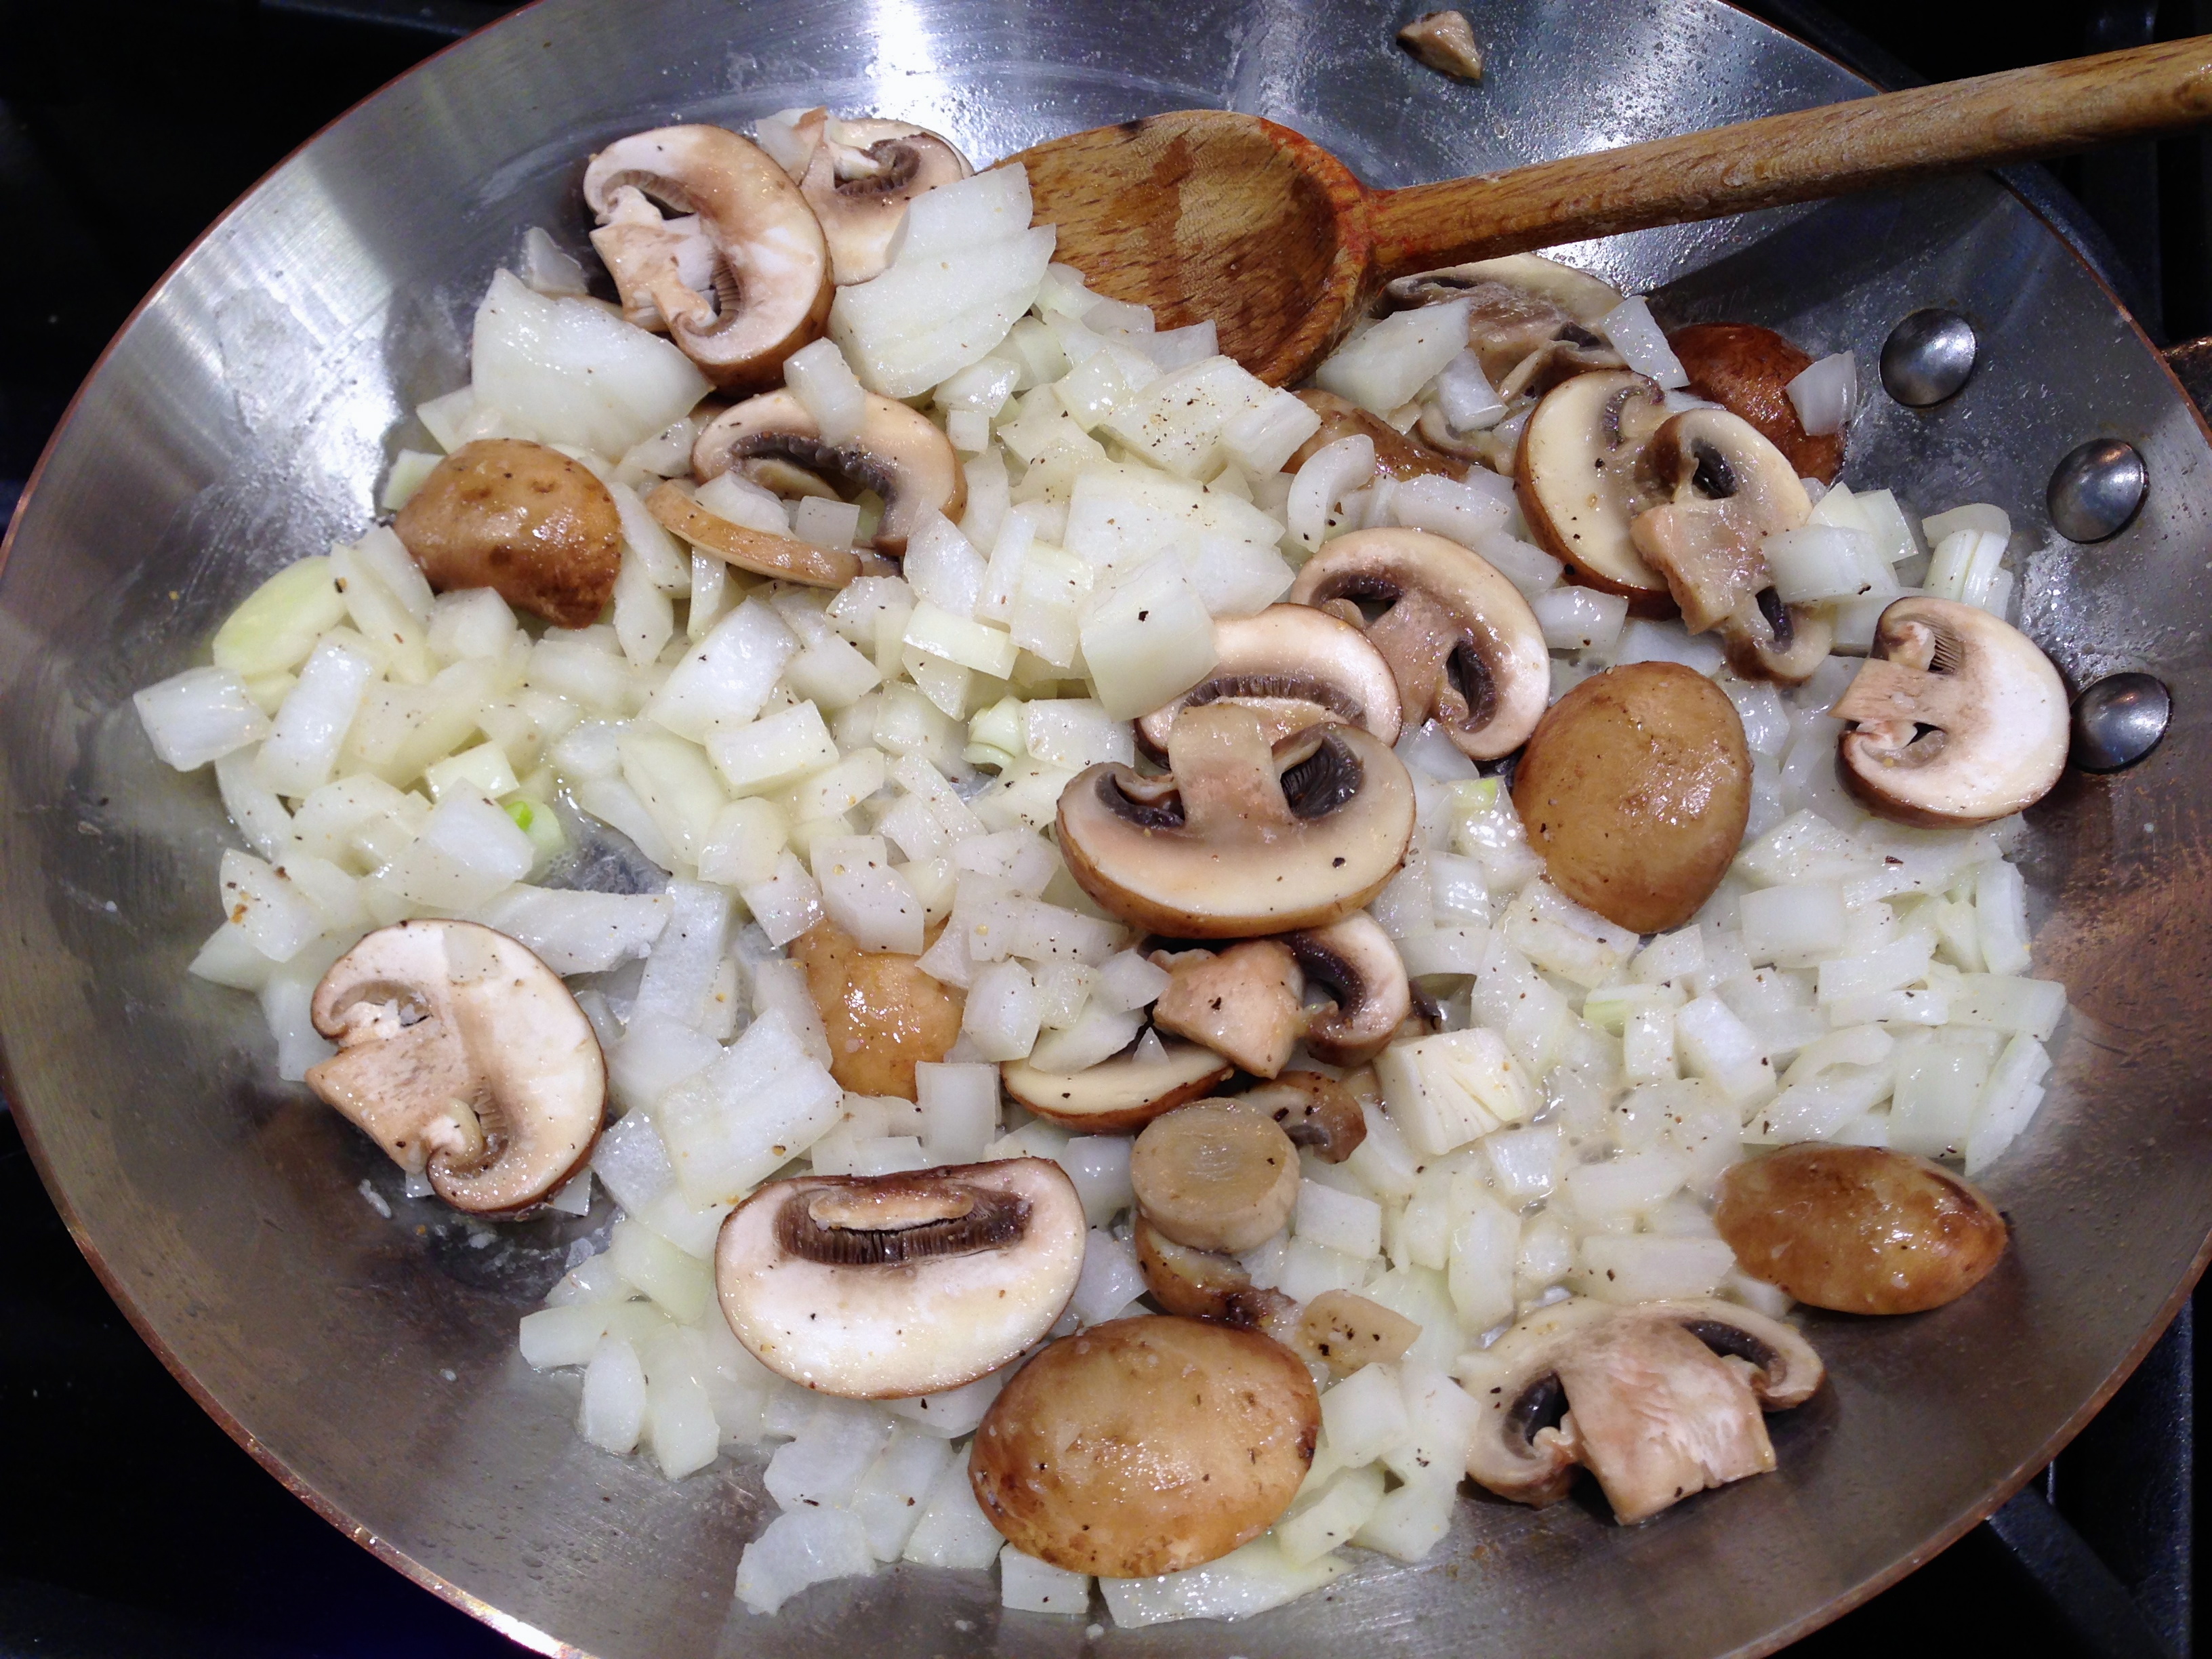
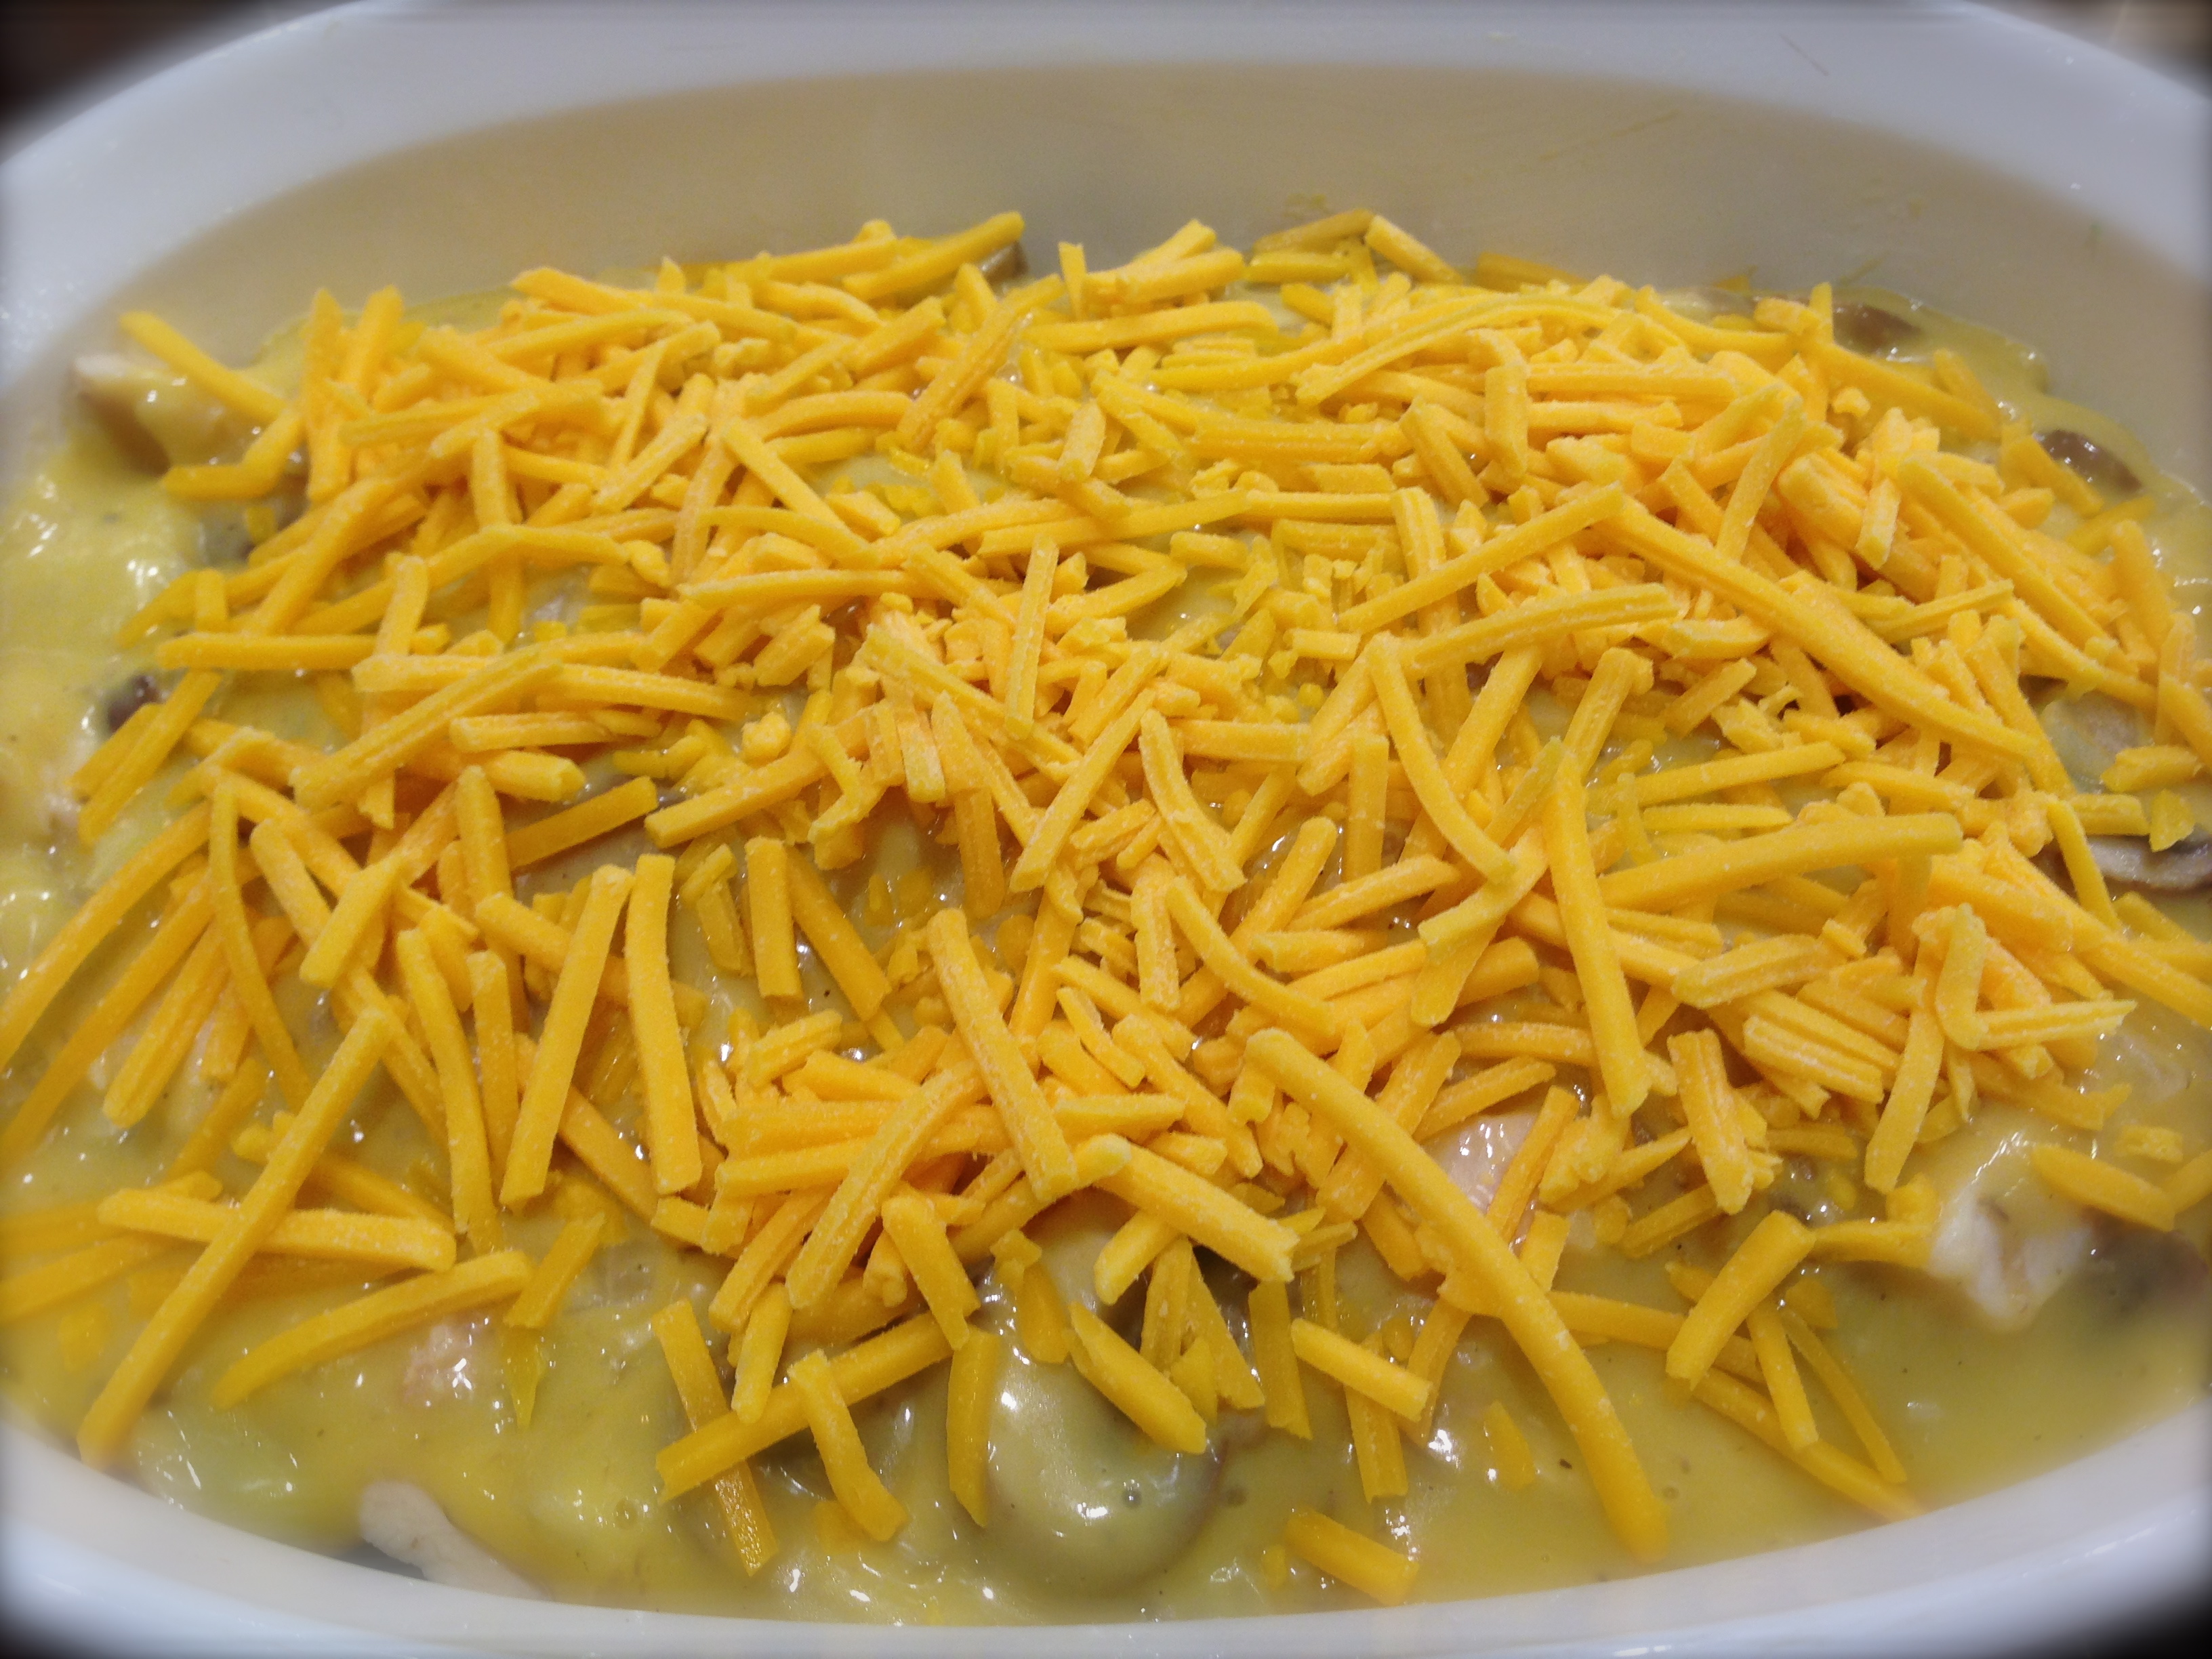
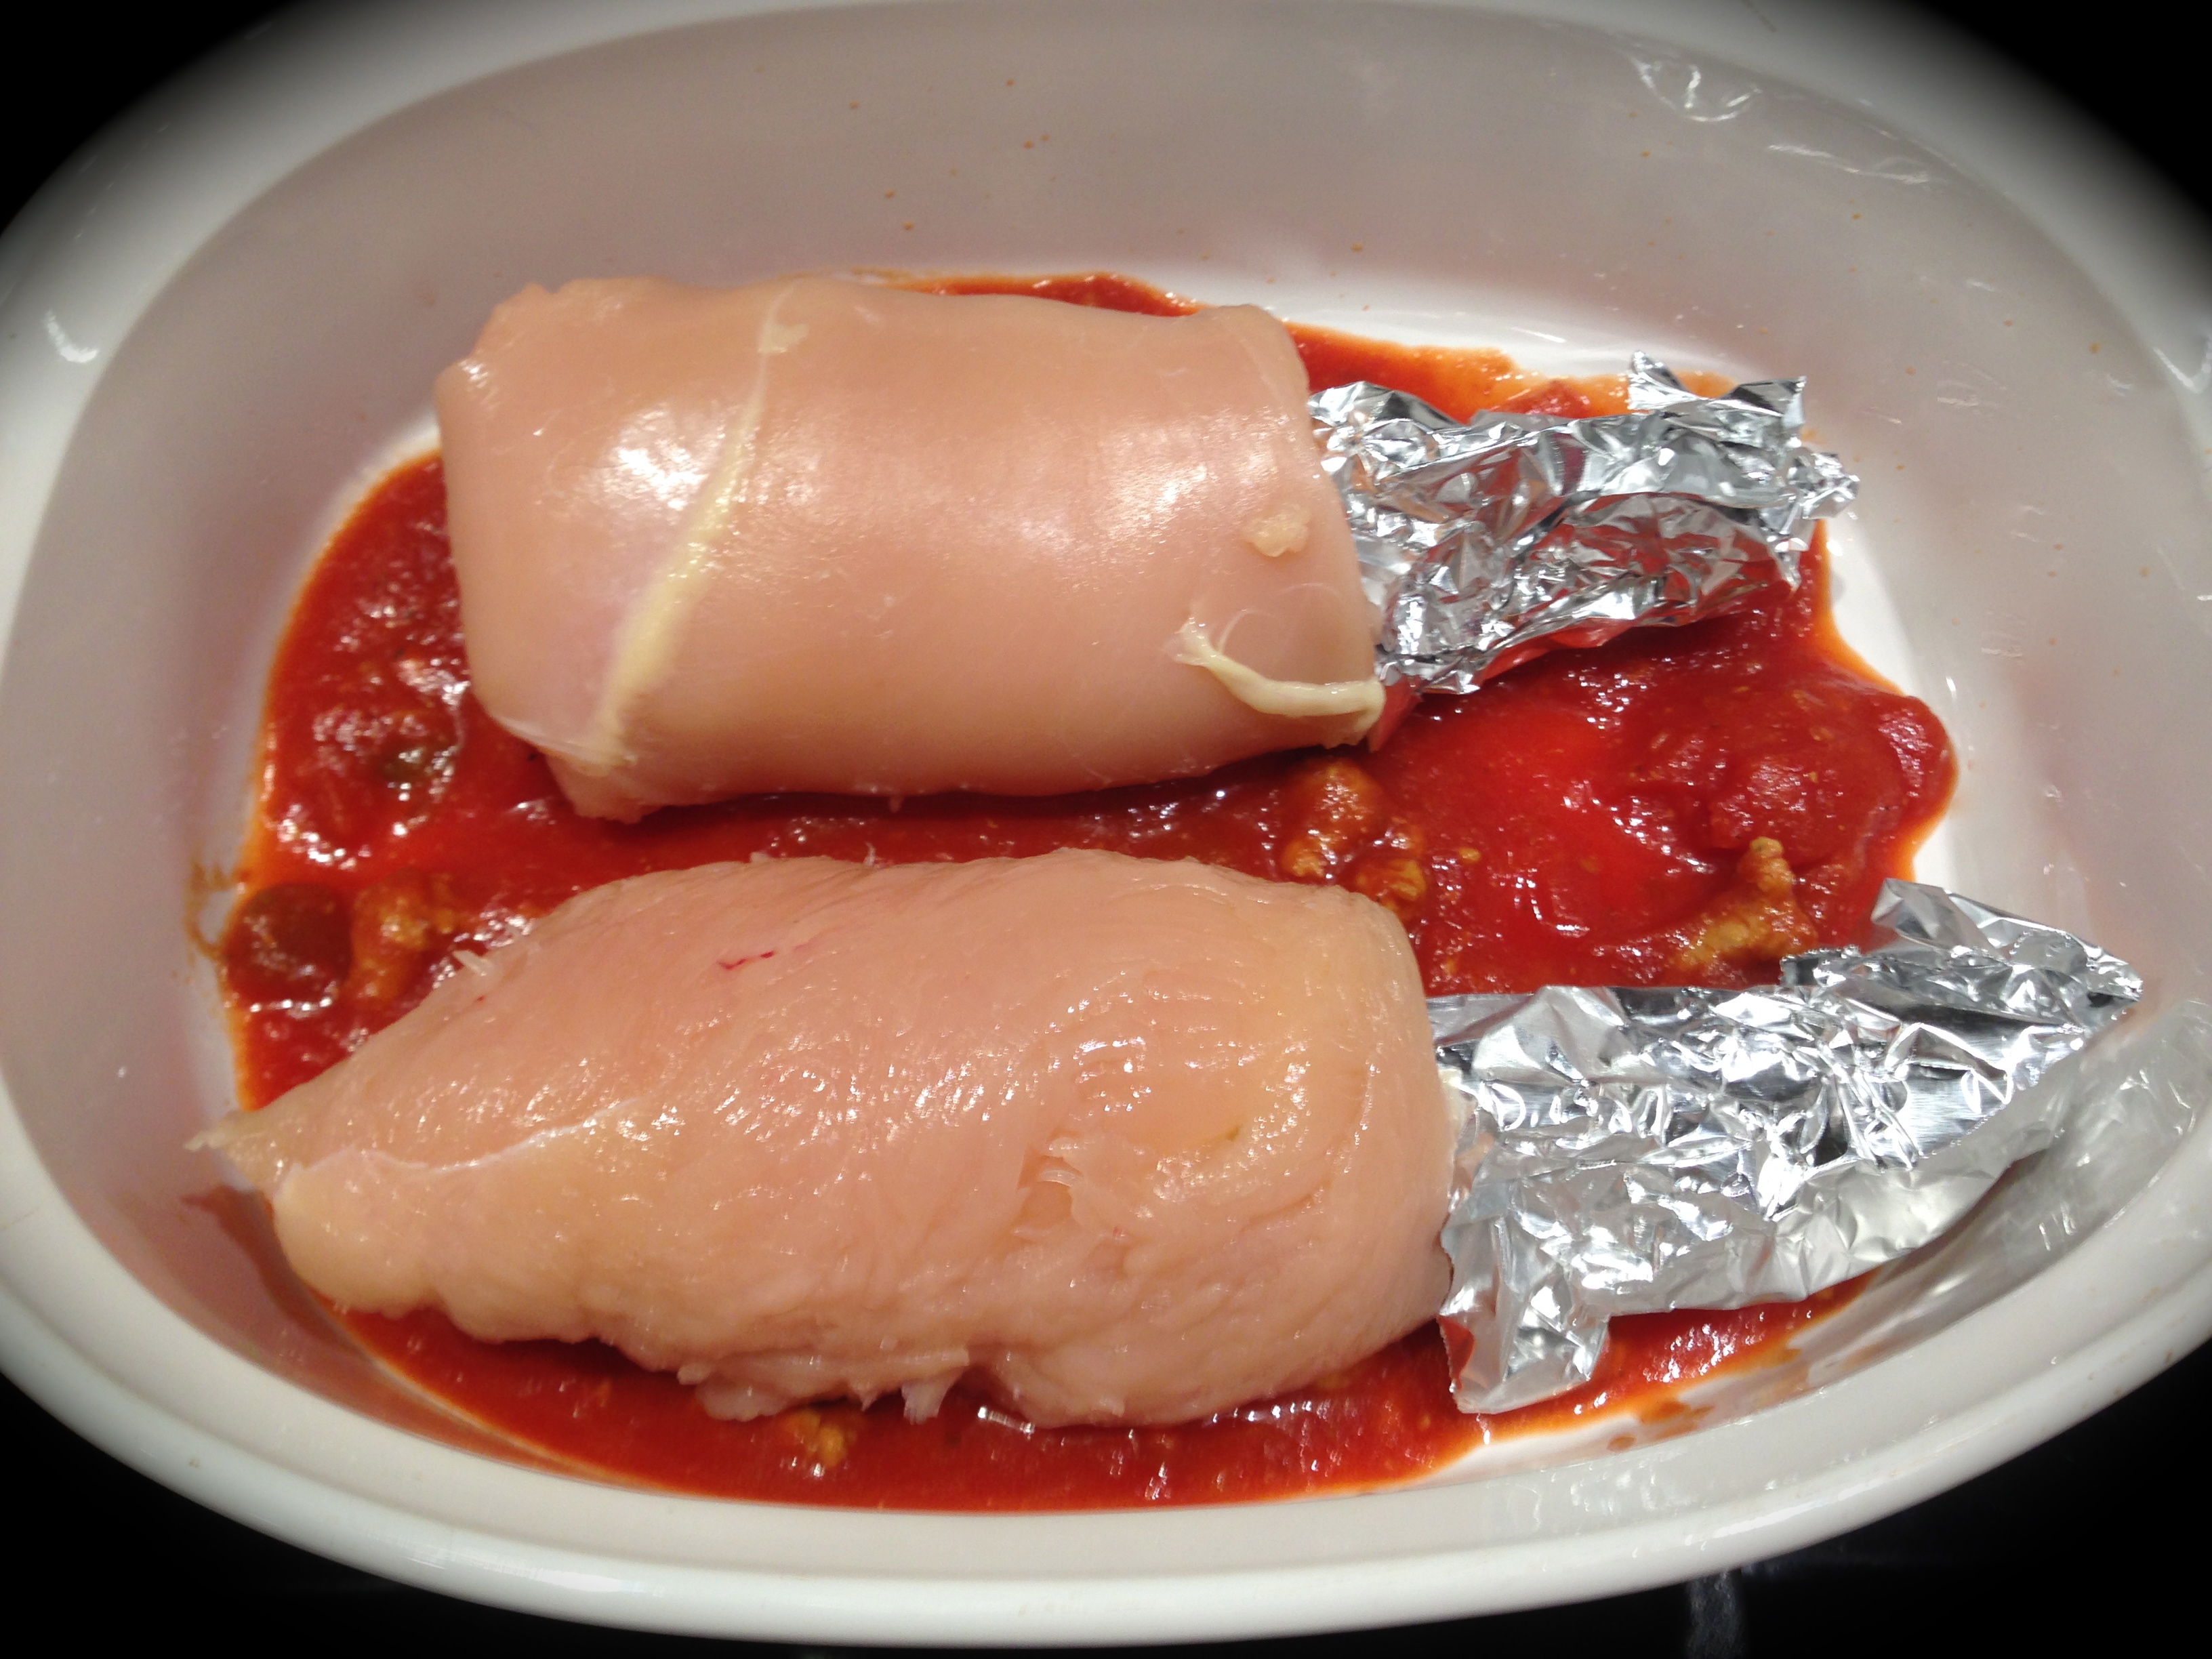
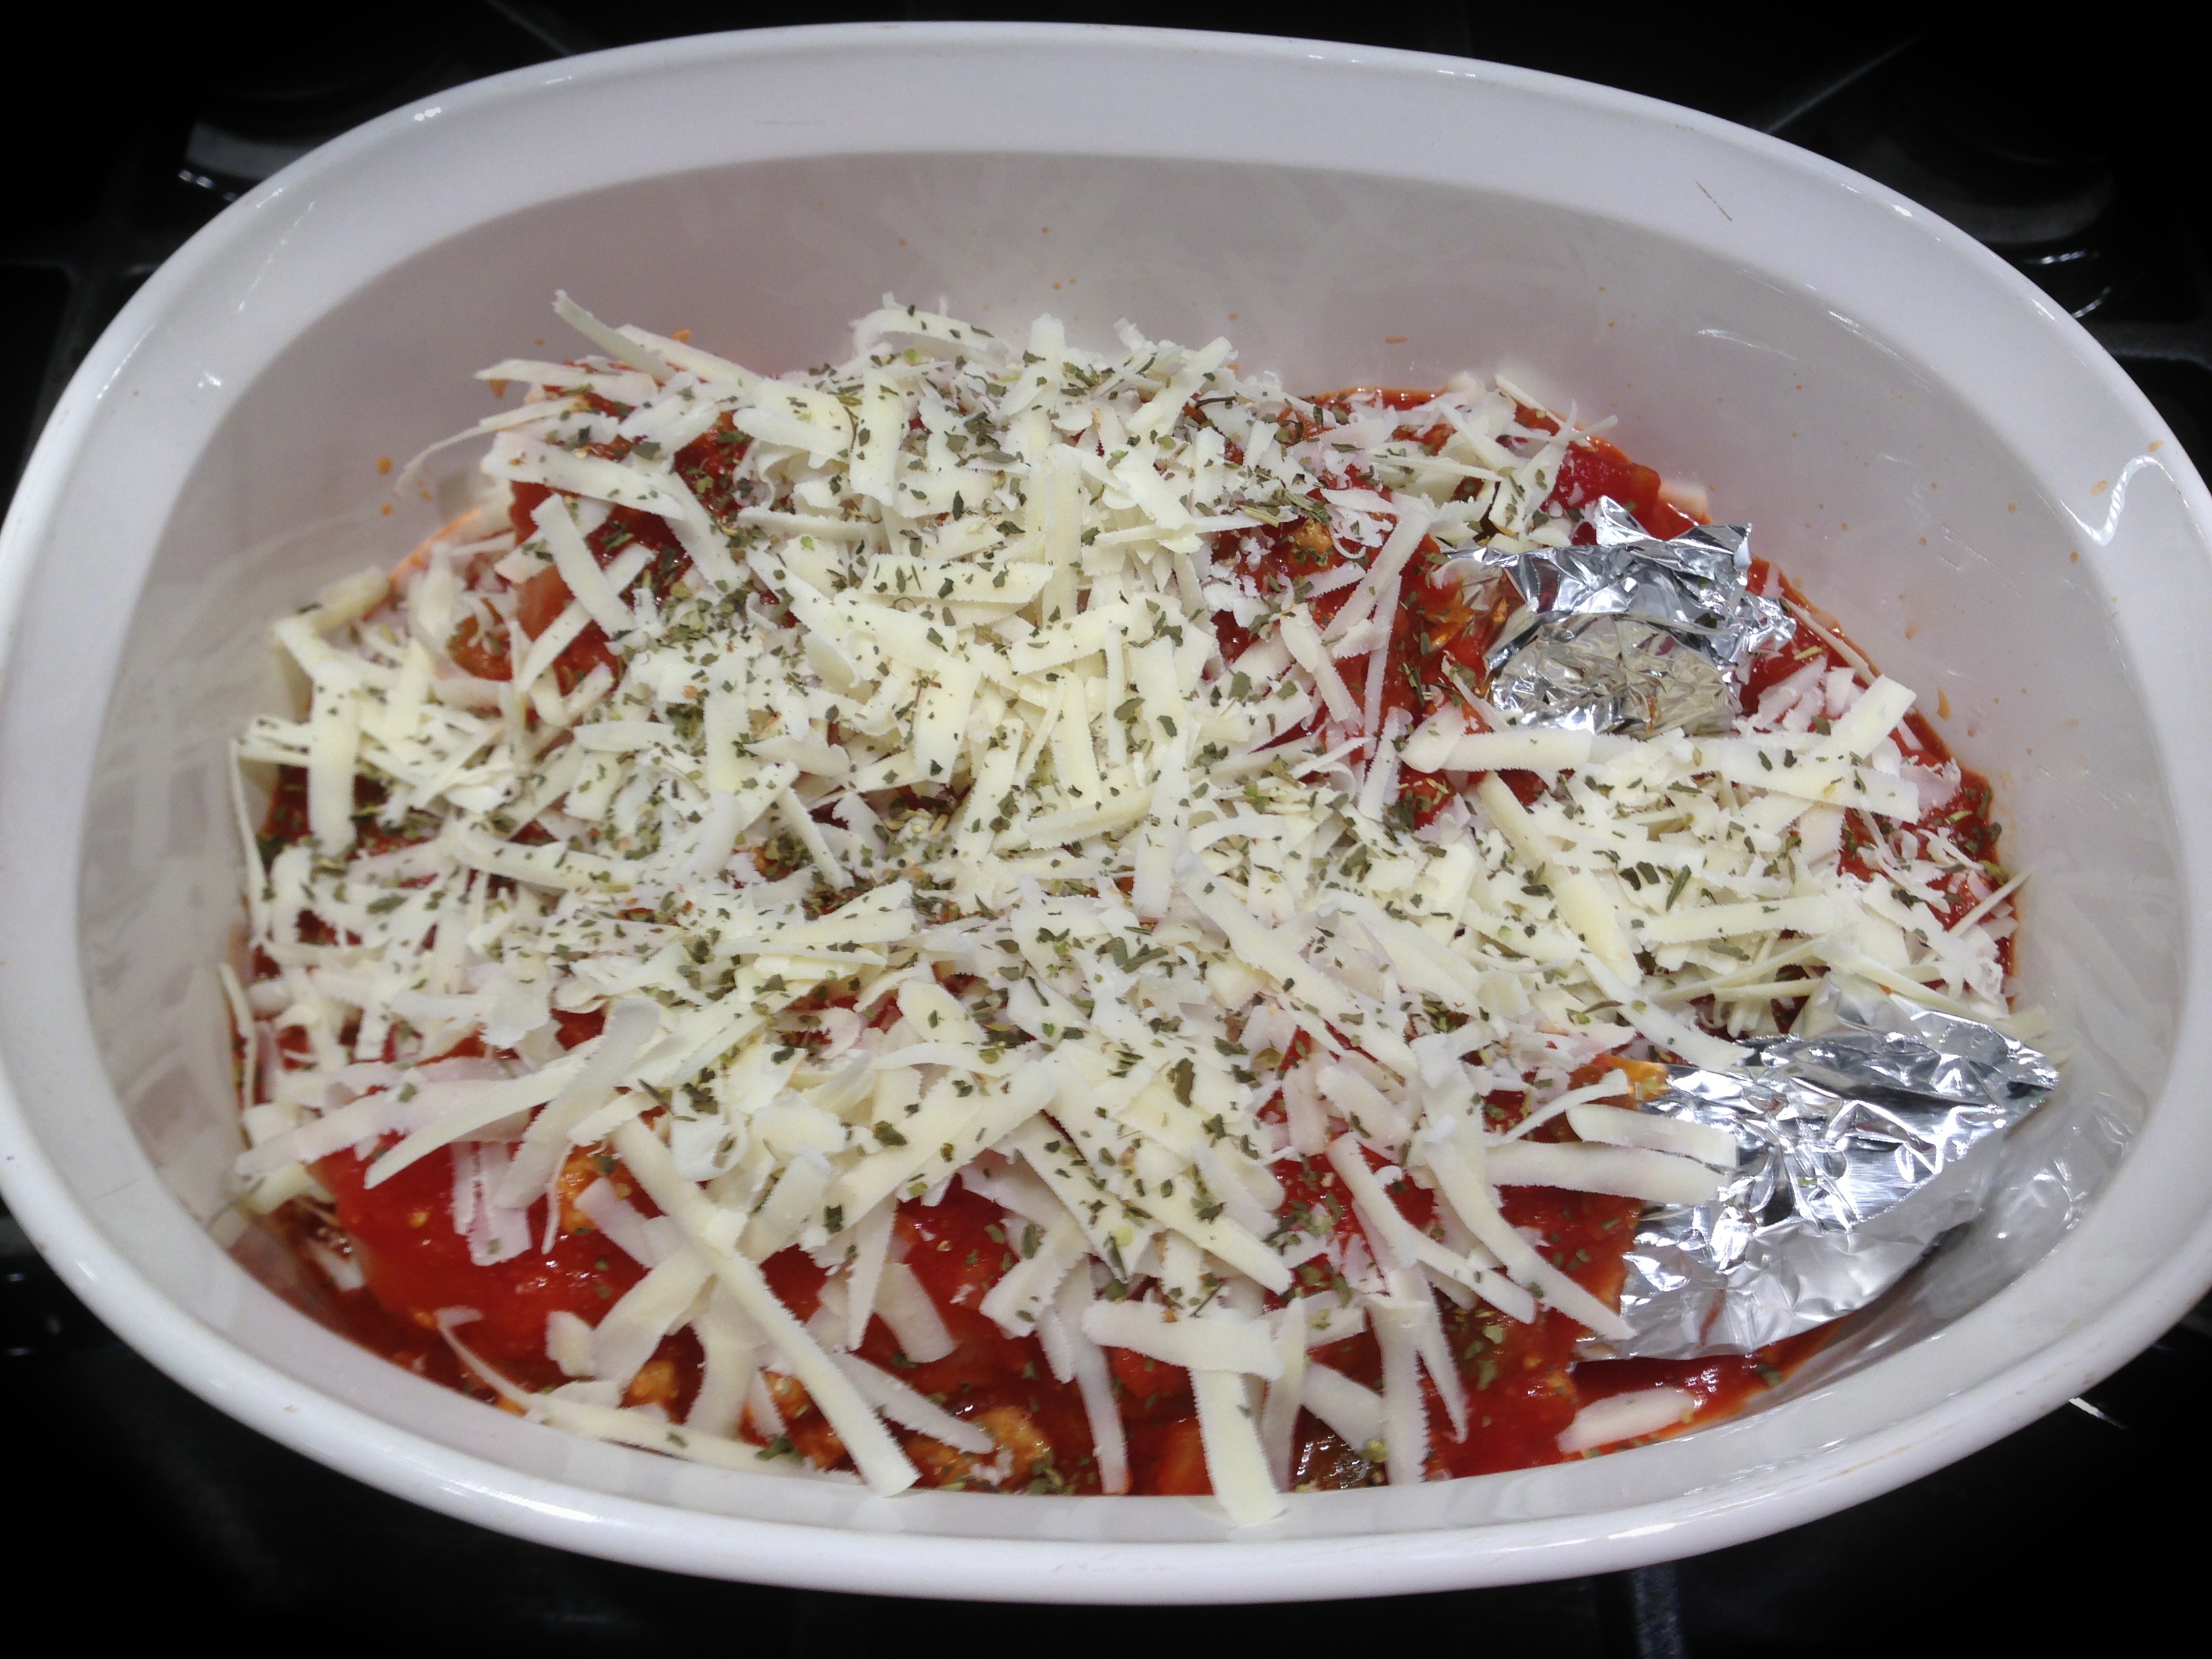
Bottom line – this is how the ingredients looked going into the oven…

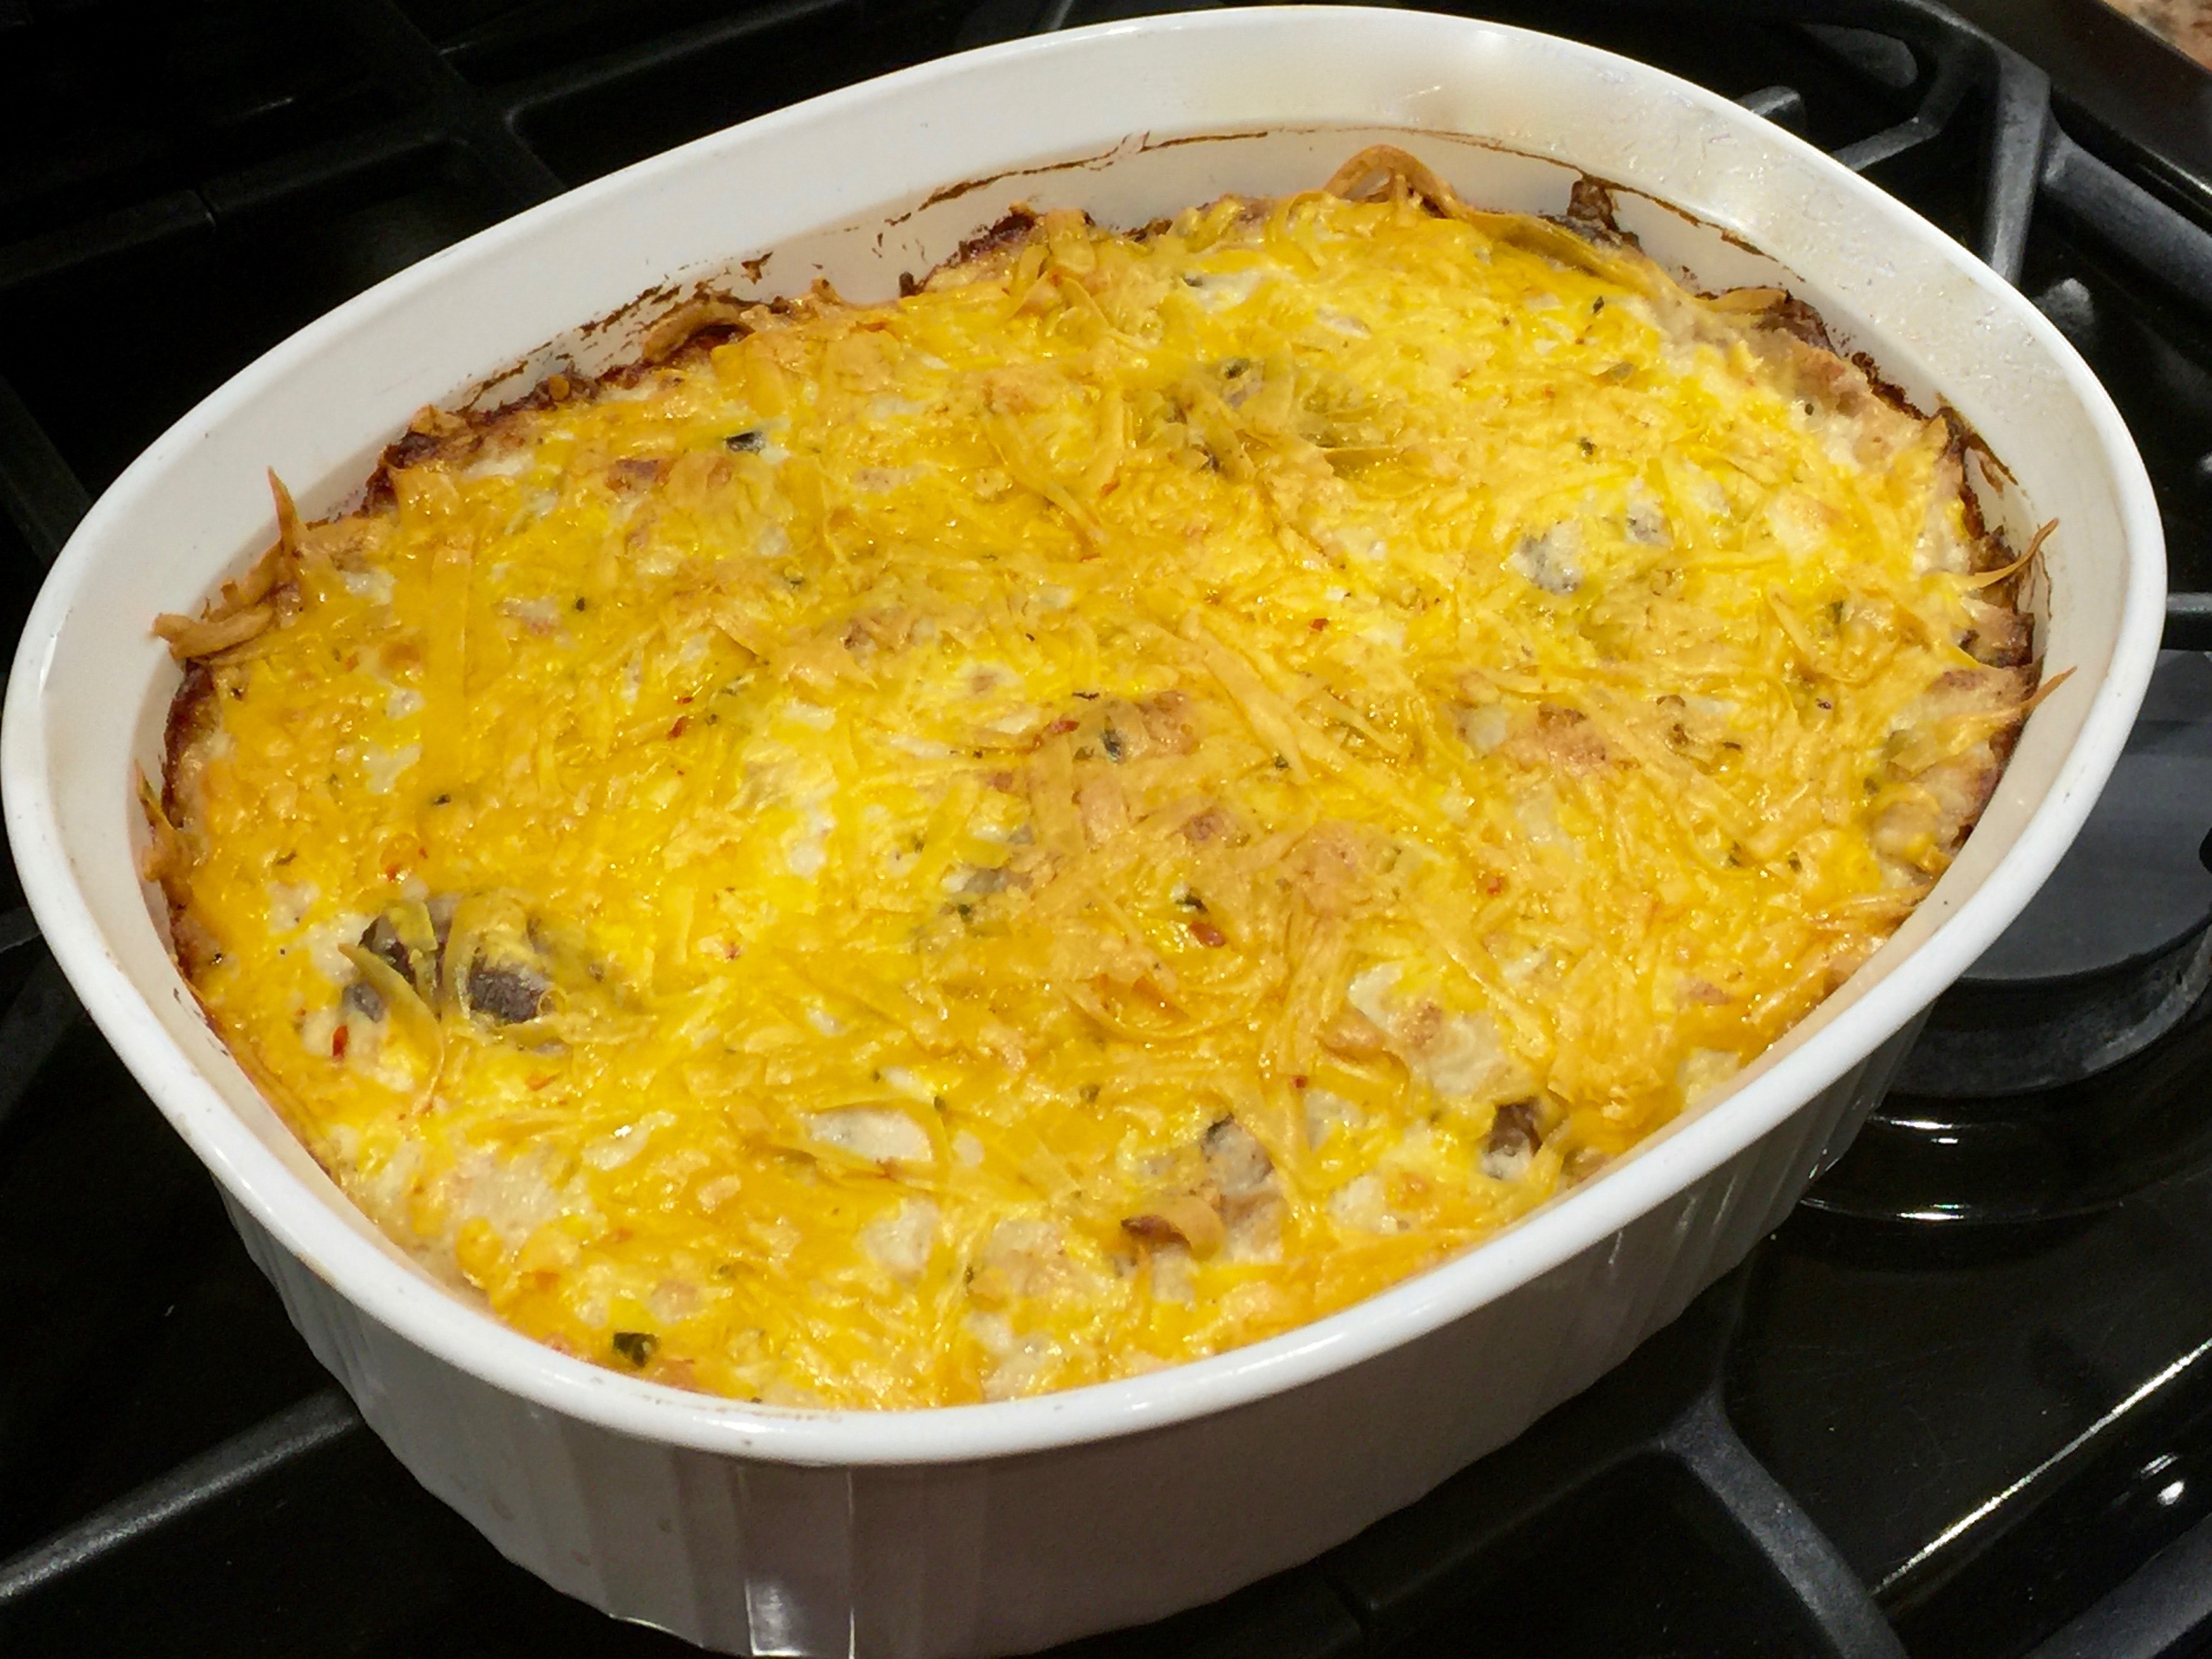
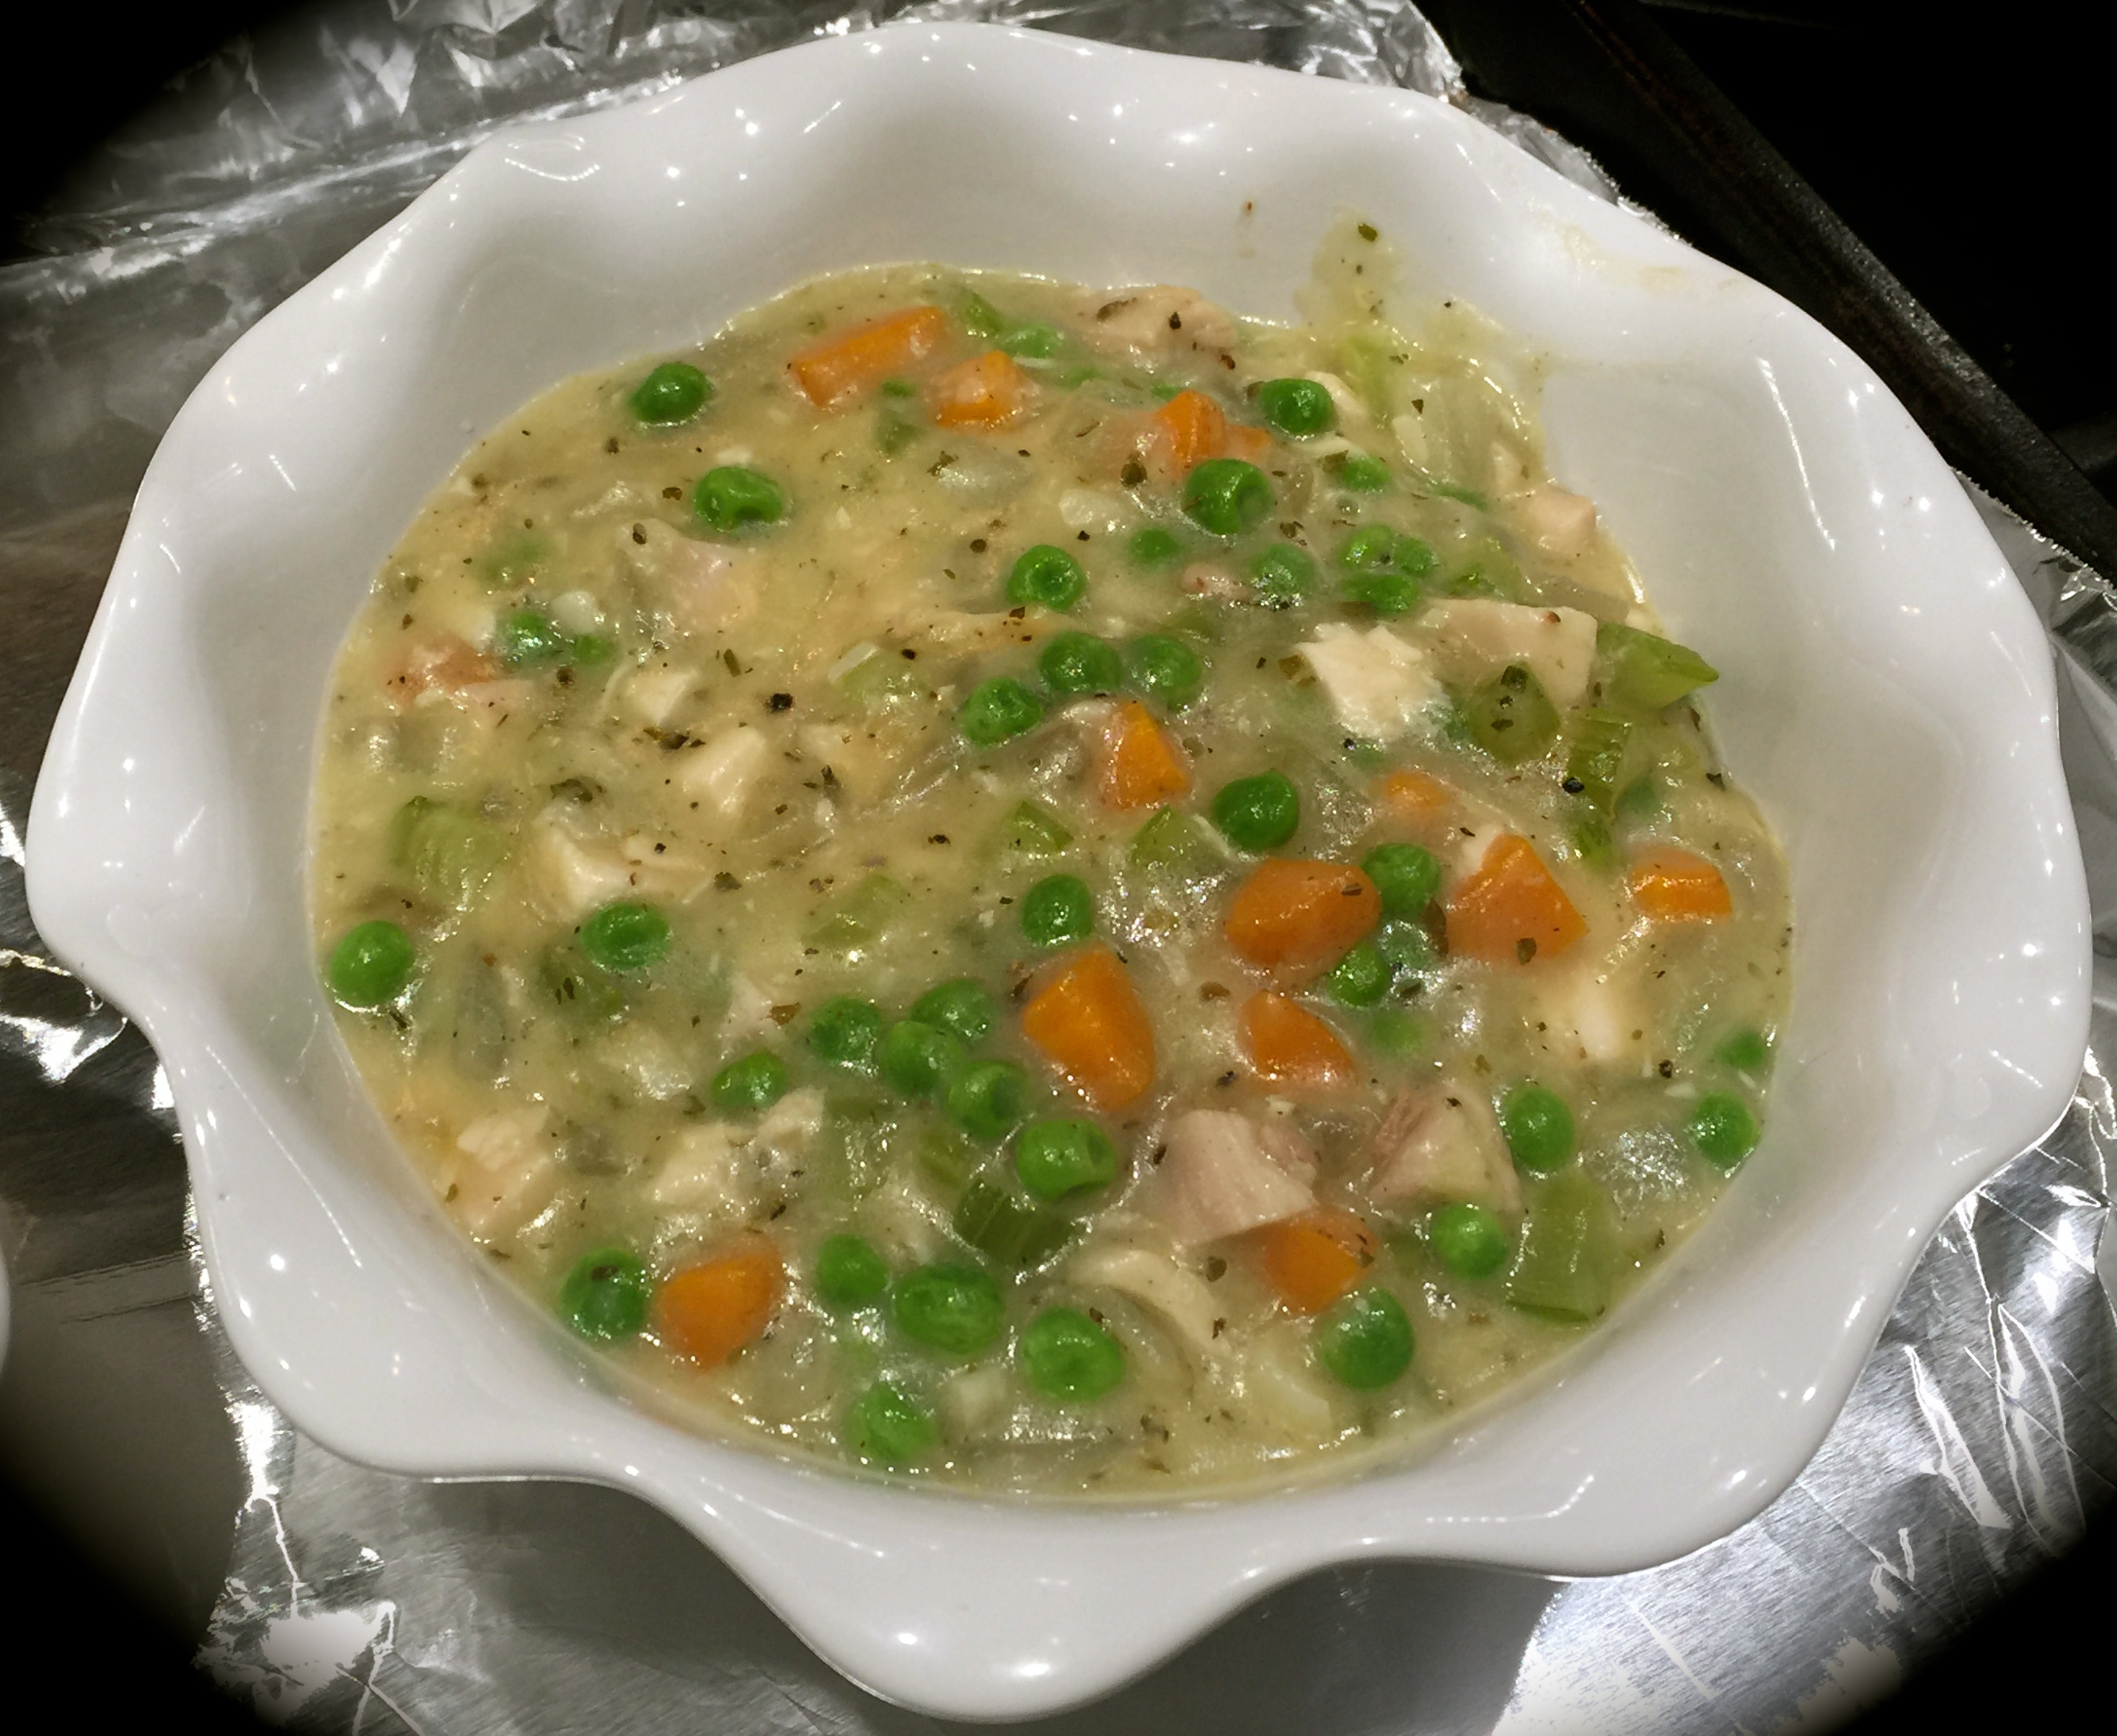
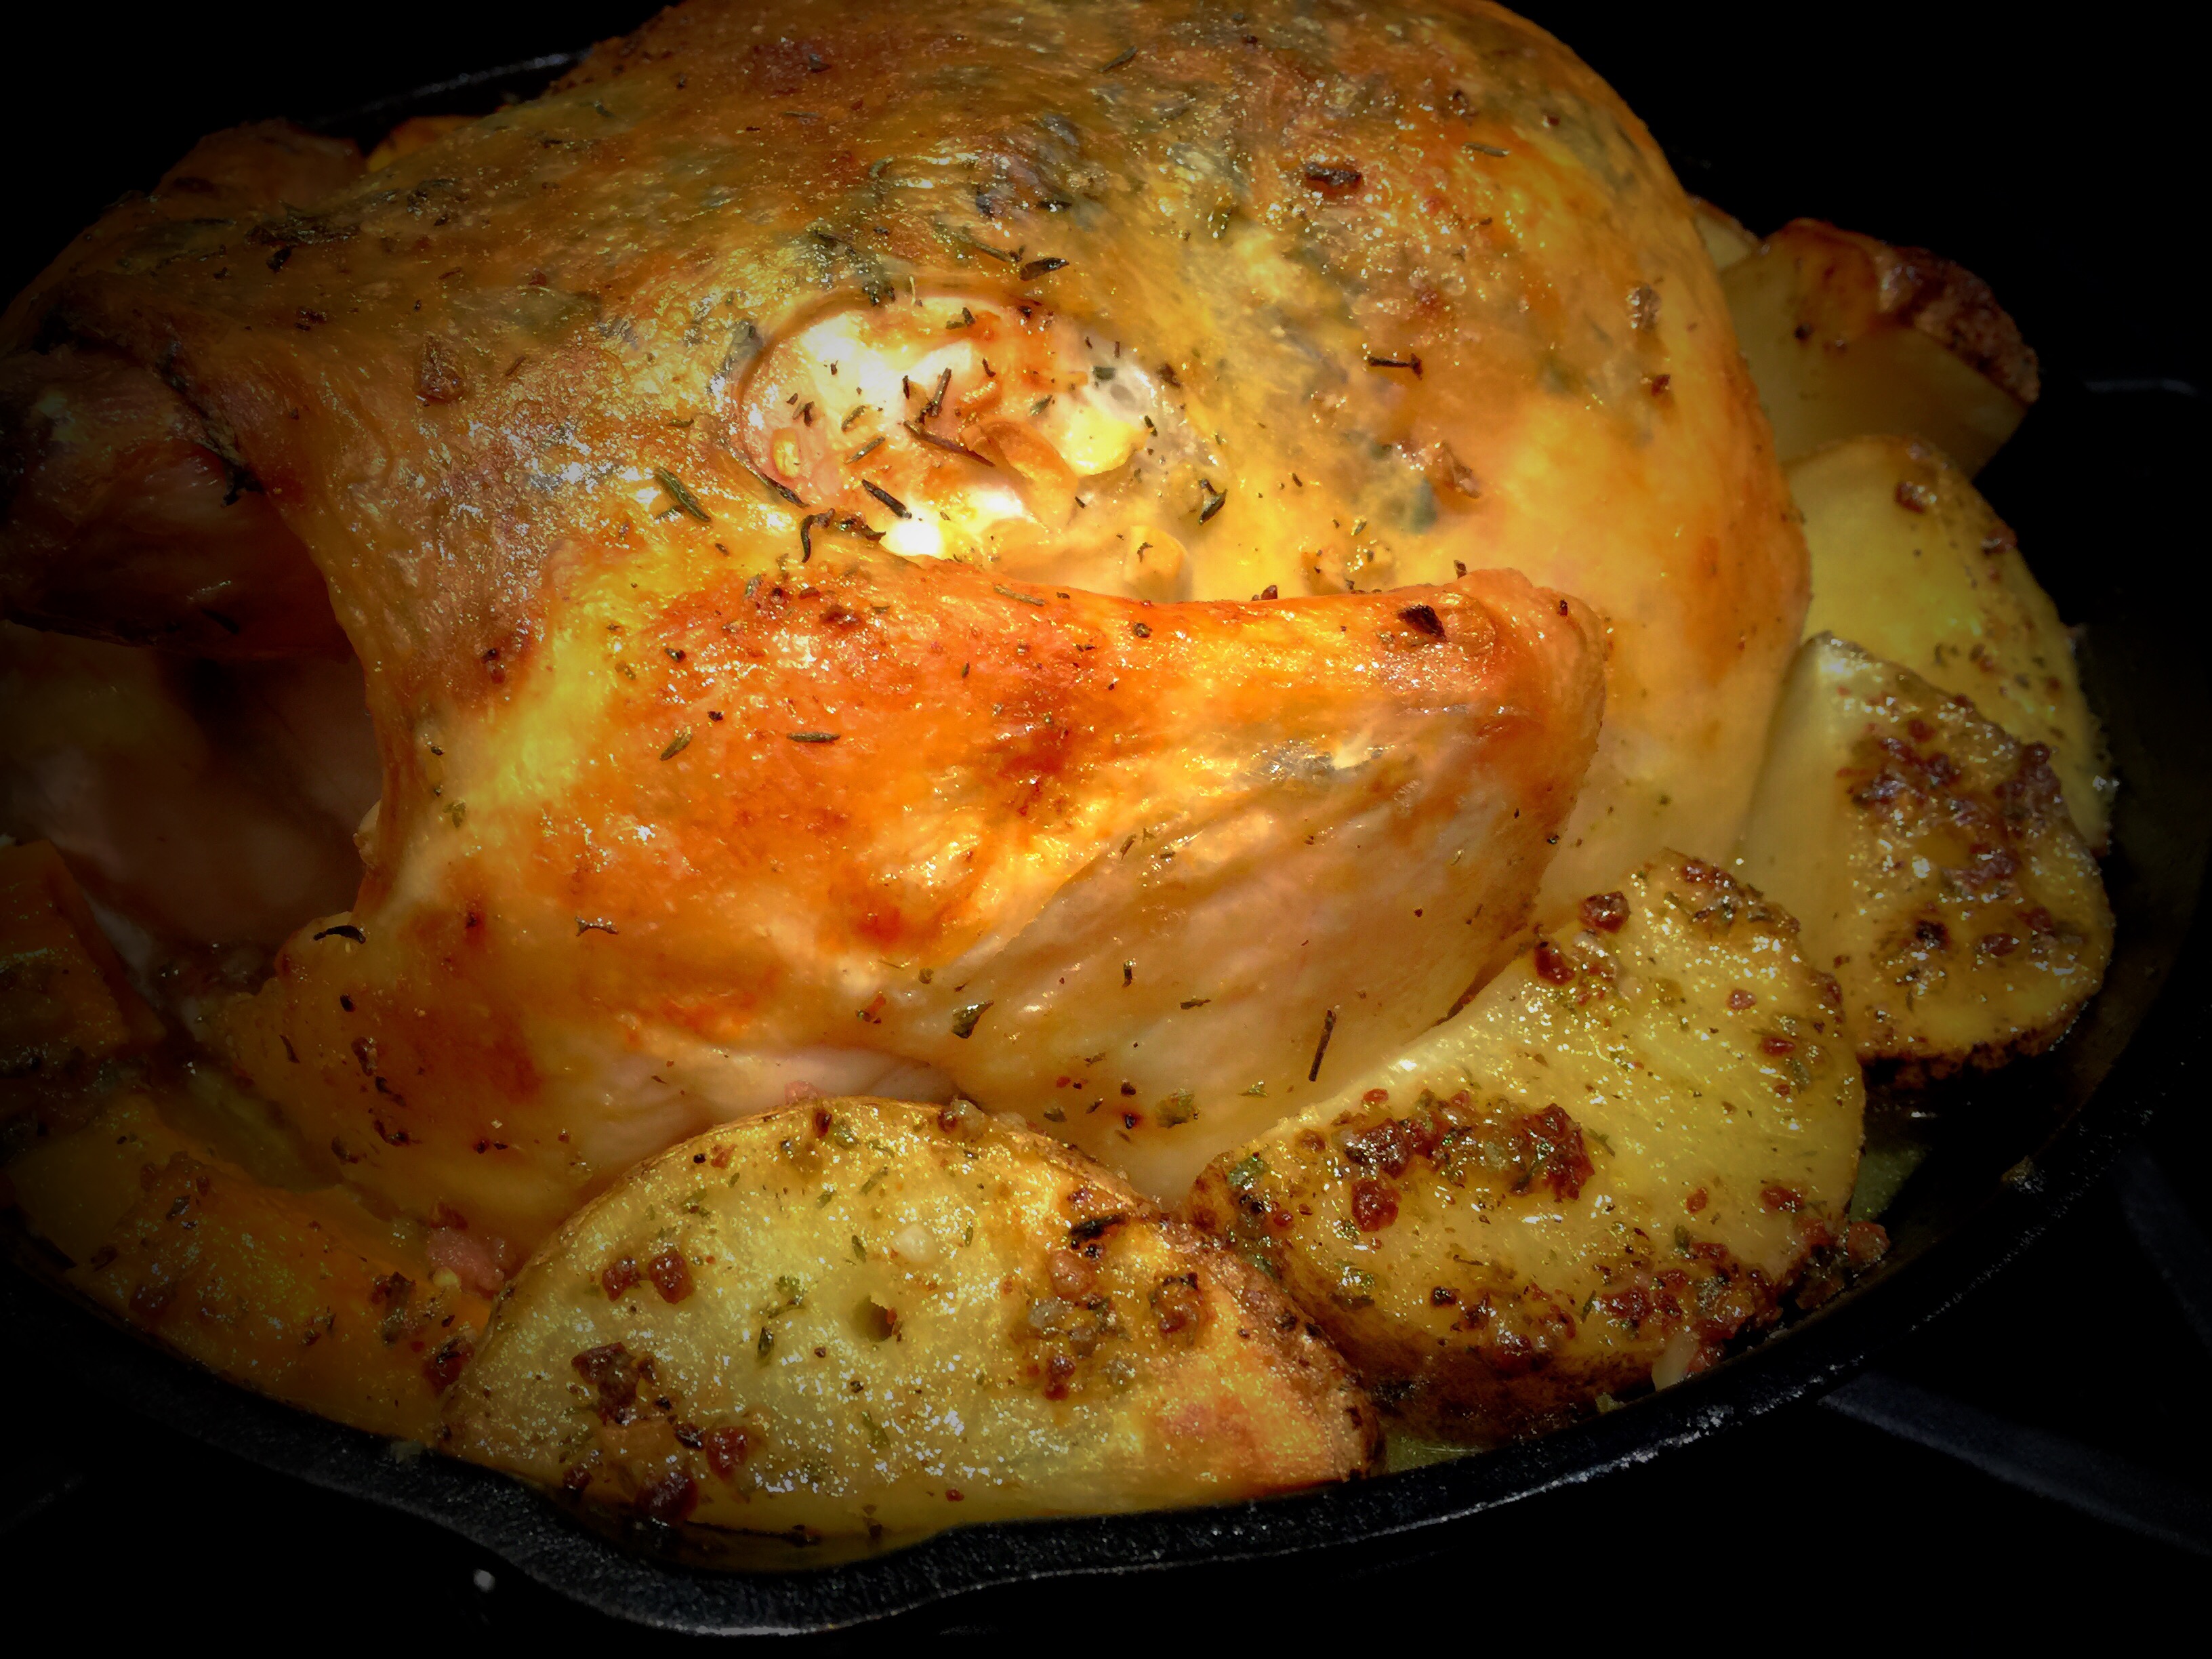
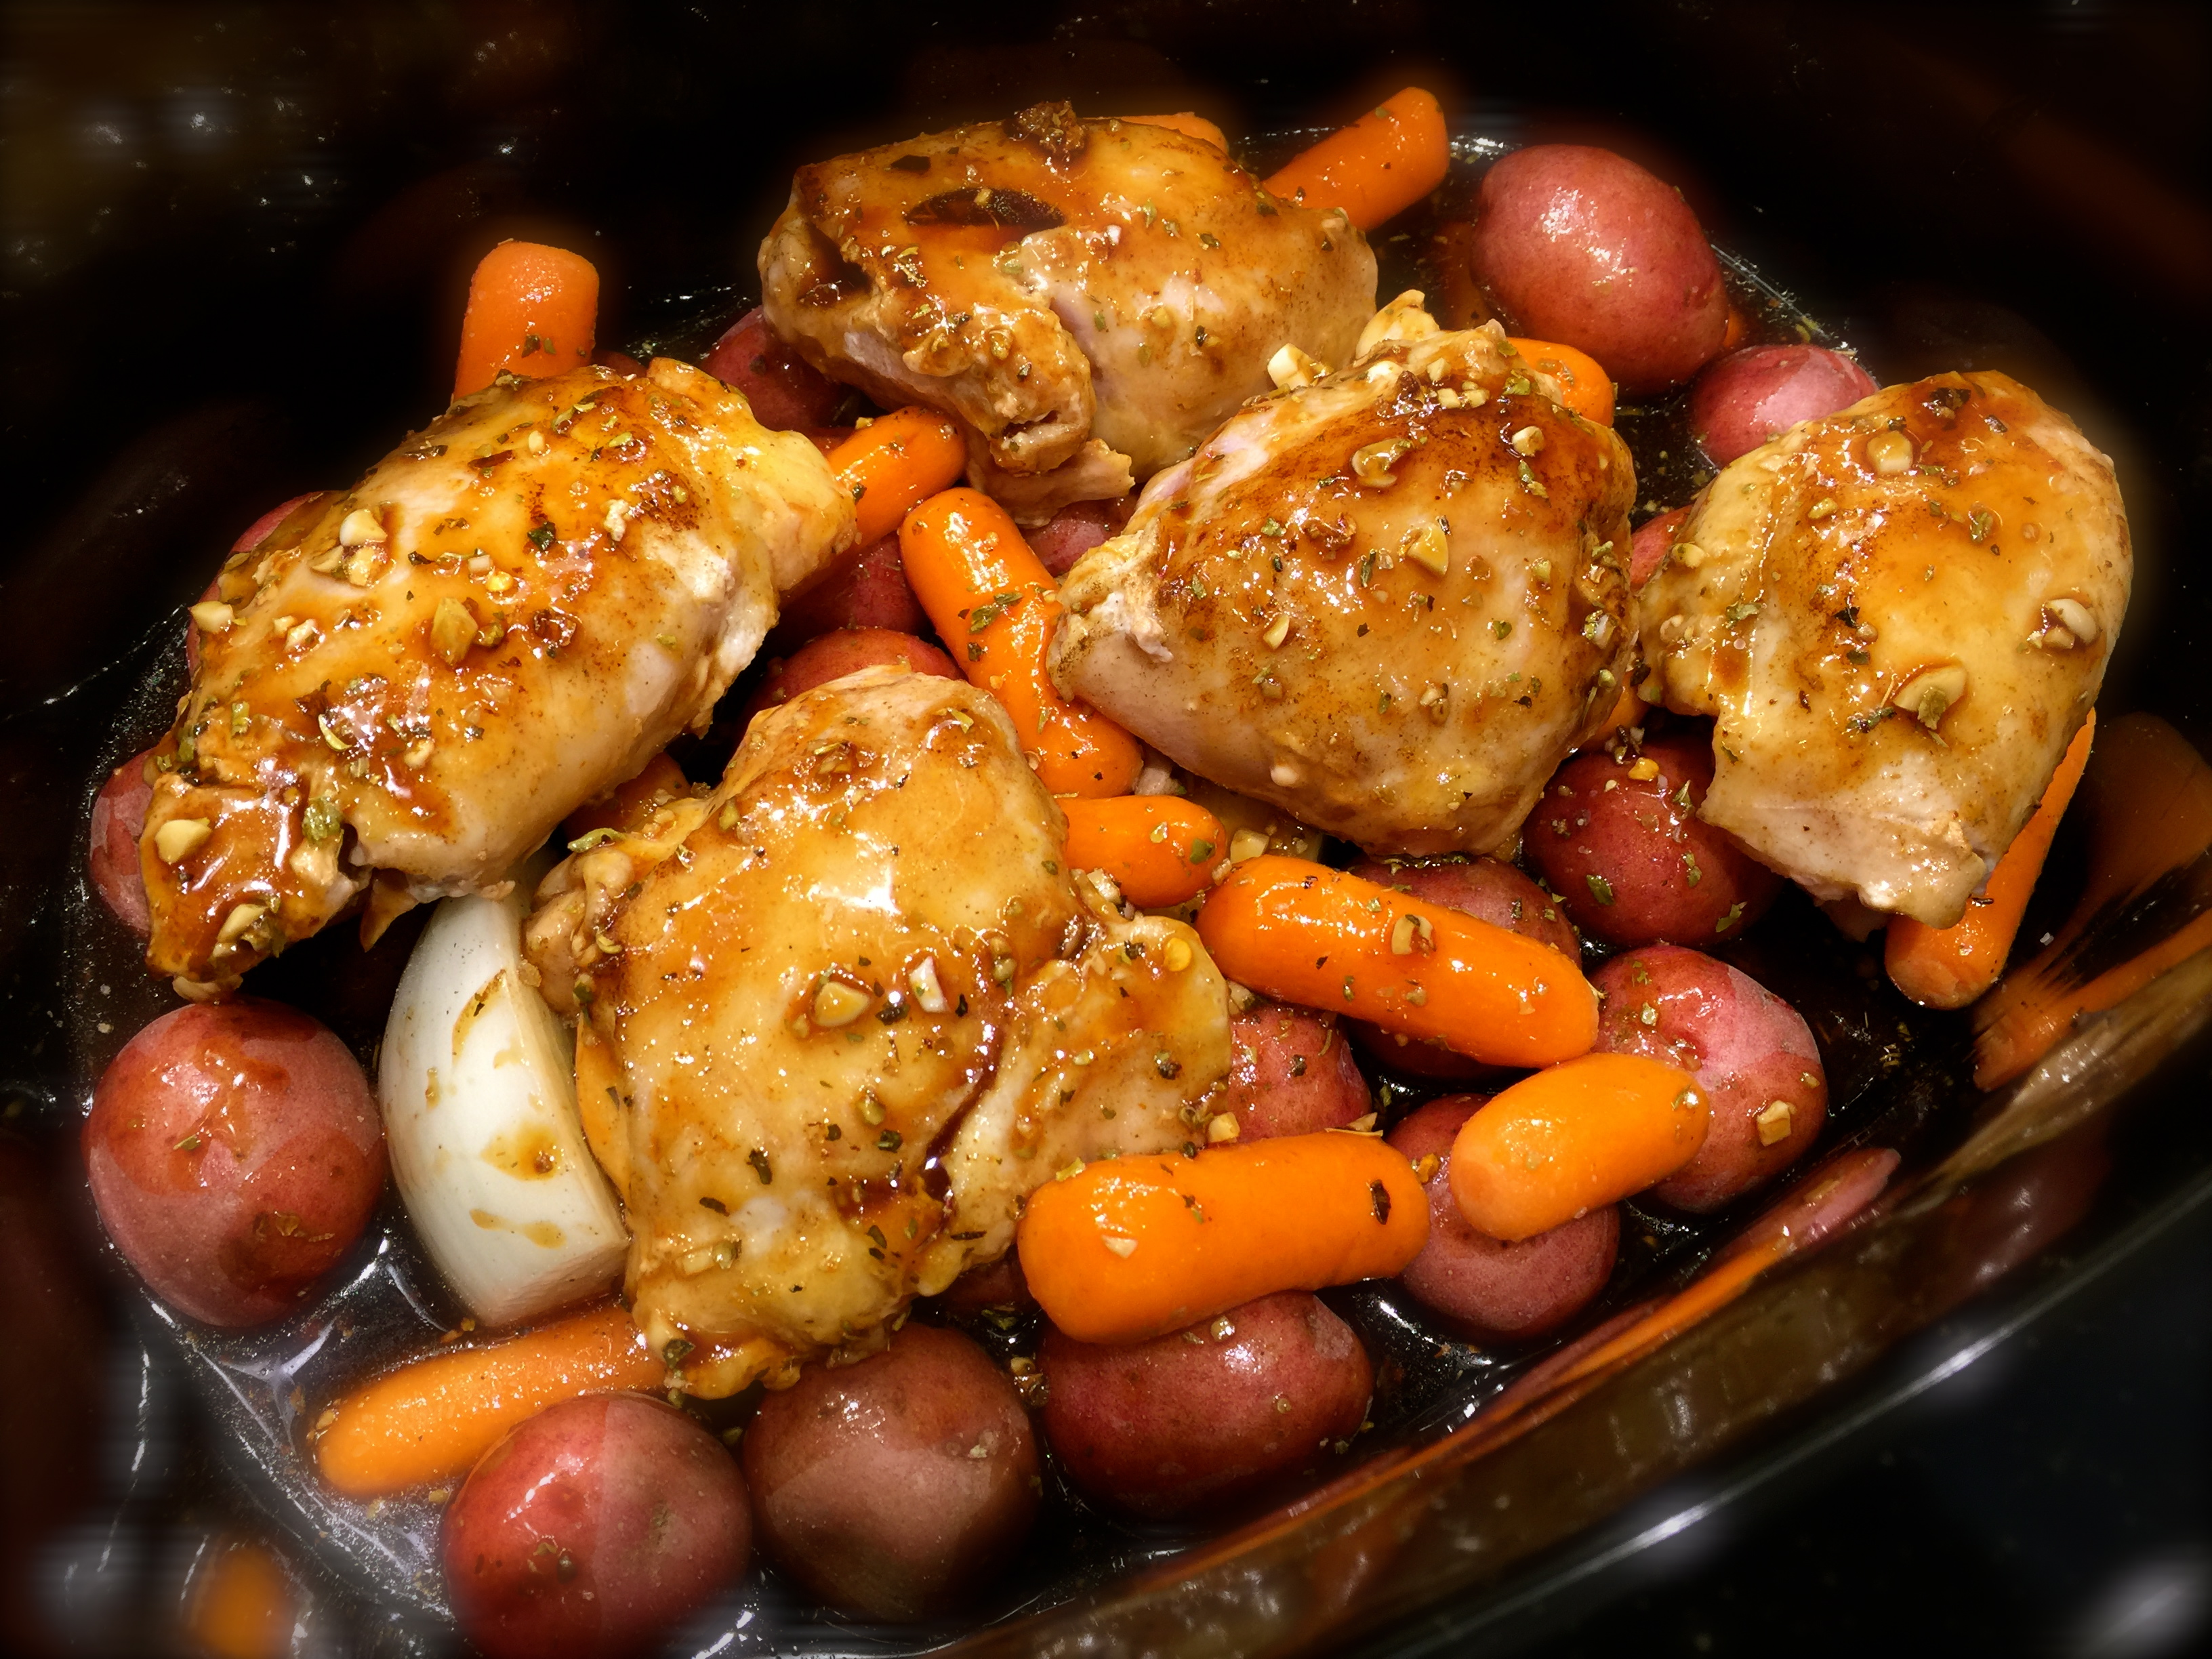
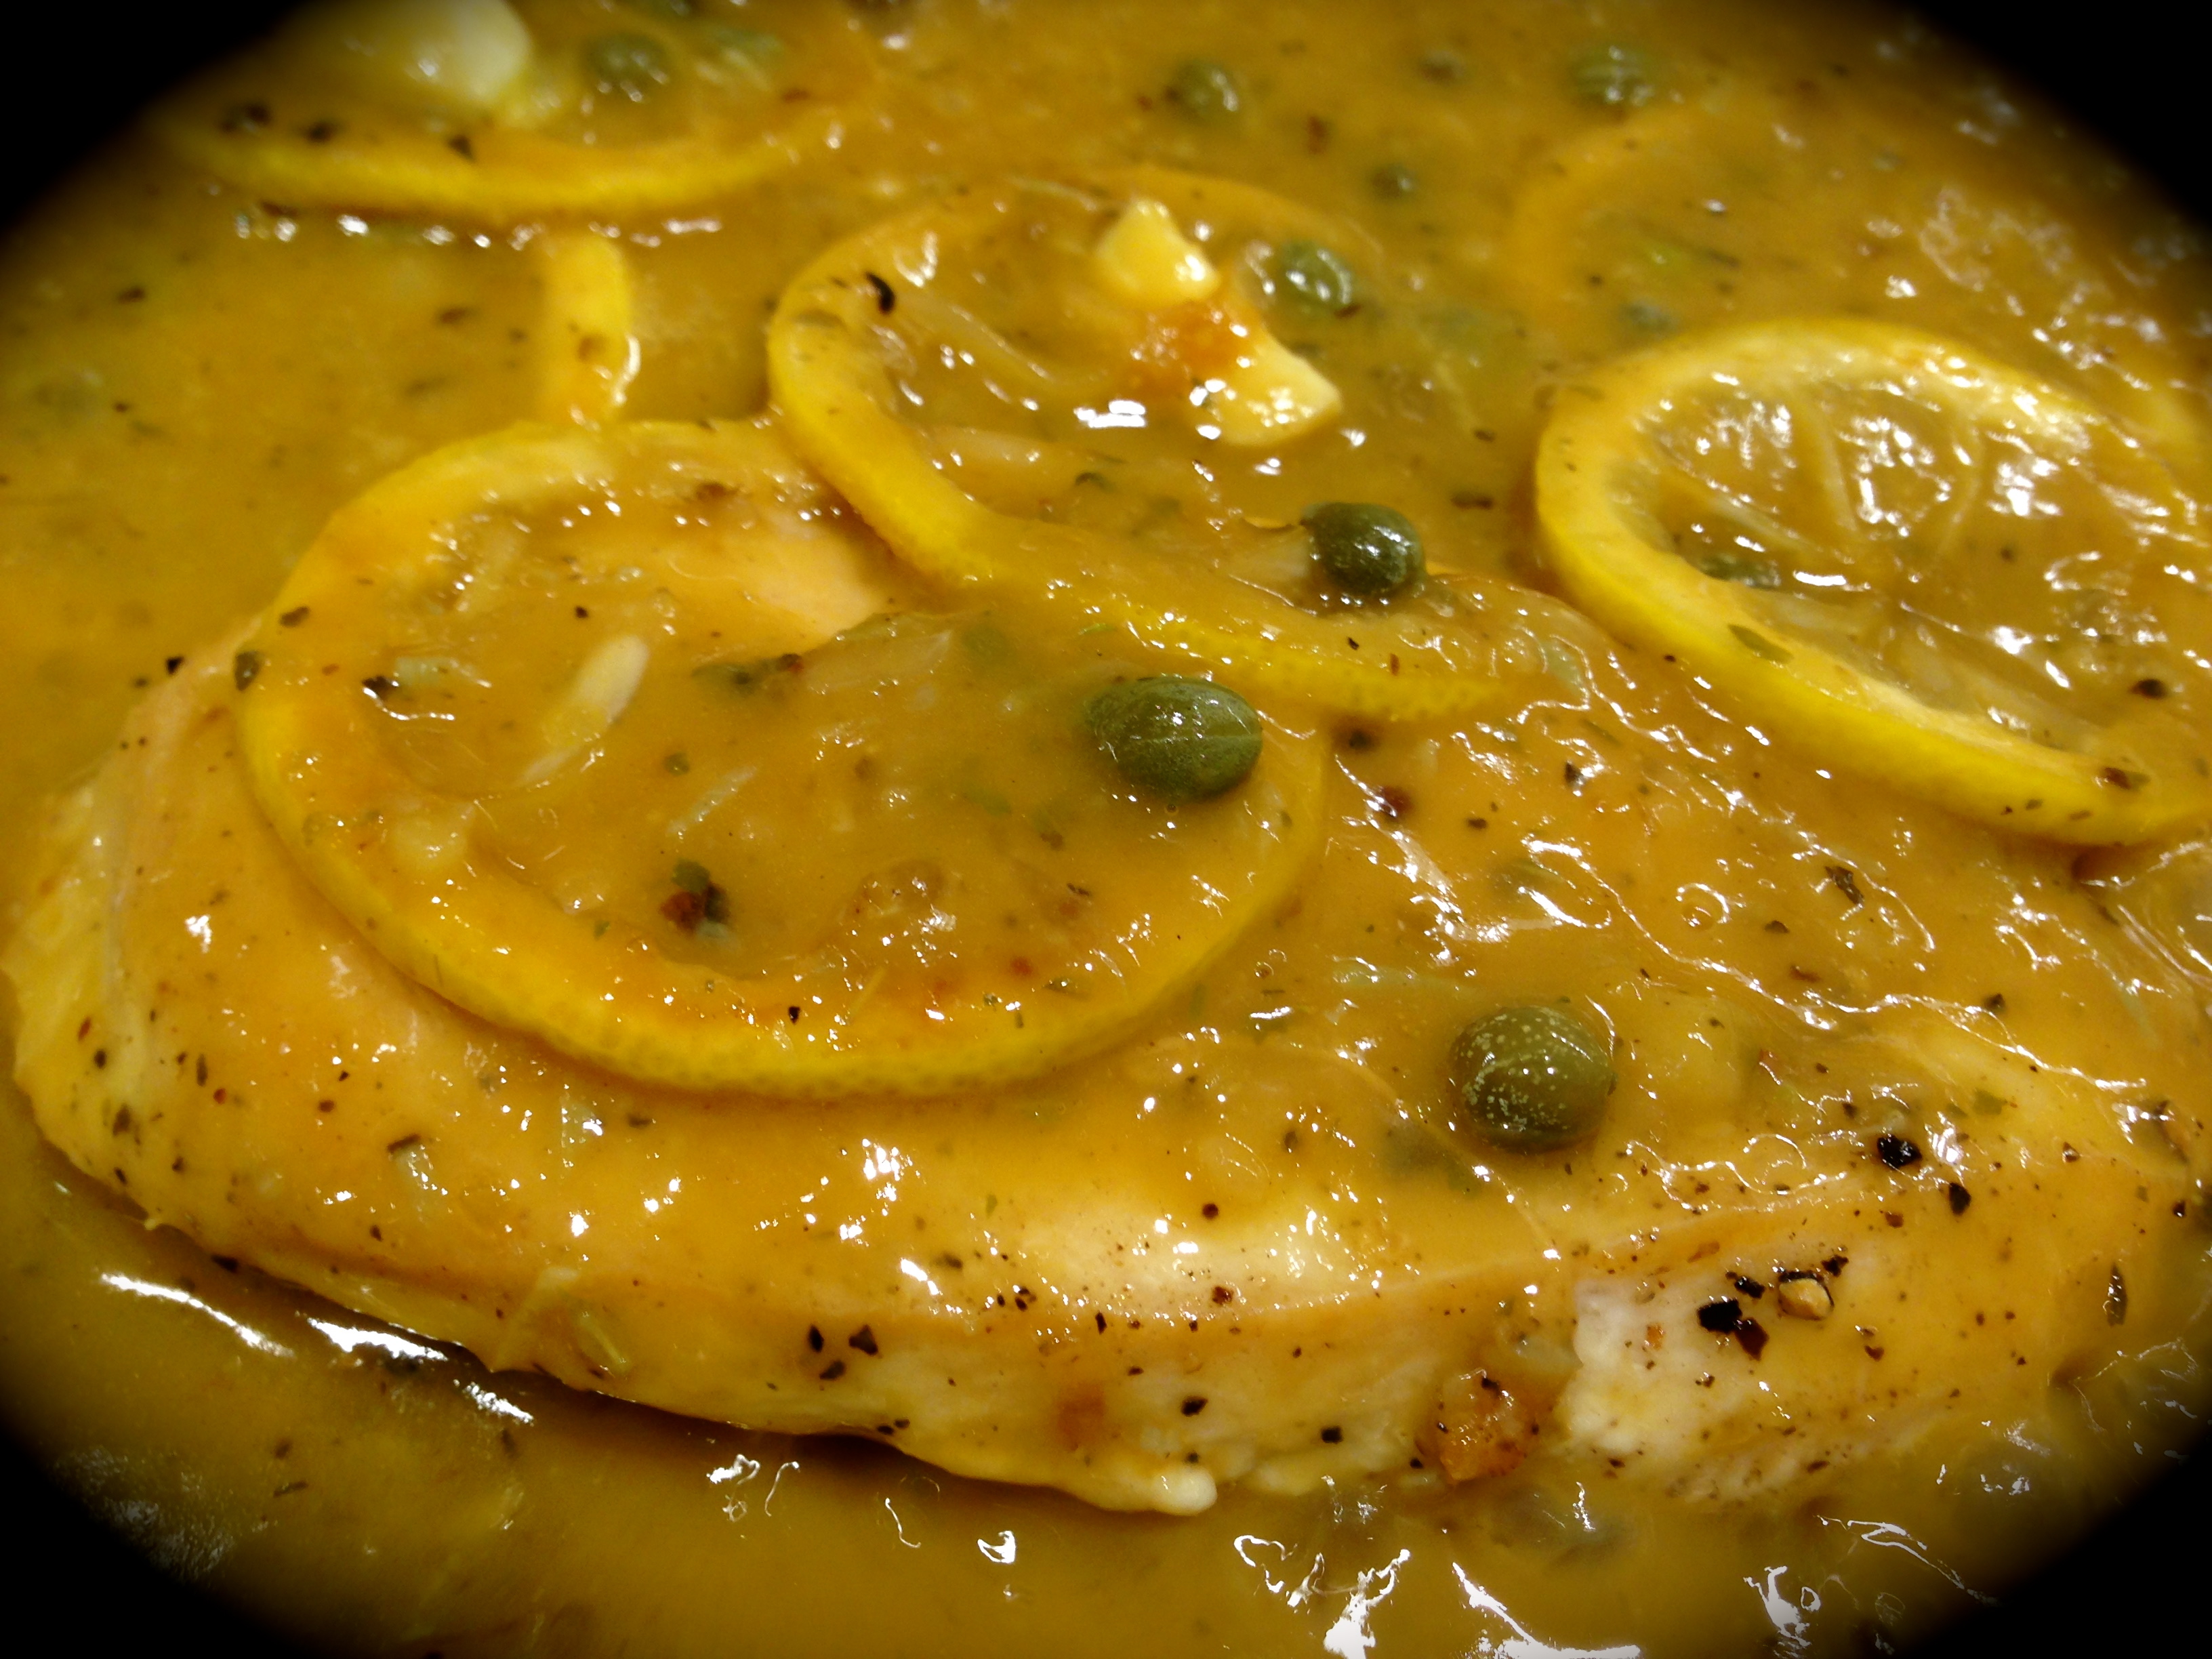
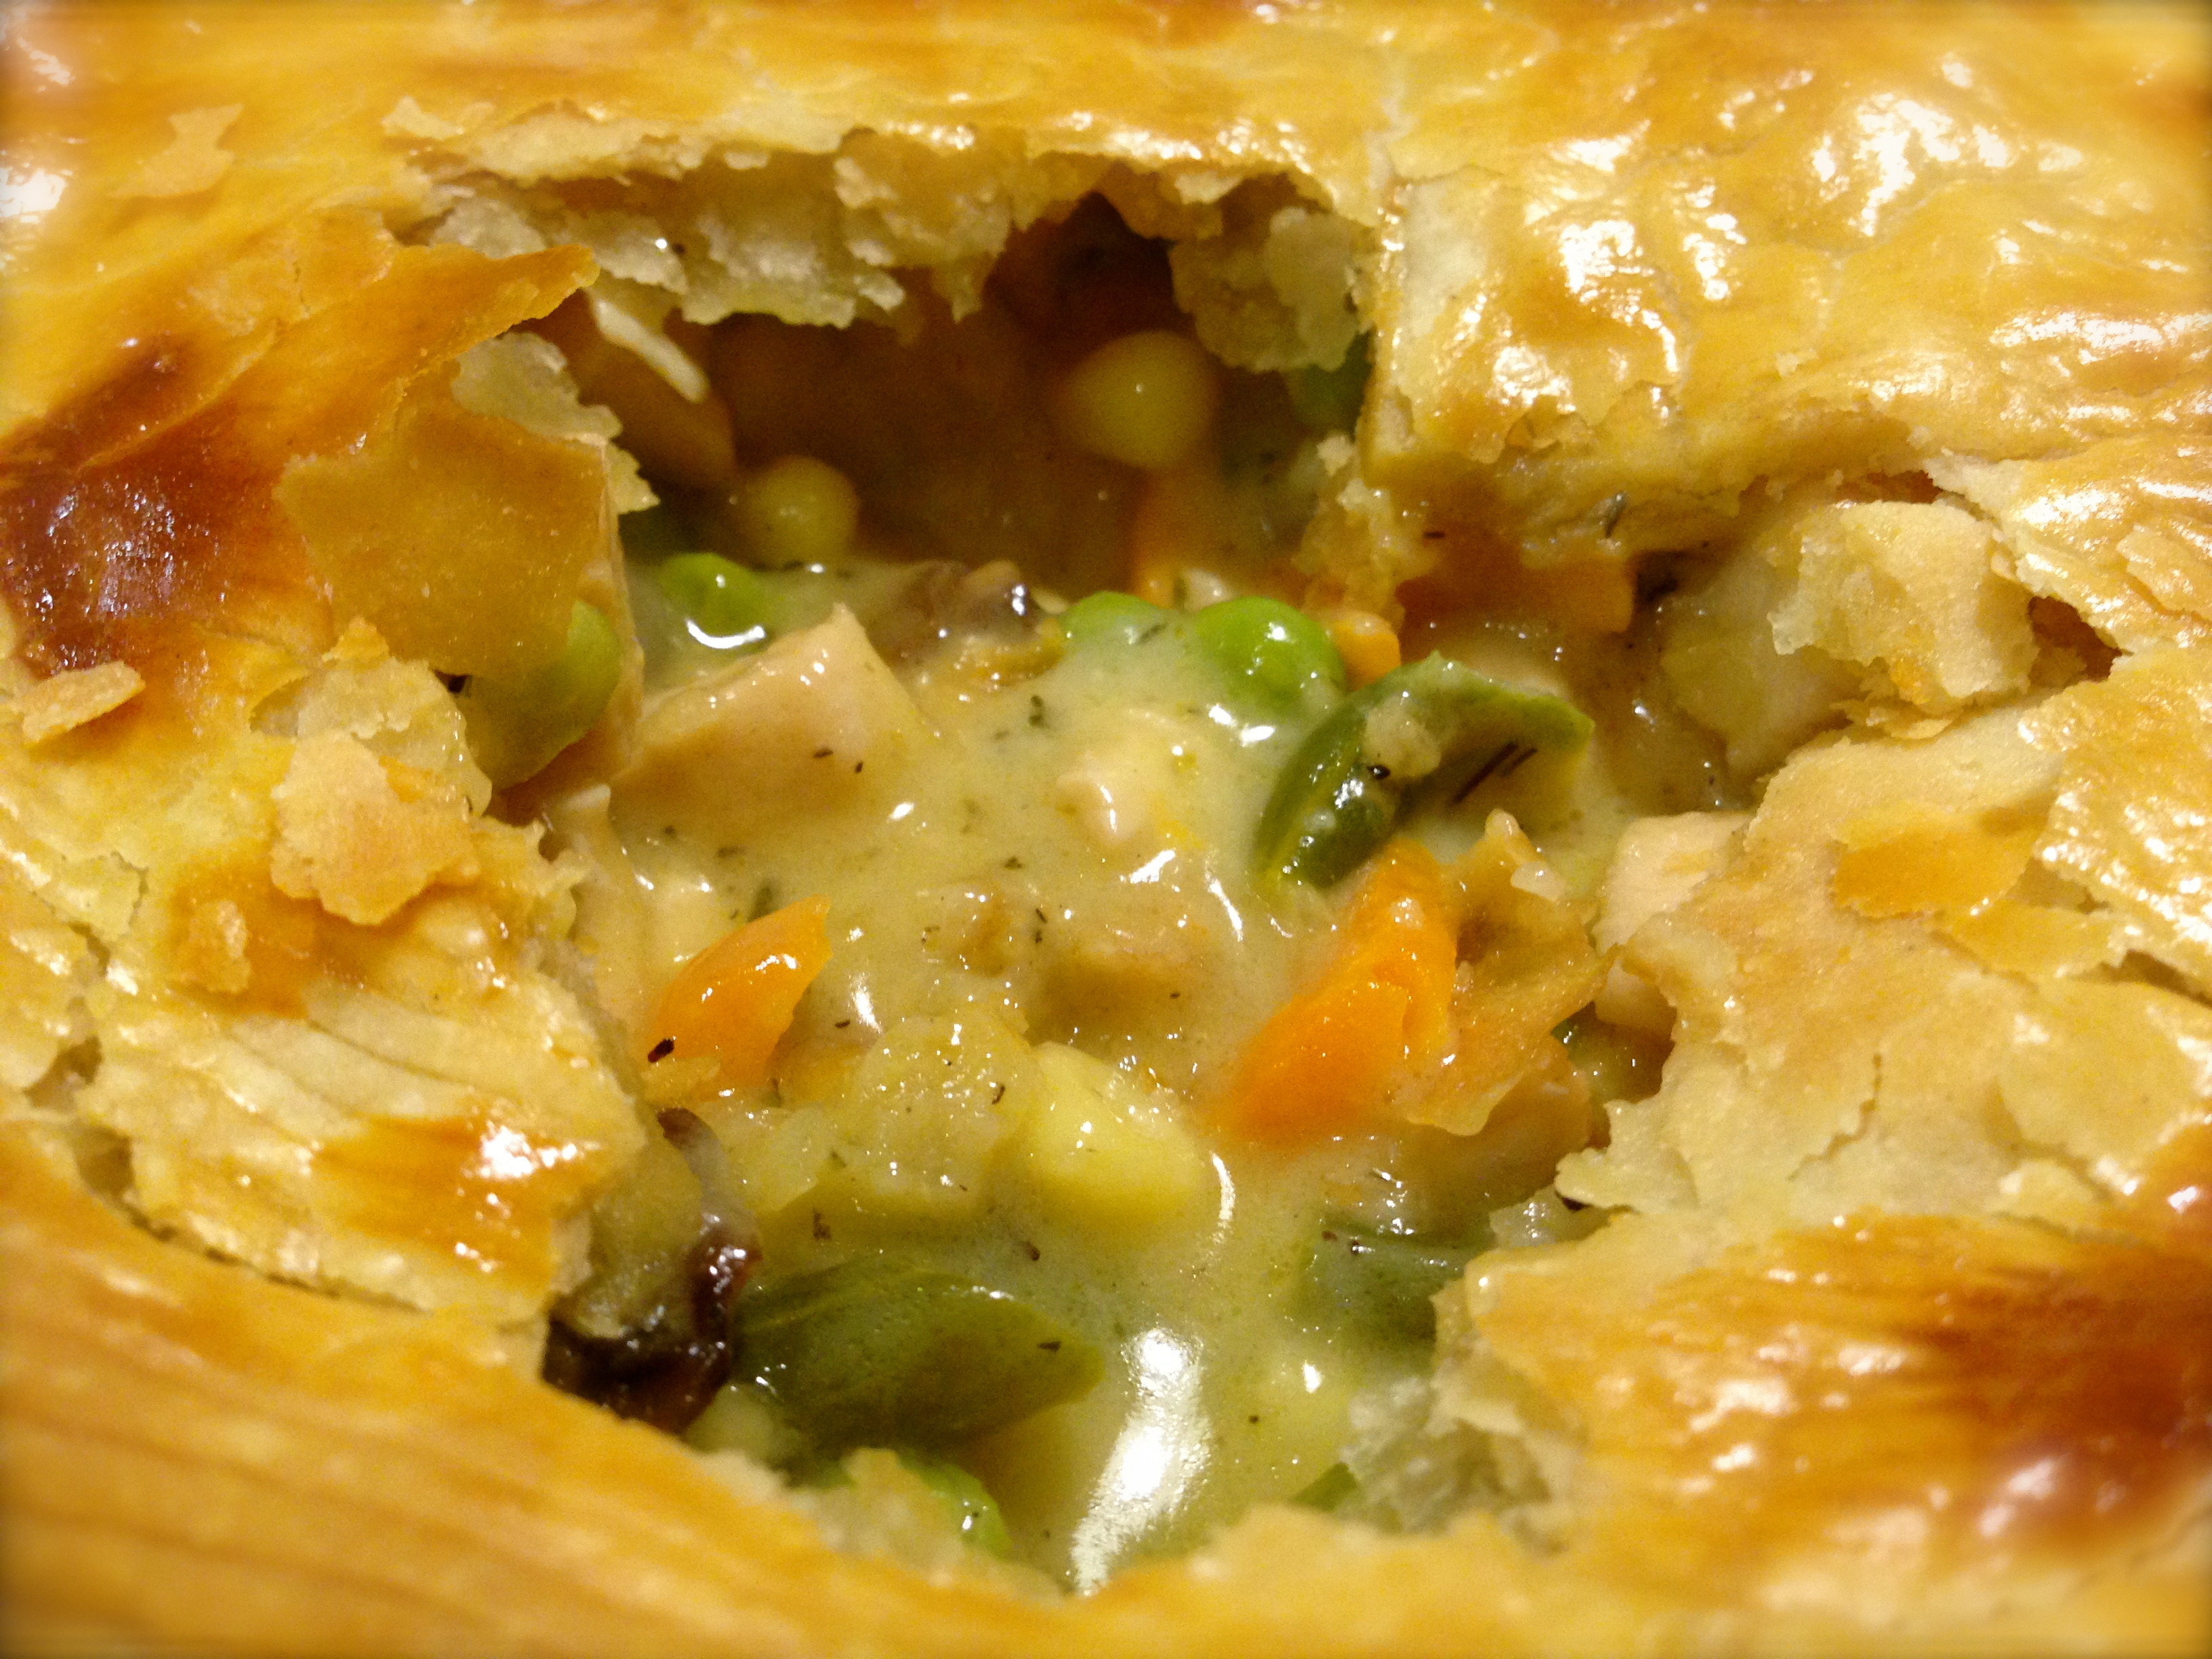
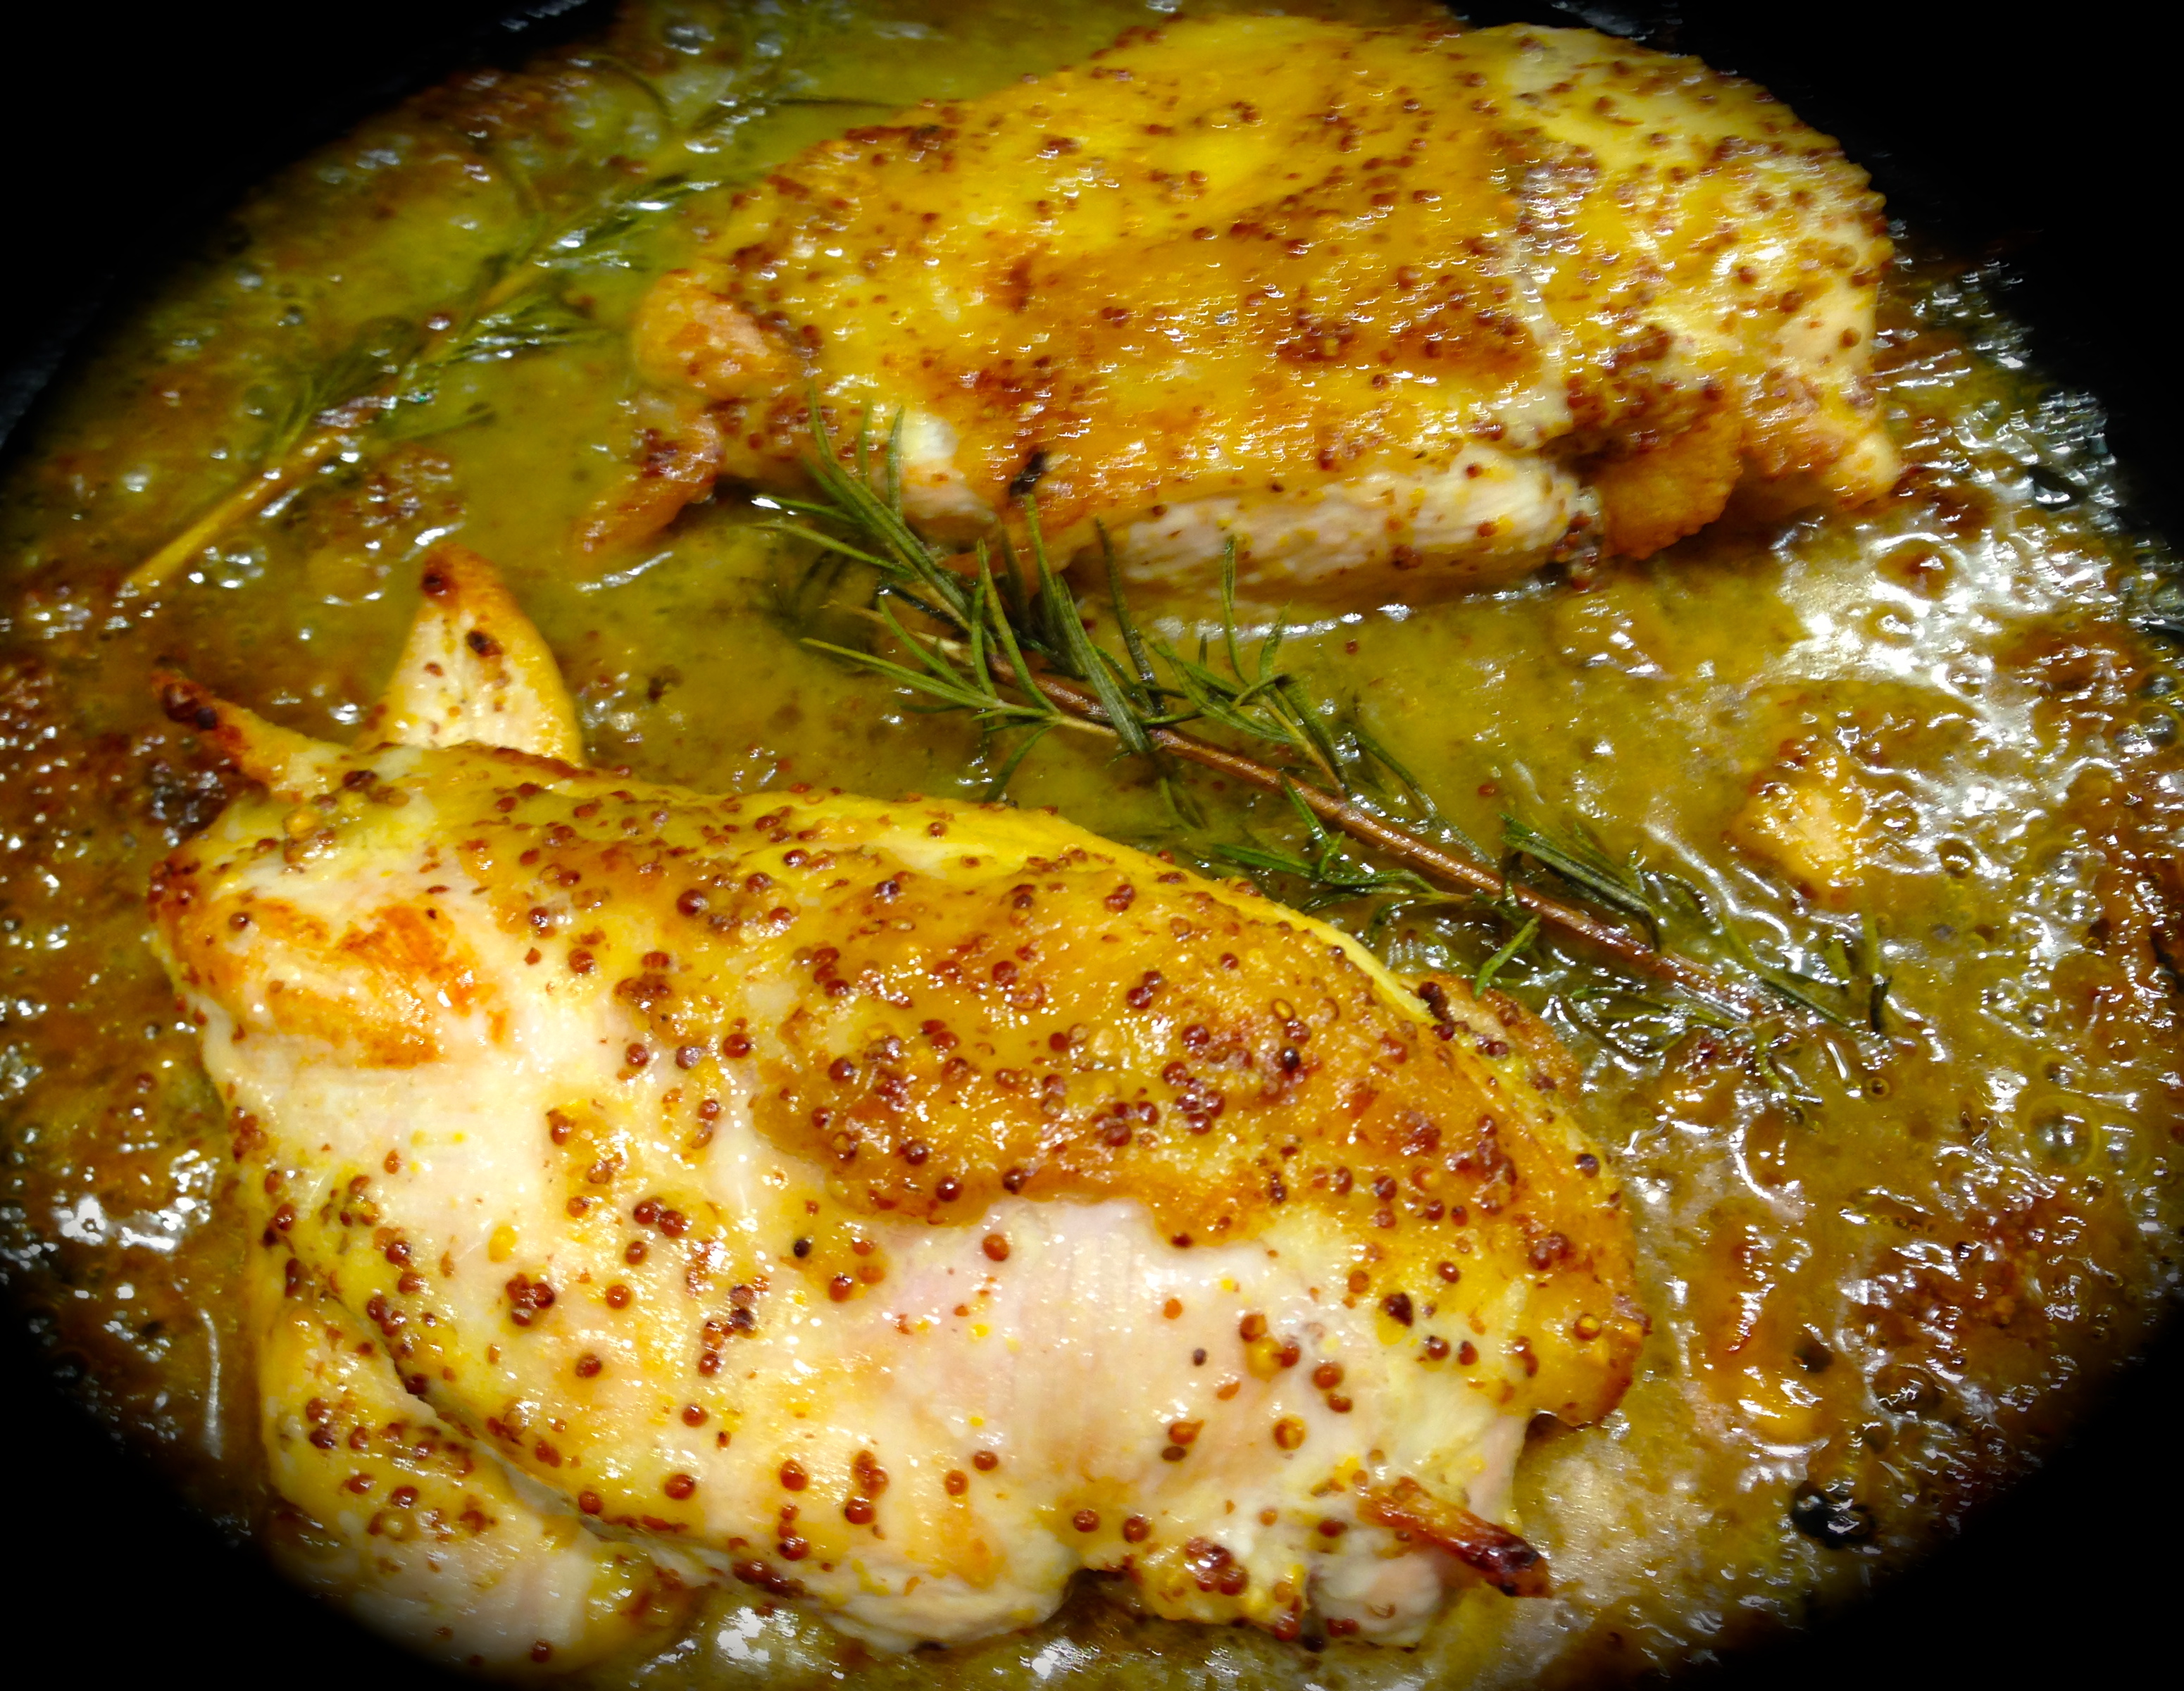
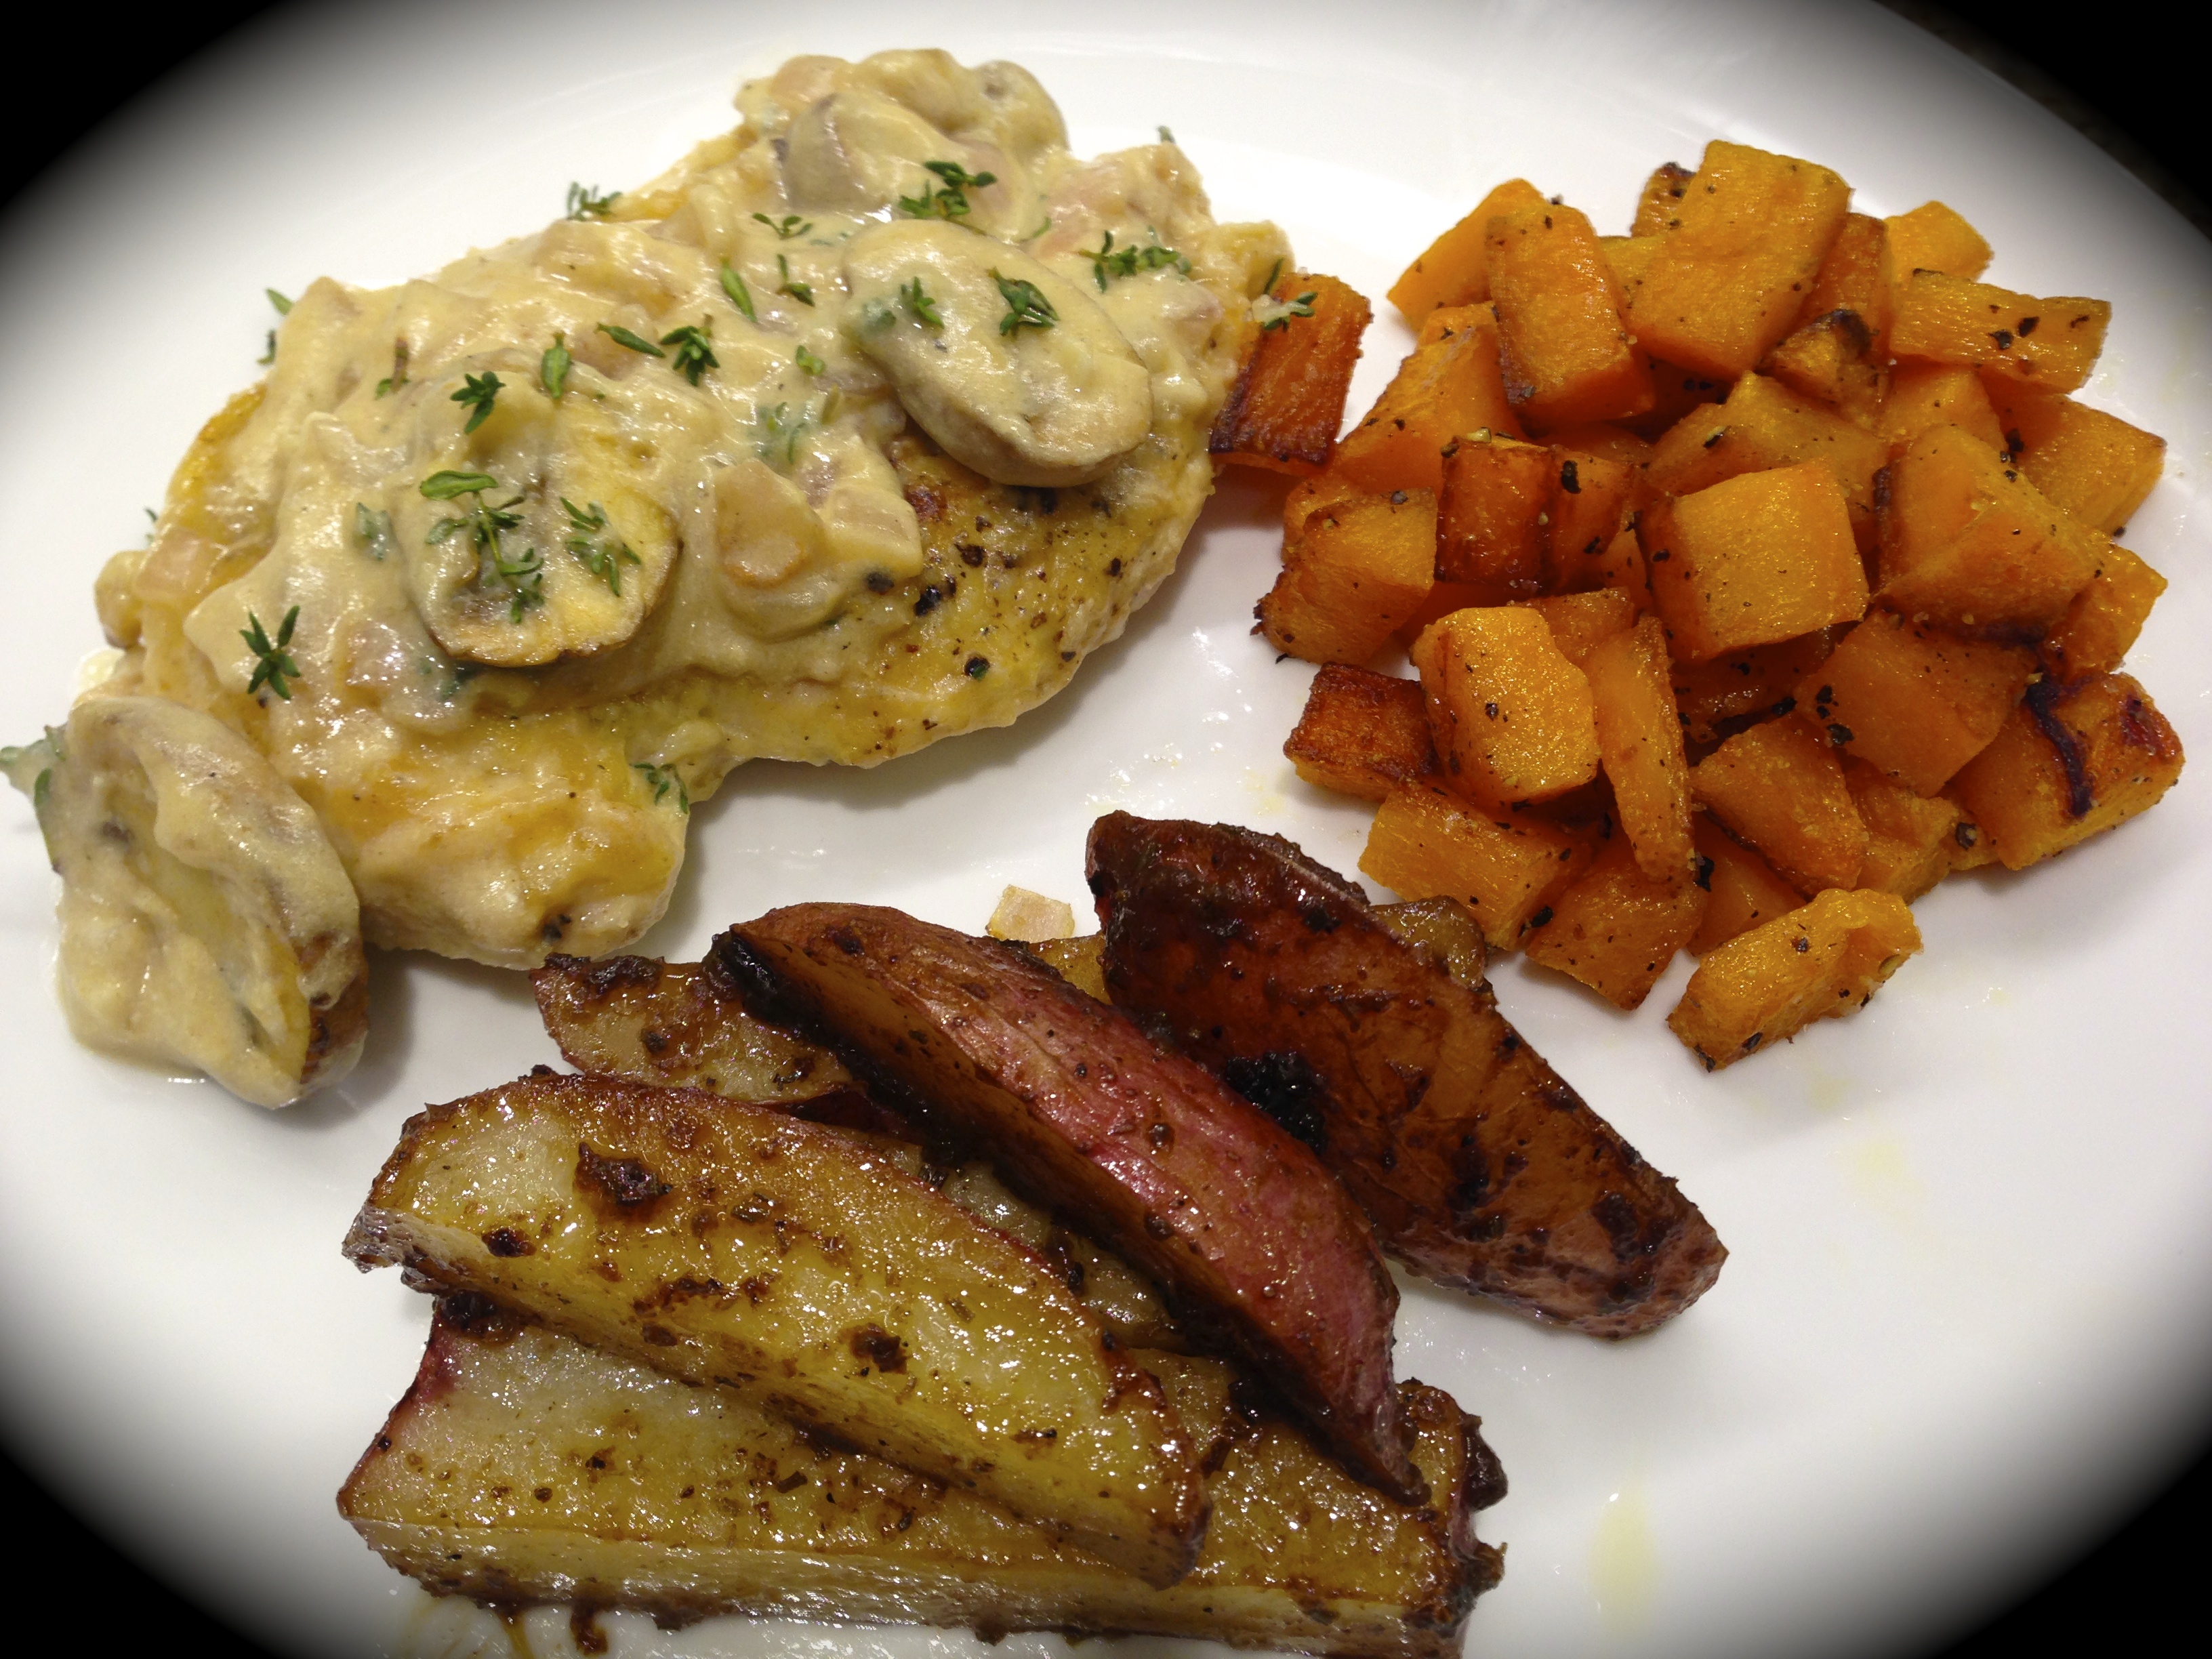
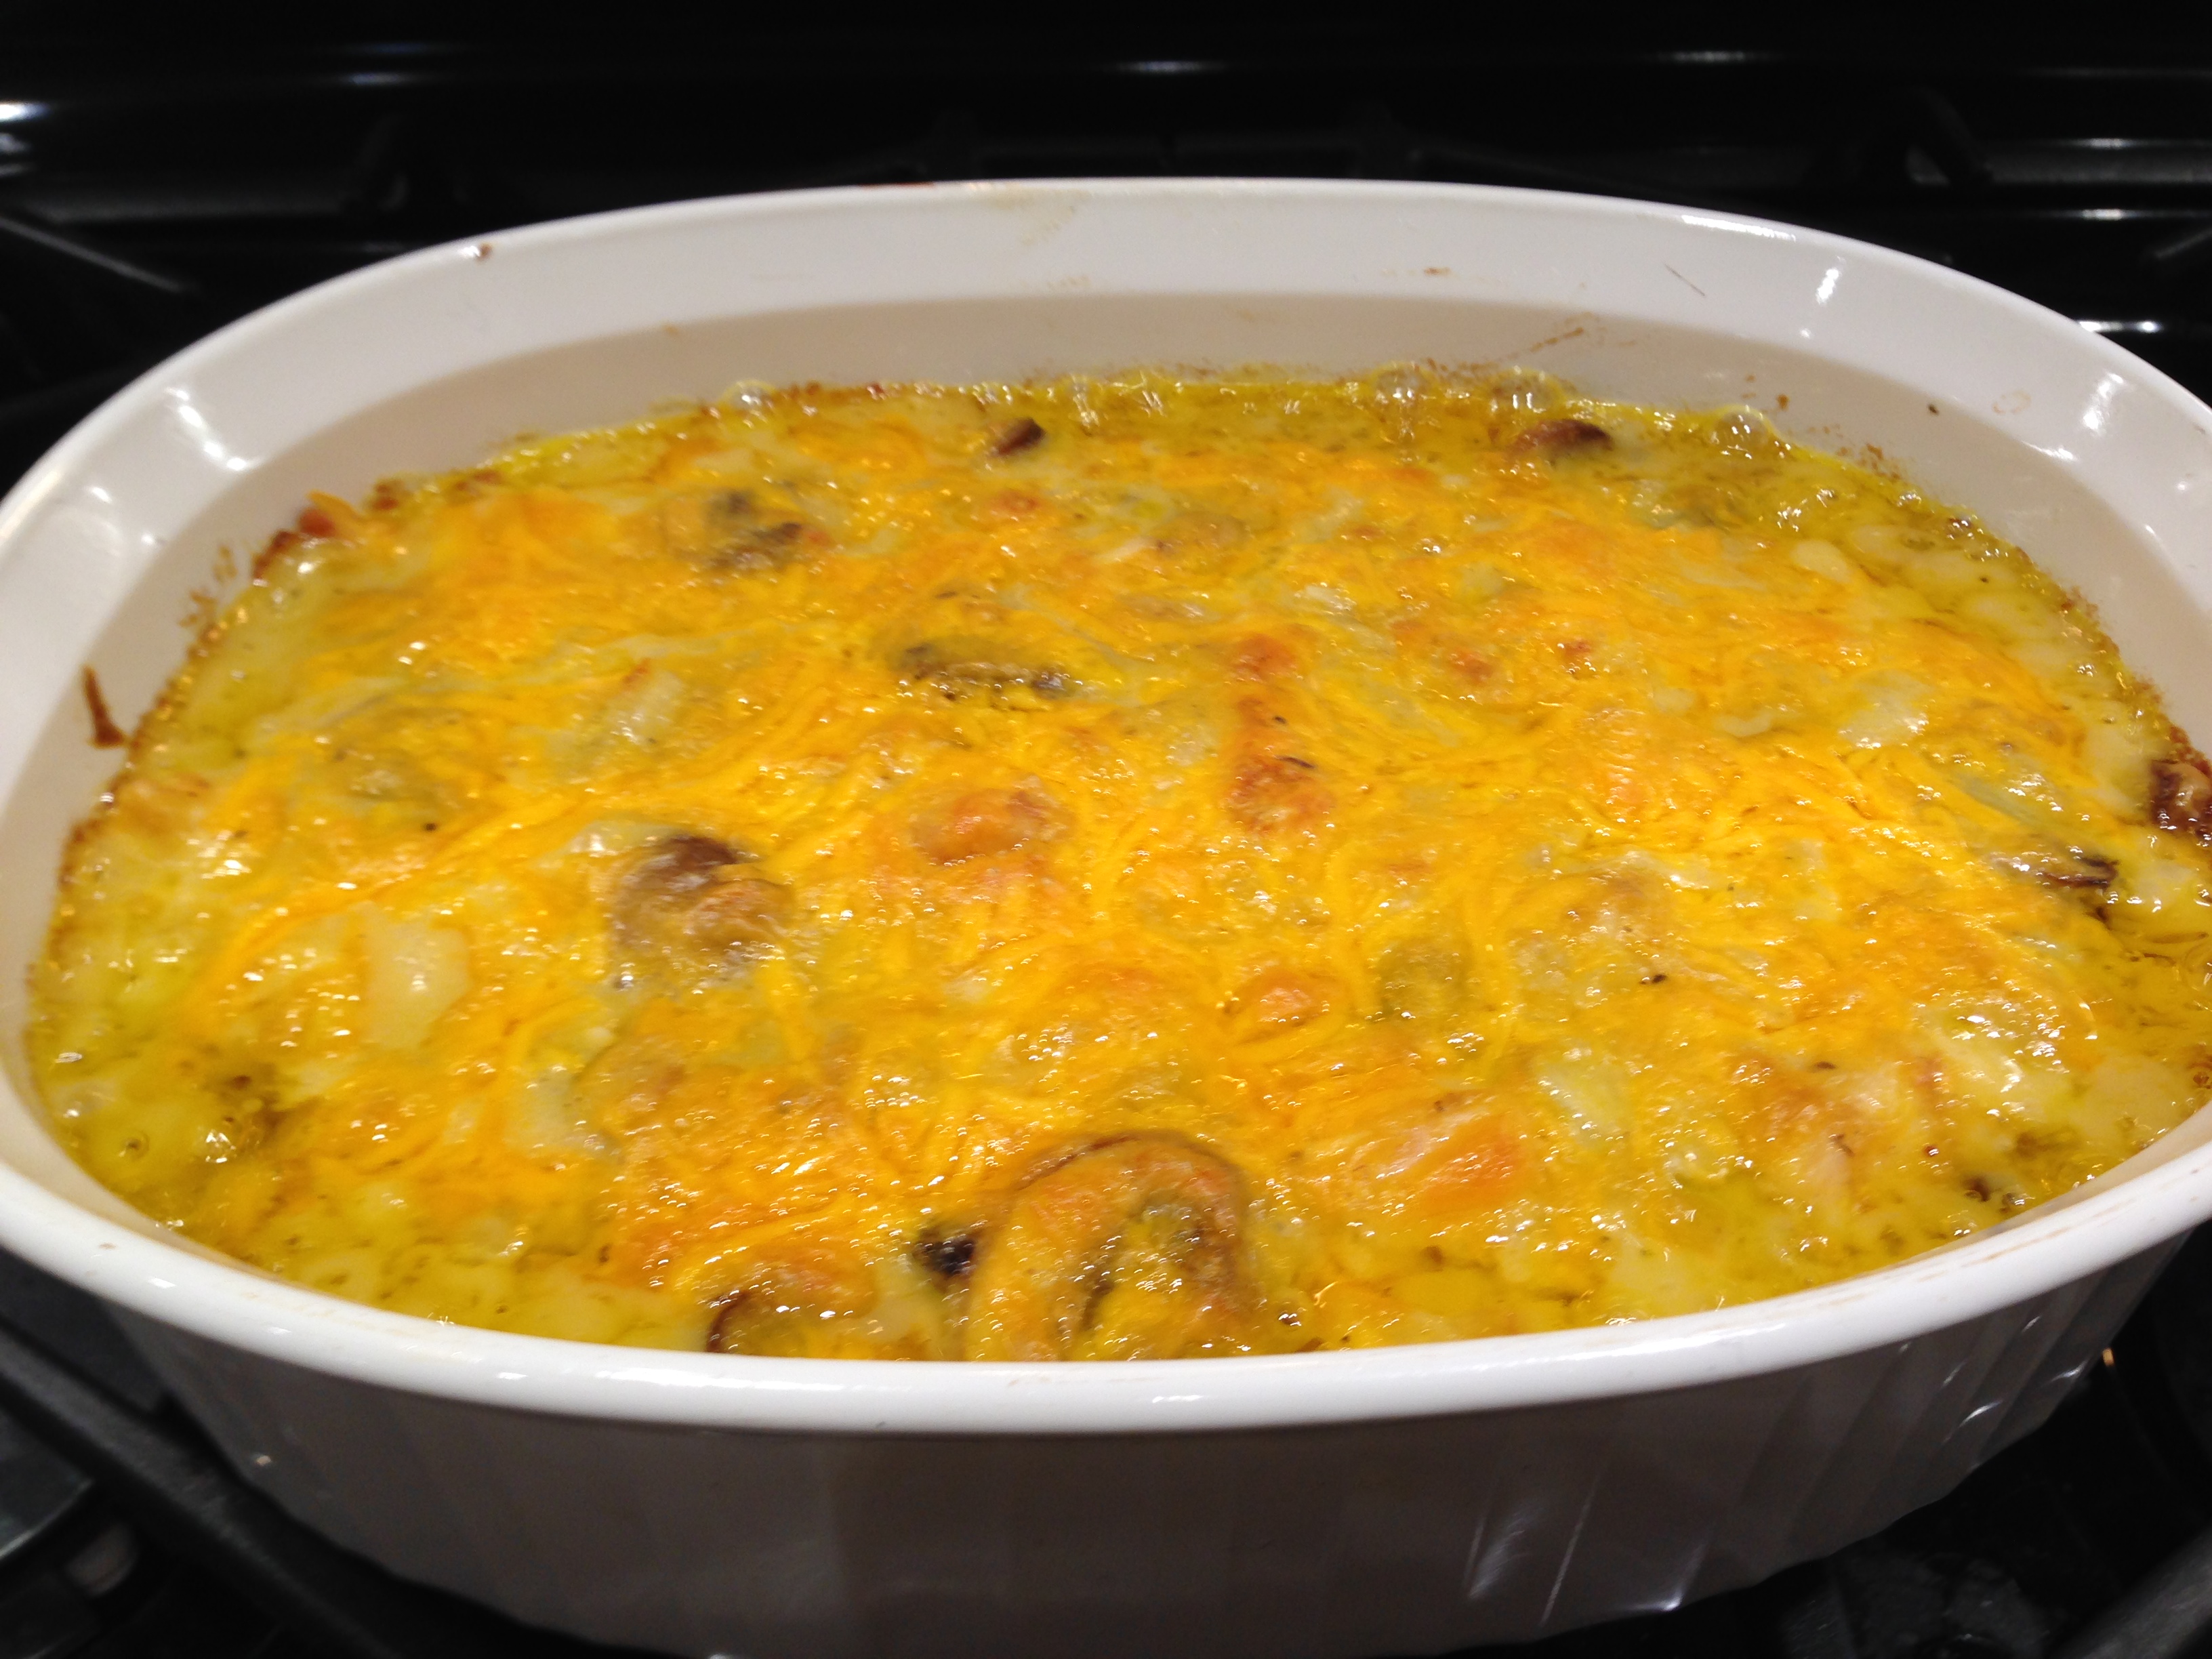
And this is how they looked coming out…

I’m not sure what the “demi glace” sauce was, but if you’ve ever had chicken marsala you know this sauce did not have nearly the depth of flavor it should have. Rather it was just a hint of something, and I’m not sure it was marsala. Instead I wish they had prepared some sort of marsala sauce and not a quick substitute. I wanted the sauce to be thicker and richer. Maybe their attempt to make it thicker and richer had something to do with the cream cheese, but it certainly didn’t work.

So, would I try a meal kit again. Yes, I think I would before making any final decisions. It certainly was convenient. I enjoyed the juicy chicken breast with the mushrooms and the peas but the rest was not that great.

You know what – I have an even better idea. Why don’t you try my EASY CHICKEN MARSALA recipe. it was one of the first recipes I posted when I started this blog in 2013. I guarantee you will like it more than this! And when I try another meal kit I will blog about how it turned out. I haven’t completely soured my opinion on this meal convenience yet. And if you have any thoughts or stories about meal kits that you’d like to share, I am all ears!

Slow Cooker Lemon Garlic Butter Chicken…

I saw a version of this recipe online and it intrigued me. First of all I love my slow cooker. It has become a more versatile tool than it was years ago when you’d put in some meat and veggies, make some concoction usually comprised of some sort of cream soup and let it cook for hours until you had a tasteless soggy mess. Slow cookers can produce some great meals but you have to know how to use them. And just like your oven, no two brands of slow cookers are alike so you need to know your slow cooker.

I have two All-Clad slow cookers, a 7 quart and a 5 quart. For smaller meals when I cook for one or two I prefer the 5 quart, plus it has the versatility of browning food in its own sleeve which is very convenient. I find the All-Clad slow cookers to have a nice moderate temperature. Some slow cookers boil your food, even on low. I don’t find that to be the case with mine. I get a nice even slow cooking process and so if I gauge my cooking times correctly I do not wind up with dried out tasteless food.

Enough about slow cookers, let’s talk about slow cooker lemon garlic butter chicken…

Lesson Learned 1 – Recipes are designed to be guides, not gospel: The instructor in one of my more recent cooking classes said this and it really struck home with me. When you are making something savory, make the recipe your own. You don’t have to follow the recipe exactly ingredient by ingredient. Now mind you, this is not the case when you’re baking – you need to be precise with those recipes. But savory recipes can take on a life of their own depending upon your likes and dislikes. So feel free to experiment. Some of my most popular recipes were a result of doing just that.

The version I worked from called for 1/3 teaspoon of red pepper flakes. I did not want the heat so I eliminated that ingredient. I also added less butter and more lemon zest than recommended in the recipe and I added some carrots to the slow cooker which served as a base for the chicken thighs.

Lesson Learned 2 – Avoid the common mistake of long cooking times with your slow cooker: This is all a part of knowing your slow cooker as I mentioned above. I find, mostly where chicken recipes are concerned, that slow cooker recipes have cooking times that are too long. The recipe that I based this on called for 4 hours on high or 6-8 hours on low. I cooked my chicken for 5 hours on low and the result was perfect. Normally with beef recipes I find the recommended cooking times to be more accurate. But be careful with chicken in a slow cooker. You can really dry it out by cooking it too long. If you’re not sure if your chicken is done take its internal temperature. The safe internal temperature for cooked chicken is 165 degrees.

Lesson Learned 3 – Yes, you must brown your chicken first to get it to look like my pictures: The one drawback of a slow cooker is that it does not brown meat when it is slow cooking. The good news is there are now slow cookers on the market where you can brown your meat in its own sleeve and place the sleeve back in the slow cooker to finish the rest. These slow cookers tend to be a little more expensive but are a great convenience.

I browned my chicken thighs for about 4 minutes with the skin side down. I just browned them on one side and drained them on paper towels before adding them to the slow cooker. Some people don’t care if their meat looks grey and skip the browning process. But it you want your chicken thighs to look like mine, you’ll need to brown them first.

Lesson Learned 4 – I prefer using chicken thighs in a slow cooker: I find chicken thighs to be more forgiving, especially if you overcook them in a slow cooker. So if you feel it absolutely necessary to cook them for 6 hours on low use chicken thighs. The result will be much better.

Lesson Learned 5 – Slice the garlic in thin slices and place the slices on top of the chicken: I found that to be the best way to infuse the garlic into the meat. If you want you can also put some garlic slices under the meat as well. Once the chicken was done I removed the garlic slices and disposed of them. But you can serve them as well. I’m just not a big fan of eating garlic that way. You can also just mince the garlic and sprinkle it on top of the chicken. The choice is yours.

Lesson Learned 6 – Baste the chicken in the drippings before serving: This recipe makes a great lemon butter sauce. Baste the chicken thighs in that sauce before plating them. You’ll be glad you did.

And that’s it. This is a very basic recipe with a minimal amount of ingredients. You can skip adding the carrots if you want, or you can add some onions under the chicken as well. The choice is yours. I definitely enjoyed this recipe and will make it again. Let me know what you think!

Slow Cooker Lemon Garlic Butter Chicken...

  • Servings: 2-4
  • Difficulty: Easy
  • Print

INGREDIENTS:

4 chicken thighs with skin on

1 Tbs. vegetable oil

1 tsp. butter

1 tsp. garlic powder

1 tsp. onion powder

1/2 tsp. paprika

1 tsp. Italian seasoning

4 garlic cloves sliced thin

1/2 stick of butter diced

The zest of one medium size lemon (or two small)

The juice of one medium size lemon (or two small)

1/3 cup low sodium chicken broth

Salt and pepper to taste

4 carrots, peeled and cut into chunks

Chopped fresh flat leaf parsley for garnish, optional

Lemon slices for garnish, optional

DIRECTIONS:

Heat the vegetable oil and butter in a pan on the stove. Brown the chicken thighs skin side down for approximately 4-5 minutes. Remove the chicken thighs and drain on a paper towel. Set them aside.

Place carrots in the bottom of the slow cooker. Combine the chicken broth, lemon juice and zest. Place thighs on top of the carrots and pour the chicken broth mixture over them.

In a small bowl combine the Italian seasoning, onion powder, garlic powder, and paprika with some salt and pepper. Sprinkle the spice mixture over the chicken thighs. Top them with the garlic and dot them with the diced butter.

Cook on low for 5 hours. Baste the chicken thighs with the lemon butter sauce before removing them from the slow cooker. Garnish with lemon slices and parsley.


Cider Braised Chicken With Bacon and Apples…

Finally Fall is in the air. I don’t know what it’s been like where you live, but here in Colorado it was unusually hot all summer long with 90 degree days still happening well into September. But now it’s starting to look like the weather is becoming more Fall-like and I couldn’t be happier.

This is my favorite time of year for a variety of reasons – the leaves begin to change into an array of gorgeous colors, the air is crisp and clean, and it’s finally time to think about Fall comfort food, of which this recipe is an absolutely perfect example.

Not only does this recipe scream comfort food but it’s also extremely easy to make. So let’s talk cider braised chicken with bacon and apples…

Lesson Learned 1 – Remove the fatty parts on the chicken thighs: I used boneless skinless chicken thighs in this recipe but even with that you’ll find pieces of fat are still on the meat. Make sure you use a sharp knife and remove, as much as you can, the fatty pieces. If you leave a little bit that’s fine. That will help flavor the sauce.

Lesson Learned 2 – You can choose whether you want to peel your apples or not: I made this recipe with the skins on but you can peel them if you prefer. Some people have a difficult time digesting the skins. The good thing is it doesn’t make any difference whether or not the apples are peeled.

Lesson Learned 3 – Make sure you reduce the sauce by half twice: Once you add the brandy you’ll need to reduce the mixture to half. Then when you add the cider you’ll need to reduce it again by half. This leaves you with a rich, luscious sauce. And if you don’t have apple brandy it’s no big deal. Just add an additional half cup of apple cider instead. Doing it that way will only require you to reduce the liquid once.  You can see by the pictures below that the reduced braising liquid is thicker and the ingredients much more visible.

The non-reduced braising liquid

The reduced braising liquid

Lesson Learned 4 – You don’t have to use a lot of dishes to make this meal: Once the chicken and apples have been cooked just lay them out on a sheet pan, making sure they are separated.  Then when the braising liquid is done put the meat back into the pot first. The apples will be added back a little later. (I recommend using an enamel coated cast iron dutch oven for this recipe). Combine all the ingredients after you simmered the chicken in the sauce for about 5 minutes and you’re basically done. You can also serve this family style in the cast iron dutch oven you used to make everything. That will give serving a nice rustic touch and it’s perfect for a Fall party or family meal. Just make sure you let your family or guests know that the pan will be very hot.

I just love this recipe. It is so flavorful and screams Fall comfort food. Try this one and let me know what you think…

Cider Braised Chicken With Bacon And Apples...

  • Servings: 4
  • Difficulty: Easy
  • Print

INGREDIENTS

2 Tbs. vegetable oil

1 1/2 pounds boneless skinless chicken thighs

3 Granny Smith apples cored and peeled (peeling is optional)

5 slices of thick cut bacon sliced into 1/4 inch lardons

1 yellow onion diced thick

1 large or 2 small cloves of garlic, minced

1/2 cup apple brandy

2 cups apple cider

2 Tbs. whole grain mustard

1/4 cup heavy whipping cream

1 Tbs. finely chopped sage

Kosher salt and freshly cracked pepper to taste

DIRECTIONS:

Put the vegetable oil in a large dutch oven that has warmed over medium heat. Pat the chicken dry and generously season with salt and pepper. Add the chicken to the pan and cook until browned on both sides, about 5 minutes on each side. Once you’ve placed the chicken in the pan do not move it until it is ready to flip over. Place the chicken on a sheet pan.

Add the apples to the dutch oven and saute, stirring frequently until just softened and caramelized, about 5-7 minutes. Put the apples on the same sheet pan as the chicken, keeping the two separated

Add the bacon and onions to the pan stirring occasionally until the onions are tender and the bacon fat has rendered, but the bacon is not crisp. Add the garlic and cook until fragrant, about 1 minute.  Stir in the brandy and reduce the mixture by half. Stir in the apple cider and scrape the bottom of the dutch oven with a wooden spoon the de-glaze the pan. Bring to a boil and continue to cook until the mixture is reduced by half. Add the chicken into the pan, stir and cover. Simmer for about 5 minutes. Stir in the mustard, cream, sauteed apples and sage. Simmer uncovered for about 10 minutes. Taste and adjust seasoning if needed.

Serve in the dutch oven but make sure you family or guests know that the dutch oven will be very hot. Or, divide the braised chicken and apples among 4 plates and serve immediately.


Chicken, Carrot and Fried Onion Casserole

I just love casseroles. During the winter months there’s nothing better than having a casserole baking away in the oven. The smells, the hot and bubbly goodness and the combination of flavors is simply comfort food heaven. And, if you know me, you know I also love chicken. So what can be better than a chicken casserole? Well, there is one thing and that’s a chicken casserole topped with fried onions – yummo!

I really do try to balance what I eat and so I’ll warn you up front this recipe has the potential to be an artery clogger. But I also know that the key to good living is moderation so every once in a while you can walk on the wild side with something like this. Plus this recipe is versatile, especially where adding vegetables is concerned. And making this is a good way to get come of those vegetables into your children – they are beautifully masked in the deliciousness of the casserole and fried onions.

So let’s talk chicken, carrot and fried onion casserole

Sauteed Carrots

Lesson Learned 1: I used carrots but you can be creative where the vegetables in this recipe are concerned: My husband prefers eating carrots, butternut squash, acorn squash and cauliflower – that’s why you’ll see me using a lot of them in my recipes. But you can use a variety of vegetables.

I chose fresh baby carrots and chopped them into 1/4 inch coins. You can add them to this recipe as is, but I chose to saute mine in butter before adding them to the other ingredients as my husband likes his carrots soft. The cooking time for this recipe will not achieve soft carrots (they will be crisp tender) so I had to give the carrots a head start. But if you like your carrots crisp tender just add them to the other ingredients and skip the sauteing part. The key is cutting them small enough so they’re not rock hard when the casserole is done baking.

You can also use frozen vegetables. Using frozen carrots or frozen mixed vegetables would work very well with this recipe in the allotted cook time. So do what your family loves or what you want your family to eat.

Shredded Chicken

Lesson Learned 2: This is a great recipe for using precooked chicken: Whether you’re trying to think about how to use some of your leftover cooked chicken, or buying a rotisserie chicken at the grocery store, using precooked chicken makes this recipe a breeze. My grocery store actually sells portions of precooked white meat chicken and I used that a lot in my recipes. You can either cut up the chicken into bite size pieces or shred it like I did. Either way will work.

For a quick and delicious week night meal you can’t beat this recipe. You can even assemble it the night before or before going to work and pop it in the oven when you get home. If you do that, I would recommend taking the casserole out of the refrigerator asap and letting it sit on the counter for about a half an hour before putting it into the oven. That will remove some of the chill. You’ll have a better chance of cooking the casserole in the allotted time if it’s not ice cold when you put it in the oven.

Ready For The Oven

Enjoy this one. It’s a keeper!

Chicken Carrot And Fried Onion Casserole...

  • Servings: 6
  • Difficulty: Easy
  • Print

INGREDIENTS:

4 cups cooked shredded chicken

2 cups sliced carrots (cut into 1/4 inch coins)

1 cup shredded cheddar cheese

1 cup sour cream

1 cup mayonnaise

1 can cream of chicken soup

1-6oz. can of french fried onions

1 Tbs. butter, melted

Salt and pepper to taste

Cooking spray

DIRECTIONS:

Preheat oven to 350 (365 high altitude)

In a large skillet melt the butter and saute the carrots for about 10 minutes, flipping them at regular intervals. Remove them from heat and set aside.

While the carrots are sauteing, mix together in a large bowl the cheese, sour cream, chicken soup and mayonnaise. Once the carrots are cooked and slightly cooled fold them into the sour cream mixture along with the chicken until combined. Taste and add any salt and pepper as needed.

Spray a 9 inch square pan with cooking spray. Add the mixture to the pan and bake for 35-45 minutes. Once the casserole is hot and bubbly add the fried onions on top and continue to bake for an additional 10 minutes.

Let the casserole stand for 5 minutes and serve.

The Cooked Casserole

Homemade Chicken Salad…

You may have noticed over the years that I love chicken. I could eat chicken every day of the week and am always looking at either new recipes or how to perfect old ones. This is the latter. I used to make a very basic chicken salad with grapes, green onions, mayo, salt and pepper and although it wasn’t bad it wasn’t the kind that was over the top in flavor. This recipe is, and I am so excited to share it.

It is not unusual for me to have leftover chicken in the house but this time I made it as the main event and not as a way to use leftovers. But either way, these combination of ingredients makes a chicken salad that you’ll make again and again.

So let’s talk homemade chicken salad…

Chicken Salad Ingredients

Lesson Learned 1 – Use this recipe as a base for what the amount of chicken you have: The recipe I am providing produces enough chicken salad to feed 8 people but can be adjusted for use with lesser amounts of leftover chicken. Just reduce the ingredients according to the percentage of chicken you may have on hand. To make the entire recipe I recommend using a 3 – 4 pound rotisserie chicken, cut up. When I made it initially I had about 2 pounds of cooked chicken pieces, so I reduced the ingredients slightly (remember this is not baking and so it’s ok to fiddle with the amounts) and it came out perfectly. You may have to step out of your comfort zone a little if you decide to adjust the ingredients, but frankly I can’t see that you’ll hurt the chicken salad doing whatever you choose as long as you are somewhat mindful of the overall portions in relation to the full recipe.

Lesson Learned 2 – No matter how much you want to eat it immediately, let the chicken salad sit in the refrigerator for at least an hour and, if you can, overnight: Once the chicken salad is made it looks so good you’ll want to eat it on the spot. I remember I tasted it right away and wasn’t all that enamored with it. But I know from experience that recipes like this require the ingredients to get acquainted in order to fully develop their flavors and so I let it sit overnight. The next day I couldn’t believe the difference in the taste. I was mostly struck by the flavor of the dill which I could hardly taste when I first made it but could really taste after the chicken salad rested overnight.

It wasn’t only the dill flavor that was different – the combination of flavors fully developed and complimented one another to the point that I felt I could eat the whole bowl right on the spot. So please, when you make this, give the ingredients a chance to fully develop. You won’t be sorry you did!

Lesson Learned 3 – You can also add slivered almonds to this recipe: Many recipes I researched included thinly sliced almonds as one of the ingredients. You can certainly add them to this recipe. I did not use them because my husband has a hard time with them – but I wanted to let you know that they are certainly an option for you.

Not a lot of lessons learned on this one as you basically combine all the ingredients and let them sit for a period of time. But this is a great recipe and I’m sure if you try it it’ll be your go-to chicken salad recipe…

Homemade Chicken Salad...

  • Servings: 8
  • Difficulty: Easy
  • Print

INGREDIENTS:

3 – 4 lb. rotisserie chicken, cut into bite size pieces

3/4 cup seedless red grapes, halved

2 celery ribs, diced

3-4 scallions, chopped (including the green parts)

2 Tbs. fresh dill, chopped

1 Tbs. fresh flat leaf parsley, chopped

1 cup mayonnaise

1 lemon, juiced

1 Tbs. Dijon mustard

Salt and pepper to taste

DIRECTIONS:

In a large bowl combine the chicken, grapes, celery, scallions, dill and parsley. In another bowl combine the mayonnaise, lemon juice and mustard. Add the mayo mixture to the chicken mixture and carefully stir until mixed. Taste and season with salt and pepper as desired.

Cover with plastic wrap and refrigerator for minimally an hour and preferably over night. Great for sandwiches and salads.


Creamy Chicken And Cauliflower Casserole…

I love casseroles, especially during the winter time. I find them to be the true definition of comfort food. And this particular recipe is definitely a throw back. It features all of the ingredients your grandma used to make a quick but delicious meal. And this meal is versatile – you can serve it with pasta or as the main feature in a loaded baked potato or even with rice.  Anyway you look at it, if you want something fast and delicious this is the recipe for you!

What I particularly like about this recipe is that it’s quick to throw together and it’s a great way to use leftover chicken, and there always seems to be a lot of that in my refrigerator. As a matter of fact, I bet you already have all of the ingredients in this casserole in your pantry.

So let’s talk Creamy Chicken And Cauliflower Casserole…

Lesson Learned 1: The ingredients in this casserole are not written in stone: Not only is this casserole easy to put together but it can be made with a wide variety of ingredients. Think of the recipe I’m providing as a base for your imagination. But you can certainly add other things.  You can add some sliced mushrooms if you like. You can substitute frozen broccoli for cauliflower or include a little of both. Frozen peas and carrots would be a great addition as well. Wherever your imagination and pantry take you – this will always be a scrumptious comfort food casserole.

Lesson Learned 2 – If using frozen cauliflower (or broccoli) make sure it is slightly (or completely) thawed. You only bake this for 35-45 minutes and you want to make sure your vegetables are warmed all the way through. Smaller frozen vegetables such as pearl onions or peas and carrots can be added frozen. They will cook through within the allotted time. And if you used frozen chopped cauliflower or broccoli you can simply add them as well since the pieces will be smaller.

Lesson Learned 3 – Use more chicken than you think: I will suggest a certain amount in the recipe since I found that after I made mine I wound up adding more chicken to the leftovers. I initially used a pound and a half of cooked chicken pieces that I got at my local grocery store. But I felt the recipe needed more. I am going to recommend getting a rotisserie chicken from your grocery store and shredding the whole chicken for this recipe. You want to be able to see and taste chicken as the main ingredient and when you shred chicken it just seems to be a lot less for some reason.  If you don’t use a rotisserie chicken then I recommend using 3 large chicken breasts.

There are not a lot of lessons learned to impart on this one as this recipe is super easy. And the extra added bonus is the leftovers are equally scrumptious. You can’t go wrong with this one. Enjoy this easy to make winter comfort food!

Creamy Chicken And Cauliflower Casserole...

  • Servings: 6-8
  • Difficulty: Super Easy
  • Print

INGREDIENTS

1 store bought rotisserie chicken, cut up and shredded

2 cans cream of chicken and mushroom soup

1 cup mayonnaise

1 cup cheddar cheese, shredded

1 cup colby and monterey jack cheese, shredded

1 1/2 cups frozen cauliflower, thawed

1 cup frozen pearl onions

Salt and pepper to taste

DIRECTIONS

Preheat oven to 375 degrees.

Mix all the ingredients (chicken, soup, mayo, cheeses, cauliflower and onions) together. Add salt and pepper as needed.

Transfer the ingredients to a lightly greased 2-3 quart casserole dish. Bake for 35-45 minutes or until the casserole is bubbly.  Serve.

Slow Roasted Chicken And Rice…

My last blog was about my favorite carb “taters”. This blog is about my favorite protein, chicken! I kid you not, I could eat chicken every single night of the week. Nothing tops it in my book. So, as with “taters”, I am always on the lookout for new chicken recipes and the easier the better.

Let me tell you, nothing can be easier than this one. It is pretty much a retro classic and so good to make when you have little time to prepare something. The only glitch is it takes 2 1/2 hours to roast in the oven, but it’s one of those recipes where you prep it and forget it.

This recipe relies on canned soup, cream of chicken and cream of celery, and with a little water, rice, poultry seasoning and carrots you have an entire meal in one pan ready to serve all at the same time. Plus it creates a fabulous aroma in your kitchen. You can’t beat that.

So let’s talk slow roasted chicken and rice…

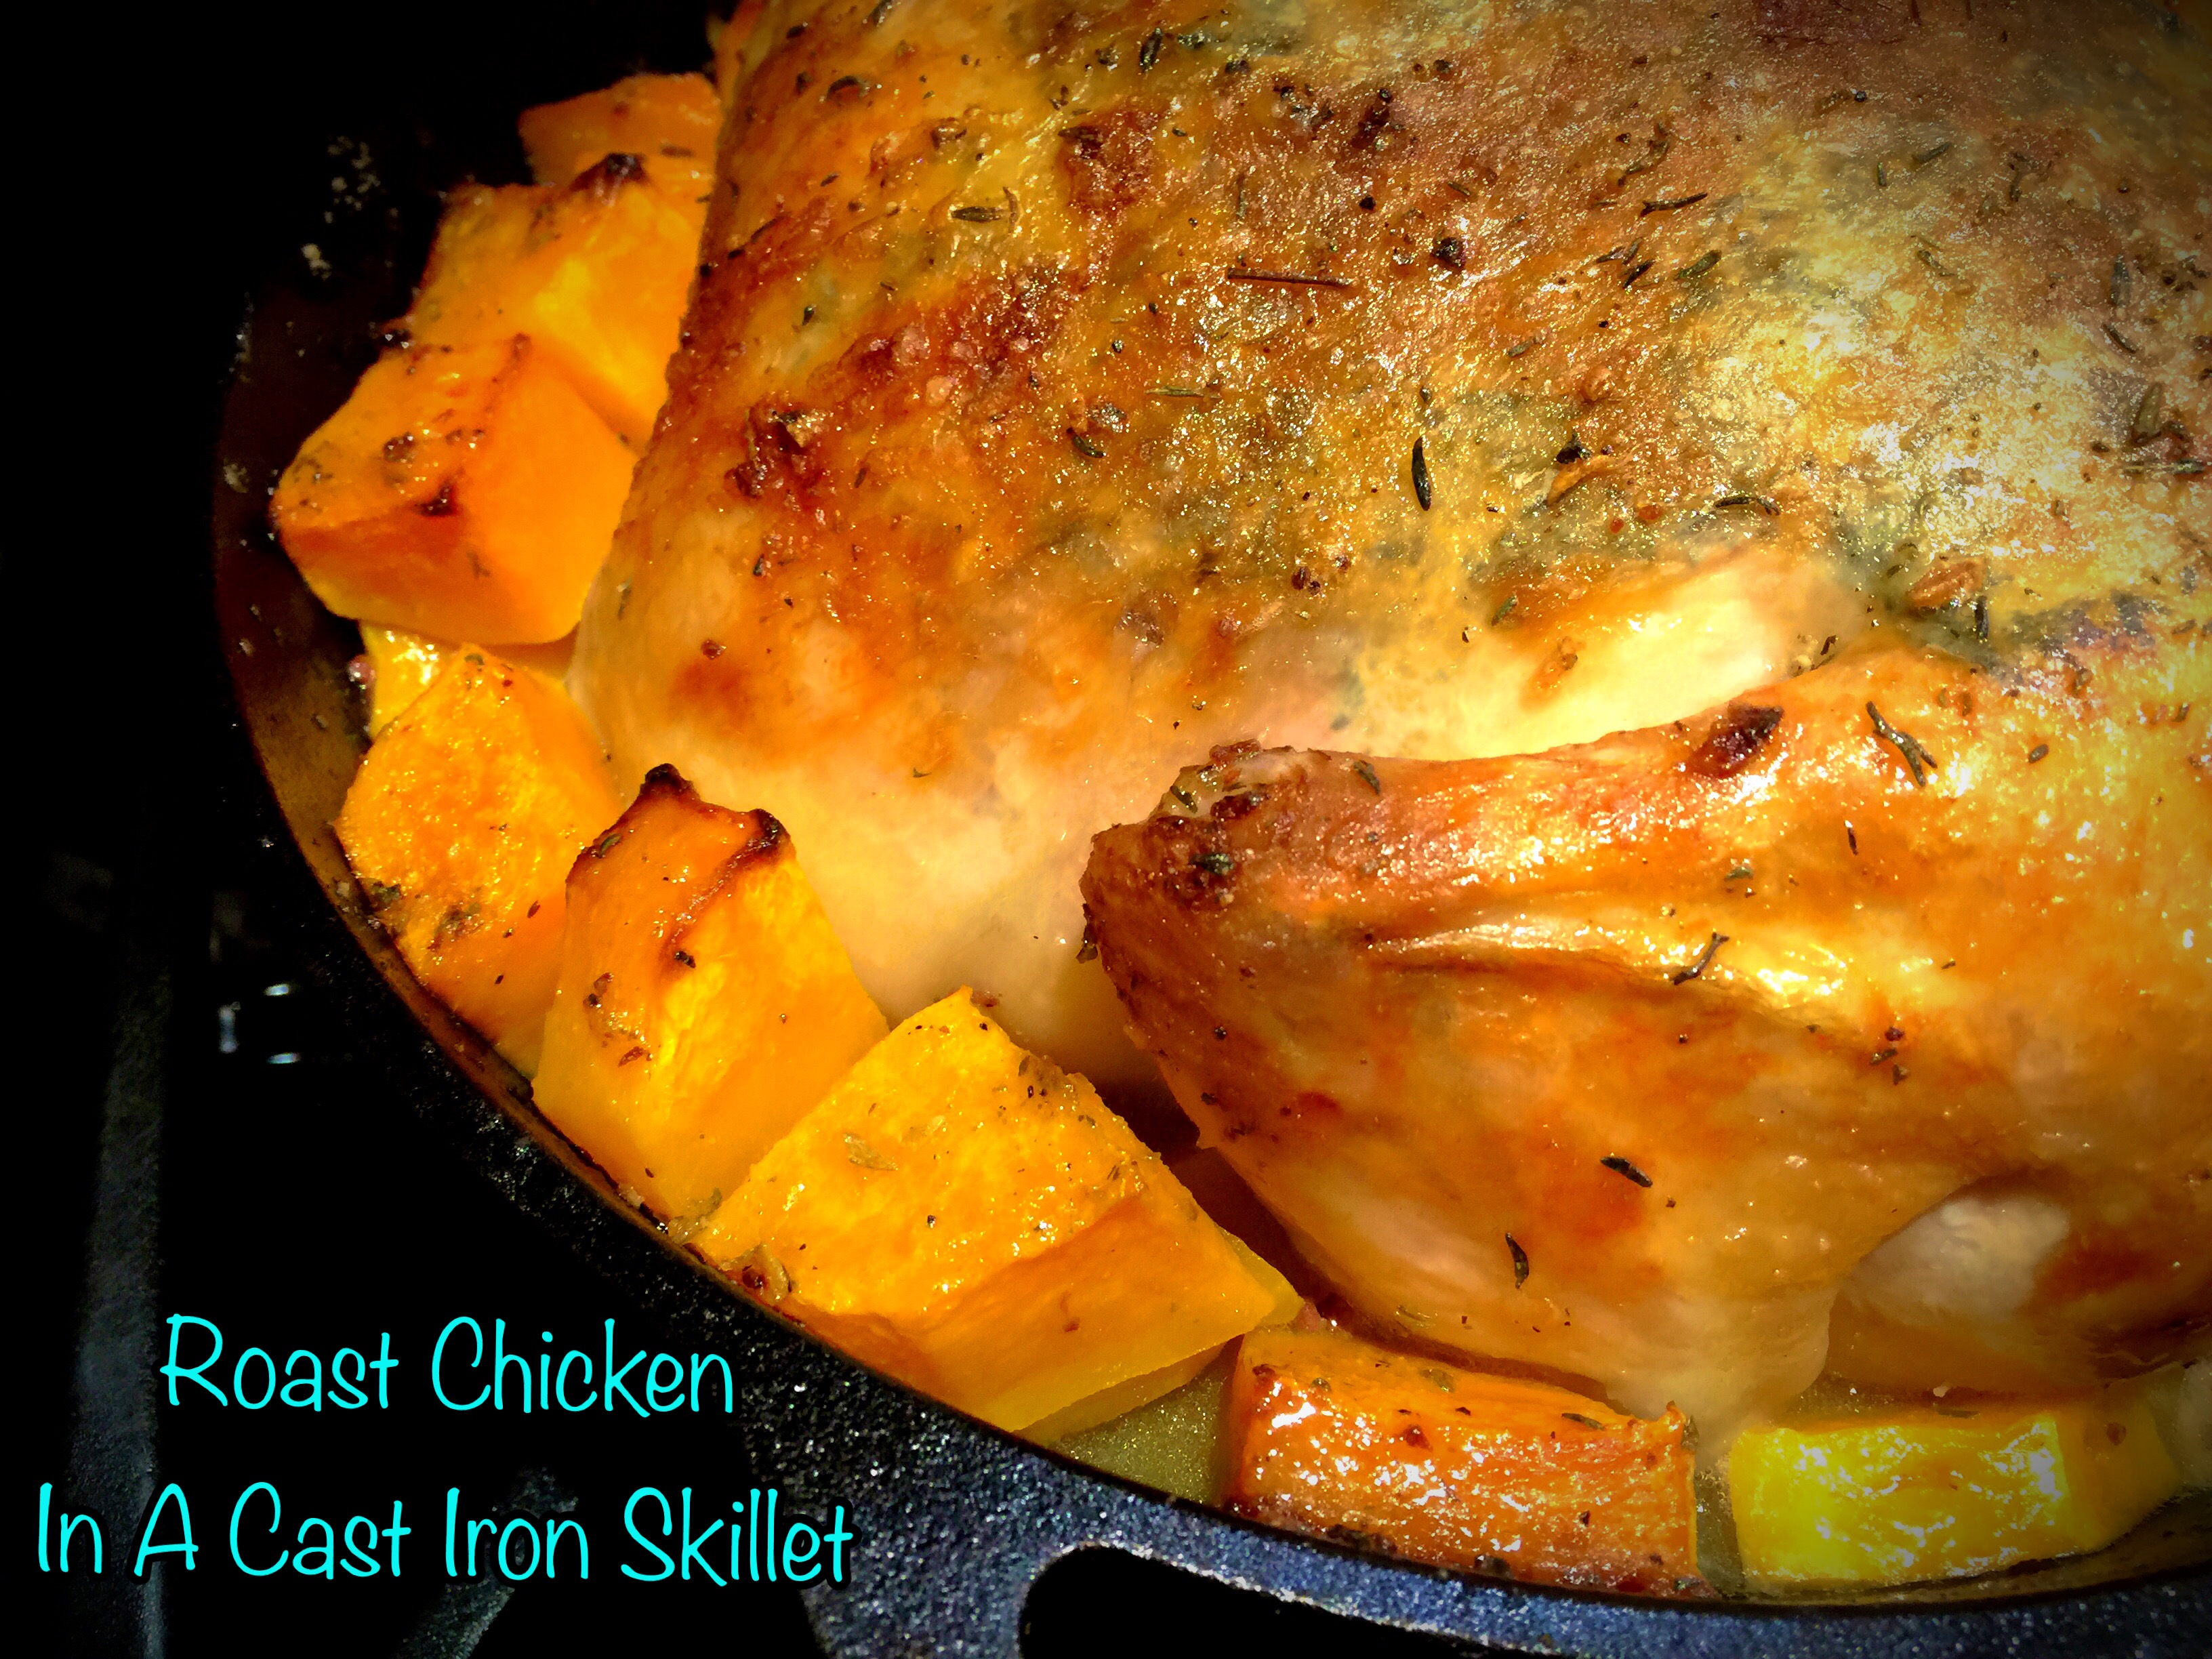
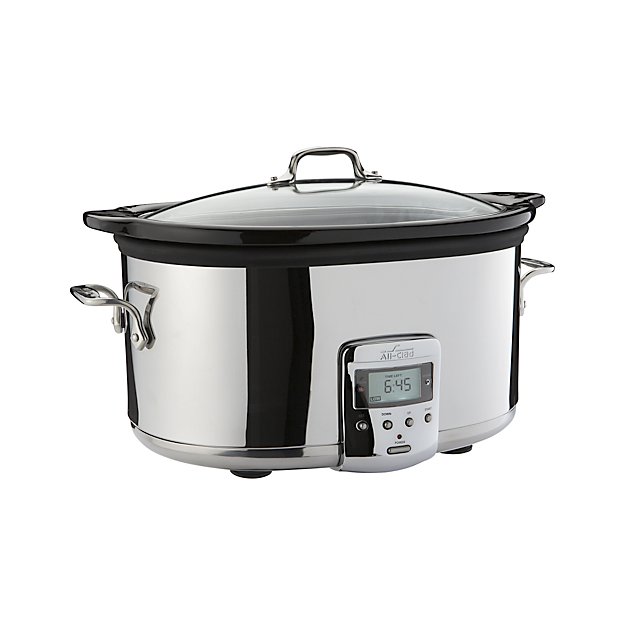
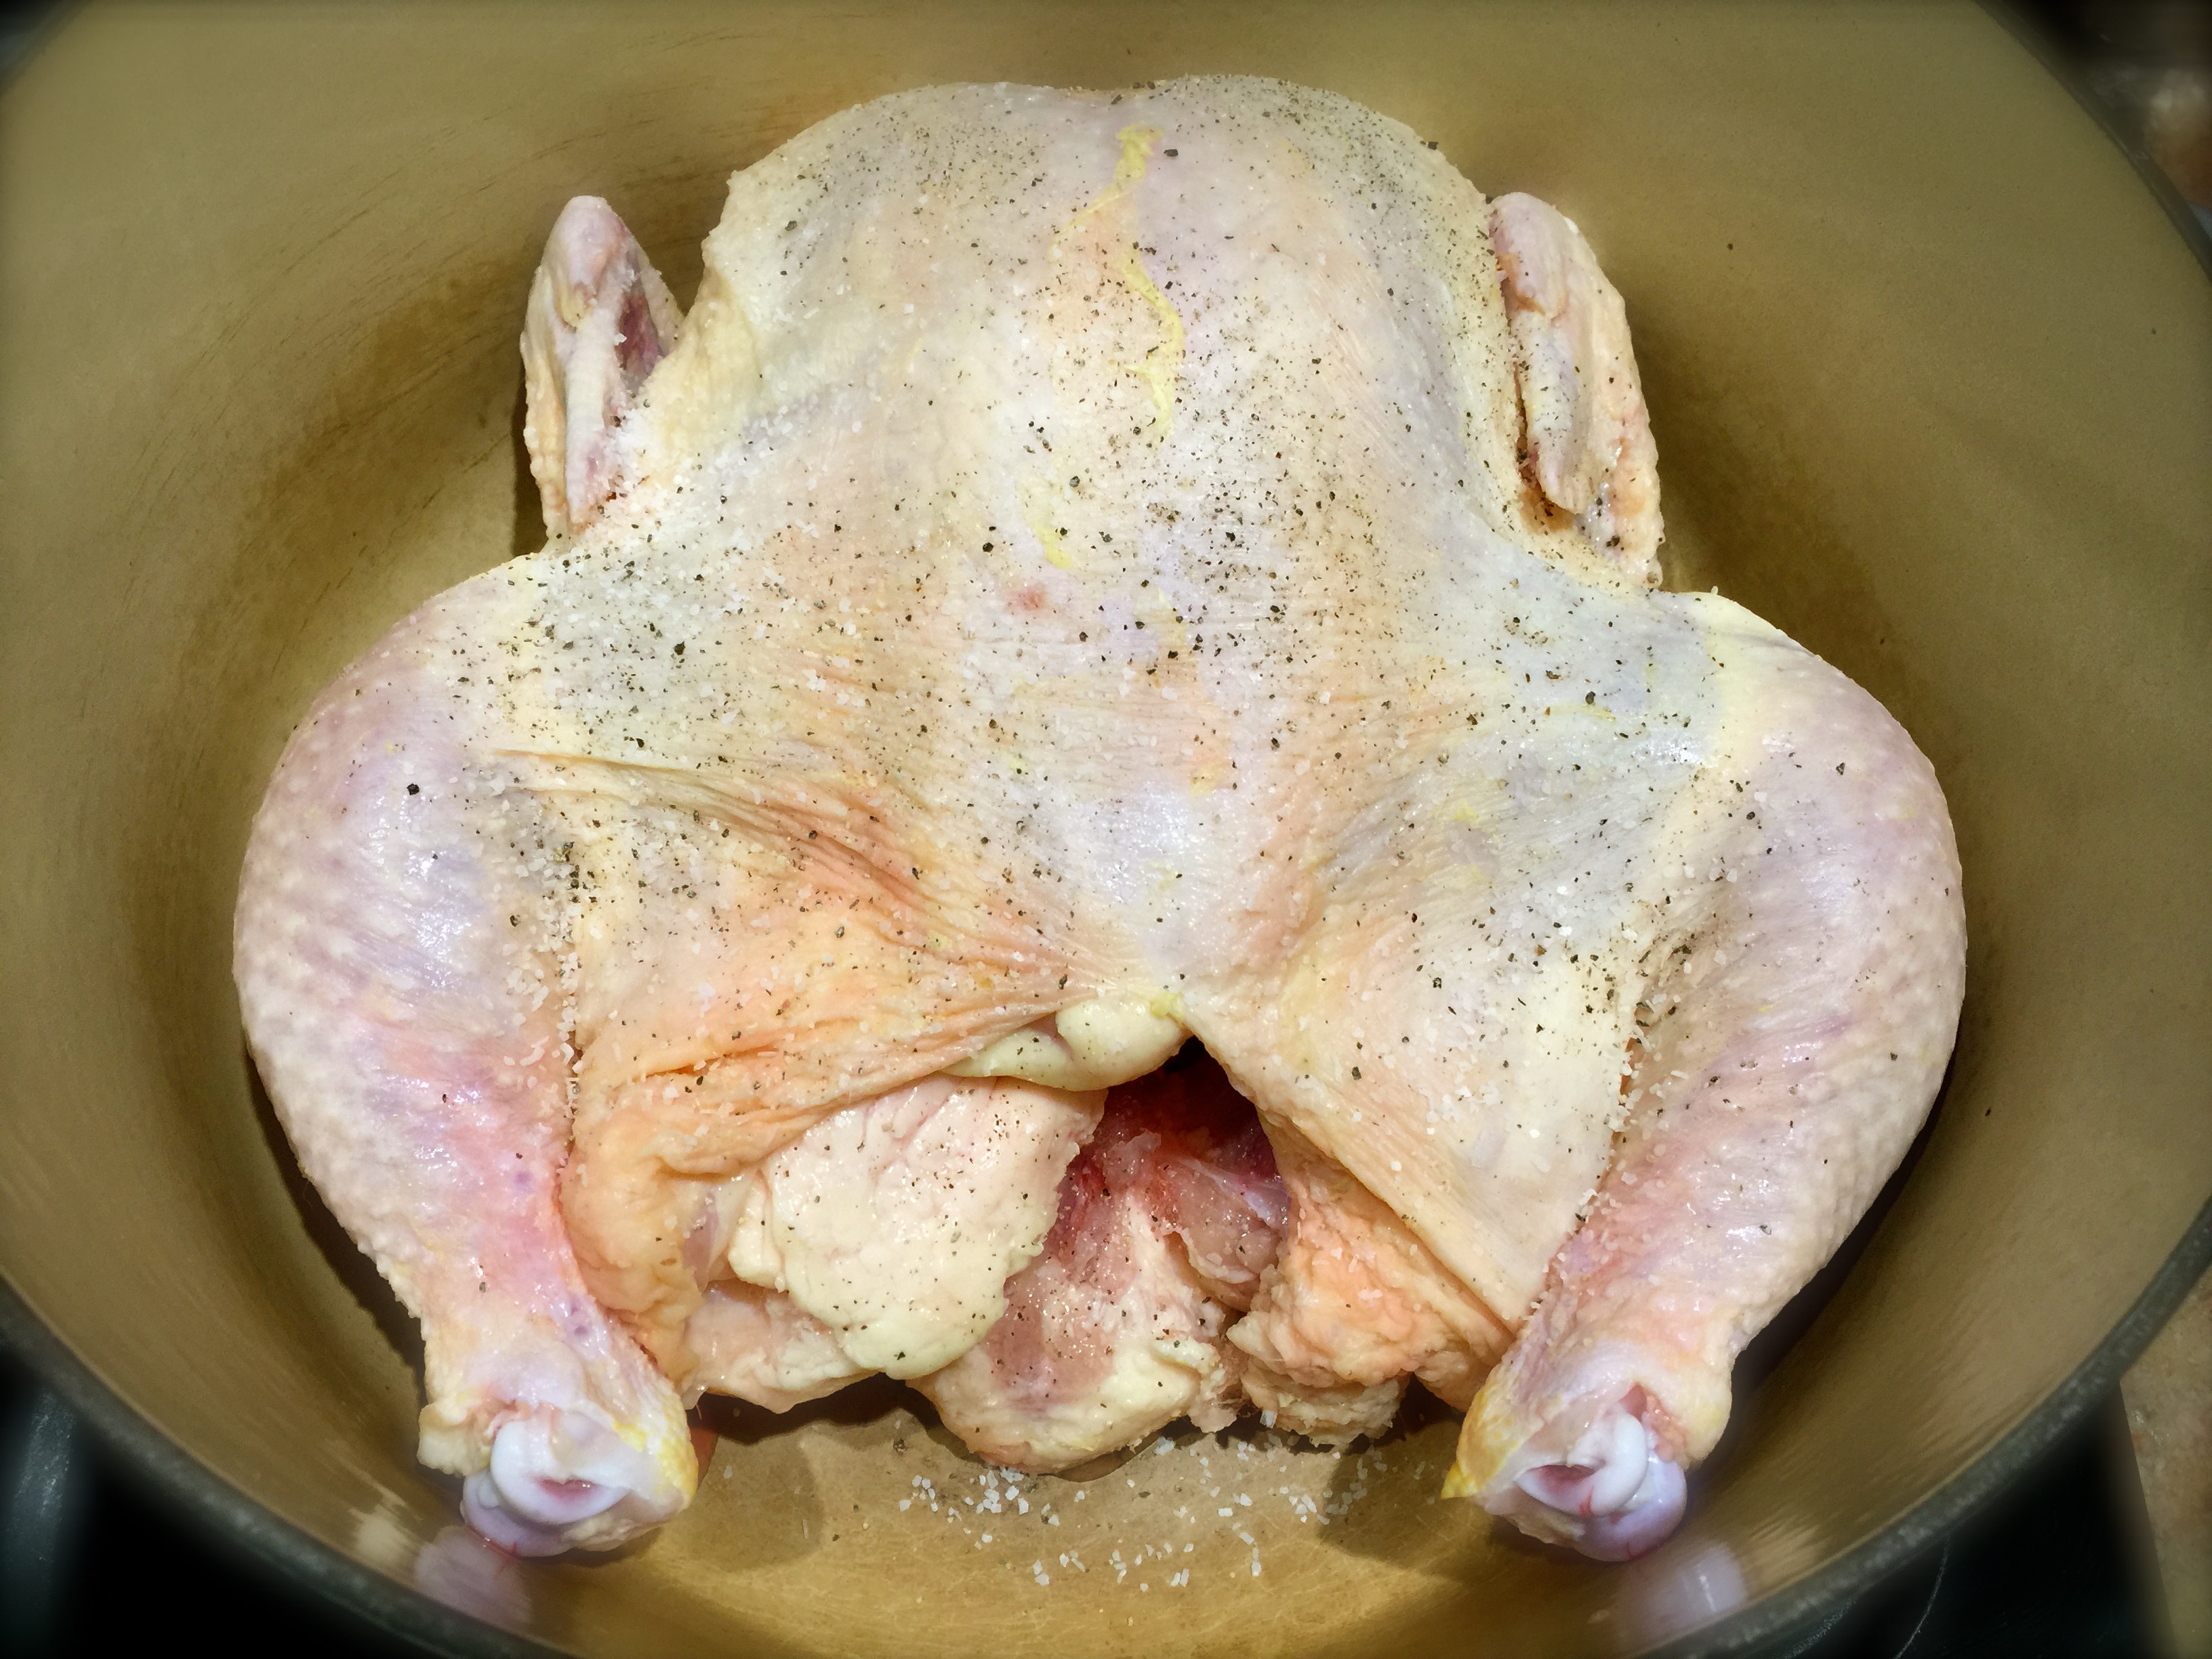
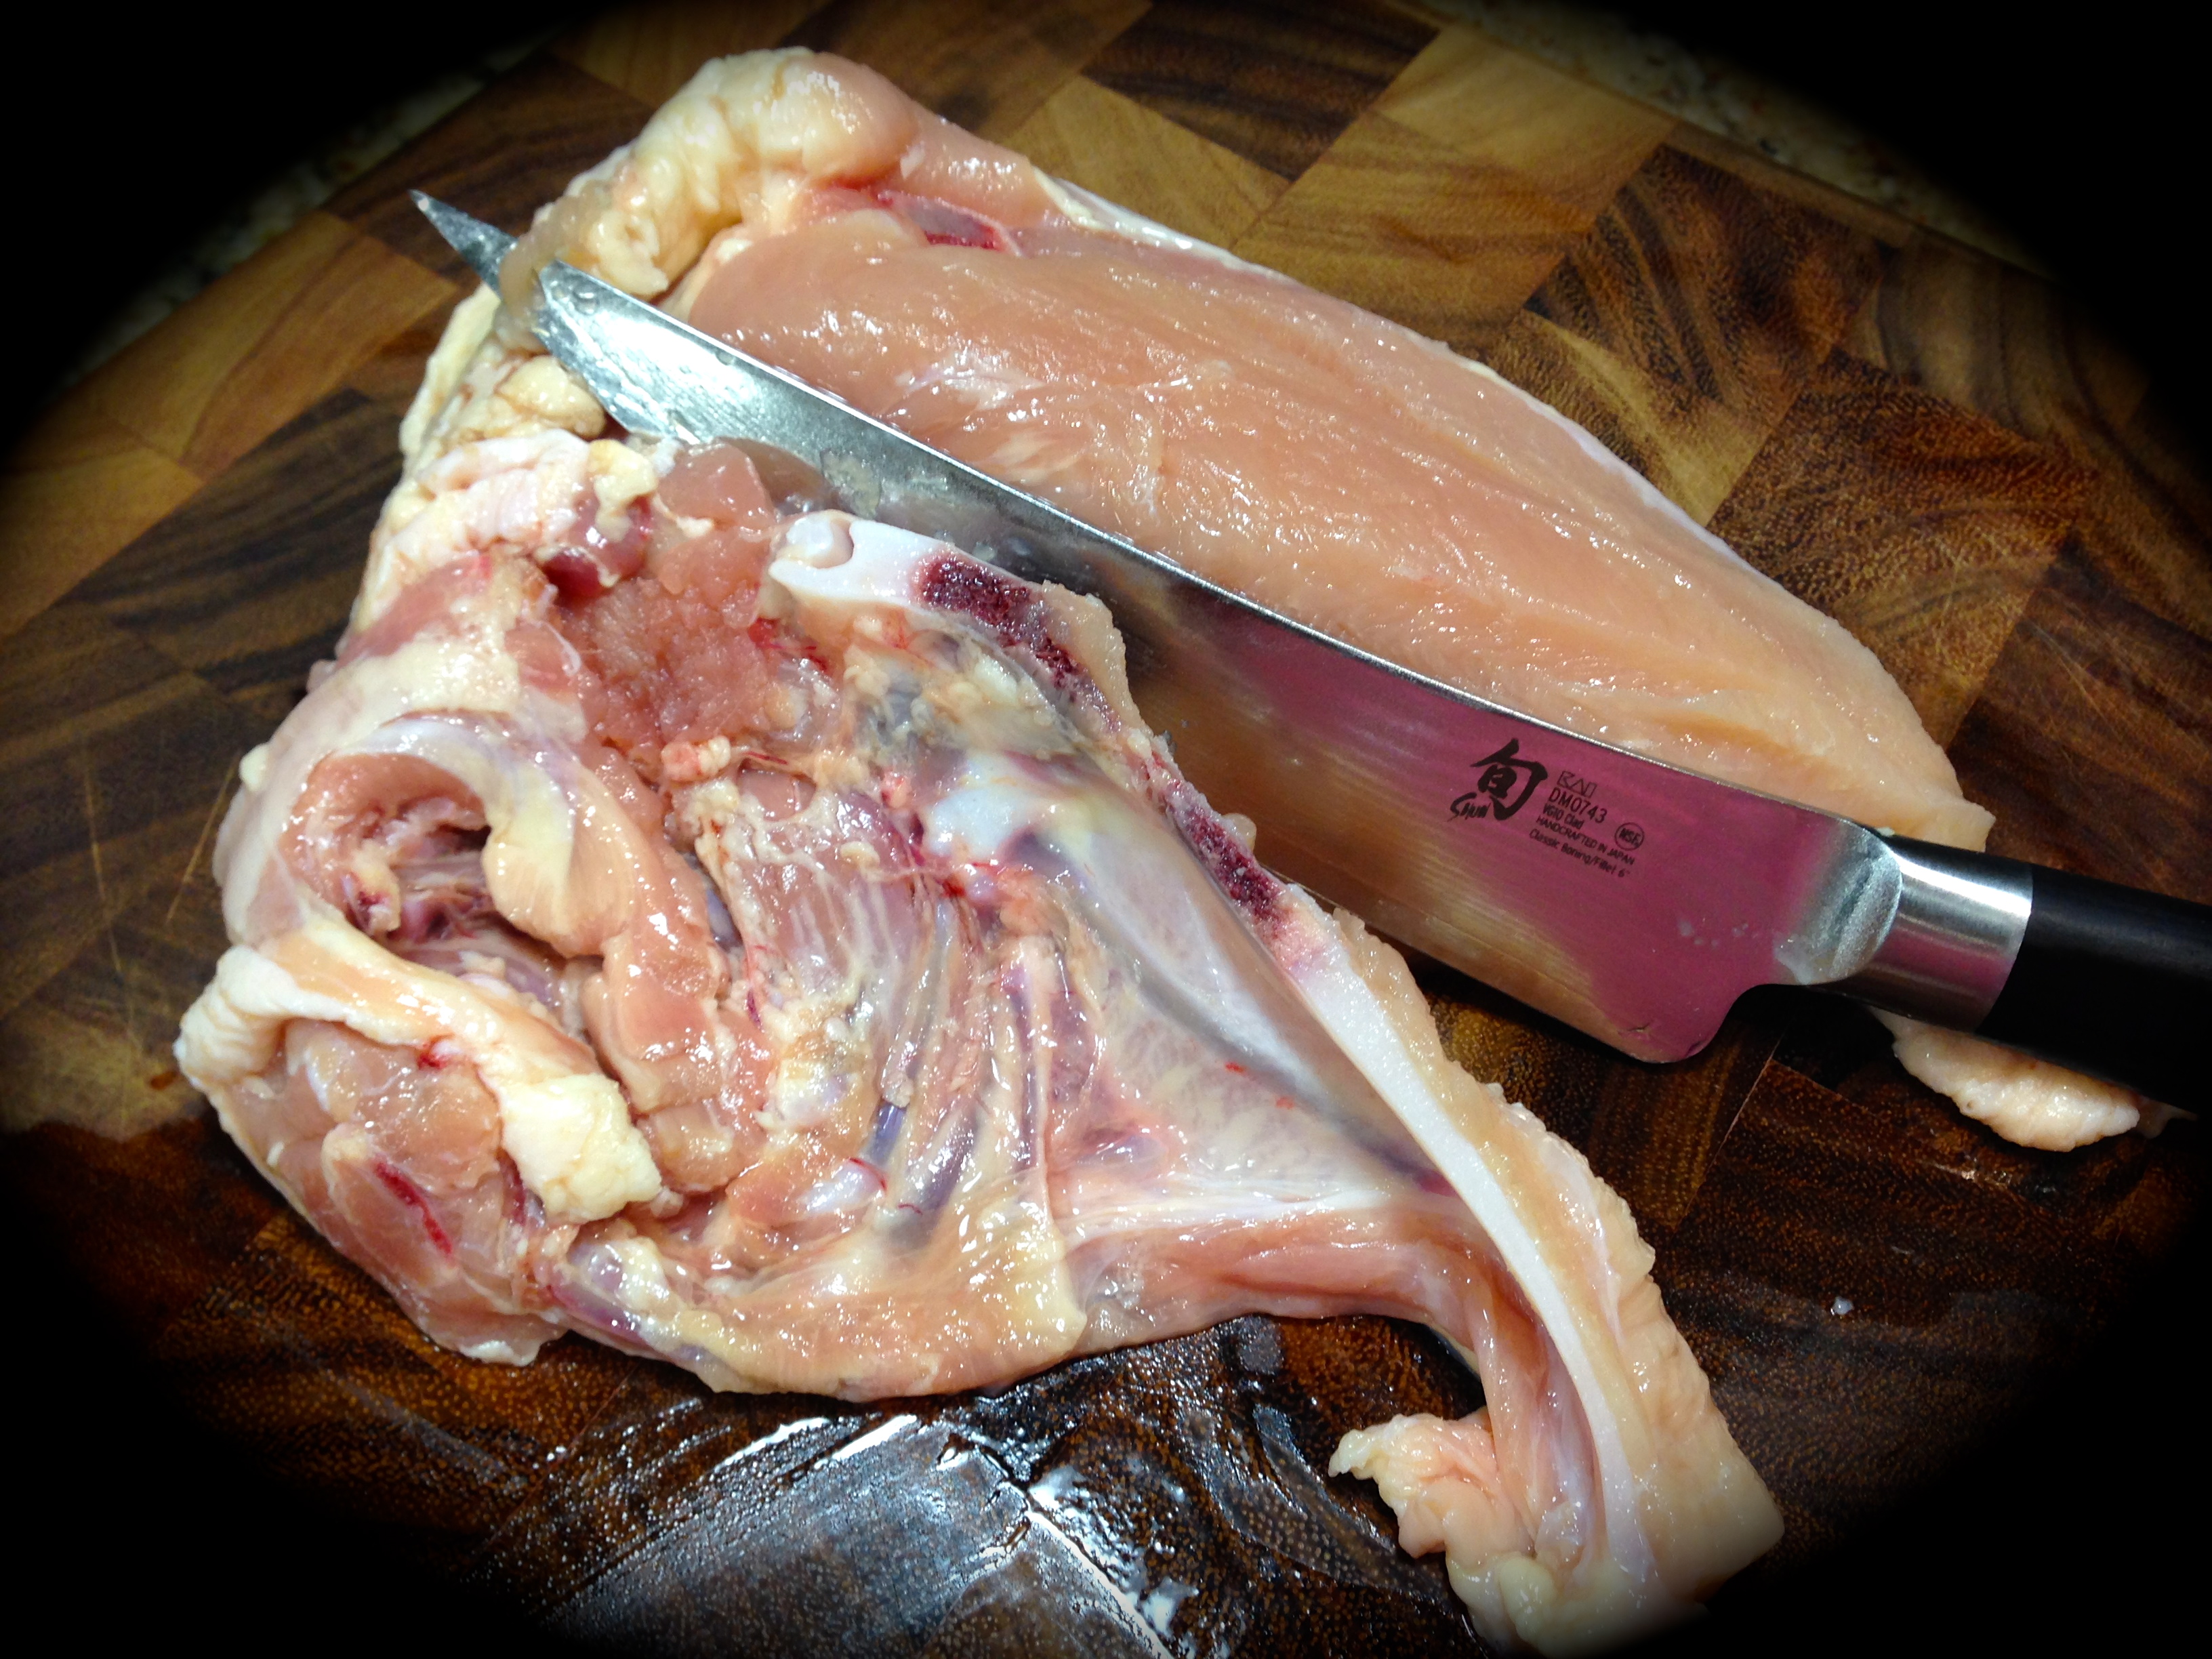
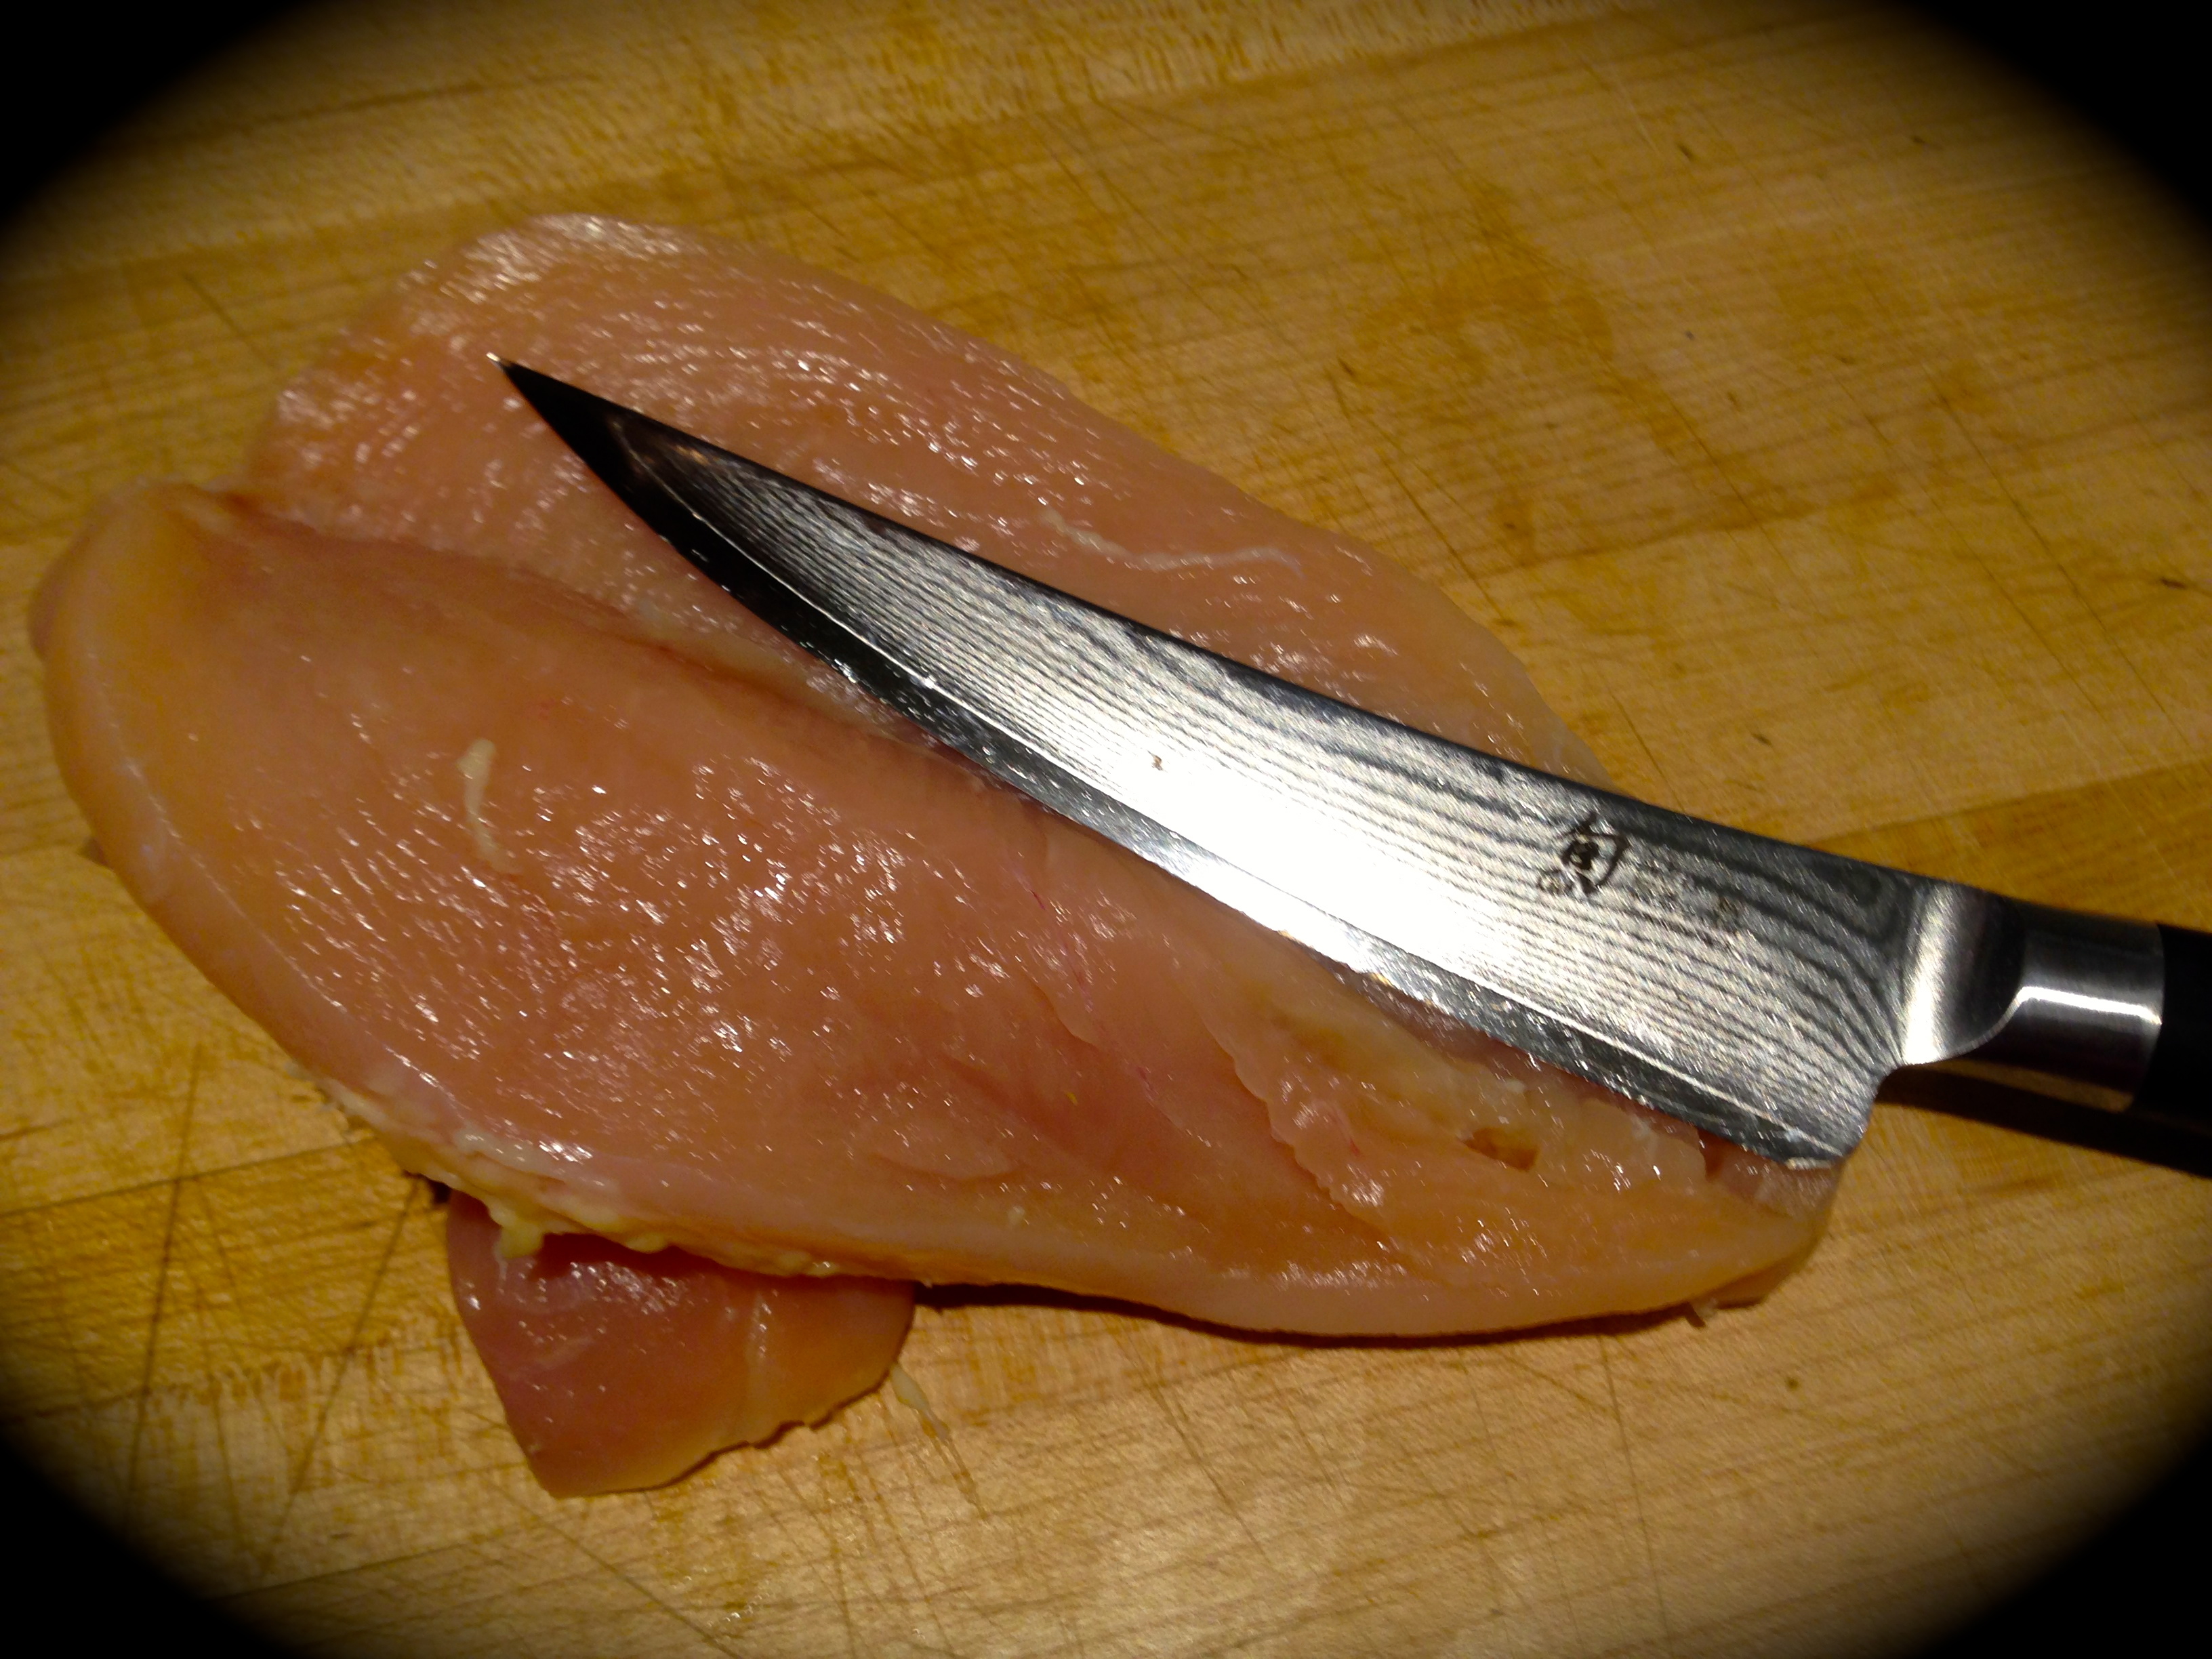
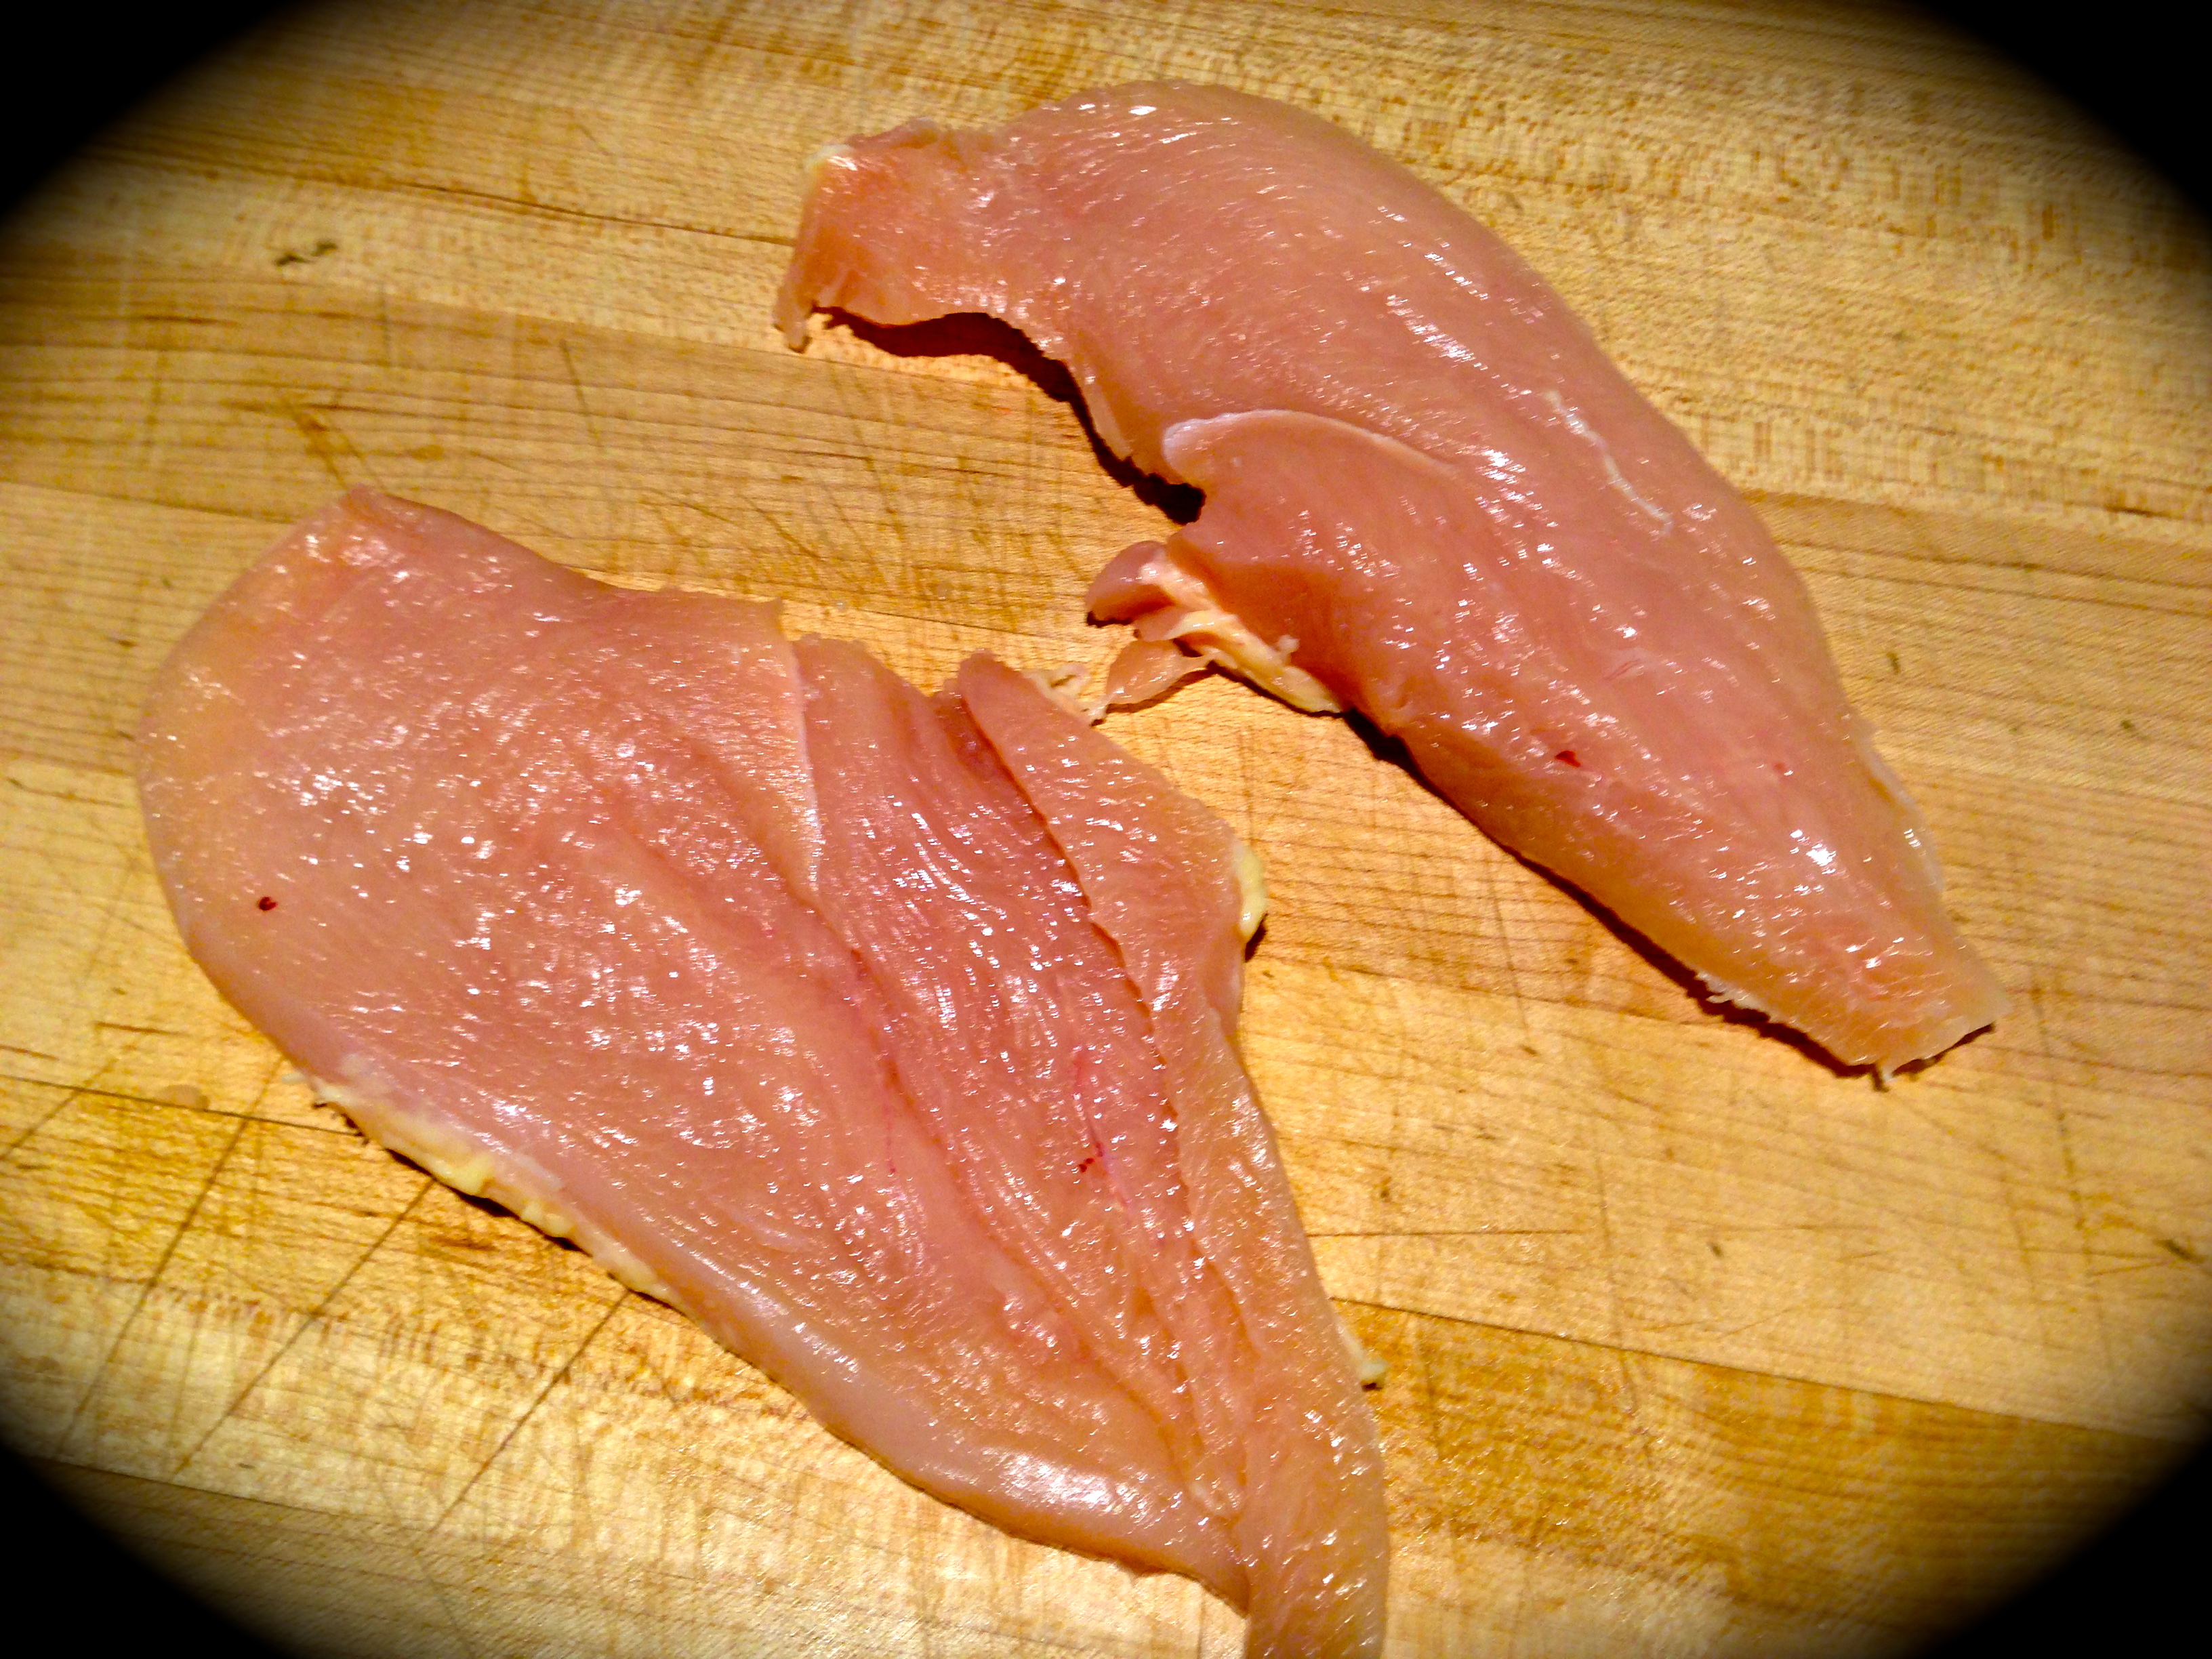
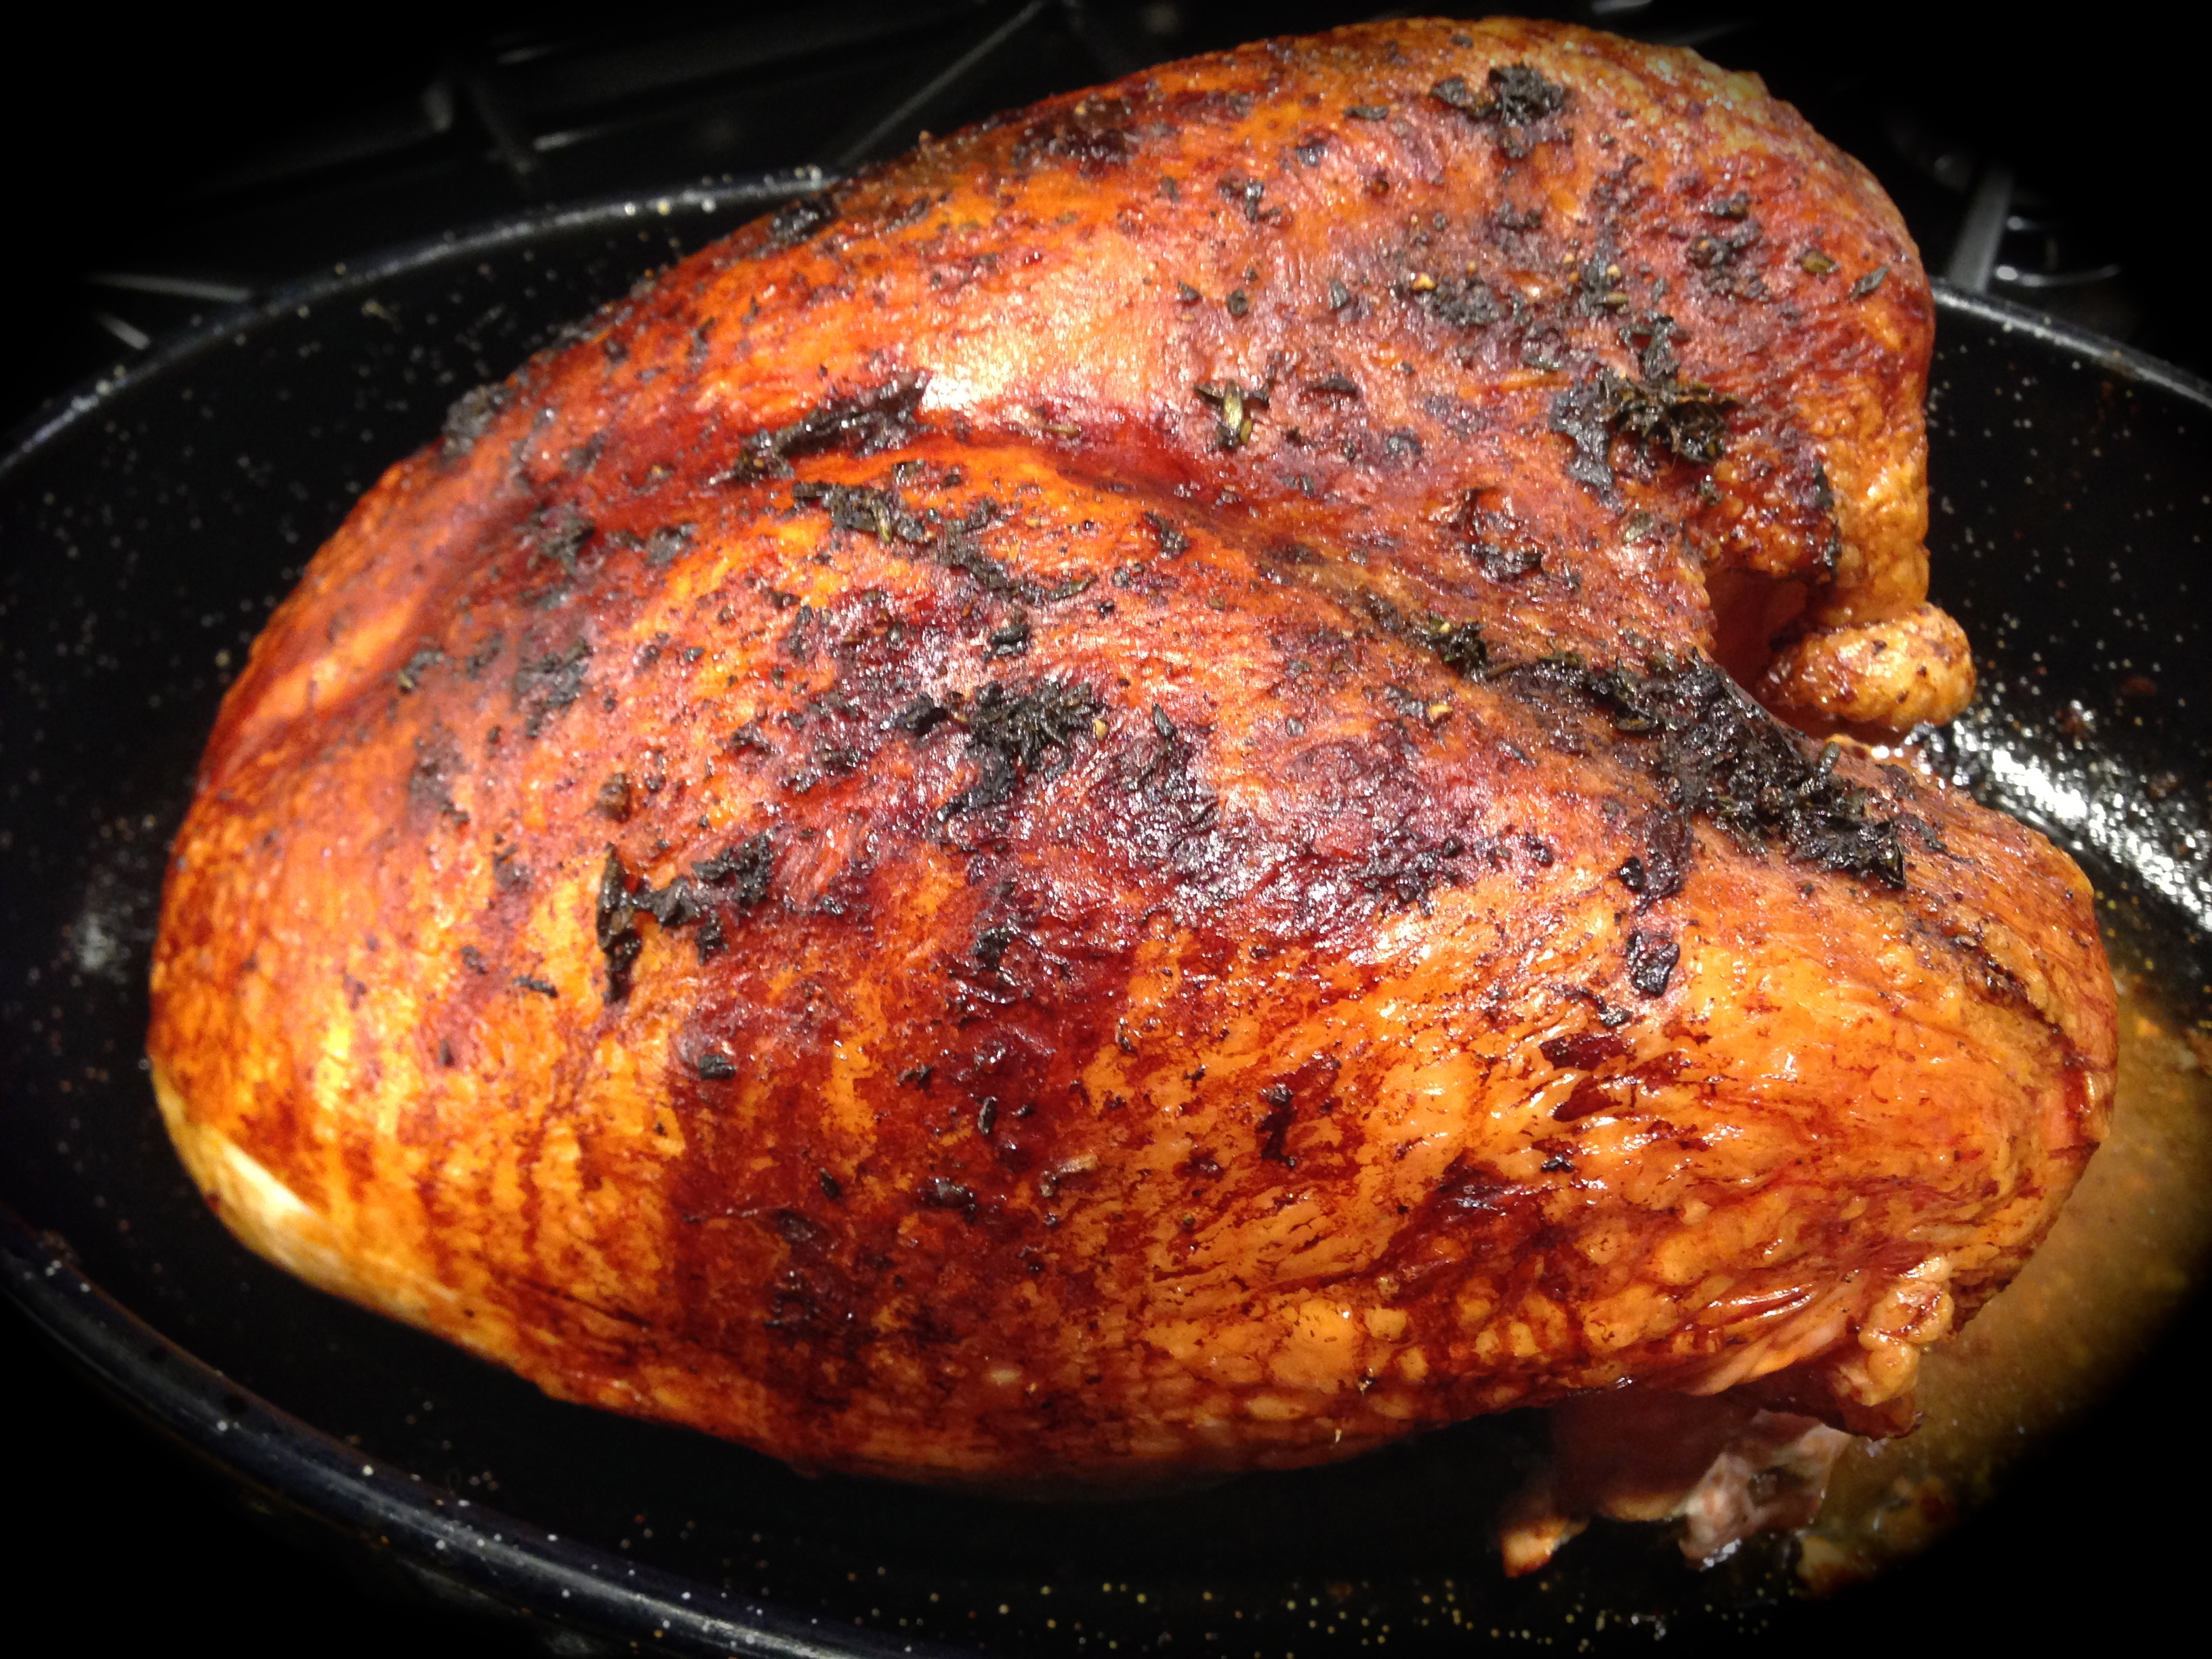
Lesson Learned 1 – Buy chicken breasts with skin and ribs and debone the chicken yourself: You want to do this for a couple of reasons. First it is much less expensive to buy chicken this way. Second by leaving the skin on it keeps the breast nice and moist during the slow roasting process. Invest in a good boning knife and regularly maintain it with a hand sharpening tool like the one pictured to the left. It is surprisingly inexpensive and will keep your knife nice and sharp for a long time and boning the chicken breasts will be a breeze. These days it’s pretty hard to find boneless breasts with the skin still on so this may be the only way to do it.

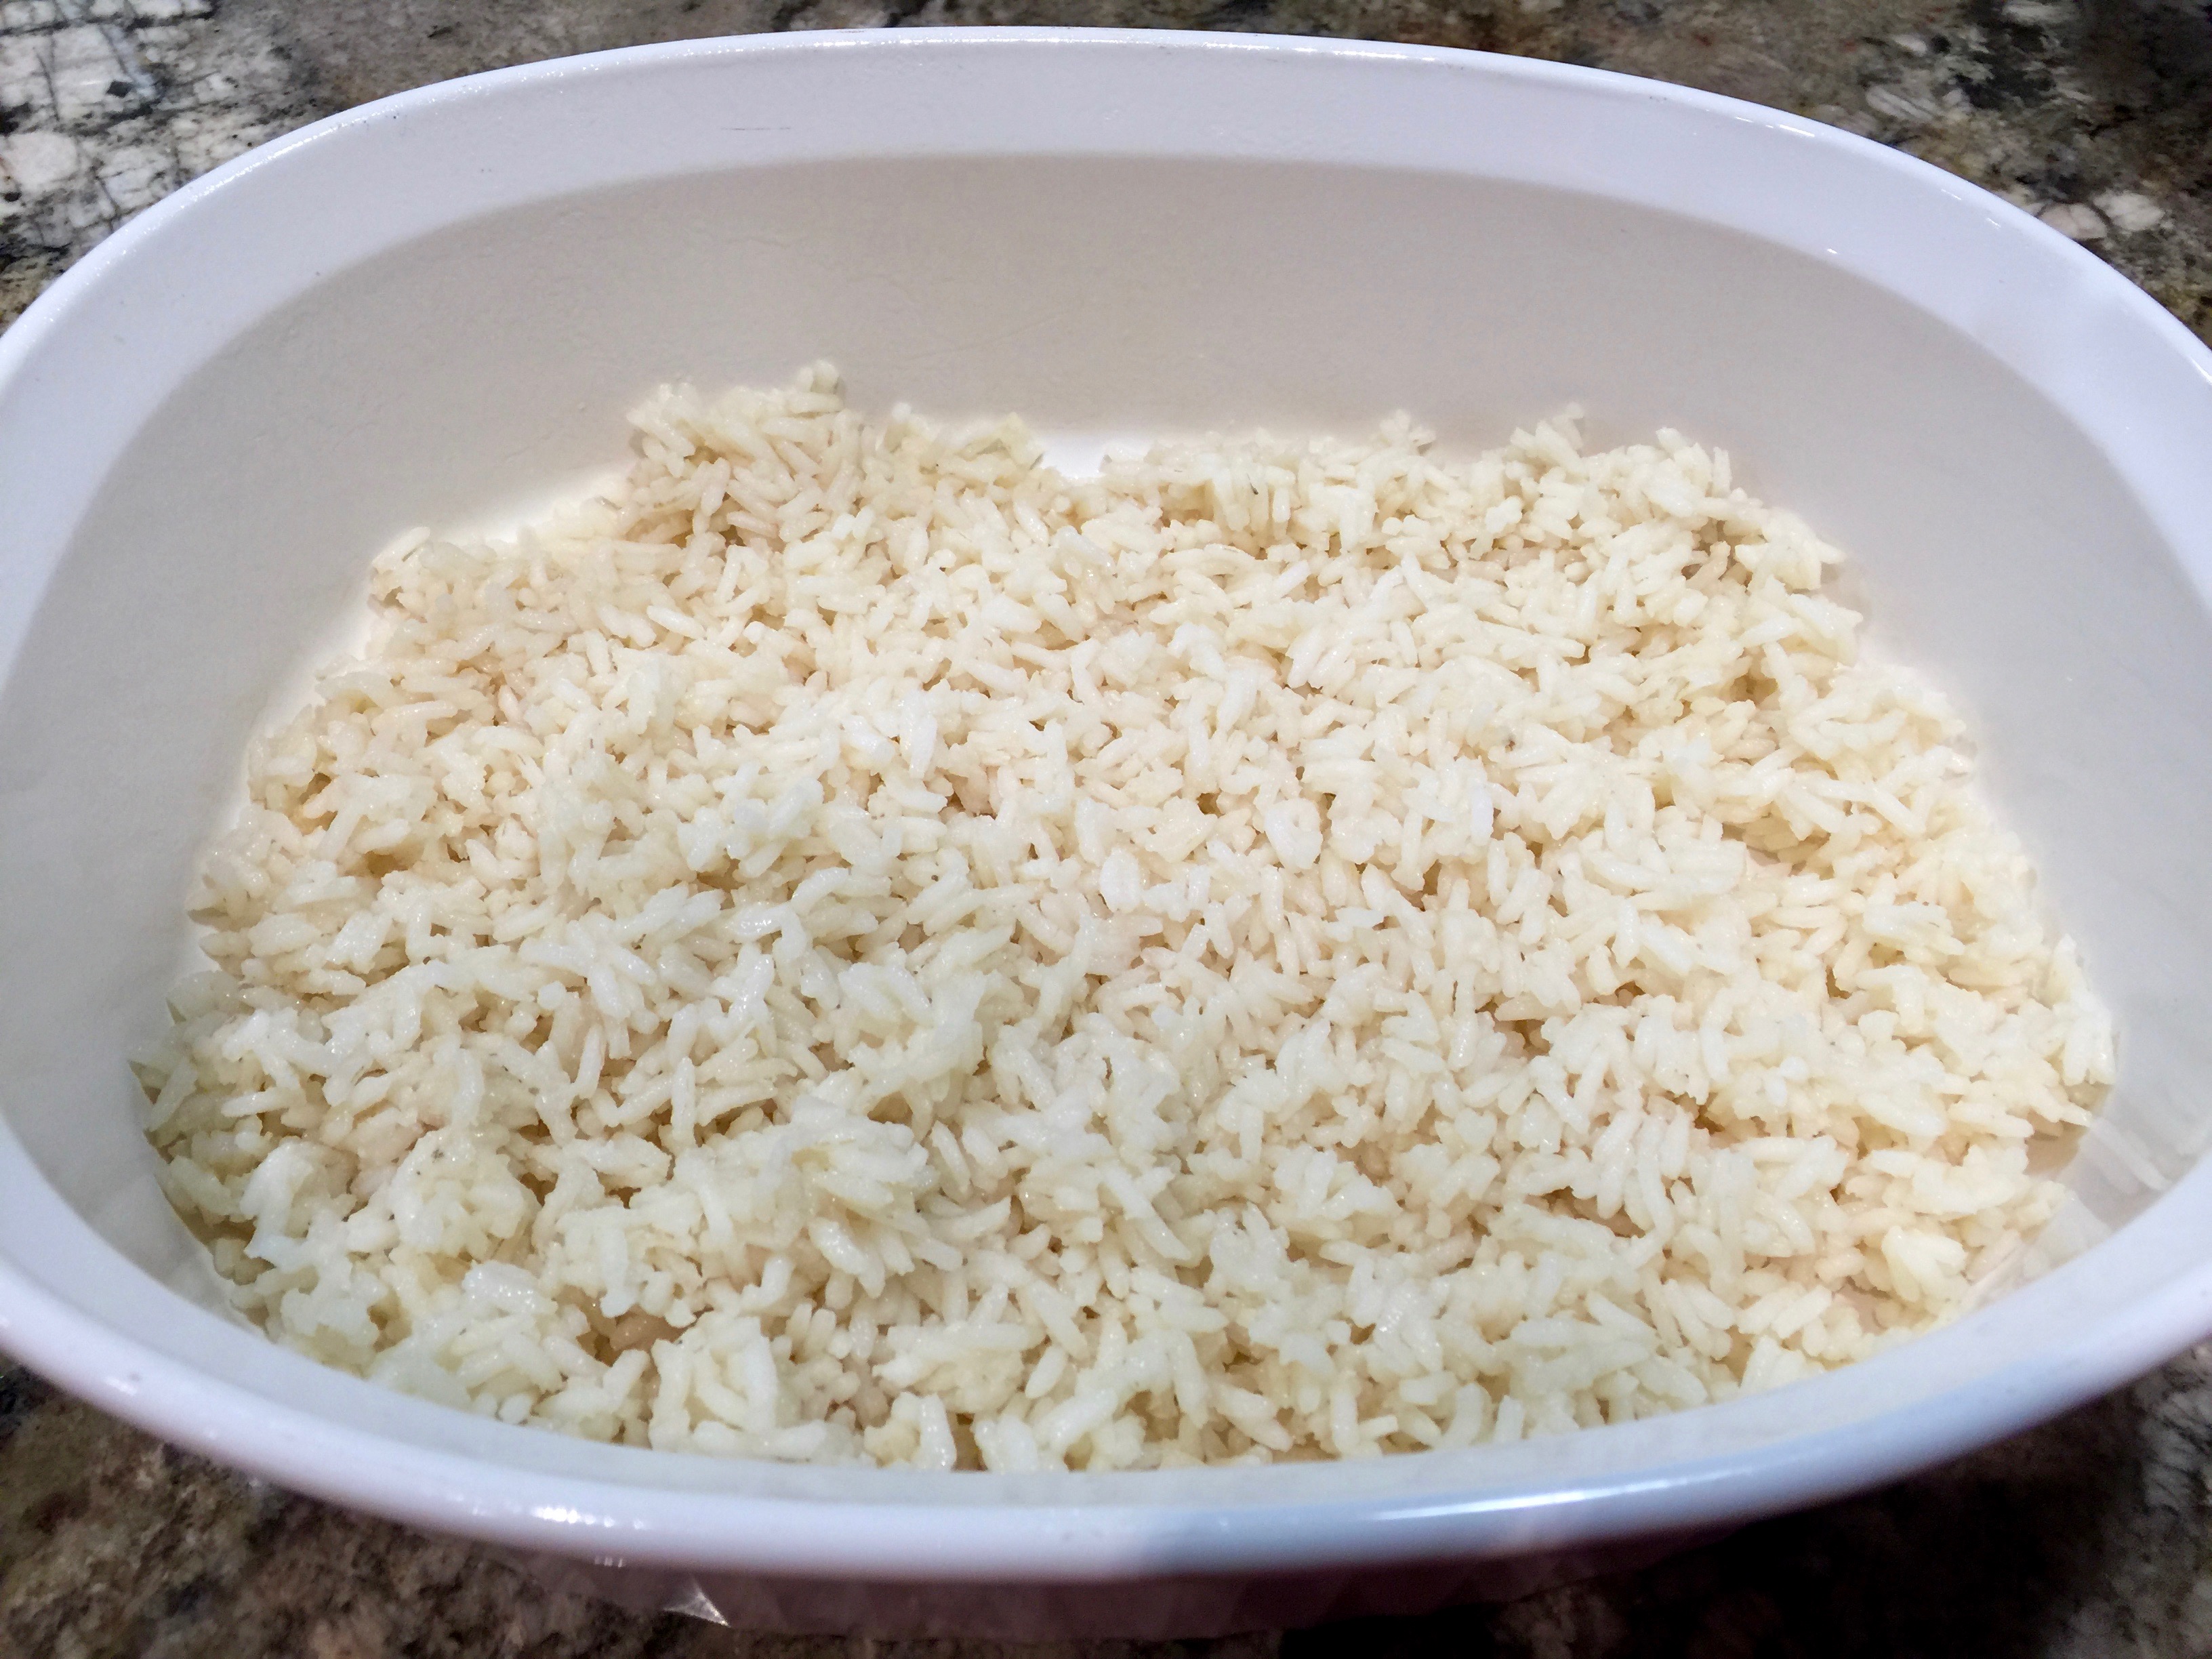
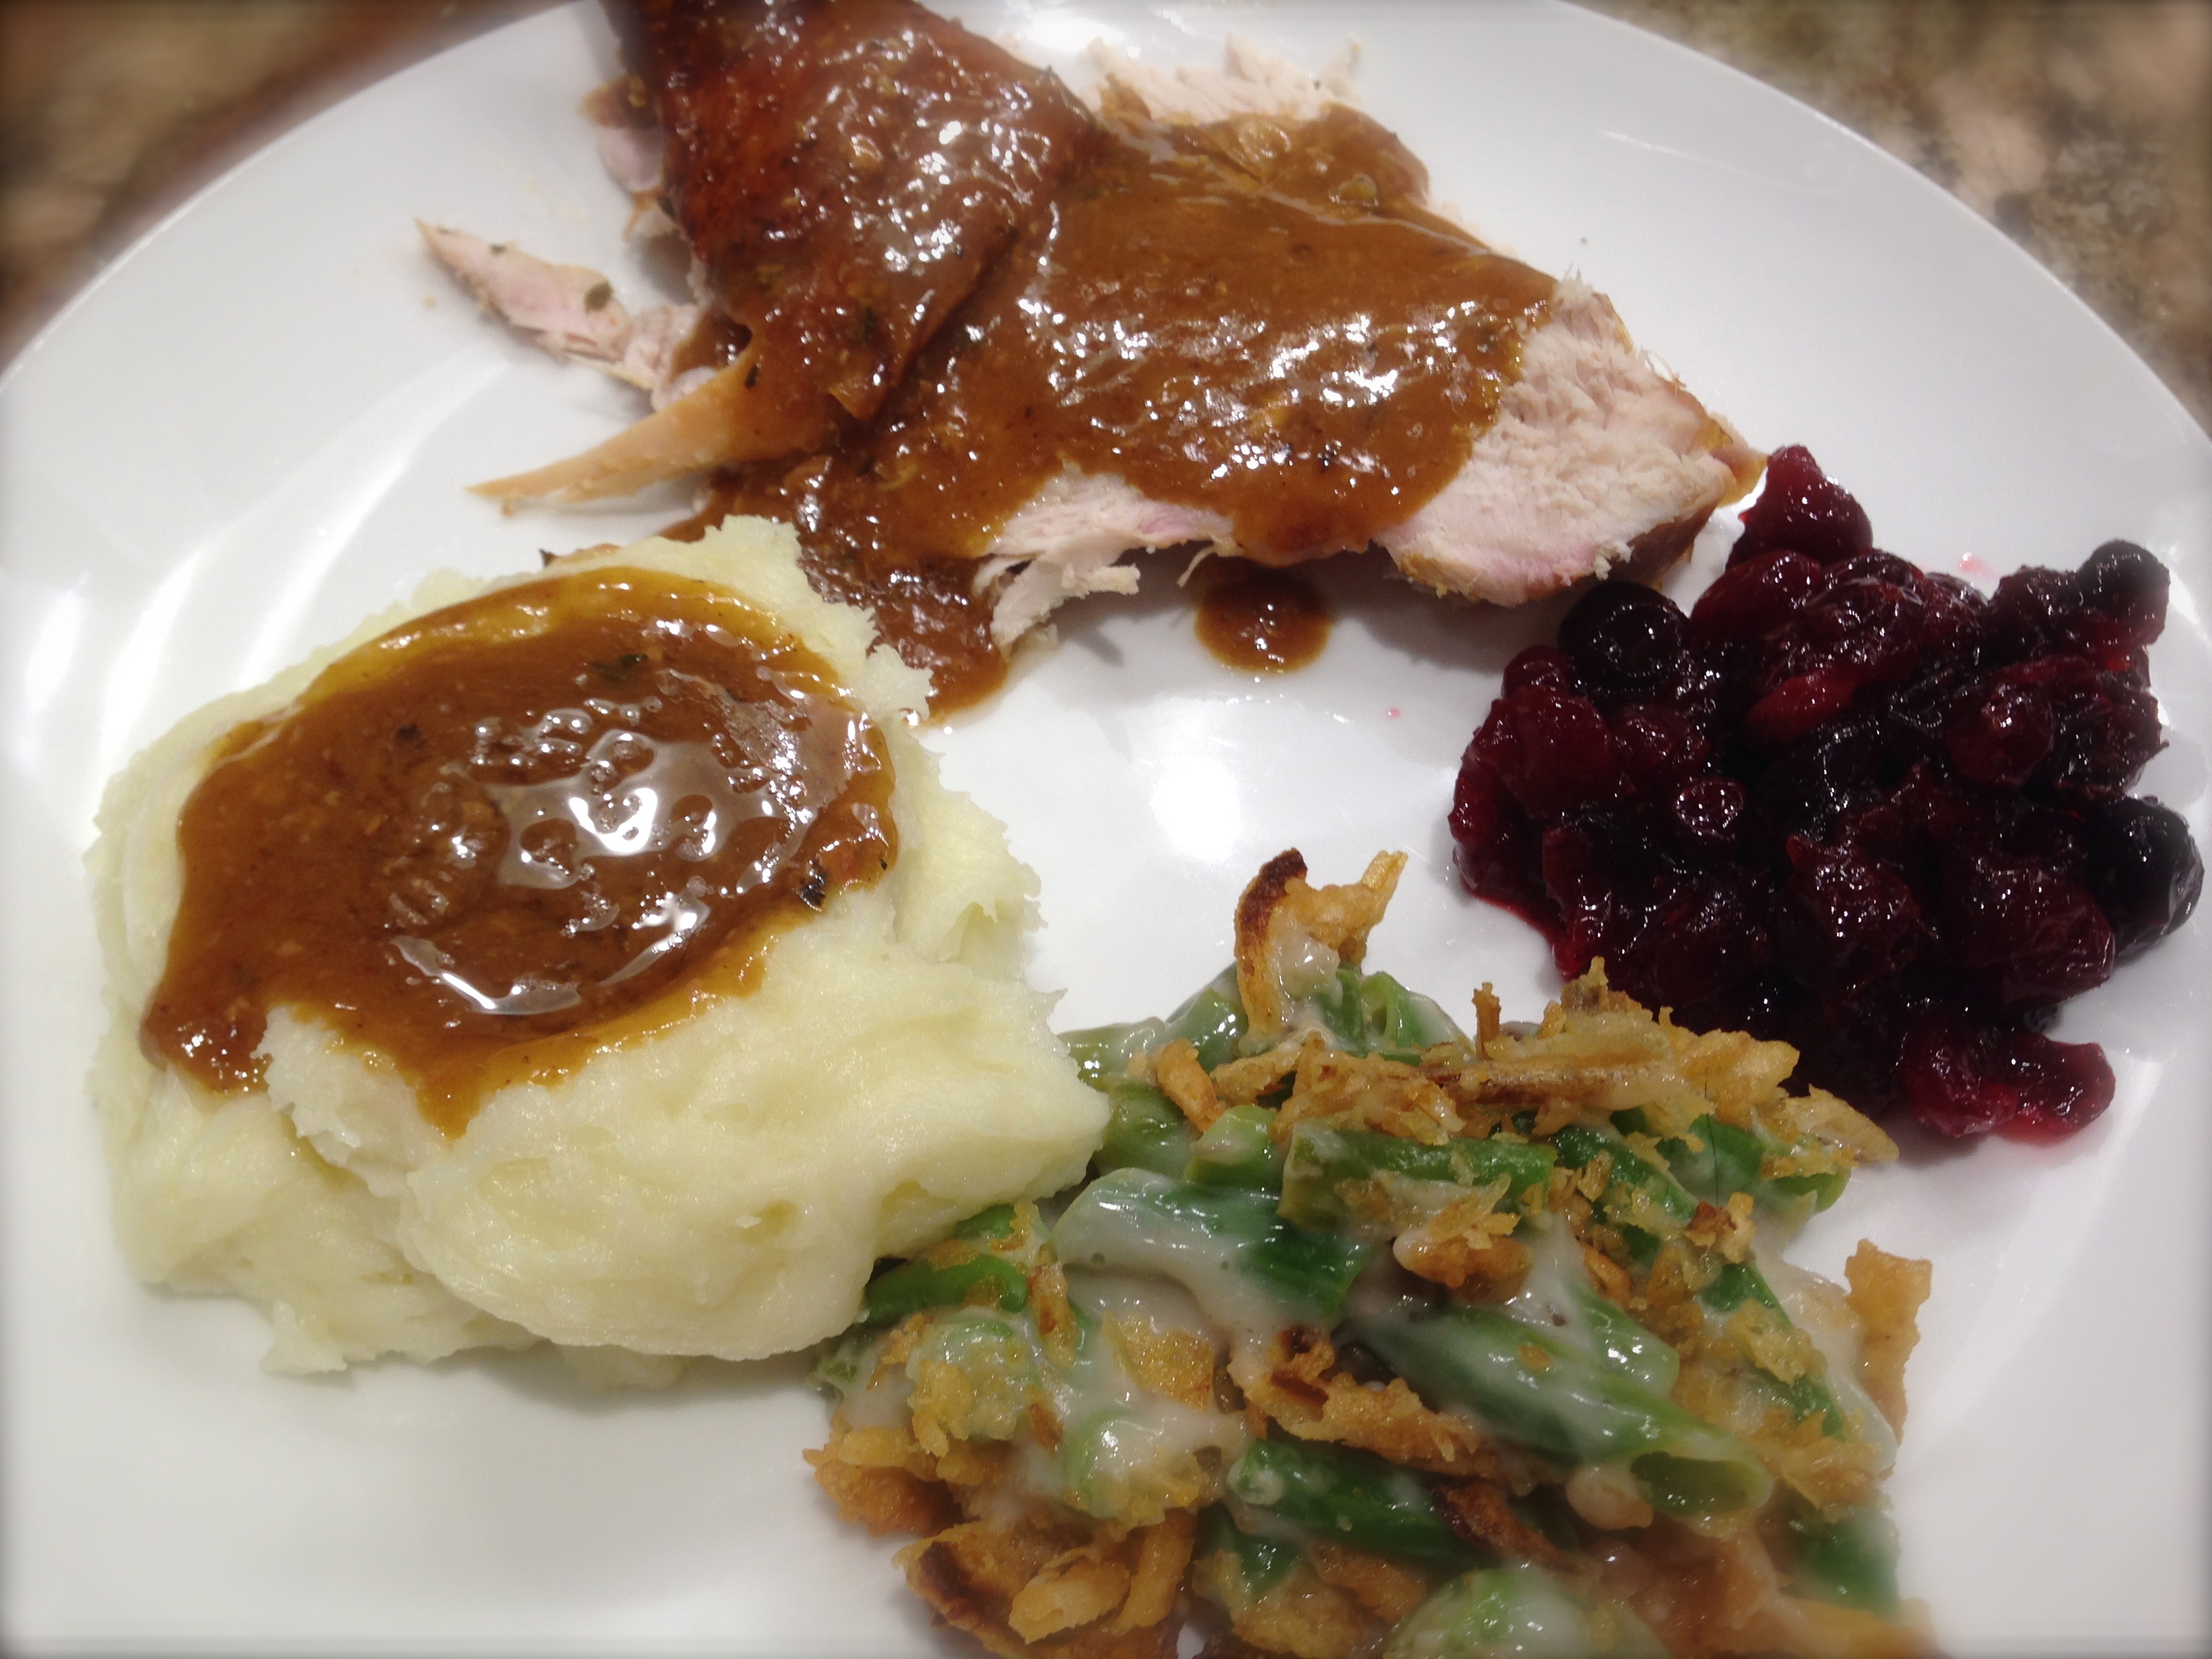
Lesson Learned 2 – Use a rice mixture for an extra flavor boost: Go ahead, be adventurous and use a rice mixture instead of just plain white rice. You can use wild rice, basmati rice or the mixture that I use which is a combination of white, brown, wild and red rice and pictured to the right. You’ll be amazed at how it punches up the flavor volume and makes the dish even more interesting.

Lesson Learned 3 – If you use thick carrots cut them in half lengthwise: I found the best way to make sure that the carrots are soft roasted is to cut them in half lengthwise if they are an inch or more thick. If they’re thick and you simply cut them in chunks they will not be as tender. If you like a little more body to your carrots you can certainly roast them without cutting them in half. With this recipe I prefer the carrots soft roasted and found the best way to achieve that is cut any that are overly thick. The decision is totally yours.

There are not a lot of lessons learned to share on this one as it is so darn easy to make. I love this recipe because it is a great blend of convenience and good flavor and cooks in one pan. Try this one and I know it will become a staple in your home…

Slow Roasted Chicken And Rice...

  • Servings: 4
  • Difficulty: Easy
  • Print

INGREDIENTS:

1 10 ounce can cream of celery soup

1 10 ounce can cream of chicken soup

5 – 10 ounces of water (the more water the creamier the rice)

3/4 cup of rice

1 Tbs. poultry seasoning

4 small or 2 large boneless chicken breasts with skin on

4-6 carrots sliced lengthwise and cut into chunks

1 tsp. McCormick Perfect Pinch Rotisserie Chicken Seasoning

DIRECTIONS:

Preheat oven to 350 degrees. In a medium sized bowl combine the soups, water, rice and poultry seasoning. Chop carrots into chunks.

Spray a 9  x 13 pan with non-stick cooking spray. Spread the soup mixture across the bottom of the pan. Place chicken breasts on top of soup mixture. Arrange carrots around the chicken breasts. Sprinkle the top of the chicken breasts with the rotisserie chicken seasoning.

Cover with foil and roast in the oven for 2 1/2 hours. Do not remove the foil during the entire roasting process. Remove from the oven and uncover. If using large breasts, cut them in half before serving. Serve immediately.

Soup Mixture Ingredients

Arrange The Ingredients In A Prepared Pan

Cover With Foil And Roast

Serving Suggestion

Chicken, Cauliflower and Mushroom Casserole…

Casseroles can be deceptive. On the outside what you see is a one dish meal – couldn’t be easier right? But upon closer inspection you see a wide variety of ingredients that have to be “bake-off” ready in order to assemble the casserole. And if you don’t have those ingredients on hand, there’s a lot of work involved in putting a casserole together.  Just be aware of that, especially if you are prepping ingredients from scratch. Let’s face it, casseroles are basically designed to help you use your leftovers – sort of a “fooled you, you ate this the other night for dinner and here it is again, just dressed up differently!” But whether you are using leftovers or preparing ingredients from scratch there is nothing as comforting as a casserole. And besides, I’d rather be relaxing an hour before the meal than scrambling right up to the last minute before you put the meal on the table. For me, that is the beauty of a casserole.

Casseroles also feed my love of prepping things. So I’ll admit I made this the other day without using any leftovers. This was a from scratch casserole. But if you’re a prep nut like me who gets satisfaction out of chopping, mincing, dicing and slicing than it really is no big deal.

So let’s talk about making a chicken, cauliflower and mushroom casserole…

Casserole IngredientsLesson Learned 1 – Get all the individual ingredients prepped first: This is pretty much a rule of thumb for almost any recipe, but since there are so many different types of ingredients in a casserole I’ve found the best thing to do is to get everything “assembly ready” first. That way you’re much more organized and the casserole assembly process is a breeze. That means have the chicken cut up or shredded, slightly steam the cauliflower, sauté the mushrooms, either use leftover rice or cook your rice, and shred all of your cheeses.

And by the way, it is always better to shred your own cheese. Packaged pre shredded cheese has an “ingredient” in it, cellulose, designed to keep the shreds of cheese from sticking together. And guess what – cellulose is made from wood pulp. So unless you want to have a regular amount of wood pulp in your diet, I’d recommend shredding your cheese by hand. It’s not that hard and obviously healthier for you.

Lesson Learned 2 – A chicken casserole’s best friend – store bought rotisserie chicken: You can always roast the chicken you need ahead of time in your own oven, but it’s so much simpler just to buy store bought rotisserie chicken and use that. I bought a small chicken, removed and discarded the skin and shredded the meat. It saved a lot of time and believe me, no one knew the difference.

Lesson Learned 3 – Use any melting cheese you have on hand: I had gruyere and havarti on hand so I just combined those two for this casserole. To top the casserole I found a specialty cheese called buffalo wing artisan cheddar cheese. That cheese was great because it had a nice kick to it and added a unique flavor to the top of the casserole. Really, you can be inventive with your cheeses. You just want to make sure that whatever cheese(s) you use it is good melting cheese.

Lesson Learned 4 – Just slightly steam the cauliflower: I steamed mine for about 5 minutes. Really all you want is for them to just show the first signs of cooking. Remove them from the heat. No need to shock them. Just don’t feel that you have to steam them for a long time. All you really need to do is give them a little nudge.

Lesson Learned 5 – Once everything thing is prepped, assembly is a snap: Here is what the assembly looks like in pictures.

Line the bottom of a pan treated with non stick cooking spray with rice

Line the bottom of a pan treated with non stick cooking spray with rice

Put the cauliflower florets on top of the rice

Put the cauliflower florets on top of the rice

Spread the chicken mixture on top of the rice and cauliflower

Spread the chicken mixture on top of the rice and cauliflower

Spread chicken mixture over the rice and cauliflower

Top with cheese

Top with cheese and pop into the oven

And there you have it. Forty-five minutes to an hour later you will be in casserole heaven. So try this one, play with the ingredients and as always let me know what you think…

CHICKEN, CAULIFLOWER AND MUSHROOM CASSEROLE

  • Servings: 8
  • Difficulty: Easy
  • Print

INGREDIENTS:

1  Four pound rotisserie chicken, skin removed, cubed or shredded

1 small head of cauliflower cut into florets and slightly steamed (4 cups of florets)

8 large cremini mushrooms, sliced and sautéed in 1 Tbs. of  butter

1 1/2 cups cooked rice (cooked in low sodium chicken broth for additional flavor)

1 ten ounce can of condensed cream of mushroom soup

1 cup of sour cream

1/2 cup mayonnaise

1 Tbs. fresh lemon juice

2 1/2 cups shredded melting cheese (I used a combination of havarti and gruyere)

1 – 1 1/2 cups shredded buffalo wing artisan cheddar cheese (for the top)

Salt and pepper, to taste

DIRECTIONS:

Preheat oven to 375 degrees. Grease a 6 quart casserole dish with butter or spray it with cooking spray. Line the bottom of the dish with the cooked rice. Arrange the cauliflower florets on top of the rice.

In a large bowl combine the chicken, sautéed mushrooms, mushroom soup, havarti and gruyere cheeses, sour cream, mayonnaise and lemon juice. Salt and pepper to taste.

Spread the chicken mixture on top of the rice and cauliflower. Cover the casserole with the buffalo wing cheddar cheese.

Bake in the oven for 45 minutes. If need be, cook up to an additional 15 minutes longer. Casserole is done when the cheese on top is melted and the casserole is bubbly. Remove the casserole from the oven and let it stand for 5 minutes before serving.

Chicken, cauliflower mushroom casserole

Chicken, cauliflower and mushroom casserole

Chicken, cauliflower and mushroom casserole

Chicken, Cauliflower and Mushroom Casserole


Chicken Shepherds Pie…

After having made a delightful roast chicken (check out my roast chicken in a cast iron skillet recipe) I was faced with how to use the leftovers. Quite often I make a simple chicken salad consisting of cut up chicken, scallions, grapes, mayo and seasonings, but this time I wanted to do something different.

I’ve always liked the concept of shepherds pie. You basically take your leftover meat and mashed potatoes and create a pie that is oh so good – the true definition of comfort food. Most recipes I’ve seen suggest using frozen vegetables and if you’re in a hurry that will certainly work. But I like to use fresh vegetables whenever I can so I decided to do that instead. I also did not have any left over mashed potatoes so I just whipped up a batch. I’ve tried shepherds pies with store bought pre-prepared mashed potatoes or with instant mashed potatoes but I didn’t think the consistency was as good as when you use homemade mashed potatoes. But you can still use them if you want to.

I guess what I’m trying to say here is the beauty of this recipe is you can make it as simple or as intricate as you like. I still think taking the time to use fresh ingredients and home made mashed potatoes produces the best results. But the choice is yours.

So let’s talk chicken shepherds pie…

Sauteed vegetablesLesson Learned 1 – Use whatever vegetables you want or have on hand: This time I used the “trinity”, onions, celery and carrots along with some frozen peas. But really you can use anything you have. You just have to make sure that you sauté the vegetables to crisp tender before putting them into the pie dish. Next time I’m going to try using some broccoli and cauliflower heads chopped on the smaller side along with onions and carrots. I may even try adding pearl onions instead of chopped onions. It is important to cut the carrots small as they will take the longest to soften. I halved my carrots lengthwise and then halved them again before chopping them. That way they softened right along with the celery and onions. And if you’re using frozen peas (which I did) don’t add them until the very end. They thaw very quickly.

Lesson Learned 2 – Add the chicken at the very end: The chicken you use in this recipe is already cooked so your goal is to warm it through and not cook it to the point that you dry it out. All you really need to do is mix the chicken with the vegetables and then put the mixture into the dish(es) you will be using. The time the pie spends in the oven will be more than enough to warm the chicken through. You might want to take the chicken out of the refrigerator about a half hour before using it in the recipe. That way you will get the chill off of it and it will warm nicely in the oven.

Shepherds Pie FillingLesson Learned 3 – You can use individual pie pans or one 9 inch pie pan: I prefer giving everyone there own little pie but you can certainly bake this as one big pie as well and spoon out individual servings. Either way will work.

Lesson Learned 4 – Put the pie(s) on a foil lined baking sheet before placing them in the oven: I guarantee you, the pie filling WILL LEAK OUT of the pie dish. In order to avoid the filling dripping all over the bottom of your oven make sure the pans are resting on a foiled lined rimmed baking sheet. That way you’ll save yourself a lot of mess and clean up time.

Lesson Learned 5 – Use russet potatoes when making mashed potatoes: Russet potatoes have a lot more starch in them and hold up better in the baking process than other types of potatoes (at least that’s my opinion). Use russet potatoes and don’t make them too runny. Although I will write out some ingredients for making the potatoes use common sense when making them. If they already appear very soft after you mash them add very little liquid to them. If they are stiff, add a little bit of liquid at a time and see how they turn out when you mix them. Remember you can always add more of an ingredient if you need to. I think you get the best results when the potatoes have a slightly firmer consistency. If they’re too soft they will get even runnier in the oven, and you don’t want that.

Also another trick I learned is to add an egg yolk at the end of the mashing process. That gives the potatoes a richer color and more depth of flavor. Just make sure your potatoes are not hot to the point that they scramble the egg yolk. Chances are that will not be the case.

Also if you want to be fancy you can use a pastry bag and pipe the potatoes on the top of the pie. I chose not to. I used a frosting knife and after I dolloped some potatoes on top smoothed them over the vegetables. Try to create some peaks with your potatoes. The peaks are what will brown in the oven and give the eye pleasing look as seen in the second picture below.

Ready To Go Into The Oven

Ready To Go Into The Oven

Fresh Out Of The Oven

Fresh Out Of The Oven

This recipe is the epitome of comfort food. Try it and tell me what you think… Enjoy!

CHICKEN SHEPHERDS PIE…

  • Servings: 4
  • Difficulty: Easy
  • Print

INGREDIENTS

2 large russet potatoes, peeled and chopped

1 medium onion chopped

2 stalks of celery, chopped

1 cup of carrots, chopped small

4 cloves of garlic, divided: 2 whole and 2 minced

4 Tbs. unsalted butter, divided

3 Tbs. flour

1 1/2 cups unsalted chicken stock

1 1/2 cups roasted chicken, cubed or shredded

1/3 cup frozen peas

1 1/2 cups loosely packed emmenthaler cheese (a good melting swiss)

1 large egg yolk

1/4 cup heavy cream

2 tsps. dried oregano

Salt and pepper to taste

DIRECTIONS

Preheat oven to 375 degrees. Put the potatoes and two peeled cloves of garlic in a large pot and cover them with cold water (the water should be about an inch over the potatoes. Add a generous pinch of salt and bring the potatoes to a boil. Cook until tender about 20-25 minutes (the cooking time will vary depending on how large or small your cut the potatoes). The potatoes are done when they are fork tender.

Meanwhile in a large skillet melt 3 Tbs. of butter. Add the onion, celery and carrots. Salt and pepper to taste. Cook until crisp tender, approximately 5 minutes. Add the remaining 2 cloves of minced garlic and cook until fragrant, about 1 minute. Add the flour and stir for about a minute to remove any “floury” taste. Add the chicken stock and continue to cook until the liquid thickens about 10 minutes. Add the cheese and oregano and stir until the cheese is melted. Taste the mixture and add any additional salt and pepper as needed. Add the chicken and peas. Stir to combine. Turn off the heat and let stand.

Drain the potatoes and put them back into the pot. Add 1 Tbs. of butter and cover for a few minutes until the butter is melted. Using a hand masher or electric hand mixer, mash the potatoes until most of the lumps are gone. Add the heavy cream (you may want to add it incrementally instead of all at once so that the potatoes don’t wind up to runny) and finish mashing. Separate an egg and put only the yolk into the mashed potatoes. Stir until completely combined. Add any additional salt as needed.

Place the vegetables mixture into the pan(s). Top with the mash potatoes. Smooth the potatoes over the top of the vegetables until they are completely covered. Place the pan(s) on a foil lined rimmed backing sheet. Bake until the potatoes are lightly browned and the vegetable mixture is warm and bubbly, approximately 20-30 minutes.

Chicken Shepherds Pie

Chicken Shepherds Pie

Balsamic Chicken and Vegetables…

Once again, another chicken recipe. What can I say, I love chicken. I like this recipe because it is quick, colorful and ever so delicious. Just one half hour and you’re putting a great meal on the table.

So let’s talk balsamic chicken and vegetables…

The ingredients.

The ingredients.

Lesson Learned 1 – Preparation is the key to success in this recipe: This recipe cooks relatively quickly. It is important to have everything prepped ahead of time so that you can move seamlessly through the steps.

I got everything ready and had the ingredients in prep bowls so that I could add things systematically. Because this recipe cooks so quickly it would be difficult, if not impossible to prep things as you went along.

Lesson Learned 2 – Cooking with shredded carrots: Boy, did I learn my lesson on this one. When carrots are cut that thinly they cook very quickly. I added them in with the asparagus and tomatoes and they overcooked. If you decide to add shredded carrots to this recipe add them at the end when you put the chicken back in the pan.  That gives them only a couple of minutes to get warm which is what you want. As you notice in my final pictures you don’t see the carrots. They got so overdone that I just tossed them. True lesson learned.  (you see, even cooks that have a lot of successes can have failures too – it’s all part of the process).

Lesson Learned 3 – Use cherry tomatoes and keep them whole: You can use any kind of tomato in this recipe, but I found that if you use cherry tomatoes and keep them whole they cook in the same amount of time as the asparagus. The cherry tomatoes were just starting to burst at the time the asparagus became crisp tender.

Chicken TenderloinsLesson Learned 4 – Use chicken tenderloins for this recipe: You can buy prepackaged chicken tenderloins or you can cut your own from boneless skinless chicken breasts. Chicken tenderloins are slightly thicker than chicken cutlets (about a quarter of an inch or so) and they cook very quickly, I found cooking them for 3 minutes on each side and then adding them back to the pan at the end for a couple of minutes was more than enough time. The tenderloins were cooked and still juicy.

Lesson Learned 5 – Be careful how much oil you use: I cooked this in a well seasoned cast iron skillet so I only used about a tablespoon of garlic infused olive oil. You can use two tablespoons of oil or a combination of one tablespoon oil and one tablespoon butter but if you do, measure it and don’t eyeball it. You don’t want the end result to be greasy and if you’re not careful that’s what will happen. Less is more where the oil is concerned in this recipe.

This is a great recipe for a quick meal that tastes special. Try it and let me know what you think!

BALSAMIC CHICKEN AND VEGETABLES…

  • Servings: 4
  • Difficulty: Easy
  • Print

INGREDIENTS

Balsamic Chicken and Vegetables1 Packet Italian Dressing Mix (make according to directions on the packet)

3 Tbsp. good balsamic vinegar

1 1/2 Tbs. honey

1/8 tsp. red pepper flakes, optional

1 – 2 Tbs. olive oil (no more than 2)

1/4 cup shallots, chopped

2 cloves garlic, minced

6-8 chicken tenderloins

1 pound asparagus, trimmed

1 1/2 cups cherry tomatoes, left whole

1 cup shredded carrots, optional (see lessons learned above)

Salt and pepper to taste

DIRECTIONS:

In a large prepare the salad dressing mix according to the instructions on the packet. Add the balsamic vinegar, honey and red pepper flakes. Set aside.

Heat oil in (preferably) a large cast iron skillet. Pat chicken tenderloins dry with a paper towel. Season one side with salt and pepper. Place the tenderloins seasoned side down in the heated oil. Season the other side of the tenderloins. Cook for three to four minutes on each side. Remove the tenderloins from the pan and cover them with foil to keep them warm.

Add the shallots and garlic to the pan. Cook for only a minute. Add half the salad dressing mixture to the pan. Add the asparagus and tomatoes. Cook for about 3 minutes or just until you see slightly cracking on the skins of the tomatoes.

Remove the veggies from the pan and cover them to keep them warm. Add the remaining salad dressing mix and cook stirring constantly until the liquid begins to reduce and thicken. Turn down the heat and the chicken and veggies back into the skillet. Cook for another two minutes. Serve immediately.

Balsamic Chicken and Vegetables

Serving Suggestion: Balsamic Chicken And Vegetables With And Individual Sweet Potato Casserole

Serving Suggestion: Balsamic Chicken And Vegetables With An Individual Sweet Potato Casserole

Roast Chicken In A Cast Iron Skillet…

Anyway you slice it, I like chicken. I don’t think there’s a chicken recipe out there that I don’t love. And I’m always looking for new ways to prepare chicken. Never in a million years did I ever think I’d find a new way to roast chicken. But I’m always learning new things in the kitchen, and this roast chicken recipe has quickly become my go-to way of making chicken.

This recipe is so easy and I say this, without reservation, it produces the best roast chicken ever! The most time consuming part of the process is making the rub and cutting the vegetables. The rest of the work is done by the cast iron skillet. Amazing!

So let’s talk roast chicken in a cast iron skillet…

Roast Chicken In A Cast Iron SkilletLesson Learned 1 – Cut the butternut squash and russet potato into large pieces: This recipe is designed for two with plenty of chicken remaining for your favorite leftover recipes (I used my leftovers to make chicken salad). The thing to remember is the chicken will be roasting at a high temperature, 400 degrees, for an hour to an hour and a half. If you don’t cut your squash and potatoes into large chunks they will become mush. I cut my squash into squares a little less than an inch thick and they turned out perfectly. I cut the potato in half lengthwise and then in inch and a half sized half moons and again they were perfectly done.

Lesson Learned 2 – Resist the urge to baste the chicken: In the past I would baste my chicken all the time thinking it would create a crispy skin. In actuality it does quite the opposite. Because you roast the chicken at a high heat all you need to do is brush the skin with some melted butter before you put it in the oven. Then leave the chicken alone.

At the half way mark baste the squash and potatoes with the liquid in the pan. That worked well and helped to soak the bacon and chive seasoning I used into them. But remember to leave the chicken alone.

Lesson Learned 3 – Once the chicken has reached an internal temperature of 160 degrees, remove the skillet from the oven, cover it with foil and let is rest for 20 minutes: With chicken, turkey, steak, etc., it is so important to let it rest once the meat has reached its desired cooking temperature. That allows for all the juices to redistribute into the meat and not wind up running all over your plate. The chicken will carve easily if you let it rest.

I don’t think I will roast a small chicken using any other method than this one ever again. I was so amazed at how simple everything was and how delicious the chicken, squash and potatoes were. If you love chicken the way I love chicken, you simply have to try this recipe!

Roast Chicken In A Cast Iron Skillet…

  • Servings: 2 With Leftovers
  • Difficulty: Easy
  • Print

INGREDIENTS:

1 five pound roasting chicken (I roasted a 5 1/2 pound chicken)

1 1/2 tsp. garlic, minced

1 tsp. kosher salt

1/2 tsp. pepper

1/2 tsp. dried thyme (or you can used dried sage)

Butternut squash cut into large chunks (one small squash should be more than enough)

1 russet potato, halved and cut into 1 1/2 inch half moons

1 1/2 Tbs. bacon and chive seasoning

4 Tbs. melted butter, divided

1 tsp. garlic infused olive oil (you can use plain olive oil as well)

DIRECTIONS:

Preheat oven to 400 degrees. Clean and pat dry the chicken. Mix together the garlic, salt, pepper and thyme to use as a rub. Using your fingers, slide your hand between the breast skin and the chicken. Take the thyme mixture and rub it between the skin and the meat. Any remaining mixture can be rubbed onto the surface of the outer skin.

With a pastry brush lightly brush some melted butter on the bottom of a 10 or 12 inch cast iron skillet (I used a 10 inch skillet). Place the chicken in the skillet. Baste the top of the chicken with some butter.

In a large bowl cut up the squash and potatoes. Sprinkle them with olive oil and stir until the squash and potatoes are coated. Add the bacon and chive seasoning and stir until coated. Place the squash on one side of the chicken and the potatoes on the other. Pour the remaining melted butter over the squash and potatoes.

Roast for an hour to an hour and a half or until a meat thermometer stuck into the thickest area of the chicken between the breast and leg reads 160 degrees. (My chicken needed to roast for 1 1/2 hours. A smaller one should take about an hour). Half way through the roasting process baste the squash and potatoes with the juices that have accumulated in the skillet.

Once the chicken has reached an internal temperature of 160 degrees, remove the skillet from the oven, cover it with foil and let it rest for 20 minutes. Carve and serve.

Roast Chicken In A Cast Iron Skillet

Roast Chicken In A Cast Iron Skillet

Roast Chicken In A Cast Iron Skillet

Slow Cooker Honey Garlic Chicken…

I think I have a love/hate relationship with slow cookers. The concept of the slow cooker is undeniably fabulous – put something in the pot when you leave the house in the morning and voila, when you come home from work, you have a meal ready to go. The challenge is to find or create slow cooker recipes that in the end not only produce a meal but a flavorful one, one that is not cooked to the Peter Principal of bland. I’ve tried many variations of slow cooker recipes and have only a few that I think I’ve perfected. This is one of them.

What I’ve found with a slow cooker is if you vary what you are slow cooking with either other ingredients not in the slow cooker or ingredients that you put in the slow cooker near the end of the cooking process you’ll get a much better outcome. So is the case with this recipe.

So let’s talk slow cooker honey garlic chicken…

Browned Chicken ThighsLesson Learned 1 – The best type of chicken to use and how to prepare it: For this recipe and for most slow cooker recipes involving chicken, I use chicken thighs. I recommend using bone in, skin on chicken thighs for this particular recipe. Slow cooking tends to take the moisture out of chicken and by using these types of chicken thighs you protect yourself against getting dried out, bland chicken. I recommend searing the thighs briefly over a very hot heat, preferably in a cast iron skillet, before putting them into the slow cooker. Then after the meal is prepared, I recommend putting the chicken under the broiler just briefly the crisp up the exterior skin a little. As I mentioned earlier, I think the process of slow cooking is merely a part of the cooking process and not the entire thing. By searing and then briefly putting the chicken under the broiler at the end, you’ll wind up with a juicier, more flavorful outcome.

all-clad-6.5-qt.-slow-cookerLesson Learned 2 – Get to know how your slow cooker cooks: All slow cookers are not created equal. Some have higher default temperature settings than others. I have an All-Clad slow cooker and I love it, but I’ve learned over time that I can lessen the cooking time on my chicken recipes and they turn out better. Many of the recipes I read from which I based this one called for the cooking time to be 7-8 hours on low. In my experience and with my slow cooker I know I can cook chicken for 6 hours on low and I wind up with chicken that is cooked through but doesn’t taste like chalk. Especially with this recipe where you open the slow cooker twice during the cooking process to baste and to add the haricot vert. So be aware, you may have a few disappointments before perfecting recipes in your slow cooker. But there is nothing like the convenience of a slow cooker and once you find your groove with yours, you will love it!

Lesson Learned 3 – Ingredients to add at the end of the cooking process: In this recipe you add the haricot vert (green beans) during the last half hour of cooking. At the time I added them, I also scooped some of the sauce over the chicken just to add a little more moisture to it. (I also basted the chicken with the sauce about half way through the cooking process). By adding the green beans at the end they turned out crisp tender and were delightful. Put in only the amount you intend to have for that meal. If you have leftovers, cook a fresh bunch of beans at that time.

Also, if you want crisp tender onions you can add frozen pearl onions in with the haricot vert during the last thirty minutes.

Slow Cooker Honey Garlic ChickenCertain ingredients only take a short amount of time in the slow cooker (like beans, shrimp, frozen okra) but others take the full cooking time (like carrots, potatoes and onions). The ones you cook the entire time should always be cut into large chunks so they don’t fall apart at the end. The ones you put in for a short time can go in as is.

I think you’ll like this recipe. It definitely is easy and with a few simple tricks you can achieve great flavor as well. Try it and tell me what you think!

Slow Cooker Honey Garlic Chicken…

  • Servings: 4
  • Difficulty: Easy
  • Print

INGREDIENTS

8 bone in, skin on chicken thighs

baby new potatoes (or red potatoes quartered)

baby carrots (or 4-5 large carrots cut into chunks)

1 large sweet onion, quartered (or frozen pearl onions)

haricot vert (thin green beans), enough for your initial serving

1 Tbs. butter

1 Tbs. garlic infused olive oil (you can use plain olive oil)

1 1/2 cups low sodium soy sauce

1 1/2 cups clover honey

3/4 cup ketchup

4 cloves garlic, minced

1 1/2 tsp. dried basil

1 tsp. dried oregano

1/2 tsp. red pepper flakes (you can add more if you want it spicier)

Salt and pepper

DIRECTIONS

In a cast iron skillet, heat the butter and olive oil until the butter is melted. Pat dry the chicken thighs and season them with salt and pepper. Place them skin side down into the hot pan. Sear them until light golden brown, about 3 minutes. Remove the chicken thighs from the pan and set aside.

Whisk together the soy sauce, honey, ketchup, garlic, basil, oregano and red pepper flakes. Place the potatoes, carrots and onions (if using frozen pearl onions, add them during the last 30 minutes of cooking time) in the slow cooker. Season with salt and pepper. Place the chicken thighs on top of the vegetables. Pour the soy sauce mixture over the chicken and vegetables. Cover and cook on low for 6-8 hours (this time depends on your slow cooker and its default temperatures). Half way through the cooking process baste the chicken with the soy sauce mixture.

One half hour before serving add the green beans and baste the chicken again (add the frozen pearl onions at this time). If desired, before serving, place the chicken thighs on a baking sheet and put them under the broiler for approximately three minutes. Serve immediately.

Ingredients ready for slow cooking

Ingredients ready for slow cooking

IMG_9344

Chicken Meatballs In Cheesy Tomato Cream Sauce…

I was in search of somewhat quick comfort food meal that was a little bit out of our ordinary faire. My husband suggested trying to make meatballs with ground chicken and I took it from there.

Meatball IngredientsI’d never made meatballs with anything other than ground beef so I was interested to see how they would turn out. They were fabulous, but I have to admit they still tasted like a regular old meatball to me. It was fun experimenting with a different spin on meatballs and the meal was absolutely divine with very little fuss.

So let’s talk chicken meatballs in cheesy tomato cream sauce…

The meatball mixtureLesson Learned 1 – Although in the end they may taste similar, working with ground chicken is different than working with ground beef: Because ground chicken is leaner you have to be careful how you mix it and how much you cook it. Otherwise you will be stuck with dry, tasteless meatballs.

First of all, to keep the mixture moist I added a tablespoon of sour cream and 1/4 cup milk along with an egg. I will warn you now, the mixture will be very moist as seen in the picture to the left. I started out with 1/2 cup of panko bread crumbs and wound up adding about 1/4 cup more. Keep in mind you do want the mixture to be very moist, probably more moist than you think. Although it seemed a little strange at first, this consistency produced tender, juicy meatballs.

You also want to make sure you don’t overcook the meatballs. I formed the meatballs using a well rounded teaspoonful of the mixture and rolling them in my hand. I arranged them on a pan lined with foil and sprayed with cooking spray. They went under the broiler for about 6 minutes and then I cooked them through in the simmering tomato sauce. The pictures below show the meatballs before and after going under the broiler.  There appears to be only a slight difference. You put them under the broiler to “set” them so when you take them out they are only somewhat cooked. But trust me, the tomato sauce will do the rest of the work and you’ll have fabulous and tender meatballs in the end.

Meatballs Before Going Under The Broiler

Meatballs Before Going Under The Broiler

How The Meatball Should Look After Coming Out From The Broiler

How The Meatballs Should Looking Coming Out From Under The Broiler

Lesson Learned 2 – Use good ingredients: I always remember Ina Garten saying that you need to use good ingredients in order to have the best outcome. I am especially referring to the tomato sauce you use. With this particular recipe I used a tomato basil sauce. Now you may turn up your nose on “organic” but I actually spent time reading the labels on many sauce jars and was surprised by some of the ingredients in them. I finally settled on a little known organic brand that had only fresh clean ingredients and no chemical sounding names. It was a little more expensive, but I felt good about what I was eating and the sauce was divine. It’s your choice. I just get a little uncomfortable putting ingredients into my body that I cannot even pronounce.

Mozzarella PearlsLesson Learned 3 – Use only a small amount of mozzarella pearls: I was happy to discover that you can buy mozzarella in a size called “pearls”. They are much smaller than mozzarella balls and just the perfect size for this recipe.

You may think you want to put in more than what is called for in the recipe but I would advise against it. Too many mozzarella pearls and your sauce will get overly thick and gloppy. You want the flavor of the mozzarella and a slight texture of melted stringiness in the cheese. In this case a little goes a long way. If for some reason you add too much and your sauce gets too thick, simply add some of the pasta water to the pot to thin the sauce. Or you can use chicken broth and get the same result.

You can find mozzarella pearls in the dairy case next to the fresh mozzarella. This was quite a find for me as I can envision using them in a lot of other recipes.

Adding Mozzarella Pearls To The Sauce

Mozarella Pearls Added To The Sauce

The biggest part of the work in this recipe is assembling the meatballs. If you are pressed for time prepare the mixture the night before. It takes no time to roll them up and put them under the broiler. The rest is basically adding them to the sauce, heating the sauce while cooking the pasta and adding the mozzarella at the end. My husband gave a two thumbs up to this recipe, so you know it has to be good!

Chicken Meatballs In Cheesy Tomato Cream Sauce…

  • Servings: 4-6
  • Difficulty: Easy
  • Print

INGREDIENTS:

1/2 – 3/4 cup italian style panko bread crumbsChicken Meatballs In A Cheesy Tomato Cream Sauce

1/4 cup whole milk

1 lb. ground chicken

1 egg

2 Tbs finely grated onion

1 Tbs. fresh parsley, minced

1 Tbs. sour cream

1/2 tsp. kosher salt

1/4 tsp. freshly cracked black pepper

2 cups pasta (I used a pasta called orecchiette)

Pasta water, if necessary to thin out the sauce

1 jar organic tomato basil sauce

1 Tbs. tomato paste

1/2 cup heavy cream

1/2 cup mozzarella pearls

Fresh parsley or basil, chopped for garnish.

DIRECTIONS:

For the meatballs: Set your oven rack in the center of the oven and put the broiler on high. In a large bowl combine 1/2 cup panko, milk, chicken, egg, onion parsley, sour cream, salt and pepper. The mixture will be very moist. If too moist add a little more panko being careful not to make the mixture too dry. Take rounded teaspoonfuls of the mixture and roll into meatballs approximately one inch thick. Spray a foil lined pan with cooking spray and arrange the meatballs on the pan. Broil the meatballs for 5-6 minutes until very lightly golden.

Cook the pasta according to the package instructions. While the pasta is cooking put the tomato sauce in a deep pan, and heat. Once the sauce is warmed through add the tomato paste and stir until combined. Add the cream and simmer for a few minutes. Add the meatballs and simmer for an additional five minutes. Add the cooked pasta to the sauce. Add the mozzarella pearls and stir until melted. If pasta sauce is too thick, add some of the pasta water to thin it.

Sprinkle with fresh herbs and serve immediately.

Tomato Basil Sauce With Orecchiette Pasta

Chicken Meatballs In A Cheesy Tomato Cream Sauce

Chicken Meatballs In Cheesy Tomato Cream Sauce…

Mom’s Chicken Soup With Dumplings…

Most of you know by now that my mom wasn’t much of a cook. She led a busy life raising two kids and working (and you have to remember, at that time women were staying home when they had children) and so her meals were pretty rudimentary – meat, potatoes, peas or corn – that was about it. But there was one meal she made that was over the top fabulous and that was chicken soup and kugelis. I’m sharing the chicken soup recipe today. As for the kugelis recipe (kugelis is a Lithuanian dish and basically a baked potato pudding) I’ll share another time. Whenever my mom would visit us I would always ask that she make this meal. No one could make it like my mom – but she did pass down those secrets to me.

For years this was the only homemade soup I made. This year I ventured into making some others (broccoli cheddar and creamy tomato soups) and I now find it hard to believe why anyone would not make homemade soup. It’s so easy and most of the work, besides the chopping and dicing, is done in the pot.

I guarantee you this recipe is a keeper. It’s not rocket science but it is so-o-o good – it was and still is a tradition in my family. So let’s talk mom’s chicken soup with dumplings…

Chicken in a large enameled cast iron potLesson Learned 1 – Use a very large stock pot: I have a 6 1/2 quart LeCreuset stock pot that I use whenever I make soup and there’s a reason why. You need a big enough pot to put in a whole chicken and still have plenty of room for liquid. I make this recipe using a 5-6 pound chicken and it can take up a lot of room.

I also like using an enameled cast iron pot when I make soup because of it’s ability to hold heat and provide even heat. There is no better way to cook than to use cast iron, but it has its drawbacks. Mainly it’s very heavy and it takes a little more time for it to heat up. But when you’re cooking something for a substantial amount of time, I find the way to get the best results is to use cast iron.

DumplingsLesson Learned 2 – Don’t be afraid to make dumplings: Some people say they have no luck making dumplings. There is a trick to making them that basically ensures success all the time. Once you’ve spooned the dumpling batter in the pot, put the lid on and keep it on for at least 20 minutes – NO PEEKING. The dumplings need time to solidify and they only way they do is if you keep that lid on and let the steam cook them through. Don’t worry, you’ll have plenty of time to view your dumpling prowess after they’ve fully cooked. If you don’t do this, they will fall apart. So don’t be like my husband who likes to lift the lid of the crock pot mid through the cooking time to see how things are going. Keep the lid on and you will be successful!

texture of dumpling doughThe texture of the dumpling batter should resemble a slightly moist sticky dough. I apologize in advance but this is a skill you learn with trial and error. Just remember that you don’t want the dough too runny nor do you want it to lack some moisture. Don’t worry, it’s not as hard as it sounds.  The picture on the left shows the dough just a little too moist but almost the desired consistency. I think I added another tablespoon of flour at this point and it turned out perfectly. Once you have combined all the ingredients in the recipe, if it looks a little dry add a little more buttermilk and if it looks a little too wet add a little more flour. The trick is to add the buttermilk or flour a little at a time at that point, so you don’t over mix but get the right consistency.

One more great dumpling making secret: Before you start spooning in the dough, place your teaspoon into the boiling soup. That way when you drop in the dough it will easily release from the teaspoon. Do that every time and you’ll never have to worry about a lot of dough sticking to your spoon.

That’s it. The rest is assembling and preparing the ingredients and letting the chicken and dutch oven do all of the work. This is a great recipe especially for this time of year. I hope you enjoy it!

Mom's Chicken Soup With Dumplings

  • Servings: 10
  • Difficulty: Easy
  • Print

INGREDIENTS:

Soup:

1 five to six pound chicken, thawed

5-6 medium sized carrots peeled and cut into 2 inch logs (or you can use baby carrots as well)

4 celery heart stalks

3 cloves of garlic peeled but left whole

2 bay leaves

2 thirty-two ounce boxes of unsalted chicken stock (half stock, half broth is best)

2 tsp. instant bouillon chicken granules or 2 Tbs. roasted chicken better than bouillon

water

chopped chives for garnish

salt and pepper

Dumplings:

1 cup flour

1 tsp. baking powder

1 tsp. salt

1 extra large egg, slightly beaten

1/4 cup buttermilk

1/8 cup melted butter (2 Tbs)

2 Tbs. chopped chives or 1/s tsp. poultry seasoning

DIRECTIONS:

Wash chicken, remove any material inside the cavity and pat dry. (if the chicken has any innards such as a neck, liver and heart throw that in the pot as well). Put the chicken in a 6 1/2 quart stock pot. Season the chicken with salt and pepper. Add the carrots, celery, garlic and bay leaves. Pour in the chicken broth and stock. Add the bouillon. Fill the remainder of the pot with water until the liquid is about an inch from the top of the pan. Cover the pot and cook for 60 minutes. (a six pound bird required 60 minutes on medium-high heat).

After 60 minutes, turn off the heat and carefully remove the chicken from the pot along with the bay leaves. The garlic cloves will basically disintegrate so you don’t need to worry about removing them. Allow chicken to cool slightly so that you can work with it. Remove all the meat from the chicken, being careful to discard any bones and skin. Chop the chicken meat into nice bite size pieces. Put the meat back in the pot, cover the pot and bring to a boil.

While the soup is coming back to a boil make the dumpling batter. Melt the butter and give it time to cool before adding it to the dumpling mixture. Combine all of the dry ingredients including the chives. Make a well in the dry ingredients and pour in the wet ingredients (it is important for the melted butter to be cool so that it doesn’t scramble the egg). Stir until combined. If the mixture is too dry add a little more buttermilk, if too moist add a little more flour.

Remove the cover from the pan. If the broth is boiling quickly drop the dumpling dough into the pan by the teaspoonful. Once all the dough is in the dutch oven, put the lid back on, lower the heat to medium and do not take the lid off the pan for at least 20 minutes.

All Ingredients With Stock

 Cook for at least 30-40 minutes

Cut up the chicken

Put dumpling dough into boiling soup

Mom's chicken soup with dumplings

Chicken Parmesan For Two…

Once again this young girl’s fancy turns to a chicken recipe, and this time with an Italian flair. What can you say about chicken parmesan that doesn’t scream delicious. Breaded chicken, marinara sauce, fresh basil leaves, provolone and parmesan cheeses. Sounds like a killer combo to me. And I like my little twist on this recipe, incorporating whole basil leaves under the provolone. This one got a two thumbs up from my husband, so you know it’s got to be good.

Lesson Learned 1 – You need to be organized for this recipe: This recipe has several different steps that can either work like a charm or throw you for a loop. Make sure you prep everything ahead and the process will be a breeze. Preheat the oven, set up the dredging station, grate the parmesan, lay out the basil leaves and provolone slices, have pans ready for the excess marinara and frying the breasts and so on. The key to success here is not only in the ingredients but also in the preparation.

Lesson Learned 2 – Grate fresh parmesan and don’t use the canned stuff: There is a difference. Grated fresh parmesan has a fuller, more robust flavor. It also melts better and tastes less salty. And it’s not that hard to do. I cut small pieces off a brick and put them in my mini food processor. I pulse the processor a few times just to get it started and once it appears the pieces have been broken down I just let the processor go. I guarantee you it’s worth the effort.

IMG_3349IMG_3360


Lesson Learned 3 – Use less marinara sauce than you think: You want to make sure the chicken doesn’t get too soggy. Use only a little bit of marinara in the bottom of the pan and spoon only about a tablespoon on top of it before adding the basil and provolone. Keep the leftover sauce warm on the stove and you can add more to the chicken when you serve it if you like. Or you can do what I did and use it to top a side of spaghetti.

IMG_3398

Lesson Learned 4 – Use fresh basil leaves if at all possible: The fresh basil leaves provide great flavor to the chicken. You can sprinkle the chicken with dried basil if that’s all you have, but fresh is so much better. Top the basil with a slice of provolone and you’re ready to go.

IMG_3404

IMG_3414

Lesson Learned 5 – You can use just one chicken breast for this recipe: I only used one large chicken breast for this recipe. I buy breasts whole with the bone and ribs attached and bone them myself. I halved one of the breasts and it left me with two perfect portions that were 1/2 inch thick. If you have thicker breast meat you’ll need to pound it down to 1/2 inch thick in order for the chicken to cook in the allotted time. Many people shy away from boneless skinless breasts because they think they’re too dry when in actuality they overcook them. Boneless chicken breasts can be very tender and juicy if cooked properly. Follow the allotted time in the recipe and you’ll have great results.

parmcollage

While I was making this my husband said, “Wow, that’s a lot of work.” For someone who enjoys the prep part of preparing a meal, I didn’t find that to be the case. But as I mentioned earlier, you definitely have to be organized when you make this recipe. Get everything ready up front so that all you’ll have to do is move seamlessly between each step of the process.

I’ve written this recipe for two people but it can be easily adaptable to 4 or more. You’ve got to try this and let me know what you think. It’s definitely worth it!

Chicken Parmesan For Two…

  • Servings: 2
  • Difficulty: Medium
  • Print

INGREDIENTS:

1 large boneless chicken breast, halved and pounded to 1/2 inch thick (if needed)

1 cup of flour

1 cup of bread crumbs, plain or seasoned

1 Tbs. italian seasoning

1 Tbs. garlic powder

1 cup of grated parmesan, halved

1 egg

Splash of milk

1 small jar of marinara sauce

4 large basil leaves

2 slices of thinly sliced provolone

Canola oil

DIRECTIONS:

Preheat the oven to 350 degrees. Set up a dredging station for the chicken with 3 separate dishes (I use paper plates for two of them and that works just fine). Combine the flour, garlic powder and italian seasoning on one plate. In a rimmed dish, beat the egg and milk together. Combine the bread crumbs and half the grated parmesan on another plate.

Dredge both sides of a chicken breast in the flour. Dip the breast into the egg mixture coating both sides. Dredge the breast in the bread crumb mixture and set aside. Follow the same process with the second chicken breast.

In a large skillet heat the canola oil until it looks shimmery. Use enough canola oil so that when the chicken is added it sizzles around the chicken. Add the chicken breasts and cook for 3 minutes on each side. Once done on both sides, place the chicken breasts on paper towels to absorb the excess oil.

Lightly coat the bottom of a baking dish with marinara sauce. Arrange the chicken on top of the sauce. Put a tablespoon of marinara over the each breast. Sprinkle the remaining grated parmesan on top of both breasts. Top each breast with two large basil leaves and place a provolone slice over the basil.

Bake the chicken for 15-20 minutes. Serve.

IMG_3446

IMG_3443

Serving Suggestion: chicken parmesan with garlic roasted asparagus and spaghetti


Lemon Chicken With Garlic And Capers…

If you happen to glance at my recipe page and notice a plethora of chicken recipes there’s a reason for that. I simply love chicken, no two ways about it. A lot of people blog a wide variety of recipes. I simply blog recipes that I like. If my recipes don’t fit the bill for you, no worries. There are so many websites to choose from these days so I’m sure you’ll find what you’re looking for if it’s not here.

Not only do I blog recipes that I like, but also ones that are simple but can challenge you in some regard to move yourself out of your comfort zone. My goal is to be your test kitchen by doing the work up front and giving you insights on how to be successful. I wished for a long time that I had someone who would do that for me. It can get frustrating when you fail to get things right time after time. So hopefully I can demystify a few things for you, and I hope I can learn some things from you as well.

So back to this chicken recipe. It’s relatively simple. What takes the most time is the prep. But I love to prep. Chopping, mincing, dicing, slicing – it’s therapeutic for me. Don’t let the prep make you shy away from making this. So much can be done ahead and then once it’s time to cook, everything goes relatively quickly. I made this with a brussels sprouts, pancetta and sun-dried tomato side and it was a little tricky balancing the steps between both. But it was all worth it when my husband kept saying, “This dinner is really good.” Enjoy this recipe and my lessons learned…

IMG_2614Lesson Learned 1 – Cooking with lemon slices: First you need to slice the lemon into even-sized thin rounds. The best way to do this is with a mandolin slicer. In a past recipe I spent quite a bit of time talking about how great a mandolin slicer can be and also how dangerous it can be to use. Just be careful when you use one. But as you can see from the picture, the mandolin will give you even-sized thin rounds.

IMG_2625In the recipe you actually sauté the lemon rounds. It gives the chicken and sauce a delightful flavor and also serves as a garnish for the chicken when you serve it. The trick is to cook them quickly, no longer than about 45 seconds. Once you notice the lemons starting to turn brown, as you can see in the picture to the right, remove them from the pan. You want them to be slightly browned but you don’t want them to loose their shape or too much of their sections.

Lesson Learned 2 – Make sure the chicken breasts are no thicker than 3/4 inch: The thin breasts cook quickly, about 4 minutes per side. I took regular chicken breasts and with a sharp knife cut them in half. That gave me 3/4 inch pieces. You can also take a breast and pound it out to that thickness and then cut it into portion size pieces. Whatever is easier.

10-piece-2.25-10.25-glass-bowl-setLesson Learned 3 – Be organized when making this recipe: I like this recipe not only because it’s flavorful, and believe me it is, but because once you’re done with the prep, the rest is a breeze and goes quite quickly. But the trick is to be organized and have everything prepped up front. I systematically go through the list of ingredients and see what needs to be done with each. Then I put each ingredient into little prep bowls and set them aside until it’s time to use them. Just be careful, you don’t want to prep some things too far ahead. Something like flat leaf parsley that you use for a garnish is best prepped right before you want to use it. If I’m not sure about something I prep it, cover it with plastic wrap and put it in the refrigerator until it’s time to start cooking. I am not suggesting doing your prep hours in advance. I normally start, depending upon the requirements of the recipe, about an hour before I plan on cooking it. The key is to have everything chopped, diced, sliced, etc., before you start. You will have no time to do this work once you start the cooking process.

Now that I come to think of it, this really applies to any recipe. It is so important to understand it and stick to the process, especially when you’re learning to maneuver your way around a kitchen. Ready recipes thoroughly (at least twice all the way through), understand the terminology, prep ahead and go through the process as designed. This will help to ensure your success with any recipe.

I really like this recipe and will definitely make it often. I hope you try it and let me know what you think.

Lemon Chicken With Garlic And Capers

  • Servings: 4
  • Difficulty: Easy
  • Print

INGREDIENTS:

2 small lemons cut into thin rounds

1 1/2 tsp. of sugar

4 cloves of garlic, halved

4 boneless skinless chicken breasts 3/4 of an inch thick

2-3  Tbs. olive oil (I used garlic infused olive oil)

2 Tbs. butter

2 tsp. grated shallot

1/2 tsp. grated garlic

1/2 tsp. dried oregano (use can use 1 fresh spring as well)

1 fresh thyme sprig (you can use dried – I preferred to have at least one herb fresh)

1/2 cup dry white wine

1 cup unsalted chicken stock

1 tsp. flour

1 Tbs. capers, drained and rinsed

flat leaf parsley for garnish, optional

Salt and pepper to taste

DIRECTIONS:

Slice the lemons and combine in a bowl with the sugar and garlic. Set aside. Season chicken with salt and pepper. In a large skillet over medium high heat add the oil. Swirl to coat the pan. Add the chicken to the pan and cook about 4 minutes each side. Remove the chicken front the pan, put on a plate and cover with foil to keep warm.

If needed, add some oil to the pan and add the lemon mixture. Cook stirring occasionally until the lemons start to turn a light brown. Remove the mixture from the pan and set aside.

Add 1 1/2 tsp. butter to the pan and once melted add the grated shallots, grated garlic and herbs. Cook for about a minute. Add the wine and deglaze the bottom of the pan. Continue to cook until the wine is almost completely evaporated. Season with salt and pepper. Add the flour and stir for about a minute, just to remove any floury taste. Add the chicken stock and whisk while bringing the mixture to a boil. Reduce the heat and continue to whisk until the liquid has thickened and reduced by a third. Remove herb sprig(s) from pan. Add a remaining butter and capers. Stir until the sauce gets shiny. Add the chicken and lemons back into the pan. Cover the chicken with the sauce, cover the pan and cook for and additional 2-3 minutes. Serve garnished with flat leaf parsley.

IMG_2649

IMG_2670

IMG_2681

IMG_2663

Turkey Pot Pie…

For some reason I am not a big fan of having turkey on Thanksgiving but I LOVE having turkey  on  Christmas Day. This year we had three guests for Christmas dinner and that precipitated making a whole turkey versus just a turkey breast. I had plenty of practice over this past year making bone-in turkey breasts but I never really had a lot of luck making a whole turkey, that is until this year…

I found two tricks that finally rendered me a perfectly cooked bird. One, making sure that the bird was completely defrosted (and I found it takes longer than what is written which is one day in the refrigerator for every four pounds –  plus the importance of removing the guts as soon as possible so you don’t harbor an ice ball in the cavity) and second to roast it at 350 when conventional wisdom says to roast the bird at 325. Needless to say, my bird turned out perfectly this year – the very first time I’ve ever done a whole turkey the right way. So if you are struggling with making a whole turkey, have faith. It only took me several years to finally get it right!

But, this blog is not about roasting a turkey. It’s about what you can do with the leftovers. And for me, one of the best comfort food recipes you can make with leftover turkey is turkey pot pie. And believe me, you will have greater success making this than learning how to roast the perfect turkey.

IMG_2584


I like this recipe because you can use just about anything you have leftover in it. I had some mushrooms that I cut up and sautéed and had a bag of frozen vegetables that had green beans, corn, peas, carrots and celery. But you can use frozen peas and carrots, or a broccoli cauliflower medley – really any bag of frozen veggies you have will do the trick. It really takes no time to put together the filling and within 25 minutes after that you have a delicious meat pie that no one will ever consider a leftover. Here are some lessons I learned while making this recipe:

Image 1Lesson Learned 1 – Don’t take the easy way out and use canned soup for the filling: Have you ever read the labels of many canned soups? The amount of sodium in them is unbelievable. Don’t get me wrong, I am not a proponent of no salt, but when you use processed foods sodium is used as a preservative as well as a seasoning. It is so easy to make the filling from scratch and you can use unsalted chicken stock which has only 5% sodium in it versus the 36% sodium you get in a canned soup! That’s a big difference.

One thing I learned as I became more adept in the kitchen is how easy certain things are to make that I had been, out of habit and lack of knowledge, using previously as pre-prepared or processed. True sometimes they can be very convenient, but when you look at what you may be putting into your system on a regular basis it makes you take pause. Making a simple roux and using unsalted chicken stock creates the same creaminess and flavor as a canned soup, and I would venture to say it gives even greater flavor. I also know that time is a factor for most people and therefore convenience is important. But believe me, in this case, making a simple roux and using unsalted chicken stock takes no time and in the end is much better for you.

IMG_2498

Lesson Learned 2 – If you really want convenience, use prepackaged pie crusts: I am still in the process of mastering the homemade pie crust but must admit that part of my reluctance to do so is based on the fact that the ones you can by pre-made are so darn good. If you are a purist, then make your own pie crust. There are tons of recipes out there to choose from. But for me, I like the convenience of the pre-made dough. The trick is to let the dough come to room temperature before using it. Don’t just let it sit in the fridge and then pull it out and use it. Let it sit on the counter for about an hour and the dough will not only be easier to work with but also will give you the best results.

Lesson Learned 3 – Working with pie crust dough: I unrolled the pie crust dough and put my pie dish on top of it.  I used small individual pie plates six inches in diameter and 1 1/2 inches deep (I had to use both pieces of dough), and cut out a piece of dough that was one inch longer than each dish all the way around. Don’t be fooled into thinking your pie crust needs to look pretty. Once you have the filling in the dish, put the pie crust on top, fold the edges under and crimp them. Cut a couple of slits in the center to let out the steam. Be prepared, you will probably have some mixture dripping out of the sides while it cooks. That is the beauty of the pot pie. What I did to mitigate the mess was to put both dishes on a foil lined baking sheet that was sprayed with cooking spray. That way any dripping during the cooking process did not stick to the baking sheet or prevent me from removing the dishes from the baking sheet.

This is a pretty basic recipe and one most cooks, even the novice ones, can master the first time around. And it is so darn good. I like the idea of making individual pot pies, but you can also adapt this recipe by putting it all into a 10 inch cast iron skillet and topping the skillet with the pie crust. Then you’ll have one big pie that you can proportion out.

IMG_2510

Turkey Pot Pie…

  • Servings: 2
  • Difficulty: easy
  • Print

INGREDIENTS:

3 cups diced cooked turkey

1/2 tsp. dried sage or poultry seasoning

1 tsp. sweet paprika

3 – 4 Tbs. butter

3 – 4 Tbs. flour

I 16 ounce bag of frozen vegetables, a vegetable medley preferred

1 cup pearl onions, frozen or jarred

2 cloves garlic, minced

2 cups low sodium chicken broth

1 cup heavy cream

I package store bought pie crusts

1 egg, slightly beaten with a dash of water

Salt and freshly cracked black pepper to taste

DIRECTIONS:

Preheat the oven to 375 degrees. In a large deep pan melt 3 tablespoons of butter. Add the pearl onions and frozen vegetables and cook until tender, about 3 minutes. Add the garlic, paprika and sage. Cook until fragrant, about 1 minute. (At this point look at the amount of butter you have in the pan. If there is hardly any, add another tablespoon and melt it. Just make sure you use equal parts of butter and flour). Sprinkle the flour all throughout the pan and whisk it with the vegetable mixture for about a minute. Add the chicken stock and stir until it starts to thicken. (You will notice it thickening once it begins to get hot and bubbly. If it does not thicken, you can always add an additional amount of a little flour and water whisked together to get it to thicken). Once it has thickened, add the heavy cream and turkey and stir to combine. Season with salt and pepper as needed. Take the mixture off of the heat.

Lightly flour your counter and unfold one pie crust disc. Place a 6 x 1 1/2 inch individual glass pie pan on the crust. Cut the crust so that the edges are 1 inch longer than the outer edges of the pan. Repeat this process with the second piece of dough and pie pan.

Spoon the prepared filling into each pie pan. Place the dough over the top of each pan, tucking the excess edges under themselves. Crimp the edges with your fingers.  Whisk together the egg and water and brush the crusts evenly with the egg wash. Using a sharp knife cut two vents in the center of the crust.

Place the pie plates on a baking sheet that is lined with foil and sprayed with non-stick cooking spray.  Bake for 25-30 minutes or until the inside mixture is bubbly and the crust is golden brown.

IMG_2501

IMG_2521

IMG_2508

IMG_2533

Happy Thanksgiving Leftovers…

Happy Thanksgiving to all. And as you begin to wonder what you’ll do with the mound of turkey leftovers you’ll soon have in the refrigerator, think about making Shepherd’s Pie Turkey style(click on the red colored link for the recipe and lessons learned). 

Shepherds Pie Turkey Style...

Shepherds Pie Turkey Style…

I am thankful for everyone who takes the time to read this blog. Hopefully my lessons learned have helped you become more adept in the kitchen. Have a great Thanksgiving Day and thanks again for following this blog. It means a lot!

Soon I will venture into my holiday cookie baking ritual. Much more to come. Please feel free to share your favorite holiday recipes with me. I’d love to try some of them. Happy Thanksgiving!

And don’t forget:

cooking


To Die For Honey Mustard Chicken…

For those of you who have read my blog you know that chicken is my favorite. I cannot think of any way you can make chicken that I wouldn’t like. And since my husband is eating less and less red meat these days, my new recipes tend to center around chicken, turkey, fish, pasta and ground beef. You won’t hear me complain.

So I am always on the lookout for new chicken recipes and I found one on, yes you know, Pinterest and thought I’d try it. I’ve experimented with various honey mustard chicken recipes in the past but I liked this one because it suggested doing a honey mustard rub on the chicken as well as baking it in a honey mustard sauce. Needless to say, when my husband says “this one’s a keeper” I know this has been the best recipe yet.

Recipe Rating – A++ – this recipe is so flavorful and the sauce is just divine, great for crusty bread dipping. It isn’t difficult to make and is now one of my all time favorite ways of making chicken.

Lesson Learned 1 – Chicken thighs or breasts: The original recipe called for using chicken thighs. My husband is not a big fan of chicken thighs (I know, he’s probably the only one in the world). So I decided to make this with boneless breasts. It turned out perfectly. Most people shy away from cooking with chicken breasts. They think they are too dry. But the problem really is that most people cook chicken breasts far too long. I cooked mine at 375 for 25 minutes and they were moist and tender (I also kept the skin on the breasts). Chicken breasts lend themselves well to this recipe as the sauce gives them tremendous flavor. So don’t shy away from using chicken breasts – just be careful not to over cook them.

IMG_1123Lesson Learned 2: Buy chicken breasts with the rib meat attached and bone them yourself: I’ve found that I can save money buy purchasing chicken breasts with the ribs attached and bone them myself. It is a little bit of work but I think it’s worth it. Plus it’s getting harder and harder to find boneless chicken breasts with the skin still on them. I like to cook them with the skin on as I think that adds moistness and flavor. You don’t have to eat the skin, but I think it’s a great flavor enhancer in the cooking process. Just be careful when boning the breast. You want to finish with all of your fingers. The main thing is to use a very sharp boning knife. If you don’t have one then don’t do this. You’ll wind up either cutting yourself of getting frustrated because the process is taking to long. Sections of the ribs lie very close to the meat and you need to have a knife that can easily slice between the marrow and meat. Believe me, the only way to do this is with a high quality, very sharp boning knife.

IMG_1137Lesson Learned 3 – Let the meat marinate with the mustard rub on it for at least an hour: The skin and breast meet will be slippery so the rub will slide around on you. Get as much as you can on both sides and then cover it with plastic wrap and let it marinate in the refrigerator for at least an hour. As soon as you brown the meat the rub will come off. Don’t worry, it’s just more flavoring for the sauce.

Lesson Learned 4: The best sauce ever: I’ve made different versions of honey mustard sauces but I have to say I prefer this one. I like it because it has a nice balance of mustard and honey and also uses a little chicken stock. The stock tempers the sauce thickening process.  A sauce made with IMG_1131honey that is not diluted in this manner can stick to the pan and cause a baked-on mess. This sauce is so good that you’ll want to eat it with a spoon or dunk your bread in it. I also recommend using a seasoned cast iron pan when making this for a variety of reasons. First, cast iron is one of the best conductors of even heat. It takes cast iron a little longer to heat up but it holds heat well and it provides even heat. Second, a well seasoned cast iron pan is even better than a non-stick pan and that’s a plus when cooking with a honey based sauce. Third, cast iron moves seamlessly from stove to oven and I really like that. Some people treasure their cast iron pans so much they hand them down through generations. Yes, the pans are heavy, but they are relatively inexpensive (unless you invest in enameled cast iron like Le Creuset) and are oh so worth it!

I know I will be making this recipe often, it’s that good. This time I served it with rice and a steamed vegetable medley, but this would also be great with a baked potato and a vegetable of your choice. I can’t wait to make this again. I really hope you try it!

To Die For Honey Mustard Chicken

  • Servings: 2
  • Difficulty: Easy
  • Print

IMG_1147INGREDIENTS:

2 boneless chicken breasts, skin on preferred (you can use chicken thighs)

3 Tbs. Dijon mustard

3 Tbs. whole grain mustard

3 Tbs. honey or more to taste

3 Tbs. chicken stock

1 Tbs. olive oil

2-3 rosemary sprigs

INGREDIENTS FOR THE RUB:

1 Tbs. olive oil

1 Tbs. whole grain mustard

salt and pepper to taste

DIRECTIONS:

Mix together ingredients for the rub. Rub both side of the chicken breast with the mixture. Cover with plastic wrap and let the chicken marinate in the refrigerator for at least one hour.

Preheat oven to 375. In a large bowl whisk together the mustards, honey and chicken stock. Add additional chicken stock to taste and until the sauce reaches the desired consistency. Set aside.

Heat a cast iron pan. Add oil and sear both sides of the chicken breast until golden brown, approximately 2-3 minutes per side. Add mustard sauce, sprinkle with rosemary. Place in oven and roast until the chicken is cooked through – approximately 25 – 30 minutes.

Spoon sauce over chicken when serving.

Ready To Go Into The Oven...

Ready To Go Into The Oven…

Fresh Out Of The Oven...

Fresh Out Of The Oven…

Succulent Chicken Breast With Honey Mustard Sauce...

Succulent Chicken Breast With Honey Mustard Sauce…

Serving Suggestion" With Rice and Steamed Vegetables...

Serving Suggestion” With Rice and Steamed Vegetables…


Chicken Cutlets with Thyme Mustard Sauce…

I’m always looking for a quick and easy dinner recipe and I’m always on the hunt for new ways with chicken. This particular recipe definitely fits the bill in both areas. I like this recipe for a variety of reasons but mostly because it’s so easy and so flavorful. If you’re a chicken fan like I am, this recipe will become one of your favorites.

Recipe Rating – A+: This recipe is so good and easy to prepare that even I was a little amazed. My husband, who normally just gives me either a thumbs up or thumbs down on a new dish, felt compelled to comment. He must have said at least three times, “this chicken is really good.” That in itself is super validation for this particular recipe.

IMG_0548Lessons Learned 1 – Never underestimated the power of having a glass of wine while preparing a new recipe: I just had to put this in here. Usually I am a little nervous when trying out a new dish. Those few sips while I’m cooking away make the experience pleasurable. Add a little music to the mix and I begin to feel like Julia Child’s got nothing on me. I know I’m being slightly tongue and cheek here, but the idea is to do whatever you can to make the experience a good one. Anything that helps you enjoy the process is worth it. Have fun in the kitchen. I know I do.

Lesson Learned 2 – Prepping ahead always makes it easier: A couple of years ago my husband got me a Christmas gift of some cooking classes. One of the things that really stuck with me from those classes was the importance of prepping all of your ingredients first. Cooking time should be cooking time and not prepping time. So mince your shallots, slice your mushrooms, chop your garlic and thyme, measure out any ingredients that you don’t feel comfortable eyeballing, such as the sour cream, wine and mustard, and have everything set and ready to go before you start the cooking process. You’ll find it will help keep your kitchen cleaner and more organized and that will also make the experience better.

IMG_0544Lesson Learned 3: Don’t be afraid to substitute herbs: I used thyme in this recipe because I have it growing in my garden, but fresh tarragon would also work very well. My only caution would be not to substitute dried herbs for fresh ones. I think using fresh thyme provided more depth of flavor, especially with the short cooking time in this recipe.

Lesson Learned 4 – Cooking with chicken cutlets can be tricky: By chicken cutlets I mean boneless skinless breasts that either have been cut or pounded to about 1/4 inch thick. I actually found them at my local grocery store so that made it even easier. Chicken cutlets take no time to cook at all and you can easily make them taste like leather if your overcook them. I cooked mine for 3 minutes on each side before taking them out of the pan and preparing the sauce. I kept them on the plate covered with foil which resulted in some minimal carry over cooking. Once the sauce was made I put them back in the pan and let them simmer in the sauce for no more than two minutes. They came out juicy and tender.

IMG_0553

This is a great recipe for the burgeoning chef. The only area I would caution you on is to make sure not to overcook the cutlets. Because they are so thin they cook in no time flat. There is not a lot to prep for this recipe and within 20 minutes, including prep, this chicken is ready to plate. I served it with roasted butternut squash and balsamic roasted potato wedges and it was a big hit. Try this one. I know you will like it.

IMG_0569

Chicken Cutlets with Thyme-Mustard Sauce…

  • Difficulty: Easy
  • Print

INGREDIENTS:IMG_0597

2 TBS. extra virgin olive oil

1 pound chicken cutlets, 3-4 pieces

6 ounces baby bella mushrooms, optional

1/2 tsp. salt

1/4 tsp. freshly cracked black pepper

1 medium size shallot

I clove garlic, minced

1 tsp. flour (for the sauce – additional needed to dust cutlets)

1/2 cup dry white wine

1/4 cup sour cream, light preferred

1 TBS. dijon mustard

2 TBS. chopped fresh thyme leaves

DIRECTIONS:

Do all prep work first. Chop the shallots, mince the garlic, chop the thyme and measure out any remaining ingredients that you do not feel comfortable eyeballing.

Heat a large skillet over medium heat. Dust cutlets lightly with some flour. Sprinkle cutlets on both sides with salt and pepper. Add oil to the pan. Place the cutlets in the oil and cook for 3 minutes on each side. Remove cutlets from pan to a plate and cover with foil.

Add some additional olive oil to the pan. Saute mushroom until lightly brown. Add shallots and cook for about 1 minute. Add garlic and cook until fragrant, approximately 30 seconds to 1 minute. Sprinkle flour over shallots and mushrooms and cook for an additional minute stirring constantly. Add wine and bring liquid to a boil. Stir with a spoon to loosen all the brown bits in the pan.

Lower heat. Add mustard, sour cream and thyme. Stir until combined. Add chicken back to the mixture and let simmer for a couple of minutes. Add some additional thyme as garnish when serving.

IMG_0575

IMG_0583

IMG_0597

Serving Suggestion: Chicken with Roasted Butternut Squash and Balsamic Roasted Potato Wedges

Serving Suggestion: Chicken with Roasted Butternut Squash and Balsamic Roasted Potato Wedges

Shepherds Pie Turkey Style…

I’ve always liked the concept of Shepherds Pie, it’s a great way to use leftover pot roast – but what about using poultry as the main protein? A grocery store near my home often features fresh half turkey breasts on the bone and I love them. Because of their smaller size, it’s a great way to have turkey more often than just during the holidays, it’s easy to cook and you still get great turkey leftovers to boot. The only difference is that now I don’t have all of the other holiday side dishes to serve with the leftover turkey, and I wanted to try something a little different than just a turkey pot pie.

Spread The Turkey Over The Bottom of the Dish

Spread The Turkey Over The Bottom of the Dish

I’m beginning to wonder what I would do without Pinterest. What great way to find recipes from sites I would probably never find otherwise. My blog now also links to my taste.com and there you can find a compilation of tons of recipes from a variety of different food blogs. I’ve just started connecting with that site and if you want to find my recipes (and there are only a few of them featured right now but there will be more to come) just type in “jan geden” in the search engine and my recipes will pop up.

But this time I found a recipe on Pinterest that I adapted and to my surprise it turned out great. I am now becoming a little more sure of myself in the kitchen with a better understanding of what will and will not work, especially in high altitude. And although this was adapted from a recipe called turkey potato casserole from all recipes.com, it is my version of it with several changes I made based on what I had in my refrigerator at the time. So, here are my lessons learned and recipe rating.

Saute the Veggies...

Saute the Veggies…

RATING: A+ – I wish I could give it a few more pluses but the only drawback was the casserole did not get as hot as I would have liked it even with the time I added on to the original recipe. Next time I will bake it longer and at a slightly higher temperature. Otherwise it was very flavorful and definitely a great way to use leftovers in a casserole.

Lesson Learned 1: COOKING TIME – and once again as I’ve stated several times before, things take longer to cook in high altitude. The original recipe called for the casserole to bake for 30-40 minutes at 350. 350 to me automatically means at least 365-375. I baked it for 50 minutes at 365 and it was warm, but this recipe needs to be served piping hot. Next time I will do 375 for an hour and I bet it will be perfect.

Layer The Veggies Over The Turkey

Layer The Veggies Over The Turkey

Lesson Learned 2: ADAPTABILITY – I love this recipe because it is easily adaptable. The original recipe called for adding only onion and frozen green beans. When I read the reviews, someone suggested that they used peas instead of the beans. I liked that idea better. I also had some mushrooms (don’t I always) and a lot of carrots in my refrigerator. I chopped the onions and carrots, sliced the mushrooms and sautéed them until the carrots were softened and added them to the mixture along with some frozen peas. The next time I might even add a little chopped celery. The vegetable medley really added to the flavor of the dish in my opinion.

Lesson Learned 3: PRE-MADE MASHED POTATOES – what a time saver they were. The pre- made mashed potatoes that you can get now in the grocery stores are really very good. I think I got a tub of Country Crock garlic mashed potatoes, but any brand will do. All I did was microwave them for about 3 minutes, stir them and spread them on top of the casserole. It worked out perfectly.

Spread Soup Mixture On Top Of Veggies

Spread Soup Mixture On Top Of Veggies

Lesson Learned 4: CHEESE – the recipe called for cheddar cheese to be mixed with the cream of mushroom soup and the mashed potatoes. I decided to get a three cheese blend and I only mixed it with the soup and not the mashed potatoes. That way you save a little on the calorie side and the cheese blend, in my opinion, melted better than just using cheddar cheese alone.

Lesson Learned 5: LEFTOVERS – this also makes great leftovers and warms up very nicely after a few minutes in the microwave.

On average I’ve found that although casseroles have the appeal of a one pot meal, they generally take some work to put them together. And although this version involves some chopping and sautéing, the finished product is well worth the time and effort. I plan on making this one often it was that good. Enjoy!

Fresh Out Of The Oven

Fresh Out Of The Oven

Shepherds Pie Turkey Style…

  • Servings: 4-6
  • Difficulty: Easy
  • Print

INGREDIENTS:

2 cups diced cooked turkey meat

1 onion chopped

1 large clove of garlic chopped

1 cup frozen peas

1 cup carrots diced small

4 ounces sliced baby bella mushrooms

1 can cream of mushroom soup

6 ounces shredded three cheese blend

3 TBS butter

1 tub (28 oz) pre-made mashed potatoes (or you can use leftover fresh mashed potatoes)

DIRECTIONS:

Preheat oven to 375. Dice turkey and put in the bottom of a 8×8 casserole dish. In a large pan, melt  the butter and sauté the onions and carrots for a few minutes before adding the mushrooms. Continue to sauté until onions are translucent and carrots have started to soften. During the last minute of cooking add the garlic until the garlic becomes fragrant. Remove from heat and set aside.

Microwave the mashed potatoes for approximately 3 minutes. While potatoes are in the microwave, mix the cheese and the soup together in a small bowl. After 3 minutes, take the potatoes out of the microwave and stir to soften.

Put the vegetable mixture over the turkey and spread the soup and cheese mixture on top of it. Spoon the softened mashed potatoes over the soup mixture and spread out evenly to cover the entire casserole.

Bake in the oven for 40-60 minutes or until heated through. Serve immediately.

Shepherds Pie Turkey Style...

Shepherds Pie Turkey Style…


Chicken Cutlets with Peppers, Mushrooms, Onions and Tomatoes For Two…

Recipe Ingredients...

Recipe Ingredients…

You’ve probably figured out by now that I am a chicken girl. Anyway you make it, I love chicken and I love trying out new chicken recipes. Yesterday I was looking for something different and also something quick. I just got back from a consulting job and was still on east coast time so I was still pretty tired. I wanted to fulfill my goal of one new recipe a week but did not have a lot of energy to put into it. I found just what I was looking for in the most recent “Cooking Light” magazine entitled the “fast” issue. It was labeled as a fast chicken scaloppine with peperonata (don’t you just love it when they give these fancy words for sautéed vegetables?) and it looked intriguing and quick so I decided to try it. So here is my rating and lessons learned…

Recipe rating: A – this one is quick cooking and has great flavor. I’m not so sure it holds up to it’s 25 minute meal guarantee and I will address that in my lessons learned.

Pepper Mixture...

Pepper Mixture…

Lesson Learned 1: This recipe takes longer than 25 minutes if you add the prep time. I’m not sure they factored that in, but it definitely took me a good 15 minutes or more to mince the garlic and slice the peppers, onions, tomatoes (of course I added some baby bella mushrooms so I won’t fault them for that). It also takes some time, not a lot, to halve the chicken breast and pound them to 1/3 inch thickness and dredge them in flour. When you factor all the prep time, all in all for the everyday cook like myself this recipe takes about 45 minutes from start to finish. No worries, one of my favorite parts of any recipe is the chopping, slicing and dicing – I find it cathartic – but recognize this recipe is more time consuming than the magazine would lead you to believe.

Lesson Learned 2: I halved the recipe since I was only making it for two. That worked out very well. The only thing I would change is to use even less than half the balsamic vinegar than the recipe stipulated. You only need a little to give the flavor. If you add more I think it darkens the vegetables too much, which I thought was the case with mine when I made it. Next time I make it I’ll only add a little, probably 1/8 of a teaspoon or less.

Lesson Learned 3: You will need to make this in two frying pans – one for the veggies and one for the chicken. I think it best to try to time them so they both finish together. The veggies can get cold very quickly and you don’t want that to happen. Err on the side of less time for the veggies instead of more. I started them 15 minutes before I planned to serve and I could have done 10-12. I like crisp tender veggies and 15 minutes put them on the borderline of being overcooked. Definitely cook the peppers first as they will need the full amount of time. But after sautéing them for 3 minutes, add everything else (except the tomatoes and garlic) and they will cook down nicely all together.

Lesson Learned 4: I used a basil paste in the recipe as my grocery store did not have any fresh basil on hand. You can use this, but again use only a small amount. I find the paste to be much more concentrated and a little goes a long way. Use a 1/4 teaspoon at the most.

Lesson Learned 5: The recipe called for adding the garlic when you add the onion. That would mean the garlic would be cooking for about 7 minutes. Garlic burns when cooked for a long time. I added the garlic when I added the tomatoes (and that cooked for about a minute and was done right before serving). That way the garlic cooked, was fragrant and it did not burn.

Lesson Learned 6: The original recipe calls for prepping the chicken once you’ve started the pepper mixture on the stove. I would not do that as you will probably wind up cooking your vegetable mixture for too long of a period of time. Prep the chicken first and put it aside. It can sit for a few minutes without any harmful effects and I found that slightly taking the chill out of it makes for a truer cooking time. I also added some garlic powder to the dredging mixture to give some additional depth of flavor.

Cook the chicken breasts until golden and done. Be careful not to overcook...

Cook the chicken breasts until golden and done. Be careful not to overcook…

Lesson Learned 7: It is tricky to cook a chicken cutlet and have it come out juicy. The original recipe called for it took cook for two minutes on each side or until golden and done. Boy, that gives you a lot of specifics doesn’t it. I cooked mine for 4 minutes on one side and 3 1/2 minutes on the second I could have cooked it a little less. Next time it will be 3 minutes on each side and I think that will be perfect. You get so used to cooking much thicker chicken breasts that sometimes it’s hard to imagine that the cutlets can get done so quickly. But they can and don’t be afraid of that. If you cook them too long they will dry out quickly. You don’t want that to happen.

I liked the recipe but felt I needed to make some adjustments to it based on past experience and in order to make it for two. Here is my version of the recipe.

Chicken Cutlets With Peppers, Mushrooms, Onions and Tomatoes For Two

  • Servings: 2
  • Difficulty: Easy
  • Print

INGREDIENTS:

2 TBS olive oil

1/2 red bell pepper sliced in strips

1/2 yellow bell pepper sliced in strips

1/2 large yellow onion sliced in strips

4 ounces (1/2 package) baby bella mushrooms sliced

1 large clove of garlic minced

8 grape tomatoes halved

1 TBS fresh chopped basil or 1/4 tsp. basil paste

1/8 tsp. balsamic vinegar

1 boneless skinless chicken breast cut in half horizontally and pounded to 1/3 inch thickness

1/4 tsp. garlic powder for dredging mixture

2 TBS butter

Flour for dredging (about 1/3 cup)

Salt and Pepper to taste

DIRECTIONS:

Cut the chicken breast in half horizontally. Place between two pieces of wax paper and pound until the breast is approximately 1/3 of an inch thick. Place your mallet at the center of the breast and pound outward. Take a paper towel and pat the breast halves dry. Mix flour with garlic powder and some freshly cracked black pepper. Dredge cutlets in the flour mixture and shake off any excess flour. Place on a plate to rest for a couple of minutes.

Heat a large skillet and add the olive oil. Swirl the olive oil to completely coat the bottom of the pan. Add the peppers and sauté for approximately three minutes. Add the onions and mushrooms. Salt and pepper to taste. Continue to sauté for another 5-6 minutes.

After you add the mushrooms and onions to the vegetable mixture, in another frying pan over medium high heat, melt the butter. Add the chicken breasts and cook for 3 minutes on each side.

During the last minute of overall cooking time, add the garlic and tomatoes to the pepper mixture. Cook until tomatoes begin to wilt. Add the basil and balsamic vinegar at the very end of the cooking time.

Immediately serve the chicken with pepper mixture.

Chicken Cutlets with Peppers, Mushrooms, Onions and Tomatoes

Chicken Cutlets with Peppers, Mushrooms, Onions and Tomatoes

All in all this is a simple and flavorful recipe. If you want to adhere to the 25 minutes or less time frame that the original recipe touts, I would do all of the prep work the night before. That way it actually will be a very quick and very good meal. Enjoy this one!

Chicken, Broccoli, Mushroom, Cheese and Rice Casserole…

Casserole Ingredients

Casserole Ingredients

Right out of the gate I will tell you that I had a love-hate relationship with this recipe. I loved the way it tasted and I will definitely make it again. My husband gave it a two thumbs up so I know it’s a keeper. What I hated was how the recipe was written and that is always a big sticking point with me. I try to be empathetic toward recipe authors as I understand I live in high altitude and that changes the rules somewhat. But even with that, I find it hard to believe this recipe (I amended it for you in this blog) as originally written would even work at sea level. So for my non-intuitive cooking friends out there, beware. I suggest you do the recipe the way I’ve written it and I think you will be successful on the first try.

This recipe came from the website http://www.keyingredient.com. From what I can tell, it appears that people submit recipes and they are published on this site. This particular recipe was intriguing to me as I had all of the ingredients already and I was looking to try something different. My goal is to try one new recipe a week and blog about it. So this recipe helped me on both fronts. So here is my rating and lessons learned along with my version of the recipe. You can always search for the original recipe on the key ingredients website.

RATING: A: for flavor and ease of preparation, F: for how the recipe was written. With a few simple adjustments this recipe could easily get an “A” on both counts. But in my estimation it was not well written.

Saute the Mushroom and Onions First

Saute the Mushroom and Onions First

LESSON LEARNED 1: The original recipe called for either 3 cups of cooked rice or 1 cup of uncooked rice, with no differentiation in cooking time for either one. Even I know that there has to be some sort of a difference, right? You can’t expect uncooked rice to turn out the same as cooked rice without some adjustment to the cooking time. So adjust I did, and even with that the rice still turned out slightly crunchy. The original recipe called for a cooking time of 350 for 30 minutes. So for me, in high altitude, that normally means I set my oven to 365. But I just had a feeling that 30 minutes would not cut it, so I planned on a 45 minute timeframe. After 45 minutes I looked at the casserole and it still did not seem as hot and bubbly as I would like it so I cranked the temperature up to 375 and cooked it for another 15 minutes. And even with all that time, the rice was still not fluffy and in some instances slightly crunchy. Lesson learned for me: the next time I make this I will cook it at 375 for 1 hour using cooked rice. I will cover the casserole with foil for the first 45 minutes and leave it uncovered for the last 15 to get some good browning on top of it.  If you choose to use uncooked rice remember to adjust your time. What that time might be I cannot tell you as I have no clue. All I can tell you is that after an hour it was not completely cooked through for me.

LESSON LEARNED 2: This is also a big bug-a-boo of mine. In a recipe be clear about whether a dish should be covered or uncovered in the oven. Don’t assume I know. This recipe calls for cheddar to be put in the sauce as well as sprinkled on top and did not indicate anything regarding whether the dish should be covered or not. In my experience, cheddar cheese left uncovered on casseroles for a long time tends to look burnt. I covered the casserole with foil for the first 45 minutes and then left it uncovered for the last 15. It worked out beautifully.

Blend the cheddar cheese with soup mixture until completely melted

Blend the cheddar cheese with soup mixture until completely melted

LESSON LEARNED 3: The orignal recipe calls for sautéing the onions in margarine. Why margarine instead of butter? Butter is a much purer ingredient. I used butter instead.

LESSON LEARNED 4: I was surprised how long it took for the cheddar cheese to melt in the soup mixture. It took about 5 minutes and required constant stirring. So be patient, it will melt but it does take time. (This was probably the most labor intensive part of the process).

LESSON LEARNED 5: The original recipe called for 2 cups of frozen broccoli. Although frozen vegetables are of much higher quality than they used to be, why not use fresh? I used fresh broccoli chopped into bite size pieces. The broccoli turned out perfectly, crisp tender. So use fresh broccoli if you can. I think frozen broccoli might turn out mushy in this recipe.

The first layer of rice, broccoli and 1/3 of the soup mixture.

The first layer of rice, broccoli and 1/3 of the soup mixture.

Don’t get me wrong, I really liked this recipe. It would have been tremendous if the rice was cooked properly. So give this one a try and try it the way I am writing it. I think you will be much more successful that way.

Chicken Broccoli Mushroom Cheese and Rice Casserole

  • Servings: 4-6
  • Difficulty: Easy
  • Print

INGREDIENTS:

3 cups cooked rice

3 cups cooked chicken (rotisserie chicken or any other type of precooked chicken, drained)

2 cups broccoli (fresh or frozen – no need to thaw) chopped into bite size pieces

1 can cream of chicken soup (low sodium preferred)

1 can cream of mushroom soup (low sodium preferred)

3 TBS. butter

1/2 cup chopped onion (more if desired)

1 clove garlic, minced (more if desired)

1 cup sliced portobello mushrooms

8 ounces of shredded cheddar cheese

DIRECTIONS:

Preheat the oven to 375. Cook 1 1/2 cups of rice (this should yield 3 cups of cooked rice) according to package directions. (Minute rice is not advised for this recipe). Cut chicken and broccoli into bite sized pieces. Slice mushrooms, chop the onion and mince the garlic clove. Melt butter and sauté the mushrooms for a couple of minutes. Add the onions and cook until slightly translucent. Add the garlic and sauté until fragrant, about 30 seconds. Add both cans of soup and stir until combined and hot. Add 6 ounces of the cheddar cheese and stir until melted (this could take about 5 minutes before the cheese is completely melted).

Grease or spray a 3 quart casserole dish. Spread rice evenly on the bottom. Put broccoli on top of rice. Pour about 1/3 of the soup mixture over the broccoli and rice. Add chicken and top with remaining sauce. Top with remaining two ounces of cheese.

Cover with with foil and cooked covered for the first 45 minutes. Remove foil and return to oven for an additional 15 minutes. Let stand for 5 minutes before serving.


Ready to pop in the oven...

Ready to pop in the oven…


Fresh Out Of The Oven...

Fresh Out Of The Oven…

Chicken Broccoli Mushroom Cheese and Rice Casserole

Chicken Broccoli Mushroom Cheese and Rice Casserole

Brandy Chicken With Mushrooms and Pearl Onions…

After my post last week that featured one of my favorite go-to recipes, chicken roll ups, I thought I would be off of the chicken bandwagon for awhile. But lo and behold the very next day I got my copy of Cooking Light in the mail and what was this months feature but “12 ways for perfect chicken!” On the cover was an enticing picture of chicken smothered in mushrooms and pearl onions and I thought, I just gotta make this one. And so I did, last night.

I am always on the look out for a good chicken recipe and this issue features an abundance of them, but I was drawn to the recipe pictured on the cover. I’d never cooked with Brandy before and was a little fearful and skeptical. I looked online to see if there was a viable substitute for brandy, as I don’t drink it and would use it only for cooking, but the information I found stated there really was no substitute. Wine was mentioned as an alternative but it would not provide the same flavor. So off to the liquor store I went. I actually found a small bottle of Korbel brandy for $10 and so I figured I could live with that. Other than fresh thyme and pearl onions, all the other ingredients I already had in the house so this seemed like a no-brainer. So here is my rating and lessons I learned making the dish for the first time.

Rating: A- for the recipe B- for the instructions. As I’ve mentioned several times I am not an intuitive cook so I need for the directions to be explicit and correct. I tend to take things literally, but more and more I am beginning to trust my instincts. I enjoyed this recipe, would definitely make it again and maybe even experiment using wine instead of brandy. I’ll explain all that in my lessons learned.

Lightly Dust With Flour and Cook In Olive Oil Until Almost Done

Lightly Dust With Flour and Cook In Olive Oil Until Almost Done

Lesson Learned 1: The time of this recipe was overestimated in my opinion. The recipe calls for halving boneless skinless chicken breasts, thus making a “cutlet”. So how do you define cutlet? I’m thinking about a quarter of an inch thick, right? When I halved a breast I wound up with 2 pieces that were a half inch thick. I decided to use that thickness instead of pounding them out based on the cooking time for the recipe, 43 minutes (how they came up with 43 versus 42 or 44 gives me a chuckle), taking into consideration I was not making as many “cutlets” as called for in the recipe so I was cooking a lesser amount of meat but at a greater thickness. My pieces of chicken were probably double the size of what I assume a cutlet should be (and that’s another thing that aggravated me, the recipe never defined the thickness of the cutlet – you just can’t assume every knows). I found that using that time as a guide for the rest of my meal wound up giving me slightly overdone chicken. I think one of the common errors most cooks make is overdone boneless skinless chicken breasts. Next time I make this I’ll reduce the cooking time by 7-10 minutes. Because I planned the rest of my meal around that 43 minute timeframe, I wound up keeping the dish on a very low simmer until everything else was ready and I think that lent to having slightly overdone chicken breasts. Mind you, they were not bad, but I do know the difference between a chicken breast that is juicy and tender and one that is overdone. (OK, I’ll get off of my soap box now).

Lesson Learned 2: Cooking with brandy did not wow me. I’m not sure what I expected the flavor to be, but it really did not supply the depth of flavor I thought it would. The recipe calls for cooking the brandy down until it’s almost evaporated (which I did) but the chicken stock that I added next seemed to overpower it. Next time I might leave a little more brandy in the pan or try this with either red or white wine. Most of the information I looked at regarding a substitute for brandy recommended using white wine, but I think red wine (like a good merlot) could also make this recipe interesting.

Lesson Learned 3: You also have to be careful cooking with brandy as it can produce a large amount of flame coming out of your pan. The recipe states that you should take the pan off the heat add the brandy and then put it back on the heat. I would highlight something like that in a recipe and even do a warning that if you don’t you could produce a large flame and injure yourself. Again, not everyone is a seasoned chef and I think a pointed warning would be helpful.

Cook Mushrooms Until Browned and Onions are Slightly Caramelized

Cook Mushrooms Until Browned and Onions are Slightly Caramelized

Lesson Learned 4: This recipe called for button mushrooms. I never use button mushrooms anymore now that baby portobello mushrooms are so easy to get. I think button mushrooms are virtually flavorless and baby bellas stand up to the cooking process better and have a much better texture. So I substituted baby portobello mushrooms for button mushrooms and I highly recommend it.

Lesson Learned 5: The original recipe cooked 8 cutlets and called for 1 teaspoon of fresh thyme leaves. One teaspoon was not enough even for my recipe for two people. I would recommend two teaspoons of fresh time for four servings. With one teaspoon I could barely see the thyme much less taste any flavor from it.

Lesson Learned 6: Adding the butter at the end gives a nice silkiness and shine to the sauce. Don’t skip that part.

Even with some of the issues, this recipe is a keeper and one I will continue to play with. What I also like about this recipe is the progressive cooking process allows you to do your clean up in stages, so by the time I served dinner the only prep dish that needed to be washed was the skillet. I liked that aspect a lot. So here is my version of that recipe:

Brandy Chicken With Mushrooms and Pearl Onions

  • Servings: 4
  • Difficulty: Medium
  • Print

INGREDIENTS:

2 boneless skinless chicken breasts halved (ideally 1/2 inch thick)

1 jar of pearl onions or 1 box of frozen pearl onions (thawed and drained)

6 – 8 ounces of baby portobello mushrooms sliced

2/3 cup of brandy

1 cup of chicken stock

2 tsps. cornstarch

1 TBS butter

2 teaspoons of fresh thyme

1/4  cup all purpose flour

Olive oil

salt and pepper

DIRECTIONS:

Halve the chicken breasts horizontally. Pat dry and season with salt and pepper. Dredge chicken breasts in flour and shake off the excess.

Heat skillet with just enough olive oil to lightly coat it. Cook chicken breast for 4 minutes on each side until almost cooked through. Remove them from the skillet and wrap them in foil to keep them warm.

Add some additional oil in the pan. Add mushrooms and cook for 2-3 minutes and then add the onions. Continue to cook until mushrooms are nicely browned and onions begin to caramelize. Remove from the pan and set aside.

TAKE THE PAN OFF THE HEAT AND ADD THE BRANDY (this is important so as not to produce a flame). Put the pan back on the heat and cook down the brandy by half. Whisk together the chicken stock and cornstarch until smooth and add it to the skillet. Continue to whisk the mixture for a couple of minutes until smooth and mixture begins to bubble.

Return chicken, mushrooms and onion to the pan, reduce heat and simmer for 3-5 minutes. Add salt, butter and thyme. Serve once the butter has melted.

Brandy Chicken with Mushrooms and Pearl Onions

Brandy Chicken with Mushrooms and Pearl Onions

Chicken Roll Ups…

Chicken Roll Ups (right out of the oven)

Chicken Roll Ups (right out of the oven)

I think I may be related to Ina Garten’s husband Jeffrey, at least in the love of chicken department. Like him, anyway you prepare it I just love chicken. Ina makes it for him every Friday. I have it at least once a week and sometimes more. Because of that fact I’m always looking for new chicken recipes and especially the ones that are easy to prepare and super delicious.

This recipe is one of my husband’s favorites. Every time I make it he always comments on how much he enjoys it. I love it for its combination of ingredients – boneless chicken breasts, genoa salami, provolone cheese, asparagus and pasta sauce. In my mind it doesn’t get much better than that.

But I have to admit there is a catch to this recipe. Like any recipe for a roll up, the challenge is rolling it up. It took me a few tries to perfect the technique but hopefully through my lessons learned it will be easier for you. There are a few recipes that I’ve posted so far on this blog that are my go-to favorites. I put this one right up there with one of my all time favorites, my ravioli lasagna recipe. Once you master the art of the roll up you will make this recipe often as it is so simple and yet very flavorful.  So here’s my rating and lessons learned:

ru1Rating A+  The only thing difficult about this recipe is mastering the roll up technique so that all of the ingredients are covered by the chicken breast. Once you’ve got that, the rest is a breeze. You’ve basically got your meat and vegetable all in one. Serve with a simple salad and some crusty bread and you’ll have a dinner that will become a staple in your household! I’ve learned a lot of lessons making this recipe and hopefully these will help you be successful the very first time you make it.

ru2Lesson Learned 1: It is so important to make sure the chicken breast is the right thickness. If it’s too thick you’ll never get it to roll up, if too thin all the provolone will ooze out.  I used to use one breast for each roll up but it seems like they are getting larger and larger and once you pound them out you are left with an enormous roll up. Now I take my boning knife and halve the chicken breast. From there I put them between two pieces of wax paper and pound each to a quarter of an inch thick. I found doing it this way makes for a much more reasonably sized portion and one breast now serves two.ru3

Lesson Learned 2: Figuring out the art of the roll up took a few tries on my part before I perfected it. What I learned is if you put the cheese, meat and asparagus closer to where you begin rolling and leave a little more just plain meat toward the end the process seems to work. As you are rolling the meat and cheese tend to move a little along with you. If you leave some “wiggle room” at the end you can get all of the insides covered with the chicken breast.

Place ingredients more toward the bottom before you roll the chicken

Place ingredients more toward the bottom before you roll the chicken

Lesson Learned 3: I have yet to find a toothpick that will hold the roll up in place without breaking off. Now I use a turkey skewer (the kind you use on your holiday turkey to keep the stuffing in place) and that seems to work well. I use the skewer to secure a flap on the bottom (opposite the asparagus tips) so that cheese does not ooze out and then weave it through the chicken flesh to hold the rest of the roll up in place. Just make sure you remember to tell people that you used a skewer. With the pasta sauce it is not always easily visible and whoever is eating it could be sawing away wondering why they can’t completely cut through the roll up. If I can I remove it before serving. If I can’t remove it, I make sure the person eating it knows it’s there.ru5

Lesson Learned 4: This is probably the biggest lesson I learned from making this – covering the asparagus tips with aluminum foil. You are baking this dish for 45-50 minutes at 350. If you don’t cover the asparagus tips they will turn to mush. If you do cover them they turn out beautifully as can be seen by the picture at the bottom of this blog.

Lesson Learned 5: Put about a quarter of a cup of sauce on the bottom of the pan before you put the roll ups in. That way the roll ups won’t stick to the bottom of the pan.

Put sauce on the bottom of the dish before adding the roll ups

Put sauce on the bottom of the dish before adding the roll ups

Lesson Learned 5: This recipe is a version that came from a Bertoli pasta sauce add I clipped from the newspaper. The beauty of this recipe is that you can basically use any red sauce that you like and top with any cheeses that you like. The original recipe called for topping the roll ups with the sauce and shredded romano cheese. I like that and so that’s what I do, but you could use a combination of parmesan and romano and you could even top it with some mozzarella for the last ten minutes of the baking process.

Ready To Go Into The Oven

Ready To Go Into The Oven

All the work in this recipe is up front. Once you get the prep work done it’s just a matter of baking and eating it. Serve this with a side salad and crusty bread and you have an easy, flavorful and fun meal.

Easy Chicken Roll Ups

  • Servings: 4
  • Difficulty: Medium
  • Print

INGREDIENTS:

2 Boneless Skinless Chicken Breasts (halved)

Genoa Salami (12 thin slices)

Provolone Cheese (4-8 slices)

12 Asparagus Spears

1 Jar Tomato-Based Pasta Sauce (15 oz. or larger)

Shredded Romano Cheese (at least 1 cup)

Italian Seasoning

DIRECTIONS:

Place your hand on the top of the chicken breast and using a boning knife start on one side and cut the breast in half (see pictures above). Place each breast between two pieces of wax paper and use a meat mallet or rolling pin and pound moving from the center out until the breast is 1/4 of an inch thick.

Beginning at the bottom of the breast, place one or two pieces of provolone cheese and three slices of salami on top of the cheese making sure to leave about an inch of just plain meat at the top of the breast (see picture above). Trim the woody bottoms off of the asparagus spears and place at the bottom of the breast. Roll the chicken breast so that the cheese, salami and asparagus (except for the tips) are all covered by the meat. Take a skewer and close off the flap a the bottom (the opposite end from the asparagus tips) and lace it through the roll up to secure it in place. Cover the asparagus tips with aluminum foil.

In a casserole dish, spread about 1/4 cup of the pasta sauce to cover the bottom. Place the roll ups in the casserole dish and cover with the remaining pasta sauce. Sprinkle with shredded romano cheese and italian seasoning.

Bake at 350 for 45-50 minutes. Remove skewer from roll ups and serve.

A Chicken Roll Up

A Chicken Roll Up

Easy Orange Chicken…

I will never forget that conversation. I was sitting at lunch with a colleague and she was telling me how she was a Food Network junkie. I laughed at her. I could not believe someone would actually enjoy watching a television program of someone cooking. So one Saturday morning, just for a lark, I decided to watch the Food Network. I’ve not been the same since.

What I liked about the Food Network, and especially the shows of a few years past, is that it educated me on various types of foods, taught me technique and challenged me to try new recipes and to experiment in the kitchen. The Food Network made me an accidental “foodie” and there’s not turning back now.

What the chicken skin looks like after the initial browning...

What the chicken skin looks like after the initial browning…

I used to really like Robin Miller’s show, but it’s no longer on the network. I’m a big fan of Ina and Giada and I also like Melissa D’Arabian. And it is my testing of one of Melissa’s recipes that is the subject of the blog today. She called the recipe “Crispy Chicken a l’Orange” and it is from her book Ten Dollar Dinners. I first saw the recipe on one of her shows, and it is listed on the Food Network website for free, so I’m pretty sure I’m not breaking any copyright laws by sharing this with you. I am always looking for different ways to make chicken and this recipe intrigued me, so I thought I’d try it. Here is my rating and lessons learned from making it.

Rating A-  the main reason I give it a minus is that the sauce is tricky. By that I mean it is a combination of frozen orange juice concentrate and honey. The tricky part is cooking this in the oven and not getting a pan that has burnt-on honey all over it, making it a nightmare to clean. I haven’t quite figured out how to avoid that. I make this recipe in a well seasoned cast iron skillet and I still have a difficult time cleaning my pan. Maybe it’s my fault. The recipe calls to brown the meat in a skillet and then transfer it to a baking dish. By using the cast iron pan I tried to do this as a one-stop shop and brown the meat and cook it all in one pot. Maybe next time I’ll try what the recipe recommends and see if that makes a difference with the clean up.

Drizzle the chicken with the orange juice and honey mixture and put into the oven

Drizzle the chicken with the orange juice and honey mixture and put into the oven

Lesson Learned 1: Brown the chicken skin side down for at least five minutes. Resist the temptation to move it around. Just let it stay in one place. After 5 minutes on medium-high heat you should have nicely browned skin and will continue to brown in the oven. (see the picture above).

Lesson Learned 2: Make sure the chicken is patted very dry before you begin to brown it. If it is moist it won’t brown.

Lesson Learned 3: It is very important to let the chicken rest for at least 10 minutes after cooking as called for in the recipe. The chicken comes out very juicy if you do it that way. Other than that there are really no other tips I can give you about this recipe. It is relatively easy to make. You get great flavor without a lot of work. The only challenge for me so far is the clean up.

When I get a thumbs up from my husband I know a recipe is a keeper. This got two thumbs up on this one. I served this with parmesan oven roasted asparagus and my pesto orzo with roasted red peppers and olives (pictured at the bottom). So try it, I’m sure you’ll find this recipe to be a keeper as well.

IMG_5517

CRISPY CHICKEN A L’ORANGE (EASY ORANGE CHICKEN)

Easy Orange Chicken

  • Difficulty: Easy
  • Print

INGREDIENTS:

Skin on chicken breast (the recipe calls for bone-in but I did mine boneless and it was delicious)

1 1/2 tsp. kosher salt

1/2 tsp. ground black pepper

1 TBS. vegetable oil

1/2 cup thawed orange juice concentrate

1/4 cup honey

DIRECTIONS:

Preheat oven to 375. Season chicken with salt and pepper. Heat oil in a skillet over medium-high heat and seat the chicken skin side down until brown and beginning to crisp – about 5 minutes.

In a small saucepan bring the orange juice concentrate honey and a dash of salt and pepper to a boil. Cook until syrupy (about 3 minutes).

Transfer chicken skin side up to a baking dish and drizzle with half of the orange juice mixture. Bake for approximately 35 minutes or until the internal temperature is between 160 and 170. After the chicken has been in the oven for about 15 minutes, drizzle the remaining orange juice mixture on it. When cooked, remove the chicken from the oven and let rest for about 10 minutes.

Serving suggestion: parmesan roasted asparagus and pesto orzo with roasted red peppers and olives

Serving suggestion: parmesan roasted asparagus and pesto orzo with roasted red peppers and olives

Don’t Chicken Out On Roast Turkey…

My husband and I went out to dinner this past Thanksgiving and I made a rib roast for Christmas so I knew eventually I would feel like I was cheated out of a traditional Thanksgiving meal. Luckily for me my local grocery store had a great manager’s special over the Christmas holiday pricing every single fresh turkey breast, regardless of weight, at $7.00. OK, I said to myself, I can’t afford to pass this up even though turkey was not on the Christmas menu. So into the freezer it went just waiting for the right time to resurrect Thanksgiving.

I used to be intimidated by cooking a turkey – I could never seem to get it right making it either over-done or, mostly in my experience, under-done. To me there is nothing worse than a dry turkey especially if you are just cooking an all-white meat turkey breast. Overcooking it means you eat sandpaper and when you spend that amount of time preparing a meal nothing can be more frustrating.

I can tell you right now, cooking a turkey is about trial-and-error, a firm resolve that it really is no big deal and a belief that you can actually be good at it. I’ve had numerous disasters over the years and only through the school of hard knocks have I become adept at roasting turkey. I very seldom cook a whole bird anymore as even a small one is way too much for me and my husband. But I find that with the right prep and know-how a turkey breast, whether half or whole, is equally as good and lends itself to being on the dinner menu more than once a year. At other times I don’t make all the traditional sides as the caloric intake is far too great, but this time I just had to opt for tradition – I mean you just gotta do it once a year, right?

Normally I critique recipes from Pinterest, Facebook or other foodie-type websites, but this is solely my recipe adapted from years of experience and variations of several recipes I’ve tried. So here are my lessons learned and rating.

7 pound turkey breast

7 pound turkey breast

Rating: Finally A+ – I say finally because this took a lot of practice on my part. For some reason the perfect roast turkey took a few years of trial and error. Thanks goodness I love turkey so much that failure did not weaken my resolve. What is great about when you master this is that you feel confident to make it any time of year. One of our local grocery stores often stocks fresh bone-in half breasts and that is plenty for my husband and me for a great meal and leftovers.

Lesson Learned 1: If the turkey is frozen, make sure it is completely thawed. This may sound rudimentary, but I can’t tell you how many times I thought the bird was thawed only to find out at the last minute that it was still frozen in the middle. The turkey breast in the picture above was a little over 7 pounds. I planned to make it on Sunday so I took it out of the freezer and put it in the fridge the Tuesday before. In my experience turkeys thaw very slowly in the fridge and I finally figured out that if I add a day on to what I think will be the right amount of time to get a perfectly thawed bird I tend to get it right. Even with putting the bird in the fridge on Tuesday I still took out frozen matter from the cavity on Sunday. But I did that very early in the day, cleaned and dried the turkey breast and put the bird back in the fridge after that so that when it was time to begin prepping it, it was completely thawed inside and out. This was perhaps the biggest difference in ensuring even cooking and determining the appropriate cooking time.

Lesson Learned 2: Prepare a butter rub and rub it under the skin as well as all over the outside of the bird. The nice brown color that you see in the picture is achieved by doing that. I normally make a mixture of butter, fresh thyme, salt and pepper. The darker pieces in the picture are not burned skin but darkened thyme. You can scrape that right off.

Lesson Learned 3: Forget about putting a bread stuffing in the cavity, instead stuff it with aromatics. With this particular bird I jammed a thyme bundle, large garlic clove, two sweet onion quarters and a half of a lemon into the cavity. You’ll be amazed at how this helps to flavor the meat. You can discard all of it before you start to carve it. It’s work is done by then.

Lesson Learned 4: Put some white wine in the bottom of the pan before you begin the roasting process. This provides a nice steam bath for the bird and enhances the juices that you can use to make homemade gravy. I never worry about having basting juices or a solid basis for my gravy anymore. This is a great trick. The gravy in the picture below was made from the wine and drippings mixture from the turkey breast.

Lesson Learned 5: Know your oven. I’ve said this in a few other recipes, but for turkey I think it is very important. I roast turkey at 350/twenty minutes per pound. Some recipes call to roast the bird at 325. I live in high altitude and so, on average, cooking times are longer and cooking temperatures need to be a little higher. After much trial and error I have found this to be the perfect roasting guideline for my circumstance. Also get a good meat thermometer and use it. That is the only way to ensure you meat is cooked to the desired doneness.

Lesson Learned 6: Let the turkey rest for at least 20 minutes to half-an-hour after roasting. The internal temperature should be 185. I normally take it out when it reaches between 175-180 as carry over cooking will occur while it is resting. Keep it covered in foil but make sure you let it rest. It will be much easier to carve that way and you will retain the natural juices in the meat.

Lesson Learned 7: Be prepared for failure, especially if you’re new to roasting turkey. It’s all part of the learning process and you can always make a turkey pot pie or turkey salad with the spoils.

So go ahead, jump into the deep end of the pool and make a roast turkey more often than just on Thanksgiving. Once you get the hang of it you’ll be surprised at exactly how easy it really is. I’m including for you my basic recipe for both a roast turkey and homemade cranberry sauce, also pictured below (forget store bought, this is sooo easy and sooo worth it).

Turkey and all the trimmings...

Turkey and all the trimmings…

Perfect Roast Turkey With HomeMade Cranberry Sauce

  • Servings: Varied
  • Difficulty: Easy
  • Print

Ingredients:

I whole turkey or a whole or half turkey breast, 7-12 pounds (you may need to adjust the cavity ingredients for a larger bird)

6 TBS. salted butter

Fresh thyme (enough to chop and mix with the butter and to put a bundle in the turkey cavity); you can also use turkey fresh herb blends sold in the grocery store that usually include sage, thyme, and rosemary.

1 sweet onion

1 large garlic clove

1-2 small lemons

2 cups dry white wine

Salt and Pepper

DIRECTIONS:

Make sure the turkey is completely thawed to ensure even cooking. Remove the turkey from its packaging, clean anything out of the cavity, rinse with cold water and pat dry. Cover with plastic wrap and refrigerate for at least an hour. Bring butter to room temperature. Mince approximately 2-3 TBS. of fresh herbs and combine with softened butter, salt and pepper. One half hour before putting the turkey in the oven take it out of the refrigerator, rinse again with cold water and dry off completely with paper towels. Use your hands to create a pocket between the turkey meat and the skin. Massage some of the butter mixture under the skin. Use the remaining butter mixture and massage the entire outside of the bird. Pour 2 cups of dry white wine into the bottom of the roasting pan and place the bird on a roasting rack inside the pan. Salt and pepper the outside of the bird. Let stand for at least 15 minutes.

Roast uncovered at 350 degrees, 20 minutes per pound, basting occasionally. Halfway through the cooking process check on the color of the skin. Once the skin reaches the desired color, tent the bird with foil to prevent the skin from getting too dark. Near the end of your estimated time, check the internal temperature of the bird at the thickest part of the thigh or breast. Poultry should be cooked to 185 degrees.  While the turkey is resting you can put the finishing touches on the other parts of your meal or make your homemade gravy.

THE BEST EVER HOMEMADE CRANBERRY SAUCE: (pictured on plate above)

Ingredients:

2/3 cup sugar

1 large or two small naval oranges (zest and 1/2 cup juice)

1/4 tsp. cinnamon

1/8 tsp. kosher salt

1 bag of fresh cranberries

DIRECTIONS:

Put the cranberries in a saucepan. Zest a large naval orange (or two small naval oranges) and juice the orange(s) – this should give you about 1/2 cup of fresh juice but if it does not just augment with bottled juice. Add sugar, zest, juice, cinnamon and salt. Stir until well mixed. Bring to a boil and then simmer for 15 minutes. Let cool and refrigerate. Make the day before serving to ensure all ingredients have sufficient time to meld. This is so easy and flavorful, you will never served canned cranberry sauce again.

My First Venture into French Cooking (Easy Chicken Marsala)…

I don’t know about you but I just love Pinterest. I find it a great place to find recipes and to find recipe sites that I may never have found otherwise. Repinning has become one of my favorite pastimes. Last week as I was in the midst of doing some massive repinning, I came across a recipe for easy Chicken Marsala. Now I don’t know about you but I am always on the lookout for something different to do with chicken. Chicken is such a great staple, but after a while the same old tried and true recipes just don’t seem to cut it. So this one had me intrigued. The recipe came from the website savorysweetlife.com, a site I had never come across before. The picture on the pin looked pretty good so I thought, what the heck, give it the old college try.

Needless to say it was easy. The hardest part was making the sauce and that came together in about 10 minutes. One thing I’ve learned about cooking in Colorado is that when it comes to cooking everything takes longer. Maybe it’s the altitude, but after having lived here for 10 years I always add time to my recipe preparation plans because it always needs it. I will share the recipe as it is, but depending where you live, your stove and cooking utensils, be prepared to add an additional 10 minutes on to this. The only things I changed were that I added some flour to the sauce to thicken it, without it the sauce just looked too runny, and some dried thyme to the flour dredging mixture. Otherwise, I followed the recipe as is and it turned out great. This particular recipe is for 4 people so adjust accordingly.  I got a thumbs up from my husband on this one and he always has a little bit of trepidation when I tell him I am trying something new. So this one is definitely a keeper. Enjoy easy Chicken Marsala!

Easy Chicken Marsala

  • Servings: 2
  • Difficulty: Easy
  • Print

INGREDIENTS:

  • 2 boneless skinless chicken breasts
  • salt and freshly ground pepper
  • 1/2 cup of all purpose flour or corn starch for gluten free
  • up to 1/2 cup olive oil or vegetable oil (I used olive oil and needed close to the whole amount)
  • 8 ounce container of mushrooms cleaned and sliced (I used baby bellas)
  • 1/2 cup marsala wine
  • 1/4 cup chicken stock (I only had vegetable stock on hand and it worked just fine)
  • 1/4 sherry or dry white wine (I used white wine)
  • Optional: 2 tablespoons of heavy cream (I used this)
  • Garnish with fresh parsley or oregano

DIRECTIONS:

  1. Split each chicken breast through the middle to make 2 pieces. Place plastic wrap over them and pound them flat using a meat mallet until they are about 1/4 inch thick. Season with a good amount of salt and pepper on both sides. Place some flour on a plate and dredge each piece of chicken in it. (I added some dried thyme to the flour)
  2. Heat the oil over medium-high heat and when the oil is hot fry each piece of chicken for 3-4 minutes on each side until they are golden brown (this may require you do this in two batches). Remove chicken and place them on your serving platter covering them with foil. (I put my toaster oven on a low heat setting and kept them warm in there). Carefully soak up any remaining oil in the pan with a paper towel and discard.
  3. Reduce the heat to medium and add the butter and mushrooms. Saute the mushrooms for 4-5 minutes making sure to season them with lightly with salt and pepper. Add the marsala wine, white wine, cream and chicken stock allowing the liquid to reduce slightly, approx. 3 minutes. (This is where I added approx. a teaspoon of flour to thicken the sauce). Pour mushrooms and sauce over the chicken and serve.

Chicken Marsala

Chicken Marsala