Cranberry Orange Cake Topped With Fresh Plums…

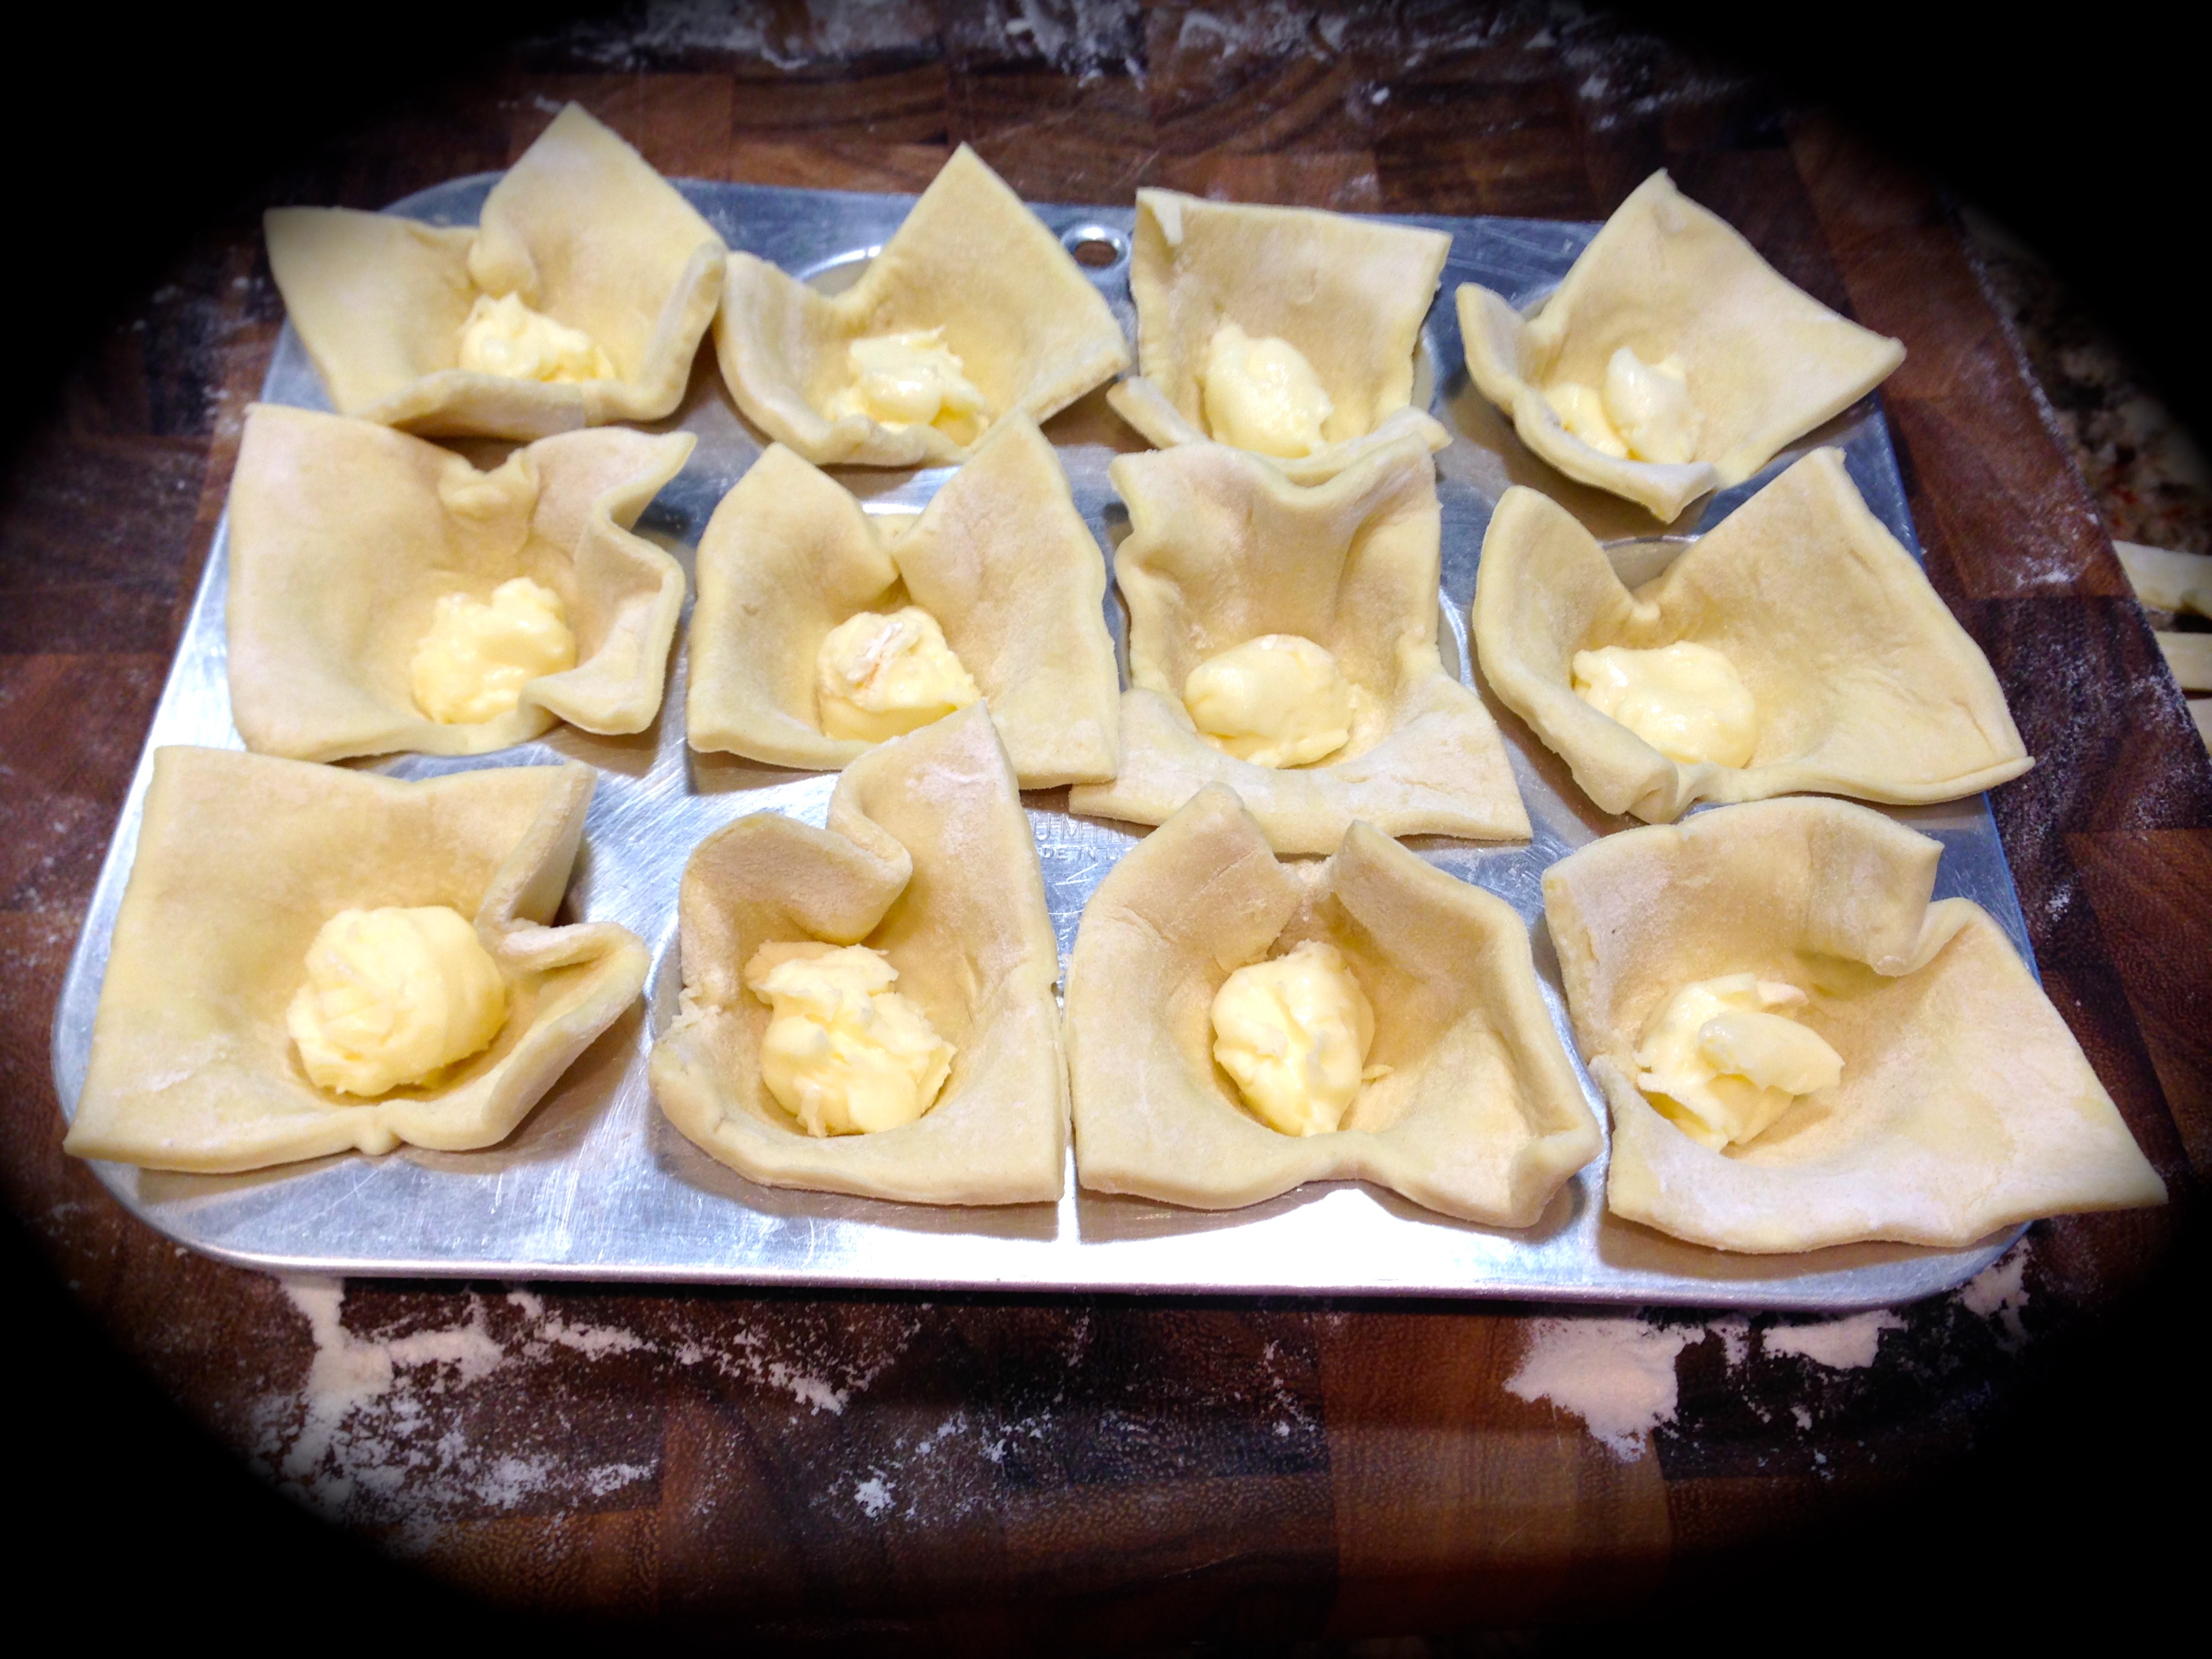
Those of you who followed my blog over the years know that early on in my cooking/baking days I was heavily influenced by the Food Network. The early shows they produced were more about learning to cook and less about cooking contests and road shows. I miss those days. Remember Semi-Homemade with Sandra Lee? I really liked that show. I felt Sandra showed people how to take a few simple ingredients, add it to something store bought and make it into something special without all the muss and fuss. In today’s world that is such a gift for the busy cook.

Well, that is what this recipe is all about. I wish I could take credit for this but I can’t. I was at the grocery store looking for something to make, like a quick bread or muffins and I picked up this box of Krusteaz Cranberry Orange Muffin Mix. I looked on the back of the box to see if I could use this to make a quick bread and lo and behold on the bottom right hand corner was the recipe for this cake. All it required was a few extra ingredients, namely almond extract and fresh plums. The picture of the cake looked so good I just had to try it. Needless to say, it was fabulous and very easy to make so I felt I had to share it with all of you. Nobody has to know that this cake is semi-homemade.

So let’s talk Cranberry Orange Cake Topped With Fresh Plums…

Lesson Learned 1 – Pick plums that are not overly ripe: You want plums that are hard. Hard plums are easier to slice and cook beautifully in the oven. It’s very difficult to get good slices with soft plums, even if you have a very sharp knife. The pieces tend to get mushy. So be aware of that.

Also when you cut the plums, cut them like you would an avocado. I found it very hard to get the stones out of the plums. But if you cut the plum all around at the center and twist the two halves in the opposite direction, just like you do with an avocado, the plum halves will separate easily. You may have to dig a little with a sharp knife to get the stone out of the one half (be careful) but the harder the plum the easier that will be.

Lesson Learned 2 – Create the plum arrangement you want on top of the cake on a paper plate first: I found I had to play with the plums a little to create the arrangement I wanted. You don’t want to be doing that on top of the batter. I took a dinner size paper plate and created my plum arrangement on that. When it came time to put the plums on top of the batter I simply moved them from the plate to the cake just like I arranged them. It was a piece of cake, no pun intended!

Lesson Learned 3 – You could also add chopped nuts to this recipe: I did not make it with nuts this time but you could add 1/2 cup chopped nuts to this cake as well. It’s all up to you!

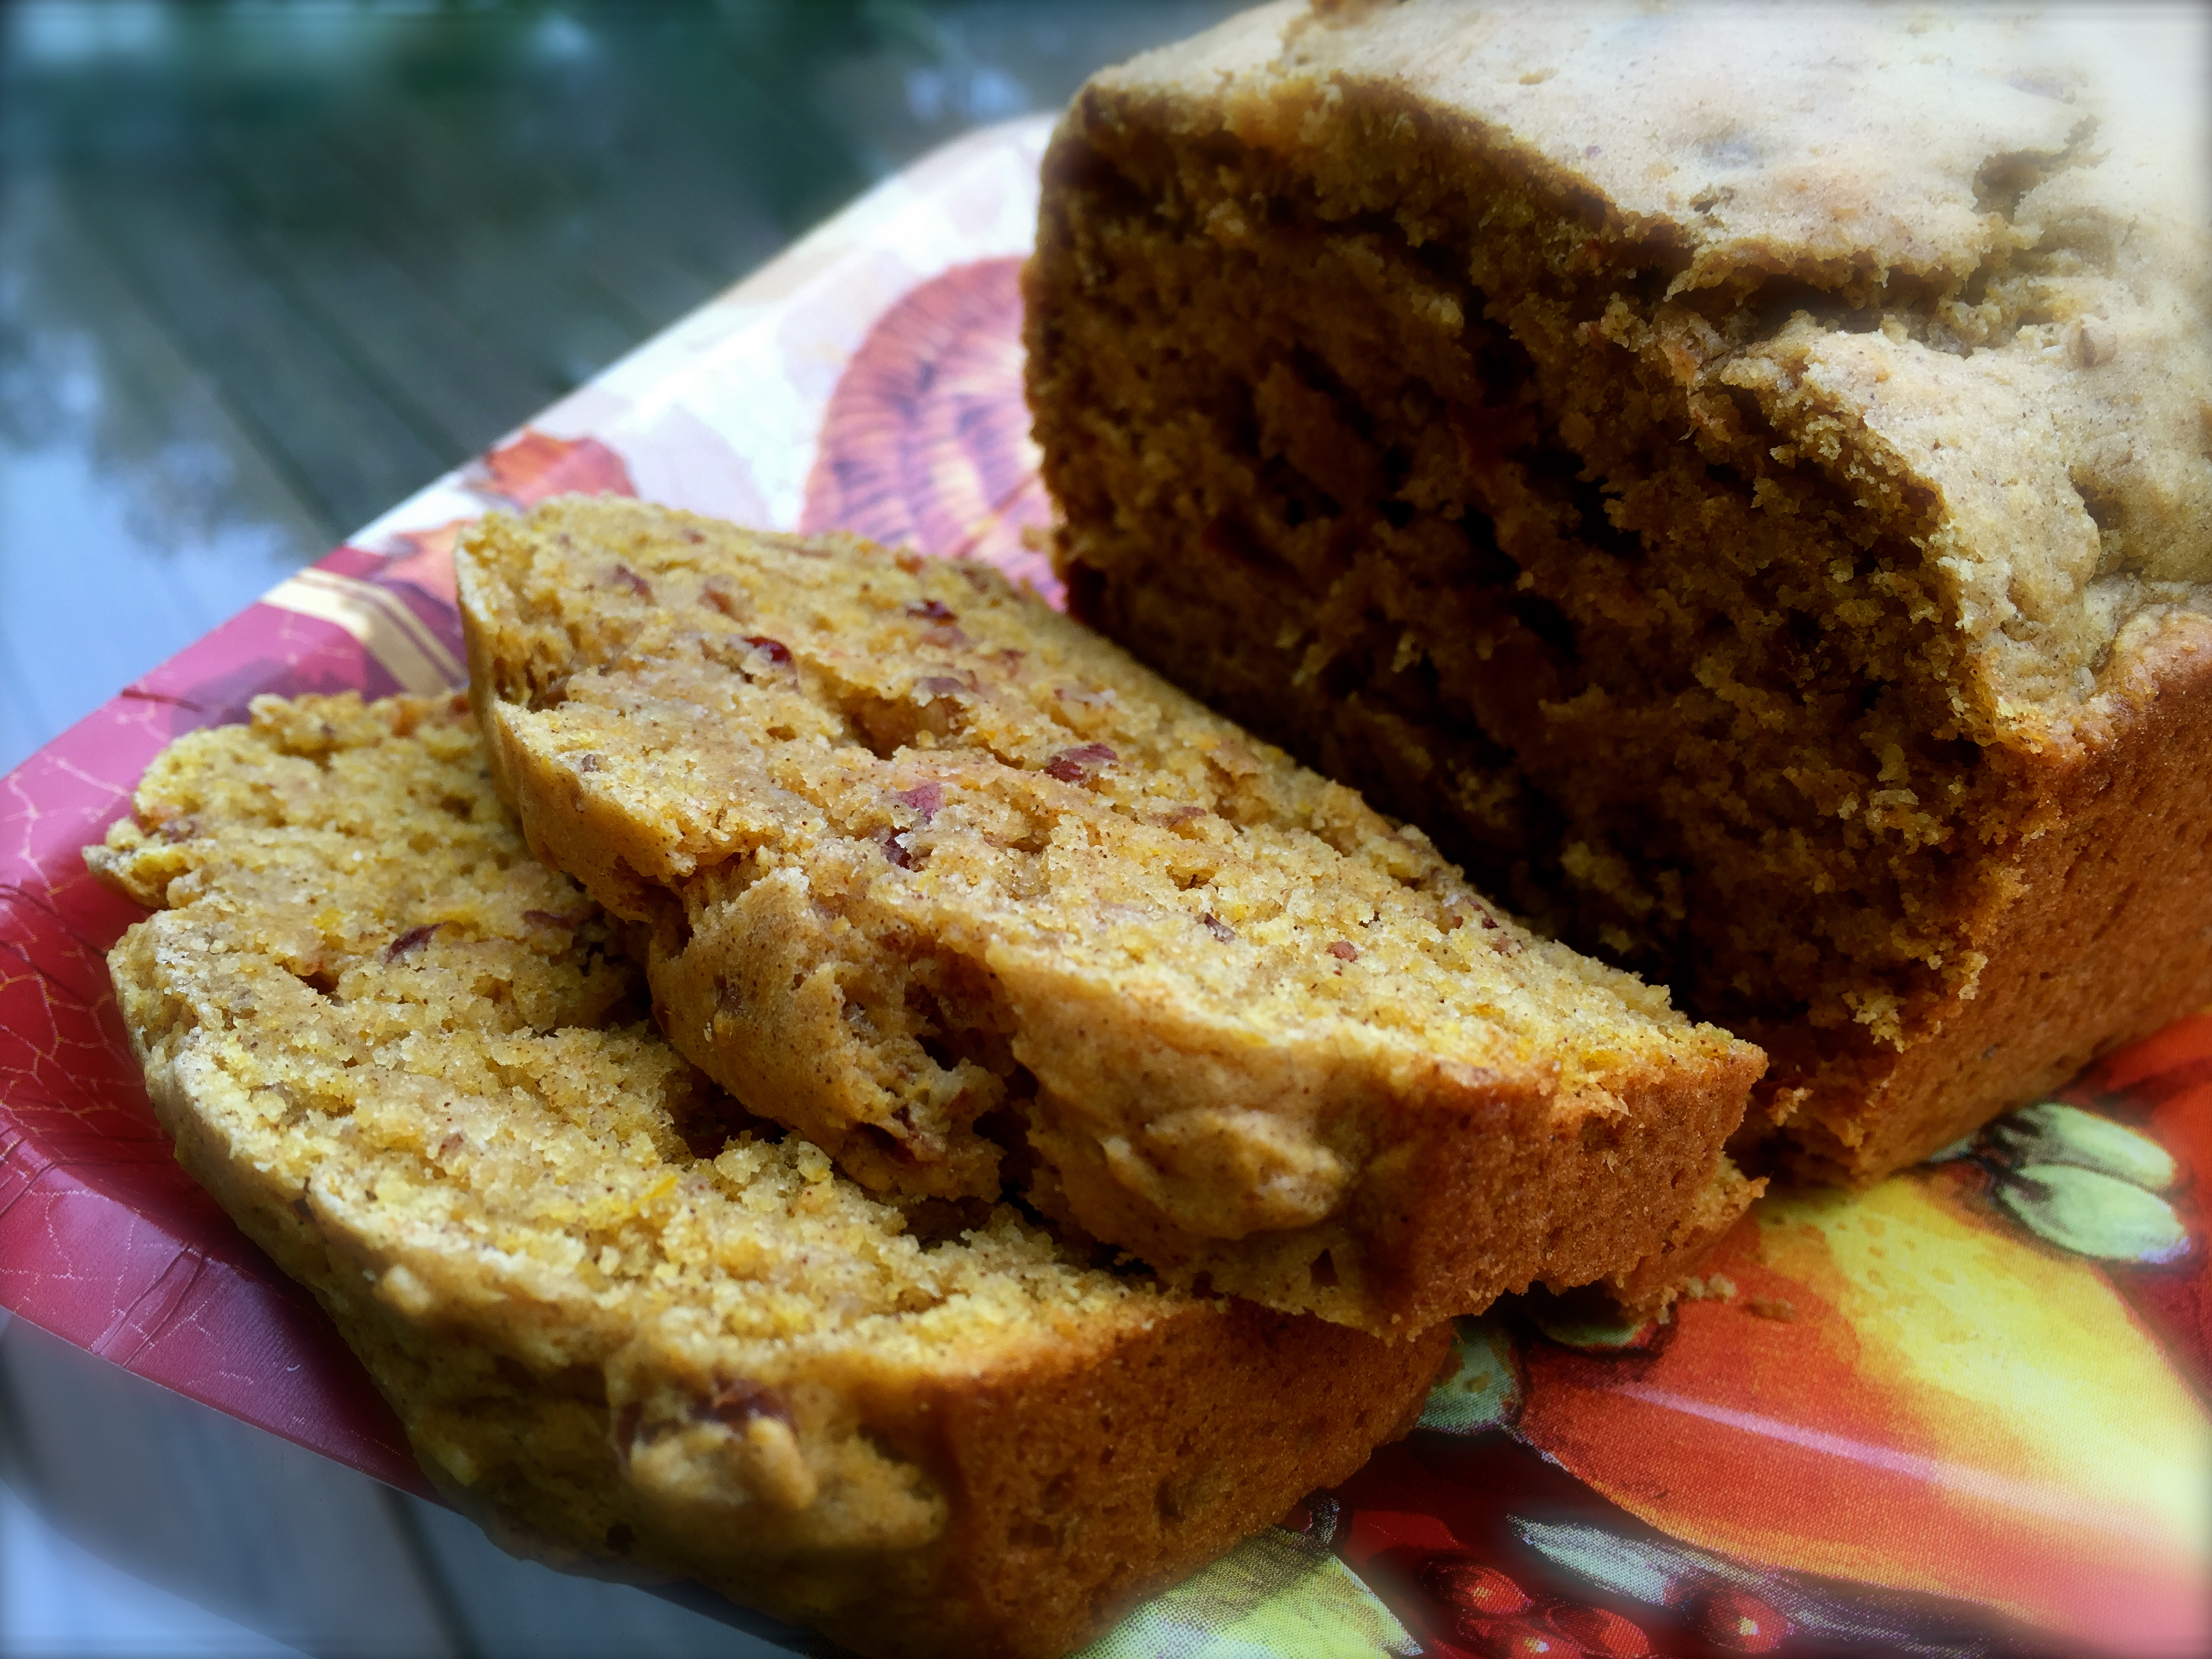
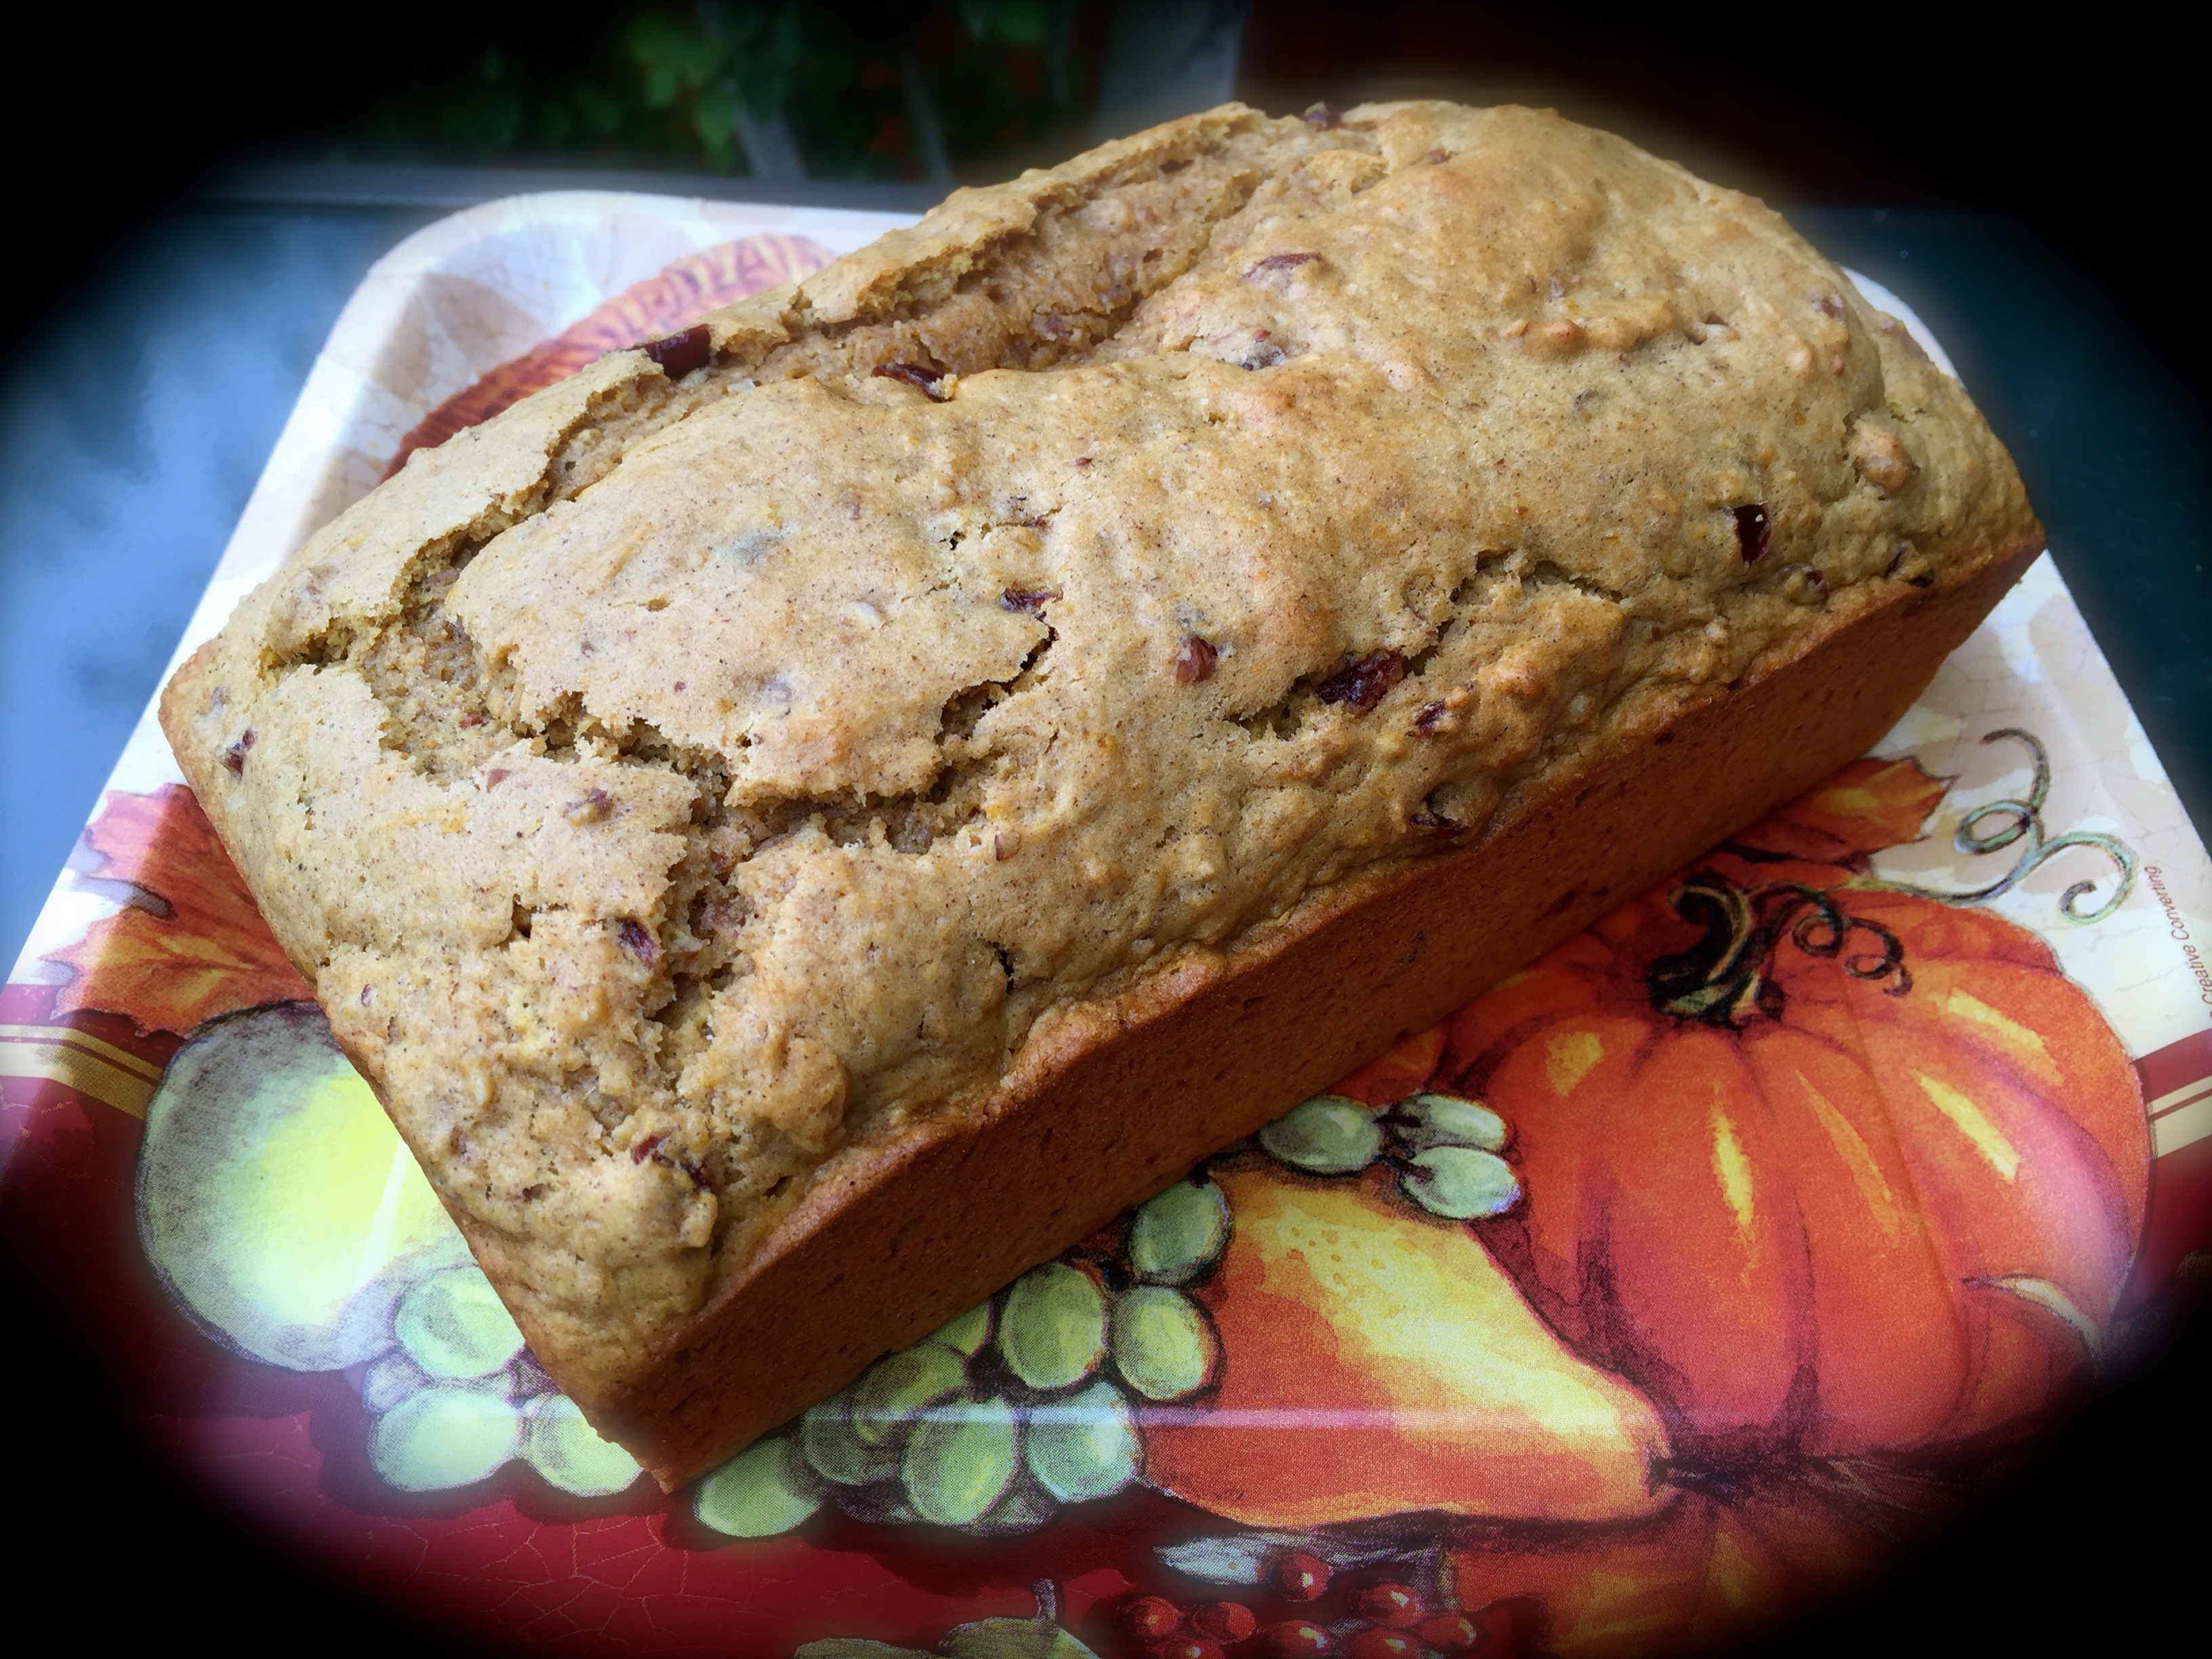
And the rest is easy. Just follow the directions on the box. I’ll write out the recipe here just in case the packaging gets changed. This is a quick, impressive and delicious semi-homemade recipe. I will definitely make this one again. Enjoy!

Cranberry Orange Cake Topped With Fresh Plums...

  • Servings: 12
  • Difficulty: Easy
  • Print

INGREDIENTS:

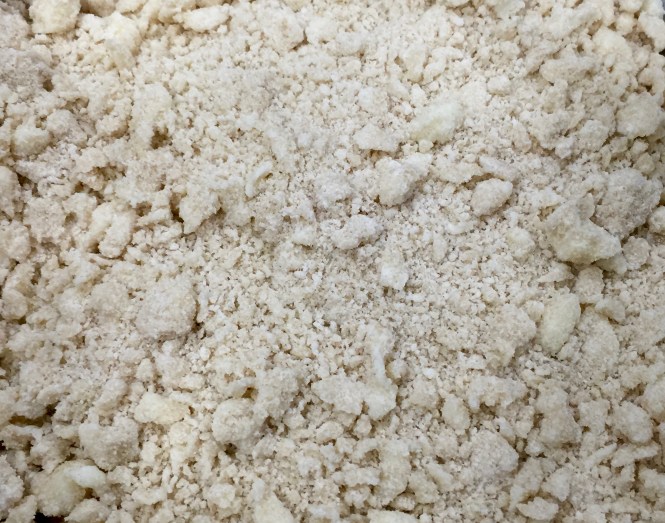
1 box Krusteaz Cranberry Orange Muffin Mix

2 eggs, room temperature

1/2 cup water (plus 2 Tbs for high altitude)

1/2 cup vegetable oil

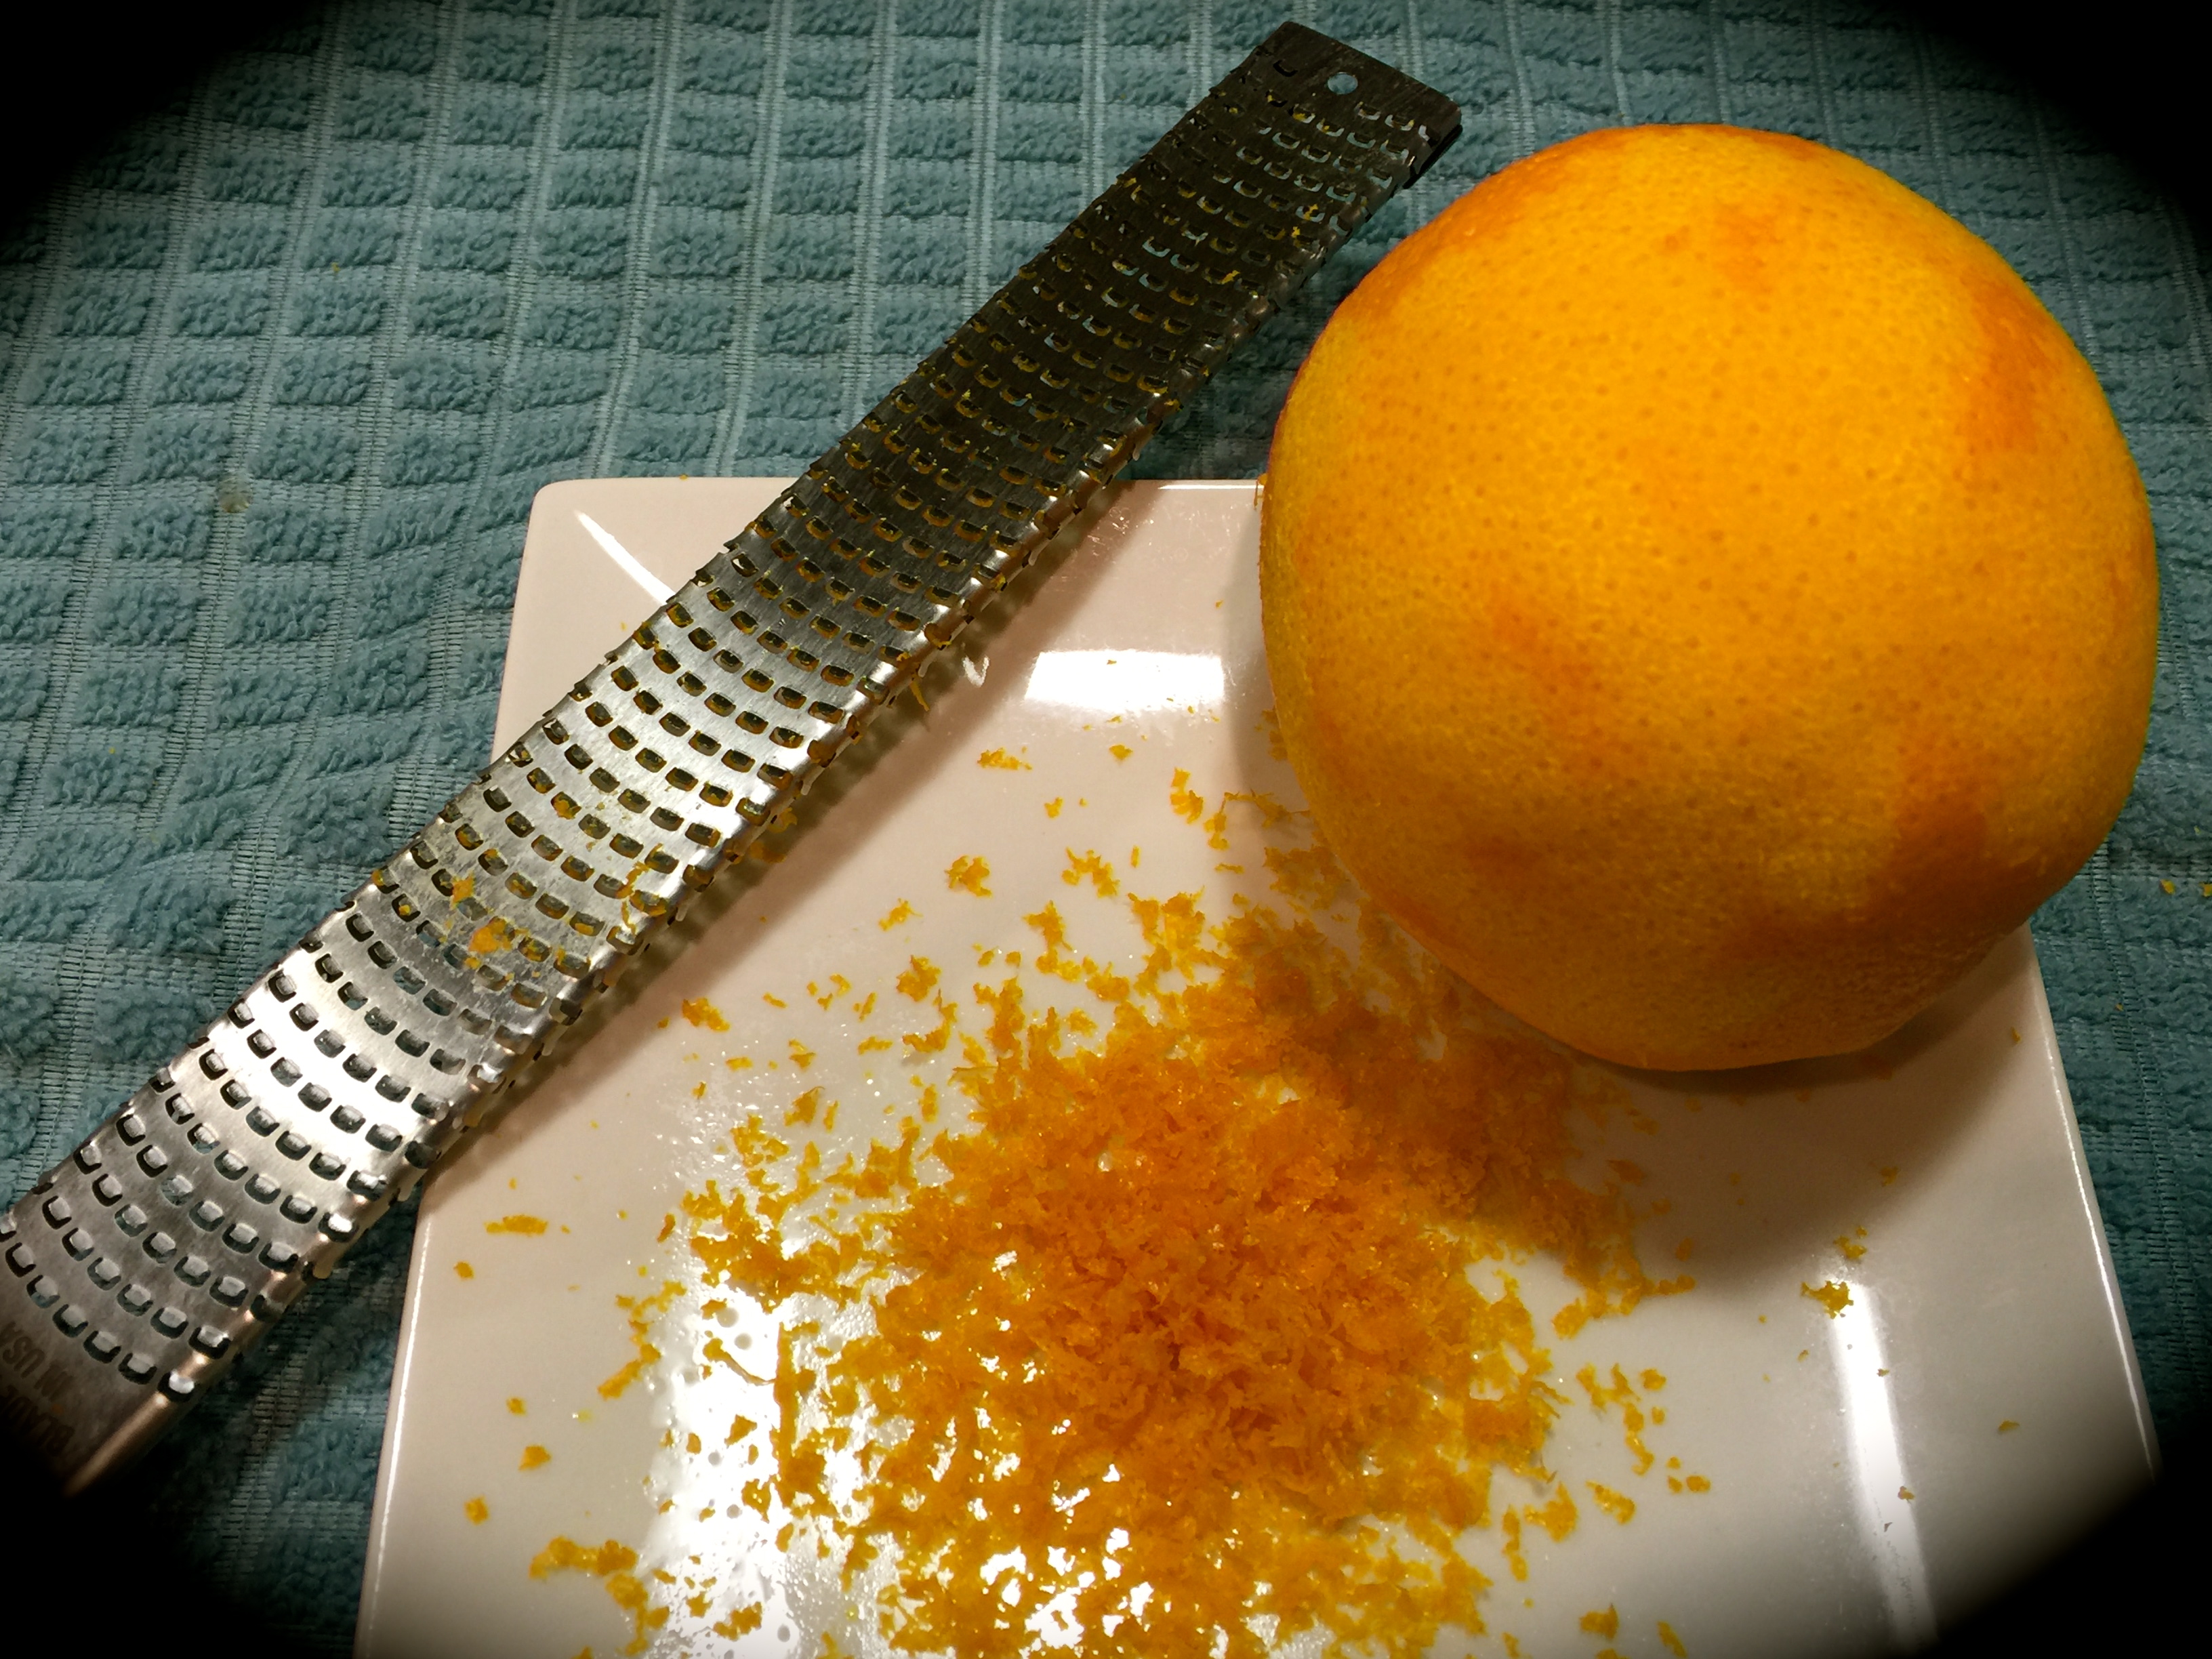
1/2 tsp. almond extract

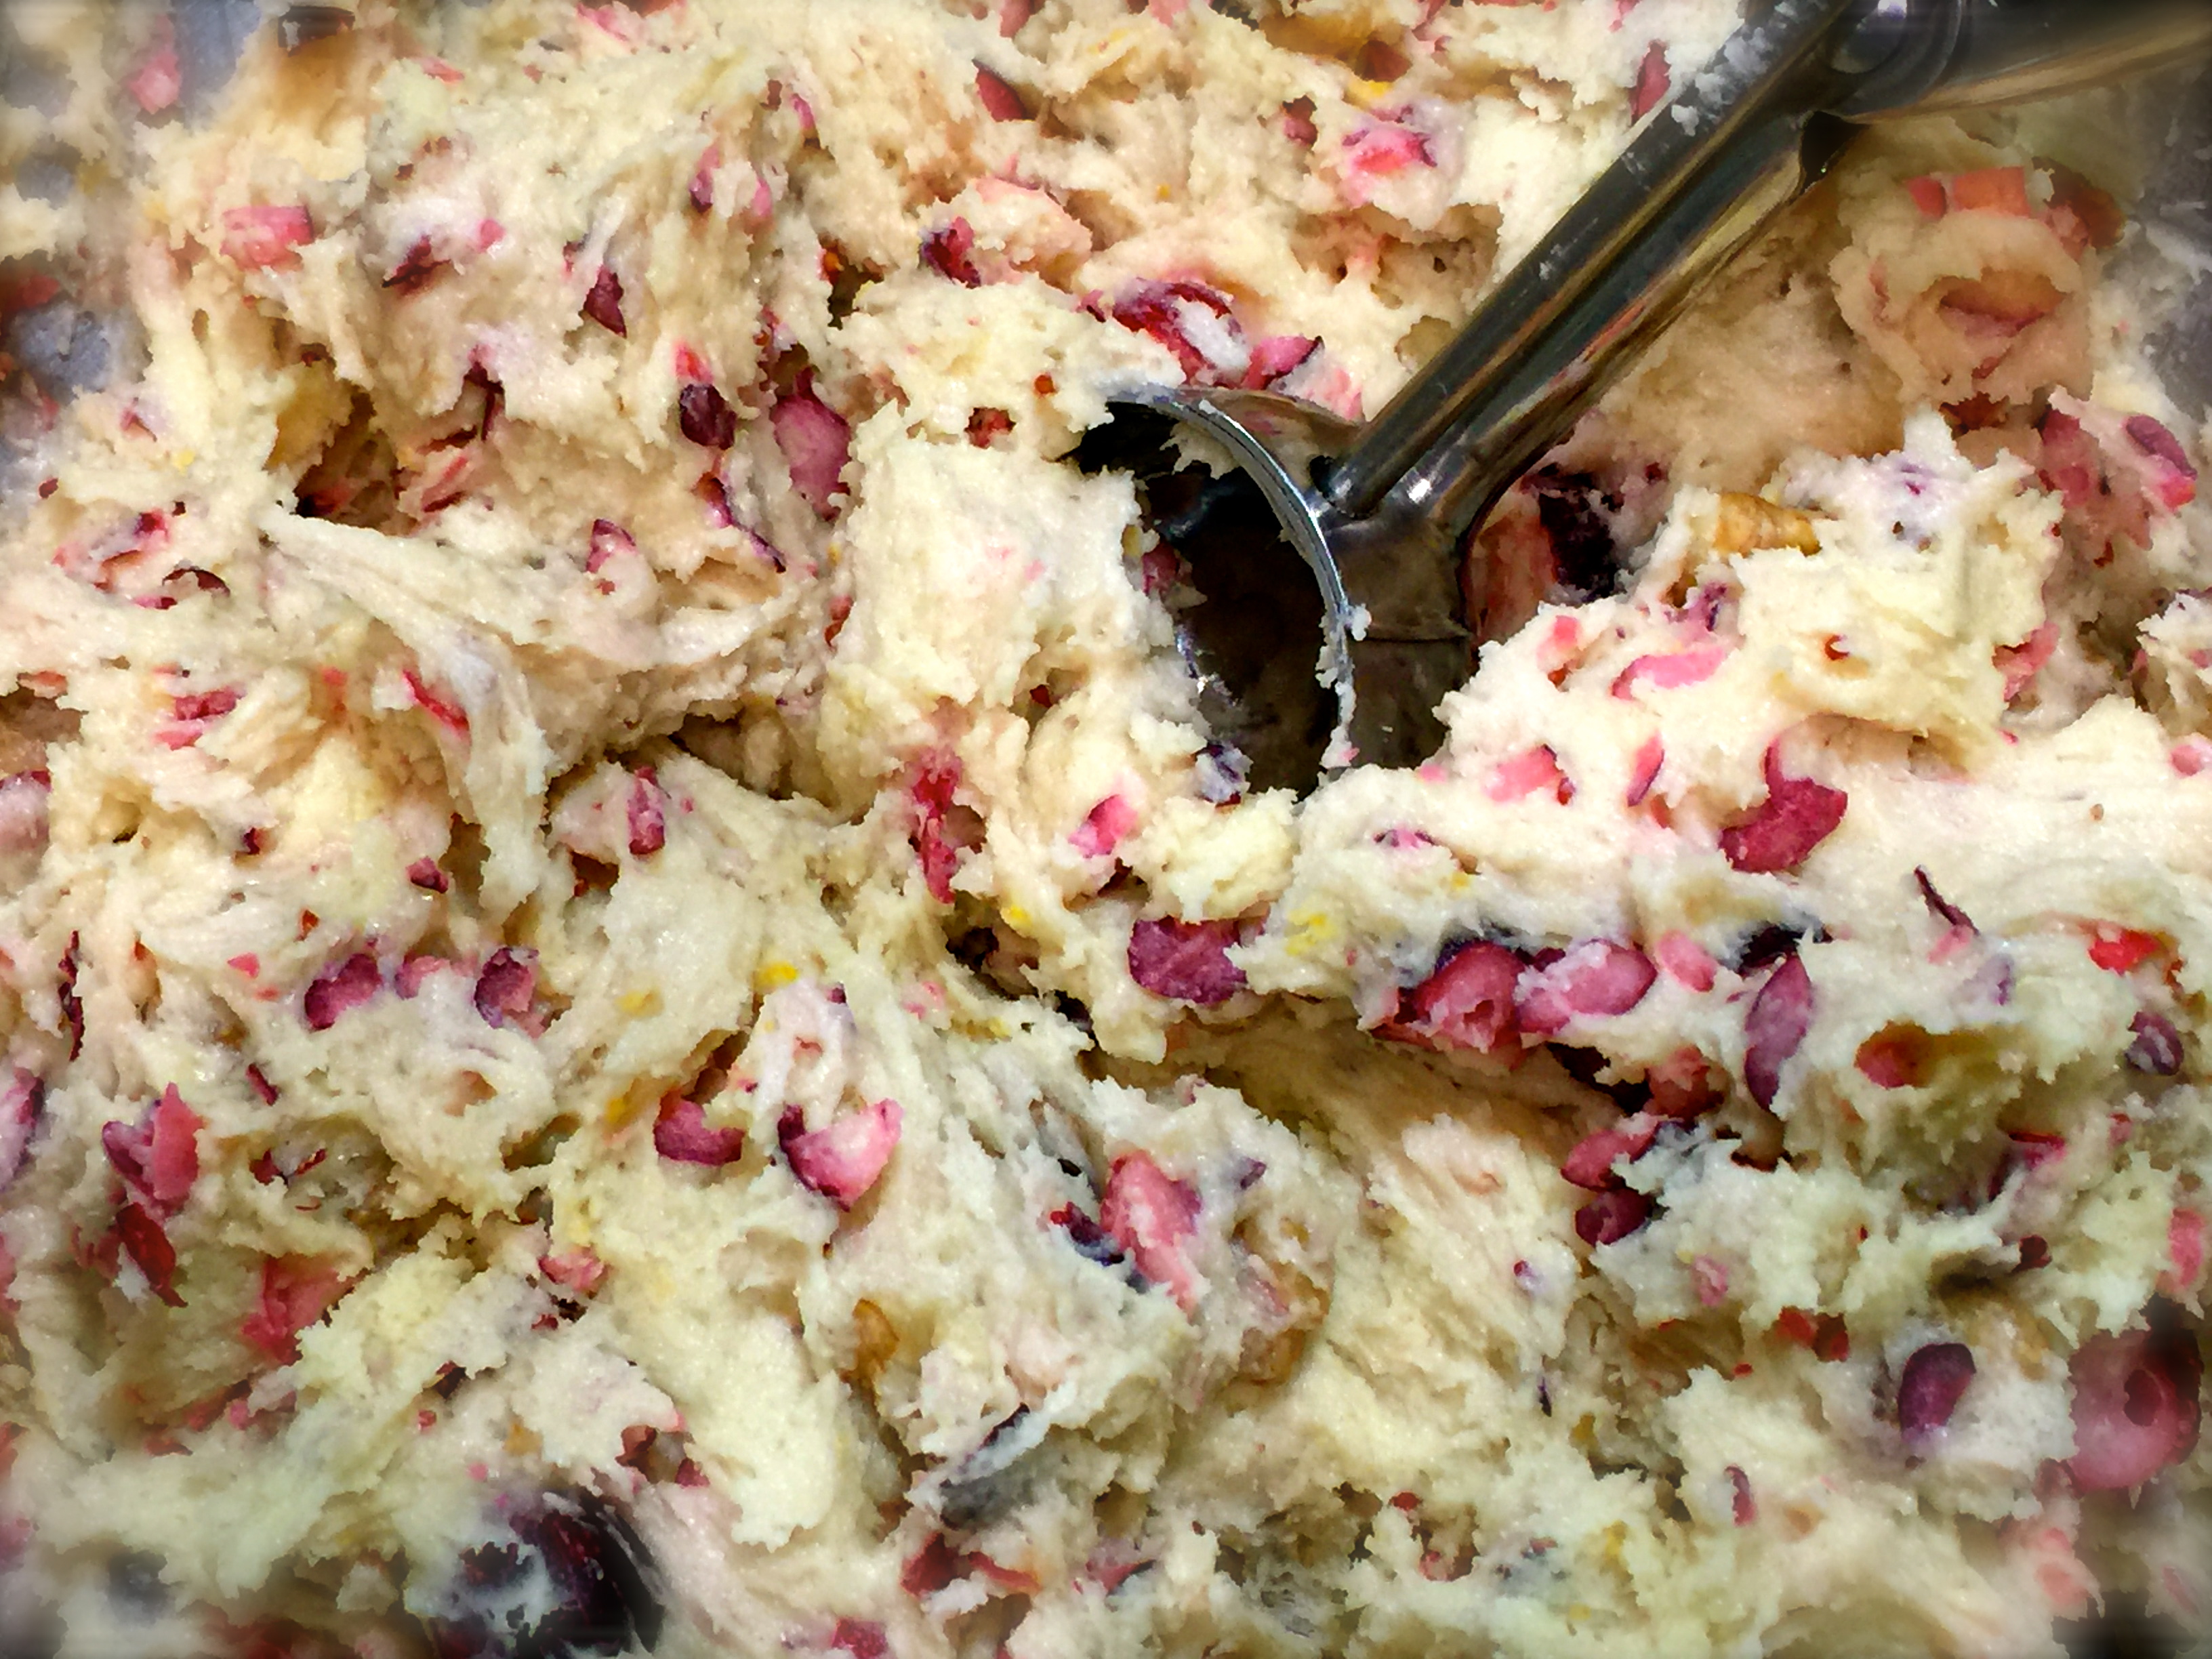
1 can cranberries (included in the box), undrained

2 under ripe plums, sliced

baking spray

DIRECTIONS:

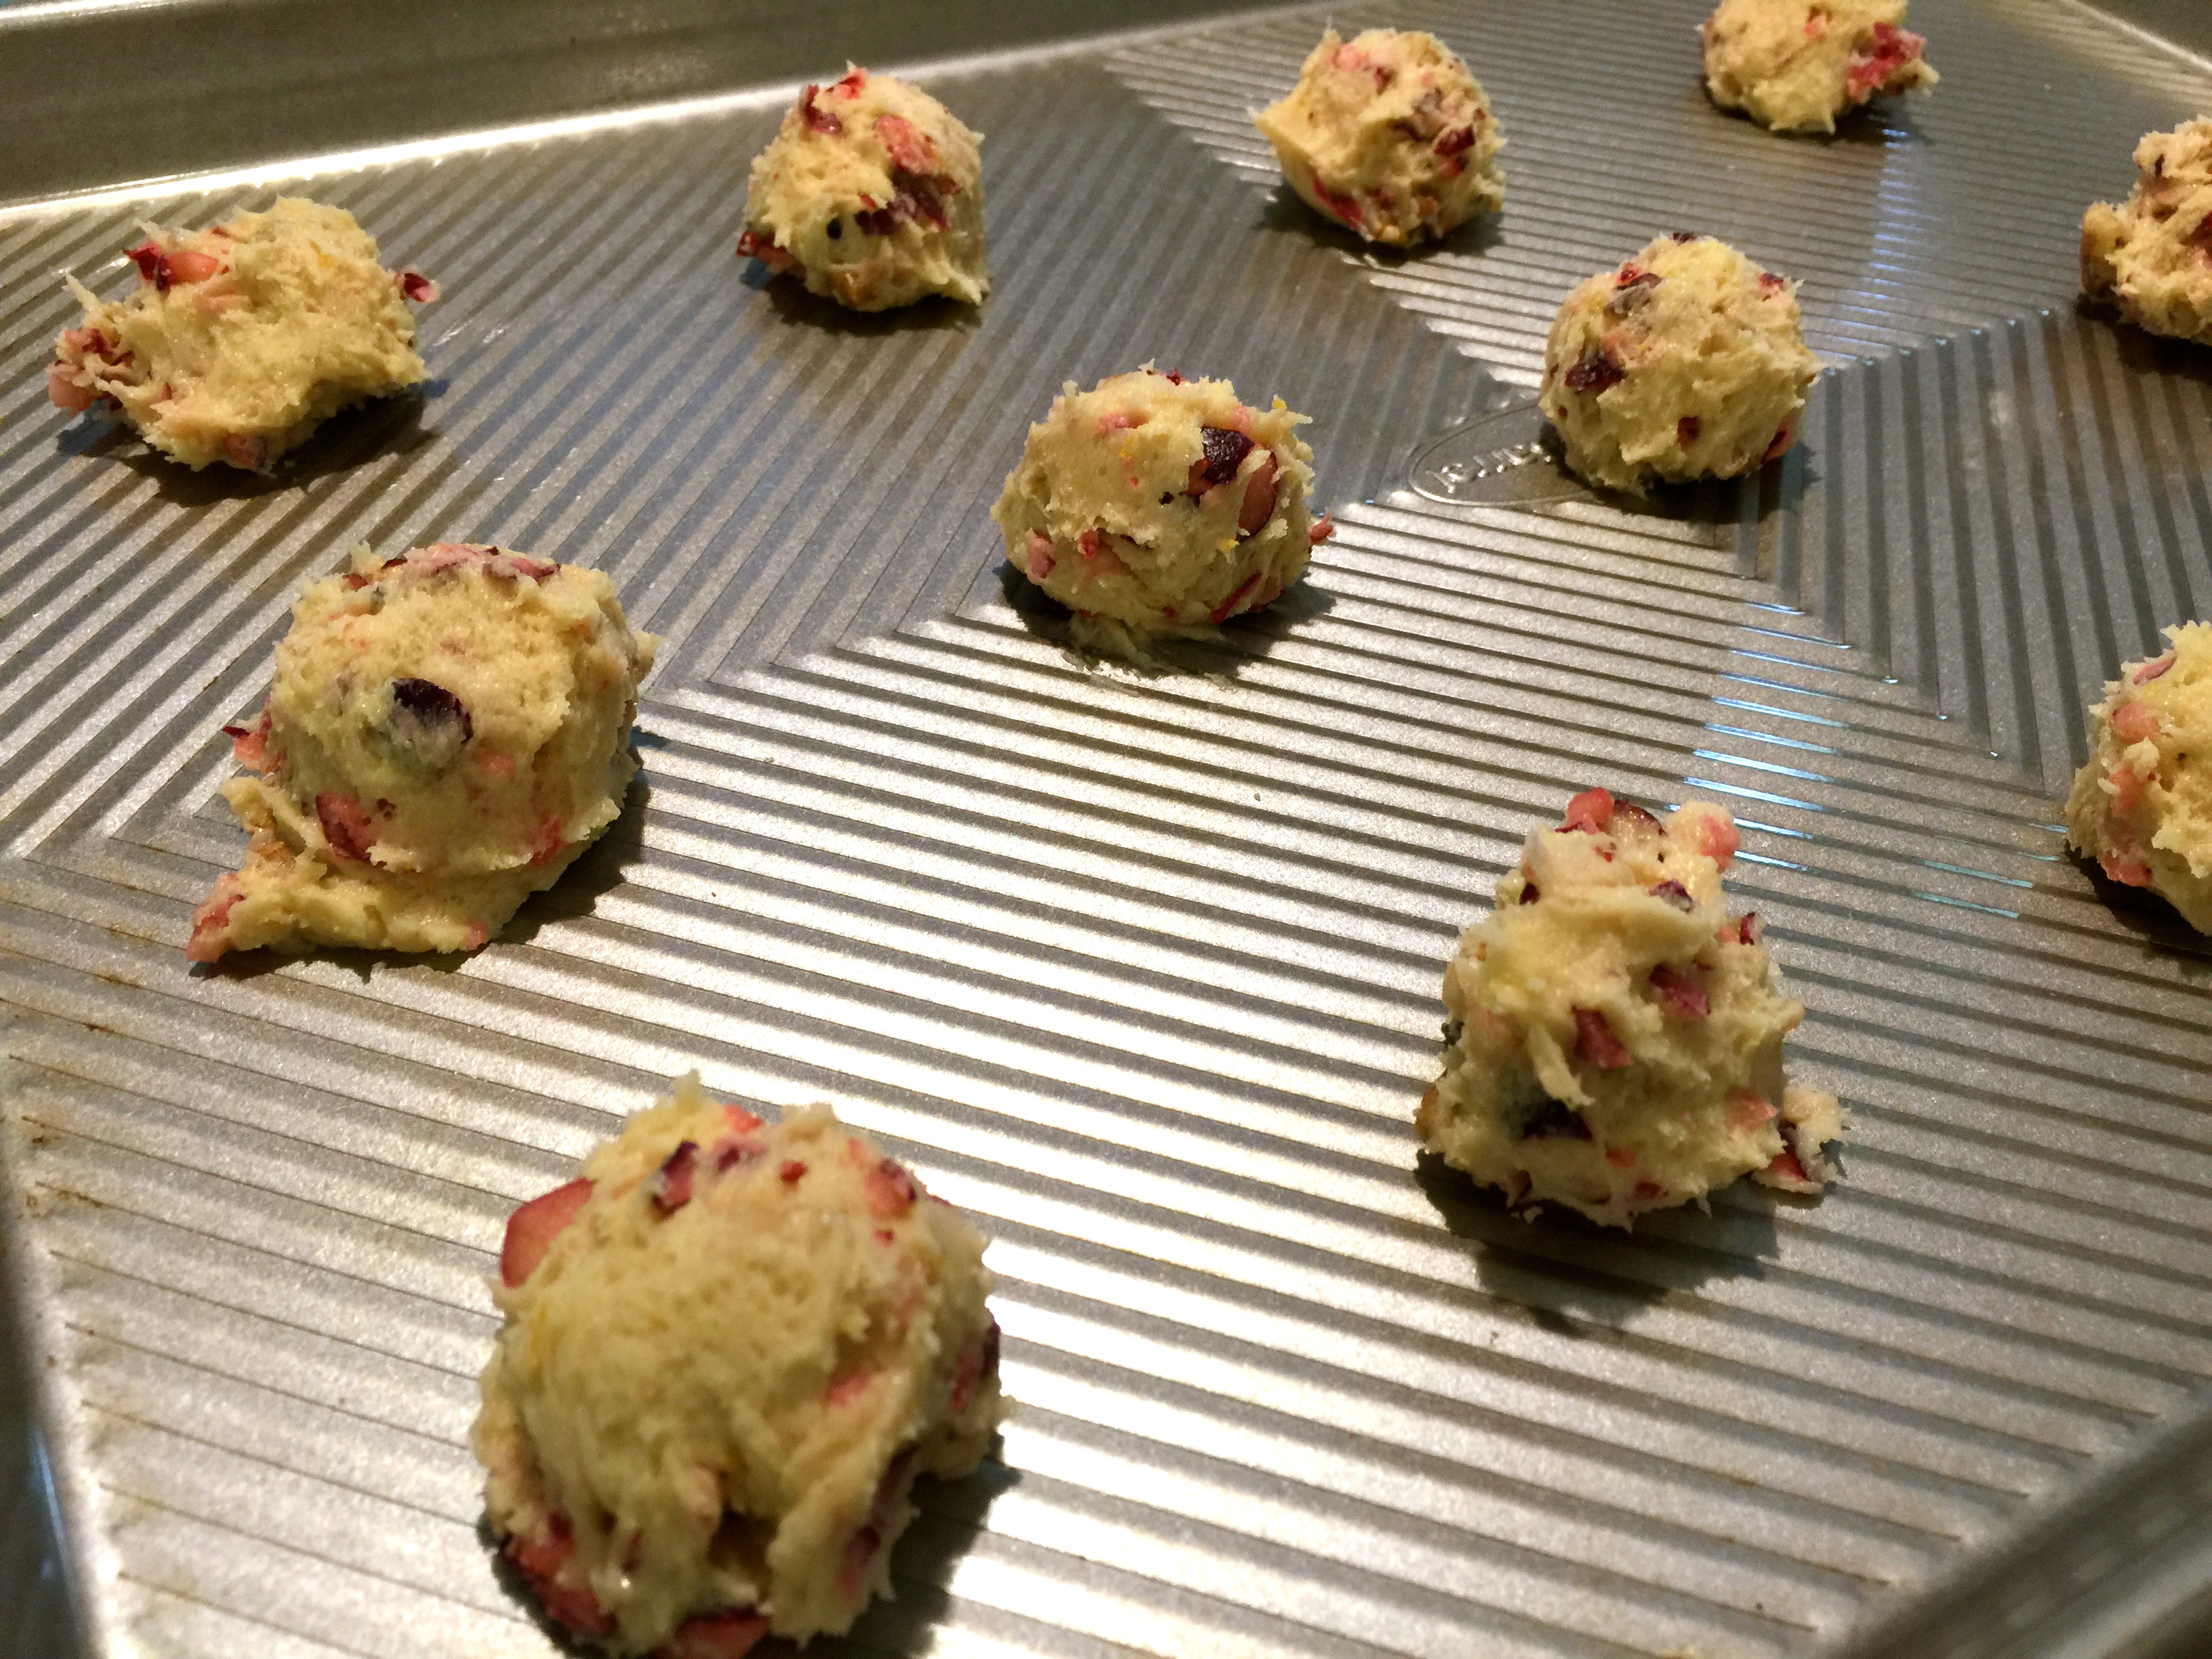
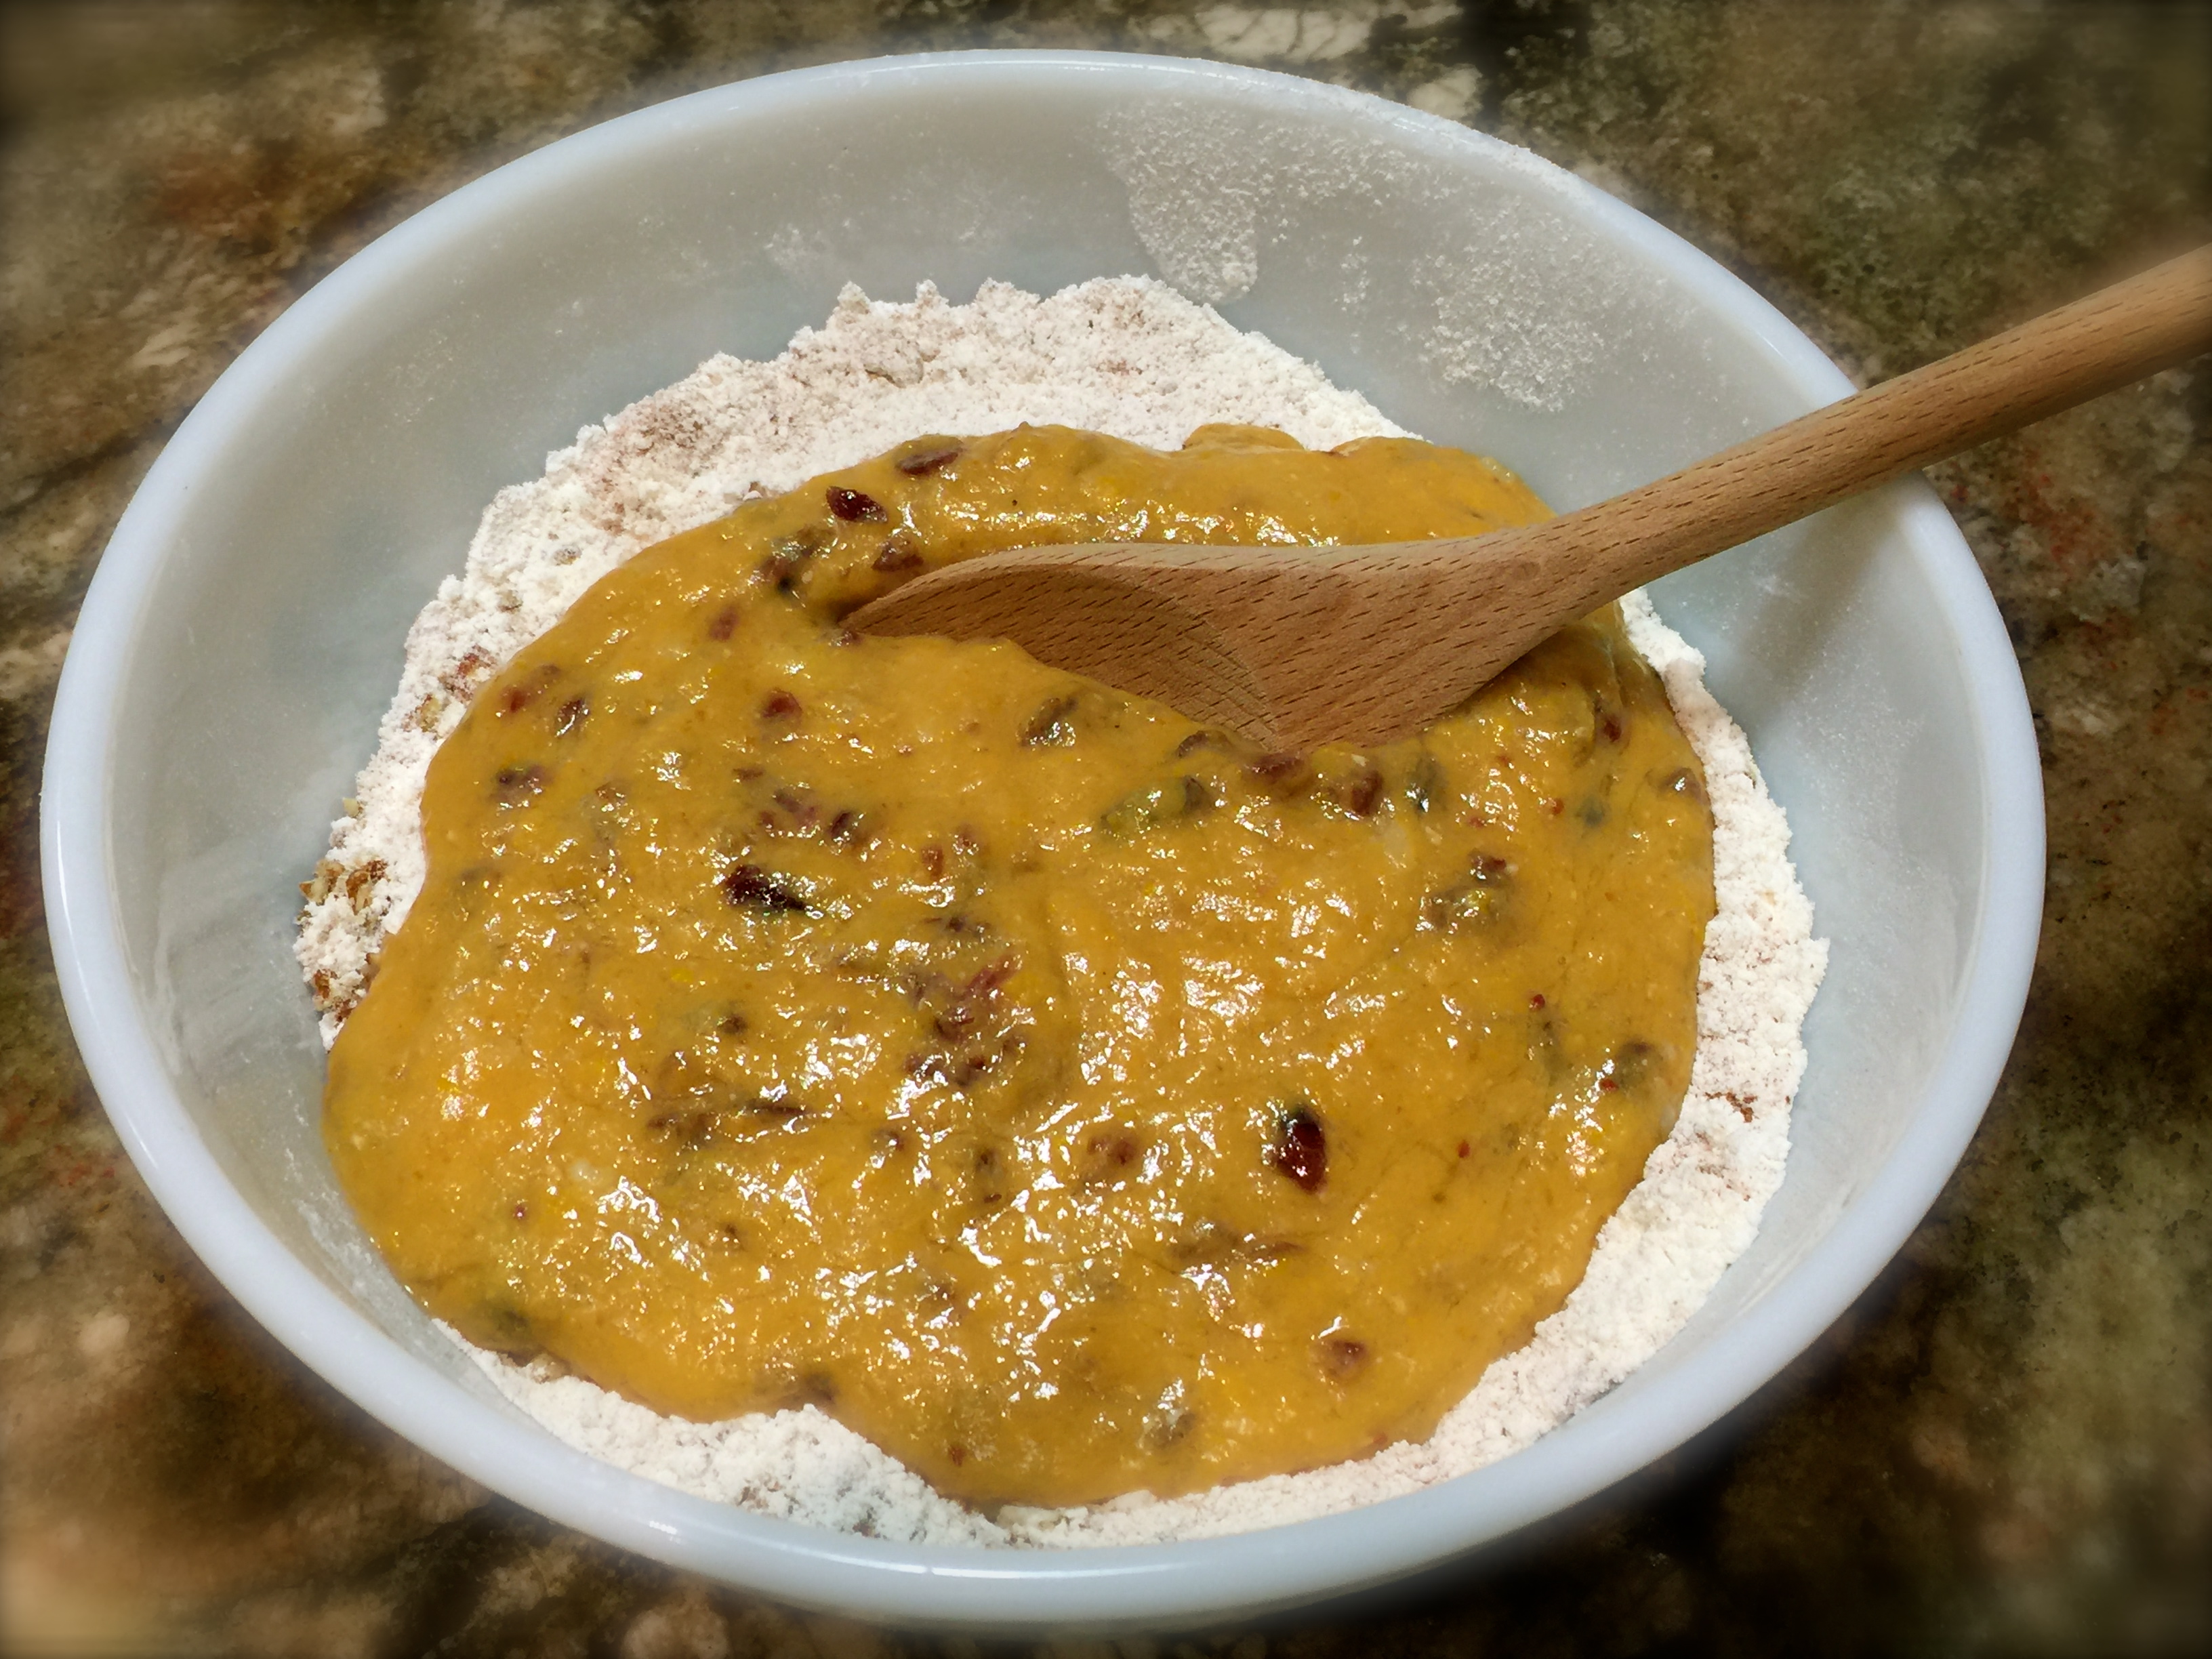
Heat oven to 350. Mix well the muffin mix, eggs, water, vegetable oil and almond extract. Fold in the cranberries.

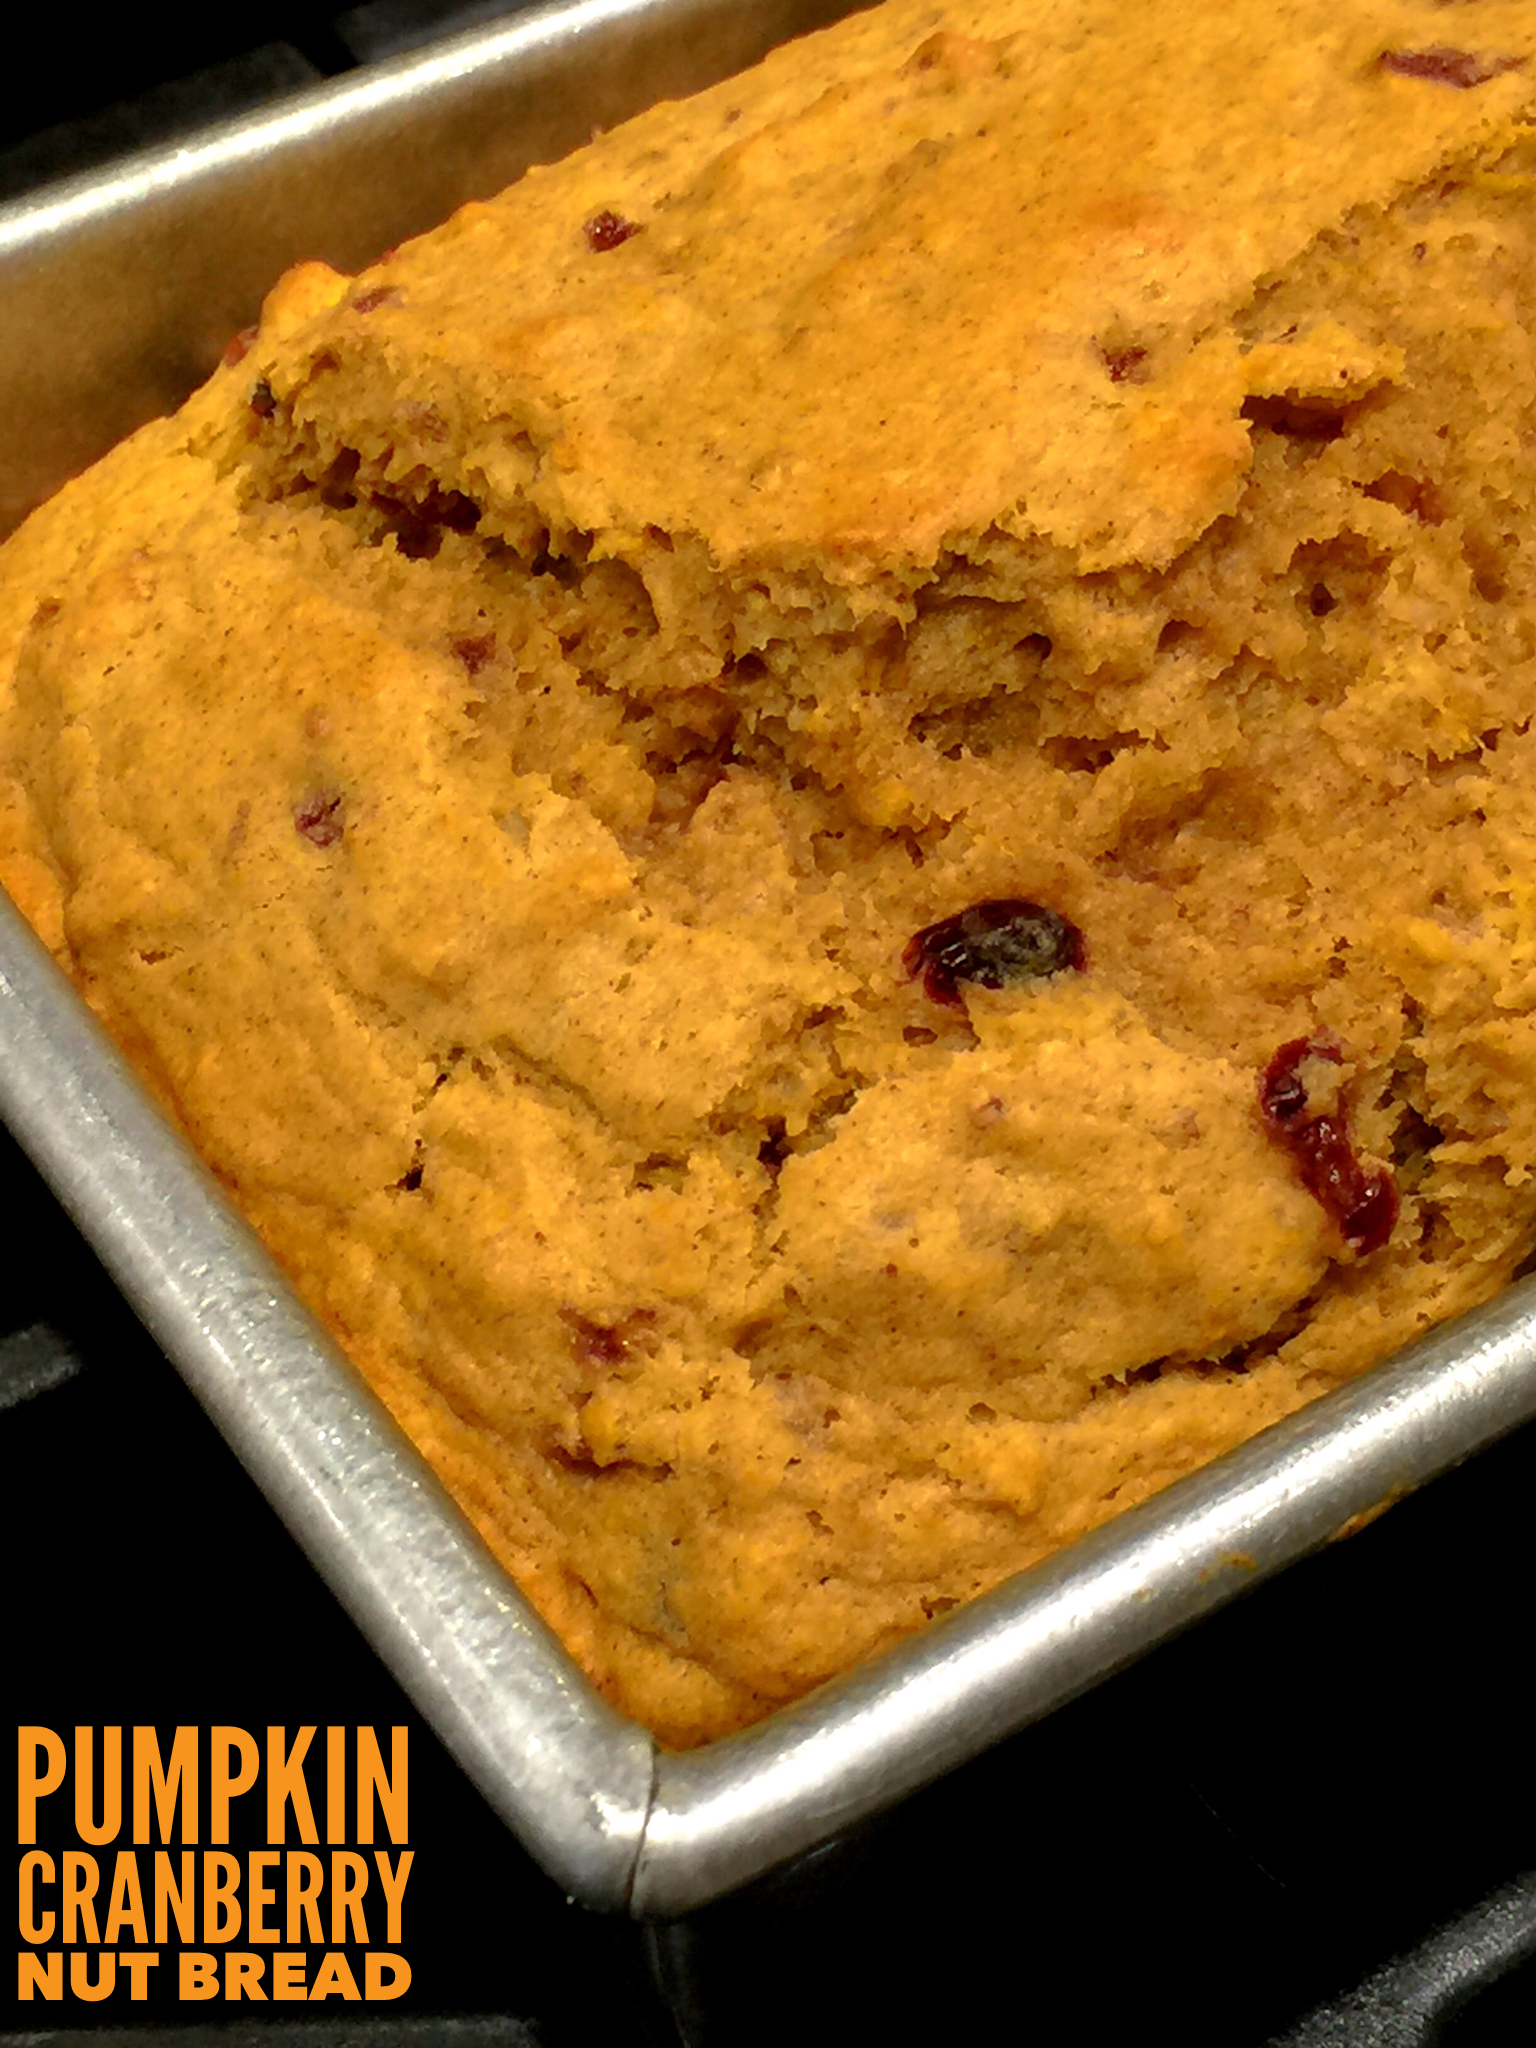
Spray a 9 inch springform pan with baking spray. Spoon the batter into the pan. Arrange the plum slices evenly over the batter.

Bake for 45 minutes or until a toothpick inserted in the center comes out clean. Let cool in pan for 15 minutes before removing.


Skillet Breads – Rosemary Parmesan and Cranberry Walnut…

Nothing in this world compares to home made bread. There is something so comforting about it, it creates that feeling of “there’s no place like home” every time you smell it baking in the oven. And bread baking has progressed over the years from a process that took hours to much quicker and easier methods. To date I have made bread the traditional way (letting it rise over and over for hours and baking in a loaf pan), to making bread in an enameled cast iron dutch oven and now this third way of making it in a plain old cast iron skillet.

I’ve made this recipe a few times before I felt I perfected it and I’ll go through all of that in my lessons learned. But bottom line, even with the few blips I encountered I still wound up with wonderful homemade bread. The two versions I’m going to talk about in this blog are Cranberry Walnut Skillet Bread and Rosemary Parmesan Skillet Bread. Two very different varieties but two wonderful breads.

So let’s talk skillet breads…

Lesson Learned 1 – Use rapid rise yeast and make sure it is fresh: I had a jar of rapid rise yeast in my refrigerator and used it the first time I tried to make this bread. It never rose the way it was supposed to (the jar had been in the fridge for quite some time) and the bread wound up “doughy” as if it didn’t have enough air in it. The second time I made the bread I used fresh yeast and their was a marked difference in how much the dough had risen. Also make sure that you use warm but not scolding water when you activate the yeast. Scolding water will kill the yeast but very warm water will activate it.


The picture on the left shows the newly mixed dough. The one on the right shows what the dough will look like after it had risen in the bowl for one hour.

Skillet bread requires the dough to rise twice, once for an hour in the bowl and once for a half hour in the skillet. The picture above shows what the dough should look like after it has risen in the skillet for a half hour.

Lesson Learned 2 – Use only a small amount of olive oil to season the skillet and use good olive oil: What I really like about making bread this way is the crust you get from the cast iron skillet. 
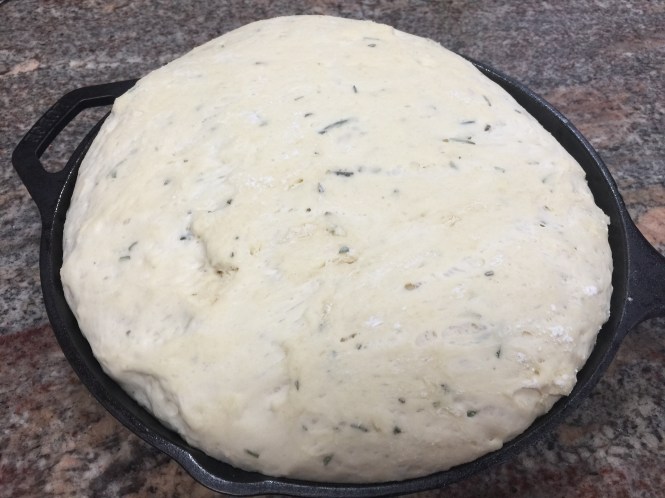
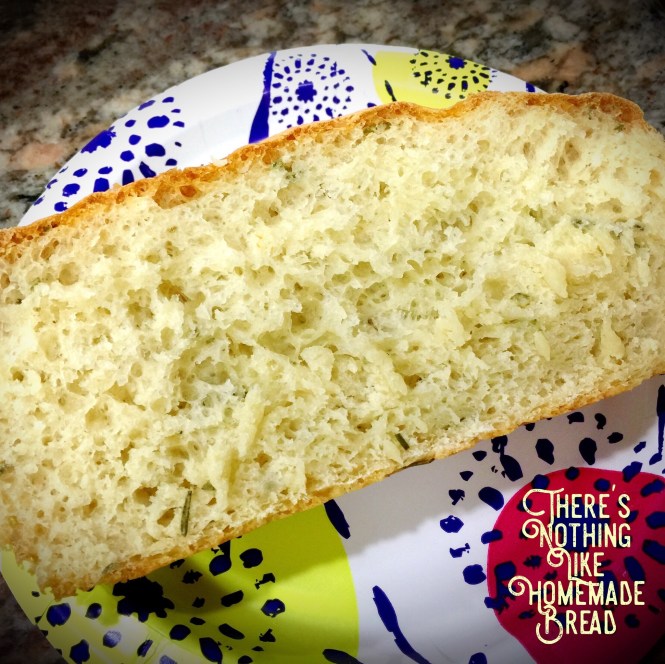
Take a silicone brush and lightly coat the bottom and sides of the skillet. You really don’t want a lot of oil sitting on the bottom. That will give you a greasy crust. And make sure you use a good quality olive oil. I used a garlic infused olive oil when I made the rosemary parmesan bread and a mild flavored premium olive oil for the cranberry walnut bread. If you don’t overdo the oil the crust will have just the right amount of crispiness and will taste heavenly.  Just make sure you use a good olive oil. I prefer the crust in this method compared to the crust you get when using an enameled cast iron dutch oven (in the process you do not oil the pan). That crust, to me, is a little tougher. But don’t get me wrong, both methods produce wonderful bread.

Lesson Learned 3 – Some recipes tell you to cut an “X” in the center (called scoring) of the dough before you put it in the oven – for this recipe DON’T:  I truly don’t think you need to score the bread using this method. When you put bread in the oven it continues to rise and a tension begins to exist between the top formed layer and the softer dough beneath. Scoring is done to assist with the bread rising consistently and predictably during this process.

When I made the rosemary parmesan skillet bread I scored it in the center before I put it in the oven. It created a small crater in the middle of the bread as seen below. It didn’t hurt anything and the bread still turned out fine but I was looking for a more rounded look in the finished product.

When I made the cranberry walnut bread I did not score it in the middle and got more of the rounded look I was wanting.

Lesson Learned 4 – The dough will be very sticky when you go to transfer it into the skillet: I’ve read many versions of how to make this type of bread and most recipes tell you to flour your hands and the dough to successfully transfer it to the skillet. I don’t find that works unless you use a lot of flour and I’m not a big fan of baking a lot of flour into my bread crust.

What I do is take a silicone spatula and work the dough to the edge of the bowl and then quickly move the spatula to get the dough into the skillet. The beauty of this type of bread is that it doesn’t need to look pristine. The more rustic looking the better. And after the dough rises for a half hour in the skillet, many of the imperfections have disappeared. So don’t angst over transferring the dough to the skillet. It’s really pretty simple if you use a silicone spatula.

I couldn’t believe how simple this was to make. The hardest part is letting the dough rise for an hour and a half – the rest is easy. And to me there is nothing like homemade bread. So try one or both of these recipes and let me know what you think…

Skillet Breads - Rosemary Parmesan or Cranberry Walnut...

  • Servings: 12 slices
  • Difficulty: Easy
  • Print

INGREDIENTS:

BOTH BREADS:

1 package instant rapid rise yeast (2 1/4 tsp.)

2 cups warm water

4 1/2 cups all bread flour

1 1/2 tsp salt

Olive oil for the skillet

ROSEMARY PARMESAN BREAD ADDITIONAL INGREDIENTS:

3 Tbs. of chopped fresh rosemary, divided

1/4 cup grated parmesan cheese

CRANBERRY WALNUT BREAD ADDITIONAL INGREDIENTS:

1/2 cup dried cranberries

1/2 cup chopped walnuts

INSTRUCTIONS:

In a large mixing bowl combine the yeast and water. Add half the flour and mix together. Mix in the remaining flour along with either the rosemary or the cranberries and walnuts. If some of the flour is still dry add a little extra warm water until the dough is completely formed.

Cover the bowl securely with plastic wrap and let it rise until doubled in size, about an hour.

Brush some olive oil on the bottom and sides of a cast iron skillet using a silicone brush. Transfer the dough to the skillet and cover loosely with a kitchen towel. Let the dough rise for 30 minutes.

While the dough is rising, preheat the oven to 400 degrees.

After the dough has risen the second time put the skillet in the oven. If making the rosemary parmesan bread, sprinkle some chopped rosemary on the top of the bread before putting it in the oven. For rosemary parmesan bread, after 20 minutes remove the bread from the oven and sprinkle the top with the parmesan cheese. Let the bread bake an additional 20 minutes. For cranberry walnut bread, let the bread bake for 40 minutes straight.

Remove the bread from the oven. Using a spatula, transfer the bread from the skillet to a cooling rack. (This should be very easy but be careful because the skillet will be very hot). Slice and enjoy.

These breads can also be frozen. Cut them into two slice or more pieces. Cover securely with plastic wrap. Put pieces in a freezer bag. Close the bag while trying to eliminate as much air as possible from the bag. Your bread will stay fresh for one month.

Rosemary Parmesan Skillet Bread

SaveSaveSaveSave

SaveSave

SaveSave

SaveSave

SaveSaveSaveSave

SaveSave

SaveSave

SaveSave

SaveSave

SaveSave

SaveSave

SaveSave

SaveSaveSaveSave

SaveSave

SaveSave

SaveSaveSaveSave

SaveSave

SaveSave

SaveSave

SaveSave

SaveSave

SaveSave

SaveSave

SaveSave

SaveSave

SaveSave

SaveSave

Homemade Cranberry Jam…

I don’t know about you but it seems after the holidays I always have at least one bag of fresh cranberries that I haven’t used. In the past the bag would jut sit in the refrigerator until I threw it out. I always felt it was such a waste as you can only get fresh cranberries around the holidays. But I finally discovered how to use those cranberries in a way I never considered before. That is, to make a wonderful jam. I tried it on my morning toast the other day and just loved it!

There are only a few ingredients, cranberries, brown sugar and water. No need to add any pectin to this recipe as cranberries are a natural source of it. Pectin is a starch that occurs naturally in the cell walls of fruits and vegetables. When these fruits and vegetables are cooked to a high temperature in combination with acid and sugar, a gel is formed. This is what gives jams and jellies their set when they cool. Pectin by itself can be used in other dishes that require food to gel or thicken. It’s also used as a fat substitute in some baked goods. But the cranberries naturally release pectin when they are boiled. That pop, pop you hear is the cranberry splitting open and releasing the pectin.

Now I realize you probably have already either used your remaining cranberries or thrown them out (like I used to do) but this is a good recipe to have in your back pocket for next holiday season. I promise I’ll remind you of it then so don’t worry.

So let’s talk cranberry jam

Lesson Learned 1 – You can control the sweetness of the jam: The recipe uses brown sugar. I suggest using the least amount and tasting the mixture before you reduce the heat and begin the stirring process. You can always add more sugar. I liked this recipe on the tangy side so I only added the least amount of brown sugar.

Lesson Learned 2 – For the last 10-15 minutes you need to stir the mixture constantly: You need to make the cranberries release the maximum amount of pectin. You also need to break down the berries for the jam. Cooking them the last 10-15 minutes accomplishes that. As I was stirring I was also taking some of the larger berries and pressing them against the side of the pan with a wooden spoon. That helped to break the berries down as well. After a while you will see a noticeable difference in the texture of the mixture – more jam-like. That is when you can stop.

Lesson Learned 3 – You can adjust this recipe: Depending on how much cranberries you have left you can adjust this recipe to that amount. So if you have a little or a lot, you can still make this wonderful jam.

I’m so pleased to know that I no longer need to waste any fresh cranberries after Christmas. This recipe makes a delightful unique jam that you will enjoy or toast, pancakes, or in any other way you use jam.

Homemade Cranberry Jam...

  • Servings: 16-18 Portions
  • Difficulty: Easy
  • Print

INGREDIENTS

4 cups of whole fresh cranberries

1 – 2 cups brown sugar, packed (start with 1 cup)

1 cup water

DIRECTIONS:

Bring the cranberries, sugar and water to a boil. Reduce the heat and let cook for 10 minutes stirring occasionally. At this point taste the mixture to see if it needs more sugar. Add more if necessary.

Reduce heat to a very low setting. Cook for an additional 10-15 minutes, stirring constantly. Break apart larger cranberries against the side of the pan with a spoon if necessary.

Cool in the pan for about 30 minutes. Transfer the mixture to a mason jar, cover and chill.

SaveSave

SaveSave

SaveSave

SaveSave

SaveSave

SaveSave

SaveSave

SaveSave

SaveSave

SaveSave

SaveSave

Cranberry Orange Coffee Cake Pt 2…

This time of year with all of the Fall/Winter holidays approaching just screams to me cranberry and orange. As a matter of fact I love that flavor combination so much this is the second variety of cranberry orange coffee cake that I’ve posted on this site. To see the original post just click on “recipe”.

There are slight variations to the two of them and both are equally delicious. One you make in a spring form pan with the traditional leavening agents of baking powder and soda and that produces a taller, airier cake. This particular recipe does not use any type of leavening. Rather the eggs and sugars are beaten for an extensive period of time to create a mixture that doubles in size and provides the needed lift for the cake. This particular cake is denser and moister.

Both cakes are equally good, although my husband liked this particular recipe better. Whenever he monitors how much of a finished product I bring to work and how much I leave at home, I know the recipe is a hit. This time he made me bring much less of the cake to work than usual.

So let’s talk Cranberry Orange Coffee Cake Pt. 2…

Lesson Learned 1 – Be organized when you bake: I found the experience of baking much more pleasurable if I do it in an organized fashion. By that I first get out any ingredients that need to be room temperature in plenty of time for them to reach that desired state. Then I read the entire recipe to see what I’m up against. I preheat the oven and prep any pans that require prep. After that I figure out how to organize the assembly process (as in this recipe I recommend making the crumb topping first as you will read below). Then I get all my ingredients out and ready. That usually means getting the dry ingredients together and combined and then moving on to the wet ingredients. After that, everything seems to fall into place.

What you are trying to avoid is stopping to find things and taking time to mix things while other mixtures sit and wait for a long period of time. Think about how making the recipe can flow and organize yourself to make the process go that way.

Lesson Learned 2 – The importance of beating the eggs and sugar for a long time: As mentioned above this recipe does not use traditional leavening agents like baking powder or soda so you need something to provide the lift to the batter. That lift is produced by beating eggs and sugar into submission. By submission I mean you need to beat them for at least 5-7 minutes. That’s why I recommend using a stand mixer for this recipe so you’re not left with holding a hand mixer for that length of time.

I would also time the process and not leave it up to your memory. You will actually see the mixture double in size and become more thick when you beat it for that length of time. That’s what you’re looking for. Be careful. Don’t try to shortcut this part of the process. If you do you will be left with a somewhat flat coffee cake.

Lesson Learned 3 – This cake may need to bake for much longer than the recipe suggests: I was originally thinking this would take between 45-50 minutes. It actually took me 65 minutes, but then again I live in high altitude where everything takes longer to make. The key with this cake, as with all cakes, is having a toothpick inserted in the middle come out clean. If you have some redness from the cranberries on your toothpick that’s ok. But it should be clean of everything else.

Lesson Learned 4 – Make the crumb topping first: I found the entire process of making this cake went much more smoothly if you made the crumb topping first. Other than beating the eggs, this is the most labor intensive part of the recipe. If you make the topping first than everything else seems to go like clockwork.

As with making any type of crumb topping, use very cold butter and a pastry cutter to cut the butter into flour and sugar. The desired result is coarse crumbs as seen in the picture below.

The Desired Consistency Of The Crumb Topping

Lesson Learned 5 – The importance of room temperature eggs: In my baking recipes you will see that I always call for room temperature eggs. Why? The answer is simple. Room temperature eggs blend much more thoroughly into the batter. And that is the ideal. Quite often I hear the reason one doesn’t use room temperature eggs is they don’t have the time to get them to room temperature. Never fear, I have a quick and easy trick for you so you will always have room temperature eggs when you need them. Just click on “tips”.

Otherwise every other step of the process is what you normally expect when you make a cake. This cake, although delicious anytime, is a great recipe for the Holidays. And I guarantee you it won’t be around your kitchen for very long. Enjoy!

Cranberry Orange Cake Pt. 2...

  • Servings: 20-24
  • Difficulty: Easy
  • Print

INGREDIENTS:

CRUMB TOPPING:

3/4 cup flour

6 Tbs. brown sugar, packed

6 Tbs. butter, unsalted and chilled

CAKE

3 eggs, room temperature

1 1/2 cups sugar

1/2 cup firmly packed brown sugar

3/4 cup butter, room temperature

1 tsp. vanilla

2 cups flour

1- 12oz. pkg. of fresh cranberries

Zest of 1 large orange, divided into 3/4 and 1/4 portions

GLAZE:

1 cup powdered sugar

Juice from 1 orange (approx. 4 Tbs)

1/4 of the orange zest already grated for the cake

DIRECTIONS:

Preheat oven to 350 degrees.

In a small bowl combine all the topping ingredients. Use a pastry cutter to cut the butter into the flour and sugar until the mixture forms into coarse crumbs. Set aside.

In a stand mixer, beat the eggs and sugars for about 5-7 minutes until thick and doubled in size. Add the butter and vanilla and mix for an additional 2 minutes. Stir in the flour until just combined. Fold in the cranberries and the 3/4 portion of the orange zest.

Put the batter into a greased 13 x 9 pan. Spread the crumb topping on top of the batter.

Bake 45 – 50 minutes or until the top is golden brown and a toothpick inserted into the center of the cake comes out clean.

Let cool completely.

Combine glaze ingredients and drizzle over the cake.


Cranberry Orange Coffee Cake…

One of the great things I love about the holidays is all the recipes you can make with cranberries. And when you pair them with orange juice, zest or both, well you have what I call a killer combo! But thanks to the frozen food isle, cranberries are not just for Christmas anymore. You can make great cranberry recipes all year long. And this is definitely one of them.

This recipe is a little time consuming as you basically have three separate components to prepare in order to assemble the coffee cake. But believe me, it’s worth it. Normally I give most of my baking to neighbors or co-workers, but this time my husband ate the bulk of it. He absolutely loved it, and so will you.

So let’s talk cranberry orange coffee cake…

Lesson Learned 1 – Prepare all three components first and then assemble the cake: I found this the easiest way to make this coffee cake and once all three components, the cake, the filling and the topping are made, assembling the cake is a breeze. I made the cake part first, then the topping and finished by making the cream cheese filling. I chose that order because both the cake and the topping take a little bit more time to assemble but the cream cheese filling can be made in a snap.

The cake mixture

The topping mixture

The cream cheese filling

Lesson Learned 2 – Cube the butter first and put it back into the refrigerator: The topping needs really cold butter to create the crumble and even if you start out cubing it when it’s cold it will start to warm up. I found that if you cube the butter and then put it back into the refrigerator until you need it you will have nice cold butter when it comes time to make the topping.

Lesson Learned 3 – Be patient when making the topping mixture: This is a traditional crumble topping mixture that requires you to cut cold butter into flour and sugar. I have a pastry cutter and I’m always struggling, at least initially, with the butter sticking to the pastry cutter. I find myself constantly scraping the butter off of the cutter. But don’t worry, as the butter starts to become more incorporated with the flour you will not have to do that anymore. It just takes a little time, so be patient and scrape the butter when necessary.

Lesson Learned 4 – All ovens are not created equal: I’ve said this many times but it bears repeating. For me living in a high altitude environment I find things always take longer to bake. That might not be the case for you. So normally I post sea-level cooking times, but keep in mind that this is just a gauge. Start looking at your cake at 70 – 75 minutes. The important thing is to make sure the cream cheese filling has set. If it is too jiggly the cake is not done. If you touch the center and it feels firm but slightly jiggly, you are good to go. (Do you love how technical this is?!)

Right Out Of The Oven

I think you will find this coffee cake is more than worth the work involved. And don’t let me scare you away from this, the work really isn’t that much or that complicated. Try it and let me know what you think…

Cranberry Orange Coffee Cake...

  • Servings: 10-12
  • Difficulty: Easy
  • Print

INGREDIENTS

Coffee Cake:

2 cups flour

1 cup sugar

1 1/2 tsp. baking powder

1/2 tsp. baking soda

1 egg, room temperature

1 Tbs. orange zest

3/4 cup fresh squeezed orange juice

1/4 cup melted unsalted butter

1 tsp. vanilla

2 cups fresh or frozen cranberries

Cream Cheese Filling:

1 8 oz. package cream cheese, room temperature

1/3 cup sugar

1 egg, room temperature

1 tsp. vanilla

Topping:

3/4 cup flour

1/2 cup sugar

1/2 cup cold unsalted butter cubed

DIRECTIONS

Preheat the oven to 350. In a large bowl whisk together the flour sugar baking powder and soda. Set aside. In another bowl whisk together the egg, orange zest, orange juice, melted butter and vanilla until blended. Pour this mixture into the flour mixture and stir until just moistened. Fold in the cranberries and set aside.

For the topping mix the flour and sugar in a small bowl. With a pastry cutter or two knives cut the butter into this mixture until the mixture looks crumbly. Set aside.

For the cream cheese layer, beat the cream cheese and sugar with a hand mixer until smooth. Add the egg and vanilla and beat on a low speed until just blended.

Transfer the coffee cake mixture into a greased or sprayed 9 inch springform pan. Pour the cream cheese mixture over the top and spread it out evenly. Sprinkle the toping mixture all over the top.

Place the pan on a baking sheet lined with foil. Bake for 70-75 minutes (in high altitude it can take up to 15 minutes more) or until the top is golden brown and the cream cheese mixture set.

Cool in the springform pan for 15 minutes before removing the coffee cake. Refrigerate any leftovers.

Iced Cranberry Orange Walnut Cookies…

It’s cranberry season, my favorite time of year. I love cooking and baking with cranberries. Their tartness adds zip to both sweet and savory recipes. I especially like them in cookies. I think they balance out the sweetness in cookie recipes and add a festive flavor.

Now need I mention that it is also getting very close to holiday baking season, and every year I try out at least one new cookie recipe. I saw a version of this recipe in an Allrecipes magazine and tweaked it not only from an ingredient perspective but also to adapt it to high altitude baking.

High altitude baking can be tricky and unless you purchase a cookbook specifically written for high altitude baking you are most likely using ingredient amounts designed for sea level. The higher the altitude the lower the air pressure which makes it difficult for the baker. Baking depends on specific interactions of various ingredients such as flour, leavening, fats and liquid. Those interactions change with a change in air pressure. And to make matters worse, baking at 3,500 feet is different from baking at 5,000 feet and as you continue to rise in elevation the trickier it gets. I live at a 5,000 feet and have done a lot of research into how to adapt recipes for that elevation and still have some baking failures. But the more you do it, the better you get at it. The additions to this recipe are specifically designed for baking these cookies at 5,000 feet. I played around with the ingredients and I nailed it! But since many of you are probably at sea level I will use sea level amounts as the base and note what needs to be changed for high altitude.

IMG_8408Lesson Learned 1 – Use the juice from fresh oranges: Fresh ingredients are always the best. This recipe requires both orange zest and juice. Don’t take the easy way out and use bottled orange juice. Plus take a look at the amount of sugar in your orange juice. It’s crazy the amount of sugar there is a most juices. It can be anywhere from 10 to 30 grams. That’s a lot of sugar. Use fresh juice. Any small way that you can control the amount of sugar in anything you make is a good thing.

Cookie batter and scoopLesson Learned 2 – Use a cookie scoop to ensure even amounts of cookie dough: When I was growing up most cookie recipes would say drop the dough in rounded teaspoons or tablespoons onto the cookie sheet. That wasn’t very precise and you want to make sure you can, to the best of your ability, make each cookie the same size. That way every cookie will bake evenly versus having some baked and others raw or burnt.

These days you can purchase what looks like a small ice cream scoop to make the cookie dough virtually the same size on your baking sheet. Working with them can be a little tricky so here is a helpful hint: spray the inside of the scoop with baking spray before scooping any dough. That way the dough will release more easily. I found that even with using baking spray the scoop gets pretty gummed up after scooping out a dozen or so cookies. Once you’ve filled your baking sheet, put your dirty scoop into a glass of warm water. When you’re ready to scoop out more dough, take a paper towel, wipe the inside clean and spray it again. This may sound like a lot of work but the results are evenly sized, evenly baked cookies.

Cooking dough on the baking sheet

Lesson Learned 3 – How to glaze cookies: I’m not a professional baker nor do I have some of the tools that professional bakers have namely pastry bags and decorator nozzles. When I glaze cookies I put the glaze in a plastic bag, work it into one of the bottom corners, twist close the top of the bag and snip the corner where the glaze settled. Voila, a home made pastry bag! Here are a couple of helpful hints for glazing cookies and working with a homemade pastry bag:

  1. Open the plastic bag and put it in a tall drinking glass, spreading the bag open as widely as you can inside the glass. Now you have an easy way of pouring the glaze into the bag and both of your hands are free to do this.
  2. Snip only a very small portion off of one of the corners of the bottom of the bag. That way you’ll have a manageable stream of glaze when decorating your cookies.
  3. Put a sheet of wax paper under a cooling rack and put your cookies on the cooling rack before glazing. That way clean up will be a breeze.
  4. Just free flow the glaze over your cookies. You can do each cookie individually or do one long strip back and forth over a row of cookies. Have fun with it.
  5. Let the glaze set before storing them. Touch the glaze and if feels firm then you’re ready to store them.

These are fabulous cookies and perfect for a holiday get-together. You really should try these and let me know what you think. Enjoy!

Iced Cranberry Orange Walnut Cookies

  • Servings: 4 dozen cookies
  • Difficulty: Easy
  • Print

INGREDIENTS:

Cookie Dough:Iced Cranberry Orange Walnut Cookies

2 sticks unsalted butter, softened

1 cup sugar (minus 1 Tbs. for high altitude)

1/2 cup firmly packed brown sugar (minus 3/4 Tbs. for high altitude)

1 egg, room temperature

1 tsp. orange zest (1 large orange will give you the zest and juice you need)

2 Tbs. orange juice (plus 2 Tbs. for high altitude)

2 1/2 cups flour (plus 2 Tbs. for high altitude)

1/2 tsp. baking soda

1/2 tsp. salt

1 1/2 cups chopped fresh cranberries

3/4 cup chopped walnuts

Glaze:

1/2 tsp. orange zest

3-4 Tbs. orange juice

1 1/2 cups powdered sugar

DIRECTIONS:

Preheat oven to 375. Cream together butter and sugars. Beat in egg until thoroughly combined. Add zest and juice and combine.

In a separate bowl sift together flour, baking soda and salt. Add in batches to the butter/sugar mixture and mix until combined. Stir in the cranberries and walnuts by hand.

Drop dough in rounded tablespoons (the cookie scoop will do this perfectly for you) two inches apart onto an ungreased cookie sheet. Bake for 12 – 14 minutes (mine baked in 13 minutes – sea level baking on average takes less time). Transfer the cookies to a wire rack to cool.

For the glaze: combine all ingredients together. Drizzle glaze onto the cookies. Let the cookies stand until the glaze has set and then store.

Iced Cranberry Orange Walnut Cookies

IMG_8456

Iced Cranberry Orange Walnut Cookies

Pumpkin Cranberry Nut Bread…

So after making my pumpkin cream cheese sweet bread I had some leftover pumpkin puree. Since  I didn’t want to waste it and the sweet bread was such a big hit I thought I’d try making another type of sweet bread using the leftovers.

What I like about this bread is it combines some of my favorite Fall flavors – pumpkin, cranberry and orange. Then you throw in a little chopped pecans and you’re in sweet bread heaven.

So let’s talk some pumpkin cranberry nut bread…

Cover the cranberries with orange juiceLesson Learned 1 –   Plump the dried cranberries for even more flavor: I had a bag of cooking and baking julienne sliced cranberries and I was able to give them an extra body and boost by soaking them in warm fresh orange juice. Yum!

In a microwavable bowl I just poured the juice of one large orange over a half cup of the cranberries, put plastic wrap over the bowl, slit the wrap to vent and heated the mixture for 45 seconds.  Then I let the mixture sit covered in the plastic wrap for at least 5 minutes and voila, plumped cranberries. You may have done this process before with raisins, and it works the same for dried cranberries. Plus it gives the cranberries an extra boost of orange flavor.

Lesson Learned 2 – I adapted this recipe from a muffin recipe: Almost any muffin recipe can be adapted into a sweet bread recipe. You just have to remember to bake it longer. I took the guess work out for you. I started checking the bread at 30 minutes and wound up baking it for an additional 15 minutes, checking the loaf every 5 minutes. My determination is, based on your oven and where you live, the bread should be baked for 40-45 minutes, or until a toothpick inserted in the center comes out clean.

Pour the wet ingredients into the dryLesson Learned 3 – You don’t need any mixer for this recipe:  Just combine the wet and dry ingredients in separate bowls, make a well in the dry ingredients and pour the wet ingredients into the dry. Mix until just combined – don’t over mix. It couldn’t be easier.

This bread is incredibly easy to make. So if you’re looking for a great Fall treat that’s full of flavor and requires hardly any effort on your part, this is the recipe for you! Enjoy!

Pumpkin Cranberry Nut Bread…

  • Servings: 14-16 slices
  • Difficulty: Easy
  • Print

INGREDIENTS:

1/2 cup dried cranberries (I used cooking and baking cranberries, julienned)

The juice of one large orange

2 cups flour, plus 1 Tbs. for high altitude

2/3 cup granulated sugar, measure slightly less for high altitude

1 Tbs. pumpkin spice blend

2 tsp. baking powder

1/2 cup chopped pecans

1/2 tsp. salt

1 stick unsalted butter, melted

1/2 cup canned pumpkin

1/2 cup milk, you can used reduced fat milk

2 extra large eggs

The zest of one large orange

DIRECTIONS:

Preheat your oven to 350. Zest the orange. Cut the orange and juice it. Place the cranberries in a microwavable bowl and pour the orange juice over them. Take plastic wrap and cover the top of the bowl, cutting a small slit in the center to vent the steam. Microwave for 45 seconds. Set aside and let the cranberries steep for at least 5 minutes.

In a large bowl sift together the flour, sugar, pumpkin spice blend, baking powder, and salt. Whisk in the chopped pecans. Drain the cranberries and put them in another large bowl. Add the somewhat cooled melted butter (you don’t want the eggs to scramble) the canned pumpkin, milk, eggs and orange zest. Stir until just combined.

Make a well in the dry ingredients and pour the wet ingredients into the bowl. Mix with a spoon or spatula until just combined.

Spray the bottom and sides of a 9 x 4 loaf pan with cooking spray. Pour the batter into the pan. Smooth the top of the batter with a spatula making sure the batter has reached into all corners and the top is even.

Bake for 40-45 minutes or until a toothpick inserted in the center comes out clean. Let the loaf rest in the loaf pan for 15 minutes then remove it to a wire rack. Cool completely.

Pumpkin Cranberry Nut Bread

 Pumpkin Cranberry Nut Bread

Pumpkin Cranberry Nut Bread

Cranberry Brie Puff Pastry Bites…

In case you haven’t noticed the holidays are coming and with them the conundrums of what to make for those holiday parties. Last year I created a recipe for a fabulous crab dip that was a hit all season long. The only challenge with making that appetizer was the cost, $11 for a can of crab claw meat and that was the least expensive one I could find.

This year I wanted to make something different. I decided to venture into the realm of puff pastry as I’ve had some successes with it in the past, specifically making a salmon en croute. In researching various recipe options I came upon several recipes for combining brie cheese with cranberry sauce and puff pastry. That sounded divine. So I went about borrowing dribs and drabs of various recipes to create my own puff pastry appetizer. Here’s my rating and lessons learned:

Recipe rating: B+ with the potential to be an A+: I had never made anything like this before and I learned some valuable lessons while making it. This is a great appetizer but with some specific caveats you should follow in order to make them the best they can possibly be.

IMG_1859Lesson Learned 1 – You only need a small amount of brie: Having never made these before I was unsure as to how much brie to put into each puff pastry shell. I used the small side of a melon baller to portion out the brie. Next time I will use half that amount. The first batch I made the brie ran over the sides of the puff pastry and not much was left inside. The second batch I made I used a little less (I could have even used less) and the outcome was much better. (I found a wheel of brie at Costco for a little over $7.00. I had more than enough for the appetizers with plenty left over.) You want to make sure that the brie and cranberry sauce meld together and not just have cranberry sauce with a hint of brie, which was what I had. Anyway, a valuable lesson learned for the next time I make them.

The same applies to the cranberry sauce as well. Use only a small amount as you don’t want it to overpower the brie. Err on the side of less is more, especially since the pastry puffs up so much in the oven.

Lesson Learned 2 – Getting the desired result when baking puff pastry: In my mind there are two tried and true rules for successfully making puff pastry – one, a very hot oven and two, applying an egg wash. Most of the recipes I read said to bake these bites at 375 for 15 minutes. I should know better. The puff pastry was nowhere near done by that time. When I make my salmon on croute I bake it at 400 for 20 minutes and the puff pastry comes out perfectly. Why should this be any different. Needless to say at 15 minutes the puff pastry was nowhere near browned and I wound up having to keep them in the oven for an additional 10 minutes. Next time I will bake these at 400 and check them at 15 minutes. Lesson learned – follow my instincts and not necessarily what is suggested in any given recipe.

IMG_1848The recipe is made in a mini muffin pan. I found that cutting the puff pastry in thirds and then into twelve equal squares still gave me a little too much puff pastry per appetizer. I wound up cutting off about 1/8 inch off the sides so that the squares would not abut each other in the pan. You could probably fold the pastry more in the muffin cup to prevent this as well. I try to work with the pastry as little as possible so as not to get it too warm. You may have to play with this a little until you figure out what works for you.

Also no recipe I researched said anything about using an egg wash to enhance the browning of the puff pastry. To me this is elementary but you cannot assume that everyone knows this. An egg wash on puff pastry or pie dough gives the dough a gorgeous color that it cannot get on its own within the baking time allotted. So always brush on an egg wash when using puff pastry to get a nice golden brown color.

IMG_1841Lesson Learned 3 – Make your own homemade cranberry sauce: To me, making your own cranberry sauce is like making your own apple sauce – store bought simply can never compare. And it is so easy to make. If you don’t have your own recipe – just click on “cranberry sauce” and you can make my recipe. It is so easy and so flavorful. You’ll never buy canned again. Plus you will have some delightful left overs to serve as a side dish or even as a spread on sandwiches. Divine!

Lesson Learned 4 – Serve them warm: I read many different versions of this type of recipe and many of them said in the comments that you can serve these warm or cold. I made these and then brought them to a party by which time they were no longer warm. I can guarantee you that although they tasted ok they were divine when they were warm. So if you’re looking for a cold appetizer to bring to a holiday gathering, bring my crab dip and not this one. But if you have the ability to serve a warm appetizer, this is the one. I cannot attest to how these would reheat in a microwave. I’m thinking that a microwave and puff pastry just don’t mix. If you have any tips regarding that, please feel free to comment. But trust me, these are much much better served warm.

I am definitely trying this recipe again. Even with the few slip ups I had the taste was fabulous. It seems you just can’t go wrong when puff pastry is involved. Try this one and let me know what you think!

Image copy

Cranberry Brie Puff Pastry Bites…

  • Servings: 24 Individual Pastries
  • Difficulty: Medium
  • Print

INGREDIENTS:

1 package frozen puff pastry

1/2 pound brie (maybe even a little less)

1/2 cup cranberry sauce

1 egg

Splash of water

DIRECTIONS:

Let puff pastry sheets thaw for at least 2-3 hours in the refrigerator or overnight. Preheat the oven to 400 degrees. With a sharp knife or pizza cutter, cut the puff pastry along the folded lines. Cut each strip into four equal size squares. Using a mini muffin pan, press the puff pastry into each muffin cavity.

Put a small amount of brie in the cavity and top it with a small amount of cranberry sauce. Whisk the egg and water in a small bowl and brush the edges of the puff pastry with the egg wash. Bake for 15 minutes or until the puff pastry turns gold brown.

Remove from muffin pan and let cool for approximately 5 minutes before serving.

IMG_1869

IMG_1899

IMG_1907

IMG_1910

Cranberry Orange Pecan Sweet Bread…

It’s cranberry time of year again! I so love cranberries. Not only do I make a simple but killer homemade cranberry sauce  for the holidays, but I enjoy baking with cranberries – they have a tartness that lend themselves well to making delicious breads, pies and cookies. So this past week when I saw my first bag of cranberries at the grocery store I just had to buy them and bake something.

IMG_1318Years ago I used to buy box mixes to make cranberry bread. No more. It is so easy to make it yourself and I like the fact that you control what goes into it. Box mixes have become a thing of the past for me. If I can’t make it fresh, I don’t make it.

This particular recipe I did not find on Pinterest. This time I did a Google search and looked at various cranberry sweet bread recipes and their ingredients. A couple of things intrigued me about the recipe I chose. First, it used buttermilk in the batter and I’ve found that buttermilk tends to give you moister cakes/breads. Second, you don’t need a mixer for this recipe so no need to drag out the heavy KitchenAid, and I was loving that. The original recipe called for the bread to be glazed. I did not glaze my bread but I will include the glaze recipe in case you want to try it.

Recipe Rating: A+ This recipe is easy to make, and the combination of ingredients brings out the full flavor of the cranberries, pecans and orange zest – a killer combo in my estimation.

IMG_1415Lesson Learned 1 – Weighing Ingredients: I’ve read so many recipes where the author spoke of the importance of weighing ingredients, specifically flour. I never thought much off it. Normally I make sure my flour is aerated in the canister (swirling a knife in it does the trick) and then scoop out what I need and level it off. This recipe calls for 2 cups of flour or 250g. I recently purchased a kitchen scale and thought I’d try measuring the flour instead. I was surprised at how much “extra” flour I had in my measuring cup when I weighed it. It was eye opening. If you can, invest in a kitchen scale and use it when a recipe lists grams. You’ll be amazed at how much extra you may be putting into your recipe.

I did not weigh the sugar because I know how to adjust that measurement for high altitude so the bread will not fall in on itself. I do that adjustment by sight, but I will include the grams measurement for the sugar and flour in the recipe for those who do not live in high altitude. Use those measurements when at all possible. It really does make a difference

IMG_1310Lesson Learned 2 – Mixing the streusel: I don’t know about you but I have a difficult making streusel even with a pastry cutter. The butter always seems to collect on my pastry cutter and not fall off. This time I cut the cold butter (and it needs to be cold) into small cubes and just mixed it with my hands. I pretty much got the desired consistency. Next time I think I will mix it in my small food processor and see how it turns out. I am including a picture of the consistency of the streusel that worked well on top of the cake.

I’ve made many different versions of cranberry nut breads over the years but I have to say that so far this one is my favorite. The tartness of the cranberries, the hint of orange from the zest combined with the pecans is heavenly. Next time I make this (and this will be made at least one time if not more this holiday season) I will try adding the glaze. But I can assure you, even without the glaze this is a fabulous sweet bread!

Cranberry Orange Pecan Sweet Bread…

  • Servings: 12
  • Difficulty: Easy
  • Print

INGREDIENTS:

Streusel:

1/4 cup (31g) flour

2 Tbs. (30g) sugar

1 tsp. cinnamon

3 Tbs. (45g) cold, unsalted butter

Bread:

2 cups (250g) flour

1 tsp. baking soda

1/2 tsp. salt

1 cup (110g) chopped fresh cranberries (you can also use unthawed frozen cranberries)

1/2 cup (65g) chopped pecans or walnuts (I used pecans)

1 large room temperature egg

1/2 cup (105g) light brown sugar (loosely packed for high altitude)

1/2 cup (100g) sugar (slightly less for high altitude)

1 cup (240ml) buttermilk (no substitutions)

1/3 cup (80ml) vegetable oil (or melted coconut oil – I used vegetable oil)

1 tsp. vanilla extract

2 Tbs. orange zest

Glaze:

1 cup (120g) confectioners sugar

1 -2 TBS orange juice

Orange zest to taste

DIRECTIONS:

Preheat oven to 350. Spray an 8×4 pan with cooking spray. (I use a professional grade non-stick pan and do not have to do this. Invest in one if you can – it’s worth it).

First make the streusel by tossing the flour, sugar and cinnamon together. Cut in the cold butter with a pastry cutter or food processor until you get a crumbly looking mixture. Set aside.

In a large bowl mix the flour, baking soda, salt cranberries and nuts together. Set aside. In another bowl whisk the egg and sugars until well combined with no lumps. Whisk in the buttermilk, oil, vanilla and orange zest.

Make a well in the center of the dry ingredients and pour in the wet ingredients. Stir together until combined being careful not to over mix. Pour the batter into the prepared pan. Add the streusel on top and press it gently into the batter.

Bake for 50-60 minutes or until a toothpick inserted in the center comes out clean. Cool in the pan for 15 minutes and then remove the bread from the pan.

This bread is great without the glaze. If you choose to glaze it, mix all of the glaze ingredients together and pour on top once the bread has completely cooled.

cranb IMG_1361

IMG_1380

Cranberry Oatmeal Cookies…

Cranberry oatmeal cookies have been a staple in our family for the last five years. I was looking for something completely different from what I traditionally made for the holidays and found this recipe in the 2008 Taste of Home Best Loved Cookies and Bars holiday magazine. At the time the magazine cost me $9.99 and I thought that was pretty pricey. But I can now without hesitation say that it was the best money I ever spent. That magazine is my go to place for holiday cookie ideas and it has a wealth of cookie recipes, many that have become our holiday favorites and many still needing to be tried. The magazine is a compilation of recipes from different people around the country and the editors did an excellent job of choosing fabulous recipes.

Cranberry Oatmeal Cookies

Cranberry Oatmeal Cookies

Initially I made these cookies just because I liked the way the picture looked in the magazine. I was not prepared for how delicious they would be. A co-worker recently described their flavor as being close to a Starbuck’s cranberry orange scone with a bonus of white chocolate chips. I think she hit it on the head. Not only are they easy to make but they look colorful on a dessert tray. Here is my rating and lessons learned making these cookies.

Rating: A+++++ – once again this cookie is one of our all time holiday favorites. How could I rate it any less?

Lesson Learned 1: Use golden raisins in this recipe. The recipe does not specify what type of raisins to use but I found the dark raisins create a less colorful and vibrant looking cookie, and after all you eat first with your eyes, remember? Make sure the raisins are fresh. Don’t use the box that’s been sitting in your pantry for six months. As with any ingredient, the fresher the better but especially with raisins.

Lesson Learned 2: Put in a healthy tablespoonful of grated orange peel. I used the grated peel of two large oranges. Don’t skimp on this. The flavor of the orange peel so compliments the tartness of the cranberry and the sweetness of the white chocolate. Use more than less.

Lesson Learned 3: These cookies keep well both in the refrigerator and the freezer so these are great make ahead cookies.

I guarantee that you will love these cookies. They are easy to make, easy to store and add a nice colorful holiday flair to your cookie assortment.

Cranberry Oatmeal Cookies

  • Servings: 4 dozen
  • Difficulty: Easy
  • Print

INGREDIENTS:

1 cup unsalted butter softened

1 1/2 cups sugar

2 eggs

1 tsp. vanilla

2 cups flour

1 tsp. baking powder

1/2 tsp. salt

1/4 tsp. baking soda

2 cups quick cooking oats

1 cup raisins

1 cup coarsely chopped cranberries (you can you frozen ones but I prefer fresh)

1 TBS. grated orange peel

1 package (12 ounces) white chocolate chips

DIRECTIONS:

Preheat the oven to 375.

In a mixing bowl cream butter and sugar. Add the eggs one at a time beating until well combined. Beat in the vanilla. Combine flour, baking powder, salt and baking soda; add to the creamed mixture. Stir in the oats, raisins, cranberries and orange peel. Add the white chocolate chips.

Drop by rounded teaspoonfuls (I use a cookie scoop) 2 inches apart onto an ungreased baking sheet. Bake for 10-12 minutes or until the edges are lightly browned. Remove to wire racks to cool. Enjoy!

Cranberry Oatmeal Cookies

Cranberry Oatmeal Cookies