Cinnamon Roasted Butternut Squash…

One of my favorite vegetables is butternut squash. It is a versatile vegetable capable of being made in a variety of ways but my favorite is roasted butternut squash (with a close second butternut squash soup).

I stumbled on a version of this recipe a while back and have been making my version regularly ever since. But it dawned on me that I never posted this recipe so I will now. There are only a few ingredients in this recipe but they compliment the squash so perfectly and give a gentle sweetness to its flavor.

So let’s talk cinnamon roasted butternut squash…

Lesson Learned 1 – The size of the squash pieces matters: If you cut the squash too large it will remain hard. Conversely if you cut it too small it will turn into mush. For this particular recipe you want to cut your squash into 3/4 – 1 inch thick pieces. I recommend that you cook the squash at 375 for 30-35 minutes. Cutting the squash into those sized chunks results in the pieces being cooked through without being overly mushy and with a nice caramelization on the outside. Don’t get worried if all your pieces are not exactly the same size. Make them close enough in size as you possibly can.

Lesson Learned 2 – Only use coconut oil in this recipe: If you use olive oil you simply will not get the same flavor. The coconut oil renders a subtle sweetness that, along with the cinnamon, makes the squash taste so good. Now, can you use olive oil if you don’t have coconut oil – of course you can. But I wouldn’t recommend using cinnamon with olive oil. I don’t think the flavors would compliment each other as much.

I’ve been roasting squash for years and my go-to recipe was using a garlic flavored olive oil with some dried thyme – and that’s a great combination as well. But I’ve found when I use coconut it not only enhances the flavor but the squash roasts more evenly, if that makes any sense. When I roasted the squash with olive oil sometimes I would get pieces that did not cook through and were somewhat hard even though the only major change was the oil I used. That never happens with coconut oil. Funny, isn’t it?

Lesson Learned 3 – Be careful how much cinnamon you add: In this recipe it is important for the oil and cinnamon to balance each other out in order to get the correct flavor and sweetness. For that to happen the correct proportions need to be used.

Cinnamon on its own without the benefit of sugar can be quite pungent and not very good tasting. Think about it, when do you ever see cinnamon used without some sort of sweetener? I wouldn’t add any more than a teaspoonful in order the get the correct mixture of both the oil and the cinnamon. If done correctly the combination is heavenly. If not, you’ll wind up throwing the squash out.

Lesson Learned 4 – Don’t crowd the pieces of squash when roasting them: Did you ever see the movie “Julie and Julia” about a woman from New York who blogged about cooking her way through Julia Childs’ cookbook? There is a scene in the movie where Amy Grant, who plays Julie, is cooking mushrooms on the stove and says that Julia noted in her book not to crowd the mushrooms – they won’t brown. Well the same thing applies to the squash. You want the squash to roast so you need to give the pieces room. If you don’t they’ll steam instead of roast and you won’t get the benefit of the wonderful caramelization that so enhances the flavor of the squash.

There could not be a recipe any simpler than this that produces such a flavorful, elegant side dish. I make this at least once a week now and can guarantee that you will make it often once you try it. Enjoy!

Cinnamon Roasted Butternut Squash...

  • Servings: 4
  • Difficulty: Easy
  • Print

INGREDIENTS:

3 cups butternut squash cut into 3/4 – 1 inch pieces

1 Tbs. coconut oil, melted

1 tsp. cinnamon

Salt and pepper to taste

DIRECTIONS:

Preheat oven to 375 degrees. Cover a 9x 13 pan with foil. Set aside.

In a medium sized bowl combine the squash, coconut oil and cinnamon. Combine until all pieces are thoroughly coated.

Transfer the squash to the prepared pan making sure the pieces are not crowded in the pan. Salt and pepper to taste. (I’d go easy on both – you could always add more when you serve).

Roast for 30-35 minutes turning over the pieces of squash at the half way point. Serve.

Squash & Cinnamon

Thoroughly Combine Squash, Coconut Oil & Cinnamon

Don’t Crowd The Squash In The Pan


SaveSave

SaveSave

SaveSave

SaveSave

SaveSave

SaveSave

SaveSave

SaveSave

SaveSave

SaveSave

SaveSave

SaveSave

SaveSave

SaveSave

SaveSave

SaveSave

SaveSave

SaveSave

Apple Cinnamon Coffee Cake…

There’s a lot going on in my life right now so over the next few months I may not be able to meet my weekly goal of publishing a new recipe. I will try to publish as often as I can but rest assured I will get back to my weekly postings asap. I do have some time to post today and so I chose a recipe that my husband went bonkers over. When your husband turns to you and says, “Hon, this cake is really, REALLY good” you know you hit the jackpot!

I never tried making a coffee cake before so I was a little leery. But judging by the results I will certainly be making one again soon. There were a few tricks in getting this right and I’ll share them in my lessons learned. So let’s talk apple cinnamon coffee cake…

Lesson Learned 1 – The hardest part of the recipe is spreading the batter in the pan: The first layer of batter you spread over the bottom of a springform pan lined with parchment paper. It was an interesting trick trying to keep the parchment paper in place while spreading the batter. What I wound up doing was dolloping the batter in various spots over the parchment paper and spreading it with my right hand while holding the parchment paper down near one of the edges of the pan with my left index finger. After a while I got the hang of it but just be warned it may be an interesting journey starting out.

Then the next hardest part is spreading the second layer of batter over the apples and crumble. My advice is to make sure you dollop batter all around the pan versus putting all the batter in the center and then trying to spread it out. Remember on the second layer you will get part of the crumble mixed in with the batter. Don’t worry about that. You can’t avoid it.

Lesson Learned 2 – A little bit of batter goes a long way: This recipe does not have a lot of batter. When you spread the batter on the bottom it creates a very thin layer. But the combination of the batter, apples and crumble creates a substantive cake. Just be forewarned that the layer of batter on the bottom will be thin so don’t worry about that.

Slice the apples in small chunksLesson Learned 2 – Cut your apples into small pieces: You want to make sure that the apples cook and so you need to slice them in small pieces. I normally do this part of the recipe first. Then in order to prevent the apples from oxidizing while I get everything else ready, I squeeze just a little bit of fresh lemon juice over them and make sure all the apples are lightly coated with the juice. By doing this the apples will retain their color until you are ready to add them into the cake.

Line the bottom of the pan with parchment paperLesson Learned 4: Make sure you prepare the pan so the cake can be easily removed once it has cooled: You need to do a couple of things to prepare the springform pan. First you need to grease the sides and the bottom. Second you need to cover the bottom with parchment paper. I start out by opening the latch on the pan and removing the bottom. I normally take a piece of parchment paper, put it over the bottom part and trace the outline of it onto the paper. Then I just cut out the what I outlined. I do that first before greasing the pan. Then I reassemble the pan, grease the bottom and sides and then put the parchment paper in place to cover the bottom.

Lesson Learned 5 – The layering of the cake is a process: Let me show you that process in the pictures below…

The first layer with the batter and diced apples

The first layer with the batter and diced apples

The first layer completed with batter, apples and crumble

The first layer completed with batter, apples and crumble

The second layer of batter on top of the crumble

The second layer of batter on top of the crumble

Ready to go into the oven

Ready to go into the oven

The finished coffee cake

The finished coffee cake

Assembling this may be a little tricky but I guarantee you the end result is worth it. Try it and tell me what you think…

APPLE CINNAMON COFFEE CAKE

  • Servings: 16
  • Difficulty: Medium
  • Print

INGREDIENTS

Crumble:

Apple Cinnamon Coffee Cake1 1/2 cups flour

1/2 cup brown sugar

1/4 cup sugar

1/2 tsp. salt

1 1/2 tsp. cinnamon

1/4 tsp. nutmeg

1/2 cup butter, melted

1/2 tsp vanilla

2 small granny smith apples, peeled and diced small

1 tsp. fresh lemon juice

1/3 cup sliced almonds for the very top (not added to the crumble mixture)

The Batter:

4 Tbs. unsalted butter

1/2 cup sugar

1 extra large egg

1 tsp. vanilla

1/2 cup sour cream

1 cup flour

1/4 tsp. baking soda

1/2 tsp. baking powder

1/4 tsp. salt

The Glaze:

1/2 cup powdered sugar

1 tsp. vanilla

1-2 Tbs. heavy cream (use the smaller amount for a thicker glaze)

DIRECTIONS

Preheat the oven to 350 degrees. Grease the bottom and sides of an 8 inch springform pan. Line the bottom with parchment paper and set aside. Peel and dice the apples. Pour the lemon juice over the diced apples and stir until all the pieces of apple are coated. Set aside.

For the crumble, whisk together all of the dry ingredients except the sliced almonds. Add the melted butter and vanilla and stir until combined. Set aside.

For the batter, cream together the butter and sugar until light and fluffy. Add the egg and beat until combined. Add the vanilla and sour cream and beat the mixture until well combined. Whisk together the flour, baking soda, baking powder and salt. Add to the wet ingredients and stir until just combined. Do not over mix.

Dollop half the batter around the bottom of the springform pan and spread to evenly distribute. Distribute the apple chunks evenly over the batter and sprinkle about 1 cup of the crumble on top of the apples. Spread the remaining half of the batter over the top of the crumble (it will be easier if you dollop the batter around the pan before spreading). Spread the remaining crumble over the batter. Distribute the sliced almonds evenly over the crumble.

Bake for 40-45 minutes or until a toothpick inserted in the center of the cake comes out clean. Remove cake from oven and let cool on a wire rack for 10 minutes. Run a thin knife around the edges of the cake before unlocking the springform pan.

Let the cake cool completely before adding the glaze. To make the glaze combine all of the ingredients and whisk until smooth. Drizzle the glaze all over the cake. Slice and enjoy!

Apple Cinnamon Coffee Cake

Apple Cinnamon Coffee Cake

Cinnamon Roll Cake…

I like to dabble with baking, trying new and interesting ways of creating sweet delectable treats. And let me tell you, where that’s concerned this recipe takes the cake (pun intended)! Every bite of this cake tastes exactly like a cinnamon roll. It is unbelievably good. I took some of this to work and one of my co-workers said it was an absolutely wicked treat. You must try this one.

So let’s talk about making this cake..

Lesson Learned 1 – The ingredients for the cake are a bit untraditional: Most cake recipes use a combination of baking soda and baking powder, usually a teaspoonful or less of each, as leavening agents for the batter. This particular cake recipe uses 4 teaspoons of baking powder and no baking soda. It seems like a lot of baking powder, but what that amount actually does is create a yeasty bread-like quality for the cake. You can see in the picture below the bubbles created by using the large amount of baking powder. It was interesting to see its affect on the batter. And when you think about it, cinnamon rolls tend to have a texture that’s more like bread than cake, so using the larger amount of baking powder to create that consistency makes sense.

Bubbles In The Batter

Another somewhat non traditional aspect to making the batter is adding the melted butter. Once you’ve combined all the ingredients together, you slowly add the melted butter into the batter. It is important to add it slowly so that the butter fully incorporates. I poured a little in at a time, mixed it in, and repeated that process until all the melted butter was fully incorporated into the batter. It gave the batter the luxurious consistency you see below.

The Cake Batter

Before adding the melted butter the cake batter will look a little lumpy. As you slowly add the melted butter the lumps will disappear.

Lesson Learned 2 – The cinnamon topping will be thick in consistency: A lot of cinnamon cake recipes have more of a streusel-like mixture that you incorporate into cake batter. The topping for this cake is thicker and more frosting-like as you can see from the picture below.

The Cinnamon Topping

When preparing this mixture it’s very important the butter be as soft as possible without melting it. I put the butter in the microwave and kept nuking it in 10 second increments until it was slightly runny along the edges. You can see from the picture below how soft the butter was before I mixed it with the other topping ingredients.

The Topping Ingredients

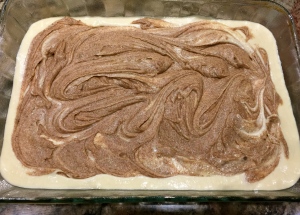
Lesson Learned 3 – How to combine the cinnamon and cake batter: Many recipes similar to this require sprinkling the topping on the batter and using a knife to swirl it down into the cake. You don’t need to do that with this recipe. All you need to do is dollop the cinnamon mixture on top and use a knife and spread it around. The cinnamon will permeate the batter while it bakes. Try to spread the mixture as close to the edges as possible. That way the end pieces will have some cinnamon in them as well.
Swirled Cinnamon Mixture

Dollop The Cinnamon On Top Of The Batter

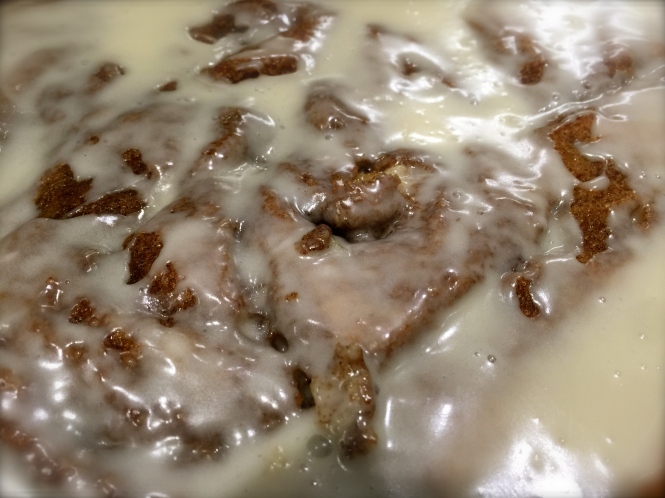
Lesson Learned 4 – Add the glaze when the cake is still warm: Most of the time you wait for a cake to cool before you add glaze. With this recipe you add the glaze while the cake is still slightly warm. That way it seeps into the cake as well as stays on top. I prefer to make thicker glazes for this type of recipe so I combine heavy cream and milk with the vanilla and powdered sugar to get a rich, thick glaze.

Thick Rich Glaze

I hope you decide to try this recipe. It is sinfully delicious and keeps well in an air tight container. I got two thumbs up on this on this one from my co-workers and my husband!

Cinnamon Roll Cake…

  • Servings: 20-24 Squares
  • Difficulty: Easy
  • Print

INGREDIENTS:
CAKE BATTER:

Cinnamon Roll Cake

3 cups flour (plus 2 Tbs. high altitude)

4 tsp. baking powder

1/2 tsp. salt

1 cup sugar (7/8 cup high altitude)

1 1/2 cups milk

3 tsp. vanilla extract

2 extra large eggs

1/2 cup butter, melted.

CINNAMON TOPPING MIXTURE:

1 cup firmly packed brown sugar

2 Tbs. flour

2 heaping Tbs. cinnamon

1 cup very soft butter

GLAZE:

2 cups powdered sugar

5 Tbs. heavy cream

2-3 Tbs. Milk

1 tsp. vanilla

DIRECTIONS:

Preheat the oven to 350 degrees. Mix together all of the ingredients for the cinnamon topping and set aside.

In a large mixing bowl, mix together all of the cake batter ingredients except the melted butter. After everything is combined, slowly add the melted butter in small amounts making sure it is thoroughly combined before adding more. Continue with this process until all of the melted butter is incorporated into the batter.

Spray a 9 x 13 dish with cooking spray. Add the batter to the dish and smooth until evenly distributed. Dollop portions of the cinnamon mixture on top of the batter. Using a smooth edged knife, swirl the cinnamon mixture all over the top of the batter getting the mixture as close to the edges of the pan as possible.

Bake for 45-50 minutes.

Mix together all of the glaze ingredients. While the cake is still slightly warm, pour the glaze all over the top of the cake. The cake keeps best when stored in an airtight container.

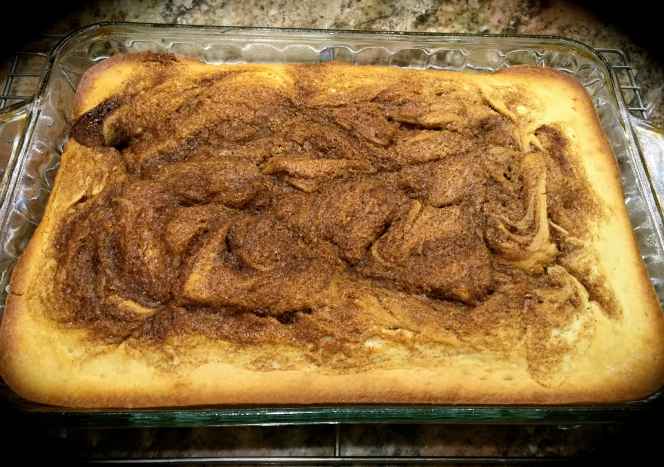
The Cake Right Out Of The Oven

The Cake Right Out Of The Oven

Cinnamon Roll Cake

Cinnamon Roll Cake

Blueberry Cinnamon Streusel Coffee Cake…

I needed something quick and easy that would use the blueberries I recently purchased. How about a coffee cake? I looked through various recipes in search of what I could adapt and found one that used ingredients I already had in the house. As with most baking recipes, I had to adapt the ingredients for high altitude (and I will include that in the recipe) but I also decided to add a cinnamon streusel topping to the coffee cake, and I can tell you that was the best accompaniment to the recipe. This coffee cake takes no time to put together and judging by how it was devoured when I took it to work, it’s a great way to have something homemade, sweet and delicious without a lot of fuss.

Here are my lessons learned when making this:

The correct consistency of the batter...

The correct consistency of the batter…

Lesson Learned 1 – Don’t be afraid to trust your gut: As I mentioned earlier, I adapted this from a recipe I found in a Taste Of Home magazine. I new I would have to adapt the recipe for high altitude, but I also think there may have been a misprint in the recipe as it did not, in my estimation, include enough milk. The original recipe called for 1/2 cup of milk. When I added that, along with the butter and egg mixture, the batter was still very dry and even slightly powdery. I knew that wasn’t right. So I began adding more milk and testing the consistency of the batter. I suggest at sea level you start with 3/4 cup of milk and check the consistency of the batter. You can always add a little more but you can’t take it away.

Because I added 4 additional tablespoons of flour (2 for each cup, a standard high altitude adjustment) I knew I might have to add a little more milk. As it was I had to double the amount of milk (I used 1 cup) and that shouldn’t be the case. So I am writing the recipe with the suggestion of using 3/4 – 1 cup of milk. As you can see the cake turned out beautifully, but would not have if I didn’t make the adjustment and trust my gut. So don’t be afraid to adjust the milk if you think the batter doesn’t look right.

IMG_5071

The butter, sugar and egg mixture…

Lesson Learned 2 – The egg, milk and butter mixture will look lumpy, and that’s ok: I am including a picture of what the egg, milk and butter mixture looks like before you add it to the dry ingredients. It looks lumpy and that’s the butter. Don’t let that bother you. It is supposed to look that way. If you don’t want to drag out your hand mixer, you can actually combine all of these ingredients at one time by hand using a whisk, which is what I did. Just make sure the butter is at room temperature before you combine all of them. It won’t work if the butter is not soft. If you choose to use a hand mixer, beat the butter and egg together first and then add the milk. Either process will work.

The consistency of the streusel

The consistency of the streusel…

Lesson Learned 3 – Making a streusel: I’ve always struggled with making a streusel. Most recipes say to either use a pastry cutter and cut the cold butter into the flour, or use two knives and do the same thing. I’ve never mastered it with knives and it seemed that every time I used the pastry cutter the butter would just stick to the blades. What I learned this time is, with patience, (what a concept) the pastry cutter actually works. The first few times I had to scrape the butter off the blades, but after a short while the butter became more incorporated into the flour and soon I was cutting the butter into the flour and got the desired pea-sized consistency necessary for a good streusel. So be patient. It actually works.

If you want something sweet that is quick and easy to make this is the recipe for you. Enjoy!

Blueberry Cinnamon Streusel Coffee Cake

  • Servings: 12
  • Difficulty: Easy
  • Print

INGREDIENTS: 

2 cups flour (plus 4 Tbs. for high altitude)

3/4 cup sugar (2/3 cup for high altitude)

2 Tbs. baking powder (1 Tbs. for high altitude)

1/4 tsp. salt

1 extra large or jumbo egg, room temperature

3/4 – 1 cup milk (start with smaller amount and add more if needed)

1/2 cup butter, room temperature

2/3 cup fresh blueberries (if using frozen add to batter frozen)

2/3 cup pecans, chopped

Vegetable shortening to grease the pan

1/2 tsp. flour for dusting the blueberries (if using fresh blueberries)

CINNAMON STREUSEL TOPPING:

1/2 cup sugar

2 Tbs. ground cinnamon

1/3 cup flour

1/4 cup cold butter, cubed.

DIRECTIONS:

Preheat the oven to 375. Grease a 9 x 9 baking pan with shortening. Set aside.

In a large bowl, combine flour, sugar, baking powder and salt. Whisk to combine. In another bowl, whisk together the milk, egg and butter. Make a well in the center of the dry ingredients. Add the wet ingredients and stir to combine. Slowly add small portions of additional milk to the batter if the the consistency of the batter appears too dry.

Dust the fresh blueberries with a small amount of flour and stir until the berries are slightly coated. Fold the blueberries and pecans into the batter. Spread batter into the prepared pan.

For the streusel, combine sugar, flour and cinnamon into a bowl. Cube the cold butter and cut it into the flour/sugar mixture until the mixture reaches a pea-sized consistency. Sprinkle the streusel over the batter.

Bake 35 – 40 minutes or until a toothpick inserted in the center comes out clean. Cool in the pan for at least one half hour. Cut and serve.

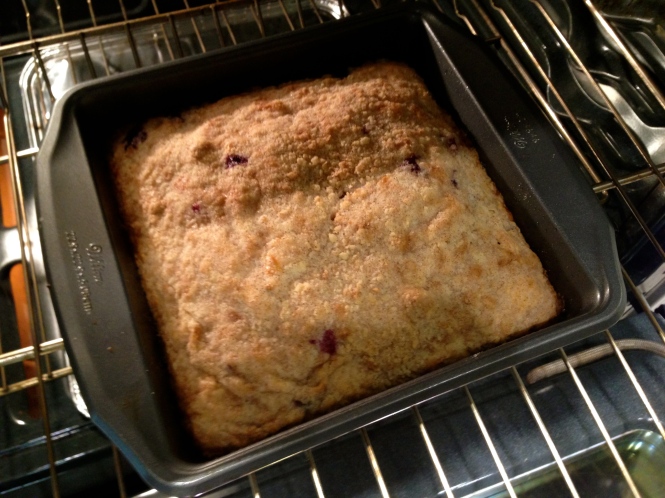
Coming out of the oven...

Coming out of the oven…

Blueberry Cinnamon Streusel Coffee Cake...

Blueberry Cinnamon Streusel Coffee Cake…

Servings suggestion: With a dollop of whipped cream dusted with cinnamon sugar...

Servings suggestion: With a dollop of whipped cream dusted with cinnamon sugar…

Easy Apple Pie…

Over the years I haven’t had a lot of luck making apple pies. I’m not sure of the exact reason but I would wind up with a variety of issues such as a burnt crust, a gooey crust, hard uncooked apples, lack of flavor in the filling and on and on and on… So when my neighbor across the street gave us a whole bunch of apples from his backyard and after numerous hints from my husband saying, “What are you going to do with them – make a pie?” I thought I would take another stab at it.

I know there are certain apples that better lend themselves to being baked in a pie, but I had no idea what type of apples I was given. I even asked my neighbor if he knew but he didn’t. I washed one, cut a piece of it, ate it and thought it might do well in a pie. So I put my cooking ego aside and decided to once again give it the old college try.

IMG_0821

I combed through a variety of recipes, reading different tips and techniques and looking at the various ingredients I could potentially use. I was surprised to find that some use heavy cream in the filling and others mixed the apples with some flour. After reading a bunch of different recipes I decided on one that I thought would give me a traditional apple pie, by that I mean one like my grandmother used to make. And from there my adventure began…

Recipe Rating A+++ – Color me surprised. It turned out great! I used a very basic recipe but added some ingredients and used different techniques I picked up looking at other recipes and the combination worked beautifully. I told my husband I thought that this was the best apple pie I ever made. He agreed!

IMG_0608Lesson Learned 1 – Invest in an apple corer: Since the apples I was using were smaller and had imperfections that I needed to work around I needed to peel and core a lot of them. When I made an apple cake recently I just used my knife to cut the core out of the apples. That took a lot of time. I invested in a simple apple corer and I was able to peel, core and cut up the apples a lot more quickly. And I also did not waste as much of the apple. It was well worth the money spent.

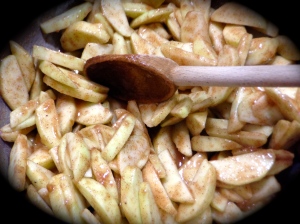
Lesson Learned 2 – Use lemon juice on your sliced apples to keep them from browning: I was working with some small to medium sized apples and had to use a lot of them. It took time to peel, core and slice them. If I did not sprinkle some fresh lemon juice on them periodically, some of the slices would have turned brown by the time I was ready to put them in the pie. Lemon juice prevents oxidation from occurring and that’s what turns peeled apples brown. By using lemon juice the apples looked gorgeous when I was ready to mix the filling and put them in the pie.

IMG_0618Lesson Learned 3 – Don’t slice the apples too thick and pile them high: If you slice the apples too thick they won’t cook. I sliced mine about a quarter of an inch thick and they cooked perfectly. Don’t be afraid the pile the apples into a big mound in the pie plate. They will shrink down in the cooking process and you want to make sure you still have a nicely rounded pie once it’s cooked.

Lesson Learned 4 – Prick the bottom layer of crust with a fork and sprinkle a little flour on it:  One recipe that I read included this tip. What I liked about the tip was the blogger said her grandmother always did this technique and she had no idea why but since her grandmother did it, she does it too. Well, if it’s good enough for grandma, it’s good enough for me so I did the same thing. I think the trick actually helped to cook the bottom crust as this was the first time ever that I was pleased with how the bottom crust turned out. Thanks grandma!

IMG_0615

Lesson Learned 5 – Never underestimate the power of packaged refrigerated pie crusts: As I mentioned earlier, to date I’ve not had a lot of success making apple pies. Because of that I decided to concentrate on the filling first before venturing into the realm of making a homemade pie crust. I used Pillsbury refrigerated pie crust dough in this recipe and the crust turned out amazingly well. The trick is to let the dough sit out and get to room temperature (and that takes only about 15 minutes – about the same amount of time it took to prepare the apples). That way it is much more malleable and less prone to cracking when you work with it. I brushed the top crust with an egg wash consisting of one egg yolk and a tiny splash of milk and it browned beautifully. I may venture into a homemade crust the next time, or if I want to have a great pie a little more quickly, I’ll use the prepackaged ones again. They are really surprisingly good.

IMG_0625

Lesson Learned 6 – Taste the apple mixture and adjust spices if necessary: After I mixed the apples with the flour, sugars, cinnamon and nutmeg I tasted the apples and the nutmeg seemed to be the predominant spice. I wanted the nutmeg to enhance in the background but the cinnamon to be the dominant spice. I added an extra teaspoon of cinnamon and the filling was perfect. I am writing the recipe with 2 teaspoons of cinnamon instead of one, but if you are skeptical, try it with one teaspoon first and go from there.

Lesson Learned 7 – Adjusting your oven temperature during the pie baking process: When I made this pie I started the oven at 425 and baked it at that temperature for 15 minutes. Then I reduced the temperature to 350 and continue to bake it for another 45 minutes. I’d never done this before and I think this helped not only to cook the filling all the way through but also not burn the crust. I did not have to protect the edges of the crust at all during the entire baking process.

Lesson Learned 8 – Brush the crust with an egg wash to make it brown in the oven: All you need to do is to take one egg (I’ve seen it recommended as just the yolk or the entire egg – either way it works) whisk it with the smallest splash of milk and brush the mixture on top of the pie crust. You will have way more than you need so don’t put the whole amount on. Once it is lighted coated pop the pie in the oven and the rest is magic. You’re left with a beautifully browned crust.

IMG_0646

Lesson Learned 8 – Put a baking sheet lined with foil on a rack below the pie to catch drippings: I thought about this just as I was putting the pie in the oven and immediately grabbed a baking pan, lined it with foil and put it on a rack below the pie. Even though you vent the pie and crimp the edges of the crust it always seems like some filling manages to leak out. I was so glad I did this. I did get some drippings on the foil but it was so much easier to clean up that way.

I could not be more pleased with this recipe. I always wanted to make an apple pie like my grandmother used to make and I finally figured out how to do it. We got another batch of apples from our neighbor yesterday and the first thing my husband said was, “Are you going to bake another pie?” I think I am going to try out an apple cake recipe that I found in the newspaper first, but I do think I’ll still have enough apples to make a pie. And now I’m not afraid to make one anymore. I just know you will enjoy this recipe. Try it and let me know how it turns out.

Easy Apple Pie...

  • Servings: 10-12
  • Difficulty: Medium
  • Print

INGREDIENTS

1 box refrigerated pie crust, Pillsbury pie crust recommended

8 cups of baking apples – peeled, cored and sliced – approx. 3 lbs. (Granny Smith, Cortland, Jonathan)

Lemon juice – approx. 2 Tbs., fresh or bottled

3/4 cup sugar

1/4 cup brown sugar

1/4 cup flour, plus a 1/2 teaspoon for dusting the lower crust

2 tsp. cinnamon – start with 1 tsp. and add from there if needed

1/4 tsp. nutmeg

2 Tbs. butter, cut in small cubes

1 egg yolk

Splash of milk

DIRECTIONS

Preheat oven to 425 degrees. Take box of pie crust dough out of the refrigerator and bring to room temperature. Core, peel and slice the apples. Sprinkle a small amount of lemon juice over the apples as you slice them. Stir to coat the apples with the lemon juice. (This process only needs to be repeated two or three times while slicing the apples or you can do a little more if you notice the apples are browning)

Combine flour, sugars and spices. Pour over the apples and stir to combine. Taste the mixture to ensure the correct amount of spices have been used. (don’t be afraid to add a little more cinnamon if necessary).

Line a 9 inch pie plate with one of the pie crusts. Prick the crust several times with a fork and dust with flour. Fill crust with the apple mixture. Dot the apple mixture with the butter cubes. Place the second crust on top of the pie filling. Seal the edges crimping by hand or using a fork. Cut a slit in the center of the pie to vent. Whisk together the egg and milk. Brush the top crust with the egg mixture.

Bake at 425 for 15 minutes. Lower the oven to 350 and bake for an additional 45 minutes, or until the crust is golden and the filling is bubbly.

IMG_0661


IMG_0667


Apple Cake With Cream Cheese Frosting

The other day I opened my front door and lo and behold a bag of apples magically appeared on my porch. My neighbor across the street has apple trees in his backyard and was nice enough to share a bag of them with us. I had no idea what type of apples they were but when I tasted one I knew it would lend itself to baking. But what to make – applesauce, apple crisps, apple streusel – the possibilities were endless.

IMG_0273I decided to make an apple cake that is really a combination of two recipes that I found on Pinterest. One intrigued me because of the spices and the other because it included pecans. So why not just take the best out of both recipes and make a new one, right? Well, surprisingly it worked out even better than I thought it would.

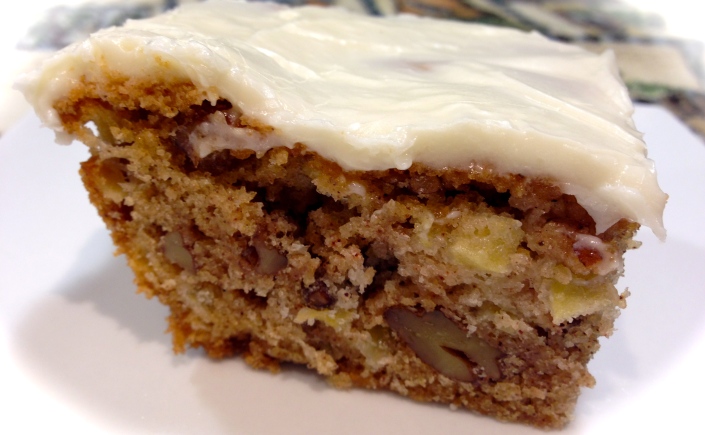
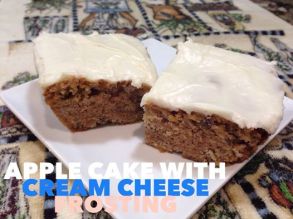
RECIPE RATING: A+ The cake came out great. The apples were moist but not mushy and the spices complimented the apples perfectly. The next time I make this I may add a little more cinnamon but as written it is still a fabulous cake. I took most of it to work and it was gone in less than an hour. The cream cheese frosting was a great compliment to the cake.

It’s Fall, there are plenty of apples out there – so don’t wait – you’ve just got to try this one!

LESSON LEARNED 1- Don’t be afraid to experiment: I say this with a caveat. Remember that baking is not like cooking. The amounts need to be relatively exact for the end result to be good. Eyeballing it is simply not recommended for baking. You must measure your ingredients. Experiment wisely.

That being said, when I was searching for recipes I found two apple cake recipes that basically had the same proportions for the main ingredients (flour, sugar, oil) but had different spices. I decided to used the main ingredients from one (it used two eggs instead of three) and I also added the spices from the other (cinnamon and allspice). One of the recipes only had vanilla as a spice and I just could not imagine baking apples without cinnamon and allspice. So I borrowed the spices from one recipe and incorporated it into the other while eliminating the vanilla (although I imagine you could put that in as well). It worked like a charm.

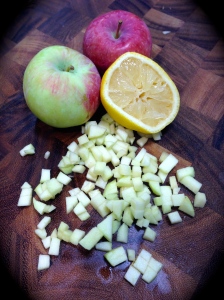
IMG_0277LESSON LEARNED 2 – Cut the apples into small pieces: I learned this lesson the hard way a few years ago. If you cut the pieces too big they won’t cook and the cake won’t taste as good. Cut them into nice small pieces and they will cook beautifully, moist but not mushy, within the allotted time. Also, make sure you peel the apples. Tough apple peels in a cake just don’t cut it in my estimation.

LESSON LEARNED 3: Use lemon juice to keep your apples from turning brown: This recipe calls for three cups of diced apples which takes a little time to prepare. During that time if you don’t sprinkle them with some lemon juice they will begin to turn brown. In order to avoid that take either some fresh or bottled lemon juice and sprinkle it sparingly on top of the apples. Stir the apples so that the lemon juice is incorporated thoroughly. You may have to do this process a couple of times because of the amount of apples but you need just a little lemon juice to keep the apples from browning.

LESSON LEARNED 4: Keep your nuts fresh by putting them in the freezer: Let’s face it nuts are expensive. Rarely do I finish a package of nuts in a recipe. I used to keep the leftover package in my pantry until the next time I needed them and then wondered why they tasted funky when I went to use them. I found out along the way that nuts have oil in them and if you don’t freeze them they will become rancid. Freezing leftover nuts makes them last much longer. And because they are frozen you don’t have to be dust them with flour in order to incorporate them throughout the batter.

IMG_0291LESSON LEARNED 5 – The batter will be thick:  I was actually surprised to see the thickness of this batter. You will need to spread it to fill a 9×13 pan. Make sure you spread it evenly and get it into all the corners.

This is a perfect Fall recipe. The cake is moist and flavorful and the cream cheese frosting is to die for. One of my co-workers said that he could just eat the frosting it was that good. If you try this one I’m sure it will become a Fall staple in your home.

A friend of mine also gave me a recipe for apple chips. I think I may try that as well. What is your favorite apple recipe?


[recipe: title=”Apple Cake With Cream Cheese Frosting” servings=”16-20″ time=”75 Minutes Including Prep” difficulty=”Easy”]

CAKE INGREDIENTS:

1 1/2 cups vegetable oil

2 cups sugar

2 eggs, room temperature

3 cups flour

1 1/2 tsp. baking soda

1/2 tsp. salt

1 tsp. cinnamon

1/4 tsp. allspice

3 cups chopped apples

1 cup chopped pecans

1 tsp. vanilla (optional)

lemon juice to coat the diced apples

FROSTING:

1 package cream cheese

4 cups powdered sugar, sifted

1 tsp. vanilla

dash of heavy cream (you can substitute with milk)

DIRECTIONS:

Preheat oven to 350 degrees. Grease a 9×13 pan (you can also use cooking spray). Peel and dice apples. Put a dash of lemon juice on them to prevent browning. Combine oil and sugar. Add eggs one at a time and mix thoroughly. Add vanilla if desired. Combine flour, baking soda, salt, cinnamon and allspice. Add dry ingredients incrementally into wet ingredients until combined.

Fold in pecans and apples. Spread in prepared pan and bake for 45-50 minutes or until a toothpick inserted in the center comes out clean. Cool completely before adding frosting. (about 2 hours).

For the frosting: Sift powdered sugar. Beat sugar and cream cheese until combined. Add dashes of heavy cream until you get your desired consistency. (I prefer heavy cream to milk and I feel it gives a thicker, more lush frosting). Spread on top of cake. Enjoy!

[/recipe]

IMG_0362


Iced Cinnamon Chip Cookies

If you have been following my recent holiday cookie recipe posts you know by now that every year I try at least one new cookie recipe. This year I tried two, Salted Caramel Butter Bars and the one I am going to share in this post the Iced Cinnamon Chip Cookies. The Caramel Bars were a huge hit with my husband but my favorite was the cinnamon chip cookies.

First of all, did you even know that cinnamon chips existed? I didn’t until I saw the recipe and decided to do some hunting at the grocery store. Lo and behold, right next the semi-sweet chocolate morsels were the cinnamon chips. I had never seen them before but I guess I just wasn’t looking for them. They were there in plain sight.

Cinnamon Chip Cookies

Cinnamon Chip Cookies

At first I was a little hesitant about making this cookie – the recipe was very similar to a chocolate chip cookie recipe but I wanted to make an iced cookie this year and thought a hearty cookie like this would stand up well to icing. I found the recipe in my trusty 2008 Taste of Home Best Loved Cookies and Bars magazine (the magazine that has supplied quite a few a my holiday cookie recipes over the years). The one thing that I did not like about the recipe was the frosting ingredients (they seemed bland to me, just the usual milk and confectioners sugar combination) so I went online to research a cinnamon cream cheese frosting recipe. I found one that was part of a soft pumpkin cookie recipe and decided to try it. I’m so glad I did. I’m sure it complimented the cookie much better than the original frosting recipe. So now my recipe rating and lessons learned.

Rating: A++++++  I absolutely LOVE this cookie recipe. The cinnamon chips provide a delightful unique flavor and the frosting highly compliments the cookie and makes it an absolutely tasty delight. If you try any cookie this year, I would recommend this one. It is easy to make and soooooo good!

Lesson Learned 1: I am providing you the recipe as it is in the magazine. I had to adjust it for high altitude. Please note the adjustments in the recipe. If you are at high altitude it is important to make them, otherwise the cookies will not bake correctly and will be inedible.

Lesson Learned 2: Storing an iced cookie can be a challenge. I recommend making the icing, refrigerating it and putting it on the cookie before serving or giving away. That way the cookies are easier to store.

Lesson Learned 3: These cookies are so easy to make that there are no more words of wisdom I can depart regarding making them or storing them. Just make them and enjoy them.

Iced Cinnamon Chip Cookies

  • Servings: 4 dozen
  • Difficulty: Easy
  • Print

INGREDIENTS:

Cookies:

1 cup unsalted butter, softened

3/4 cup packed brown sugar (2/3 cup high altitude)

3/4 cup sugar (2/3 cup high altitude)

2 eggs

1 tsp. vanilla

3 cups flour (3 1/4 cups high altitude)

1 tsp. baking soda

1 tsp. salt

1 package (10 ounces) cinnamon baking chips

Frosting:

8 oz. cream cheese, softened

4 TBS softened butter

2 1/4 cups powdered sugar

1/2 tsp. cinnamon

1 tsp. vanilla

DIRECTIONS:

Preheat oven to 350.

In a large mixing bowl cream butter and sugars. Beat in eggs and add vanilla. Combine flour, baking soda and salt; gradually add to creamed mixture and mix well. Fold in the cinnamon chips.

Drop by rounded tablespoonfuls (I use a cookie scoop) 2 inches apart onto an ungreased cookie sheet. Bake for 10-12 minutes or until golden brown. Remove to wire rack to cool.

Frosting: In a mixing bowl cream butter and cream cheese. Add powdered sugar and mix until combined. Add cinnamon and vanilla. Store in refrigerator until ready to use.


IMG_2216 2


IMG_8894

Iced Cinnamon Chip Cookies

Iced Cinnamon Chip Cookies

Baking on Facebook (Apple Cinnamon Loaf) …

If you are in forced recuperation like I am (not sure why I’m making it sound like a death sentence) you are constantly looking for things to occupy and enrich your mind while your body heals. And if you’re outside adventures, such a trips to the grocery store, are also limited until you get clearance from the doctor, you need to rely on what you already have at home. And although I love my computer, one can only surf so much before you seek stimulation elsewhere.

Apple Cinnamon Loaf Ingredients

Apple Cinnamon Loaf Ingredients

I found an outlet on, of all places, Facebook. Scrolling through the news feed the other day I came across a recipe for an apple cinnamon loaf. Now I’ve looked at dozens of recipes that people post and generally gloss over most of them but this one intrigued me because not only did is sound very “Fall-ish” and wonderful but also because I already had all of the ingredients in my pantry. So today, instead of being the self-proclaimed Pinterest recipe critic, I am switching my critique to what I found on Facebook.

In a previous blog when I reviewed a Pinterest recipe for Lemon Blueberry Yogurt Loaf, I talked about the technique of mixing fruit with flour so that it disburses throughout the loaf and doesn’t all sink to the bottom. Unfortunately that technique did not work for me when I made it (I attribute it to the use of frozen instead of fresh blueberries). Upon seeing the loaf my husband dubbed it my “sunken berry” cake and although delicious not as pleasing to the eye as I would have wanted. This time I wanted to avoid the dreaded sunken berry (almost sounds like a breakfast cereal, doesn’t it?).

This particular loaf uses a different technique, one that is used frequently in boxed loaf mixes, that of putting half the batter in the pan, adding the spices or fruit and topping and then adding the remaining batter with another layer of topping. This recipe calls for adding a layer of spices and fruit onto half the batter, patting it down, repeating the process and then finally before putting it into the oven using your finger or a spoon and swirling the mixture all around. That sounded interesting. And what technique do you think I used?  Of course, nix the spoon, the finger is so much more fun! Nothing like getting your hands dirty while in the kitchen I always say.

Needless to say, a very simple and full proof recipe. My Rating: A-. What I like about this recipe is that it’s very easy to make and uses staples most of us have in the pantry. Believe it or not I did not have enough vanilla extract for the recipe (who ever runs out of vanilla extract, I mean really?) so I substituted the cinnamon extract I had on hand and it seemed to work fine. And, as always when I make something, there are some lessons learned.

Lesson Learned 1.) I think the recipe needs a couple of boosts to get rid of the minus on the rating.  First, I would specify using a green apple (which I did in the directions below). I had a gala apple on hand and although it worked well I think green apples are your best bet when a recipe calls for using apples.

Lesson Learned 2.) The next time I make this I will try coating the apple chunks with some nutmeg and cinnamon sugar and letting them absorb them before I layer them on the batter. I think that will enhance the flavor of the apple.

Lesson Learned 3.) The recipe calls for 1/3 cup brown sugar not packed. I would recommend packing the brown sugar as I think the cake needed a little more of that sweetness. You may need to add a little more cinnamon to the brown sugar but that is no big deal.

Lesson Learned 4.) The recipe called for the loaf to bake for 30-40 minutes. It took my loaf 45 minutes to render a clean toothpick when inserted in the center.

Lesson Learned 5.) As mentioned in previous critiques, as soon as I am able I am getting a new loaf pan. Hopefully that will help to get a loaf that is evenly baked and not crunchy on the ends.

All in all I was very pleased with the outcome, especially when it turns out well the very first time you make it. This is an easy recipe, one I would recommend to keep in your recipe box.

APPLE CINNAMON LOAF

inside

Apple Cinnamon Loaf

  • Servings: 1 loaf
  • Difficulty: Easy
  • Print

INGREDIENTS:

1/3 cup brown sugar packed

1-1 1/2 tsp. ground cinnamon

2/3 cup sugar

1/2 softened butter

2 eggs

1 1/2 tsp. vanilla extract

1 1/2 cups flour

1 3/4 tsp. baking powder

1/2 cup milk

2 apples peeled and chopped, honey crisp or granny smith

Cinnamon, sugar and nutmeg to coat the chopped apple (mixture to taste)

DIRECTIONS:

1. Preheat oven to 350 degrees. Grease and flour a 9 x 5 loaf pan (or use baking spray).

2. Mix together brown sugar and cinnamon and set aside. Chop the apple and lightly coat with a mixture of cinnamon, sugar and nutmeg and set aside.

3. Beat sugar and butter until smooth and creamy. Beat in eggs one at a time until incorporated. Add vanilla extract.

4. In a separate bowl, sift together flour and baking powder. Make a well in the center and stir in butter mixture. Once combined, stir in milk until batter is smooth.

5. Pour half the batter into the prepared pan. Top with half the chopped apples. Sprinkle brown sugar mixture on top. Pat apples and brown sugar into the batter. Pour the remaining batter over the apple layer, top with remaining apples and brown sugar and cinnamon mixture. Lightly pat. Swirl batter with your finger or your spoon.

6. Bake in preheated oven for 30-40 minutes or until a toothpick inserted in the center of the loaf comes out clean.

Apple Cinnamon Loaf

Apple Cinnamon Loaf

IMG_7095

Fall – When Ovens End Their Hibernation…

What is it about Fall weather that makes you want to fire up the oven? The manner in which you cook totally changes from Summer’s outdoor grill mode to Fall’s indoor nesting and baking mode. And for me that usually means heavy duty oven time. Think about it. You move away from grilling chicken and steak to making pot roast and casseroles. And I think that is what I most appreciate about Fall – bringing all those marvelous smells back into the house. And if a Fall day also happens to be a rainy day, well then it is an absolute must to fire up the oven!

And so it was yesterday, that killer combination of Fall and rain and I knew I just had to make something. There were only two givens – one, it had to smell wonderful when it was cooking and two, it had to be a recipe I had not tried before. That doesn’t narrow the playing field very much but I happen to love endless possibilities. But how to proceed… hmm…

Then it struck me. My husband and I recently returned from a trip from Santa Fe, New Mexico. While we were there we stayed at a bed and breakfast and each morning my husband would have an English Muffin and a piece of coffee cake. My husband is not a sweets eater but he often talked about how much he enjoyed the coffee cake. The coffee cake had a cream cheese filling and so as I thought about what I would bake I began to think in that vein.

The finished product

The finished product

So off I went to one of my favorite sites on the web, Pinterest, in search of a cream cheese coffee cake recipe. Lo and behold I found one on a website called Bake or Break and like that my decision was made. There was no turning back, I succumbed to the trappings of Fall weather and rain by making a cinnamon cream cheese coffee cake.

As you can see the finished product was great and it tasted divine. I encourage you to try it. Here are some things I learned when making it:  1.) Be aware that it does take some time to prepare because basically you are making three separate things from scratch, the crumb topping, the cream cheese swirl and the cake. 2.) The cake mixture is much thicker than you might think – I poured it into the prepared pan and literally had to spread it out by hand in order for it to fit the entire pan. I thought this might make the cake tough, but it was not. 3.) Be very mindful of the cooking time – it helps to know your oven on this and really on almost everything else you bake. The recipe says to cook it at 350 for 40-45 minutes. Mine was done at 40 and could maybe have been in for even a few minutes less.

But anyway it turned out great – so much so that even though it takes a little more time to prepare it is definitely worth making in my opinion. My husband loved it, my co-workers are getting a treat today, and a newly formed cooking group that I just joined (something for a future blog) will be getting samples of it tomorrow night. So enjoy the coffee cake, it is definitely worth the work. Happy Fall baking!

Cinnamon Cream Cheese Coffee Cake

Cinnamon Cream Cheese Coffee Cake

Cinnamon Cream Cheese Coffee Cake Recipe