Lemon Blueberry Quick Bread…

My husband has an insatiable sweet tooth and lucky for him he can eat sweets and stay thin. So I’m always looking to make something for him, and there are times I just don’t want a lot of fuss getting it done. When that happens, this recipe allows me to make him something fresh without a lot of work on my part. And oh, did I happen to mention – it tastes divine!

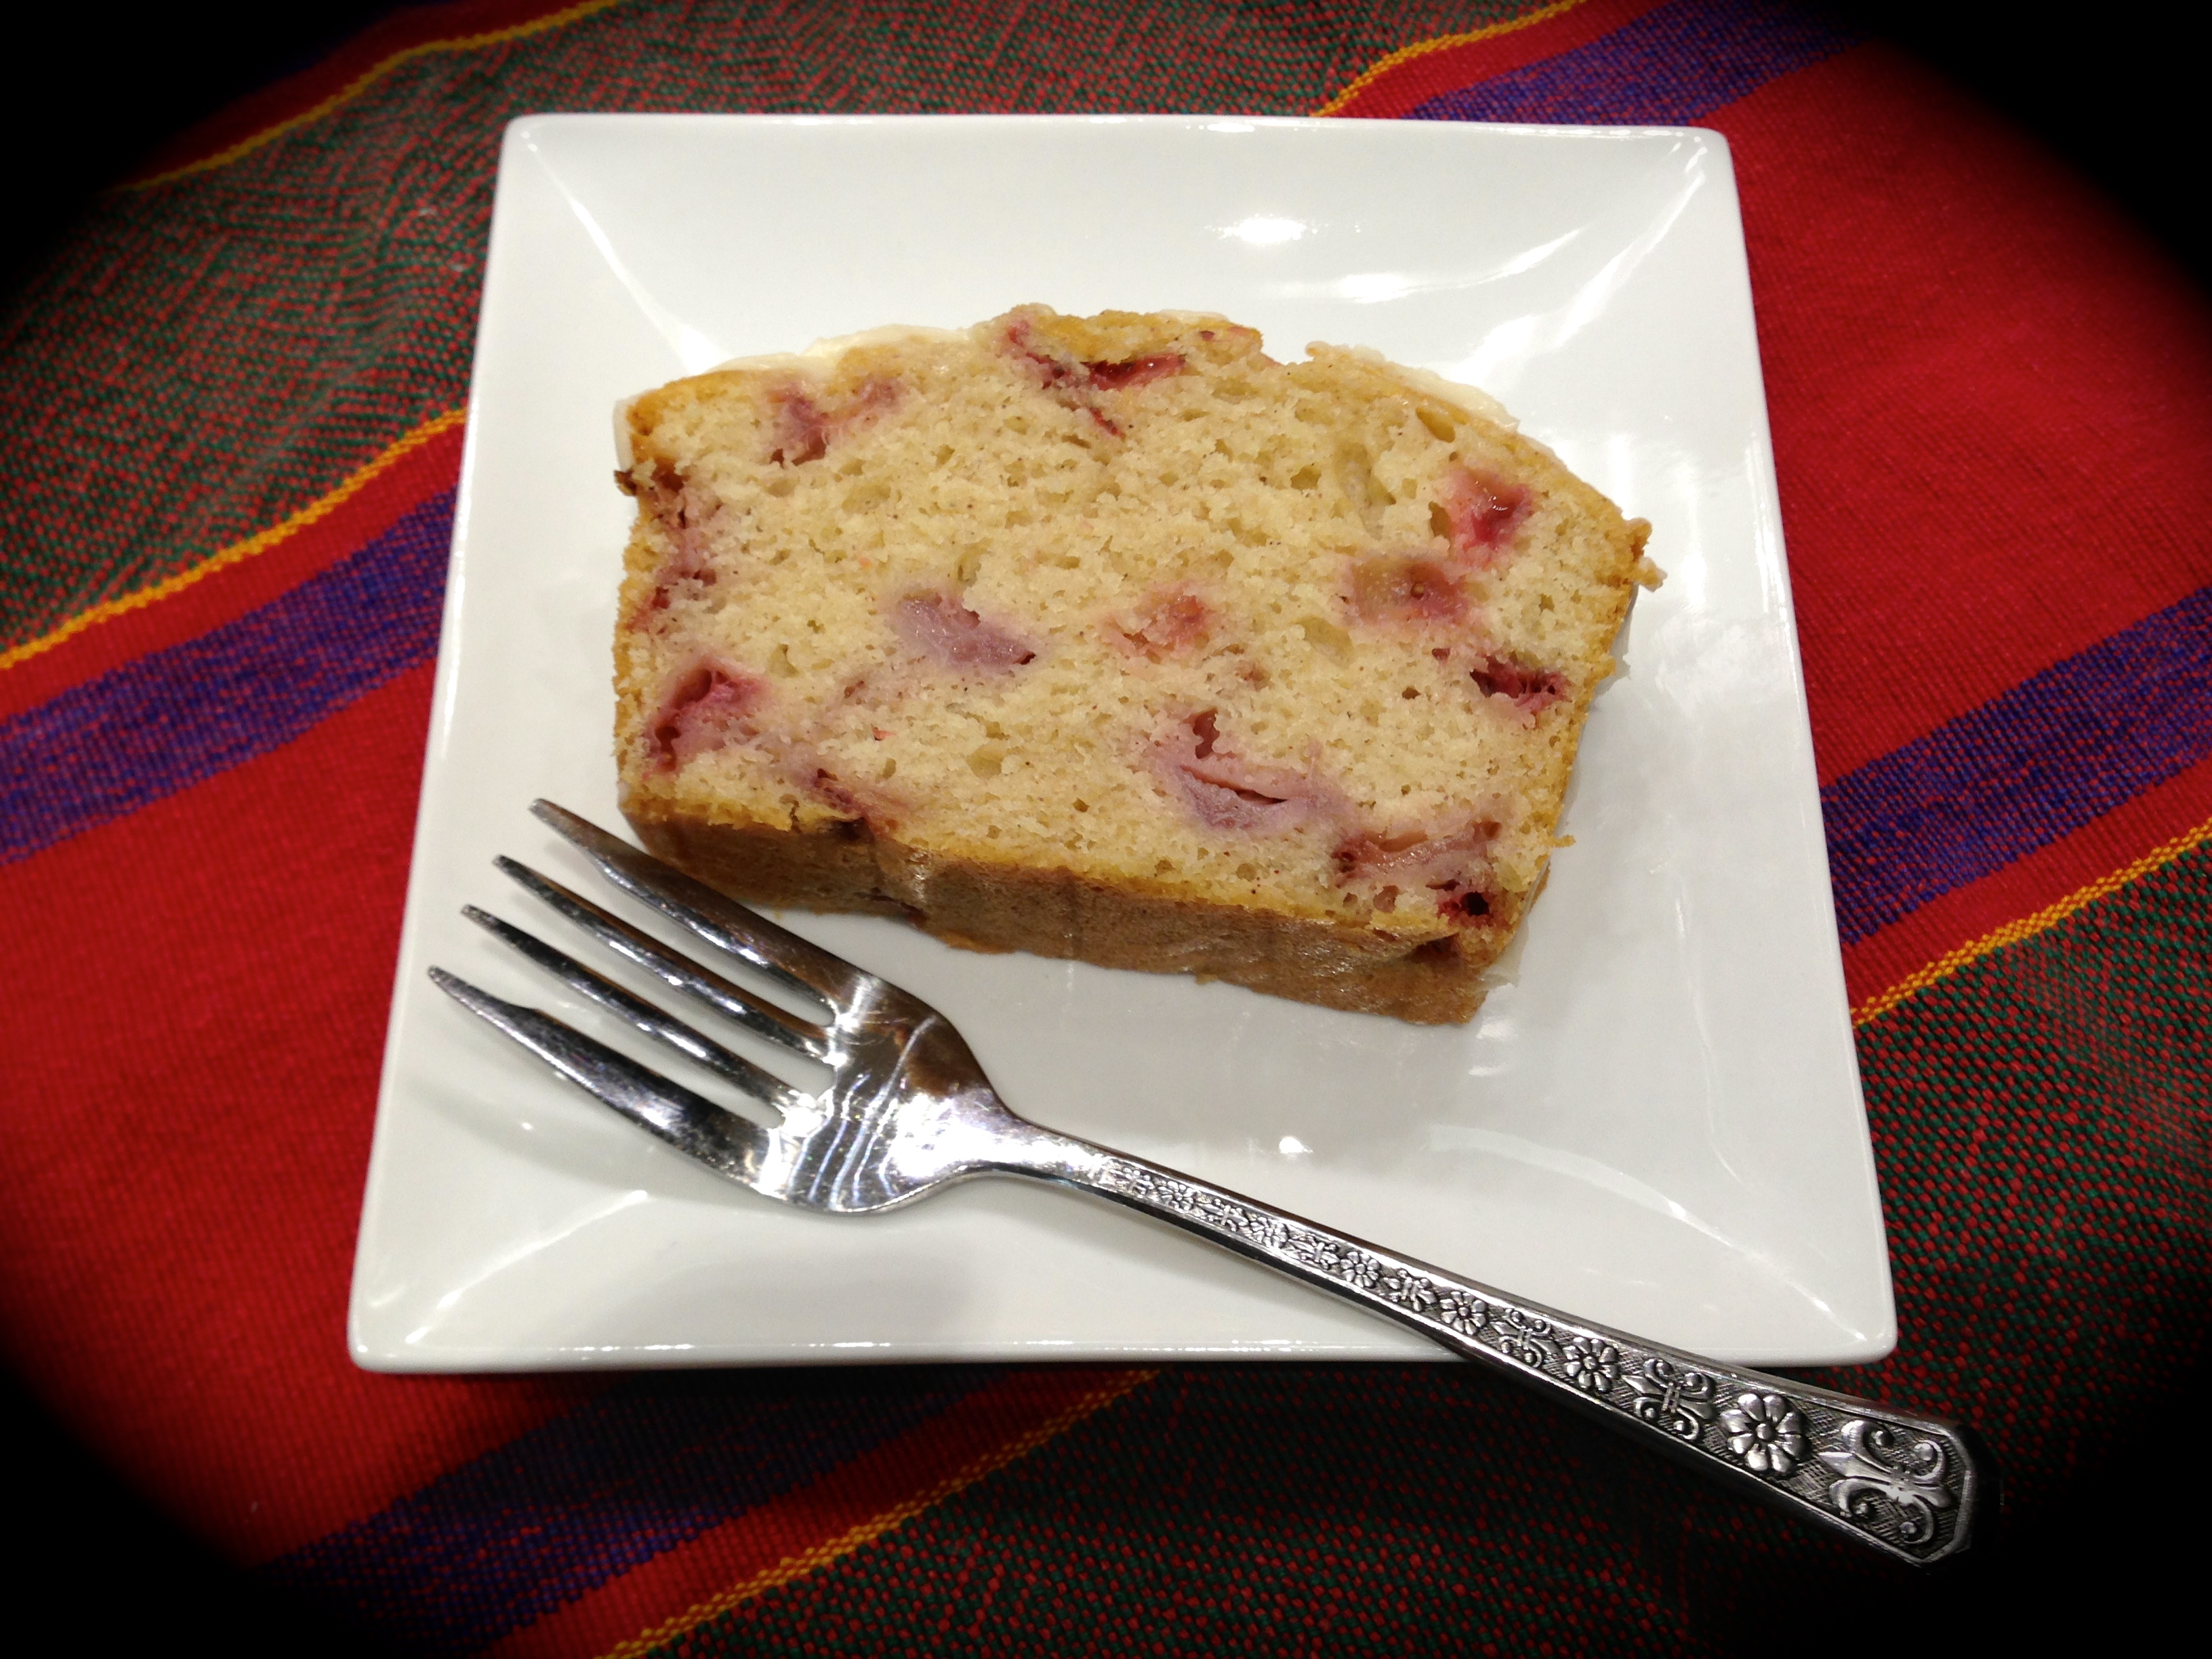
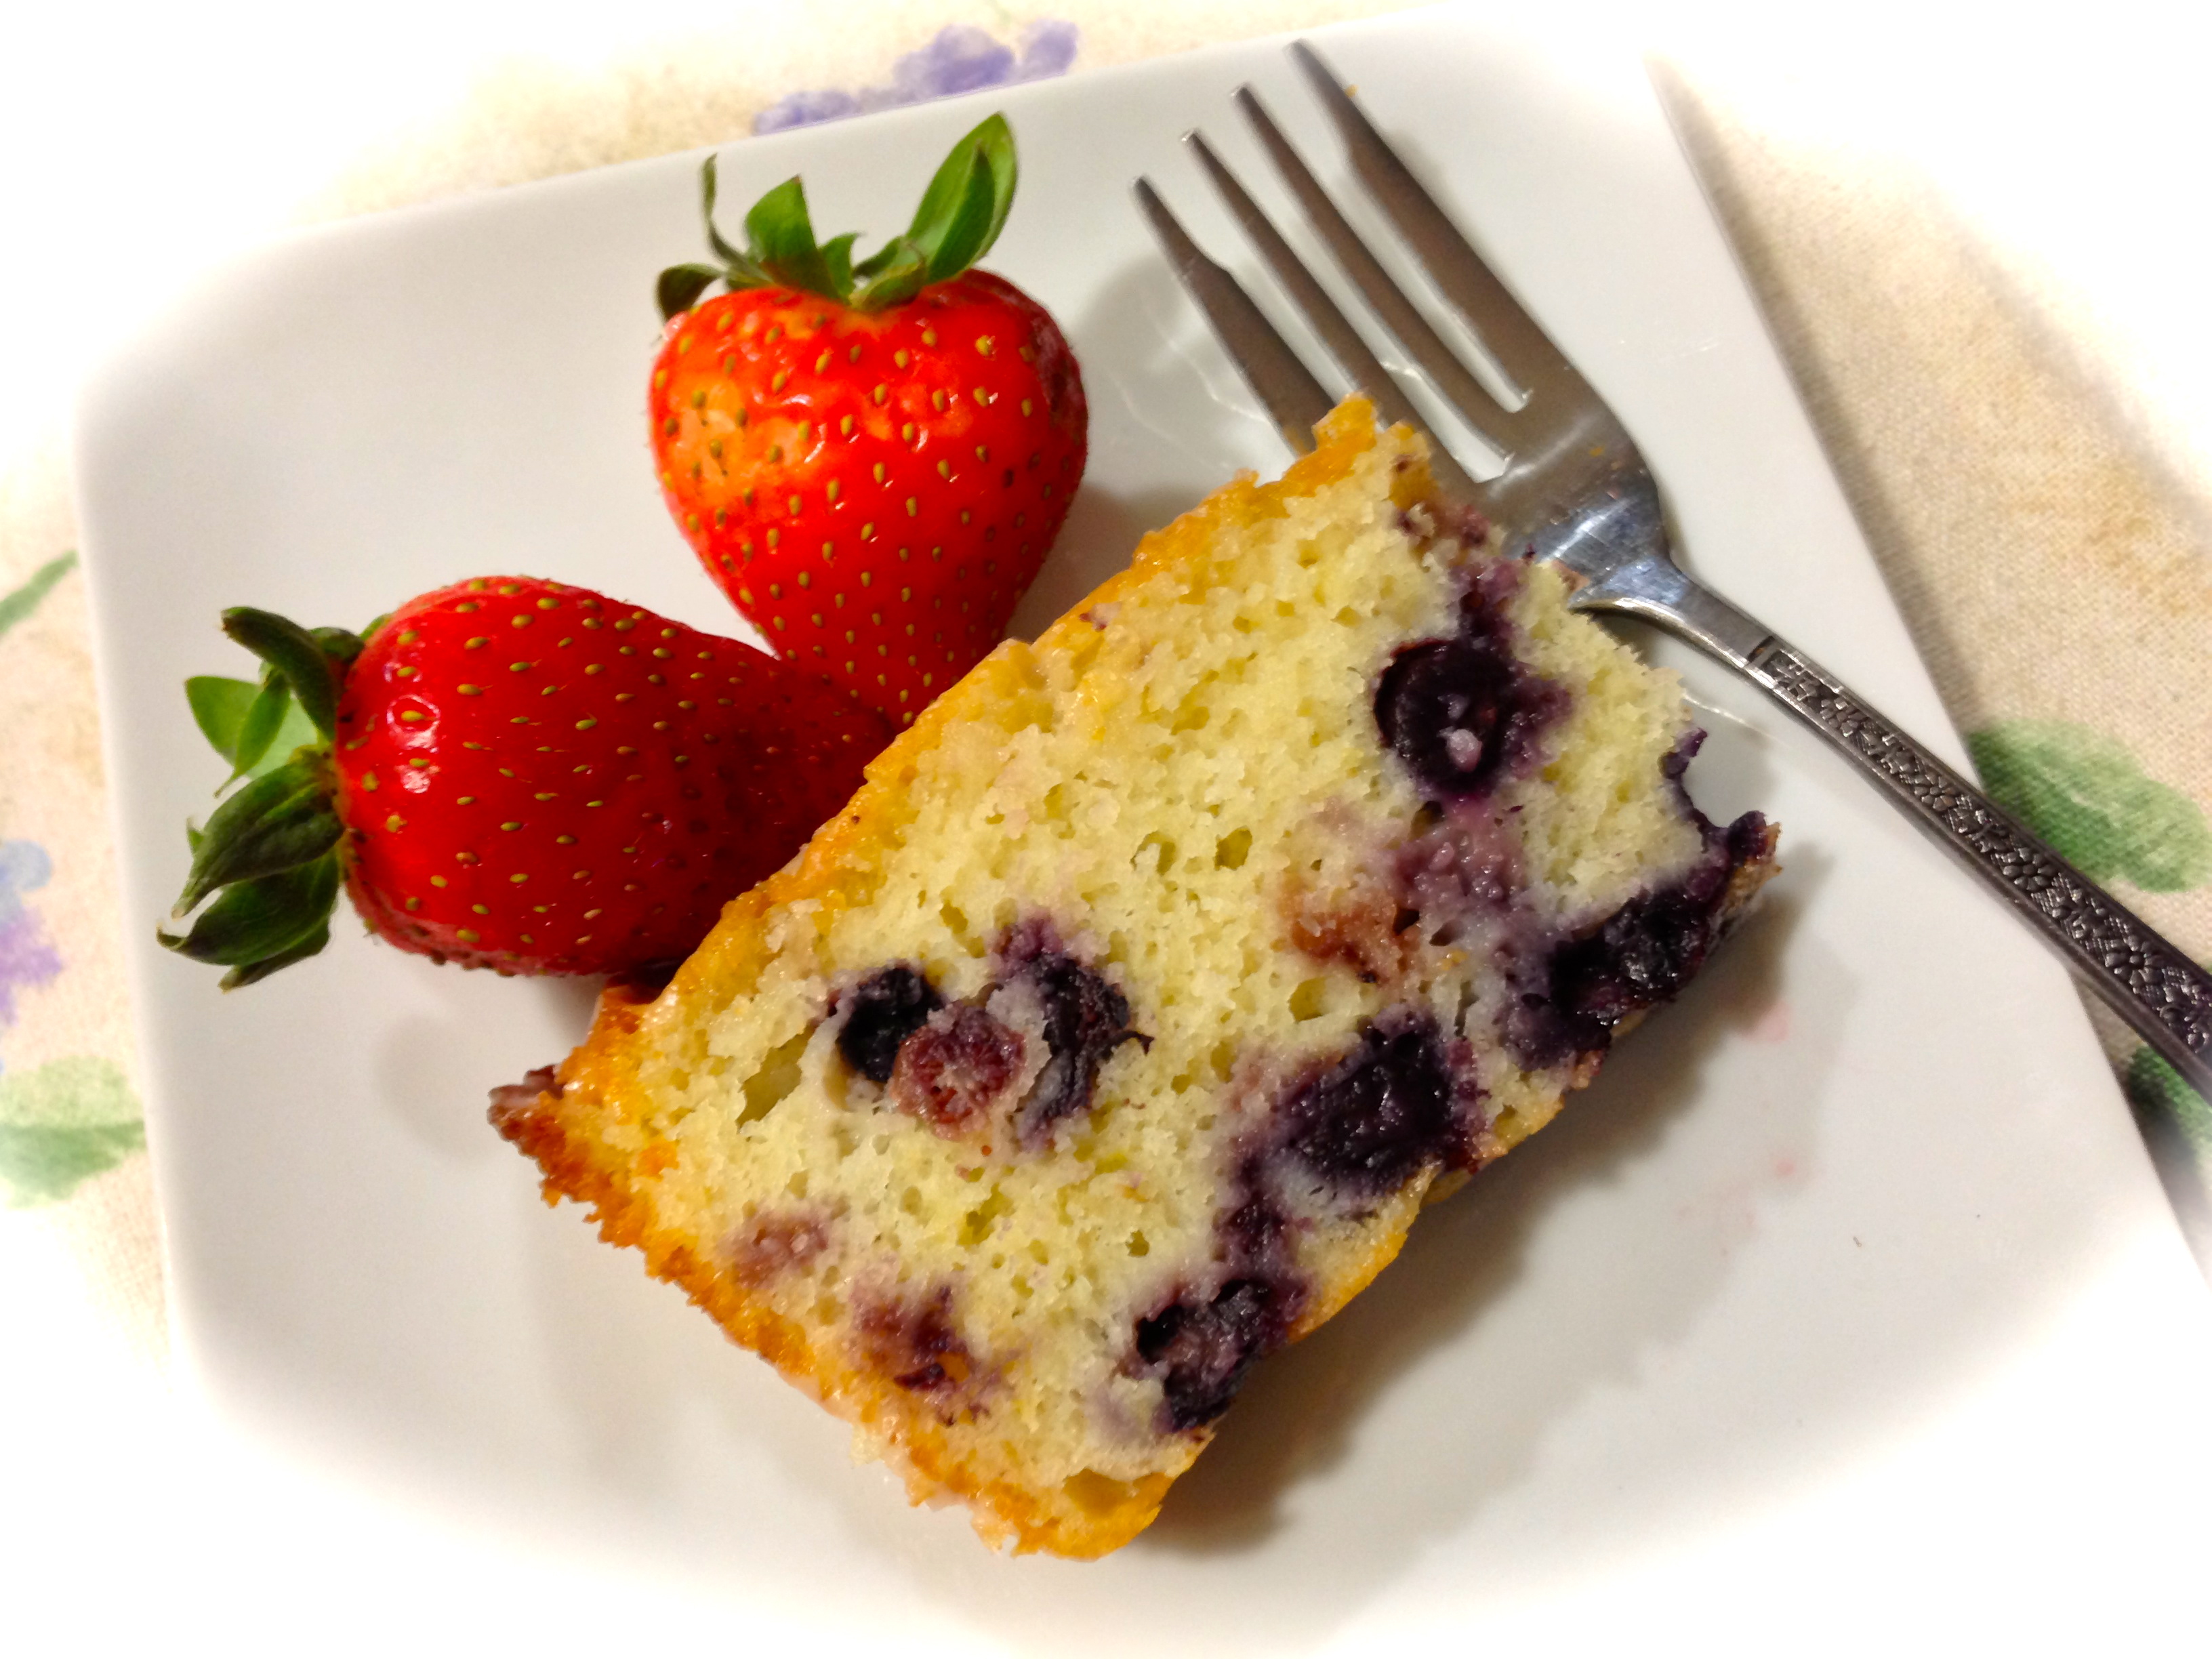
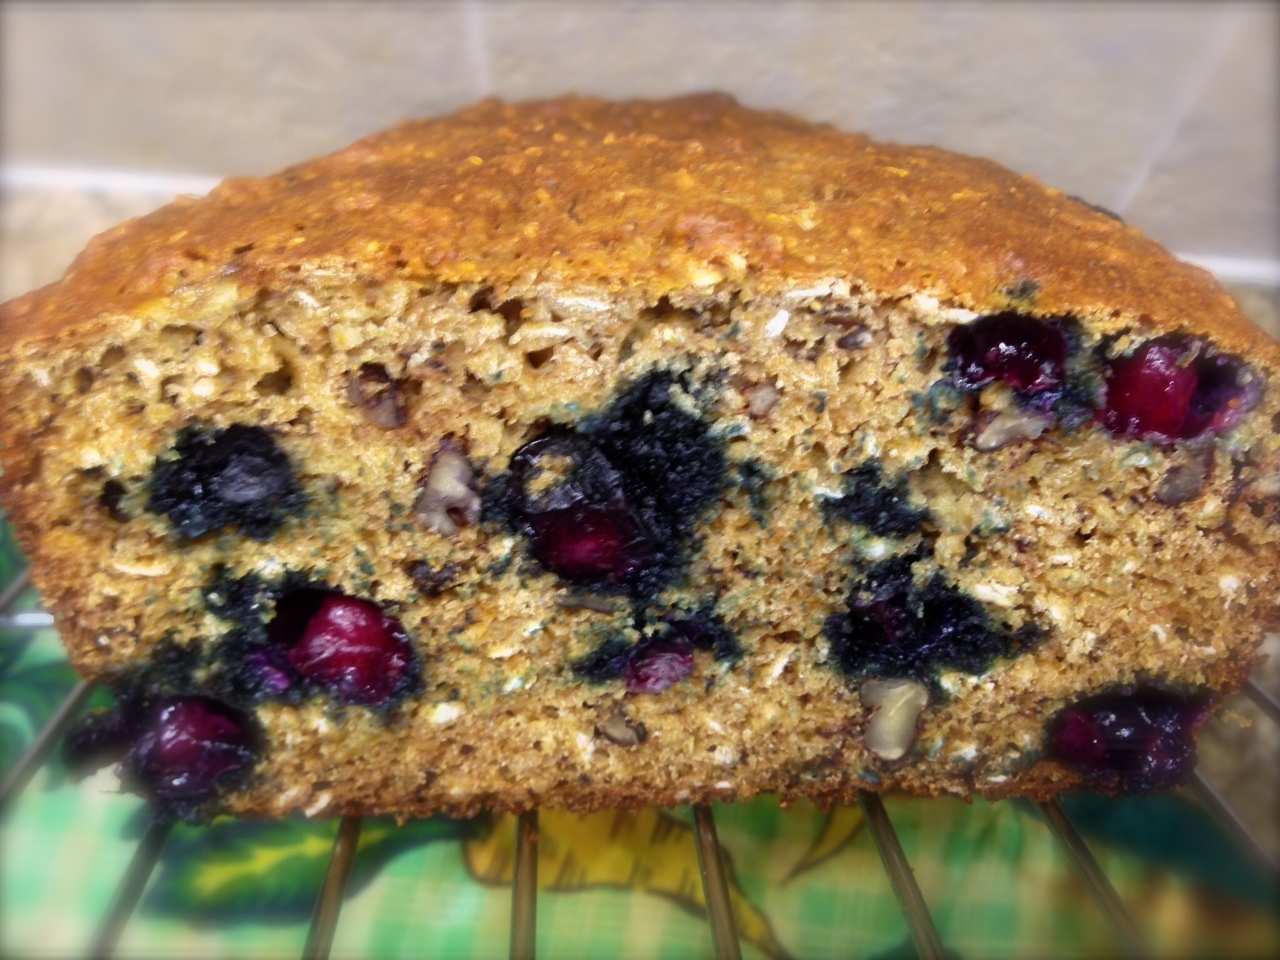
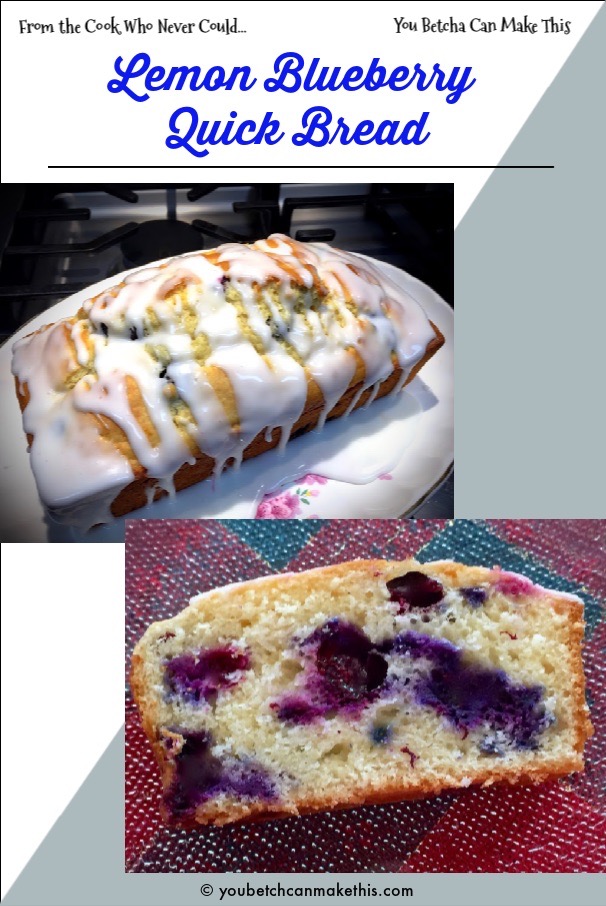
I love baking with blueberries. When they get hot enough they burst and release sweet juices into whatever it is you’re making. This particular quick bread is loaded with them and when you add the lemon zest to the batter and frost it with lemon glaze, the combination of flavors are to die for.

So not only is this a great tasting sweet loaf, it’s quick and utterly delicious. So let’s talk lemon blueberry quick bread…

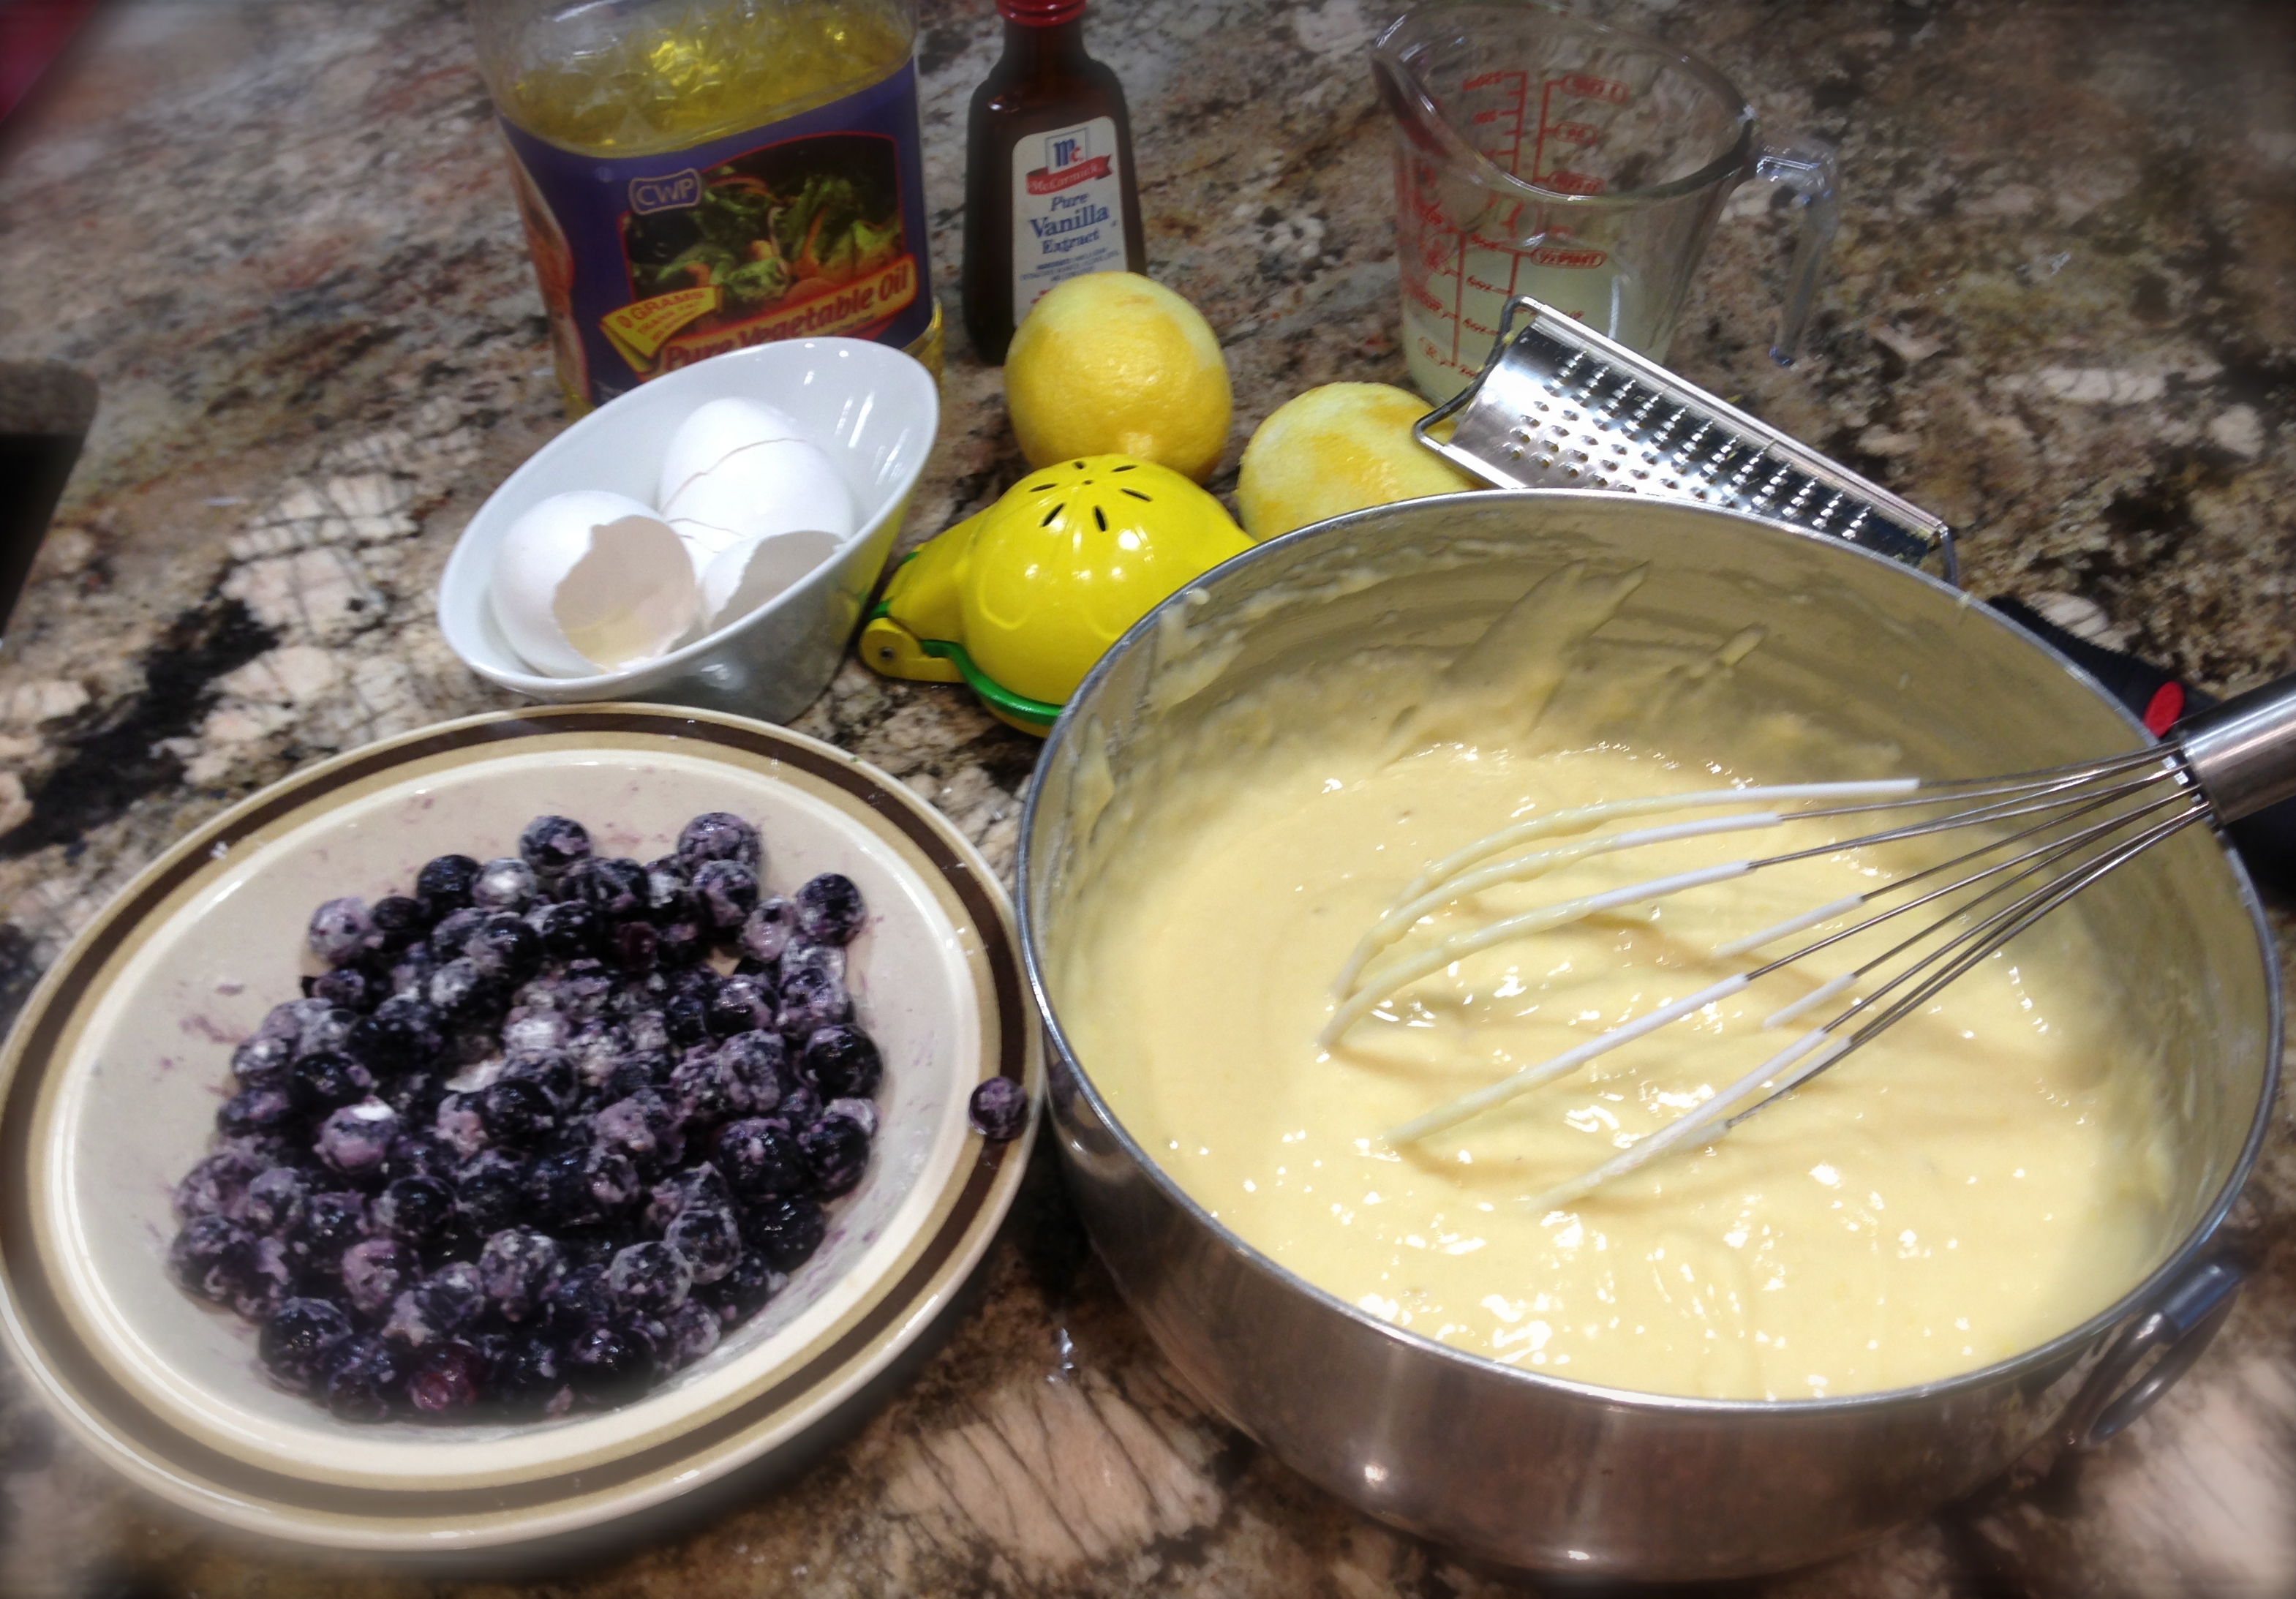
Lesson Learned 1 – Be careful when baking with blueberries: Blueberries can be tricky and believe me I’ve had my failures where blueberries are concerned. You have to coat them with a small amount of flour before you put them in the batter. If you don’t they’ll all sink to the bottom of your bread and you’ll have a blueberry mess on your hands.

It’s very important that you coat with blueberries thoroughly with the amount indicated in the recipe. I’ve also made the mistake of thinking they were fully coated and pouring them into the batter only to find that there was still a bunch of flour on the bottom of the bowl. I recommend that you place your blueberries in a small cereal bowl and stir them from the bottom of the bowl up. That way you’ll know that you’re using all the flour. Check the bottom of the bowl for any residual flour. If there is some, scoop it on top of the blueberries and continue to stir until there’s no flour on the bottom of the bowl when you pour the blueberries into the batter.

This quick bread was so good I made it twice within the span of a week. The second time I tried a few tweaks and I liked the way the bread turned out even better. One of the tweaks I did was change the amount of blueberries. Originally I used 1 cup of blueberries in the recipe and the bread was loaded with blueberries. Don’t get me wrong, that was fine, but I felt the blueberries were a tad overpowering. The second time I only used 3/4 cup of blueberries and I liked that ratio of blueberries to batter much better. So I recommend using only 3/4 cup of blueberries.

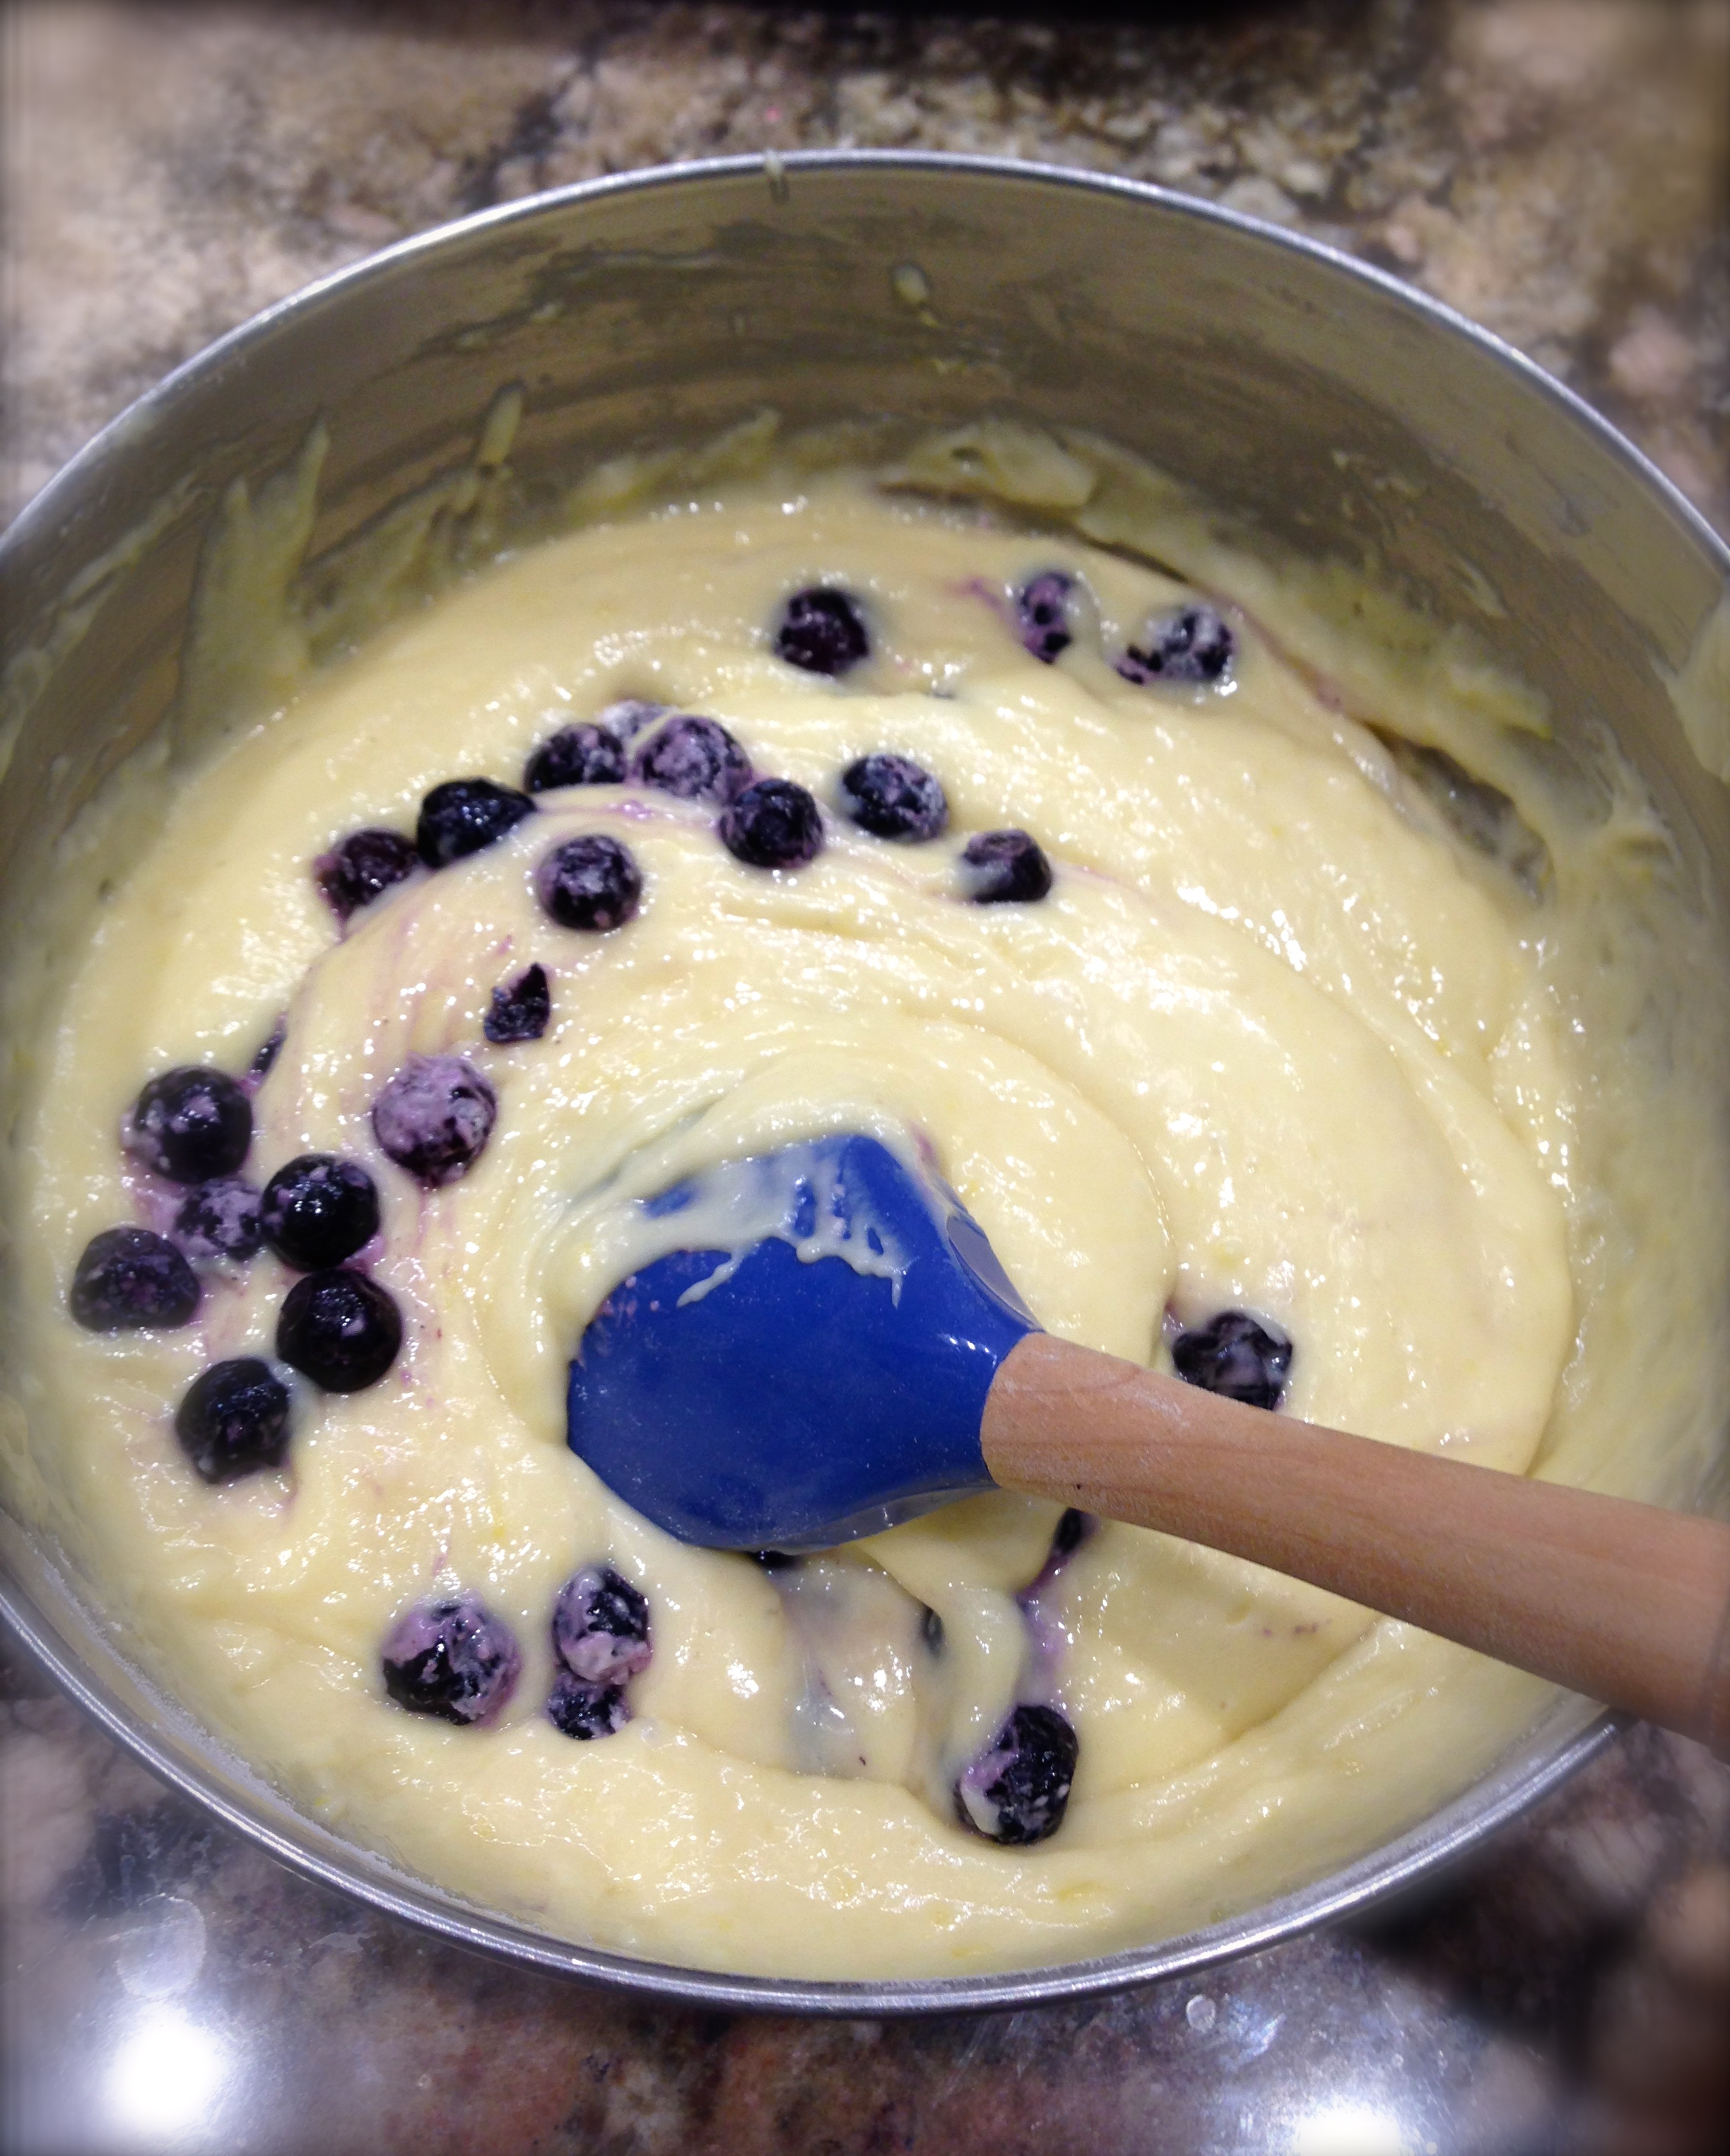
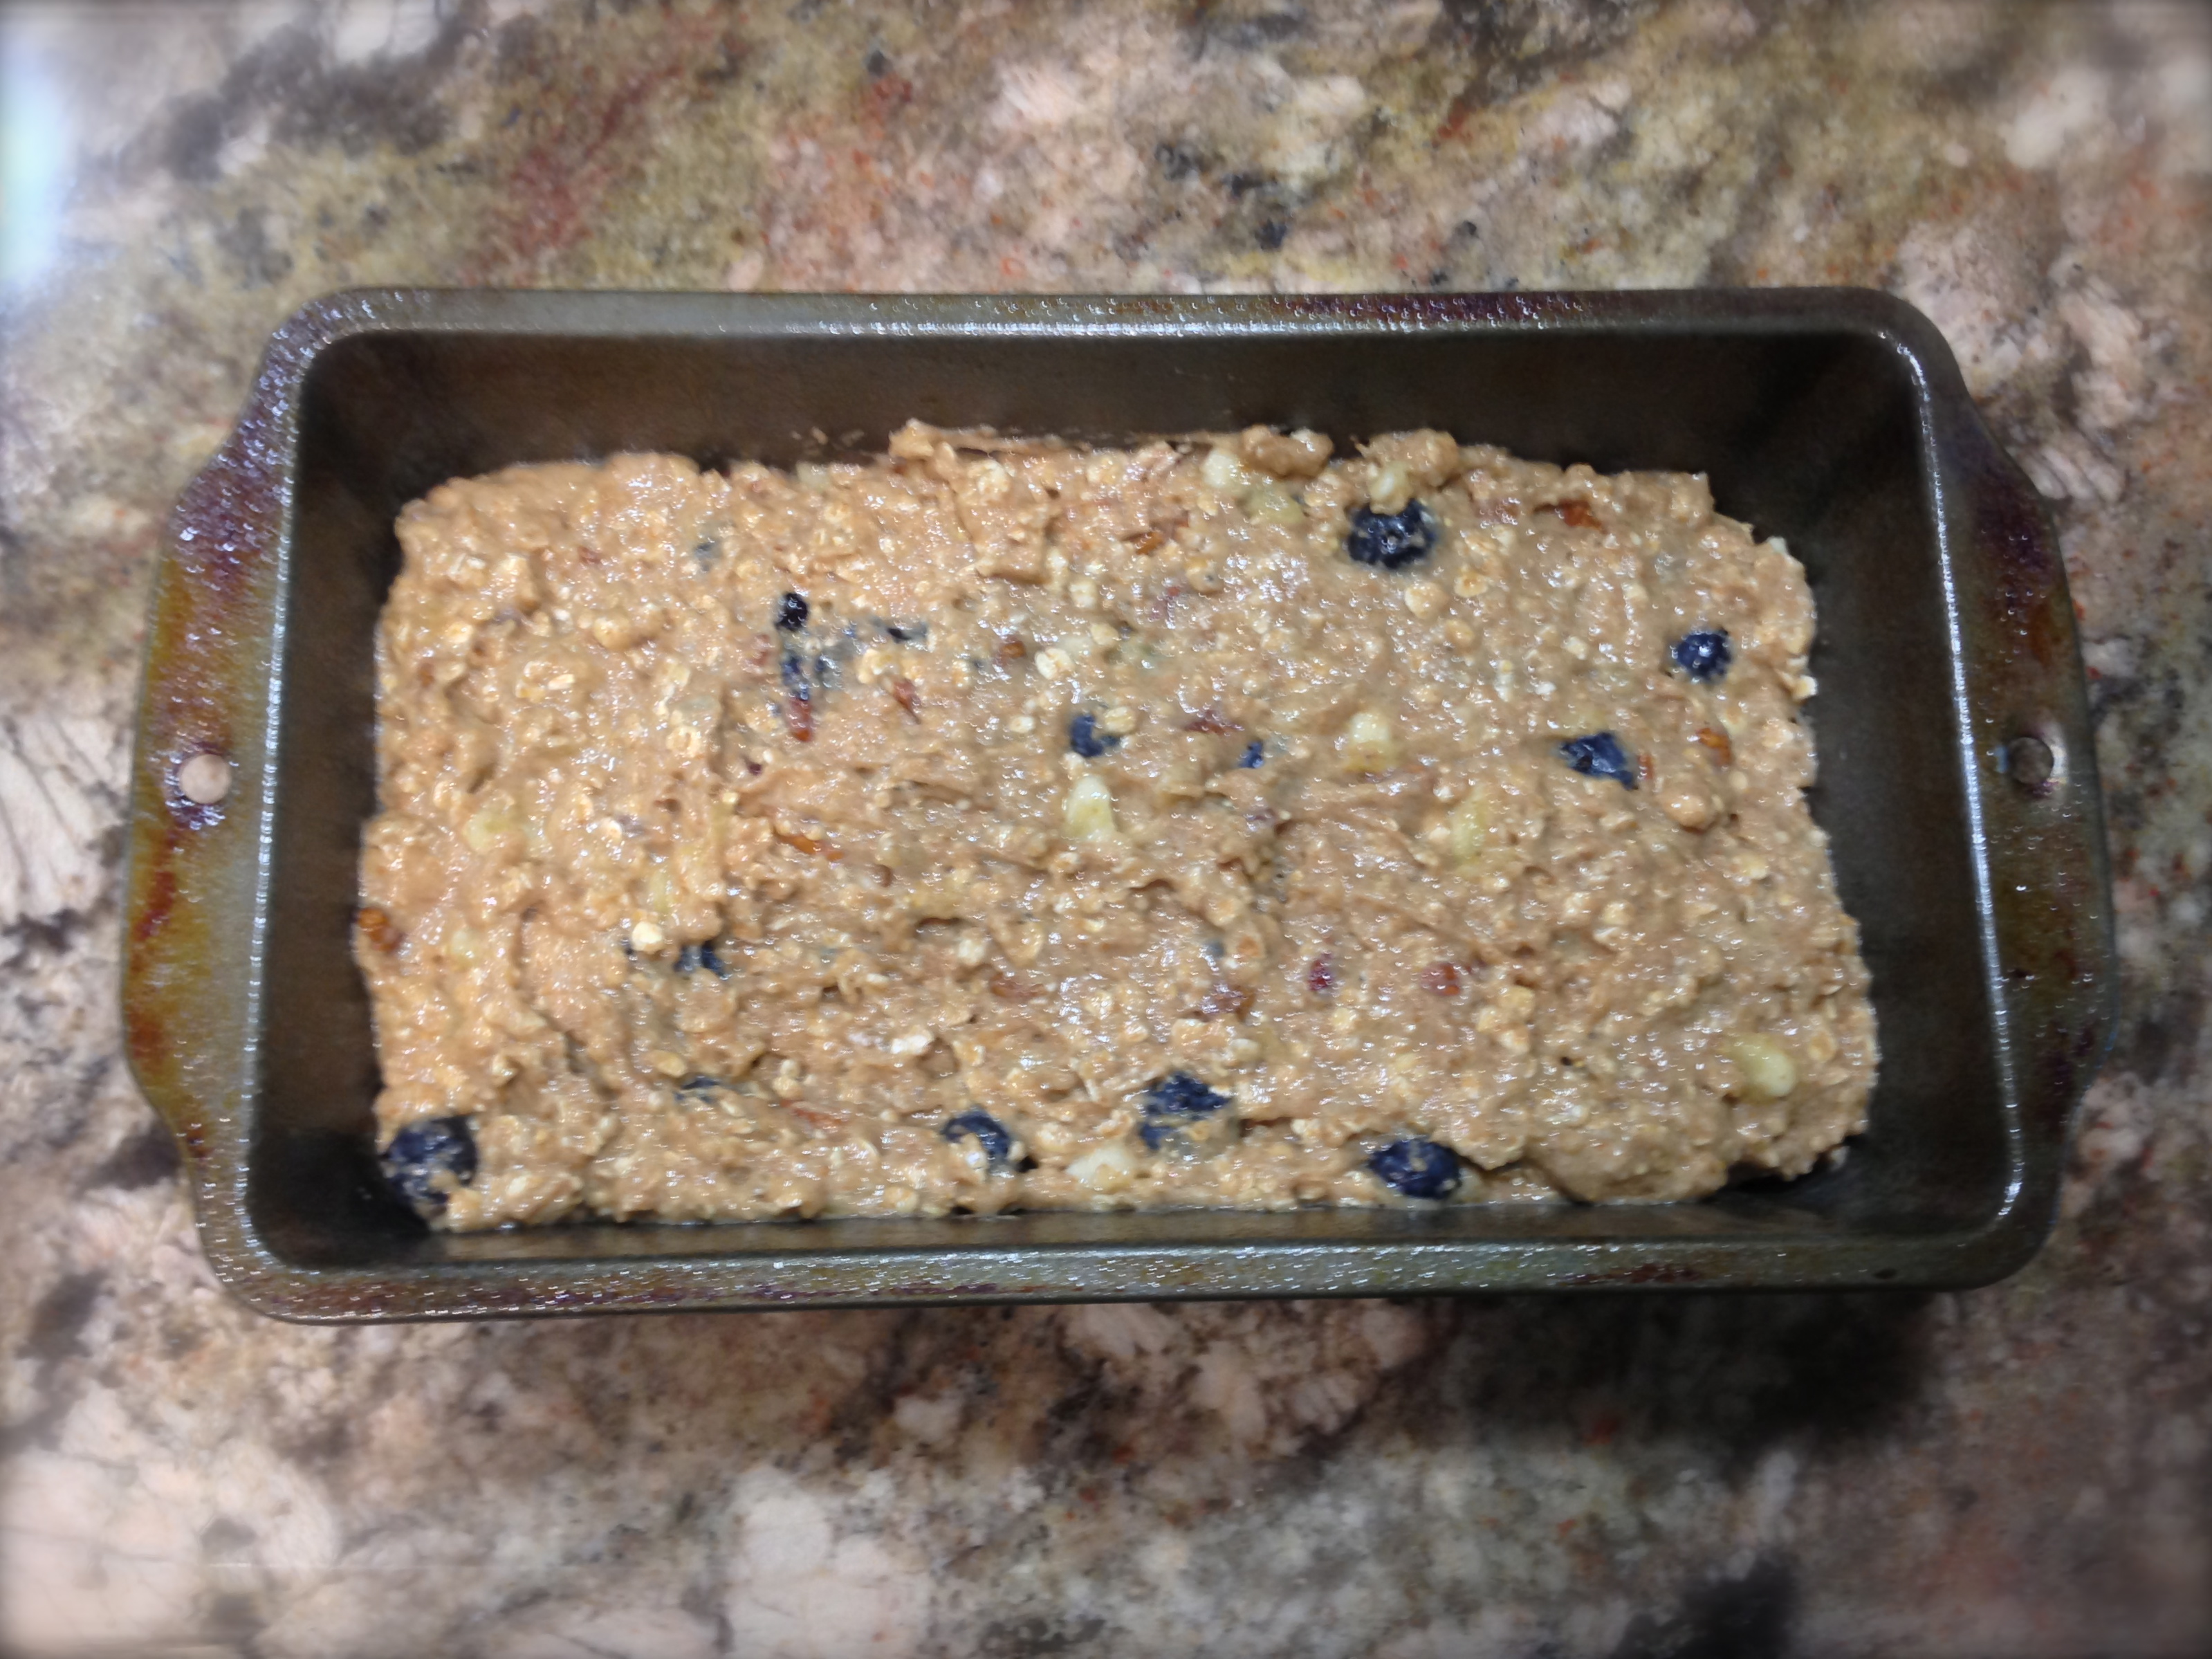
Another trick I used to avoid having the blueberries sink to the bottom of the cake – once the batter was in the baking pan I used a small spoon, dipped it into the batter and scooped some of the blueberries up to the top. I went about half way down in the batter and did a few scoops to make sure all the blueberries didn’t settle in one place. Doing a few scoops with the spoon and making sure the blueberries were completely coated in the flour gave a good distribution of blueberries in the batter.

Lesson Learned 2 – High altitude baking: I live in the Denver area which is 5,000 feet above sea level. When you live in high altitude it affects your baking and you need to make adjustments in order to get your desired results. If you don’t make adjustments your cakes and sweet breads will wind up sinking in the middle with the edges being more than done. It’s frustrating. And it takes some time to get used to high altitude baking.

The main difference between high altitude and sea level baking is air pressure. The higher the altitude the lower the air pressure, and lower air pressure plays havoc with baking. The King Arthur Flour’s website has an excellent article explaining why adjustments need to be made with high altitude baking and recommended adjustments for cakes, cookies and the like. If you’re in high altitude I highly recommend you check it out. I will write out the recipe with sea level ingredients and put in parenthesis the high altitude adjustments. Keep in mind my adjustments are for 5,000 feet. If you’re at 3,000 or 7,000 the adjustments change. The article gives specific adjustments for those altitudes as well. And if you’re at sea level (which I was for many years) just follow the recipe as is. You’ve got nothing to worry about. The link to the article is directly below:

https://www.kingarthurflour.com/learn/high-altitude-baking.html

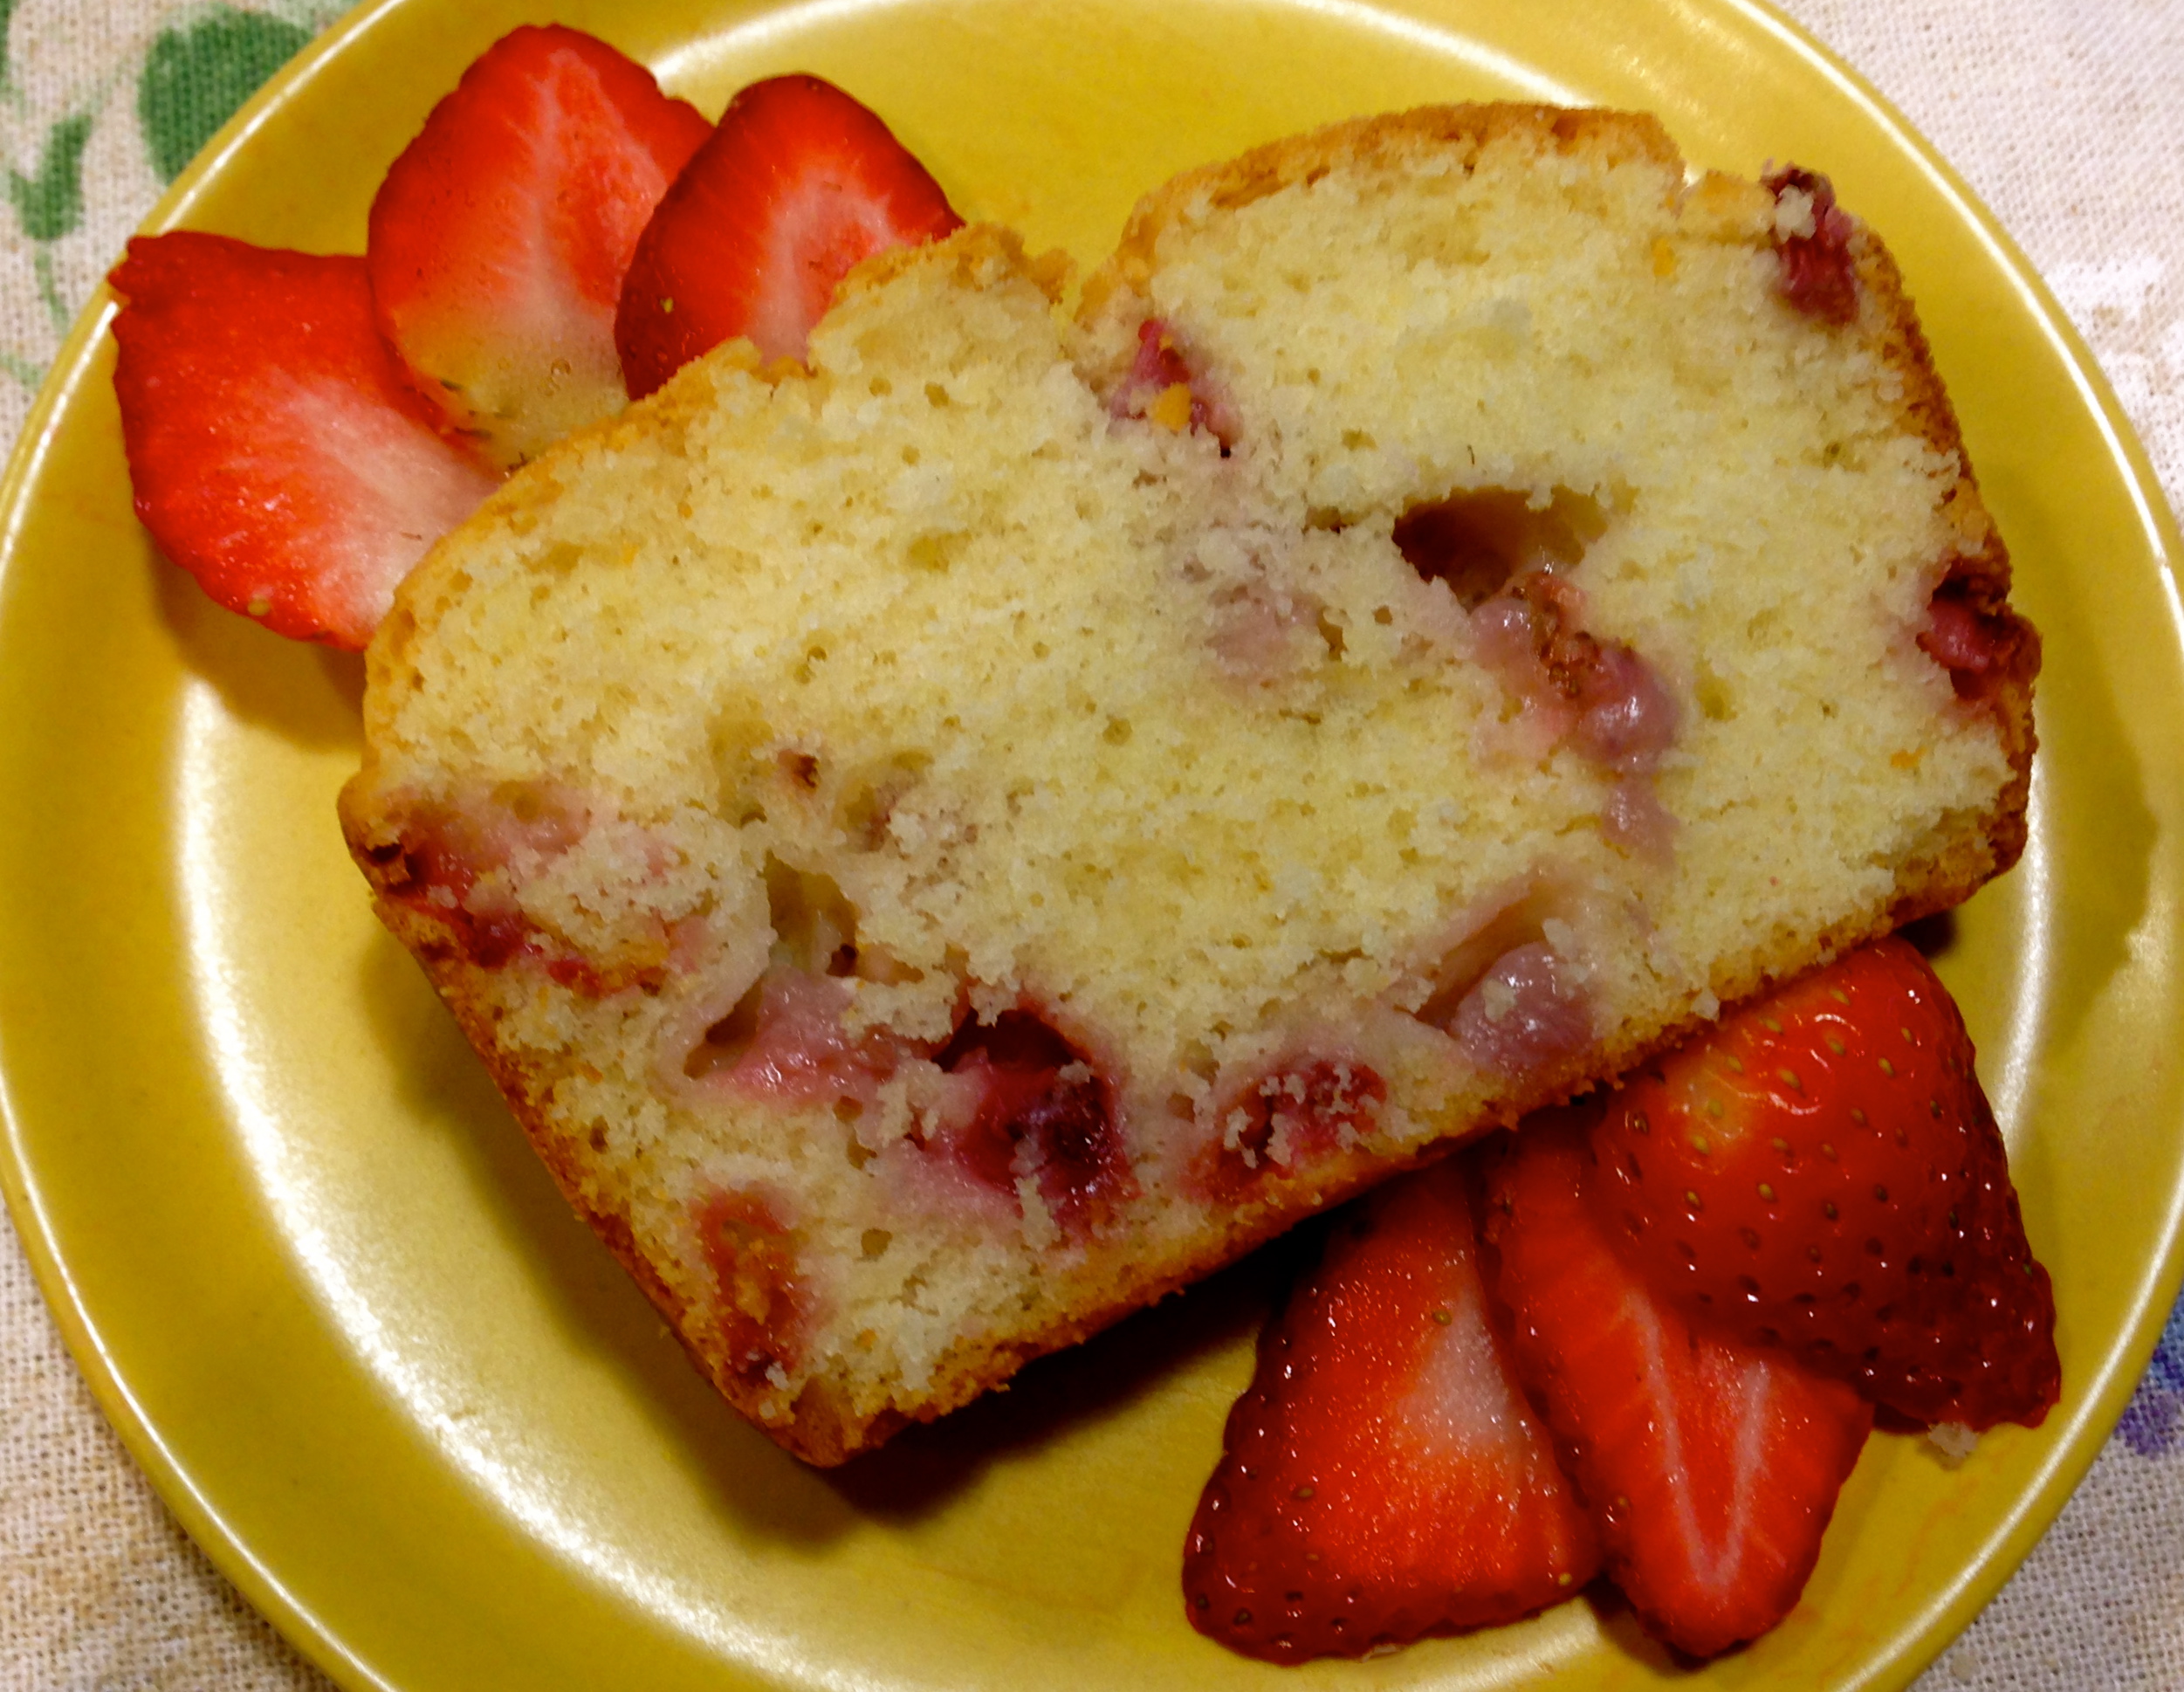
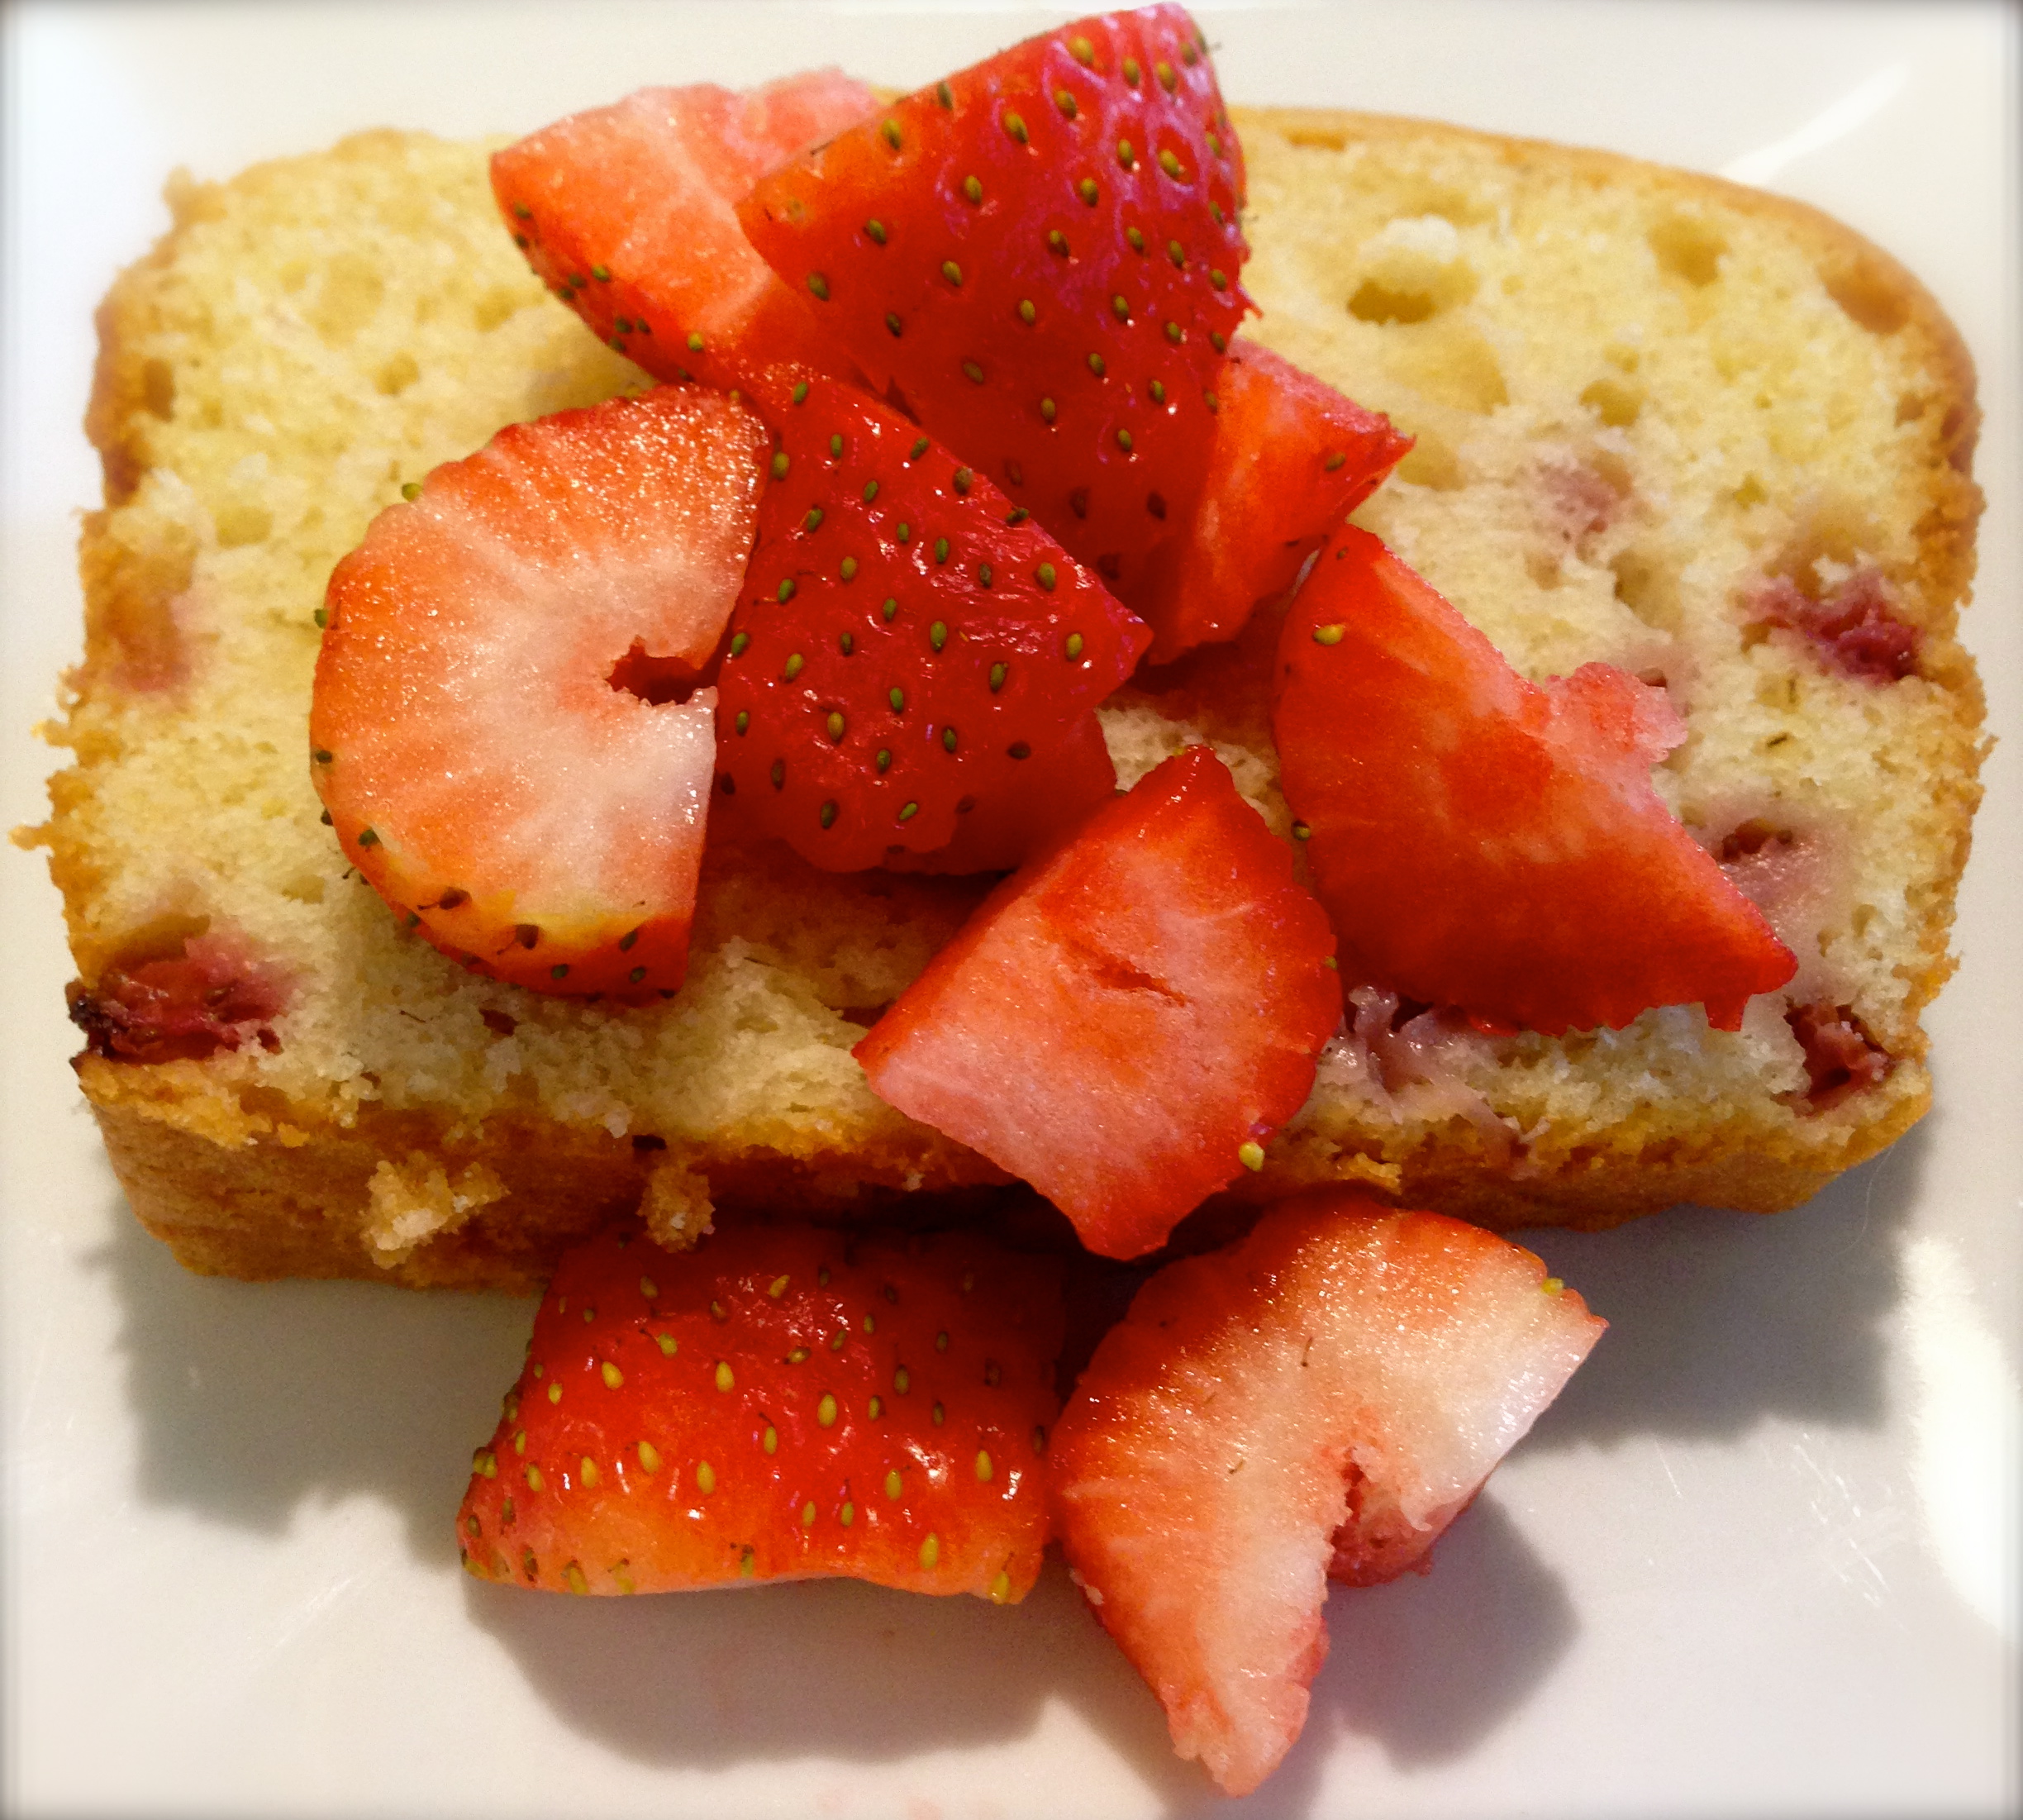
Other than how to work with blueberries and how to adjust for high altitude this quick bread is super simple to make and super delicious. Try it out and tell me what you think…

Lemon Blueberry Quick Bread...

  • Servings: 10-12
  • Difficulty: Easy
  • Print

INGREDIENTS:

Quick Bread

1 1/2 cups flour + 1 tsp., divided

2 tsp. baking powder (1 1/2 tsp. for high altitude)

1/4 tsp. salt

1/3 cup sugar

Zest of one medium size lemon, plus the juice for the glaze (see below)

3/4 cup whole milk (+ 1 Tbs. for high altitude)

1 egg, beaten

2 Tbsp. canola oil

3/4 cup fresh blueberries

Baking spray

Glaze

1 cup confectioners sugar

1-2 Tbs. fresh squeezed lemon juice

DIRECTIONS:

Preheat oven to 350 (365 for high altitude).

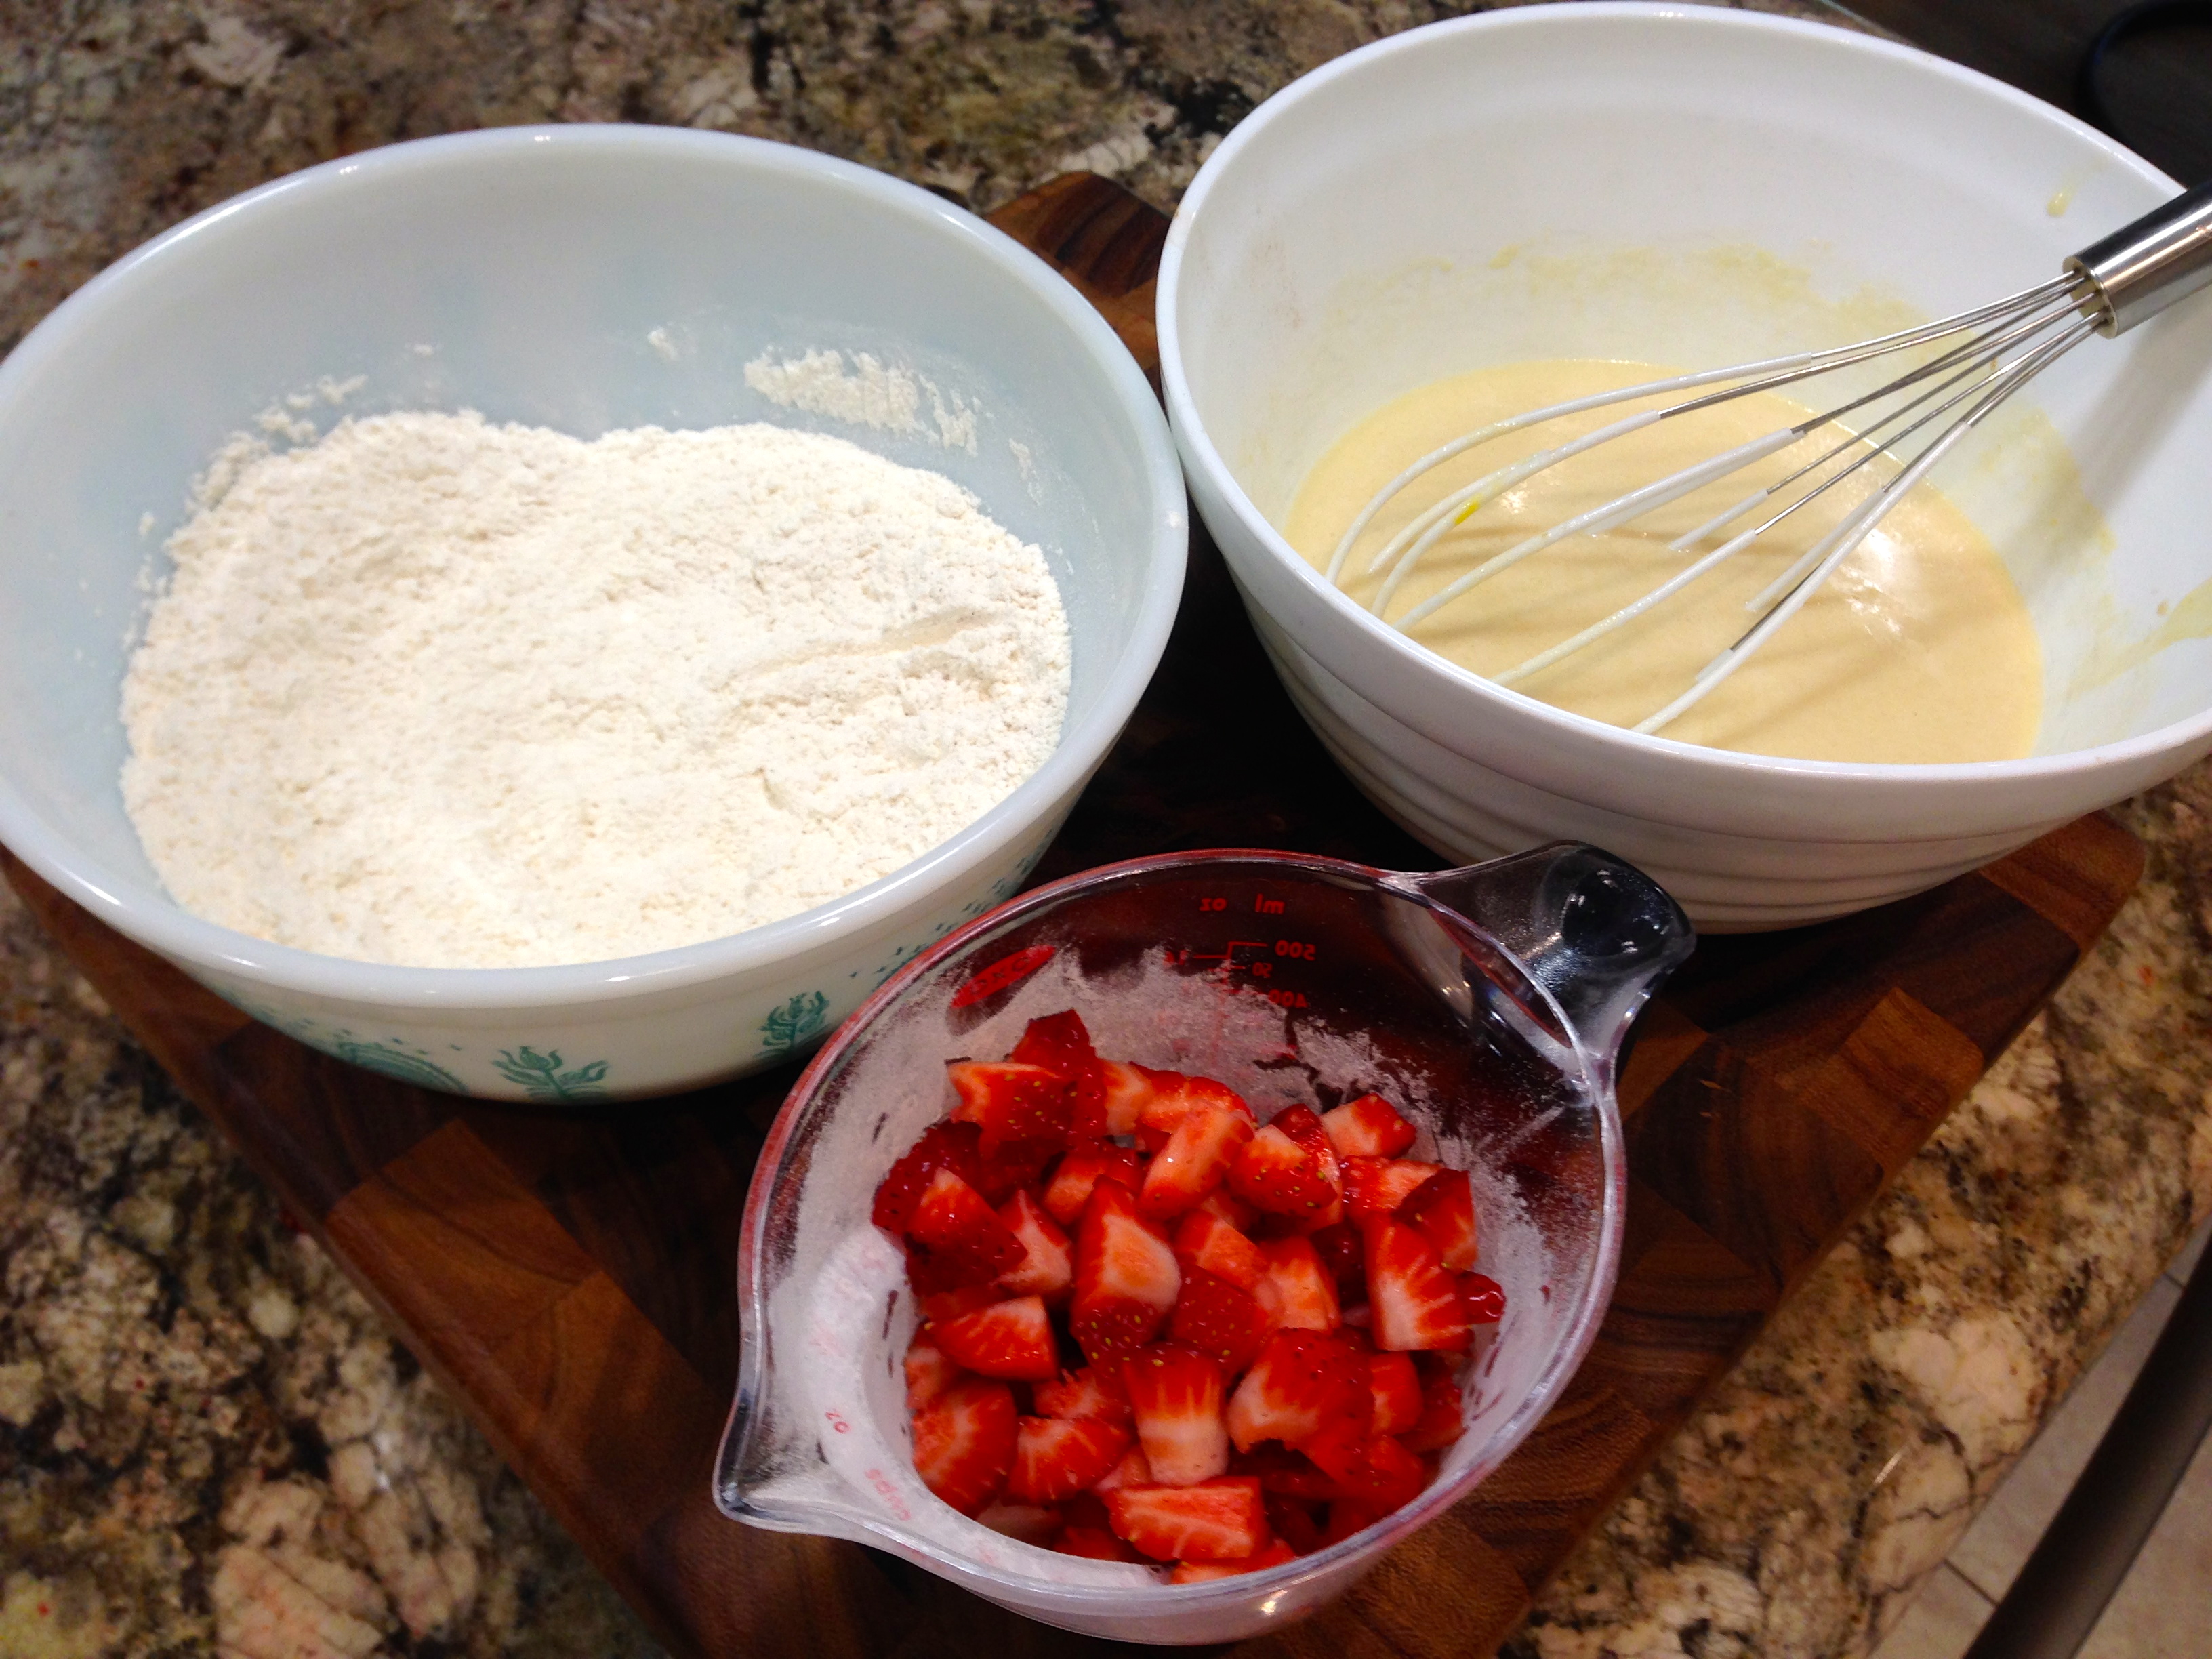
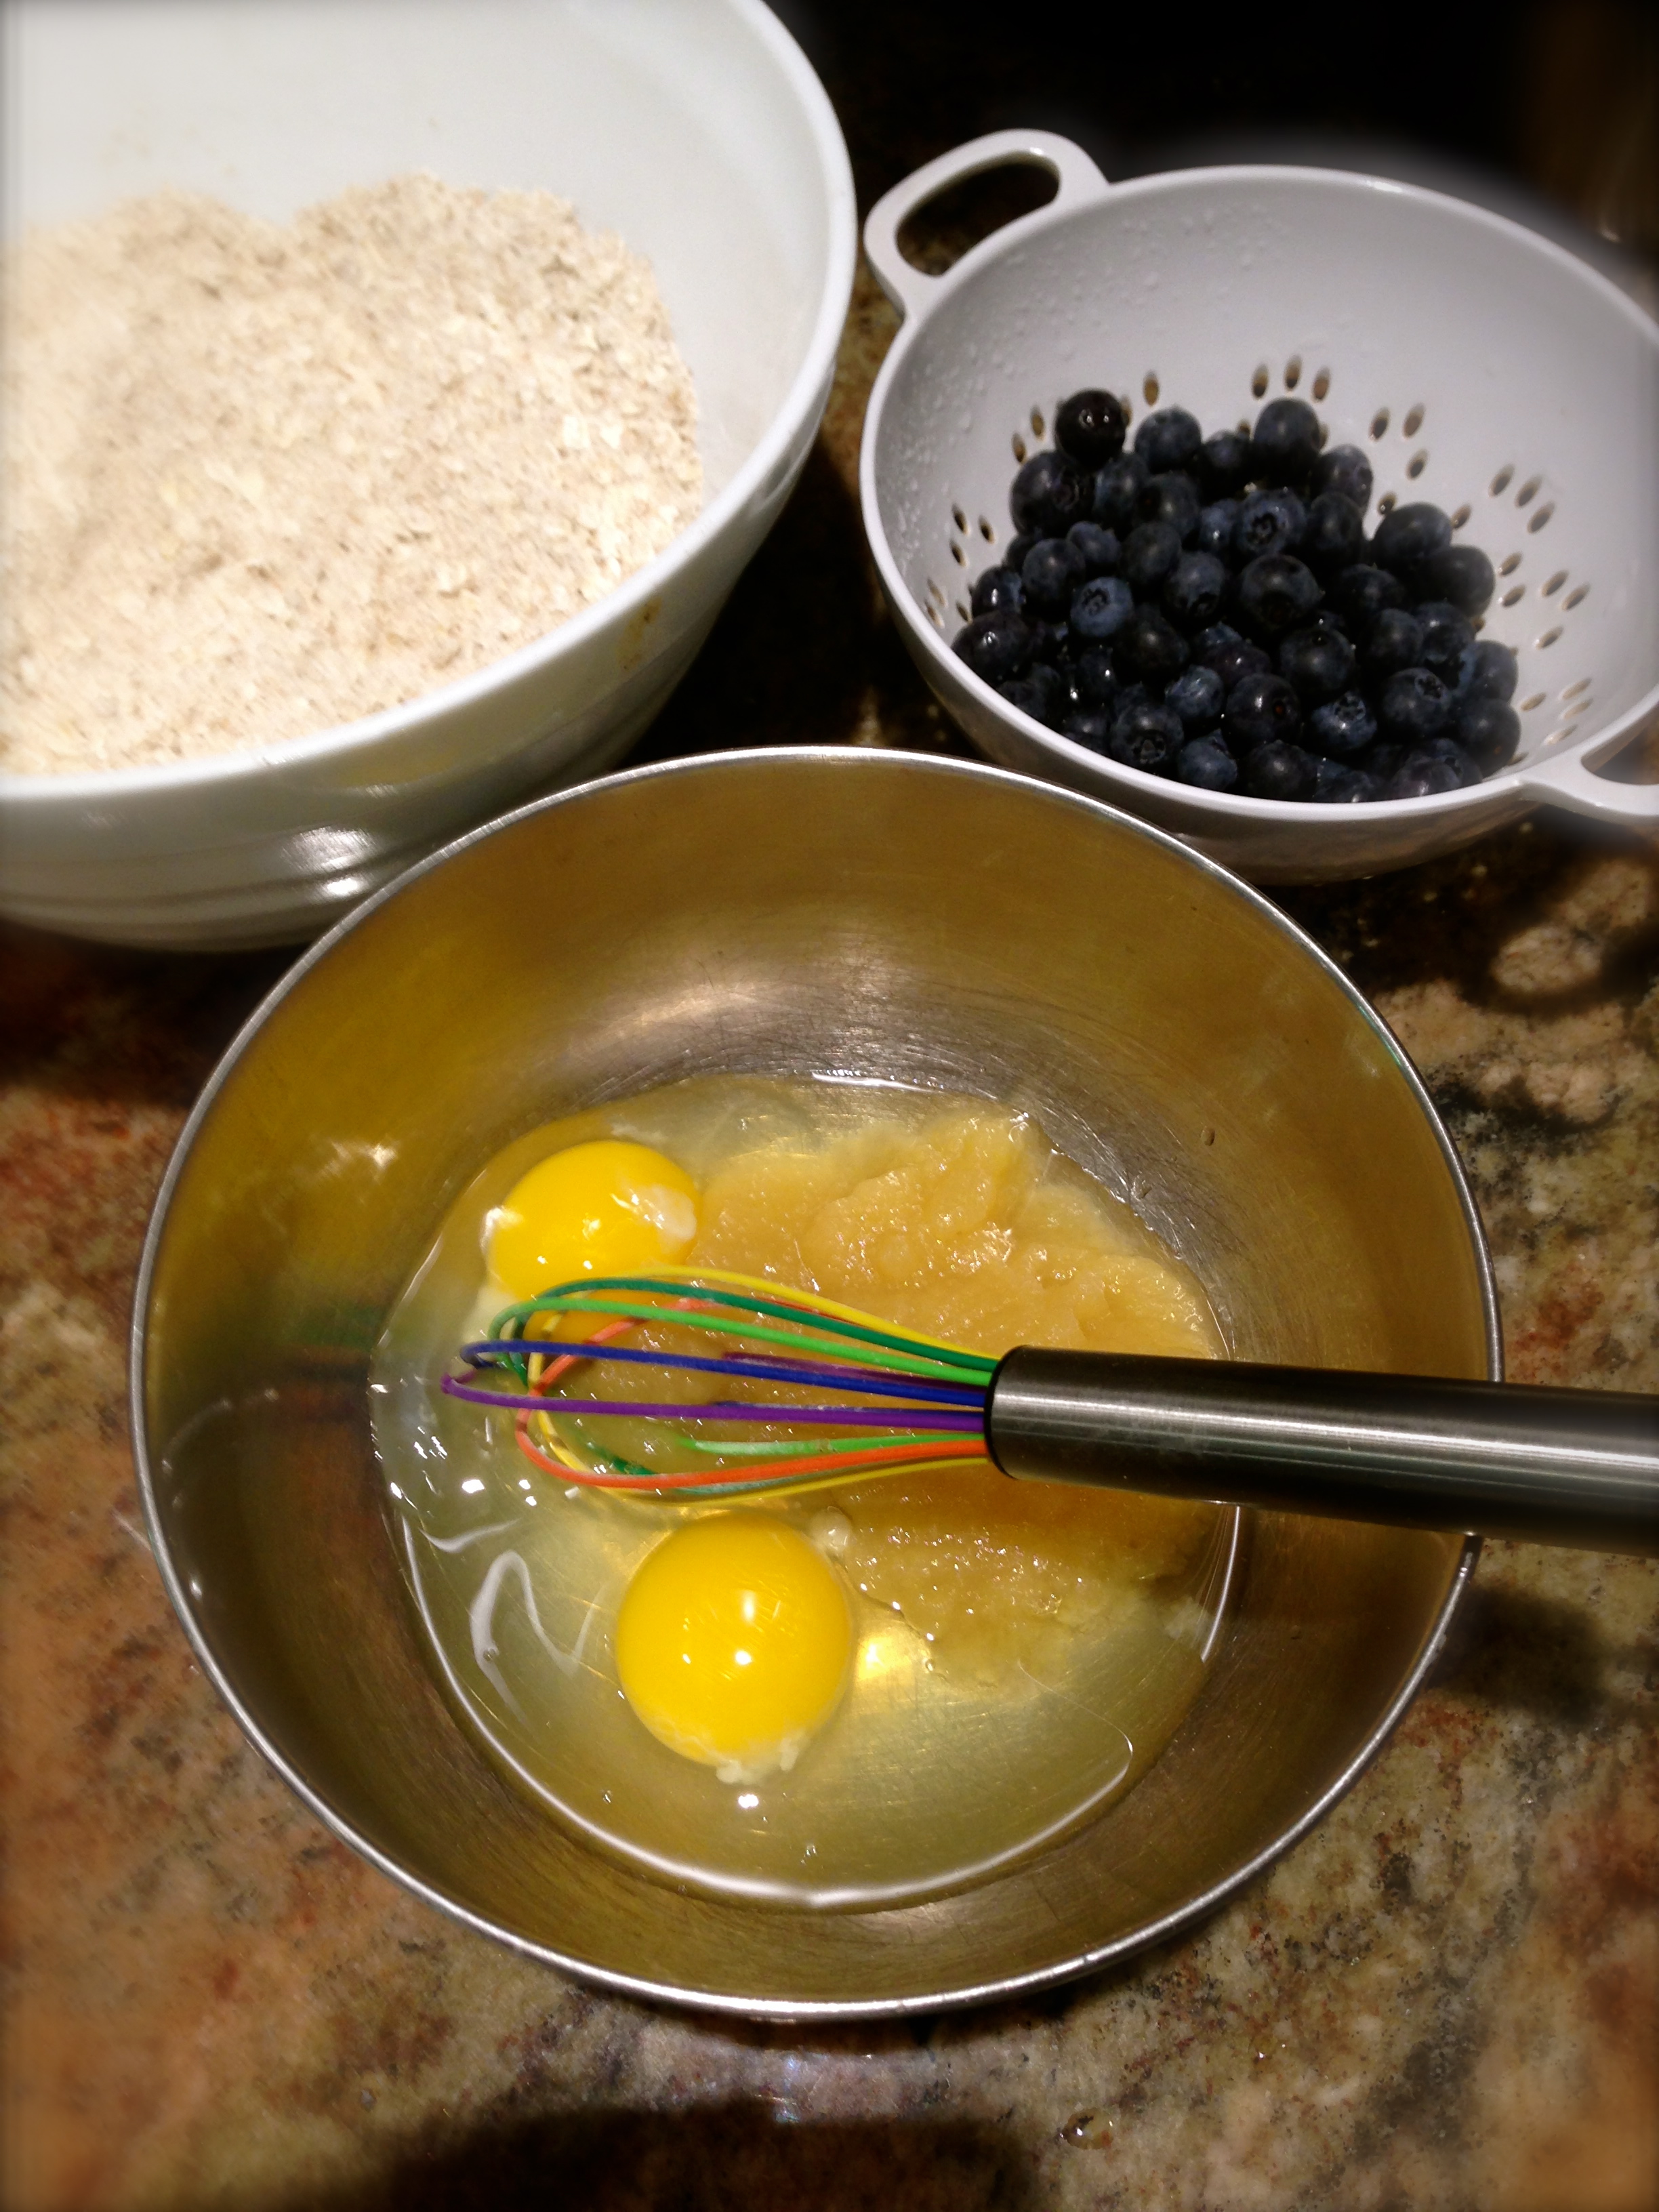
In a large bowl combine the flour, baking soda and salt. Whisk until thoroughly combined. Stir in the sugar and lemon zest. Set aside.

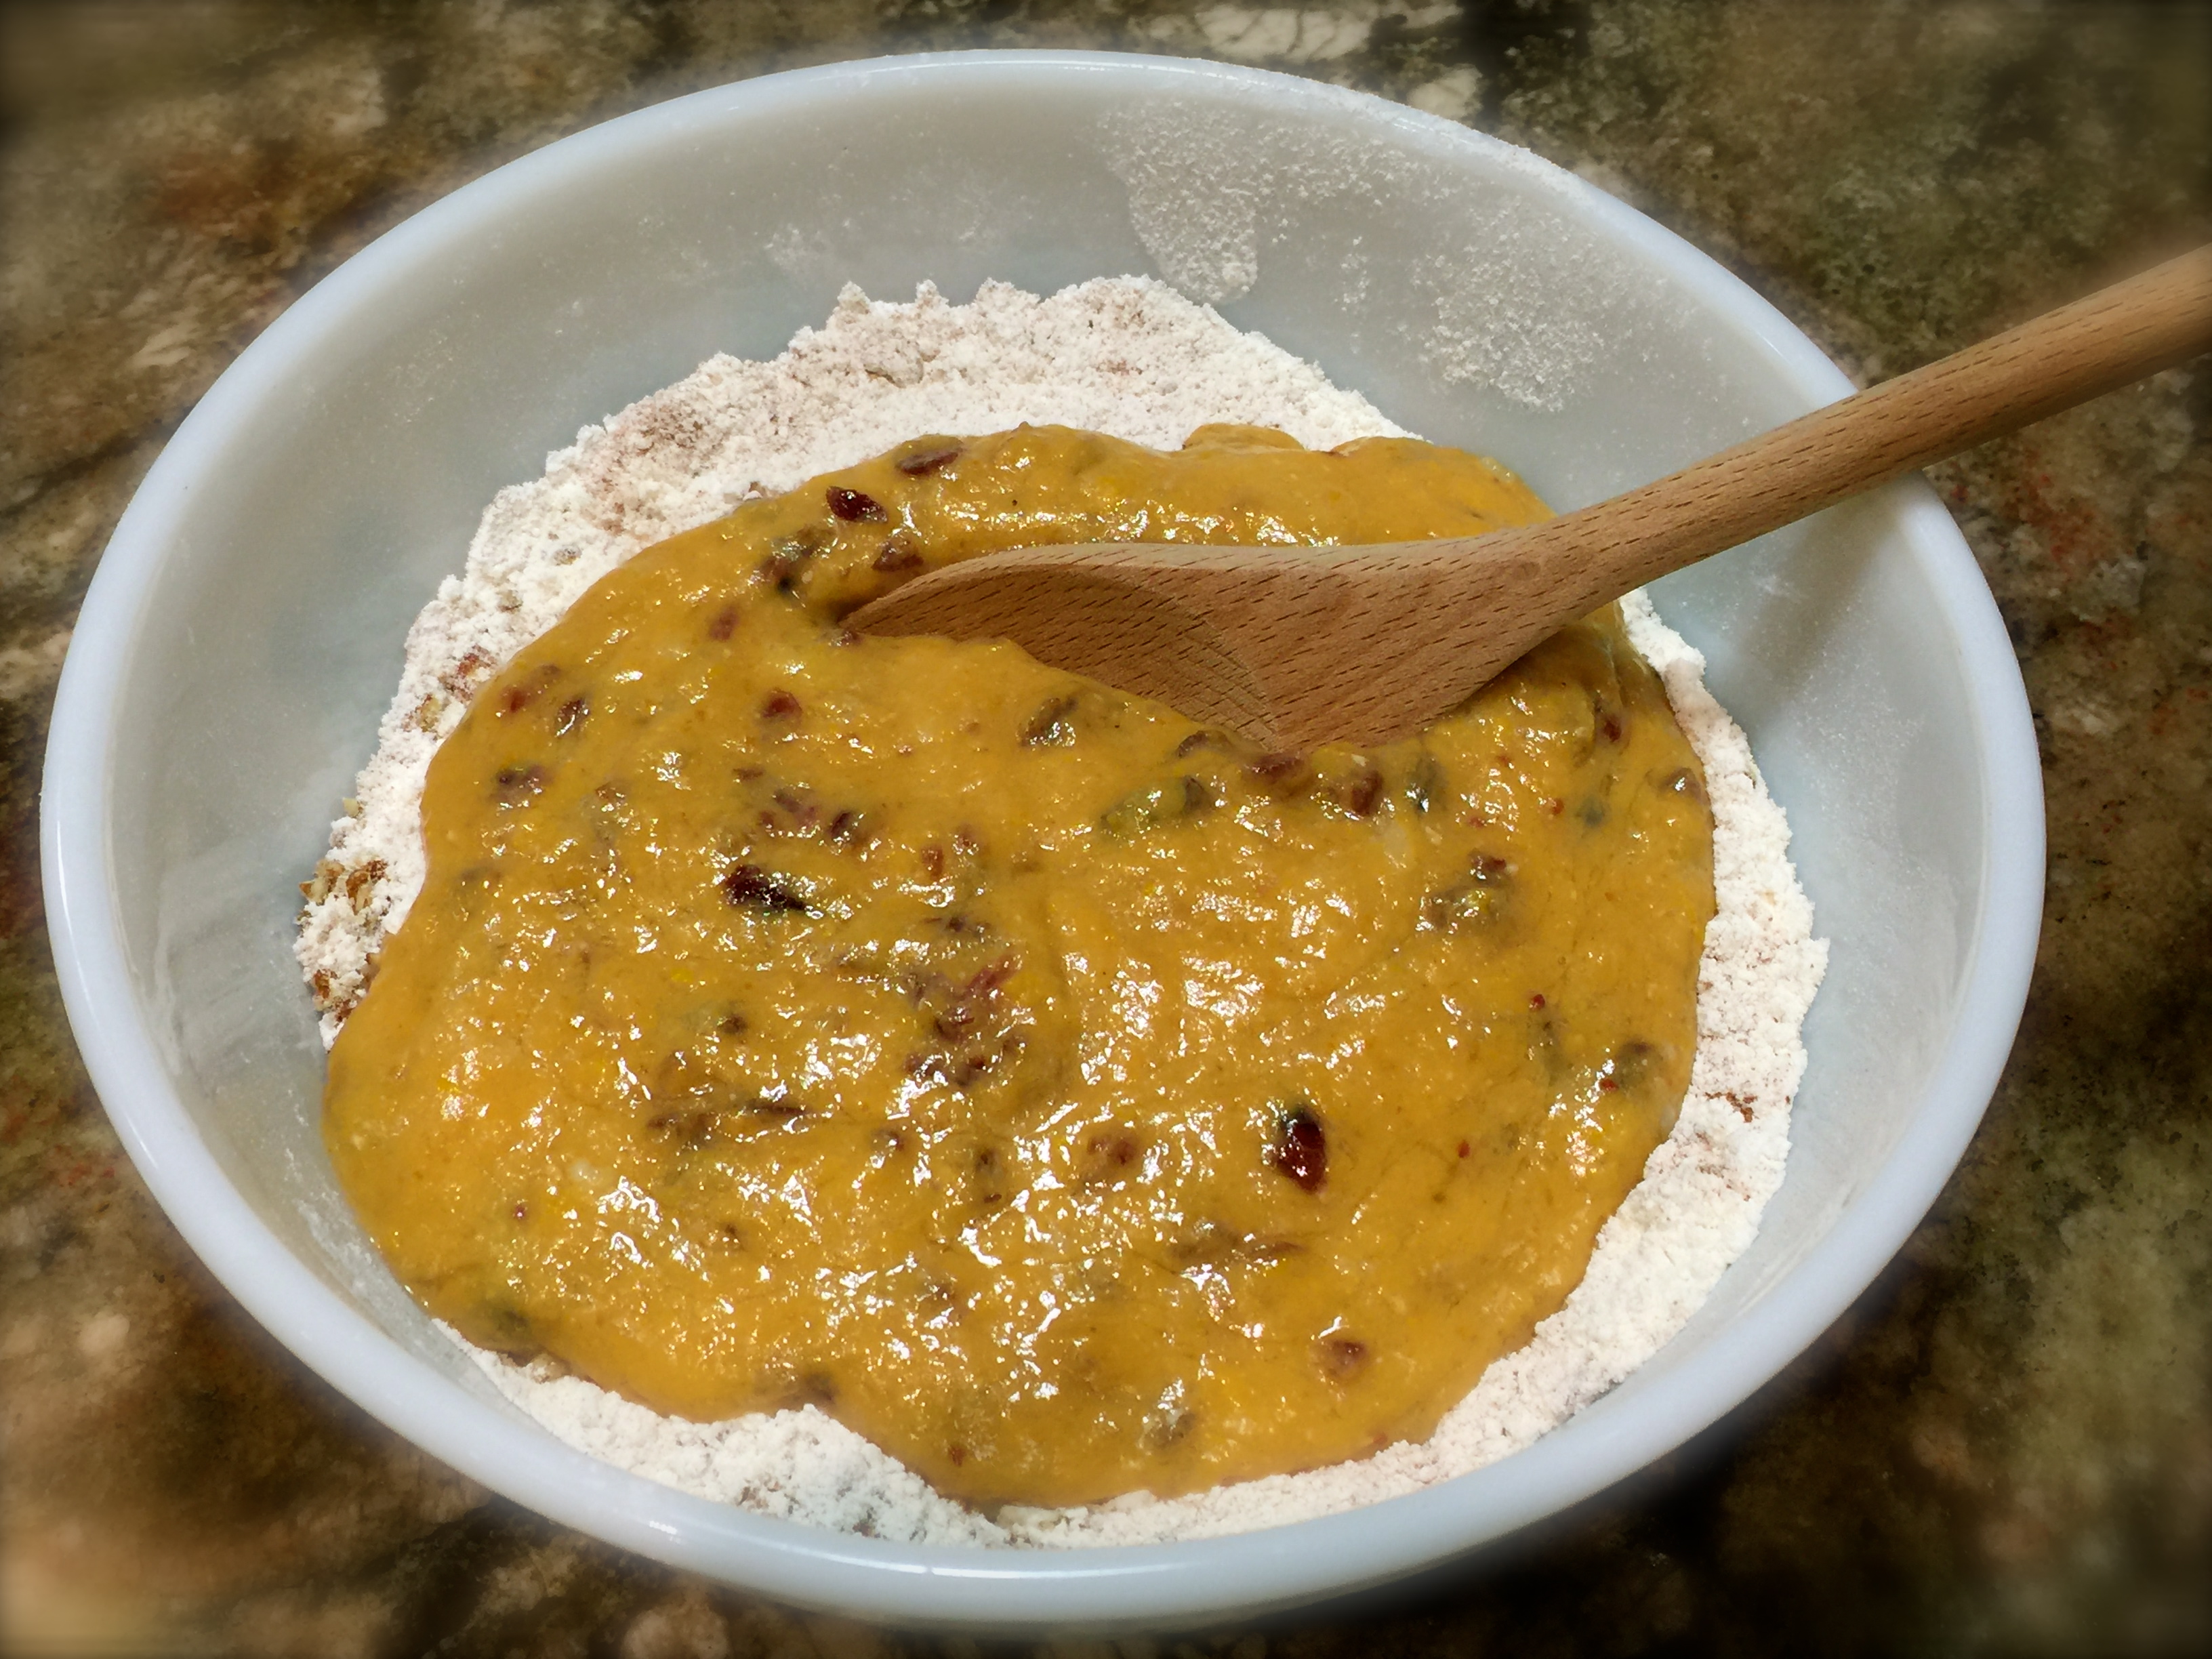
In a medium size bowl whisk together the egg, milk and canola oil. Pour the wet ingredients into the dry ingredients and stir until just combined.

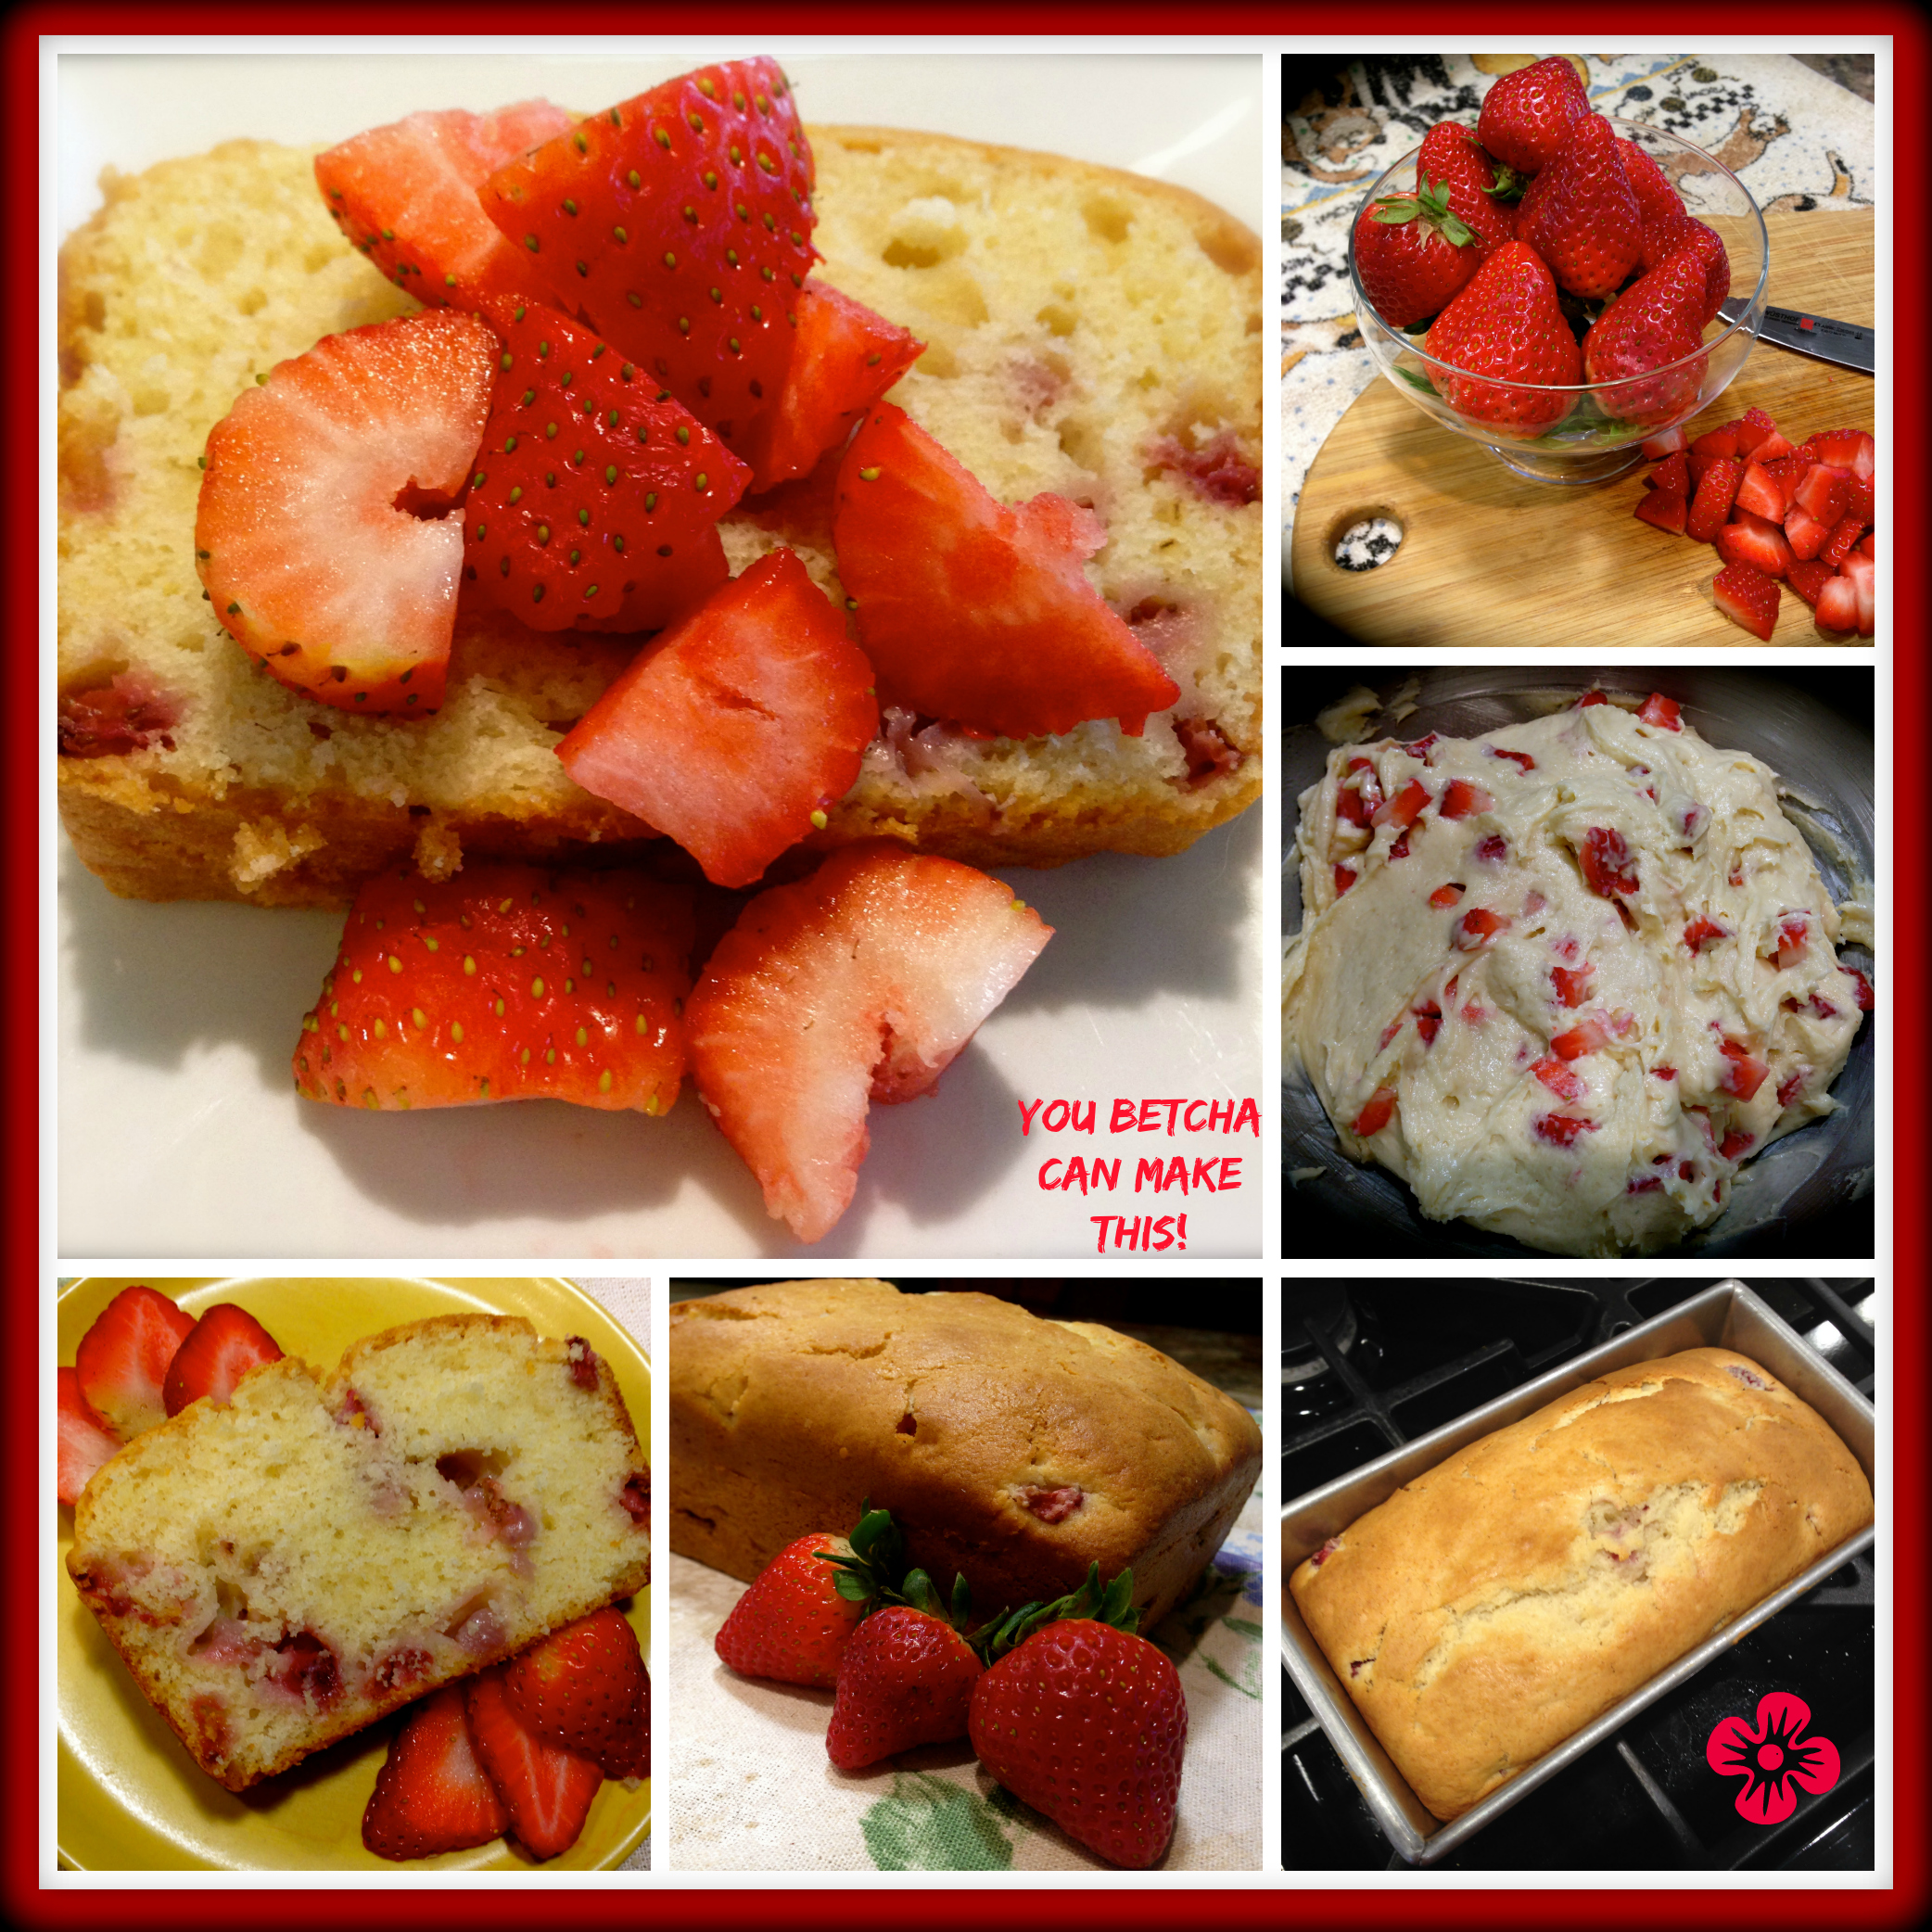
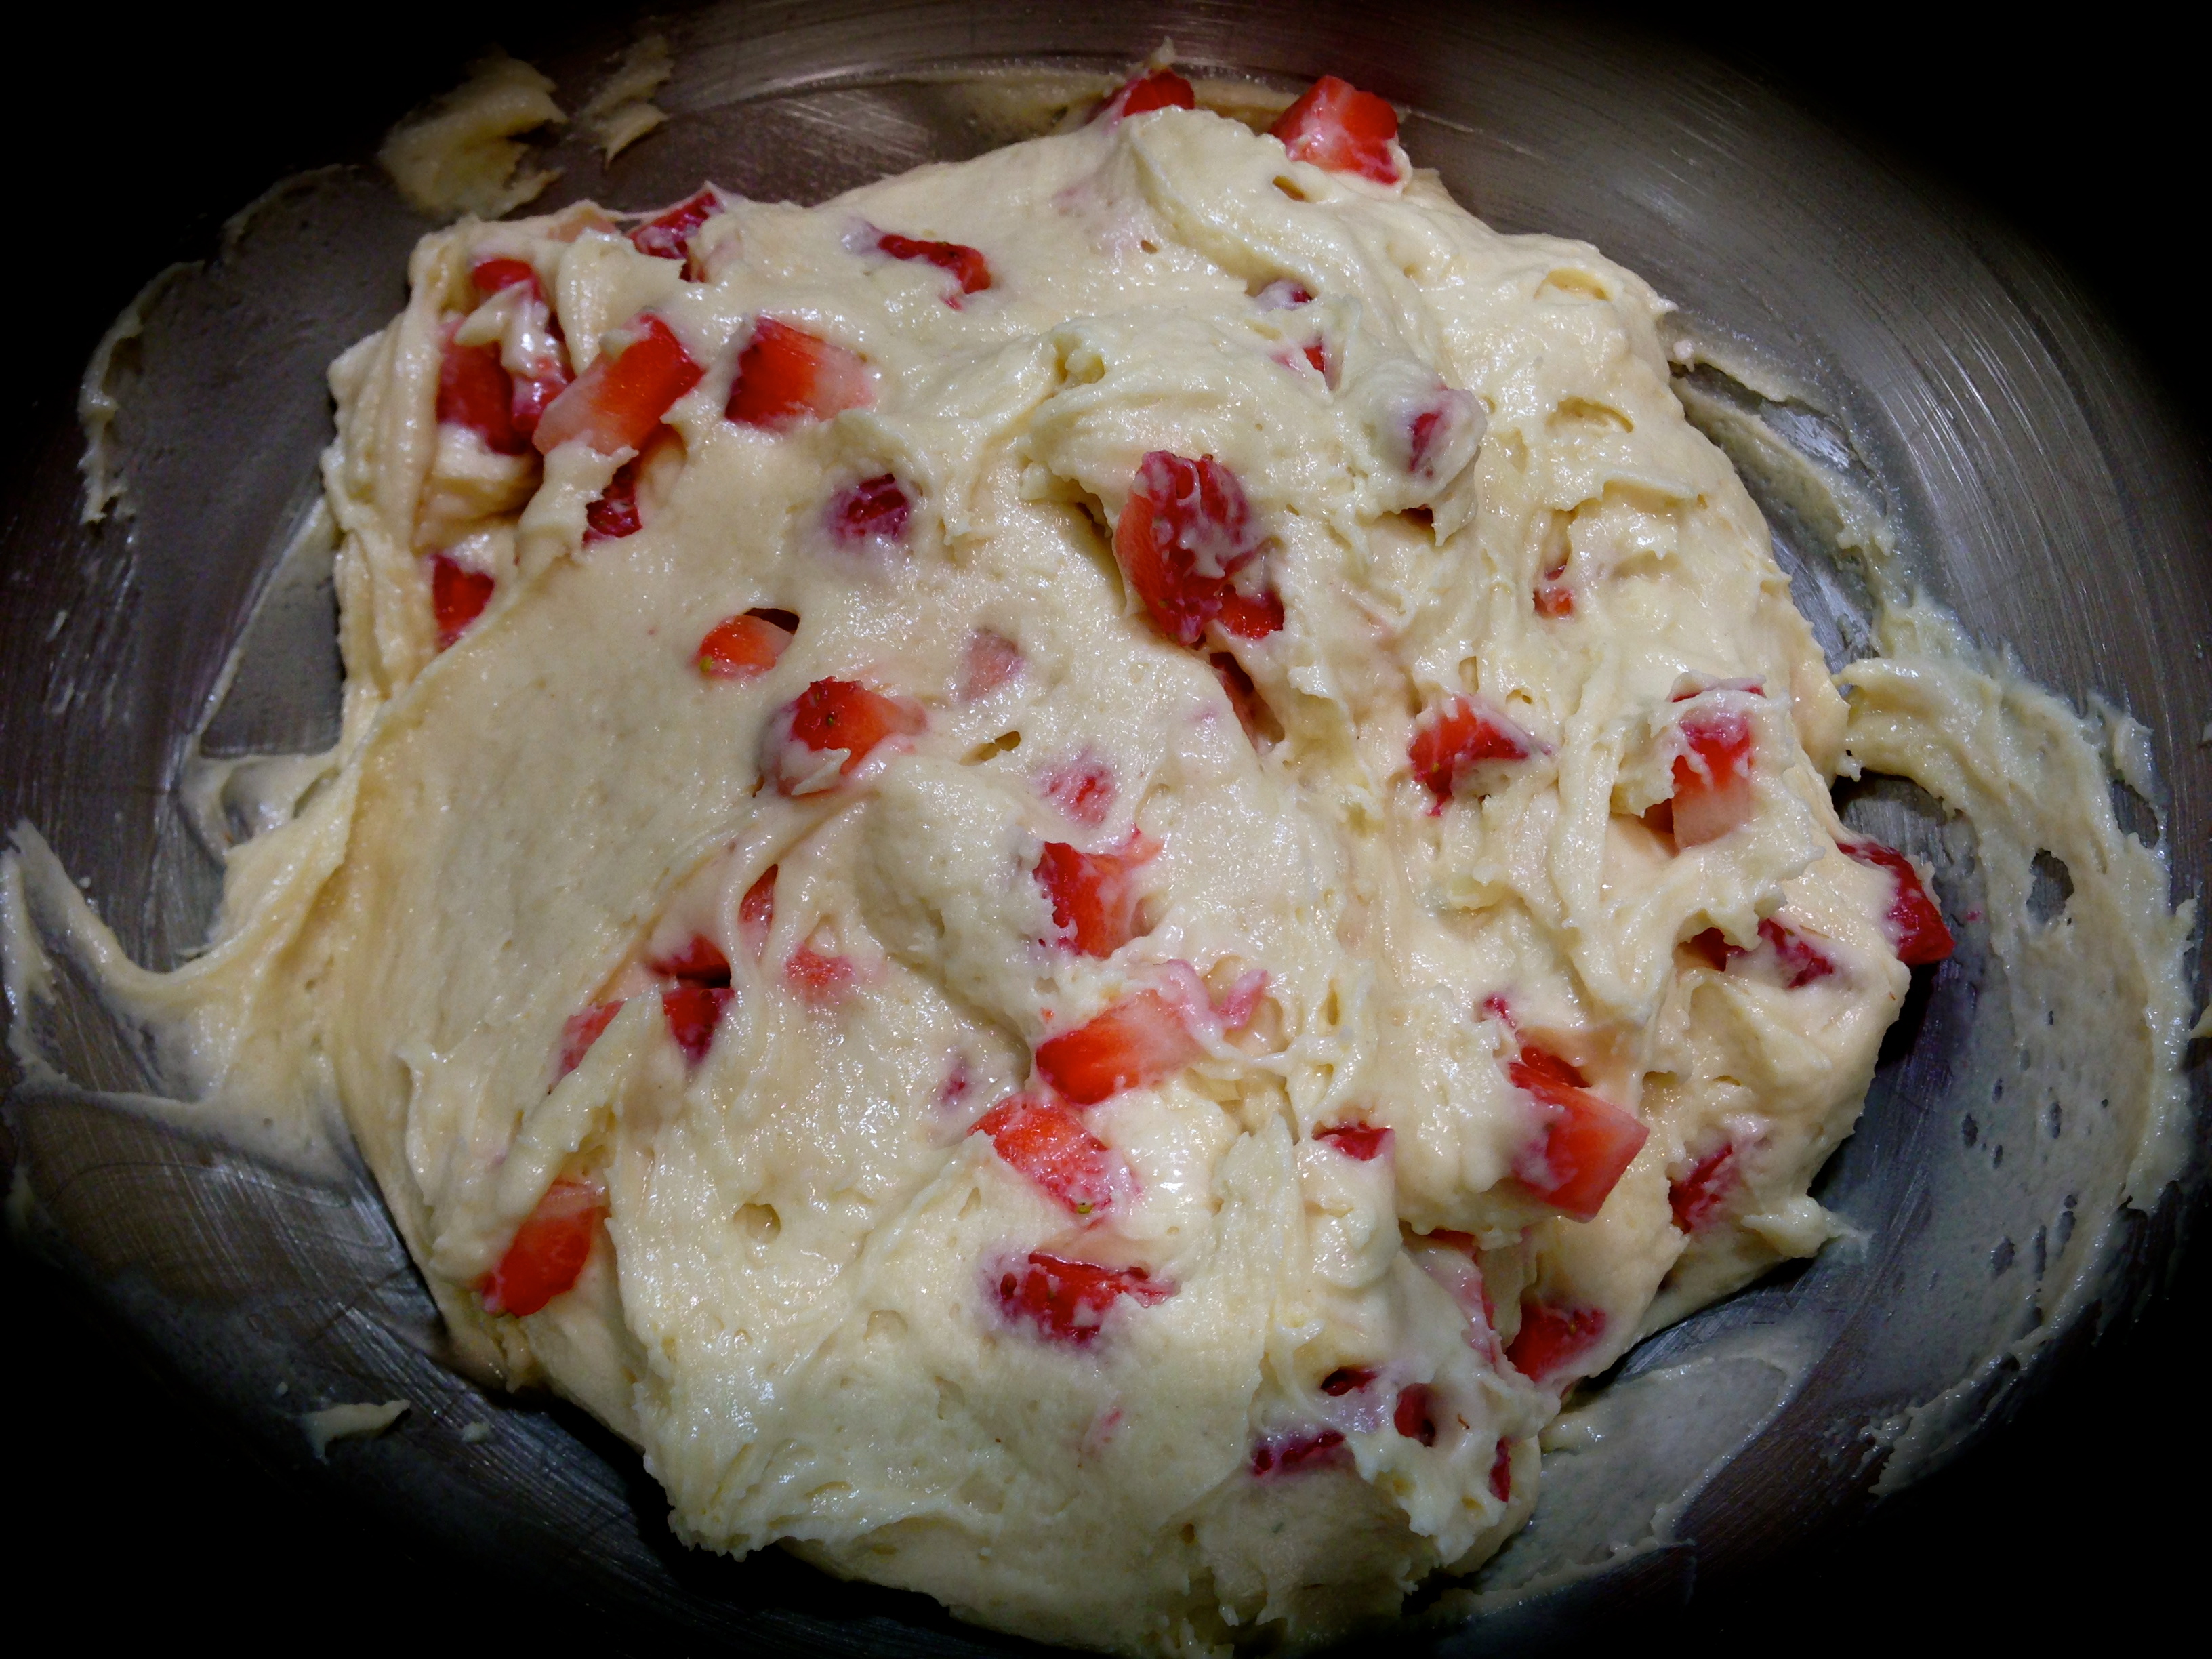
Use the remaining teaspoon of flour and coat the blueberries with the flour. Add the blueberries to the batter and gently fold them in.

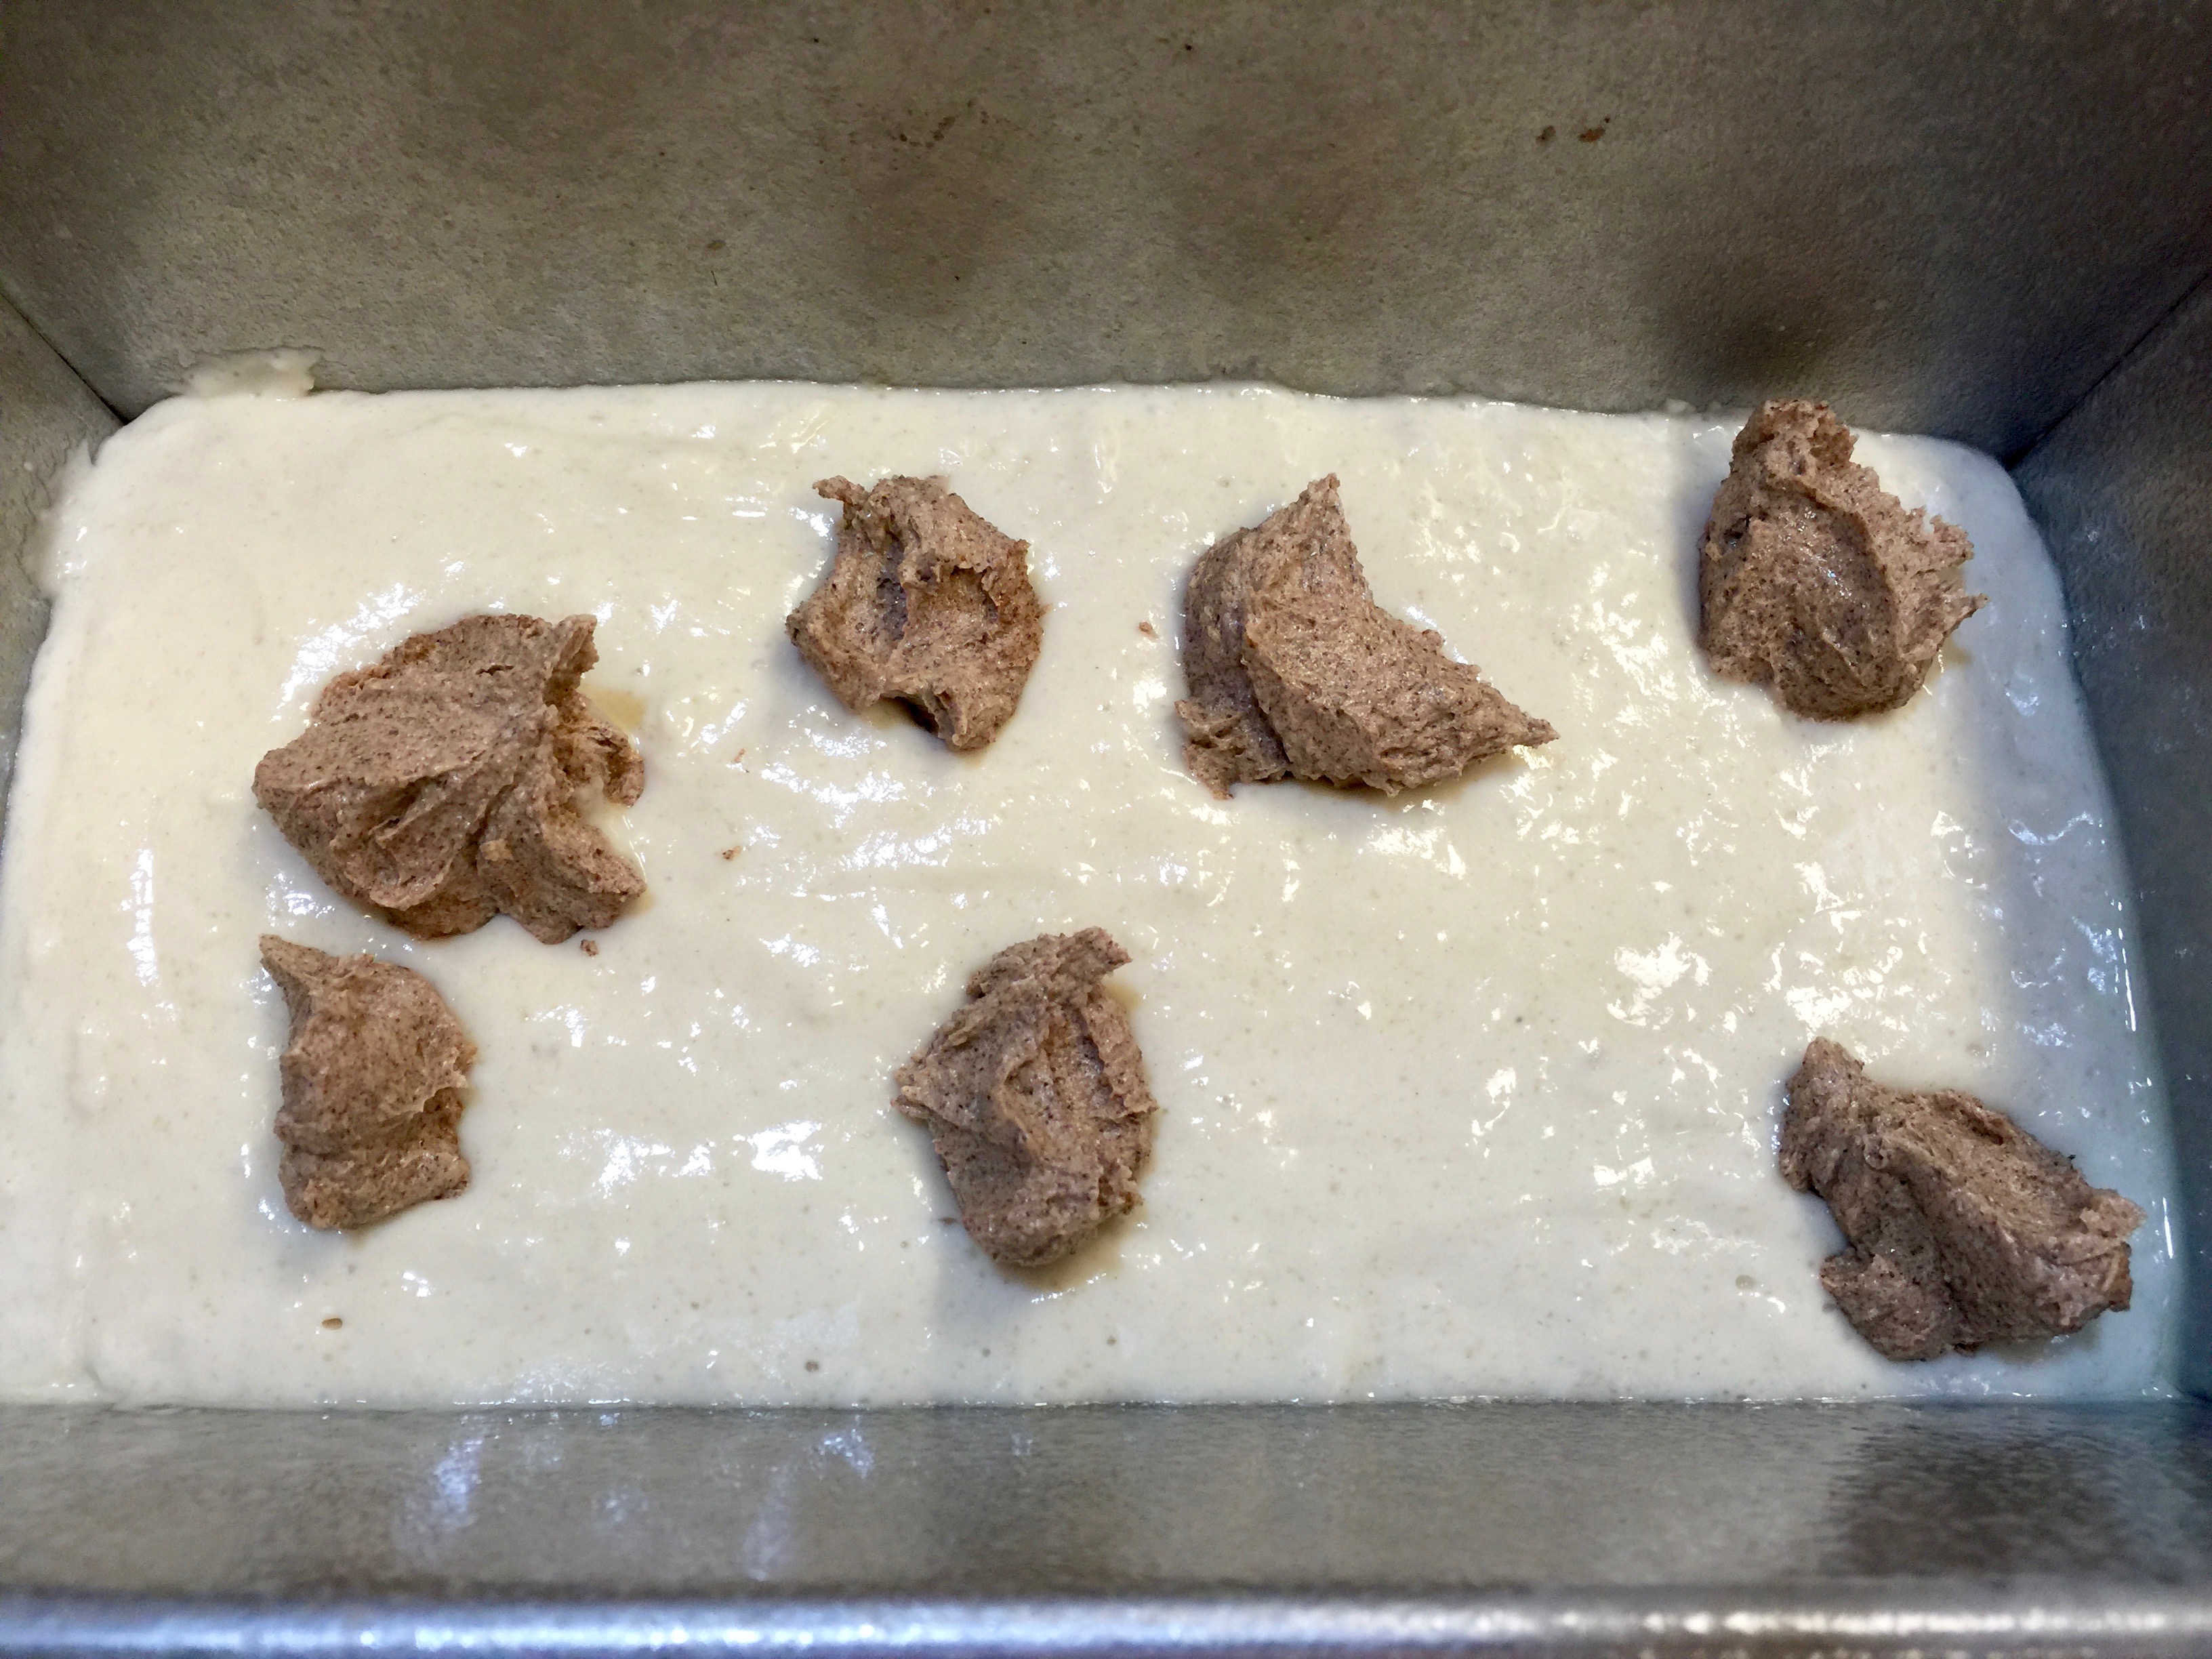
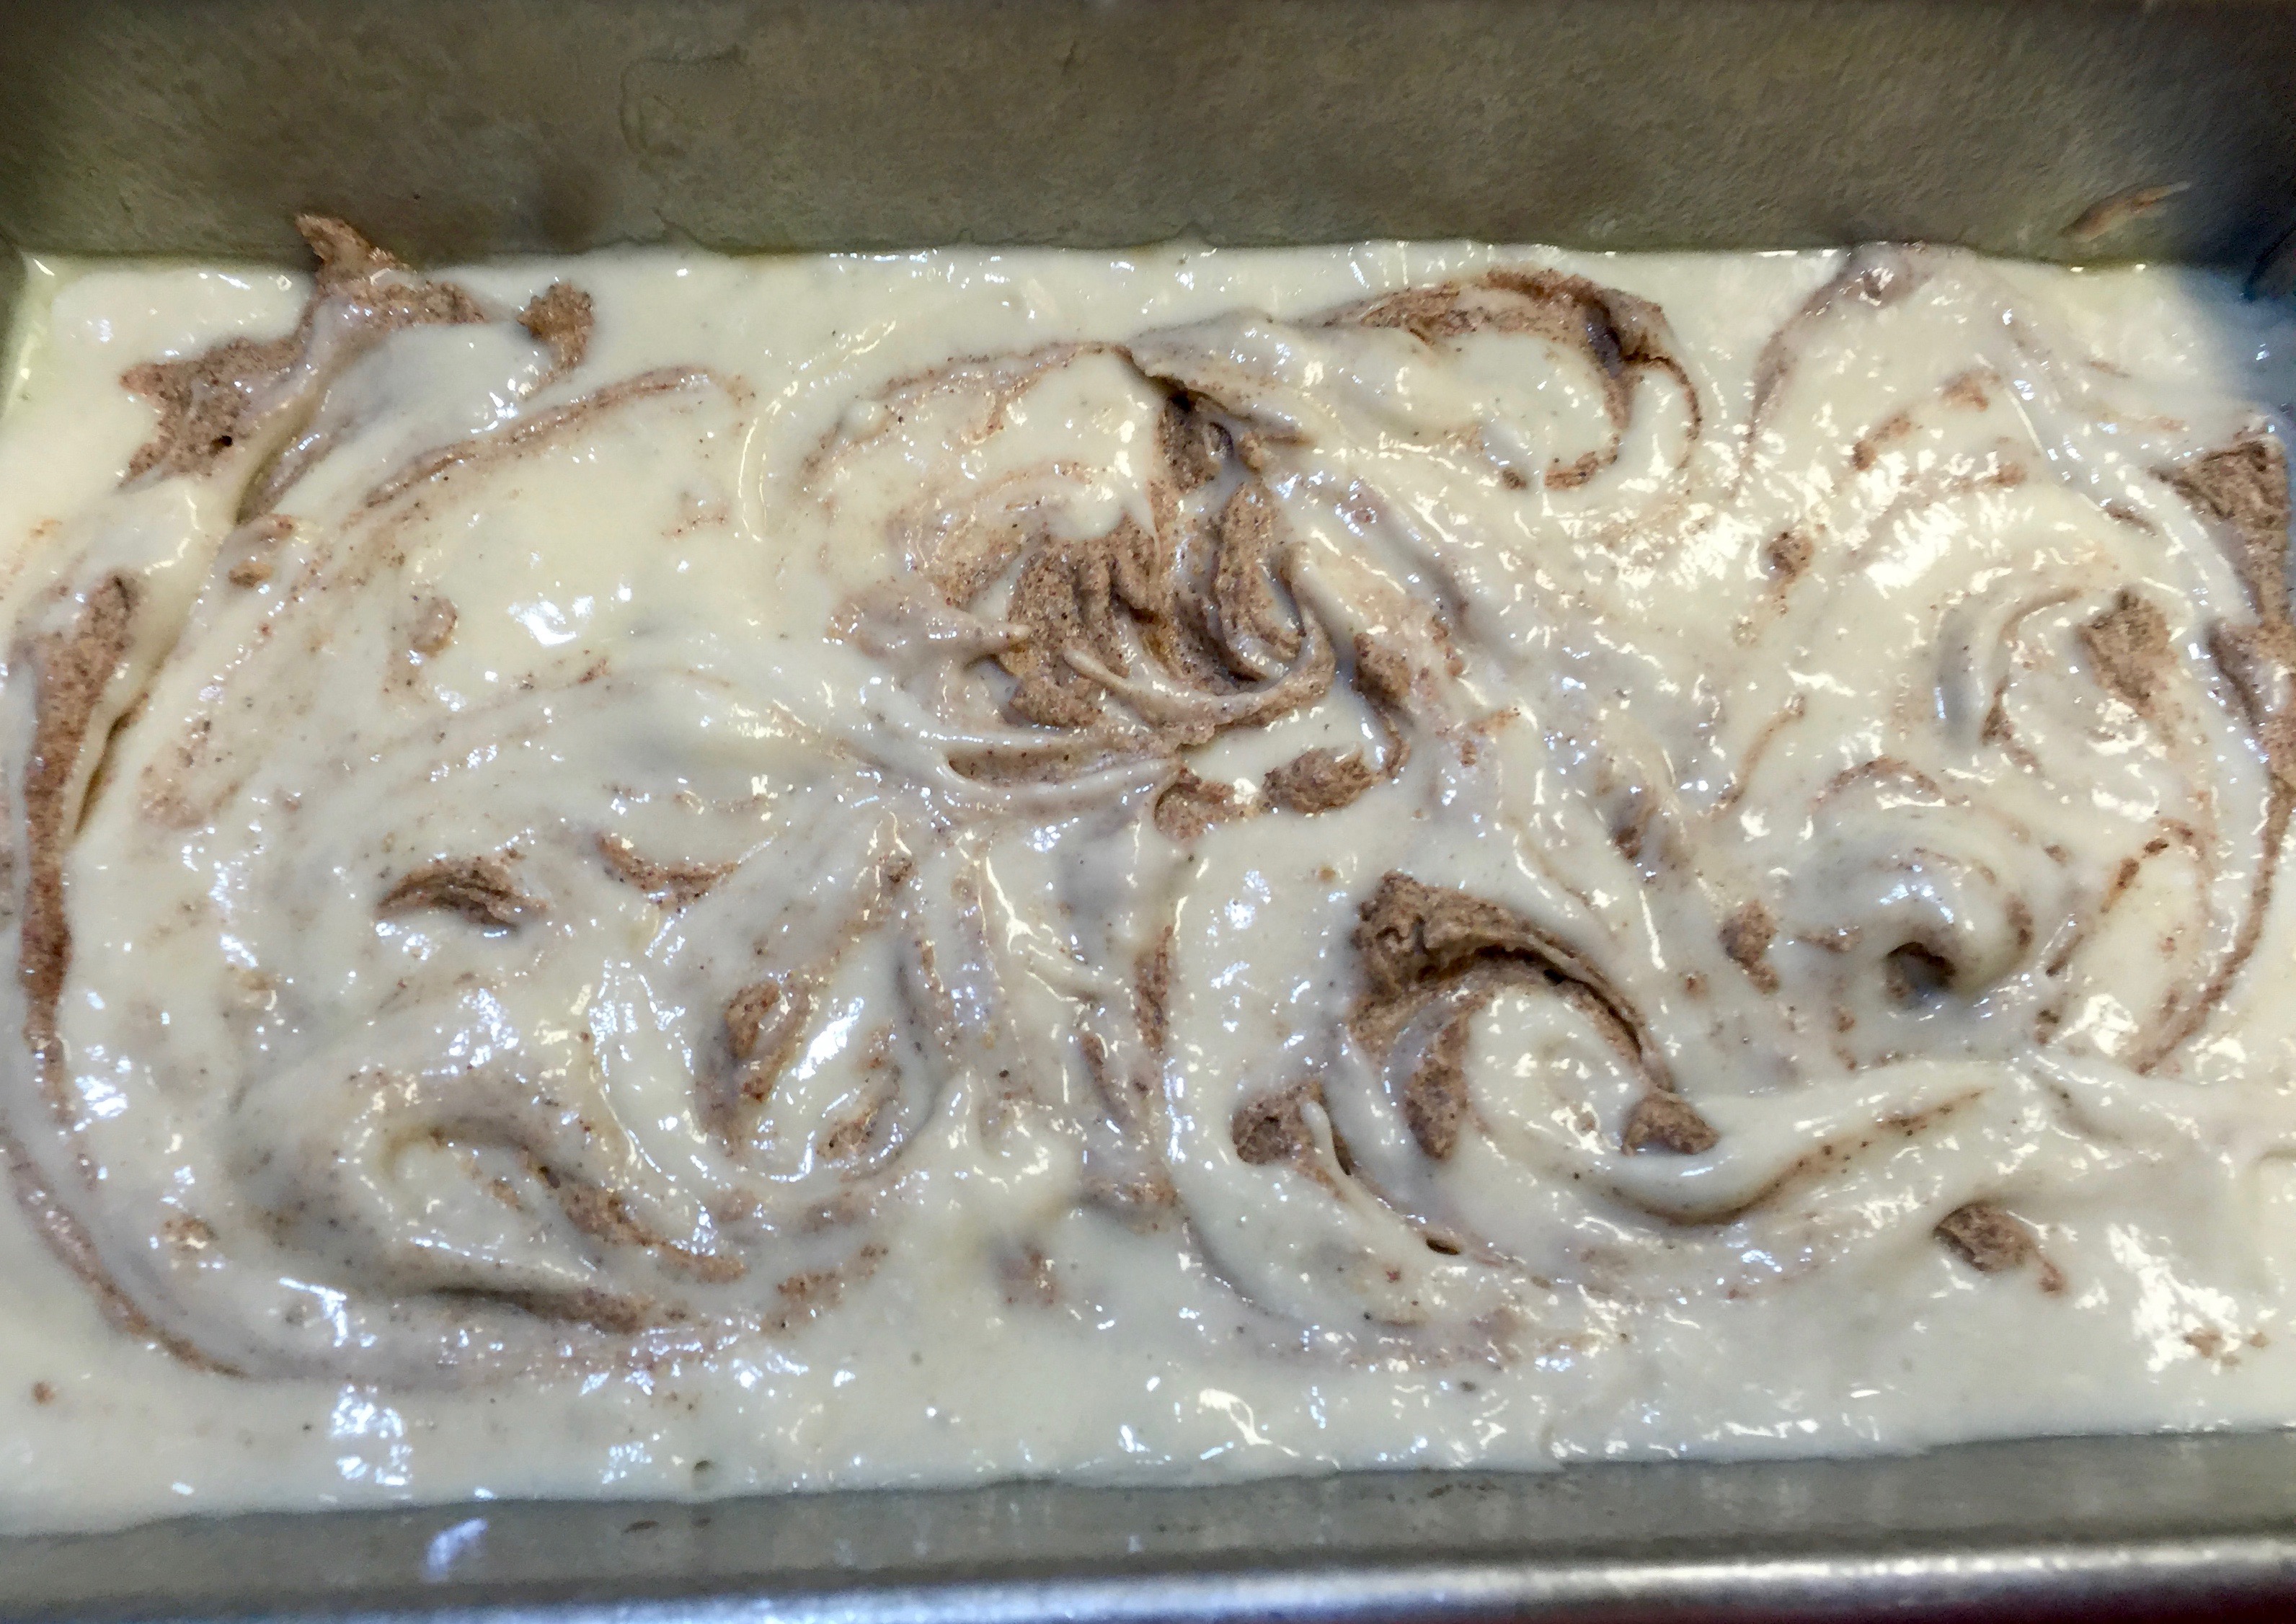
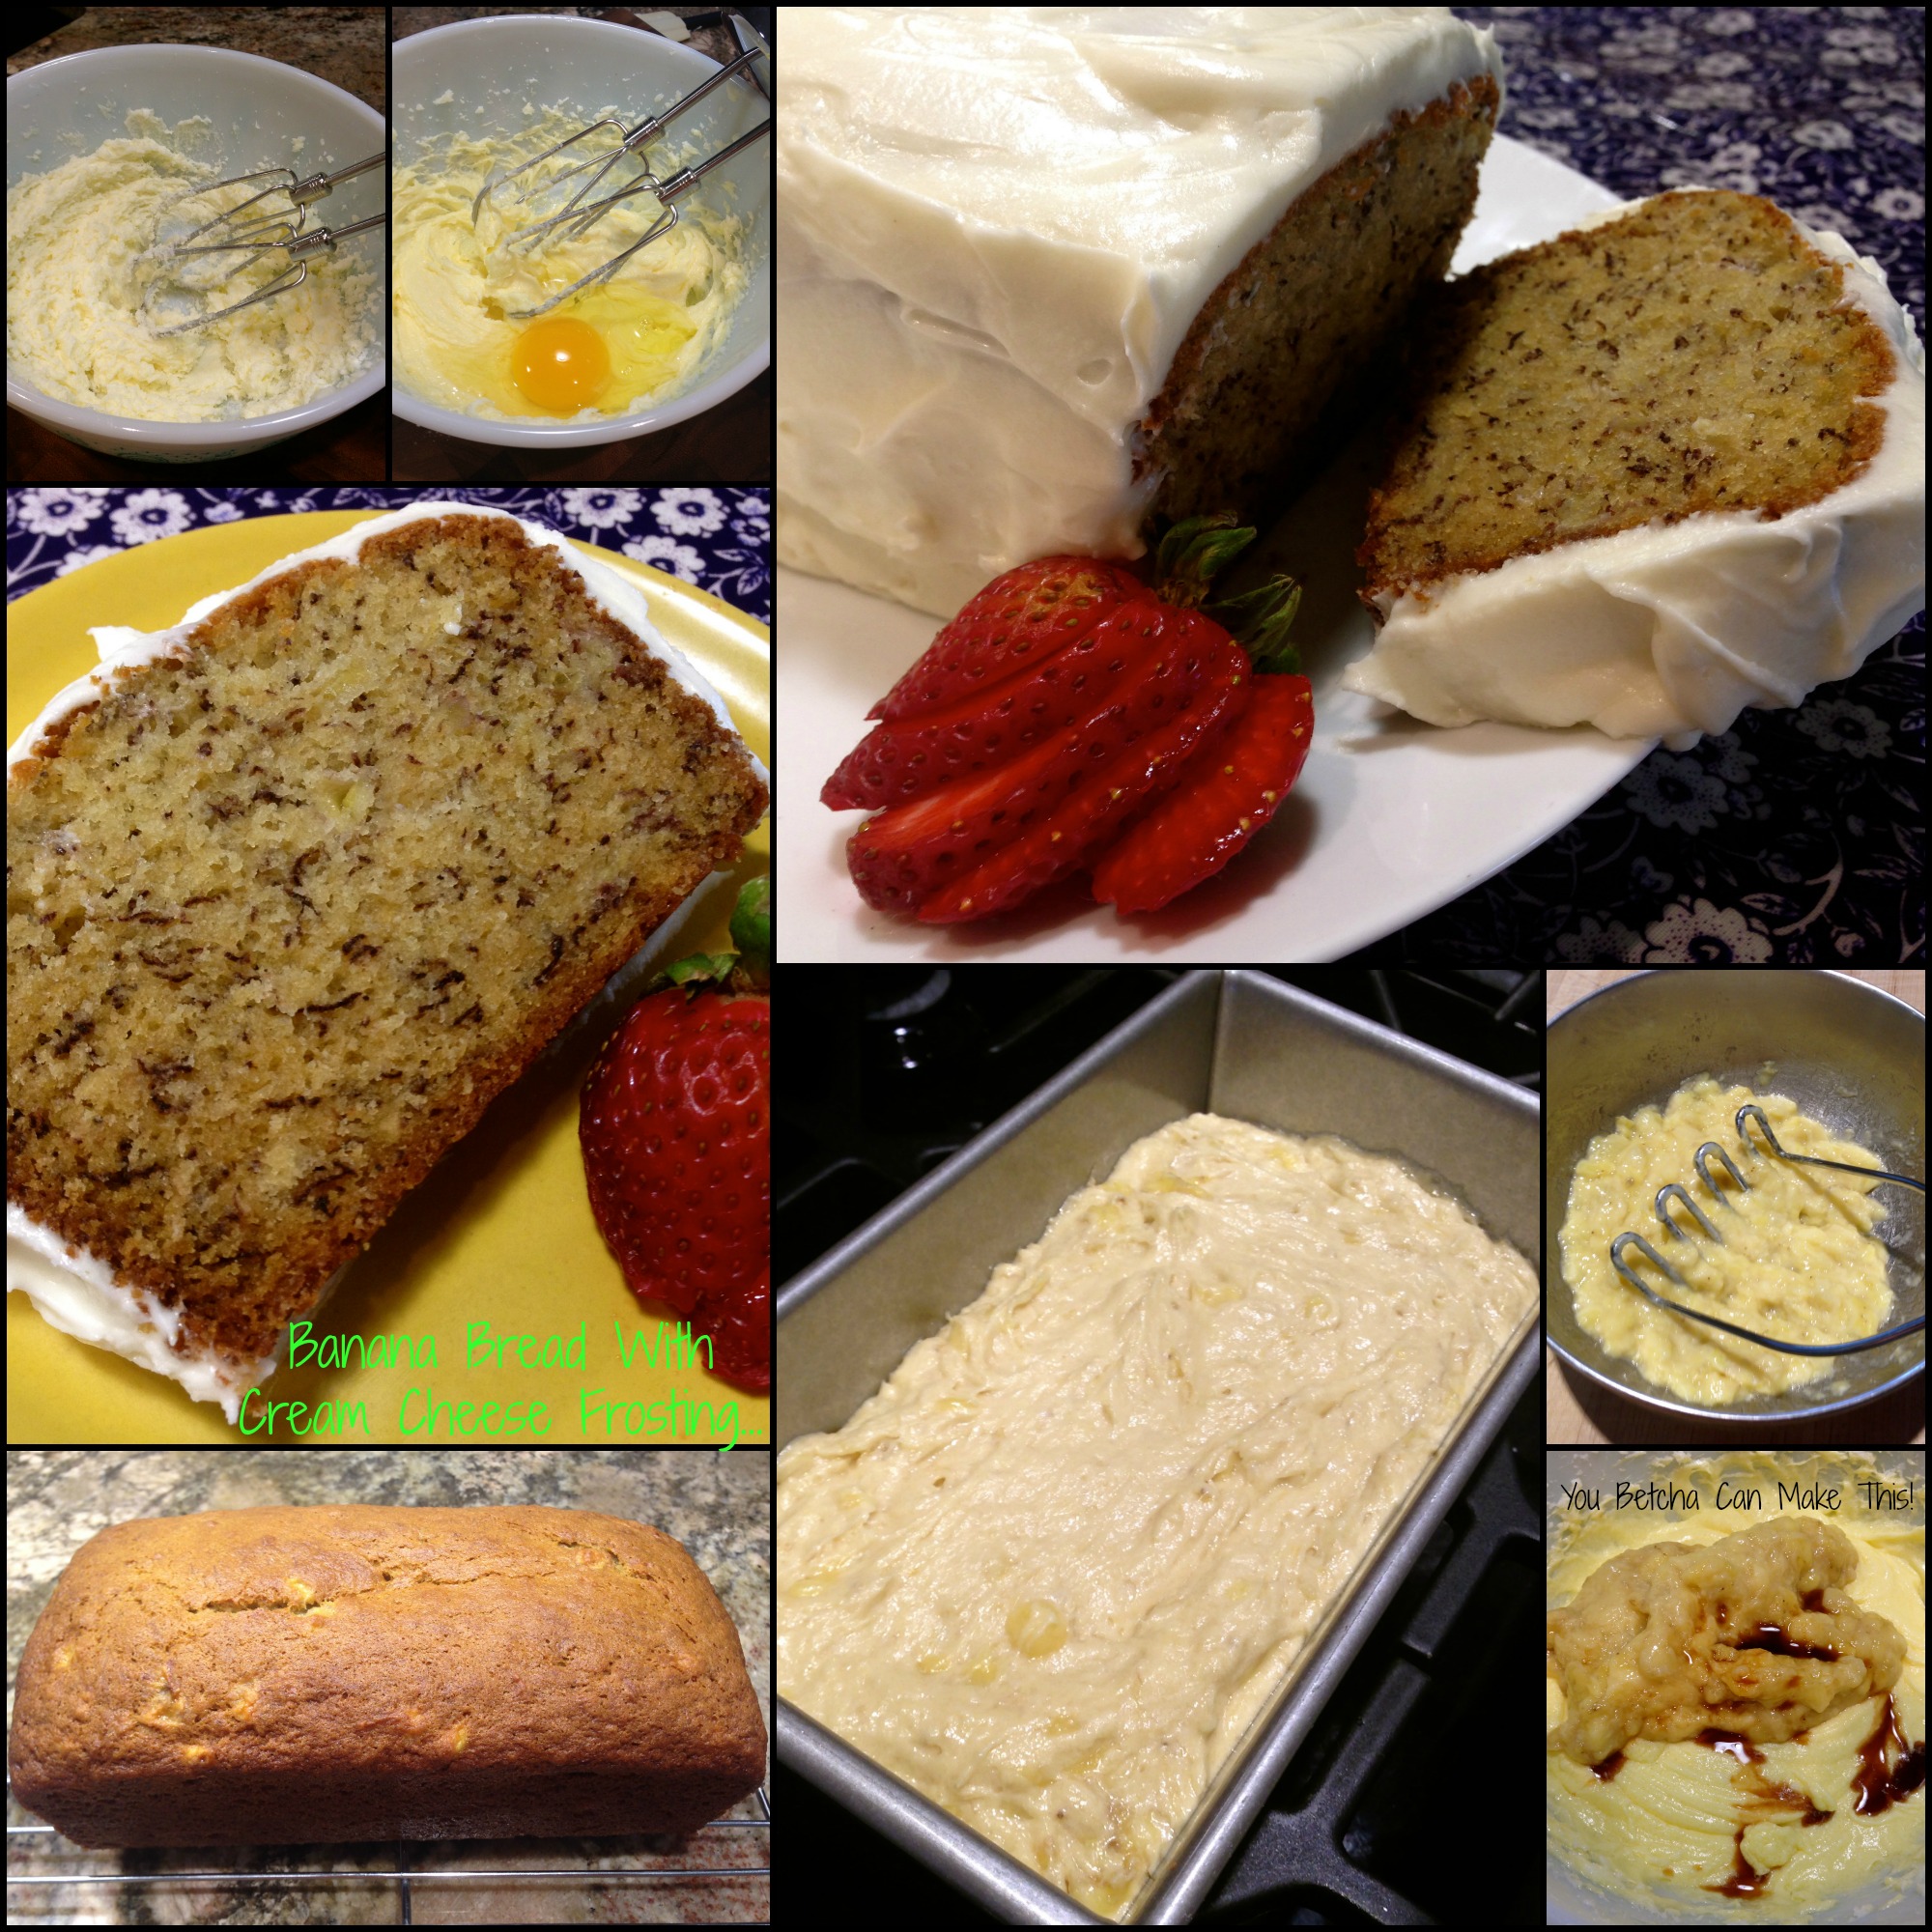
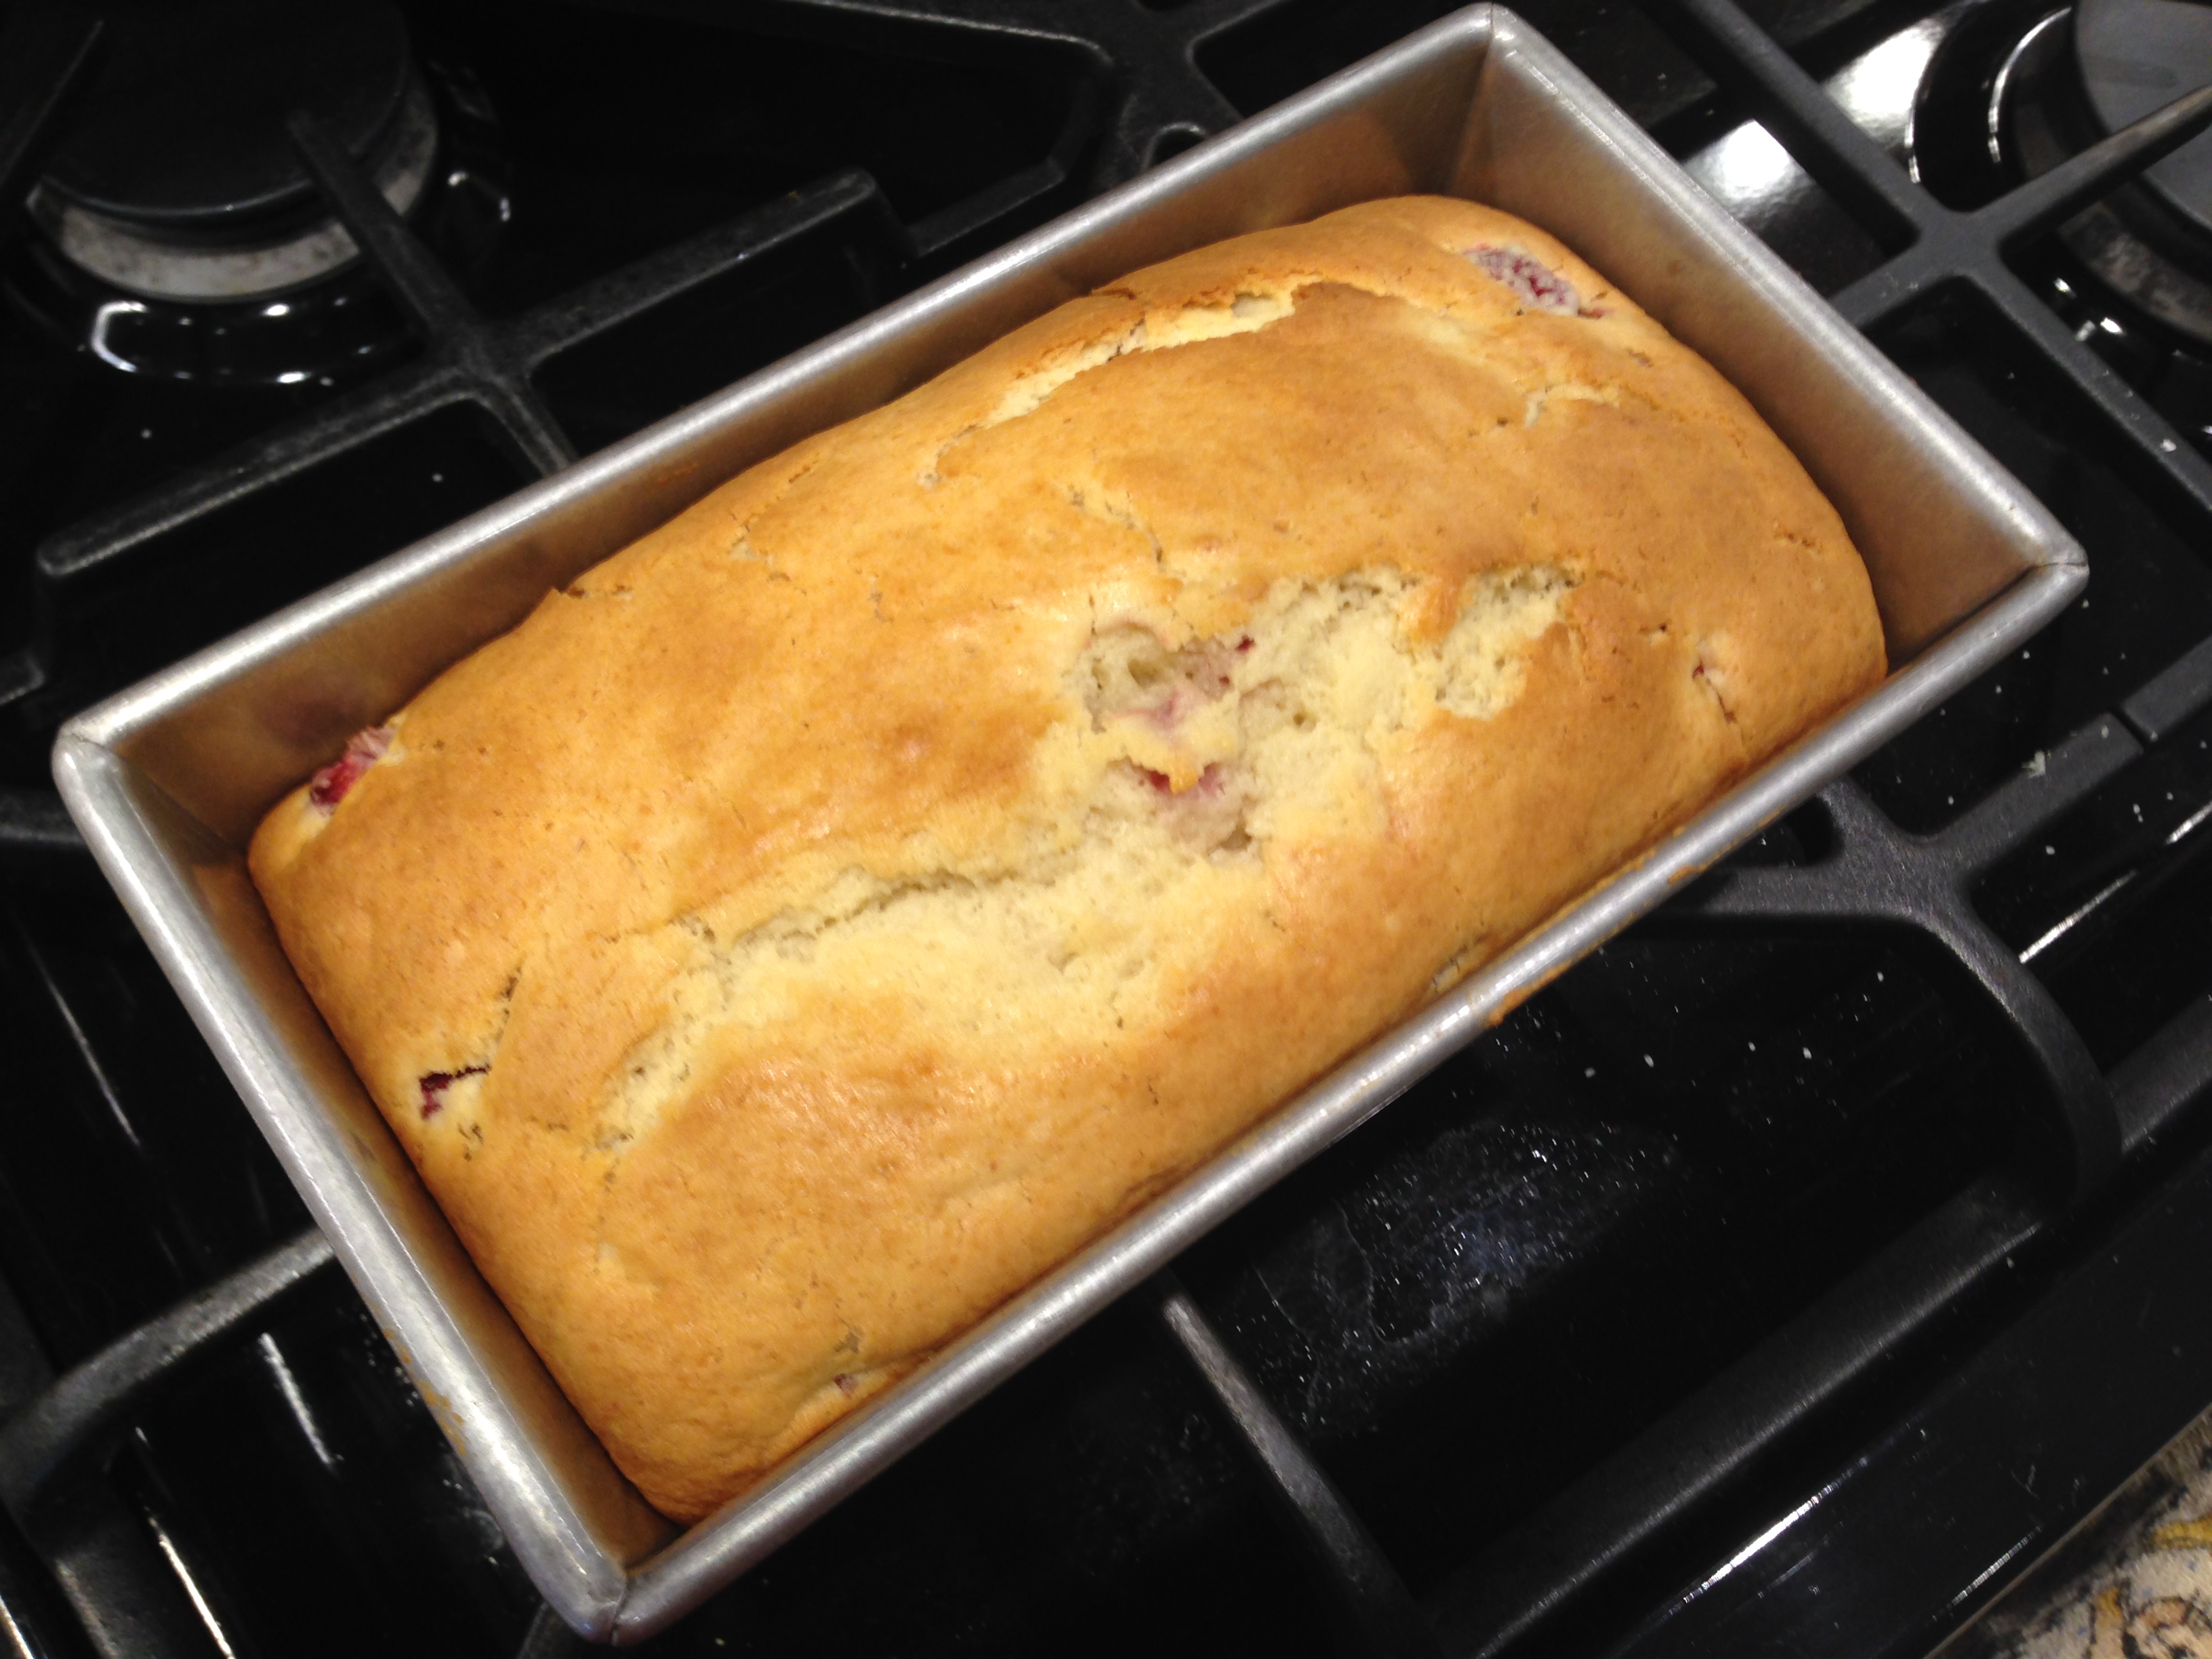
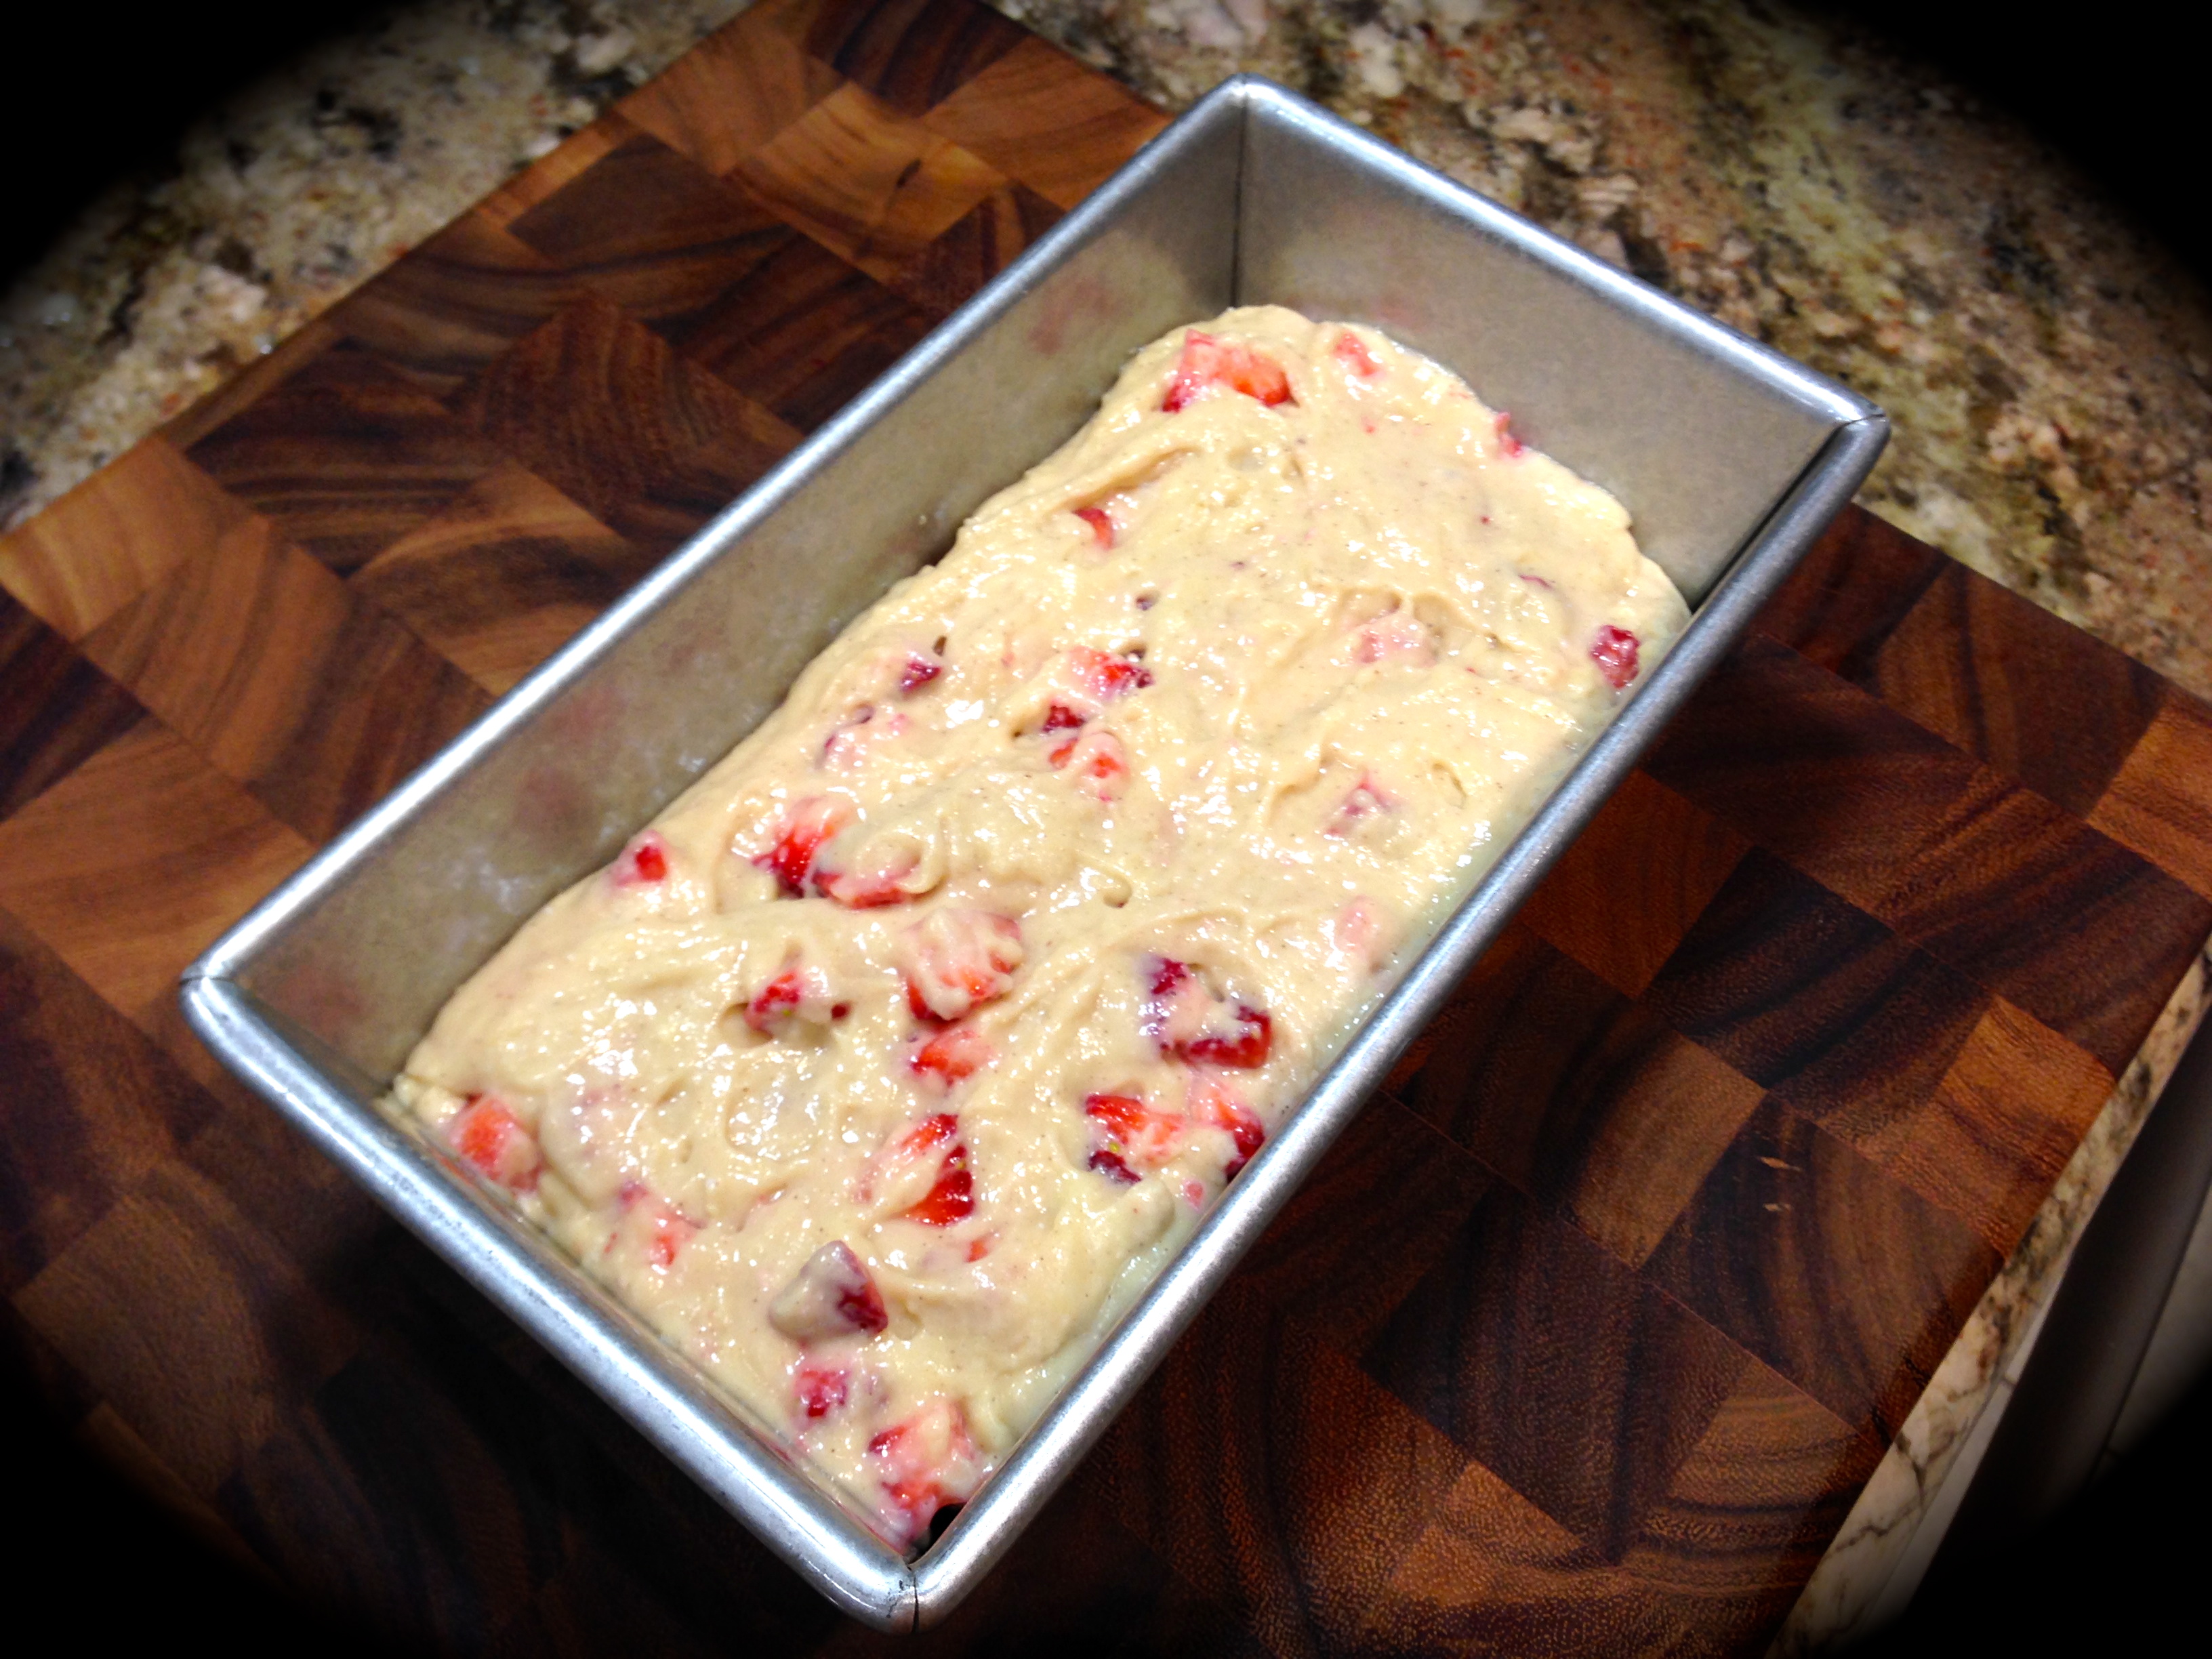
Coat an 8 x 4 inch loaf pan with baking spray. (I used the one that also includes flour). Pour the batter into the pan. Place a small spoon into the batter (about half way down) and scoop some of the blueberries up to the top. (repeat this two or three times).

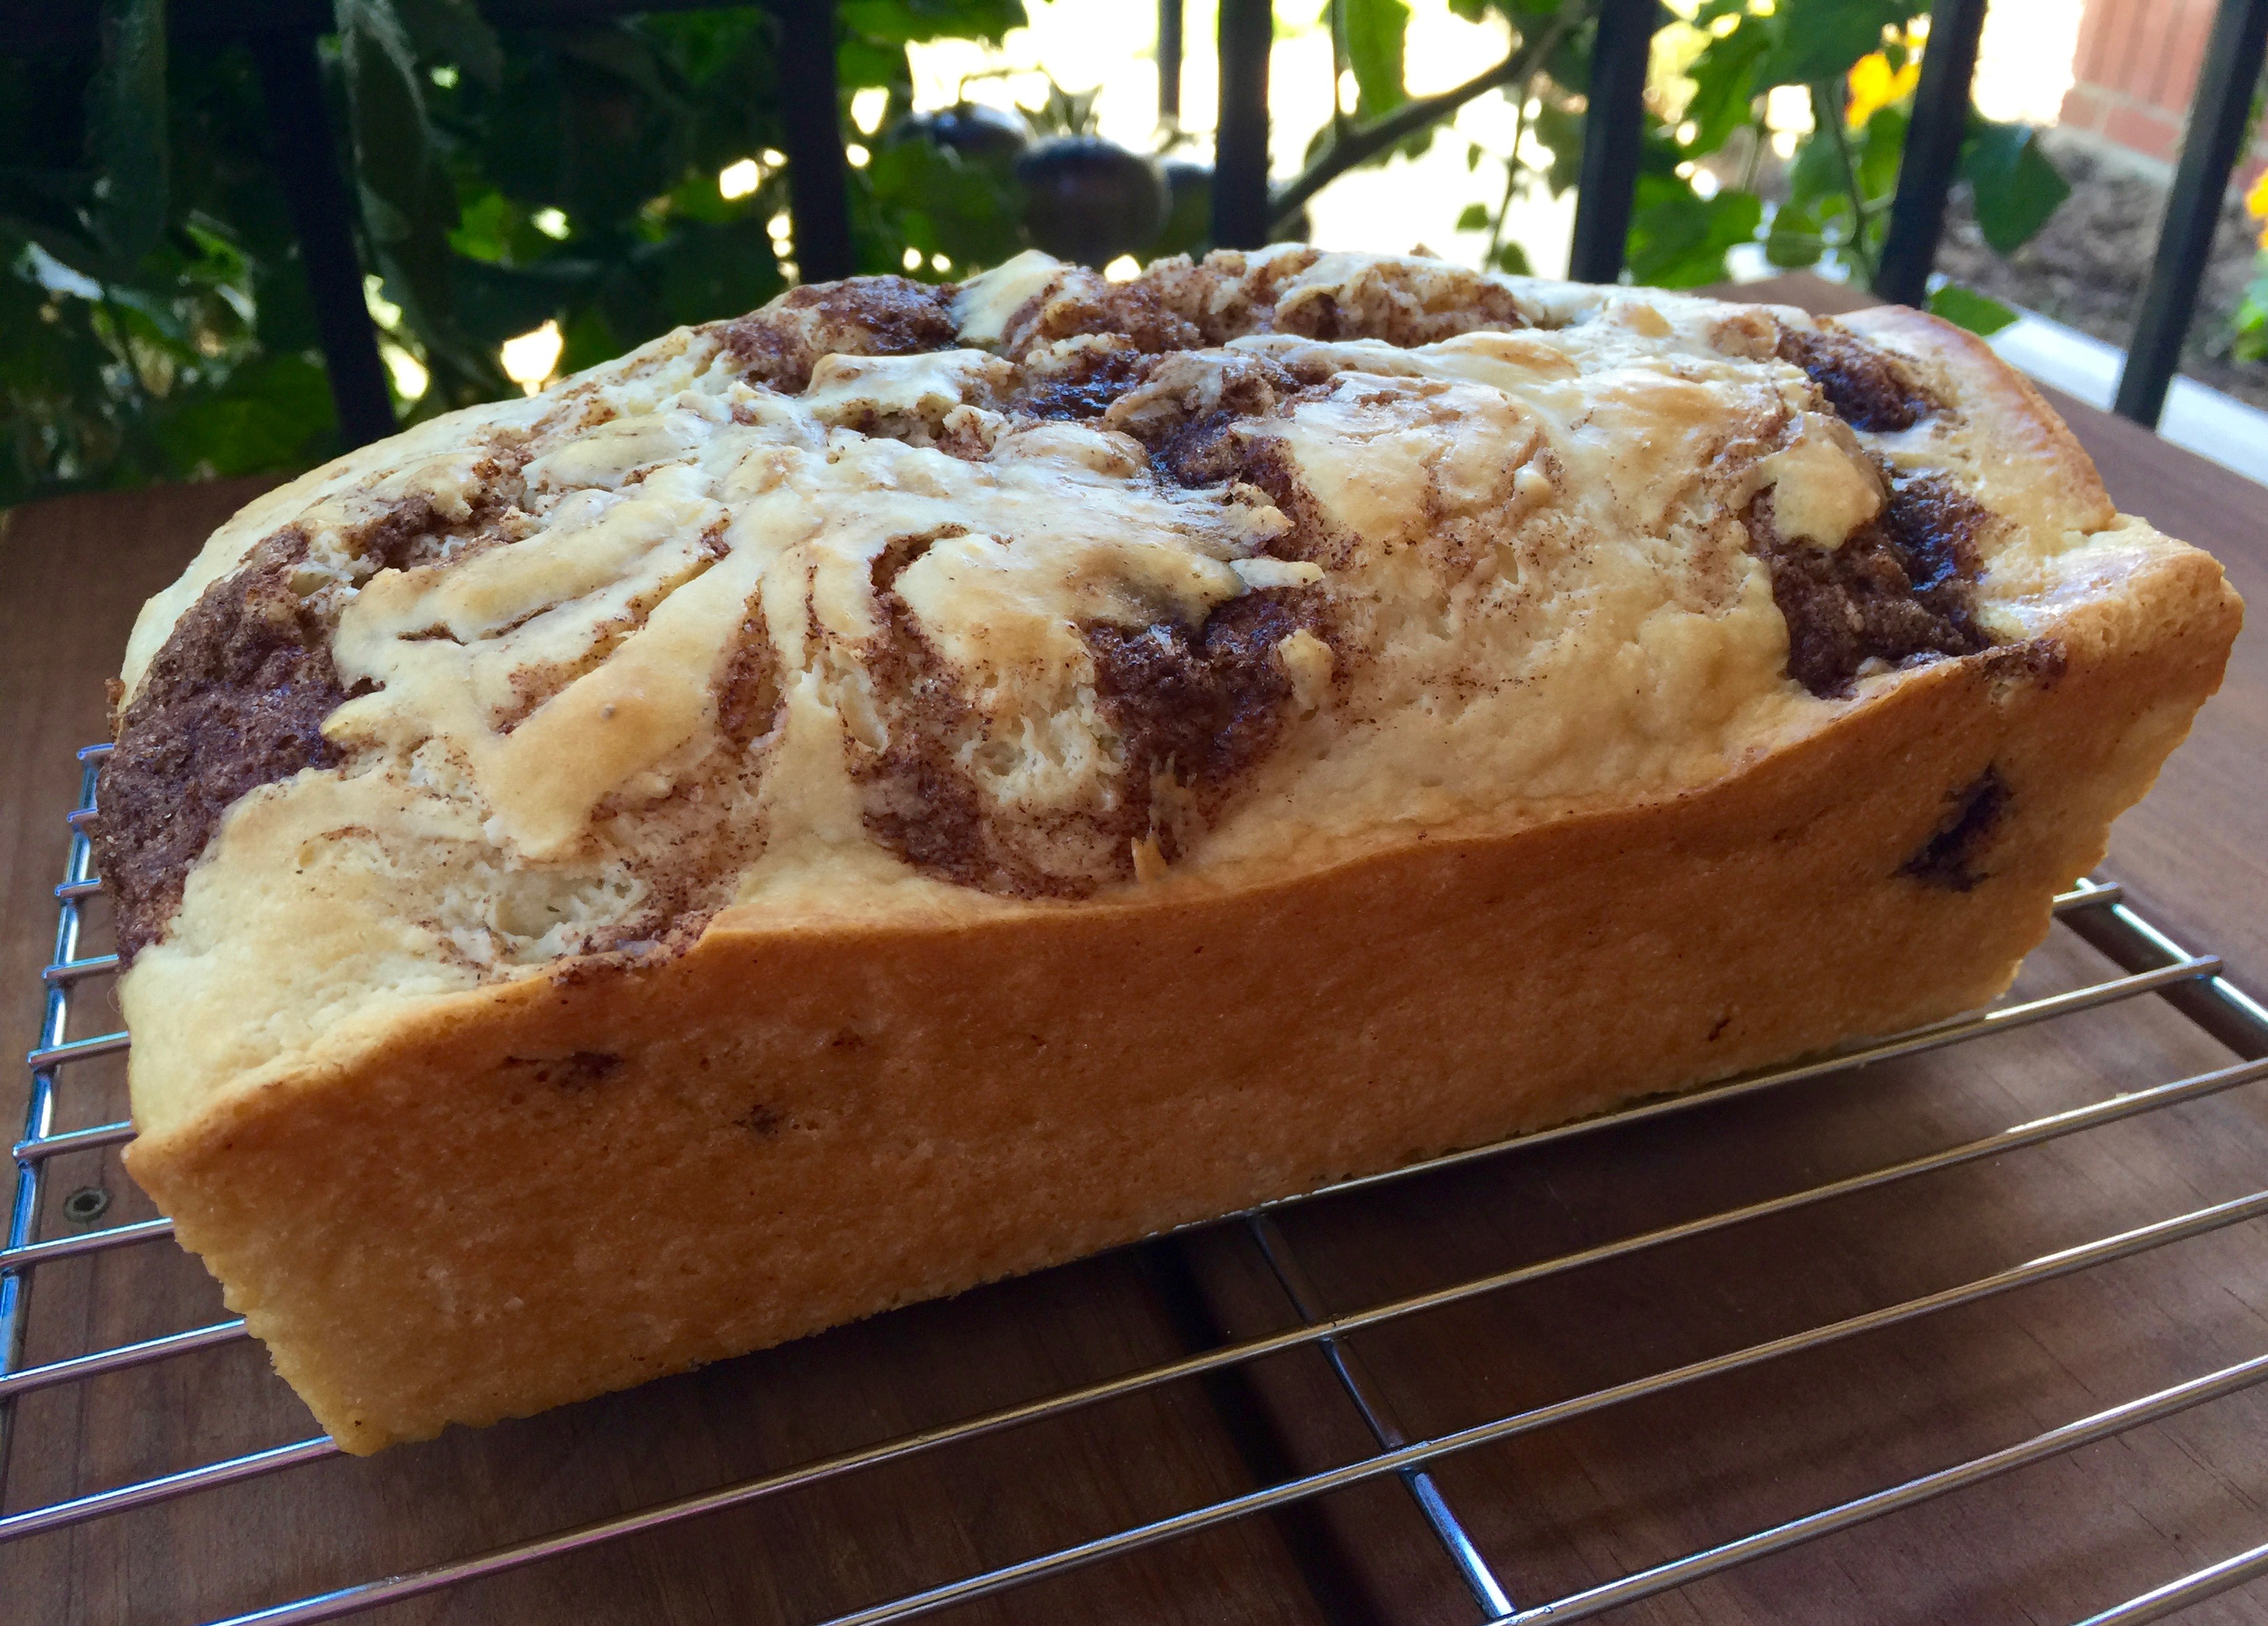
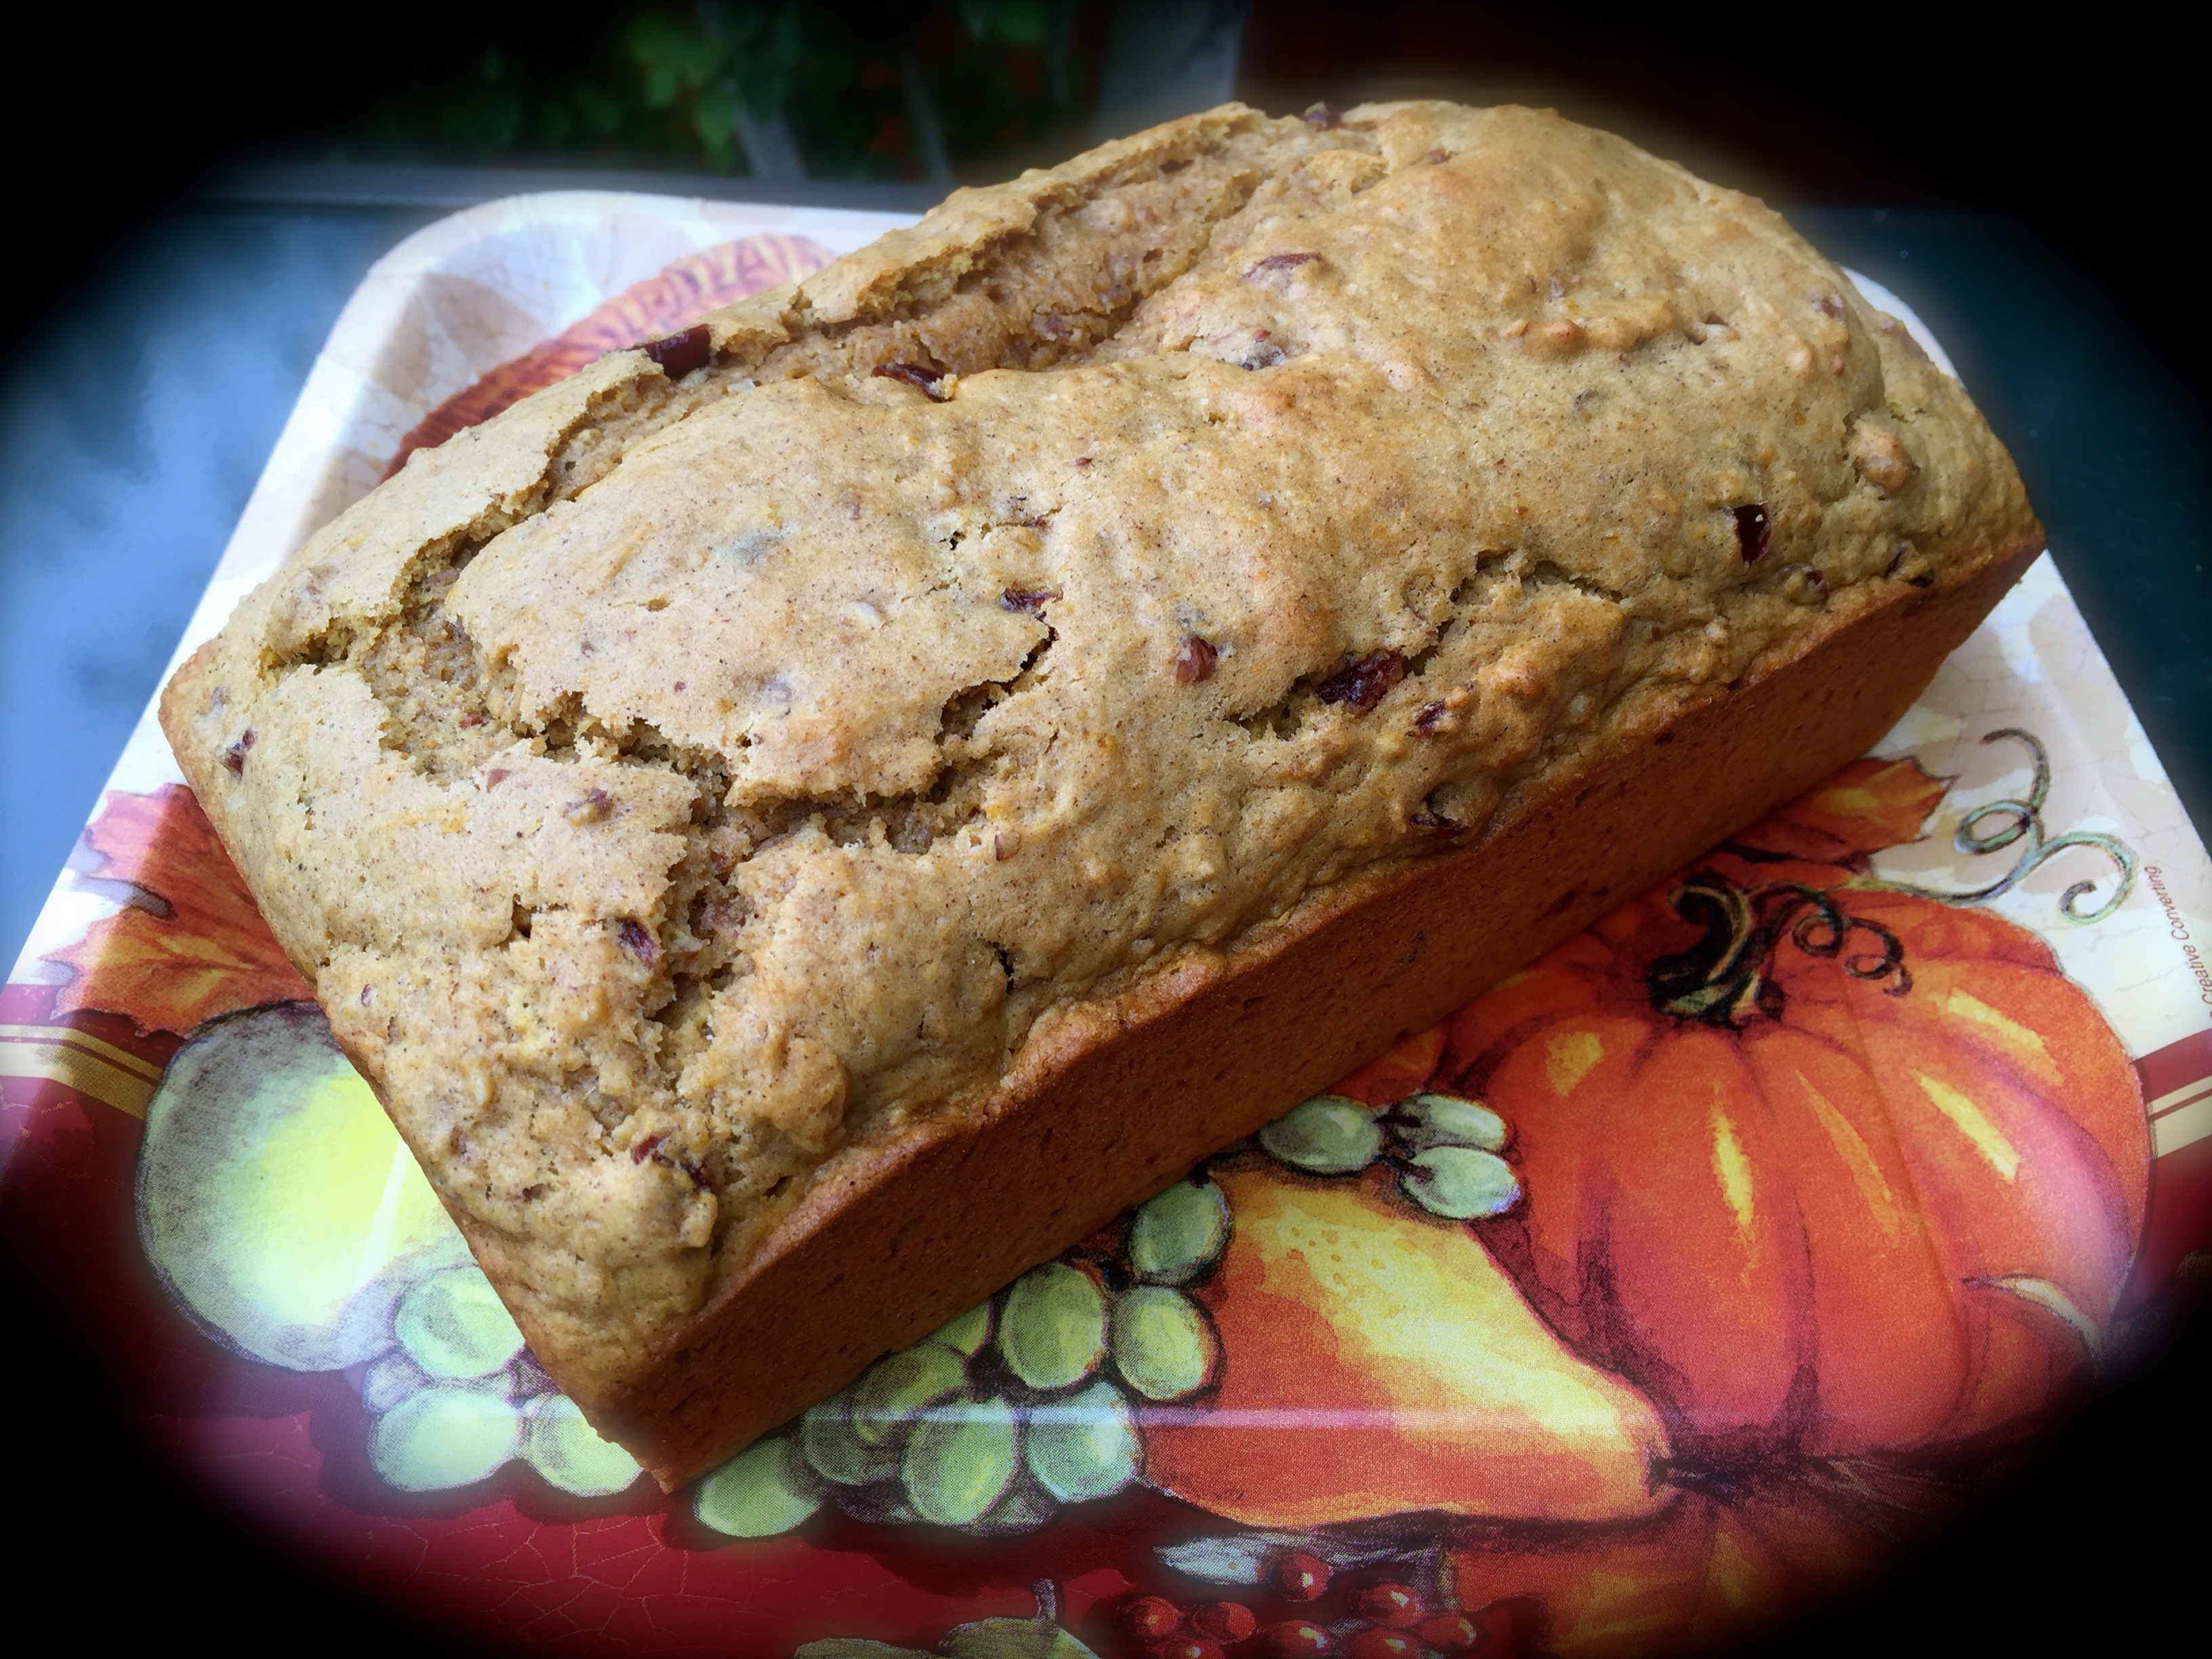
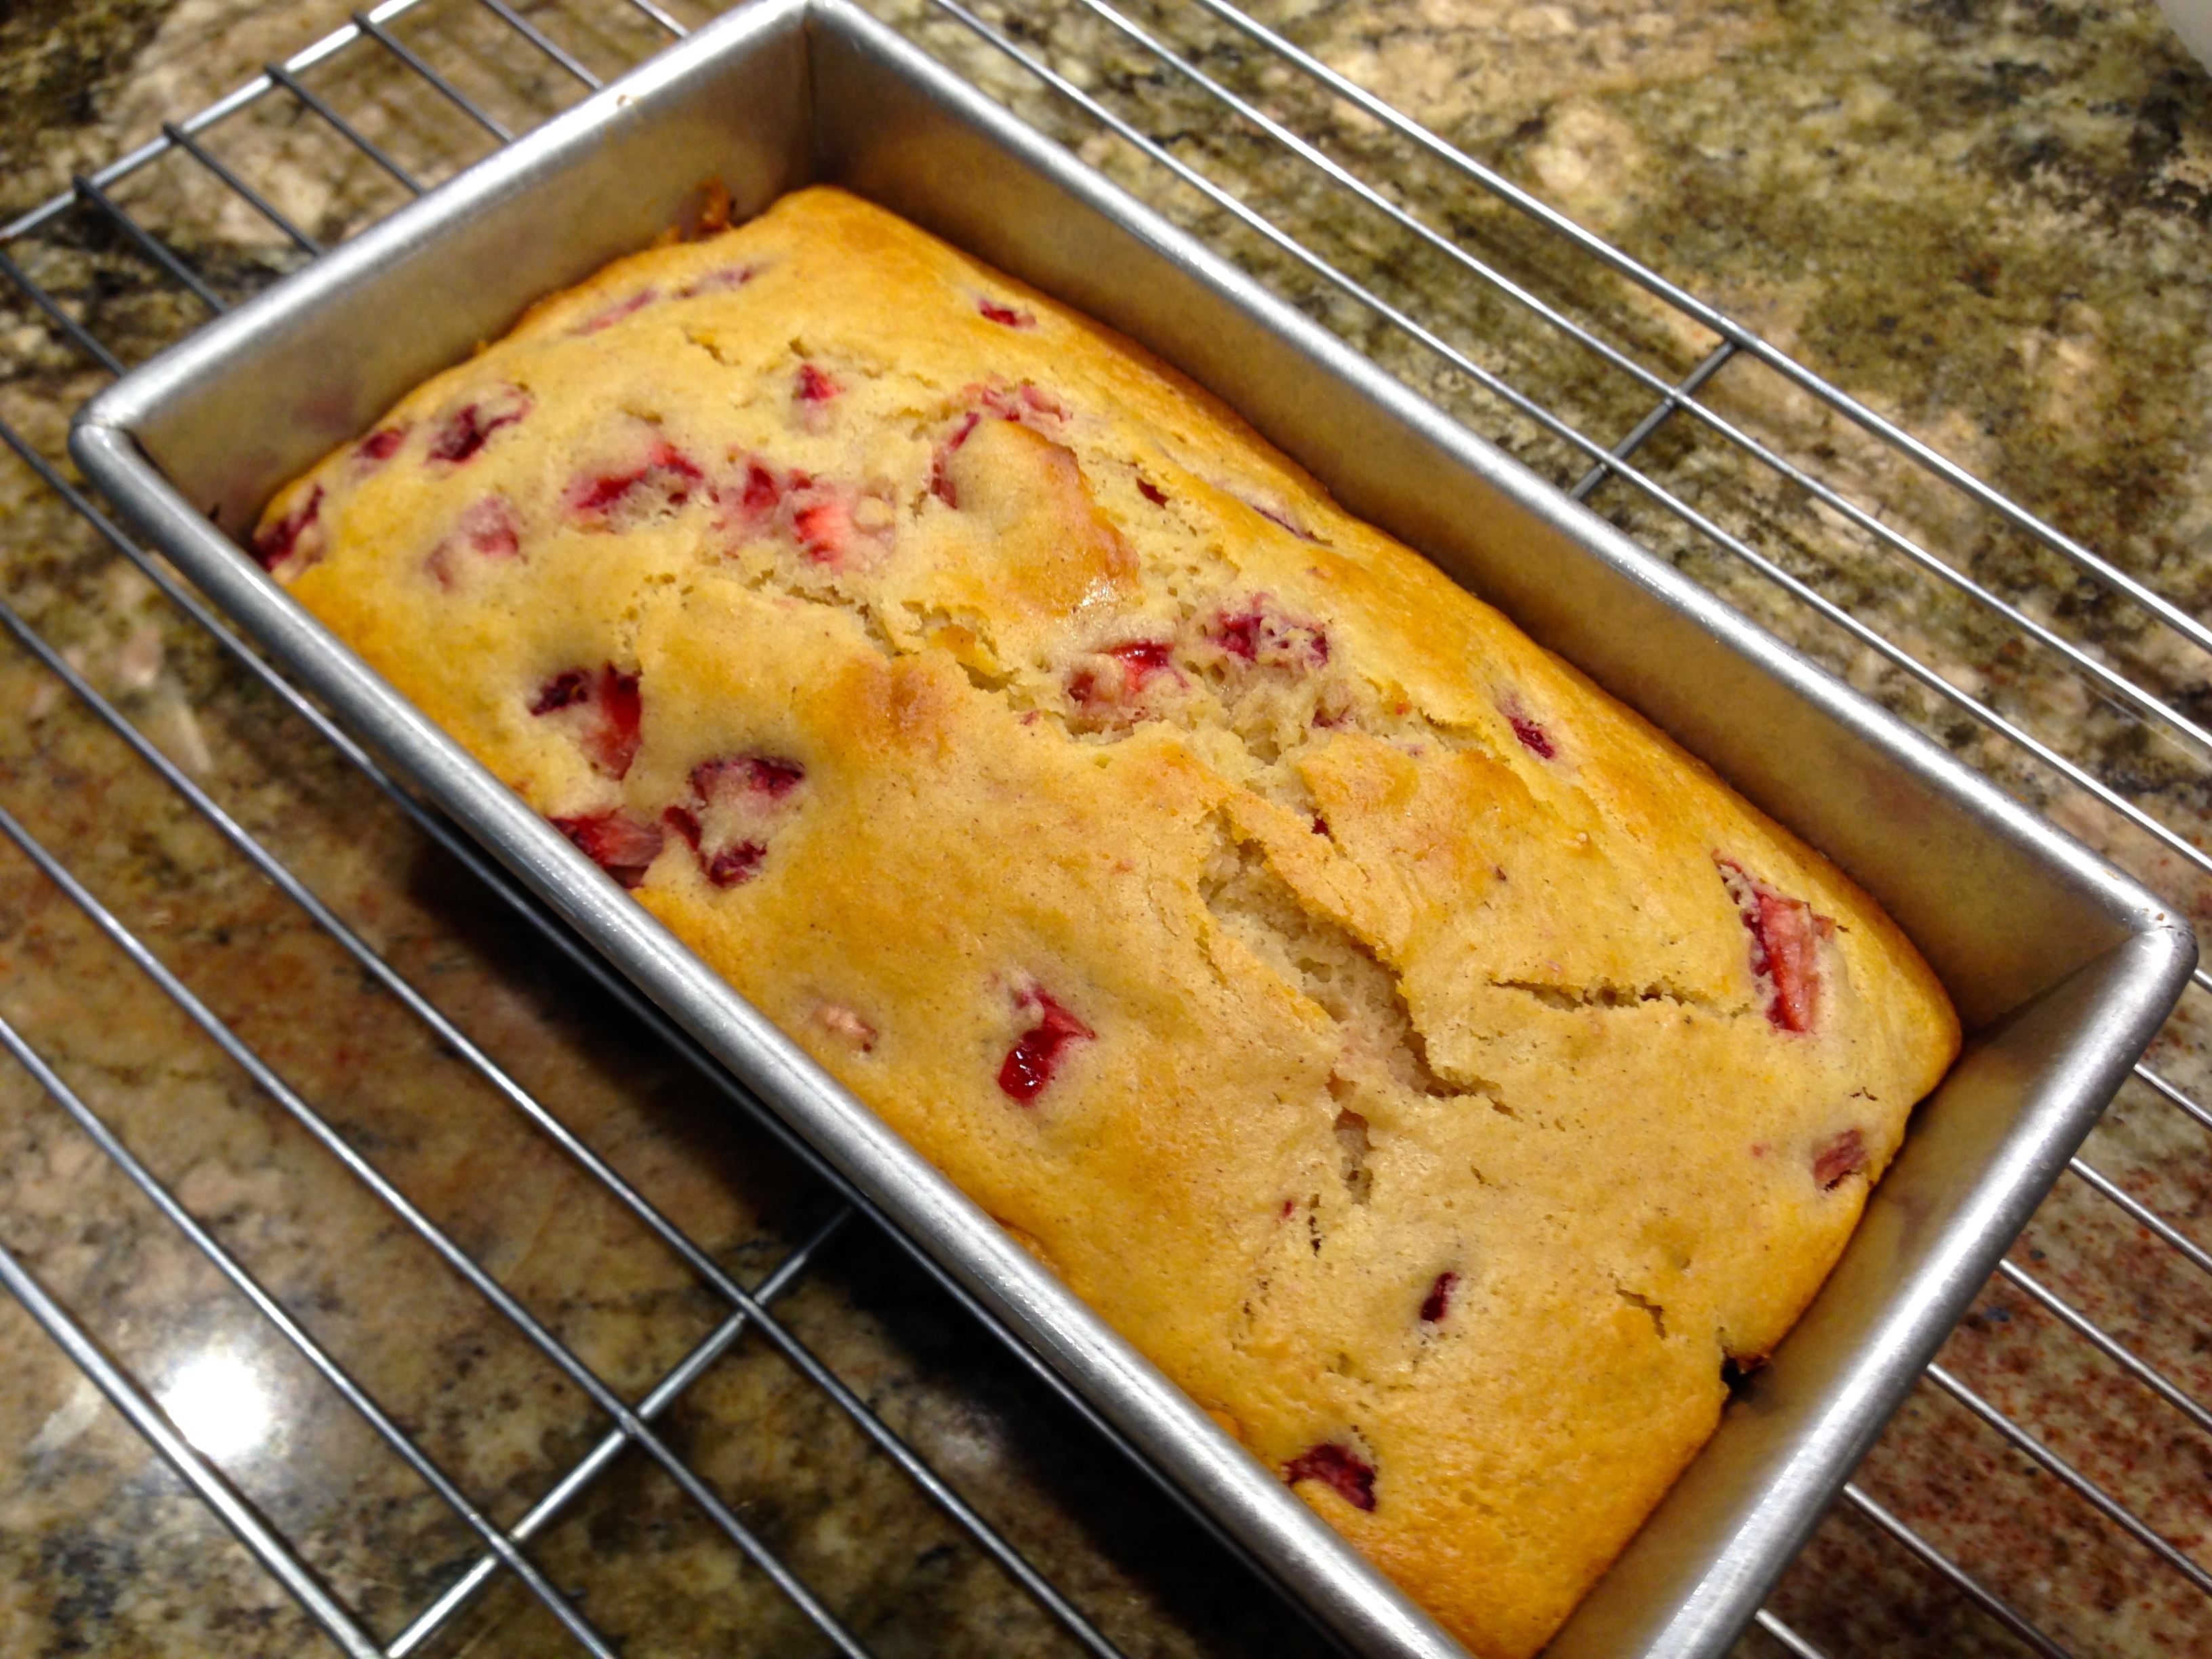
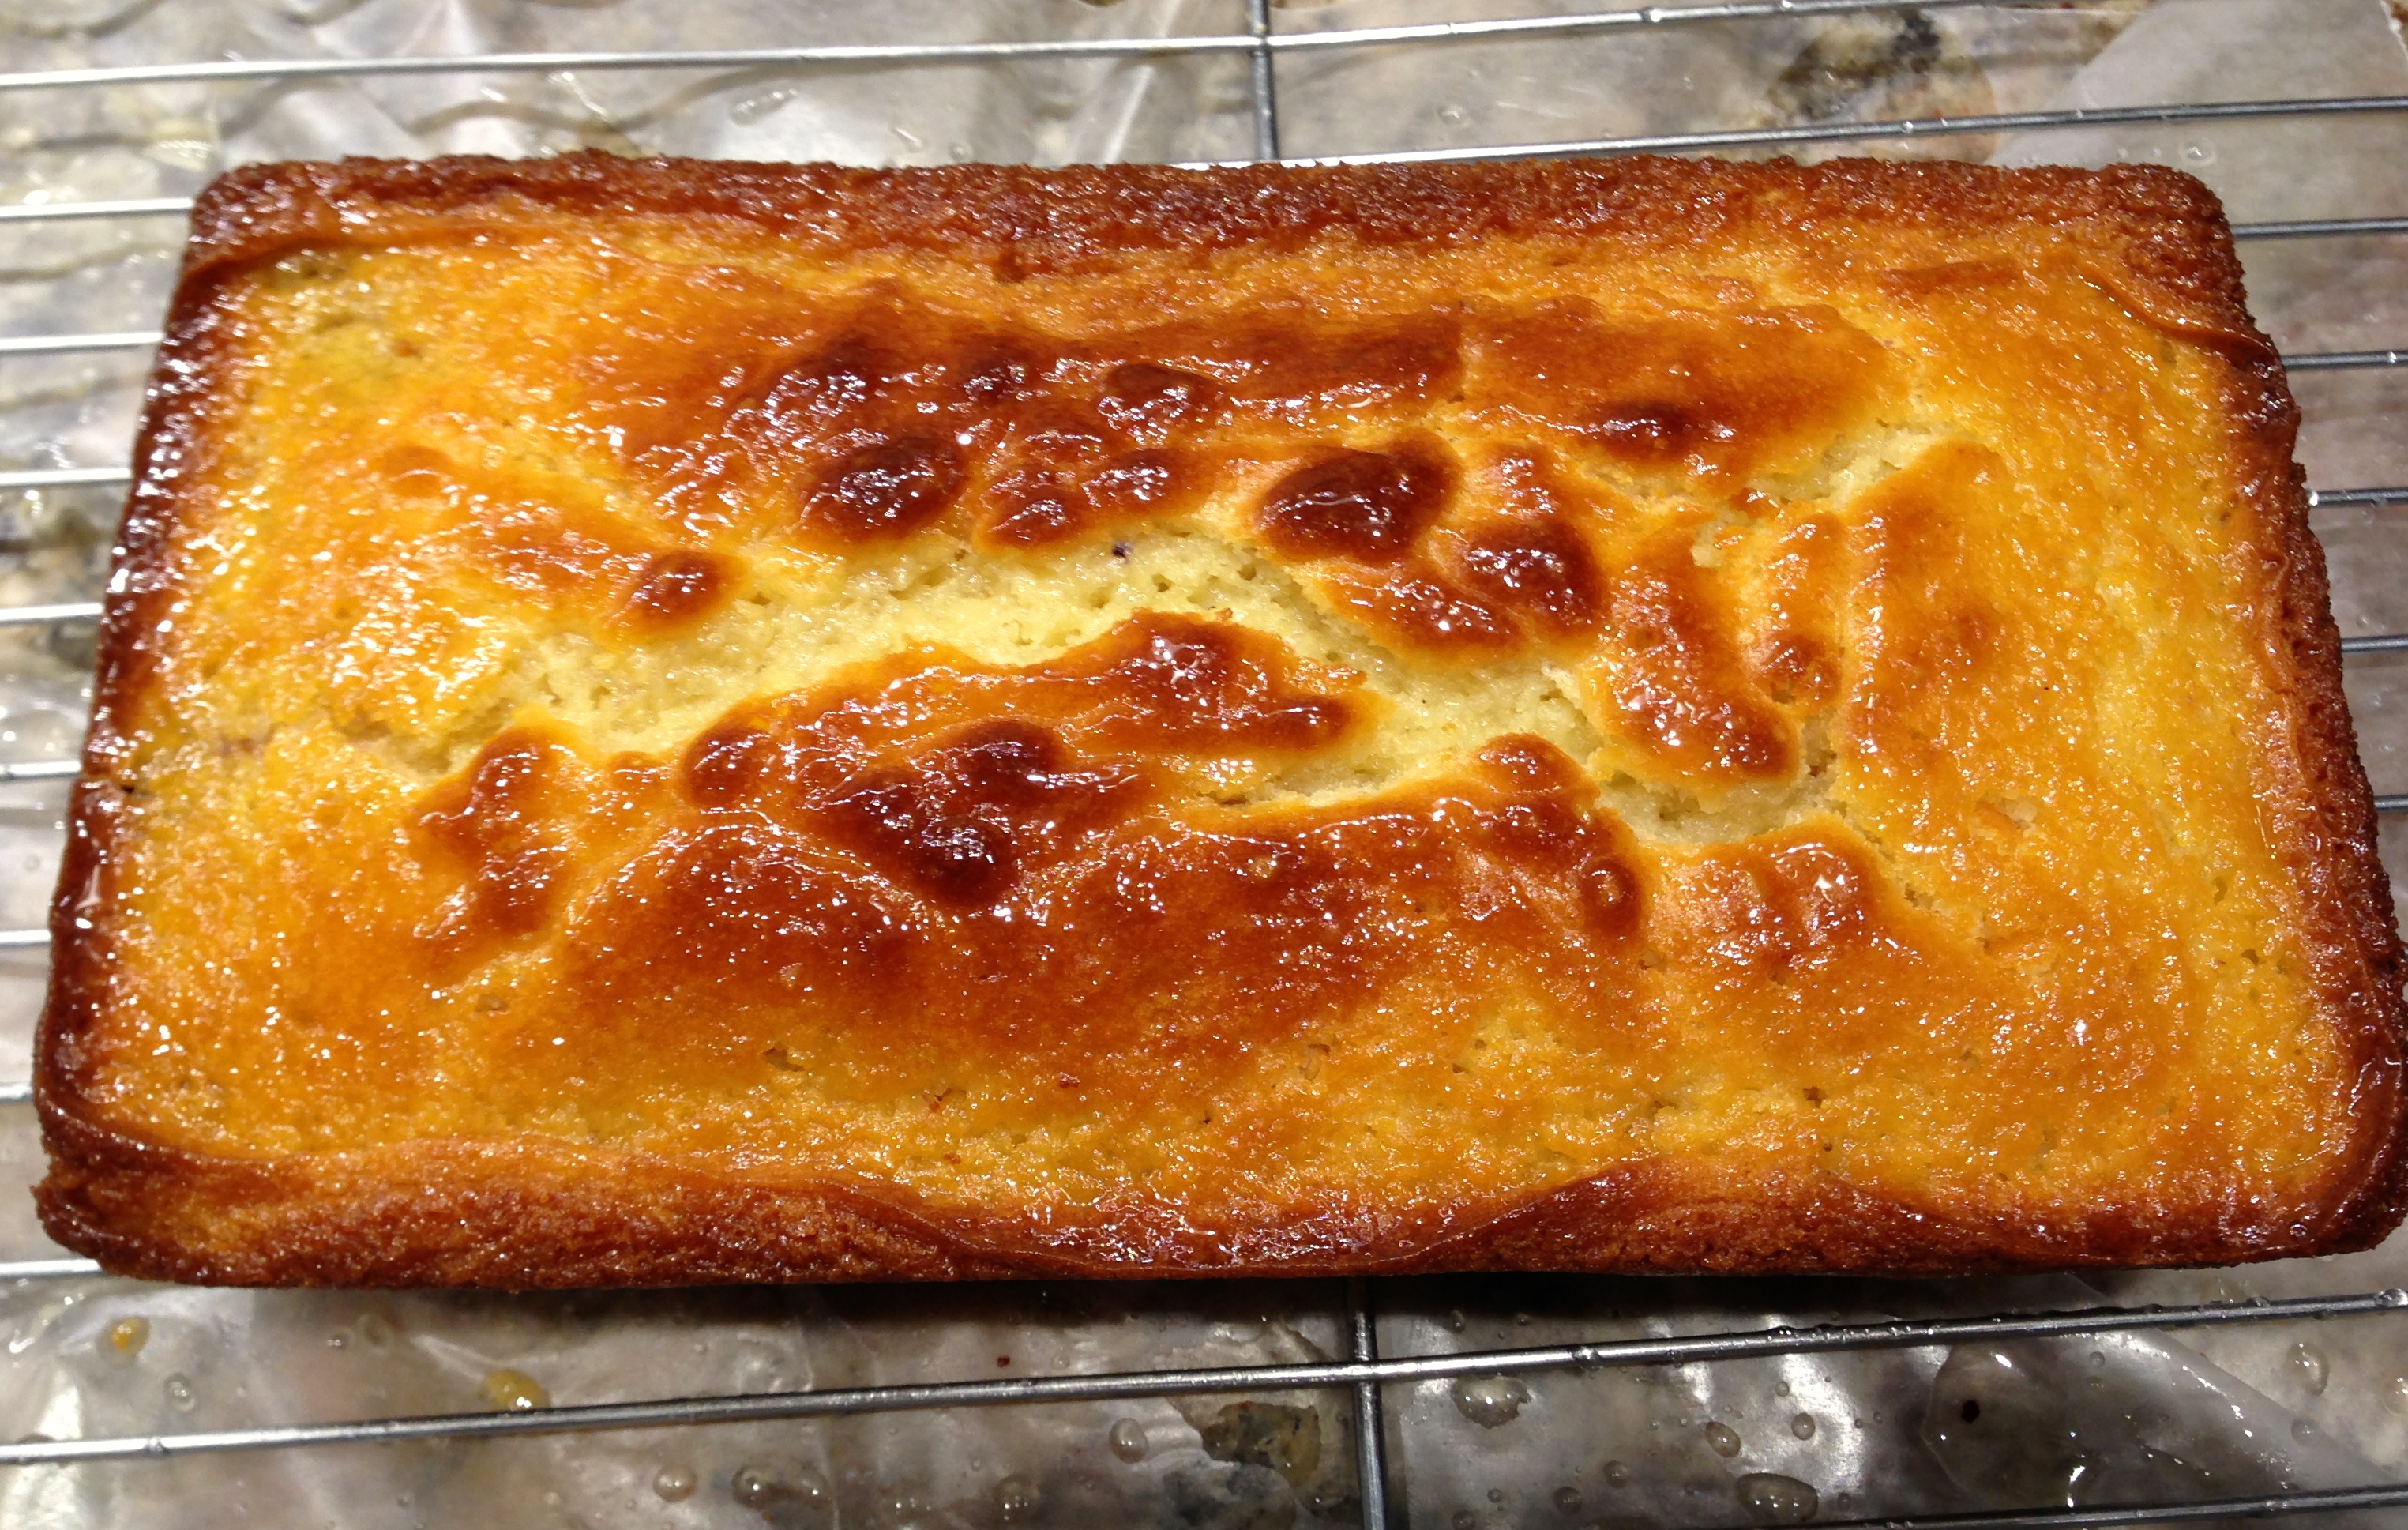
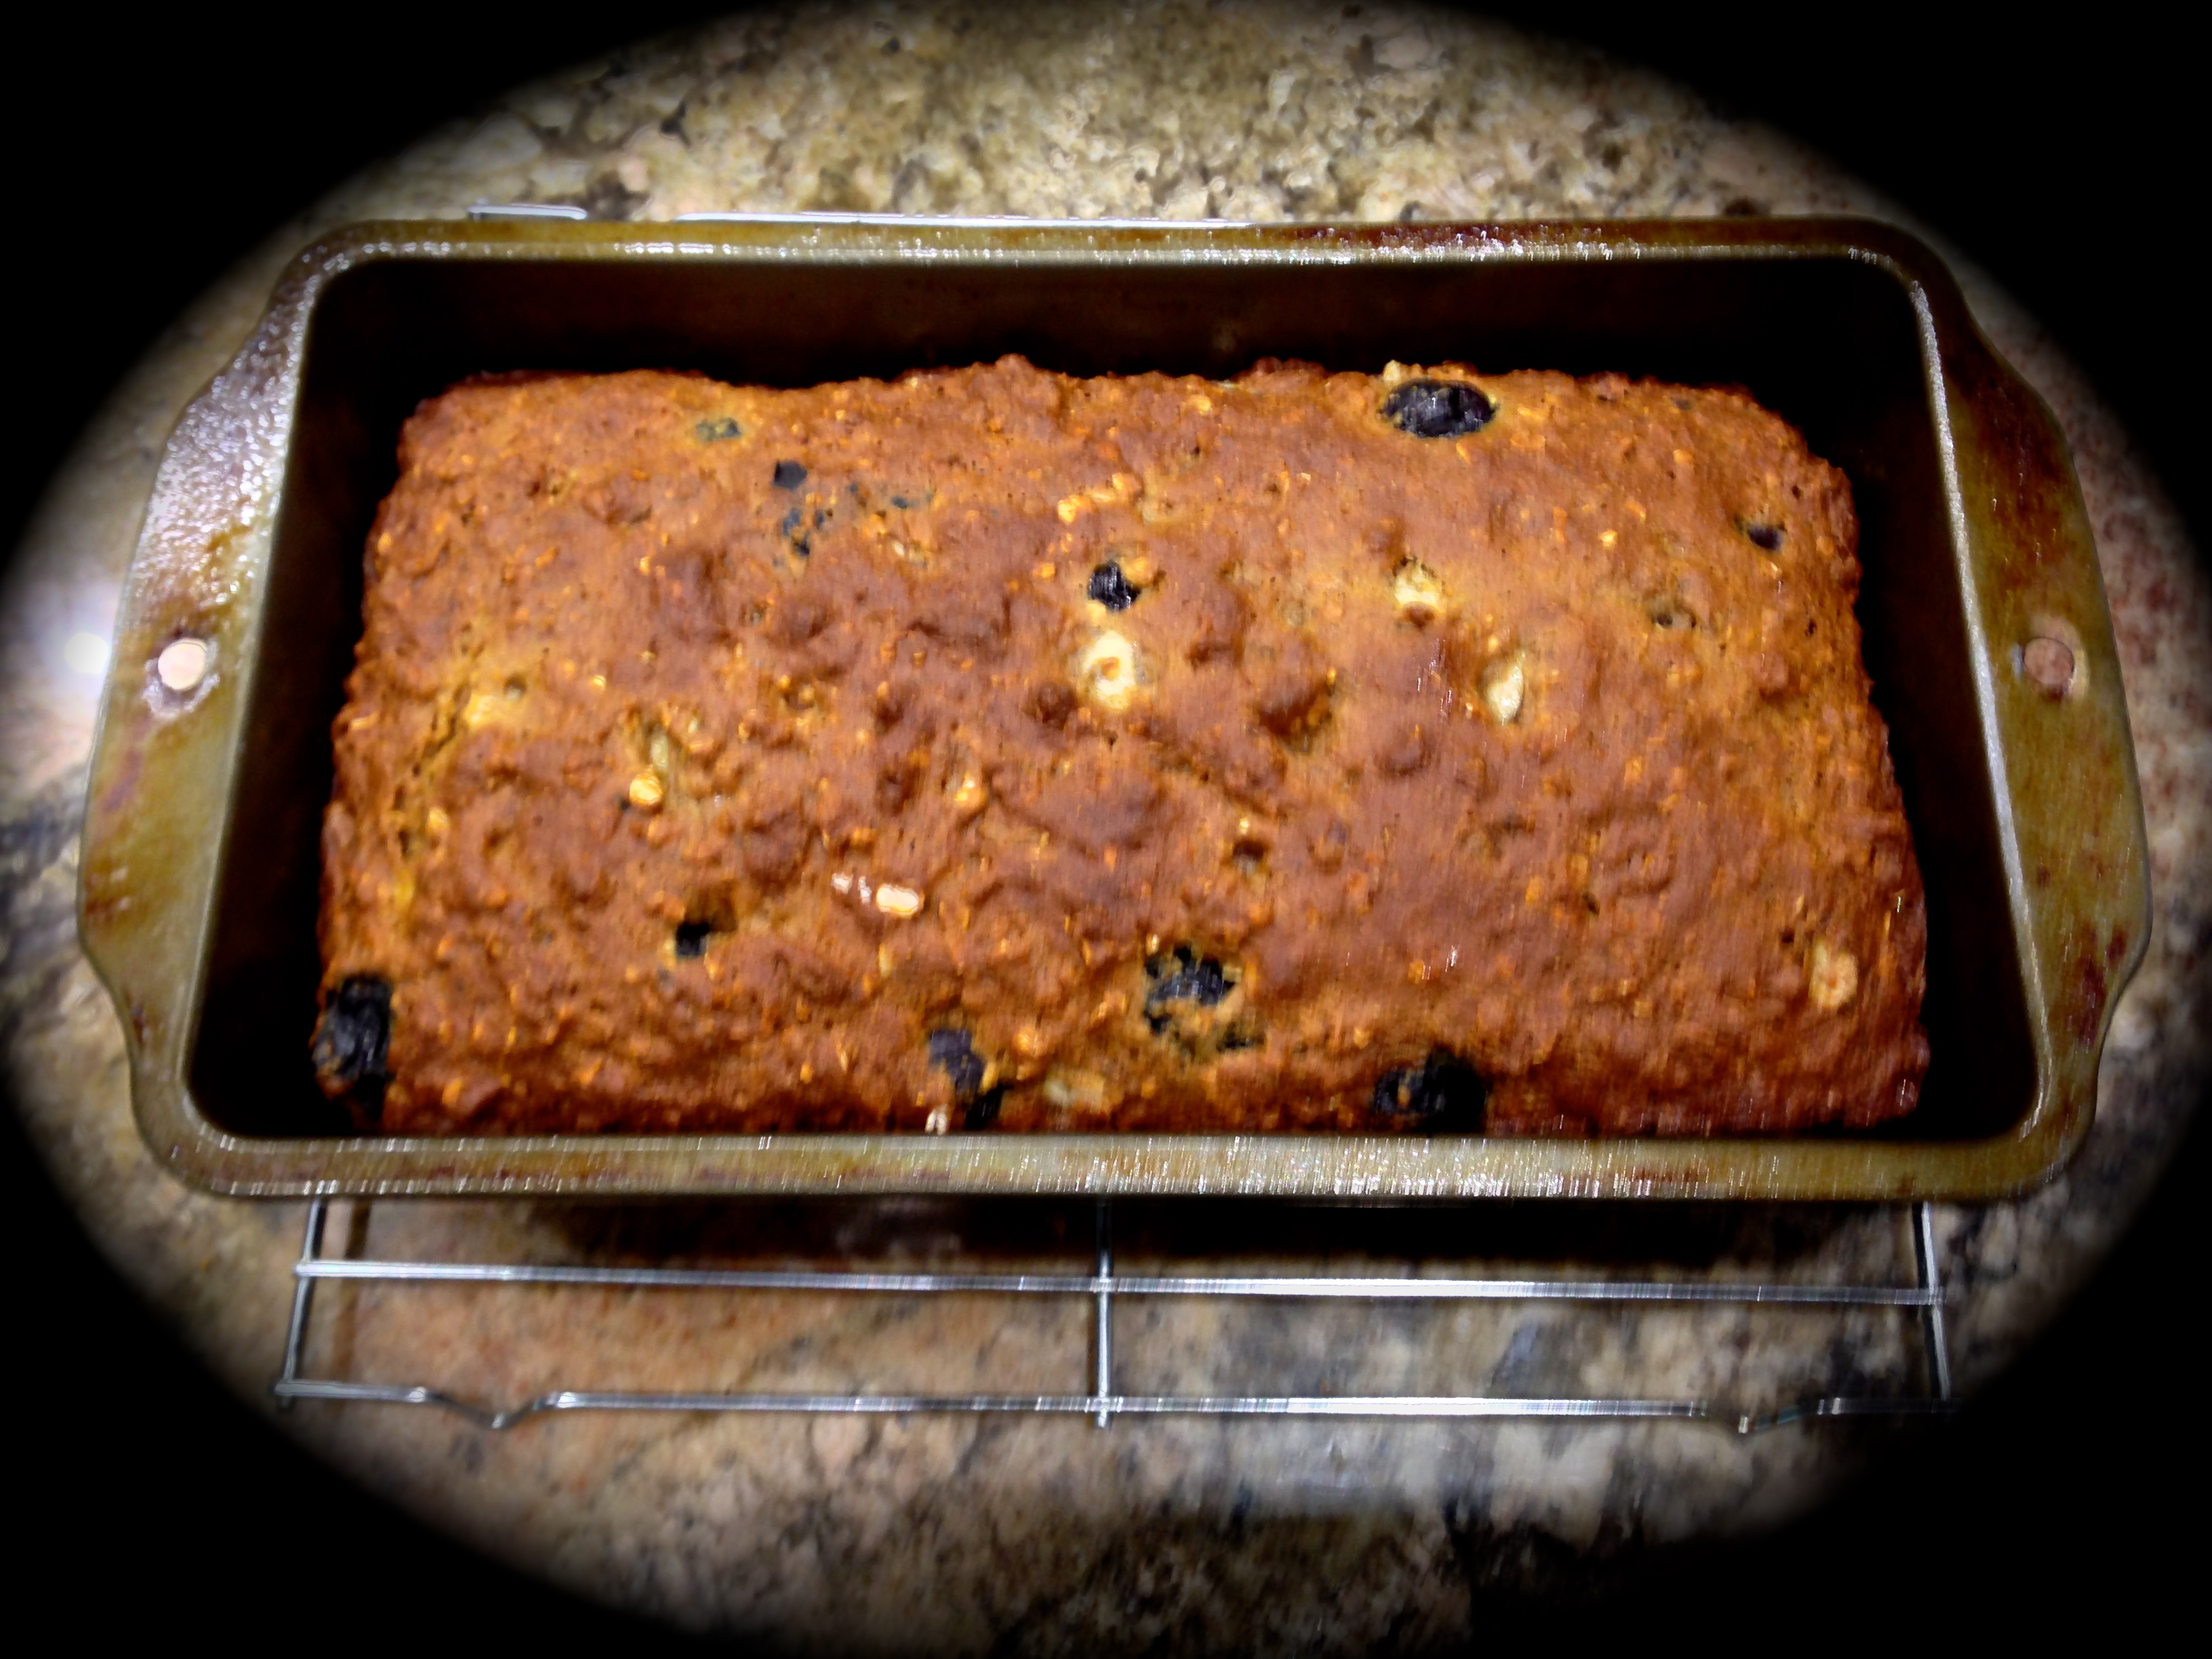
Bake for 40-50 minutes (mine was done in 40 minutes). Remove the pan from the oven. Move a rounded edged knife along all sides of the pan. Let the pan cool for 15 minutes, then remove the quick bread from the pan and let it continue to cool.

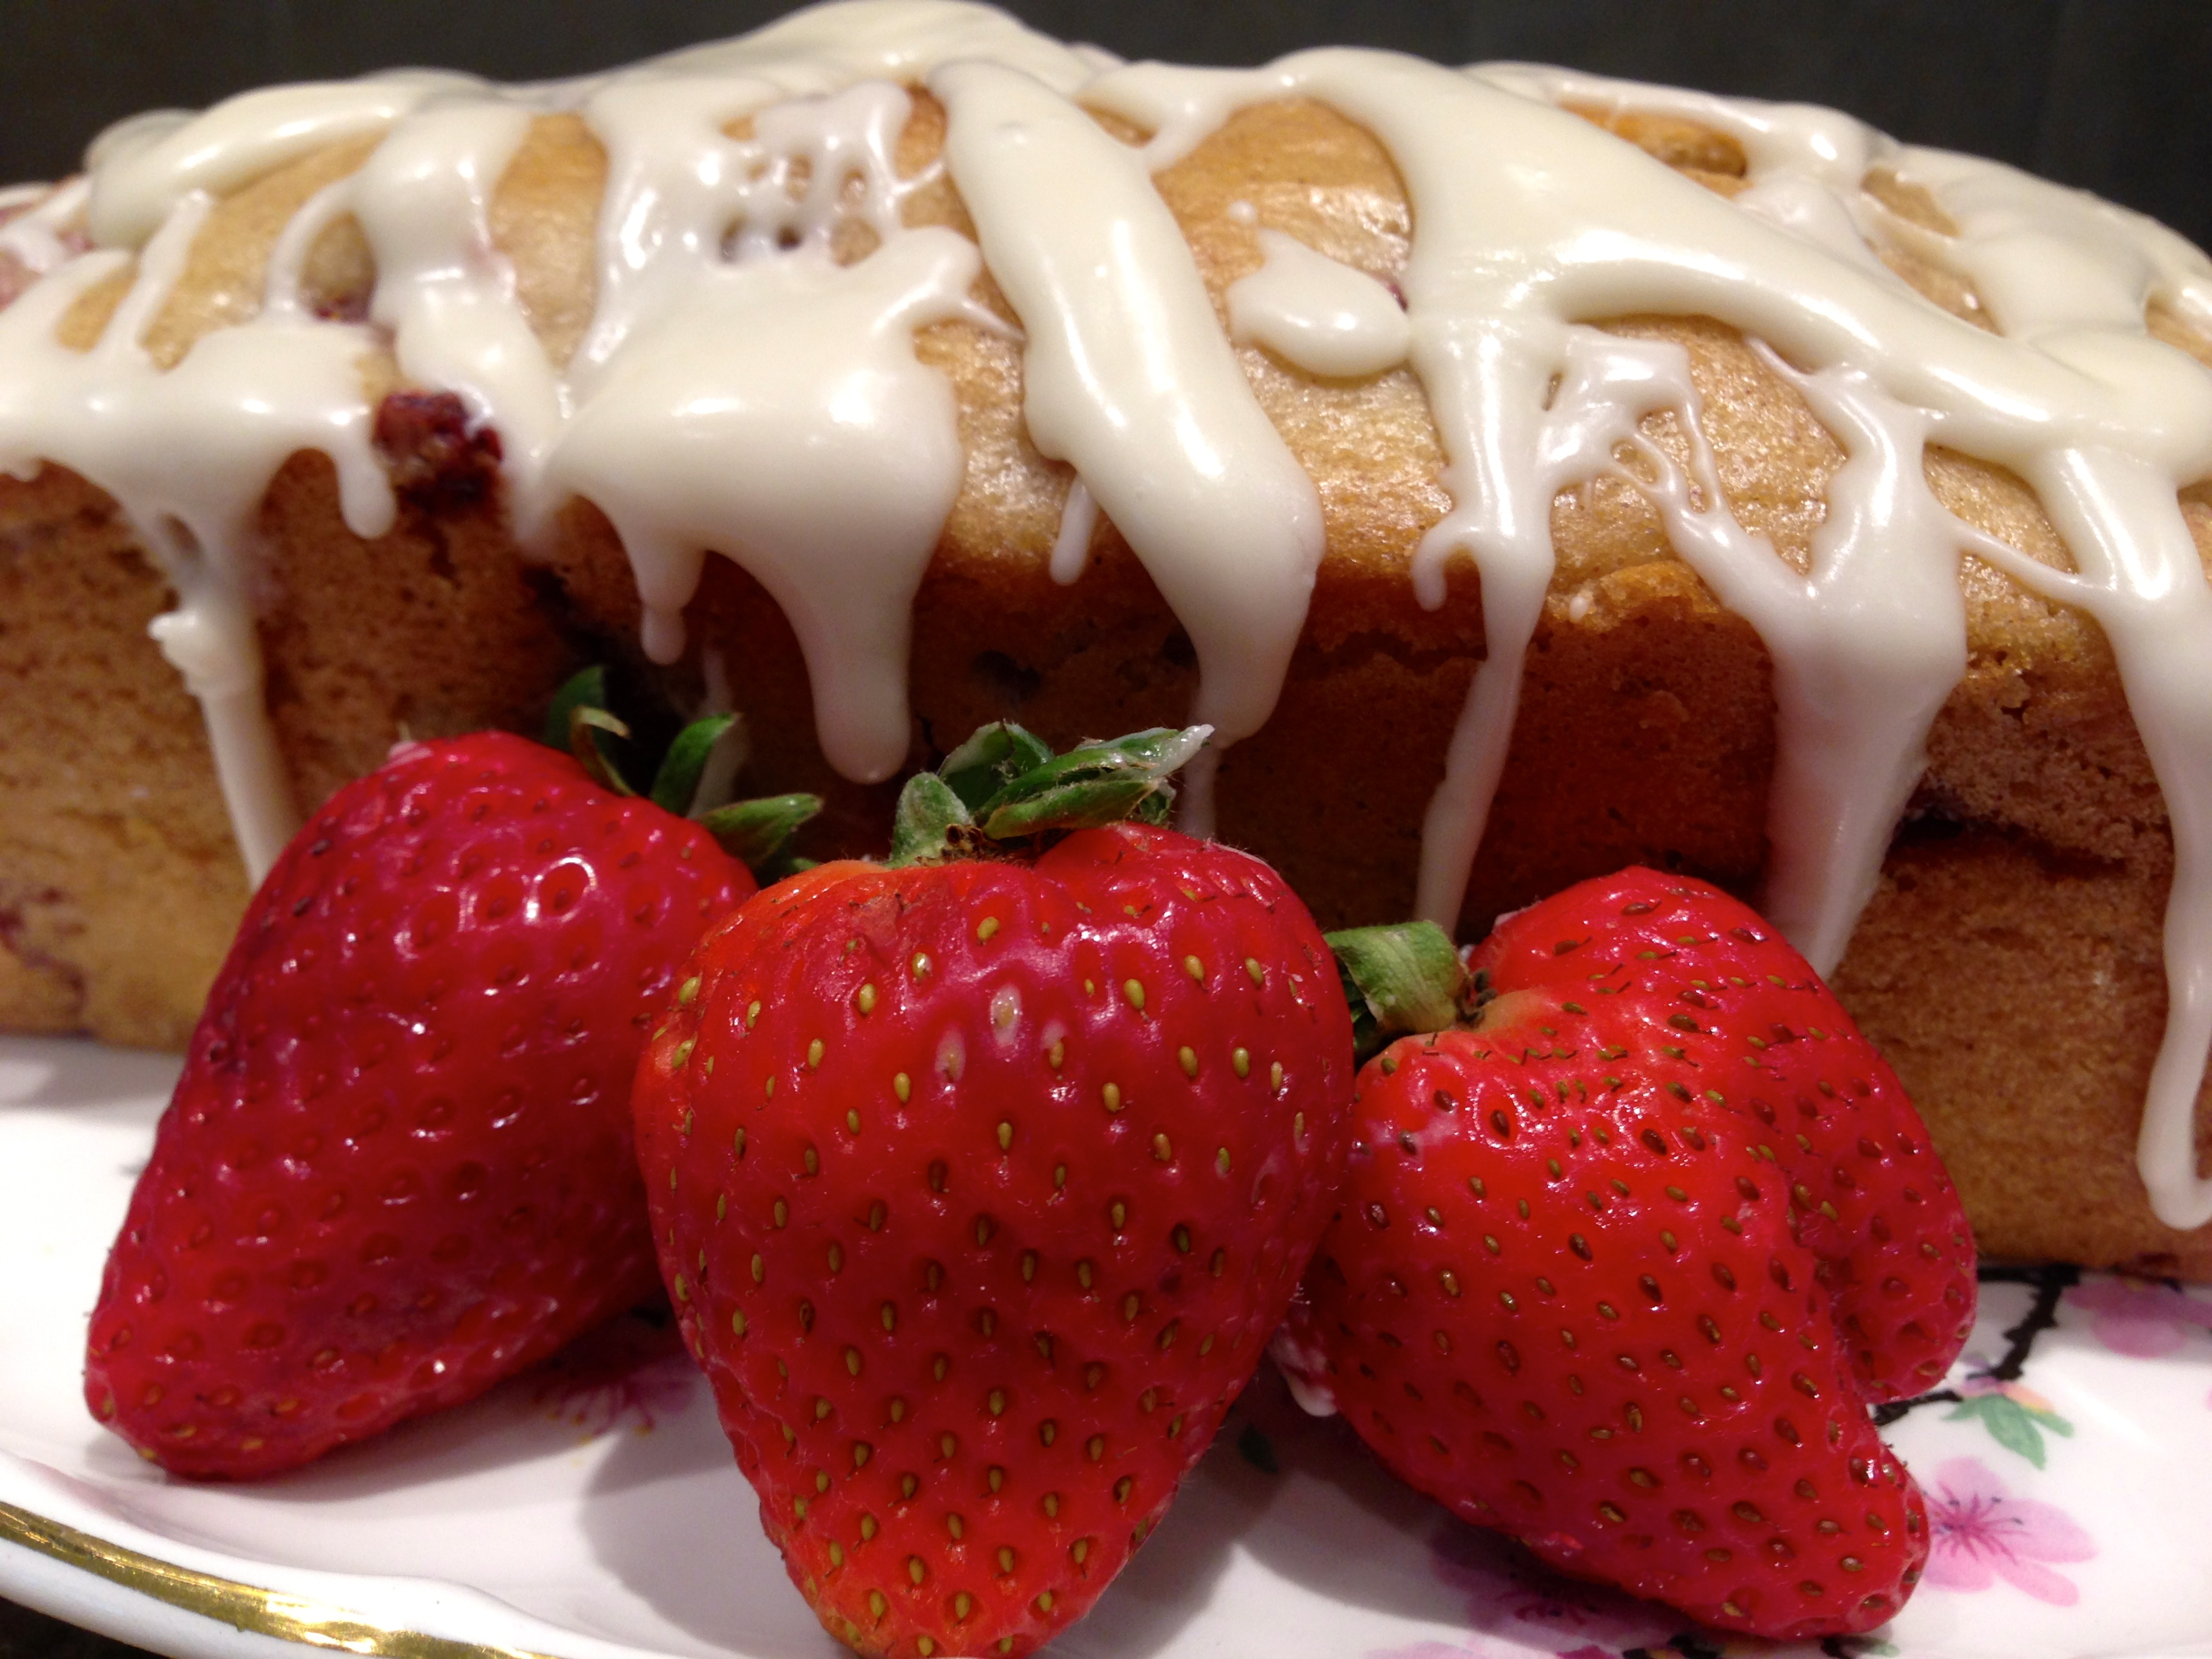
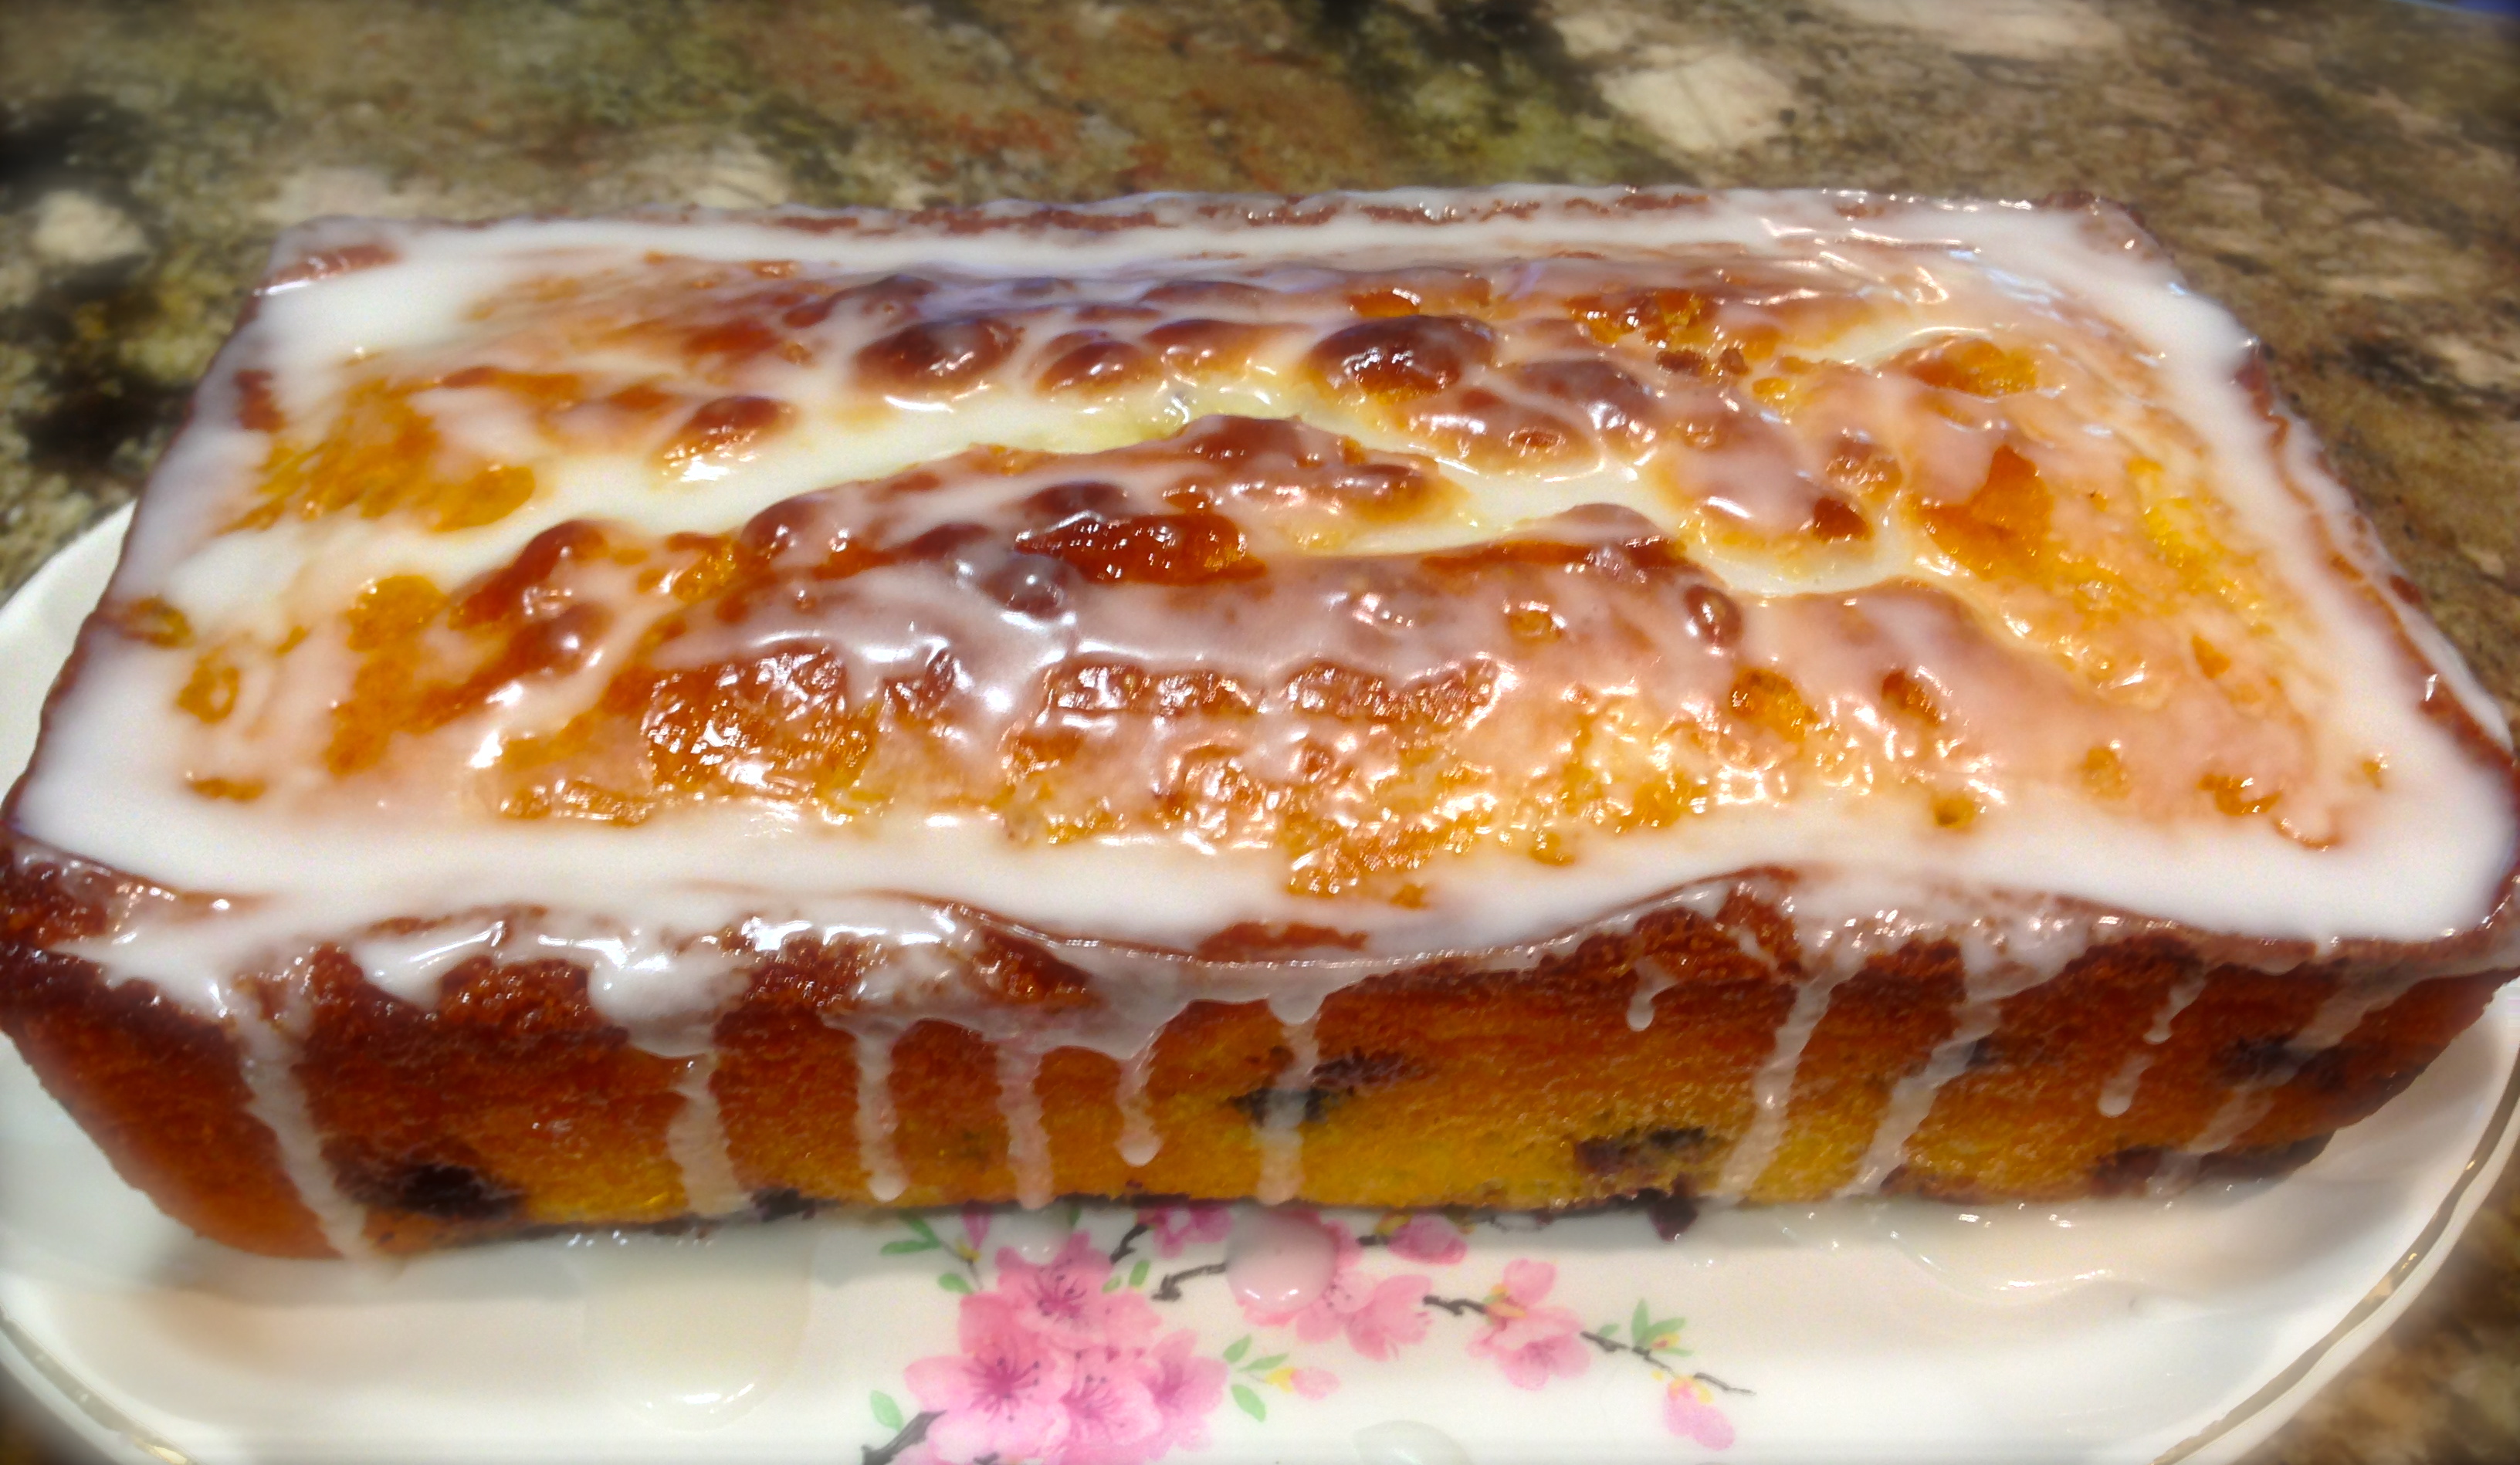
Once the bread is completely cooled mix together the glaze ingredients. Start with 1 Tbs. lemon juice and add more to achieve your desired thickness (I used 2 Tbs.). Drizzle the glaze over the top of the bread before serving. Store any leftovers in an air tight container.


Scrumptious Cranberry Nut Bread…

It’s that time of year again. I know this sounds silly but I get a little wave of excitement every time I see bags of cranberries in the grocery store for the first time. To me it’s heralding the holiday season, my favorite time of year.

Immediately my thoughts go to making a cranberry bread. It’s tradition, sort of like making Christmas cookies every year. And each year I fiddle with the recipe a little but I think I’ve got it down to something I really like.

I love the tartness of cranberries and when you combine them with orange juice, orange zest, nuts and all the other regular cast of characters you have in a sweet bread loaf that’s simply heaven. So let’s talk cranberry nut bread…

Lesson Learned 1 – Process the cranberries in a mini food processor: In my estimation this is the quickest way to get the job done with minimal mess. I pulse the cranberries so that I can get some nice sized chunks. You don’t want to pulverize them, that would defeat the purpose of the bread. The pictures below show how I processed them.

Lesson Learned 2 – Use the zest of 1 medium sized orange: I’ve seen different amounts of zest called for in various recipes and I just made it easy and said use the zest of one medium sized orange. That will render a generous table spoon which noticeably adds flavor to the bread. Quit fooling around with measuring spoons on this one. Just use one orange!

Lesson Learned 3 – I adjusted the leavening in my recipe: Again after looking at several recipes I adjusted the leavening (baking powder and soda) for high altitude. I will give you the amounts I used and also the recommended amounts that I saw on various recipes for sea level. As you can see from the pictures my bread turned out great with no cave-in in the middle (which is a result of too much leavening at high altitude). Those of you at sea level – just use the “normal” amounts I listed.

And that’s it. This is one of my all-time Fall classics. I make it every year when cranberries arrive at the grocery store. I hope you enjoy it and please, let me know what you think…

Scrumptious Cranberry Nut Bread...

  • Servings: 1 Loaf
  • Difficulty: Easy
  • Print

INGREDIENTS:

2 cups flour

1 cup sugar

1 1/2 tsp. baking powder (1 tsp. high altitude)

1/2 tsp. baking soda (1/4 tsp. high altitude)

1 tsp. salt

3/4 cup orange juice

2 Tbs. vegetable oil

Zest of one medium sized orange

1 egg, room temperature, beaten

1 1/2 cups fresh cranberries, coarsely chopped

1/2 cup chopped pecans

Baking spray

DIRECTIONS:

Preheat oven to 350. Spray an 8 x 4 inch loaf pan. In a medium bowl combine flour, sugar, baking powder, salt and baking powder. Set aside.

In another bowl combine orange juice, oil, zest and egg. Pour into the flour mixture and stir until combined. Fold in the cranberries and nuts until they are all throughout the batter.

Bake for 55 minutes or until a toothpick inserted in the center comes out clean. Let the loaf cool in the pan for 15 minutes. Remove the loaf from the pan and cool completely.


Luscious Zucchini Bread…

I know, I know, by now everyone has their own zucchini bread recipe. I mean, it’s a must especially if you grow zucchini or have access to a farmers market. It is definitely zucchini time of year, that glorious time when you are so grateful to have your first harvest but by the end of the season are looking for ways either to use them or get rid of them.

Fortunately (or unfortunately) for me, now that I live in a condo I can’t grow zucchini so I can control the amount of zucchini I am willing to use. So last week when I went to the farmers market I got a couple of them and used one as a vegetable side dish and the other to make a couple of loaves of zucchini bread.

So what makes this recipe better than most. A secret ingredient that I use to up the flavor factor. So let’s talk luscious zucchini bread…

Lesson Learned 1 – The secret ingredient is vanilla bean caviar: Most zucchini bread recipes call for vanilla, as does mine. But I decided to try adding the caviar from the inside of a vanilla bean to try to enhance the flavor. And let me tell you, it really ramped up the taste factor. That’s why I call this zucchini bread luscious.

These days you can buy vanilla beans at your local grocery store but not so long ago you had to go to a specialty spice store to get them. The picture below shows you what a vanilla bean looks like.

Step 1: The shaft of the bean is quite small and kind of hard so you’ll need a very sharp knife to extract the caviar from the pod. First you need to straighten out the pod.

Step 2: Using a sharp knife, cut a slit all the way up and down the bean pod


Step 3: Pry the slit open with your hands and scrape the tip of the knife up and down the open shaft of the pod making sure to get as much of the caviar out of the inside as you can.

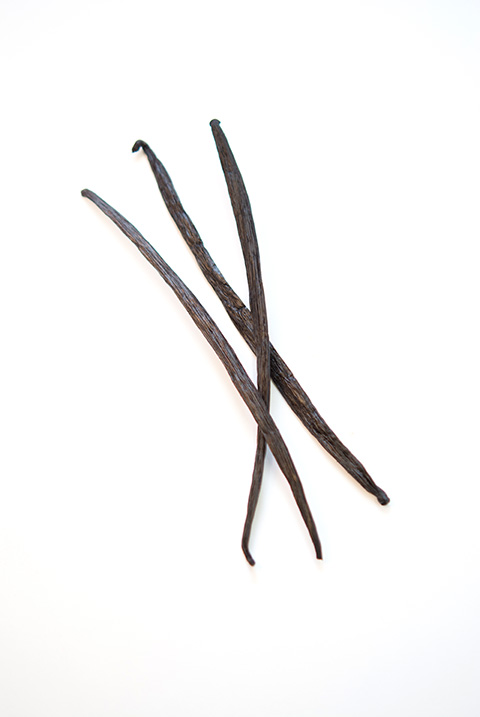
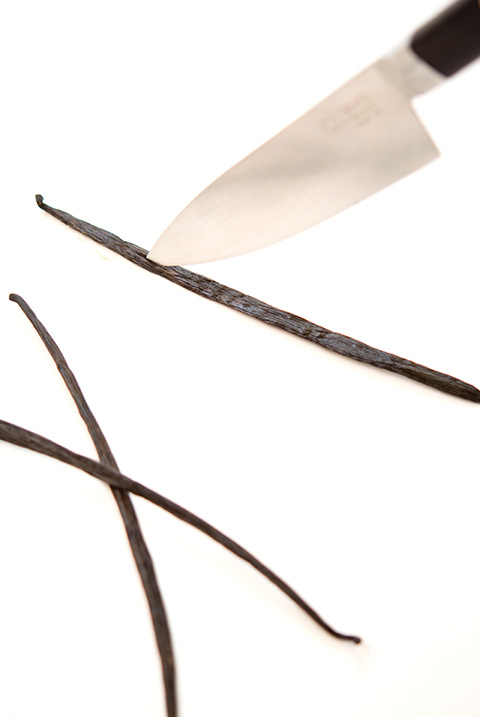
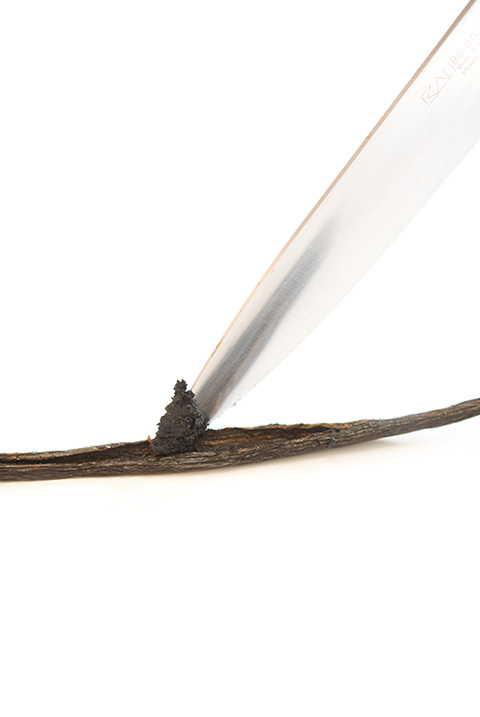
A whole vanilla bean will give you the equivalent of approximately one teaspoon of vanilla extract. Adding this to the two teaspoons of vanilla already in the recipe and it gives a wonderful but not over powering vanilla flavor to the zucchini bread. And that’s what makes it so luscious.

Now can you make this without the caviar? Of course… but I compare this to adding some espresso powder to a chocolate recipe. The recipe would be good without it but with it there is a fuller, richer flavor. Now I will warn you, vanilla beans are expensive, but they are worth it.

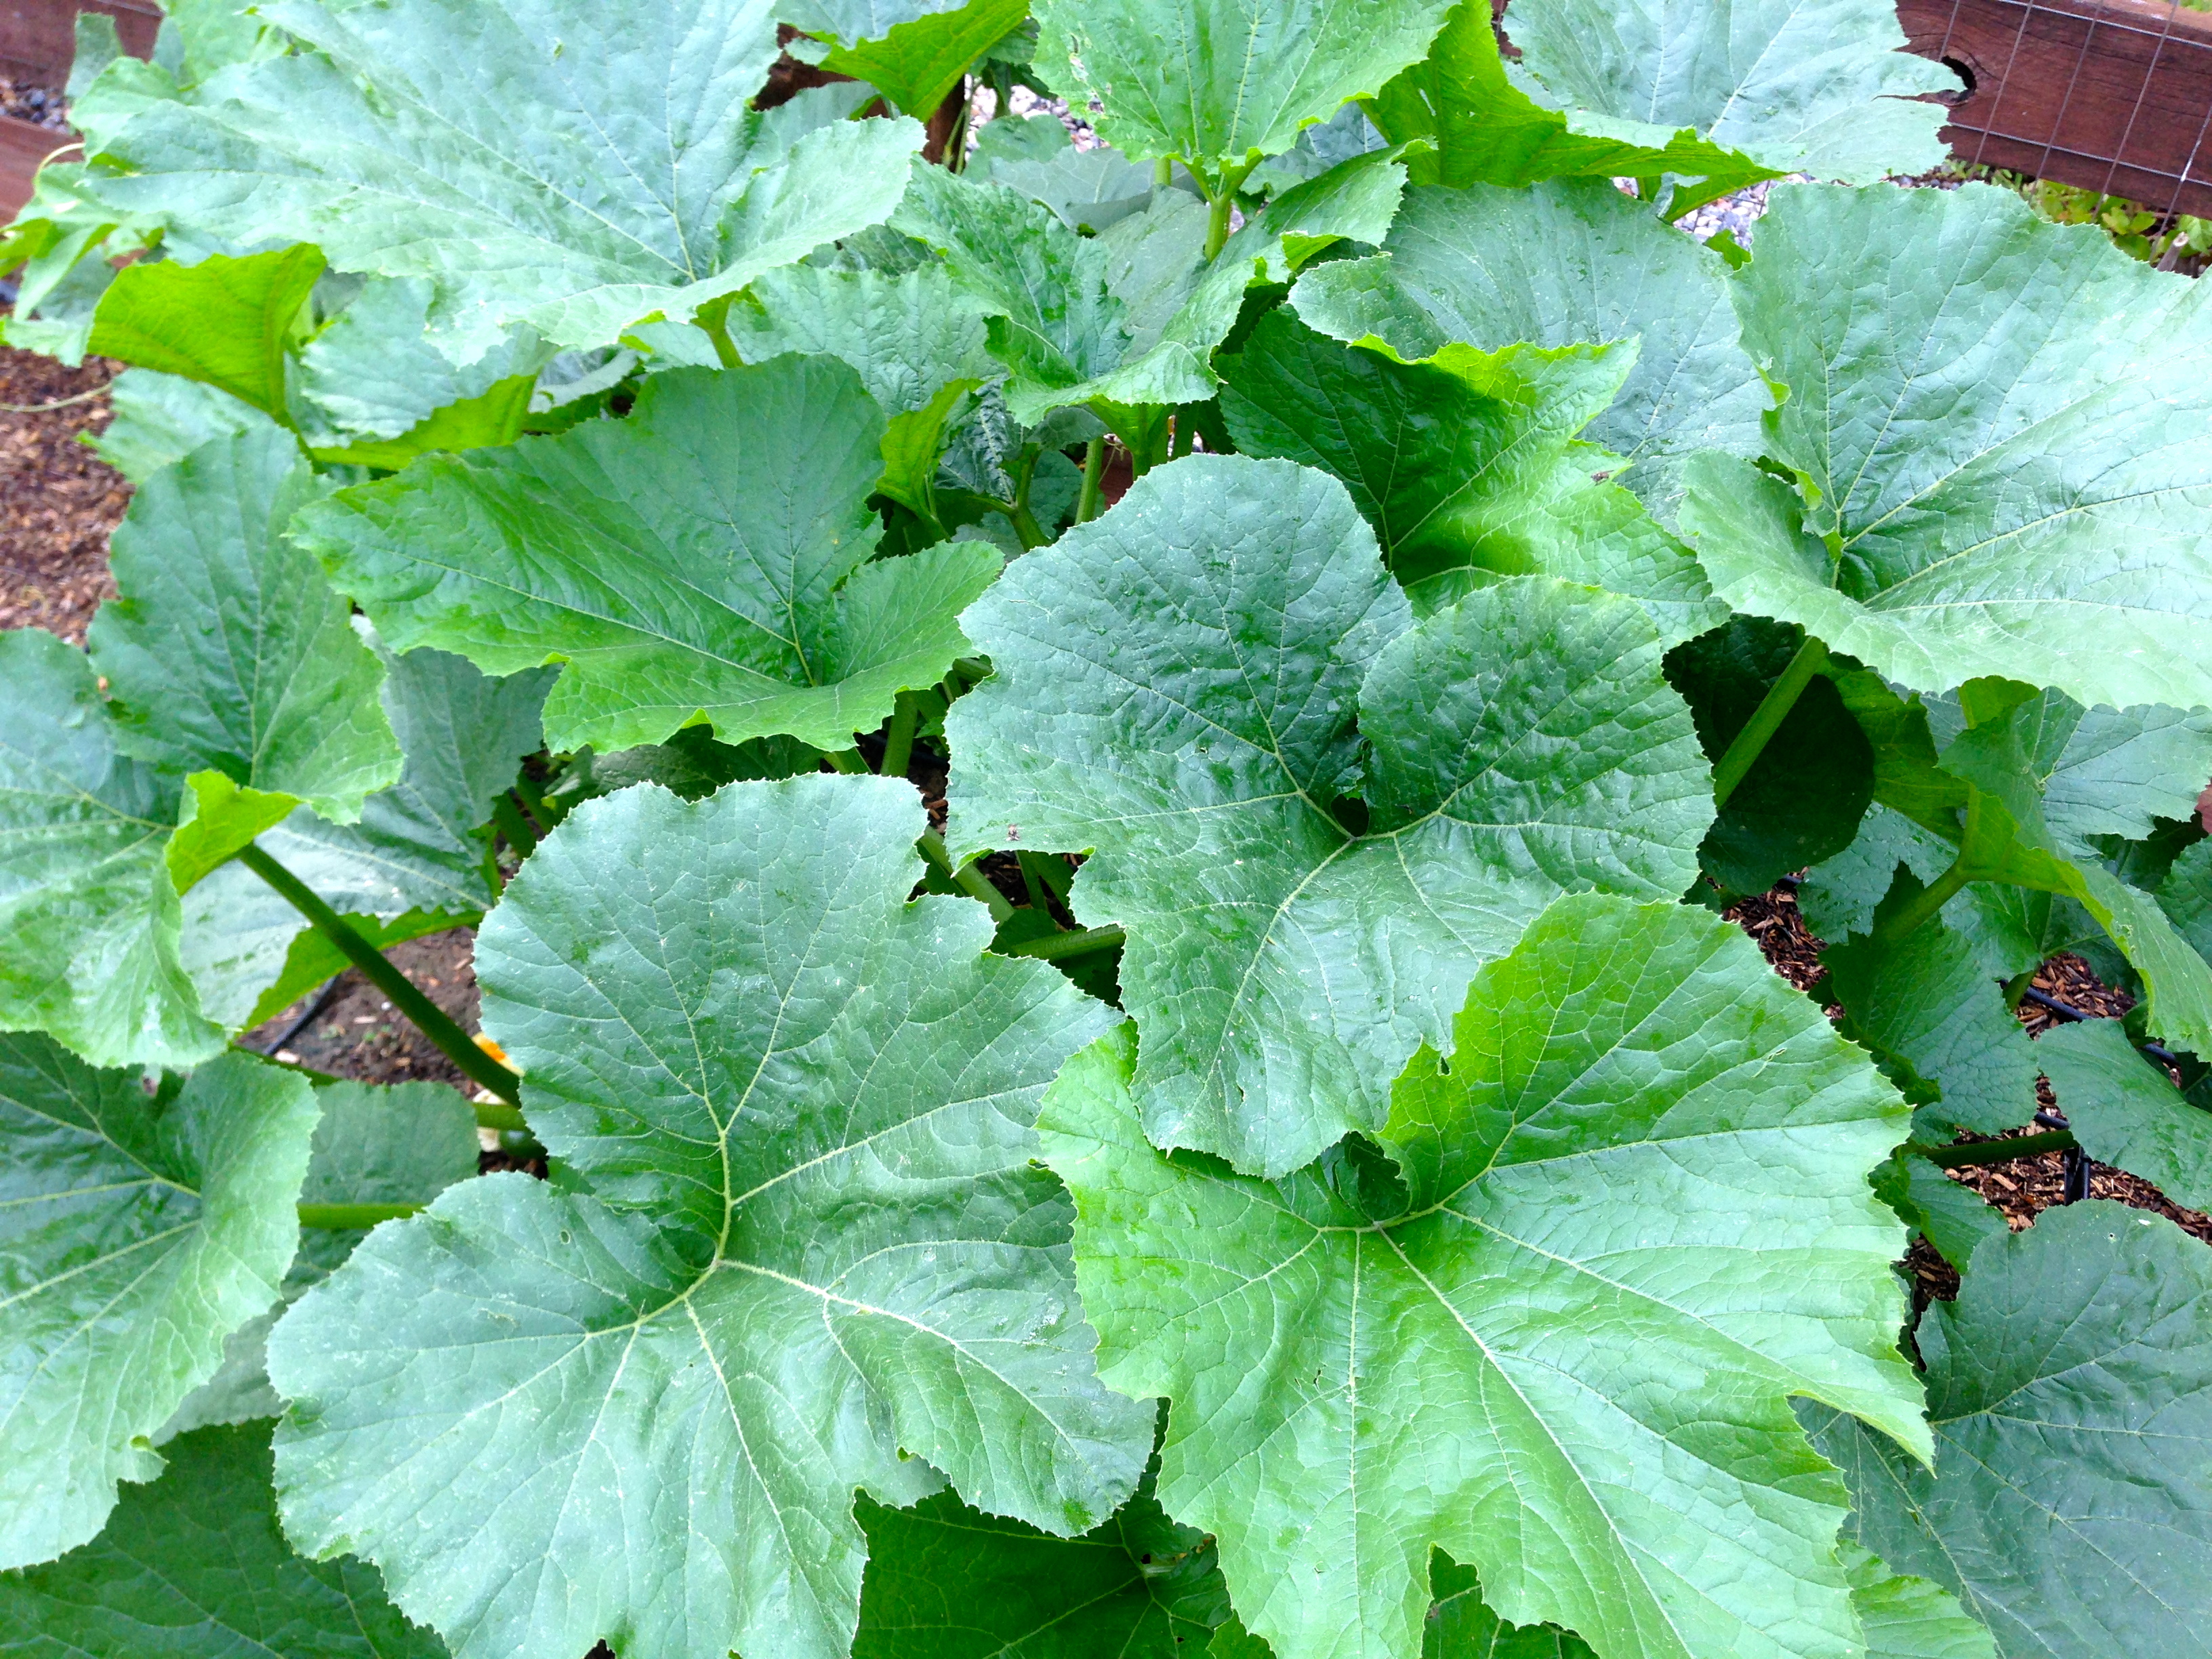
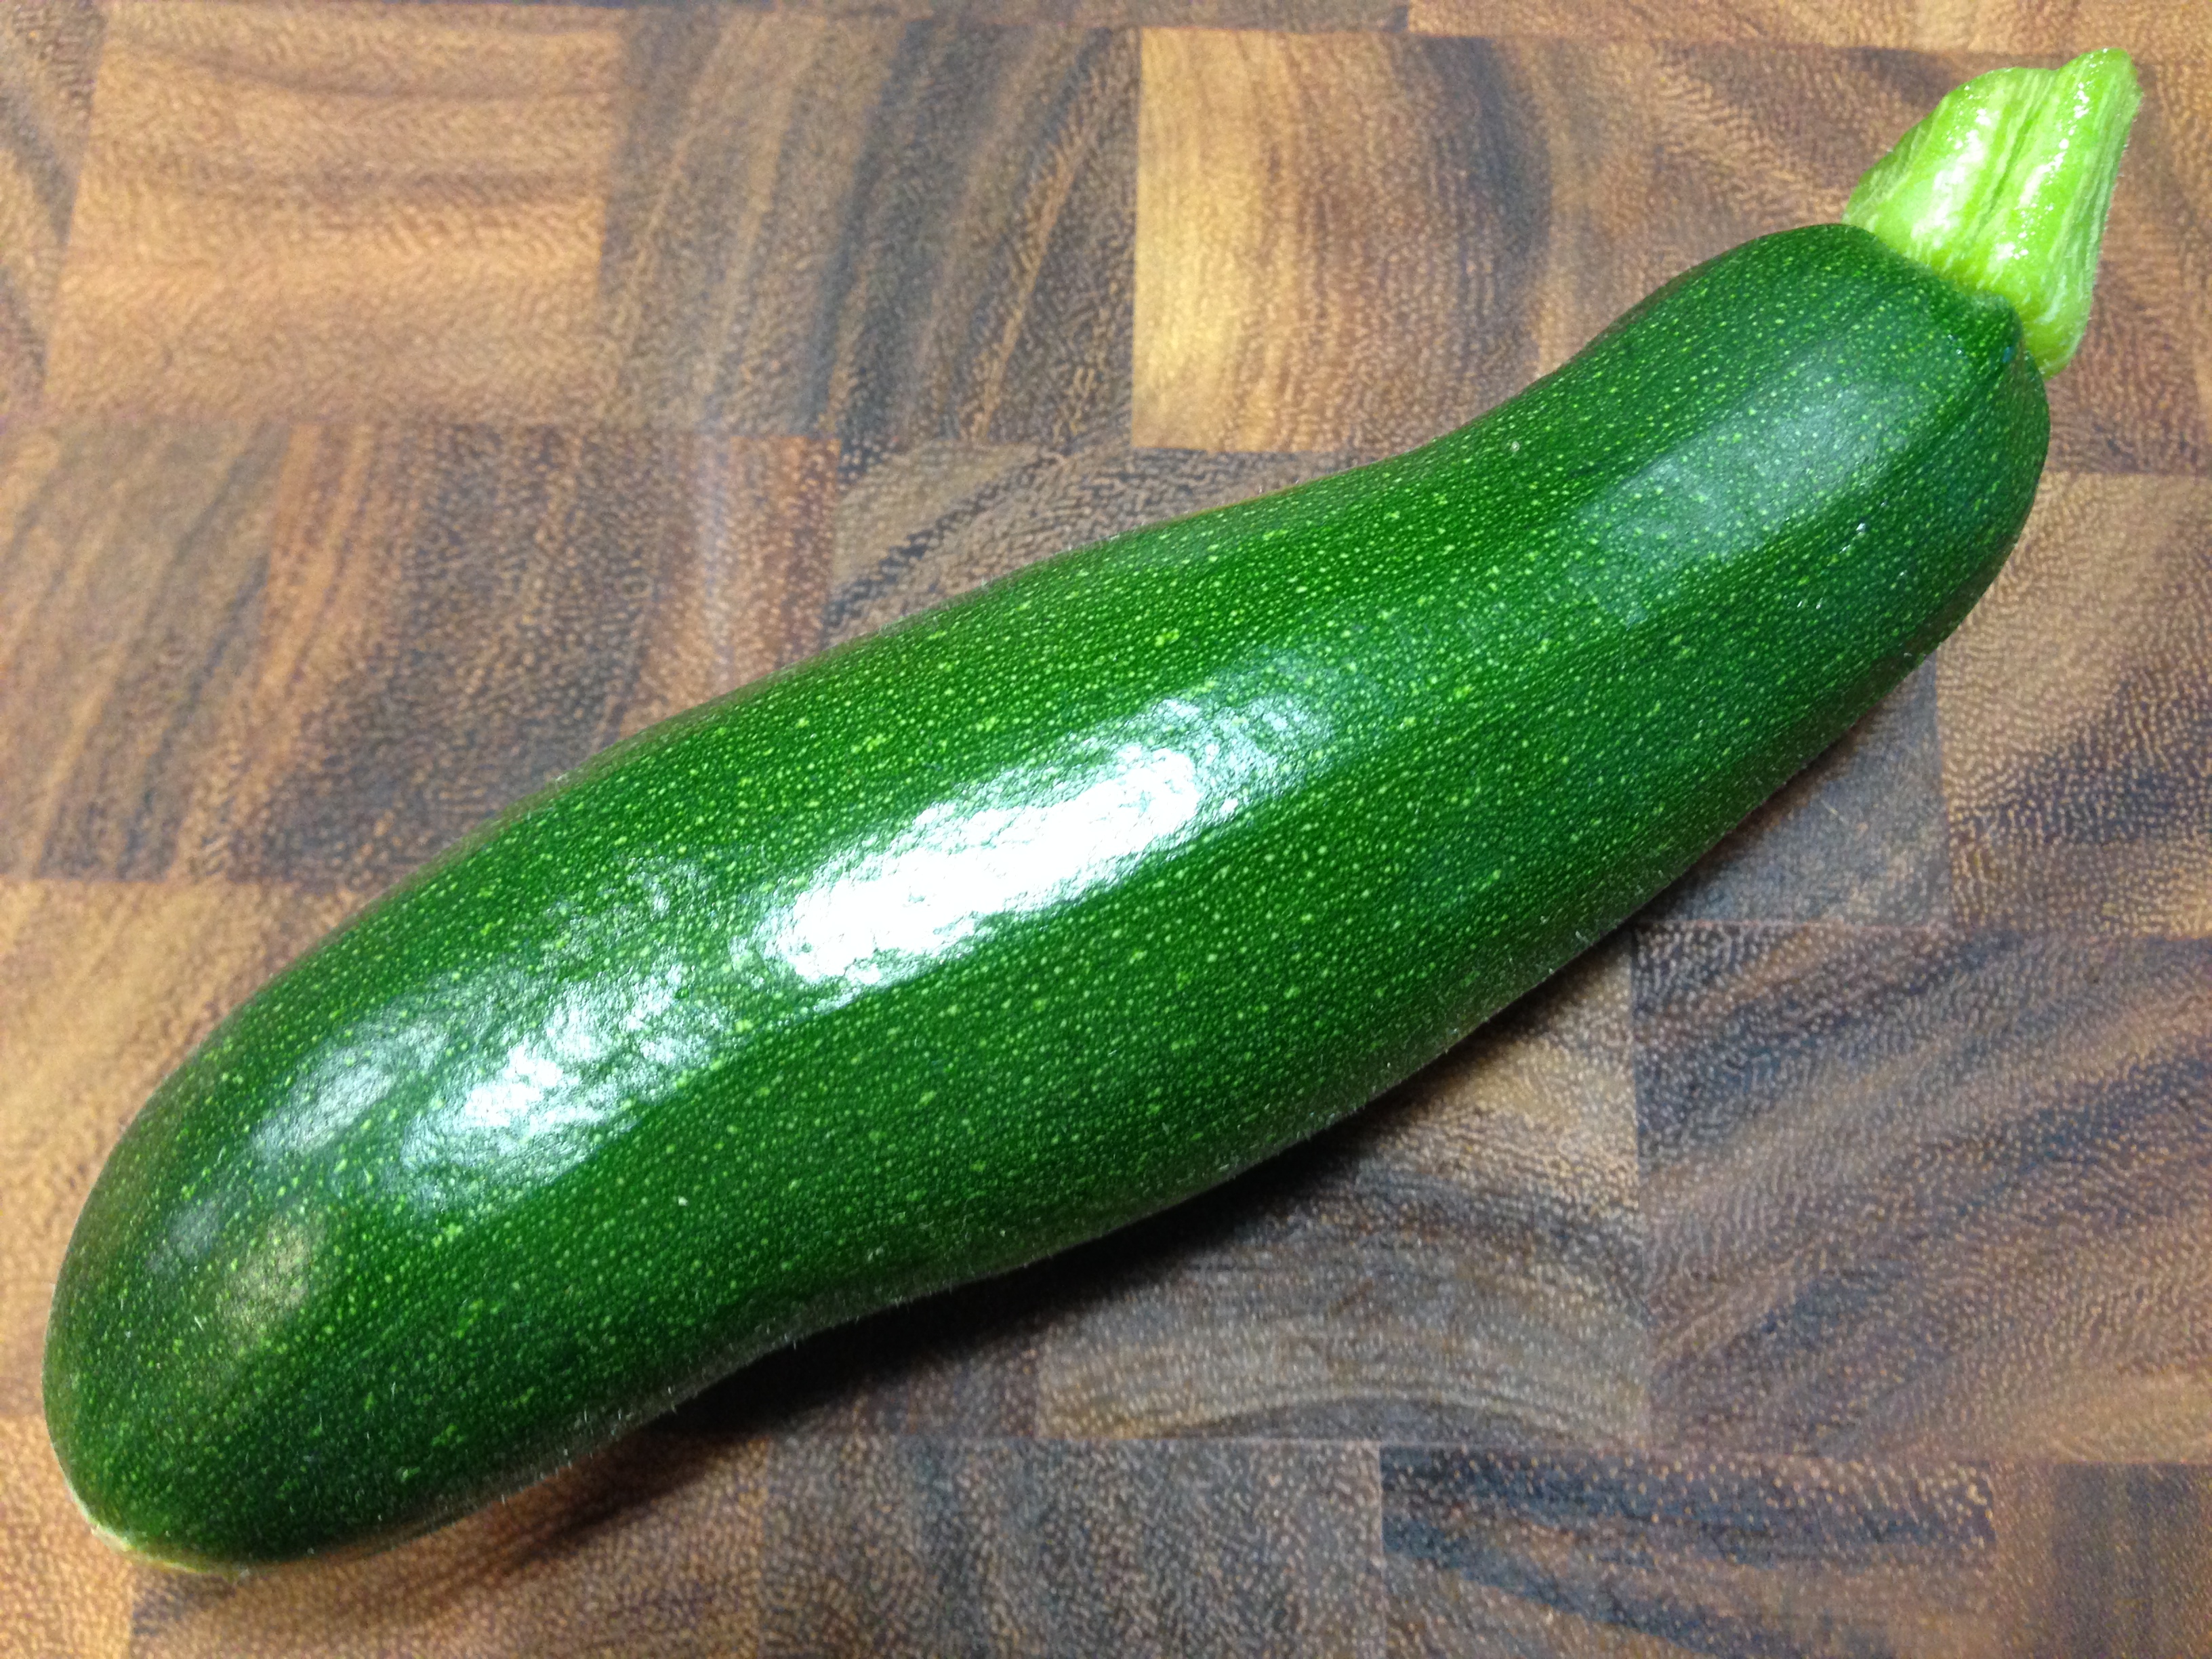
Lesson Learned 2 – Use a food processor to shred the zucchini: Although you can use a box grater, a food processor is a faster and easier way to shred the zucchini for this recipe. One medium to medium-large size zucchini will give you the two cups needed to make the bread. The food processor shreds the zucchini to just the right size so there are small strands in the bread. You don’t want to the zucchini shreds to be too big. They are designed to add moisture to the cake without providing any noticeable flavor. Also, make sure to pat down the zucchini shreds in your measuring cup. You want them slightly compacted.

Lesson Learned 3 – You can use shredded carrots in this recipe as well: I chose not to use carrots this time but you can add them as well. Just substitute one cup of shredded zucchini for one cup of shredded carrots. You can also add one cup of semi-sweet chocolate chips to this recipe. Try it a variety of ways and see what you think.

Try this version of zucchini bread and compare it to yours. I’d love to know what you think!

Luscious Zucchini Bread...

  • Servings: 8 Slices Per Loaf
  • Difficulty: Easy
  • Print

INGREDIENTS:

1/2 cup plus 2 Tbs. orange juice

1/2 cup canola oil

1/2 cup unsweetened applesauce

3 eggs, slightly beaten

1 tsp. vanilla bean caviar (the caviar from one pod)

2 tsp. vanilla

3 cups flour

2 cups sugar

5 tsp. ground cinnamon

1 1/4 tsp. baking powder (1 tsp. for high altitude)

1/2 tsp. baking powder (1/4 high altitude)

1 tsp. salt

2 cups shredded zucchini, lightly packed

1 cup chopped pecans, optional

Cooking spray

DIRECTIONS:

Preheat oven to 350. In a large bowel combine orange juice, oil, applesauce, eggs, vanilla extract and vanilla caviar. In another bowl combine flour, sugar, cinnamon, baking powder, baking soda and salt. Mix to combine. Fold the wet ingredients into the dry ingredients. Stir to combine. Do not over mix.

Fold in the zucchini and pecans.

Pour the mixture into two 8 x 4 inch loaf pan coating with cooking spray. Check loaves at 45 minutes. Depending on your oven they may need to bake anywhere from 45 – 55 minutes. Loaves are done when a toothpick inserted in the center of a loaf comes out clean.

Let cool  in the loaf pan for 15 minutes. Remove loaves from the pans and let cool on a wire rack.

Zucchini Bread Batter


Skillet Irish Soda Bread…

There’s no doubt about it, the recipes that are handed down from generation to generation are the best. And sometimes that’s an impossible task as the old fashioned cooks would simply say, “Oh I just eyeballed what I needed and used a pinch of this and a little of that” leaving you to try to assimilate the exact ingredients to recreate the recipe.

This recipe is one of those handed down gems. A neighbor of mine served it at her St. Patrick’s Day party and the rest is history. I remember looking at all the wonderful things she laid out on her table but only eating the soda bread with some fresh Irish butter. It was heaven. I found out later it was her Mother’s recipe and she had been making this for years!

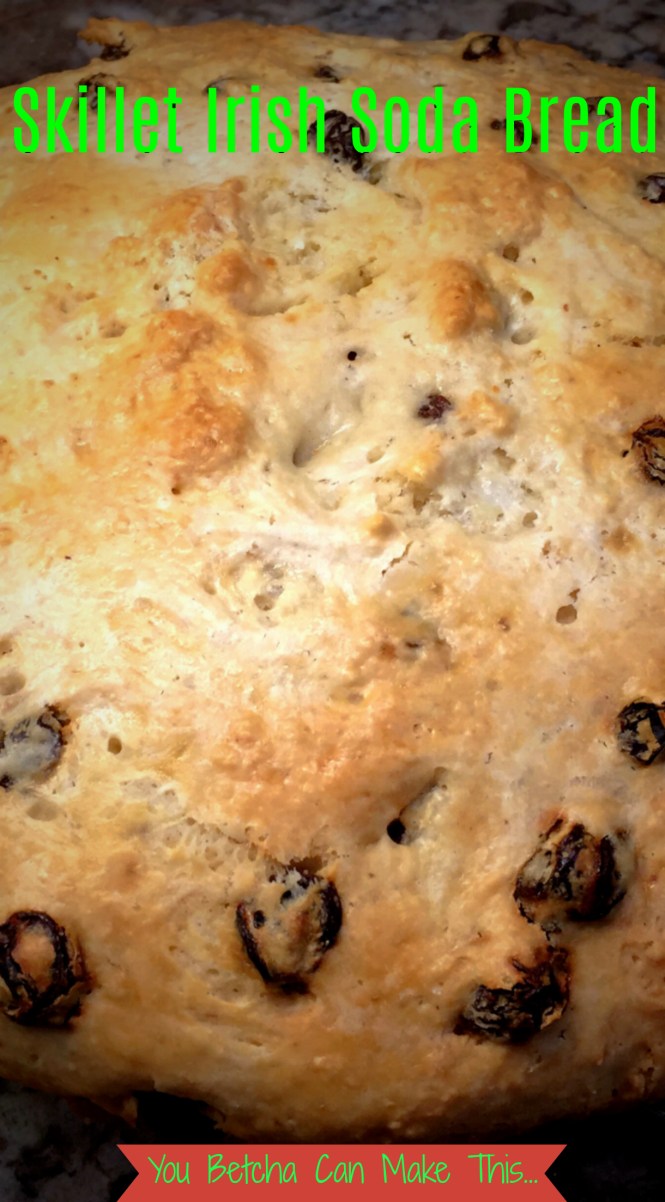
I’ve tasted many iterations of soda bread over the years and, to be honest, most of them were less than stellar. There was only one other time that I can remember having fabulous soda bread. That was when I was working at the Chicago Park District and one of my co-workers, Carol Diver, brought some to work. Carol was Irish through and through with an infectious laugh and a heart as big as all outdoors. And her soda bread was to die for. Unfortunately Carol is not longer with us and I’d never asked her for her soda bread recipe. But from then on, her soda bread was the standard to which I held all others. As time went on none would ever compare, until now.

So this time I made sure to get the recipe and with permission I am sharing it with you. I made it the other night and it was just as fabulous as I remember, moist with just the right amount of sweetness. I hope you enjoy this recipe and make it often.

So let’s talk Irish Soda Bread…

The dough did not reach the sides of a 10 inch skillet

Lesson Learned 1 – The size cast iron skillet you use is important:  The recipe I got said it made two loaves and my neighbor said she used a 10 inch skillet to bake the bread. But once I made the dough and put it in my 10 inch cast iron skillet I knew that couldn’t be the case. The only way there would be enough dough for two loaves is if you used a smaller cast iron skillet – probably an 8 inch skillet. With a 10 inch skillet there is only enough dough for one loaf.

With using a larger skillet it will take longer to cook, approximately 1 1/4 to 1 1/2 hours. If you use a smaller skillet I would begin checking it at 45 minutes. You want a nice gold brown on the top. Once you see that you know the bread is done.

Don’t get me wrong, the bread turned out beautifully and was so delicious as you can see from the pictures in this blog.  I just think the directions I got were for a smaller pan than what I used.

Lesson Learned 2 – Do not use self rising flour in this recipe: The second time I made this I decided to experiment and use self rising flour – BIG MISTAKE! The bread did not rise and the top of it looked like a battle had been fought on it, all lumpy and messy looking. And although I baked it for the correct amount of time, it did not cook through and was gooey inside. So take a tip from me, stick with regular flour and you’ll be just fine.

That’s the only advice I have for making this as the recipe is pretty straightforward. And let me reiterate, this is the best Irish Soda bread I have ever tasted since I had my friend’s, Carol Diver’s, bread all those years ago. I know you will enjoy this one!

Skillet Irish Soda Bread...

  • Servings: 12-14
  • Difficulty: Easy
  • Print

INGREDIENTS:

4 cups all purpose flour

1 cup sugar

1 tsp. salt

1 tsp. baking soda

2 Tbs. cold butter

1 1/2 cup raisins

1 1/2 cup buttermilk (you may need to add a little more)

Shortening, to grease the skillet

DIRECTIONS:

Preheat oven to 325.

Whisk together the flour, sugar salt and baking soda until well combined. Cut in the butter. Add raisins and buttermilk and mix until moist. (You may need to add more buttermilk. I found I needed to add about a 1/4 cup more to get all the ingredients moist).

Lightly grease a cast iron skillet with shortening (use a 10 inch skillet for one large loaf or an 8 inch skillet for two loaves). Transfer dough to the skillet. Brush the top of the dough with a light coating of buttermilk. If desired, cut a cross on the dough.

Bake for 45 minutes for the smaller loaves and 75 minutes for a large loaf. Check the loaves at 45 minutes and 60 minutes respectively to see if you need to add extra time.

Let bread sit in skillet for about 5 minutes after taking it out of the oven. Remove the bread from the skillet and let it cool on a wire rack.

Serve with Irish butter for a delectable treat!

SaveSave

SaveSave

SaveSave

SaveSave

SaveSave

SaveSave

SaveSave

SaveSave

SaveSave

SaveSave

SaveSave

SaveSave

SaveSave

SaveSave

SaveSave

SaveSave

SaveSave

SaveSave

SaveSave

SaveSave

SaveSave

SaveSave

SaveSave

SaveSave

SaveSave

SaveSave

SaveSave

SaveSave

SaveSave

SaveSave

SaveSave

SaveSave

SaveSave

SaveSave

SaveSave

SaveSave

SaveSave

SaveSave

SaveSave

SaveSave

Cinnamon Roll Bread…

I was intrigued by the idea of a cinnamon roll-type bread and who doesn’t love the smell of cinnamon wafting through the house especially on a crisp cool Fall day? I have to admit, though, that I made this recipe twice with two very different ways of adding the cinnamon sugar filling. I definitely discovered my preference which I will share later in the blog.

The first time I did the filling I made it in a more liquid-type consistency combining the cinnamon and sugar mixture with water. The second time I used a stiffer consistency, added brown sugar instead of white sugar and mixed it with room temperature butter and a dash of flour.

Water based cinnamon sugar mixture

Water Based Cinnamon Sugar Mixture

Swirled Mixture

Swirled Mixture

Although both breads turned out perfectly fine, I have to say that I preferred the the butter blend to the water blend and here’s why. I don’t know about you, but every time I use the method of putting some sort of mixture on top of my batter and blending it into the batter with a knife it never gives me the deep kinds of swirls I want. When I used the water-based cinnamon sugar mixture it provided a nice concentration on the top of the bread but in the center it basically just blended with the bread. You could see the cinnamon but not the more distinct type of swirl that I wanted. (the pictures below show the differences between the two – the one on the left is the bread made with the water based cinnamon mixture and the one on the right represents the butter based cinnamon mixture)

Cinnamon Roll BreadCinnamon Roll Bread

The second time I made the bread I used the butter mixture and not only did I swirl it on top but I divided the batter and actually added it to the center as well. The end result was much better and really permeated the batter with the cinnamon sugar swirls as you can see from the picture on the right above. I can’t say that the water based mixture wouldn’t do the same thing as I did not use the divided batter method with it. But I think the consistency of the butter based filling gave more concentrated swirls versus just blending in with the batter. I would recommend the butter mixture but will put both mixtures in the recipe for you to try for yourself.

Butter Based Cinnamon Sugar Mixture

Butter Based Cinnamon Sugar Mixture

Applying The Mixture

Applying The Mixture

Swirled Mixture

Swirled Mixture

So let’s talk cinnamon roll bread…

Lesson Learned 1 – Be careful not to overcook this bread: The batter in this recipe has a very stiff consistency so it is important not to over mix or over bake the bread. If you do you will wind up with a very dry bread. Depending on your oven, I would check this bread about 5 minutes before the minimum baking time just to see how it is doing. It is very easy to over bake this bread.

Lesson Learned 2 – Regardless of what filling type you use, I would divide the batter and put some both in the middle and on the top: Doing it this way you will ensure more dense swirls throughout the bread and not just on top. Keep in mind there is not a lot of sugar in the batter so you want that cinnamon sugar mixture to permeate the bread as much as possible.

Lesson Learned 3 – If using the butter based cinnamon sugar mixture, use most if not all of it: When I first made it I thought, boy, this is a lot of filling. But if you want the richness of a healthy amount of cinnamon throughout the bread use it all, or most of it at least. You will need to eyeball it to determine when you’ve used enough but feel free to err on the side of more versus less. Although it looks like a lot you need a lot to get a generous amount spread throughout the bread.

Lesson Learned 4 – Make the glaze with heavy cream: I don’t know about you but I can taste a significant difference when I make a glaze with heavy cream versus making it with milk. The heavy cream gives the glaze a thicker consistency and mellows out the flavor of the powdered sugar. But if you don’t have heavy cream lying around and only have milk you can certainly use that. I just think it tastes so much better and richer when you use heavy cream.

Lesson Learned 5 – Making glaze is full proof: There is no secret to making glaze. The biggest choice you will make is what consistency you want. Don’t worry if you think your glaze it too thick or too runny. If it is too thick, add a little more cream. If it is too runny, add a little more powdered sugar. It’s just that easy.

What I really like about this recipe is that you don’t need a stand mixture (I used a hand mixer to blend the butter based cinnamon sugar mixture) and in no time flat you have a fabulous sweet bread.

Be sure to let me know your thoughts regarding the cinnamon sugar mixture. Enjoy this great recipe!

CINNAMON ROLL BREAD...

  • Servings: 8
  • Difficulty: Easy
  • Print

INGREDIENTS:

Cinnamon Roll BreadBatter:

2 cups flour, sifted

1 Tb. baking powder

1/2 tsp. salt

1/2 cup white sugar

1 large egg, room temperature & lightly beaten

1 cup whole milk

2 tsp. vanilla

1/3 cup sour cream (you can substitute plain greek yogurt)

#1 Swirl Ingredients:

1/3 cup white sugar

2 tsp. cinnamon

2 Tbs. water

OR

#2 Swirl Ingredients:

1/2 cup butter, room temperature

1/2 cup brown sugar

1 Tbs. flour

2 Tbs. cinnamon

Glaze:

1/2 cup powdered sugar

2-3 Tbs. heavy cream (you may need more depending on the consistency desired)

1 tsp. vanilla

DIRECTIONS:

Preheat oven to 350 degrees. Spray a loaf pan with non-stick cooking spray and set aside.

Prepare the cinnamon sugar mixture (either choice #1 or 2) by combining all of the ingredients. Set aside.

In a large bowl combine the flour, baking powder, salt and sugar. In another bowl whisk together the egg, milk, vanilla and sour cream. Pour the wet ingredients into the dry ingredients and stir to combine. Be careful not to overmix.

Pour about 1/3 of the batter into the prepared pan. Add half of the cinnamon sugar mixture. With a sharp knife swirl the mixture into the batter. Add the remaining batter and repeat the same process with the cinnamon sugar mixture.

Bake for 45 minutes or until a toothpick inserted in the center comes out clean. Put the pan on a cooling rack. Take a rounded knife and run it along all of the edges of the pan. Let the bread cool for 15 minutes. Remove the bread from the pan and allow it to cool completely.

Mix together all of the glaze ingredients. Drizzle the glaze over the bread. If you do not serve immediately, cover the bread loosely with foil once the glaze has hardened.

Cinnamon Roll Bread


Cinnamon Roll Bread

 Cinnamon Roll Bread

Cinnamon Roll Bread

Cinnamon Roll Bread

Pumpkin Cranberry Nut Bread…

So after making my pumpkin cream cheese sweet bread I had some leftover pumpkin puree. Since  I didn’t want to waste it and the sweet bread was such a big hit I thought I’d try making another type of sweet bread using the leftovers.

What I like about this bread is it combines some of my favorite Fall flavors – pumpkin, cranberry and orange. Then you throw in a little chopped pecans and you’re in sweet bread heaven.

So let’s talk some pumpkin cranberry nut bread…

Cover the cranberries with orange juiceLesson Learned 1 –   Plump the dried cranberries for even more flavor: I had a bag of cooking and baking julienne sliced cranberries and I was able to give them an extra body and boost by soaking them in warm fresh orange juice. Yum!

In a microwavable bowl I just poured the juice of one large orange over a half cup of the cranberries, put plastic wrap over the bowl, slit the wrap to vent and heated the mixture for 45 seconds.  Then I let the mixture sit covered in the plastic wrap for at least 5 minutes and voila, plumped cranberries. You may have done this process before with raisins, and it works the same for dried cranberries. Plus it gives the cranberries an extra boost of orange flavor.

Lesson Learned 2 – I adapted this recipe from a muffin recipe: Almost any muffin recipe can be adapted into a sweet bread recipe. You just have to remember to bake it longer. I took the guess work out for you. I started checking the bread at 30 minutes and wound up baking it for an additional 15 minutes, checking the loaf every 5 minutes. My determination is, based on your oven and where you live, the bread should be baked for 40-45 minutes, or until a toothpick inserted in the center comes out clean.

Pour the wet ingredients into the dryLesson Learned 3 – You don’t need any mixer for this recipe:  Just combine the wet and dry ingredients in separate bowls, make a well in the dry ingredients and pour the wet ingredients into the dry. Mix until just combined – don’t over mix. It couldn’t be easier.

This bread is incredibly easy to make. So if you’re looking for a great Fall treat that’s full of flavor and requires hardly any effort on your part, this is the recipe for you! Enjoy!

Pumpkin Cranberry Nut Bread…

  • Servings: 14-16 slices
  • Difficulty: Easy
  • Print

INGREDIENTS:

1/2 cup dried cranberries (I used cooking and baking cranberries, julienned)

The juice of one large orange

2 cups flour, plus 1 Tbs. for high altitude

2/3 cup granulated sugar, measure slightly less for high altitude

1 Tbs. pumpkin spice blend

2 tsp. baking powder

1/2 cup chopped pecans

1/2 tsp. salt

1 stick unsalted butter, melted

1/2 cup canned pumpkin

1/2 cup milk, you can used reduced fat milk

2 extra large eggs

The zest of one large orange

DIRECTIONS:

Preheat your oven to 350. Zest the orange. Cut the orange and juice it. Place the cranberries in a microwavable bowl and pour the orange juice over them. Take plastic wrap and cover the top of the bowl, cutting a small slit in the center to vent the steam. Microwave for 45 seconds. Set aside and let the cranberries steep for at least 5 minutes.

In a large bowl sift together the flour, sugar, pumpkin spice blend, baking powder, and salt. Whisk in the chopped pecans. Drain the cranberries and put them in another large bowl. Add the somewhat cooled melted butter (you don’t want the eggs to scramble) the canned pumpkin, milk, eggs and orange zest. Stir until just combined.

Make a well in the dry ingredients and pour the wet ingredients into the bowl. Mix with a spoon or spatula until just combined.

Spray the bottom and sides of a 9 x 4 loaf pan with cooking spray. Pour the batter into the pan. Smooth the top of the batter with a spatula making sure the batter has reached into all corners and the top is even.

Bake for 40-45 minutes or until a toothpick inserted in the center comes out clean. Let the loaf rest in the loaf pan for 15 minutes then remove it to a wire rack. Cool completely.

Pumpkin Cranberry Nut Bread

 Pumpkin Cranberry Nut Bread

Pumpkin Cranberry Nut Bread

Pumpkin Cream Cheese Sweet Bread…

It’s that time of year, my favorite time of year – Fall. I love everything about Fall, the cooler crisp weather, the fabulous colors, the onset of professional football, but most of all I love the food of fall. Whether it be a good ole pot of chili, a pot roast filling the house with fabulous smells or just the thought of cranking up that oven and making something sweet or savory, Fall is definitely the best time of the year for food and fun in my opinion.

And when it comes to Fall, undeniably the most popular gourd of the season is the pumpkin. Not only is it great in recipes but it also serves as one of the primary decorations that signals the coming of Halloween. So as I was sitting on my deck the other day enjoying an early morning cup of coffee and enjoying the Fall weather, I decided to make something with pumpkin in it.

Breakfast Al Fresco

Now I am far from a purist. I had absolutely no intention of cutting up a pumpkin and processing it to get some pumpkin puree. I simply turned to the canned variety. The result was absolutely fabulous. This time I took my creation to work, and it was gone within 20 minutes, so I think you’re really going to like this one.

So let’s talk pumpkin cream cheese sweet bread…

Cream Cheese FillingLesson Learned 1 – Make the cream cheese filling first: With any recipe that has filling or an internal swirl, I find it easier to make the filling first. A lot of recipes have you make the batter and then the filling. I think once the batter’s done, it makes more sense to move on to assembling the bread versus making the filling and letting the batter sit. Just remember to make sure your cream cheese is room temperature before making the filling. That way you’ll have a silky smooth batter without lumps.

This recipe makes a generous amount for the filling. I really like that the cream cheese filling is a major part of the cake and the contrast between it and the dark pumpkin batter is pleasing to the eye. This sweet bread is not only delicious but delightful to look at as well.

The wet ingredientsLesson Learned 2 – You don’t need a stand mixer for this one: I made the pumpkin batter in a stand mixer and used a hand mixer for the filling. You really only need a hand mixer. The wet ingredients combine easily and you fold the dry ingredients into the wet ingredients by hand. So don’t pull out the stand mixer for this one.

Lesson Learned 3 – Dividing the batter: Normally recipes like this tell you to divide the batter into fourths or thirds with the larger percentage going on the bottom and the smaller on top of the filling. I think I divided it by three-quarters to one quarter and I was really nervous that I did not have enough batter to put on top of the filling. At one point I even pulled out a butter knife and meticulously kept moving batter from the center of the pan to the edges. I felt the amount of batter around the edges was dangerously thin and at one point I just thought, oh well, what will be will be.

To my surprise, and as is verified in the pictures, the amount I had on top was more than enough. I forgot the batter has leavening agents (baking powder and soda) and that made the batter on top rise higher than I ever expected.

My advice here is to be careful. I think I’d have felt more comfortable with a slightly larger amount of batter to spread on top. But if for some reason you find yourself in the same situation as I was, don’t worry. I probably had the least amount of batter you can have on top and the bread turned out beautifully.

Cream Cheese Pumpkin Sweet Bread

Lesson Learned 4 – The challenge of knowing when it is done: Because this sweet bread has a cream cheese layer, it can be difficult to determine when it is done. Inserting a toothpick and expecting it to come out clean can be misleading, since the cream cheese will not set in the same way as the batter.

Also, depending upon your oven, the top and the sides can cook faster than the center. So, here’s what I did. I checked the bread after 30 minutes. I felt that the top and sides were cooking faster and so I tented the bread with foil making sure the foil did not touch the batter. I baked it for another 20 minutes tented and then I took off the tent. The center still looked a little too jiggly for me and so I removed the foil and baked it for another 5 minutes and then took it out of the oven. The sweet bread turned out perfectly.

Remember everyone’s oven is different. I also live in high altitude and so things normally take a little longer to bake. Start your overall time at 50 minutes and go from there. If it looks too jiggly in the center, let it bake a little longer. It sounds harder than it actually is, but believe me the end result is worth it.

Pumpkin Cream Cheese Sweet Bread…

  • Servings: 10-12 Quarter Inch Slices
  • Difficulty: Easy-Medium
  • Print

INGREDIENTS:

Cream Cheese Filling

1 extra large egg, room temperature

4 ounces cream cheese, room temperature

1/4 cup sugar

3 Tbs. flour

Sweet Bread

1 extra large egg, room temperature

1 cup canned pumpkin

1/2 cup brown sugar, firmly packed

1/4 cup sugar (7/8 of a 1/4 cup for high altitude)

1/4 cup coconut oil (in its liquid state)

1/4 cup sour cream

2 tsp. vanilla

2 tsp. ground cinnamon

1 tsp. pumpkin pie spice

1/2 tsp. nutmeg

1 cup flour (plus 1 Tbs for high altitude)

1/2 tsp. baking soda

1/2 tsp. baking powder

DIRECTIONS:

Preheat oven to 350 degrees. Using a hand mixer, mix all the cream cheese filling ingredients until smooth. Set aside.

For the batter: In a large bowl sift together the flour, baking soda and baking powder. In another large bowl mix together (using a hand mixer) the remaining ingredients. Pour the dry ingredients into the wet ingredients and gently fold them in using a wooden spoon or spatula. Continue until just combined. Do no over mix.

Spray the bottom and sides of a 9 x 4 inch loaf pan with baking spray. Pour in 2/3 of the batter mixture. Using a spatula, smooth out the mixture making sure it has spread to all sides and corners.

Pour the filling mixture on top, smoothing it out to reach all sides and corners. Add the remaining batter mixture on top of the filling. With a round edge knife or frosting spreader, smooth the remaining batter over the filling, making sure it reaches all sides and corners and covers the filling.

Bake for 50-55 minutes until cake it set. Half way through the baking process if it appears the sides  and top are cooking faster than the center, tent the loaf pan for the remaining baking time.

Let the sweet bread cool in the pan for at least 15 minutes before removing it. Let it cool completely before slicing.

The Layering Process

Fresh Out Of The Oven

Fresh Out Of The Oven

Pumpkin Cream Cheese Sweet Bread

Pumpkin Cream Cheese Sweet Bread

Banana Bread With Cream Cheese Frosting…

There’s nothing as comforting as the smell of banana bread baking in the oven. I love banana bread and have tried various recipes that produced marginal results. But now I think I’ve found my go-to recipe and I want to share it.

One of the problems I’ve had with banana bread is wanting to make it but not planning on having ripe bananas on hand to do so. C’mon, how many of you actually plan on having ripe bananas on hand? Quite often banana bread is an after thought when you have ripe bananas and don’t know what to do with them. Personally I am not a big banana fan. I’ll eat them in banana bread or a banana split but that’s about it. So normally I do not intentionally have bananas around the house.

But I’ve discovered over many years of making banana bread that ripe bananas actually make a huge difference in the flavor of the bread. When bananas get ripe, they release their natural sugars which intensifies their flavor. It’s actually amazing. Try making this recipe with unripe bananas and then with ripe bananas. You will be amazed at the difference! But what do you do when you want to make banana bread but can’t find ripe bananas at the store (and I’ll clue you in, you probably never will). I solved that dilemma in a very simple way which I will share in my lessons learned.

IMG_4103Lesson Learned 1 – You can always have ripe bananas on hand: It’s really rather simple. Just preheat your oven to 350 degrees. Place the bananas on a baking sheet and keep them in the oven for 5-10 minutes. Start checking them after 5 minutes. You want the skins to be nice and dark like in the picture to the left. I checked my bananas at 5 minutes and they just had a couple of brown spots on them. I checked them again 3 minutes later and they were almost there and finally after an additional 2 minutes they were the perfect dark color. The amount of time you’ll need to get the bananas to brown as shown in these pictures will depend on your oven and altitude.

IMG_4110

I can’t stress enough the difference this makes in the flavor of the bread. It only takes a few minutes but the end result is so worth it. The picture above shows what the banana looks like after this process. Simply peel the bananas, put them all in a bowl and mash them. It will take no effort to do so as the bananas will be delightfully soft and perfectly ripe.

Lesson Learned 2 – The basics for any moist sweet bread (or cake): I know I’ve shared this before but it bears repeating. When making a sweet bread or a cake there are a few basic keys to success: 1. Take the time needed to cream the butter and sugar. I’ve found most cooks short change this step and it’s essential for having a moist sweet bread. It can take 5-7 minutes to cream the butter and sugar properly. The end result should be a light color and the mixture should look fluffy and creamy. 2. Use room temperature eggs. Room temperature eggs mix more thoroughly into a batter. Forgot to take your eggs out of the refrigerator before baking? No worries – click on “this link” for a down and dirty trick to get room temperature eggs in just 5 minutes. 3. Don’t over mix the batter. Once you put the dry and wet ingredients together, just combine them. Once they are fully incorporated into one another, STOP! Do these 3 simple steps and you will have a moist sweet bread every single time.

bananabread

This bread would be delightful on it’s own but it goes over the top when frosted with my cream cheese frosting. Either way, you will have a great go-to banana bread recipe that is quick, easy and every so flavorful. Enjoy!

Banana Bread With Cream Cheese Frosting…

  • Servings: 8-10
  • Difficulty: Easy
  • Print

INGREDIENTS:

Sweet Bread:

1/2 cup room temperature butter

1 cup sugar

2 eggs, room temperature

4 ripe bananas, mashed

1 1/2 cups flour

1 tsp. baking soda

1 tsp. cinnamon

1/2 tsp. salt

1 tsp vanilla

Frosting:

1/2 cup butter softened,

1 8 ounce package of cream cheese, room temperature

3 1/2 cups confectioners sugar

1-2 tsp. vanilla (to taste)

DIRECTIONS:

Preheat the oven to 350 degrees. Grease and flour (or you can use non-stick organic cooking spray) an 8 x 4 inch loaf pan and set aside. Cream butter and sugar together until light and fluffy (5-7 minutes). Add eggs one at a time and beat until combined. Beat in vanilla. Stir in the mashed bananas until combined.

Sift together flour, baking soda and salt. Make a well in the center of the dry ingredients and add the wet ingredients. Stir only until combined. Pour into prepared loaf pan.

Bake at 350 for 45 – 50 minutes or until a toothpick inserted into the center of the bread comes out clean. Let cool in the pan for 15 minutes before removing it. Let cool completely before frosting.

FROSTING:

Cream butter and cream cheese until smooth. Beat in vanilla. Add confectioners sugar and beat on a low speed until combined and then on a high speed until smooth. Spread on cooled bread.

 IMG_4228

Strawberry Cream Cheese Loaf…

Now we’re seeing more and more strawberries in the grocery stores – the season is vastly approaching (and thank goodness because we’re all getting tired of snow). Yesterday I wanted to make something quick and sweet and decided on this particular loaf. This recipe is one that differs slightly from sea level to high altitude and I’ll write out both versions so you can successfully make it wherever you live. Regardless, this loaf is a sure winner. It is moist and not overly sweet – great for snacking or for dessert.

strawbread2

Lesson Learned 1 – Don’t over mix the batter: In order to keep this loaf moist you only need to incorporate the ingredients. Once they are, quit mixing! Loafs like this will get tough quickly if they’re over mixed.

IMG_3266Lesson Learned 2 – Cut the strawberries into small pieces: After removing the hull I cut the strawberries in half and sliced them. If the strawberry was larger, I cut it in half twice before I sliced it. Strawberries tend to be like blueberries when you bake them, they have a tendency to explode (as I like to call it) in the batter. If they’re too large when they explode your loaf will sink in on itself. In this recipe I used only 1 1/4 cups of strawberries, but you could easily use only 1 cup and still have a great loaf.

IMG_3286Lesson Learned 3 – Fold the strawberries gently into the batter: Strawberries break apart rather easily so you need to be careful when adding them. Fold them in as if you’re folding egg whites into a batter. That way you will have nice marbling and not a strawberry explosion.

Lesson Learned 4 – You may have to use an extra pan for all of the batter: This batter rises rather high. I filled a 9 x 5 loaf pan about two thirds of the way up and put the excess batter in a 3″ x 5″ mini foil loaf pan. If I hadn’t done that, the batter would have risen over the side of the larger pan. What’s nice about doing this is I had a small loaf that I could give as a gift to a neighbor and still had the larger loaf for my family. I recommend not putting all of the batter in one pan, but if you’re brave go ahead. I think you’ll find that if you do, it will run over the sides. If you put some batter in a small loaf pan, it only needs to bake for 30 minutes. The larger loaf takes 50 – 60 minutes.

For as easy and quick as this is to make, it’s a delicious sweet treat. Next time you’re in a pinch for time but want to make something fresh, this would be the loaf to make. Enjoy!

Strawberry Cream Cheese Loaf...

  • Servings: 12
  • Difficulty: Easy
  • Print

INGREDIENTS:

1/2 cup unsalted butter, softened

1 cup sugar (slightly less for high altitude)

4 ounces of cream cheese, softened

2 eggs, room temperature

1 tsp. vanilla

2 cups all purpose flour

2 tsp. baking powder (1 tsp for high altitude)

1/2 tsp. baking soda (1/4 for high altitude)

1/2 tsp. kosher salt

1/2 cup buttermilk

1 – 1 1/4 cups strawberries, diced small

DIRECTIONS:

Preheat oven to 350 degrees. Grease and flour (you can use an organic cooking spray as well) a 9 x 5 loaf pan and a 3″ x 5″ inch mini foil loaf pan. In a medium size bowl, mix flour, baking powder, baking soda and salt. Stir to combine. Set aside.

Using a electric stand mixer (or hand mixer) cream butter, sugar and cream cheese until soft. Add eggs one at a time. Mix in the vanilla.

Add the flour mixture to the butter mixture and mix until just blended. Add the buttermilk until combined. Do not over mix.

Carefully fold in the strawberries (the dough will be thick). Bake the small loaf for 30 minutes and the large loaf for 50 – 60 minutes or until a toothpick inserted in the center of the loaf comes out clean.

Let the loaf cool for at least 15 minutes in the pan before removing it.

IMG_3313

 IMG_3336

IMG_3459

Cranberry Orange Pecan Sweet Bread…

It’s cranberry time of year again! I so love cranberries. Not only do I make a simple but killer homemade cranberry sauce  for the holidays, but I enjoy baking with cranberries – they have a tartness that lend themselves well to making delicious breads, pies and cookies. So this past week when I saw my first bag of cranberries at the grocery store I just had to buy them and bake something.

IMG_1318Years ago I used to buy box mixes to make cranberry bread. No more. It is so easy to make it yourself and I like the fact that you control what goes into it. Box mixes have become a thing of the past for me. If I can’t make it fresh, I don’t make it.

This particular recipe I did not find on Pinterest. This time I did a Google search and looked at various cranberry sweet bread recipes and their ingredients. A couple of things intrigued me about the recipe I chose. First, it used buttermilk in the batter and I’ve found that buttermilk tends to give you moister cakes/breads. Second, you don’t need a mixer for this recipe so no need to drag out the heavy KitchenAid, and I was loving that. The original recipe called for the bread to be glazed. I did not glaze my bread but I will include the glaze recipe in case you want to try it.

Recipe Rating: A+ This recipe is easy to make, and the combination of ingredients brings out the full flavor of the cranberries, pecans and orange zest – a killer combo in my estimation.

IMG_1415Lesson Learned 1 – Weighing Ingredients: I’ve read so many recipes where the author spoke of the importance of weighing ingredients, specifically flour. I never thought much off it. Normally I make sure my flour is aerated in the canister (swirling a knife in it does the trick) and then scoop out what I need and level it off. This recipe calls for 2 cups of flour or 250g. I recently purchased a kitchen scale and thought I’d try measuring the flour instead. I was surprised at how much “extra” flour I had in my measuring cup when I weighed it. It was eye opening. If you can, invest in a kitchen scale and use it when a recipe lists grams. You’ll be amazed at how much extra you may be putting into your recipe.

I did not weigh the sugar because I know how to adjust that measurement for high altitude so the bread will not fall in on itself. I do that adjustment by sight, but I will include the grams measurement for the sugar and flour in the recipe for those who do not live in high altitude. Use those measurements when at all possible. It really does make a difference

IMG_1310Lesson Learned 2 – Mixing the streusel: I don’t know about you but I have a difficult making streusel even with a pastry cutter. The butter always seems to collect on my pastry cutter and not fall off. This time I cut the cold butter (and it needs to be cold) into small cubes and just mixed it with my hands. I pretty much got the desired consistency. Next time I think I will mix it in my small food processor and see how it turns out. I am including a picture of the consistency of the streusel that worked well on top of the cake.

I’ve made many different versions of cranberry nut breads over the years but I have to say that so far this one is my favorite. The tartness of the cranberries, the hint of orange from the zest combined with the pecans is heavenly. Next time I make this (and this will be made at least one time if not more this holiday season) I will try adding the glaze. But I can assure you, even without the glaze this is a fabulous sweet bread!

Cranberry Orange Pecan Sweet Bread…

  • Servings: 12
  • Difficulty: Easy
  • Print

INGREDIENTS:

Streusel:

1/4 cup (31g) flour

2 Tbs. (30g) sugar

1 tsp. cinnamon

3 Tbs. (45g) cold, unsalted butter

Bread:

2 cups (250g) flour

1 tsp. baking soda

1/2 tsp. salt

1 cup (110g) chopped fresh cranberries (you can also use unthawed frozen cranberries)

1/2 cup (65g) chopped pecans or walnuts (I used pecans)

1 large room temperature egg

1/2 cup (105g) light brown sugar (loosely packed for high altitude)

1/2 cup (100g) sugar (slightly less for high altitude)

1 cup (240ml) buttermilk (no substitutions)

1/3 cup (80ml) vegetable oil (or melted coconut oil – I used vegetable oil)

1 tsp. vanilla extract

2 Tbs. orange zest

Glaze:

1 cup (120g) confectioners sugar

1 -2 TBS orange juice

Orange zest to taste

DIRECTIONS:

Preheat oven to 350. Spray an 8×4 pan with cooking spray. (I use a professional grade non-stick pan and do not have to do this. Invest in one if you can – it’s worth it).

First make the streusel by tossing the flour, sugar and cinnamon together. Cut in the cold butter with a pastry cutter or food processor until you get a crumbly looking mixture. Set aside.

In a large bowl mix the flour, baking soda, salt cranberries and nuts together. Set aside. In another bowl whisk the egg and sugars until well combined with no lumps. Whisk in the buttermilk, oil, vanilla and orange zest.

Make a well in the center of the dry ingredients and pour in the wet ingredients. Stir together until combined being careful not to over mix. Pour the batter into the prepared pan. Add the streusel on top and press it gently into the batter.

Bake for 50-60 minutes or until a toothpick inserted in the center comes out clean. Cool in the pan for 15 minutes and then remove the bread from the pan.

This bread is great without the glaze. If you choose to glaze it, mix all of the glaze ingredients together and pour on top once the bread has completely cooled.

cranb IMG_1361

IMG_1380

How Do You Solve A Problem Like Zucchini…

I am in the midst of selling and buying a house so I have not had time in the kitchen to try out recipes. I should be back doing my regular schtick by the end of July. In the interim enjoy some of my reposts. See you soon!

[Note: A version of this post published a few years go has been my most successful blog to date. I get at least one hit on it every day and often more. I’m not sure if it’s the title or the content, but it’s had amazing success. I have updated it with some additional thoughts since I’ve made this recipe dozens of times since first posting it, have definitely perfected it and can provide some additional lessons learned. This is the ideal post for this time of year, especially if you’re like me and have tons of zucchini and are running out of ideas on how to use them. Of all my zucchini recipes, savory or sweet, this is by far my absolutely favorite!]


I love to grow vegetables in my garden. It’s not only fun it’s also very satisfying. And I’ve learned over the years, just like anything else in life, that less is more. So I’ve finally come to terms with having blank space in my garden knowing that as the summer progresses the vegetable plants will fill them in. They’re also much happier and produce more because now they have the room to grow and don’t have to compete with other plants for space and water. What a concept. I wish I’d figured that out a lot sooner.

Zucchini Flowers...

Zucchini Flowers…

And for some reason my gardening prowess seems to be growing zucchini. Once the onslaught begins it never seems to end. I love grilled zucchini and I have a great recipe for Zucchini and Mushroom Gratin (thanks in part to Ina Garten) but I’ve struggled with using zucchini to make zucchini bread. The usual recipes seemed too dry and too bland to me. I was searching for the perfect recipe and happened to stumble upon it last year thanks to Pinterest and my friend Kelly Brown who originally pinned it. It is a recipe for double chocolate zucchini bread and I am not kidding when I say it is to die for! I can’t take credit for the original version of the recipe, it is from King Arthur’s Flour, but I love my version for several reasons. So let’s rate the recipe and talk about some lessons learned by making it several times over the past year.

Recipe Rating: A+ to the moon and back (my highest rating ever)! This is by far the best recipe recipe I’ve found to use zucchini, sweet or savory. It is easy to make and uniquely flavorful. I guarantee if you try this, it will become one of your staple recipes.

My very happy zucchini plant...

My very happy zucchini plant…

Lesson Learned 1 – You don’t need butter and white sugar to make a cake sweet: There is no butter or white sugar in this recipe. The substitutes for them are vegetable oil, honey and chocolate chips. This produces a cake/bread that tastes like a flourless chocolate cake with just the right amount of sweetness without being sickeningly sweet. We are so used to a lot of sugar in recipes that the first time I tasted this I wasn’t sure if I liked it. After a few bites I was hooked and now I prefer it to the sweeter versions of zucchini breads.

Lesson Learned 2 – Zucchini enhances the moistness of the bread: This recipe uses a good quantity of zucchini, two cups patted down (that translates into about two 8-9 inch long zucchinis). As with other types of zucchini breads, you really don’t taste the zucchini but it gives the bread a wonderful moistness. Plus it is a great way to use up a bumper crop of zucchini which I tend to get just about every year.

IMG_9519Lesson Learned 3 – Coffee enhances the flavor of chocolate: The original recipe calls for 1/2 teaspoon espresso powder used as a flavor enhancer. I couldn’t find espresso powder at my local grocery store so I just used plain ole’ brewed coffee as a substitute, 2 tablespoons to be exact. It’s amazing how much more robust coffee makes the flavor of chocolate! Plus we make coffee everyday and don’t drink espresso so I didn’t have to spend money on something that would wind up taking up shelf space in the pantry and only used for a few recipes.

Lesson Learned 4 – Add frozen chocolate chips: When adding ingredients like fruit or baking chips you normally have to coat them in flour so they don’t all fall to the bottom of the bread. If you freeze your chips and then add them at the very end right before pouring the mixture into the pan, they will distribute evenly in the bread without having to flour them.

This recipe is simple to make and is so killer delicious you won’t believe what you are tasting. Try it and let me know what you think. Also, I am always on the lookout for zucchini recipes so please if you have a favorite, share it and I will try to make it. I am determined to use all of the zucchini my garden produces and so variety is key to getting that accomplished! Enjoy this one!

Double Chocolate Zucchini Bread

  • Servings: 1 loaf
  • Difficulty: easy
  • Print

INGREDIENTS:

2 large eggs, at room temperature

1/3 cup honey

1/2 cup vegetable oil

1/2 cup brown sugar

1 tsp. vanilla extract

1 tsp. salt

1/2 tsp. baking powder

1/2 teaspoon baking soda

2 TBS. brewed coffee (or 1/2 tsp. espresso powder)

1/3 cup baking cocoa

1 2/3 cup flour

2 cups shredded unpeeled zucchini, gently pressed

1 cup frozen chocolate chips (I use dark chocolate chips)

DIRECTIONS:

1. Preheat oven to 350 degrees, lightly grease an 8 1/2 x 4 1/2 inch loaf pan. Grate two 8-9 inch zucchinis. Set aside.

2. In a large mixing bowl, beat the eggs, honey, oil, brown sugar, vanilla and coffee until smooth.

3. In a separate bowl combine the salt, baking soda, baking powder, cocoa and flour whisking until well combined. (if using espresso powder add it to the dry ingredients). Gradually add the dry ingredients to the wet ingredients. Do not over mix.

4. Stir in the zucchini until combined. Add the frozen chocolate chips.

5. Pour the batter into the prepared pan.

6. Bake the bread for 65-75 minutes. Test for doneness (a toothpick or cake tester inserted into the center will come out clean save for perhaps a light smear of chocolate from the melted chips).

7. Remove the bread from the oven and let it cool for 15 minutes before taking it out of the pan.

8. Cool completely before slicing (although slightly warm is delectable as well). Store well wrapped at room temperature.


Double Chocolate Zucchini Bread

Double Chocolate Zucchini Bread

Serving suggestion: with strawberries and a dollop of whipped cream...

Serving suggestion: with strawberries and a dollop of whipped cream…


Glazed Strawberry Bread…

NOTE: Here’s my second in a series of re-blogs while I’m in the throws of selling/buying and moving. I hope to be back online with one new recipe a week starting at the end of July. Until then, let’s revisit some of my more popular recipes! You’ve gotta try this one. It is simply fabulous!


It’s been a little longer than usual since my last post. The month of May has many “things” happening like birthdays, anniversaries and of course Memorial Day. I got a little caught up in all of that but now am back to a more normal schedule regarding this blog.

Cut The Strawberries Into Small Pieces

Cut The Strawberries Into Small Pieces

I don’t know about you but this season it seems like the strawberries are more plentiful, sweeter and cheaper. I’ve mostly been eating a lot of strawberries combined with blueberries and raspberries and mixed with greek yoghurt as a special breakfast treat. But I was also interested in finding a good recipe for strawberry bread and I think I’ve found just about the best one yet on a website called sallysbakingaddiction.com.

I liked this recipe for a variety of reasons which I will talk about in my rating and lessons learned. That being said, make sure you make this one – you will not be disappointed.

Rating: A+ to the nth degree! This is the highest rating I have ever given a recipe because in my mind it is the perfect one – it was easy to make, turned out perfectly the first time and the recipe was well written. Yahoo! This one gets the highest honors to date!

Wet And Dry Ingredients and Chopped Strawberries

Wet And Dry Ingredients and Chopped Strawberries

Lesson Learned 1: THE RECIPE. Read this recipe carefully because if you do it will turn out perfectly. In the original recipe, the author took great pains to include the little nuances that so many cooks consider basic knowledge and consequently omit. The recipe is very specific on what you should use not only to create a moist cake but to get it to brown to perfection. Bravo to this cook who took the time to include all of the information you need to know. The recipe I am writing below is my version which includes the original recipe and my adjustments for high altitude.

Lesson Learned 2: THE CORRECT SIZE LOAF PAN. The original recipe called for a 9×5 pan. I used an 8×4 and it worked out perfectly. As a matter of fact I would recommend using an 8×4 for this recipe as you get a taller bread by using the smaller pan.

Lesson Learned 3: OIL. The original recipe called for vegetable oil but I used coconut oil and it turned out beautifully. As a matter of fact, I would recommend using coconut oil if you have it. The cake turned out really moist.

Ready To Go Into The Oven

Ready To Go Into The Oven

Lesson Learned 4: ROOM TEMPERATURE EGGS. What I absolutely loved in this recipe was a tip regarding using room temperature eggs. First of all, I’ve always heard you should use room temperature eggs in baking but I never knew why. I found out that room temperature eggs tend to mix more evenly than cold eggs, who knew? But here’s the greatest TIP: If you’re like me and never remember to take the eggs out before you start baking, just take your eggs, put them in a cup, cover them with warm water and let sit for 5 minutes. Voila! You have a room temperature eggs!

Lesson Learned 5: A KITCHEN SCALE. Baking is not like cooking. You need your measurements to be exact in order to get the best results. I’ve found that to be especially the case with flour. If a recipe (which this one does) includes the weight of flour in grams, use a scale and measure the flour that way. It is so much more precise. TIP: If you keep your flour in a canister, take a knife and stir the flour to eliminate any compaction that may have occurred while sitting in the canister. Then put your measuring cup in, scoop the flour out and level it off at the top with your knife. That is another trick to get a more accurate amount of flour in your recipe, although using a scale is the most accurate.

Fresh Out Of The Oven...

Fresh Out Of The Oven…

Lesson Learned 6: COVERING THE BREAD IN FOIL. The recipe calls for loosely covering the bread with foil after the first 30 minutes of baking so the bread will not get overly dark. Great tip! I covered the bread after thirty minutes, baked it for another 20 and it still was not done but uncovered it and baked it for 10 more minutes and it came out perfectly.

Lesson Learned 7: THE GLAZE. This is perhaps the best glaze I ever tasted and I think the reason is that it’s made with heavy cream instead of just milk or water. One place where the recipe differed from what I experienced was in the amount of heavy cream to use. The original recipe called for 2 Tablespoons of heavy cream, 1 cup of confectioners sugar and 1/2 tsp. of vanilla extract. That combination gave me a ball of paste. I wound up using about 6 TBS. of heavy cream and 1 TBS of vanilla extract in order to get the consistency you see in the pictures. It tasted better than any glaze I’ve ever made. Heavy cream is definitely the key to a great tasting glaze.

Lesson Learned 8: MIXING. The recipe cautions not to over mix the batter in order to have a moist cake. This is absolutely true. Pay attention when mixing and just when everything is combined, stop! I was very careful not to over mix and the cake was moist and delicious.

My husband almost ate the whole loaf all by himself, that’s how great this bread is. It is so easy to make and so flavorful. I know you will thoroughly enjoy this recipe! You must try it.

Serving Suggestion

Serving Suggestion

Glazed Strawberry Bread…

  • Servings: 10-12
  • Difficulty: Easy
  • Print

INGREDIENTS:

BREAD:

2 cups (250g) flour

1 tsp. baking soda (1/2 tsp for high altitude)

1/2 tsp. salt

1/2 tsp. ground cinnamon

1 large egg, room temperature

3/4 sugar (2/3 cup high altitude)

1/4 cup brown sugar (50g) not firmly packed (high altitude leave an 1/8 inch visible around the rim of the measuring cup)

1/3 cup vegetable or canola oil (you can use melted coconut oil)

1 cup buttermilk (no substitutions)

2 tsp. vanilla extract

1 cup fresh strawberries cut in small pieces

GLAZE:

1 cup (120g) confectioners sugar

1 tsp vanilla extract

4-6 TBS heavy cream

DIRECTIONS:

Preheat the oven to 350 degrees. (If you did not allow for a room temperature egg, place your egg in a container, cover it with warm water and let it sit for 5 minutes. If using coconut oil, put the oil in a pan, melt it and set aside to cool.)  Spray a 8×4 loaf pan with nonstick spray and set aside.

In a large bowl whisk the flour, baking soda, salt and cinnamon until combined. In a medium bowl whisk together the egg, granulated and brown sugars. Whisk until there are no visible lumps. Whisk in the buttermilk, oil and vanilla. Make a well in the center of your dry ingredients and pour in the wet ingredients. Stir until there are no lumps. Do not over mix.

Mix the strawberries with 1-2 TBS of flour (this will prevent the strawberries from only staying at the top of the bread). Carefully fold the strawberries into the batter. Pour the batter into the prepared pan and smooth it out evenly.

Bake for 50 minute to 1 hour. Loosely cover the bread with foil after 30 minutes of baking. Remove foil for the last 10 minutes of baking. The bread is done when a toothpick inserted in the center comes out clean. Keep the bread in the pan for 15 minutes before removing it. Allow the bread to cook completely before glazing it.

Glazed Strawberry Bread

Glazed Strawberry Bread

Glazed Strawberry Bread

Glazed Strawberry Bread


Cinnamon Crumb Banana Bread…

Snowing on May 11, really? Just when you thought Spring had finally sprung here comes the frenetic rush to protect the rose bushes and the irises from the impending onslaught of freezing temperatures. Not much fun and I certainly hope we’ve seen the last of snow for a long while, but even so, when it snows and gets cold I’m conditioned to crank up the oven and bake something. I’m sure it comes from some childhood memories of how wonderful the house felt and smelled when the weather was cold and something was baking in the oven. So it’s ingrained in me whether it be December or May.

As the temperature dropped I decided to bake something but I wanted it to be easy while making the house smell divine. I found my answer on, you guessed it, Pinterest. Double bonus, I had all the ingredients already in the house so I didn’t even have to venture out in the cold. And once again I put my “self-proclaimed Pinterest recipe critic” hat on and started to make cinnamon crumb banana bread from a recipe I found on a website called littlebitsof.com.

Recipe Rating: A+++++ I recognize that unless stated recipes are not written to the specific needs of high altitude baking so I made some adjustments and it turned out beautifully. If I had to rate the recipe overall on how it was written I would not have given it as high of a mark and I’ll explain that in my lessons learned.

Lesson Learned 1: WRITING A RECIPE – As a non-intuitive cook I need to have things spelled out for me, at least for the first time I try a recipe. Once I get an initial “try” under my belt and am successful, then the rest is up to me. This recipe left out one very specific and important element that being the size of the pan to use. Loaf pans come in two traditional sizes, a 9 x 5 inch or an 8 x 4 inch. When using a recipe designed for a 9 x 5 inch pan in an 8 x 4 inch pan you can obviously encounter some potential differences – the two most typical being the loaf rising and spilling over the sides of the pan or the cooking time needing to be adjusted for the denser amount in the smaller pan. I will tell you up front, this recipe as written is probably for an 9 x 5 inch pan. I used an 8 x 4. I was lucky. The cake rose quite high but did not spill over but it took 15 minutes longer than what the recipe called for to bake. Please recipe writers, when writing your recipes be as specific as you can. How can you leave out the size of the pan in a recipe? I definitely was not happy about that. That being said, I thought the cake turned out pretty well, but had I been a cook just starting out I might not have been so lucky.

Also I’m not a big fan of recipes that don’t tell you how to do things systematically. For example, in my mind a recipe should indicate if an oven needs to be preheated right at the very beginning. I know it sounds picky but telling me at the very end that the loaf needs to go into a preheated 350 degree oven doesn’t cut it. If an oven needs to be ready once the batter is made, indicate that up front and not at the end.

The Crumb Topping

The Crumb Topping

Lesson Learned 2: THE CRUMB TOPPING – this is perhaps the best crumb topping I have made on loafs to date. It was easy to make, combined into crumbs well and looked as good as it tasted. This is definitely a crumb topping to use on a wide variety of sweet breads.

Lesson Learned 3: THE LOAF PAN – before I start I have to give a disclaimer that I work for Crate and Barrel. But even so, I would not sing the praises of a piece of equipment just because Crate and Barrel carries it. So I am not kidding when I say that the Pro-Line cooking and baking line carried by the store is, in my estimation, second to none. I have both the loaf pan and the baking sheet and I can tell you unequivocally that they are superior products worth the investment. These pans are commercial grade with a texture weave technology that bakes things beautifully while being totally non-stick. At first I didn’t even believe it myself, but when you can pour cake batter into a pan without pretreating it in any way and the cake comes out of the pan without any trouble and is evenly baked you know you have a good kitchen utensil. From the pictures you can see how nicely browned the loaf is and after it cooled for 15 minutes it came out of the pan with no trouble. These are great products and worth the investment, just saying. 

My Husband's Infamous Corner Cut...

My Husband’s Infamous Corner Cut…

Lesson Learned 4: NUTS – I would add nuts to this recipe, maybe a half cup chopped pecans or walnuts, whatever you have on hand. I think it would compliment this recipe well.

My husband is usually my best critic for my recipe attempts and lately he has created a unique way of sampling my baked goods. Once I tell him that I’m satisfied with the pictures I’ve taken for the blog he meticulously cuts out a corner of the cake for his taste testing. He never does a slice, just a hallowed out corner. I can tell if a recipe is really good when he goes for more. He very quickly went for more on this one so I highly recommend it to you.

The recipe below reflects elements of how it was originally written with notes about adjustments for high altitude. Enjoy this one – it’s a keeper!

Cinnamon Crumb Banana Bread…

  • Difficulty: Easy
  • Print

INGREDIENTS:

1 extra large egg

1 cup sugar (make it a “light” cup for high altitude leaving an 1/8 inch visible at the rim)

1 stick unsalted butter at room temperature

1 tsp. vanilla (2 tsp. for high altitude)

1/2 cup buttermilk

2 large overripe bananas, mashed

2 cups all purpose flour

1/2 tsp. salt

1/2 tsp baking soda (1/8 for high altitude)

1 tsp. baking powder (1/4 for high altitude)

1 heaping tsp. cinnamon

Crumb Topping:

1/2 cup powdered sugar

1/2 cup all purpose flour

4 TBS. unsalted butter melted

1/2 heaping tsp. cinnamon

pinch of salt

DIRECTIONS:

Preheat the oven to 350 degrees. Melt the 4 TBS. of butter and combine with the sugar, flour, cinnamon and salt until it forms a course crumble. Set aside.

In a stand mixer using a paddle attachment beat sugar, egg and vanilla. Add the butter and beat until smooth and the butter is completely incorporated. Add the buttermilk and bananas and beat to combine.

Put the flour, salt, baking powder, baking soda and cinnamon in a separate bowl and whisk together. Slowly add these dry ingredients into the wet ingredients until all of the flour mixture is incorporated. Spray a 9 x 5 inch loaf pan with non-stick cooking spray and pour in the batter. Crumble the crumb topping on top of the batter.

Bake for 45-50 minutes (high altitude may take as much as 65 minutes) or until a toothpick put in the center comes out clean.

Right Out Of The Oven

Right Out Of The Oven

Cinnamon Crumb Banana Bread

Cinnamon Crumb Banana Bread

Cinnamon Crumb Banana Bread

Cinnamon Crumb Banana Bread


A Delicious Disaster…

I wish I could say that everything I bake comes out perfect the first time. I would be a liar if I did. Actually it often takes a few stops and starts to get a new recipe right. And today’s venture into baking was definitely an example of that.

Nutella Banana Bread Ingredients

Nutella Banana Bread Ingredients

How do you feel when you bake something for the first time and it basically flops? I used to get very frustrated and never attempt the recipe again until I learned that it is more the exception than the rule that first time ventures are actually successful. Now I view my flops as learning moments and from that point on it becomes a mission to get the recipe right. And by right I mean it has to meet the two basic criteria: it has to look good and it has to taste good. Today’s foray into baking was a taste delight that literally collapsed upon itself.

So let’s talk briefly about the recipe. Today’s recipe for Nutella Banana Bread came via Pinterest from a website called Chef-In Training. I was intrigued by the combination of combining Nutella with bananas and being that I had all the ingredients in the house decided to try it.  The recipe states that this is the BEST way to make banana bread and after tasting the finished product I would have to agree. The trick is combining the ingredients in such a way that the bread doesn’t collapse unto itself. Needless to say the bread looked pretty good right out of the oven, but once I took it out of the pan the middle slowly started to sink in. At that point I was pretty frustrated but when I eventually tasted it, I knew I needed to make the effort to perfect this recipe.

Bread Mixture Before Baking

Bread Mixture Before Baking

So, how would I rate this recipe: A+ for flavor, B- for instructions. The recipe did indicated that the bread would look a tiny bit undercooked (because of the nutella) but I wasn’t prepared for a major collapse. I really think the amount of nutella called for in the recipe is a tad too much. Here are some lessons learned making it:

Lesson 1: Don’t give up on what may seem to be a failure. I was ready to throw the bread in the garbage but my husband sliced a bit off the end and told me it was worth tasting. I did, and this is a very delicious recipe.

Lesson 2: I need to play with the nutella amount. The recipe calls for 3/4 heaping cup of Nutella mixed with one cup of the bread mixture. I would cut that down a bit. In my opinion, the high density of the nutella was the reason for the collapse in the center of the bread. I think next time I will pare down the combination to 1/2 cup nutella and 3/4 cup of the cake mixture. You definitely need more cake mixture sans nutella to give the cake a fuller body.

Bread Collapsing In Center

Bread Collapsing In Center

Lesson 3: Get a good cake pan. I finally did. Now I need to add the disclaimer that I work part-time at Crate and Barrel. But they have a loaf pan made exclusively for them called the Pro-Line Loaf Pan. It is commercial grade and non stick. It is fabulous. I have to admit I had my doubts, but I put the batter in the pan (and this was a gooey batter with the the nutella) and once it was baked and I let it cool for about 10 minutes the cake popped right out of the pan without greasing and flouring or using sprays. Also, the cake cooked evenly and not like my old pan the cooked the edges faster than the center. My point here is, if you’re going to bake a lot, invest in good pans. They are worth the money.

Lesson 4: The recipe calls for layering the bread and nutella mixtures and then swirling them with a knife. I did that and it still did not mix the nutella into the batter they way I would have liked it. Next time I am going to do a layer of each (starting with the basic batter) swirl it and then add the next two layers and swirl again. I think that will combine the mixture better and prevent a mass of nutella from settling in any one place in the batter.

Top Of Bread Sinking In

Top Of Bread Sinking In

I cannot stress enough that this bread is very delicious. Once I have it perfected I will write and addendum to this with the amounts that I used that created a perfectly swirled bread that did not collapse onto itself. If you try this recipe and have more initial success than I did, let me know how you did it. But bottom line, the recipe is worth the work to perfect.

Baking on Facebook (Apple Cinnamon Loaf) …

If you are in forced recuperation like I am (not sure why I’m making it sound like a death sentence) you are constantly looking for things to occupy and enrich your mind while your body heals. And if you’re outside adventures, such a trips to the grocery store, are also limited until you get clearance from the doctor, you need to rely on what you already have at home. And although I love my computer, one can only surf so much before you seek stimulation elsewhere.

Apple Cinnamon Loaf Ingredients

Apple Cinnamon Loaf Ingredients

I found an outlet on, of all places, Facebook. Scrolling through the news feed the other day I came across a recipe for an apple cinnamon loaf. Now I’ve looked at dozens of recipes that people post and generally gloss over most of them but this one intrigued me because not only did is sound very “Fall-ish” and wonderful but also because I already had all of the ingredients in my pantry. So today, instead of being the self-proclaimed Pinterest recipe critic, I am switching my critique to what I found on Facebook.

In a previous blog when I reviewed a Pinterest recipe for Lemon Blueberry Yogurt Loaf, I talked about the technique of mixing fruit with flour so that it disburses throughout the loaf and doesn’t all sink to the bottom. Unfortunately that technique did not work for me when I made it (I attribute it to the use of frozen instead of fresh blueberries). Upon seeing the loaf my husband dubbed it my “sunken berry” cake and although delicious not as pleasing to the eye as I would have wanted. This time I wanted to avoid the dreaded sunken berry (almost sounds like a breakfast cereal, doesn’t it?).

This particular loaf uses a different technique, one that is used frequently in boxed loaf mixes, that of putting half the batter in the pan, adding the spices or fruit and topping and then adding the remaining batter with another layer of topping. This recipe calls for adding a layer of spices and fruit onto half the batter, patting it down, repeating the process and then finally before putting it into the oven using your finger or a spoon and swirling the mixture all around. That sounded interesting. And what technique do you think I used?  Of course, nix the spoon, the finger is so much more fun! Nothing like getting your hands dirty while in the kitchen I always say.

Needless to say, a very simple and full proof recipe. My Rating: A-. What I like about this recipe is that it’s very easy to make and uses staples most of us have in the pantry. Believe it or not I did not have enough vanilla extract for the recipe (who ever runs out of vanilla extract, I mean really?) so I substituted the cinnamon extract I had on hand and it seemed to work fine. And, as always when I make something, there are some lessons learned.

Lesson Learned 1.) I think the recipe needs a couple of boosts to get rid of the minus on the rating.  First, I would specify using a green apple (which I did in the directions below). I had a gala apple on hand and although it worked well I think green apples are your best bet when a recipe calls for using apples.

Lesson Learned 2.) The next time I make this I will try coating the apple chunks with some nutmeg and cinnamon sugar and letting them absorb them before I layer them on the batter. I think that will enhance the flavor of the apple.

Lesson Learned 3.) The recipe calls for 1/3 cup brown sugar not packed. I would recommend packing the brown sugar as I think the cake needed a little more of that sweetness. You may need to add a little more cinnamon to the brown sugar but that is no big deal.

Lesson Learned 4.) The recipe called for the loaf to bake for 30-40 minutes. It took my loaf 45 minutes to render a clean toothpick when inserted in the center.

Lesson Learned 5.) As mentioned in previous critiques, as soon as I am able I am getting a new loaf pan. Hopefully that will help to get a loaf that is evenly baked and not crunchy on the ends.

All in all I was very pleased with the outcome, especially when it turns out well the very first time you make it. This is an easy recipe, one I would recommend to keep in your recipe box.

APPLE CINNAMON LOAF

inside

Apple Cinnamon Loaf

  • Servings: 1 loaf
  • Difficulty: Easy
  • Print

INGREDIENTS:

1/3 cup brown sugar packed

1-1 1/2 tsp. ground cinnamon

2/3 cup sugar

1/2 softened butter

2 eggs

1 1/2 tsp. vanilla extract

1 1/2 cups flour

1 3/4 tsp. baking powder

1/2 cup milk

2 apples peeled and chopped, honey crisp or granny smith

Cinnamon, sugar and nutmeg to coat the chopped apple (mixture to taste)

DIRECTIONS:

1. Preheat oven to 350 degrees. Grease and flour a 9 x 5 loaf pan (or use baking spray).

2. Mix together brown sugar and cinnamon and set aside. Chop the apple and lightly coat with a mixture of cinnamon, sugar and nutmeg and set aside.

3. Beat sugar and butter until smooth and creamy. Beat in eggs one at a time until incorporated. Add vanilla extract.

4. In a separate bowl, sift together flour and baking powder. Make a well in the center and stir in butter mixture. Once combined, stir in milk until batter is smooth.

5. Pour half the batter into the prepared pan. Top with half the chopped apples. Sprinkle brown sugar mixture on top. Pat apples and brown sugar into the batter. Pour the remaining batter over the apple layer, top with remaining apples and brown sugar and cinnamon mixture. Lightly pat. Swirl batter with your finger or your spoon.

6. Bake in preheated oven for 30-40 minutes or until a toothpick inserted in the center of the loaf comes out clean.

Apple Cinnamon Loaf

Apple Cinnamon Loaf

IMG_7095

Lemon Blueberry Yogurt Loaf…

Being forced to take it easy after spinal surgery has its advantages and disadvantages. For the life of me I never thought I would feel guilty just taking it easy. It’s made me realize that our lives are so full and programmed that once you’re forced to just relax and heal it feels very strange – and it’s also very hard.

The one could thing about my recuperation is I am relatively mobile. I have to be careful with my movement, no bending or twisting and the waist, and no lifting anything over ten pounds. But other than that my activity is based on what I think my body can tolerate and how I feel. The key is to try to continually build up my strength and activity.

And what kind of activity has in recent years become a passion of mine? Well, cooking and baking of course! So today instead of just loafing around it was time to get active and make a loaf, a lemon blueberry yogurt loaf to be exact. This recipe comes from a website called Sweet Peas in the Kitchen and I found it on Pinterest (surprise, surprise). What intrigued me about the recipe was the process for making the loaf.

Ingredients

Ingredients

The ingredients consist of all the usual suspects, flour, sugar, lemon juice and zest, yogurt, eggs, vanilla, blueberries and such. But the interesting part of making this loaf is what you do to it once it comes out of the oven. This recipe calls for making a lemon sugar syrup that you cook on the stove and brush all over the loaf after you’ve thoroughly pierced it with a toothpick. Once the syrup soaks in you continue the process again until the syrup is completely used up. The idea here is to add moisture to the inside of the loaf after it bakes. This was a new one for me. Then once the loaf is completely cooled you make a simple lemon juice and confectioners sugar glaze and drizzle it all over.  Sounded interesting, so I had to try it.

As with all recipes I get from Pinterest, once I initially try them I like to rate them and talk briefly about some lessons I learned while making them. So, first the RATING: A. I really like this recipe. It is easy and very flavorful. You know when you lick the batter and it’s yummy that you’ve got a winner on your hands. This is definitely one to put into your recipe box.

Lessons Learned: 1 : The recipe calls for fresh or frozen blueberries rinsed and coated with a little flour, a common trick to get the blueberries not to gather at the bottom of the cake while its baking. I couldn’t find fresh blueberries so I opted for frozen. Frozen ones are mushier and wetter and so next time I will use fresh blueberries. Although my blueberries did not totally sink the the bottom, they definitely showed a propensity to being there and I’m thinking fresh blueberries will be drier and because of that more evenly distribute themselves in the loaf.

Folding Blueberries Into The Batter

Folding Blueberries Into The Batter

Lesson Learned 2: I was intrigued by the process of piercing the warm loaf and brushing it with a lemon sugar syrup. I’d never heard of using this type of technique to infuse moisture into a loaf once it’s baked. I found that it does indeed add moisture but felt that using the entire amount was not necessary. The recipe calls for a mixture of 1/3 cup lemon juice and 1/3 cup sugar cooked on the stove and applied until gone. I would decrease that to 1/4 cup each and maybe even after some experimentation to 1/8 of a cup. I definitely don’ t think you need all of it, but try it and see what you think.

Loaf Basted With A Lemon Sugar Syrup

Loaf Basted With A Lemon Sugar Syrup

Lesson Learned 3: Note to self. I need to get a new loaf pan. I currently use a dark one and it tends to really cook the edges of loaves much faster than the center and so my edges tend to get very crispy before the center is completely done. I want to try either a glass or just light metal pan to see if it makes a difference. I have a feeling it will. Have you any thoughts on what works best?

All in all, as you can see by the final product below, I am very pleased with the way it turned out considering it was the first time I made it. You should add this recipe to your repertoire – it’s a keeper!

The Finished Iced Cake

The Finished Iced Cake

Lemon Blueberry Yogurt Loaf

Lemon Blueberry Yogurt Loaf

A Self-Proclaimed Pinterest Recipe Critic…

Tonight I’m getting together with a group of people, undercover foodies, to begin a conversation of how we can form a group based on cooking, learning and fun. The group already has a name – Sweet Serendipity, Supper, Sips and Such – and the name leads me to believe that the members will all be “foodie forces” unto themselves. The person who coordinated the group asked us to bring an appetizer or something sweet, preferably a recipe taken from the Pinterest site.

Now I know I’ve mentioned this before but I am a big fan of Pinterest. What I love about using Pinterest is that you are exposed to a broader segment of the internet often being introduced to interesting websites and blogs you might never have found through Google. And I love it for the wealth of cooking information and recipes that are pinned to various boards. So, needless to say, I am “on board” with the idea of this cooking group and with Pinterest.

For this evening’s cooking contribution I made a coffee cake recipe I found Pinterest. I made it on Friday but the coffee cake was such a hit that this morning I was faced with the dilemma of having only a meager amount to bring to the meeting. So, off I went back to Pinterest in search of something simple but also unique. I found what I was looking for on a website called “Pardon The Dog Hair” (a website I would never have found on my own), a recipe for Blueberry Banana Oatmeal Bread. The pictures of the bread looked delicious, the recipe was simple and I had most of the ingredients already so the decision to make it was easy.

The bread is made from a traditional process, combining all the dry ingredients, adding the wet ingredients and then finally folding in the blueberries and nuts.

Preparing the ingredients

Preparing the ingredients

What’s nice about this recipe is that it doesn’t use any white sugar. The sweetness comes from brown sugar, apple sauce and bananas. After you combine all the dry ingredients you whisk together the eggs, apple sauce and bananas and then combine the wet mixture with the dry mixture. Last, you carefully fold in the blueberries and the nuts and put the mixture in a prepared loaf pan.

bbo4

bbobread2

The recipe calls for baking it at 350 for one hour – that seemed like a long time to me so I started with 40 minutes and pulled the bread out of the oven at that time. As you can see the bread was already quite dark and even though it was very firm at the very very middle top it wasn’t completely done. Despite that the end result, as you can see below, was still wonderful but there definitely were some lessons learned about making this recipe.

Blueberry Banana Oatmeal Bread

Blueberry Banana Oatmeal Bread

First lesson: The next time I make this I will use a glass loaf pan. I used a dark loaf pan and I think it contributed to making the bread darker more quickly even when it was not completely done. Second lesson: If you look at the pictures of the bread from the website where the recipe was taken, it looks like the top of the bread was also dusted with quick cooking oats. I think that would offset the very dark color on top, keeping in mind that whole wheat flour is the main flour in this bread so it will naturally look darker. Third lesson: The recipe did not call for this but I dusted the pecans with just a smidge of flour. I’ve found that the nuts will more evenly disperse themselves into a mixture and not just rise to the top during the baking process when you do that.

Rating for the recipe: Between very good and excellent – if the blogger did in actuality dust the top of the bread with quick cooking oats like the pictures on the site seem to suggest, I would note that in the recipe. Taste-wise the rating is excellent, and I love the fact that this recipe is delicious without having to use white sugar. This is definitely a recipe to try. 

I have a feeling I will be trying a lot more recipes from the Pinterest site in the upcoming weeks and months. I plan to share the escapades of making and eating them on this blog. If you see a Pinterest recipe you’d like me to “test” with the group – just let me know. If you’re anything like me you’ve probably been wondering if all those recipes you see posted are really as good as they look. And if you have any experiences with Pinterest recipes, I would love to hear about them. The Pinterest test kitchen is now open for business.

Fall – When Ovens End Their Hibernation…

What is it about Fall weather that makes you want to fire up the oven? The manner in which you cook totally changes from Summer’s outdoor grill mode to Fall’s indoor nesting and baking mode. And for me that usually means heavy duty oven time. Think about it. You move away from grilling chicken and steak to making pot roast and casseroles. And I think that is what I most appreciate about Fall – bringing all those marvelous smells back into the house. And if a Fall day also happens to be a rainy day, well then it is an absolute must to fire up the oven!

And so it was yesterday, that killer combination of Fall and rain and I knew I just had to make something. There were only two givens – one, it had to smell wonderful when it was cooking and two, it had to be a recipe I had not tried before. That doesn’t narrow the playing field very much but I happen to love endless possibilities. But how to proceed… hmm…

Then it struck me. My husband and I recently returned from a trip from Santa Fe, New Mexico. While we were there we stayed at a bed and breakfast and each morning my husband would have an English Muffin and a piece of coffee cake. My husband is not a sweets eater but he often talked about how much he enjoyed the coffee cake. The coffee cake had a cream cheese filling and so as I thought about what I would bake I began to think in that vein.

The finished product

The finished product

So off I went to one of my favorite sites on the web, Pinterest, in search of a cream cheese coffee cake recipe. Lo and behold I found one on a website called Bake or Break and like that my decision was made. There was no turning back, I succumbed to the trappings of Fall weather and rain by making a cinnamon cream cheese coffee cake.

As you can see the finished product was great and it tasted divine. I encourage you to try it. Here are some things I learned when making it:  1.) Be aware that it does take some time to prepare because basically you are making three separate things from scratch, the crumb topping, the cream cheese swirl and the cake. 2.) The cake mixture is much thicker than you might think – I poured it into the prepared pan and literally had to spread it out by hand in order for it to fit the entire pan. I thought this might make the cake tough, but it was not. 3.) Be very mindful of the cooking time – it helps to know your oven on this and really on almost everything else you bake. The recipe says to cook it at 350 for 40-45 minutes. Mine was done at 40 and could maybe have been in for even a few minutes less.

But anyway it turned out great – so much so that even though it takes a little more time to prepare it is definitely worth making in my opinion. My husband loved it, my co-workers are getting a treat today, and a newly formed cooking group that I just joined (something for a future blog) will be getting samples of it tomorrow night. So enjoy the coffee cake, it is definitely worth the work. Happy Fall baking!

Cinnamon Cream Cheese Coffee Cake

Cinnamon Cream Cheese Coffee Cake

Cinnamon Cream Cheese Coffee Cake Recipe

How Do You Solve A Problem Like Zucchini…

(Please check out my more recent post regarding this recipe and the lessons I’ve learned after a year of making it several times – just click here and enjoy!)

I love to grow vegetables in my garden. It’s not only fun it’s very satisfying. And I’ve learned over the years, just like anything else, that less is more. So I’ve finally come to terms with having blank space in my garden knowing that as the summer progresses the vegetable plants will fill them in. They’re also much happier because now they have the room to grow and don’t have to compete with other plants for space and water. What a concept. I wish I had figured that out a lot sooner.

A zucchini from my garden...

A zucchini from my garden…

And for some reason my gardening prowess seems to be growing zucchini. Once the onslaught begins it never seems to end. I love grilled zucchini and I have a great recipe for zucchini gratin (thanks to Ina Garten) but I’ve struggled with using zucchini to make zucchini bread. The usual recipes seemed too dry and too bland to me. I was searching for the perfect recipe and happened to stumble upon it last year thanks to Pinterest and my friend Kelly Brown who posted it. It is a recipe for double chocolate zucchini bread and I am not kidding when I say it is to die for! I can’t take credit for the recipe, it is from King Arthur’s Flour, but I love it for several reasons. First, there is no white sugar in the recipe – honey is the substitute for that. Second it uses a good quantity of zucchini, two cups patted down that translates into about two 8-9 inch long zucchinis. Third it uses coffee as a flavor enhancer  (technically the recipe calls for espresso powder but I have been challenged in finding that so I just substitute plain ole’ brewed coffee) and it is amazing how much more robust coffee makes the chocolate flavor. Fourth, it is so simple to make and it so killer delicious you won’t believe what you are tasting.

So enough is enough – here is the recipe. I will write the recipe as originally printed and note adjustments I made to it that work for me in high altitude. I guarantee you will enjoy this one!

Double Chocolate Zucchini Bread

  • Servings: 1 loaf
  • Difficulty: easy
  • Print

INGREDIENTS:

2 large eggs

1/3 cup honey

1/2 cup vegetable oil

1/2 cup brown sugar

1 tsp. vanilla extract

1 tsp. salt

1/2 tsp. baking powder

1/2 teaspoon baking soda

1/2 tsp. espresso powder (I used a Tbs. of brewed coffee and got the same effect)

1/3 cup baking cocoa

1 2/3 cup flour

2 cups shredded unpeeled zucchini, gently pressed

1 cup chocolate chips (I used dark chocolate chips)

DIRECTIONS:

1. Preheat oven to 350 degrees, lightly grease an 8 1/2 x 4 1/2 inch loaf pan (I used the 9 inch loaf pan and struggle to think that the amount of batter you get in this recipe would fit in an 8 inch pan. It doesn’t rise all that much, but there is a lot of batter).

2. In a large mixing bowl, beat the eggs, honey, oil, sugar and vanilla until smooth. (I added the brewed coffee to this mixture).

3. Add the salt, baking soda, baking powder, espresso powder, cocoa and flour mixing until well combined.

4. Stir in the zucchini and chocolate chips.

5. Pour the batter into the prepared pan.

6. Bake the bread for 65-75 minutes. (the first time I did this I way overcooked the bread. I think because I was using a bigger pan and it takes less time. So now I only bake mine for 45 minutes and it turns out perfectly. If you use the smaller pan you may have to bake it longer because the batter will be less spread out. You may have to play with the cooking times the first few times you make this recipe. Don’t get frustrated if it is not perfect the first time. I guarantee it is worth figuring out how it will work for you and your oven). Test for doneness (a toothpick or cake tester inserted into the center will come out clean save for perhaps a light smear of chocolate from the melted chips).

7. Remove the bread from the oven and let it cool for 15 minutes before taking it out of the pan.

8. Cool completely before slicing (although slightly warm is delectable as well). Store well wrapped at room temperature.

One more thing to note: I am always on the lookout for zucchini recipes so feel free to share. Enjoy making this one – it is divine!

Double Chocolate Zucchini Bread

Double Chocolate Zucchini Bread

The Saving Banana Bread…

More and more you read about the perils of eating too much white sugar. And if you read the ingredients on food items at the grocery store, you’ll be amazed at the number of grams of sugar in most things you eat. I don’t know about you, but white sugar has been a staple in my diet for most of my life. And I will be the first to admit that I was never a nutritional expert. But the more I learn about cooking, the more I’ve become aware of things that were never part of my consciousness before.  So, why all of a sudden, is white sugar so bad for you (or at least it seems all of a sudden)? This got me thinking and so I did a little research. Is white sugar really bad? I looked at various articles and over and over saw the same message as the one below:

“Most foods containing sugar, especially refined white sugar, have very little nutritional value and are often referred to as “empty” calories. Beyond this, insulin is also secreted in proportion to the amount of sugar consumed. Since insulin is the hormone that instructs the body to store energy as fat, it’s a nemesis if it becomes too high. Repeatedly eating sugar throughout the day eventually leads to chronically high insulin and ultimately to insulin resistance.”

And that is why so many Americans develop Type II Diabetes as they get older. White sugar is probably not the only cause, but after pounding it for years and years I’m certain it makes a substantial contribution. And yet white sugar, or granulated sugar as it is widely known, has its purpose. Apart from being used as a sweetening agent, white sugar has other essential functions:

  • It delays the coagulation of the proteins in eggs
  • Promotes aeration and colour in baked products
  • Lowers the freezing point in ice cream preparation
  • Increases the shelf life of cakes

Plus, let’s face it, sugar just makes things taste so darn good. What would sugar cookies be without white sugar? What would chocolate cake be without white sugar? What would ice-cream be without white sugar? Sounds like a no-win situation here. But maybe, not.

Now I am not a proponent of getting rid of white sugar altogether. It would be interesting to see what my Christmas cookie baking tradition would be without it. And there’s nothing that tops having something sweet with your morning coffee. But I’ve learned over time that moderation in all things is the best way to maximize good health. So, with that in mind, how do you manage to be more moderate with your intake of white sugar and still feel like you’re eating something enjoyable? Are there sensible ways of diminishing the amount of white sugar you eat so that you don’t become insulin resistant?

I went on a mission and forayed onto Pinterest in search of a recipe for something that I usually make that can be made with no white sugar and still be as good as if it were. I stumbled on a recipe for banana bread that uses sugar free applesauce and honey instead of white sugar. Ah yes, banana bread, so good with a cup of coffee in the morning. I decided to begin my journey into baking without white sugar by making banana bread.

To my surprise it actually turned out quite good. Here in high altitude most food cooked in the oven takes longer than what is prescribed in the recipe. But for some reason baking is different. I alway have to be careful when I’m baking and baking times seem to vary from recipe to recipe. What I usually do now is to start looking at a baked items, specifically cakes and breads, about 5-10 minutes before the time written in the recipe. Cookies generally take the allotted time although sometimes that changes too. Needless to say, cooking or baking at high altitude is always an adventure and usually requires two to three tries before a new recipe is perfected. The recipe below is as was printed online. I baked my bread for only 55 minutes and it came out ok, but I think even baking it for 50 minutes would work and make the bread a little moister. That being said, the taste was great. I learned a lesson today. You can make things that taste good without the demon white sugar. Enjoy the recipe! (from 8 weeks to a better you recipes) 

Healthy Banana Bread

  • Servings: 1 Loaf
  • Difficulty: Easy
  • Print

Banana Bread

Ingredients:

  • 2 cups whole wheat flour
  • 1 teaspoon baking soda
  • 1/4 teaspoon salt
  • 1/2 sugar free apple sauce
  • 3/4 cup honey
  • 2 eggs beaten
  • 3 mashed overripe bananas

Directions:

  1. Preheat oven to 350 degrees. Lightly grease a 9 x 5 inch loaf pan.
  2. In a large bowl, combine flour, baking soda, and salt. In a separate bowl, mix together applesauce and honey. Stir in eggs and mashed bananas until well blended. Stir banana mixture into flour just to moisten. Pour batter into prepared loaf pan.
  3. Bake in preheated over for 60-65 minutes (use your judgment here) until a toothpick inserted into the center of the loaf comes out clean. Let bread cool in pan for 10 minutes, then turn out onto a wire rack.  
  • Banana Bread and Fresh Strawberries

    Banana Bread and Fresh Strawberries