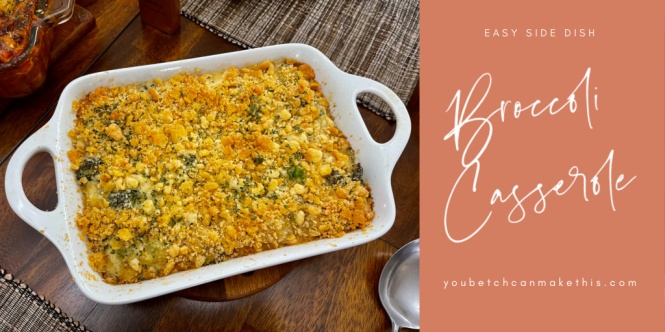
Easy Broccoli Casserole…

Lately I’ve been trying some new things with some friends and they are asking for the recipes. I love it when I try something and it is appreciated. So not only will I share this with my friends, but with all of you as well.

It has been bitterly cold here recently, so when I invited some friends over for lunch and cards I wanted to make something hot and hearty. I decided to make a version of my ravioli lasagna and try a side dish I hadn’t made before, broccoli casserole. My friends don’t seem to mind me trying new recipes on them and, thank goodness, this one was a hit.

LESSONS LEARNED MAKING THIS RECIPE:

  1. An easy way to prep the broccoli: Most broccoli recipes I looked at called for steaming the broccoli for about 3 minutes in a pot on the stove – the traditional way. But the other day I happened to be watching a cooking show on the Food Network and the chef, Jet Tila, talked about using Mike to prep the broccoli for a recipe he was making. He went on to say that Mike was the microwave and all he did was put the broccoli in a microwave safe bowl, cover it with plastic wrap and steam it for 3 minutes – much, much easier! So I did that with one exception – I only steamed my broccoli for a minute and a half as it was going to be baking in the oven for 30-40 minutes and that would accomplish the rest of the cooking.
  2. The recipe I based this on solely called for grated sharp cheddar cheese in both the mixture and with the crumb topping. I used shredded sharp cheddar for the mixture and grated gruyere with the cracker topping. It was divine!

The rest was so easy. This is a recipe that you can make ahead of time, refrigerate the mixture and when ready to make it, let it sit out for about an hour to take the chill off, add the crumb mixture and bake it off.

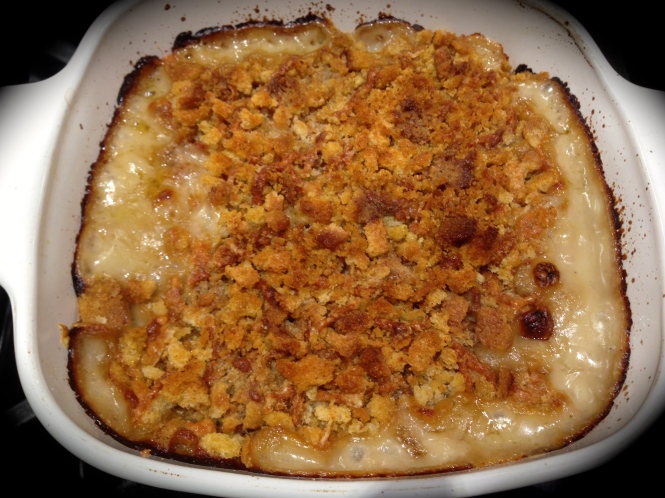
Easy Broccoli Casserole

  • Servings: 8
  • Difficulty: Easy
  • Print

INGREDIENTS:

6 cups chopped fresh broccoli florets

1 (10 3/4 oz) can of condensed cream of mushroom soup

1 cup mayonnaise

1/2 stick melted butter

2 large eggs, slightly beaten

1 small onion, diced

1 cup shredded sharp cheddar cheese

1 cup gruyere cheese, grated

1 sleeve of Ritz crackers, crushed

Salt and pepper to taste

DIRECTIONS:

Preheat the oven to 375

Place broccoli in a microwave safe bowl with about 1/8 cup water. Cover tightly with plastic wrap. Microwave on high for 1 1/2 minutes. Remove plastic wrap, drain the broccoli and set aside.

In a large bowl combine the broccoli, soup, mayonnaise, butter, eggs, onion, salt and pepper. Mix well. Add the cheddar cheese and mix again until cheese is incorporated.

Place the mixture in a medium size buttered casserole dish.

Mix together the gruyere cheese and crumbled crackers. Sprinkle cracker mixture on top.

Bake for 30 – 40 minutes. Let stand for 5 minutes before serving.

Asparagus Soup…

Ingredients

Last Saturday I visited our local farmers market. I love going there on Saturday mornings. Our famers market has a wide variety of vendors selling vegetables, meats and baked goods. There is also a guy who sharpens knives (I love that) and food and crafts vendors. It’s easy to spend a couple of hours meandering the site, sampling the goodies, listening to live music and going home with in season farm-to-table goodies.

This week the farmers stands were inundated with chives and asparagus. There was asparagus as far as the eye could see. I couldn’t resist buying some (along with some cranberry walnut bread and some cheddar brats). I’ve had a craving for soup lately and thought I’d try my hand at making some asparagus soup. And the rest is history… I could’t believe how easy it was to make but even better than that how delicious it was. I’ll probably head back next Saturday for another batch.

But let’s talk asparagus soup…

Lesson Learned 1 – Learn what parts of the asparagus spears you can use: Quite often you’ll see on television the way to trim asparagus is to bend it and where it breaks off is where you should trim your bunch. I’ve found that sometimes that wastes too much asparagus especially if you’re making soup. I learned early on that even with a very sharp knife, there can be a part of the spear that will very hard to cut – you almost always have to use two hands pressing down on the knife to cut it. That is the part you want to throw out. That still leaves some of the tougher parts of the asparagus, but as long as a knife will go through it without a lot of force you can use it in the soup. Keep in mind that soup is designed to use as much of the asparagus spear as you possibly can so don’t be afraid to use some of the tougher parts of the spear. As long as you can cut through it without a lot of force it will be perfectly fine for the soup.

Lesson Learned 2 – Be careful when using an immersion blender: I recommend using an immersion blender for this recipe. Some recipes have you blend the soup in batches in a regular blender. That’s a lot more work than is actually necessary. But, be careful when you use an immersion blender. If you lift the blade up over the top of the soup you’ll have soup splattered all over the place. (I know, I’ve done this!) Move the blender around slowly in the soup and don’t lift if above the top of the soup. If you have to lift it up higher, turn it off first. Just a little tip to save you a lot of aggravation.

Lesson Learned 3 – You can make this soup and store it: This soup will keep it’s freshness for a couple of days. If you decide not to serve it immediately hold off on stirring in the last tablespoon of butter and lemon juice. I made my soup in the morning, refrigerated it and served it for dinner. Right before I served it I stirred in the butter and lemon juice. It gives the soup that that final finishing touch and freshness.

This recipe is so simple and easy. Most of the work is in the prep of the ingredients. I also like this recipe because it makes a manageable amount of soup, servings for four. That way you don’t have a lot of waste. But if you want more, just double the recipe and it’ll turn out just as good.

This recipe is so good I plan on going to the farmers market again this Saturday and buying more asparagus to make some more soup. It’s so much better than the canned stuff. Enjoy!

Asparagus Soup...

  • Servings: 4
  • Difficulty: Easy
  • Print

INGREDIENTS:

3 Tbs. butter, separated

1 medium sized onion, diced

2 cloves garlic, minced

1 pound fresh asparagus, cut into 1/2 inch slices

2 Tbs. flour

3 cups low sodium chicken broth (you can use vegetable broth as well)

1/4 cup creme fraiche (you can use sour cream)

1/2 lemon, juiced

salt and pepper to taste

DIRECTIONS:

Take the tough bottoms off the asparagus spears. Remove a couple asparagus tips and set aside for garnish. (you can slightly steam them or leave them as is for a bit of crunch). Cut spears into 1/2 inch pieces. Place in a small bowl and set aside.

In a medium size high sided pot melt 2 Tbs. of butter. Add the onions and cook until translucent, approximately 5 minutes. Salt and pepper the onions while cooking.

Add the asparagus pieces to the onions and cook over low/medium heat for five minutes. Salt and pepper the asparagus. Add the garlic and cook until the garlic is fragrant, approximately 1 minute. Sprinkle the flour over the asparagus, stir and cook for about 2 minutes.

Add the chicken stock and bring the mixture to a low boil. Turn down the heat, cover and simmer for 25-30 minutes.

Turn off the heat. Use an immersion blender to blend the asparagus into the soup. Continue until there are no evidence of remaining spears. After a few minutes, if any parts of spears remain remove them – they are probably too tough to be broken down. Add the creme fraiche and stir to thoroughly combine.

At this point you can cool the soup and store it for a couple of days if you like. If you plan to serve it immediately stir in the remaining tablespoon of butter and the juice from the lemon. If you plan on serving it later, warm the soup and at that time and add the butter and lemon juice right before you serve.


SaveSave

SaveSave

SaveSave

SaveSave

SaveSave

SaveSave

SaveSave

SaveSave

SaveSave

SaveSave

Cinnamon Roasted Butternut Squash…

One of my favorite vegetables is butternut squash. It is a versatile vegetable capable of being made in a variety of ways but my favorite is roasted butternut squash (with a close second butternut squash soup).

I stumbled on a version of this recipe a while back and have been making my version regularly ever since. But it dawned on me that I never posted this recipe so I will now. There are only a few ingredients in this recipe but they compliment the squash so perfectly and give a gentle sweetness to its flavor.

So let’s talk cinnamon roasted butternut squash…

Lesson Learned 1 – The size of the squash pieces matters: If you cut the squash too large it will remain hard. Conversely if you cut it too small it will turn into mush. For this particular recipe you want to cut your squash into 3/4 – 1 inch thick pieces. I recommend that you cook the squash at 375 for 30-35 minutes. Cutting the squash into those sized chunks results in the pieces being cooked through without being overly mushy and with a nice caramelization on the outside. Don’t get worried if all your pieces are not exactly the same size. Make them close enough in size as you possibly can.

Lesson Learned 2 – Only use coconut oil in this recipe: If you use olive oil you simply will not get the same flavor. The coconut oil renders a subtle sweetness that, along with the cinnamon, makes the squash taste so good. Now, can you use olive oil if you don’t have coconut oil – of course you can. But I wouldn’t recommend using cinnamon with olive oil. I don’t think the flavors would compliment each other as much.

I’ve been roasting squash for years and my go-to recipe was using a garlic flavored olive oil with some dried thyme – and that’s a great combination as well. But I’ve found when I use coconut it not only enhances the flavor but the squash roasts more evenly, if that makes any sense. When I roasted the squash with olive oil sometimes I would get pieces that did not cook through and were somewhat hard even though the only major change was the oil I used. That never happens with coconut oil. Funny, isn’t it?

Lesson Learned 3 – Be careful how much cinnamon you add: In this recipe it is important for the oil and cinnamon to balance each other out in order to get the correct flavor and sweetness. For that to happen the correct proportions need to be used.

Cinnamon on its own without the benefit of sugar can be quite pungent and not very good tasting. Think about it, when do you ever see cinnamon used without some sort of sweetener? I wouldn’t add any more than a teaspoonful in order the get the correct mixture of both the oil and the cinnamon. If done correctly the combination is heavenly. If not, you’ll wind up throwing the squash out.

Lesson Learned 4 – Don’t crowd the pieces of squash when roasting them: Did you ever see the movie “Julie and Julia” about a woman from New York who blogged about cooking her way through Julia Childs’ cookbook? There is a scene in the movie where Amy Grant, who plays Julie, is cooking mushrooms on the stove and says that Julia noted in her book not to crowd the mushrooms – they won’t brown. Well the same thing applies to the squash. You want the squash to roast so you need to give the pieces room. If you don’t they’ll steam instead of roast and you won’t get the benefit of the wonderful caramelization that so enhances the flavor of the squash.

There could not be a recipe any simpler than this that produces such a flavorful, elegant side dish. I make this at least once a week now and can guarantee that you will make it often once you try it. Enjoy!

Cinnamon Roasted Butternut Squash...

  • Servings: 4
  • Difficulty: Easy
  • Print

INGREDIENTS:

3 cups butternut squash cut into 3/4 – 1 inch pieces

1 Tbs. coconut oil, melted

1 tsp. cinnamon

Salt and pepper to taste

DIRECTIONS:

Preheat oven to 375 degrees. Cover a 9x 13 pan with foil. Set aside.

In a medium sized bowl combine the squash, coconut oil and cinnamon. Combine until all pieces are thoroughly coated.

Transfer the squash to the prepared pan making sure the pieces are not crowded in the pan. Salt and pepper to taste. (I’d go easy on both – you could always add more when you serve).

Roast for 30-35 minutes turning over the pieces of squash at the half way point. Serve.

Squash & Cinnamon

Thoroughly Combine Squash, Coconut Oil & Cinnamon

Don’t Crowd The Squash In The Pan


SaveSave

SaveSave

SaveSave

SaveSave

SaveSave

SaveSave

SaveSave

SaveSave

SaveSave

SaveSave

SaveSave

SaveSave

SaveSave

SaveSave

SaveSave

SaveSave

SaveSave

SaveSave

Baked Eggplant Fries…

I have to admit I’ve not cooked a lot of eggplant over the years. If memory serves me right I think I may have dabbled into making eggplant parmesan once but the result was less than memorable. But I happened to be at the market the other day and they had the most gorgeous display of eggplant I’ve seen in a long time. All black and shiny and firm. I couldn’t resist getting one. And I vowed I would not let it spoil in my vegetable bin but do something that would make me want to have eggplant again. And boy did I ever!

I decided to make eggplant fries, but by baking them in the oven versus frying them in oil. I was really jumping into the deep end of the pool on this one as I’d never attempted something like this before with eggplant. But I thought, what the heck – what do I have to lose, right? Now in retrospect I am so glad I did because I guarantee you I will make these often. They are s-o-o-o-o good!

So let’s talk about baked eggplant fries…

Lesson Learned 1 – After you cut the eggplant make sure you salt it and let it rest for 20-30 minutes. The first step of the process is to cut the eggplant into 1 inch rounds.

The picture above shows you the amount of 1 inch rounds you get from a small-medium sized eggplant. It is very important to salt both sides of the rounds and then let them rest. The salt will “sweat” out the eggplant and remove any bitterness. After 20-30 minutes you will be surprised at how much clear liquid is on each slice. Wipe them off with a paper towel and you are ready to go.

Lesson Learned 2 – Cutting the fries. It’s hard to believe but the rounds pictured above produced close to 40 fries. The secret is to first cut about 4 per each round. Then because the rounds are so thick you take each “fry” turn it on its side and vertically cut it once again. That gives you 8 fries per round. I also trimmed some of the skin off on the fries that were cut from the end of the rounds. A small-medium sized eggplant can easily serve 4 people.

Lesson Learned 3 – The secret to dredging. This recipe calls for a traditional dredging station consisting of flour, beaten eggs and bread crumbs. What I’ve found is the most important way to ensure a nice coating on your eggplant is to make sure you don’t over-flour them. The eggplant has a degree of moisture that will automatically allow the flour to cling to it. Once you dredge the fries in the flour, tap them lightly against the palm of your hand to remove any access or areas that have too much flour. I’ve found if an area has too much flour the egg wash does not cling to it. With the nice light dusting of flour, the egg clings beautifully which then makes the bread crumbs adhere well to the fries.

Dredged Fries Before Baking

Lesson Learned 4 – Set up a sheet pan with a wire rack for the fries: This can be a messy recipe so I advise that you line your sheet pan with foil before you put the wire rack on top of it. That way any baked on drippings will be easy to clean up. And make sure you spray the wire rack with olive oil cooking spray before placing the fries on the rack. You don’t want them to stick.

Lesson Learned 5 – You can use regular or panko bread crumbs: I’ve made this recipe both ways and both ways are delicious. The panko bread crumbs will provide even more of a crunch to the fries but regular bread crumbs work just as well and seem to brown a little better. I really don’t have a preference so use whatever you have on hand. At the bottom of the post I have pictures that show a batch with bread crumbs and then a batch with panko.

That’s it! The rest of the work is done by the oven. These fries come out crispy and flavorful. Pair them up with some Tzatziki or warm marinara sauce and your tastebuds will think they’ve died and gone to heaven. Enjoy this one – it’s a keeper!

Baked Eggplant Fries...

  • Servings: 4
  • Difficulty: Easy
  • Print

INGREDIENTS

1 small-medium eggplant (big enough to produce a minimum of five 1 inch rounds)

3/4 cup flour

2 eggs, beaten

1 cup bread crumbs (I used roasted garlic bread crumbs)

1 tsp. garlic powder

1 tsp. dried oregano

A pinch of salt and pepper

Olive oil cooking spray

DIRECTIONS

Preheat the oven to 425

Slice the eggplant into 1 inch rounds. Sprinkle both sides of the rounds with salt and set aside on a paper towel for about 20-30 minutes. Cover a 9 x 13 baking sheet with foil. Put a wire rack on top and set aside.

Mix together the bread crumbs, garlic powder, oregano, salt and pepper. Prepare a dredging station consisting of beaten eggs, flour and bread crumb mixture.

Pat the eggplant rounds dry. Slice each round into 4 slices. Turn each slice on its slide and slice in half vertically.

Dredge the fries first in the flour, then the egg mixture and then the bread crumbs. Spray the wire rack with some olive oil cooking spray and set the fries on the rack. Spray all the dredged fries lightly with the olive oil cooking spray. Bake for 10-15 minutes or until the fries are golden and crisp.

Serve plain or with the sauce of your choice.

SaveSave

SaveSave

SaveSave

SaveSave

SaveSave

SaveSave

SaveSave

SaveSave

SaveSave

SaveSave

SaveSave

SaveSave

SaveSave

SaveSave

SaveSave

SaveSave

SaveSave

SaveSave

SaveSave

Easy Tangy Cucumber Salad…

I don’t know about you but after the holidays I crave eating light. My body just wants to go back to a more reasonable routine and dictates that my diet consist of mostly feel good food. And after a few days I feel back on track. Does that happen to you?

Quite often that change in diet consists of revisiting what I call “free” foods. By free foods I mean those that technically have no calories. Don’t get me wrong, all food has calories, but free foods are the kind that take more calories to digest than what they have resulting in a negative balance of calories. And one of my all-time favorite free foods is cucumber.

There are many ways you can serve cucumber that ramps up the calories, but this particular recipe, even though it does contain some sugar (and only if you feel you need it), keeps it down to a dull roar. This recipe is so easy to make and if you like tangy foods like I do, it will easily become your go-to salad option.

So let’s talk easy, tangy cucumber salad…

Lesson Learned 1 – Yes the dressing has sugar in it, but you can regulate that: After pouring through several variations of this kind of recipe I found that the amount of sugar used to offset the tartness of the vinegar can vary. Personally I like tart. I can eat a lemon like a piece of fruit. So I do not find apple cider vinegar to be over the top in terms of tartness. So here is my suggestion. Start with a light teaspoon of sugar (or maybe even no sugar at all). If after you taste the mixture you think it is too tart, add a little more. I would not go any higher than two teaspoons. After all this recipe is designed to be tangy.

Dressing Mixture

Lesson Learned 2 – Use a mandolin slicer to get nice thin, even slices: Nothing replaces a mandolin slicer for consistency in slicing. The main drawback of the mandolin slicer is the potential for slicing your skin as well, especially if you aren’t paying attention. Always use a mandolin slicer with caution, but use it to get the best results in slicing.

Lesson Learned 3 – This dish is not meant to be eaten immediately: This recipe tastes much better after it has a little time to sit so the cucumbers and dressing can get well acquainted. I would let it sit a minimum of 1 hour before serving. It’s even better if you let it sit for about 4 hours.

Lesson Learned 4 – This recipe is best if eaten with 2 days: Make only enough so that you will either finish it at one meal or for have it only for a couple of days. After that the cucumbers get lose their freshness and get too limp.

Quick, easy and flavorful. That’s what this recipe is all about. Try serving this as a replacement for a side salad or use it as a bed for a nice piece of roasted salmon as pictured below. You will love it, I guarantee it!

Easy Tangy Cucumber Salad...

  • Servings: 6
  • Difficulty: Easy
  • Print

INGREDIENTS:

1-2 English Cucumbers (depending on size) sliced into 1/8 inch slices

1/4 cup apple cider vinegar

2 Tbs. olive oil

1-2 tsp. sugar (start out with none or a light teaspoon, taste and go from there)

1 tsp. kosher salt (add more if needed)

1/2 tsp. freshly cracked pepper

2 Tbs. fresh chopped chives

DIRECTIONS:

In a medium bowl mix the vinegar, olive oil, sugar, salt and pepper. Mix well. Slice the cucumbers and chop the chives. Add the cucumber and chives to the dressing mixture. Stir till well combined. Cover and let sit in the refrigerator for at least an hour. Serve as a salad or as an accompaniment to a meal (see roast salmon suggestion above).

SaveSave

SaveSave

SaveSave

SaveSave

SaveSave

SaveSave

SaveSave

SaveSave

SaveSave

SaveSave

SaveSave

SaveSave

SaveSave

Mustard Herb Salmon With Oven Roasted Butternut Squash…

Although this recipe may sound difficult it is incredibly simple to make. Even non-fish lovers will find this recipe hard to resist. Couple that with delectable butternut squash and being able to cook both at the same time – well the result is you have one heck of any unbelievably easy,  flavorful meal!

My husband and I have been trying to incorporate more fish into our diet and salmon is one of our favorites for a few reasons: 1.) It has a nice, mild, non-fishy flavor, 2.) Salmon is a reasonably priced fish, and 3.) Salmon can be made in a wide variety of ways. And what can I say about butternut squash? When you roast it the sides caramelize and give a nutty/sweet flavor to the squash. You definitely can’t beat that!

So, lets talk mustard herbed salmon with roasted butternut squash…

Lesson Learned 1 – Use a piece of salmon that is at least 1 1/2 to 2 inches thick at its widest part. A thinner piece will not stand up to this roasting time. You want the fish to flake but you don’t want it to dry out. My husband and I tend to opt for approximately 4 ounces each and you can go up to 6 ounces. Just make sure that the filet is not thicker than two inches at the widest part or thinner than 1 1/2 inches. The length of the piece does not matter.

Also keep in mind the cost of your filets will be less if you buy them with the skin on. For this recipe I remove the skin. As long as you have a sharp boning knife that should not be a problem whatsoever.

2. Choose any herb blend you think will work well with salmon: I used a Tuscan Garlic Seasoning Blend. It contains onion, garlic, spicy red pepper and lemon peel. I like it because it gives a gentle spicy kick to the salmon. If you’re not sure what to use read the label on the jar your considering. Quite often it will tell you whether it works best with meat, poultry or fish. Think of the herbs you enjoy and find a blend that resembles that. Or mix up a blend of your own.

When using herbs in any recipe always start from the standpoint that less is more. With the herb blend that I use if you add too much the salmon gets overpowered and the fish is too spicy, at least for us. I’ve found that as you repeatedly make a recipe you get a good feel for the amount of herbs to add. I lightly coat the mustard with the herbs and the combination of both gives a wonderful zing to the fish. So start out with less, you can always add more.

Lesson Learned 3 – Cut the butternut squash into 1 inch square pieces: Now I know that is easier said than done and there will be variances in your pieces but you want to make sure the pieces are large enough so the squash cooks through but does not become mushy. The beauty of this recipe is that you can roast both the fish and squash together, albeit you put the squash in the oven ten minutes prior to the fish. That way they are both ready to come out of the oven at the same time. Here’s at tip – check out any pre-prepared butternut squash you might find in your grocery store. I can get squash that is already peeled and cut into large chunks. I only have to do minimal prep when I buy my squash that way. Believe me, it saves a lot of time and effort.

I normally roast the fish on the middle rack of the oven on a foil lined baking sheet sprayed with cooking spray. I roast the squash on the lower rack, also on a foil lined baking sheet. Because I use olive oil in the prep of the squash there is no need to use cooking spray on that sheet pan.

Lesson Learned 4 – My secret for getting a nice caramelized squash – don’t flip it: So many recipes tell you to flip the squash half way through the roasting process. I found that if you don’t you get one side with a gorgeous caramelization, sort of like creating a crust on each piece. That caramelization provides a sweeter taste that permeates the entire piece. So be brave, don’t flip the squash. I guarantee you’ll love it!

As I mentioned earlier, the beauty of this recipe is that you can prep both the fish and squash and roast them together in the oven at the same temperature. How easy is that. This is one of my go-to week night meals and if you try it, I’m sure it’ll be one of yours as well. Enjoy!

Mustard Herb Salmon With Oven Roasted Butternut Squash

  • Servings: 2
  • Difficulty: Medium
  • Print

INGREDIENTS:

Mustard Herb Salmon:

2 four to six ounce salmon filets, skin removed

2 tsp. dijon mustard, I use Grey Poupon

1/2-1 tsp. herb blend, I used tuscan garlic blend

Olive oil cooking spray

Roasted Butternut Squash:

12 oz. butternut squash cut into 1 inch. cubes (I get mine pre -packaged and cut)

1 Tbs. dried thyme (you can use a little more if you need to evenly apply it to the squash)

Garlic infused olive oil

Kosher salt, to taste

Freshly cracked black pepper, to taste

DIRECTIONS:

Preheat oven to 400 degrees. Pat salmon dry and place it on a foil lined backing sheet sprayed with cooking spray. Dollop one tsp. of dijon mustard on each piece. Spread the mustard to coat the entire top of the salmon. Sprinkle the herb blend over the mustard. Set aside.

Place squash pieces on a foil lined baking sheet. Drizzle olive oil over the squash. With your hands mix the squash pieces to make sure all are covered with the olive oil. Spread the pieces apart so they do not touch. Sprinkle pieces with salt, pepper and thyme.

Place the squash on the bottom rack and roast for 10 minutes prior to putting the salmon in the oven. After 10 minutes put the salmon on the center rack in the oven and roast both the salmon and squash for and additional 20 minutes. Remove from oven and serve immediately.


SaveSave

SaveSave

SaveSave

SaveSave

SaveSave

SaveSave

SaveSave

SaveSave

SaveSave

SaveSave

SaveSave

SaveSave

SaveSave

SaveSaveSaveSave

SaveSave

SaveSave

SaveSave

SaveSave

SaveSave

SaveSave

SaveSave

SaveSave

SaveSave

SaveSave

Grilled Ronde de Nice Squash…

Have you ever heard of Ronde de Nice Squash? I hadn’t, that is until I went to our local farmers market last Saturday.

I love our local farmers market especially this time of year. What an array of fresh fruits and vegetables that are available. It seems like every time I go I learn something new. This last time I was introduced to a wonderful member of the squash family called Ronde de Nice Squash.

Ronde de Nice Squash looks a lot like acorn squash but slightly smaller in size. I asked the farmer to tell me what it tastes like and how to cook it. She told me that it’s very similar to zucchini. She said I could grill it or I could scoop some of it out and add ingredients such as ground beef, rice and chopped vegetables and bake it. Another shopper heard my question and suggested that I marinate it and grill it. Ultimately that’s what I decided to do.

I always get excited when I learn a new cooking technique or try a new food. I was pleasantly surprised with this member of the squash family. So let’s talk Ronde de Nice Squash.

Lesson Learned 1 – This squash is much easier to cut than an acorn squash: I was not prepared for how easy this squash was to cut. I thought it would be hard like an acorn squash but the skin is much thinner on this squash. When you cut into it, the flesh looks very similar so zucchini as you can see from the picture below.

There is no need to seed it – the seeds are very small and quite soft just like a newly ripened small zucchini. I removed the stem on top and cut each half into half and then cut slices that were approximately 1/2 inch thick. I found that using this thickness made the squash stand up beautifully to the grilling process.

Lesson Learned 2 – Marinate the slices for at least 2 hours: You can use any type of marinade you like with this squash. I chose a simple Italian dressing marinade. Marinate the squash for at least two hours in the refrigerator, turning the squash over at regular intervals to make sure all pieces are evenly marinated. I kept my squash marinating for 4 hours and the flavor really came through when it was grilled.

Lesson Learned 3 – Your grilling time may vary: Your grilling time will depend on how you like your squash, crisp tender or soft. I wanted mine crisp tender and so I grilled my squash for 15 minutes. As with ovens, no two grills are alike. Know your grill and determine your best cooking time from there. I use a gas grill but if you use a charcoal grill I would recommend putting these slices outside of the hottest areas on the grill. Otherwise you may burn them before you cook them.

I love it when I try new foods and it turns out great. Go ahead, be adventurous. It doesn’t take much. And try this recipe. I know you’ll love it!

Grilled Ronde de Nice Squash

  • Servings: 4
  • Difficulty: Easy
  • Print

INGREDIENTS:

1 Ronde de Nice Squash, cut in quarters

1 cup marinade, (I used Italian dressing)

Salt and Pepper, to taste

DIRECTIONS:

Cut squash in half. Remove the stem and cut the halves into half. Cut 1/2 inch slices from the quarter pieces.

Place pieces in a plastic bag. Pour the marinade over the squash. Seal the bag and turn it several times to ensure the marinade is reaching all of the pieces. Place on a flat surface in the refrigerator. Marinate the squash for a minimum of 2 hours regularly turning the bag over so all pieces are evenly marinated.

Heat your grill to medium heat (on a gas grill the heat was between 350-400). Place slices on the grill. Turn slices over halfway through the cooking time (for crisp tender the cooking time is 15 minutes). Do not move the slices until they are ready to be turned.

Remove the slices from the grill. Serve immediately.

SaveSave

SaveSave

SaveSave

SaveSave

SaveSaveSaveSave

SaveSave

SaveSave

SaveSave

SaveSave

SaveSave

SaveSave

SaveSave

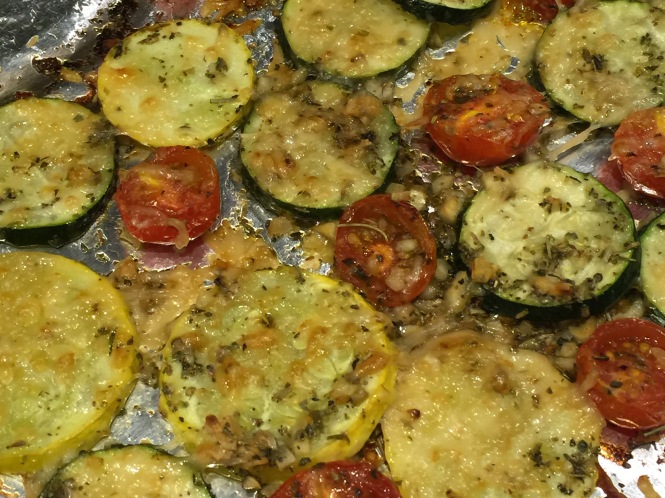
Garlic Roasted Summer Squash And Tomatoes…

Get ready for the onslaught of summer squash. If your garden has been anything like mine in recent years you will soon be inundated with more summer squash than you can handle. It often gets to the point where you can’t even give the squash away. So think about different ways you can use of all of that squash.

Over the years I’ve posted a wide variety of recipes using summer squash and you can find those recipes in my recipe index. Today’s recipe is very basic. It is quick and easy and a great way to use your squash to accompany just about any meal.

So let’s talk about garlic roasted summer squash and tomatoes…

garlic roasted summer squash and tomatoesLesson Learned 1 – For the best results, let the olive oil, garlic and seasoning rest: A great way to infuse your olive oil with the flavors of the garlic and Italian seasoning is to combine them all together and let the mixture sit for 5-10 minutes before coating the squash and tomatoes. That way you will get a great infused olive and those flavors will permeate the squash and tomatoes during the roasting process.

Lesson Learned 2 – once again it is important to cut the squash rounds into evenly thick pieces: I cannot sing the praises of a mandolin slicer enough. It is truly the best way to cut veggies into rounds that are uniformly thick in size. The reason you do this is so the squash cooks evenly and you don’t wind up with some pieces overcooked, some undercooked and some just right. Eliminate what I call the Goldilocks And The Three Bears dilemma and use a mandolin slicer. And once again, I cannot stress enough to use the finger guard whenever using the mandolin slicer. Accidents can happen very easily if you don’t.

Roasted summer squash and tomatoes

Lesson Learned 3 – Use firm tomatoes in this recipe: I would not use overly ripe soft tomatoes in this recipe. A firmer, slightly less juicy tomato holds up best during the 30 minute roasting time. I used firm cherry tomatoes in this recipe but you can also cut up roma tomatoes or use firm campari tomatoes.

The prep on this recipe is quick and the result is fabulous. And with squash season upon us, this is a great recipe to have in your hip pocket. Try it and let me know what you think…

GARLIC ROASTED SUMMER SQUASH AND TOMATOES...

  • Servings: 4
  • Difficulty: Easy
  • Print

INGREDIENTS:

1 large or 2 small zucchini squash

1 large or 2 small yellow squash

1/2 cup firm cherry tomatoes, halved

3 Tbs. olive oil

3-4 cloves of garlic, minced

1 1/2 tsp. Italian seasoning

1 cup shredded parmesan cheese

Salt and Pepper, to taste

DIRECTIONS:

Preheat the oven to 400 degrees. Line a lipped baking sheet with foil. Spray the foil lightly with cooking spray.

Mix together the olive oil, garlic and Italian seasoning. If you can, let the mixture sit for 5-10 minutes to infuse the olive oil with the garlic and seasoning.

Slice the squash into 1/8 slices (using a mandolin slicer is preferred). Cut the cherry tomatoes in half. Put the squash and tomatoes in a large bowl. Pour the olive oil mixture over the vegetables and stir to evenly combine.

Spread the vegetables out evenly onto the prepared baking sheet. Season the mixture with salt and pepper. Sprinkle the parmesan over the top of the vegetables. Roast for 30 minutes or until the vegetables are tender and the parmesan is golden brown. Serve immediately.

Garlic Roasted Summer Squash And Tomatoes

Garlic Roasted Summer Squash and Tomatoes

Garlic Roasted Summer Squash And Tomatoes

Garlic Butter Roasted Carrots…

This recipe could not be any more basic but it produces a side dish rich in flavor. Whenever you caramelize something it produces a sweetness that is awesomely delicious. And because this blog is dedicated to those beginning to feel their way around the kitchen, this recipe is perfect because it produces spectacular results with very little effort. If you’re looking for something to boost your confidence in the kitchen, this one’s is for you!

So let’s talk garlic butter roasted carrots…

Lesson Learned 1 – Use lots of garlic: I used 4 big cloves of garlic in this recipe and you can even add more if you want. Just be aware that the garlic will turn dark in the oven but that’s ok. It will still infuse the carrots with great garlic flavor.

Saute the cloves in the butter for a good 3-4 minutes and just when you start to see some slight browning on the edges, remove the mixture from the heat and pour it over the carrots. Make sure the carrots are evenly coated with the butter/garlic mixture. Use your hands if you have to to make sure they’re coated all over.

IMG_0198

Lesson Learned 2 – Cut the carrots in one inch chunks on the diagonal: One inch chunks work well for this roasting time. Cutting them on the diagonal makes them look prettier.

Lesson Learned 3 – Make sure you flip the carrots during the roasting process: You want to make sure the carrots caramelize on all sides so check them after 15-20 minutes and flip them over so the other side can caramelize as well.

When I first took these carrots out of the oven I thought perhaps I had browned them too much. I was wrong. These carrots had such a wonderful sweet flavor and the darkened areas were rich and sweet. The main thing to remember is to flip them so they caramelize on both sides.

Image-1

I have to say I could not believe how sweet and delicious these carrots were. This is a great recipe for when you want to impress but also want something insanely easy. Enjoy!

Garlic Butter Roasted Carrots

  • Servings: 4-6
  • Difficulty: Easy
  • Print

INGREDIENTS:

4-6 large carrots, cut in 1 inch lengths on the diagonal

5 Tbs. butter

4-5 cloves of garlic, minced

Salt and pepper to taste

Flat leaf parsley for garnish

DIRECTIONS:

Preheat oven to 400 degrees. In a saucepan melt the butter. Add the garlic and cook for 3 – 4 minutes being careful not to burn the garlic.

Put the carrots in a large bowl and add the butter/garlic mixture. Toss until all the carrots are completely covered.

Spread the carrots out on a prepared baking sheet (I covered my sheet with aluminum foil and sprayed it lightly with olive oil cooking spray), making sure they are not crowded and that all the butter/garlic mixture is poured onto the sheet.

Roast for 30 – 40 minutes making sure to flip them half way through the roasting process. Remove the carrots from oven and salt and pepper to taste. Garnish with flat leaf parsley and serve. Enjoy!

Garlic Butter Carrots

Creamy Garden Tomato Soup…

I warned you about a plethora of tomato recipes as my tomato plants this year have been producing like they are on steroids. A co-work of mine suggested that the strains I’m growing, the indigo rose and tie-dye heirloom tomatoes (pictured below), would make a great tomato soup. I’ve never made home made tomato soup before, so I thought I would try. I really didn’t want to waste any of these great tomatoes and I knew making soup would use up a lot of them.

The Indigo Rose Heirloom Tomato

The Indigo Rose Heirloom Tomato

Tie-Die Heirloom Tomatoes

Tie-Die Heirloom Tomatoes

A while back I posted a recipe for home made Broccoli Cheddar Soup. That was only the second homemade soup I ever made. For years I have been making my mothers chicken and dumpling soup but never thought about trying other recipes. Now after having made this tomato soup I wonder why I waited so long to make a variety of different home made soups. I’m pretty sure I’ll be trying more soup recipes in the future. They are relatively easy to make and so much more flavorful than what you buy in a can. Plus you control the ingredients. And if you look at canned soup, they tend to have a lot of sodium. So take the extra time and try making home made soup. It’s truly worth it.

This recipe is based on a recipe by Ina Garten called Cream Of Fresh Tomato Soup. It’s a great recipe as is, but I made a few tweaks and loved what I got. I used less onion, more garlic, less sugar, more tomato paste, more basil and I finished it off with 1 Tbs. of butter to give it a nice shimmery, satiny look. Many of the reviews of her recipe said not to change a thing, that the soup was fabulous as is. But I know my tastes and I also can tell if I like how things are looking by eyeballing it. The changes that I made worked wonderfully, and I will chronicle in the recipe below what I did.

So let’s talk about making tomato soup…

Carrots and onionsLesson Learned 1 – Cut the carrots into small pieces: I think the carrots add a nice flavor to the soup, but recipes hardly ever tell you how to cut them. Carrots are dense and they take time to cook. And you are trying to soften them with chopped onions which by nature are less dense and can soften more quickly. So cut the carrots small. I cut the carrots in half lengthwise and then in half again lengthwise and then started chopping from there. The smaller pieces soften faster. Also remember to soften the onions and carrots on a medium heat. You’re not looking for the onions to caramelize, you just want them to soften. The carrots will soften slightly but not all the way. That’s perfectly fine as you will be simmering them for a long while and that will complete the softening process.

Lesson Learned 2 – To peel or not to peel the tomatoes: I did a lot of reading regarding whether you should peel your tomatoes when making the soup. I found a lot of different opinions but I chose to peel them. In Ina’s recipe, she tells you to cook the tomatoes with skin on. Later on in the process you take the soup mixture and process it through a food mill to remove any skin and seeds. I don’t have a food mill, so I decided to peel the tomatoes at the very beginning.

Peeled Tomatoes

Peeled Tomatoes

Lesson Learned 3 – How to peel a tomato: Peeling a tomato is really quite simple. All you need to do is to put it in boiling water for 30 seconds, remove it, and the skin will practically peel off by itself. I used this method and it worked like a charm.

Lesson Learned 4 – Using a blender to puree your soup: When using a blender to puree hot soup you need to do a few simple things to prevent having an explosion. First, never fill the blender completely full with hot liquid. Fill it up only to the half way point or even a little less. Second put a towel over the hole in the top of the blender to let steam escape while you’re pureeing your soup. Otherwise you may wind up with soup all over your walls. Or, an even easier way to puree your soup is to use an immersion blender. You stick it right into the hot pot and emulsify the soup right there. Currently I do not have an immersion blender but I am definitely going to invest in one. In the meantime, using a blender worked perfectly fine.

If you haven’t tried making homemade soup you really should. I was surprised at how easy and good it was. So go ahead, walk on the wild side and make some homemade soup…

[recipe: title=”Creamy Garden Tomato Soup…” time=”2 Hours Including Prep” Servings=”8-10″ difficulty=”Easy”]

INGREDIENTS:

3 Tbs. olive oil

1 medium sized red onion, chopped

2 medium carrots, unpeeled and chopped

4 cloves minced, garlic

8-10 garden tomatoes, medium to large in size

1 tsp. sugar

2-3 Tbs. tomato paste

1/3 cup loosely packed and chopped fresh basil leaves

3 cups unsalted chicken stock (preferably half broth and half stock)

2 Tbs. roasted chicken Better Than Bouillon

1 Tbs. salt (taste along the way and add more if desired)

1 tsp. freshly cracked black pepper

3/4 cup heavy cream

1 Tbs. butter

DIRECTIONS;

On the stove, bring a large pot of water to a boil. Once the water is boiling, place 2-3 tomatoes in the water and cover. After 30 seconds, take the tomatoes out of the water. Repeat this process with all the tomatoes. Once the tomatoes cool slightly, remove the skins with a paring knife. (the skins should come off easily).

Cut the tomatoes and remove and imperfections or gristle. Heat the olive oil in a large dutch oven. Add the onions and carrots and sauté until tender, 10-15 minutes. Add the garlic and cook until fragrant, approximately one minute.

Put all the remaining ingredients in the pot except the heavy cream and butter. Bring to a boil then lower the heat and simmer covered for 45 minutes or until the tomatoes are very tender. Puree the mixture using an immersion blender, blender or food mill. If using something other than an immersion blender, pour the pureed mixture back into the dutch oven. Over low heat add the heavy cream and stir to combine. Drop a tablespoon of butter into the pot and melt in right before serving.

Serve hot.

[/recipe]

The Ingredients Before Adding Stock

The Ingredients Before Adding Stock

Cook Ingredients in Stock for 45 minutes

Cook Ingredients In Stock For 45 Minutes

Creamy Garden Tomato Soup
Creamy Garden Tomato Soup

Simple Oven Roasted Tomatoes…

As I have chronicled in my past couple of blogs, this year has been the year of the tomatoes in my garden. Every day I seem to pick about 5-6 large tomatoes and at least a cupful of yellow grape tomatoes. And because of that I have been on a quest to let no tomato go to waste.

I can’t say it enough, the tomatoes in my garden have been nothing short of phenomenal (for a quick read on the heirloom tomatoes I am growing in my garden this year go to my tri-tomato salsa recipe). You just don’t get tomatoes like this in the grocery stores. When the inside of the tomato looks like the picture below, you know you’ve got a juicy, flavorful tomato. The inside of the tie-dyed tomato

I’m surprised my skin isn’t turning red from all of the tomatoes I’ve been eating lately. They are just so darn good and this recipe is a great way to enjoy them. It’s so simple to make and once it’s cooked you feel like you’re eating a decadently thick marinara sauce topped with gooey cheese.

Lesson Learned 1 – You can use different herbs to flavor the tomatoes: The first time I made this recipe I used some lemony thyme. I have a big pot of it growing on my deck. The second time I used fresh basil (also growing in a pot on my deck) and cut it into lardons before sprinkling it on the tomatoes.

Either the way the process couldn’t be simpler. Cut the tomato into half inch slices, sprinkle with herbs and top with mozzarella and shaved parmesan. You can sprinkle a little italian seasoning on the top or leave it plain, then bake and finish it off with a drizzle of good olive oil before you serve (I used white truffle olive oil).

Lesson Learned 2 – Cut the bottom of each end of the tomato to create a flat surface: Since the tomatoes are round, your end pieces will not lie flat on the baking sheet. That’s really no big deal except that if the tomato is too wobbly the melted cheese can fall right off of it onto the baking sheet. All you need to do is cut off a small portion of the round end and the tomato will lie flat.

I would also recommend spraying your baking sheet with a cooking spray so the tomatoes won’t stick to the pan. I actually line my pan with foil and then spray the foil.

Simple Oven Roasted Tomatoes...

  • Servings: 3 Slices Per Each Medium/Large Tomato
  • Difficulty: Easy
  • Print

INGREDIENTS:

Fresh tomatoes (1 tomato per person)

Fresh Herbs (I used lemony time or basil, chopped – 1 Tbs. per tomato)

Shredded Mozzarella

Shaved Parmesan (I think it melts better than grated parmesan)

Italian Seasoning, if desired

Good olive oil for finishing (I used white truffle olive oil)

DIRECTIONS:

Preheat the oven to 375 degrees. Wash the tomatoes and cut them into half inch slices. Cut a small portion off the bottom of the end slices so they lie flat on a baking sheet. Spray a baking sheet with cooking spray.

Place the tomato slices on the baking sheet. Sprinkle the herbs on top of each slice. Top each slice with mozzarella and shaved parmesan. Put the mozzarella on first and top with parmesan. The mozzarella will help the parmesan stick on top of the tomato. Sprinkle with italian seasoning, if desired.

Bake for 15-20 minutes or until the cheese starts to turn golden brown. Plate the tomatoes and drizzle with some good olive oil. Serve immediately.

Top Each Slice With Herbs

Top Each Slice With Herbs

Top With Mozzarella And Shaved Parmesan - Sprinkle With Italian Seasong

Top With Mozzarella And Shaved Parmesan – Sprinkle With Italian Seasoning

Simple Oven Roasted Tomatoes

Broccoli Cheddar Soup…

Soup Ingredients...

Soup Ingredients…

Even though we are in the midst of summer I still get cravings for soup. Now I have to admit I normally only make a home made chicken and dumpling soup (my mom’s recipe that I’ll post in the Fall) but this time I decided to venture into trying something different. I researched various versions of broccoli soups and decided I wanted to do a broccoli and cheddar combination.

I like this recipe for a variety of reasons. First it is absolutely delicious – second, it’s so easy to make, and third it freezes well so you can have some now and save some for later. So let’s talk about making broccoli cheddar soup…

Slice VegetablesLesson Learned 1 – Use all of the broccoli but cut the pieces small: Most often people tend to discard the broccoli stalks and they actually provide great flavor especially when making the soup. So when you are cutting up the broccoli cut up the stalks as well. Be careful to cut the stalk into small pieces. They are obviously more dense than the florets and will take longer to cook if you leave them in large pieces. The smaller you cut them the less time you will have to cook them.

The same goes for the carrot. I took a pretty big thick carrot, halved it and then quartered it before slicing it. Carrots are also pretty dense and the smaller you cut them the faster they’ll cook. The nice thing about this recipe is you can chop everything up and put it in one big potl. You sauté everything at the same time and that makes it easy.

Lesson Learned 2 – You may have to use both flour and cornstarch to thicken the soup: I know it sounds strange – but it worked. Once the vegetables sautéed in butter for about 5 minutes I added the flour and cooked it down with the vegetables for about a minute. You need to do this for two reasons: 1 – so you remove the “floury” taste from the flour, and 2 – So you won’t have any lumps when you add the liquid.

Before Adding Cornstarch...

Before Adding Cornstarch…

After I cooked the flour with the vegetables I added the chicken broth (this was before I added the stock). As I was simmering everything the liquid seemed a little too light and runny as you can see from the picture on the right. So I added the stock and then systematically added some cornstarch mixed with stock to the soup to thicken it. I wound up using 3 tablespoons of each but added them in three separated batches. That way I could control how thick the soup was getting. You may find you are happy with the consistency you get by just using the flour. But if not, you can always added the cornstarch in small doses until you get your desire consistency. I would make sure to add some stock. I found that by adding one cup it gave the soup a richer color and enhanced the flavor.

A couple of tips: Give the first cornstarch and stock mixture a little time to thicken the soup before you add more. The heat of the soup activates the cornstarch, but it takes a couple of minutes. Be patient. If after a couple of minutes you are not happy with the thickness add a little more. And, just remember, do not add cornstarch to the pot all by itself. You have to mix it with liquid and then add it in liquid form. Otherwise you’ll get lumps. I found a 1:1 ratio of cornstarch to liquid works best. Just make sure the cornstarch is completely mixed into the liquid before you add it (I stick my finger in and swish it around to make sure there’s not a pile of cornstarch on the bottom of the measuring cup). I could have mixed the cornstarch with water but since I had the stock, why not continue to add more flavor.

After Adding Cornstarch...

After Adding Stock And Cornstarch…

Lesson Learned 3 – Use an immersion blender to puree the soup: Unfortunately I do not have an immersion blender (but I think it will be on my shopping list), so I used my blender to puree the soup. You can also use a food processor as well. I had to puree the soup in several batches using the blender. An immersion blender allows you to puree in the pot you’re cooking in and that’s much more convenient. But if you don’t have one, a blender or food processor will do the trick. They just require a little more effort.

So here’s the recipe. I hope you enjoy it!

Broccoli Cheddar Soup…

  • Servings: 6-8
  • Difficulty: Easy
  • Print

INGREDIENTS:

4 Tbs. Butter

1 1/2 – 2 pounds fresh broccoli, cut into small pieces including the stems

1 large onion chopped

2 large cloves of garlic, minced

1 carrot, diced

4 Tbs. flour

3 cups of chicken broth

1 cup of chicken stock

1/2 cup heavy cream

2 cups shredded sharp cheddar cheese

Kosher salt and freshly ground black pepper, to taste

3 Tbs. cornstarch mixed with 3 Tbs. stock, used as needed or not at all

DIRECTIONS:

Melt the butter in a large pot over medium high heat. Add the broccoli, onion, and carrot. Add some salt and pepper. While vegetables are cooking mince the garlic over the pot using a zester and combine with the vegetables. Cook until the onions start to look translucent, approximately 5-7 minutes.

Add the flour to the vegetables and stir for about a minute or until the flour begins to look blonde in color. Add the broth and stock and bring to a boil. Reduce the heat and simmer uncovered until the vegetables are tender, about 20-25 minutes. Check the consistency of the soup during this time. If it appears too runny pour in 1 Tbs. of cornstarch thoroughly mixed with 1 Tbs. of stock. Add more if needed. It should take no more than 3 Tbs. of each to reach a nice thick consistency. Simmer until all the vegetables are tender.

Using an immersion blender, puree the soup. Add the cream and cheddar cheese. Stir until the cheese has completely melted.

Broccoli Cheddar Soup

Grilled Marinated Zucchini…

It’s that time of year again when zucchini plants start to produce like gang busters. Last year was an epic year for zucchinis in my garden. I was taking two to three zucchinis off the plant daily. This year my plant is not doing as well, but I anticipate getting at least a few. And even if you don’t grow them yourself, there’s a good chance your neighbors will be ringing your doorbell asking you to take a few off their hands. So whether you grow them, share them or simply get them at a farmer’s market, zucchinis are versatile and can be used in both savory and sweet recipes.

The recipe I am going to share today is simple but produces a very flavorful grilled zucchini.

Zucchini MarinadeLesson Learned 1 – Patience is key: The hardest part about this recipe is making sure you marinate the zucchini for a minimum of 3 hours. You can even marinate the zucchini overnight if you like. Just put the zucchini in a plastic bag, pour the marinade over it, close the bag and refrigerate. I turned the bag over every hour or so just to redistribute the marinade. I grilled my zucchini after it had been marinating for 4 hours and it was delicious. 

Lesson Learned 2 – Don’t eliminate the sugar in the marinade: I know we all are trying to limit our intake of sugar these days, but don’t skip it here. When I tasted the marinade before I put some sugar in it was too tart. The sugar balances out the tartness of the vinegars and lemon and gives you a nice well rounded flavor.

Marinate In A Plastic BagLesson Learned 3 – Shallot verus onion: I recommend using a shallot in this marinade because it’s milder but still gives you that infusion of onion flavor. You’ll appreciate that especially when you finish off the grilled zucchini with a drizzle of the marinade.

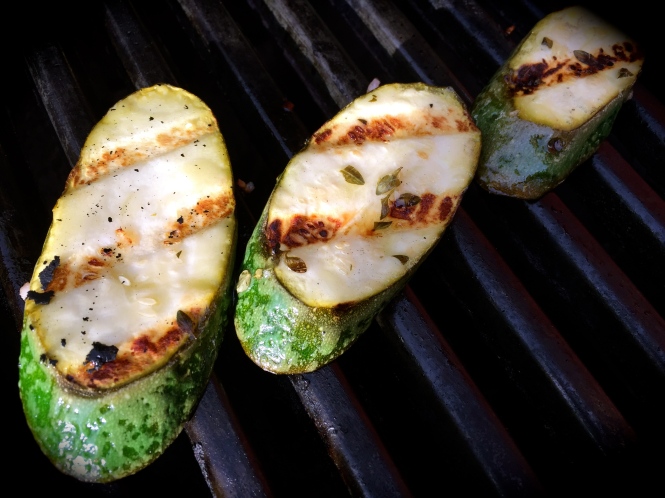
Lesson Learned 4 – Grill or grill pan: The beauty of this recipe is that it can be done either on an outdoor grill or on a grill pan on top of the stove. Either way you’ll get those gorgeous grill marks and the same wonderful flavor. This time I cooked them on my gas grill, but I’ve also made these on top of the stove as well. This recipe is quick, easy and a great way to use that summer zucchini bounty!

Zucchini Cooking On The Grill

[recipe: title=”Grilled Marinated Zucchini” servings=”4″ time=”4 1/2 Hours Including Prep” difficulty=”Easy”]

INGREDIENTS:

1 Tbs. red wine vinegar

2 Tbs. white wine vinegar

1/2 tsp. lemon zest

2 Tbs. fresh lemon juice

1 tsp sugar

1 large garlic clove, minced

1 shallot, minced

1 Tbs. chopped fresh thyme leaves (I used a strain called lemony thyme)

1/3 -1/2 cup olive oil (I used garlic infused olive oil), taste after using 1/3 cup and add a little more if necessary

2 medium zucchini trimmed and sliced diagonally

Salt and pepper to taste

DIRECTIONS:

Whisk the vinegars, lemon zest and juice, sugar, garlic, shallot and thyme in a bowl. Gradually mix in the oil. Salt and pepper to taste. Spoon a couple of tablespoons of the marinade into a small dish, cover and refrigerate.

Slice the zucchini diagonally and put it in a gallon size plastic bag. Add the rest if the marinade and gently squeeze the bag to distribute the marinade evenly over the zucchini. Close the bag and refrigerate for at least 3 hours, turning the bag over occasionally in the refrigerator during the marinating process.

Place zucchini on the grill over medium high heat. Turn after 4 minutes. Keep the zucchini on the grill for an additional 4 minutes. Transfer the zucchini to a serving dish. Drizzle with the remaining marinade and serve hot.

[/recipe]

Check out two of my other favorite zucchini recipes on this site: Double Chocolate Zucchini Bread and Zucchini Mushroom Gratin. Enjoy those zucchinis!

Grilled Marinated Zucchini

Brussels Sprouts With Pancetta…

I’ve never been a big fan of brussels sprouts. Cooked cabbage of any kind doesn’t do anything for me. The meal I dread the most is corned beef and cabbage (sorry to any of my readers that love CB&C) – I could just gag. But my husband loves brussels sprouts and has often asked me not only to eat them but also make them. I now can empathize a little more with my mother who was not a great cook. She had a limited palate and she refused to make anything she didn’t like. I get it now. It’s hard to get excited about making something you don’t like. But if you know me, you know I like a good challenge. Was there a brussels sprouts recipe out there that could actually get me to eat and enjoy them? I had my doubts.  And so my research began…

I looked at a wide variety of recipes and came across a couple of combinations that sounded interesting. One involved cranberries, feta cheese and nuts (and that will be a future blog) and one involved pancetta. Making brussels sprouts with pancetta is a little less involved so I thought I would try it. The results were quite interesting…

Image 2

Recipe Rating: A – I even had to admit that the results, for me, were very palatable and for my husband, who is a brussels sprouts lover, it was phenomenal. The combination of the pancetta, garlic and chicken stock infused the brussels sprouts with flavor. I actually made this recipe twice (as I had a lot of brussels sprouts and extra pancetta) and enjoyed it. Don’t get me wrong, I didn’t kid myself into thinking that brussels sprouts will now become my vegetable of choice, but at least I know there is a way to prepare them that I can live with and that brussels sprouts lovers truly enjoy!

IMG_1491Lesson Learned 1 – The difference between pancetta and bacon: Both pancetta and bacon are made from pork bellies. The difference is how they are prepared. Bacon is brined and smoked. Pancetta is seasoned with a lot of salt and pepper then rolled and wrapped in a casing to keep its shape. Pancetta is cured but not smoked. You can easily substitute bacon for pancetta in any recipe. I cut the pancetta into lardons just like I would bacon and added the brussels sprouts once the pancetta began to crisp. What I learned in making this recipe is, if you use pancetta, wait until the very end to add any salt to the sprouts. The nice thing about brussels sprouts is they highly absorb the flavors they are cooked with, and in this case they absorb the salt and pepper from the pancetta. I found it best to use unsalted chicken stock as well and to taste the sprouts at the very end to see if they needed any additional salt or pepper. I found that I needed very little salt at the end, much less than I would have added originally. So be careful. You can always add more salt, but you can’t take it away. You don’t want the brussels sprouts to be too salty.

IMG_1617Lesson Learned 2 – Boiling the sprouts before putting them in the skillet: You need to do this otherwise the sprouts will not cook all the way through in the time allotted for the recipe. I found putting them in boiling water and letting them cook for 5-7 minutes is the best way to get the desired end result. The remaining time they cook (approx. 25 minutes) in the skillet will then be sufficient to produce tender sprouts.  Also it is important to try to make the sprouts of equal size. If some of them are too big, cut them in half or in quarters. That way they will all cook evenly.

This recipe is easy to prepare and if can be enjoyed by someone who is not the biggest fan of brussels sprouts, imagine how good it will be for someone who loves them. I can now say that I have eaten brussels sprouts and enjoyed them – something I thought would never have come out of my mouth!

Brussels Sprouts With Pancetta…

  • Servings: 2
  • Difficulty: Easy
  • Print

INGREDIENTS:

1/2 pound fresh brussels sprouts, trimmed

2 Tbs. olive oil (I used garlic infused olive oil)

2-3 ounces of very thinly sliced pancetta cut into lardons

2 cloves garlic, minced

3/4 cup unsalted chicken stock

DIRECTIONS:

Start a pot of water boiling on the stove (do not add any salt to the water at this time). Once the water comes to a boil put in the brussels sprouts and cook for 5-7 minutes.  Drain the brussels sprouts and set aside.

Add olive oil to a hot pan. Add the pancetta and cook until the edges start to crisp. Add the garlic and cook for 30-60 seconds until the garlic becomes fragrant. Add the brussels sprouts to the pan and cook until they begin to brown. Turn them over and allow them to cook a little longer or until the second side begins to brown. Add the chicken stock, scrape any bits off the bottom of the pan and cook until the broth reduces to the point that it is just coating the sprouts. Serve immediately.

IMG_1639


IMG_1656


Cheesy Zucchini Mushroom Bake…

I guess at this point you can probably tell that I’ve been a little fixated on zucchini recipes and with good reason. The zucchinis just keep coming and coming. Every day it seems I’m harvesting two to three new zucchinis. Last year my zucchini plant (I only have one as I have limited space in my garden) hardly produced anything. This year my plant is producing prolifically. Go figure. Mind you, I am not complaining. The challenge is to determine ways to use all this zucchini as I won’t let any go to waste. I know I can give them away if I need to, but most of my neighbors are looking to give their zucchini away as well. Some have even gone to the lengths of just leaving them on neighbor’s door steps. The whole neighborhood must be over run. So my challenge – how can I not only use my zucchini but also make it exciting when having it several times a week.

IMG_9540The latest recipe I tried was a side dish.  Those are probably the easiest recipes to find. This recipe came off of a website that featured 35 different zucchini recipes and I always like to one stop shop. This one seemed relatively easy and so I thought I’d try it. The original recipe called for paring zucchini with yellow squash and I think that would have been perfectly fine, but I had so much zucchini that I wanted to use and so I just skipped the yellow squash. I did add some mushrooms that I had and that worked very well (I always seem to have mushrooms in my refrigerator). My point is that this recipe is adaptable and I am all for adaptable. Bottom line, this is an easy recipe to prepare and it’s actually quite good. I had some issues with how the recipe was written and I will share those in my lessons learned.

Recipe rating: B+ – most of my issues came from how the recipe was written as I am a stickler for detail and how to achieve success the first time you make something. In my experience even the best of recipes are seldom tried again if they can’t be done well the very first time. These days everyone is so busy that recipe success the first time around is just about a given for making a recipe again. This one had one critical piece of information missing that, in my estimation, made the dish look great as well as taste great.

IMG_9550Lesson Learned 1 – prepping ahead: The beauty of this recipe is that it can be prepped ahead and put into the oven when needed. I prepped all of the ingredients about an hour ahead of time and simply covered them in plastic wrap and put them into the refrigerator. The only other thing I did was to take it out of the fridge about 15 minutes before putting it into the oven to take the chill off. Right before putting it in the oven I topped it with some additional cheese. I am thinking this is something that can be prepped in the morning and then finished off when you get home from work – a nice little advantage especially for a busy day.

Lesson Learned 2 – use fresh herbs whenever possible: The original recipe called for 1/2 teaspoon of dried thyme. I have thyme growing in my garden and I used that. You always need to add more of an herb if it is fresh, so I substituted 1 teaspoon of fresh thyme and I felt it gave the side dish a great flavor boost.

Ready to go into the oven

Ready to go into the oven

Lesson Learned 3 – you eat with your eyes first: How often have you heard someone say, “Oh that looks delicious!” When you think about it, it’s really a sort of oxymoron since something can only taste and not look delicious. But the truth of the matter is we eat with our eyes first. If something looks great, we automatically assume it will taste great. And this is probably my biggest bug-a-boo with the original recipe. That recipe called for baking the ingredients uncovered for 25-30 minutes then adding the remaining cheese and baking it for an additional 10-15 minutes. I would never have gotten the rich color on the cheese by doing that. What I wound up doing is putting the dish under the broiler for the last 5 minutes thereby getting those nice brown bits of color on the cheese. If I had not done that, the top would’ve just looked gooey white. Getting the browning from the broiler, in my estimation, makes the dish look much more inviting. Believe me, it did not look nearly as inviting when I followed the directions in the original version of the recipe. At 350 degrees you would have to cook the cheese much longer to get it to brown on top.

I realize that my rant about using the broiler may be very picky, and it probably is. Don’t let that deter you from trying this recipe. It’s a great way to use up some of that extra zucchini and I’m pretty sure it will be a family pleaser as well.

Right Out Of The Oven

Right Out Of The Oven

Cheesy Zucchini Mushroom Bake

  • Servings: 6
  • Difficulty: Easy
  • Print

INGREDIENTS:

4 medium zucchini

4-6 ounces of baby portobella mushrooms sliced

3 Tbs. chopped fresh basil (this can be adjusted depending upon personal taste)

2 green onion spears thinly sliced (white and green parts)

1 tsp. fresh thyme chopped (1/2 tsp. dried thyme)

3/4 tsp. garlic powder

1 cup cheese, divided (I used a combination of mozzarella and pizza cheese – you can use more cheese if you like, I think I actually used 1 1/2 cups of these cheeses all total)

1/2 cup parmesan, divided

salt and pepper to taste

DIRECTIONS:

Preheat the oven to 350 degrees. Wash and cut the zucchini into half moons. Slice the mushrooms into thick slices. Finely chop the basil. Thinly slice the green onions. Chop the fresh thyme.

Combine the sliced squash, mushrooms, basil, onion, thyme garlic powder and half of each of the cheeses. Stir carefully to combine all of the ingredients making sure that the cheese and herbs are well distributed. Season with salt and pepper. Put the mixture in an 8 x 8 baking dish that has been sprayed with cooking spray. (At this point I added a little more cheese on the top). Bake uncovered for 25 minutes.

Take the dish out of the oven and sprinkle with the remaining cheese. Let bake for an additional 5 – 10 minutes then place casserole under the broiler for the last 5 minutes. Let stand for a few minutes and serve.

Cheesy Zucchini Mushroom Bake

Cheesy Zucchini Mushroom Bake

Serving Suggestion: With Grilled Chicken Breast and Oven Baked Potato Chips

Serving Suggestion: With Grilled Chicken Breast and Oven Baked Potato Chips

Zucchini Mushroom Gratin…

It’s that time of year again. I’ve already harvested five zucchinis from my one zucchini plant and by the looks of things there are plenty more to come. This is the time of year that I start scrambling to locate as many zucchini recipes as I can find so that I don’t waste one precious home-grown squash. And although I am always on the lookout for new recipes, I also have some tried and true ones that I look forward to making every year at this time as well.

A zucchini from my garden...

A zucchini from my garden…

One of my all time favorites is a version of a recipe from Ina Garten. I’ve mentioned Ina several times in this blog. She is a cook that inspired me not only to make new and different things but to believe that I can and be successful at it.

I’d never heard the term gratin before I made this recipe and it’s a term that I found is not in most fledgling cooks’ vocabularies. A gratin originated in French cuisine and it simply means a dish that is topped with a browned crust achieved either through a baking or broiling process. You can make a gratin out of just about anything, potatoes, artichokes, cauliflower – you name it. I especially like to make a zucchini gratin since it is not only delicious but also another recipe in my arsenal to deal with the onslaught of zucchini I get at this time of year.

My very happy zucchini plant...

My very happy zucchini plant…

I saw Ina make her recipe on a Food Network episode and I’ve been making it ever since. I have amended it to appeal to my personal tastes but the basis of the recipe is Ina’s (if you want to see her recipe it is on the Food Network site). So I will rate her recipe and then include my version of it for you to try.

Recipe Rating: A++++++++ This is definitely one of the best recipes ever. It is easy to make and a great accompaniment to any meal. A hint of nutmeg gives wonderful flavor to this recipe. I highly recommend trying this one!

Saute the zucchini and mushrooms gently...

Saute the zucchini and mushrooms gently…

Lesson Learned 1- Sautee the zucchini and mushrooms gently: Ina’s recipe calls for cooking the zucchini covered for about 10 minutes before making the white sauce. In my experience, cooking the zucchini for that amount of time made it limp before you even put it in the oven. I cook my zucchini and mushrooms for five minutes just to take the “edge” off of them and let the oven do the rest. That way when you serve the gratin the vegetables still have some body.

Lesson Learned 2- Making a white sauce: This recipe includes making a simple white sauce for the zucchini and mushrooms to simmer in. The first step is to add flour to the zucchini/mushroom mixture. Make sure you cook that flour for at least a minute before you add the milk. It will create a whitish looking goo on the vegetables but don’t worry about that. Just keep stirring until it’s time to add the milk. The reason you cook it for a minute is to get rid of any floury taste. You certainly don’t want your white sauce to taste like flour. Once you add the milk the whitish goo will begin to disappear right before your eyes and you will wind up with a rich, thick white sauce.

Cook until the sauce becomes rich and thick...

Cook until the sauce becomes rich and thick…

Lesson Learned 3 – Bread crumbs versus croutons: Last week I made a hash brown casserole that called for a crushed crouton topping. I loved it so much on that recipe that I tried it on this one and it turned out perfectly. The original recipe stipulates to cover the top with bread crumbs mixed with grated Gruyere cheese. Maybe if you made home made bread crumbs the end result would be similar to that of using croutons, but I thought the croutons added a greater crunch and more flavor. You can try topping it either way but at this point I prefer the crushed croutons.

Lesson Learned 4 – A little nutmeg goes a long way: I’d never cooked with nutmeg before I made this recipe and I can tell you it adds a great depth to the gratin but you need to be careful when you use it. A little bit of nutmeg goes a long way and it can easily overpower a dish if you use too much. My advice is to use exactly what the recipe recommends. Then in subsequent bakings try to vary the proportion. My guess is that if you choose to vary it, it will be for a lesser rather than a greater amount.

Lesson Learned 5 – Oven times vary: This seems to be a regular “lesson learned” in my recent posts but rarely does a dish come out of my oven the way it is supposed to in the time written in a recipe. I assume that part of the issue is living in high altitude and the other is how my oven is calibrated. The original recipe says to bake the gratin in the oven for 20 minutes. In order for me to get a nice bubbly casserole I have to bake mine for 40-45 minutes. This is where it can get somewhat frustrating for the fledgling cook. But never fear, in time you will learn the ins and outs of your oven and be able to plan accordingly.

Place the croutons in a bag and crush with a rolling pin...

Place the croutons in a bag and crush with a rolling pin…

The beauty of this recipe is that it’s not difficult to make but tastes like you slaved all day in the kitchen. Over time, because the directions are so true to form, I’ve not gleaned a lot of lessons learned making it and I view that as the beauty of the recipe. It is the kind where you can be successful making it the first time and every time. If you’re like me at this time of year, desperately searching for various ways to cook my zucchini crop, this recipe is a must. Try it – I know you’ll like it as much as I do.

Zucchini Mushroom Gratin

  • Servings: 4-6
  • Difficulty: Easy
  • Print

Brown and bubbly out of the oven...

Brown and bubbly out of the oven…

INGREDIENTS:

3 Tbs. butter (plus some for on top of the crushed croutons)

1 medium size onion, diced

2-3 medium zucchini cut in to 1/4 inch rounds

4-6 ounces of portobella mushrooms cut in thick slices

1/8 tsp. nutmeg

2 Tbs. flour

1 cup warm milk

3/4 cup crushed croutons or bread crumbs

1 cup grated Gruyere cheese, divided

Salt and pepper to taste

Flat leaf parsley for garnish

DIRECTIONS:

Preheat the oven to 400 degrees. Pour the milk into a saucepan and warm under a very low heat (you don’t want the milk to boil, you just want to get the chill out of it). Grate the Gruyere, dice the onions and slice the zucchini and mushrooms and set aside. Put the croutons in a plastic bag, seal the bag and crush them with a rolling pin. Set the bag aside.

Melt the butter in a large sauté pan. Add the onions and cook under low to medium heat until translucent (about 5-7 minutes). Add the zucchini and mushrooms, cover the pan and cook for about 5 minutes (you do not want the zucchini to be limp). Uncover, salt and pepper to taste and add the nutmeg.

Stir in the flour. Cook for at least one minute. Add the warm milk and 1/4 cup grated Gruyere cheese and cook over a low heat until the sauce thickens. Pour the mixture into a 1 1/2 – 2 quart baking dish.

Combine the croutons (or bread crumbs) with the remaining Gruyere and sprinkle on top of the zucchini mixture. Dot with small amounts of butter and bake until bubbly and browned. (the original recipe called for the casserole to bake for 20 minutes, I had to bake mine for 40-45 minutes).

Let sit for 5 minutes, garnish with chopped flat leaf parsley and serve.


Ready to go into the oven...

Ready to go into the oven…


Brown and bubbly out of the oven...

Brown and bubbly out of the oven…

Serving Suggestion: garnish with flat leaf parsley...

Serving Suggestion: garnish with flat leaf parsley…

Sauteed Spinach With Almonds, Tomatoes and Onions…

Our neighbors across the street were going out of town. Before they left they gave my husband of bag of lettuce from their garden so it wouldn’t go to waste. A little while later my husband said he also found a bag of spinach on his workbench in the garage. He came into the house with it and said, “What are we going to do with all this. I think you should just throw the spinach out.”

Ingredients

Ingredients

The spinach look gorgeous and I just couldn’t rationalize throwing out home-grown spinach. I put the bag in the refrigerator and began to think about how I could use it. Then it dawned on me, I could sauté  it! I’d never sautéed spinach before, only having eaten it in salads, and so I thought this would be a great thing to blog about.

I found a recipe on the Food and Wine website for sautéed spinach with almonds and grapes. Although I did have red grapes on hand, I decided to use up the cherry tomatoes I had in the refrigerator instead. So here’s my rating of the original recipe, my lessons learned and my final version of the recipe.

Rating: A for flavor – C for how the recipe was written. The almonds definitely provided depth of flavor in this recipe but the directions were poor and I totally disagreed with the amount of oil the recipe recommended.

Lesson Learned 1 – AMOUNT OF OIL: Before I made the recipe I happened to mention to my husband what I was planning to do. He said he’d had a conversation with our neighbor about sautéing spinach and they discussed the fact of being very careful with the amount of oil you use as sautéed spinach can become too oily very quickly. The original recipe called for a quarter of a cup of olive oil. Now granted you are also sautéing the onions, almonds and garlic in the oil, but I still think a quarter of a cup is way too much. I started out by eyeballing it and put in just enough to put a very thin coat on the bottom of the pan. Then once the onions, almonds and garlic were sautéed it looked like I might need just a little more and so i added a couple of additional tablespoons. My advice is to be very careful with the amount of oil you use and err on the side of less versus more. You can always add more if you need it. All in all, I’d say I used about 4 tablespoons of oil total (a little more than 1/8 cup) and the spinach turned out beautifully.

Add Spinach By Handfulls

Add Spinach By Handfulls

Lesson Learned 2 – COOKING ORDER: sauté the onions and almonds first. They take much more time. It takes about 4-5 minutes on medium heat for the onions to become translucent and the almonds to brown. I used shaved almonds and chopped them into smaller pieces. Slivered almonds would work as well. After the onions and almonds are done add the garlic and cook only until it becomes fragrant. I’ve found that normally takes a little more than 30 seconds. Once the garlic has become fragrant then add the spinach. At the very end add the tomatoes as you simply want to warm them and don’t want them to break down.

Lesson Learned 3 – COOKING SPINACH: spinach cooks fast, even faster than I thought. I planned for the spinach to cook down in about 5 minutes and it happened in about 3 minutes. So be prepared for how quick it goes once you add the spinach. I used a whole 10 ounce bag of spinach and it was just enough for two people. It was a great way to use up all of that home-grown spinach.

Add Tomatoes At The Very End

Add Tomatoes At The Very End

Lesson Learned 4 – ALMONDS: My advice is don’t eliminate the almonds. They provided a great contrast to the spinach and added a wonderful nutty flavor to the dish. As I was eating it I kept saying to myself what is that fabulous hint of flavor and then recognized it was the almonds.

My husband not only loved the recipe but was pleased I figured out a way to use the spinach. I will definitely make this recipe again. Most of the work entails chopping the onions, almonds and garlic. The rest is pretty straightforward and takes about 7 minutes to cook.

Sauteed Spinach With Almonds, Tomatoes and Onions…

  • Servings: 2
  • Difficulty: Easy
  • Print

INGREDIENTS

4 TBS Olive Oil (eyeball the olive oil making sure not to use too much, just lightly coat the pan)

1/4 cup almonds, chopped

1/4 finely chopped onion

1/4 cup cherry tomatoes diced

2 cloves of garlic minced

1 10 ounce package of spinach, large stems discarded

2 TBS dry white wine

Salt and Pepper to taste

DIRECTIONS:

Chop onion, garlic, tomatoes, almonds and set aside. In a large skillet (preferably with high sides) heat 3 TBS of olive oil. Add the almonds and onions and cook over medium heat until onions become translucent and almonds become slightly golden. Add the garlic and sauté until fragrant.

Add the spinach in handfuls and stir adding more spinach as the leaves begin to wilt. Add tomatoes when spinach is just about completely wilted and cook until warmed (less than a minute). Add the wine and toss altogether. Season with salt and pepper and serve immediately.

IMG_7706

Sauteed Spinach With Almonds, Tomatoes and Onions


Oven Roasted Vegetables…

For a long time I’ve been trying to perfect roasting vegetables in the oven. My last foray into oven roasting was making balsamic parmesan cauliflower which sounds heavenly but had its challenges as a recipe. So I am always on the lookout for new recipes. I found this one the other day on, and this will not surprise you, Pinterest and thought I would try it. It came from a website called foodservice.com and though it looked great I could tell before making it that it had issues from the get-go. Luckily I’m finally starting to trust my instincts and not take recipes verbatim. I adapted it and it turned out beautifully, but I don’t think it would have the way it was originally written. So I will rate how I made it and then describe lessons learned based on the original recipe. For the burgeoning chef who may not have good gut instincts, like myself, I get a little perturbed when I see recipes that I know simply will not work. I’ll include my adapted recipe for you to print.

The Vegetables Used In This Recipe

The Vegetables Used In This Recipe

Rating A – the way I adapted the recipe produced tender crisp roasted vegetables, always a great accompaniment to any meal. I have to admit the original recipe provided a great trick that I will expound on in lessons learned.

Lesson Learned 1: In this recipe I used zucchini, yellow squash, thick asparagus spears, carrots cut in one inch size rounds and grape tomatoes. The original recipe also called for baby red potatoes and snow peas as well. So now I will get on my high horse for a minute. What I’ve learned over the years is the secret to successfully roasting vegetables starts out with veggies that have similar roasting times. If they don’t you will, and I guarantee it, overcook some and undercook others. Adding potatoes and snow peas to this recipe made absolutely no sense to me. Even baby red potatoes take a longer time to cook than most veggies and snow peas cook in nothing flat. And the original recipe called for roasting the veggies at 425 for 30 minutes covered and then uncovered for 15 minutes. That may well be the correct time allotment for cooking the potatoes, but I think the rest of the vegetables would have been annihilated. In defense of the recipe it does state to shorten the cooking time somewhat if you like your vegetables al dente, but 45 minutes at 425 would have, in my estimation, produced mush. I roasted the vegetables at 400 for 1/2 hour total, 20 minutes covered and ten minutes uncovered. You can see the results at the bottom of the blog. Next time I may even take 5 additional minutes off the cooking time as I like super al dente vegetables.

Vegetables Seasoned For Roasting

Vegetables Seasoned For Roasting

Lesson Learned 2: When slicing the squash, I cut them into 1 1/2 inch rounds and then cut them on the diameter both ways producing four pieces for each slice. That gave them sufficient “chunkiness” to withstand the cooking time.

Lesson Learned 3: You can see I used a thicker asparagus spear. When you buy asparagus quite often you can find it in various thicknesses. I bought the thickest one I could find so it was of sufficient “chunkiness” (I’m starting to like that word) to withstand the longer cooking time.

Lesson Learned 4: The original recipe called for baby carrots. I only had regular carrots so I took a couple that were about an inch in diameter and cut them into one inch rounds. You don’t want your carrots too big or they will remain hard.

Lessons Learned 5: I also looked for larger rather than smaller grape tomatoes for this recipe. I was most concerned about how the tomatoes would turn out but they were fine, nicely soft but not annihilated and that is ok.

Lesson Learned 6: The original recipe called for about 1/4 cup of EVOO – way too much, especially if you are adapting the recipe using smaller amounts of veggies! You want to make sure that your veggies are evenly coated but you don’t want them swimming in oil. You have to eyeball the EVOO and follow the rule of thumb that you can always add more if you need it. As long as they all have a nice shimmer of oil they will be fine and roast beautifully.

Lesson Learned 7: There is very little “exacting” to this recipe. I made this for my husband and myself and added amounts that I felt were appropriate for 2 people (and it could have probably served 3). I only cut up two rounds each of the squash, used 4 asparagus spears about 6 plum tomatoes and I think I was a little heavy handed on the carrots. There are no right or wrong amounts here. The key is to cut the veggies into sizes that will stand up nicely to the cooking time.

Lesson Learned 8: What I liked about the original recipe is the inclusion of steak seasoning. I never thought about using that on vegetables. I used Montreal Steak Seasoning and it really gave the vegetables depth of flavor. If you’ve never tried it, I recommend it. I was pleasantly surprised.

Lesson Learned 9: The recipe calls for dried rosemary, and even states that you might want to add more of it than the basil. I’m not a big fan of dried rosemary unless you really crush it. I’ve found that if you don’t you get these tasteless rosemary spears in your teeth. But you can certainly add your desired amount to the recipe below.

I would have rated the original recipe an “F” as I felt, as written, it would have been a failure. The ingredients were not well matched and the cooking time was outrageous. These types of recipes always get my goat since someone, like me, who is not an intuitive cook finds it sets you up for failure – and when you are learning in the kitchen you want easy successes to build your confidence. So, I am sharing my adaptation of the recipe. If you want to check out the original just go to the website I listed above and search for oven roasted vegetables. Good luck with that one. If you get it to work as written, let me know. I would like to hear how you accomplished that.

Oven Roasted Vegetables

  • Servings: Varied
  • Difficulty: Easy
  • Print

INGREDIENTS:

Thick Asparagus

Yellow Squash

Zucchini

Carrots cut in one inch rounds or baby carrots

Grape Tomatoes

Olive Oil

Dried Rosemary

Dried Basil

Montreal Steak Seasoning

Garlic Salt

DIRECTIONS:

Preheat the oven to 400 degrees. In this recipe you will need to use amounts based on the number of servings you want. Cut the squash into 1 1/2 rounds and then into quarters. If you don’t use baby carrots, use carrots an inch in diameter and cut into one inch rounds. Make sure to snap the bottom of the asparagus to remove the woody part. If the remaining spear is large, cut it in half. If not, keep the spear whole.

Evenly coat the veggies with olive oil and add the herbs and steak seasoning so that the veggies are evenly covered and toss. Place in a deep casserole dish and sprinkle with garlic salt. Roast covered with foil for 20 minutes. Remove the foil and roast uncovered for the remaining 10 minutes. Enjoy!

Oven Rosted Vegetables

Oven Rosted Vegetables

Balsamic Parmesan Roasted Cauliflower

As I’ve mentioned may times before, I am a big fan of Pinterest especially as it comes to finding recipes. What I like about the site is one’s ability through “pins” to access websites that might not come to the top of a Google search, so you’re basically connecting with little known sites that you may never have found otherwise. And I have found these sites to be great resources for information and new ideas  for the kitchen.

So as I was browsing Pinterest the other day I came across the pin for a recipe called balsamic parmesan roasted cauliflower. It was pinned from the website http://www.kidneybuzz.com. Now doesn’t balsamic parmesan roasted cauliflower sound divine? And since I’m always looking for new ways to roast vegetables I just had to give the recipe a try.

When I evaluate recipes I look for a few simple things. First, are the directions clear – second, is it easy to prepare – third, can you be successful the very first time you make it, and fourth, did the recipe tell you everything you needed to know (as I find quite often recipes do not – especially where chefs-in-training are concerned). So here is my rating and lessons learned making this recipe:

Rating: C- with the potential for an A. I have never been so psyched to make a recipe and been so disappointed. I’m getting to the point though where I am starting to trust my own instincts versus just doing what is written. After some interesting lessons learned I would try this recipe again, as I do believe it has the potential to be an “A” rated recipe.

Balsamic Parmesan Roasted Cauliflower

Balsamic Parmesan Roasted Cauliflower

Lesson Learned 1: This recipe called for cooking the cauliflower from 20-30 minutes at 450. I will tell you right now if you do that you will have limp overcooked cauliflower. I’ve roasted cauliflower before and never over 400. But I thought, ok, I’ll compromise. I’ll roast it at 425. Big mistake!! The cauliflower came limp and overdone. I like my roasted vegetables to have some crispness to them. If you like them limp then cook them longer. In my opinion (and I roasted rather large florets) 15 – 20 minutes max at 400 is my recommendation.

Lesson Learned 2: This recipe does not tell you how to roast with balsamic vinegar, and that can be tricky. The proportions are perfectly fine, but you need to make sure that the cauliflower is primarily coated and not the pan. Otherwise you will have a sticky, gooey hard to clean mess because (unless this is different in high altitude) balsamic vinegar doesn’t evaporate as the recipe suggests, it burns especially in any concentrated amounts. That’s why I say make sure the cauliflower is covered in it and you don’t leave a puddle of it in your pan. If you do, clean up will be a nightmare (and in my opinion they should tell you these things in a recipe). I would also either spray your pan with cooking spray or line it with foil so that any balsamic that does not “evaporate” can be easily cleaned.

Lesson Learned 3: Tossing the cauliflower half-way through the cooking process is a must. That way you will get an even caramelization and the cauliflower won’t looked burnt. So, toss half-way through and don’t add the vinegar and cheese until the last five minutes.

Lesson Learned 4: Obviously this was not a recipe that turned out well the first time making it. I overcooked it and wound up with a gooey mess in my pan. That being said, it still had an interesting flavor, almost sweet. So I am definitely going to try this again as I think it has great potential.

I hope my lessons learned help you have more success the first time you try this recipe. I plan to continue to play with it until I get it right. When I do I will either update this blog or post a new one referencing this. I am a big fan of roasted vegetable but you have to get the cooking time and temperature just right, otherwise you have a limp burnt mess.

I’m Definitely In A Pickle…

About this time of year I begin to panic about using all of the bounty that comes out of my garden. It pains me to think that after taking all the time and effort to grow something that I will not use it just because I have much more than can be consumed within a short timeframe. So, what to do, what to do…

Before today I’ve never ventured into the world of pickling because I always thought it would be too difficult or too time consuming. Wrong… I searched and searched for something that would be easy, allow me to use some of the massive amounts of cucumbers coming out of my garden, did not involve boiling jars on the stove and could render something delicious and fast – and finally I found it and with a few tweaks made the recipe my own. So here’s an easy recipe for refrigerated dill pickled cucumbers that after five days gives you something delightful, crisp and definitely “dilly”.

Pickles Cucumbers with Garlic, Peppers and Onion.

Pickled Cucumbers with Garlic, Peppers and Onion.

Pickled Cucumbers With Garlic, Peppers and Onion

  • Servings: 2 quart jars
  • Difficulty: Easy
  • Print

INGREDIENTS:

2 medium sized cucumbers per quart sized jar

Sweet Pepper (any color)

Red Onion

2 cloves of garlic per jar

1 teaspoon dill weed

1-2 sprigs of fresh dill

1 1/2 teaspoons kosher salt

1 teaspoon mustard seed

1/2 cup apple cider vinegar

1 cup water

DIRECTIONS:

1. With a fork, score the outside of the cucumbers from the tip to the base. Cut them into 1/8-1/4 inch rounds. Slice the red onion and pepper into strips. Remove the skin from the garlic.

2. On the bottom a sealable mason jar place the garlic cloves, dill weed and fresh dill.

3. Layer the cucumbers, onion and peppers into the jar making sure to pack it tightly.

4. In a bowl mix together the apple cider vinegar, water, salt and mustard seed.

5. Pour mixture into jar making sure that everything in the jar is covered.

6. Seal the jar and let stand in the refrigerator for 5 days. Once the jar is opened, make sure to use it within one week.

Fresh, Crisp Pickled Cucumbers

Fresh, Crisp Pickled Cucumbers