Blueberry Cream Cheese Coffee Cake…

My life has been chaotic for the last six months and now that the dust has started to settle I’m trying to get myself back on track. One of the ways I see myself doing that is trying to post more often on my blog. I missed not doing my regular posts but dealing with health care issues was so much more important. Now I am trying to put one foot in front of the other in an attempt to establish my new normal and begin to incorporate some of the things that brought joy into my life before everything started. This blog is certainly one what to do that.

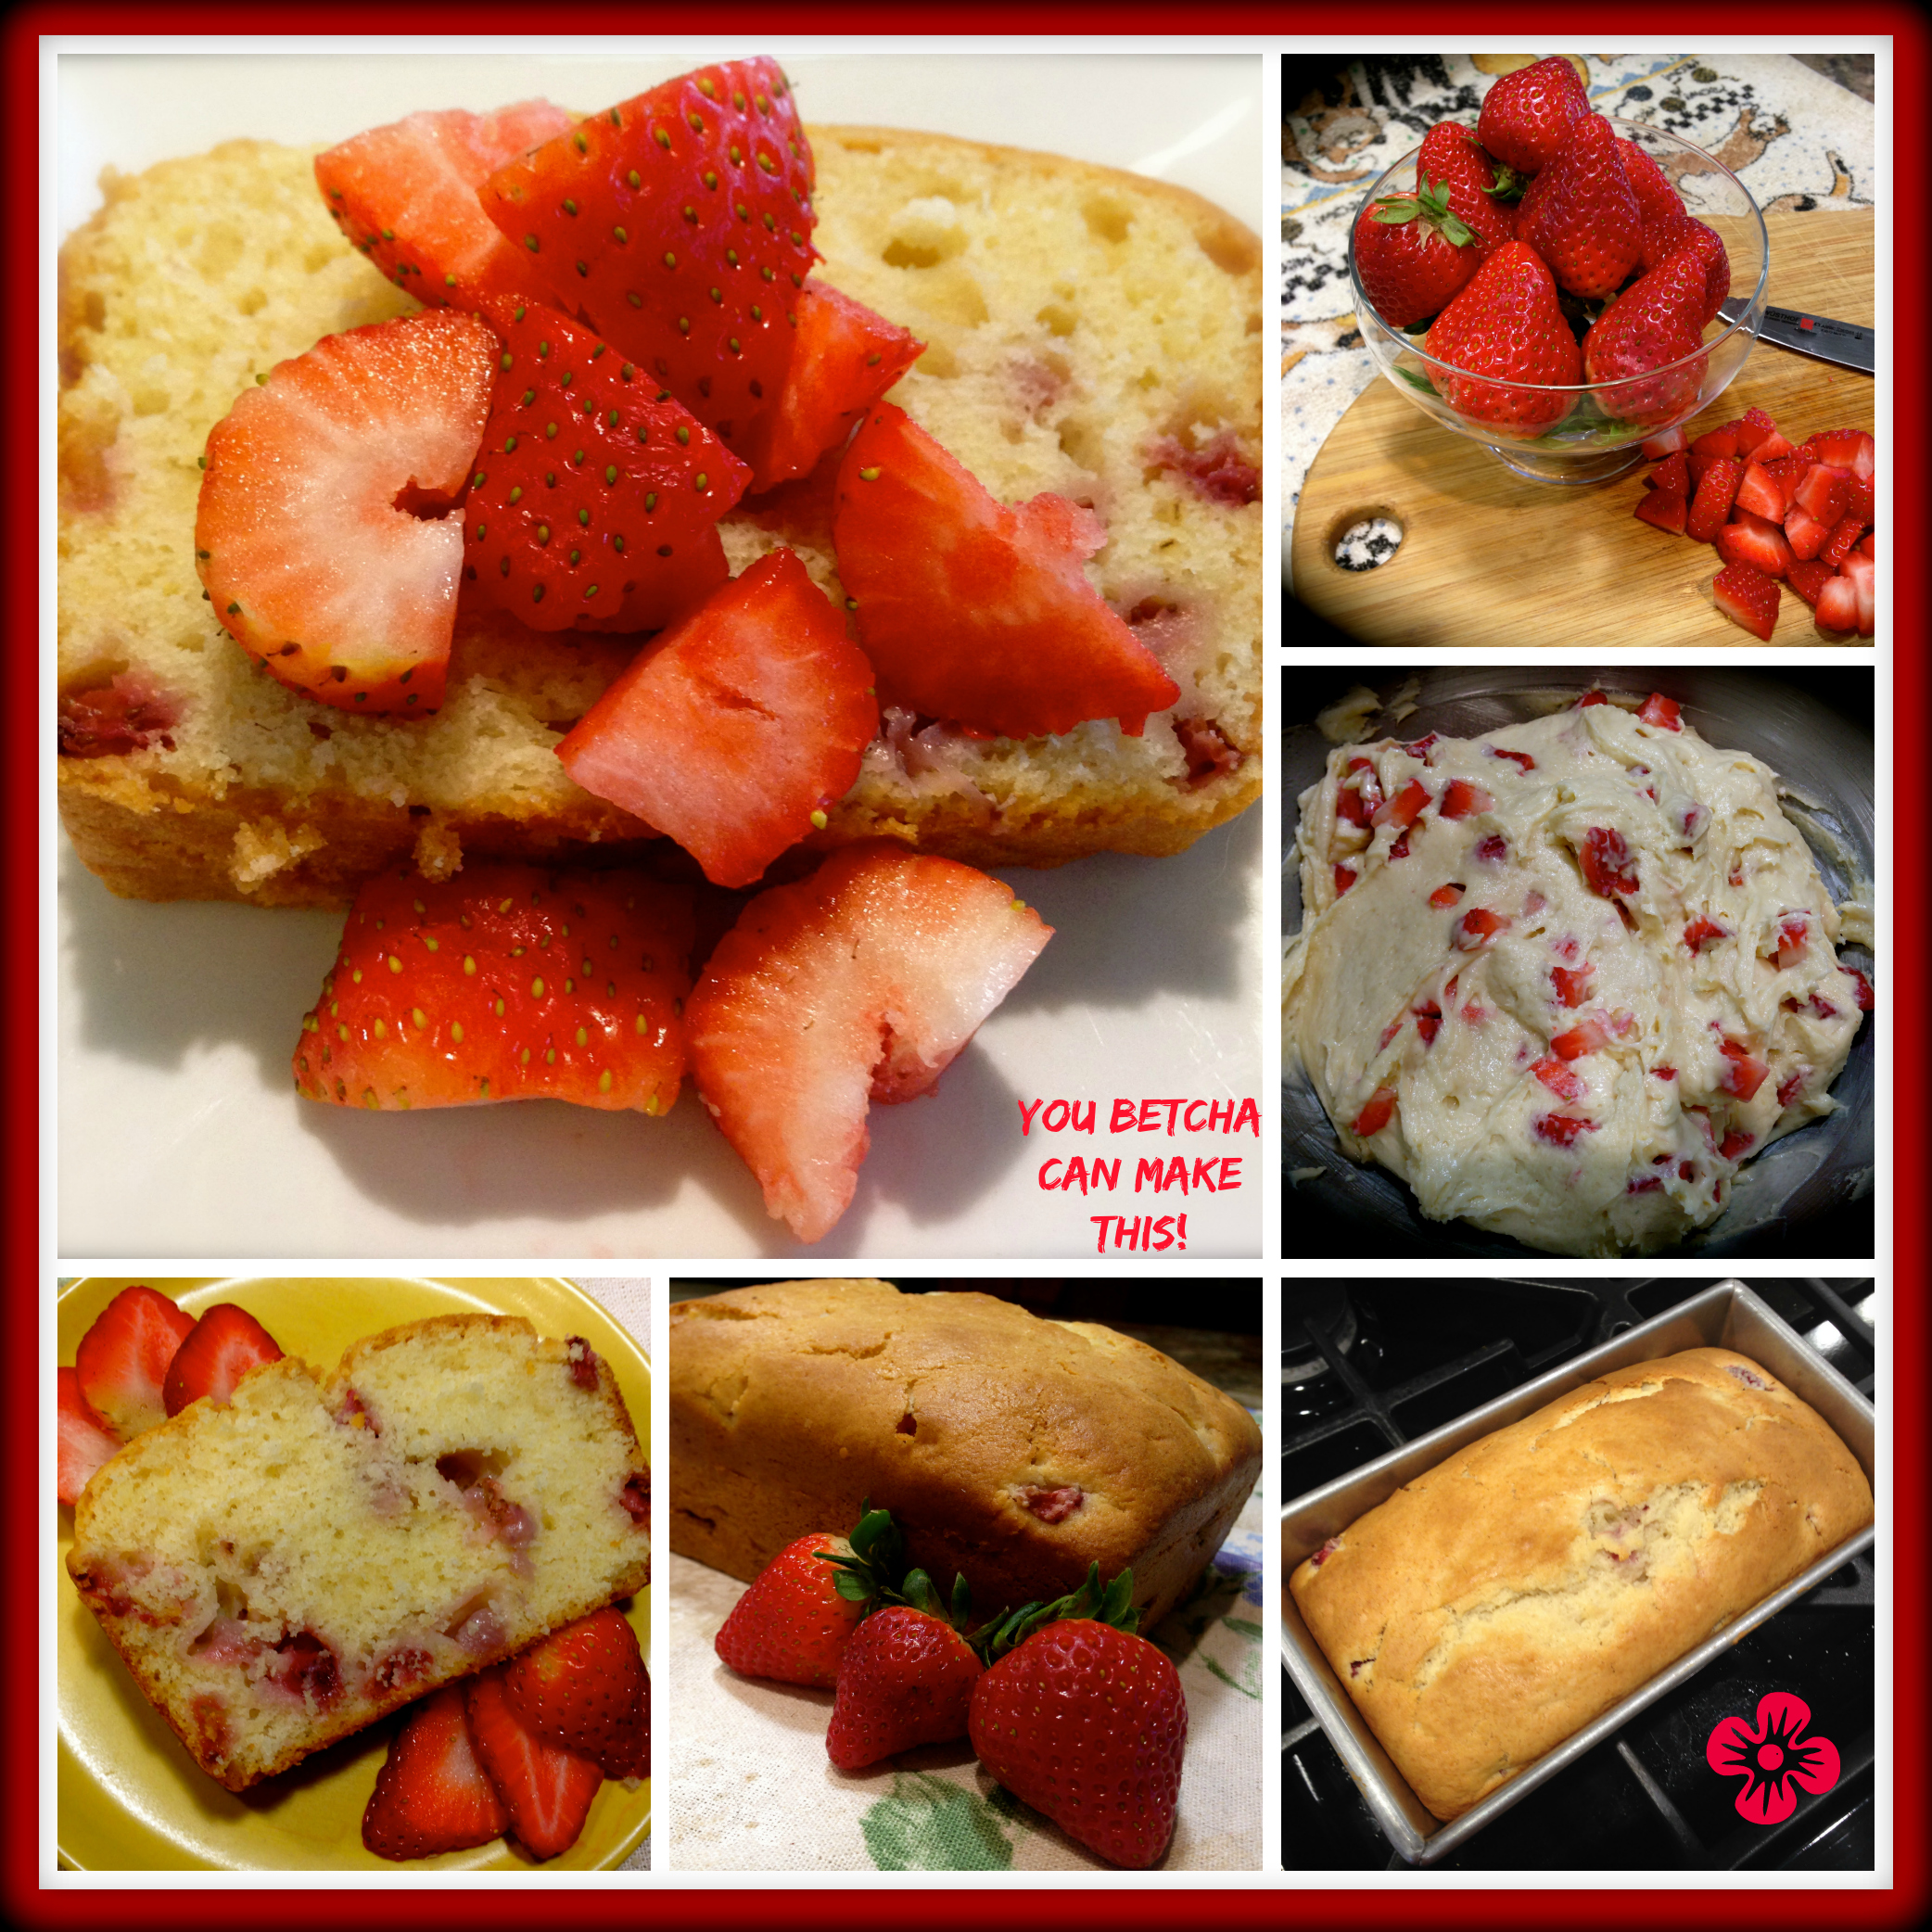
I made this recipe the other day and posted some pictures on Instagram and Facebook and got so many comments about sharing the recipe that I felt compelled to blog it faster than I thought I would. I made this recipe mainly because I had a ton of blueberries that I needed to use (Lord only knows why I bought so many) and I also had several bars of cream cheese.

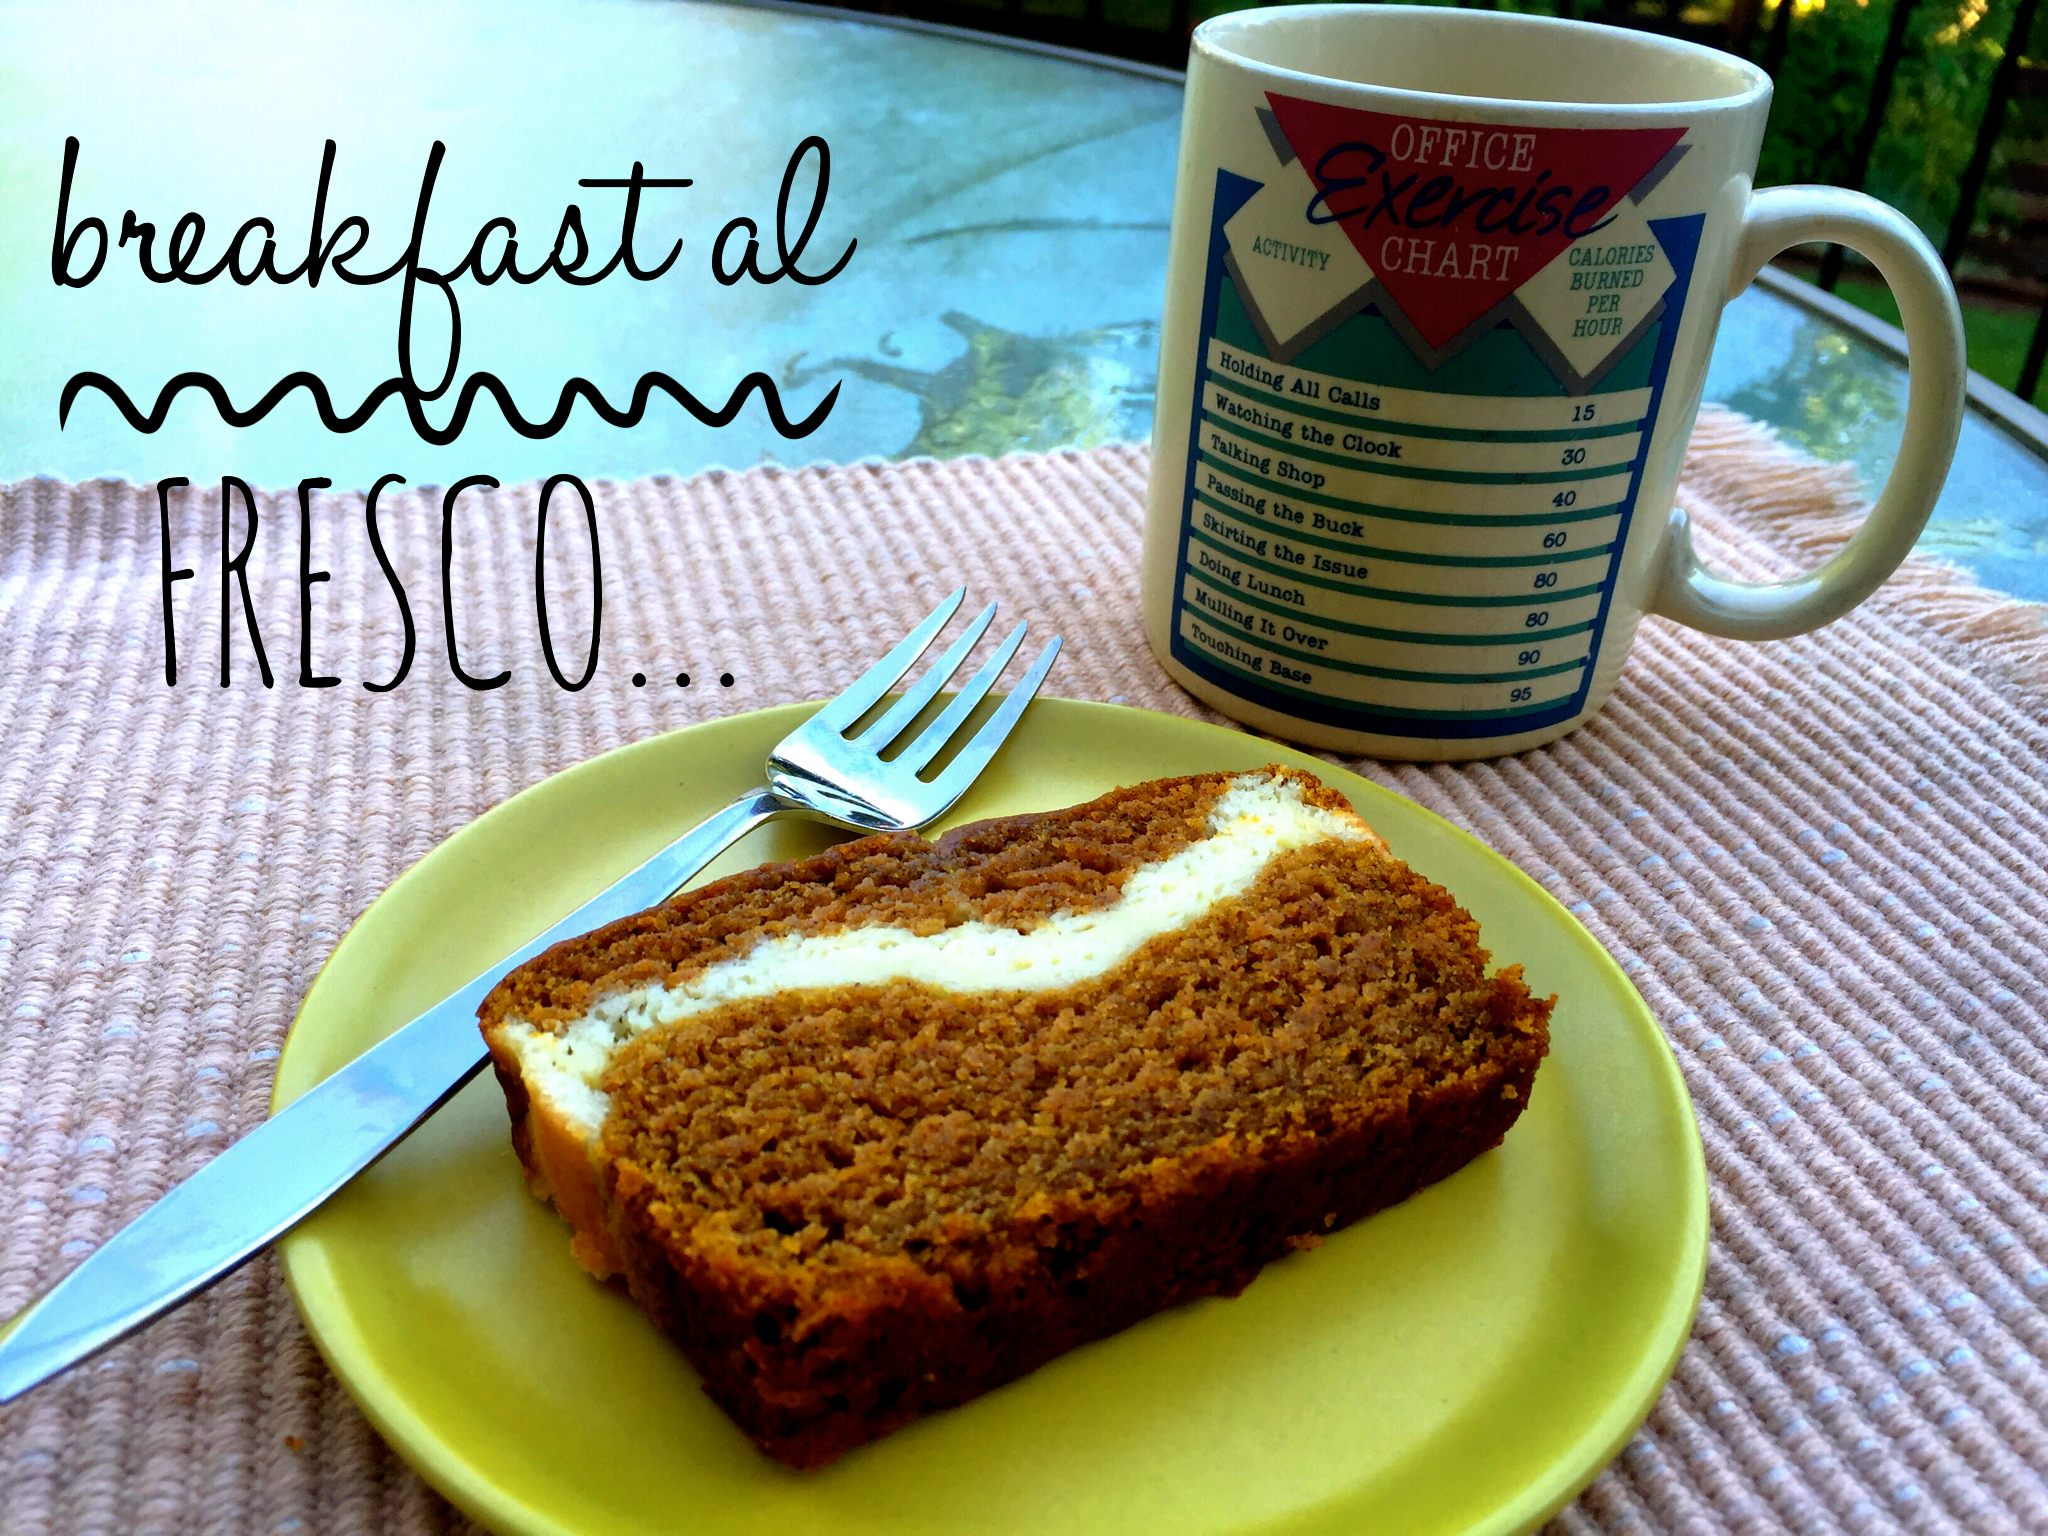
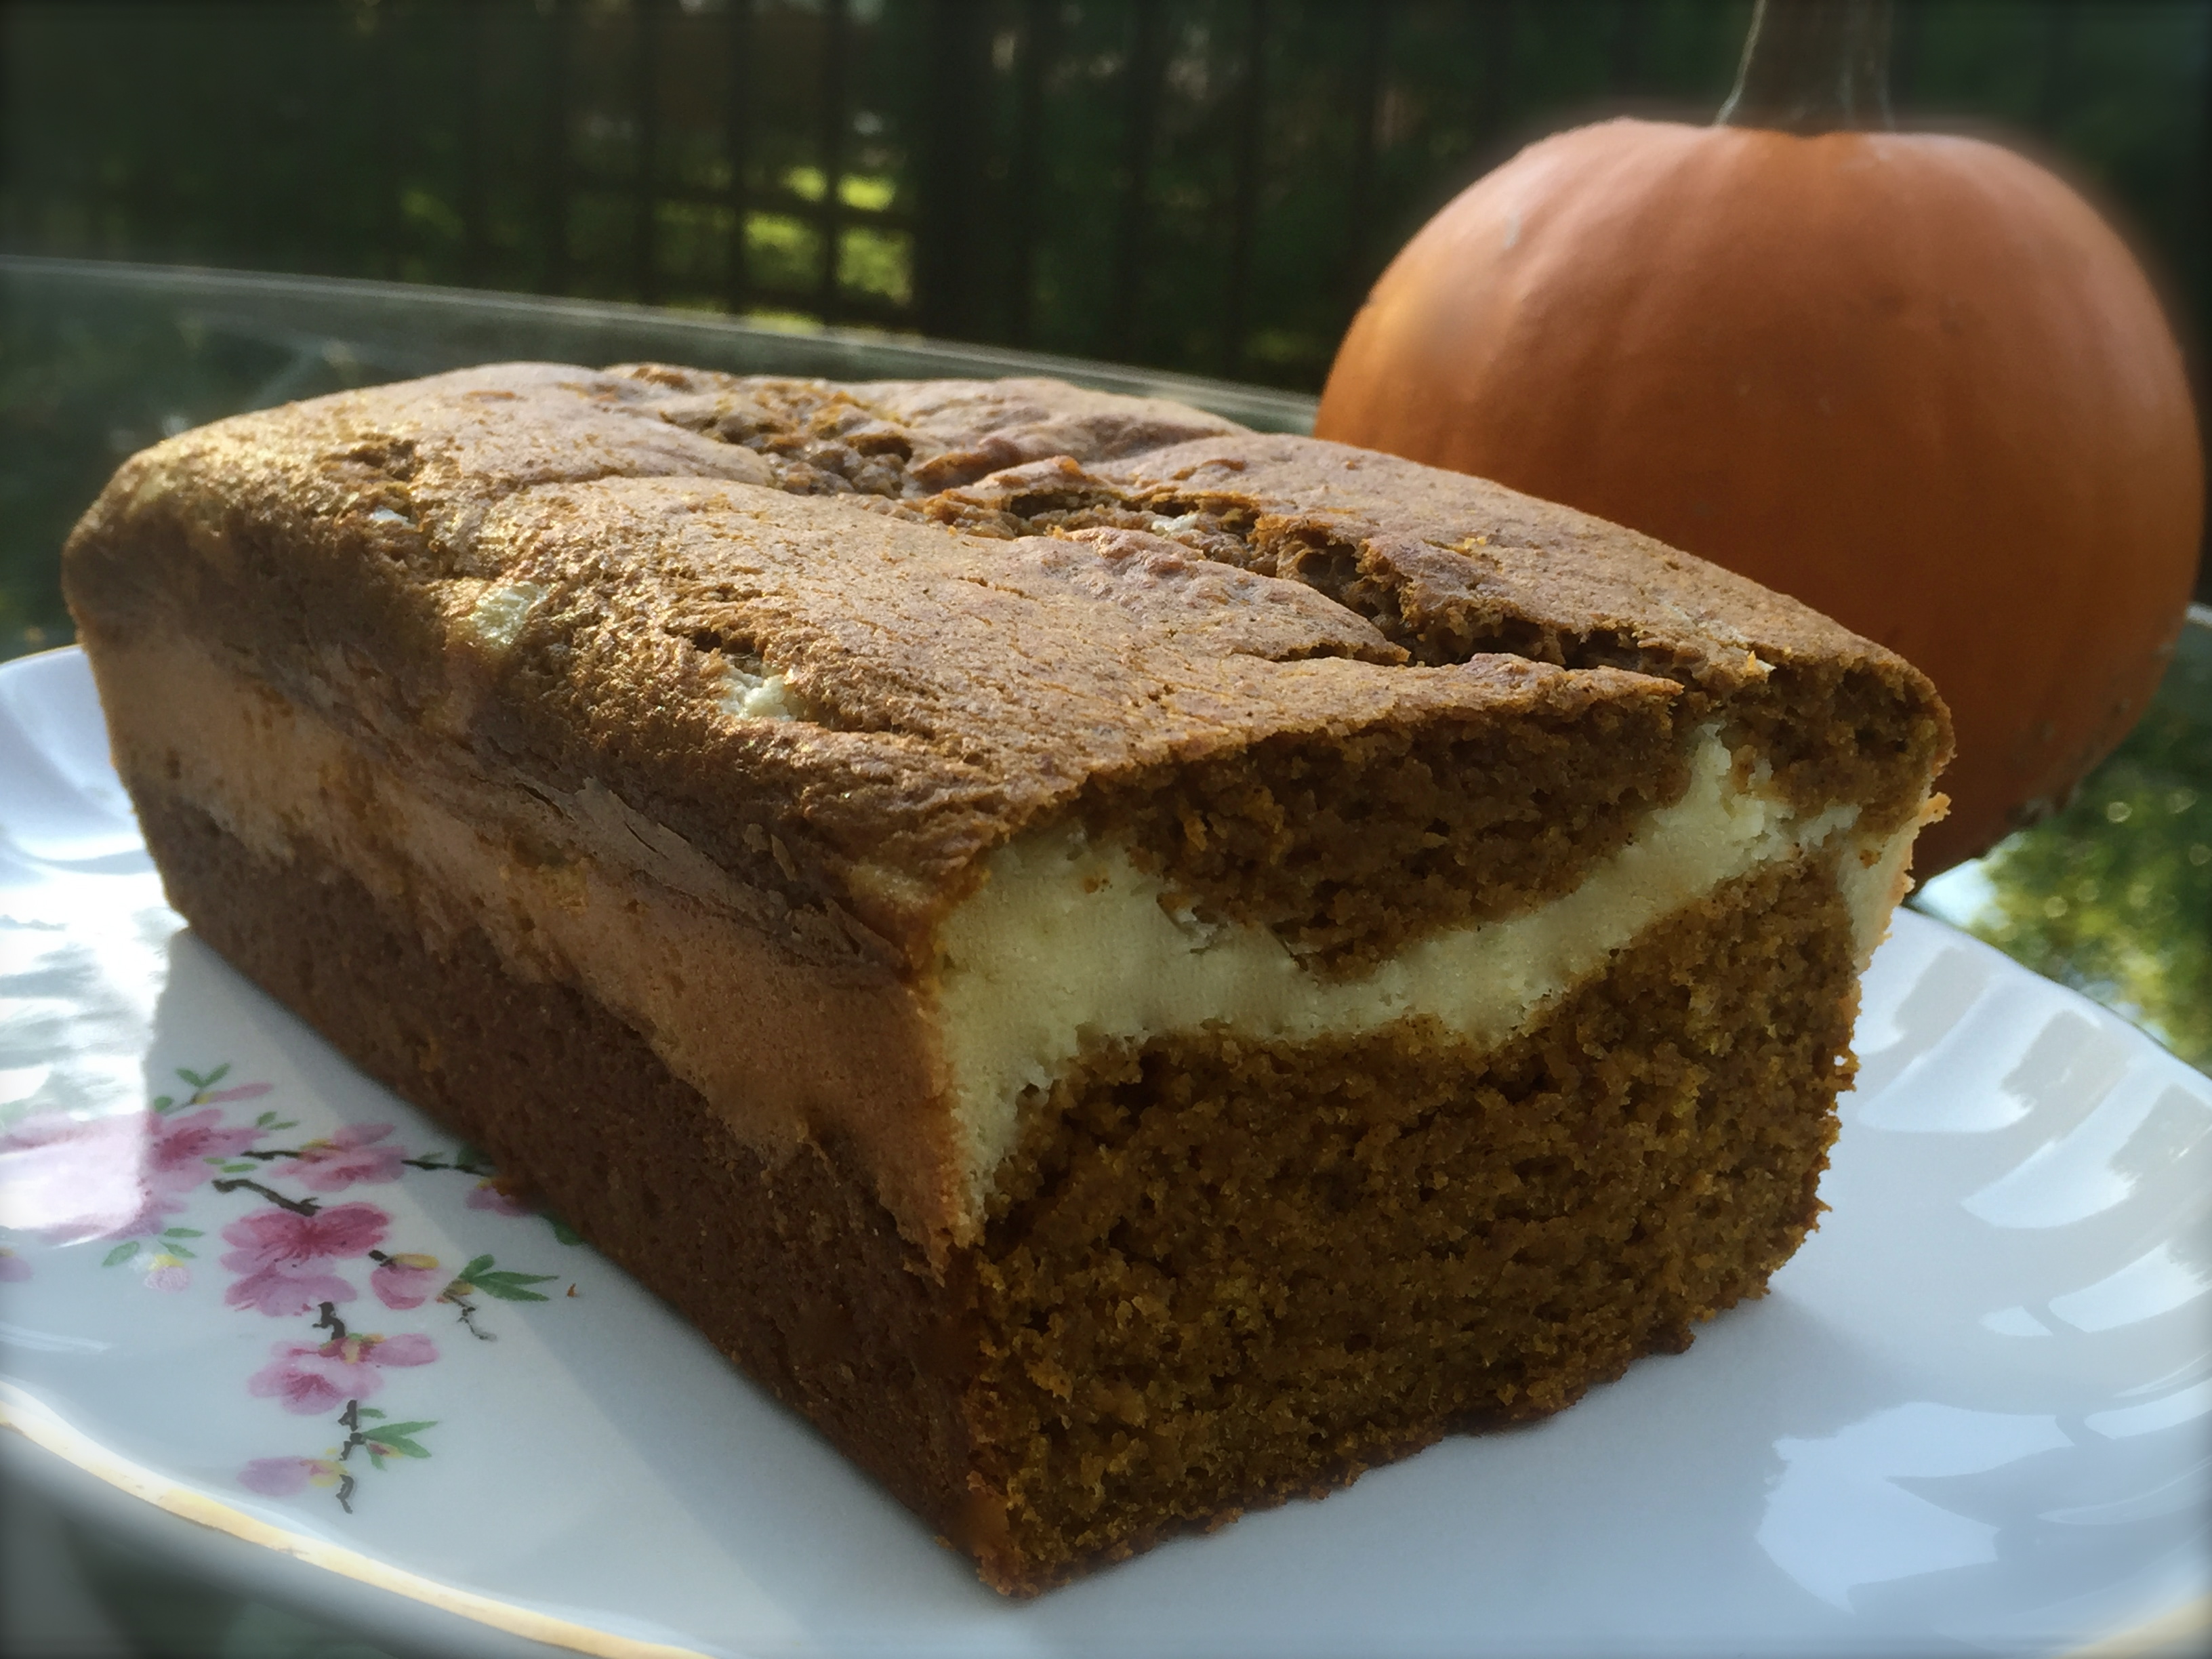
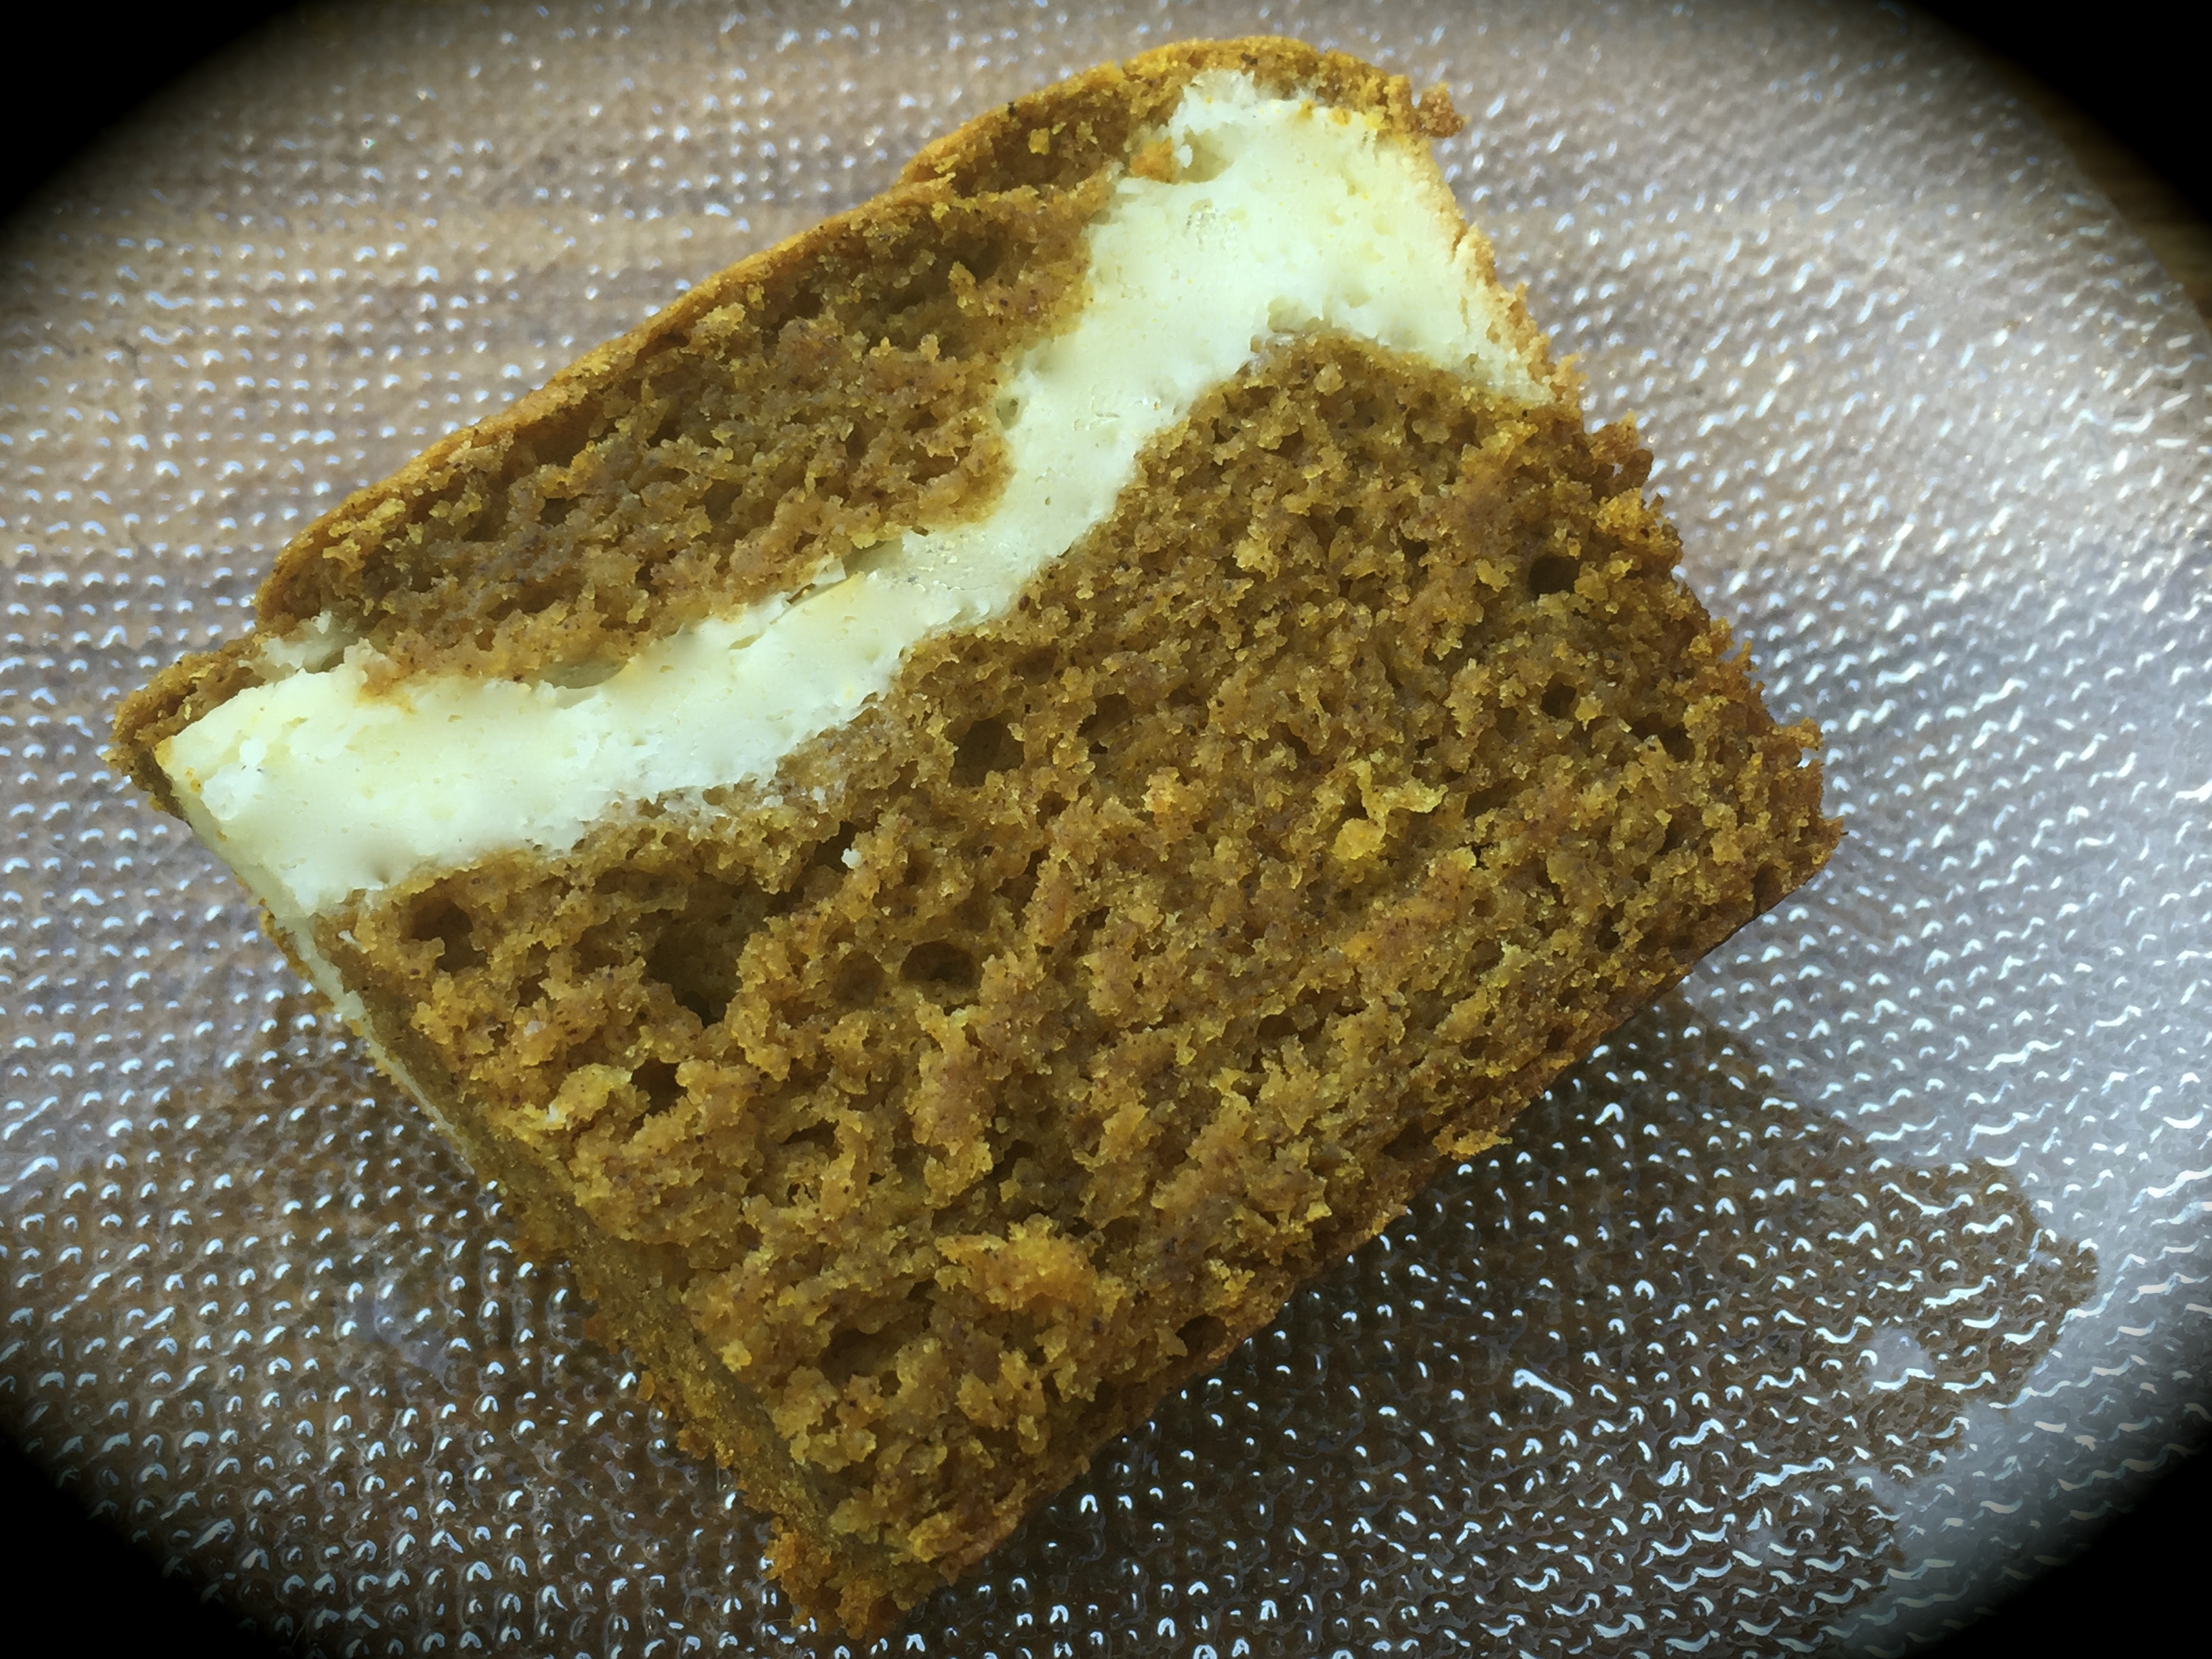
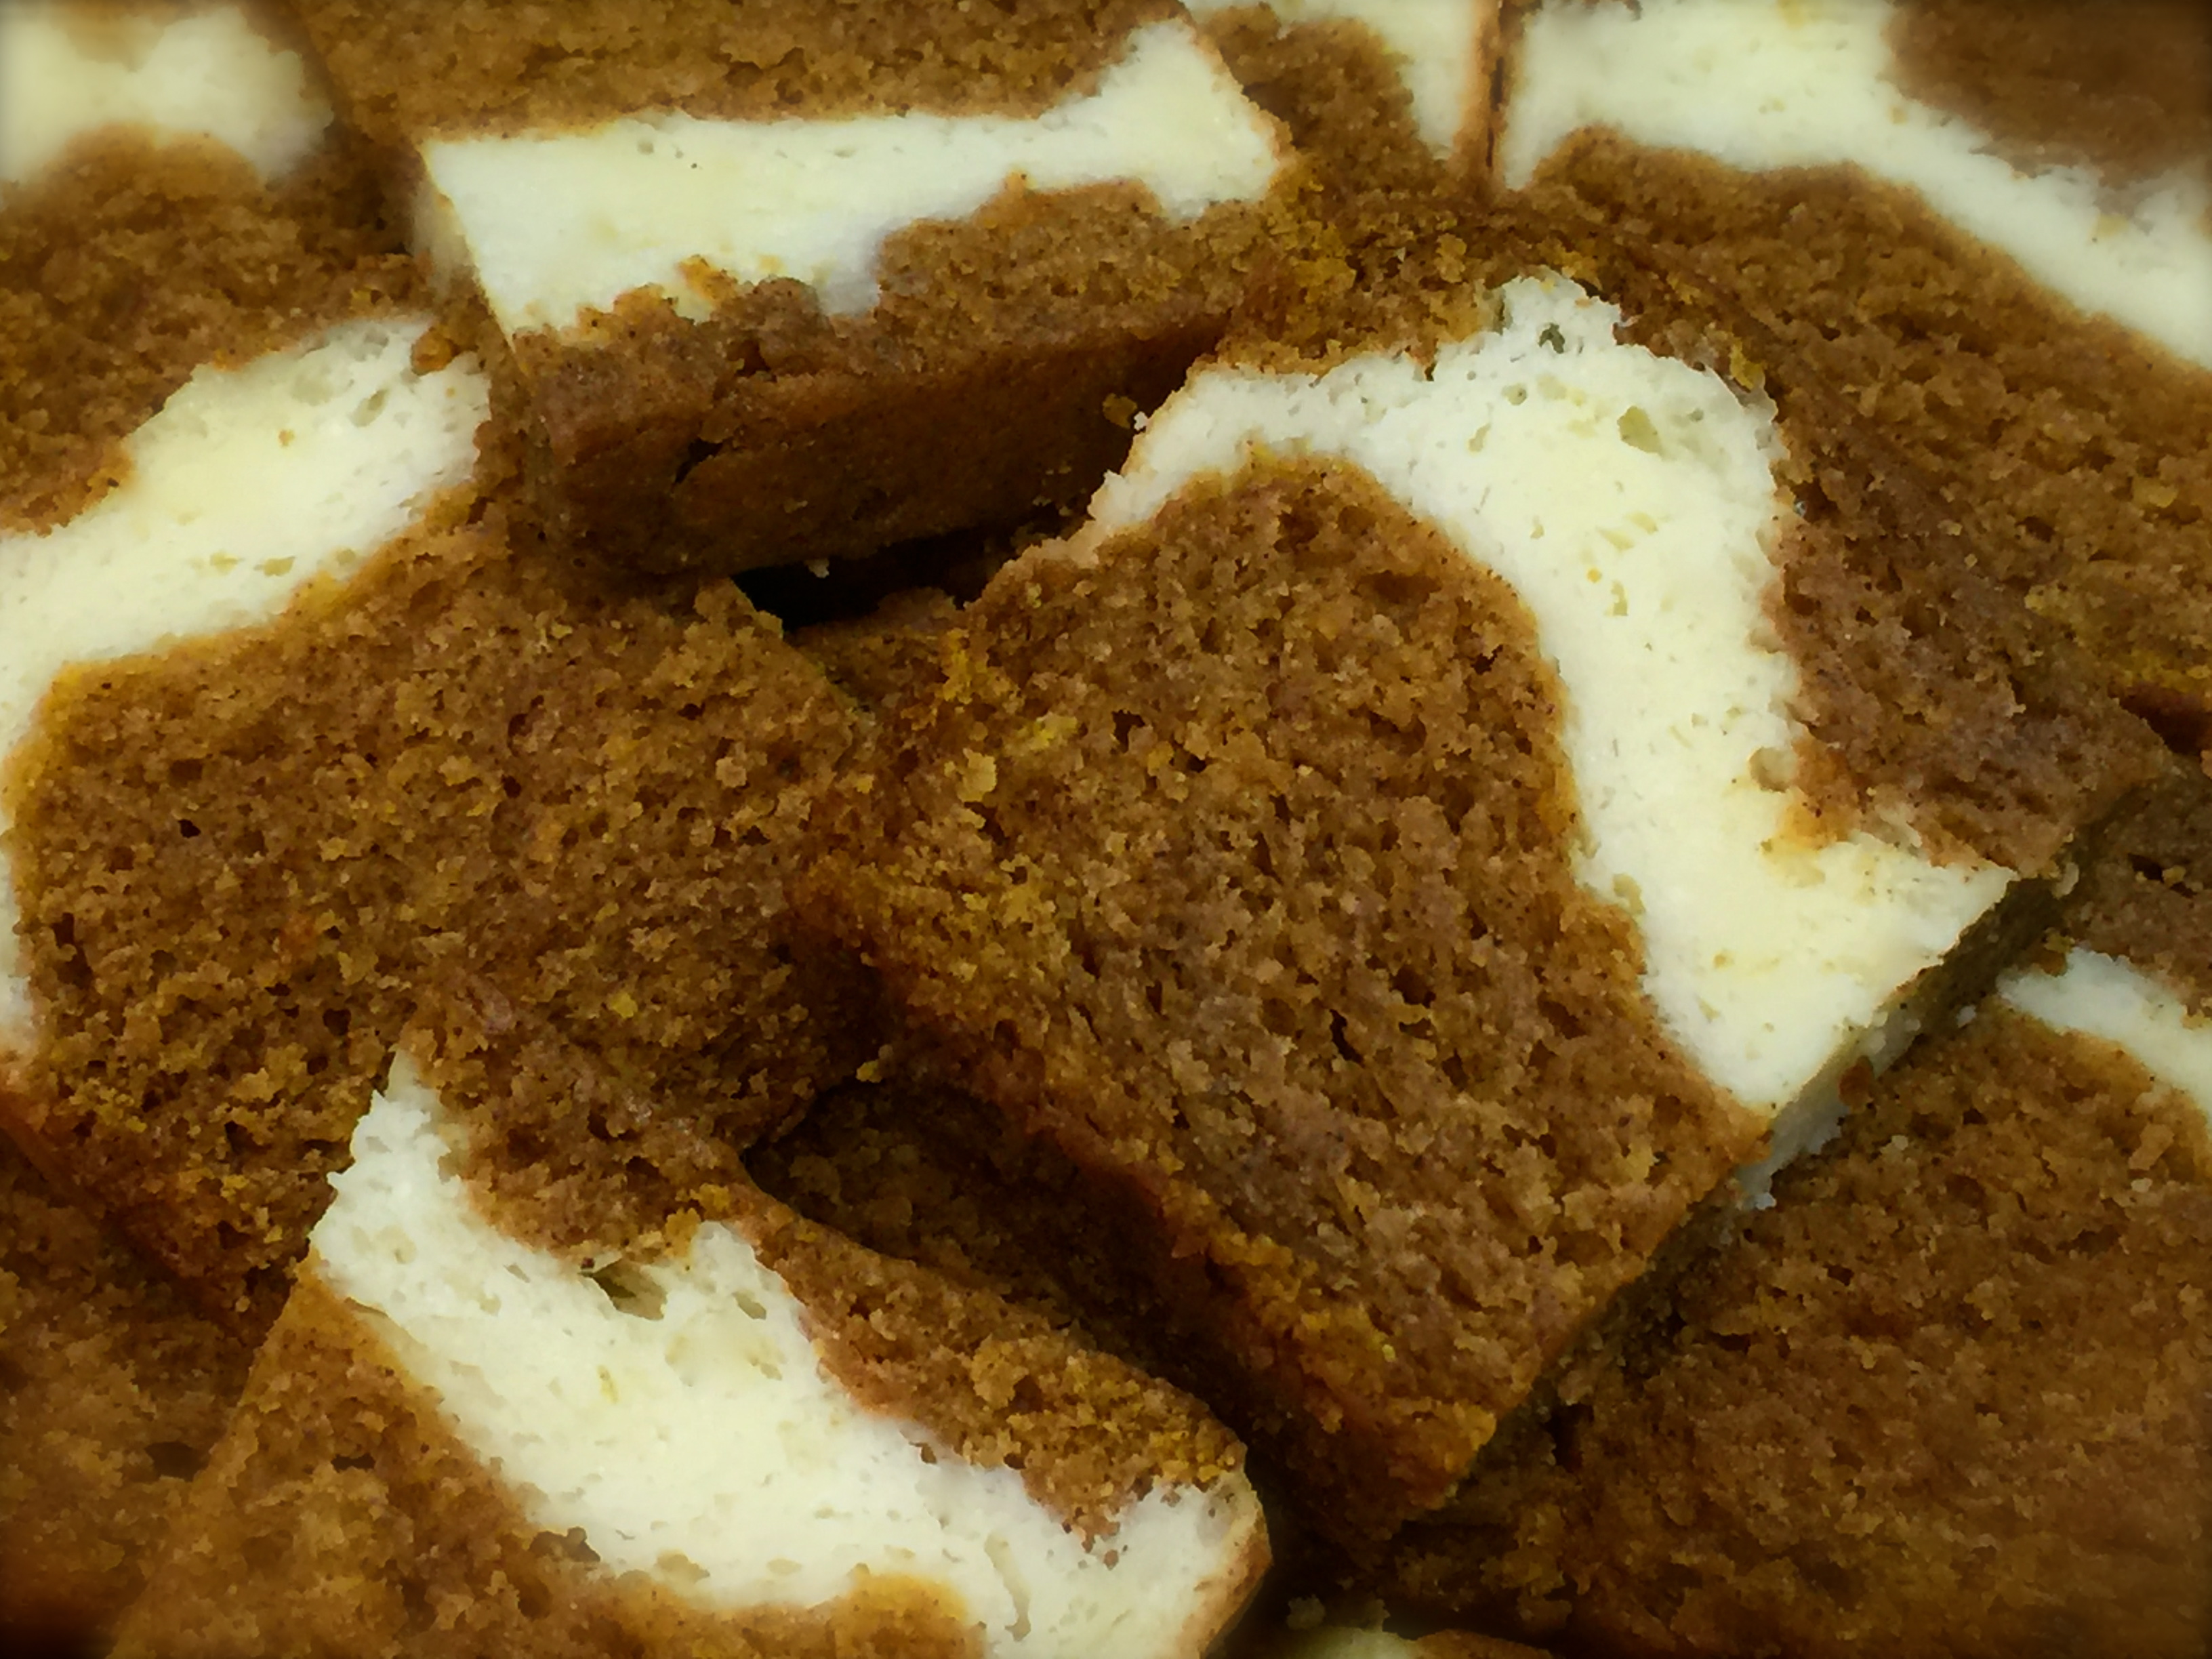
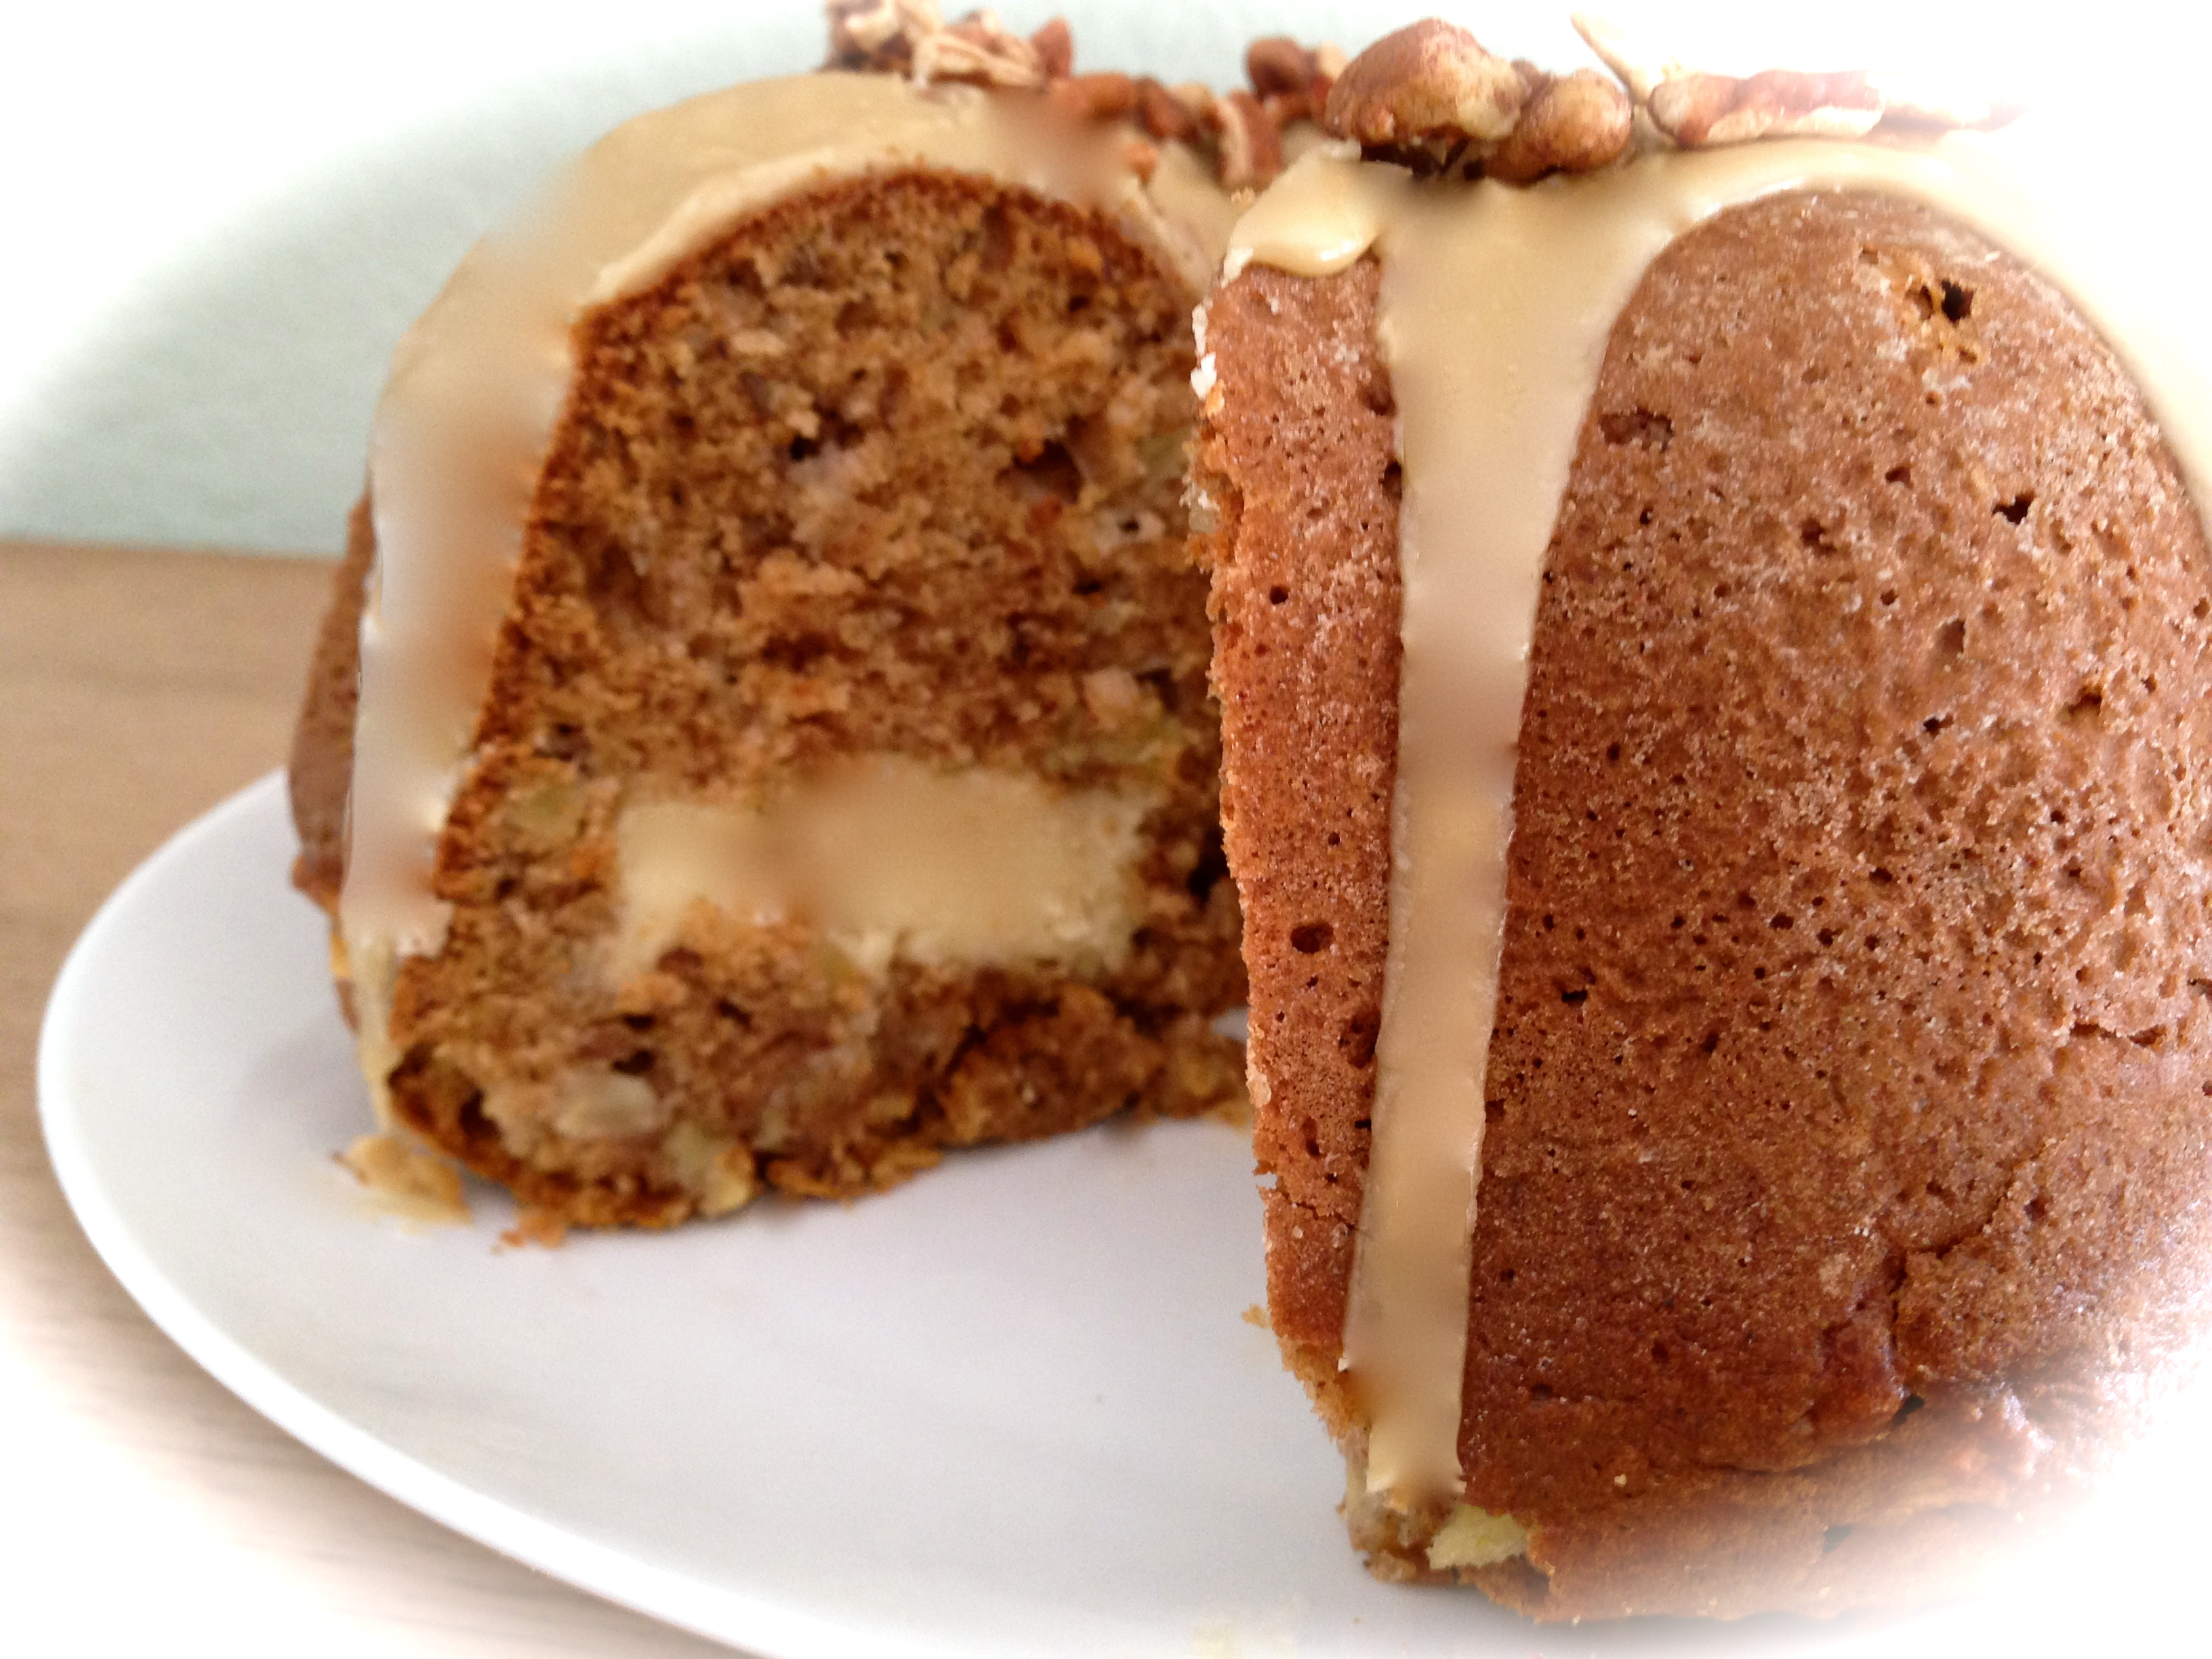
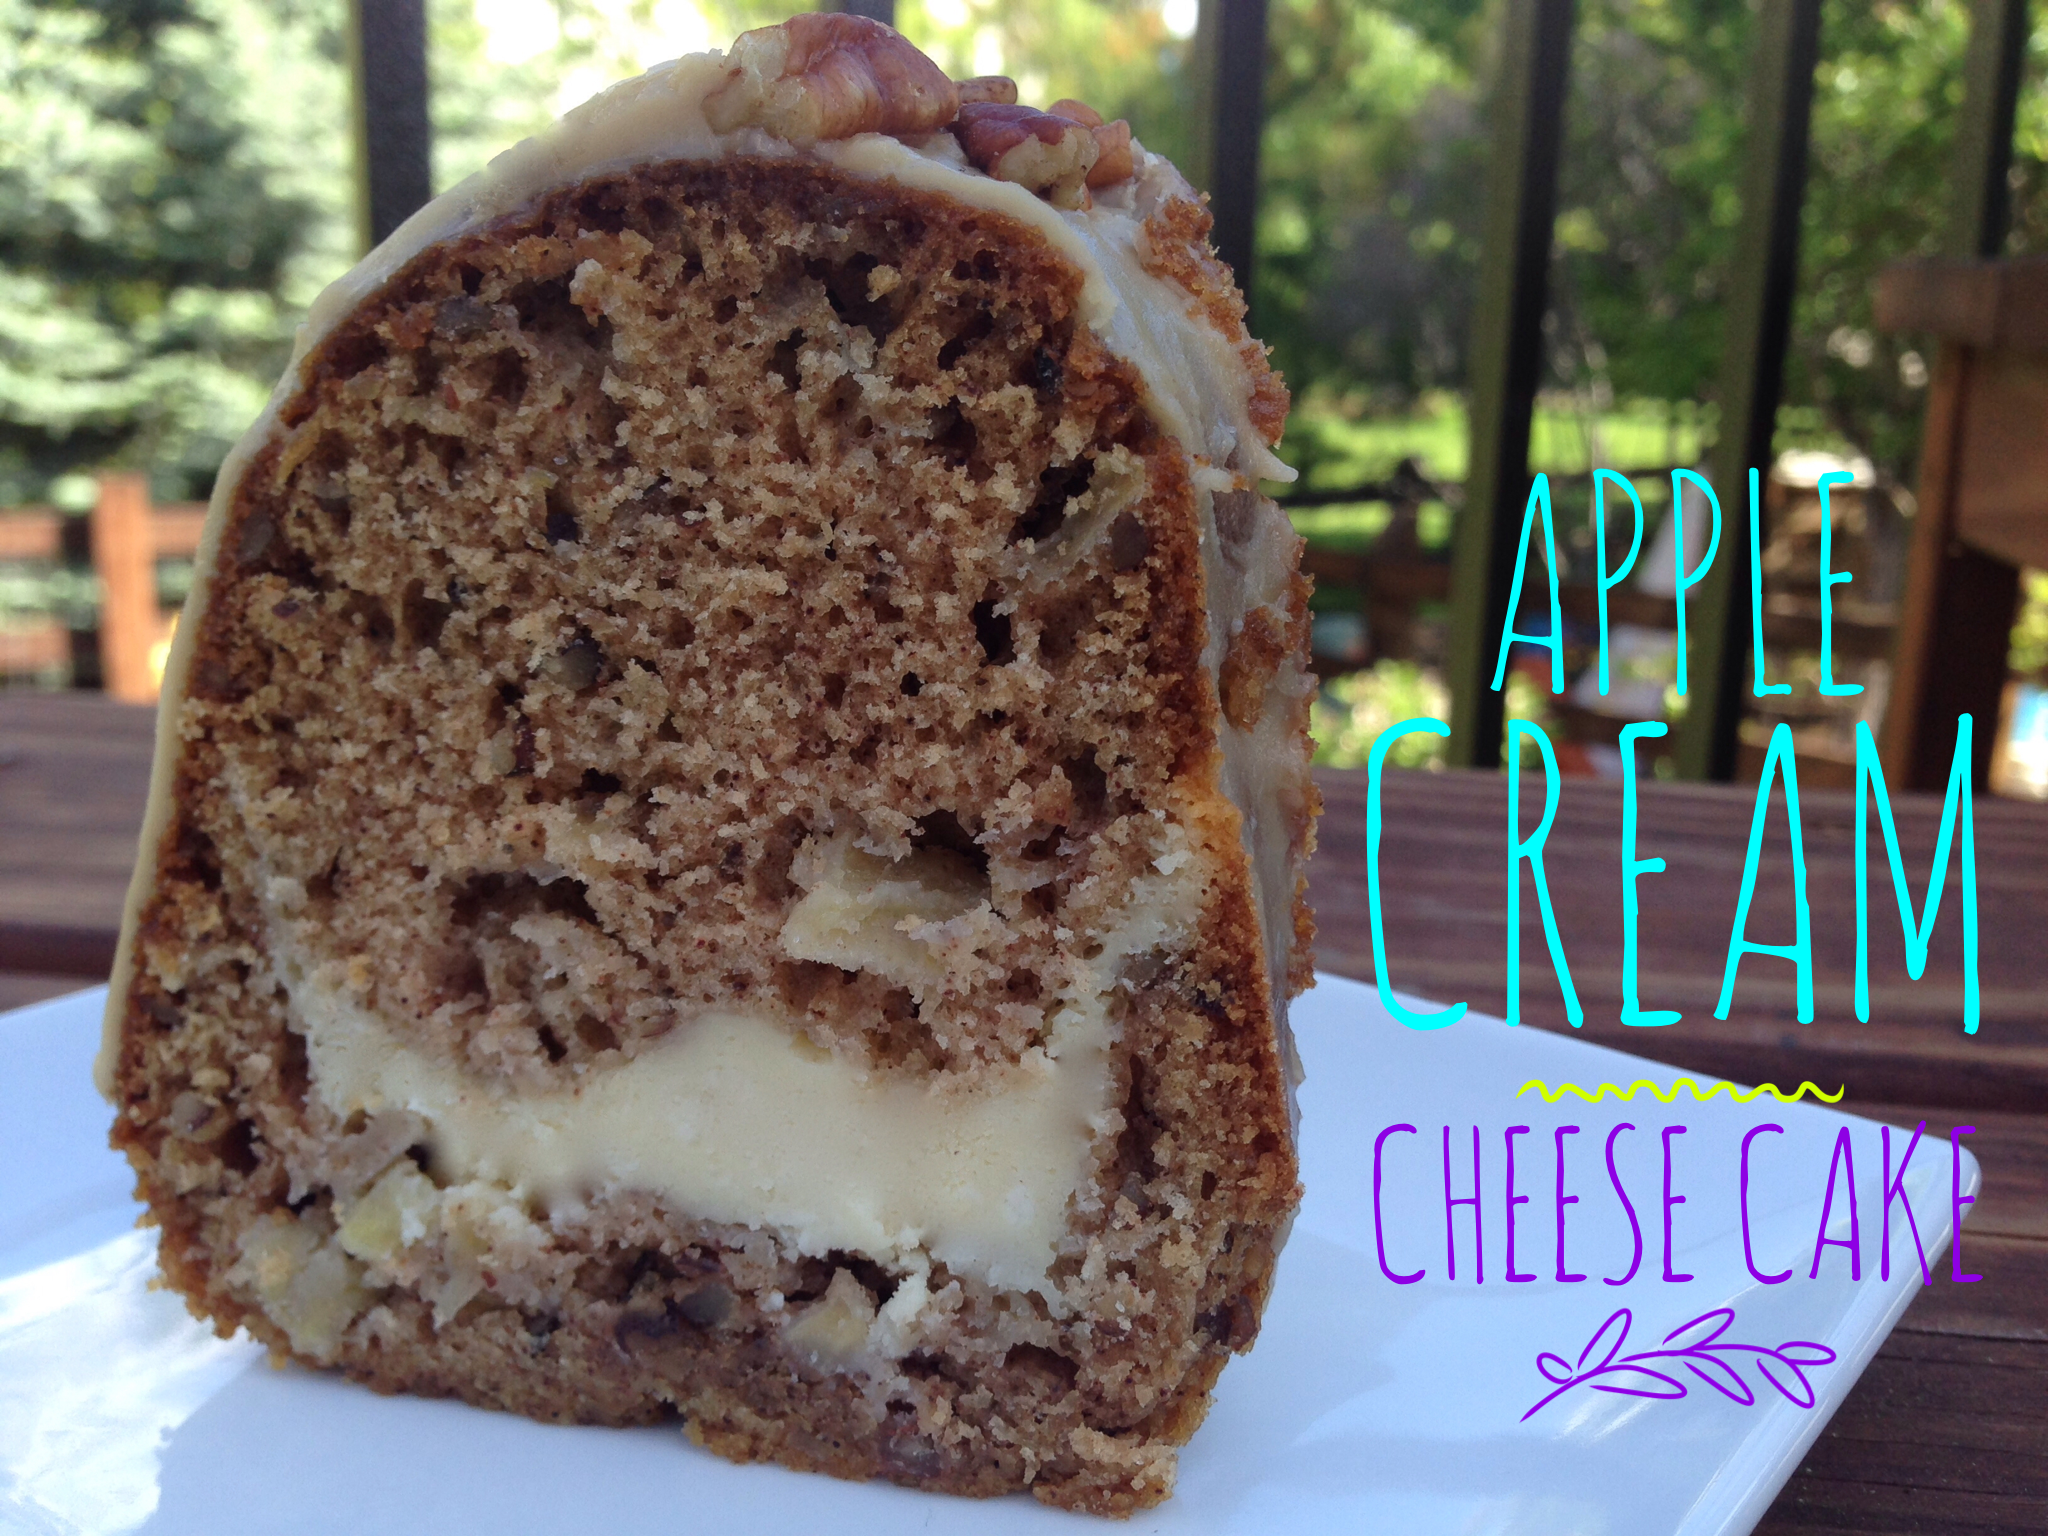
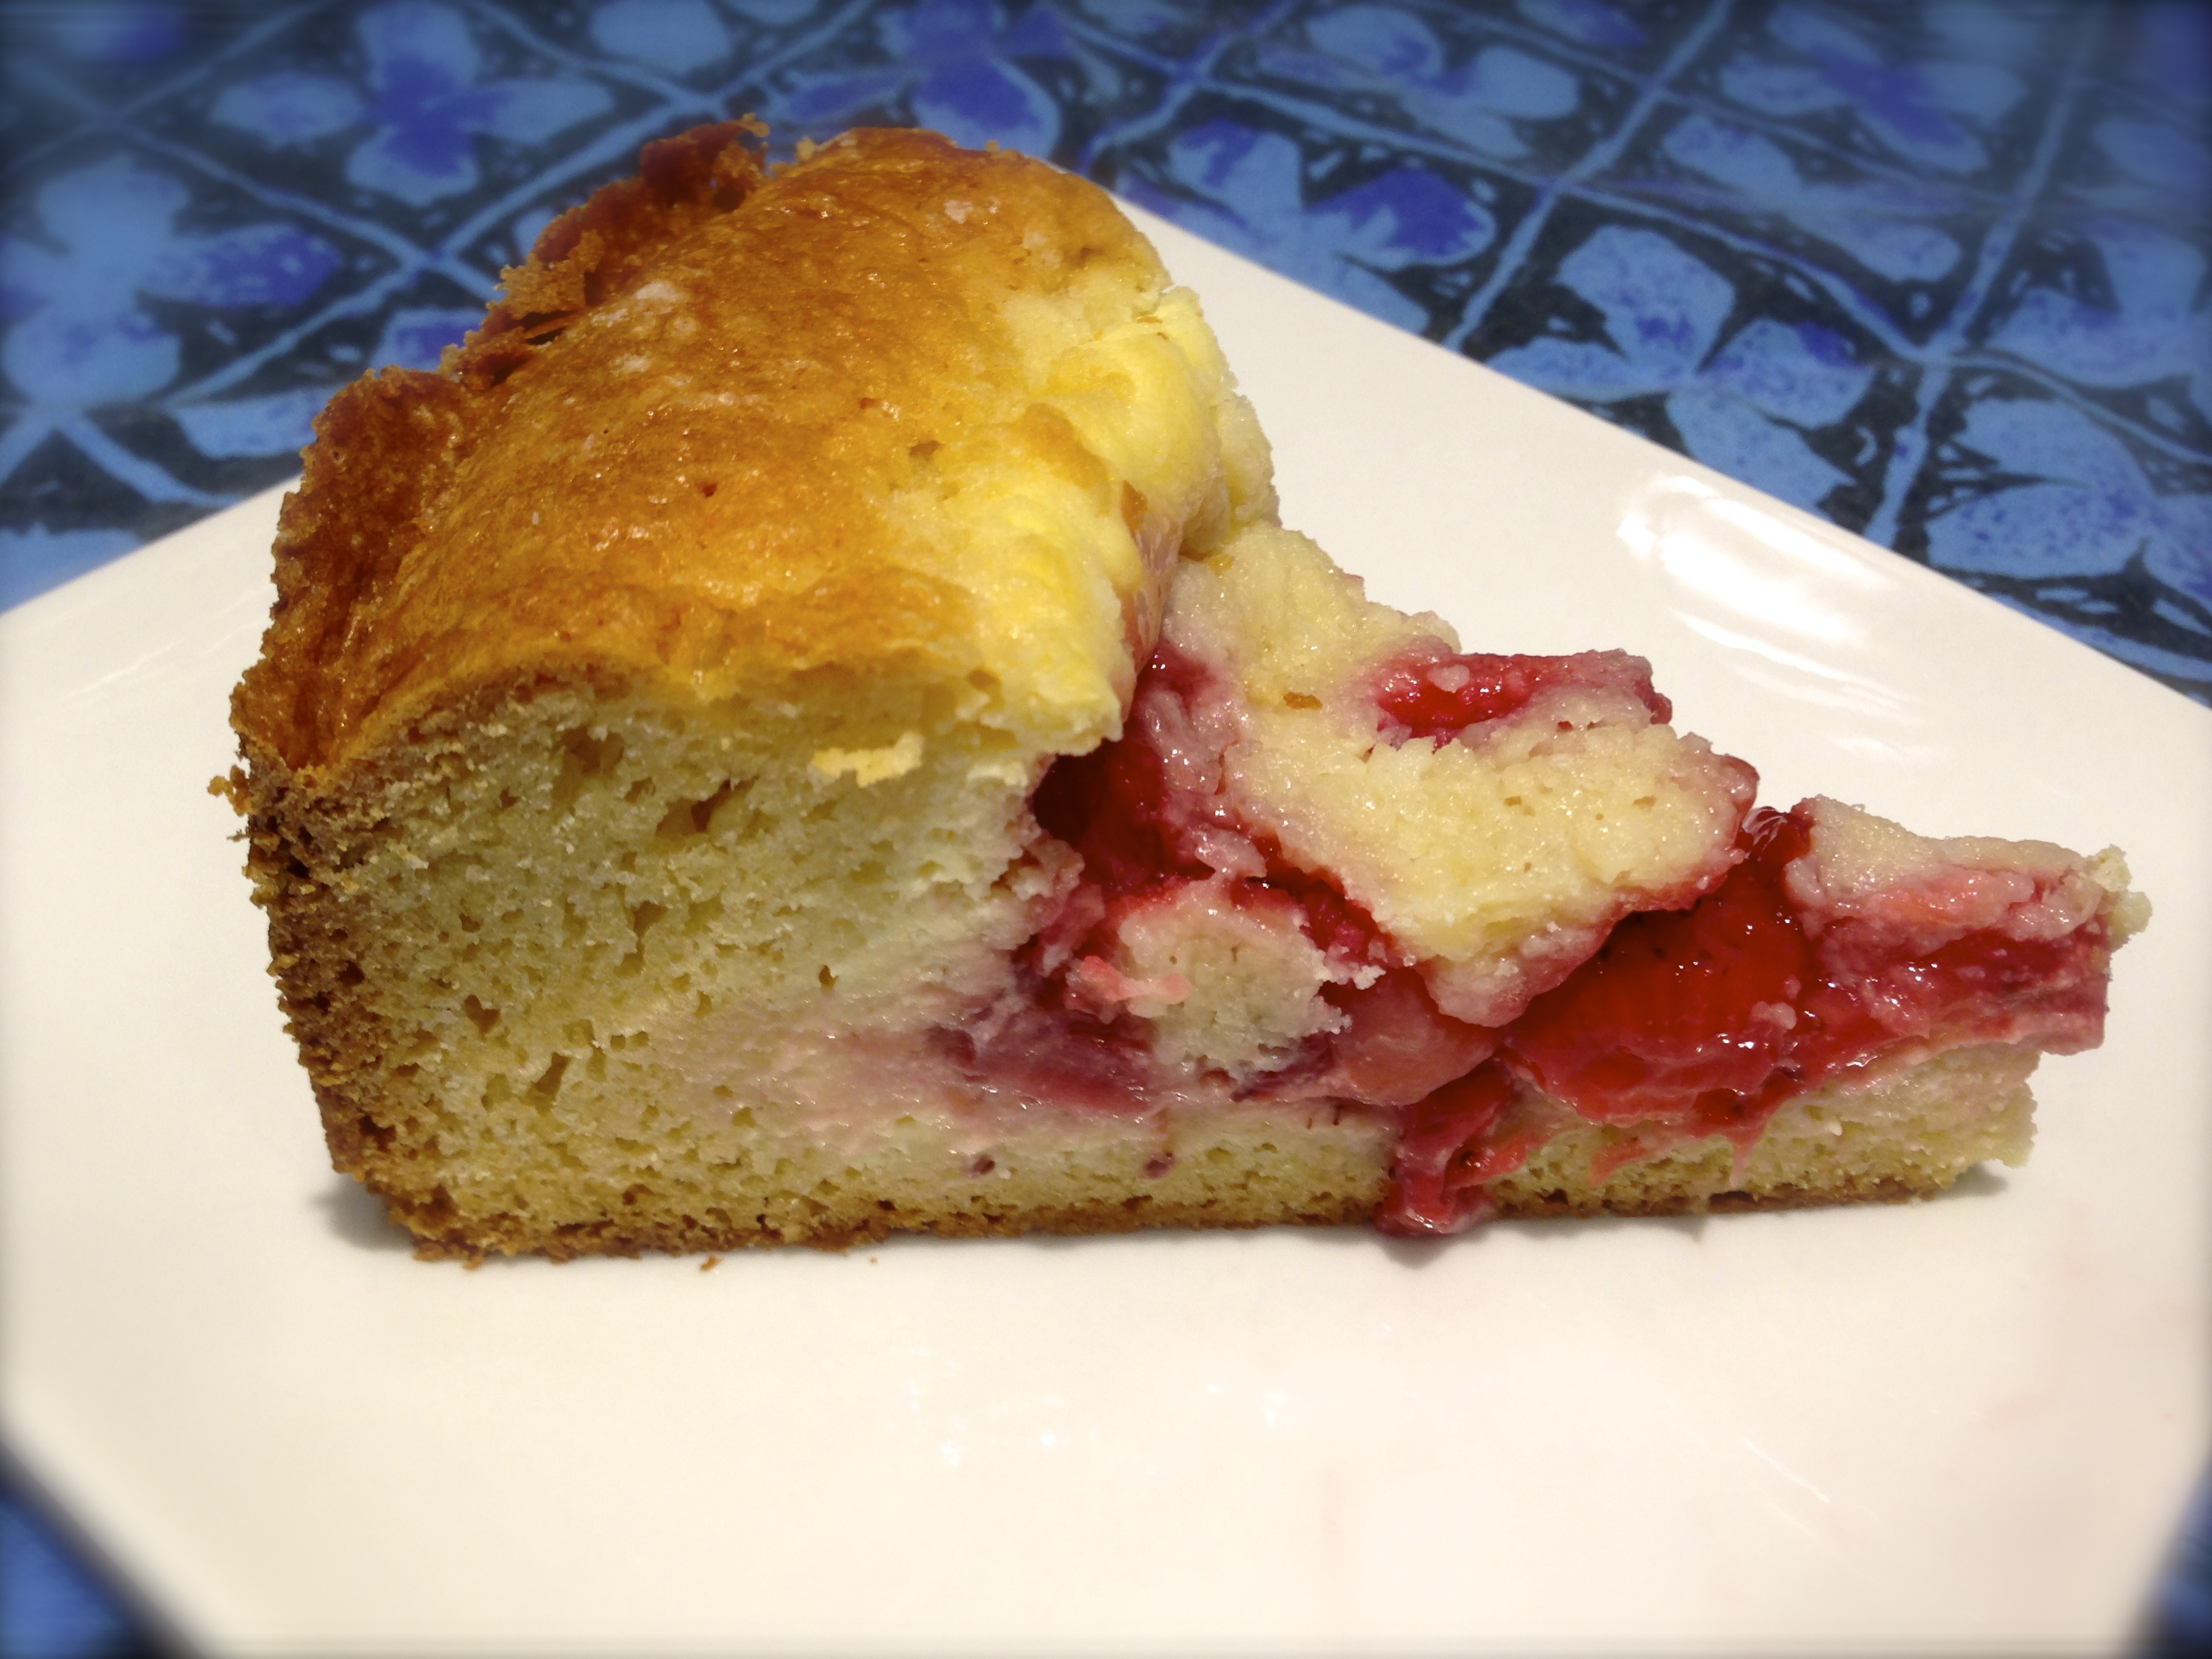
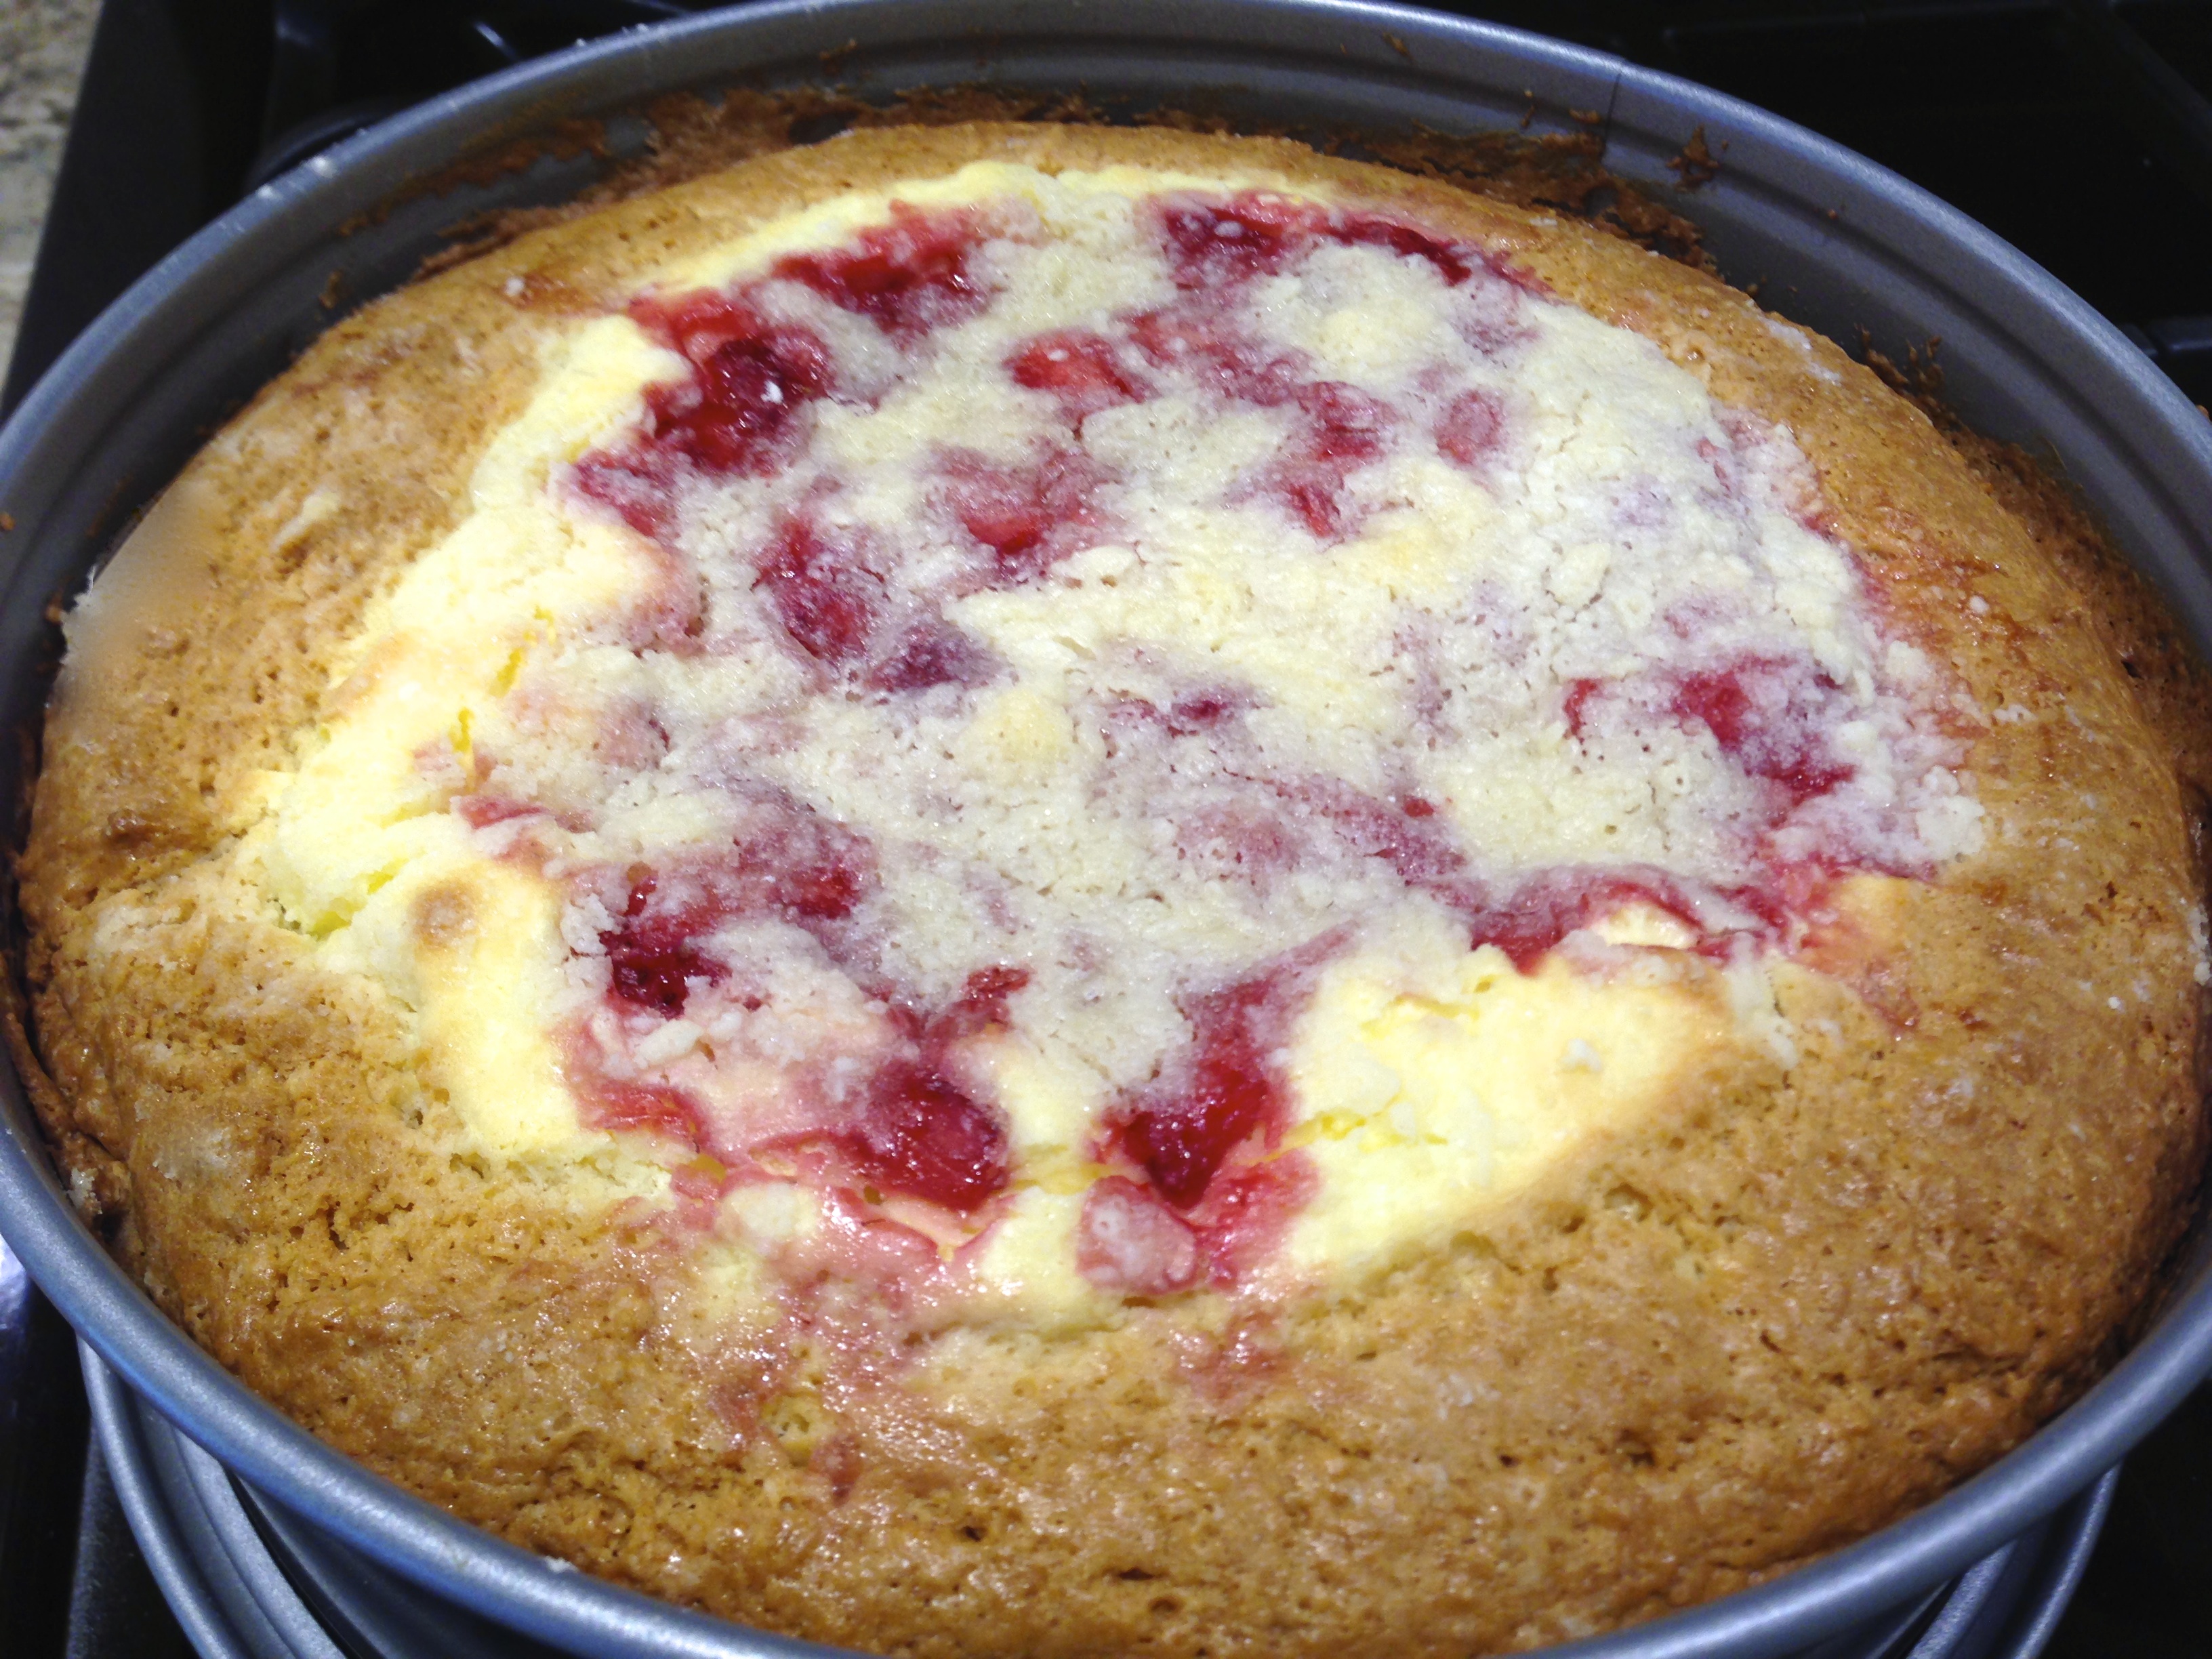
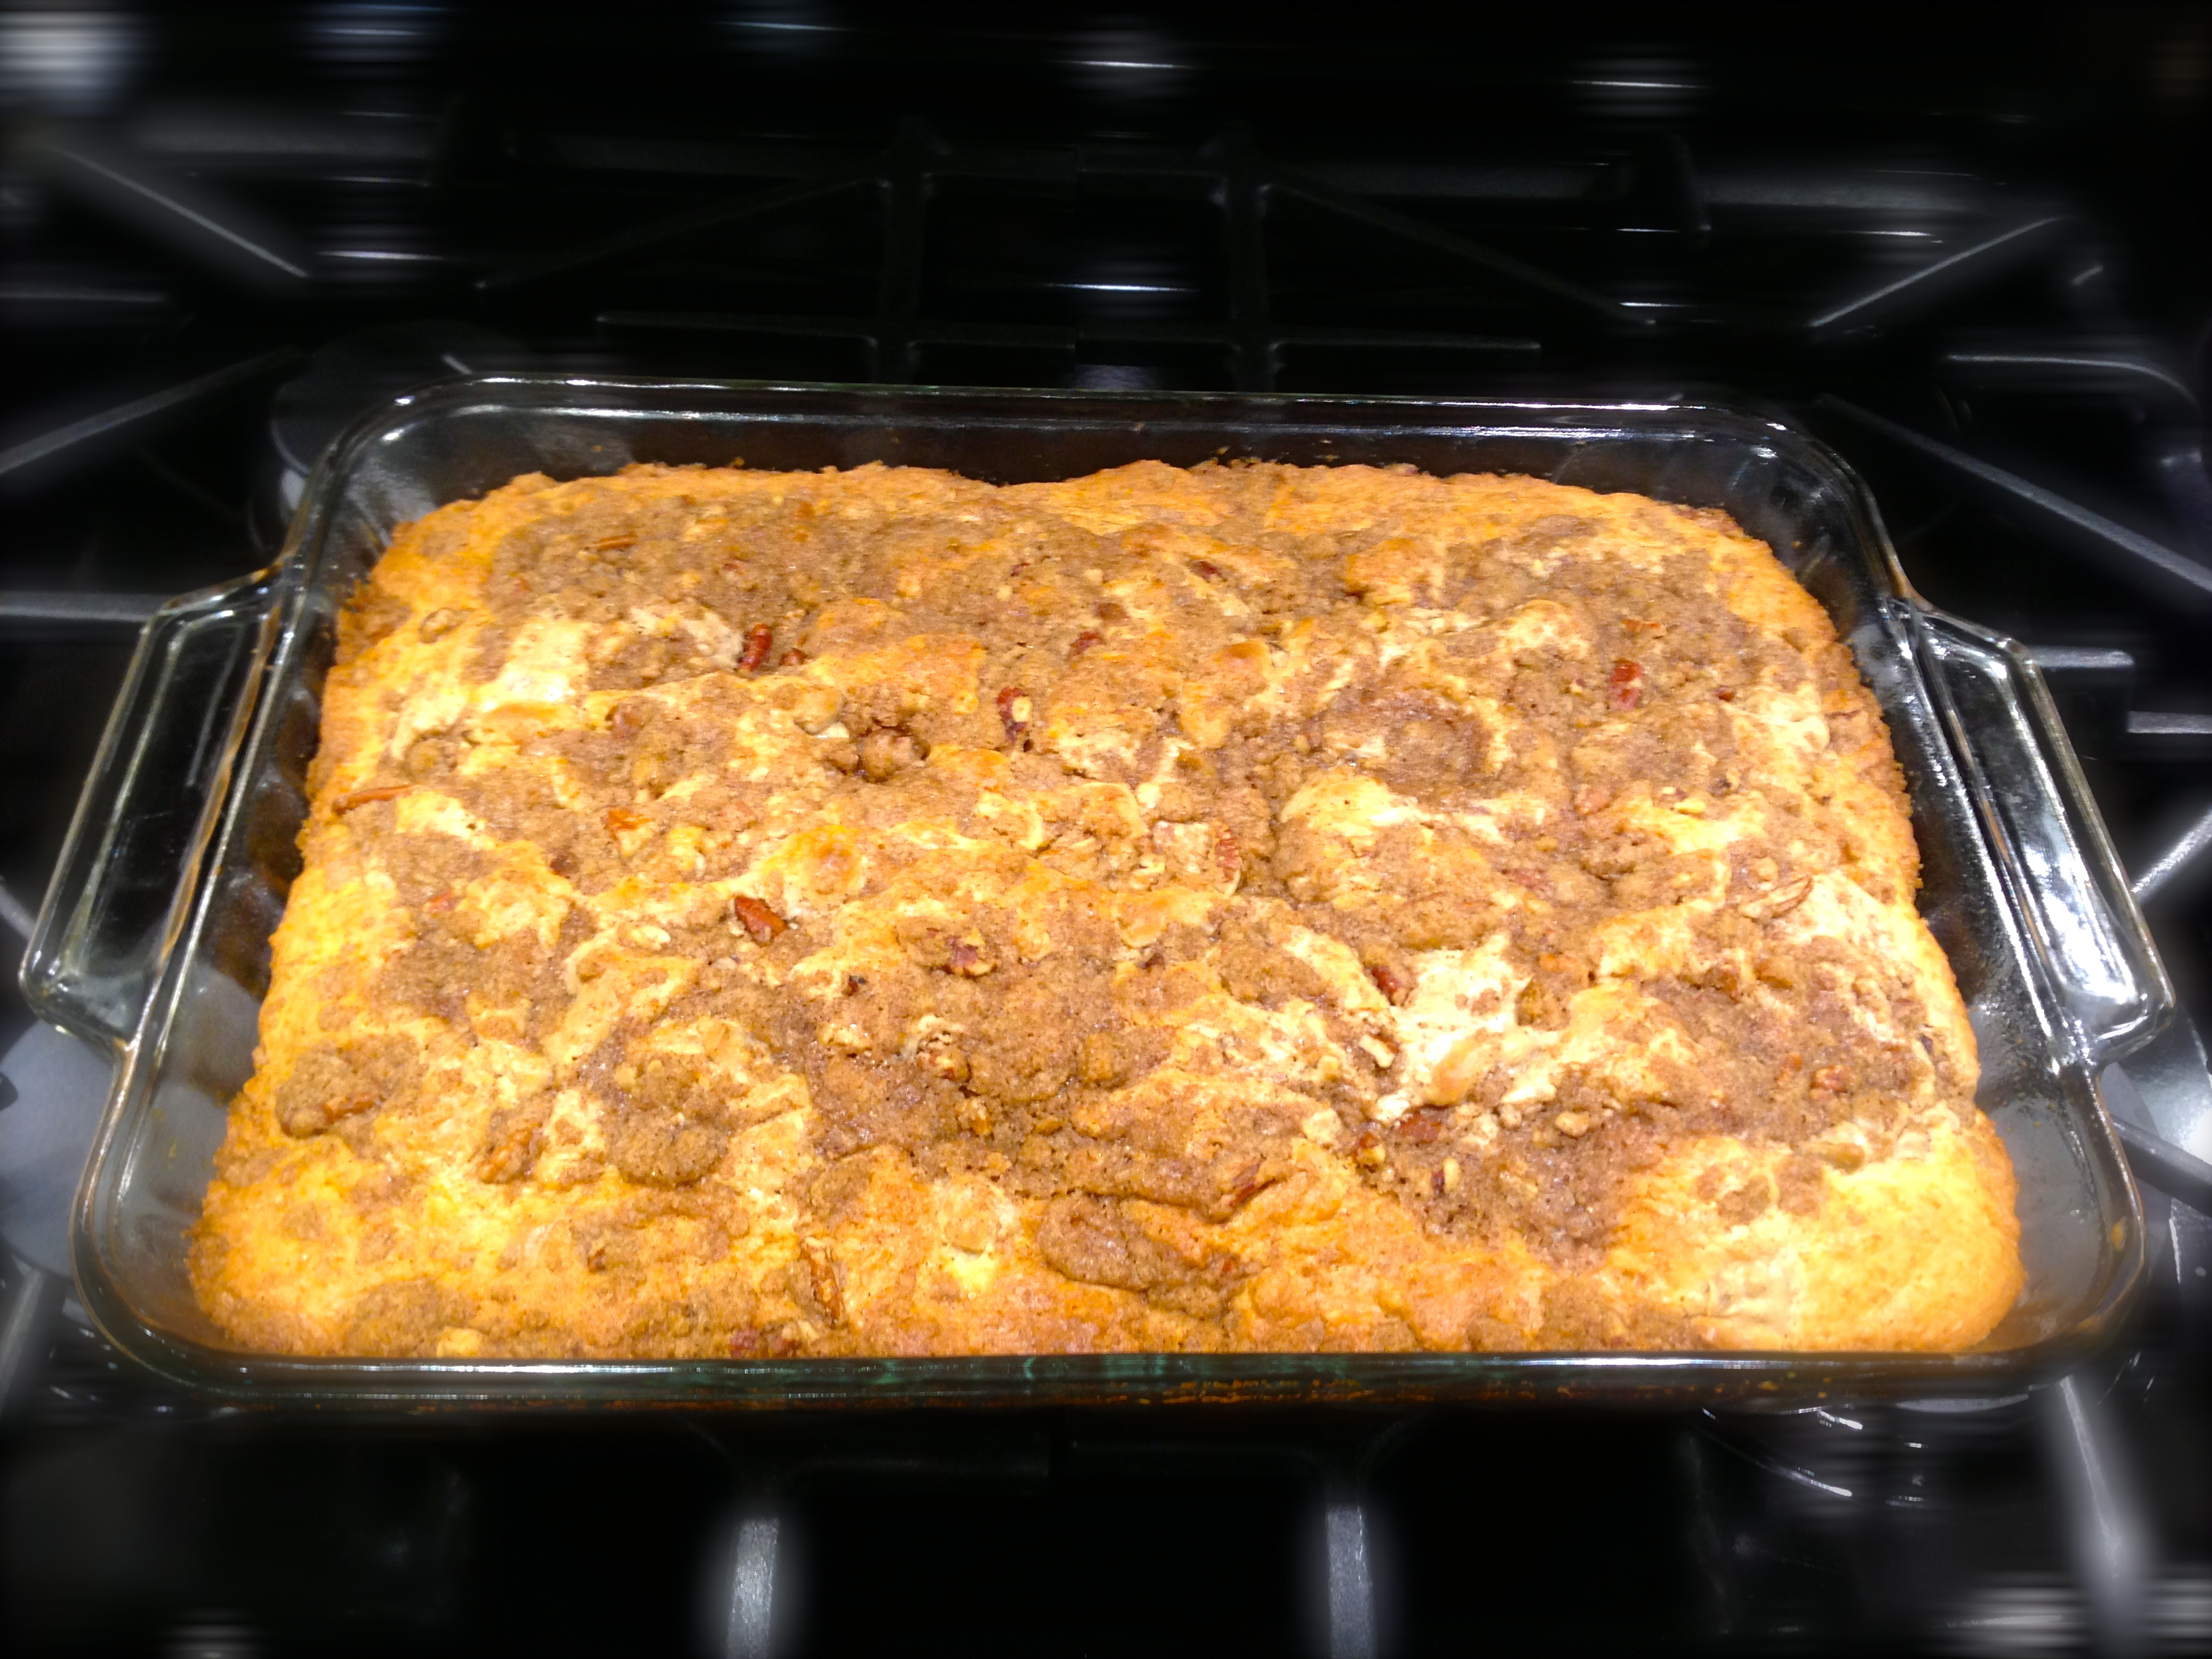
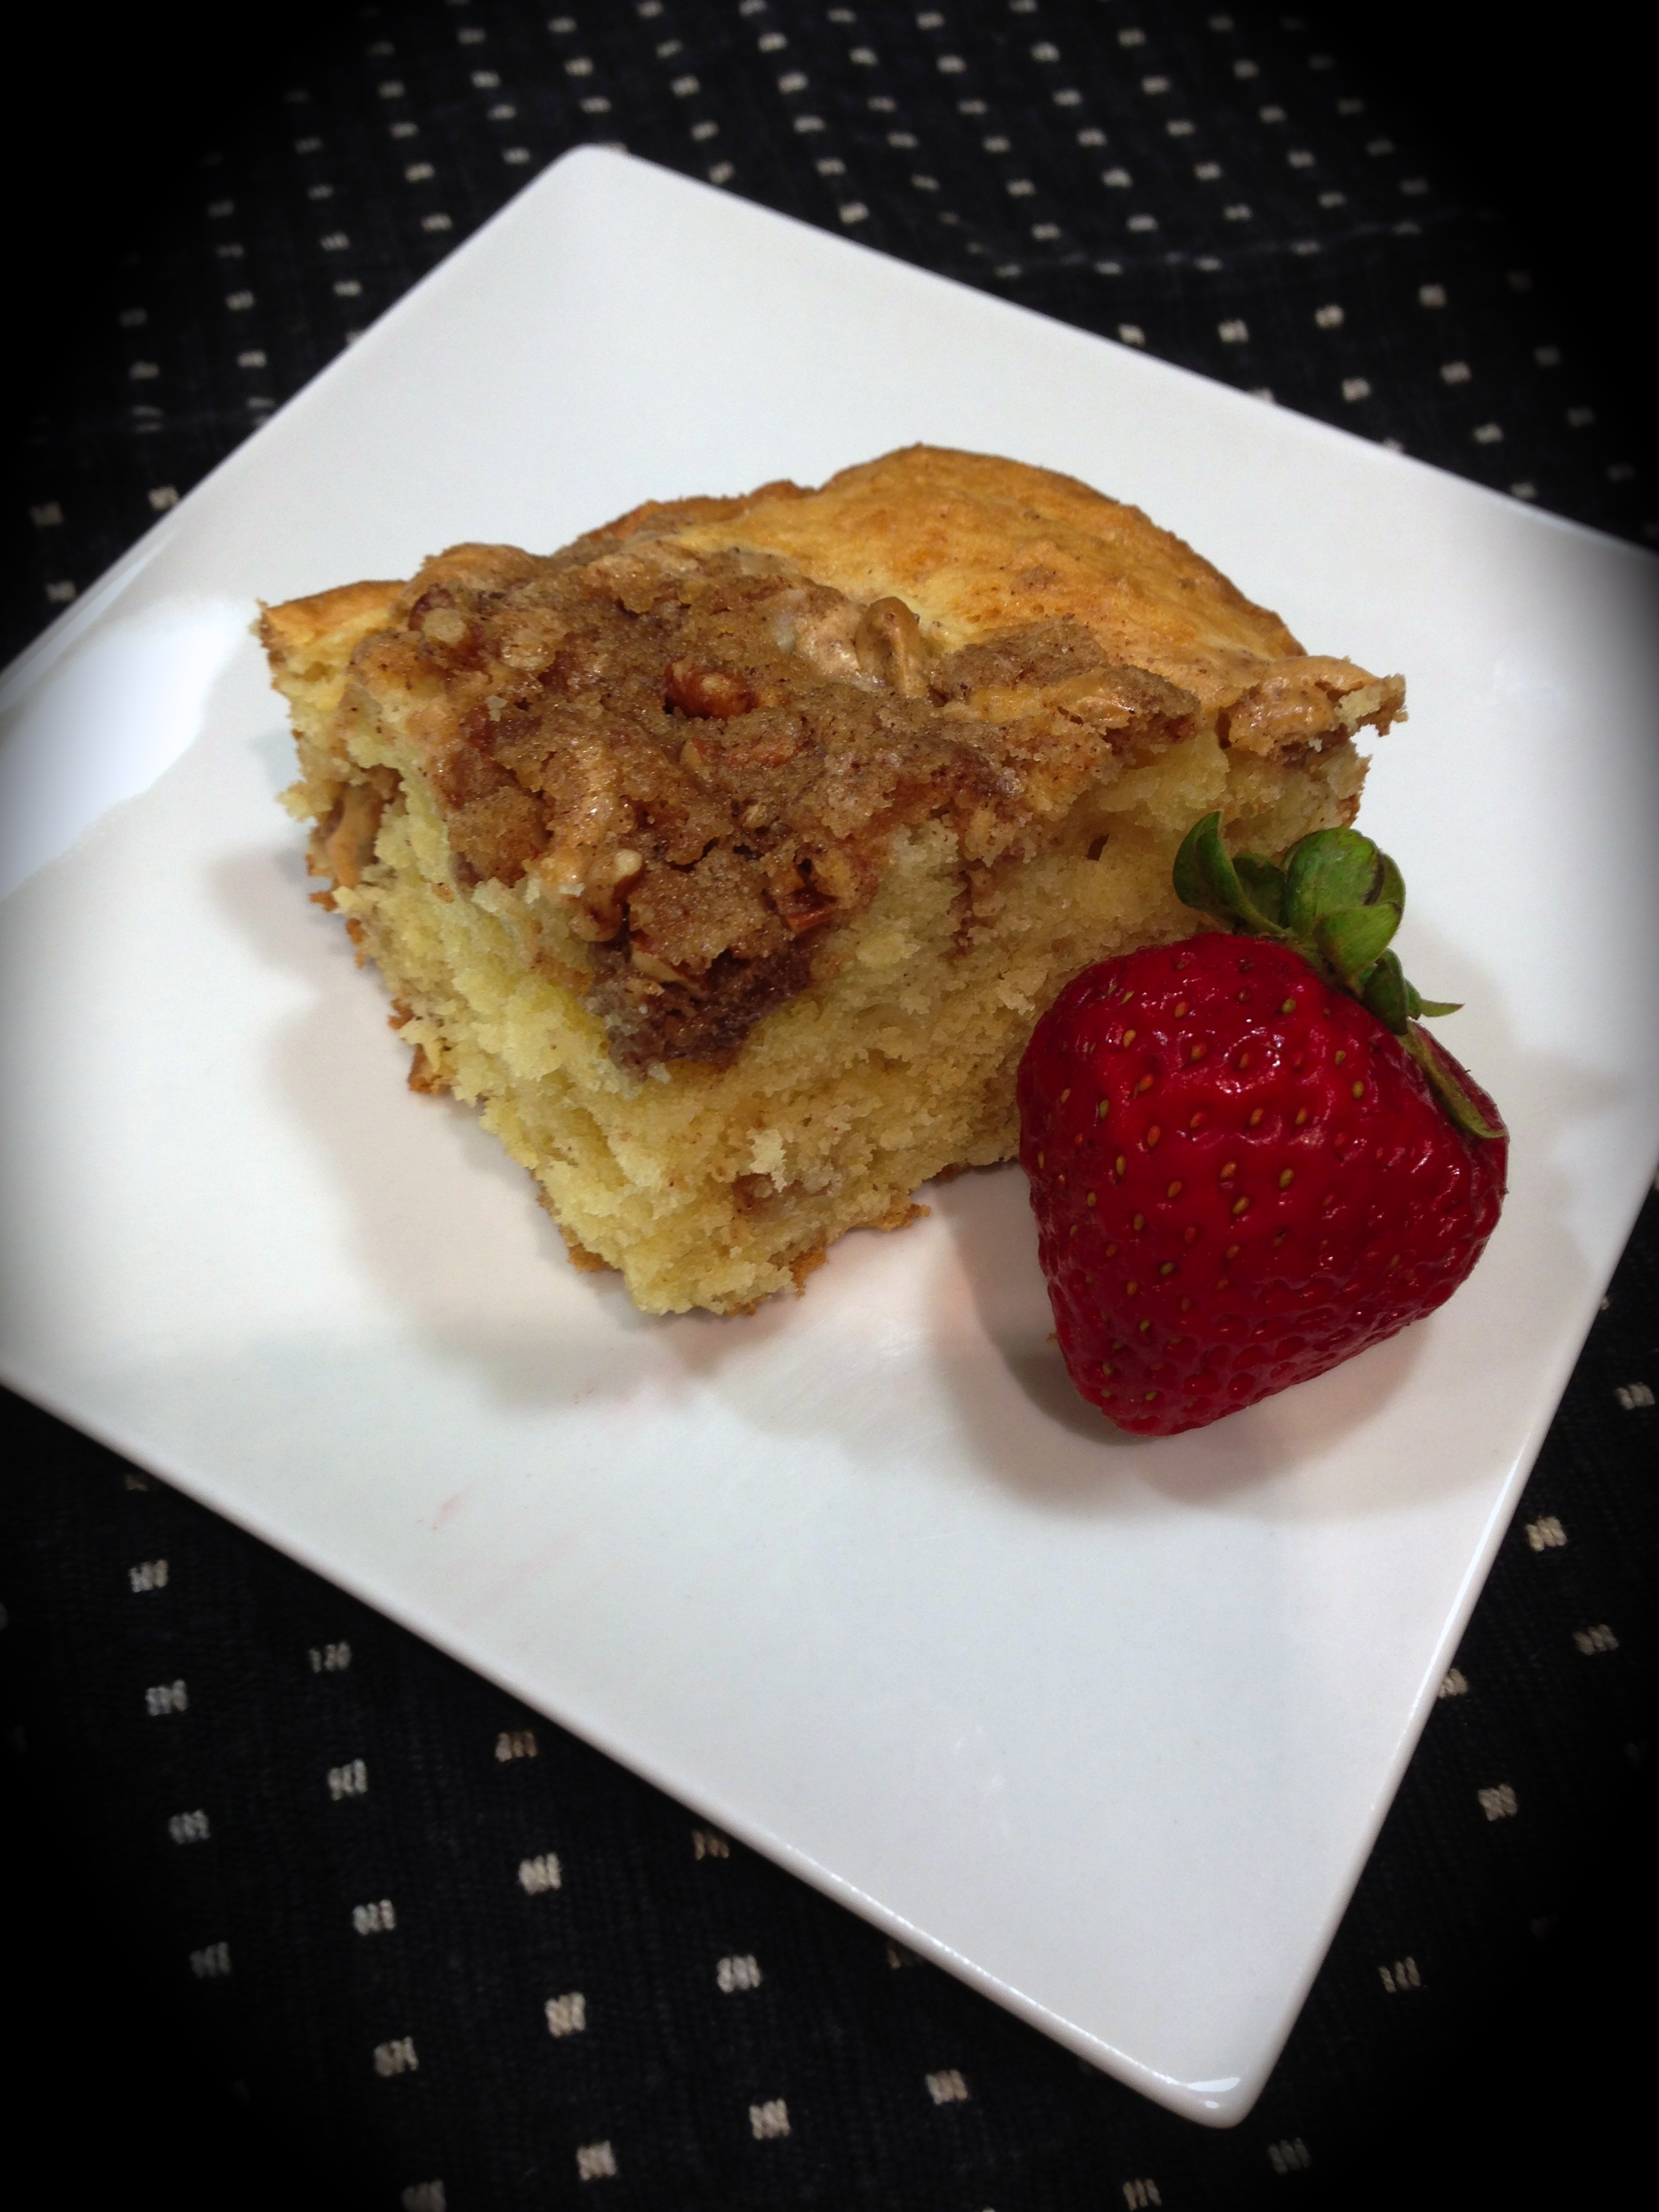
I have to say that I was more than pleasantly surprised at the outcome. What I liked the best about this coffee cake is the addition of the cream cheese layer. It provides a nice moistness to the cake and really kicks the cake over the top. So let’s talk blueberry cream cheese coffee cake…

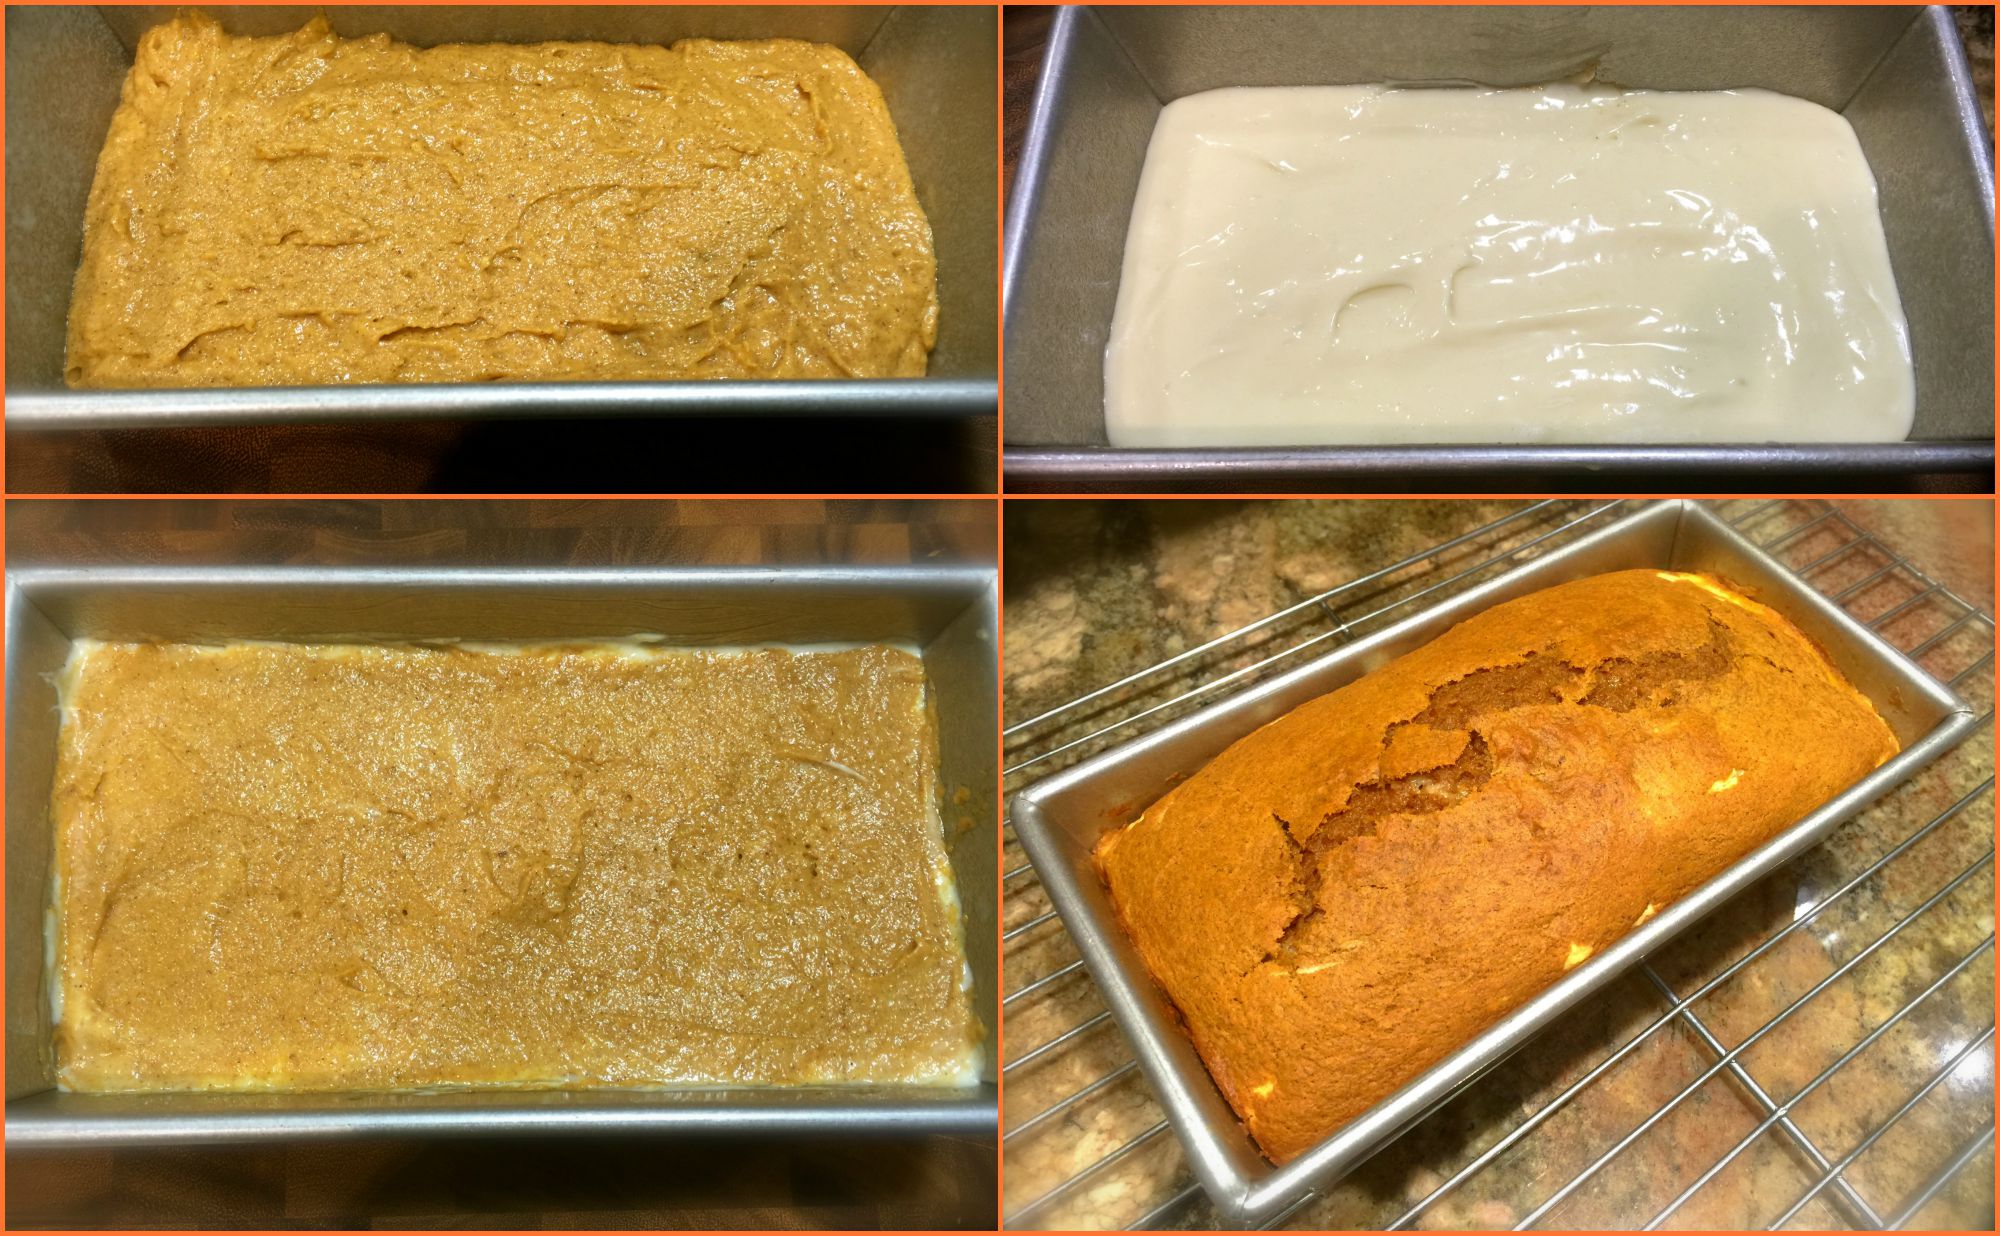
Lesson Learned 1 – This cake requires you to be organized: This cake has 3 separate processes, that being making the cream cheese filling, making the cake batter and making the streusel topping. It requires a little more equipment to get the coffee cake put together. I recommend you use a separate hand mixer and bowl to make the cream cheese filling. Then I recommend making the streusel topping so you are ready to top the cake once you’ve assembled the layers. Use your stand mixer to make the cake batter. Try to measure everything out for all three processes before you begin. That way the processes will run smoothly. It really isn’t a hard cake to make. It just has a few more steps than most.

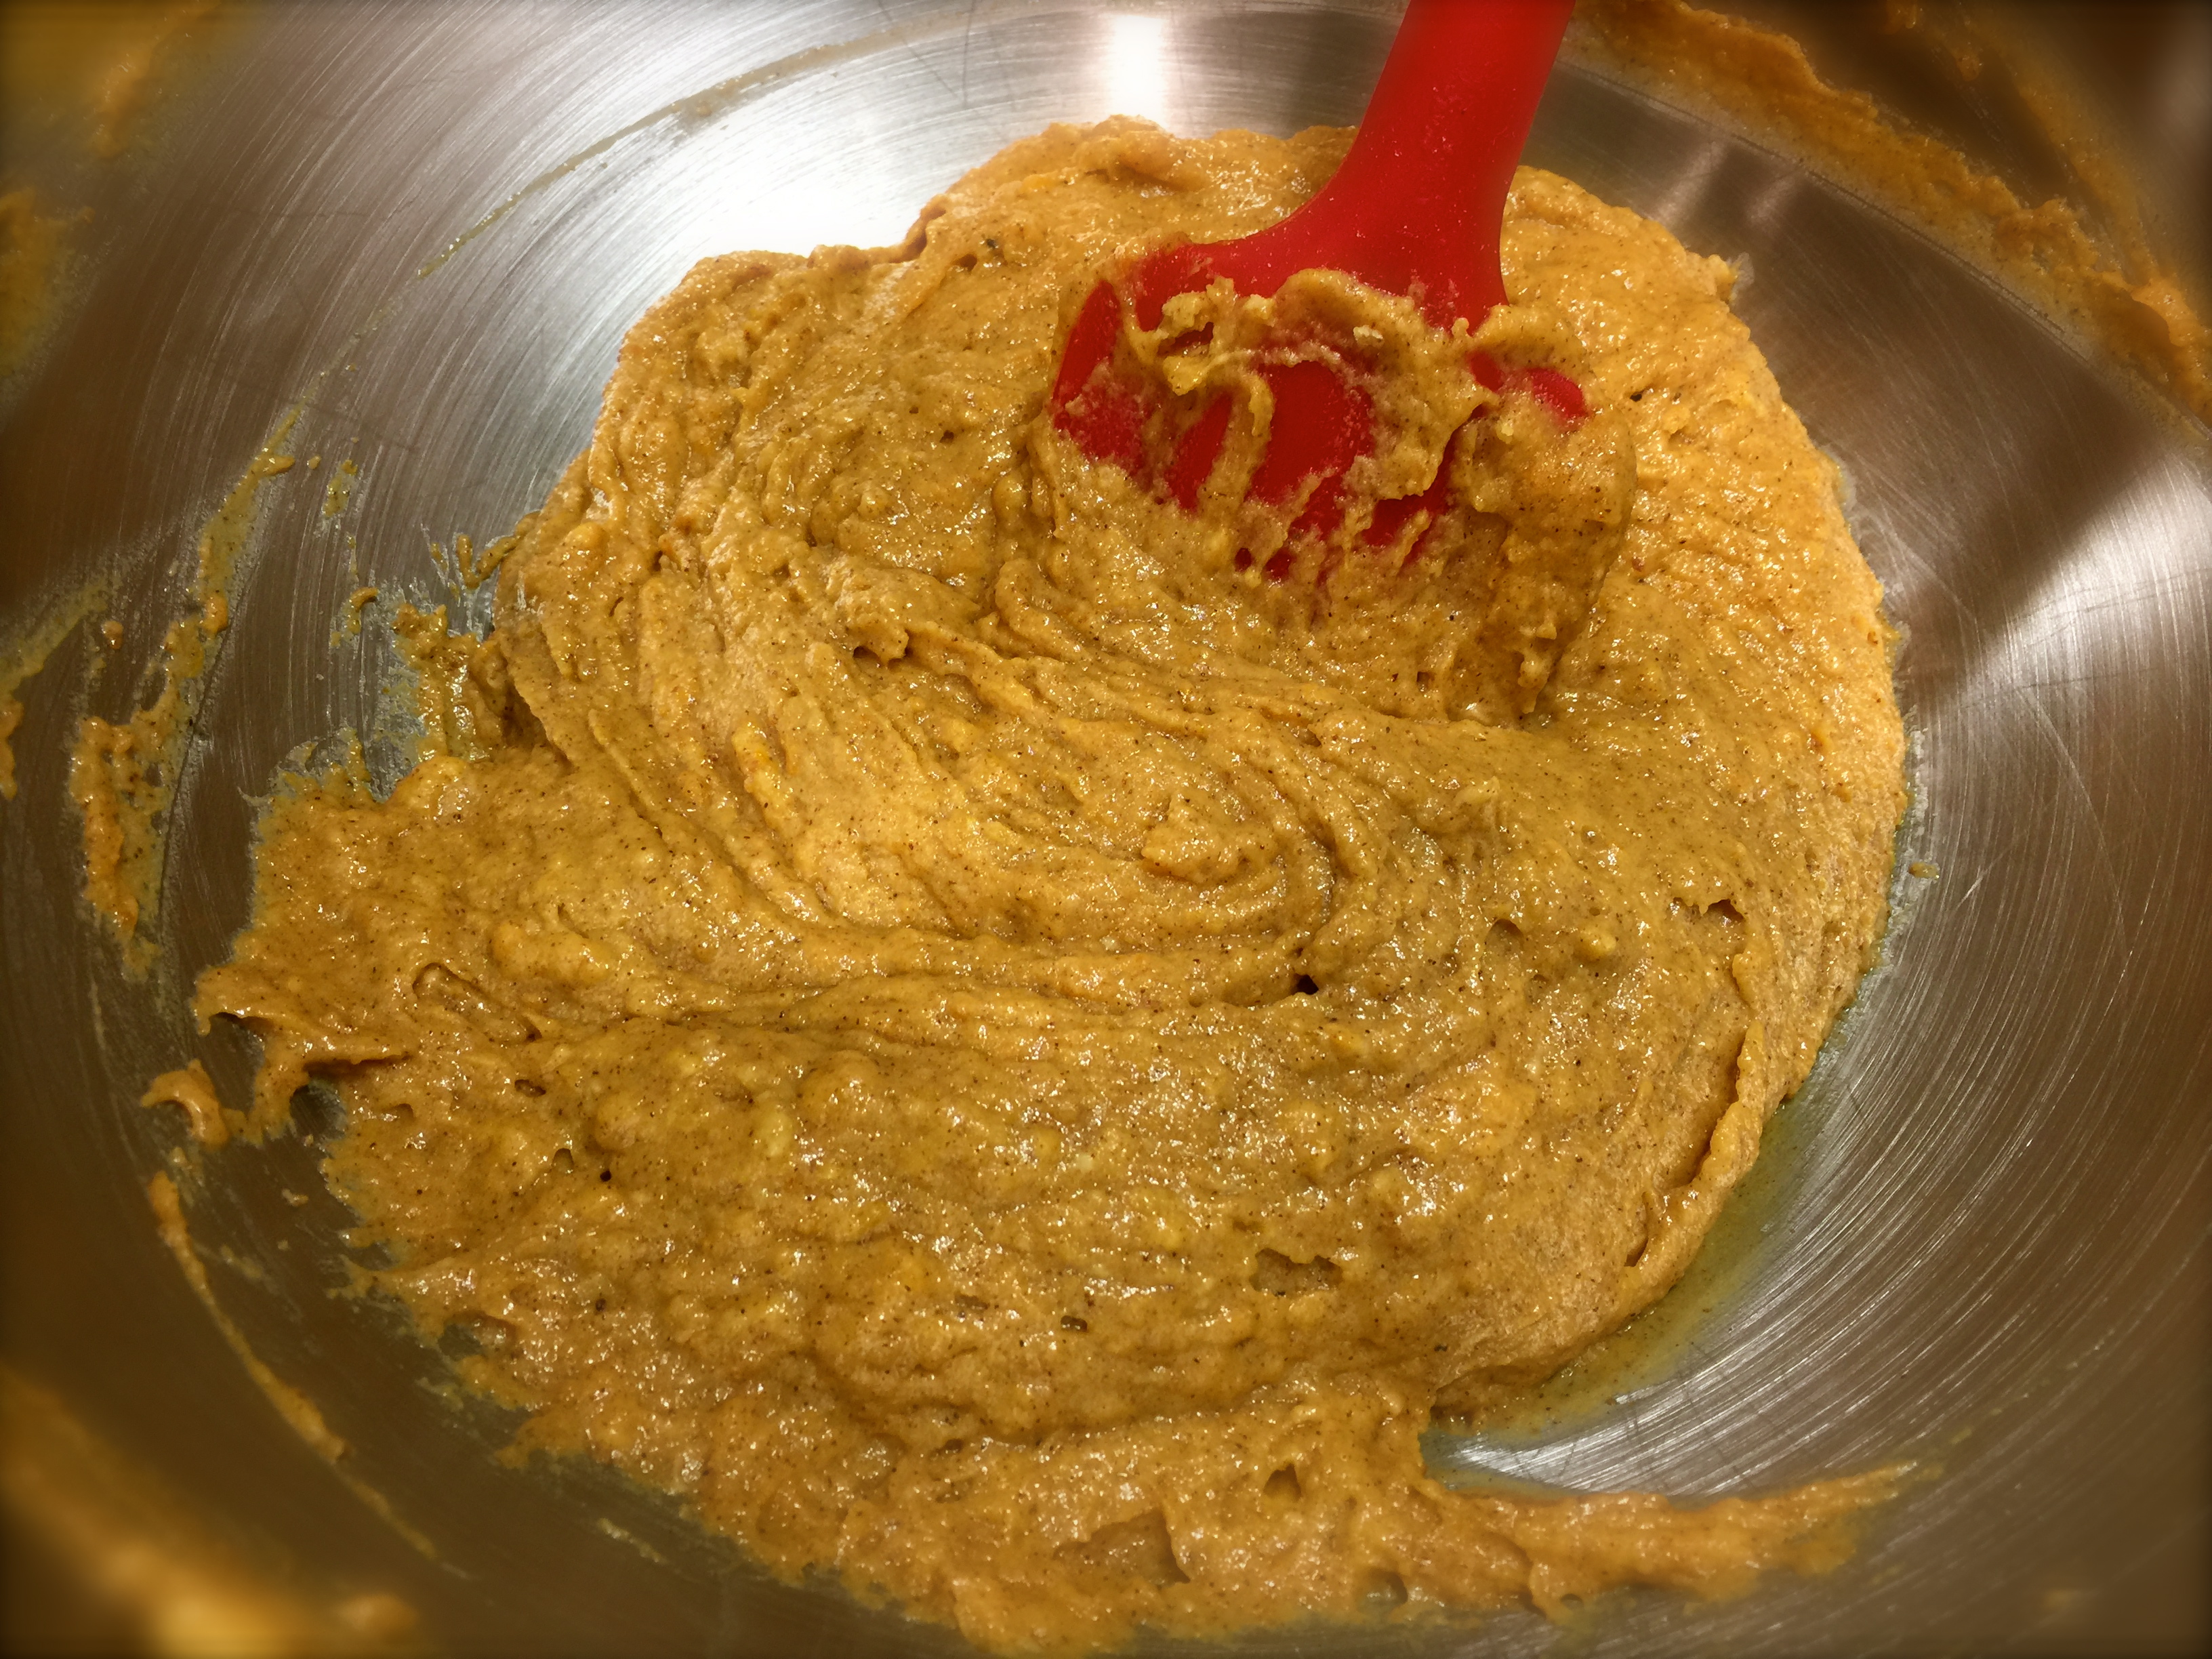
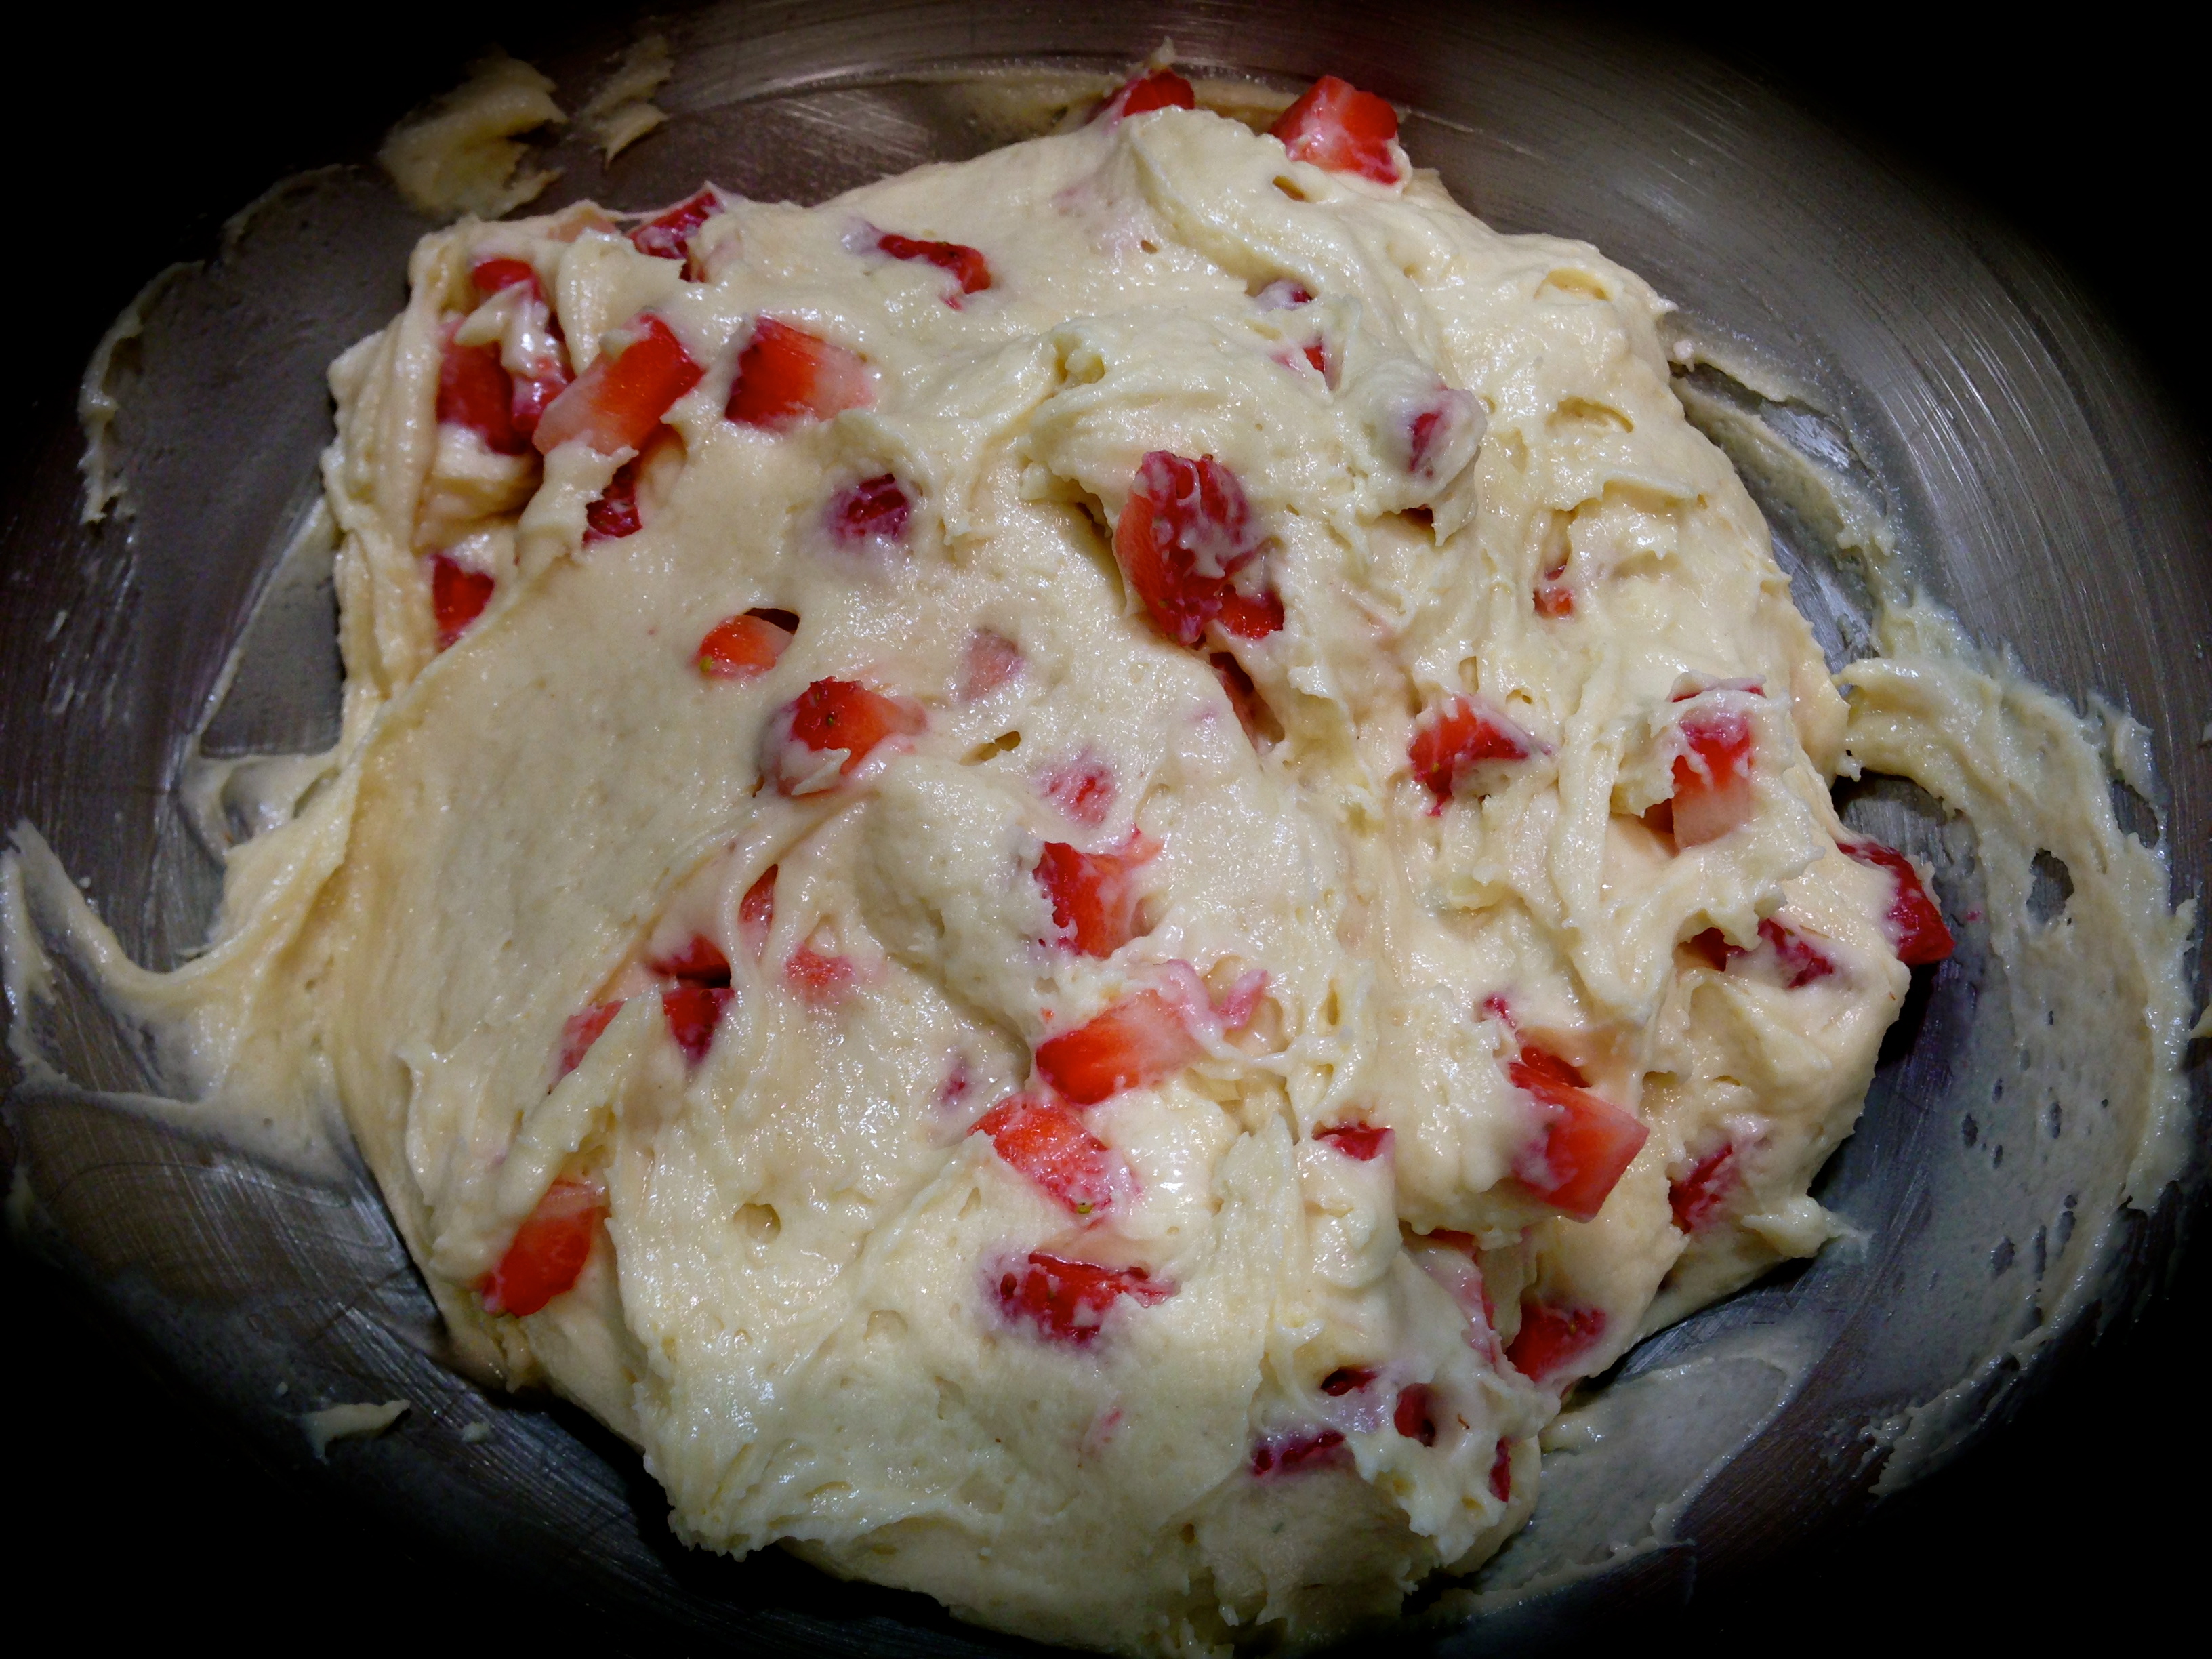
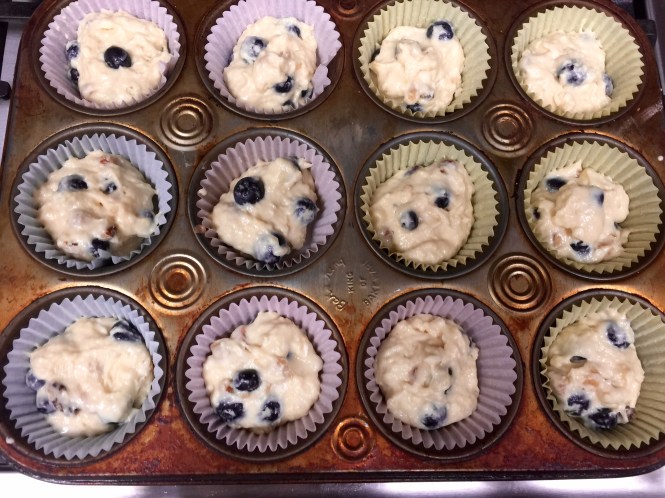
Lesson Learned 2 – The cake batter is thick: This batter creates a nicely dense cake that is balanced out by the cream cheese layer. But a dense batter can be a challenge to spread around when it comes time to put it in a pan. I’ve learned over time that when you work with a dense batter it’s better to drop it in the pan in spoonfuls all around the pan. That way when it comes time to spread the layer most of the batter is already in place and you can spread the batter around more easily.

Lesson Learned 3 – Vanilla bean paste versus vanilla extract: When I’m making a recipe where I want to really kick up the vanilla flavor I use vanilla bean paste. The paste has a syrup-like consistency and it measures out the same way as vanilla extract. Vanilla bean paste is richer and more flavorful. It is also much more expensive. But if you can afford it I highly recommend using it. But only use it for special recipes. Using it in things like cookies doesn’t really make a difference. But using it in something like this recipe or a creme brulee really enhances the flavor of the dish.

Lesson Learned 4 – Arranging the blueberries in the layers: This cake requires two blueberry layers, one on top of the cake batter layer and one on top of the cream cheese layer. When putting in both layers be careful to not let any of the blueberries touch the sides of your spring form pan. If you do you’ll find it difficult to clean the sides of the pan after baking. If you don’t you can still clean the sides of your pan, it’s just a little more difficult even though the pan has been greased.

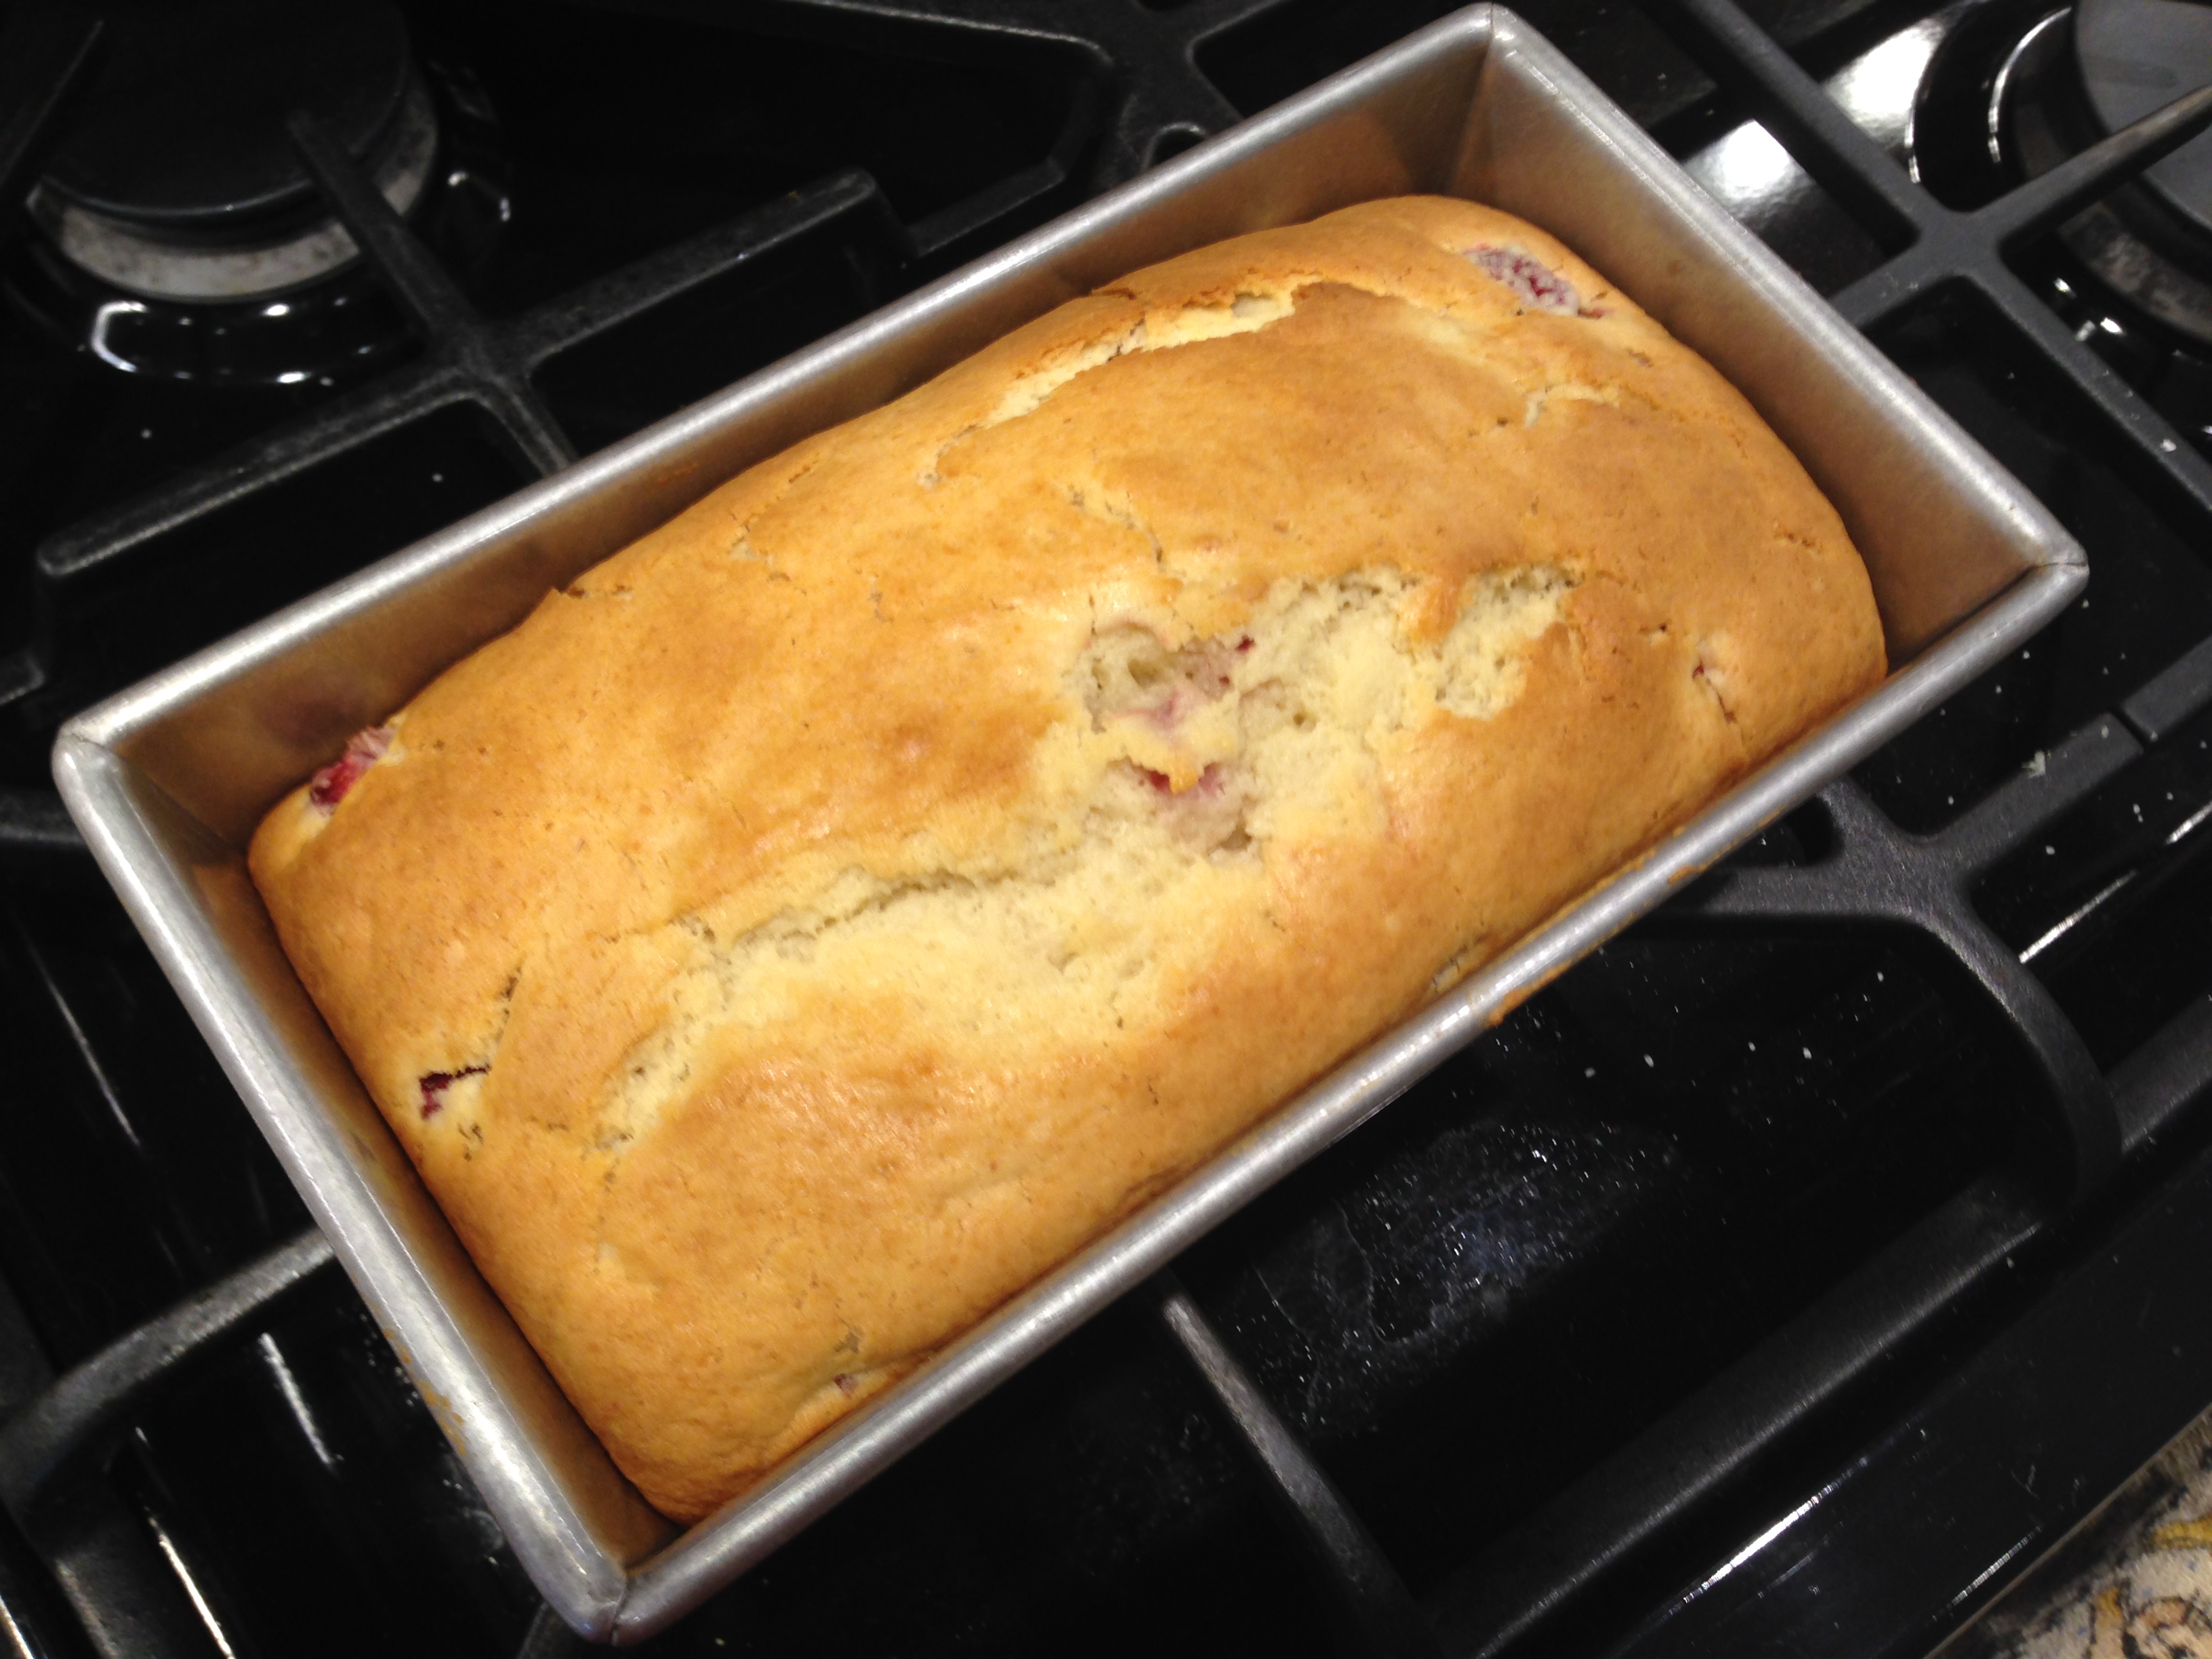
Lesson Learned 5 – Depending upon your oven, you may have to cook the cake longer than the allotted time: Now as you know I live in high altitude so everything tends to have to cook for longer periods of time and/or higher temperatures. This recipe calls for the cake to cook for 45 minutes. I had to cook mine for 1 hour. Just keep an eye on it after 45 minutes and you should be fine.

Lesson Learned 6 – Someone asked me if you could substitute raspberries for blueberries: I don’t see why not. Raspberries tend to cook just like blueberries. They release their juices in a similar way. So try it with raspberries. I bet it will be delicious.

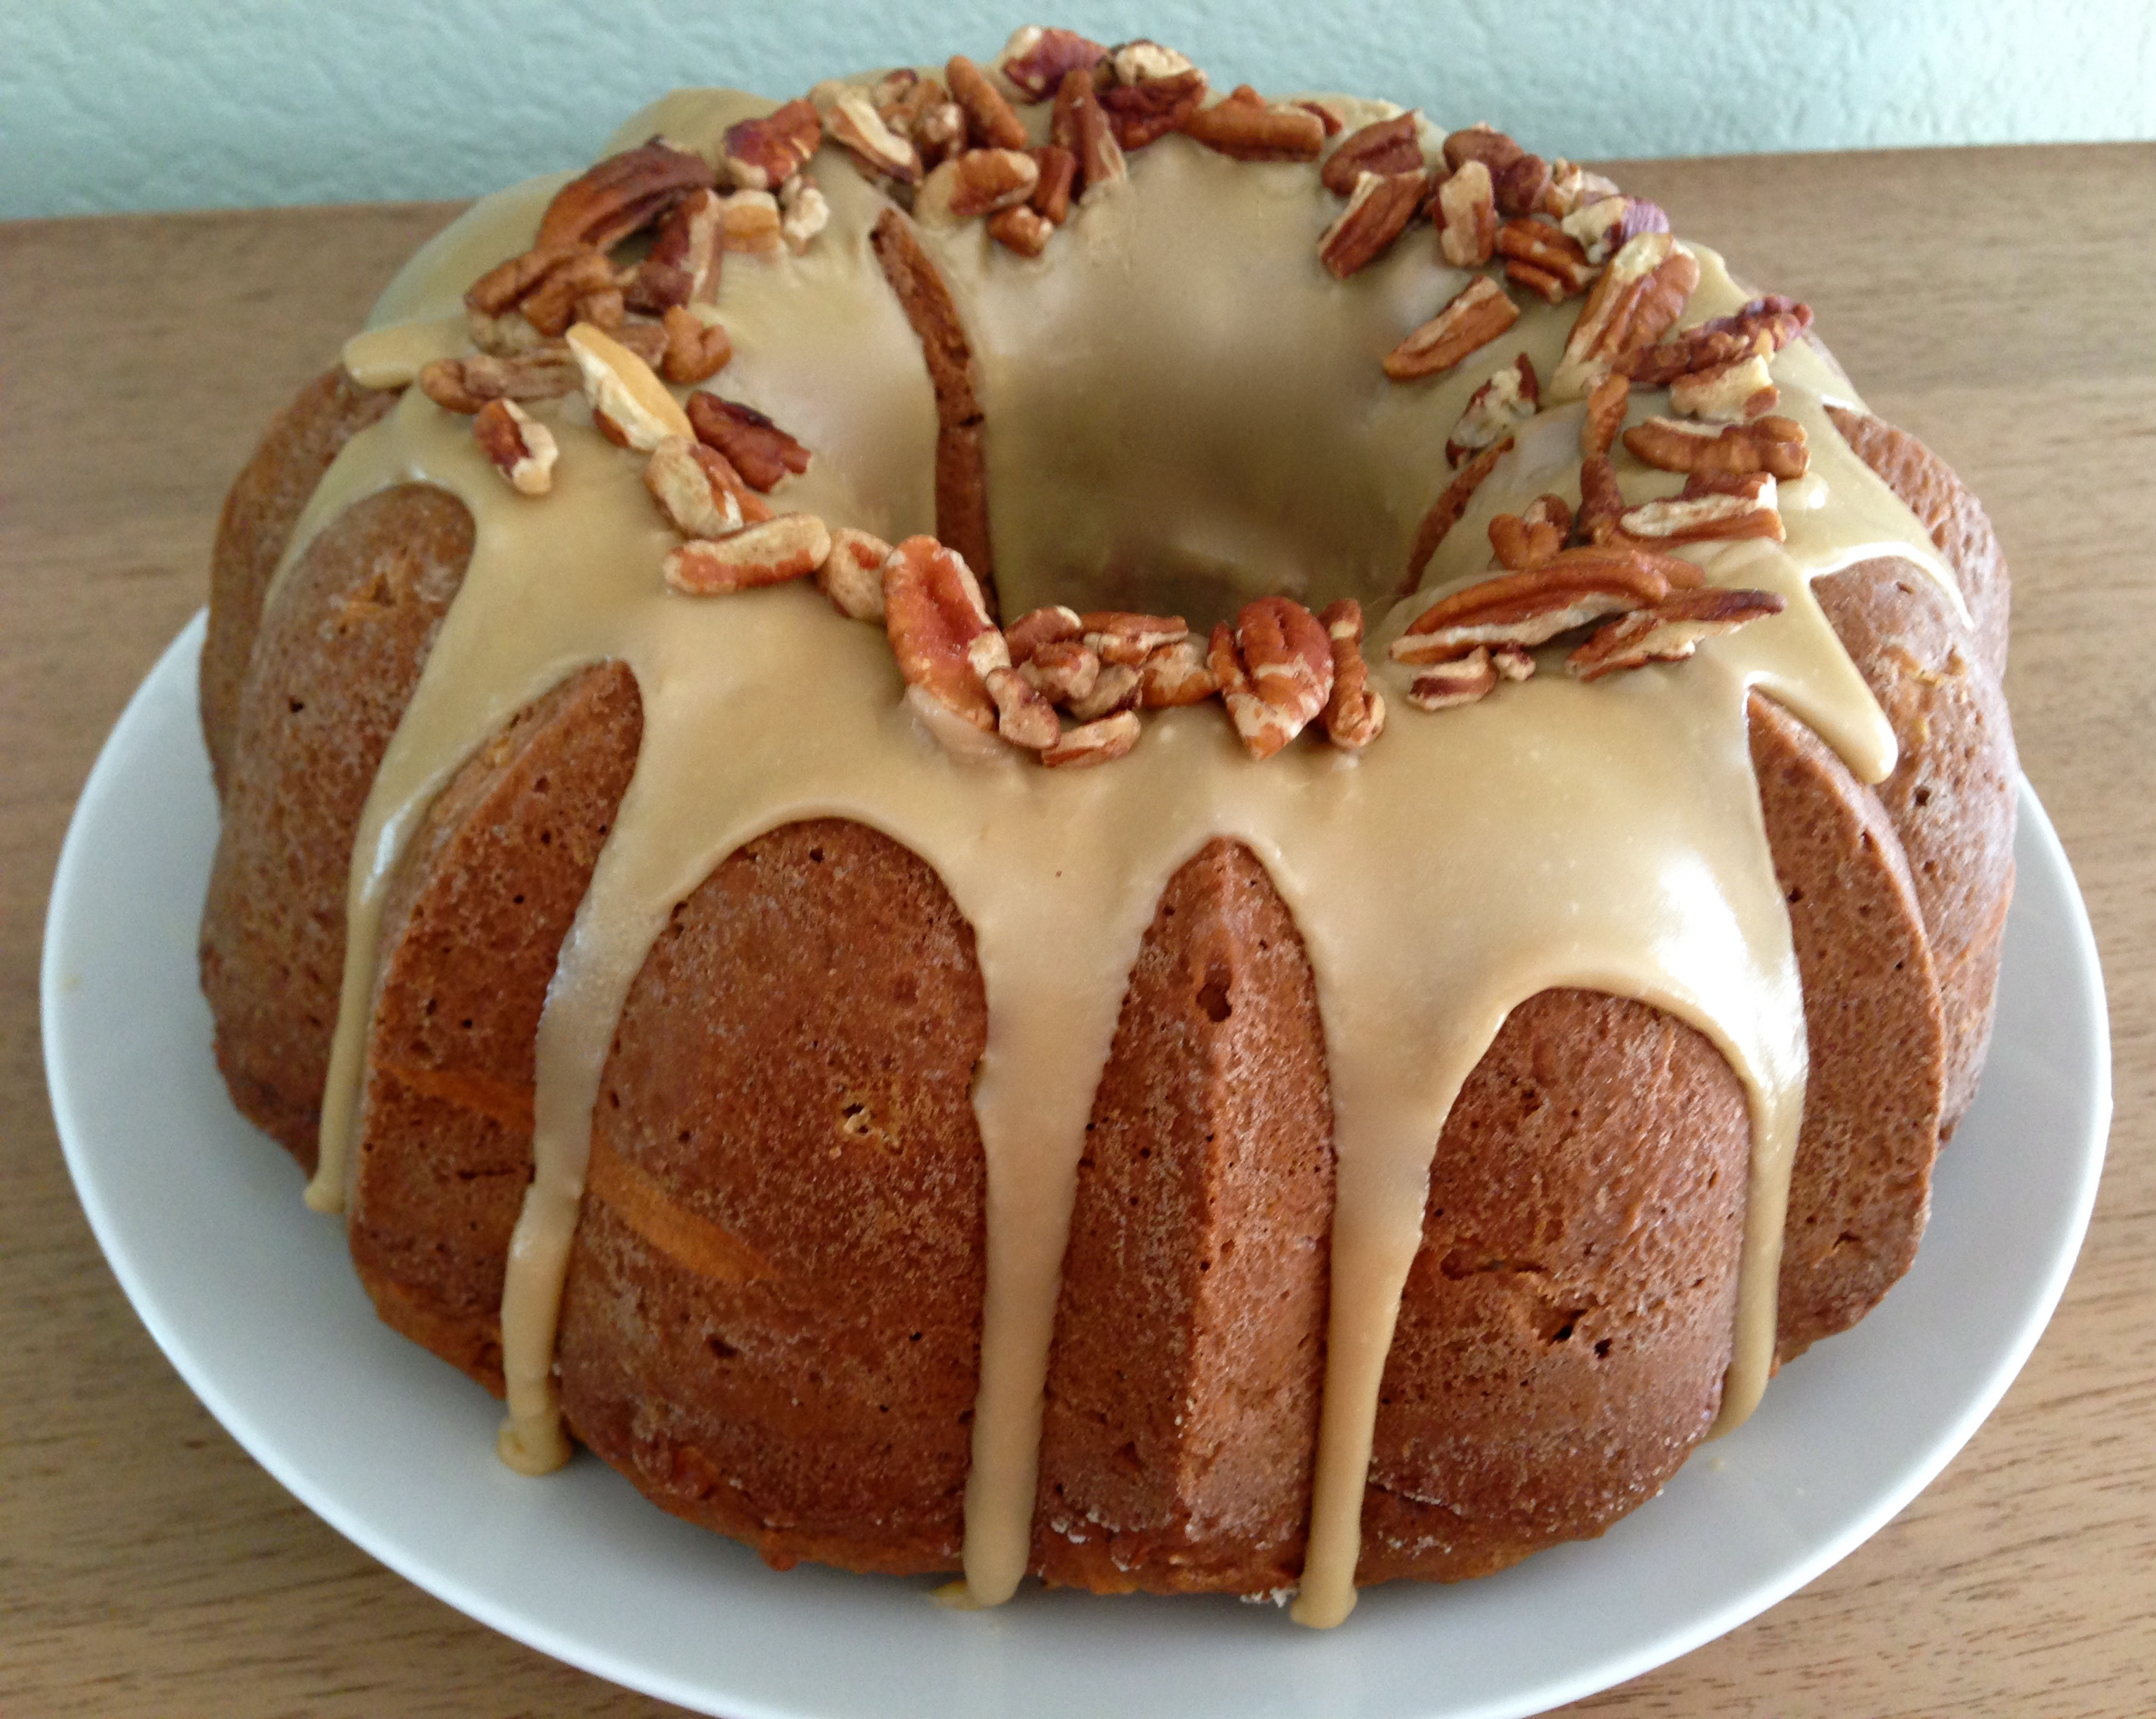
And that’s it. I guarantee you will love this cake. Try it and let me know what you think…

Cake Layer

First Layer Of Blueberries
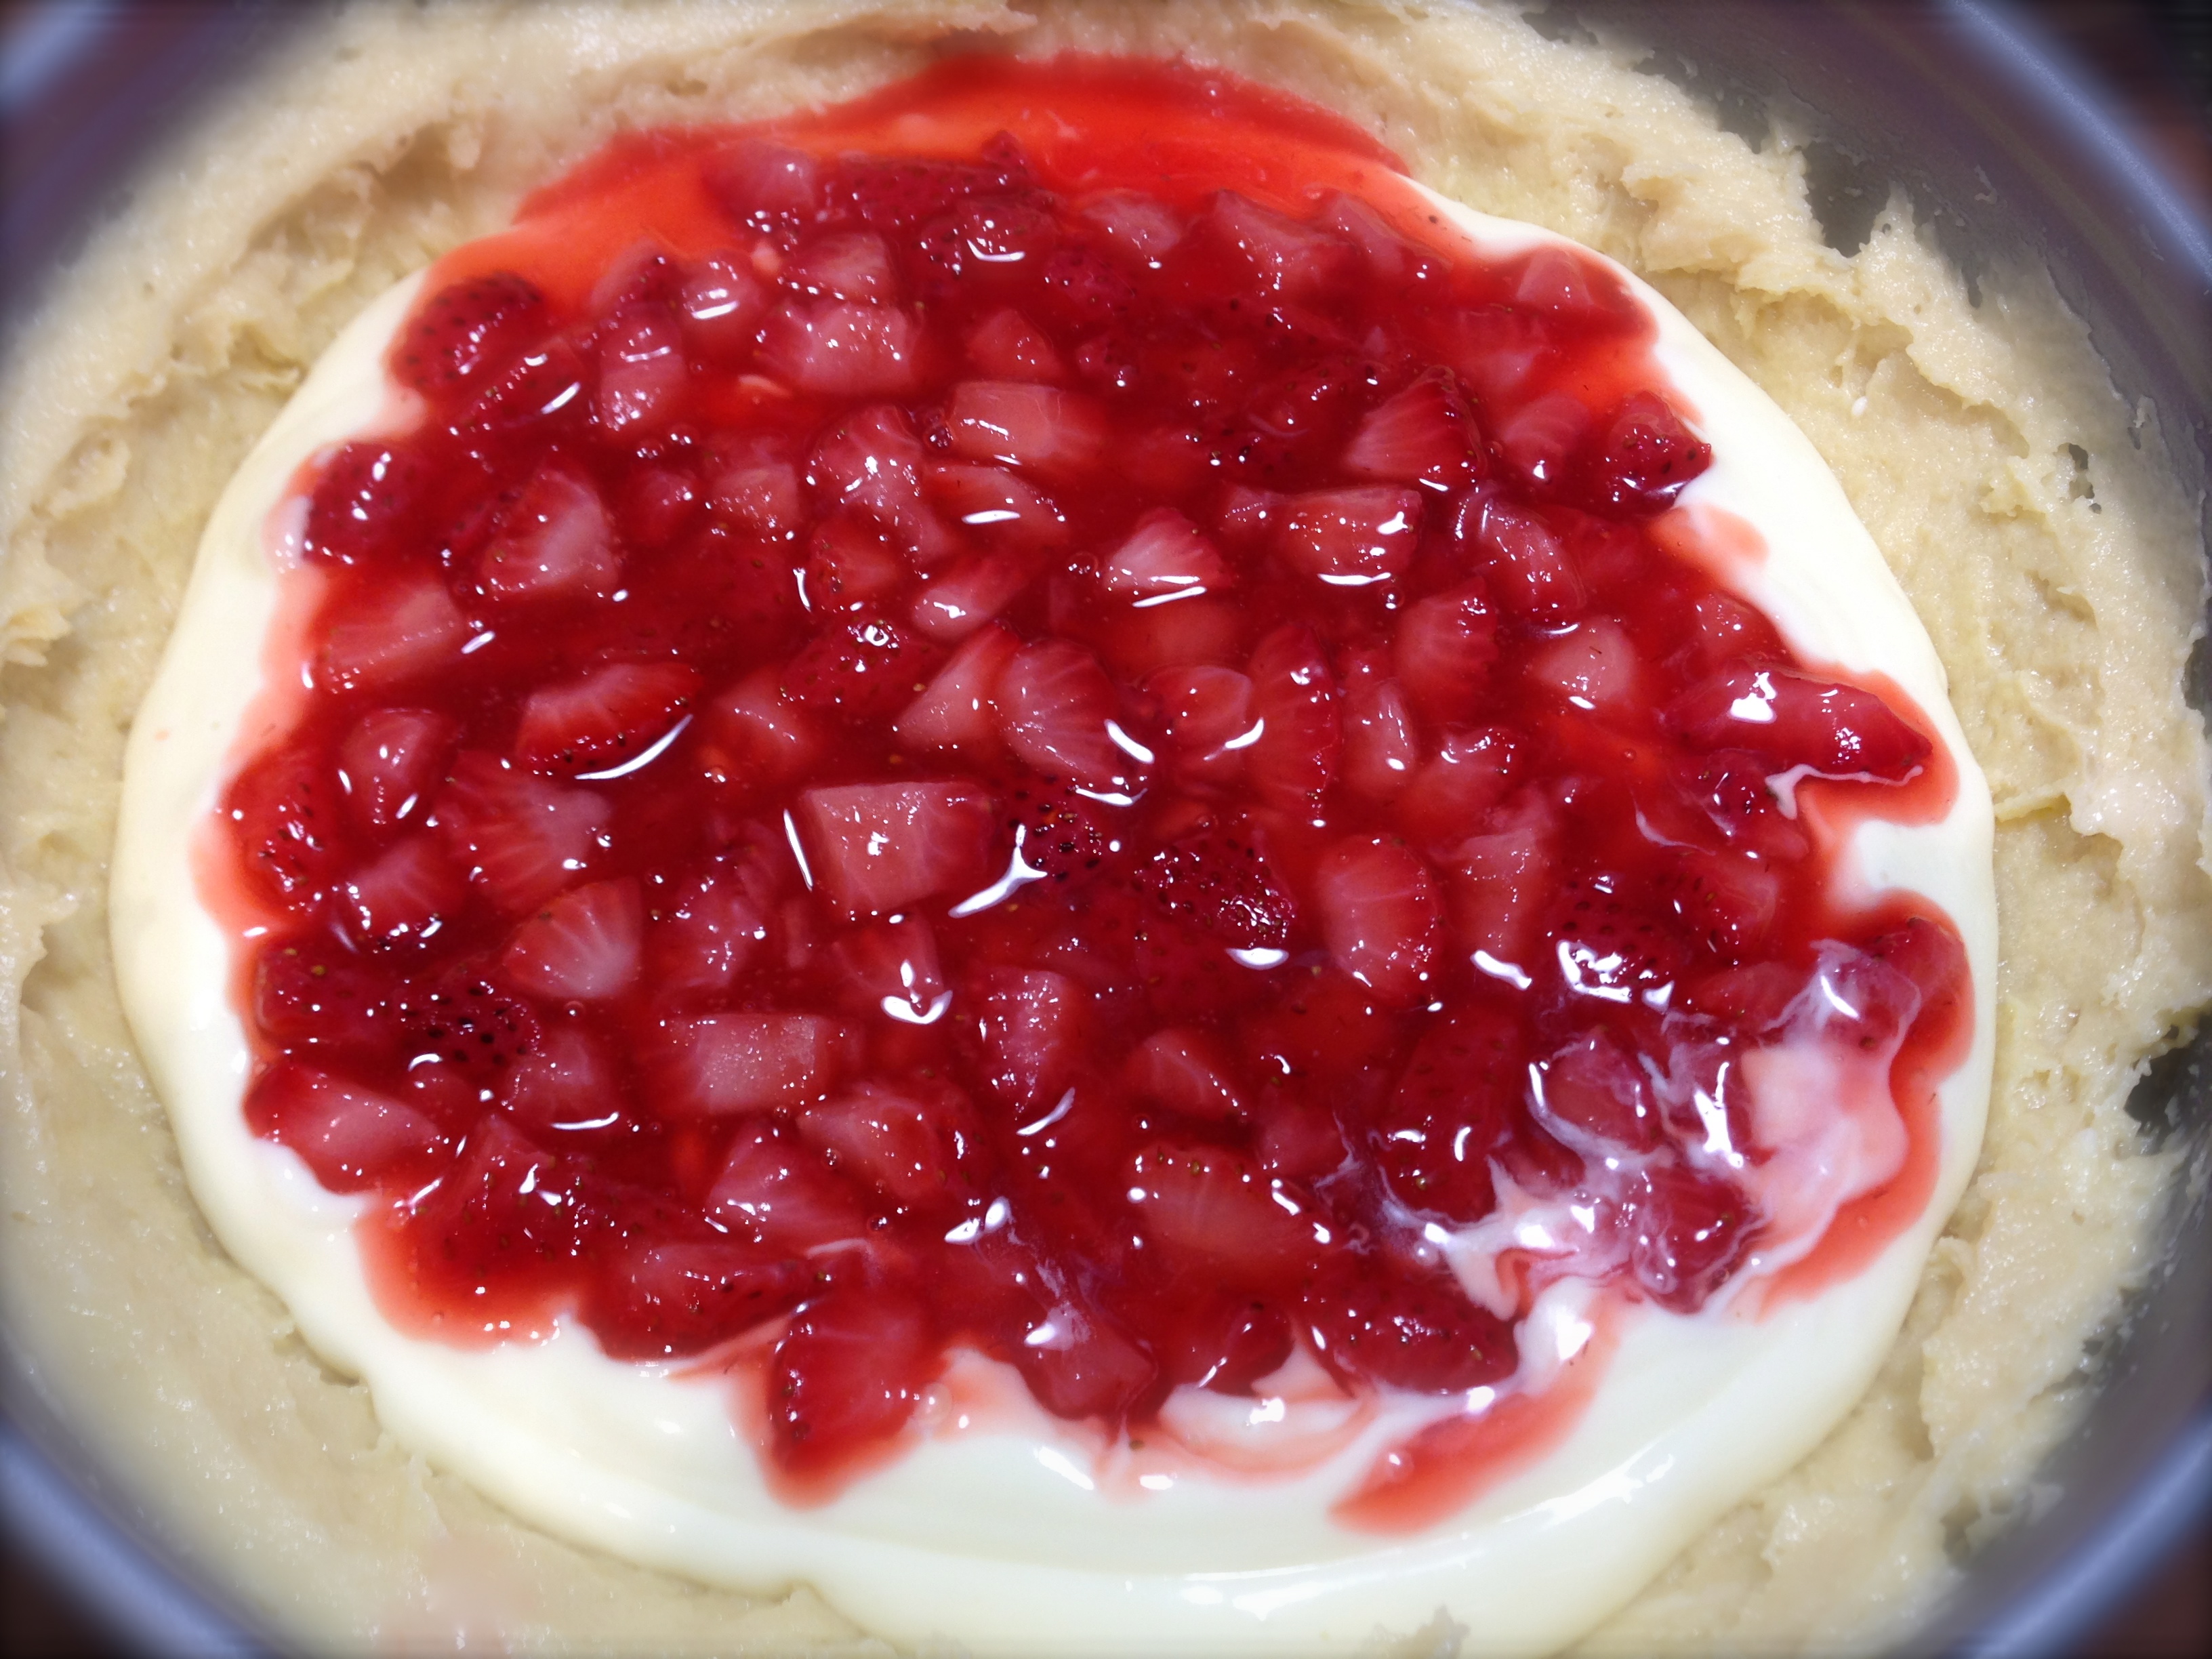
Cream Cheese Layer

Second Layer of Blueberries

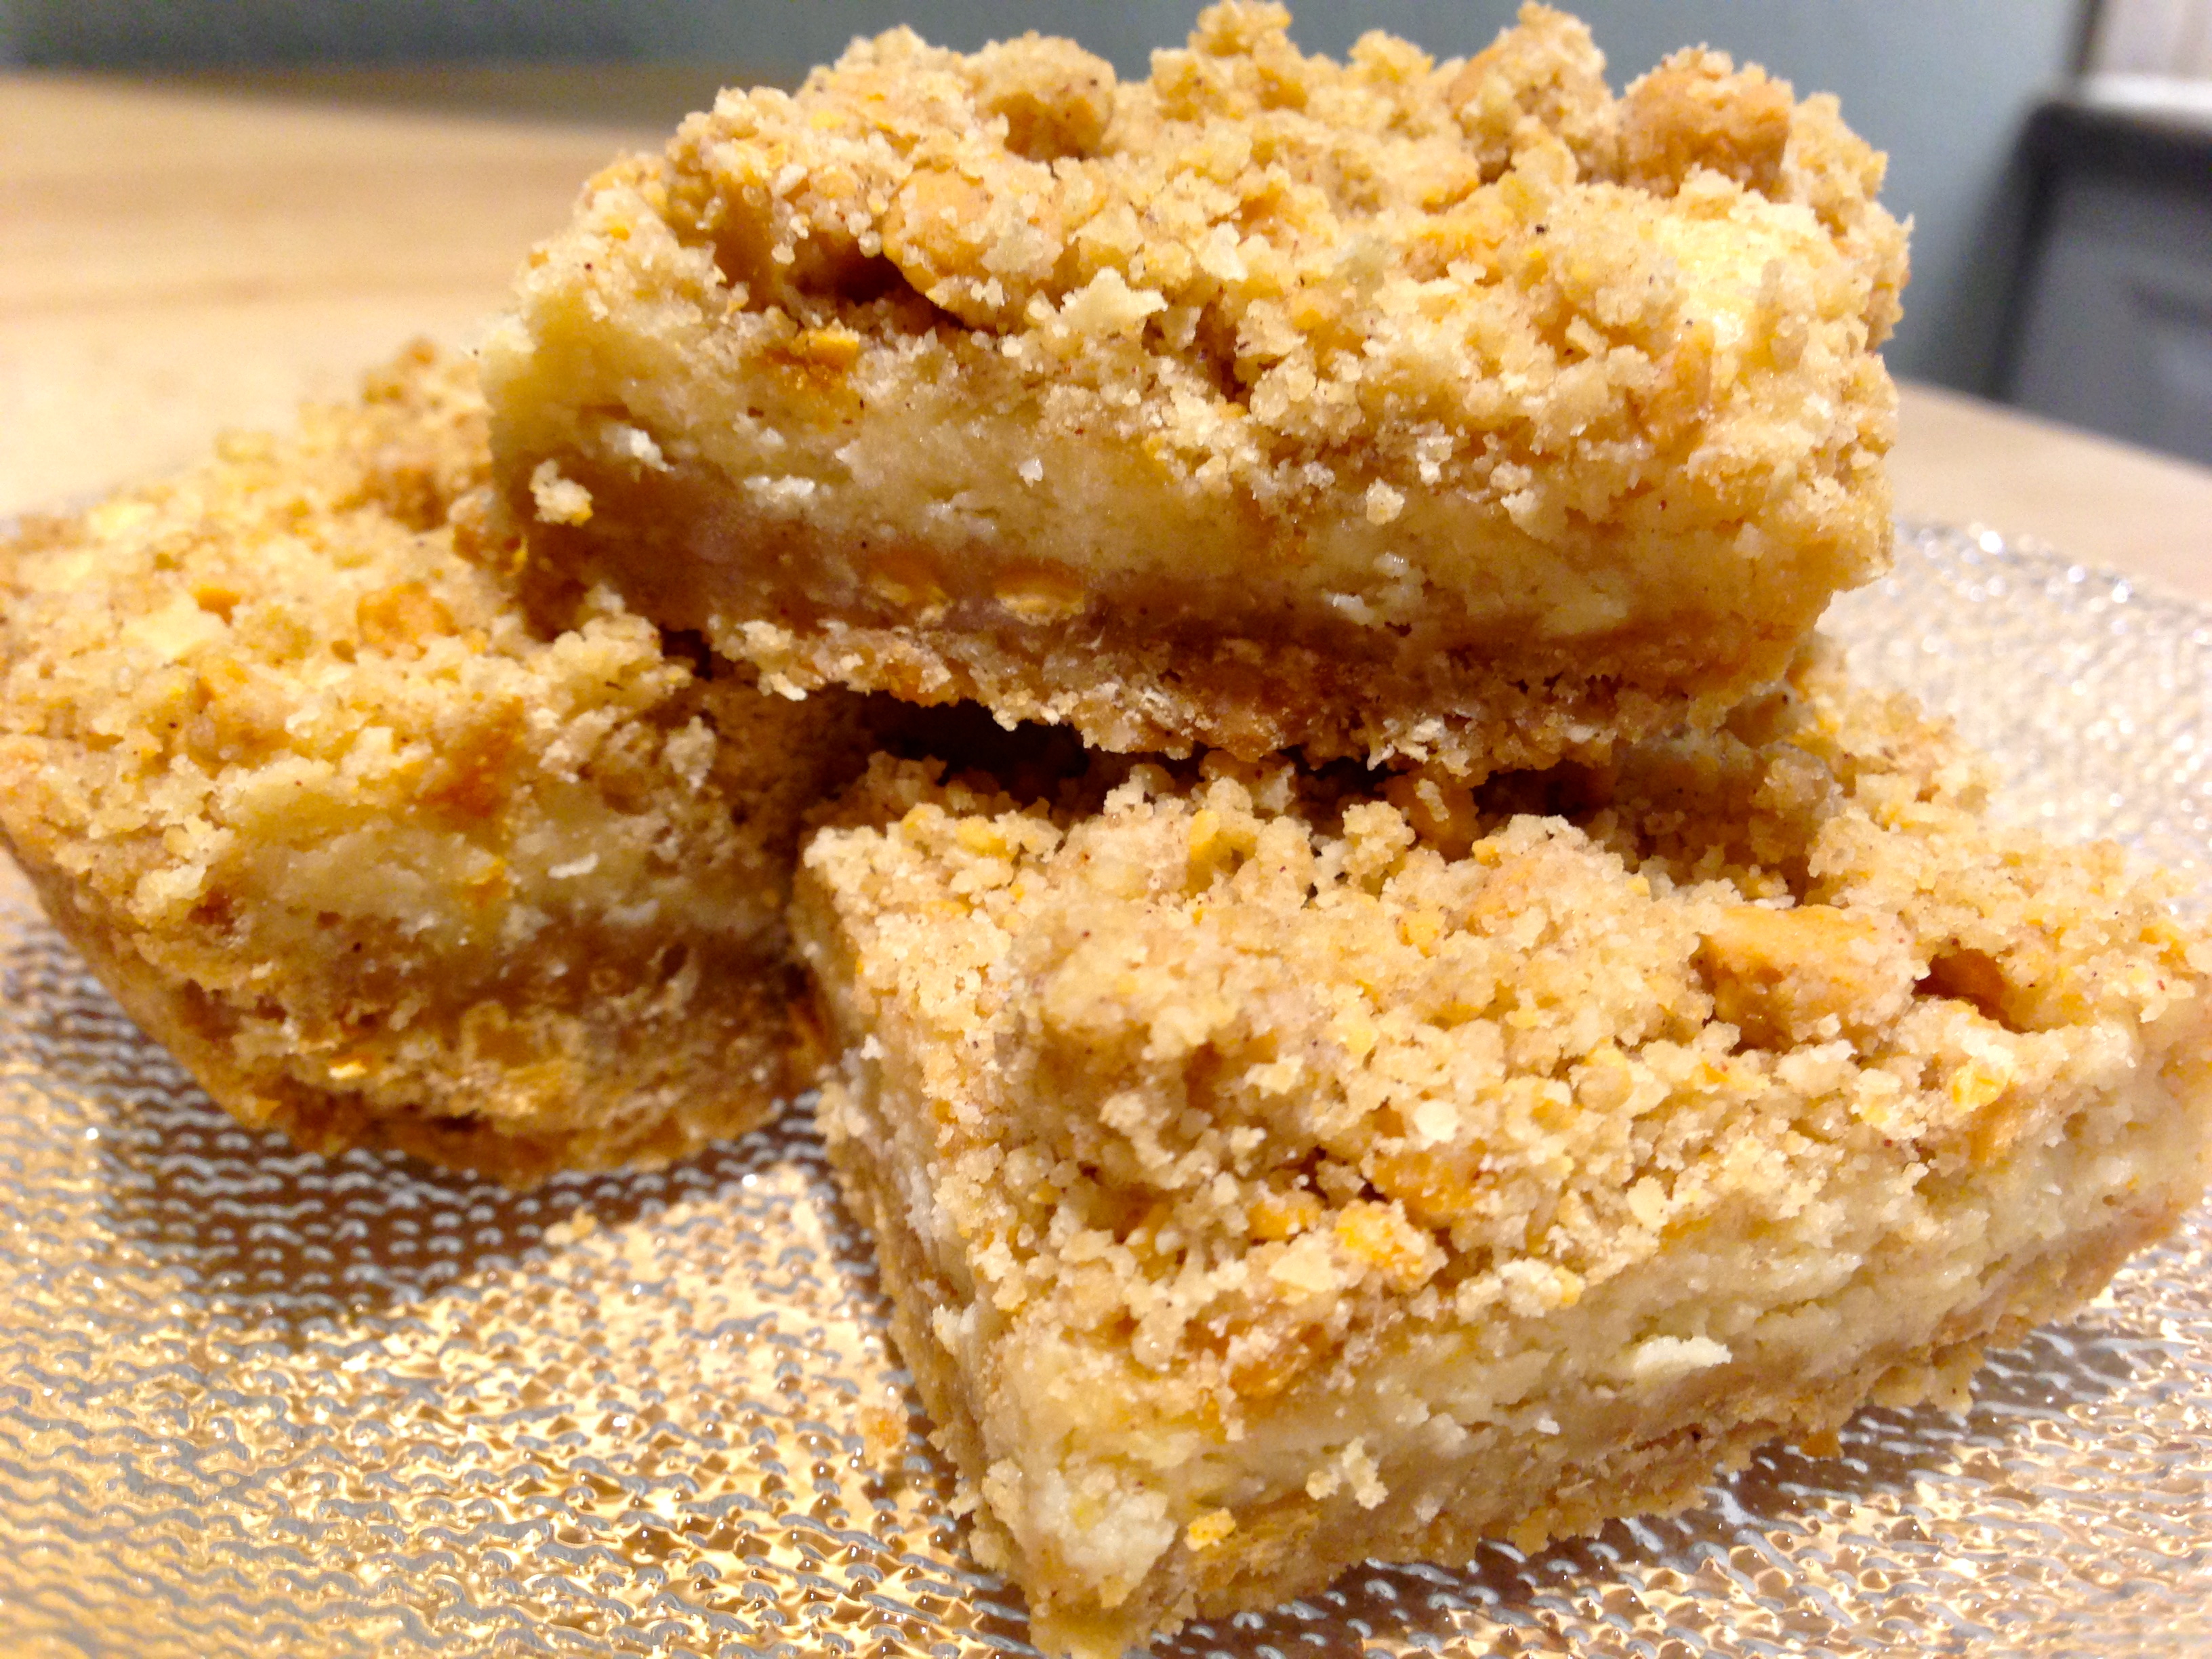
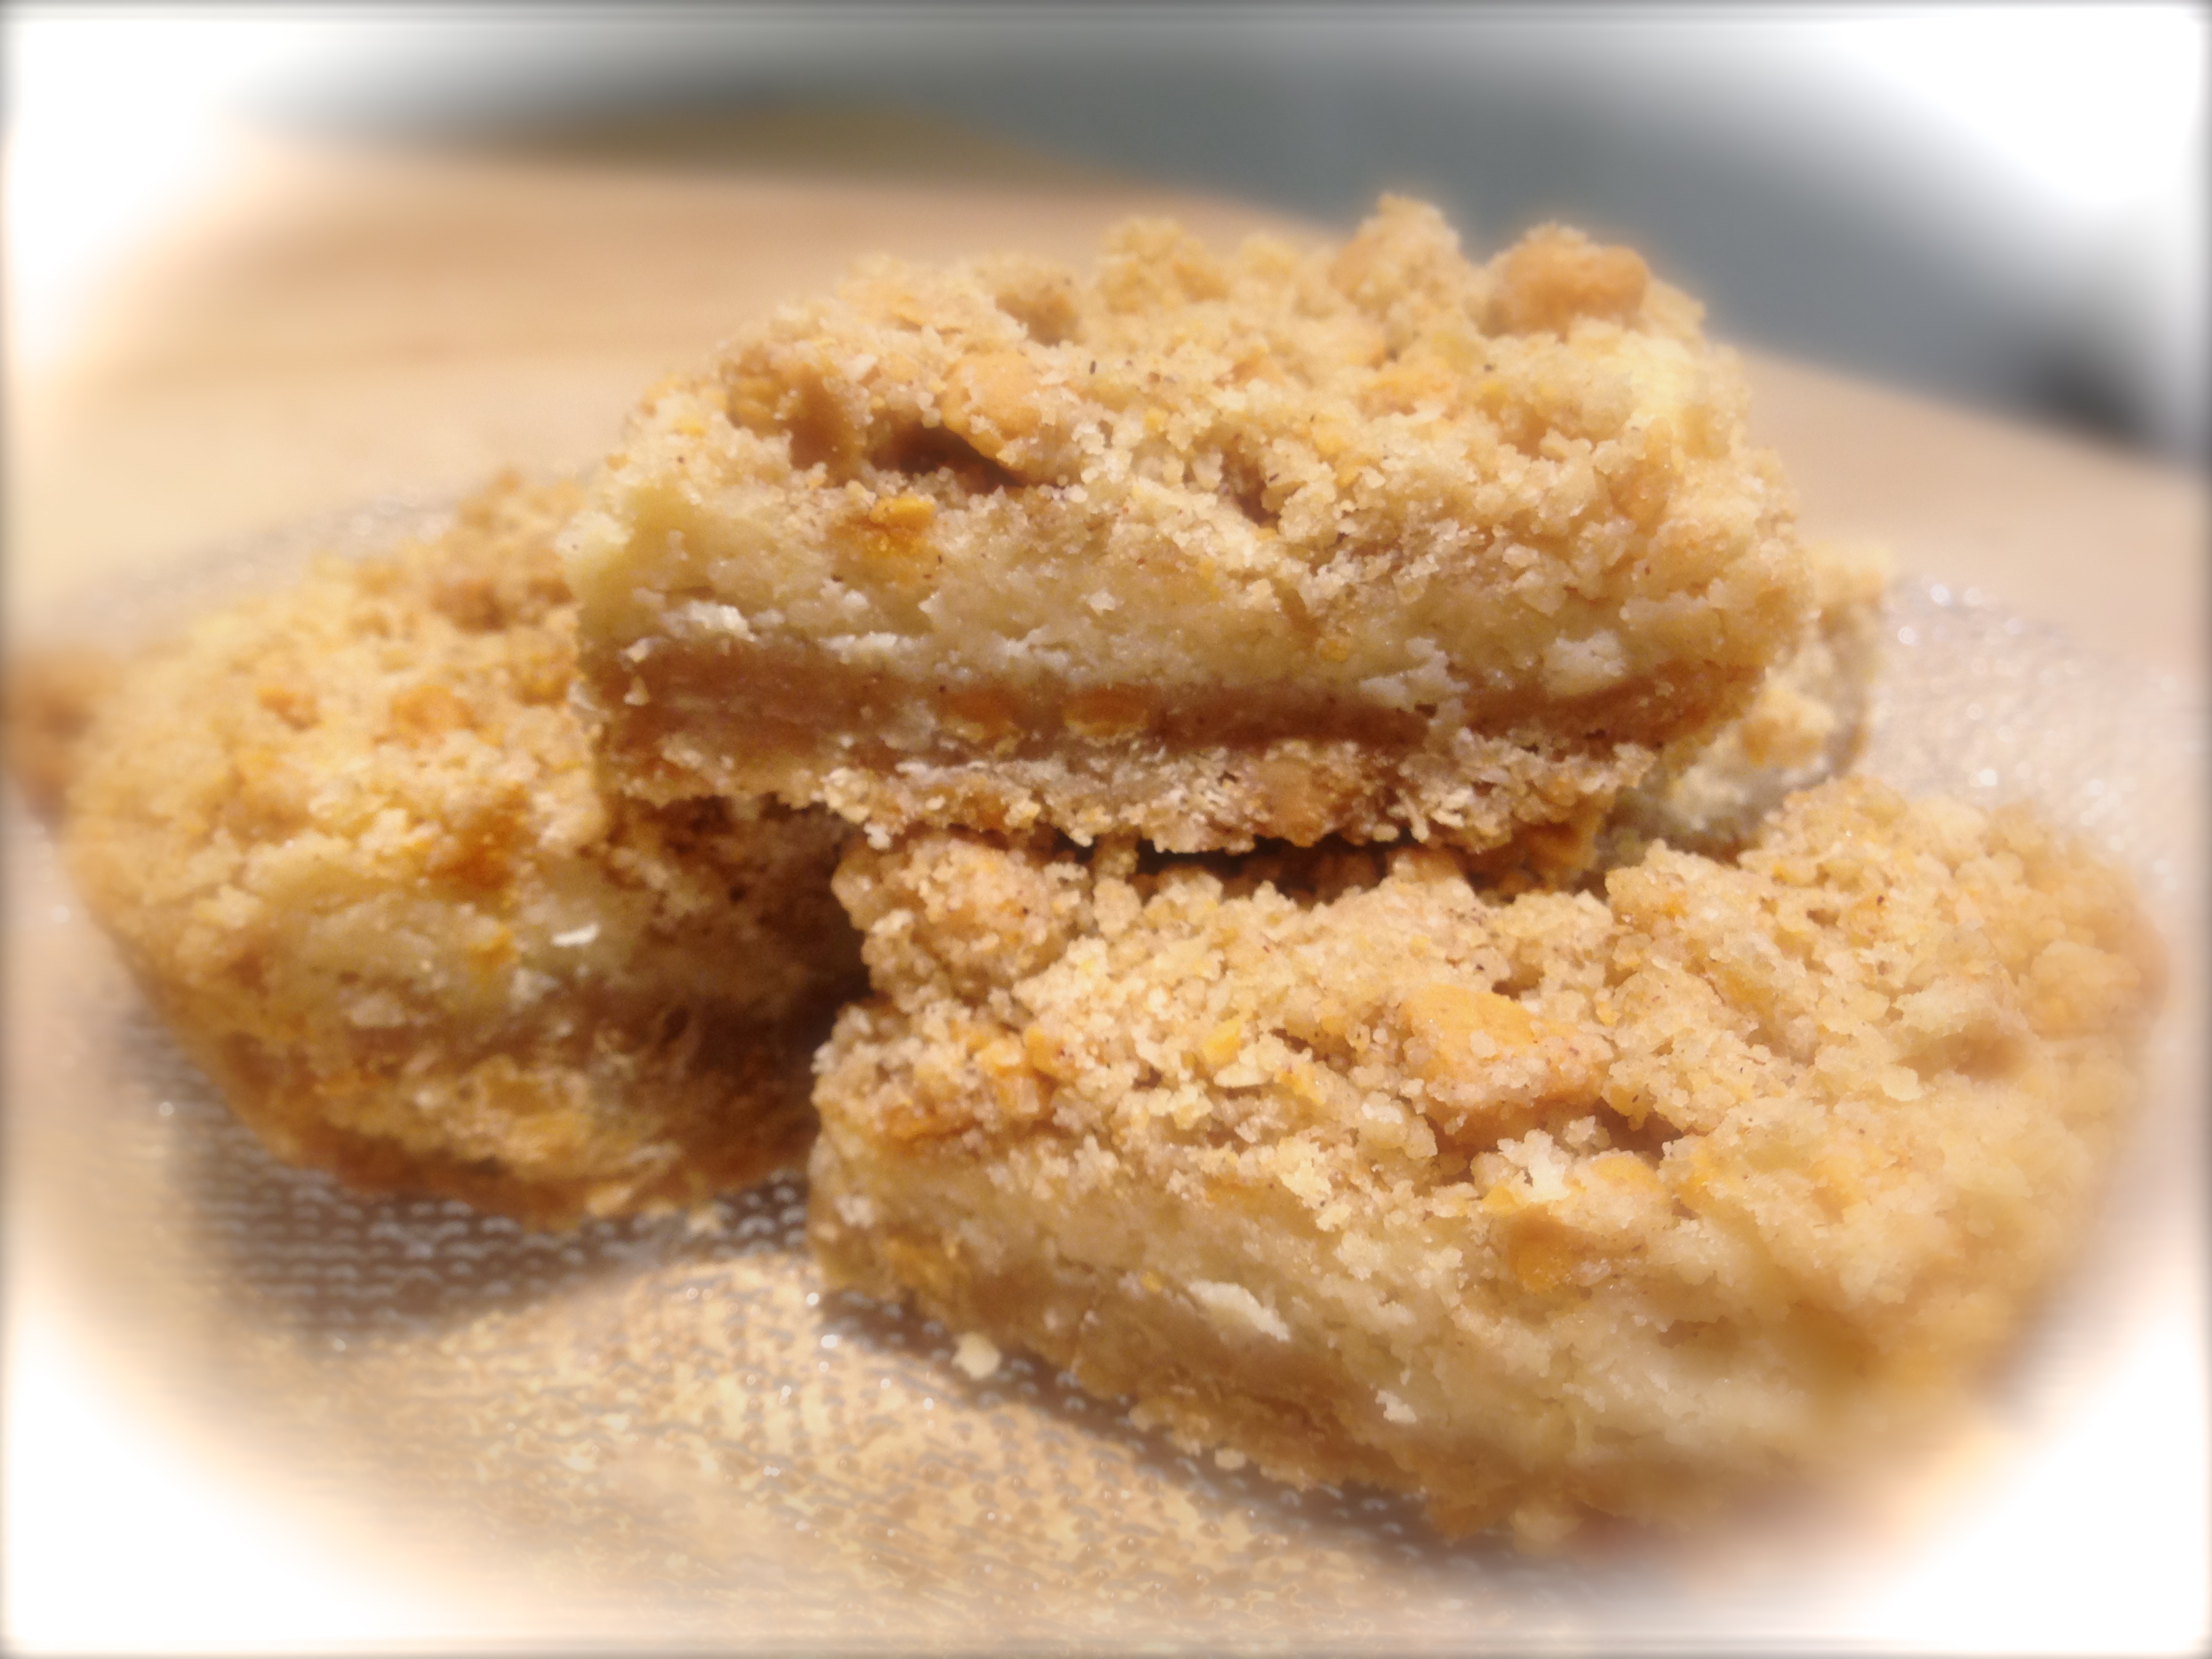
Cake With Streusel Topping

Blueberry Cream Cheese Coffee Cake...
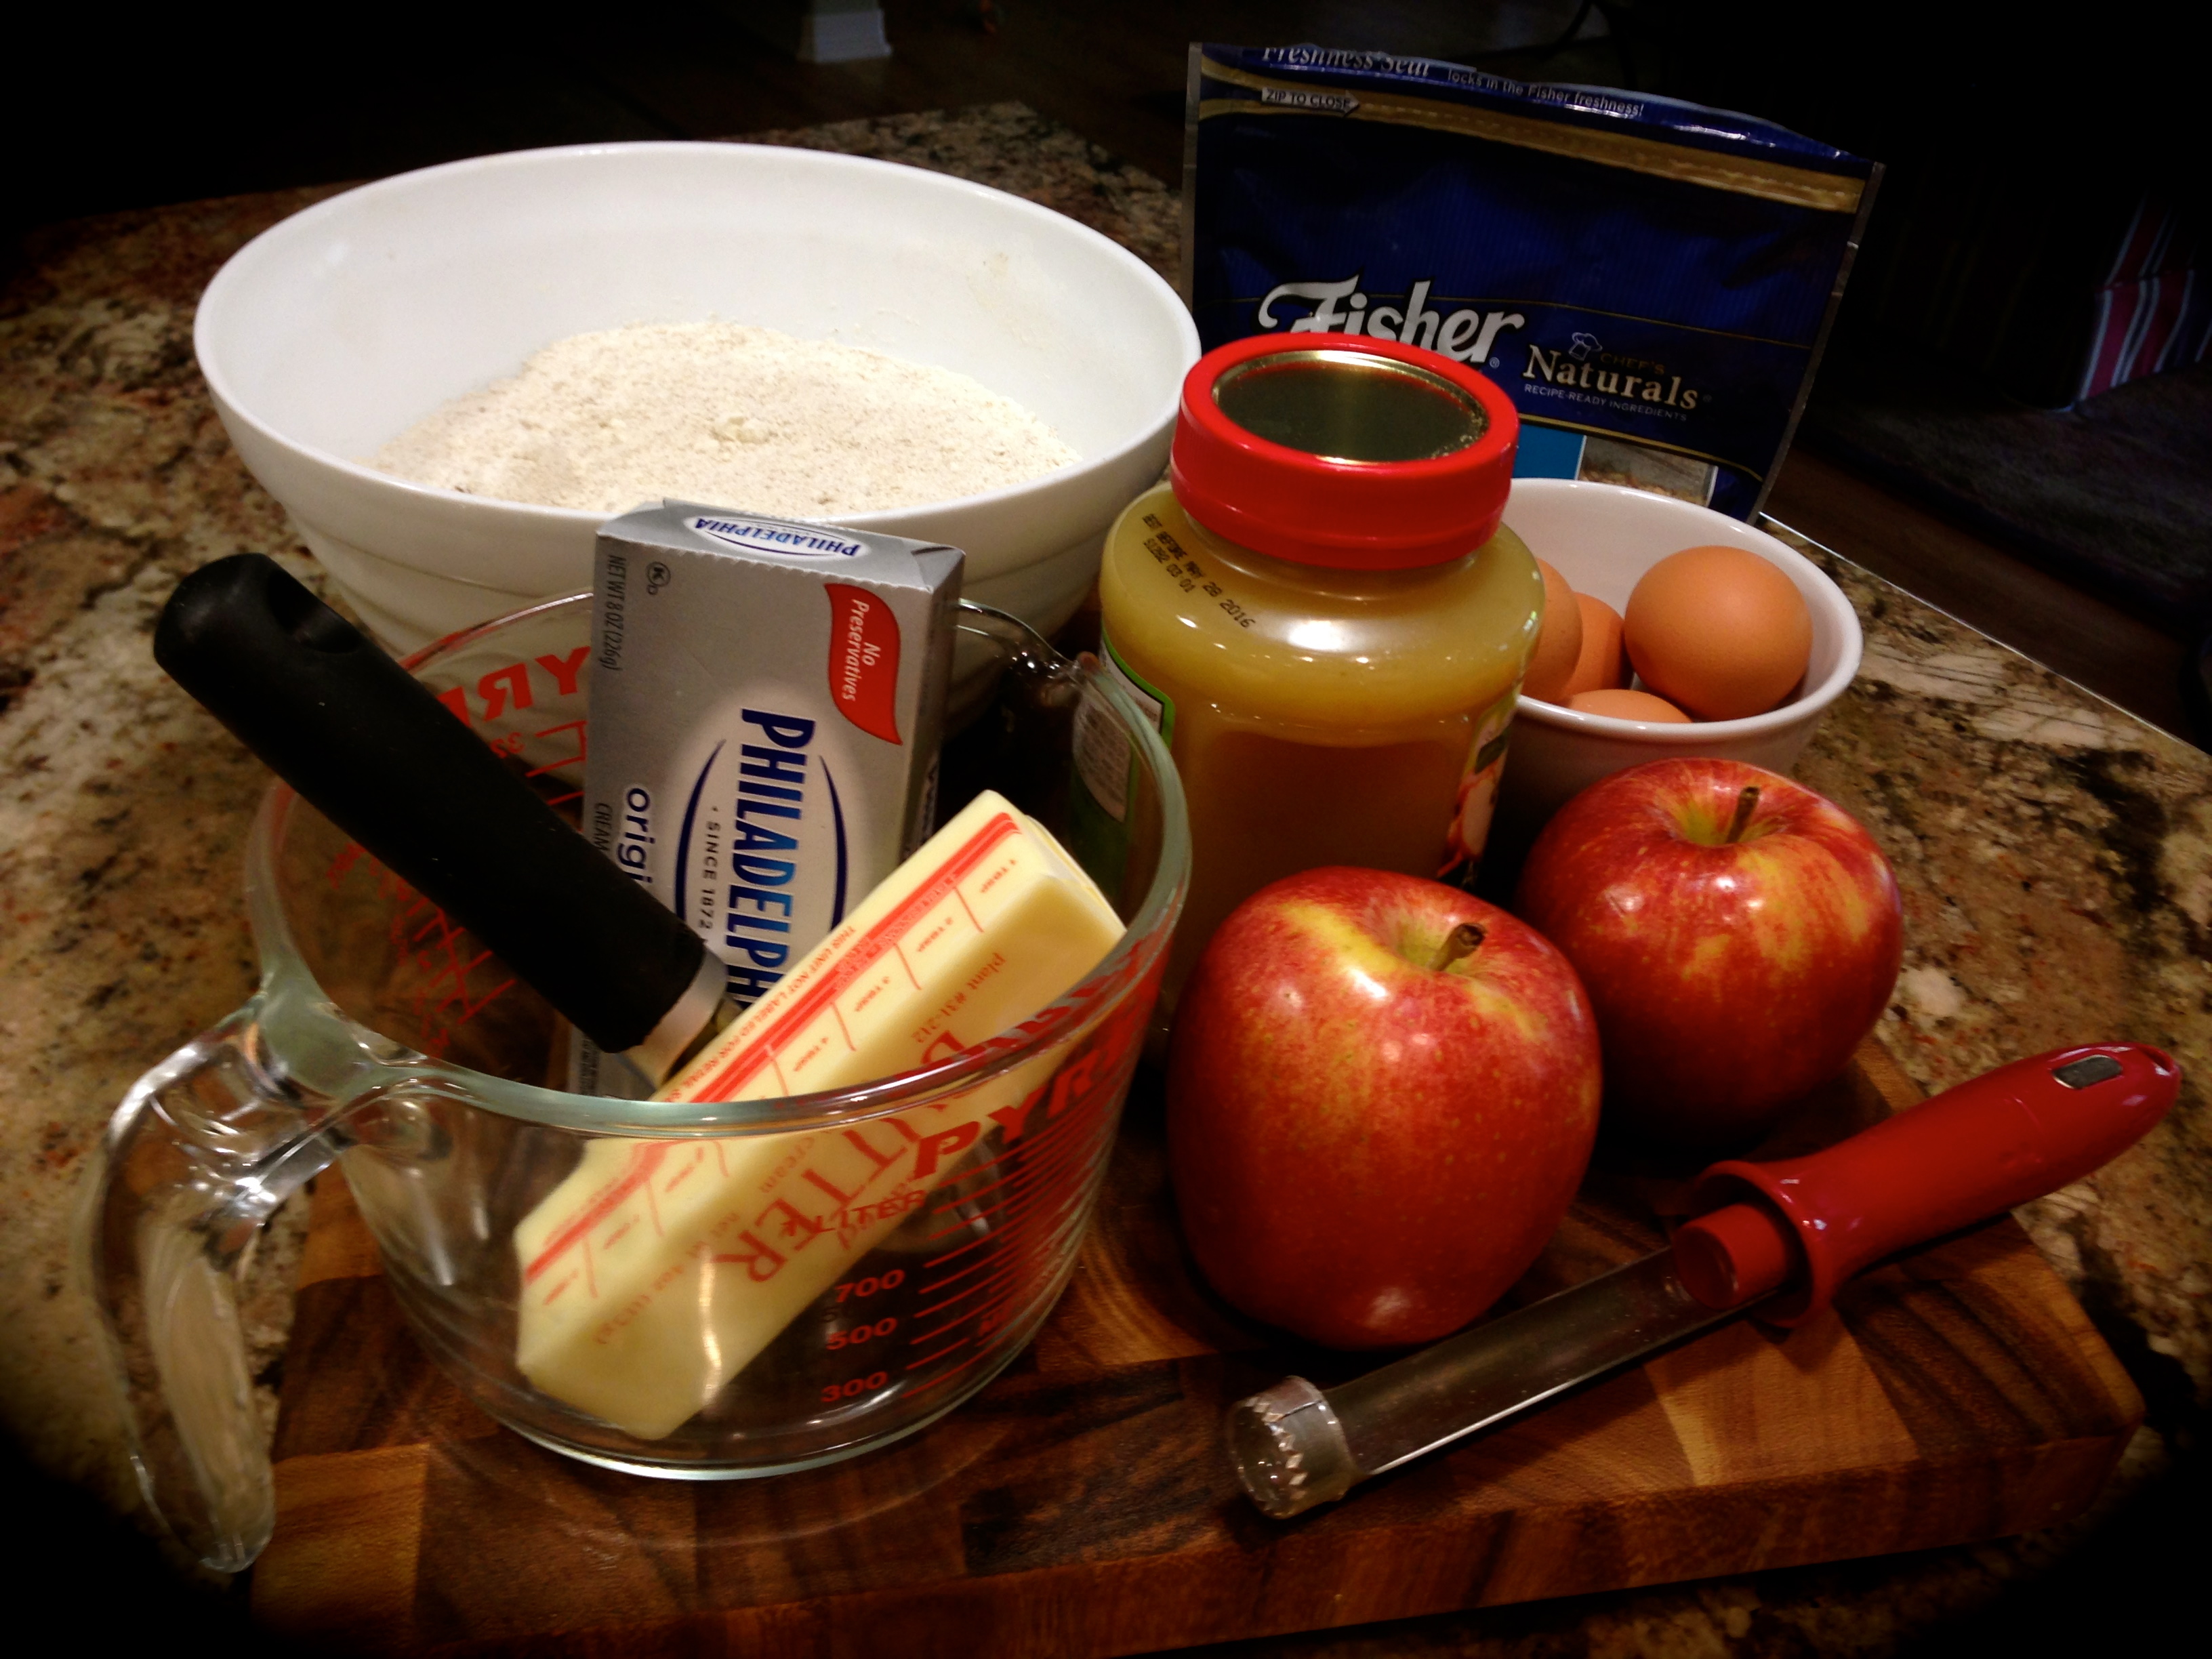
  • Servings: 10-12
  • Difficulty: Medium
  • Print

INGREDIENTS:

Cream Cheese Filling:

1/4 sugar

8 oz. cream cheese, room temperature

1 egg white

1/2 tsp. vanilla bean paste (you can substitute vanilla extract)

1 1/4 cup blueberries, divided

Coffee Cake:

1 1/2 cups flour

1/2 tsp. baking powder

1/2 tsp. baking soda

1/4 tsp. table salt

5 1/2 Tbs. unsalted butter, room temperature

1/4 cup sugar

1 egg

1 egg yolk

3/4 cup sour cream

1 tsp. vanilla bean paste

Streusel Topping:

1/3 cup sugar

1/2 cup flour

3 Tbs. butter, very cold and cut into chunks

DIRECTIONS:

Preheat your oven for 350. Line the bottom of a 9 inch spring form pan with parchment paper and grease the sides of pan. Set the pan aside.

Mix together the cream cheese, sugar, and vanilla on medium speed until creamy. Add egg white and mix just until combined. Set aside.

For the streusel topping combine sugar, flour and chilled butter in a bowl. Cut the butter in with a pastry blender until the mixture is crumbly and and the crumbles are pea sized. Set aside.

For the cake batter, stir together the flour, baking powder, soda and salt. Set aside. In a stand mixer cream together the butter and sugar. Add egg, egg yolk, sour cream and vanilla and mix until combined. Slowly combine the two mixtures beginning with part of the flour mixture alternating it with the sour cream mixture, then the flour mixture followed by the sour cream mixture finishing with the flour mixture. Take a spoon and transfer this batter in spoonfuls around the base of the pan. Smooth the batter around the bottom of the pan with a spatula. Sprinkle 1/3 cup of blueberries over the batter. Spread the cream cheese filling on top of the blueberries (drop in spoonfuls just like the cake batter and spread) and top with the remaining blueberries. Sprinkle the streusel on top of the blueberries. Bake for 40-45 minutes or until a toothpick inserted in the center comes out clean. If the top starts browning too quickly cover the pan with aluminum foil.

Put the pan on a cooling rack and run a knife around the sides of the pan. Let the cake cool for 15 minutes and then loosen the ring of the spring form pan. Remove the ring and let the cake continue to cool.

Serve warm or at room temperature. Store in remaining cake in the refrigerator.


Cream Cheese And Pineapple Stuffed Celery

I bet you’ve been wondering where I’ve been? All I can say is this Summer has been crazy and I never anticipated having so little time to think about my blog. I’ve had very little time for recipe experimentation but I promise by the Fall I will be posting more regularly.

But with that in mind, I have a quick, down and dirty and outrageously simple appetizer that you can bring to your next Summer get together. This particular recipe was my mother’s and when you see how simple it actually is you’ll know that everything I’ve been telling you about how she was not the creative or adventurous cook is completely true. But, that being said, it is also really delicious.

My memory of this recipe does not come from Summer parties but rather holiday parties. Every Christmas and Easter (but especially Christmas) she would make these and have them on the table. I hadn’t thought about them in a long, long time until last week when I was charged with bringing an appetizer to an event but literally had no time to make anything. This recipe came to the rescue and it was a big hit!

I also think this was my mother’s way of getting her kids to eat celery – and it worked! For such an easy recipe, it is perfect to serve when time is limited and you want something fun and delicious to put on the table as an appetizer or snack.

So let’s talk cream cheese and pineapple stuffed celery…

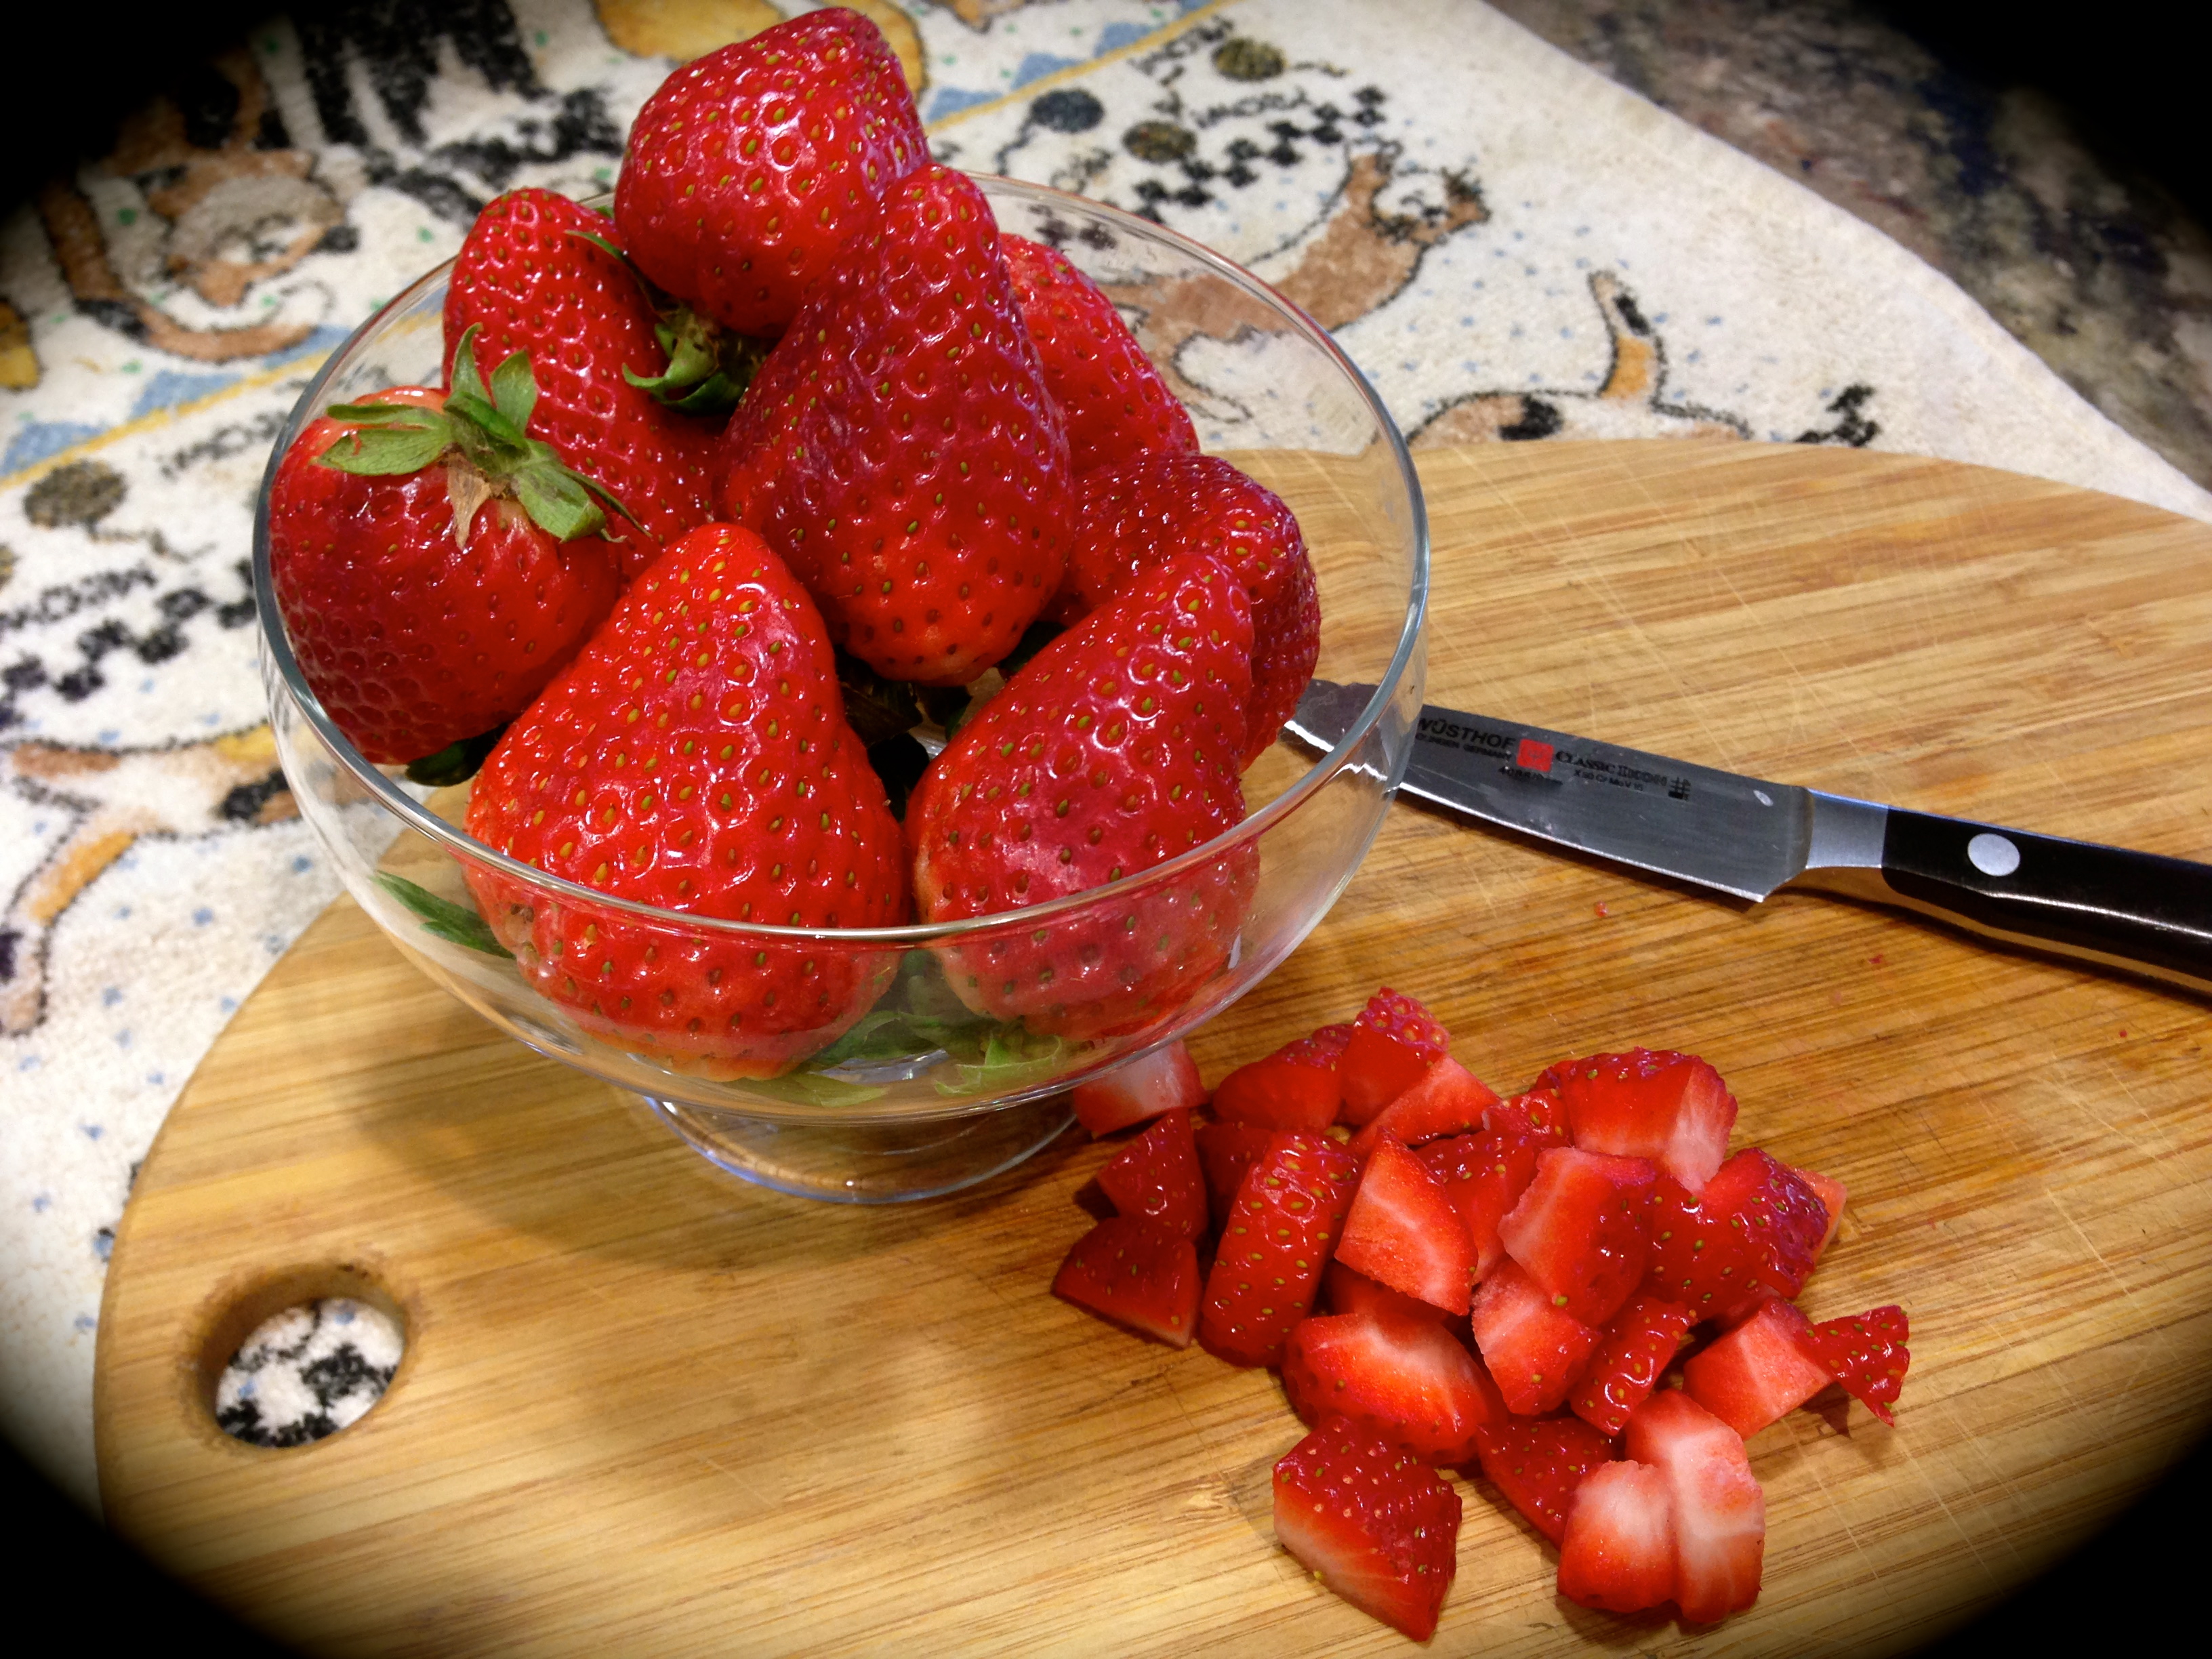
Lesson Learned 1 – Pre-cut celery is a great time saver: My grocery store cells pre-cut celery. The stalks are approximately three inches in size and packed in water. That’s the perfect size for this recipe. The only thing I needed to do to prepare the celery was take a small slice off each end to freshen the ends up. I was able to pat them dry and stuff them right away. But you can also buy celery and wash and slice it on your own. But I loved the convenience of having all that work done for me ahead of time.

Lesson Learned 2 – It is important to use BOTH a can of crushed and chunked pineapple: Initially I tried it with just one can of crushed and found that the pineapple flavor was being overpowered by the cream cheese. When I added the chunked pineapple it gave a nice balance of flavor and you could visually see some pineapple, which was not very visible when I just used the crushed. I also recommend dicing the pineapple chunks out of the jar and before adding them to the cream cheese. That way the chunks are the perfect size. Fold the diced chunks in at the end so as not to overly crush them in the mixing process.

Make sure you drain both the crushed and chunked pineapple so that the cream cheese mixture doesn’t become too runny.

Lesson Learned 3 – If you can, chill the stalks before serving: If you have time refrigerate the stuffed celery stalks before serving. I found that at a Summer party serving them that way makes them even more refreshing. But if you can’t you can always serve them right away.

Lesson Learned 4 – This is a very versatile dish: There are different ways of using this cream cheese mixture. It would be delightful on a toasted bagel. You can serve it as part of a crudite platter. You can also serve it as a dip on a veggie plate with radishes, celery, sweet baby peppers, snap peas, and carrots or you can serve it with some crackers and grapes. I like serving it with celery as it’s easy to pick up and go.

Lesson Learned 5 – Why not just buy this pre-made at the store? That’s a good question but the answer is very simple – this takes no time to make and you control exactly what ingredients go into it, which is always a good thing.

It couldn’t be easier! Sometimes I shy away from posting these very rudimentary recipes as I think my readers will consider them too simple. But I’ve found that any new recipe idea, easy or otherwise, tends to be very much appreciated. So make this one and tell me what you think!

Cream Cheese and Pineapple Stuffed Celery

  • Servings: 20-30 Three Inch Stalks
  • Difficulty: Very Easy
  • Print

INGREDIENTS:

1 – 8 ounce package of cream cheese, softened

Celery stalks, washed, dried and cut into 3 inch pieces

1- 8 ounce can of crushed pineapple, drained

1 – 8 ounce can of pineapple chunks, drained and diced in smaller pieces

DIRECTIONS:

Cut off a small slice on each end of the celery stalks and discard. Wash and dry the celery if not pre-washed. Combine the cream cheese with the drained crushed pineapple. Mix thoroughly. Fold in the drained diced pineapple.

Over-stuff each stalk with the cream cheese mixture. If possible, refrigerate for at least one hour, although this also can be served immediately.


Apple Cake With Praline Glaze…

There are many reasons why Fall is my favorite time of year. First, I love the crisp Fall air with its milder temperatures. Second, I love the spectacular bursts of colors the trees and bushes provide.  And third, I love Fall cooking and baking. The aromas in the kitchen at this time of year are like no other, from the smell of the first pot roast braising in the oven to the sweet smell of baked apples providing that warm feeling of comfort and home. Fall is definitely the best season of the year.

So let’s start out the season by focusing on Fall baking! I chose this particular recipe because it embodies everything I love about Fall – apples, cinnamon, cream cheese, vanilla… need I go any further. The ingredients scream Fall and the smell of this cake when it’s baking in the oven beats any apples and cinnamon air freshener you could ever buy.

So let’s talk apple cake with praline glaze…

Lesson Learned 1 – Be organized when you make this recipe. This recipe has several components and the best way to make it is to be organized. First, that means reading the recipe thoroughly. Second, and I know this may sound silly, is to create a strategy for putting everything together. When I made this I did things in stages to stay on track and to keep the kitchen from being turned upside down.

The first thing I did was shred the carrots. (If you can find carrots already shredded at your local store you can certainly use them). I used my food processor for that. Make sure you used the shredding disc as shown below.

Cut the carrots and put them into the processor’s feeding tube.

With the processor on, push the carrots down the feeding tube using the round plastic tool that comes with the processor. You will wind up with shredded carrots as seen below.

I am going into such detail about this for a couple of reasons. First to show the correct disc to use to get shredded carrots. You don’t want to use the processor’s main blade for this. Second because this step takes up time and space. I found the best way to stay organized when making a recipe is to see if there are any components that require a machine other than a mixer and determine how using that machine may affect your work space.

Once I shredded the carrots I put them in a bowl, washed my food processor and put it away. If you’ve ever worked with a food processor you know it’s comprised of several pieces and all those pieces needed to be washed. Washing them, reassembling the food processor and putting it away freed up a lot of work space for me – space that I could use to comfortably assemble the other components of the cake.

After using the food processor I put together the cream cheese filling and set it aside, assembled the wet and dry ingredients, greased and floured the bundt cake pan, measured out the pecans (I purchased pecan pieces so I didn’t have to worry about chopping them) and lastly I cut up the apples. I saved the apples for last because I wanted as short of a period of time between when they were chopped and when they were incorporated into the batter. Apples, when cut, will oxidize meaning they will start to turn brown the longer they are exposed to the open air. By cutting them last I still had nice light green apple pieces to put into the batter. There are altogether seven major components of this cake and so the more organized you are the smoother the process of making the cake will go.

The Seven Major Components Of The Apple Cake

Lesson Learned 2 – Check each egg before putting it into the batter: There are four eggs in this recipe and each one should be checked separately by cracking it into a small dish before adding it to the batter. You don’t want to add them all at once just to find you have one bad egg and then have to throw out all the batter. It only takes a few seconds to ensure that all the eggs you’re using are good.

Lesson Learned 3 – For high altitude baking decrease the baking powder by 1/4 teaspoon. The baking soda amount can stay the same.

The major point to consider when making this recipe is being organized. Otherwise everything is relatively simple. I can assure you this cake is delicious. I gave some to a neighbor who said it was so delicious that she wanted the recipe. I’m sure you’ll want to print this recipe and keep it as part of your Fall lineup of baking…

Apple Cake With Praline Glaze...

  • Servings: 12
  • Difficulty: Easy To Medium
  • Print

INGREDIENTS:

CAKE

1 8 oz. package of cream cheese, room temperature

2 cups sugar, divided

4 eggs, divided

1 cup canola oil

2 cups flour

2 tsp. baking powder

2 generous tsp. ground cinnamon

1 tsp. salt

1/4 tsp. baking soda

2 cups green apples, peeled and chopped (2 medium size granny smith apples)

1 cup shredded carrots (2 large carrots)

1/2 cup chopped pecans

PRALINE GLAZE

1/2 cup brown sugar, packed

1/4 cup butter, cubed

2 Tbs. milk

1/2 cup confectioners sugar

1/2 tsp. vanilla

1/4 cup chopped pecans

DIRECTIONS:

Preheat the oven to 350. Grease and flour a 10 inch fluted bundt pan. Set aside.

In a small bowl beat the cream cheese and 1/4 cup of sugar until smooth. Beat in 1 egg. Set aside.

In a medium bowl combine the flour, baking powder, cinnamon, salt and baking soda. Whisk together until thoroughly combined. Set aside.

In a large bowl beat together the oil with the remaining sugar and eggs until well blended. Gradually beat the flour mixture into the oil mixture until blended. Fold in the apples, carrots, and pecans.

Put half of the better evenly around the bundt pan. Put the cream cheese mixture on top. Add the remaining batter on top of the cream cheese mixture.

Bake 50-60 minutes or until a toothpick inserted in the center comes out clean. Cool 10 minutes in the bundt pan before removing the cake from the pan.

To make the glaze – in a large saucepan bring the brown sugar, butter and milk to a boil. Cook and stir for 1 minute. Remove from the heat and whisk in the confectioners sugar and vanilla until smooth. Drizzle over cooled cake. Sprinkle with pecans.


Frosted Blueberry Muffins…

This time of year brings an abundance of fresh fruits and vegetables to your table. Sometimes its hard to pass them up, especially when the prices are low and the quality is high. And because of that, sometimes I find I buy more than I can actually use. Or sometimes I’m positive I don’t have what I want at home only to find after I buy it I have more than enough in the refrigerator already.

Such was the case the other day when I looked in my refrigerator and found and I had pints of blueberries – way too much for me to use by myself before they spoiled. My solution was to make frosted blueberry muffins…

I have to say I really like this recipe. The muffins are just the right texture and the cream cheese frosting is the perfect compliment to the tart blueberries. So let’s not waste any time and start talking about blueberry muffins…

Muffin Ingredients

Lesson Learned 1 – This recipe make A LOT of muffins: If you’re making muffins for a crowd or have large family the proportions in this recipe will be perfect for you. This recipe can make anywhere from 36-40 muffins, which for me with only two people in my household, was way too much. I didn’t realize how much the recipe made until I started filling the muffin cups. OOOPS!

But the good news is you can easily cut the recipe in half and have a more manageable amount of muffins for a smaller family. Either way, they will still come out tasting delicious.

Lesson Learned 2 – This recipe would also be good using fresh cherries: I chose blueberries for this recipe because they are more readily available during the course of a year and I had some I need to use. But you could also use fresh cherries. All you would need to do is make sure the cherries are pitted and chopped. For the full recipe I would add 4 cups of cherries.

Lesson Learned 3 – I recommend frosting these muffins: The frosting is a great compliment to the tartness of the blueberries. And although you can leave them plain the frosting, in my opinion, takes them over the top.

Lesson Learned 4 – You can also make jumbo muffins: If you’re worried about the amount of muffins this recipe makes try making jumbo muffins. You can make approximately 18-24 jumbo muffins from this recipe. The only difference will be in the baking time. Bake the jumbo muffins for approximately 25-30 minutes.

Other than that this recipe is pretty standard in terms of how it is structured. As always you need to use less leavening for high altitude (cut the baking powder by 1/2 Tbs.) but other than that you mix the ingredients, fill the muffin cups three quarters full and bake.

Since I had so many of these I brought some to hour community happy hour that we have each week. People raved about them. One person told me she only took one home with her and in retrospect she wished she had taken many more. I guarantee this will be a hit when you serve it. Or better yet, just keep them to yourself as a guilty pleasure. Enjoy!

Blueberry Muffins...

  • Servings: 36-40 muffins
  • Difficulty: Easy
  • Print

INGREDIENTS:

Muffins:

4 1/2 cups flour

2 Tbs. baking powder (1 1/2 Tbs. for high altitude)

1/2 tsp. salt

1 1/4 cups sugar

3/4 cup butter, room temperature

4 eggs

1/2 tsp. vanilla extract

1/2 tsp. almond extract

Zest of 1 lemon

2 Tbs. fresh lemon juice

3/4 cups milk

2 cups sour cream

1 cup chopped walnuts

1 pint fresh blueberries, washed and drained

Frosting:

1/2 cup butter, room temperature

1 – 8 oz. package of cream cheese, room temperature

1 tsp. vanilla

2 cups confectioners sugar

DIRECTIONS:

Preheat the oven to 375. Put paper liners into the muffin tins.

Combine the flour, baking powder, salt and sugar. Whisk until combined. Set aside.

Put butter, eggs, vanilla and almond extracts, lemon zest, lemon juice, milk and sour cream into a mixing bowl. Beat on medium speed until blended. (You can use a hand mixer for this).

Add the dry ingredients and mix by hand until combined. Fold in the nuts and blueberries. Do not over mix.

Spoon the batter into the muffin cups filling them 3/4 full. Bake for 15 – 18 minutes or until lightly browned on top. Let muffins cool on a rack before frosting.

To make the frosting, combine the butter, cream cheese and vanilla in a mixing bowl. Beat until smooth. Gradually add the sugar beating until smooth.


Mini Cherry Cheese Danishes…

This recipe was born out of leftovers I had from making my Chocolate Cherry Cream Cheese Cake. I still had some of the cream cheese mixture and cherry pie filling leftover and really didn’t want to just throw them out. I searched online to see if I could get some ideas and found something similar to this and thought, I’ll make some mini cheese danishes.

Apparently a lot of people are using refrigerated dough to makes these types of recipes. I was surprised to find crescent dough “rounds”. I’d never seen them before. I was thinking I might have to take the traditional crescent dough and pinch the seams in order to get the rounds I needed. I was delighted that I did not have to do that work, that it was already done for me.

So let’s talk mini cherry cheese danishes…

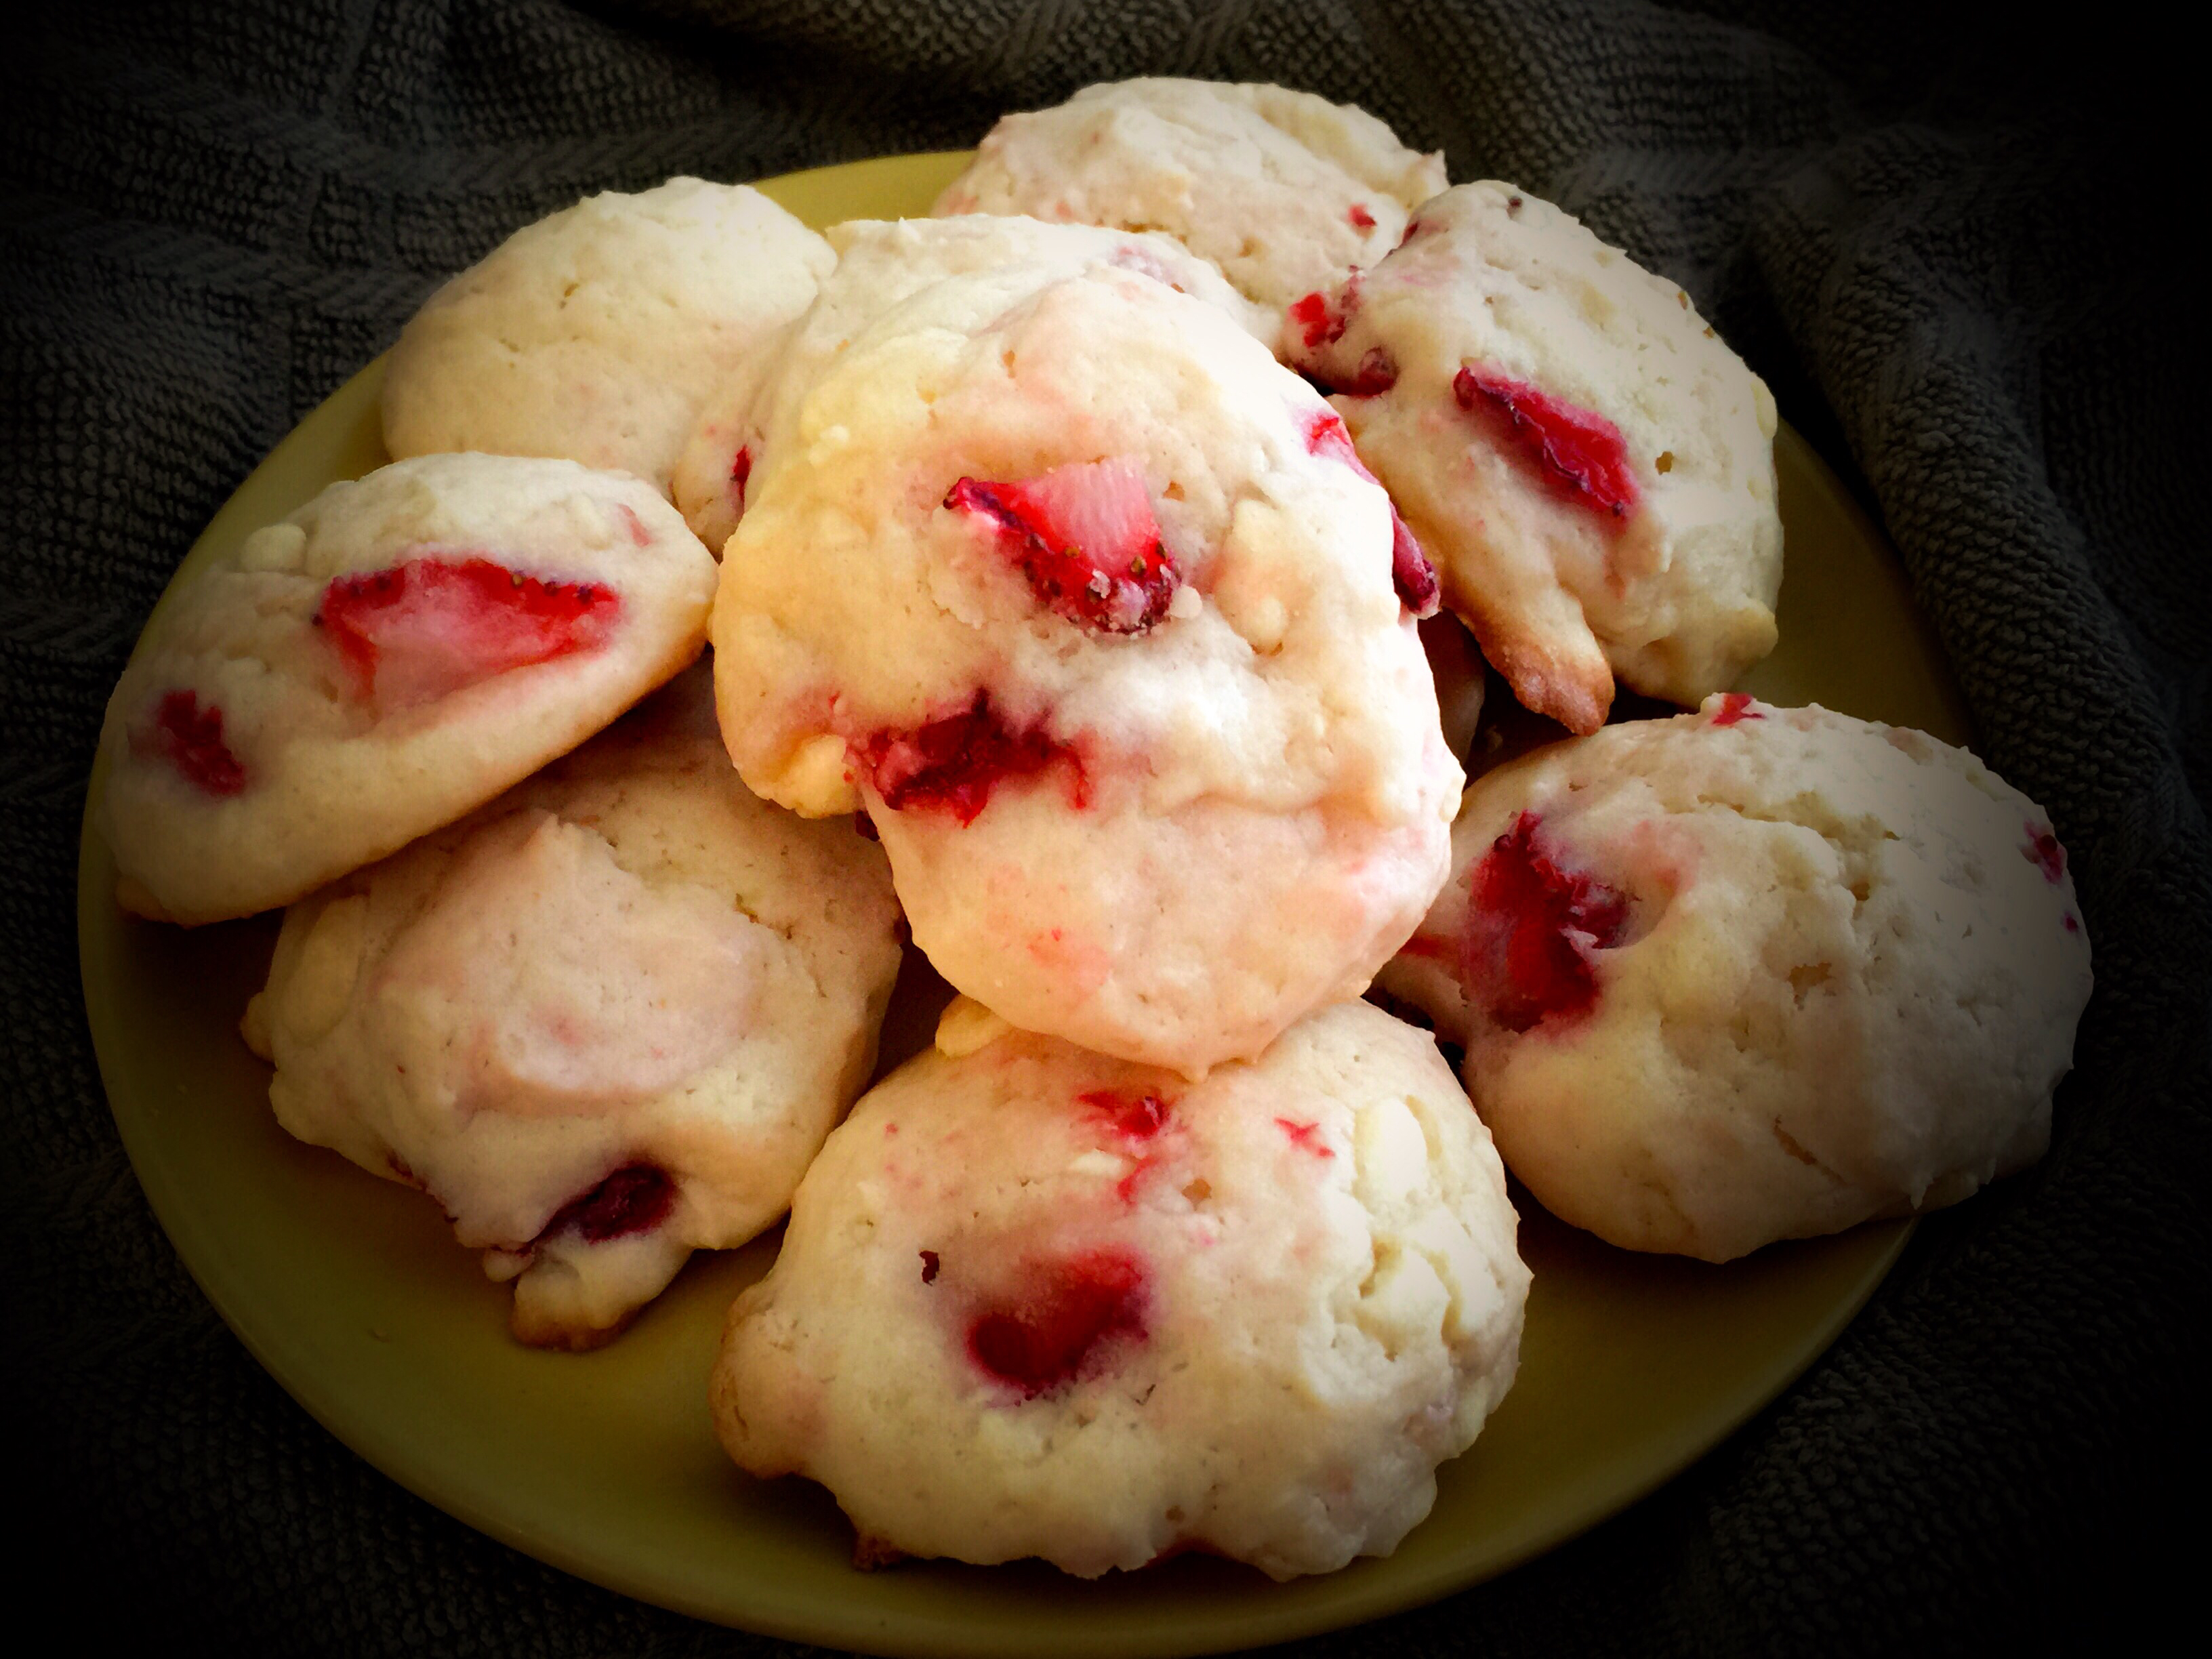
Lesson Learned 1 – Working with the refrigerator dough: Using this kind of dough is very convenient but you do have to work it a little bit. I cut the pieces along the pre-perforated edges as best I could (I wound up with 9 rounds and  I should have only had 8 if I followed the perforations exactly – oh well…) and  rolled each piece into a ball. I flattened each piece with my hand and then used my thumbs to create a crater inside the dough. The crater is important because that’s where you put the cream cheese and cherries. Making the crater as deep as possible helps to prevent the cherries from falling off. But don’t worry, if they do once you pull them out of the oven just use a small spoon to push them back on top. Once they cool they will stay put.

Lesson Learned 2 – The cream cheese filling: This recipe was inspired by the cream cheese filling and canned cherries I had left over from making a Chocolate Cherry Cream Cheese Cake. After I made the cake I had enough filling and cherries left over that I really didn’t want to just throw out. This recipe is designed for that type of leftover. You can make the filling for this recipe versus using leftovers, and I will include the the recipe for the filling I used, but any type of cream cheese filling will do. Plus if you make the filling from scratch you will definitely have too much filling. There have been many times I’ve had filling like this left over and I just trashed it. But even if I didn’t have any leftover canned cherries, another type of fruit could be substituted, like left over apple sauce or apple pie filling. This recipe is a very easy way to use your baking leftovers.

Lesson Learned 3 – The Glaze: As I’ve shared before the formula for glaze is quite simple – a cup of confectioners sugar and 1 – 2 tbs. of liquid (water, milk, heavy cream) and a little flavoring like an extract, juice, and/or zest. For this recipe I used 1/8 tsp. of almond extract and the glaze was perfect.

My husband really liked these tasty little bites. Cover them with plastic wrap or put them in an air tight container and they’ll stay fresh for 3 days, if they even last that long. I know mine didn’t. Enjoy!

Mini Cherry Cream Cheese Danishes

  • Servings: 9
  • Difficulty: Easy
  • Print

INGREDIENTS

1 can of crescent rounds, I used Pillsbury

Leftover cream cheese filling (note recipe below was the filling I used but if made from scratch is too much for this recipe)


2 – 8oz. packages cream cheese, softened

1/2 cup + 2 Tbsp. sugar

1 tsp. vanilla extract

3 Tbs. flour

1 egg, room temperature


Leftover fruit  – I used leftover canned cherry pie filling

GLAZE:

I cup confectioners sugar

1 – 2 tsp milk

1/8 tsp almond extract

DIRECTIONS:

Preheat oven to 375. Line a 9 x 13 pan with parchment paper and set aside.

Open the can of refrigerator dough and cut the dough rounds using the perforations as a guide. Roll each into a ball. Flatten each ball with the palm of your hands and create a crater in the center of each with your thumbs.

Place a half teaspoon of cream cheese filling and 2-3 cherries inside each crater.

Bake for 10 – 12 minutes.

Remove each danish onto a wire rack and let cool. If any cherries have fallen off during the baking process, spoon them back on top before placing on the wire rack.

Once cooled, make the glaze and drizzle over the danishes. Serve or place in an air tight container. Danishes will stay fresh for approximately 3 days.

Ready To Go Into The Oven

SaveSave

SaveSave

SaveSave

SaveSave

SaveSave

SaveSave

SaveSave

SaveSave

SaveSave

SaveSave

SaveSave

SaveSave

SaveSave

SaveSave

SaveSave

SaveSave

SaveSave

SaveSave

Chocolate Cherry Cream Cheese Cake…

What can I say about this one. It is simply over the top. Not only does it taste divine but it’s gorgeous. What more can you ask for from a cake? Now I’ll admit this cake takes a little more work than most but the result is breathtaking. This is possibly the most professional looking cake I’ve ever made. And we know looks are important but bottom line it has to taste good. Well let me tell you in the taste department I would consider this to be divine. I mean what’s not to love – chocolate, flavorful cream cheese, cherry pie filling, vanilla glaze – it just doesn’t get much better than that.

So let’s talk chocolate cherry cream cheese cake…

Lesson Learned 1 – Be organized when you make this cake: Really you should be organized when you make any cake but this one has so many components to it that your experience making it will be so much more delightful if you plan this out before you make it. Think about this one in stages.

  1. Get everything out in plenty of time that needs to be room temperature. In this recipe that means the eggs and sour cream. No need to worry about the butter because you melt that.
  2. Get the oven preheating. I believe it is better for your oven not only to be preheated but to be at the desired temperature for at least 5-10 minutes so that once you pop the cake pan in you can count on the oven truly being the correct temperature all throughout.
  3. Put together the dry ingredients (flour, sugar, kosher salt and baking soda) and set them aside.
  4. Measure out all of the remaining ingredients. I use little bowls to organize what needs to be measured. That way when you come to a certain juncture in the process you are all ready to go. This includes opening up the can of cherry pie filling and measuring out the amount needed. As you do that, try to opt for more cherries than filling as some fillings tend to be more juice and less cherries.
  5. Count out, drain and rinse your maraschino cherries. For my pan I needed 16 cherries, so a small jar of cherries will work just fine.
  6. Assemble the chocolate mixture.
  7. Make the batter by combining the chocolate mixture with the dry ingredients. Now you’re ready to go.
  8. Wait to spray your bundt pan until the very end. For this recipe I recommend using a baking spray with flour. Coat the bundt pan liberally. You want it to be glistening all over before you begin assembling the cake.

Because there are so many components to this recipe I guarantee you will be a lot happier and have more fun making this cake if you organize yourself.

Lesson Learned 2 – Making the glaze: Making glaze for any type of cake or pastry couldn’t be easier. All it requires is some confectioners sugar, some liquid and perhaps some sort of additional flavoring. You can use water, milk, or heavy cream for your liquid and you can use a little extract, juice or zest to enhance the flavor of the glaze. More often than not I use milk as the liquid and in this particular recipe I used a little vanilla extract to enhance the flavor.

Keep in mind you need very little liquid to create a glaze. Normally it works out to about 1 cup of confectioners sugar to about a tablespoon or so of liquid and then, if using a liquid extract, only about 1/8 teaspoon of that. But don’t get bogged down in the measurements. If your glaze is too thick just add a little more liquid to thin it out. If it becomes too runny, add a little more confectioners sugar. Glaze is very forgiving and can be made to the correct consistency with some easy minor adjustments.

One caveat – don’t use the additional flavoring to thin out a glaze. The flavor can become overpowering if you do that. And lastly, I don’t always have heavy cream around the house, but when I do I use it as my liquid. That is when you get the richest flavor. I just can’t convince myself to buy a pint of heavy cream for the needed tablespoon I will use in a glaze. But it’s all up to you.

This cake is so good and so worth the effort. Try it – I just know you will like it!

Chocolate Cherry Cream Cheese Cake...

  • Servings: 12-14
  • Difficulty: Medium
  • Print

INGREDIENTS:

2 cups flour

1 1/2 cups sugar

1 tsp. kosher salt

1 tsp. baking soda

1 cup water

3/4 cup unsalted butter, melted

1/3 cup cocoa powder

1 Tbs. espresso powder

3/4 cup bittersweet chocolate chips

1/2 cup sour cream, room temperature

2 eggs, room temperature, slightly beaten

1 tsp. vanilla extract

1 1/2 tsp unsalted butter, melted

1 Tbsp. brown sugar

16 maraschino cherries, rinsed and drained

3/4 cup cherry pie filling

CREAM CHEESE FILLING:

2 – 8oz. packages cream cheese, softened

1/2 cup + 2 Tbsp. sugar

1 tsp. vanilla extract

3 Tbs. flour

1 egg, room temperature

GLAZE:

1 cup confectioners sugar

1 – 2 Tbs. water, milk or heavy cream

1/8 tsp. vanilla

DIRECTIONS:

Preheat oven to 350 degrees. Make the cream cheese filling by beating together the cream cheese, sugar and vanilla until fluffy. Add the flour and egg and beat until smooth. Set aside.

In a large bowl combine the flour, sugar, salt and baking soda. Whisk until thoroughly blended. Set aside.

In a saucepan melt the 3/4 cup butter. Add the water and stir to blend. Add the cocoa and espresso powder and whisk until there are not lumps. Add the chips and stir until they are completely melted and the mixture is smooth.

Add the chocolate mixture to the dry mixture and whisk until combined. Blend in the sour cream. Add the eggs and vanilla and mix until combined.

Spray a 10-12 cup bundt pan thoroughly with baking spray with flour. Melt the 1 1/2 tsp of butter and pour it evenly into the bottom of the pan. Evenly sprinkle the brown sugar on top of the melted butter. Place two cherries on top of the brown sugar in each of the larger grooves of the bundt pan.

Fill the bundt pan with half the chocolate batter. Spoon in the cream cheese filling on top making sure not to have the filling touch the sides. Spoon the cherry pie filling on top of the cream cheese, making sure the filling does not touch the sides of the pan. (You may have some leftover cream cheese and cherry pie filling). Pour the remaining batter evenly on top making sure to cover the cream cheese and the cherry pie filling completely.

Bake for 50-60 minutes or until a toothpick inserted in the center comes out clean. Cool the cake in the pan on a wire rack for 10 minutes. Put a plate over the bottom of the pan and flip the cake out of the pan onto the plate and let cool completely.

Mix together all of the ingredients for the glaze. Drizzle the glaze over the cooled cake.

Pour the melted butter evenly over the bottom

Put the brown sugar on top of the butter

Place the cherries in the larger grooves

Layer the ingredients

The cake right out of the oven

SaveSave

SaveSave

SaveSave

SaveSave

SaveSave

SaveSave

SaveSave

SaveSave

SaveSave

SaveSave

SaveSave

SaveSave

SaveSave

SaveSave

SaveSave

SaveSave

SaveSave

SaveSave

SaveSave

SaveSave

SaveSave

SaveSave

SaveSave

SaveSave

SaveSave

SaveSave

SaveSave

SaveSave

SaveSave

Hard Salami Roll Ups With Olive Garnish…

A bunch of residents in my condo association have taken to meeting every Thursday for “happy hour”. It started last summer when the outdoor pavilion was finally constructed on our grounds and spilled over to the winter months with various residents opening up their condos to host. It’s a great way to get together and chit chat over a glass of wine and appetizers. Everything is BYO and it has evolved over time to quite the weekly thing to do.

So the challenge is what to make for an appetizer every week. No one is expected to bring anything but you know how that works. Someone in the group always brings cooked shrimp, someone always brings jalapeño poppers (frozen and made in the oven), various dips make appearances, the usual various kinds of chips, and one guy even brings 3 different bottles of good red wine (he is a wine aficionado and has a large free standing wine cellar in his garage loaded with various wines – he loves to share them).  Now I’m not one to go to something like this empty handed, as you may well imagine, so each week I try to think of something I can do that will be different from the usual stuff that shows up at these events. (I will admit there have been a couple of times when I was not in the mood and I just opted for some store bought guacamole or a good quality unusual kind of dip). I’ve brought my Cream Cheese, Spinach, Scallion and Bacon Pinwheels and my Basic Bruschetta, and this time I wanted something easy to make, easy to pick up and eat and interesting to look at. Hence my hard salami roll ups…

I based this recipe on something I saw online but wanted to add a little more zip to the cream cheese filling. I opted to add a few scallions and season the mixture with garlic Fleur de Sel and that took the filling over the top. Fleur de Sel is French sea salt. It’s grains are courser in texture than kosher salt and is typically used to brighten up a dish once it has been prepared. It was the perfect addition to the filling.

Needless to say these tasty little morsels were gobbled up pretty quickly so I knew I had a hit on my hands. They are a little time consuming to make but the end result is a tasty little morsel that your guests can just pop in their mouths. Everyone loved them.

So lets talk hard salami roll ups…

Lesson Learned 1 – Buy good salami: I used Boars Head salami sliced fresh from the deli. You want to make sure you use good salami as it is a key flavor ingredient in this recipe. Although it may be a little more expensive remember the old saying – garbage in, garbage out. You want the salami sliced thin but not paper thin. If you cut it almost like a shaving it will be very difficult to work with.

Lesson Learned 2 – the process for making these is just the same as making any type of tortilla roll up: In order to do roll ups you have to master the technique of how to apply the filling and learn how to perfect the roll. It’s really very simple and there only a few things to remember.

First is how to apply the filling on the roll up. You don’t want to put the filling on too thick. The picture below gives you an idea of how to do the filling. It is important to leave open edges all the way around so you don’t have filling oozing out of the sides or end seam when you roll up the salami. The thickness of the filling comes from how it spreads inside the salami during the rolling process so you don’t have to worry about that.

Second is how to do the rolling. Whether it’s salami, a tortilla or whatever you are using as the base of the roll up the process is the same. Think of the roll up in terms of top, bottom and two sides. First you want to take a small amount of the two sides and and fold them in toward the center. Then you take the bottom and begin rolling the salami onto itself. The picture below clearly shows how the sides have been folded in and the rolling process started at the bottom.

Continue rolling until you have created a log as pictured below.

I use this technique when making my pinwheels or when making enchiladas, it’s always the same. If you are careful in terms of how you put in your filling and master the folding and rolling, it becomes a breeze!

Lesson Learned 3 – What if you don’t have garlic Fleur de Sel: The answer is simple – just use garlic salt. But be careful. Garlic salt has a much finer consistency so you may want to cut the recipe portion in half at first, mix it in and then taste the filling to make sure it isn’t too salty. Remember the olive garnish will be salty as well so you don’t want the filling to negatively add to that.

Lesson Learned 4 – Make sure you chill the rolls after you make them: You create the filling by getting the cream cheese softened to room temperature and mixing it with the other ingredients. Once you create your rolls the cream cheese is too soft to cut the rolls into pieces without creating a big squishy mess. You need to chill the rolls for at least an hour so the cream cheese can harden again. (I put them altogether in a refrigerator bag as seen in the picture below).  That will make the pieces much easier to cut. Also be sure to use a very sharp knife when cutting the pieces to avoid squashing the rolls.

Lesson Learned 5 – For a smaller appetizer just cut the recipe in half: Cutting the recipe in half also makes plenty of roll ups as well. You will have some cream cheese mixture left over but you can use it on a bagel for breakfast or on a baked potato at dinner. I’m sure the remainder won’t go to waste. Think about how many people will be at your gathering and plan from there.

I had a lot of fun making these and it was the perfect appetizer finger food. I found some colorful cocktail forks and all the guests had to do was pick one up, pop it in their mouth and dispose of the fork. It was fun to make and easy to eat. Try it and let me know what you think.

Salami Roll Ups With Olive Garnish...

  • Servings: 50-60
  • Difficulty: Easy
  • Print

INGREDIENTS:

1/2 pound of good hard salami, sliced thin but not paper thin

1 8 oz. package of cream cheese, softened to room temperature

3-4 scallions, chopped

1/4 tsp. garlic Fleur de Sel

1 24oz jar of green olives stuffed with pimento

Decorative cocktail forks

INSTRUCTIONS:

Beat together the softened cream cheese and scallions until well combined. Add the Fleur de Sel and stir to combine.

Place a small amount of the cream cheese mixture on a piece of salami, making sure to leave room all around the edges. Take the two sides and fold them in slightly toward the center. Begin rolling the salami from the bottom all the way to the top making sure the sides stay folded in during the rolling process. Repeat the same process with the other slices of salami. Place the rolls in a refrigerator bag and chill for at least one hour.

Remove the rolls from the bag and cut into bite-sized pieces (approximately 3 slices per piece of salami). Pierce an olive with a cocktail fork and push it in to the top of the roll up. Serve.

SaveSave

SaveSave

SaveSave

SaveSave

SaveSave

SaveSave

SaveSave

SaveSave

SaveSave

SaveSave

SaveSave

SaveSave

SaveSave

SaveSave

SaveSave

SaveSave

SaveSave

SaveSave

SaveSave

SaveSave

SaveSave

SaveSave

SaveSave

SaveSave

SaveSave

SaveSave

SaveSave

SaveSave

SaveSave

SaveSave

SaveSave

SaveSave

SaveSave

White Chocolate Strawberry Cookies

This time I wanted to do something a little different with my leftover strawberries. Normally I make some sort of loaf but I was intrigued by the thought of making strawberry cookies, something I’d never done before. I have to say it was a learning experience, and a very good one I might add.

I’ve always found strawberries to be tricky in the baking process. They add additional moisture when baking and that can play havoc on your end result especially if you live in high altitude like I do. But I’ve had enough disasters along the way that I say with great confidence that I think I’ve finally got baking with strawberries down pat. So lets talk white chocolate strawberry cookies…

cut strawberriesLesson Learned 1 – Follow these basic tips for baking with strawberries: Strawberries give off moisture when they bake and that can make the consistency of the batter too runny and result in a baking disaster. I’ve learned a few simple tips along the way that will help you be successful when baking with strawberries. First, prep the strawberries the very first thing. Cut them into smaller rather than larger pieces. Sprinkle the strawberries with a tiny, tiny bit of lemon juice, place them in a colander over a bowl and allow them to shed some excess moisture. Normally you add strawberries at the end of a recipe. Prepping them at the beginning gives them plenty of time to shed some of that excess moisture.

Before you add them to a batter sprinkle them with a little flour and make sure all of the berries are lightly coated. That way the flour will continue to absorb moisture and the berries will not all clump together in the baking process. If you are making a strawberry bread, sprinkling them with a little flour before adding them to the batter will prevent all the strawberries from sinking to the bottom of the bread. Try these few tips and you should be successful baking with strawberries.

Lesson Learned 2 – This is a very moist batter: The consistency of this batter is very moist. Once you make it I recommend you put it in the refrigerator for 15-30 minutes. That way it will be a little easier to work with. Even after you refrigerate it the batter will still be moist as is evidenced by the picture below. Don’t worry, the cookies will not run. They will hold shape and turn out to be a delightful cookie!

Cookie dough before baking

Lesson Learned 3 – The consistency of this cookie is more like a cake than a cookie: Initially I wasn’t sure how these cookies would turn out based on the moistness of the batter. To my surprise and delight they were like small heavenly bites of cake. The cookies are soft and delightful, very different from the consistency of say a chocolate chip cookie. And the white chocolate chips divinely compliment the flavor of the cookie. I brought these to work and they disappeared within one hour.

White Chocolate Strawberry CookiesLesson Learned 4 – For extra decadence try drizzling some melted white chocolate over the top of the cookies: This time when I made these cookies I didn’t think to do this. The amount of white chocolate you use making this recipe does not use up the entire bag. Why not melt the remainder of the chocolate and drizzle it over the cookies after they cool? Next time I most certainly will do this. I can’t believe I didn’t think about doing this when I first made them. Oh well, live and learn…

This recipe is a delightful change to traditional cookies that are often hard and crunchy. The combination of strawberries and white chocolate is to die for. I also like the fact that this recipe only makes about two dozen cookies so it is a manageable amount for family and friends. And as always I recommend you try this recipe and tell me what you think…

WHITE CHOCOLATE STRAWBERRY COOKIES...

  • Servings: 2 Dozen
  • Difficulty: Easy
  • Print

INGREDIENTS:

White Chocolate Strawberry Cookies1 1/4 cups flour, sifted

1/2 tsp. baking powder

1/8 tsp. table salt

1/4 cup unsalted butter, room temperature

4 oz. cream cheese, room temperature

3/4 cup sugar

1 large egg, room temperature

1 tsp. vanilla

3/4 chopped strawberries, drained

2 tsp. lemon juice (1/2 – 1 small lemon juiced)

1 – 2 Tbs. flour, for dusting the strawberries

5 oz. white chocolate chips, chopped (I recommend using a mini food processor to chop them)

White chocolate chips, melted –  to drizzle over the cooled cookies (optional)

DIRECTIONS:

Preheat the oven to 350 degrees. Line your baking sheet(s) with parchment paper.  Chop the strawberries, place them in a colander and sprinkle them with the lemon juice. Set them aside and allow them to drain.

Whisk together the dry ingredients – the flour, salt and baking powder. Set aside.

Beat the butter and sugar until creamy. Add the cream cheese and beat until light and fluffy. Add the egg and vanilla. Mix well. Gradually add the flour mixture and stir until combined. Do not over mix.

Stir in the chopped chocolate. Sprinkle the strawberries with flour and toss them so they all are coated with a thin layer of the flour. Carefully fold the strawberries into the batter.

Place the batter in the refrigerator for about 15-30 minutes.

Once slightly chilled, make the cookies by dropping a heaping tablespoon of the batter on the baking sheet leaving approximately an inch between each cookie. (I recommend no more than a dozen cookies per baking sheet). Bake for 15 minutes or until the edges become golden brown.

Let the cookies cool for a couple of minutes on the baking sheet before transferring them to a wire rack to cool. Once the cookies are cooled, put the remaining white chocolate chips in a microwaveable dish and microwave  on high for about 10 – 15 seconds. Stir the chips until melted. (Microwave at 5 second intervals after this if the chips need to be heated through a little more. Be careful not to overheat the chocolate). Place the chocolate in a gallon size bag. Cut the end of the bag (make sure the cut is small) and use it as a pastry bag to drizzle the melted chocolate over the cookies.

White Chocolate Strawberry Cookies

White chocolate Strawberry Cookies


Pumpkin Cream Cheese Sweet Bread…

It’s that time of year, my favorite time of year – Fall. I love everything about Fall, the cooler crisp weather, the fabulous colors, the onset of professional football, but most of all I love the food of fall. Whether it be a good ole pot of chili, a pot roast filling the house with fabulous smells or just the thought of cranking up that oven and making something sweet or savory, Fall is definitely the best time of the year for food and fun in my opinion.

And when it comes to Fall, undeniably the most popular gourd of the season is the pumpkin. Not only is it great in recipes but it also serves as one of the primary decorations that signals the coming of Halloween. So as I was sitting on my deck the other day enjoying an early morning cup of coffee and enjoying the Fall weather, I decided to make something with pumpkin in it.

Breakfast Al Fresco

Now I am far from a purist. I had absolutely no intention of cutting up a pumpkin and processing it to get some pumpkin puree. I simply turned to the canned variety. The result was absolutely fabulous. This time I took my creation to work, and it was gone within 20 minutes, so I think you’re really going to like this one.

So let’s talk pumpkin cream cheese sweet bread…

Cream Cheese FillingLesson Learned 1 – Make the cream cheese filling first: With any recipe that has filling or an internal swirl, I find it easier to make the filling first. A lot of recipes have you make the batter and then the filling. I think once the batter’s done, it makes more sense to move on to assembling the bread versus making the filling and letting the batter sit. Just remember to make sure your cream cheese is room temperature before making the filling. That way you’ll have a silky smooth batter without lumps.

This recipe makes a generous amount for the filling. I really like that the cream cheese filling is a major part of the cake and the contrast between it and the dark pumpkin batter is pleasing to the eye. This sweet bread is not only delicious but delightful to look at as well.

The wet ingredientsLesson Learned 2 – You don’t need a stand mixer for this one: I made the pumpkin batter in a stand mixer and used a hand mixer for the filling. You really only need a hand mixer. The wet ingredients combine easily and you fold the dry ingredients into the wet ingredients by hand. So don’t pull out the stand mixer for this one.

Lesson Learned 3 – Dividing the batter: Normally recipes like this tell you to divide the batter into fourths or thirds with the larger percentage going on the bottom and the smaller on top of the filling. I think I divided it by three-quarters to one quarter and I was really nervous that I did not have enough batter to put on top of the filling. At one point I even pulled out a butter knife and meticulously kept moving batter from the center of the pan to the edges. I felt the amount of batter around the edges was dangerously thin and at one point I just thought, oh well, what will be will be.

To my surprise, and as is verified in the pictures, the amount I had on top was more than enough. I forgot the batter has leavening agents (baking powder and soda) and that made the batter on top rise higher than I ever expected.

My advice here is to be careful. I think I’d have felt more comfortable with a slightly larger amount of batter to spread on top. But if for some reason you find yourself in the same situation as I was, don’t worry. I probably had the least amount of batter you can have on top and the bread turned out beautifully.

Cream Cheese Pumpkin Sweet Bread

Lesson Learned 4 – The challenge of knowing when it is done: Because this sweet bread has a cream cheese layer, it can be difficult to determine when it is done. Inserting a toothpick and expecting it to come out clean can be misleading, since the cream cheese will not set in the same way as the batter.

Also, depending upon your oven, the top and the sides can cook faster than the center. So, here’s what I did. I checked the bread after 30 minutes. I felt that the top and sides were cooking faster and so I tented the bread with foil making sure the foil did not touch the batter. I baked it for another 20 minutes tented and then I took off the tent. The center still looked a little too jiggly for me and so I removed the foil and baked it for another 5 minutes and then took it out of the oven. The sweet bread turned out perfectly.

Remember everyone’s oven is different. I also live in high altitude and so things normally take a little longer to bake. Start your overall time at 50 minutes and go from there. If it looks too jiggly in the center, let it bake a little longer. It sounds harder than it actually is, but believe me the end result is worth it.

Pumpkin Cream Cheese Sweet Bread…

  • Servings: 10-12 Quarter Inch Slices
  • Difficulty: Easy-Medium
  • Print

INGREDIENTS:

Cream Cheese Filling

1 extra large egg, room temperature

4 ounces cream cheese, room temperature

1/4 cup sugar

3 Tbs. flour

Sweet Bread

1 extra large egg, room temperature

1 cup canned pumpkin

1/2 cup brown sugar, firmly packed

1/4 cup sugar (7/8 of a 1/4 cup for high altitude)

1/4 cup coconut oil (in its liquid state)

1/4 cup sour cream

2 tsp. vanilla

2 tsp. ground cinnamon

1 tsp. pumpkin pie spice

1/2 tsp. nutmeg

1 cup flour (plus 1 Tbs for high altitude)

1/2 tsp. baking soda

1/2 tsp. baking powder

DIRECTIONS:

Preheat oven to 350 degrees. Using a hand mixer, mix all the cream cheese filling ingredients until smooth. Set aside.

For the batter: In a large bowl sift together the flour, baking soda and baking powder. In another large bowl mix together (using a hand mixer) the remaining ingredients. Pour the dry ingredients into the wet ingredients and gently fold them in using a wooden spoon or spatula. Continue until just combined. Do no over mix.

Spray the bottom and sides of a 9 x 4 inch loaf pan with baking spray. Pour in 2/3 of the batter mixture. Using a spatula, smooth out the mixture making sure it has spread to all sides and corners.

Pour the filling mixture on top, smoothing it out to reach all sides and corners. Add the remaining batter mixture on top of the filling. With a round edge knife or frosting spreader, smooth the remaining batter over the filling, making sure it reaches all sides and corners and covers the filling.

Bake for 50-55 minutes until cake it set. Half way through the baking process if it appears the sides  and top are cooking faster than the center, tent the loaf pan for the remaining baking time.

Let the sweet bread cool in the pan for at least 15 minutes before removing it. Let it cool completely before slicing.

The Layering Process

Fresh Out Of The Oven

Fresh Out Of The Oven

Pumpkin Cream Cheese Sweet Bread

Pumpkin Cream Cheese Sweet Bread

Apple Cream Cheese Cake…

I know it’s not apple season but I had the desire to bake something with apples in it and decided to make this cake. It has a combination of some warm spices, namely nutmeg and allspice, and a heavenly cream cheese filling that compliments the flavor of the cake. And if that isn’t enough for you, once the cake is cooled you drizzle on a thick and luscious praline frosting. That’s more than enough to satisfy anyone’s sweet tooth!

Cake ingredients...

Cake ingredients…

Lesson Learned 1 – Make sure the eggs are room temperature: This recipe produces a very thick batter that is mixed by hand. You can use a mixer for the cream cheese filling but I highly recommend mixing the batter by hand. That way you are less likely to over mix and wind up with a tough cake. Room temperature eggs incorporate themselves more completely into a batter and you’ll want to ensure that when mixing by hand. Also for ease of mixing, the eggs should also be slightly beaten before putting them into the batter.

Lesson Learned 2 – After you chop the apples sprinkle a little lemon juice on them to avoid browning: I am amazed how many recipes I come across that require chopped apples and don’t address what can happen to an apple once it’s peeled and cut. When an apple is cut open, an enzyme called polyphenol oxidase is released from the cells of the apple and reacts with the oxygen in the air causing the fruit to brown. Lemon juice helps keep apples from browning because it’s full of ascorbic acid and it has a low pH level. Ascorbic acid works because oxygen will react with it before it will react with the polyphenol oxidase. I know this may sound like chemistry class but it helps to explain why you need to used a little lemon juice to keep the chopped apples looking fresh until you add them into the batter. If you chop the apples right before adding them to the batter you may not need lemon juice, but I would err on the side of caution.

I used two gala apples in this recipe. That produced 3 cups of chopped apples. It takes some time to peel, core and chop the apples. Even if you plan on adding them immediately, the first pieces you chopped may still start to turn brown. The browning process can happen rather quickly. Better to sprinkle a little lemon juice over the apples so you don’t have to worry. Besides lemon juice, lime juice or cranberry juice can also generally be used to stop browning. But be aware of the flavors you might be adding into your cake. For this recipe lemon juice is the best flavor choice.

Also be aware that sprinkling lemon juice on apples will not eliminate the browning process completely. Once the lemon juice has evaporated, the apples will begin to brown as the oxygen will then begin to work on the enzymes the apple produces once it is cut. Adding a little lemon juice is designed to be a short term but very effective fix. (I used about half the juice from half a small lemon on the chopped apples).

cakecollage

Lesson Learned 3 – Do not make the frosting until the cake is completely cooled: I have to admit this is very delicious frosting. It’s really more of a thick glaze. The downside is the frosting sets very quickly. So, don’t make the frosting until you are ready to immediately drizzle it over the cooled cake. That way the frosting won’t set and too quickly you’ll get the results you see in the picture below.

IMG_5250

Lesson Learned 4 – For more flavor, you can toast the pecans before adding them to the batter and on top of the cake: Just place them in a non stick pan on the stove and heat them. Remember, nuts can burn quickly so as soon as you smell them take them off of the heat.

My husband almost single handedly ate this entire cake. He loved this one. Try it and let me know what you think…

Apple Cream Cheese Cake…

  • Servings: 12=14
  • Difficulty: Easy
  • Print

INGREDIENTS:IMG_5284

Cream Cheese Filling

1/4 cup unsalted butter, room temperature

1/2 cup granulated sugar

1 large egg, room temperature

8 oz. cream cheese, room temperature

2 Tbs. flour

1 tsp. vanilla

Cake

1 cup finely chopped pecans, plus some for garnish

3 cups flour, plus 2-3 Tbs. to dust the pan

1 cup sugar

1 cup firmly packed brown sugar

2 tsp. cinnamon

1 tsp. salt

1 tsp. baking soda

1 tsp. nutmeg

1/2 tsp. allspice

3 large eggs, room temperature and slightly beaten

3/4 cup canola oil

3/4 cup unsweetened applesauce

1 tsp. vanilla

3 cups finely chopped apples (gala or granny smith)

1 tsp shortening to grease the pan

1/2 lemon squeezed for its juice to put on the chopped apple pieces

Praline Frosting

1/2 cup firmly packed brown sugar

1/4 cup unsalted butter

3 Tbs. milk

1 tsp. vanilla

1 cup powdered sugar

DIRECTIONS:

Preheat oven to 350 degrees. Grease and flour a 12 cup bundt pan. Set aside. Peel core and chop the apples into small pieces. Squeeze the lemon juice over the apples as you put them in a bowl. Stir to redistribute the lemon juice every time you add more chopped apples to the bowl. Set aside.

Using a non stick pan, heat the pecans on the stove until they become fragrant. Take off the heat and set aside.

To make the filling: Beat together the cream cheese, butter and sugar until well combined. Add the egg, flour and vanilla and beat until just combined. Set aside.

In a large bowl whisk together the flour, sugar, brown sugar, cinnamon, salt, baking soda, nutmeg and allspice. Make a well in the center of the dry ingredients. Add the eggs, oil, applesauce and vanilla. Stir just until combined (the batter will be thick). Fold in the pecans and apples.

Spoon half the batter into the prepared bundt pan, evenly distributing the batter around the pan. Top with the cream cheese filling, leaving an inch border around the edge of the pan. Top with the remaining batter.

Bake for 60 minutes or until a toothpick inserted in the center of the cake comes out clean. Cool the pan on a wire rack for 15 minutes. After 15 minutes, invert the cake onto the wire rack and allow to cool completely.

To make the frosting: Combine the brown sugar, butter and milk in a saucepan. Over medium heat bring the mixture to a boil whisking continuously. Boil for 1 minute (keep whisking). Remove from the heat and stir in the vanilla. Whisk the powdered sugar in a little at a time until the frosting is smooth. Immediately drizzle over cooled cake. Garnish with pecans.

IMG_5284

IMG_5317

Strawberry Cream Cheese Loaf…

Now we’re seeing more and more strawberries in the grocery stores – the season is vastly approaching (and thank goodness because we’re all getting tired of snow). Yesterday I wanted to make something quick and sweet and decided on this particular loaf. This recipe is one that differs slightly from sea level to high altitude and I’ll write out both versions so you can successfully make it wherever you live. Regardless, this loaf is a sure winner. It is moist and not overly sweet – great for snacking or for dessert.

strawbread2

Lesson Learned 1 – Don’t over mix the batter: In order to keep this loaf moist you only need to incorporate the ingredients. Once they are, quit mixing! Loafs like this will get tough quickly if they’re over mixed.

IMG_3266Lesson Learned 2 – Cut the strawberries into small pieces: After removing the hull I cut the strawberries in half and sliced them. If the strawberry was larger, I cut it in half twice before I sliced it. Strawberries tend to be like blueberries when you bake them, they have a tendency to explode (as I like to call it) in the batter. If they’re too large when they explode your loaf will sink in on itself. In this recipe I used only 1 1/4 cups of strawberries, but you could easily use only 1 cup and still have a great loaf.

IMG_3286Lesson Learned 3 – Fold the strawberries gently into the batter: Strawberries break apart rather easily so you need to be careful when adding them. Fold them in as if you’re folding egg whites into a batter. That way you will have nice marbling and not a strawberry explosion.

Lesson Learned 4 – You may have to use an extra pan for all of the batter: This batter rises rather high. I filled a 9 x 5 loaf pan about two thirds of the way up and put the excess batter in a 3″ x 5″ mini foil loaf pan. If I hadn’t done that, the batter would have risen over the side of the larger pan. What’s nice about doing this is I had a small loaf that I could give as a gift to a neighbor and still had the larger loaf for my family. I recommend not putting all of the batter in one pan, but if you’re brave go ahead. I think you’ll find that if you do, it will run over the sides. If you put some batter in a small loaf pan, it only needs to bake for 30 minutes. The larger loaf takes 50 – 60 minutes.

For as easy and quick as this is to make, it’s a delicious sweet treat. Next time you’re in a pinch for time but want to make something fresh, this would be the loaf to make. Enjoy!

Strawberry Cream Cheese Loaf...

  • Servings: 12
  • Difficulty: Easy
  • Print

INGREDIENTS:

1/2 cup unsalted butter, softened

1 cup sugar (slightly less for high altitude)

4 ounces of cream cheese, softened

2 eggs, room temperature

1 tsp. vanilla

2 cups all purpose flour

2 tsp. baking powder (1 tsp for high altitude)

1/2 tsp. baking soda (1/4 for high altitude)

1/2 tsp. kosher salt

1/2 cup buttermilk

1 – 1 1/4 cups strawberries, diced small

DIRECTIONS:

Preheat oven to 350 degrees. Grease and flour (you can use an organic cooking spray as well) a 9 x 5 loaf pan and a 3″ x 5″ inch mini foil loaf pan. In a medium size bowl, mix flour, baking powder, baking soda and salt. Stir to combine. Set aside.

Using a electric stand mixer (or hand mixer) cream butter, sugar and cream cheese until soft. Add eggs one at a time. Mix in the vanilla.

Add the flour mixture to the butter mixture and mix until just blended. Add the buttermilk until combined. Do not over mix.

Carefully fold in the strawberries (the dough will be thick). Bake the small loaf for 30 minutes and the large loaf for 50 – 60 minutes or until a toothpick inserted in the center of the loaf comes out clean.

Let the loaf cool for at least 15 minutes in the pan before removing it.

IMG_3313

 IMG_3336

IMG_3459

Cream Cheese, Spinach, Bacon and Scallion Pinwheels…

I know, I know, this is a pretty rudimentary recipe but I’m sharing it because the flavor is divine. I’ve eaten many varieties of these pinwheels at parties and such and I have to say I like this version the best. It is simple, easy to make and oh so delicious!

Pinwheel Ingredients...

Pinwheel Ingredients…

For those of you who’ve never made these before, (and I’m sure there has to be a few out there), there are a couple of tricks to making these that you really don’t think about the first time you make them – or at least I never did. So for the burgeoning cooks who want to avoid some of my pitfalls, here are a couple of tricks to keep in mind for making delicious and good looking pinwheels.

Lesson Learned 1 – The cream cheese must be room temperature: I think this is where many err the first time they make these. Keep in mind that you are spreading this mixture on a flour tortilla. If the cream cheese is not room temperature you will rip the tortilla to shreds. I took my cream cheese out of the refrigerator before I went to bed and then made the pinwheels first thing in the morning. When the cream cheese is room temperature it not only spreads better but mixes better with the other ingredients. Make sure you give the cream cheese enough time to get to room temperature.

Pinwheel ingredients...

Pinwheel ingredients…

Lesson Learned 2 – Heat the tortillas for 20-30 seconds in the microwave before spreading on the filling: Even though they are flour tortillas they can crack and split when you spread the filling on them and roll them up. Cover your tortillas with a damp paper towel and heat them slightly in the microwave. Only work with one tortilla at a time. Keep the others covered with the damp towel until you are ready to use them. Make sure the tortilla is not warm. Once you take it out from under the paper towel it will only take a few seconds for the warmth to dissipate but the tortilla will still be nice and pliable.

IMG_2906

Pinwheel ingredients combined…

I found that if you press your finger down on the top part of the tortilla while spreading the mixture, the process is easier and you don’t have the tortilla jumping around. Spread the mixture to within  a quarter of an inch around the edge of the tortilla and even closer to edge that will be the end of your roll. That way you will have some mixture at the very end to act as a glue holding the tortilla closed.

Lesson Learned 3 – Don’t put the mixture on too thick: If you put the mixture on too thick you’ll have a bunch coming out the ends. A nice even layer will do. I’ve found this particular recipe makes three large flour tortilla rolls. That may sound like a small amount but you get between 24-30 one inch rounds with this recipe. Keep in mind that the mixture is rolled onto itself so that creates the thickness you are looking for. You don’t need to create the thickness by overloading the tortilla.

Lesson Learned 4 – Roll the tortillas tight: Start with a very tight roll and keep it that way throughout the rolling process. Once the tortilla is rolled, I recommend squeezing it lightly from top to bottom just to solidify the tight roll. You don’t want gaps in the filling when you cut them.

IMG_2911

IMG_2916

Lesson Learned 5 – This is the most important tip of all – put the filled tortillas back in the refrigerator and let them chill for a few hours before you cut them: The first time I made these I cut the tortillas right after rolling them. Big mistake! Remember I said you have to work with room temperature cream cheese? Well room temperature pinwheels do not cut easily. In fact they become a gloppy mess when you try to cut them. You need to let the cream cheese chill again to get cleaner cuts in the pinwheels. Plus it’s also good to let these flavors meld for awhile. Believe me, the mixture tastes great when you first make it, but it tastes even better when all the ingredients have time to get better acquainted.

IMG_2926

Wrap in plastic wrap and chill for 3-4 hours…

Lesson Learned 6 – When the tortillas have sufficiently chilled, use a very sharp knife to cut them: This is also important because the tortillas can still squish a little on you if you don’t use a sharp knife. You will find that you’ll have to cut a small portion off the ends of each tortilla and discard them. You just can’t get every bit of the tortilla filled. No worries, they make tasty morsels if you just want to pop them in your mouth. Also it is important to wipe off the blade of the knife with a paper towel when more than a small amount of cream cheese builds up on it. That way you will get nice clean cuts throughout.

IMG_2928

Cut with a very sharp knife…


These are so easy to make and so worth it. My husband never had them before and he told me if any were left over after our party to be sure not to throw them out because he would eat them. “These are really good” was all I needed to hear from him to know I’d produced a hit.

You can go online and find many different ways to make these. Hopefully these few lessons learned will help you avoid my mistakes when I first tried to make them.

Cream Cheese, Spinach, Bacon and Scallion Pinwheels

  • Servings: 24-30 One Inch Rounds
  • Difficulty: Very Easy
  • Print

INGREDIENTS:

8 oz. of softened cream cheese

4 scallions finely chopped, including the green parts

1 handful of baby spinach

6-8 slices of bacon cooked, drained and cooled

1/2 package ranch dressing mix

3 large flour tortillas

DIRECTIONS:

Make sure the cream cheese is a room temperature. Put the first five ingredients in a large bowl. Mix well with an electric hand mixer. Place the tortillas on a microwave safe plate and cover them with a damp paper towel. Microwave the tortillas for approximately 20 seconds or until they fell very pliable.

Work with one tortilla at a time. Keep the others covered with the damp paper towel until you are ready to use them. Make sure the tortilla is not hot. Spread one third of the mixture on the tortilla making sure to come within a quarter inch on all edges and very near the edge that will be the end of the roll. Roll the tortilla as tight as you can. When finished rolling, gently squeeze the tortilla up and down the shaft of the roll to ensure the mixture is evenly distributed inside the roll. Place the finished rolled tortillas in a plastic bag and refrigerate them for at least 3-4 hours.

When tortillas are sufficiently chilled, remove them from the bag and using a very sharp knife slice them into one inch rounds. Serve and enjoy!

IMG_2939

pinwheels2

IMG_2945

Oatmeal Cream Cheese Butterscotch Bars…

I have a goal every holiday season of making at least one new cookie recipe. This year I was adventurous and I made two new varieties. One new cookie was peppermint twist kisses and the other, which quickly has become my husband’s favorite, was oatmeal cream cheese butterscotch bars. The past few years I’ve ventured away from some of the more traditional holiday faire and tried more unique types of cookies. Last year, my iced cinnamon chip cookies became a big hit replacing the more traditional chocolate chip cookie in look and flavor. This year my peppermint twist kisses not only gave the look of the holiday but also provided the flavor combination of peppermint and chocolate. Yum!

This recipe is a great melding of oatmeal, cream cheese and butterscotch. It’s not all that difficult to make and it tastes divine. I found I had to buy two bags of butterscotch chips as my husband attacked the first bag when it was in the refrigerator leaving me barely enough to make the bars. Beware those elves that steal the chips before the cookies are made!

For about a year I have been chronicling recipes I’ve made and giving them my rating and lessons learned. As I look back on these recipes there’s hardly a one that has a rating below an A minus. So I’ve decided not to do recipe ratings anymore as I promise to bring you only A and A plus recipes. I will definitely continue my lessons learned, as I know how appreciative I am to learn tips and tricks ahead of time that will make me more successful in the kitchen, especially when trying a recipe for the first time.

Line the pan with foil and let it overlap the sides to create handles...

Line the pan with foil and let it overlap the sides to create handles…

Lesson Learned 1 – Preparation is key to this recipe: Prepping the pan appropriately is key to the success of this recipe. You need to line a 9 x 13 inch pan with a couple of pieces of foil. Make sure the foil overlaps on the long sides of the pan to serve as handles when you lift out the bars. Grease the foil lightly, and wait until the pan is completely cool before lifting the bars out and cutting them (more on that below). If you do that, you will have absolutely no problem removing them from the pan.

Lesson Learned 2 – You don’t need a stand mixer to make these cookies: For those of you that don’t have a stand mixer, never fear – you don’t need one to make this recipe. The bottom of the bars and the crumb topping are one in the same mixture and are made in a food processor. IMG_2403The filling can be made with a hand mixer. Personally I preferred making the crumb mixture in the food processor. I think the pulsing action of the food processor blends the butter with the sugars more completely creating a perfect crumble. The texture should resemble what you see in the picture to the right. I would not recommend trying to make the crumble by hand. I also have to admit it felt weird not using my stand mixer to make the bars, but it was a delightful departure from the usual way of making cookies.

Lesson Learned 3 – Let the pan cool and chill the bars before attempting to cut them: This is critical. The ingredients need to completely set before cutting and the only way to do that is to let them cool. Once the pan was slightly cool I covered it loosely with foil and put it out in the garage. The winter temperatures here in Colorado make it easy to use the garage as a cooling station. I don’t recommend this for warmer climates. If you live in one, let the pan cool on a cooling rack in the kitchen and then put it in the refrigerator once the pan is cool to the touch. Leave the pan in the refrigerator until the bars have completely cooled.

Although this recipe may look difficult it is really quite easy, and definitely worth it. This recipe has become my husband’s new holiday favorite. I think you will enjoy it too!

Oatmeal Cream Cheese Butterscotch Bars…

  • Servings: 36
  • Difficulty: Easy
  • Print

INGREDIENTS:

2 sticks room temperature butter cut into small pieces

2 cups flour

1 1/2 cups quick cooking oats

3/4 cup firmly packed brown sugar

1 tsp. cinnamon

1 bag butterscotch chips (11 ounces)

I package cream cheese, softened (8 ounces)

1 can sweetened condensed milk (14 ounces)

1 lemon zested and juiced

1 tsp. vanilla extract

DIRECTIONS:

Preheat oven to 350 degrees. Line a 9 x 13 pan with foil making sure the foil overlaps the side of the pan to create handles for easy removal. Grease the foil lightly.

Combine flour, oats, and brown sugar in a food processor. Pulse to combine. Add the butter, cinnamon and butterscotch chips. Pulse until the mixture clumps when pressed between your fingers. Press half of the mixture in an even layer into the bottom of the prepared pan.  Bake until slightly golden and set approximately 12 – 15 minutes.

With a hand mixer beat until smooth the cream cheese, condensed milk, lemon juice and zest and vanilla. Spread the mixture evenly over the cooled oatmeal mixture. Sprinkle the remaining oatmeal mixture on the top. Bake until top is golden, approximately 40 minutes.

Cool and chill before cutting. Use the foil handles to remove the bars from the pan and place on a cutting board. Cut into squares.

IMG_2432 2

IMG_2438

Strawberry Cream Cheese Coffee Cake…

Almost ready to go into the oven...

Almost ready to go into the oven…

So I was bored and thought, gosh I haven’t baked in a while. Let’s see what I already have in the house and make something. I got a new spring form pan for Christmas and hadn’t christened it yet. What’s the matter with me? Time to figure out a baking project…

So I perused my pantry and refrigerator and went off seeking the help of my trusted friend Pinterest and voila, it was decided – I’m making a strawberry cream cheese coffee cake. I found a recipe from a blog called joansfoodwonderings on blogspot. I had everything to make the cake and so I proceeded on my baking adventure. Here are my lessons learned along with my recipe rating.

Rating: A – this is a great recipe, a little time consuming to make but well worth the effort. It is not overly sweet and yet very flavorful. The dough reminded me of chocolate chip cookie dough as I could had eaten raw by the spoonfuls. Great recipe, a must try.

A slice - obviously in need of adjustment for high altitude but still delis...

A slice – obviously in need of adjustment for high altitude but still delish…

Lesson Learned 1: I have to get off my butt and get more proficient at high altitude baking. For some reasons some recipes I have mastered but when it comes to a few I just fail miserably. My failure on this one was not horrible – it’s just that I really need to get more proficient at adjusting these types of recipes for high altitude so my cakes don’t fall in. I know the basic rules namely decrease the leavening (baking powder), decrease the sugar (it weighs the mixture down, ergo the fall-in) and increase the liquid. I tried this recipe as is and it wound up falling in (as you can see from the picture to the right). Not sure why I didn’t try to adjust it but I’ve already decided that my next baking venture is going to be a cheesecake so I will definitely do some adjusting on that and see what happens. The challenge with high altitude baking is it can be such a guessing game from recipe to recipe and that gets a little frustrating. But it’s my reality. I will definitely try this one again with a few adjustments. Thank goodness it still tastes good – just not as pretty as I would like it to be. My goal is to adjust this recipe so it the cake continues to look the same way it does when it first comes out of the oven (see picture below). I know I can do it! The recipe I will give you is not adjusted for high altitude but provides some high altitude tips.

Lesson Learned 2: Make sure the strawberries you use are ripe. Mine were a little less ripe and I think that affects the overall sweetness the strawberries provide. You do add sugar to the strawberries when you cook them, but I think the sweetness of them would have been even richer had they been just a tad riper.

Lesson Learned 3: I seem to have a hard time creating a good crumb topping. I know you need to use cold butter and use either a pastry cutter or some other sharp utensil to cut the butter into the flour mixture until the mixture turns into course crumbs. For some reason I can’t seem to get the butter incorporated to the point that my mixture looks consistently like coarse crumbs. Some parts of it does, the other parts simply look like flour. I wound up not putting the entire mixture on top of the coffee cake, just the parts that resembled coarse crumbs. I’m glad I did. Otherwise the top of the cake would have had a large dusting of flour on it instead of a crumb topping. I have to figure out how to get better at this as well. Next time I think I’m going to try to do the combining in the food processor and see if that helps. If you have any tips, let me know as this has been a perennial issue for me.

Fresh Out Of The Oven

Fresh Out Of The Oven


As you can see from the picture above, the finished product (if it doesn’t fall in) is really a site to behold. I like this recipe because it is not overly sweet. Be careful not to overcook. The recipe called for baking from 50-55 minutes. I did 55 and the cake part was slightly overdone – again not awful but next time I’ll do 50 minutes. This recipe requires a lot of dishes to put together, but in the end I think it is worth it.

Strawberry Cream Cheese Coffee Cake

  • Servings: 10-12
  • Difficulty: Medium
  • Print

INGREDIENTS:

2 cups flour

1 cup + 3 tsp. sugar, divided (high altitude consider using a light measure – i.e., not all the way to the top of the measuring cup)

1 stick cold butter

1/2 tsp baking powder (reduce for high altitude to 1/8)

1/2 tsp baking soda (reduce for high altitude to 1/8)

1/4 tsp salt

3/4 cup full fat sour cream

2 extra large eggs

2 tsp vanilla extract

8 oz. room temperature cream cheese

2 cups fresh strawberries cut into pieces

3 tsp water for slurry (high altitude consider adding 2-3 TBS of water – 1 TBS to the cream cheese mixture and 2 TBS to the cake batter)

1 1/2 tsp cornstarch

DIRECTIONS:

Preheat the oven to 350. Begin by making the strawberry filling. Cut the strawberries into small pieces, put in a pot and add sugar. Cook on medium heat for about 5 minutes until strawberries release their juices. In the meantime combine 3 tsp. of water with the cornstarch and make a slurry (make sure you get the cornstarch completely combined with the water). Add to the strawberry mixture and continue to cook until the mixture thickens (a couple of minutes). Take off the stove to set aside and cool.

Next, make the cream cheese filling by first beating the cream cheese for about a minute until it becomes fluffy. Add 1/4 cup of sugar, egg, vanilla and 1 TBS water (only in high altitude). Beat until combined. Set aside.

To make the cake, combine the flour, 3/4 cup of sugar and 1/2 cup cold butter sliced into cubes. (I use a pastry cutter to initially slice the butter and it works very well). Cut the butter into the flour and sugar mixture (try using a food processor for this so that the mixture becomes more evenly combined) until the mixture looks like coarse crumbs. Take 3/4 cup of this mixture and set aside for the topping.

In a separate bowl beat the egg, sour cream and vanilla (and for high altitude add 2 Tbs. of water) until smooth. Using a spoon, combine the sour cream mixture with the remaining flour mixture until well combined. The batter will be thick and maybe slightly lumpy.

Line the bottom of a 8 inch springform pan with parchment paper. Spread the batter in the bottom of the pan and create a well by pushing the batter up 1/2 inch all around the edges of the pan. Pour the cream cheese mixture in the center of the well making sure that it does not go over the side of the batter edges. Spread the strawberry mixture on top of the cream cheese mixture. Sprinkle the remaining crumble over the top of the cake.

Bake for 50-55 minutes. Let cake cool for at least a half hour before removing from the pan. At that point the cheese center will still be warm. Let the cake set for at least another hour before serving or put in the refrigerator to chill.


Iced Cinnamon Chip Cookies

If you have been following my recent holiday cookie recipe posts you know by now that every year I try at least one new cookie recipe. This year I tried two, Salted Caramel Butter Bars and the one I am going to share in this post the Iced Cinnamon Chip Cookies. The Caramel Bars were a huge hit with my husband but my favorite was the cinnamon chip cookies.

First of all, did you even know that cinnamon chips existed? I didn’t until I saw the recipe and decided to do some hunting at the grocery store. Lo and behold, right next the semi-sweet chocolate morsels were the cinnamon chips. I had never seen them before but I guess I just wasn’t looking for them. They were there in plain sight.

Cinnamon Chip Cookies

Cinnamon Chip Cookies

At first I was a little hesitant about making this cookie – the recipe was very similar to a chocolate chip cookie recipe but I wanted to make an iced cookie this year and thought a hearty cookie like this would stand up well to icing. I found the recipe in my trusty 2008 Taste of Home Best Loved Cookies and Bars magazine (the magazine that has supplied quite a few a my holiday cookie recipes over the years). The one thing that I did not like about the recipe was the frosting ingredients (they seemed bland to me, just the usual milk and confectioners sugar combination) so I went online to research a cinnamon cream cheese frosting recipe. I found one that was part of a soft pumpkin cookie recipe and decided to try it. I’m so glad I did. I’m sure it complimented the cookie much better than the original frosting recipe. So now my recipe rating and lessons learned.

Rating: A++++++  I absolutely LOVE this cookie recipe. The cinnamon chips provide a delightful unique flavor and the frosting highly compliments the cookie and makes it an absolutely tasty delight. If you try any cookie this year, I would recommend this one. It is easy to make and soooooo good!

Lesson Learned 1: I am providing you the recipe as it is in the magazine. I had to adjust it for high altitude. Please note the adjustments in the recipe. If you are at high altitude it is important to make them, otherwise the cookies will not bake correctly and will be inedible.

Lesson Learned 2: Storing an iced cookie can be a challenge. I recommend making the icing, refrigerating it and putting it on the cookie before serving or giving away. That way the cookies are easier to store.

Lesson Learned 3: These cookies are so easy to make that there are no more words of wisdom I can depart regarding making them or storing them. Just make them and enjoy them.

Iced Cinnamon Chip Cookies

  • Servings: 4 dozen
  • Difficulty: Easy
  • Print

INGREDIENTS:

Cookies:

1 cup unsalted butter, softened

3/4 cup packed brown sugar (2/3 cup high altitude)

3/4 cup sugar (2/3 cup high altitude)

2 eggs

1 tsp. vanilla

3 cups flour (3 1/4 cups high altitude)

1 tsp. baking soda

1 tsp. salt

1 package (10 ounces) cinnamon baking chips

Frosting:

8 oz. cream cheese, softened

4 TBS softened butter

2 1/4 cups powdered sugar

1/2 tsp. cinnamon

1 tsp. vanilla

DIRECTIONS:

Preheat oven to 350.

In a large mixing bowl cream butter and sugars. Beat in eggs and add vanilla. Combine flour, baking soda and salt; gradually add to creamed mixture and mix well. Fold in the cinnamon chips.

Drop by rounded tablespoonfuls (I use a cookie scoop) 2 inches apart onto an ungreased cookie sheet. Bake for 10-12 minutes or until golden brown. Remove to wire rack to cool.

Frosting: In a mixing bowl cream butter and cream cheese. Add powdered sugar and mix until combined. Add cinnamon and vanilla. Store in refrigerator until ready to use.


IMG_2216 2


IMG_8894

Iced Cinnamon Chip Cookies

Iced Cinnamon Chip Cookies

Fall – When Ovens End Their Hibernation…

What is it about Fall weather that makes you want to fire up the oven? The manner in which you cook totally changes from Summer’s outdoor grill mode to Fall’s indoor nesting and baking mode. And for me that usually means heavy duty oven time. Think about it. You move away from grilling chicken and steak to making pot roast and casseroles. And I think that is what I most appreciate about Fall – bringing all those marvelous smells back into the house. And if a Fall day also happens to be a rainy day, well then it is an absolute must to fire up the oven!

And so it was yesterday, that killer combination of Fall and rain and I knew I just had to make something. There were only two givens – one, it had to smell wonderful when it was cooking and two, it had to be a recipe I had not tried before. That doesn’t narrow the playing field very much but I happen to love endless possibilities. But how to proceed… hmm…

Then it struck me. My husband and I recently returned from a trip from Santa Fe, New Mexico. While we were there we stayed at a bed and breakfast and each morning my husband would have an English Muffin and a piece of coffee cake. My husband is not a sweets eater but he often talked about how much he enjoyed the coffee cake. The coffee cake had a cream cheese filling and so as I thought about what I would bake I began to think in that vein.

The finished product

The finished product

So off I went to one of my favorite sites on the web, Pinterest, in search of a cream cheese coffee cake recipe. Lo and behold I found one on a website called Bake or Break and like that my decision was made. There was no turning back, I succumbed to the trappings of Fall weather and rain by making a cinnamon cream cheese coffee cake.

As you can see the finished product was great and it tasted divine. I encourage you to try it. Here are some things I learned when making it:  1.) Be aware that it does take some time to prepare because basically you are making three separate things from scratch, the crumb topping, the cream cheese swirl and the cake. 2.) The cake mixture is much thicker than you might think – I poured it into the prepared pan and literally had to spread it out by hand in order for it to fit the entire pan. I thought this might make the cake tough, but it was not. 3.) Be very mindful of the cooking time – it helps to know your oven on this and really on almost everything else you bake. The recipe says to cook it at 350 for 40-45 minutes. Mine was done at 40 and could maybe have been in for even a few minutes less.

But anyway it turned out great – so much so that even though it takes a little more time to prepare it is definitely worth making in my opinion. My husband loved it, my co-workers are getting a treat today, and a newly formed cooking group that I just joined (something for a future blog) will be getting samples of it tomorrow night. So enjoy the coffee cake, it is definitely worth the work. Happy Fall baking!

Cinnamon Cream Cheese Coffee Cake

Cinnamon Cream Cheese Coffee Cake

Cinnamon Cream Cheese Coffee Cake Recipe