Vegetable Beef Barley Soup…

There is nothing like a good hearty soup during the cold winter months. If you’re looking to make one, this recipe wholeheartedly fits the bill. A hearty soup that mirrors a stew, it’s a great way not only to fill your tummy, but also to use any and all vegetables you may have in your refrigerator.

I am a big fan of soup during wintertime and I’ve found that making them is really quite easy and so much better for you than the canned varieties. This soup is a meal in itself and whether you decide just to serve it on its own or with a salad or some baked crusty bread (I love those take and bake breads you can find in the grocery store) this soup will be a hit with your family and friends.

So let’s talk vegetable beef barley soup…

Lesson Learned 1 – This recipe is not written in stone: I am posting this recipe as a guide. I would follow the basics of the recipe, namely the meat, seasonings, onion, garlic, barley, diced tomatoes, tomato paste, broth and wine but the rest is up to you and what you have available at the time. If you don’t have any potatoes you can still make the soup. Use whatever vegetables you might have. That’s the beauty of this recipe. I normally add mushrooms to just about everything, but since I was serving the soup with a spinach salad that had mushrooms in it I decided to leave the mushrooms out this time. I also had some asparagus spears that I knew I wouldn’t be using in a timely fashion so I cut them up and threw them in.

The only thing you need to remember is certain vegetables may not stand up to the initial longer cooking time. So after I simmered the soup for an hour I added the frozen corn, peas and asparagus and cooked it for an additional ten minutes. That way the asparagus did not get too mushy,

Lesson Learned 2 – For even richer flavor, make it the day before: If you’re like me you’ll want to dive into this soup right away. It looks and smells so luscious it’s hard to resist. But if you let it sit overnight the flavors intensity. So if you can practice some self control you’ll definitely be rewarded. But if not, the soup is still really good.

Lesson Learned 3 – Use tomato paste from a tube: Since this recipe calls for only a couple of tablespoons of tomato paste don’t buy it canned. Stores now sell tomato paste in a tube so when a recipe calls for only a small amount you can squeeze it out of the tube and refrigerate the rest until you need it again. This is a great way to minimize waste.

Lesson Learned 4 – I can’t say it enough: Better than Bouillon bases, be it roast chicken or beef, really enhance the flavor of the soup. Do yourself a favor and pick some up. You’ll definitely notice a difference in the depth of flavor of the broth.

This soup is so easy to make there is not a lot to tips I can give you other than following the basics of the recipe. I know you will love this soup. Give it a try and let me know what you think…

Vegetable Beef Barley Soup...
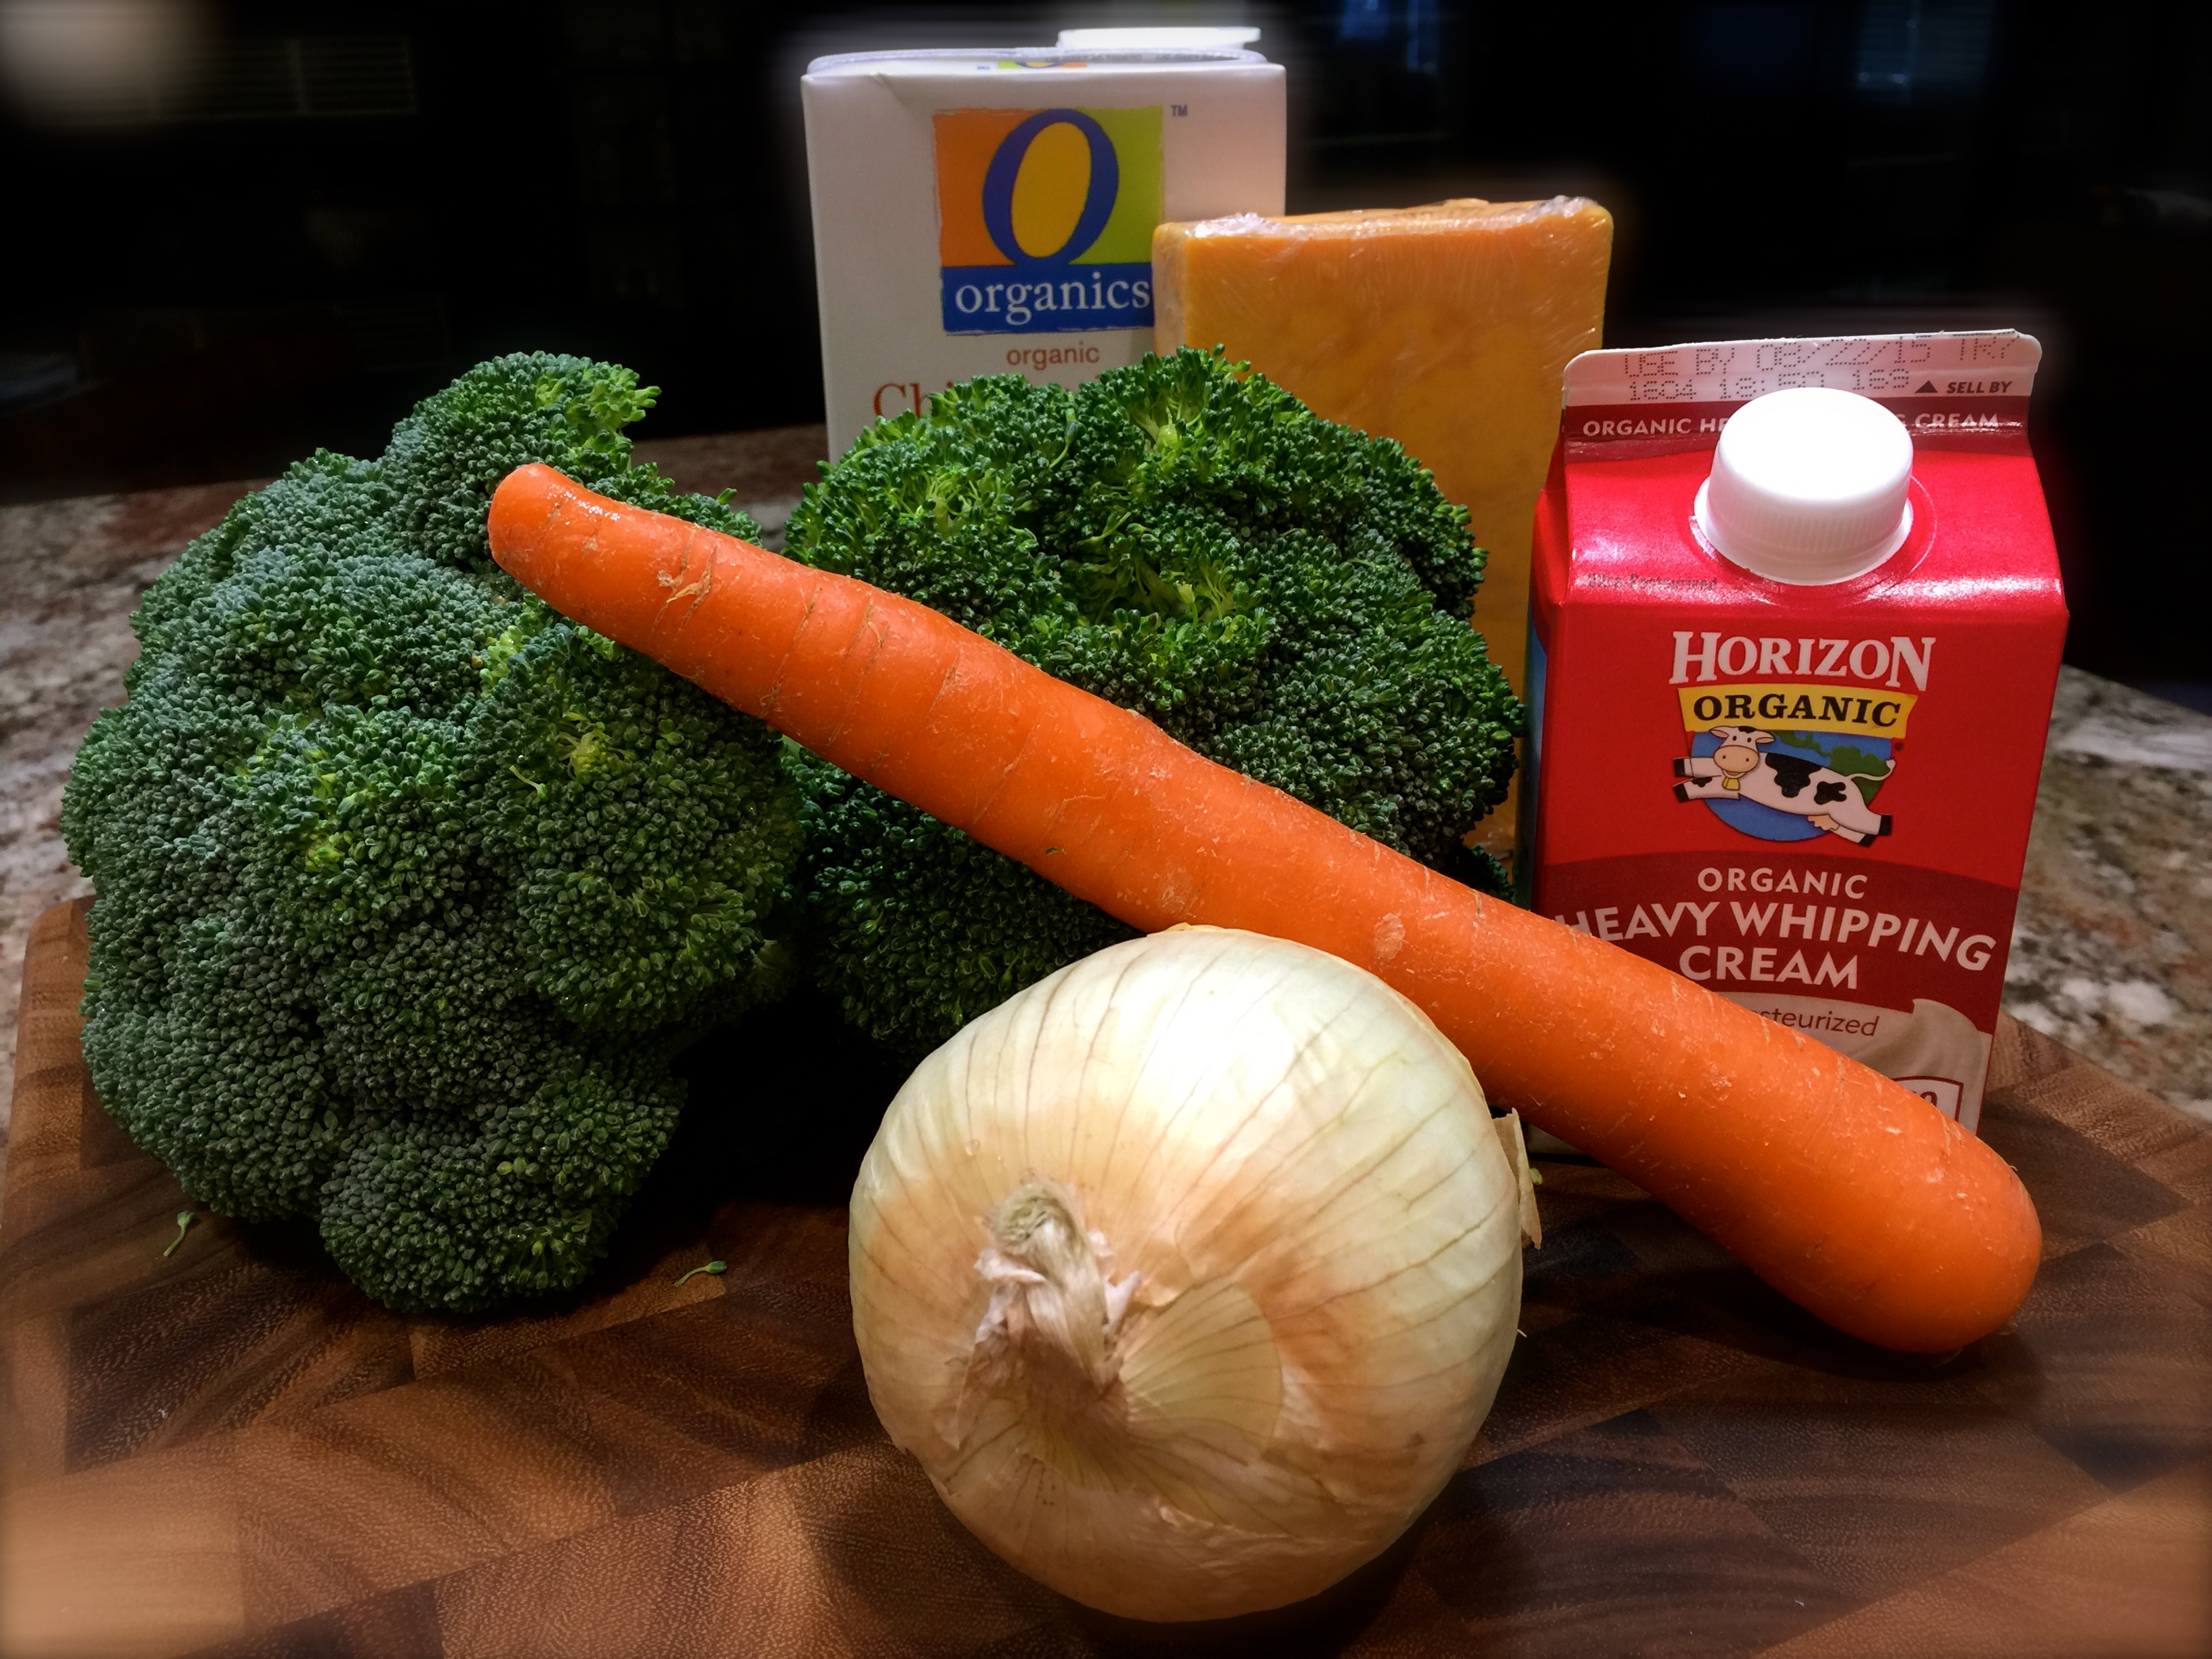
  • Servings: 10-12
  • Difficulty: Easy
  • Print

INGREDIENTS:

2 Tbs butter

2 Tbs. vegetable oil

1.5 pounds chuck (or beef stew meat) cut into 1 inch chunks

Salt and Pepper (to taste)

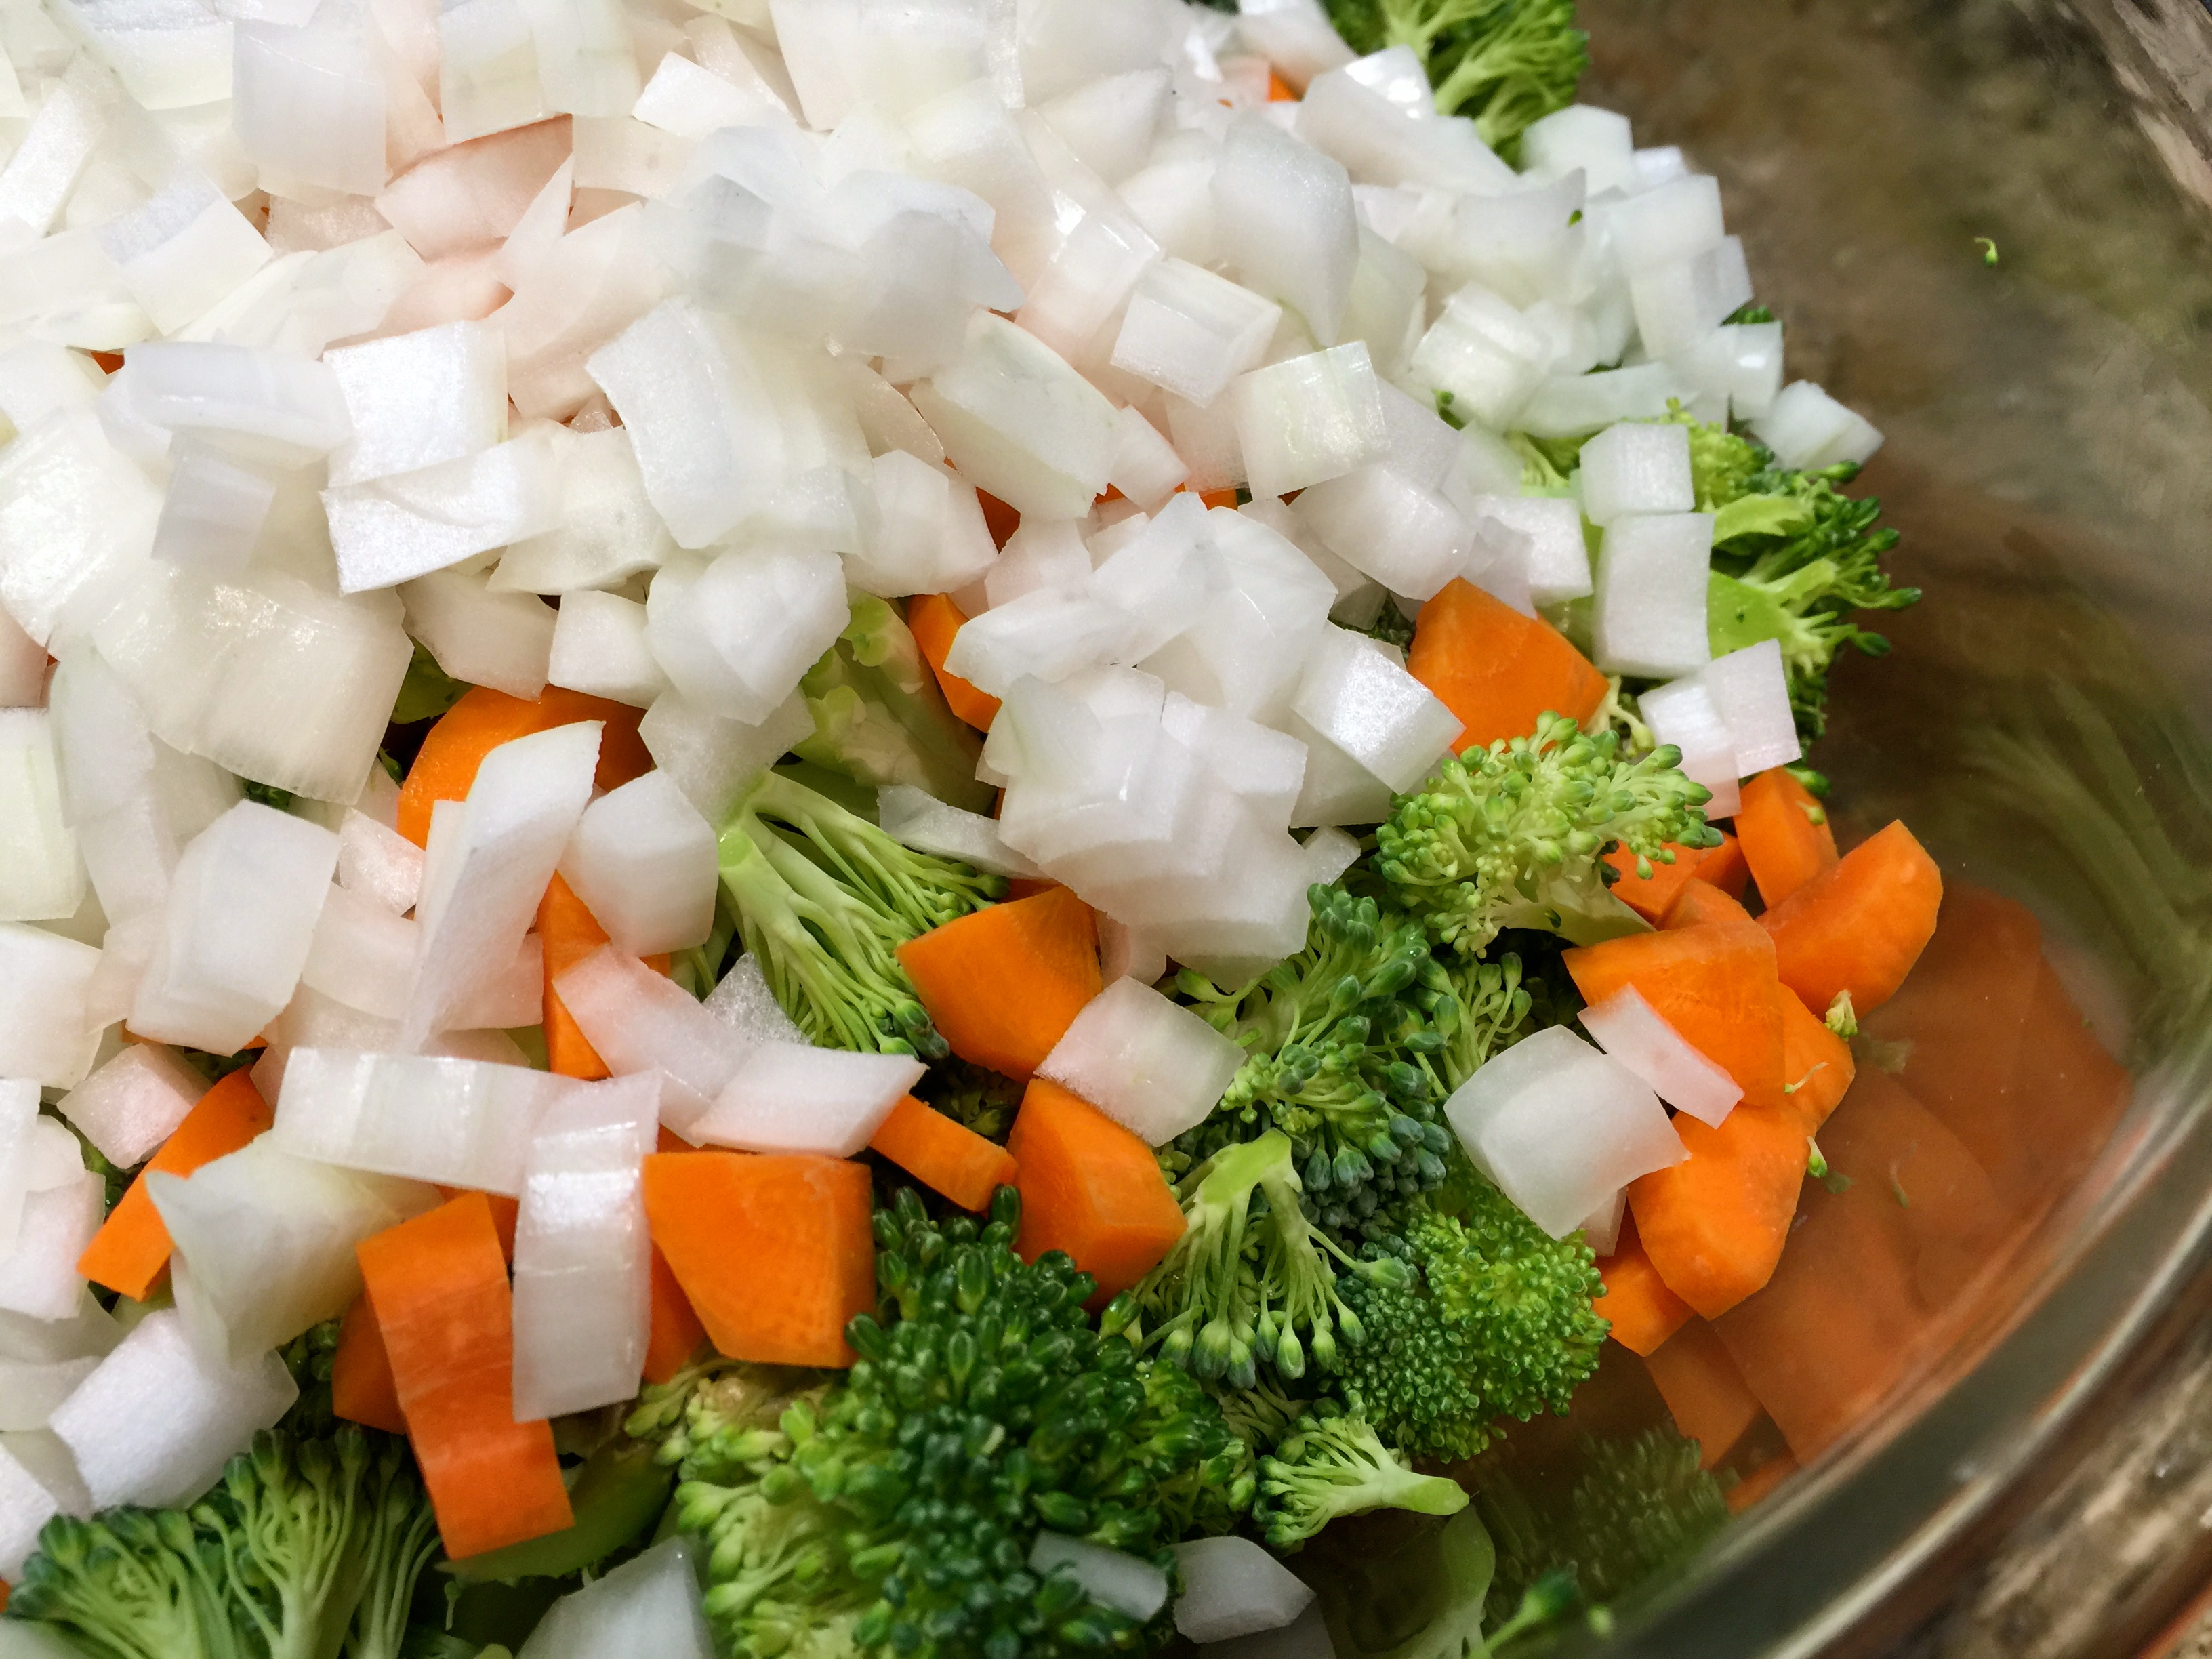
1 large yellow onion, diced

3 cloves of garlic, minced

1 14.5 ounce can of diced tomatoes

2 Tbs. tomato paste

5 cups low sodium beef broth

2 Tbs. Better Than Bouillon roasted beef base

1 cup dry red wine (I used Merlot)

3 medium red potatoes, peeled or unpeeled (wash the skins thoroughly if unpeeled)

3 stalks of celery

3 medium carrots, cut in chunks or 1 inch rounds

1 cup quick cooking barley

1 cup frozen corn

1 cup frozen peas

10 asparagus spears, cut in chunks (optional)

Fresh parsley, chopped for garnish, optional

DIRECTIONS:

Heat butter and oil in a large dutch oven. Salt and pepper the beef cubes and brown on all sides. Remove the meat from the pan and set aside. In the same pan, saute the onion until translucent (you can add a little more oil if needed). Add the garlic and cook for one minute until fragrant. Season with salt and pepper.

Add the wine and deglaze the bottom of the pan, scraping up all the bits at the bottom of the pan. Add the diced tomatoes, broth, better than bouillon and tomato paste. Mix thoroughly to combine.

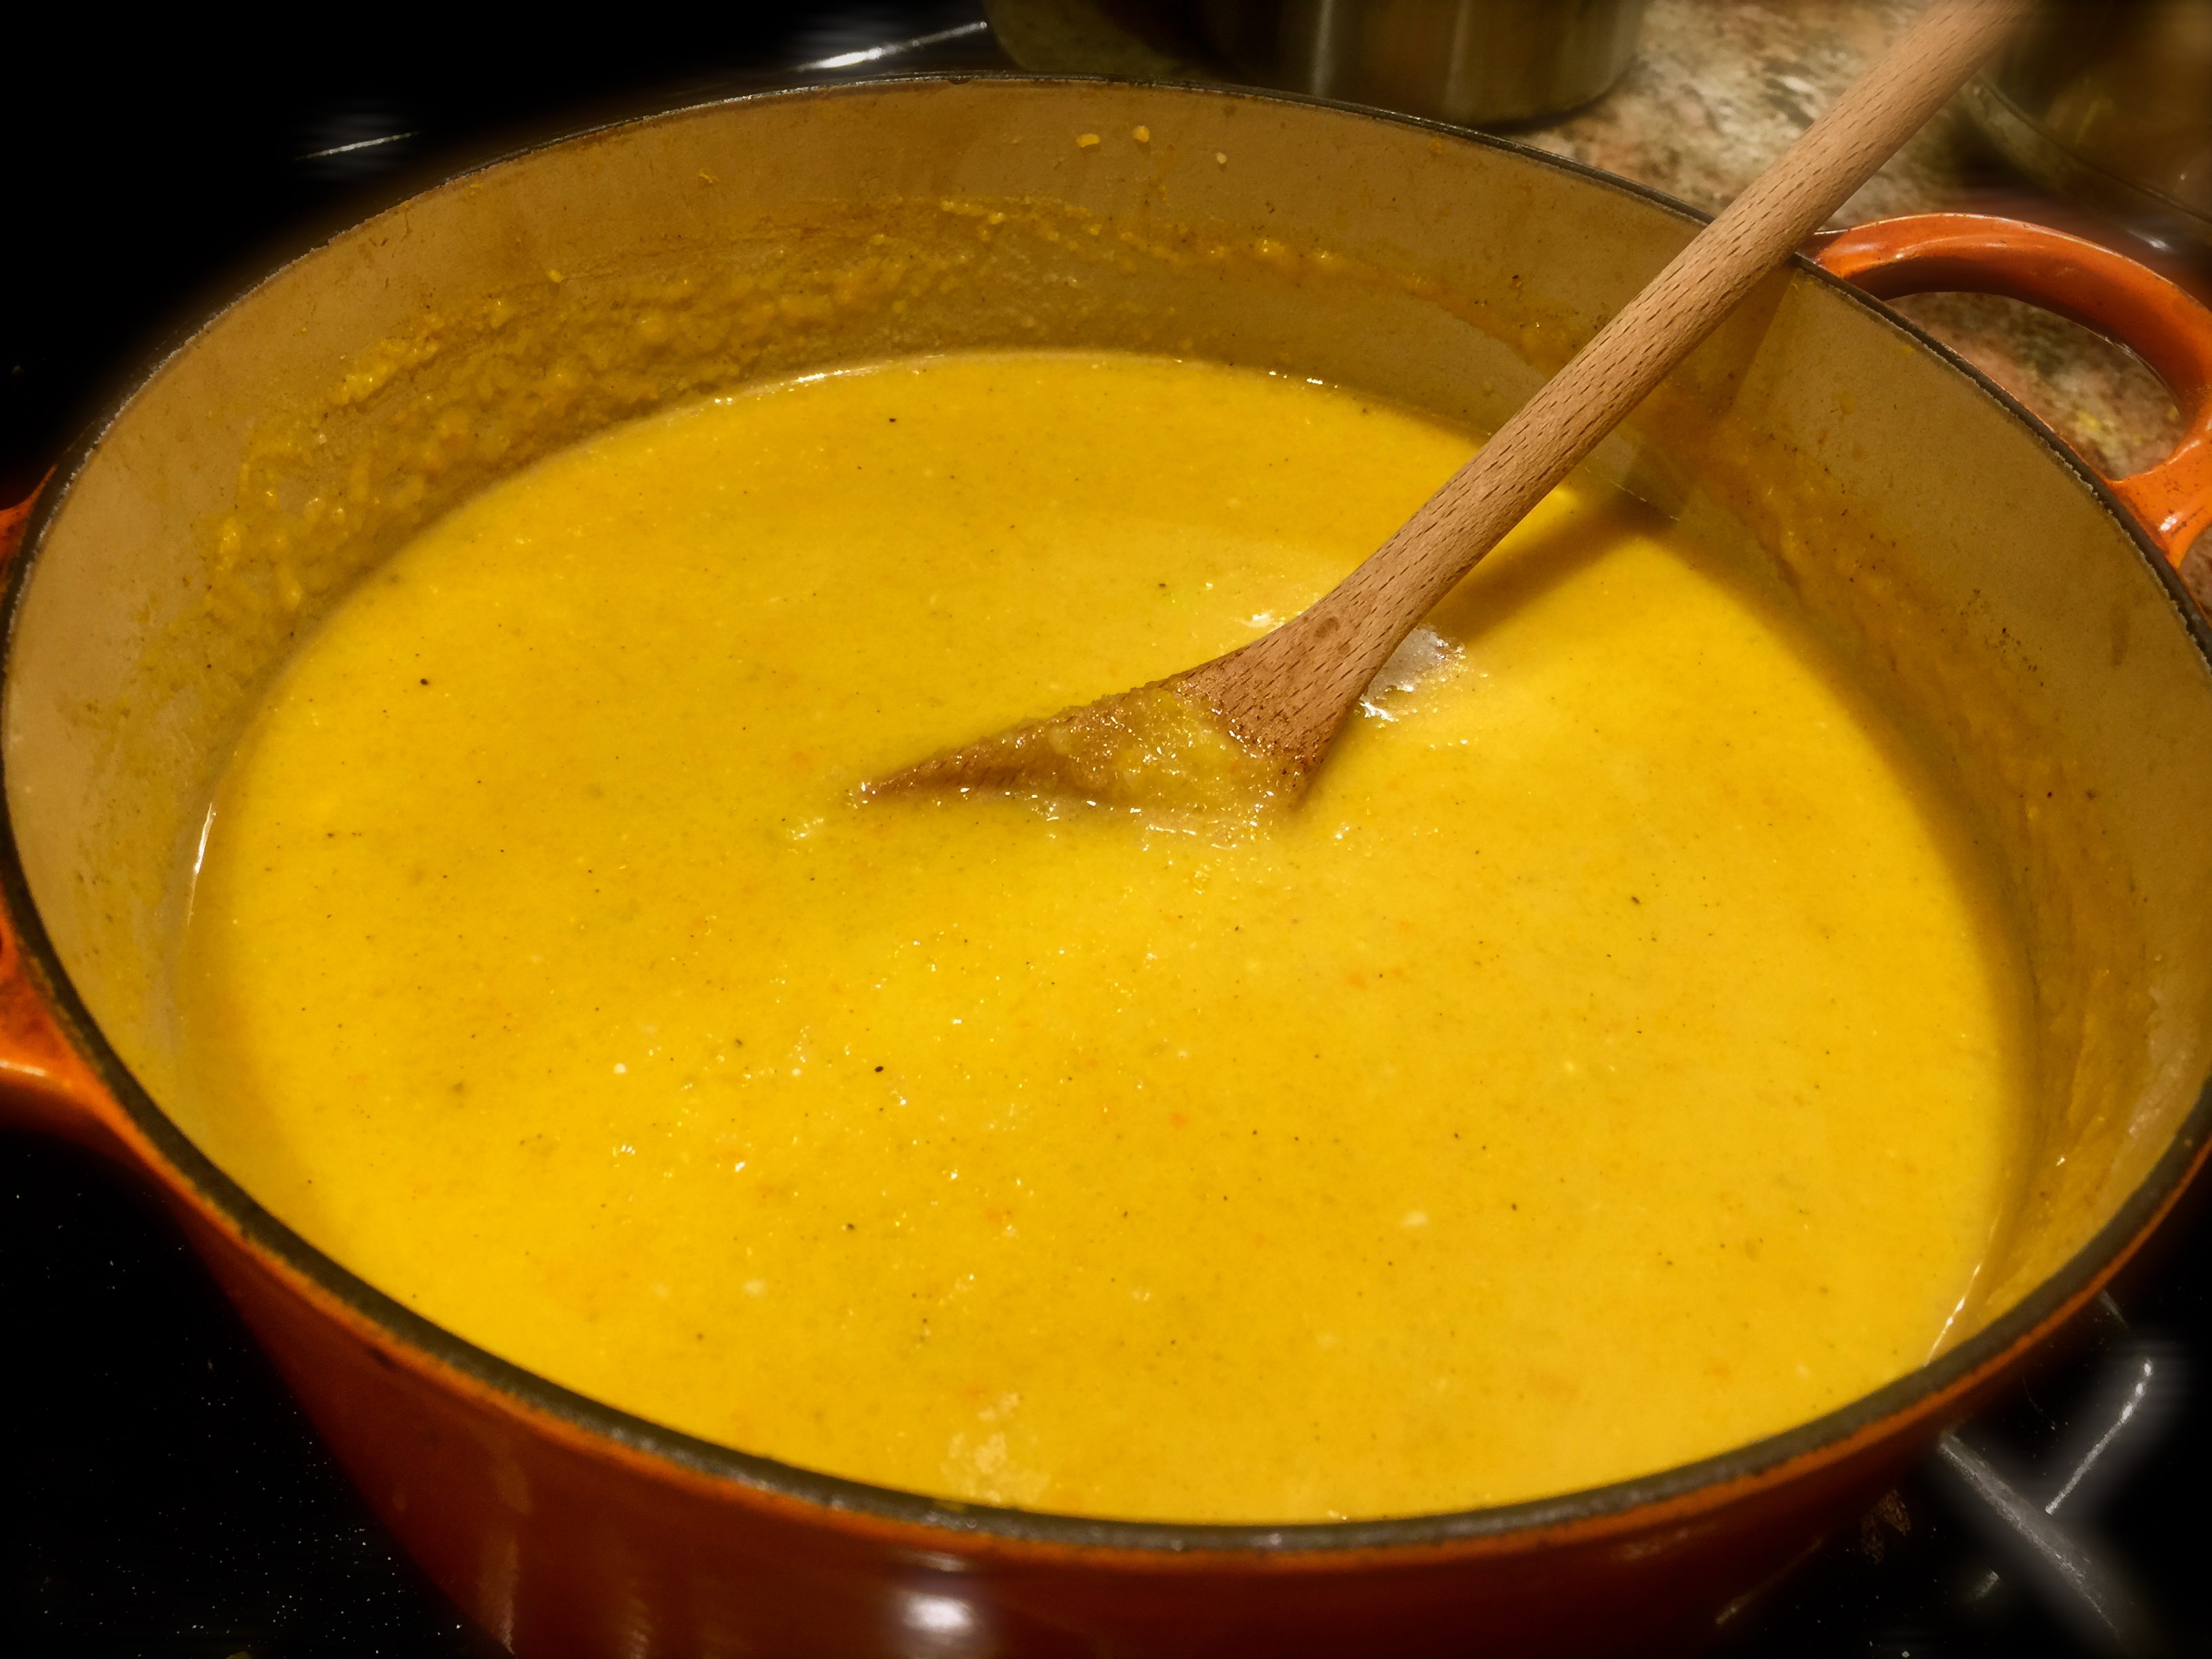
Add the meat (include any drippings) potatoes, celery, carrots and barley. Bring to a boil then cover and simmer for 45 minutes to an hour until the meat and barley are tender. Taste and add any needed salt or pepper.

Add the frozen corn, peas and asparagus (optional). Cover and cook for an additional 10 minutes. If you have time, let the soup refrigerate over night and warm it up the next day. If not, garnish with parsley, serve and enjoy!


Creamy Chicken Tortellini Soup…

When the weather starts to get cold I always think of certain types of comfort food. Who doesn’t crave the smell of a pot roast cooking away in the oven, or some hearty chili with cheese and onions or a tureen of hot soup?

I don’t tend to make soup a lot during the Spring and Summer but once Fall arrives soup becomes one of the main things on my mind. And making home made soup is so much better for you. Have you ever read the ingredients on a can of store bought soup? Next time pay attention to the amount of sodium in canned soup. It’s off the charts! And we all could use a little less salt in our lives to keep ourselves on a healthier track.

The beauty of home made soup is you can throw a myriad of goodies into it like carrots, spinach, peas, potatoes, squash, etc., the sky’s the limit. Soups are also easy to make and very satisfying, especially during the cold weather months.

This soup is so delicious I think you’ll make it several times. Serve it with a salad and warm crusty bread and you’ll have one heck of a great meal.

So lets talk Creamy Chicken Gnocchi Soup…

Lesson Learned 1 –  I love Better Than Bouillon: Many recipes call for adding bouillon cubes or granules to enhance the flavor of a soup. I’ve found that Better Than Bouillon is a great substitute and gives the soup more depth of flavor compared to the cubes or granules. I highly recommend using it but if you don’t have it substitute a couple of cubes or a tablespoon of granules and that will add some additional flavor. But you will definitely notice the difference in flavor if you use Better Than Bouillon.

Lesson Learned 2 – Soups are primo for substitutions: I used spinach in this recipe but you can also use kale. Personally I’m not a big fan of kale but it’ll work well in this soup. If you substitute any of the vegetables make sure they have a uniform cook time. If you add something like butternut squash or potatoes you might have to cut them into very small pieces or else cook them separately until somewhat tender and then add them to the other vegetables. You can also substitute shredded carrots for the carrot coins or you could even add some broccoli or peas. If you add frozen peas add them at the end when you add the browned chicken. That way they’ll cook properly. Have fun and experiment with this soup!

Lesson Learned 3 – For additional depth of flavor use equal parts chicken broth and stock: I found that by using both in equal parts it gives a better flavor to the soup than just by using one or the other. That is not to say you can’t use just one of them, but I noticed a definite difference in the richness of the soup when combining both. If you only want to use one, I would opt for chicken broth. I find chicken stock too strong to use on its own. And keep in mind it may just be my personal taste. But try combining both sometime and see if you don’t notice a difference.

I know you’ll love this soup. Try it and let me know what you think…

Creamy Chicken Tortellini Soup...

  • Servings: 6-8
  • Difficulty: Easy
  • Print

INGREDIENTS:

1 pound boneless skinless chicken breast, cut into 1/2 inch pieces

1/2 tsp. kosher salt

1/4 tsp pepper

4 Tbs. butter, divided

2 medium carrots, cut into 1/4 inch coins

1 medium sized onion, chopped

2 small celery ribs, minced

2 cloves garlic, minced

4 Tbs. flour

2 cups chicken broth

2 cups chicken stock

2 cups water

2 Tbs. Roasted Chicken Better Than Bouillon

1 package (10 oz.) three cheese tortellini

1 cup half and half

2 cups fresh spinach

Chopped fresh parsley for garnish, optional

DIRECTIONS:

Season cubed chicken with salt and pepper. In a dutch oven brown the chicken in 2 Tbs. of butter. Remove the chicken from the pot and set aside.  Add the remaining butter to the pan and sauté the onions, carrots, and celery until crisp tender. Add the garlic and cook until fragrant, about one minute.

Whisk in the flour and stir to coat the vegetables. Add the chicken broth, stock, bouillon, water and tortellini. Stir to combine. Bring to a boil, reduce heat to simmer, cover and cook for approximately 8 minutes.

Add the half and half, spinach and cooked chicken. Cook on low heat until the spinach is wilted. Remove from heat, ladle into bowls and garnish with fresh chopped parsley.

Serve with a salad and warm crusty bread.


Cauliflower And Carrot Soup…

Take it from me, if you’ve not been in the habit of making homemade soups you’re missing out on something special. I don’t know why it took me so long to get with the program, but now I’m a homemade soup junkie! I guess I never realized how incredibly easy it is to make homemade soup. Plus you can control everything that goes into it and I am a big fan of that.

Let me give you a little backstory regarding how I came about making this particular soup. A little while back, here in Colorado, we were forecast to have a blizzard. We were being told we could get anywhere from 4 inches to a foot of snow with blustery winds. As the day got closer it looked like we might be spared the heavy stuff. So at first I wasn’t overly concerned.  In my mind 4 inches of snow could hardly constitute a blizzard. But I was wrong.

I found out an interesting piece of information regarding blizzards. Blizzards are not forecast due to the amount of snow that falls. They are forecast due to heavy winds that accompany a snowfall. When you think about it, that makes sense. Regardless of the amount of snow if the winds cause white out conditions that is extremely dangerous. And so, a blizzard we did get with wind gusts up to 80 miles an hour but only 4 inches of snow. Some areas got almost two feet!

So, knowing that I would be home bound for at least a day made me go into full test kitchen mode. What a great way to test some recipes and get them in the queue for publishing. And that’s exactly what I did – and cauliflower soup was one of the recipes I played with on that day.

So let’s talk Cauliflower and Carrot Soup:

Lesson Learned 1- The cut size of the vegetables is key: I used a 2 1/2 pound head of cauliflower and two cups of sliced carrots. It is important to cut up the cauliflower into small florets. If you don’t they won’t cook in time. I also took baby carrots and sliced them thinly on the diagonal. I wanted to make sure the carrot pieces were not overly thick so they would also cook in the allotted time. The picture below gives you some idea of the cut sized I used. They cooked perfectly in the time allotted.

Carrots Onions And Roasted Garlic

Lesson Learned 2 – Take the time and roast the garlic: Have you ever roasted a head of garlic before? It’s really quite easy and the result is fabulously sweet, flavorful garlic. The process is extremely simple. Cut off the top of the entire garlic bulb about 1/4 – 1/2 inch down, place the bulb in foil (do not remove the skins), drizzle the top of the bulb with olive oil, cover it with foil (I recommend adding an additional layer of foil to protect against oil leaking out of the wrapper) and roast at 400 degrees for 45 minutes to one hour. When you take the garlic out of the oven you want the individual garlic cloves to be fork tender – that’s how you know it’s done.

I roasted my garlic in the toaster oven and put it on a foil lined sheet as extra protection from leaking oil. Once the garlic cooled I merely turned the cut side down and squeezed. The soft delicious cloves popped right out. I then coarsely chopped them and added them to the cauliflower and carrots. Preparing the garlic this way versus sauteing them raw with the onions gives the soup a much richer flavor. It is worth the extra step. But, if for some reason you don’t have the time, mince two large cloves of garlic and add them to the onions once they’ve caramelized. Continue to saute for about a minute or until the garlic is fragrant. Then add the vegetables and follow the recipe from that point.

Cut The Top Off The Garlic Bulb

Place In Foil And Drizzle With Olive Oil

Roasted Garlic Cloves

Lesson Learned 3 – Take the time to cook the onions to a golden brown: Onions are more flavorful when you take the time to caramelize them. So do yourself a favor and take that time. Just be aware that it can take about 20 minutes to get them to that beautifully warm color. But in the end, it also makes a big difference in the flavor of the soup.

Lightly Caramelized Onions

The rest of the process is pretty basic and within about 40 minutes or so you have this delicious homemade soup. Give it a try and tell me what you think. I’d love to hear how you did with this recipe.

Cauliflower And Carrot Soup...

  • Servings: 6-8
  • Difficulty: Easy
  • Print

INGREDIENTS:

2 1/2 pound head of cauliflower, cut up into small florets

2 cups thinly sliced baby carrots (sliced on the bias)

1 sweet onion, chopped

1 head of roasted garlic cloves, chopped (or two raw cloves, diced)

3 Tbs. flour

4 cups of chicken or vegetable stock

1/4 cup heavy cream

6 oz. of grated white cheddar cheese

Salt and Pepper To Taste

Olive Oil for roasting the garlic and sauteing the onions

DIRECTIONS:

Preheat oven to 400 degrees. Cut off the top of a bulb of garlic. Place the bulb in foil and drizzle with olive oil (approximately one tablespoon). Wrap the garlic in foil (I recommend wrapping it twice) and let it cook for 45 minutes to one hour or until the cloves are fork tender. Unwrap the bulb and set it aside to cool. Once cool, turn the cut side down and squeeze the bulb from the sides until the cloves pop out. If a few a the cloves are stubborn, don’t worry. What pops out will be sufficient for the soup. (If you do not have time for this step simply mince two raw cloves of garlic and saute them with the onions after they have caramelized. Once the garlic is fragrant you can add the vegetables and proceed from there.)

Preheat a dutch oven over medium heat and add about 1 tablespoon of olive oil. Add the diced onions and saute until they are golden brown, about 15-20 minutes. While the onions are sauteing, prepare the carrots and cauliflower florets. (If you roast the garlic, chop the cloves and mix them with the vegetables.)

When the onions have caramelized, add the vegetables to the onions and saute for a few minutes. (You can add a little more olive oil, if needed). Sprinkle the vegetables with the flour and mix well. Add the chicken stock while stirring the vegetables.

Cover the dutch oven with a lid, leaving a small crack for the steam to escape. Cook for approximately 20 minutes, stirring occasionally. Test the vegetables for desired consistency. If need be, let them cook for a little while longer until the desired consistency is achieved.

Stir in the heavy cream and cheese. Stir until thoroughly combined. Take off the heat and serve. (Optional: You can garnish with some croutons and some shredded Romano or Parmesan cheese).


Tortellini White Bean And Sausage Soup…

Happy New Year! I hope you had a great holiday season. I had a fabulous one. We went back home to Illinois to spend Christmas with our family. Seven kids, eight dogs and assorted adults all led to a busy and memorable time. It was so much fun until I got home and came down with a cold. I haven’t had one in a very long time and I attribute it to the sniffling, sneezing children that I was around for an entire week. Don’t get me wrong, I wouldn’t have changed it for the world. And I’m glad to be back on my feet and in the world of the living.

Perhaps this little health hiccup inspired my next recipe. I don’t know about you but when I have a cold or am not feeling up to par I immediately think of soup. Mostly I think of chicken soup, but this time I wanted something different hence this particular recipe. There’s something about a warm bowl of soup when you’re not feeling well that’s very comforting, like a soft warm blanket. It somehow just seems to make you feel better.

I never really got into making homemade soups until the last couple of years. I’d just open a can and warm up whatever I bought at the grocery store. What I’ve learned over time is homemade soup is very easy to make, doesn’t take a lot of time plus you control what goes into it, especially the salt, which tends to loom large in canned soups. So I’ve been venturing more into making homemade soups and truly enjoying it. And for the novice cook, this is a way to look very impressive without a lot of hard work. So don’t shy away from making soup.

Let’s talk Tortellini White Bean and Sausage Soup

Lesson Learned 1 – I learned the beauty of chicken sausage: When researching various recipes I came across one that used chicken Italian sausage. I never tried that before, and sometimes I am leery of the flavor of chicken and turkey substitutes for beef or pork but decided to give it a go in this recipe. I was glad I did. It was divine!

The important thing to note is that you must cook the sausage before putting it into the soup. You do this for a couple of reasons. First and foremost the soup does not cook long enough for the sausage to be fully cooked by the time the soup is finished. Second, by cooking it ahead of time you get that nice browning on the casing which you wouldn’t get if you simply boiled the sausage. So remember to cook the sausage first because once you add it to the soup you are basically just heating it through.

Lesson Learned 2 – I added tomato paste to thicken the soup: I noticed when I was making the soup the broth seemed a little lackluster – kind of thin and unexciting (if broth can be unexciting). I decided to add a 6 ounce can of tomato paste and was glad I did. The paste made the broth thicker and more luxurious. You can choose to leave it out if you like but I would recommend adding it to the recipe.

Lesson Learned 3 – Slightly mash the white beans: After you rinse the beans and before you add them to the soup give them a slight mash with a hand masher. You don’t want to do too much, just a little. This along with the tomato paste helps thicken the broth.

Lesson Learned 4 – Kale versus Spinach: A lot of similar recipes I researched recommended adding kale to this type of soup and you can certainly do so. I don’t know about you but I’m not a big fan of kale – it just tastes funky to me no matter how it’s prepared. So I opted for spinach and it was great. The choice is yours – you can certainly use kale if you like but if you’re like me and not a big fan, spinach is a wonderful substitute.

Lesson Learned 5 – Don’t be afraid to improvise: A recipe like this is ripe for improvisation. I used a tri-color three cheese tortellini but you an certainly choose any kind you like. I used chicken Italian sausage but if you’re skeptical a more traditional sweet Italian sausage will work. Or you can make sausage meatballs. If you want to spice it up a bit you can always add a little red pepper flakes or some cayenne pepper. When I warm up my leftovers I’m going to put some parmesan shavings on top. Even if you’re a novice cook, don’t be afraid to add your own touches or adjust the ingredients to your taste. Cooking is not like baking, you don’t need to be exact. Step out of your comfort zone and try a few things. You’ll be happy you did.

Tortellini White Bean and Sausage Soup

  • Servings: 4-6
  • Difficulty: Easy
  • Print

INGREDIENTS

4 cups low sodium chicken stock

1 cup water

1 – 14.5 oz. can of Italian style diced tomatoes

1 – 6 oz. can of tomato paste

1 package (13.5) oz. refrigerated tortellini (I used tri-color three cheese)

1 pkg. (4 links) Italian chicken sausage, fully cooked

2 cans 15 oz. cannellini beans, drained, thoroughly rinsed and lightly mashed

4 cups fresh baby spinach

DIRECTIONS:

In a large saucepan combine stock, water and tomatoes. Bring to a boil. Add the tomato paste and stir until completely incorporated. Add the tortellini and cook on a gentle boil for approximately two minutes. Add the sausage and beans. Bring to a low simmer and cook for about 10 minutes. Add the spinach. Cook for approximately two minutes or until the spinach is completely wilted. Serve with a salad and crusty bread. Refrigerate any leftovers.


Asparagus Soup…

Ingredients

Last Saturday I visited our local farmers market. I love going there on Saturday mornings. Our famers market has a wide variety of vendors selling vegetables, meats and baked goods. There is also a guy who sharpens knives (I love that) and food and crafts vendors. It’s easy to spend a couple of hours meandering the site, sampling the goodies, listening to live music and going home with in season farm-to-table goodies.

This week the farmers stands were inundated with chives and asparagus. There was asparagus as far as the eye could see. I couldn’t resist buying some (along with some cranberry walnut bread and some cheddar brats). I’ve had a craving for soup lately and thought I’d try my hand at making some asparagus soup. And the rest is history… I could’t believe how easy it was to make but even better than that how delicious it was. I’ll probably head back next Saturday for another batch.

But let’s talk asparagus soup…

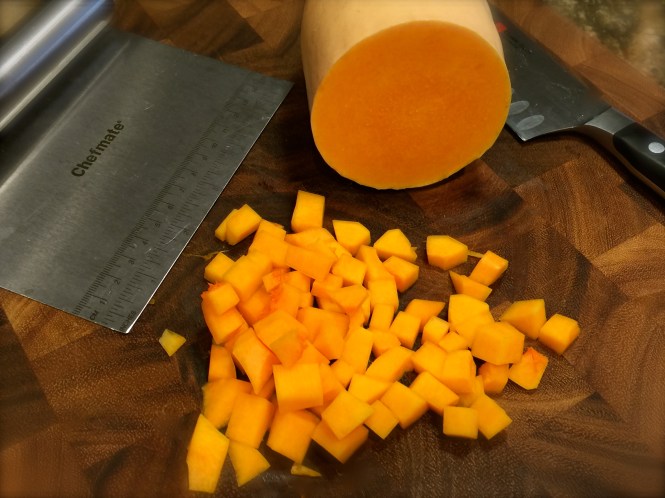
Lesson Learned 1 – Learn what parts of the asparagus spears you can use: Quite often you’ll see on television the way to trim asparagus is to bend it and where it breaks off is where you should trim your bunch. I’ve found that sometimes that wastes too much asparagus especially if you’re making soup. I learned early on that even with a very sharp knife, there can be a part of the spear that will very hard to cut – you almost always have to use two hands pressing down on the knife to cut it. That is the part you want to throw out. That still leaves some of the tougher parts of the asparagus, but as long as a knife will go through it without a lot of force you can use it in the soup. Keep in mind that soup is designed to use as much of the asparagus spear as you possibly can so don’t be afraid to use some of the tougher parts of the spear. As long as you can cut through it without a lot of force it will be perfectly fine for the soup.

Lesson Learned 2 – Be careful when using an immersion blender: I recommend using an immersion blender for this recipe. Some recipes have you blend the soup in batches in a regular blender. That’s a lot more work than is actually necessary. But, be careful when you use an immersion blender. If you lift the blade up over the top of the soup you’ll have soup splattered all over the place. (I know, I’ve done this!) Move the blender around slowly in the soup and don’t lift if above the top of the soup. If you have to lift it up higher, turn it off first. Just a little tip to save you a lot of aggravation.

Lesson Learned 3 – You can make this soup and store it: This soup will keep it’s freshness for a couple of days. If you decide not to serve it immediately hold off on stirring in the last tablespoon of butter and lemon juice. I made my soup in the morning, refrigerated it and served it for dinner. Right before I served it I stirred in the butter and lemon juice. It gives the soup that that final finishing touch and freshness.

This recipe is so simple and easy. Most of the work is in the prep of the ingredients. I also like this recipe because it makes a manageable amount of soup, servings for four. That way you don’t have a lot of waste. But if you want more, just double the recipe and it’ll turn out just as good.

This recipe is so good I plan on going to the farmers market again this Saturday and buying more asparagus to make some more soup. It’s so much better than the canned stuff. Enjoy!

Asparagus Soup...

  • Servings: 4
  • Difficulty: Easy
  • Print

INGREDIENTS:

3 Tbs. butter, separated

1 medium sized onion, diced

2 cloves garlic, minced

1 pound fresh asparagus, cut into 1/2 inch slices

2 Tbs. flour

3 cups low sodium chicken broth (you can use vegetable broth as well)

1/4 cup creme fraiche (you can use sour cream)

1/2 lemon, juiced

salt and pepper to taste

DIRECTIONS:

Take the tough bottoms off the asparagus spears. Remove a couple asparagus tips and set aside for garnish. (you can slightly steam them or leave them as is for a bit of crunch). Cut spears into 1/2 inch pieces. Place in a small bowl and set aside.

In a medium size high sided pot melt 2 Tbs. of butter. Add the onions and cook until translucent, approximately 5 minutes. Salt and pepper the onions while cooking.

Add the asparagus pieces to the onions and cook over low/medium heat for five minutes. Salt and pepper the asparagus. Add the garlic and cook until the garlic is fragrant, approximately 1 minute. Sprinkle the flour over the asparagus, stir and cook for about 2 minutes.

Add the chicken stock and bring the mixture to a low boil. Turn down the heat, cover and simmer for 25-30 minutes.

Turn off the heat. Use an immersion blender to blend the asparagus into the soup. Continue until there are no evidence of remaining spears. After a few minutes, if any parts of spears remain remove them – they are probably too tough to be broken down. Add the creme fraiche and stir to thoroughly combine.

At this point you can cool the soup and store it for a couple of days if you like. If you plan to serve it immediately stir in the remaining tablespoon of butter and the juice from the lemon. If you plan on serving it later, warm the soup and at that time and add the butter and lemon juice right before you serve.


SaveSave

SaveSave

SaveSave

SaveSave

SaveSave

SaveSave

SaveSave

SaveSave

SaveSave

SaveSave

Creamy Meatball and Tortellini Soup…

Is there anything as comforting as a hot hearty bowl of soup on a cold winter day? Enjoying a piping hot bowl of soup with some crusty bread when the weather outside is cold and snowy – well that to me defines food for the soul.

In the past, the only homemade soup I ever made was my mother’s chicken soup. I never thought about making any others. Then two years ago when I had a tomato crop that was just unheard of and left me tomatoes coming out of my ears, I tried to make homemade tomato soup. And it was fabulous. So I invested in an immersion blender and made homemade broccoli cheddar soup. And the rest is history. I love making homemade soups.

Add the evaporated milk and spinach

Prior to this recipe all my soups were made on the stove top. This time I decided to make soup in the slow cooker. As I mentioned in an earlier blog, I am getting more adventurous with my slow cooker, trying things with it that I’d never done before with it. So why not try to make some soup?The basis for this recipe I saw on Facebook and thought, wow this sounds and looks delicious. So I made it (with a few of my own tweeks). All I can say is this one is divine.

So let’s talk creamy meatball and tortellini soup…

Veggies Cut Into Chunky Pieces
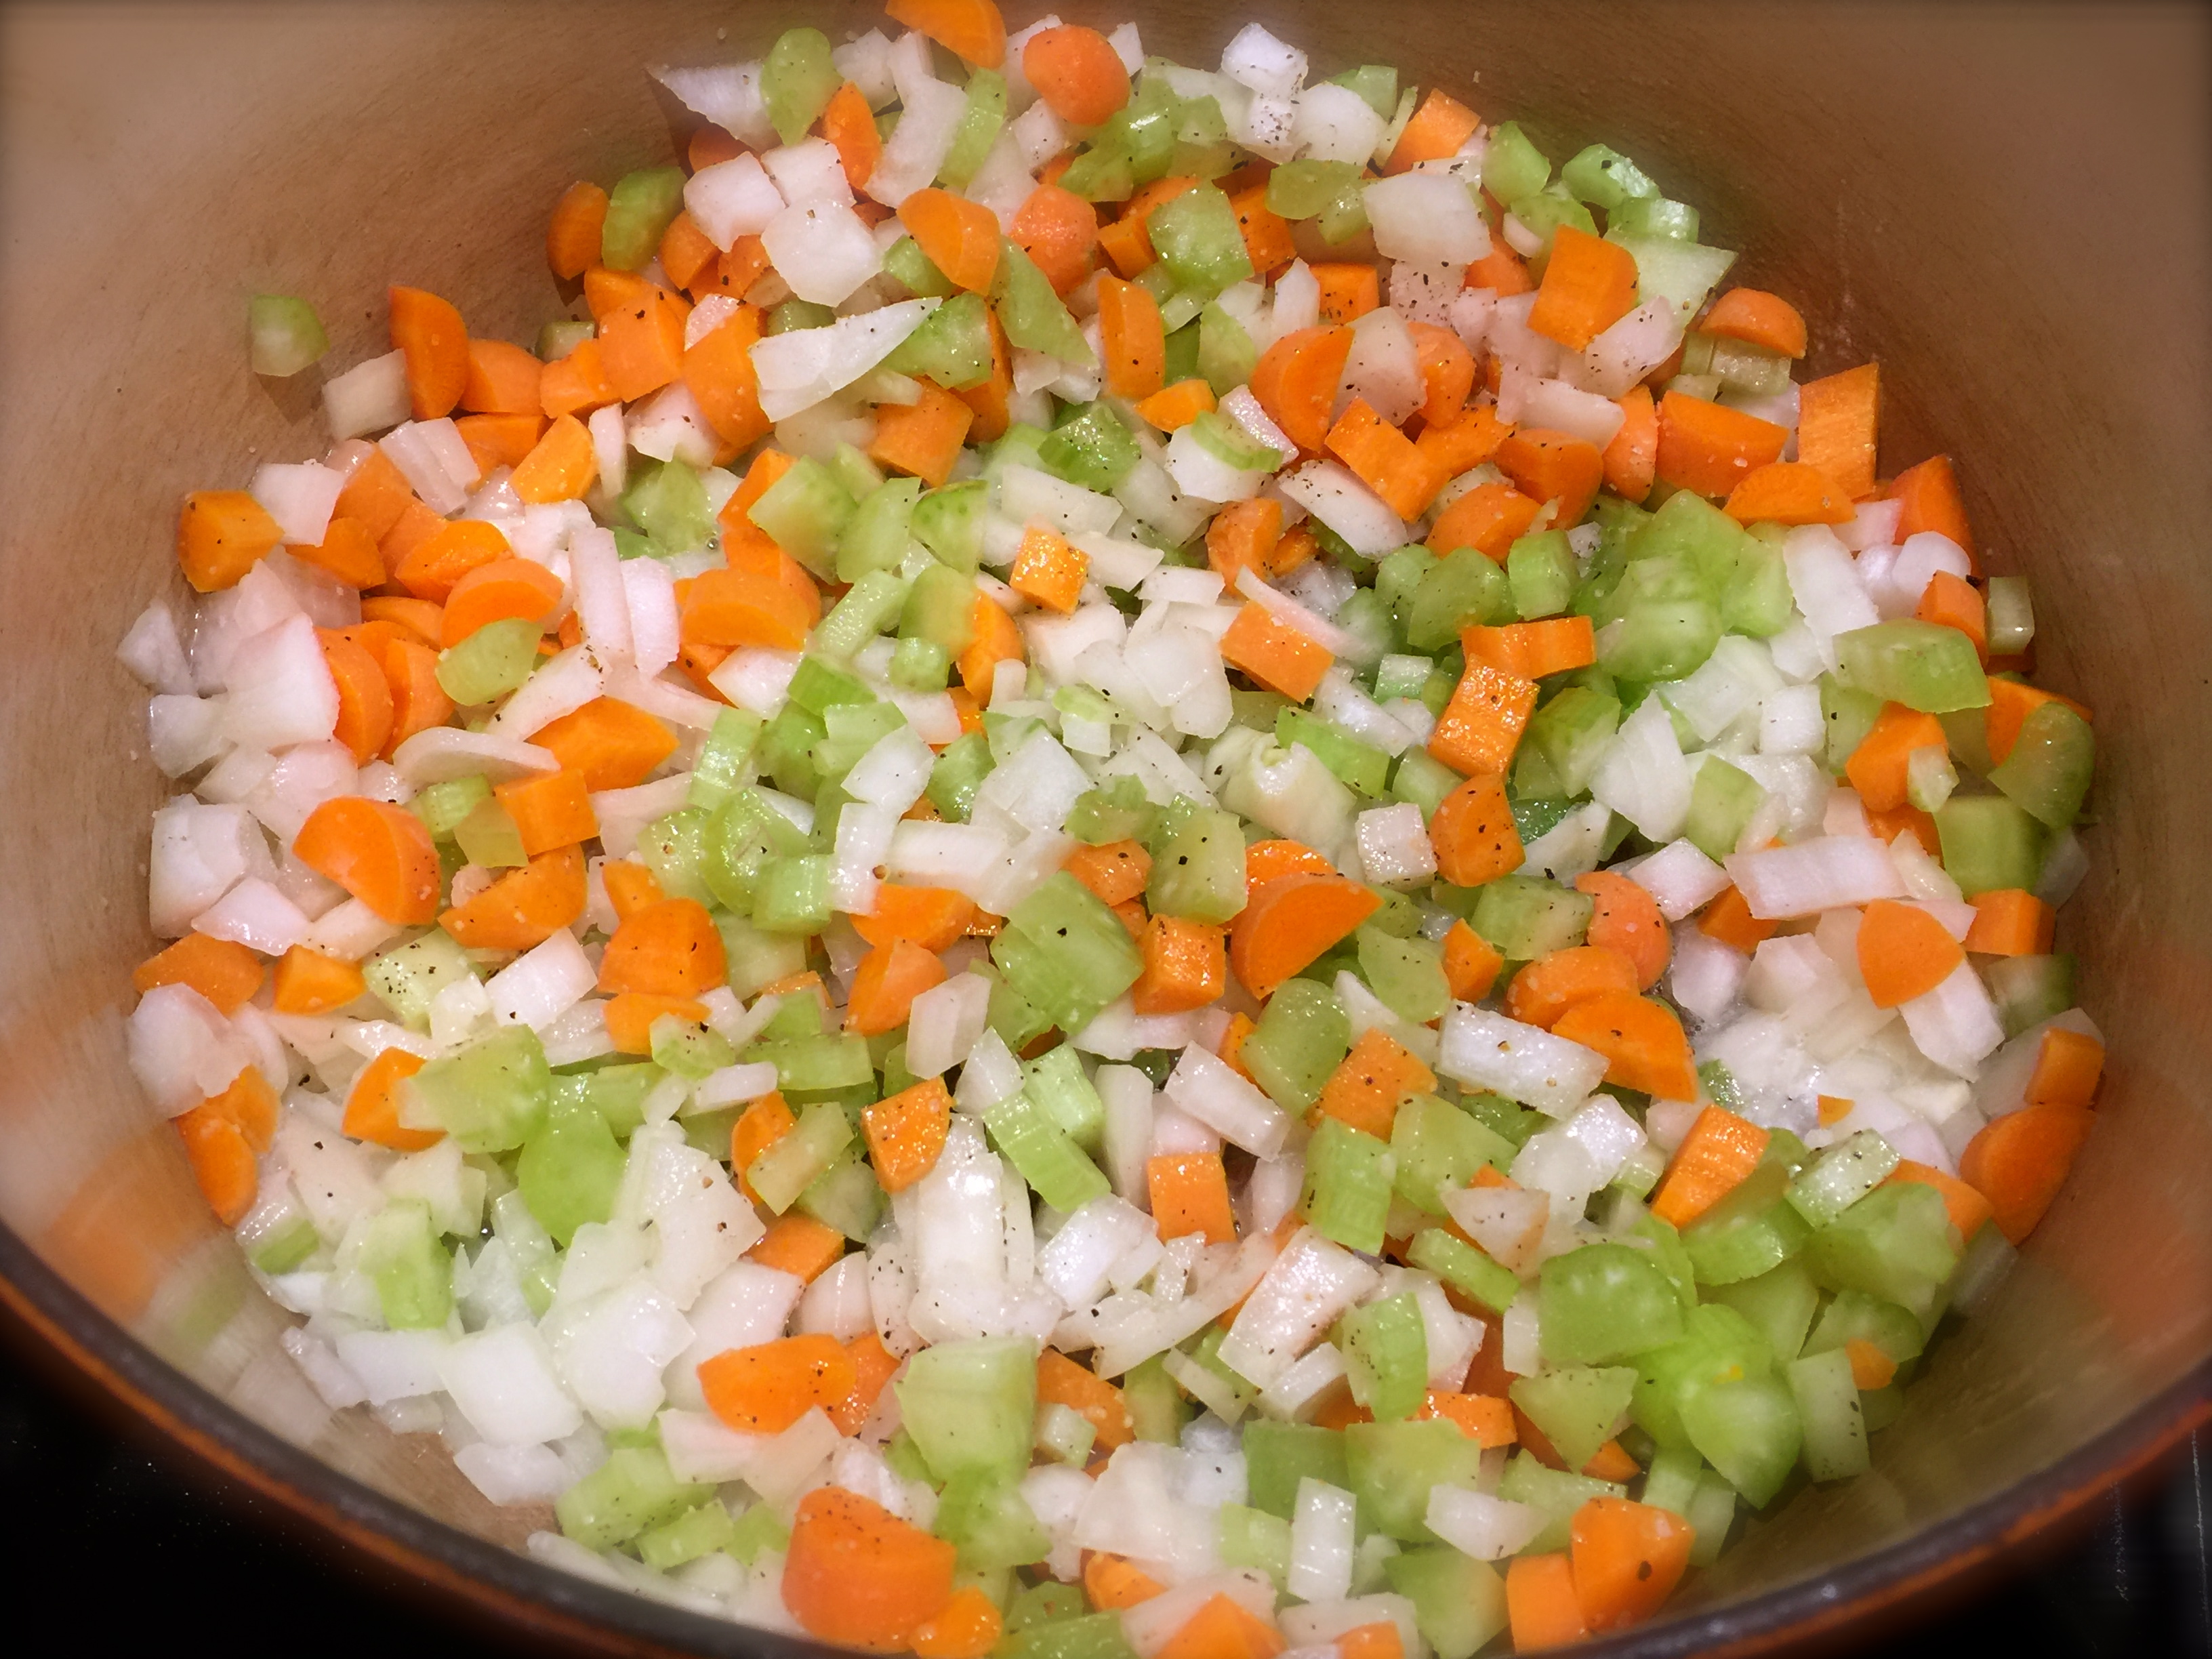
Lesson Learned 1 – It bears repeating, cut your veggies into chunky pieces: Because you cook for extended periods of time in a slow cooker your veggies can break down if you don’t cut them chunky. You want to see and taste your veggies. So don’t be afraid to cut them into chunky pieces. They will cook I promise you.

Lesson Learned 2 – Use different settings to get different results: Sounds pretty logical doesn’t it. But I used to be a one size fits all girl when it came to slow cooker settings. If I started on low, I stayed on low. And the same for high. But I found you can be more creative with recipes when you vary your settings during the cooking process. For this recipe I cooked the basic parts of it, veggies, meatballs and broth, for 6 hours on low. During the last hour I set it on high. I added the evaporated milk, thickener and tortellini and let that cook for 45 minutes on high. Then I added the spinach and let it cook on high for another 15-20 minutes. Everything cooked perfectly.

Italian Sausage MeatballsLesson Learned 3 – Don’t be afraid to be creative: Originally I was going to add chunks of sausage links to the recipe but my husband has a hard time with the casings. So I removed the casings and formed portions of the meat into meatballs. That worked just fine. I also used sweet Italian sausage in my recipe but you can use hot Italian sausage and give the soup a little more kick if you like. You can also use ground beef, but I think the seasonings in Italian sausage give more zip to the flavor of the soup.

This soup tastes absolutely divine. Your should really try this. I guarantee you will love it! You betcha can make this!

CREAMY MEATBALL AND TORTELLINI SOUP...

  • Servings: 8-10
  • Difficulty: Easy
  • Print

INGREDIENTS:

Creamy Meatball And Tortellini Soup1 pound Italian sausage (ground or links cut into chunks)

1 onion, diced

2 thick carrots cut into 1/2 inch circles

2 stalks of celery cut into chunks

3 large garlic cloves, minced

1 Tbs. Italian seasoning

2 tsp. chicken bouillon powder

1/2 tsp. salt

4 cups chicken broth

1/4 cornstarch

1/4 cup water

1 12-ounce package of cheese tortellini

3 12-ounce cans of evaporated milk

4 cups baby spinach with stems removed

DIRECTIONS:

Form the Italian sausage into 1 inch meatballs. Place the onion, carrots, celery, garlic, italian seasoning, bouillon powder, salt and meatballs into a 6 quart slow cooker. Pour in the chicken broth. Cover and cook on low for 6 hours.

Mix together thoroughly the cornstarch and water. Combine cornstarch mixture with the evaporated milk. Add the evaporated milk and the tortellini to the slow cooker, stir to combine and cook on high for 45 minutes. Add the spinach leaves and stir to combine. Cook for an additional 15-20 minutes on high.

Serve immediately with crusty bread.

Veggies and Meatballs in the slow cooker

 Add the chicken broth

Creamy Meatball And Tortellini Soup

Creamy Meatball And Tortellini Soup

Butternut Squash Soup…

Now that January has settled in and the holidays are firmly behind us, I began looking at various soup recipes so I could break in my new immersion blender. Honestly that was not the only reason. There’s nothing like a bowl of piping hot soup to melt the January chills away.

Last year I discovered the joy and ease of making homemade soups, and I can equivocally say if you haven’t tried making homemade soup you’re missing out on something special. And over the past several years I’ve grown to love making roasted butternut squash, so I decided that butternut squash soup would be my next venture.

Ingredients

I poured over a wide variety of recipes and then decided, as usual, to take the best concepts of several and create a recipe of my own. As with any soup I’ve made so far, the bulk of the work is in the preparation. Once you’ve got the ingredients prepared the process couldn’t be simpler. And if you’ve been following me for a while you know I find it very cathartic to chop, mince, dice and slice so this soup was absolutely perfect for how I like to cook.

So let’s talk about making butternut squash soup…

Lesson Learned 1 – You can prepare the squash in a couple of ways: Most recipes I read either called for the squash to be roasted in the oven first or merely just chopped and added to the pot to cook with the stock. I chose the latter and the soup was delicious. The next time I make this I’ll try roasting the squash first and see if that adds any additional dimension to the flavor of the soup. My base for the soup was the “trinity” of onions, celery and carrots along with garlic and that provided great depth of flavor.

Lesson Learned 2 – Be careful when adding the seasonings: This recipe calls for adding nutmeg, cinnamon and cayenne pepper along with salt and pepper. Nutmeg especially has a very strong flavor so just add a pinch to start. I recommend the same for the cayenne pepper. After I added a pinch of each at the end and tasted the soup, I added a second pinch of all of them. Both the nutmeg and cayenne provided a nice warmth and the cinnamon a touch of sweetness. Just remember the old tried and true rule – you can always add more, but you can’t take it out once you put it in.

Lesson Learned 3 – Be very careful when preparing the squash: I’ll be totally upfront with you – preparing the squash can be an arduous task. I recommend cutting the squash in half at the center and then with the flat edge down using a very sharp knife to remove the outer core. Start at the top and slide your knife downwards to peel the core to the bottom. Continue rotating around the squash using this process until the entire core has been removed.

The outer core is very hard, so if you try to cut it with a dull knife you can easily hurt yourself. Be careful and watch your fingers the entire time. When initially cutting the squash in half to create the flat bottoms, if your knife gets stuck mid way through, do what I do and pick up the knife with the squash stuck to it and pound it down hard on a strong cutting board or butcher block. The force of the blow(s) will get the knife completely through and your fingers are totally out of the way.

IMG_9244

If you’ve never peeled a butternut squash before, I recommend you take a few minutes and find a video on YouTube that shows you how. The key thing to remember is keeping your fingers away from the knife at all times. I’m not trying to scare you, I’m just trying to stress the importance of being safe during this process.

And if you don’t want to bother doing the cutting yourself, many grocery stores have prepared butternut squash that you can buy. The only thing I don’t like about the prepared squash is often I get some of the tough pith in with the squash pieces. I guarantee you the tough pith (any of the light orange colored part of the outer core) will not get tender. You only want to use the deep orange part of the squash.

The "Trinity" - onions, celery and carrrots

The “Trinity” – onions, celery and carrrots

Lesson Learned 4 – Using an immersion blender: One thing to remember when using an immersion blender is not to pull it up to high to the surface when you’re blending in the pot – you’ll have soup flying all around your kitchen if you do! Keep the base of the blender down low and only move it up half way through the liquid when blending. 

I personally guarantee that the work making this soup is totally worth it. This is a great soup for a cold January night and one you will make for years to come.

Butternut Squash Soup…

  • Servings: 12
  • Difficulty: Medium
  • Print

INGREDIENTS:

1 medium onion, diced

2 celery stalks, diced

3/4 cup carrots chopped small

2 cloves of garlic, minced

3 Tbs. butter

1 large or 2 small butternut squash, peeled and chopped with seeds removed

1 medium granny smith apple, peeled and diced

4 cups chicken stock (one 32 oz. box)

1 cup water

1 cup heavy cream

Pinches of cayenne, cinnamon and nutmeg (to taste – err on the side of less is more)

Salt and pepper to taste

DIRECTIONS:

In a 7 quart dutch oven melt the butter and add the onions, celery and carrots. Salt and pepper the mixture. Cook until the onions look translucent, about 5 minutes. Add the garlic and cook until the garlic is fragrant, about one minute.

Add the squash, apple, broth and water. Bring to a boil. Cover and simmer for 30 minutes or until the squash and carrots are tender.

With an immersion blender (or you can puree this in batches in a stand blender) puree the soup to your desired thickness (the more you puree the thinner the soup).

Add the cayenne, nutmeg and cinnamon. Stir and taste. Add more if desired. Salt and pepper to taste.

Once you’ve finished adding the seasoning, turn the heat off the soup and stir in one cup of heavy cream. Serve with croutons or with a dollop of sour cream.

Butternut Squash Soup

Butternut Squash Soup


Creamy Garden Tomato Soup…

I warned you about a plethora of tomato recipes as my tomato plants this year have been producing like they are on steroids. A co-work of mine suggested that the strains I’m growing, the indigo rose and tie-dye heirloom tomatoes (pictured below), would make a great tomato soup. I’ve never made home made tomato soup before, so I thought I would try. I really didn’t want to waste any of these great tomatoes and I knew making soup would use up a lot of them.

The Indigo Rose Heirloom Tomato

The Indigo Rose Heirloom Tomato

Tie-Die Heirloom Tomatoes

Tie-Die Heirloom Tomatoes

A while back I posted a recipe for home made Broccoli Cheddar Soup. That was only the second homemade soup I ever made. For years I have been making my mothers chicken and dumpling soup but never thought about trying other recipes. Now after having made this tomato soup I wonder why I waited so long to make a variety of different home made soups. I’m pretty sure I’ll be trying more soup recipes in the future. They are relatively easy to make and so much more flavorful than what you buy in a can. Plus you control the ingredients. And if you look at canned soup, they tend to have a lot of sodium. So take the extra time and try making home made soup. It’s truly worth it.

This recipe is based on a recipe by Ina Garten called Cream Of Fresh Tomato Soup. It’s a great recipe as is, but I made a few tweaks and loved what I got. I used less onion, more garlic, less sugar, more tomato paste, more basil and I finished it off with 1 Tbs. of butter to give it a nice shimmery, satiny look. Many of the reviews of her recipe said not to change a thing, that the soup was fabulous as is. But I know my tastes and I also can tell if I like how things are looking by eyeballing it. The changes that I made worked wonderfully, and I will chronicle in the recipe below what I did.

So let’s talk about making tomato soup…

Carrots and onionsLesson Learned 1 – Cut the carrots into small pieces: I think the carrots add a nice flavor to the soup, but recipes hardly ever tell you how to cut them. Carrots are dense and they take time to cook. And you are trying to soften them with chopped onions which by nature are less dense and can soften more quickly. So cut the carrots small. I cut the carrots in half lengthwise and then in half again lengthwise and then started chopping from there. The smaller pieces soften faster. Also remember to soften the onions and carrots on a medium heat. You’re not looking for the onions to caramelize, you just want them to soften. The carrots will soften slightly but not all the way. That’s perfectly fine as you will be simmering them for a long while and that will complete the softening process.

Lesson Learned 2 – To peel or not to peel the tomatoes: I did a lot of reading regarding whether you should peel your tomatoes when making the soup. I found a lot of different opinions but I chose to peel them. In Ina’s recipe, she tells you to cook the tomatoes with skin on. Later on in the process you take the soup mixture and process it through a food mill to remove any skin and seeds. I don’t have a food mill, so I decided to peel the tomatoes at the very beginning.

Peeled Tomatoes

Peeled Tomatoes

Lesson Learned 3 – How to peel a tomato: Peeling a tomato is really quite simple. All you need to do is to put it in boiling water for 30 seconds, remove it, and the skin will practically peel off by itself. I used this method and it worked like a charm.

Lesson Learned 4 – Using a blender to puree your soup: When using a blender to puree hot soup you need to do a few simple things to prevent having an explosion. First, never fill the blender completely full with hot liquid. Fill it up only to the half way point or even a little less. Second put a towel over the hole in the top of the blender to let steam escape while you’re pureeing your soup. Otherwise you may wind up with soup all over your walls. Or, an even easier way to puree your soup is to use an immersion blender. You stick it right into the hot pot and emulsify the soup right there. Currently I do not have an immersion blender but I am definitely going to invest in one. In the meantime, using a blender worked perfectly fine.

If you haven’t tried making homemade soup you really should. I was surprised at how easy and good it was. So go ahead, walk on the wild side and make some homemade soup…

[recipe: title=”Creamy Garden Tomato Soup…” time=”2 Hours Including Prep” Servings=”8-10″ difficulty=”Easy”]

INGREDIENTS:

3 Tbs. olive oil

1 medium sized red onion, chopped

2 medium carrots, unpeeled and chopped

4 cloves minced, garlic

8-10 garden tomatoes, medium to large in size

1 tsp. sugar

2-3 Tbs. tomato paste

1/3 cup loosely packed and chopped fresh basil leaves

3 cups unsalted chicken stock (preferably half broth and half stock)

2 Tbs. roasted chicken Better Than Bouillon

1 Tbs. salt (taste along the way and add more if desired)

1 tsp. freshly cracked black pepper

3/4 cup heavy cream

1 Tbs. butter

DIRECTIONS;

On the stove, bring a large pot of water to a boil. Once the water is boiling, place 2-3 tomatoes in the water and cover. After 30 seconds, take the tomatoes out of the water. Repeat this process with all the tomatoes. Once the tomatoes cool slightly, remove the skins with a paring knife. (the skins should come off easily).

Cut the tomatoes and remove and imperfections or gristle. Heat the olive oil in a large dutch oven. Add the onions and carrots and sauté until tender, 10-15 minutes. Add the garlic and cook until fragrant, approximately one minute.

Put all the remaining ingredients in the pot except the heavy cream and butter. Bring to a boil then lower the heat and simmer covered for 45 minutes or until the tomatoes are very tender. Puree the mixture using an immersion blender, blender or food mill. If using something other than an immersion blender, pour the pureed mixture back into the dutch oven. Over low heat add the heavy cream and stir to combine. Drop a tablespoon of butter into the pot and melt in right before serving.

Serve hot.

[/recipe]

The Ingredients Before Adding Stock

The Ingredients Before Adding Stock

Cook Ingredients in Stock for 45 minutes

Cook Ingredients In Stock For 45 Minutes

Creamy Garden Tomato Soup

Creamy Garden Tomato Soup

Broccoli Cheddar Soup…

Soup Ingredients...

Soup Ingredients…

Even though we are in the midst of summer I still get cravings for soup. Now I have to admit I normally only make a home made chicken and dumpling soup (my mom’s recipe that I’ll post in the Fall) but this time I decided to venture into trying something different. I researched various versions of broccoli soups and decided I wanted to do a broccoli and cheddar combination.

I like this recipe for a variety of reasons. First it is absolutely delicious – second, it’s so easy to make, and third it freezes well so you can have some now and save some for later. So let’s talk about making broccoli cheddar soup…

Slice VegetablesLesson Learned 1 – Use all of the broccoli but cut the pieces small: Most often people tend to discard the broccoli stalks and they actually provide great flavor especially when making the soup. So when you are cutting up the broccoli cut up the stalks as well. Be careful to cut the stalk into small pieces. They are obviously more dense than the florets and will take longer to cook if you leave them in large pieces. The smaller you cut them the less time you will have to cook them.

The same goes for the carrot. I took a pretty big thick carrot, halved it and then quartered it before slicing it. Carrots are also pretty dense and the smaller you cut them the faster they’ll cook. The nice thing about this recipe is you can chop everything up and put it in one big potl. You sauté everything at the same time and that makes it easy.

Lesson Learned 2 – You may have to use both flour and cornstarch to thicken the soup: I know it sounds strange – but it worked. Once the vegetables sautéed in butter for about 5 minutes I added the flour and cooked it down with the vegetables for about a minute. You need to do this for two reasons: 1 – so you remove the “floury” taste from the flour, and 2 – So you won’t have any lumps when you add the liquid.

Before Adding Cornstarch...

Before Adding Cornstarch…

After I cooked the flour with the vegetables I added the chicken broth (this was before I added the stock). As I was simmering everything the liquid seemed a little too light and runny as you can see from the picture on the right. So I added the stock and then systematically added some cornstarch mixed with stock to the soup to thicken it. I wound up using 3 tablespoons of each but added them in three separated batches. That way I could control how thick the soup was getting. You may find you are happy with the consistency you get by just using the flour. But if not, you can always added the cornstarch in small doses until you get your desire consistency. I would make sure to add some stock. I found that by adding one cup it gave the soup a richer color and enhanced the flavor.

A couple of tips: Give the first cornstarch and stock mixture a little time to thicken the soup before you add more. The heat of the soup activates the cornstarch, but it takes a couple of minutes. Be patient. If after a couple of minutes you are not happy with the thickness add a little more. And, just remember, do not add cornstarch to the pot all by itself. You have to mix it with liquid and then add it in liquid form. Otherwise you’ll get lumps. I found a 1:1 ratio of cornstarch to liquid works best. Just make sure the cornstarch is completely mixed into the liquid before you add it (I stick my finger in and swish it around to make sure there’s not a pile of cornstarch on the bottom of the measuring cup). I could have mixed the cornstarch with water but since I had the stock, why not continue to add more flavor.

After Adding Cornstarch...

After Adding Stock And Cornstarch…

Lesson Learned 3 – Use an immersion blender to puree the soup: Unfortunately I do not have an immersion blender (but I think it will be on my shopping list), so I used my blender to puree the soup. You can also use a food processor as well. I had to puree the soup in several batches using the blender. An immersion blender allows you to puree in the pot you’re cooking in and that’s much more convenient. But if you don’t have one, a blender or food processor will do the trick. They just require a little more effort.

So here’s the recipe. I hope you enjoy it!

Broccoli Cheddar Soup…

  • Servings: 6-8
  • Difficulty: Easy
  • Print

INGREDIENTS:

4 Tbs. Butter

1 1/2 – 2 pounds fresh broccoli, cut into small pieces including the stems

1 large onion chopped

2 large cloves of garlic, minced

1 carrot, diced

4 Tbs. flour

3 cups of chicken broth

1 cup of chicken stock

1/2 cup heavy cream

2 cups shredded sharp cheddar cheese

Kosher salt and freshly ground black pepper, to taste

3 Tbs. cornstarch mixed with 3 Tbs. stock, used as needed or not at all

DIRECTIONS:

Melt the butter in a large pot over medium high heat. Add the broccoli, onion, and carrot. Add some salt and pepper. While vegetables are cooking mince the garlic over the pot using a zester and combine with the vegetables. Cook until the onions start to look translucent, approximately 5-7 minutes.

Add the flour to the vegetables and stir for about a minute or until the flour begins to look blonde in color. Add the broth and stock and bring to a boil. Reduce the heat and simmer uncovered until the vegetables are tender, about 20-25 minutes. Check the consistency of the soup during this time. If it appears too runny pour in 1 Tbs. of cornstarch thoroughly mixed with 1 Tbs. of stock. Add more if needed. It should take no more than 3 Tbs. of each to reach a nice thick consistency. Simmer until all the vegetables are tender.

Using an immersion blender, puree the soup. Add the cream and cheddar cheese. Stir until the cheese has completely melted.

Broccoli Cheddar Soup