Slow Cooker Lemon Garlic Butter Chicken…

I saw a version of this recipe online and it intrigued me. First of all I love my slow cooker. It has become a more versatile tool than it was years ago when you’d put in some meat and veggies, make some concoction usually comprised of some sort of cream soup and let it cook for hours until you had a tasteless soggy mess. Slow cookers can produce some great meals but you have to know how to use them. And just like your oven, no two brands of slow cookers are alike so you need to know your slow cooker.

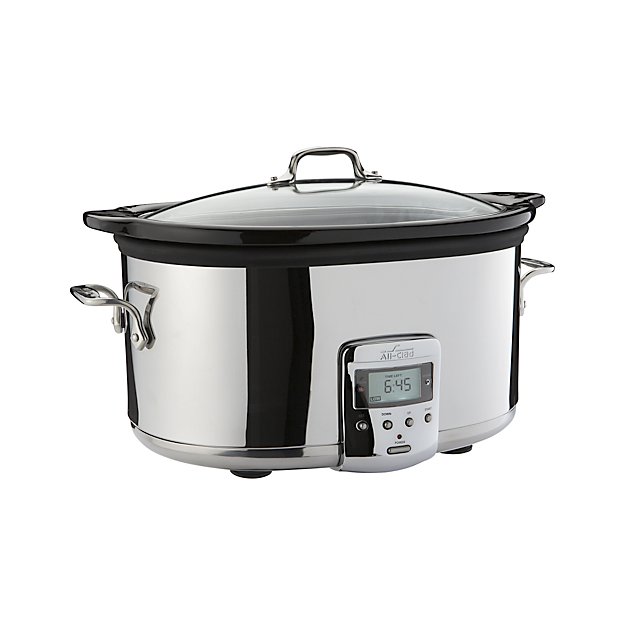
I have two All-Clad slow cookers, a 7 quart and a 5 quart. For smaller meals when I cook for one or two I prefer the 5 quart, plus it has the versatility of browning food in its own sleeve which is very convenient. I find the All-Clad slow cookers to have a nice moderate temperature. Some slow cookers boil your food, even on low. I don’t find that to be the case with mine. I get a nice even slow cooking process and so if I gauge my cooking times correctly I do not wind up with dried out tasteless food.

Enough about slow cookers, let’s talk about slow cooker lemon garlic butter chicken…

Lesson Learned 1 – Recipes are designed to be guides, not gospel: The instructor in one of my more recent cooking classes said this and it really struck home with me. When you are making something savory, make the recipe your own. You don’t have to follow the recipe exactly ingredient by ingredient. Now mind you, this is not the case when you’re baking – you need to be precise with those recipes. But savory recipes can take on a life of their own depending upon your likes and dislikes. So feel free to experiment. Some of my most popular recipes were a result of doing just that.

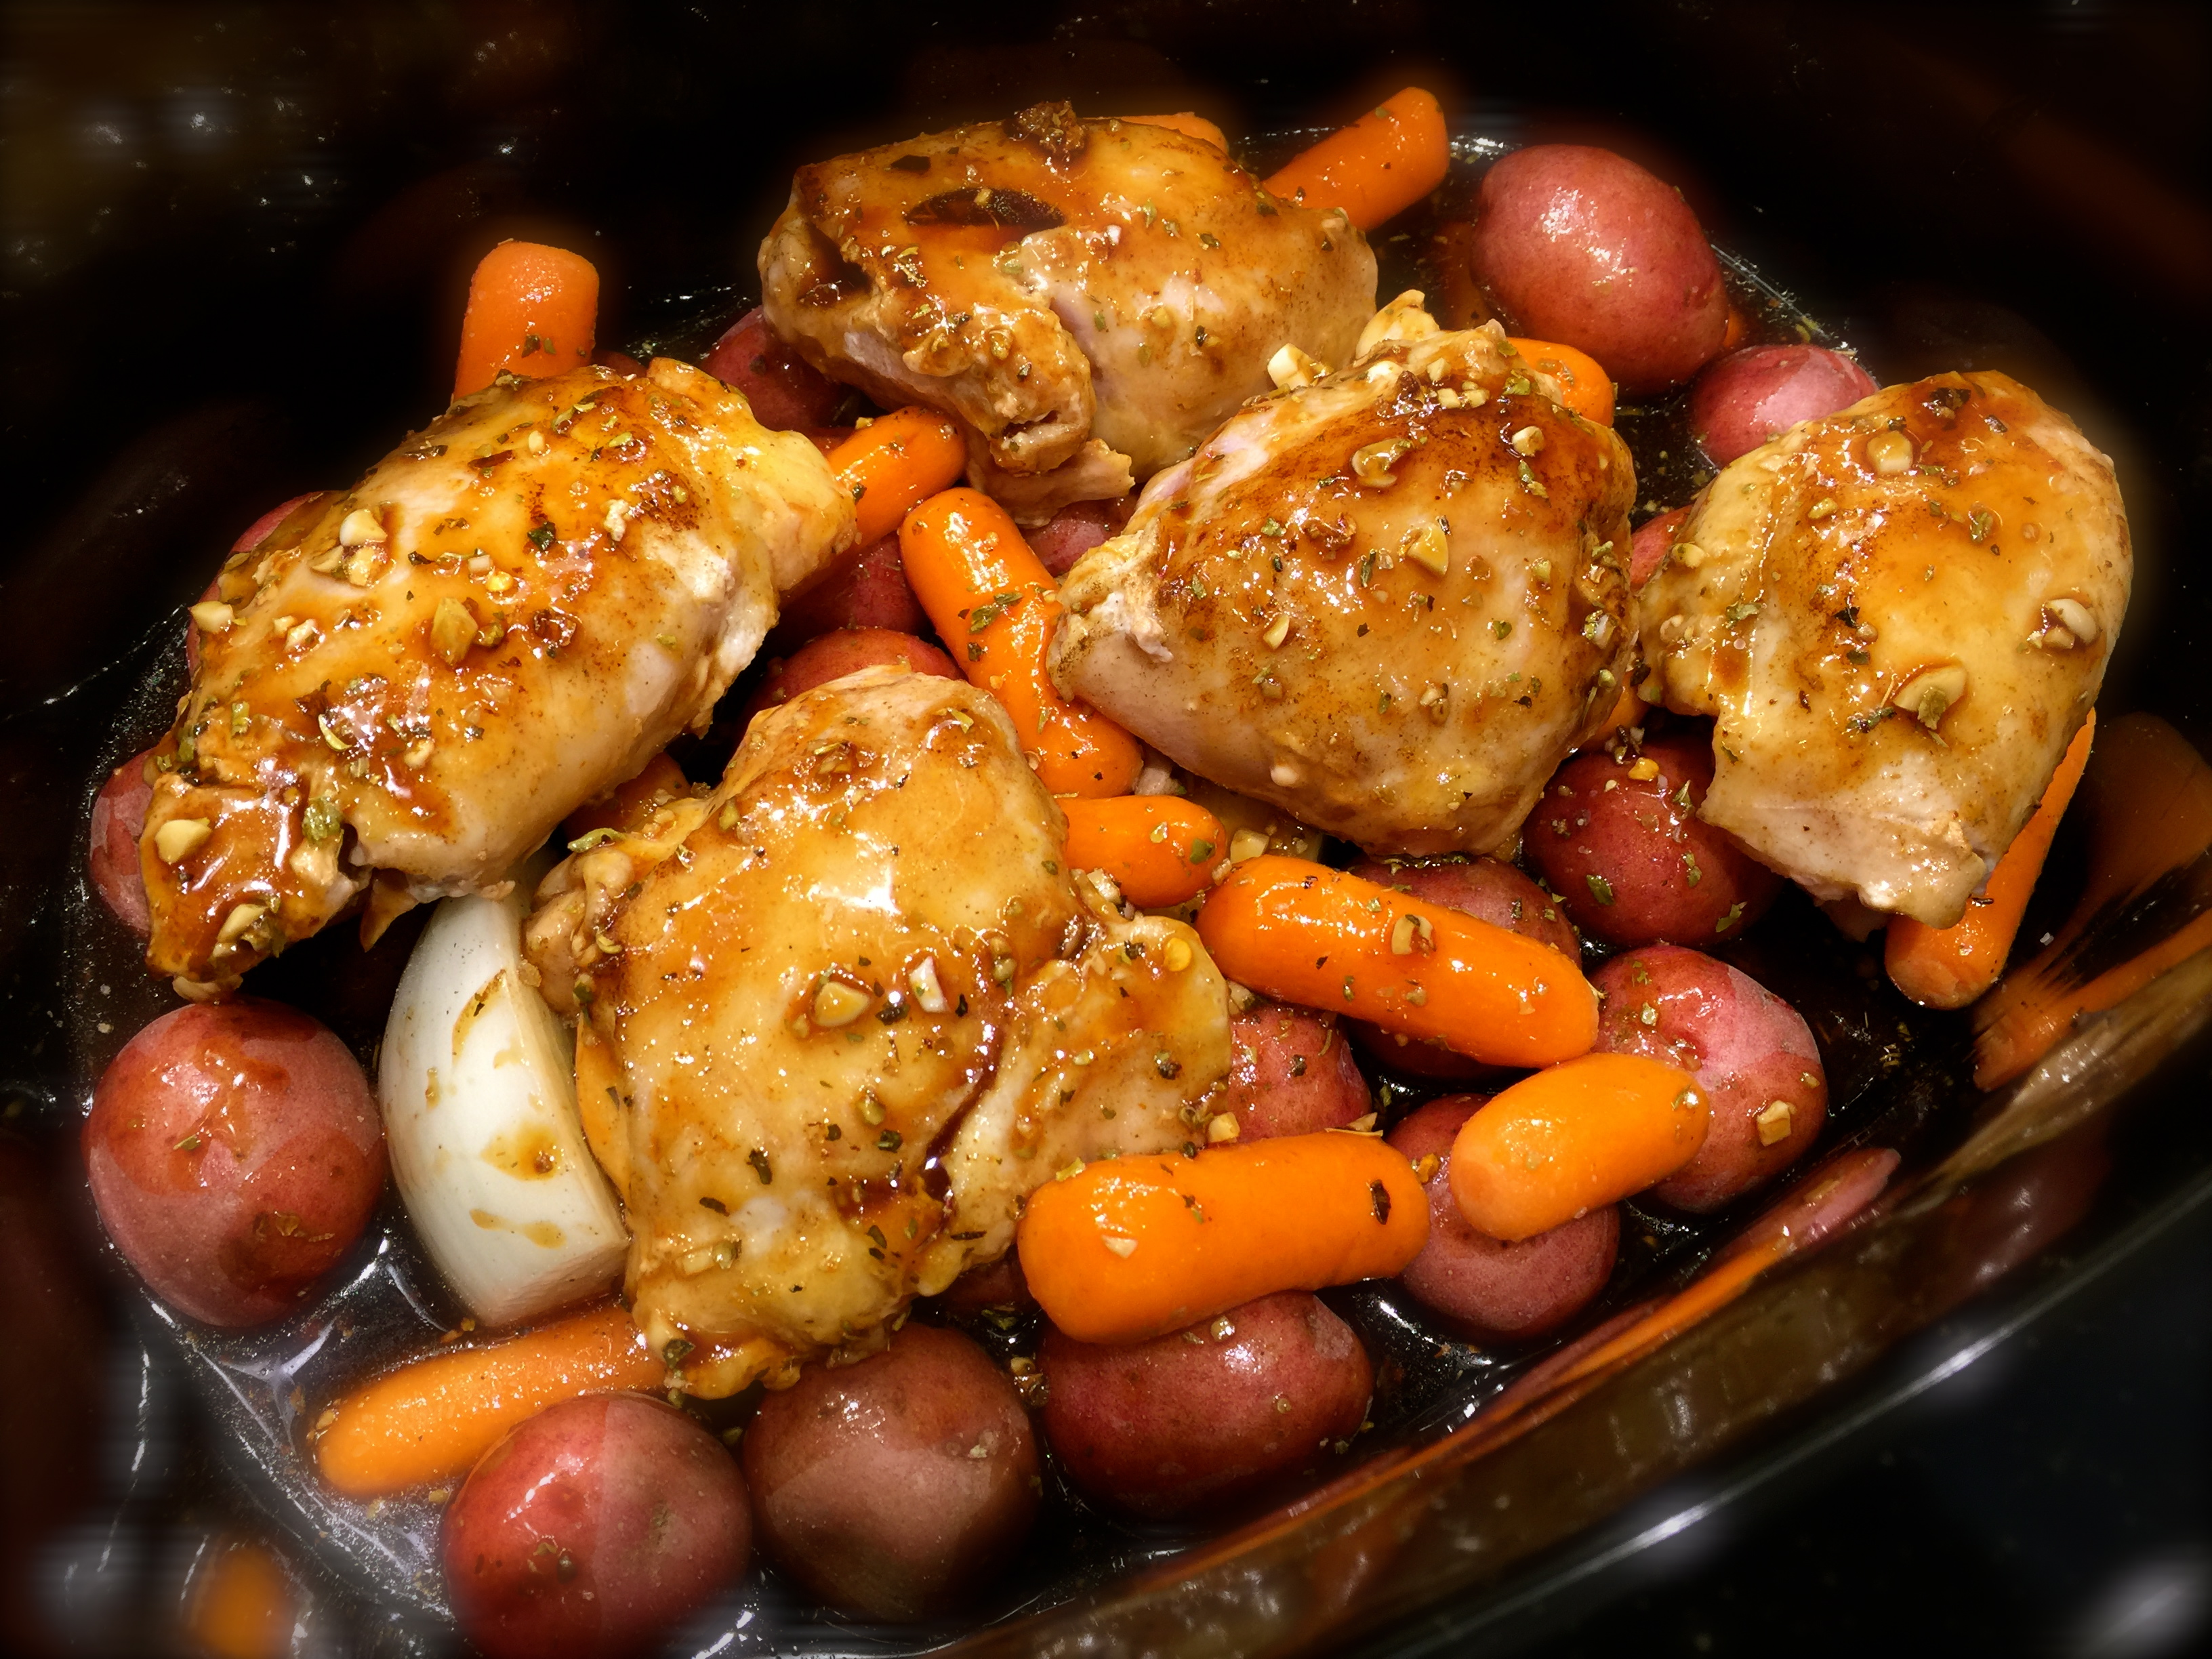
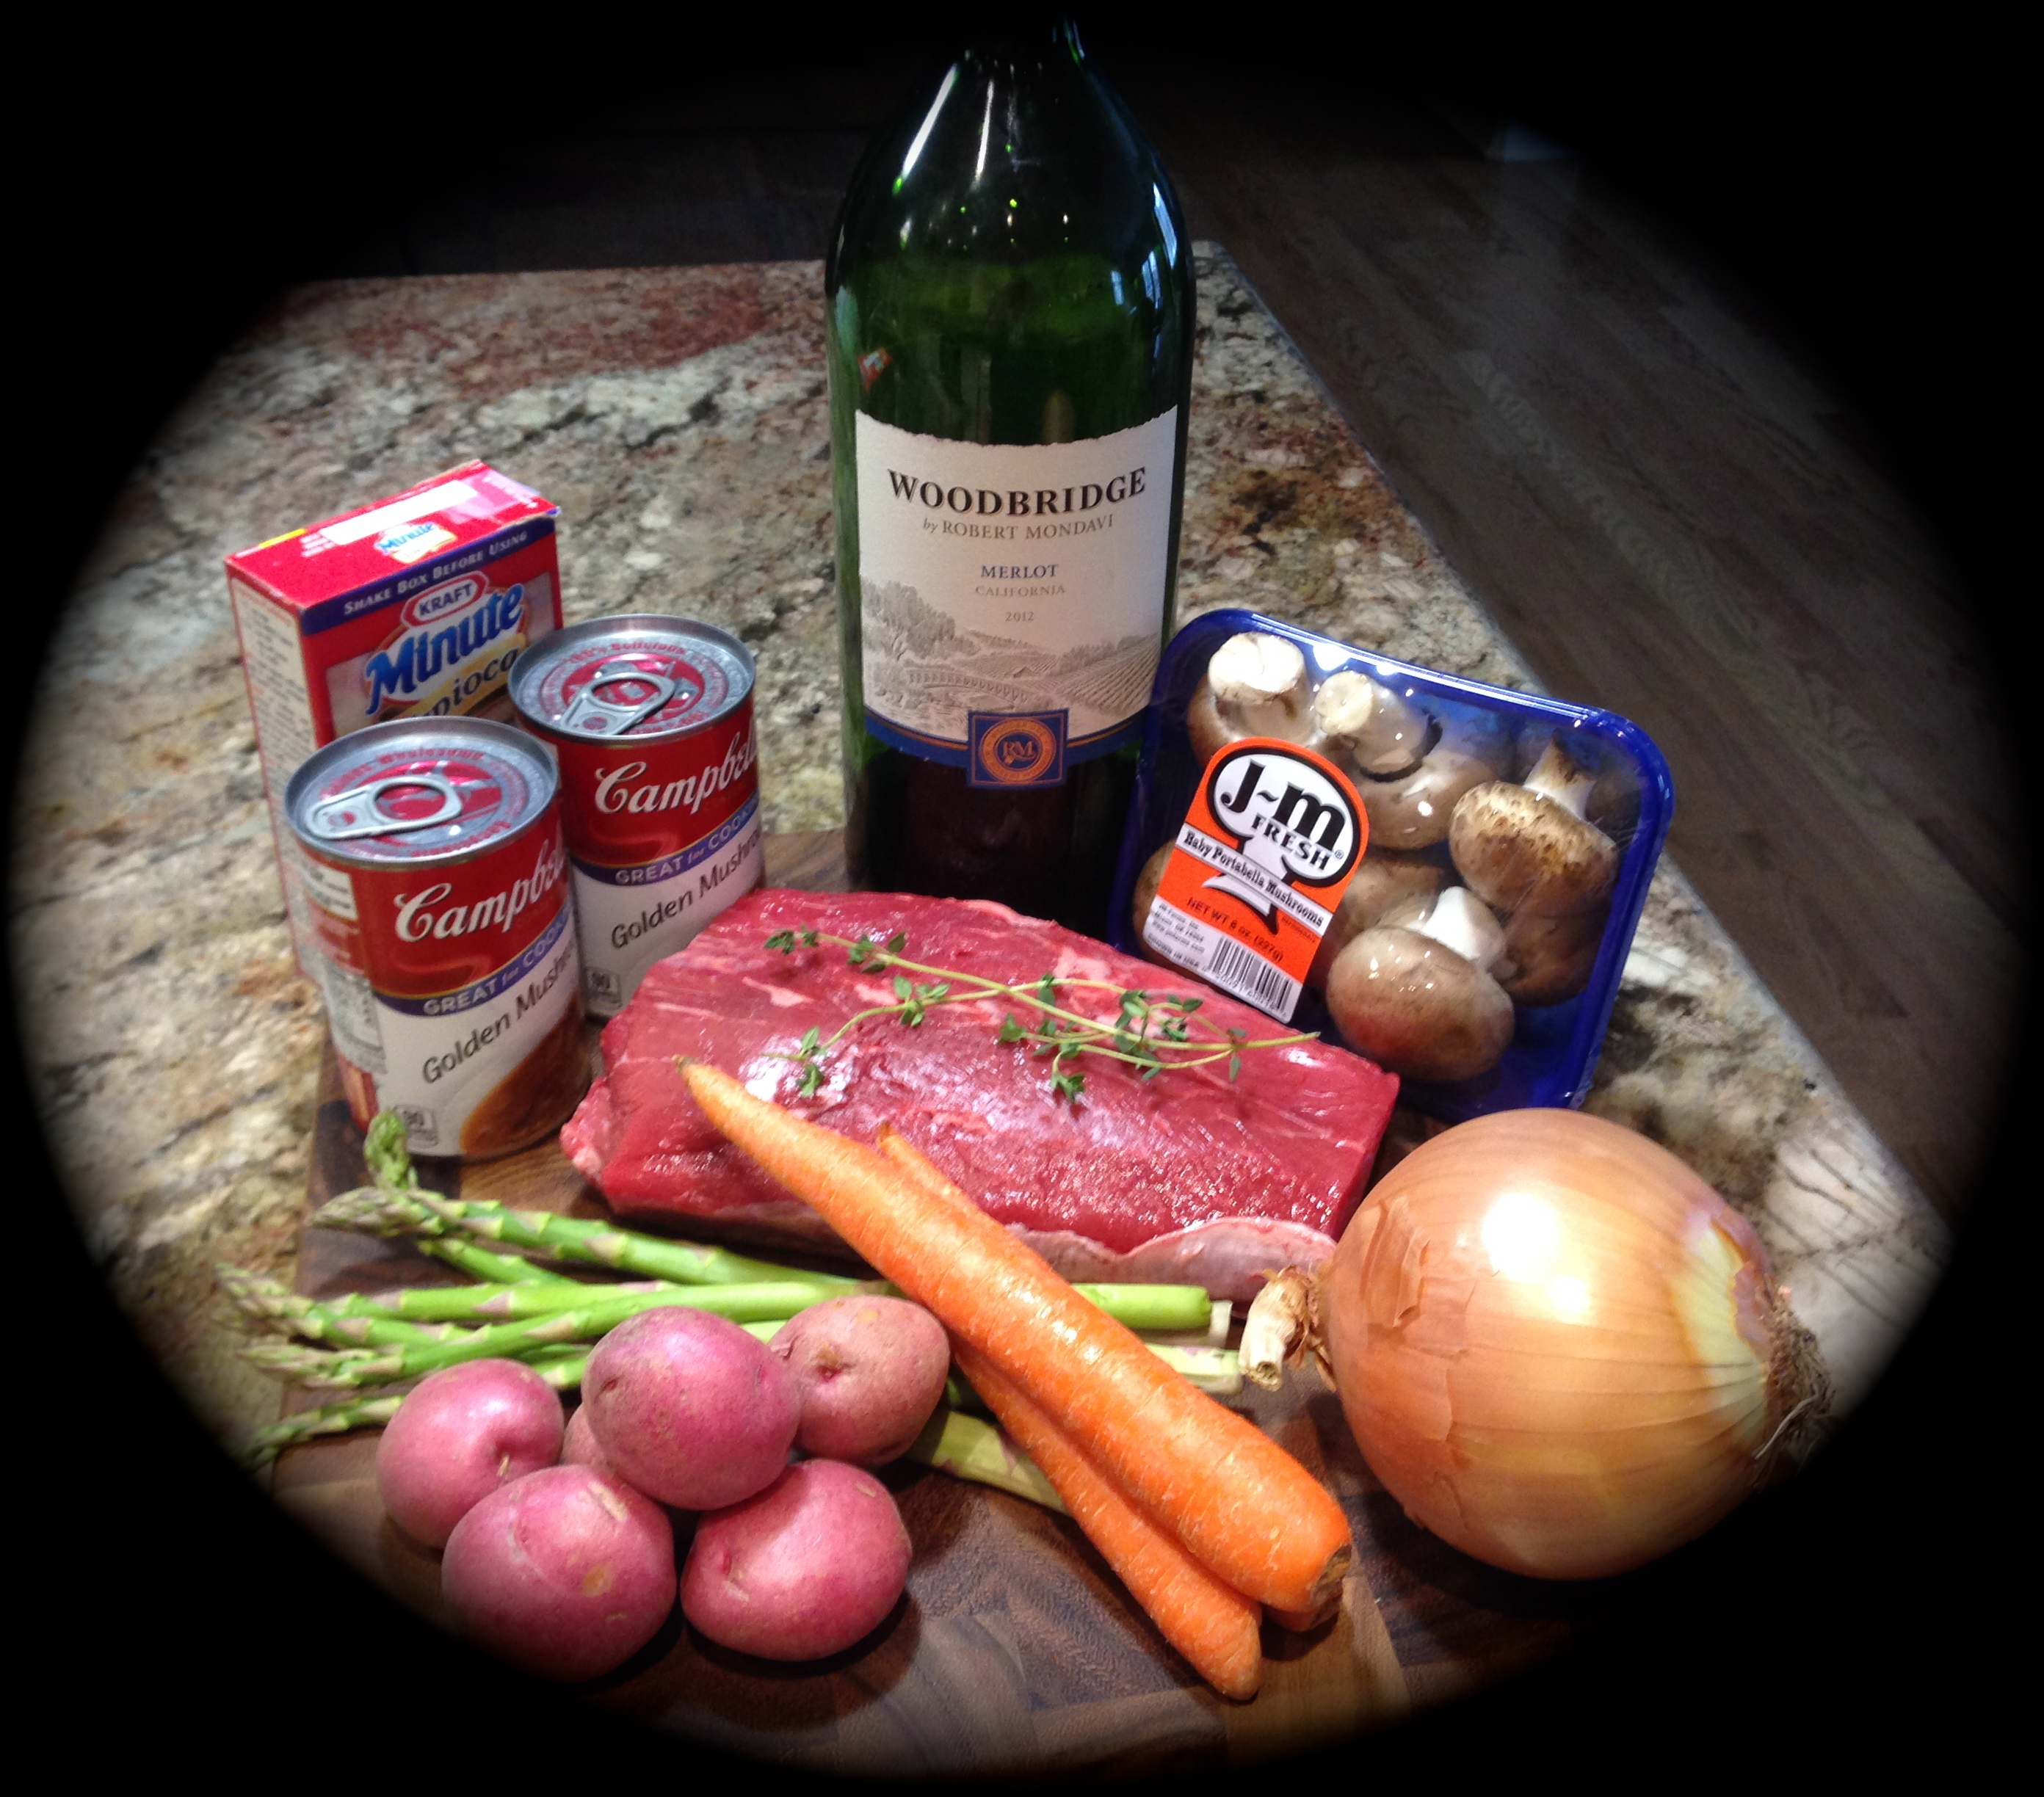
The version I worked from called for 1/3 teaspoon of red pepper flakes. I did not want the heat so I eliminated that ingredient. I also added less butter and more lemon zest than recommended in the recipe and I added some carrots to the slow cooker which served as a base for the chicken thighs.

Lesson Learned 2 – Avoid the common mistake of long cooking times with your slow cooker: This is all a part of knowing your slow cooker as I mentioned above. I find, mostly where chicken recipes are concerned, that slow cooker recipes have cooking times that are too long. The recipe that I based this on called for 4 hours on high or 6-8 hours on low. I cooked my chicken for 5 hours on low and the result was perfect. Normally with beef recipes I find the recommended cooking times to be more accurate. But be careful with chicken in a slow cooker. You can really dry it out by cooking it too long. If you’re not sure if your chicken is done take its internal temperature. The safe internal temperature for cooked chicken is 165 degrees.

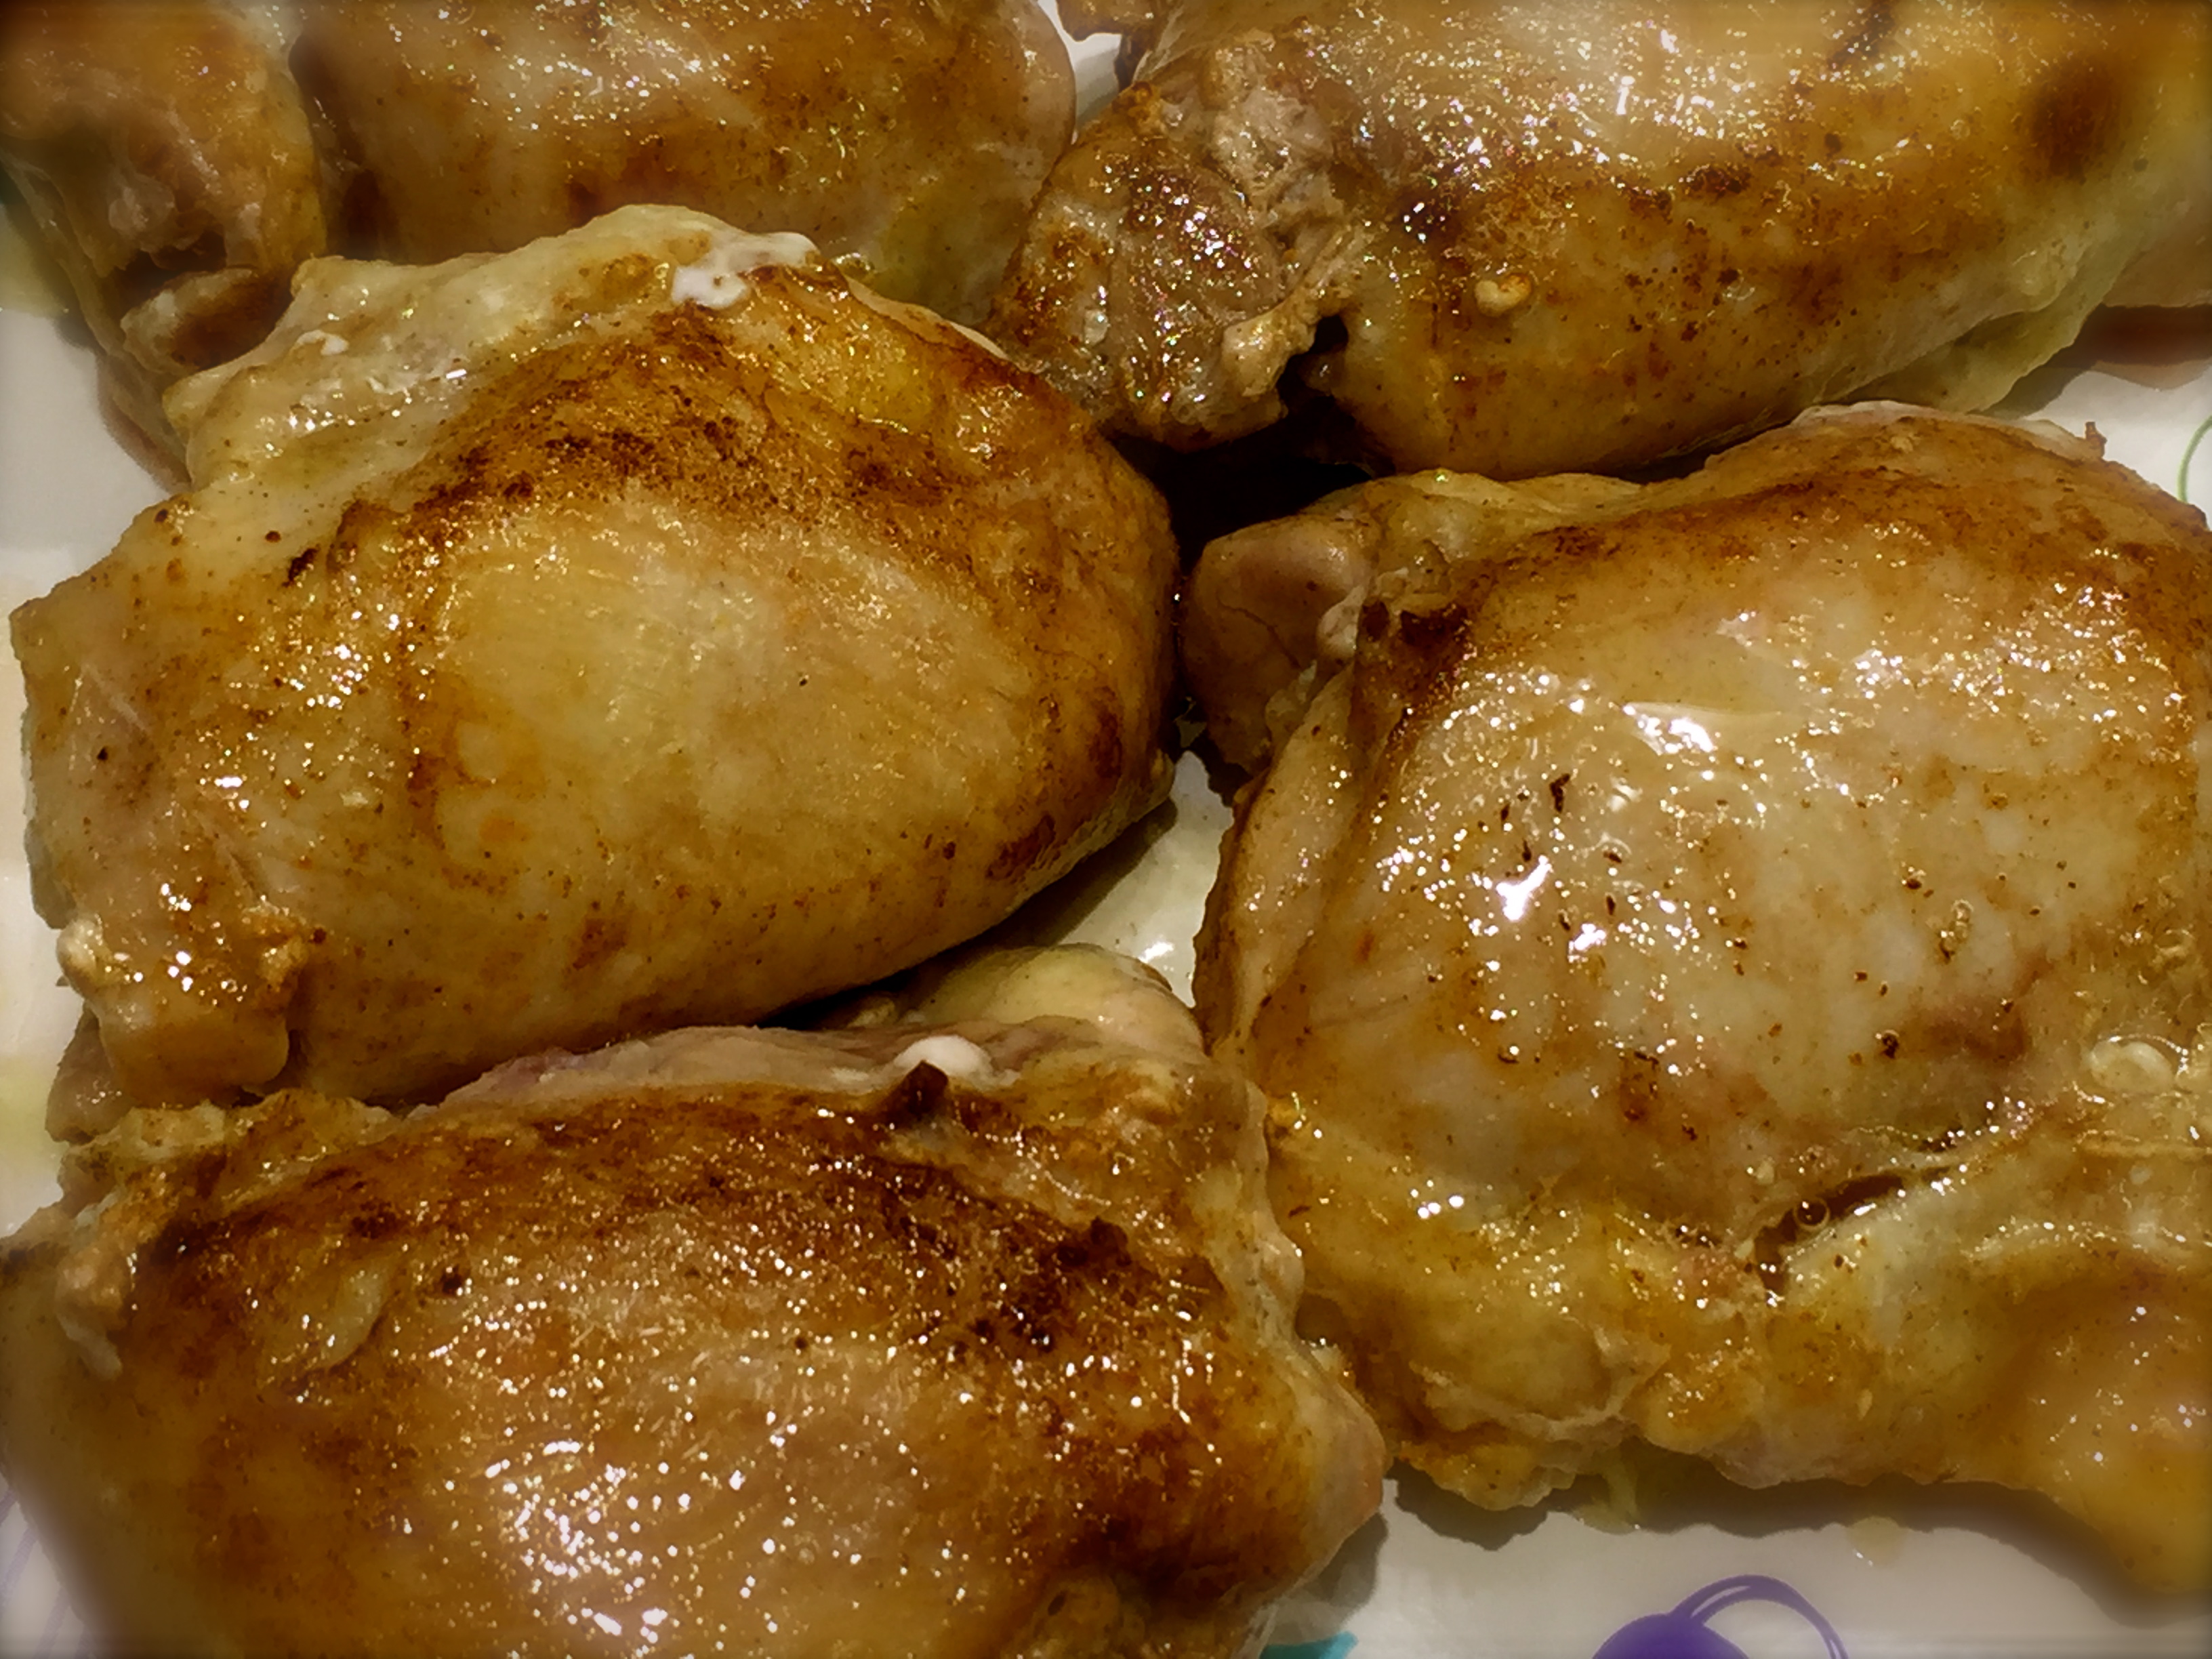
Lesson Learned 3 – Yes, you must brown your chicken first to get it to look like my pictures: The one drawback of a slow cooker is that it does not brown meat when it is slow cooking. The good news is there are now slow cookers on the market where you can brown your meat in its own sleeve and place the sleeve back in the slow cooker to finish the rest. These slow cookers tend to be a little more expensive but are a great convenience.

I browned my chicken thighs for about 4 minutes with the skin side down. I just browned them on one side and drained them on paper towels before adding them to the slow cooker. Some people don’t care if their meat looks grey and skip the browning process. But it you want your chicken thighs to look like mine, you’ll need to brown them first.

Lesson Learned 4 – I prefer using chicken thighs in a slow cooker: I find chicken thighs to be more forgiving, especially if you overcook them in a slow cooker. So if you feel it absolutely necessary to cook them for 6 hours on low use chicken thighs. The result will be much better.

Lesson Learned 5 – Slice the garlic in thin slices and place the slices on top of the chicken: I found that to be the best way to infuse the garlic into the meat. If you want you can also put some garlic slices under the meat as well. Once the chicken was done I removed the garlic slices and disposed of them. But you can serve them as well. I’m just not a big fan of eating garlic that way. You can also just mince the garlic and sprinkle it on top of the chicken. The choice is yours.

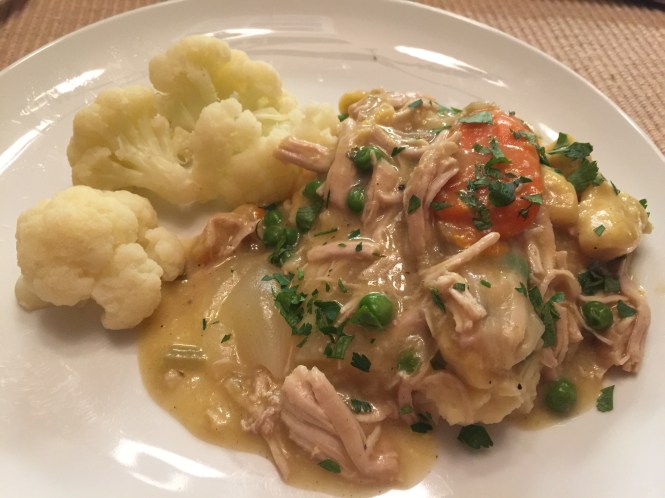
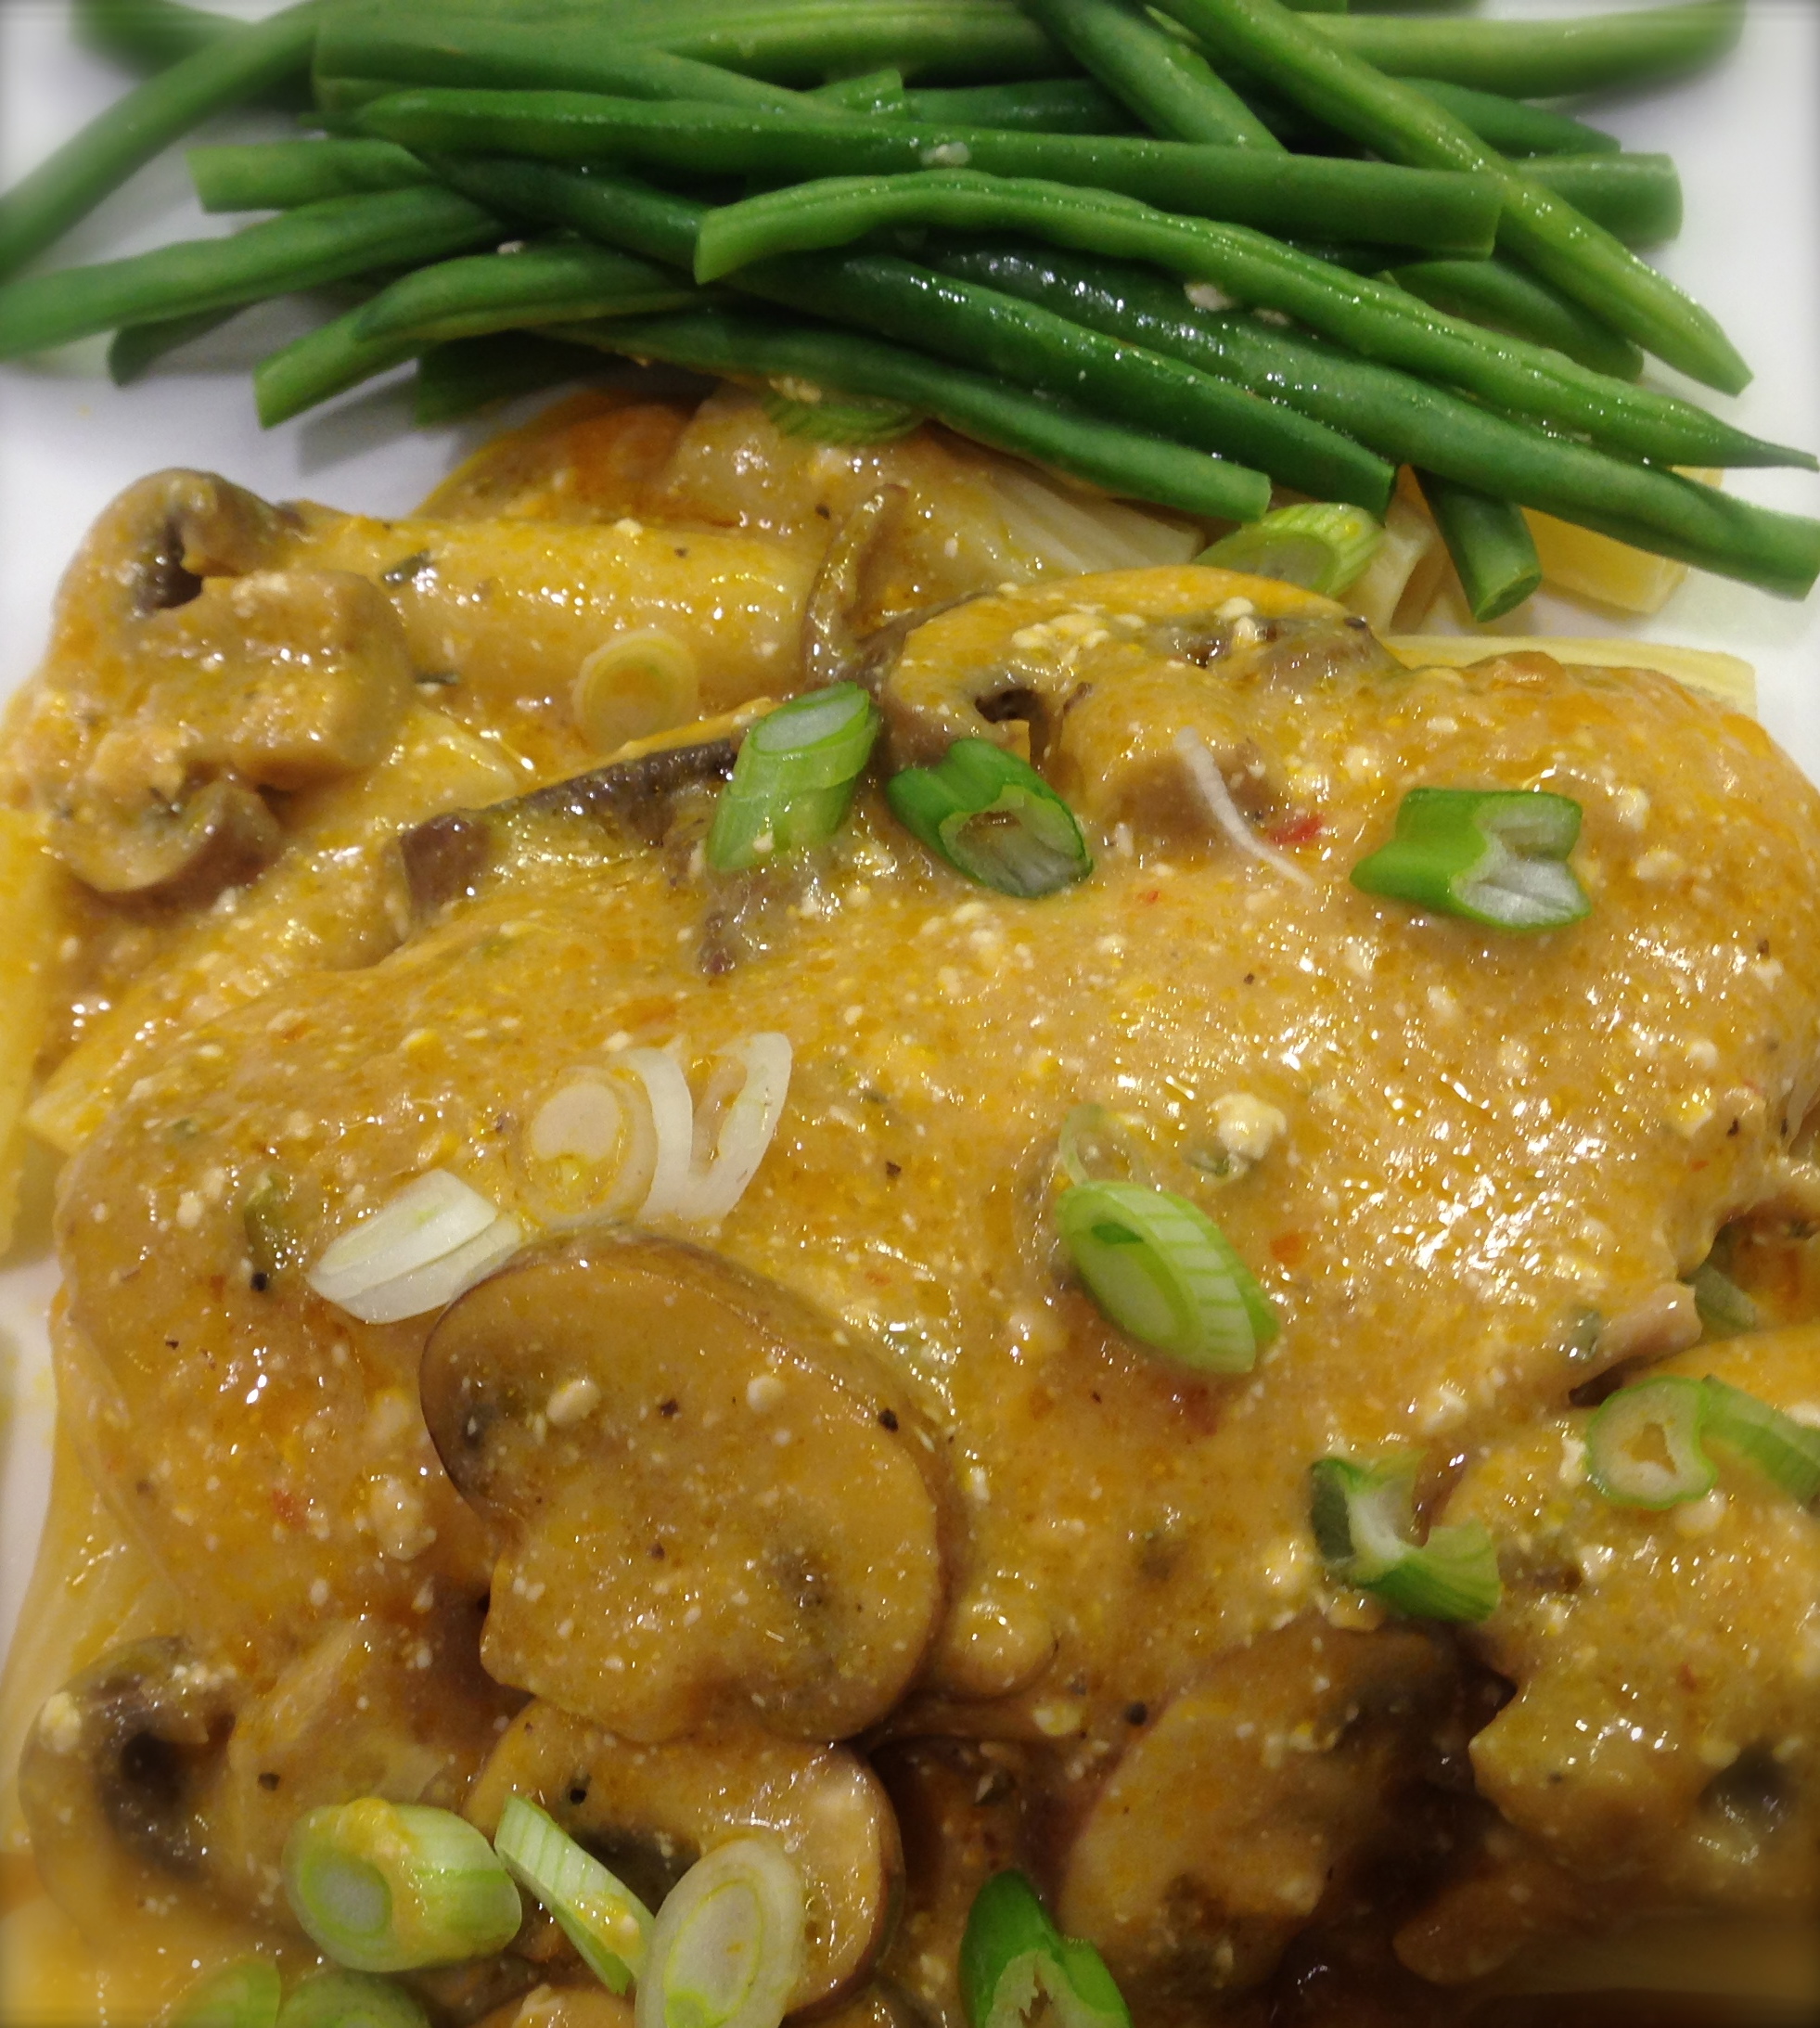
Lesson Learned 6 – Baste the chicken in the drippings before serving: This recipe makes a great lemon butter sauce. Baste the chicken thighs in that sauce before plating them. You’ll be glad you did.

And that’s it. This is a very basic recipe with a minimal amount of ingredients. You can skip adding the carrots if you want, or you can add some onions under the chicken as well. The choice is yours. I definitely enjoyed this recipe and will make it again. Let me know what you think!

Slow Cooker Lemon Garlic Butter Chicken...

  • Servings: 2-4
  • Difficulty: Easy
  • Print

INGREDIENTS:

4 chicken thighs with skin on

1 Tbs. vegetable oil

1 tsp. butter

1 tsp. garlic powder

1 tsp. onion powder

1/2 tsp. paprika

1 tsp. Italian seasoning

4 garlic cloves sliced thin

1/2 stick of butter diced

The zest of one medium size lemon (or two small)

The juice of one medium size lemon (or two small)

1/3 cup low sodium chicken broth

Salt and pepper to taste

4 carrots, peeled and cut into chunks

Chopped fresh flat leaf parsley for garnish, optional

Lemon slices for garnish, optional

DIRECTIONS:

Heat the vegetable oil and butter in a pan on the stove. Brown the chicken thighs skin side down for approximately 4-5 minutes. Remove the chicken thighs and drain on a paper towel. Set them aside.

Place carrots in the bottom of the slow cooker. Combine the chicken broth, lemon juice and zest. Place thighs on top of the carrots and pour the chicken broth mixture over them.

In a small bowl combine the Italian seasoning, onion powder, garlic powder, and paprika with some salt and pepper. Sprinkle the spice mixture over the chicken thighs. Top them with the garlic and dot them with the diced butter.

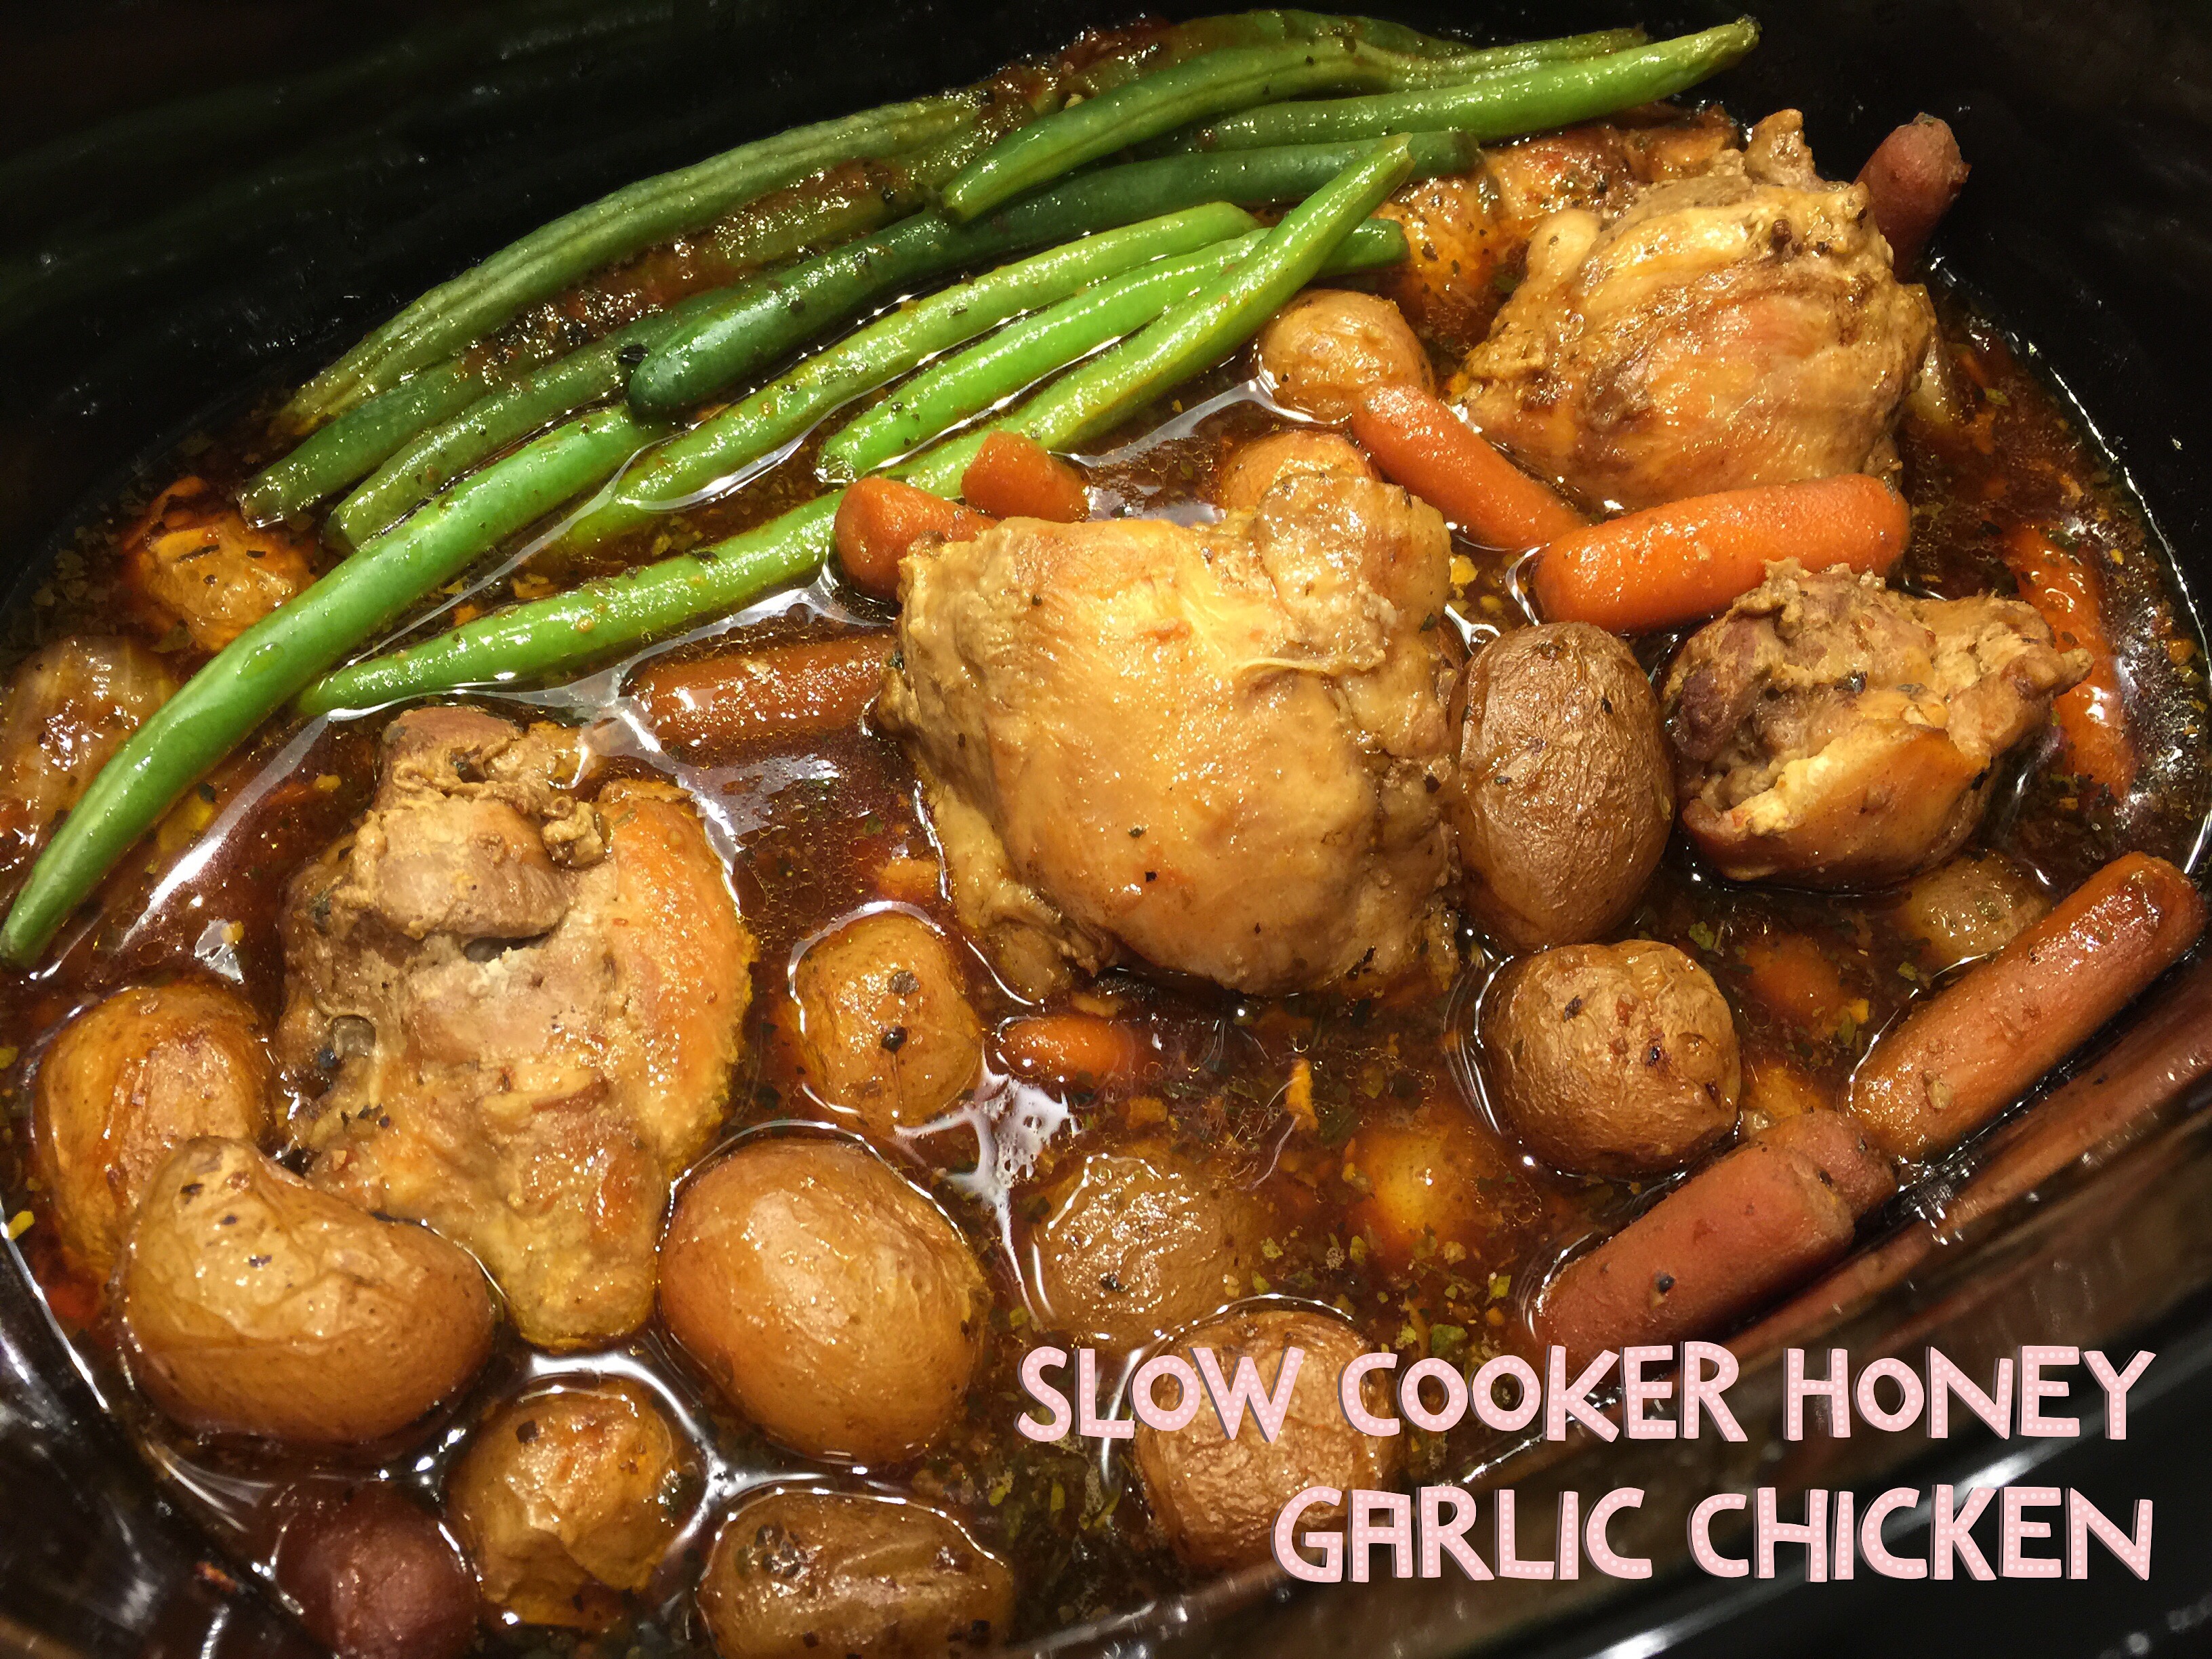
Cook on low for 5 hours. Baste the chicken thighs with the lemon butter sauce before removing them from the slow cooker. Garnish with lemon slices and parsley.


Slow Cooker Stuffed Shells…

It never ceases to amaze me what you can do with a slow cooker. Years ago it was just a tool you used to put in some meat, vegetables, some liquid (mainly canned soup) and let it cook for 8 hours or more. And generally that resulted in bland, dried out food. Well not anymore.

The slow cooker has not become a versatile tool for making a wide variety of things. Years ago I would never have thought about cooking pasta in a slow cooker and would never have thought to use the cooker for only three hours. My, how times have changed!

This recipe is insanely delicious. The combination of ricotta, cottage cheese and pesto makes a delightful creamy filling for the shells. And it also is fabulous as leftovers – so minimally you can get more than one dinner out of this recipe.

So let’s talk slow cooker stuffed shells…

Lesson Learned 1 – Cook the shells for one minute less than it says on the box directions: You boil the shells to get them somewhat softer and easier to stuff. There is no need to cook them through because they will still cook for another 3 hours in the slow cooker. So don’t boil them on the stove top for the recommended amount of time. If you do, by the time you’re ready to serve you shells will be mushy.

Lesson Learned 2 – You can add some additional veggies to the cheese mixture: I had some sweet red pepper in my refrigerator and so I decided to dot the top the cheese mixture with some sweet pepper morsels. But you could easily just mix the peppers in with the cheese – just make sure to dice the peppers small. Chopped mushrooms would also work well in the cheese mixture. Or you could slice the mushrooms and mix it with the tomato sauce and just let them cook that way. You could also add frozen spinach to the cheese mixture. Just make sure it is completely thawed and squeeze out all the water from the spinach so the cheese mixture doesn’t get soggy.

Lesson Learned 3 – Don’t precook the sausage all the way through: I suggest you cook the sausage in a skillet and when there still is some pink left in the meat, take the sausage out of the skillet and drain it on paper towels. The sausage will be cooking another 3 hours in the slow cooker so no need to cook it through on the stove top.

Lesson Learned  4 – Make sure you spray your slow cooker crock with cooking spray and line the bottom with a little tomato sauce: That way the shells won’t stick to the crock and clean up will be a breeze.

And that’s it – it’s basically soften the shells, stuff them, place them in the slow cooker and let the slow cooker do all of the work. What more could you ask? Enjoy!

Slow Cooker Stuffed Shells...

  • Servings: 6
  • Difficulty: Easy
  • Print

INGREDIENTS

15 large pasta shells, cooked 1 minute less than package directions

1 large jar of tomato sauce

2 links of Italian sausage, skin removed, partially cooked, crumbled, divided

12 ounces whole milk ricotta cheese

6 ounces cottage cheese

1/4 cup Parmesan cheese

1/3 cup pesto

1/4 cup sweet pepper, diced small

2 tsp. of Italian seasoning, divided

1 cup mozzarella cheese, shredded

salt and pepper to taste

olive oil cooking spray

Chopped or sliced mushrooms, optional

Frozen spinach, optional

DIRECTIONS

Cook the pasta shells one minute less than the package instructions. Drain and set aside to cool.

In a skillet, cook the Italian sausage, breaking it up while you cook it, leaving some pink color in the sausage. Do not cook the sausage completely through. Drain the sausage on paper towels and set aside.

In a medium size bowl mix together cheeses, pesto, sweet pepper and 1 tsp of Italian seasoning. Generously stuff each shell with the cheese mixture and set aside. Dot the top of each with pieces of sweet red pepper or combine the red pepper into the cheese mixture before stuffing the shells.

Spray the slow cooker crock with cooking spray. Lightly cover the bottom of the crock with a layer of tomato sauce. Sprinkle half the sausage on top of the sauce. Place the stuffed shells on top of the sausage and sauce. Pour the remaining sauce over the shells and sprinkle the remaining sausage on top of the sauce.

Sprinkle the mozzarella all over the top of the shells meat and sauce. Sprinkle the remaining teaspoon of Italian seasoning over the mozzarella.

Cover and cook for no longer than 3 hours.

NOTE: You can chop mushrooms small and add them to the cheese mixture or you can take mushroom slices and place them in the sauce lining the bottom of the slow cooker and then place the shells on top of them. A small box of frozen spinach can be added to the cheese mixture as well. Make sure it is thawed and all the liquid is squeezed out of it.


Add some meat and sauce to the bottom of the slow cooker…

Add the stuffed shells…

Cover with remaining sauce and meat…

Top with mozzarella and Italian seasoning…

After three hours you have…


Slow Cooker Whole Roasted Chicken…

I’m not sure why I’m always surprised when I try something totally new and it works out perfectly the first time. That is what happened with this recipe. I never in a million years thought about making a whole chicken in my slow cooker. I’m not sure why but it just never occurred to me. Until the other day…

I was planning some meals, perusing slow cooker recipes on Pinterest and all of a sudden came across a couple of recipes for making a whole chicken in a slow cooker. I was intrigued. What I found was making a whole chicken in a slow cooker couldn’t be any easier and the result is a really moist chicken with hardly any work. If you’ve never made a whole chicken in your slow cooker you simply have to try it. You won’t believe how good it is.

So let’s talk a slow cooker whole roasted chicken…

Lesson Learned 1 – The chicken needs to be elevated in the slow cooker: This was an interesting fact I learned. I saw some recipes that suggested wadding up pieces of foil into balls, placing them on the bottom of the slow cooker and then placing the chicken on top. I thought that was a little odd and wondered why. I found out that the chicken will give off a lot of juice in the slow cooker and if you don’t elevate it you’ll braise the chicken and it will fall apart when you try to get it out.

When I made it I was surprised by the amount of juice the chicken produced. But I chose not to perch my chicken on a bed of foil balls. Instead I used my vegetables as the base to elevate my chicken. Now this time I only used baby carrots, but I can see making this with potatoes and onions as well. I simply poured a very small amount of chicken broth on the bottom to prevent the carrots from sticking until the chicken produced its juices (the broth hardly even came up the sides of the carrots). But even with just carrots and a little chicken broth as the base, that did the trick and the carrots were even more flavorful having been cooked in broth and chicken juices for such a long period of time. Just remember that you need to season every layer in a slow cooker so make sure you sprinkle whatever you use as a base with salt, pepper, and in this case I used thyme as the herb.

If you choose to just use foil to elevate the chicken you can use the juices in the bottom of the slow cooker to make gravy. You’ll have plenty of liquid to provide a solid base for it.

Lesson Learned 2 – Add some aromatics to the cavity of the chicken: Another way to boost the flavor of the chicken is to add aromatics to its cavity. I put together a combination of garlic, lemon, and a shallot but you can use onions, fresh herbs (like thyme or rosemary), and you can even stuff the neck end of the bird with a sausage and herb mixture. If you do, just make sure you truss the neck skin with a skewer so the sausage cooks inside the bird and doesn’t pop out during the cooking process. And truss the legs together with cooking twine to keep the aromatics inside the cavity of the chicken.

Aromatics For The Chicken Cavity

I also made a rub for the chicken consisting of salt, pepper, cayenne pepper, thyme, minced garlic and a little olive oil. That also lent great flavor to the chicken.

Rub For the Chicken

Lesson Learned 3 – Use your broiler if you want crispy skin: The choice is up to you. Obviously the skin does not come out of the slow cooker crispy but if want it all you need do is put the chicken under the broiler for a couple of minutes once you’ve taken it out of the slow cooker. You’ll have the crispy skin you desire. Since this was just for me and my husband (and we don’t eat the skin anyway) I didn’t put the chicken under the broiler. The chicken was still juicy and delicious! I served my chicken with the carrots, some “Stove Top” stuffing for chicken and a salad. It was a great meal.

The major lesson I learned was making a whole chicken in a slow cooker is so unbelievably easy I wondered why I’d never done it before. But I guarantee you one thing, I will be making it again – and often!

Slow Cooker Whole Roasted Chicken...

  • Servings: 6
  • Difficulty: Super Easy
  • Print

INGREDIENTS

1- 4.5 – 5 pound chicken

1 – 1 lb. bag of peeled and scrubbed baby carrots

1/2 cup chicken broth

Olive oil cooking spray

The Aromatics:

4 cloves of garlic, peeled but left whole

1/2 of a lemon

1 medium size shallot, peeled but left whole

The Rub:

2 tsp. of salt + 1/2 tsp. to season the carrots

1/4 tsp. black pepper + 1/4 tsp. to season the carrots

2 tsp. paprika

1 tsp. dried thyme + 1 tsp. to season the carrots

3 Tbs. finely minced garlic

1 Tbs. olive oil

DIRECTIONS:

Remove the chicken from its packaging, rinse it inside and out, removing any parts that may have been left inside. Pat the chicken as dry as you can. Insert the garlic, lemon and shallot into the cavity. Truss the legs together with cooking twine to hold the aromatics in place.

Combine the salt, pepper, cayenne pepper, paprika, garlic and thyme. Add the the olive oil and combine until the ingredients are lightly moistened. Spread the rub generously all over the chicken.

Spray the crock of the slow cooker with olive oil cooking spray. Pour the chicken broth into the crock. Place the baby carrots on top of the broth. Season with salt, pepper and thyme. Place the chicken on top of the carrots.

Cook on high for 1 hour and 7 hours on low. Remove the chicken and place under the broiler for crispy skin if desired. Let the chicken stand covered in foil for 10 minutes before carving.

Prep The Chicken And Truss It

Put The Carrots In First And Season Them

Put The Chicken On Top of The Carrots

Cook For 8 Hours

Slow Cooker Pork Tenderloin With Vegetables And Apple Butter Gravy…

I’ve been offline for a little bit. I was having technology issues and found out that my trusted Mac has now become so old that it cannot support html 5 which is the platform now used by WordPress. Oh well… but I’ve developed some work arounds and should be fine now.

Summer is in full swing, and that includes those warm summer temperatures. During Summer I like to grill but not every day. But what do you do when it is so hot and you don’t want to heat up the house when making dinner? That’s when I rely on my trusty slow cooker. You can have a great meal and never create more heat in the house.

I am a big fan of pork loin. Like beef tenderloin, it is the the most tender, flavorful and versatile cut of pork. Cooking it in the slow cooker is so easy, but you need to pay attention not to overcook it. So let’s talk pork loin with vegetables and apple butter gravy…

Lesson Learned 1 – Brown the pork and potatoes before putting them into the slow cooker: The slow cooker cooks food but doesn’t create crust or color. If that is not a big deal for you than you can skip this step. But I’ve always espoused that you eat with your eyes first and so I like to provide that extra step to make the meal even more pleasurable.

I put a little canola oil in a cast iron skillet and browned the pork loin – about 4-5 minutes on each side. Doing that gives it a nice brown crust as you can see from the picture above. I also brown the potatoes a little. I don’t brown the carrots. I don’t think that’s really necessary. The potatoes also take about 4-5 minutes per side and I usually do two sides just enough to give it great color.

Lesson Learned 2 – Cut your carrots small or use baby carrots: This recipe will only cook for 6 hours on low so you need to consider how tender you want your carrots. If you want them crisp tender you can cut them in larger pieces. If you want them fork tender you will need to cut the pieces small or use baby carrots. I like to use the larger sized carrots and I buy only what I need for the recipe, about 3 carrots. If the carrot has a thick base, I cut it into a log and then I cut the log in half down the middle. That way I minimize the thickness and the carrots come out fork tender. When you come down to it, it all depends on how you like your carrots.

Lesson Learned 3 – Do not cook this for more than 6 hours on low: That is plenty of time to cook the pork loin without drying it out. And the sauce made with apple butter is a great accompaniment to the pork.

This is a great meal that is easy to prepare and will not heat up your kitchen on these warm Summer days. Try this recipe and let me know what you think.

Slow Cooker Pork Loin With Vegetables And Apple Butter Gravy

  • Servings: 4
  • Difficulty: Easy
  • Print

INGREDIENTS:

1 1/2- 2 pounds pork loin

4 yukon gold potatoes, peeled and sliced into chunks

3 large carrots, cut into small chunks (you can use baby carrots as well)

I medium size yellow onion, peeled and cut into large chunks

3 large garlic cloves, minced

1 9.5 ounce jar of apple butter

1/3 cup dijon mustard (you can mix dijon with seeded mustard)

1/3 cup low sodium soy sauce

1 cup beef broth

1-2 Tbs. canola oil

Non-stick cooking spray

Salt and pepper to taste

DIRECTIONS:

Heat a large cast iron skillet. Add 1 Tbs canola oil. Salt and pepper the pork loin and put that side down in the hot skillet. Salt and pepper the other side of the pork loin. Let the pork loin sear for 4-5 minutes. Turn it over and sear it on the other side. Remove from the pan and set aside.

Check to see if the skillet needs more oil and add it if it does. Place potatoes in the pan being careful not to crowd them. Let them sear for 5 minutes and flip them to another side. Let them sear for an additional 5 minutes and remove them from the pan.

Spray the crock of the slow cooker with non-stick spray. Add the onions, potatoes and carrots into the crock. Place the pork loin on top of the vegetables.

In a small bowl whisk to together the garlic, apple butter, mustard, soy sauce and beef broth. Pour the mixture over the pork and vegetables.

Cook on low for six hours. Remove the pork and vegetables from the crock. Slice the pork and plate it with the vegetables. Taste the gravy in the crock and add more salt and pepper if needed. Pour the gravy over the pork.


My Kitchen Remodel Saga And My Slow Cooker Favorites…

The saga of the kitchen, dining room, living room and den flooring projects continues and prevents me from posting some new recipes. I’ve lived through this many times before and even recognize the many ebbs and flows of this type of process. We are definitely in the “frustrated” stage of the project. The whole house is in disarray and will be for a few more weeks (the hardwood floor goes down next week) and it’s at this stage that you long for a clean, organized home.

I liken these types of projects to giving birth. Once the baby arrives you forget about all the pain and rejoice in the outcome. I am so waiting for that time. Before I go into some of my favorite slow cooker recipes I thought I’d share a few pictures of my kitchen to give you some perspective of what I am currently going through.

The picture below gives you somewhat of an idea of what the kitchen looked like when we moved in. Not bad you might say, but there were definitely some challenges. The gas cook top was not what was originally there. When buying a condo I told my husband I would not even consider one that did not have a gas stove. I’ve been a gas girl all my life and know that most if not all professional chefs cook with gas so there was no room for negotiation there.

We took out the cooktop you see in the picture below to install the gas cooktop in the picture above (the gas cooktop was the one the builder took out and replaced with the electric cooktop when doing the remodel). Our condo had been previously owned but purchased back by the builder and converted to the model for the development. (the development was done in two phases and our condo was in one of the first phase buildings). “Upgraded” appliances were installed as part of the conversion. I say upgraded in parenthesis because the new appliances were actually not very good and my husband and I wound up replacing all of them except the refrigerator. I also found it interesting that the electric cooktop they originally installed looked like Mickey Mouse, my bizarre sense of humor.

The original electric cooktop that was in our kitchen

The original kitchen design called for the cooktop and oven to be separate. You can see a small portion of the original oven on the far right of the very first picture above (note the stainless outline at the bottom far right of the picture). The problem with having the oven located there was the thermostat for our heating and cooling system was on the wall directly opposite the oven. Using the oven had a direct effect on the thermostat and we certainly didn’t want that. So we decided to eliminate the cooktop and separate oven combination and get a stove with an oven (see the picture below), install it in the space where the cooktop was (requiring removing the cabinets underneath) and adding cabinet space where the oven had been. It worked out great.

After that, the final problem we wanted to resolve was the engineered wood flooring (you can see it on the bottom of the first picture above). It really doesn’t look that bad in the picture but it was cheap stuff, scratched easily and was hard to clean. Both my husband and I have had wood floors in our previous kitchens and always wound up replacing them with tile. Tile is more durable and easily stands up to the wear and tear of work done in a kitchen. Just be careful not to drop your wine glasses, though. Tile is not forgiving in that regard.

So at this point the tile is laid and setting for a day before doing the grout. My husband does excellent work and is a perfectionist so the work sometimes is painstakingly slow. In the end I know I will be so pleased but in the interim living in a war zone has its ups and downs.

Where my stove/oven used to be

waiting for grout

The one thing we’ve already noticed is the tile is brightening up the kitchen. With the dark cabinets and the dark floor the kitchen was a pretty dark place. The tile is changing all that and brightening it up considerably.

And so, because of all this, once again I do not have a new recipe to share this week. But the good news is I have so many recipes amassed from the many years of doing this blog that I can share some of my recipes that have not seen the light of day for quite some time.

This week I decided to focus on some of my personal favorite slow cooker recipes. Over the years I’ve learned that slow cookers are actually very versatile. Years ago when I would make something in a slow cooker (or crock pots as we used to call it then) my food would come out bland and overcooked. Now I’ve mastered some techniques that have helped me create some wonderful slow cooker dishes. Those are the ones I want to share with you today.

So let’s talk slow cooker favorites…

I’ve chosen these particular recipes because they are easy, impressive and your guests (or family for that matter) will never think they were made in a slow cooker.

  1. SLOW COOKER GROUND BEEF STEW: I really like this recipe because the end result is a thick and luscious stew. The secret is using a large amount of tomato paste. For a 15 ounce can of tomato sauce I recommend using an entire 6 ounce can of tomato paste. For this recipe you want the sauce to be really thick before the stew starts to cook. If the sauce still looks a little thin after mixing the sauce and paste I recommend adding more tomato paste. Don’t be afraid if you think it’s too thick. The residual fat from the browned ground beef will loosen up the sauce in the cooking process but not to the point of making it runny. The consistency of this stew is similar to a nice thick chili. And the flavor of this stew is fabulous. I assure you, this recipe can easily become a family staple.

2. CREAMY MEATBALL AND TORTELLINI SOUP: Years ago I never would have thought of making soup in a slow cooker. But actually it is a perfect tool for making soup. This was the recipe where I learned I can vary my temperatures during the cooking process versus just cooking a recipe on low or high all the time. I made sausage meatballs for this recipe but if you don’t want to take the time to remove the casings and shape the meatballs you can just cut the sausage up in links and throw it in that way. This is a great dish for a chilly night. Serve with a salad and some crusty bread and you have one heck of a meal that takes virtually no effort at all to make.

SaveSave

SaveSave

SaveSave

SaveSave

SaveSave

SaveSave

SaveSave

SaveSave

SaveSave

SaveSave

SaveSave

SaveSave

SaveSave

SaveSave

SaveSave

SaveSave

SaveSave

SaveSave

SaveSave

SaveSave

SaveSave

SaveSave

3. SLOW COOKER TURKEY AND DUMPLINGS: Remember when you only used to have turkey around the holidays? I happen to love turkey and so I try to find as many ways of serving it all year round. I used turkey tenderloins in this recipe, cooking them whole and then shredding them. The surprise ingredient is refrigerated biscuits that I cut up and used as the dumplings. This is a flavorful and hearty dish and a great way to incorporate turkey more routinely into your meal plans.

4. JAMBALAYA: This was my breakthrough recipe using a slow cooker. From past experience, this was the first time that I made something in the slow cooker that didn’t look or taste like mush. If you are inclined to try any of these recipes, I would start with this one. This is a traditional chop and drop slow cooker recipe. The difference is you don’t add all of the ingredients at once so everything is cooked properly but not overcooked. My husband and I absolutely love this recipe and I am sure you will too.

5. SLOW COOKER COUNTRY STYLE PORK RIBS: I have been making this recipe for years. It is definitely a recipe for someone who is just learning to cook as it is, if you follow the instructions, absolutely foolproof. The sauce is rich and thick and the pork is fall-off-the-bone delicious. You can serve this with rice or potatoes and a vegetable of your choice and have a superb meal. If you want a great recipe that is a complete no brainer, this is the one for you.

And there you have it – the saga of my kitchen remodel coupled with my favorite slow cooker recipes. I’m not sure if I will be able to post a new recipe next week, but I certainly hope to. If not, I will share some of my former recipes that have not surfaced for a long time and probably something sweet versus savory. We’ll just have to see how it goes. Thanks for hanging in there with me. Next stop, doing the grout and the hardwood floor installation in the rest of the condo!


SaveSave

SaveSave

SaveSave

SaveSave

SaveSave

SaveSave

SaveSave

SaveSave

SaveSave

SaveSave

SaveSave

SaveSave

SaveSave

SaveSave

SaveSave

SaveSave

SaveSave

SaveSave

SaveSave

SaveSave

SaveSave

SaveSave

SaveSave

SaveSave

SaveSave

SaveSave

SaveSave

SaveSave

SaveSave

SaveSave

SaveSave

SaveSave

SaveSave

SaveSave

SaveSave

SaveSave

SaveSave

SaveSave

SaveSave

SaveSave

SaveSave

SaveSave

SaveSave

Slow Cooker Ground Beef Stew…

It seems that lately I’ve been obsessed with my slow cooker. You have to admit it is a major convenience, especially when you have a busy day planned. Which was the case with me last week. But even when my calendar is full I still want to have something good and home made for dinner (unless I’m so exhausted I suggest we just go out to eat). The beauty of the slow cooker is that you get it ready early in the day when you have energy so that later in the day you go home to amazing smells and a dinner that is ready to serve without a lot of time and effort on your part. I just love my slow cooker!

I’m always experimenting with basic ingredients and I’ve really never used ground beef as the main protein in one of my slow cooker meals before. So I thought, what the heck, why not give it a try. And I have to say I really, really liked this meal. It’s hearty, flavorful and all you need do is serve it with some crusty bread, or corn bread or a salad and you’re done.

So let’s talk slow cooker ground beef stew…

Lesson Learned 1 – Use a lower fat ground beef in this recipe: I used 93% lean ground sirloin for this recipe. There are some recipes that I prefer a larger fat content but for this one you don’t. You don’t want the crock to be swimming in grease when it’s done. Believe me, it’s worth it to go higher end on the ground beef for something that is cooking for 7 hours.

Lesson Learned 2 – Partially cook the ground beef before putting it in the slow cooker: Many times I’ve talked about the importance of browning meat before you put it in the slow cooker. Slow cookers do not brown meats and so your meat can wind up looking grayish if you don’t brown it first. If that doesn’t bother you then just dump the meat in. But I say you eat with your eyes first and so you want the dish to look pleasing as well. Just cook the meat so there’s only a little pink left. The slow cooker can then handle the rest.

Lesson Learned 3 – Cut your veggies and potatoes into large chunks: I know I’ve said this over and over but it’s worth repeating. If you don’t you cut your veggies into large chunks they will turn into mush. Think about it. The veggies are cooking for 7 hours. Unless they are of substantial size they will break down. Below is the picture of my potatoes and veggies before I added the meat. You can see they are nice and chunky and that’s what you need in order for them to stand up to the cooking process.

Lesson Learned 4 – You can use any kind of potato you like: When I made this I used yukon gold potatoes. Yukon golds have a very thin skin so you don’t have to peel them. I always peel them because my husband has a hard time with the skins. Whether you do or not is totally your preference. You can use red potatoes or russets. I would suggest peeling either one of those if you decide to use them.

Lesson Learned 5 – Seasoning is very important when using a slow cooker: If you don’t season the ingredients well your food can turn out bland. You’ll want to salt and pepper the ground beef when you’re browning it. You’ll want to salt and pepper the onions, carrots and potatoes after you put them in the slow cooker. After you mince the garlic sprinkle it over the veggies and potato.  Add the oregano to the tomato sauce. Making sure you season this way will give you a flavorful result.

I will admit I wasn’t too sure about this recipe and I was very pleasantly surprised at how it turned out. Plus it provided some delightful smells in the kitchen will it was cooking. For a simple, no fuss, easy meal the recipe more than fits the bill. Try it and let me know what you think.

Slow Cooker Ground Beef Stew...

  • Servings: 4-6
  • Difficulty: Easy
  • Print

INGREDIENTS:

1 1/2 pounds 93% lean ground sirloin

2 large potatoes, peeled and sliced in large chunks

3 large carrots, cut in chunks

I medium yellow onion, sliced in chunks

2 garlic cloves, minced

1- 6 oz. can of tomato paste

1 15 ounce can tomato sauce

2 Tbs. Worcestershire sauce

1 tsp. dried oregano

Kosher salt to taste

Freshly cracked black pepper

Olive oil cooking spray

DIRECTIONS:

In a medium skillet, brown the ground beef until there is only a slight bit of pink left in the meat. Set aside. In a large bowl combine the tomato paste and sauce. Stir until completely combined and smooth. (This should give you a nice thick sauce). Add the Worcestershire sauce and oregano and stir to combine.

Spray the inside of the crock with cooking spray. Add the potatoes, carrots and onions. Season with salt and pepper. Sprinkle the minced garlic over the vegetables and potatoes. Add the meat on top. Pour the tomato sauce over the meat. Stir to combine.

Cover and cook on high for 7 hours. Do not lift the lid during the cooking process. Serve with a salad and some crusty bread.

SaveSave

SaveSave

SaveSave

SaveSave

SaveSave

SaveSave

SaveSave

SaveSave

SaveSave

SaveSave

SaveSave

SaveSave

SaveSave

SaveSave

SaveSave

SaveSave

SaveSave

SaveSave

SaveSaveSaveSave

Slow Cooker Chicken Parmesan Pasta…

Happy New Year! Here’s to another year of great recipe sharing and the many lessons learned along the road to cooking and baking successes.

More and more I’ve been using my slow cooker and have become increasingly pleased with my results. The slow cooker is such a handy dandy tool and I like some of the things that I’m learning I can do with it.

I love this recipe for a couple of reasons. First, it’s really delicious. Second, it makes a large batch so you can have it as a main dish for a party or freeze a bunch of meals for those nights went you want something good but easy. With a recipe like this, all you need add is a small salad and some crusty bread and you have one heck of a meal.

So let’s talk slow cooker Penne Chicken Parmesan

Lesson Learned 1 – The process for making this meal could not be any easier: The steps to the process are pretty basic.

  1. Prepare the sauce…

Sauce Ingredients

2. Pour a little of the sauce on the bottom of the slow cooker. Add the chicken breasts. Season them with salt and pepper.

Seasoned Chicken Breasts

3. Pour the remaining sauce on top of the chicken breasts and cook on low for 4 hours.

Cook on low for 4 hours

4. Cook the pasta according to package instructions. Remove the chicken breasts from the sauce and shred. Add pasta and shredded chicken back to the sauce and cook for an additional 30 minutes.

Shred the chicken

5. Add parmesan and mozzarella and cook for an additional 30 minutes.

Lesson Learned 2 – The dish makes the best leftovers: I took the leftovers and froze them in meal sized packages. When I wanted to make it I thawed a package and put it in a casserole dish. I added some more parmesan and mozzarella on top and and some Italian seasoning and baked it covered with foil for 45 minutes at 375 degrees. I removed the foil and baked for an additional 5-10 minutes or until the cheese started to turn a nice golden brown. The picture below is how I served the leftovers. The leftovers tasted divine and from the look of them you would never have guessed they were leftovers.

This is an easy, versatile meal – perfect for this time of year when you’re busy trying to manage the holidays. You’ll feel pampered without a lot of work, and who doesn’t like that. Try this and let me know what you think!

Slow Cooker Chicken Parmesan Pasta

  • Servings: 8-10
  • Difficulty: Easy
  • Print

INGREDIENTS:

4 large boneless, skinless chicken breasts

2 – 28 oz. cans of crushed tomatoes

2 Tbs. tomato paste

1 small onion, diced

4-5 large crimini mushrooms sliced

2 cloves garlic, minced

1 Tbs. dried basil

1 tsp. dried oregano

1 tsp. dried parsley

1 pound penne pasta

1 1/2 cups shredded mozzarella

1/4 shredded parmesan cheese

kosher salt and pepper

2 Tbs. fresh italian parsley, chopped for garnish, optional

Cooking spray

DIRECTIONS:

In a large bowl, combine the crushed tomatoes, tomato paste, onion, mushrooms, basil, oregano, and parsley. Stir to combine.

Spray the inside of a 6 qt. slow cooker with cooking spray. Take one cup of the tomato mixture and spread it on the bottom of the crock. Place chicken breasts on top of the sauce. Salt and pepper the chicken breasts. Cover the chicken breasts with the remaining tomato sauce. Cover and cook on low for 4 hours.

Prepare the penne pasta according to package directions. (this step can be done ahead of time and the pasta put into the refrigerator. About 1/2 hour before adding the pasta to the sauce, take it out of the refrigerator to remove the chill – see lessons learned above).

Remove the chicken from the slow cooker and shred using two forks. Add the chicken and pasta back to the slow cooker, cover and cook on low for another half hour. Add the parmesan and mozzarella on top, cover and cook for another 30 minutes.

Serve immediately and garnish with fresh chopped parsley, if desired.

SaveSave

SaveSave

SaveSave

SaveSave

SaveSave

SaveSave

SaveSave

SaveSave

SaveSave

SaveSave

SaveSave

SaveSave

SaveSave

Slow Cooker Turkey Or Pork And Stuffing…

If you’re like me you have a taste for turkey and stuffing far beyond Thanksgiving. But who wants to buy a big old bird all the time and roast it in the oven? There’s got to be a better way. Guess what, I found it!

More and more I am becoming adept at using a slow cooker. That means I’m not using it simply to drop something in and cook it until it’s beaten into submission. A slow cooker is a valuable tool but if you don’t use it properly it can create meals that are virtually tasteless.

This recipe, I guarantee you, has tons of flavor. It also has its traditional aspects and its unique aspects and I will discuss those in my lessons learned. I started out by using a bone in turkey breast for this recipe and decided the next time I made it I would try a boneless pork roast. Guess what? Both ways it was fabulous! So let’s talk slow cooker turkey or pork roast and stuffing…

Lesson Learned 1 – How to prepare the stuffing: I used a box of stove stop stuffing for these recipes (one designed to be used with turkey and one designed for pork) so it already had the seasonings I needed in it but you can also use just a plain stuffing mix. If so, you will need to add some poultry seasoning and dried sage. I also added some sliced onions, sliced mushrooms and diced celery to boost the flavor of the stuffing mix when I made the turkey and substituted sliced apples for the mushrooms when making the pork, but you don’t have to. I’ll put both versions in the recipe below and you can chose whatever method suits you.

The first time I made this most of the stuffing was soft except for the very bottom. I stirred everything together after it was all cooked and it turned out ok. The second time I made this I added a cup of chicken broth to the stuffing mix and it turned out perfectly. Since you put the soup/gravy mixture on top of the meat, it does not totally reach all of the stuffing. And since a turkey breast doesn’t have a lot of fat to begin with you need the moistness of the chicken broth to get the desired consistency of the stuffing. I also added carrots on top of the stuffing in both recipes and they turned out perfectly. The pork roast had a little more fat so that also helped to keep the stuffing moist.

Onions And Celery Added To The Stuffing

Stuffing With Mushrooms And Carrots For The Turkey

Carrots and Apples for the Pork Roast

Lesson Learned 2 – Spray the crock with cooking spray: After the long hours of slow cooking the stuffing will stick to the crock if you don’t spray it. Make sure you spray the crock with cooking spray before adding the stuffing. You’ll be glad you did at both serving and clean up time.

Season Each Layer

Lesson Learned – Season each layer: Slow cooking requires careful seasoning so food does not come out tasting bland. Remember to season each layer with salt and pepper as you prepare the slow cooker.

Lesson Learned 4 – What kind of turkey to use: I am fortunate to have a grocery store that cuts half turkey breasts on the bone and sells them fresh. This works so well in this recipe. When I first made it I was surprised at the moistness of the turkey breast. My husband loved it.

You can use a boneless breast as well. You really shouldn’t use more than a 3 pound turkey breast for this recipe. If you do, you will need to cook it longer. If you buy the breast frozen be sure to thaw it before putting it in the slow cooker. For 4 people, 2 1/2 – 3 pounds is perfect. You may even have some leftovers. The breast pictured below is on the bone and 2 1/2 pounds.

Lesson Learned 5 – What kind of pork roast to use: I used a 2 1/4 pound boneless pork roast for this recipe. Make sure when you put it in the slow cooker you put it fat side up. That way the fat will drip down onto the stuffing and vegetables. I also seasoned the pork roast with fresh lemon thyme. I didn’t need to do that when I made this recipe with a turkey breast.

Lesson Learned 6 – Combine turkey gravy or pork gravy and mushroom soup for a delightful sauce: I found combining gravies with the soup created a surprisingly flavorful sauce to put over the meat. When I made the turkey I used a cream of mushroom soup. When I made the pork I used a cremini mushroom bisque soup. Both were great, although in hindsight I preferred the mushroom bisque over the cream of mushroom.

Gravy/Soup Mixture

I started out by making a packet of McCormick gravy on the stove and combined it with a can of mushroom soup. You can used jarred gravy as well. The combination tasted divine and gave flavorful moisture to the meat as it cooked.

If I was having a small gathering at Thanksgiving I would consider either one of these for dinner. They were unbelievably good and super simple to make. This is also a great recipe for having turkey and stuffing whenever you want it. Turkey is not just for Thanksgiving anymore.

Lesson Learned 7 – Both versions of this recipe results in super moist and tender meat: I have to say I was surprised at how moist and tender both the turkey and the pork tasted. I cooked both for 5 hours on low and both turned out perfectly. Once again I want to make it clear that you need to know your slow cooker. Also, to ensure the turkey and pork are cooked, you need to adhere to the weights I have given you. If you choose to cook something a little larger you will want to add a little more time to the cooking process.

Try this recipe combo and let me know what you think. They are becoming staples in our home!

Juicy And Tender Roast Turkey

Juicy And Tender Roast Pork

Slow Cooker Turkey Or Pork and Stuffing...

  • Servings: 4
  • Difficulty: Easy
  • Print

INGREDIENTS:

1 – 2 1/4 – 2 1/2 pound turkey breast, bone in preferable or,

1 – 2 1/4 – 2 1/2 boneless pork roast

I – 6 oz. box of Stove Top Stuffing (chicken or pork variety)

I cup cremini mushrooms, sliced thick (can use for either chicken or pork)

1 large stalk of celery, diced

1 small onion, diced

1 small granny smith apple peeled and sliced (for a pork roast)

4 carrots, peeled and sliced into 2 inch logs

1 cup chicken broth

2 Tbs butter, melted

I packet McCormick turkey or pork gravy

1 10.75 oz. can of mushroom bisque soup

Kosher Salt

Freshly Cracked Black Pepper

Fresh Lemon Thyme (pork roast)

Cooking Spray

DIRECTIONS:

Prepare gravy mix according to package instructions. Once the gravy has somewhat cooled add the mushroom soup to the gravy and stir until combined. Set aside.

Spray the crock of the slow cooker with cooking spray. Mix onion, celery, dressing mix, chicken broth and butter until combined. Spread on the bottom of the slow cooker. Add the mushrooms, carrots and apple (pork roast recipe) on top of the stuffing.

Place the turkey or pork roast on top of the stuffing and vegetables. Season with salt and pepper. If making the pork roast, strip lemon thyme leaves from the stalks and season the top of the pork roast. (You can add remaining stalks around the pork to season the stuffing and veggies – just remember to pull them out before serving).

Pour the gravy/soup mixture over the meat. Cover and cook for 5 hours on low.

Roast Turkey

Roast Pork


SaveSave

SaveSave

SaveSave

SaveSave

SaveSave

SaveSave

SaveSave

SaveSave

SaveSave

SaveSaveSaveSave

SaveSave

SaveSave

SaveSaveSaveSave

SaveSaveSaveSaveSaveSave

SaveSave

SaveSave

SaveSave

SaveSave

SaveSave

SaveSave

SaveSave

SaveSave

SaveSave

SaveSave

SaveSave

SaveSave

SaveSave

SaveSave

SaveSave

SaveSave

Slow Cooker Honey BBQ Pulled Chicken Sandwiches…

If you are looking for an easy, and I do mean easy, meal to prepare look no further. I served this meal a couple of times now and it always turns out perfectly and it’s always super delicious. I have to admit I was initially skeptical about how this would turn it, but it was absolutely fabulous. When you know you’re going to have a busy day and you still want to have a good meal at dinnertime, this recipe is the answer to that dilemma.

So let’s talk slow cooker honey bbq pulled chicken sandwiches…

Lesson Learned 1 – Try to use chicken breasts with the skin on: I normally buy chicken breasts with the skin on and rib portions attached. First they are cheaper when purchased that way and second it’s easy to remove the rib portion and you’re left with a skin-on breast. Chicken can dry out very easily in a slow cooker and often can get overcooked. With the skin on it gives the breast meat more moisture during the cooking process and that is what you’re looking for. But sometimes you just can’t find them that way and that’s ok as well. Both times I made this recipe I had skinless breasts in the freezer and so I used them. But in my experience with other recipes, skin on breasts are preferred when cooking them in a slow cooker.

It’s also important to season them as well. I seasoned mine with kosher salt, pepper and McCormick’s Perfect Pinch Rotisserie Chicken seasoning blend. I really like this blend as it gives the chicken a great rotisserie chicken flavor. Try it and I’m sure you’ll agree.

Lesson Learned 2 – Use a slow cooker liner for this recipe: The sugar and honey in the bbq sauce can cause a mess that is very hard to clean up if it burns into your ceramic crock. Personally I am not a fan of slow cooker liners but I use them for this recipe. If you use one, clean up is a breeze and you don’t wind up with burnt bbq sauce all over your crock.

Lesson Learned 3 – Don’t overcook the chicken: I know, easier said then done, but most people overcook chicken breasts no matter what cooking method they are using. Chicken breasts can be moist as well as cooked through but there is a fine line between when that occurs and dried out chicken.

My rule of thumb is I never cook half breasts (and the ones I used were quite large) for more than 6 hours on low in my slow cooker. A lot of recipes say to cook chicken between 6-8 hours. In my opinion a two hours difference in cooking times is huge. Whenever I’ve cooked chicken in a slow cooker for 8 hours it always turned out dry. But the other variable is your slow cooker. Not all slow cookers are created equal. Know your slow cooker and if for some reason you can cook chicken for 8 hours and it does not dry out that’s fine. But I bet if you cook it for only 6 hours you’ll get a much better result.

Lesson Learned 4 – You can cook a veggie with the chicken if you want to: The first time I made this recipe I only cooked the chicken in the bbq sauce mixture. The second time I added carrots. When it came time to shred the meat I just pulled out the carrots, put them on a baking sheet lined with foil and sprayed with cooking spray and kept them in a warm oven until dinner was served. Make sure you use cooking spray on the foil as the remnants of the bb sauce on the carrots will stick to the foil and you don’t want the carrots sticking. Also make sure you don’t use overly thick carrots – they won’t cook through in six hours.

Lesson Learned 5 – Serve the chicken on good sandwich rolls: The sandwich rolls are also important. I served my chicken on brioche buns. I found them at Whole Foods and I have to admit they were a little pricey, $4.99 for six rolls, but boy were they worth it. They were just the perfect compliment to the bbq chicken. I’m not saying you need to invest that much in dinner rolls, but make sure they are fresh and soft. It makes a difference. I served the sandwiches with cole slaw and sliced tomatoes and the meal was a hit!

An easier, more delicious recipe you’d be hard pressed to find. Try it and let me know what you think…

Slow Cooker Honey BBQ Pulled Chicken Sandwiches...

  • Servings: 6
  • Difficulty: Easy
  • Print

INGREDIENTS:

3 large chicken breasts, skin on preferred

1 18-ounce bottle of bbq sauce (I used Sweet Baby Ray’s)

1/2 cup Italian salad dressing

1/4 cup brown sugar

2 Tbs. Worcestershire sauce

1-2 Tbs. Perfect Pinch Rotisserie Chicken seasoning

2-3 large carrots, peeled and cut into 2 inch logs (optional)

Salt and Pepper to taste

DIRECTIONS:

Line the slow cooker with a slow cooker liner. Place chicken in slow cooker. (Place veggies in with the chicken). Season with salt, pepper and rotisserie chicken seasoning.

In a separate bowl combine bbq sauce, Italian dressing, brown sugar and Worcestershire sauce. Pour over chicken. Place lid back on top of the slow cooker.

Cook on low for 6 hours. If cooking veggies, remove them onto a foil lined baking sheet sprayed with cooking spray. Keep in a warm oven until serving.

Remove chicken, take off any skin and shred the breasts using two forks. Place shredded chicken back in the slow cooker and cook on high for 15 minutes to 1/2 hour. Serve on dinner rolls.

Creamy Meatball and Tortellini Soup…

Is there anything as comforting as a hot hearty bowl of soup on a cold winter day? Enjoying a piping hot bowl of soup with some crusty bread when the weather outside is cold and snowy – well that to me defines food for the soul.

In the past, the only homemade soup I ever made was my mother’s chicken soup. I never thought about making any others. Then two years ago when I had a tomato crop that was just unheard of and left me tomatoes coming out of my ears, I tried to make homemade tomato soup. And it was fabulous. So I invested in an immersion blender and made homemade broccoli cheddar soup. And the rest is history. I love making homemade soups.

Add the evaporated milk and spinach

Prior to this recipe all my soups were made on the stove top. This time I decided to make soup in the slow cooker. As I mentioned in an earlier blog, I am getting more adventurous with my slow cooker, trying things with it that I’d never done before with it. So why not try to make some soup?The basis for this recipe I saw on Facebook and thought, wow this sounds and looks delicious. So I made it (with a few of my own tweeks). All I can say is this one is divine.

So let’s talk creamy meatball and tortellini soup…

Veggies Cut Into Chunky Pieces
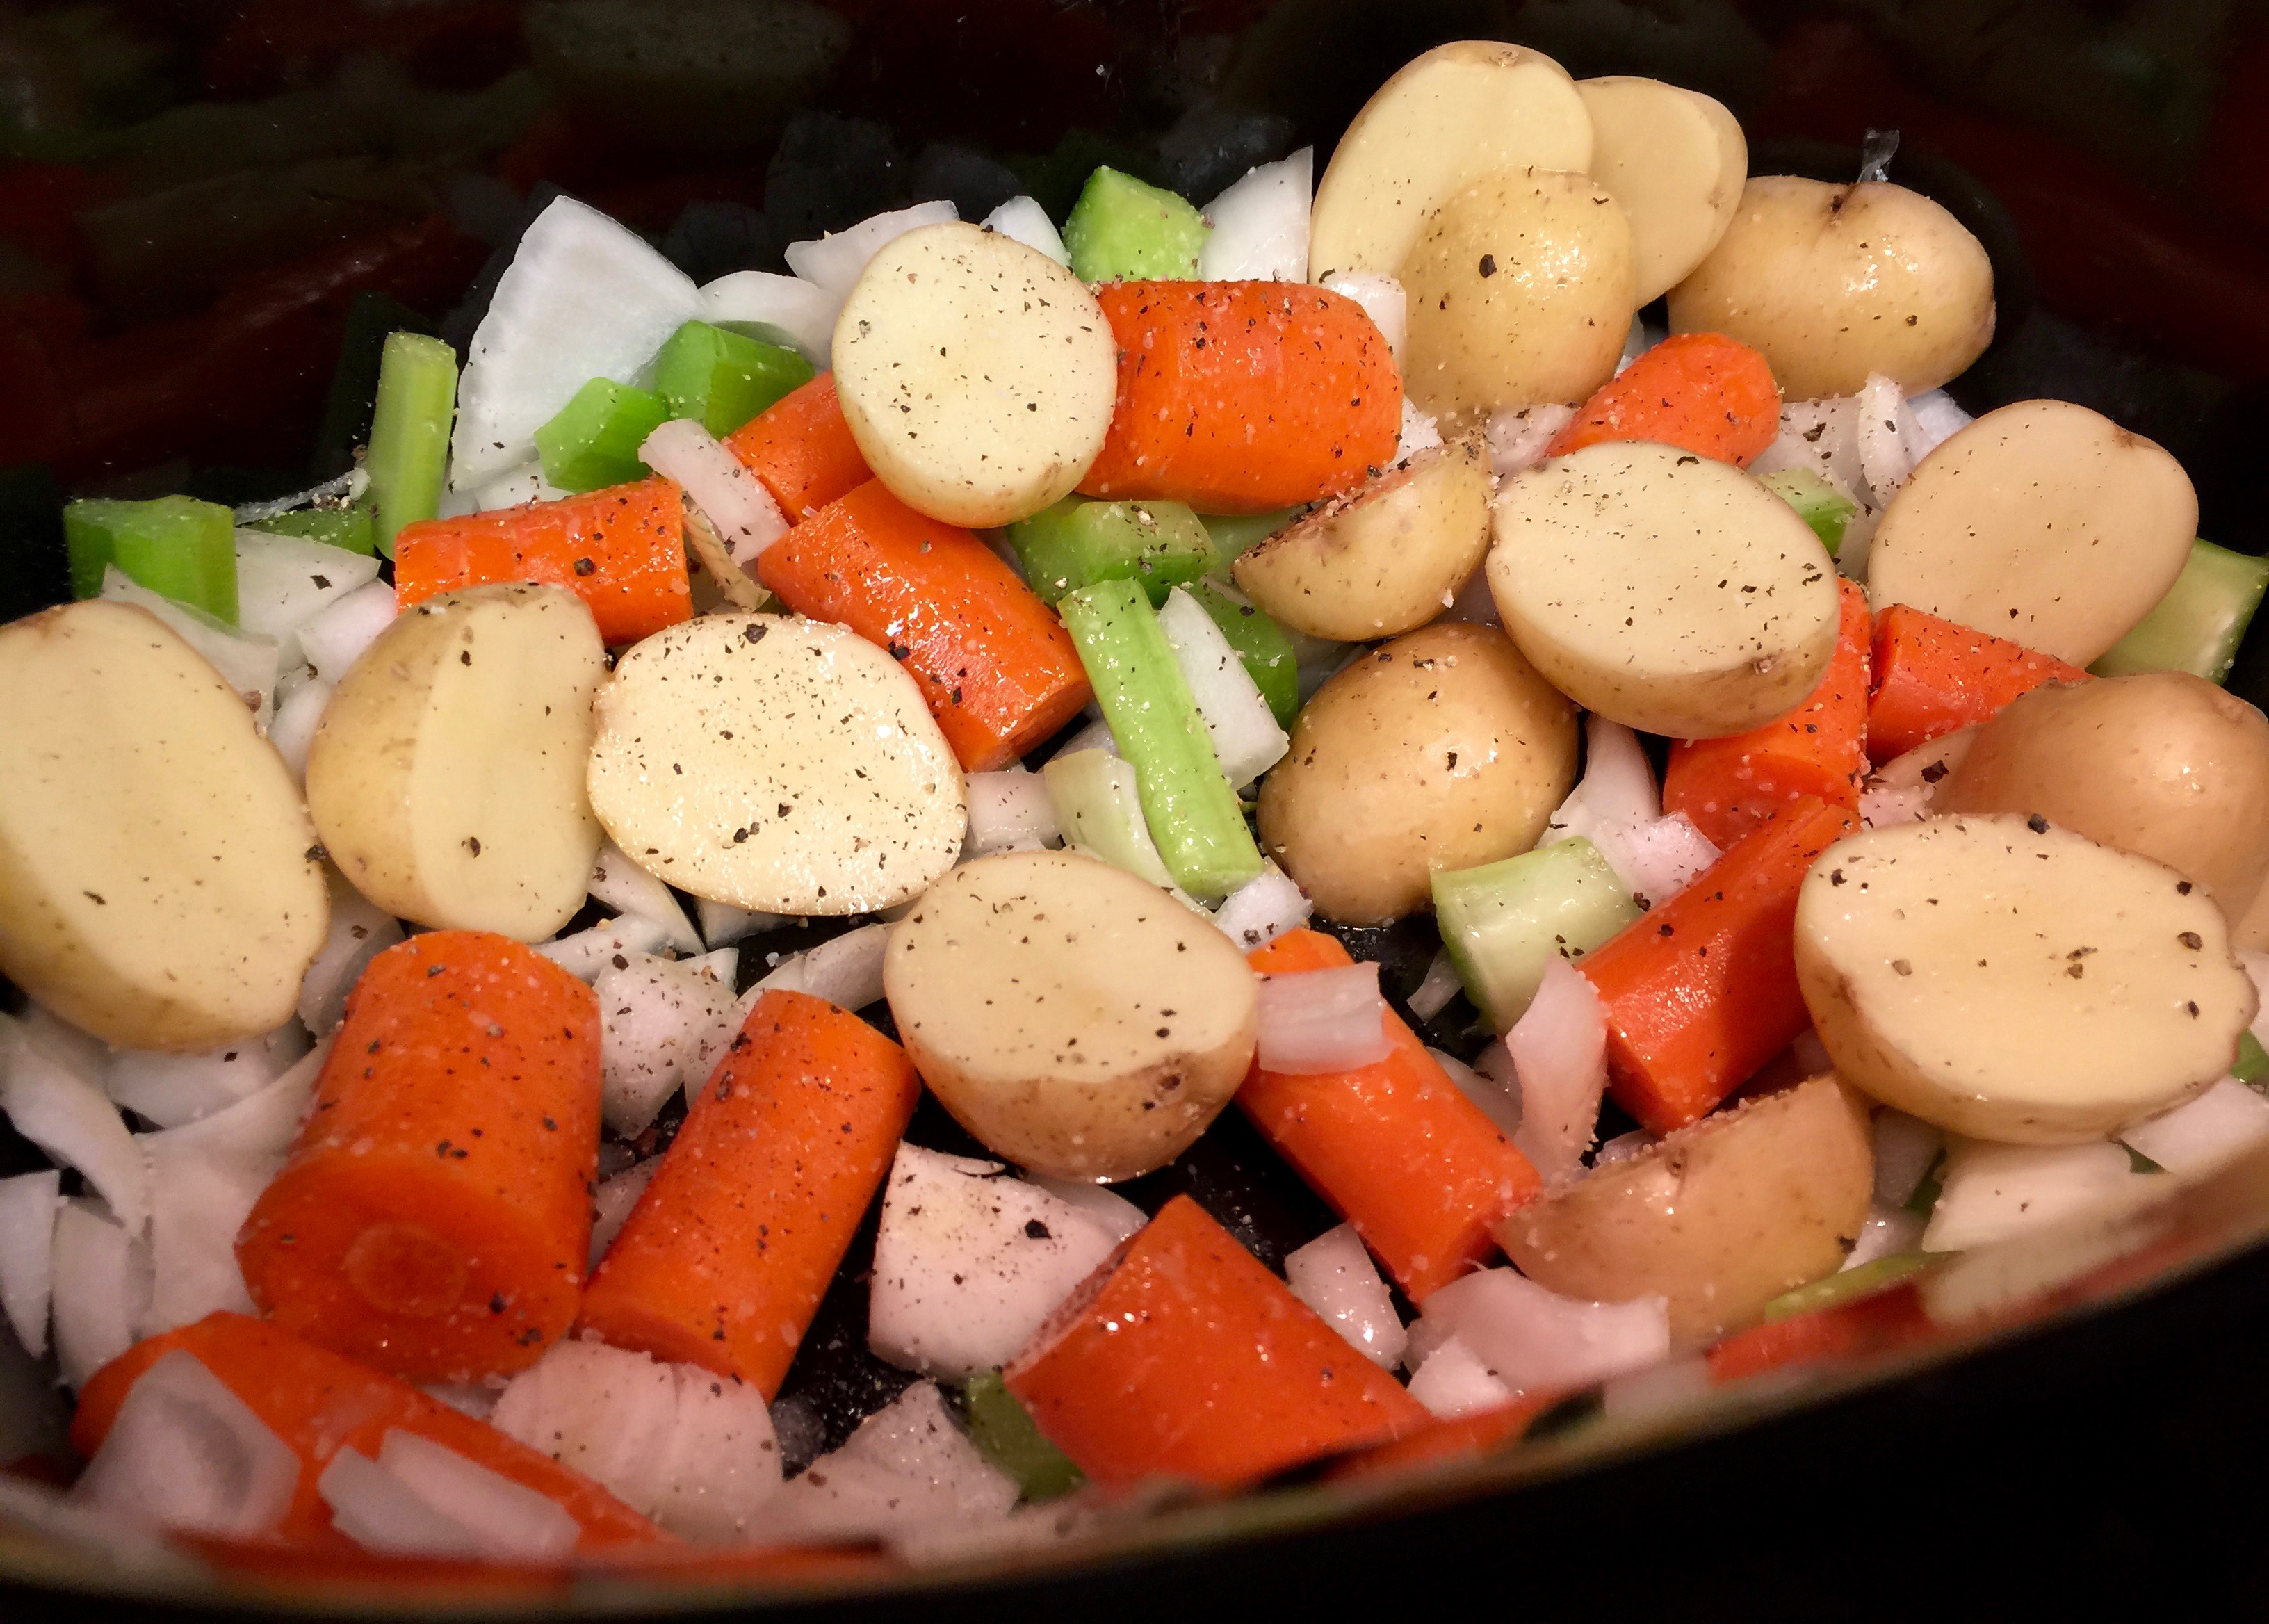
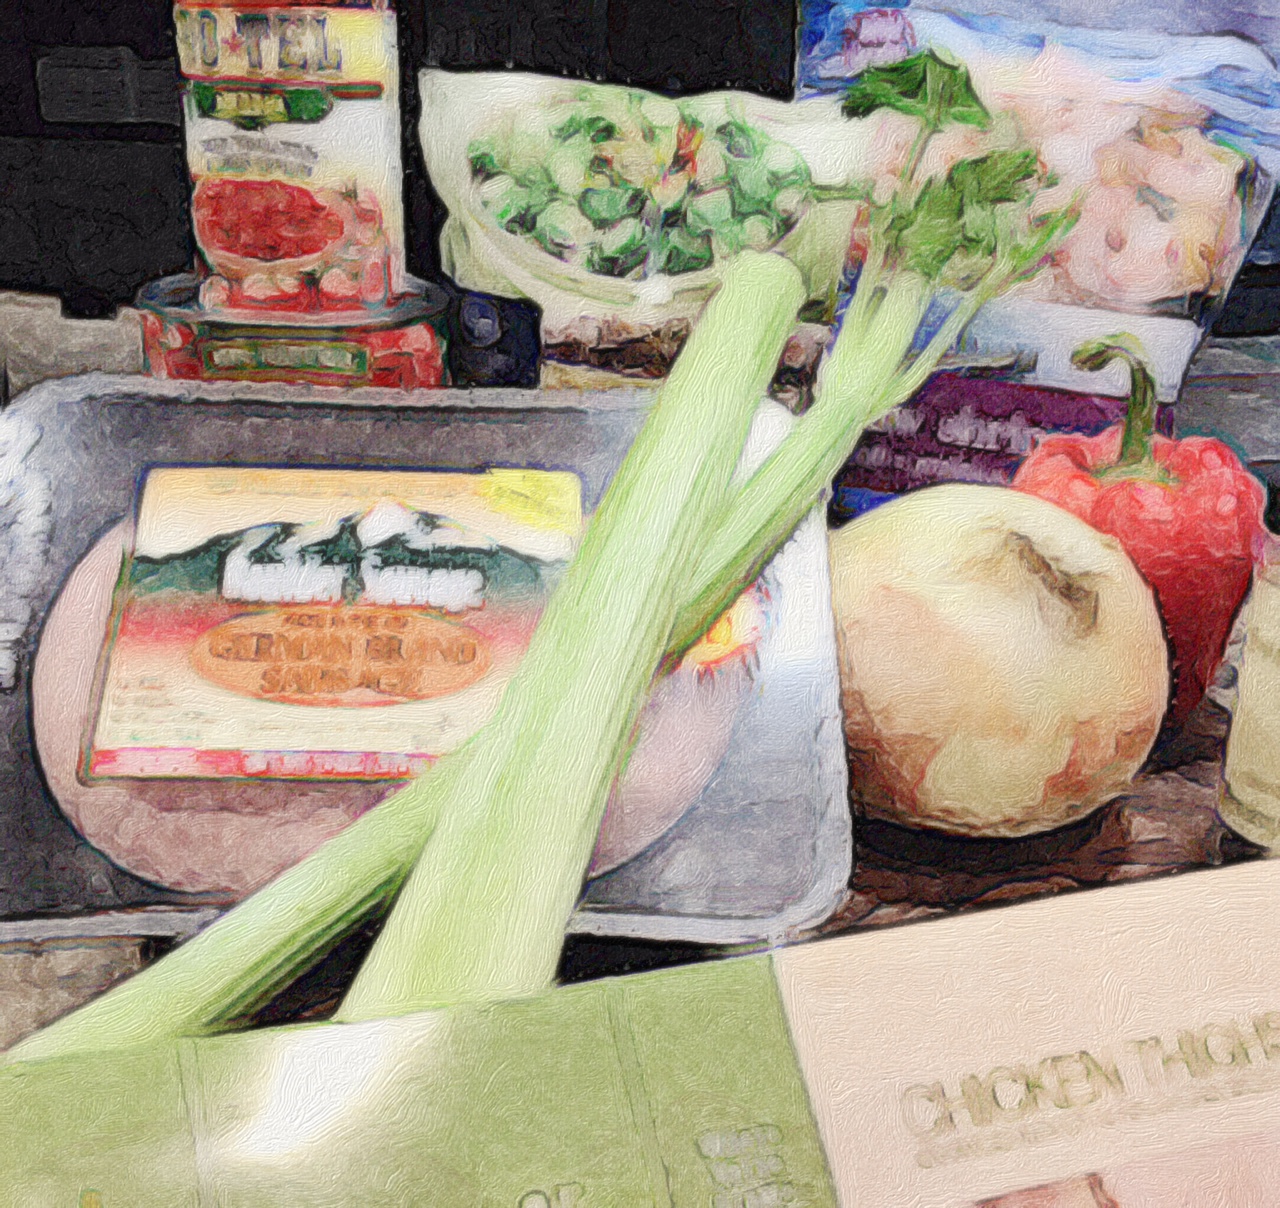
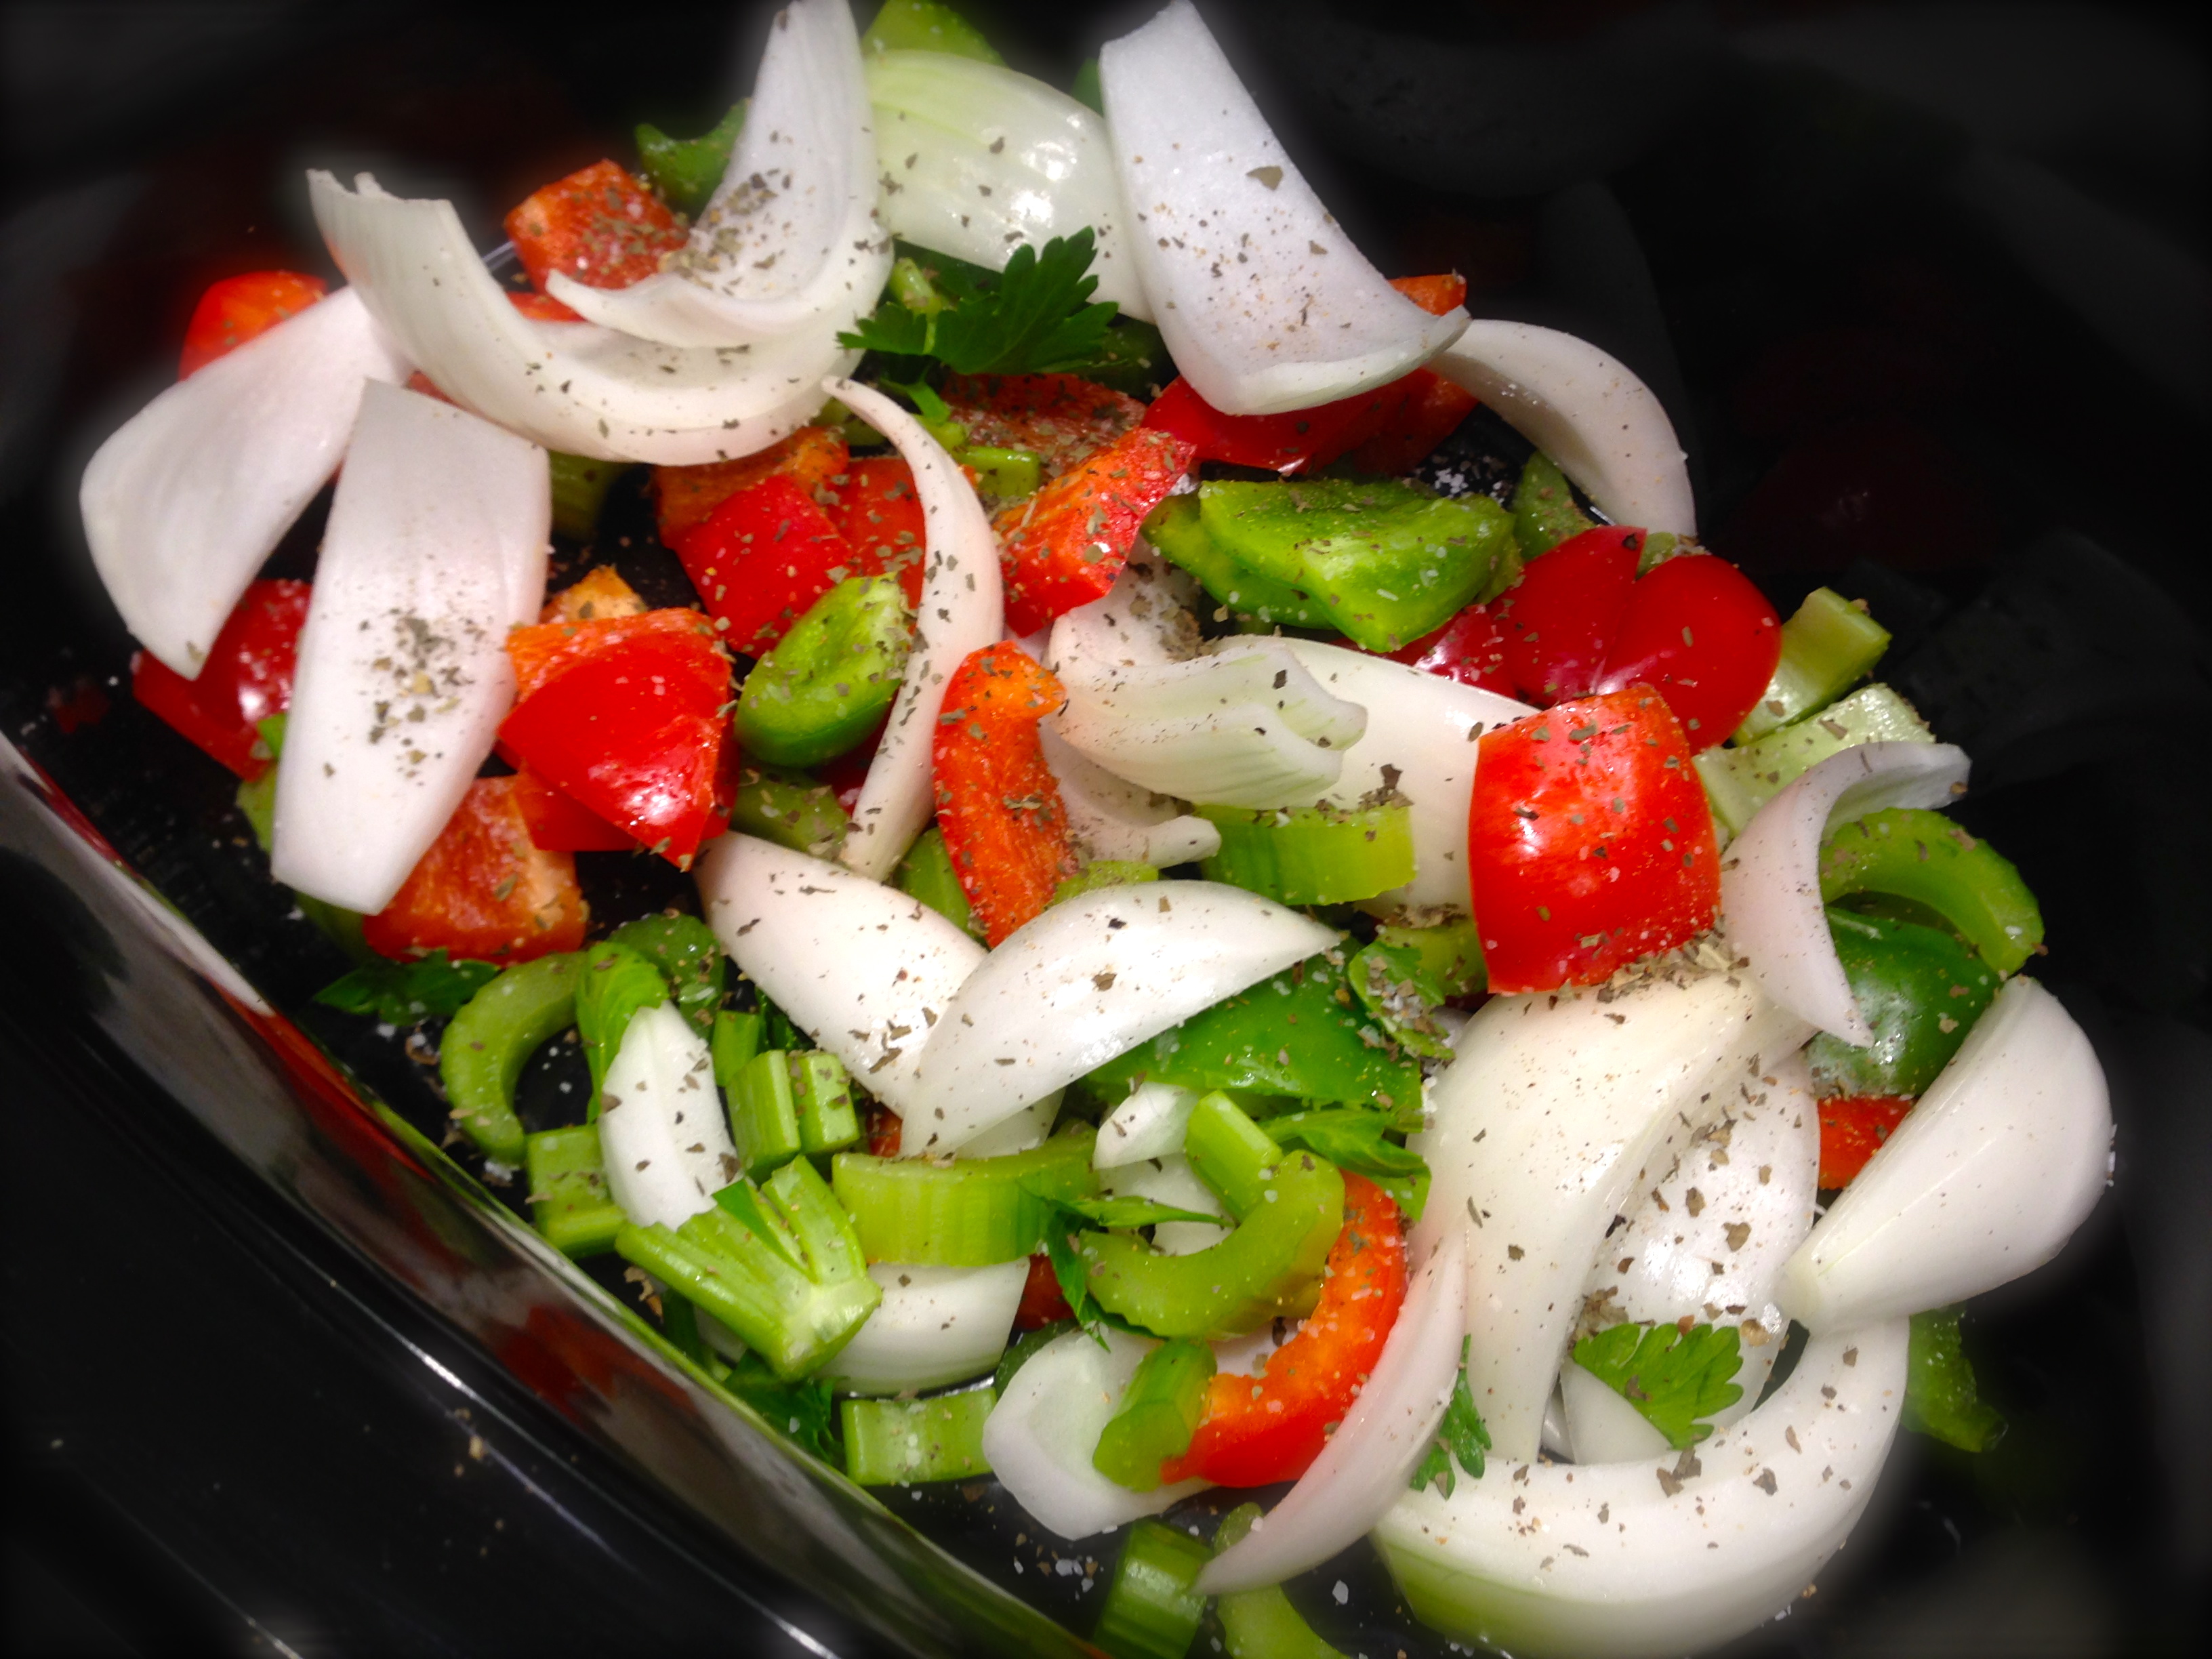
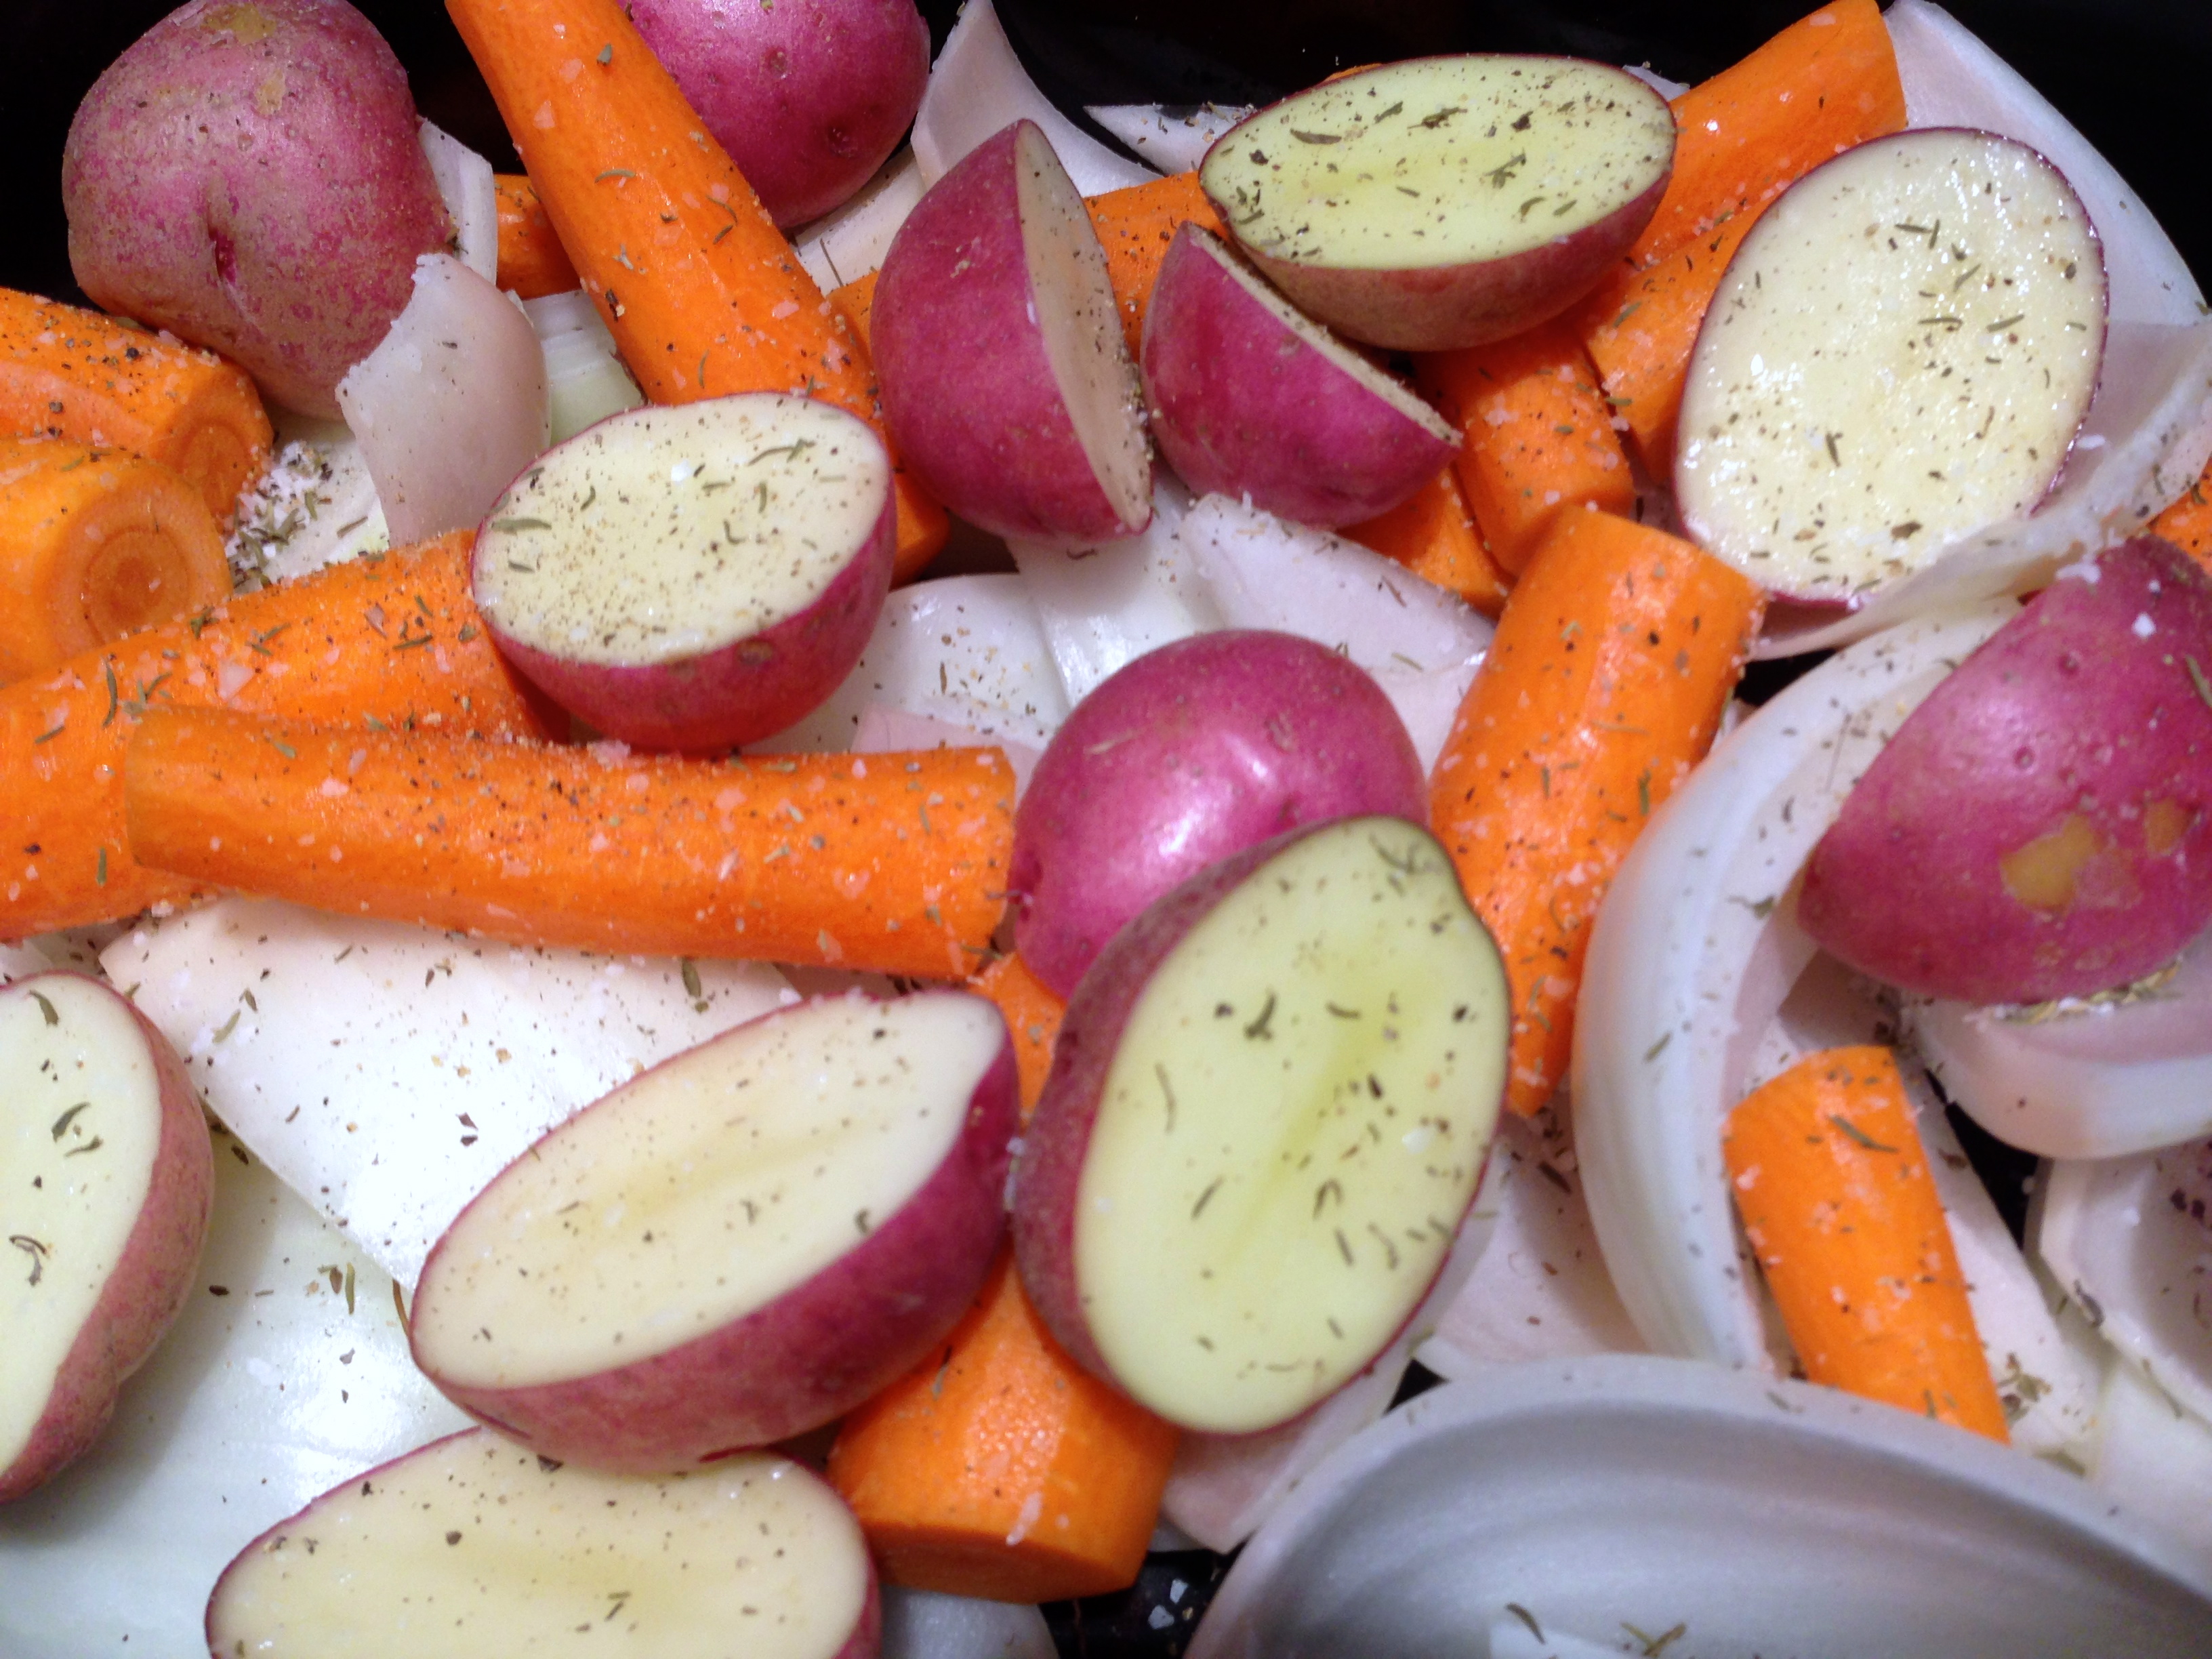
Lesson Learned 1 – It bears repeating, cut your veggies into chunky pieces: Because you cook for extended periods of time in a slow cooker your veggies can break down if you don’t cut them chunky. You want to see and taste your veggies. So don’t be afraid to cut them into chunky pieces. They will cook I promise you.

Lesson Learned 2 – Use different settings to get different results: Sounds pretty logical doesn’t it. But I used to be a one size fits all girl when it came to slow cooker settings. If I started on low, I stayed on low. And the same for high. But I found you can be more creative with recipes when you vary your settings during the cooking process. For this recipe I cooked the basic parts of it, veggies, meatballs and broth, for 6 hours on low. During the last hour I set it on high. I added the evaporated milk, thickener and tortellini and let that cook for 45 minutes on high. Then I added the spinach and let it cook on high for another 15-20 minutes. Everything cooked perfectly.

Italian Sausage Meatballs
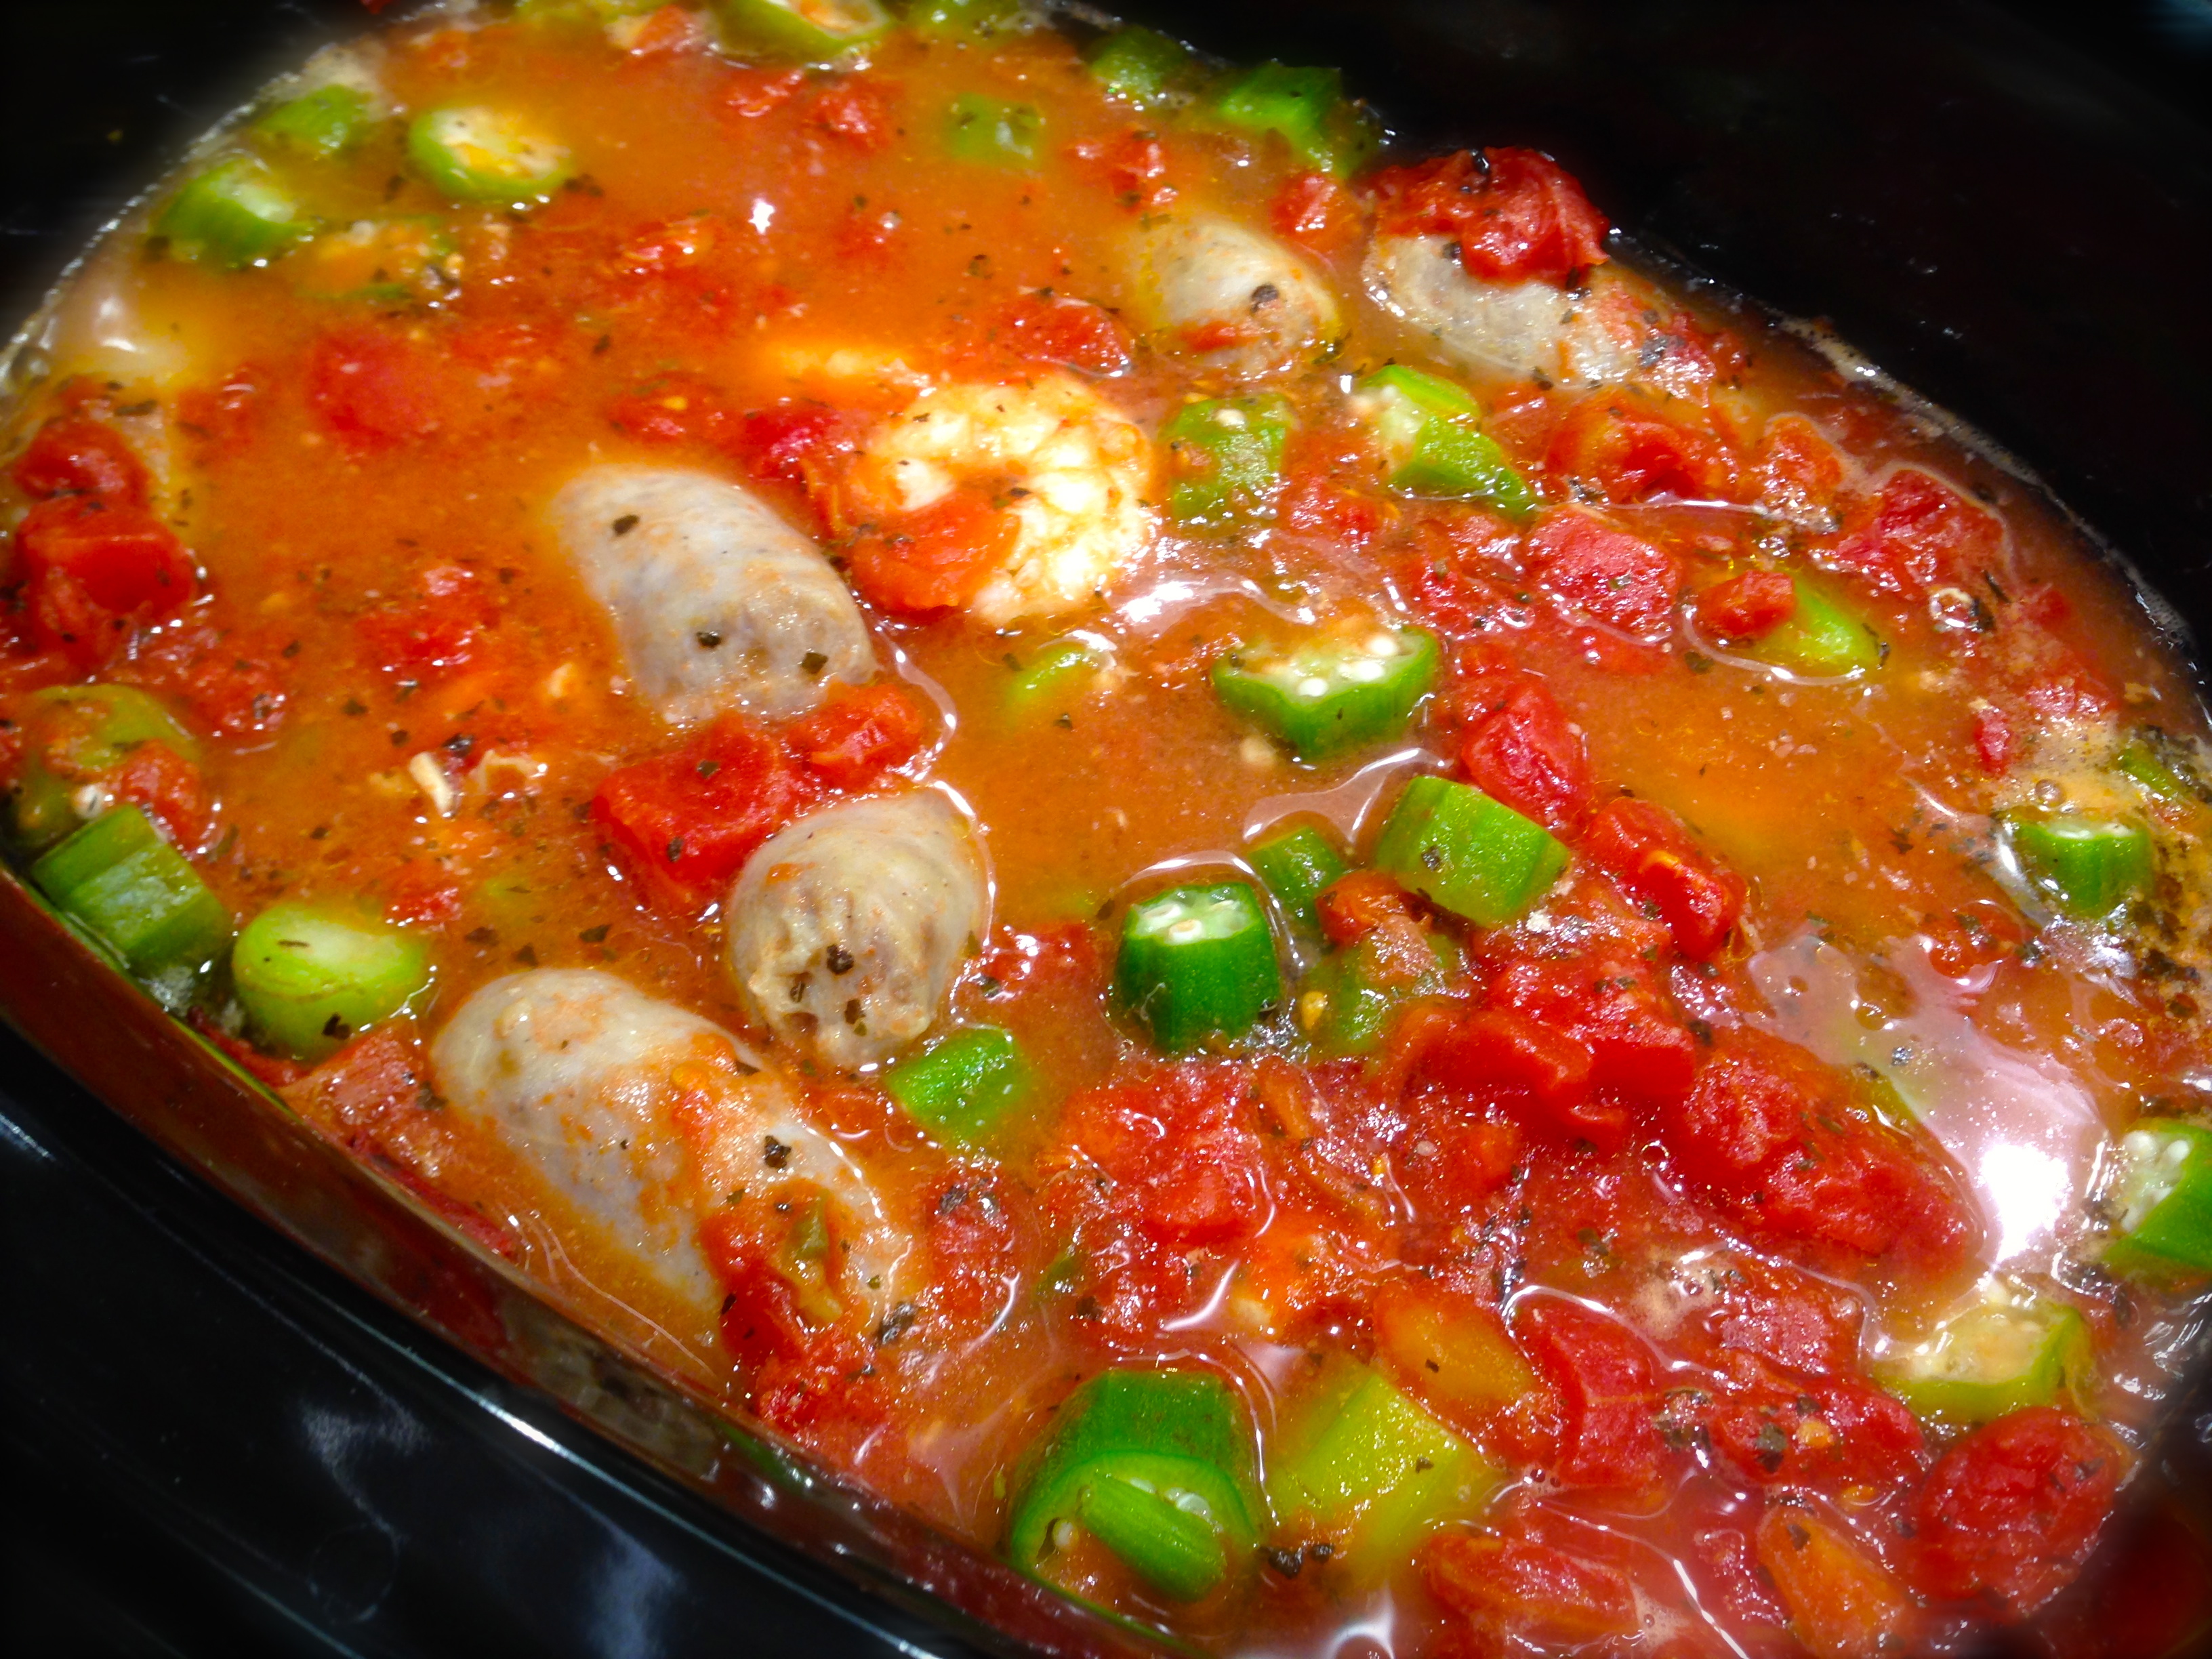
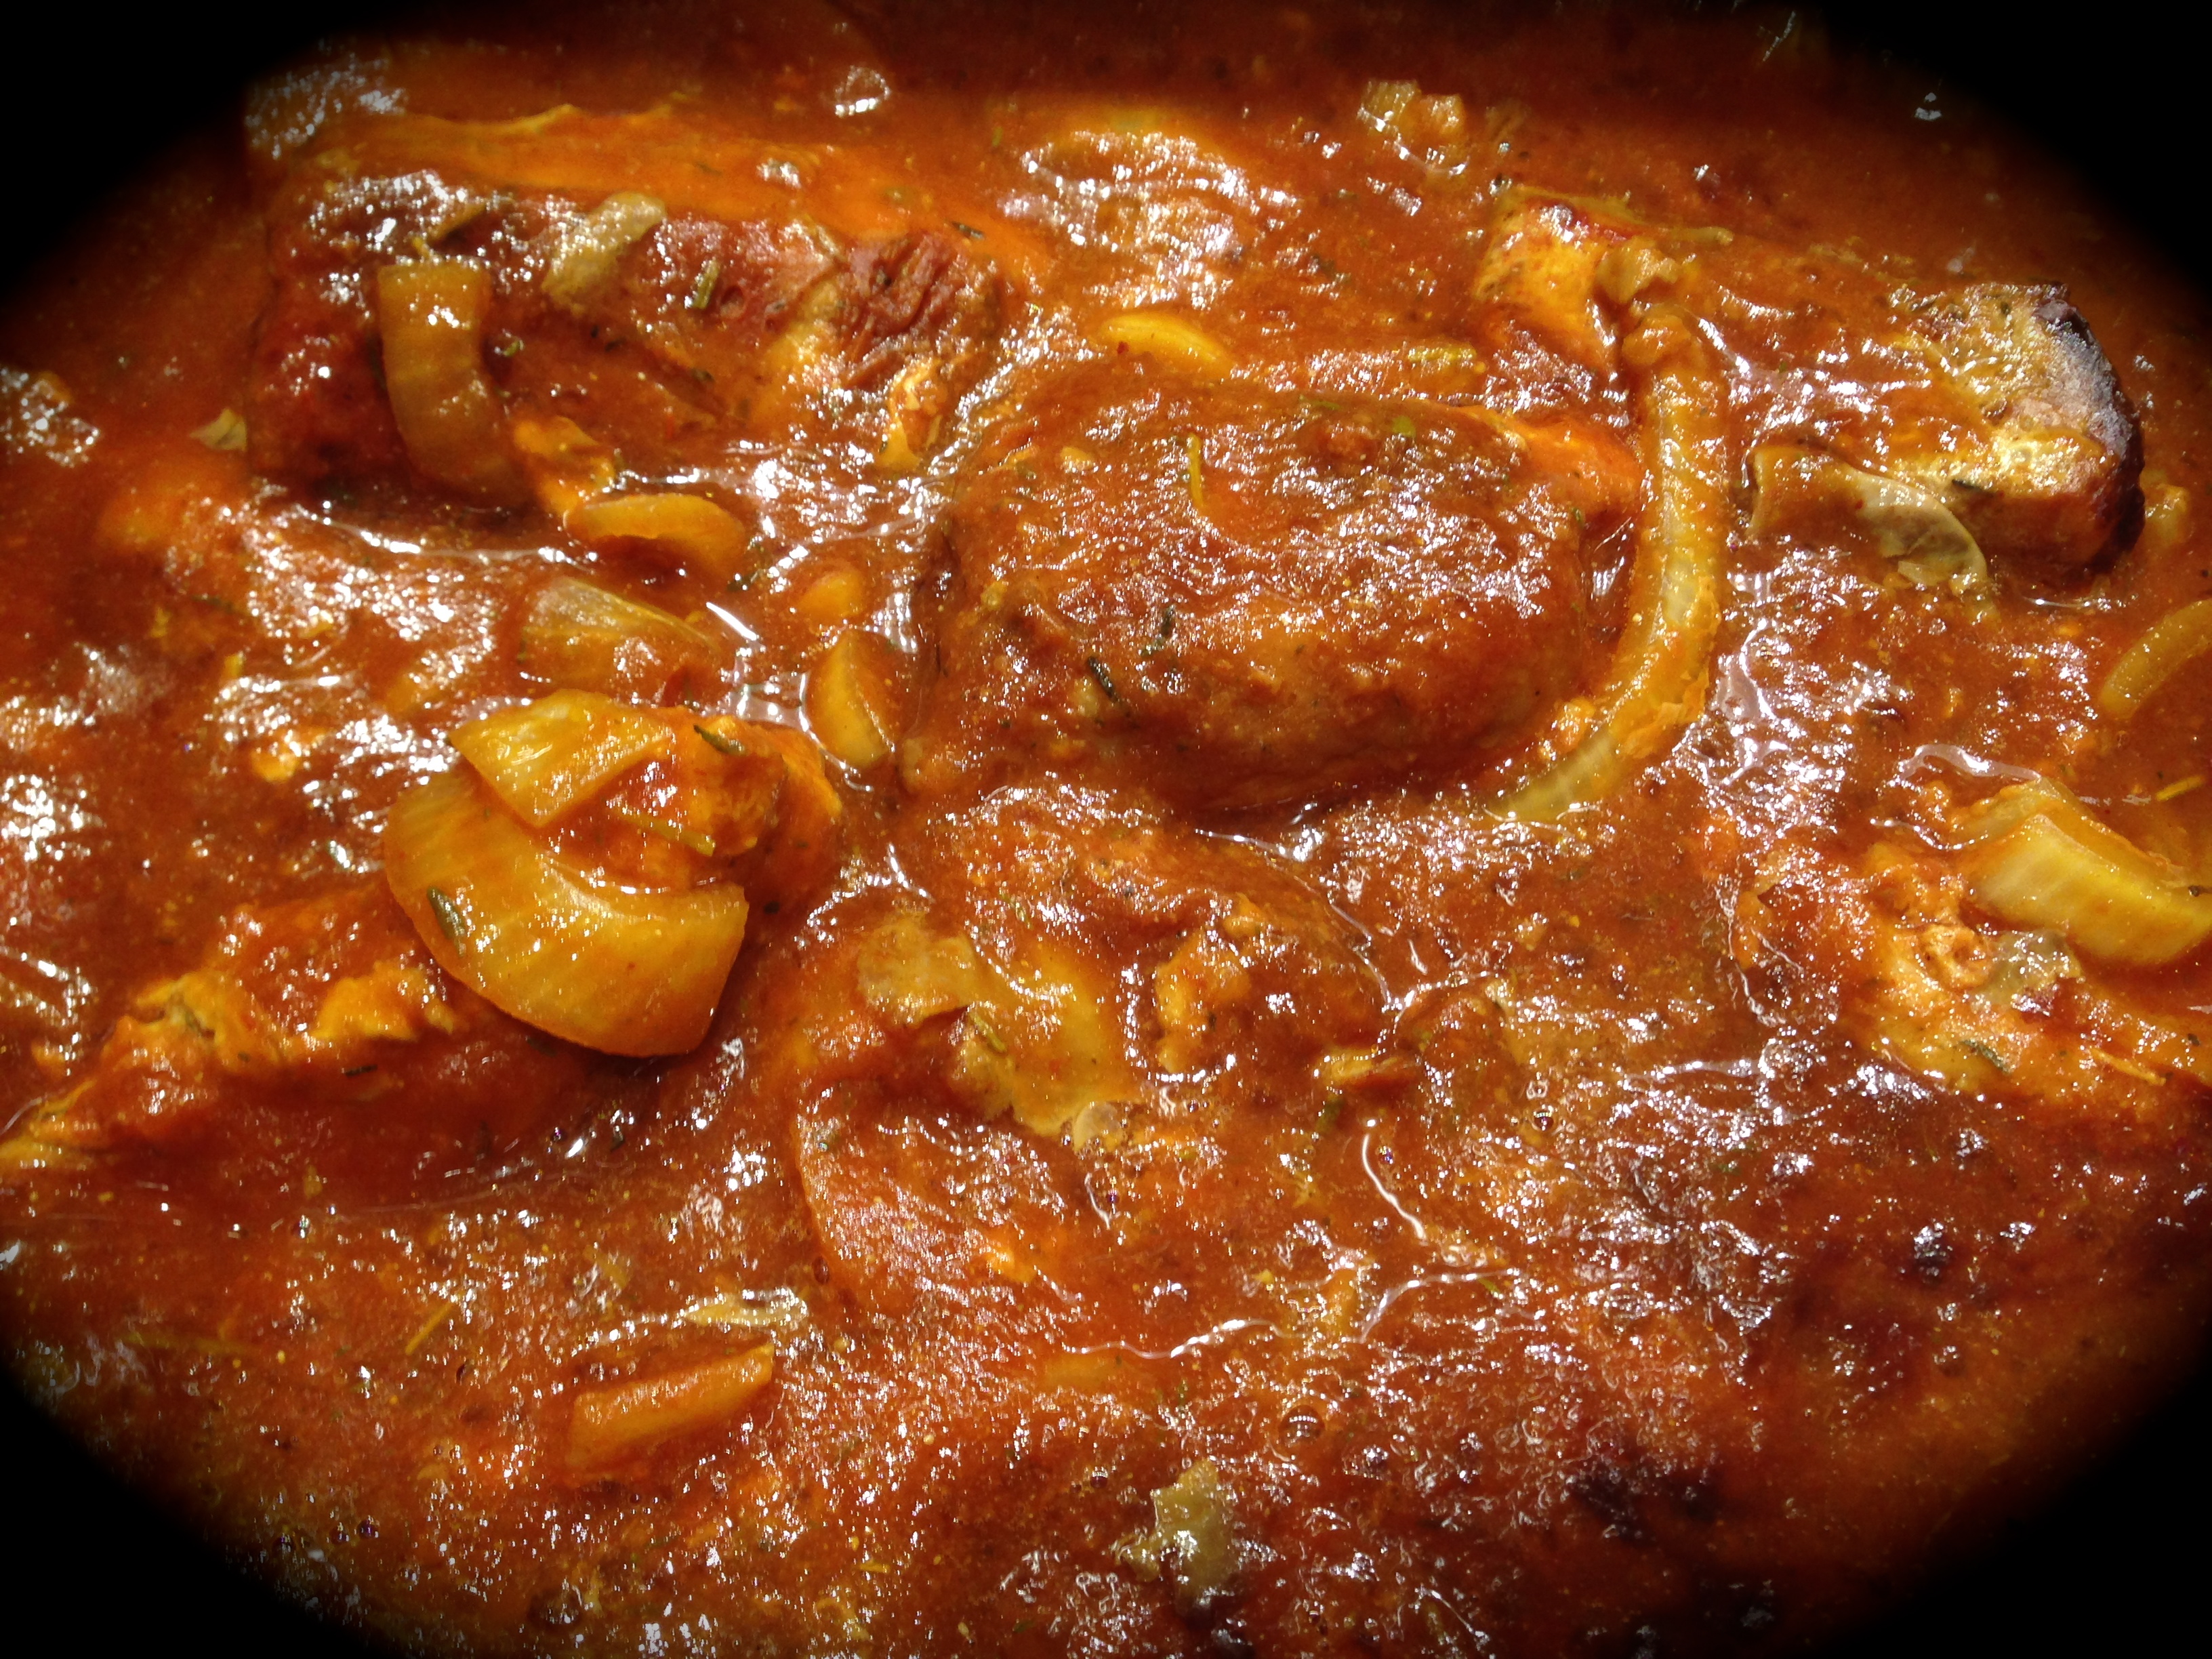
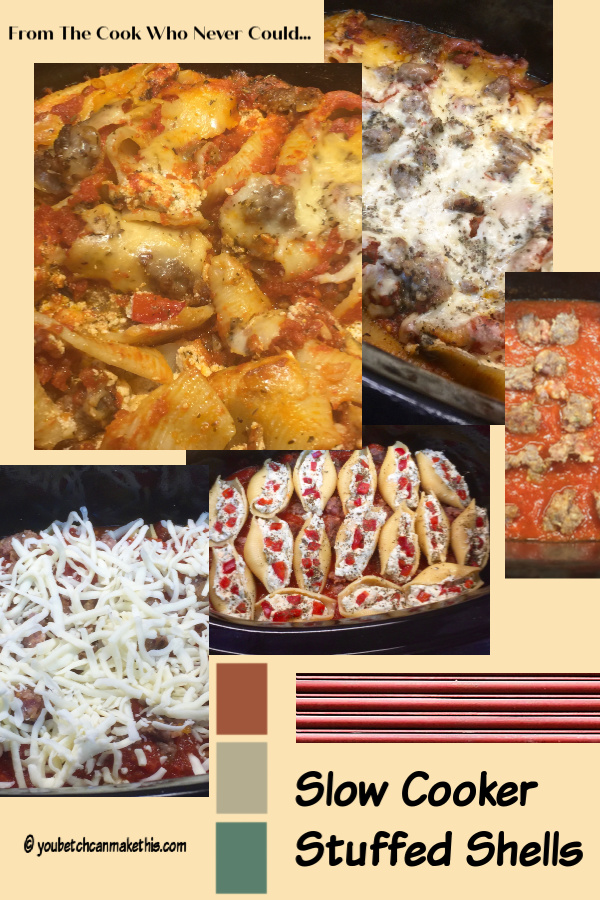
Lesson Learned 3 – Don’t be afraid to be creative: Originally I was going to add chunks of sausage links to the recipe but my husband has a hard time with the casings. So I removed the casings and formed portions of the meat into meatballs. That worked just fine. I also used sweet Italian sausage in my recipe but you can use hot Italian sausage and give the soup a little more kick if you like. You can also use ground beef, but I think the seasonings in Italian sausage give more zip to the flavor of the soup.

This soup tastes absolutely divine. Your should really try this. I guarantee you will love it! You betcha can make this!

CREAMY MEATBALL AND TORTELLINI SOUP...

  • Servings: 8-10
  • Difficulty: Easy
  • Print

INGREDIENTS:

Creamy Meatball And Tortellini Soup1 pound Italian sausage (ground or links cut into chunks)

1 onion, diced

2 thick carrots cut into 1/2 inch circles

2 stalks of celery cut into chunks

3 large garlic cloves, minced

1 Tbs. Italian seasoning

2 tsp. chicken bouillon powder

1/2 tsp. salt

4 cups chicken broth

1/4 cornstarch

1/4 cup water

1 12-ounce package of cheese tortellini

3 12-ounce cans of evaporated milk

4 cups baby spinach with stems removed

DIRECTIONS:

Form the Italian sausage into 1 inch meatballs. Place the onion, carrots, celery, garlic, italian seasoning, bouillon powder, salt and meatballs into a 6 quart slow cooker. Pour in the chicken broth. Cover and cook on low for 6 hours.

Mix together thoroughly the cornstarch and water. Combine cornstarch mixture with the evaporated milk. Add the evaporated milk and the tortellini to the slow cooker, stir to combine and cook on high for 45 minutes. Add the spinach leaves and stir to combine. Cook for an additional 15-20 minutes on high.

Serve immediately with crusty bread.

Veggies and Meatballs in the slow cooker

 Add the chicken broth

Creamy Meatball And Tortellini Soup

Creamy Meatball And Tortellini Soup

Slow Cooker Turkey and Dumplings…

We are still in the midst of a major kitchen renovation and although I have a brand new stove sometimes it’s just easier to throw things into a slow cooker and let it do all the work. And that’s what I did the other night.

I am particularly proud of this recipe for a variety of reasons but mainly because this was the first time I actually experimented with a process in a slow cooker and it turned out great. In the past I had been the type of slow cooker girl that would never open the slow cooker during the cooking process. But I found that you can and still achieve great results, probably even better results if you are not afraid to walk on the wild side.

By itself, this recipe is pretty traditional using canned soup for the liquid that braises the meat. But by thickening the soup with some flour and water it made the juices turn into a thick creamy gravy. The other trick I used was taking store bought biscuits in a can and using them for the dumplings. I just cut them up and put them in the slow cooker for the last hour. They cooked to a perfect dumpling consistency much to my surprise.

So let’s talk slow cooker turkey with dumplings…

Lesson Learned 1 – Use flour and water to thicken your sauce: At the 4 hour mark I took out the turkey tenderloins to shred them. I noticed that the liquid in the slow cooker was very thin. Right before I added the meat back in I mixed together about 2 tablespoons of flour with about 1/8 cup water and stirred it into the liquid. Then I added back the shredded meat and the biscuits, stirred the mixture, covered the slow cooker and cooked the turkey and dumplings for another hour. The result was fabulous. I guarantee you I would not have gotten such a thick sauce had I not added the flour and water.

Slow Cooker Turkey And Dumplings

One clarifying point – it is extremely important that you mix the flour and water together thoroughly before adding it to the juices. I normally mix flour and water in a glass measuring cup. Once I think I’ve gotten the mixture correct I put my finger in and scrape it along the bottom of the glass. If I can feel any clumps of flour at all I continue mixing until they are all gone. That is very important. You don’t want to wind up with a clump of flour in your gravy.

Lesson Learned 2 – Adding whole garlic cloves to the slow cooker: I discovered that if you add whole garlic cloves at the beginning of the slow cooking process you infuse garlic into your ingredients. And, since slow cooking on average takes 4-6 hours, the garlic literally breaks down into the food so there is no worry of biting into a garlic clove. And if by chance a clove survives, it would be nice and tender, just as if you had roasted it. It’s a great trick to use in a slow cooker.

The Veggies
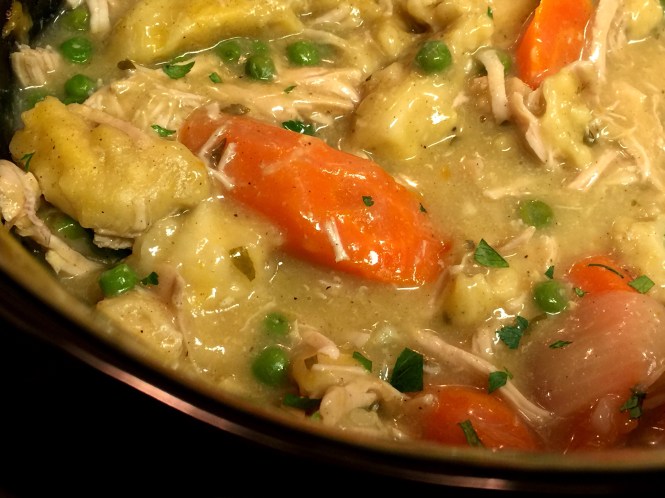
Lesson Learned 3 – Cut large slices of your veggies: Whenever I slow cook I always cut my veggies on the larger side. I find that after cooking for 4-8 hours I’m left with veggies that still have texture and flavor versus veggies that have been completely broken down by the long cooking process.

Lesson Learned 4 – Using refrigerated biscuits for your dumplings: What a great surprise this was. I took butter flavored refrigerator biscuits, flattened them out with the palm of my hand and cut them into slices. I added them during the last hour of cooking and voila, I wound up with dumplings. This is a great trick. Try it!

Refrigerated Biscuits Cut Into Strips

I am really excited about this recipe on a variety of levels. First, it tasted great. Second, it looked great (remember you eat with your eyes first). Third, I experimented with some new techniques and they worked out fabulously. You’ve got to try this one. You will love it!

SLOW COOKER TURKEY AND DUMPLINGS...

  • Servings: 8
  • Difficulty: Easy
  • Print

INGREDIENTS:

1 large onion, cut into quarters and separated

4 carrots, cut diagonally in 2 inch slices

2 large garlic cloves, whole

2 large turkey tenderloins

1 can cream of chicken soup

1 can cream of celery soup

1 Tbs. flat leaf parsley, chopped

1 Tbs. poultry seasoning

2 cups chicken stock

1 cup frozen peas

1 can refrigerated biscuits, separated, flattened and cut into slices

2 Tbs. flour

1/8 cup water

Salt and pepper, to taste

Flat leaf parsley for garnish, optional

DIRECTIONS:

Line the bottom of the slow cooker with the onion slices, carrots and garlic. Place the turkey tenderloins on top of the vegetables. Salt and pepper the ingredients.

In a small bowl, combine thoroughly the soups, parsley and poultry season. Spread over the tenderloins. Pour the stock over the top of the tenderloins. Cover and cook on high for 4 hours.

At the 4 hour mark, remove the tenderloins and cover the slow cooker. Shred the tenderloins using two forks. Open the refrigerated biscuits. Flatten each one with the palm of your hand and cut them into slices. (depending on the length of each slice you can also cut the slices once again in half). Mix together thoroughly the flour and water.

Uncover the slow cooker. Pour in the flour/water mixture and stir until combined in the liquid. Add back the shredded turkey and sliced biscuits. Gently stir to break up the biscuits. Cook for another hour on high, adding the frozen peas during the last 15 minutes of the cooking process.

Turkey Tenderloins

Turkey Tenderloins

Gravy Mixture

Gravy Mixture

Cover With Soup Mixture

Cover With Soup Mixture

Slow Cooker Turkey With Dumplings

Slow Cooker Turkey And Dumplings

Serving Suggestion

Serving Suggestion

Crock Pot Turkey And Dumplings


<