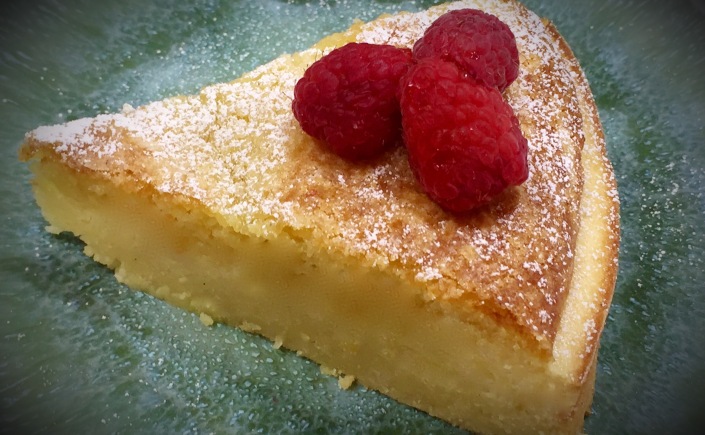
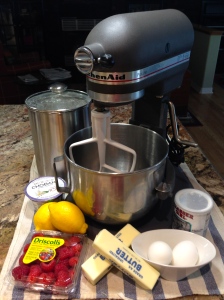
Lemon Ricotta Cake…

No one will deny that we are currently living in unprecedented times. With the country being ravaged by the coronavirus and people scrambling to figure out how to shelter at home without losing their minds, it comes as no surprise that many people are turning to cooking. Cooking (and eating) has always been associated with comfort. And at this point in time we need all the comfort we can get.

We are under a stay at home order here in Colorado so venturing outside can only be done for essential things, like going to the grocery store. When I last visited my grocery store I found it fascinating that the baking isles were heavily picked over. It was hard to find flour or eggs. I laughed when I saw there were hardly any boxed cake mixes on the shelves. And try to find flour tortillas – well I guess people are indulging their taste for Mexican food during quarantine.

I’ve been trying to limit my trips to the store as much as possible so sometimes I buy larger containers of things that will last a longer period of time. The other day I was planning on making some stuffed shells (that recipe soon to be posted) and so I purchased a large container of ricotta cheese. I did not anticipate the amount I would have left and began thinking about how I could use the remaining ricotta. And this is how I used it…

So let’s talk lemon ricotta cake…

Lesson Learned 1 – Beat the ricotta into the butter/sugar mixture really well: Ricotta is rather thick and when using it in baking it can cause lumps unless you beat it well. I found that using whole milk ricotta is the best for this cake. Make sure you beat the mixture for at least 3 minutes or until you see the mixture is smooth and creamy. Also make sure you scrape the sides and bottom of the the mixing bowl. I found when using a stand mixer that a very small portion of ingredients tends to clump right at the very base of the beater. Don’t forget to scrape there as well.

What the ricotta batter should look like

Well Mixed Ricotta Batter

Lesson Learned 2 – Grease the sides and bottom of a spring form pan with butter and dust it with powdered sugar: I read about this trick online and it is a great way to add some additional sweetness to the outside of the cake. Even though you use 1 1/2 cups of sugar in this recipe the cake does not taste overly sweet. The lemon juice and zest balance out the sweetness quite nicely.

Lesson Learned 3 – Don’t make the mistake I made: Every cook makes mistakes, even the most adept ones. I went about making this cake the way I normally bake or cook, prepping all of the ingredients first and then following the process. I did really well until I put the batter in the prepared pan and then realized I didn’t incorporate the baking soda into the batter. UGHHH!

In my mind I had three choices – 1: Start all over again (which I did not want to do) 2: Bake the cake without the baking soda (baking soda is a leavening agent that makes the cake rise so I didn’t want to do that) or 3: Figure out a way to incorporate the baking soda (it was only a half of a teaspoon so I sprinkled it all over the top of the batter and mixed it in with a spoon stirring it well but being careful not to touch the sides or bottom of the prepared pan. To my amazement it worked beautifully). So keep in mind that even the best of cooks need to improvise when they make a mistake. Not all fixes turn out as well as this one did. I was lucky this time.

Lesson Learned 4 – Try using vanilla bean paste: I was made aware of vanilla bean paste during a cooking class and I love it. I don’t use it all the time as a jar can be quite expensive ($20 or so) but in dishes where I want a richer vanilla flavor I use the paste. I wouldn’t use it for making cookies but for cakes or custards it adds much more depth of flavor. It measures just like vanilla extract (a teaspoon for a teaspoon) but it gives a much richer vanilla flavor than extract. If you can afford it try it sometime.

And that’s it. Making the cake is very easy. The cake is creamy and not overly sweet. It’s great as a dessert or a breakfast treat. I know you will enjoy this one…

Lemon Ricotta Cake...

  • Servings: 8-10
  • Difficulty: Easy
  • Print

INGREDIENTS:

3/4 cup butter, room temperature

1 1/2 cups sugar

15 ounces whole milk ricotta cheese

3 large eggs, room temperature

1 tsp. vanilla bean paste (or vanilla extract)

1 large lemon, juiced and zested

1/2 tsp. baking soda

1/2 tsp. salt

1 1/2 cups flour

Powdered sugar for dusting the pan and the top of the cake

DIRECTIONS:

Preheat oven to 350 degrees. Grease a spring form pan with butter and dust the bottom and sides with powdered sugar. Set aside.

Using a stand mixer (you can use a hand mixer) cream together the butter and sugar until light and fluffy, about 3 minutes. Add the ricotta cheese and mix until smooth and creamy, at least 3 minutes or more.

Mix the eggs in one at a time. Add the vanilla, lemon zest and lemon juice. Mix to combine. Stir in the baking soda and salt. Add the flour and mix until just combined (you can add all the flour in at once).

Pour the batter into the prepared pan. Bake for 45-50 minutes or until a toothpick inserted in the center of the cake comes out clean. Let the cake cool in the pan for at least 15 minutes before removing it from the pan. Let the cake cool completely before dusting it with powdered sugar.

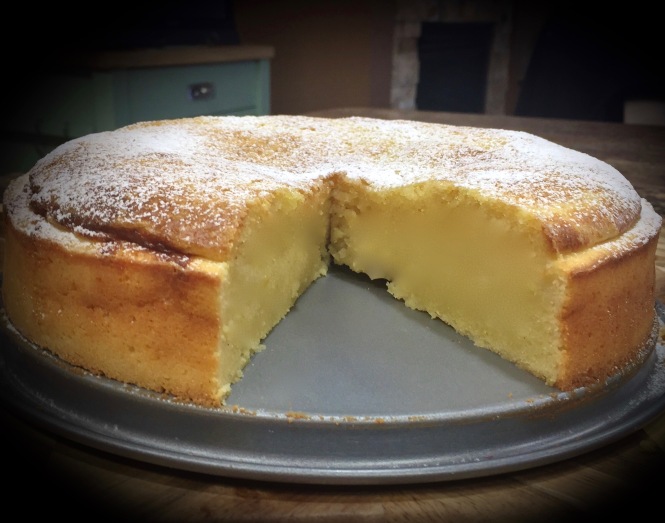
Right Out Of The Oven
Slow Cooker Lemon Garlic Butter Chicken…

I saw a version of this recipe online and it intrigued me. First of all I love my slow cooker. It has become a more versatile tool than it was years ago when you’d put in some meat and veggies, make some concoction usually comprised of some sort of cream soup and let it cook for hours until you had a tasteless soggy mess. Slow cookers can produce some great meals but you have to know how to use them. And just like your oven, no two brands of slow cookers are alike so you need to know your slow cooker.

I have two All-Clad slow cookers, a 7 quart and a 5 quart. For smaller meals when I cook for one or two I prefer the 5 quart, plus it has the versatility of browning food in its own sleeve which is very convenient. I find the All-Clad slow cookers to have a nice moderate temperature. Some slow cookers boil your food, even on low. I don’t find that to be the case with mine. I get a nice even slow cooking process and so if I gauge my cooking times correctly I do not wind up with dried out tasteless food.

Enough about slow cookers, let’s talk about slow cooker lemon garlic butter chicken…

Lesson Learned 1 – Recipes are designed to be guides, not gospel: The instructor in one of my more recent cooking classes said this and it really struck home with me. When you are making something savory, make the recipe your own. You don’t have to follow the recipe exactly ingredient by ingredient. Now mind you, this is not the case when you’re baking – you need to be precise with those recipes. But savory recipes can take on a life of their own depending upon your likes and dislikes. So feel free to experiment. Some of my most popular recipes were a result of doing just that.

The version I worked from called for 1/3 teaspoon of red pepper flakes. I did not want the heat so I eliminated that ingredient. I also added less butter and more lemon zest than recommended in the recipe and I added some carrots to the slow cooker which served as a base for the chicken thighs.

Lesson Learned 2 – Avoid the common mistake of long cooking times with your slow cooker: This is all a part of knowing your slow cooker as I mentioned above. I find, mostly where chicken recipes are concerned, that slow cooker recipes have cooking times that are too long. The recipe that I based this on called for 4 hours on high or 6-8 hours on low. I cooked my chicken for 5 hours on low and the result was perfect. Normally with beef recipes I find the recommended cooking times to be more accurate. But be careful with chicken in a slow cooker. You can really dry it out by cooking it too long. If you’re not sure if your chicken is done take its internal temperature. The safe internal temperature for cooked chicken is 165 degrees.

Lesson Learned 3 – Yes, you must brown your chicken first to get it to look like my pictures: The one drawback of a slow cooker is that it does not brown meat when it is slow cooking. The good news is there are now slow cookers on the market where you can brown your meat in its own sleeve and place the sleeve back in the slow cooker to finish the rest. These slow cookers tend to be a little more expensive but are a great convenience.

I browned my chicken thighs for about 4 minutes with the skin side down. I just browned them on one side and drained them on paper towels before adding them to the slow cooker. Some people don’t care if their meat looks grey and skip the browning process. But it you want your chicken thighs to look like mine, you’ll need to brown them first.

Lesson Learned 4 – I prefer using chicken thighs in a slow cooker: I find chicken thighs to be more forgiving, especially if you overcook them in a slow cooker. So if you feel it absolutely necessary to cook them for 6 hours on low use chicken thighs. The result will be much better.

Lesson Learned 5 – Slice the garlic in thin slices and place the slices on top of the chicken: I found that to be the best way to infuse the garlic into the meat. If you want you can also put some garlic slices under the meat as well. Once the chicken was done I removed the garlic slices and disposed of them. But you can serve them as well. I’m just not a big fan of eating garlic that way. You can also just mince the garlic and sprinkle it on top of the chicken. The choice is yours.

Lesson Learned 6 – Baste the chicken in the drippings before serving: This recipe makes a great lemon butter sauce. Baste the chicken thighs in that sauce before plating them. You’ll be glad you did.

And that’s it. This is a very basic recipe with a minimal amount of ingredients. You can skip adding the carrots if you want, or you can add some onions under the chicken as well. The choice is yours. I definitely enjoyed this recipe and will make it again. Let me know what you think!

Slow Cooker Lemon Garlic Butter Chicken...

  • Servings: 2-4
  • Difficulty: Easy
  • Print

INGREDIENTS:

4 chicken thighs with skin on

1 Tbs. vegetable oil

1 tsp. butter

1 tsp. garlic powder

1 tsp. onion powder

1/2 tsp. paprika

1 tsp. Italian seasoning

4 garlic cloves sliced thin

1/2 stick of butter diced

The zest of one medium size lemon (or two small)

The juice of one medium size lemon (or two small)

1/3 cup low sodium chicken broth

Salt and pepper to taste

4 carrots, peeled and cut into chunks

Chopped fresh flat leaf parsley for garnish, optional

Lemon slices for garnish, optional

DIRECTIONS:

Heat the vegetable oil and butter in a pan on the stove. Brown the chicken thighs skin side down for approximately 4-5 minutes. Remove the chicken thighs and drain on a paper towel. Set them aside.

Place carrots in the bottom of the slow cooker. Combine the chicken broth, lemon juice and zest. Place thighs on top of the carrots and pour the chicken broth mixture over them.

In a small bowl combine the Italian seasoning, onion powder, garlic powder, and paprika with some salt and pepper. Sprinkle the spice mixture over the chicken thighs. Top them with the garlic and dot them with the diced butter.

Cook on low for 5 hours. Baste the chicken thighs with the lemon butter sauce before removing them from the slow cooker. Garnish with lemon slices and parsley.


Lemon Crumble Cupcakes…

Recently we experienced quite a blizzard here in Colorado. Knowing that this storm was coming I decided to use the day I would be trapped in my house to get some serious cooking and baking done. I did three recipes in my test kitchen that day, and this was one of them.

I always like to have a few draft recipes in the queue so that I can maintain my goal for posting a new recipe every week – sometimes every other week but no longer than that. So this recipe was one I had in the back of my mind that I was waiting to try. After I made it my only thought was what the heck was I waiting for?

There are two main reasons why I really like this recipe. First and foremost the cupcakes taste divine – and isn’t that always the best reason The sour cream gives these cupcakes a luxurious texture. Second and equally as important to me, this is a smaller portion recipe yielding approximately 8 cupcakes and since there is only my husband and myself, I like recipes that cater to smaller portions – less waste, if any.

So let’s talk lemon crumble cupcakes…

Lesson Learned 1: Making the crumble: I’ve found that many recipes really overdo it when it comes to the amount of flour used in making a crumble. In my opinion, when there is too much flour it overpowers the sugar and butter and you’re left with a flavorless crumble. So when I make a crumble I tend to err on the side of a little less flour. So keep in mind that’s what I am including in this recipe. So if you’re anything like me, my advice is don’t mess with the flour proportion – it has already been adjusted to the lighter side.

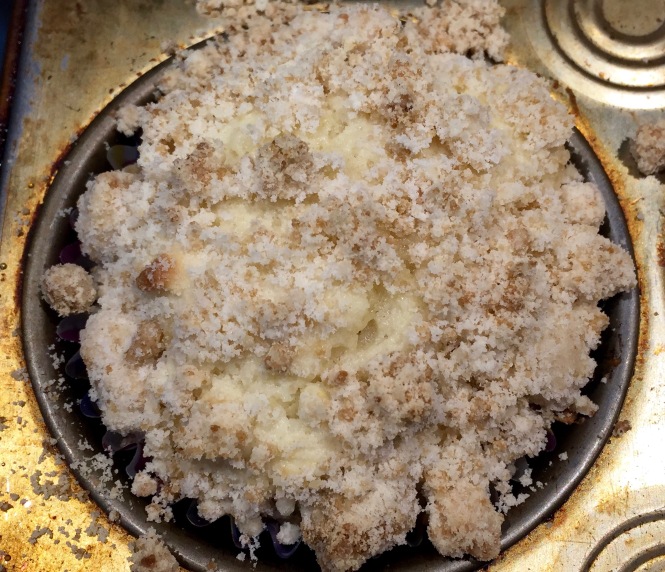
Lesson Learned 2 – Don’t expect the crumble to get overly browned: You want a nice beige color to the crumble. If it gets too brown the crumble gets too hard. The picture below shows the way the crumble should look when you take the cupcakes out of the oven.

Lesson learned 3 – Always used fresh squeezed lemon juice when you’re baking: If a recipe calls for lemon juice, please freshly squeeze it. There is a noticeable difference in flavor between the juice of a fresh lemon and lemon juice you get in a bottle. Take a few extra seconds and get your juice from fresh lemons. In a pinch you can always used the bottled stuff, but I believe in using clean ingredients as much as possible when I cook and bake. It pays off in flavor, and in the long run it pays off in your health. And don’t forget to zest the lemon before getting the juice.

Other than these few tips this recipe is pretty standard. But I can assure you, there is nothing standard about the taste of these cupcakes. And if you want more than eight, simply double the recipe. Anyway you make them they will be a hit!

Lemon Crumble Cupcakes...

  • Servings: 8
  • Difficulty: Easy
  • Print

INGREDIENTS:

Crumble

1/4 cup unsalted butter, melted

1/2 cup flour

2 Tbs. sugar

2 Tbs. brown sugar

Cupcakes

1/4 cup butter, room temperature

1/2 cup sugar

1 large egg

1/2 tsp. vanilla

1 lemon, zested

1 Tbs. fresh lemon juice

1/4 tsp. salt

1 1/2 tsp. baking powder (1 tsp. high altitude)

1 cup flour

1/2 cup sour cream

Glaze

6 Tbs. powdered sugar

1 – 2 Tbs. fresh lemon juice

DIRECTIONS:

Preheat the oven to 350 (365 for high altitude). Line a cupcake pan with 8 liners and set aside.

Make the crumble by first melting the butter. Whisk together the dry ingredients and add the melted butter. Use a fork to blend together until small pieces remain. Set aside.

In a large bowl, cream together the butter and sugar until light and fluffy. (I recommend using a hand mixture for such a small amount but if you double the recipe you can certainly use a stand mixer). Add the egg and fully combine. Add the vanilla, lemon zest and juice and mix until fully combined.

In another bowl whisk together the flour, salt and baking powder. Add the flour mixture to the butter/sugar mixture and mix until thoroughly combined. By hand, fold in the sour cream until no streaks of sour cream can be seen.

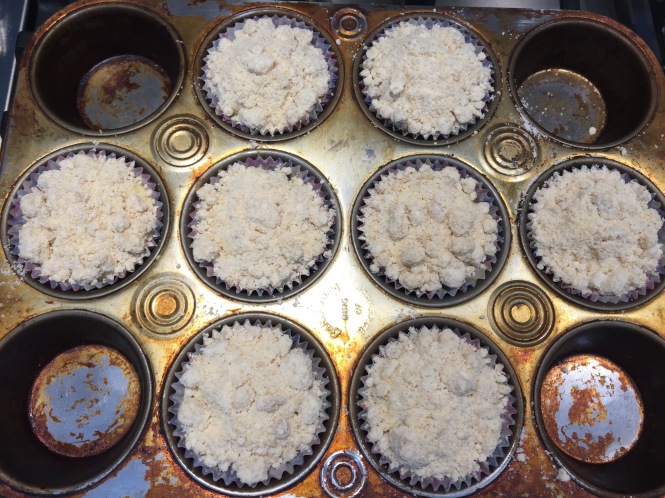
Fill each cupcake liner 3/4 full with the batter. Generously coat the top of each cupcake with the crumble.

Bake for 18-20 minutes. Cupcakes are done when a toothpick inserted in the center comes out clean. Cool muffins in the pan for about 10 minutes and transfer them to a wire rack to cool completely. Once the cupcakes are cool, make the glaze by combining the powdered sugar and lemon juice. Start with 1 tablespoon of lemon juice and determine from there if more juice is needed. You want your glaze to be on the thicker side.

Store the cupcakes not immediately eaten in a airtight container.

Fill the cupcake liners 3/4 full

Generously cover each cupcake with crumble

Lemon Blueberry Quick Bread…

My husband has an insatiable sweet tooth and lucky for him he can eat sweets and stay thin. So I’m always looking to make something for him, and there are times I just don’t want a lot of fuss getting it done. When that happens, this recipe allows me to make him something fresh without a lot of work on my part. And oh, did I happen to mention – it tastes divine!

I love baking with blueberries. When they get hot enough they burst and release sweet juices into whatever it is you’re making. This particular quick bread is loaded with them and when you add the lemon zest to the batter and frost it with lemon glaze, the combination of flavors are to die for.

So not only is this a great tasting sweet loaf, it’s quick and utterly delicious. So let’s talk lemon blueberry quick bread…

Lesson Learned 1 – Be careful when baking with blueberries: Blueberries can be tricky and believe me I’ve had my failures where blueberries are concerned. You have to coat them with a small amount of flour before you put them in the batter. If you don’t they’ll all sink to the bottom of your bread and you’ll have a blueberry mess on your hands.

It’s very important that you coat with blueberries thoroughly with the amount indicated in the recipe. I’ve also made the mistake of thinking they were fully coated and pouring them into the batter only to find that there was still a bunch of flour on the bottom of the bowl. I recommend that you place your blueberries in a small cereal bowl and stir them from the bottom of the bowl up. That way you’ll know that you’re using all the flour. Check the bottom of the bowl for any residual flour. If there is some, scoop it on top of the blueberries and continue to stir until there’s no flour on the bottom of the bowl when you pour the blueberries into the batter.

This quick bread was so good I made it twice within the span of a week. The second time I tried a few tweaks and I liked the way the bread turned out even better. One of the tweaks I did was change the amount of blueberries. Originally I used 1 cup of blueberries in the recipe and the bread was loaded with blueberries. Don’t get me wrong, that was fine, but I felt the blueberries were a tad overpowering. The second time I only used 3/4 cup of blueberries and I liked that ratio of blueberries to batter much better. So I recommend using only 3/4 cup of blueberries.

Another trick I used to avoid having the blueberries sink to the bottom of the cake – once the batter was in the baking pan I used a small spoon, dipped it into the batter and scooped some of the blueberries up to the top. I went about half way down in the batter and did a few scoops to make sure all the blueberries didn’t settle in one place. Doing a few scoops with the spoon and making sure the blueberries were completely coated in the flour gave a good distribution of blueberries in the batter.

Lesson Learned 2 – High altitude baking: I live in the Denver area which is 5,000 feet above sea level. When you live in high altitude it affects your baking and you need to make adjustments in order to get your desired results. If you don’t make adjustments your cakes and sweet breads will wind up sinking in the middle with the edges being more than done. It’s frustrating. And it takes some time to get used to high altitude baking.

The main difference between high altitude and sea level baking is air pressure. The higher the altitude the lower the air pressure, and lower air pressure plays havoc with baking. The King Arthur Flour’s website has an excellent article explaining why adjustments need to be made with high altitude baking and recommended adjustments for cakes, cookies and the like. If you’re in high altitude I highly recommend you check it out. I will write out the recipe with sea level ingredients and put in parenthesis the high altitude adjustments. Keep in mind my adjustments are for 5,000 feet. If you’re at 3,000 or 7,000 the adjustments change. The article gives specific adjustments for those altitudes as well. And if you’re at sea level (which I was for many years) just follow the recipe as is. You’ve got nothing to worry about. The link to the article is directly below:

https://www.kingarthurflour.com/learn/high-altitude-baking.html

Other than how to work with blueberries and how to adjust for high altitude this quick bread is super simple to make and super delicious. Try it out and tell me what you think…

Lemon Blueberry Quick Bread...

  • Servings: 10-12
  • Difficulty: Easy
  • Print

INGREDIENTS:

Quick Bread

1 1/2 cups flour + 1 tsp., divided

2 tsp. baking powder (1 1/2 tsp. for high altitude)

1/4 tsp. salt

1/3 cup sugar

Zest of one medium size lemon, plus the juice for the glaze (see below)

3/4 cup whole milk (+ 1 Tbs. for high altitude)

1 egg, beaten

2 Tbsp. canola oil

3/4 cup fresh blueberries

Baking spray

Glaze

1 cup confectioners sugar

1-2 Tbs. fresh squeezed lemon juice

DIRECTIONS:

Preheat oven to 350 (365 for high altitude).

In a large bowl combine the flour, baking soda and salt. Whisk until thoroughly combined. Stir in the sugar and lemon zest. Set aside.

In a medium size bowl whisk together the egg, milk and canola oil. Pour the wet ingredients into the dry ingredients and stir until just combined.

Use the remaining teaspoon of flour and coat the blueberries with the flour. Add the blueberries to the batter and gently fold them in.

Coat an 8 x 4 inch loaf pan with baking spray. (I used the one that also includes flour). Pour the batter into the pan. Place a small spoon into the batter (about half way down) and scoop some of the blueberries up to the top. (repeat this two or three times).

Bake for 40-50 minutes (mine was done in 40 minutes). Remove the pan from the oven. Move a rounded edged knife along all sides of the pan. Let the pan cool for 15 minutes, then remove the quick bread from the pan and let it continue to cool.

Once the bread is completely cooled mix together the glaze ingredients. Start with 1 Tbs. lemon juice and add more to achieve your desired thickness (I used 2 Tbs.). Drizzle the glaze over the top of the bread before serving. Store any leftovers in an air tight container.


Frosted Lemon Cookies…

Are you ready for a little Summer melt in your mouth goodness? Well here’s something that fits the bill. During the dogs days of summer you want something light, cool, refreshing… and these tasty morsels are like have a glass of lemonade in a cookie.

The ingredients in the recipe are a little unusual. For instance, you don’t use any eggs just butter and lemon juice – you use powdered sugar in place of granulated sugar – and you mix the flour with cornstarch. Sounds a little strange but the result is what, as a child, I called sand cookies. And although sand cookies doesn’t sound very appetizing, it was my term for cookies that literally melt in your mouth. The combination of ingredients in this recipe creates a melt in your mouth consistency that is amplified when you ice them with the lemon frosting. All I can say is yummo!

So let’s talk iced lemon cookies…

Dough logLesson Learned 1 – Make sure you chill the dough: The consistency of the dough is not like most cookies – it will be softer and stickier. It’s important for the dough to chill in order to form the cookies and bake them off. Divide the dough in half and make two eight inch logs. Cover the logs in plastic wrap and refrigerate for up to two hours. My dough was nice and firm after an hour and a half, so check your dough at that point to see if it is ready to go.

Dough logs

These cookies do not have a lot of binding ingredients (there is some butter but no eggs) and so they are more delicate than others. Basically that is what gives them their melt in your mouth consistency. So when they are still warm they can easily break apart. Be very careful when removing them from the baking sheet to the cooling rack. Also be careful when icing them. You can have a love-hate relationship with these cookies. You love the consistency as they flake apart in your mouth but they can also do that in your hand if they are not handled with care. Just take your time with them. These cookies are worth all the care you can give!

Lesson Learned 3 – Chill the cookies once you’re done: I found the best way to enjoy these cookies is when they have a slight chill. The flavor is so light and with the chill it creates a cooling Summertime treat sensation. You’ll find that you can’t eat only one of these flavorful bite size morsels. I guarantee they will be a hit!

Lesson Learned 4 – I used yellow food coloring in the frosting: I used yellow food coloring in the frosting but it’s not necessary. I found it gave the cookies that special look and we all know we eat with our eyes first. I used 3 drops and it created this beautiful lemony color!

Frosted Lemon Cookies...

  • Servings: 4-5 dozen
  • Difficulty: Easy
  • Print

INGREDIENTS:

3/4 cup unsalted butter, room temperature

1/3 cup powdered sugar

1 tsp. fresh lemon juice

1 1/4 cup flour

1/2 cup cornstarch

FROSTING:

1/4 cup unsalted butter, room temperature

3/4 cup powdered sugar

1 tsp. lemon zest

1 tsp. fresh lemon juice

3 drop yellow food coloring, optional

DIRECTIONS:

In a medium bowl beat together the butter and sugar until combined. Beat in the lemon juice. In another bowl whisk together the flour and corn starch. Gradually beat the flour mixture into the butter/sugar mixture until combined.

Divide the dough in half and shape into two 8 inch logs. Cover the dough with plastic wrap and refrigerate until firm – approximately 1 1/2 – 2 hours.

Preheat the oven to 350 degrees.

Unwrap the dough and cut it into 1/4 inch slices. Place slices 1 inch apart on an ungreased cookie sheet. Bake for approximately 10-12 minutes.

Gently remove the cookies from the pan onto a cooling rack. Cool completely.

For the frosting, beat together all of the ingredients. Spread over the cookies. Chill and serve.

Ready to go into the oven

Icing the cookies


SaveSave

SaveSave

SaveSave

SaveSave

SaveSave

SaveSave

SaveSave

SaveSave

SaveSave

SaveSave

SaveSave

SaveSave

SaveSave

Strawberry Lemon Muffins

I know I haven’t published in a while. It just seems when Summer arrives I find so many things to do outside of the kitchen that I become a little lax in my posting goals. But even though I haven’t posted for some time I think this recipe is well worth the wait.

If you’ve never baked with strawberries before, you’re in for quite a treat. Strawberries have a wonderful light tartness to them when they’re baked that beautifully offsets the sugar in a recipe. Combine that with a hint of lemon zest and juice and you have an incredible balance of flavors.

These muffins require very little effort to make and are decadently delicious. You must try them. So let’s talk about strawberry lemon muffins…

Lesson Learned 1 – Don’t cut the strawberries in too large of chunks: Strawberries give off a lot of moisture when they’re baked so you don’t want large chunks of strawberries in your muffins. That will make the muffins soggy. I cut the strawberries in half and then in half again. After that I cut the remaining pieces in thirds. The picture below gives you somewhat of a perspective on size. Just to the right of center and near the bottom is a strawberry cut in half from top to bottom. You can see the other pieces are smaller by comparison. You want to cut the strawberries into these smaller sized pieces.

It is also very important to make sure the strawberries are evenly distributed in the batter at the very end. Otherwise you might have soggy pockets in your muffins. Take the time to fold them into the batter completely before filling your muffin cups.

Lesson Learned 2 – The batter will be thicker than you think: I was surprised at how thick the batter was in this recipe. But the combination of a thick batter and strawberries creates the perfect balance for a moist and flavorful muffin. All the magic happens in the oven, so don’t worry about how thick the batter is.

Lesson Learned 3 – Fill the muffin cups almost to the top: Many times, especially when making cupcakes, recipes will say to fill the cups about 3/4 full. With these muffins fill the cups almost to the top. The muffins will rise in the oven but not dramatically so don’t worry about spillover.

Lesson Learned 4 – Tips for glazing and storing the muffins: Make sure the muffins are completely cooled before glazing them. I used a “home-made” pastry piping bag to glaze my muffins. I simply put the glaze in a sealable sandwich bag, twist the bag to get all the glaze in one corner and snip the corner squeezing the glaze over the muffins. The result is very professional looking and the process could not be any easier. Below are pictures of my “home-made” pastry bag and the muffins after they’ve been glazed.

These muffins can be stored in an air tight container for up to 5 days. They also freeze nicely. Try them and let me know what you think!

Strawberry Lemon Muffins

  • Servings: 12-15 Muffins
  • Difficulty: Easy
  • Print

INGREDIENTS:

2 cups flour

3/4 cups sugar

2 tsp. baking powder

1/2 tsp. baking soda

1/4 tsp. salt

1 large egg, room temperature

2 tsp. vanilla

1/3 cup vegetable oil

1 cup plain Greek yogurt

Zest and juice of one lemon

1 1/4 cup fresh strawberries, diced

GLAZE:

1 cup powdered sugar

Zest and juice of 1 medium sized lemon (2-3 Tbs. of juice)

DIRECTIONS:

Preheat the oven to 350 degrees. Line a muffin pan with muffin cups and set aside.

Whisk together the flour, sugar, baking powder, soda and salt. Set aside.

Whisk together the egg, vanilla, vegetable oil, yogurt, lemon juice and zest. Pour the wet ingredients into the dry ingredients and mix until combined. Gently fold in the strawberries.

Fill the muffin cups almost to the top. Bake for 18-20 minutes or until a toothpick inserted in the center comes out clean. Cool in the pan for about 5 minutes then transfer the muffins to a cooling rack. Cool completely.

Mix the glaze ingredients together and drizzle over the cooled muffins. Store muffins in an airtight container or freeze them.


Taters, Taters, Taters (Let’s Exchange Recipes)…

No matter what you call them, how you prepare them or how you serve them I love taters! Yes I know about carbs and yes there are some great alternatives but nothing in my mind compliments a meal like some delicious taters! Basically they are good for you, it’s all the stuff we put on them that causes the problems. But taters are one of my top guilty pleasures in life and that is not likely to change.

So I thought with this particular blog I’d try something a little different – basically suggest a tater exchange. I will give you a recipe that I’ve recently perfected and just love with the hopes that in the comments of my blog you share your favorite potato recipe. Then this blog can be a clearing house for a variety of great potato recipes – and what is better than that? Plus it will give me some new tater recipes to try.

So my recipe is for Greek Lemon Potatoes. These potatoes slow roast in the oven and the aroma of the garlic, oregano and lemon fill the air with a wonderful homey smell. So let’s talk Greek Lemon Potatoes

Lesson Learned 1 – How you cut the potatoes is important: I use Yukon Gold potatoes for this recipe and I actually peel them although it’s not necessary. Yukon Golds have a very thin skin and you can roast them either way. I try to pick out ones that are about the same size and thickness (not more than about 4 inches thick). I slice the potatoes in half and then I slice them down the middle lengthwise and into about six equal sized pieces widthwise. The picture below shows how I cut them.

Lesson Learned 2 – Be careful how much oil you use: When I originally tried this recipe I used 1/2 cup of olive oil. I found the potatoes came out too greasy. I’ve cut the amount down to a little over 1/4 cup but I found the amount of oil you use depends on the pan you roast the potatoes in. In a smaller high sided pan you will need less oil. In a larger pan where the potatoes are more spread out you’ll need more. Just make sure you’ve got at least 1/8 in of oil on the bottom. You may have to play around with the amount of oil. If you think the potatoes are coming out too greasy, just put them on paper towels for a couple of seconds before you serve them and you should be just fine.

Lesson Learned 3 – Your roasting time may vary depending on your oven: Once again I live in high altitude so the roasting process always takes a little longer. This recipe works well for me at 400 degrees for 1 1/2 hours but you may find your roasting time will be a little shorter. Keep in mind you’re cutting your potatoes into somewhat larger chunks so you will need some time to roast them completely.

Lesson Learned 4 – Salt the warm potatoes before you serve them: I’ve found that sprinkling a little bit of kosher salt on these potatoes right before you serve them gives them a little touch that really boosts the flavor. The warmth of the potatoes seems to incorporate the salt more fully. Try it and see what you think. These are not difficult at all to prepare and require very little monitoring but the end result c’est manifique… (I know that’s French and not Greek). Try these and share your favorite potato recipe with me. I’m always on the look out for a new way to make taters!

Greek Lemon Potatoes

  • Servings: 4-6
  • Difficulty: Easy
  • Print

INGREDIENTS:

2 pounds of Yukon Gold Potatoes sliced in medium sized chunks

2-3 cloves of garlic, minced

4 Tbs. freshly squeezed lemon juice, (about 1 medium sized lemon)

2 Tbs. dijon mustard

1 Tbs. dried oregano

1/4 cup olive oil (may need to adjust according to the size you use)

Kosher salt and pepper to taste

DIRECTIONS:

Preheat oven to 400 degrees. Slice potatoes into medium sized chunks and place in a bowl. In a separate bowl combine all of the other ingredients and mix thoroughly. Pour this mixture over the potatoes and thoroughly combine.

Spray a medium sized casserole dish (2 quarts or larger) with cooking spray. Put the potato mixture into the prepared pan, using a spatula to get all of the olive oil mixture out of the bowl. Cover with foil and roast for an hour, stirring the potatoes at the half hour mark.

Uncover the potatoes, stir them once again and roast for another half hour. Sprinkle with kosher salt and serve immediately.

I’LL START OFF THE RECIPE EXCHANGE!

And since I am suggesting the tater recipe exchange, I will start the process – here is a great cheesy potato recipe that I know you will just love Cheesy Potato and Green Onion Casserole

Cheesy Potato and Green Onion Casserole

Lemon Crumb Cake…

Sometimes you just want something quick and easy. This is that kind of recipe. I don’t know about you but there are days when I just don’t want to drag out all the paraphernalia in order to make something that looks and tastes good. This particular recipe requires no stand mixer, food processor, or blender. Just a bowl for the dry and wet ingredients and a small pan to melt butter.

Let’s talk Lemon Crumb Cake…

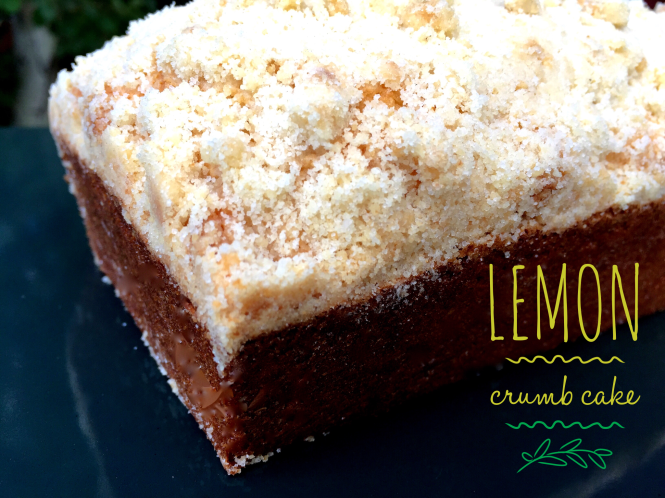
Perfect Crumble ConsistencyLesson Learned 1 – The crumb topping: Only three ingredients make the topping – flour sugar and melted butter. I found the best result for making the topping is to add 1 additional tablespoon of flour to the 1/3 cup called for in the recipe. That way you get a nice crumble without the mixture being too moist. The crumb topping is easy to do. Just melt the butter and combine it with the flour and sugar. If the mixture looks too dry, add a tiny bit more melted butter. Make sure nothing is dry in the crumble. The picture here shows the perfect consistency.

Add Wet Ingredients To Dry IngredientsLesson Learned 2 – Mixing wet and dry ingredients: The rule of thumb when making a batter you mix by hand is to add the wet ingredients to the dry ingredients. Make a well in the center of the dry ingredients and pour in the wet ingredients. Take a wooden spoon or a spoon/spatula and mix until just combined. Make sure to check at the bottom center of the bowl – that’s were unincorporated ingredients tend to hang out. Once everything is combined, STOP. Over mixing will create a tough cake.

Lesson Learned 3 – Watch the time on this cake carefully: Ok, I’ll admit it – I had to make this cake twice to get it right. This cake, depending on your oven and what part of the country you live in, can bake from 50 minutes to 1 hour and 10 minutes. And let me tell you, it can go from moist to dry rather quickly. So keep an eye on it. I use a professional grade loaf pan and so my cake baked in 50 minutes. The time you need will depend on your oven and the bakeware you use. Keep an eye on it starting at 50 minutes.

Right Out Of The Oven

Lemon Crumb Cake…

  • Servings: 8-10
  • Difficulty: Easy
  • Print

INGREDIENTS:

Topping

1/3 cup plus 1 Tbs. Flour

1/3 cup sugar

2 Tbs. melted unsalted butter

Cake

1 1/2 cups flour

1 cup sugar

1 tsp. baking powder

1/2 tsp. salt

1 5 oz. can evaporated milk

1/3 cup vegetable oil

2 tsp. lemon zest

2 large eggs

Glaze (optional)

1/2 cup powdered sugar

3 tsp. lemon juice

1 tsp. lemon zest

DIRECTIONS:

Preheat oven to 350 degrees. Lightly grease and flour the bottom and sides of an 8 x 4 loaf pan (if using a nonstick pan you only need to prepare the bottom of the pan). In a small bowl mix together topping ingredients making sure all the flour is coated with the melted butter. Set aside.

In a large bowl, sift together the flour, baking powder and salt. In another bowl whisk together the eggs, evaporated milk, oil and lemon zest. Pour the egg mixture into the flour mixture and stir until just combined.

Pour the batter into the prepared loaf pan. Sprinkle the top evenly with the crumb mixture. Bake for 50 minutes to 1 hour 10 minutes or until a toothpick inserted in the center comes out clean. Check the cake at 50 minutes. You do not want to over bake this cake.

Cool the cake for 15 minutes in the loaf pan. Remove from loaf pan and let cool completely on a wire rack. The glaze is optional. The cake is delicious with or without the glaze.

Lemon Crumb Cake

 Lemon Crumb Cake

Lemon Raspberry Cheesecake Bars…

If you want a truly delicious and decadent sweet treat, this one’s for you. I haven’t made anything like a cheesecake for a long time, and I didn’t want to do the full blown thing, so I decided to make cheesecake bars and and am I ever glad I did. Plain and simple, this recipe is divine! There are few recipes I have on this blog that I think outshine the rest. For example, my recipe for Chicago Style Deep Dish Pizza, or my Best Ever Meatballs, or my Iced Cinnamon Chip Cookies… (actually there are many more, but I don’t want to bore you with a long list). But this one goes straight to the top!

Not only is this insanely delicious, it is gorgeous to look at and simple to make. You can’t beat that. And so, without further adieu, here are a few lessons learned and the recipe.

IMG_5396Lesson Learned 1: Tips about the raspberry swirl: It couldn’t be easier to make the swirl. Just pop the raspberries and sugar in a food processor and voila, you have it. Be aware that you don’t need a lot for the top of the cheesecake. Less is more in creating a beautiful design. You can easily get away with only a 1/3 cup raspberries to create the design on top. I used 1/2 cup so I would have some extra to drizzle on the plate when I served the cheesecake.

IMG_5418Since you only need a small amount, don’t use a blender for this. If you have a mini blender or food processor, use that. Also you will want to strain the raspberry sauce.  There are tons of seeds that you will not want to have in your cheese cake. Use a spatula and press the juice through the strainer. It is a little bit of work but you get an incredibly smooth glistening sauce that you can use not only for the top of the bars but for serving as well.

Once you’ve made the cheesecake filling, all you have to do is dot the top with a little of the raspberry sauce as shown in the picture below. Take a sharp knife and gently swirl the sauce into the cheesecake mixture. It’s that simple. You can easily create a gorgeous design with no effort at all.

IMG_5421

IMG_5429

Lesson Learned 2 – Line your pan with parchment paper: I am not a big fan of using cooking spray on my good pans. I find it leaves a residue that bakes on the pan and after a while can ruin the finish. I prefer greasing and flouring pans or using parchment paper. This time I chose parchment paper. I lined the bottom and left some hanging over the side. Doing that gave me handles to pull out the cheesecake once it set. (I had to use a knife on the sides that did not have parchment paper to loosen them slightly before I lifted the cheesecake out of the pan).

IMG_5380Lesson Learned 3 – Graham Cracker Crusts: They couldn’t be easier to make. The consistency of the crust should look like wet sand as seen in the picture. Spread it evenly on the bottom of the pan and press it down flat. Also, after it is baked, make sure it’s cooled completely before pouring the cheesecake mixture on top of it.

Lesson Learned 4 – The cream cheese must be at room temperature and beat it longer than you think: You will get a lumpy cheesecake if the cream cheese is not room temperature when you beat it. And beat it for a long time. I beat the cream cheese for at least five minutes. And after that as I added each individual ingredient I beat it some more. That’s the only way you’ll get a smooth consistency to the batter.

That’s it! The hardest part of making this is the clean up. I used both my small and large food processors as well as my stand mixer so that wound up being most of the work. But was the work ever worth it. I still can’t get over how good this one is. My husband says this recipe is insanely good. Enjoy!

Raspberry Lemon Cheesecake Bars…

  • Servings: 12-14
  • Difficulty: Easy
  • Print

IMG_5449INGREDIENTS:

Crust:

9 graham cracker sheets (1 – 1 1/4 cups)

4 Tbs. butter, melted

2 Tbs. sugar

The Filling:

2 eight ounce packages of cream cheese, room temperature

2 large eggs, room temperature

1/2 cup sugar

2 small lemons, juiced and zested

Raspberry Swirl

1/2 cup fresh raspberries

1 Tbs. sugar

DIRECTIONS:

Preheat the oven to 325 degrees. Line bottom of 8 x 8 pan with parchment paper, using enough paper so it can hang over the sides. (You can also use baking spray). Set aside.

Put graham crackers into a food processor. Process until you have fine crumbs. Add the sugar to the cracker crumbs. Melt the butter and add it to the mixture, stirring until the mixture resembles coarse wet sand. Take the crumbs and spread them out evenly across the bottom of the pan. Press firmly. Bake for 10 minutes. Set aside and let cool.

Place the raspberries and sugar into a small processor and beat until smooth. Put mixture into a strainer and strain until the raspberry seeds are removed from the juice. Set aside.

Using a stand mixer, beat the cream cheese until smooth, at least 5 minutes. Add in the sugar and beat until combined. Add in one egg at a time and beat until completely incorporated. Add the lemon juice and zest and continue to beat until completely incorporated.

Pour the cheesecake filling on top of the cooled graham cracker crust. Using a spatula, make sure it is spread evenly over the crust. (You might even want to take the pan and, raising it up slightly, drop it back down on a hard surface to ensure the batter is evenly distributed). Spoon the raspberry mixture in dots over the top of the cheesecake mixture. Use a sharp knife to make swirls all over the top of the batter.

Bake for 35 minutes. Let the cake cool completely and refrigerate for at least three hours or over night. Cut into squares and serve.

IMG_5437

The Desired Texture Of The Cheesecake…

IMG_5462

Lemon Raspberry Loaf Cake

August was quite a busy month with a lot of traveling and so I wasn’t able to make my goal of one new recipe a week last month. Now things have settled down a bit and I’m back in the saddle. This recipe I found on (you guessed it) Pinterest and it intrigued me especially since our local grocery store had quite the deal on fresh raspberries. The combination of lemon and raspberries is killer in my estimation and that made the choice even easier. So here is my recipe rating for a lemon raspberry loaf cake and lessons I learned while making it.

IMG_0135Recipe Rating – I’m conflicted so I will give it a range of B+ to A+. I know it’s a strange rating but I had to make this twice in order to get it right. The reason for the range is that I am just not sure whether the issue is how the recipe was written or the the challenges related to baking in high altitude. I will explain in my lessons learned.

Lesson Learned 1 – The flavor of this cake is awesome! The loaf fell in on me the first time I made it but I was determined to perfect the recipe because of the flavor. The cake is super delicious and I’m not kidding. If you love the flavors of raspberries and lemon you have to try this one. It is to die for!

The first try produced a caved in cake...

The first try produced a caved in cake…

Lesson Learned 2 – Cooking with raspberries (and blueberries for that matter) is tricky: I’m not sure whether this is a high altitude or a berry thing but with this recipe (and also with my lemon blueberry pound cake recipe), when I used the amount of berries called for in the recipe my cake either became a mushy mess or sunk in in the middle. Both times I had to reduce the amount of berries in order for the cake to turn out perfectly. Both types of berries tend to get wetter and mushier when you bake them so I am thinking that the proportion of berry to batter is really important in order for the cake to hold its shape and not cave in. If any of my readers have any insights on this, I would certainly appreciate it. The first time I made this cake I used one cup of raspberries as called for in the recipe and the cake fell apart in the middle. The second time I used 3/4 cup and the cake did not cave in. Hmmm……

Lesson Learned 3 – Adding some additional flour: When I use box mixes (which has become less and less these days) I always add two tablespoons of flour to adjust the mixture for high altitude. I did the same for this recipe and I think that along with adding slightly less raspberries prevented the cake from falling in.

Lightly flour the raspberries to prevent them from all falling to the bottom

Lightly flour the raspberries to prevent them from all falling to the bottom

Lesson Learned 4 – Flouring the raspberries: Shame on the original recipe. It did not tell you that you have to slightly flour fresh raspberries in order for them to evenly distribute themselves in a batter. If you don’t they’ll all sink to the bottom. If you use frozen raspberries you don’t need to flour them, but it is a must with fresh berries. This was the only flaw in this recipe but the flavor of the cake more than made up for it.

Lesson Learned 5 – Adjusting batter for the size of the loaf pan: Maybe part of my problem was that I used my 8×4 loaf pan when the original recipe called for using a 9×5 pan. I googled the adjustments and it was suggested that the 8×4 pan only have 4 cups of batter put into it a opposed to 6 cups of batter for a 9×5 pan. This recipe makes 4 cups of batter so I’m not sure the amount of the batter was an issue in this case. I definitely had to bake the loaf longer, an additional 15 minutes to be exact. The additional baking time did not hurt it and produced a nicely browned top.

IMG_0153Lesson Learned 6 – The wonder of lemon zest: Zest is one of the best ways to add flavor to a recipe. Lemon zest happens to be my favorite. Not only does it produce a rich lemony flavor but also a great lemony smell. Just make sure you are careful not to zest the lemon down to the white part, the pith, as that will give you a sour zest. To avoid that just move your zester two or three times over an area of the rind and then move on to another yellow part of the rind. Continue until you zest the entire lemon. In this recipe lemon zest provides flavor not only to the cake but to the glaze as well.

Lesson Learned 7 – The technique of folding: This recipe calls for folding in the greek yogurt and then gently folding in the raspberries. Folding is a technique whereby you use a large spoon (I use a wooden spoon) and gently turn over the batter from the bottom to the top, continuing that process in a circular motion until you’ve combined the ingredient(s) you need to fold into the batter. The purpose of folding is to gently combine ingredients and in some cases not to deflate the air out of an ingredient (such as a whipped cream or meringue). If you are not gentle with the raspberries they will break apart and you will wind up having a pink cake versus a white cake dotted with raspberries. Be careful at this point not to break up the raspberries but make sure they are evenly distributed throughout the batter before pouring the batter into the baking pan.

Even though this recipe took me two tries I would highly recommend it. The combination of lemons and raspberries produces a fabulous flavor and the use of lemon zest in the glaze punctuates it. Just beware it may not turn out right the first time and be comfortable with that.  I guarantee you, the flavor is worth getting it right. Let me know how yours turned out and any adjustments you needed to make to get it right. Enjoy!

Lemon Raspberry Loaf Cake

  • Servings: 8-10
  • Difficulty: Easy
  • Print

INGREDIENTS:

IMG_0225Loaf Cake:

1 1/2 cup flour (plus two heaping TBS. for high altitude)

1 1/2 tsp. baking powder (reduce to 1 tsp for high altitude)

1/2 tsp. salt

1 1/2 cup sugar (reduce by 1/8 cup for high altitude)

1 1/2 sticks of butter, softened

2 eggs, room temperature

3 TBS. lemon juice (you will need 2-3 lemons for this recipe depending on size)

1 heaping TBS. lemon rind

1/2 cup greek yogurt

3/4 cup fresh raspberries

Glaze:

1 1/2 cup powdered sugar, sifted

3 TBS. lemon juice

1 tsp. lemon rind

A splash of heavy cream (you can use milk as a substitute)

DIRECTIONS:

Preheat the oven to 350. Grease an 8×4 loaf pan and set aside.

In a bowl combine the flour, baking powder and salt. Set aside.

Using an electric mixer, combine the butter and sugar for at least 3-4 minutes. Add eggs one at a time and beat until fully incorporated. Mix in lemon rind and lemon juice.

By hand, mix in the dry ingredients (do not use the electric mixer for this). Once combined, fold in the greek yogurt. After that, gently fold in the raspberries.

Bake in the oven for 55-60 minutes or until a toothpick inserted in the center of the cake comes out clean. Let cake stand in pan for 15 minutes. Remove from pan and cool completely.

Combine powdered sugar, lemon rind, lemon juice, and heavy cream to make the glaze. Drizzle on top of cooled cake.

IMG_0237


Lemon Raspberry Loaf Cake

Lemon Raspberry Loaf Cake


The Saga of the Lemon Blueberry Pound Cake…

Let me start off by saying that even the most proficient of cooks isn’t always successful when trying new recipes. In this blog I prefer to post my recipe successes but there have been failures along the way, more than I can count I assure you. So I thought I’d dedicate this blog to a recent failure that eventually turned to triumph.

IMG_9293The nice thing about honing your skills as a cook is that your successes come more frequently. But every once in a while an attempt at making something is botched and you recognize it’s never good to get too smug about your culinary skills. Just this past week I botched a recipe – BIG TIME – and thought I would share that escapade with you. I call it the saga of the lemon pound cake.

It all began simply enough with my usual quest for that one new recipe I would make this week. Flipping through the various posts on (you guessed it) Pinterest I came across a recipe for lemon blueberry pound cake. I already have a recipe on this site for a lemon blueberry yogurt loaf  but thought I’d try this one as I had never made a pound cake before. The recipe seemed simple enough, the only difference being that it was written to make two loafs instead of one. Great, I thought, I can have one loaf for home and give one as a gift to an unsuspecting neighbor. I liked that idea. I had to purchase some disposable foil pans as I don’t have two professional grade loaf pans. No biggie, they’re certainly cheap enough. This should be a no brainer. WRONG!!!

The blueberry disaster...

The blueberry disaster…

OMG – that’s all I can say. The end result was awful on so many levels. My husband suggested that I take a picture of the disaster and post it in the blog for all to see. So here it is to the left – can you even believe it? It looks like a blueberry explosion! Of course in the picture the cake is upside down, but right side up it was no prize either. The cake never fully cooked, the blueberries took over the entire cake and to add insult to injury they all congregated at the bottom.  On top the cake had risen onto itself and created what I call a lap over effect on the edges as can be seen in the picture below . I’m not sure what causes that but I never get that effect when I use my good loaf pan. It must have something to do with the evenness of the temperature during the cooking process and the quality of the pan.

The distorted top with the cake folding over itself on the top and bottom edges

The distorted top with the cake folding over itself on the top and bottom edges

Needless to say, it was a total disaster. I haven’t had one this bad in a long time – just enough to keep me from getting too smug regarding my baking skills. I wound up having the throw both cakes away – they just were not salvageable. So why, you might ask, would I even try this recipe again? To be honest, although it looked bad and did not cook all the way through the part that did cook actually tasted pretty good. So I thought this actually could be a keeper recipe but it definitely needed an overhaul. I guess I wanted to see if I could fix what obviously was a broken mess. So the next day I put my delicate baking ego on the line and tried my hand at making the pound cake once again.

The second time I was successful but it took some manipulation of the recipe to achieve what was intended. In deference to the author of the recipe I will not mention the site where I found it. The recipe as originally written was horrific and, regardless of altitude considerations, I find it hard to believe that the proportions as written are correct (especially where the blueberries were concerned). What I decided to do was adjust the proportions to make one pound cake instead of two. I also significantly adjusted the amount of blueberries used in the loaf and the end result is I think what the author had intended when writing the recipe. So here are my lessons learned and recipe rating.

Recipe Rating: I have two ratings for this recipe, one for the original version and one for the version I created. The original version gets an F+. Although the overall flavor combinations were very good (meriting the + in the grade) there were far too many blueberries called for in the recipe. Blueberries expand and burst during the cooking process and the original amount created a blueberry nightmare (as can be seen in the picture above). My version created a cake that was nicely integrated with blueberries but was still primarily a cake and not a blueberry compote. My version gets an A.

Lesson Learned 1 – You only get what you pay for: My advice to anyone wanting to be successful in the kitchen is to use good kitchen equipment. From pots and pans to knives to baking sheets and loaf pans, I can tell you from experience you only get what you pay for. Professional grade equipment consistently produces professional results. My professional grade loaf pan cooks cake batter evenly, does not produce a batter layover effect and generally cooks in the allotted time or slightly less than the allotted time. I don’t have to use sprays or worry about greasing and flouring the pan, the cake always comes out cleanly after it has rested for 15 minutes. Do yourself a favor and invest in good kitchen equipment, it’s worth it!

IMG_9475Lesson Learned 2 – How to bake with blueberries: As I mentioned earlier, the original recipe for this pound cake called for way too many blueberries – 3 cups for two loafs to be exact. When I was measuring it I thought it was a lot, but I know that baking requires precision in order to be successful and so I followed the recipe as written. Big mistake. The cakes became 95% blueberries and 5% cake – the blueberries just took over.

And even though I dusted the blueberries with flour to keep them from sinking to the bottom of the cake, they still did. I think the amount of blueberries contributed to that. There simply was too many of them. Just keep in mind when baking with any fruit like blueberries, you need to coat them with flour so they evenly distribute themselves and don’t all sink the the bottom of the cake. I also read that if you use frozen blueberries (which in this case I did not) and incorporate them at the very end right out of the freezer they will evenly distribute as well without the use of flour. I’ll have to try that sometime and see if it works.

In this case, the smaller amount of blueberries dusted with flour before incorporating them into the batter did the trick. In my second attempt, the blueberries evenly distributed in the pound cake. The last tip with baking with blueberries or other fruit is to make sure you add them at the very end, right before putting the batter in the pan. Fold them in gently so that they don’t burst and create a blue cake. If you follow these simple tips you will be just fine.

Lesson Learned 3 – Creaming the butter and sugar – a common baking mistake: Most people do not cream the butter and sugar when baking, they simple combine them. Creaming takes a little more time than you would think and the end result is a mixture that is light in color and very soft and fluffy. Doing creaming correctly allows for all the added ingredients to incorporate themselves more completely and also creates a fluffier, moister cake. So next time spend an extra few minutes and do the creaming process correctly.

Creaming butter and sugar should produce this consistency...

Creaming butter and sugar should produce this consistency…

Lesson Learned 4 – The glaze: I’m not a big fan of glazes. For some reason they just don’t do it for me. But I like the glaze in this recipe. It complimented the cake and did not overpower it. I also felt the use of lemon zest as well as lemon juice made the flavor richer.

Even though the initial attempt to make this cake was a disaster, the second version was a big hit. After a few days there was absolutely none left. So try my version and see what you think. You can always double it to make two loaves, but be I would be careful about doubling the amount of blueberries. I would err on the side of caution and use less instead of more. You certainly don’t want to be left with a blueberry explosion!

Lemon Blueberry Pound Cake

  • Servings: 10-12
  • Difficulty: Easy
  • Print

INGREDIENTS:IMG_9458

1/2 cup unsalted butter at room temperature

3/4 cup sugar

zest of half a lemon

1 extra large egg at room temperature

1/4 tsp. vanilla

1/3 cup buttermilk

3/4 cup fresh or frozen blueberries

1 1/4 cup flour + 1 tsp. to dust the blueberries

1 tsp. baking powder

1 tsp. salt

LEMON GLAZE:

1 1/2 cup powdered sugar

1 Tbs. fresh lemon juice

1 Tbs. lemon zest

1 Tbs. milk

1/4 tsp. vanilla

DIRECTIONS:

Preheat oven to 350 degrees. In a large bowl cream the butter, sugar and lemon zest. (3-5 minutes). Add egg and vanilla and beat an additional minute.

In a separate bowl whisk together all of the dry ingredients.  Add dry ingredients alternately with buttermilk to the butter mixture. Start and end with the dry ingredients and combine each addition thoroughly. Dust the blueberries with flour. Fold them into the batter until incorporated.

Grease and flour an 8 inch loaf pan if the pan is not non-stick. Pour in batter and smooth the top with a spatula.  Bake for 45 minutes or until a toothpick inserted in the center comes out clean (there may be some blueberry moisture on the toothpick). Let the loaf cool for 15 minutes and then remove it from the pan. Cool completely before adding the glaze.

To make the glaze: whisk all ingredients together until smooth.

Right Out Of The Oven

Right Out Of The Oven (notice no fold-overs)

Lemon Blueberry Pound Cake

Lemon Blueberry Pound Cake