Garlic and Rosemary Balsamic Roasted Pork Loin and Potatoes…

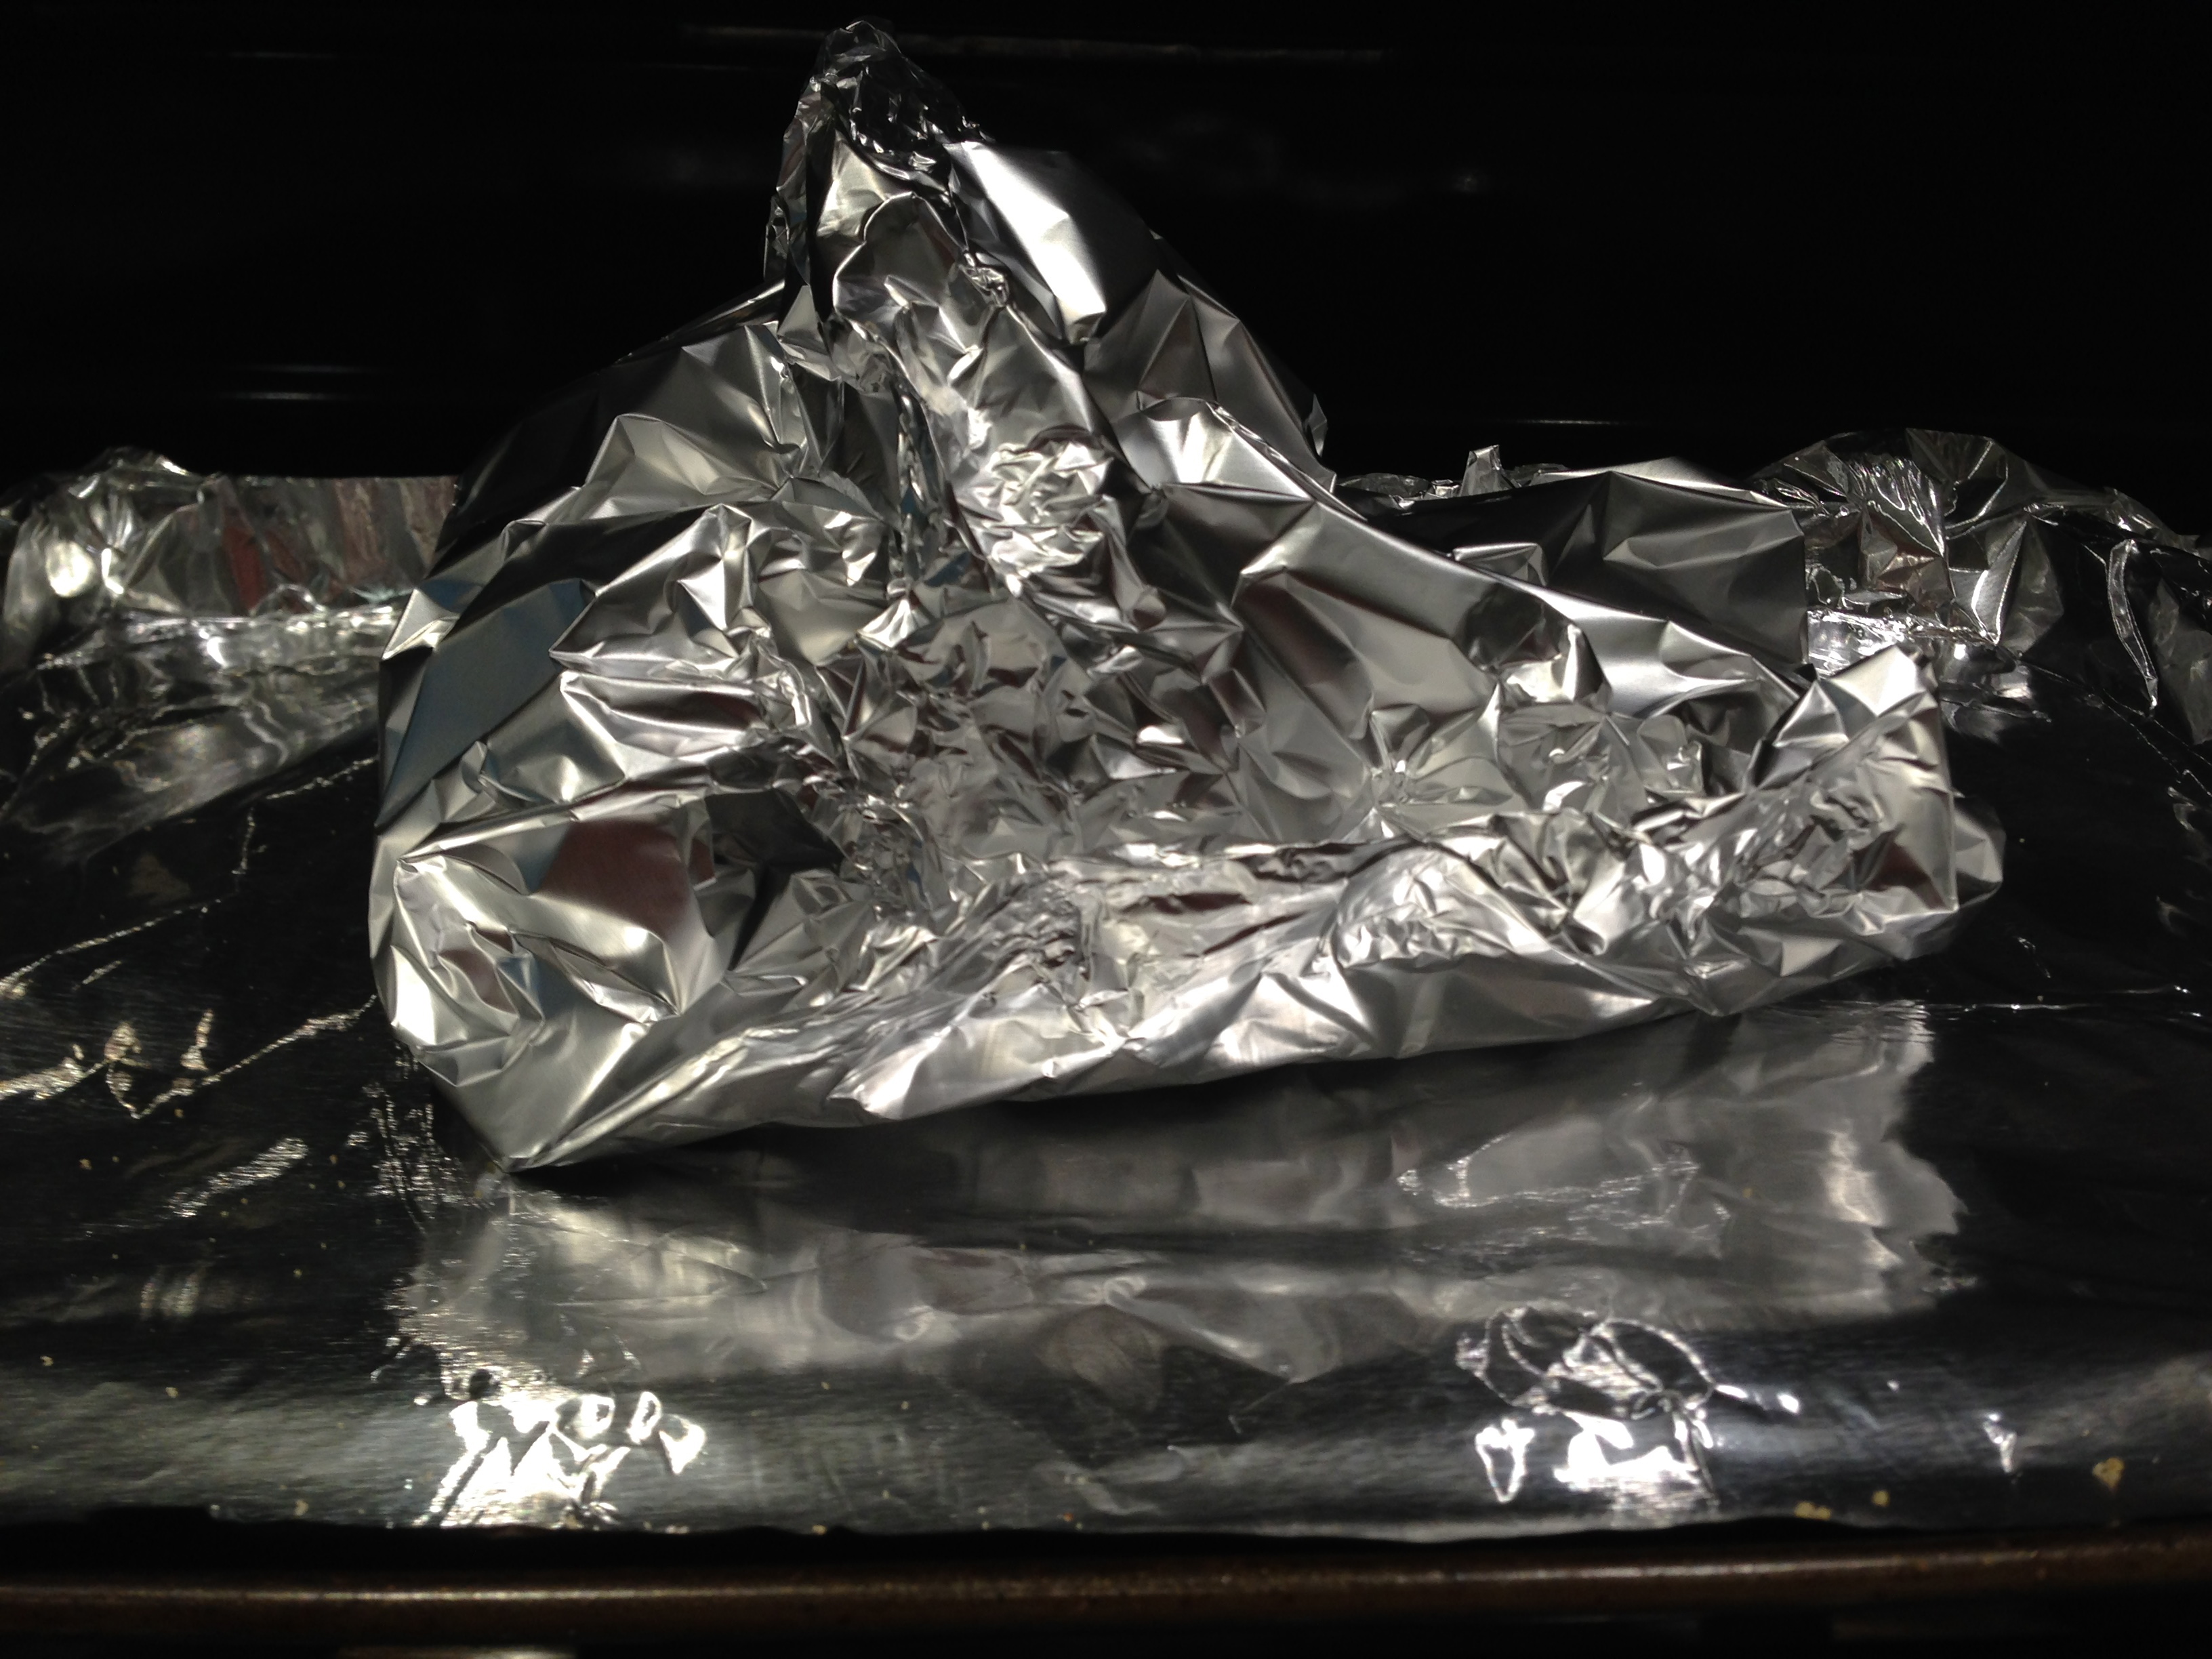
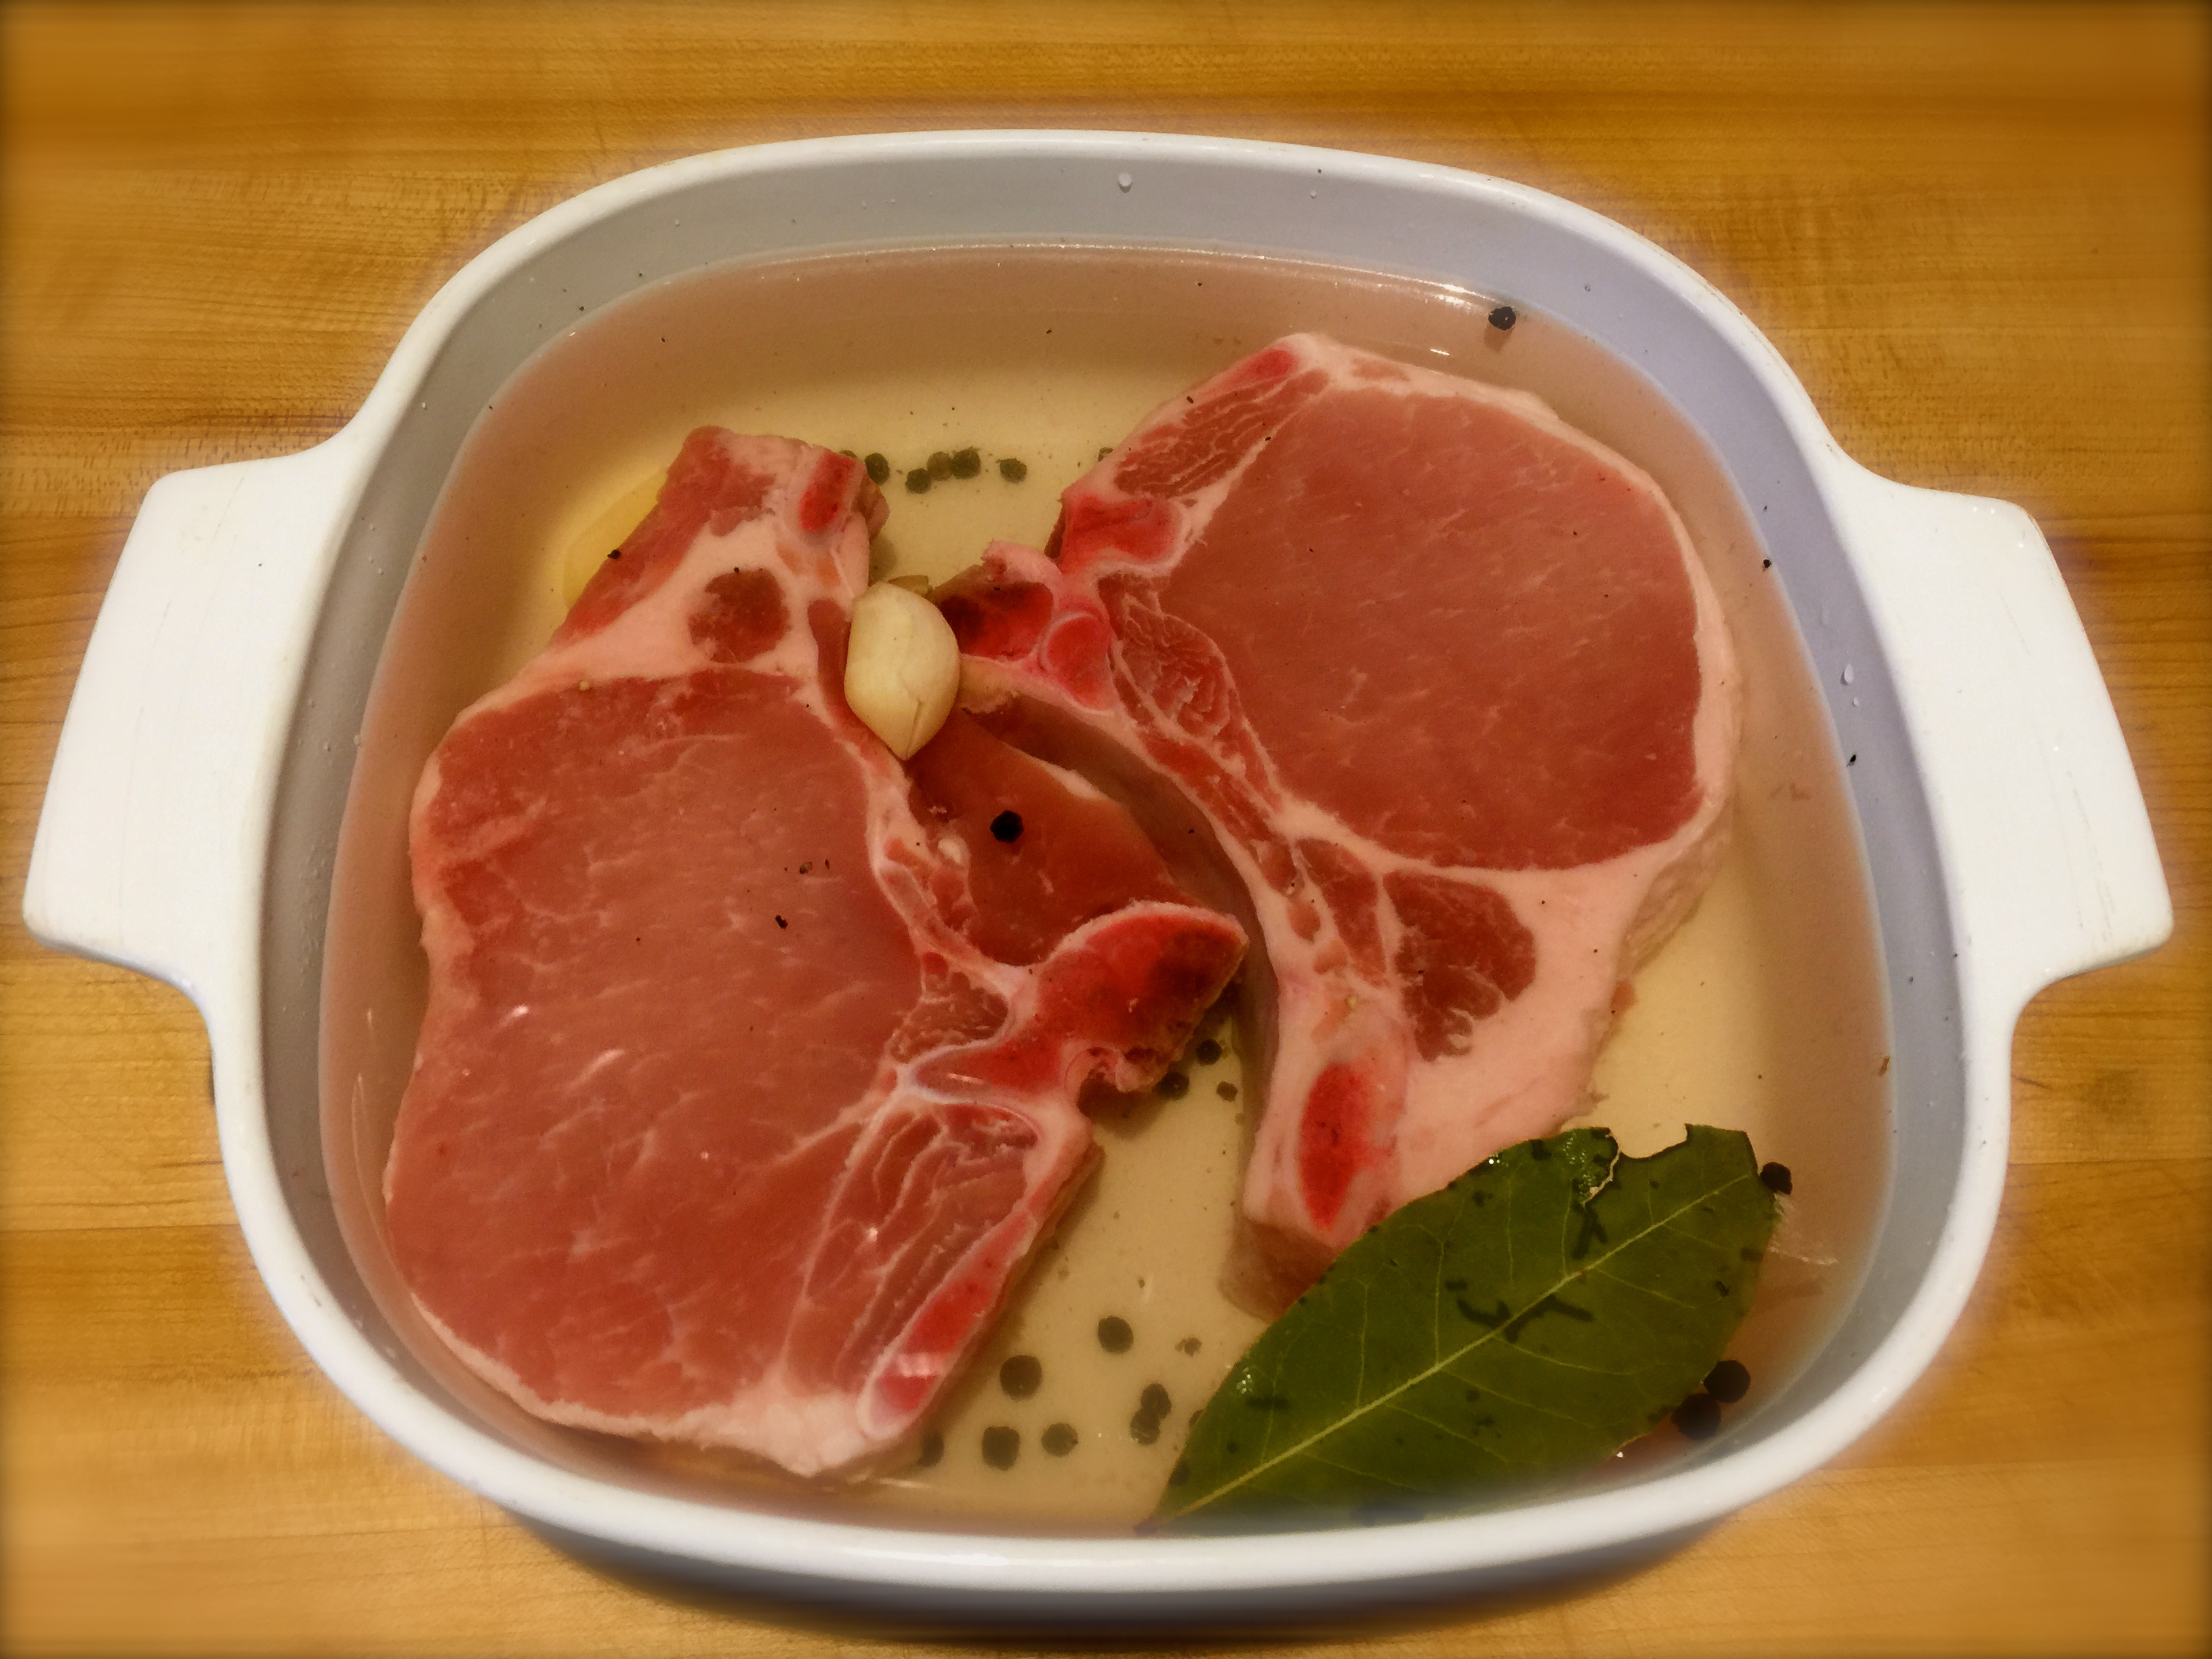
The one thing I really love about Fall is cranking up the oven again. I do a lot of grilling over the Summer and I love that too. But those smells in the house when something is roasting in the oven just can’t be beat. It makes a house a home.

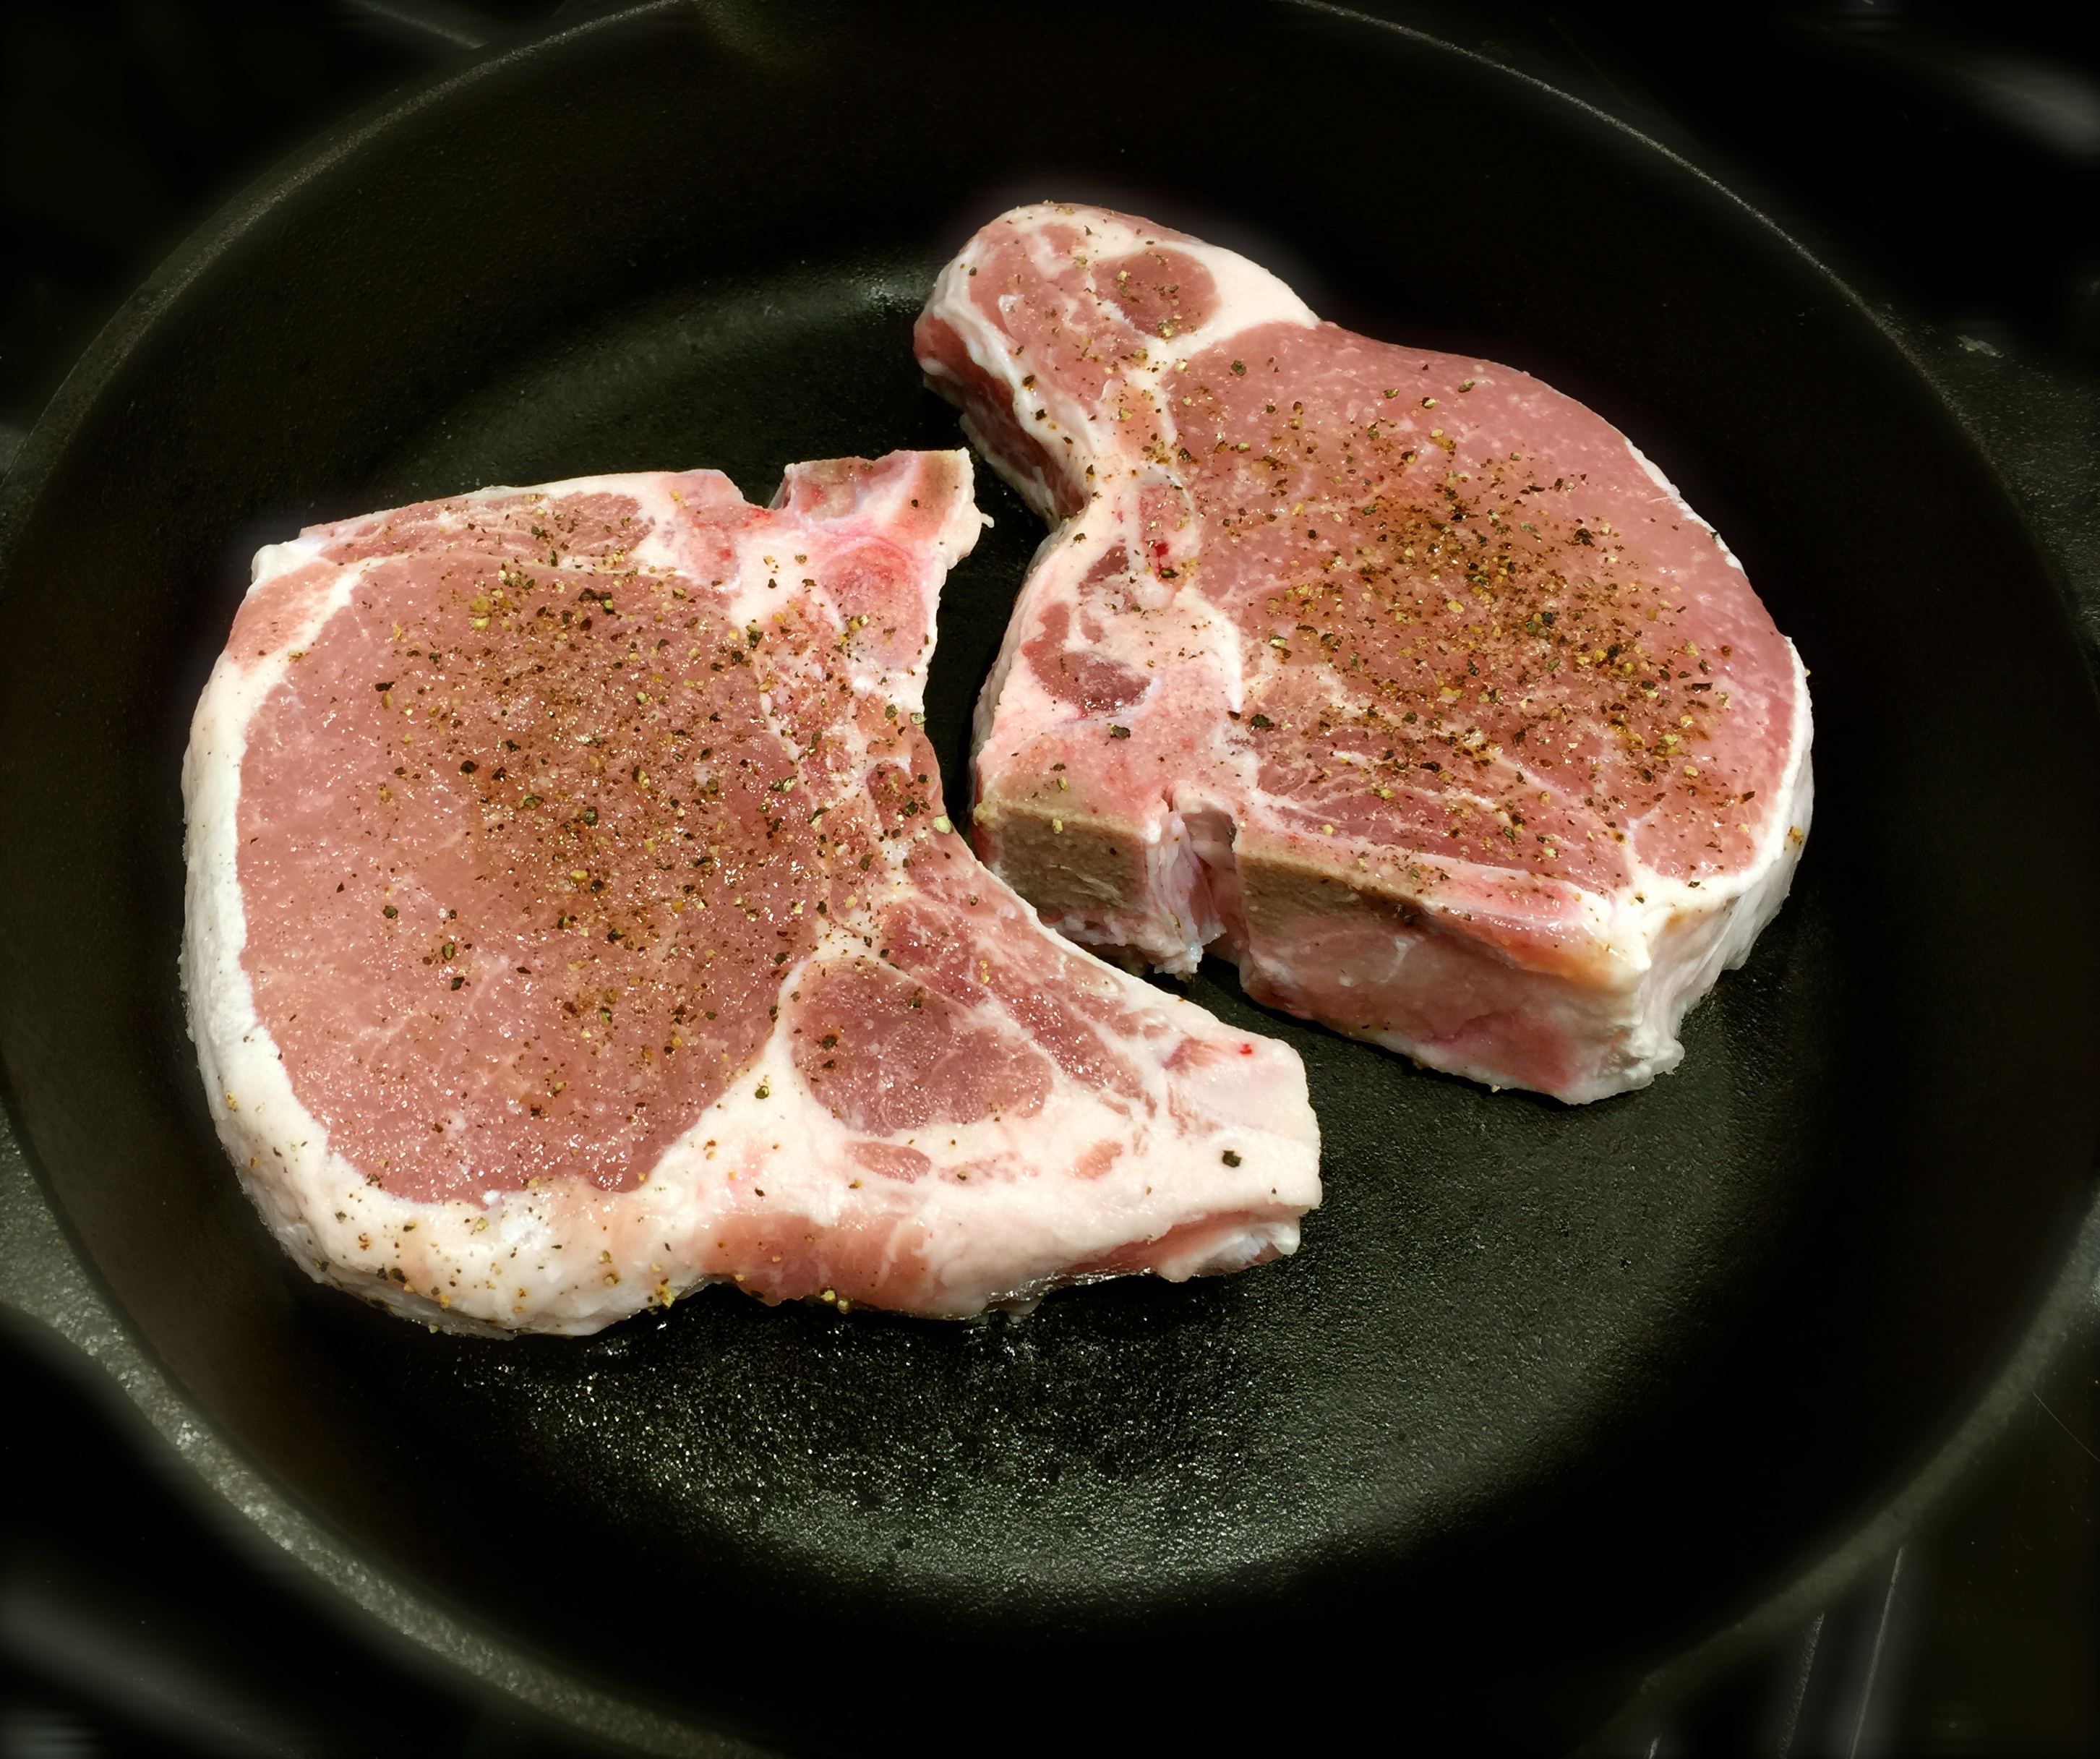
So I decided to crank up the oven the other day. I haven’t had pork in a while and I thought I’d try that. More often than not when I make a pork roast I use a pork loin. The meat is so tender and I perfected roasting it so that it’s cooked but not dried out. And if you want my secret for roasting a perfect pork loin every time just click on my blog’s tips and tricks post and you’ll never have a dry pork loin roast again.

But although pork loin is moist I find it always needs a little help in the flavor department. And whether you marinate it or use some sort of rub, that’s usually enough to up the flavor factor. And that’s exactly what this recipe does.

I also like this recipe because for all intents and purposes it is a one pot meal. You can also make your potatoes and carrots in the same roasting pan and I’ve always liked that convenience. You just have to follow a couple of tips in order to make sure they cook properly.

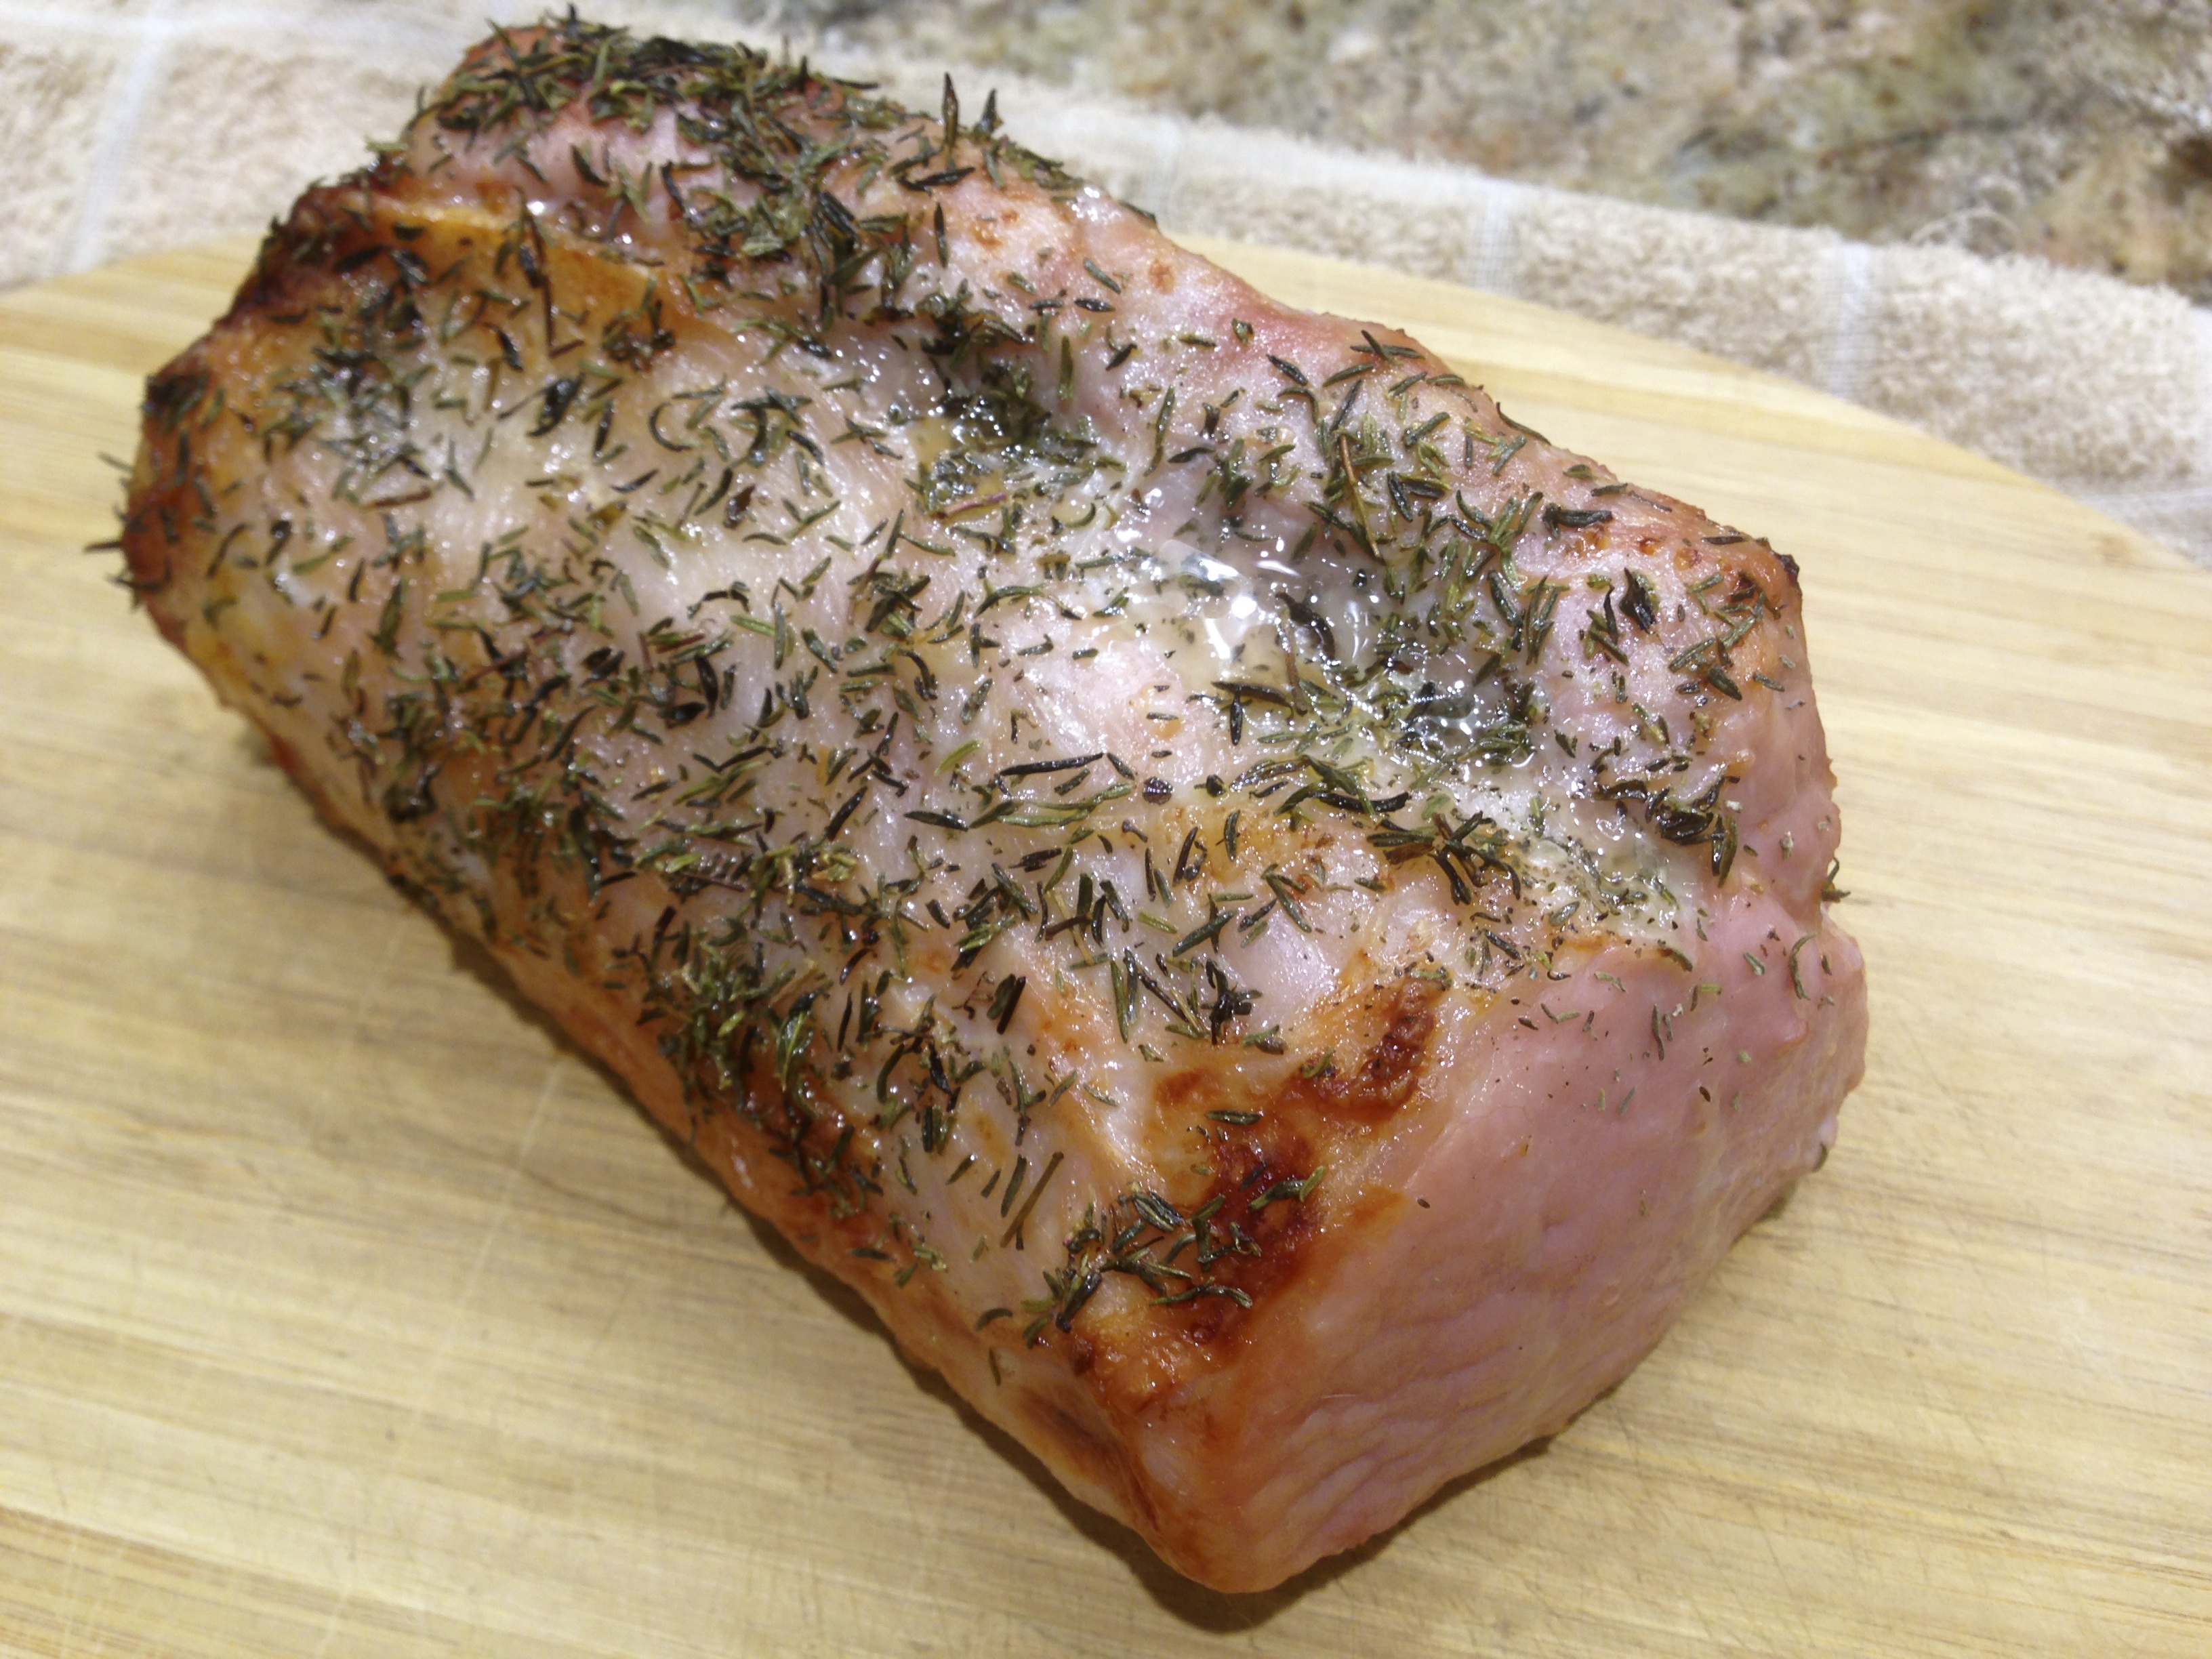
So let’s talk garlic and rosemary balsamic roasted pork loin and potatoes…

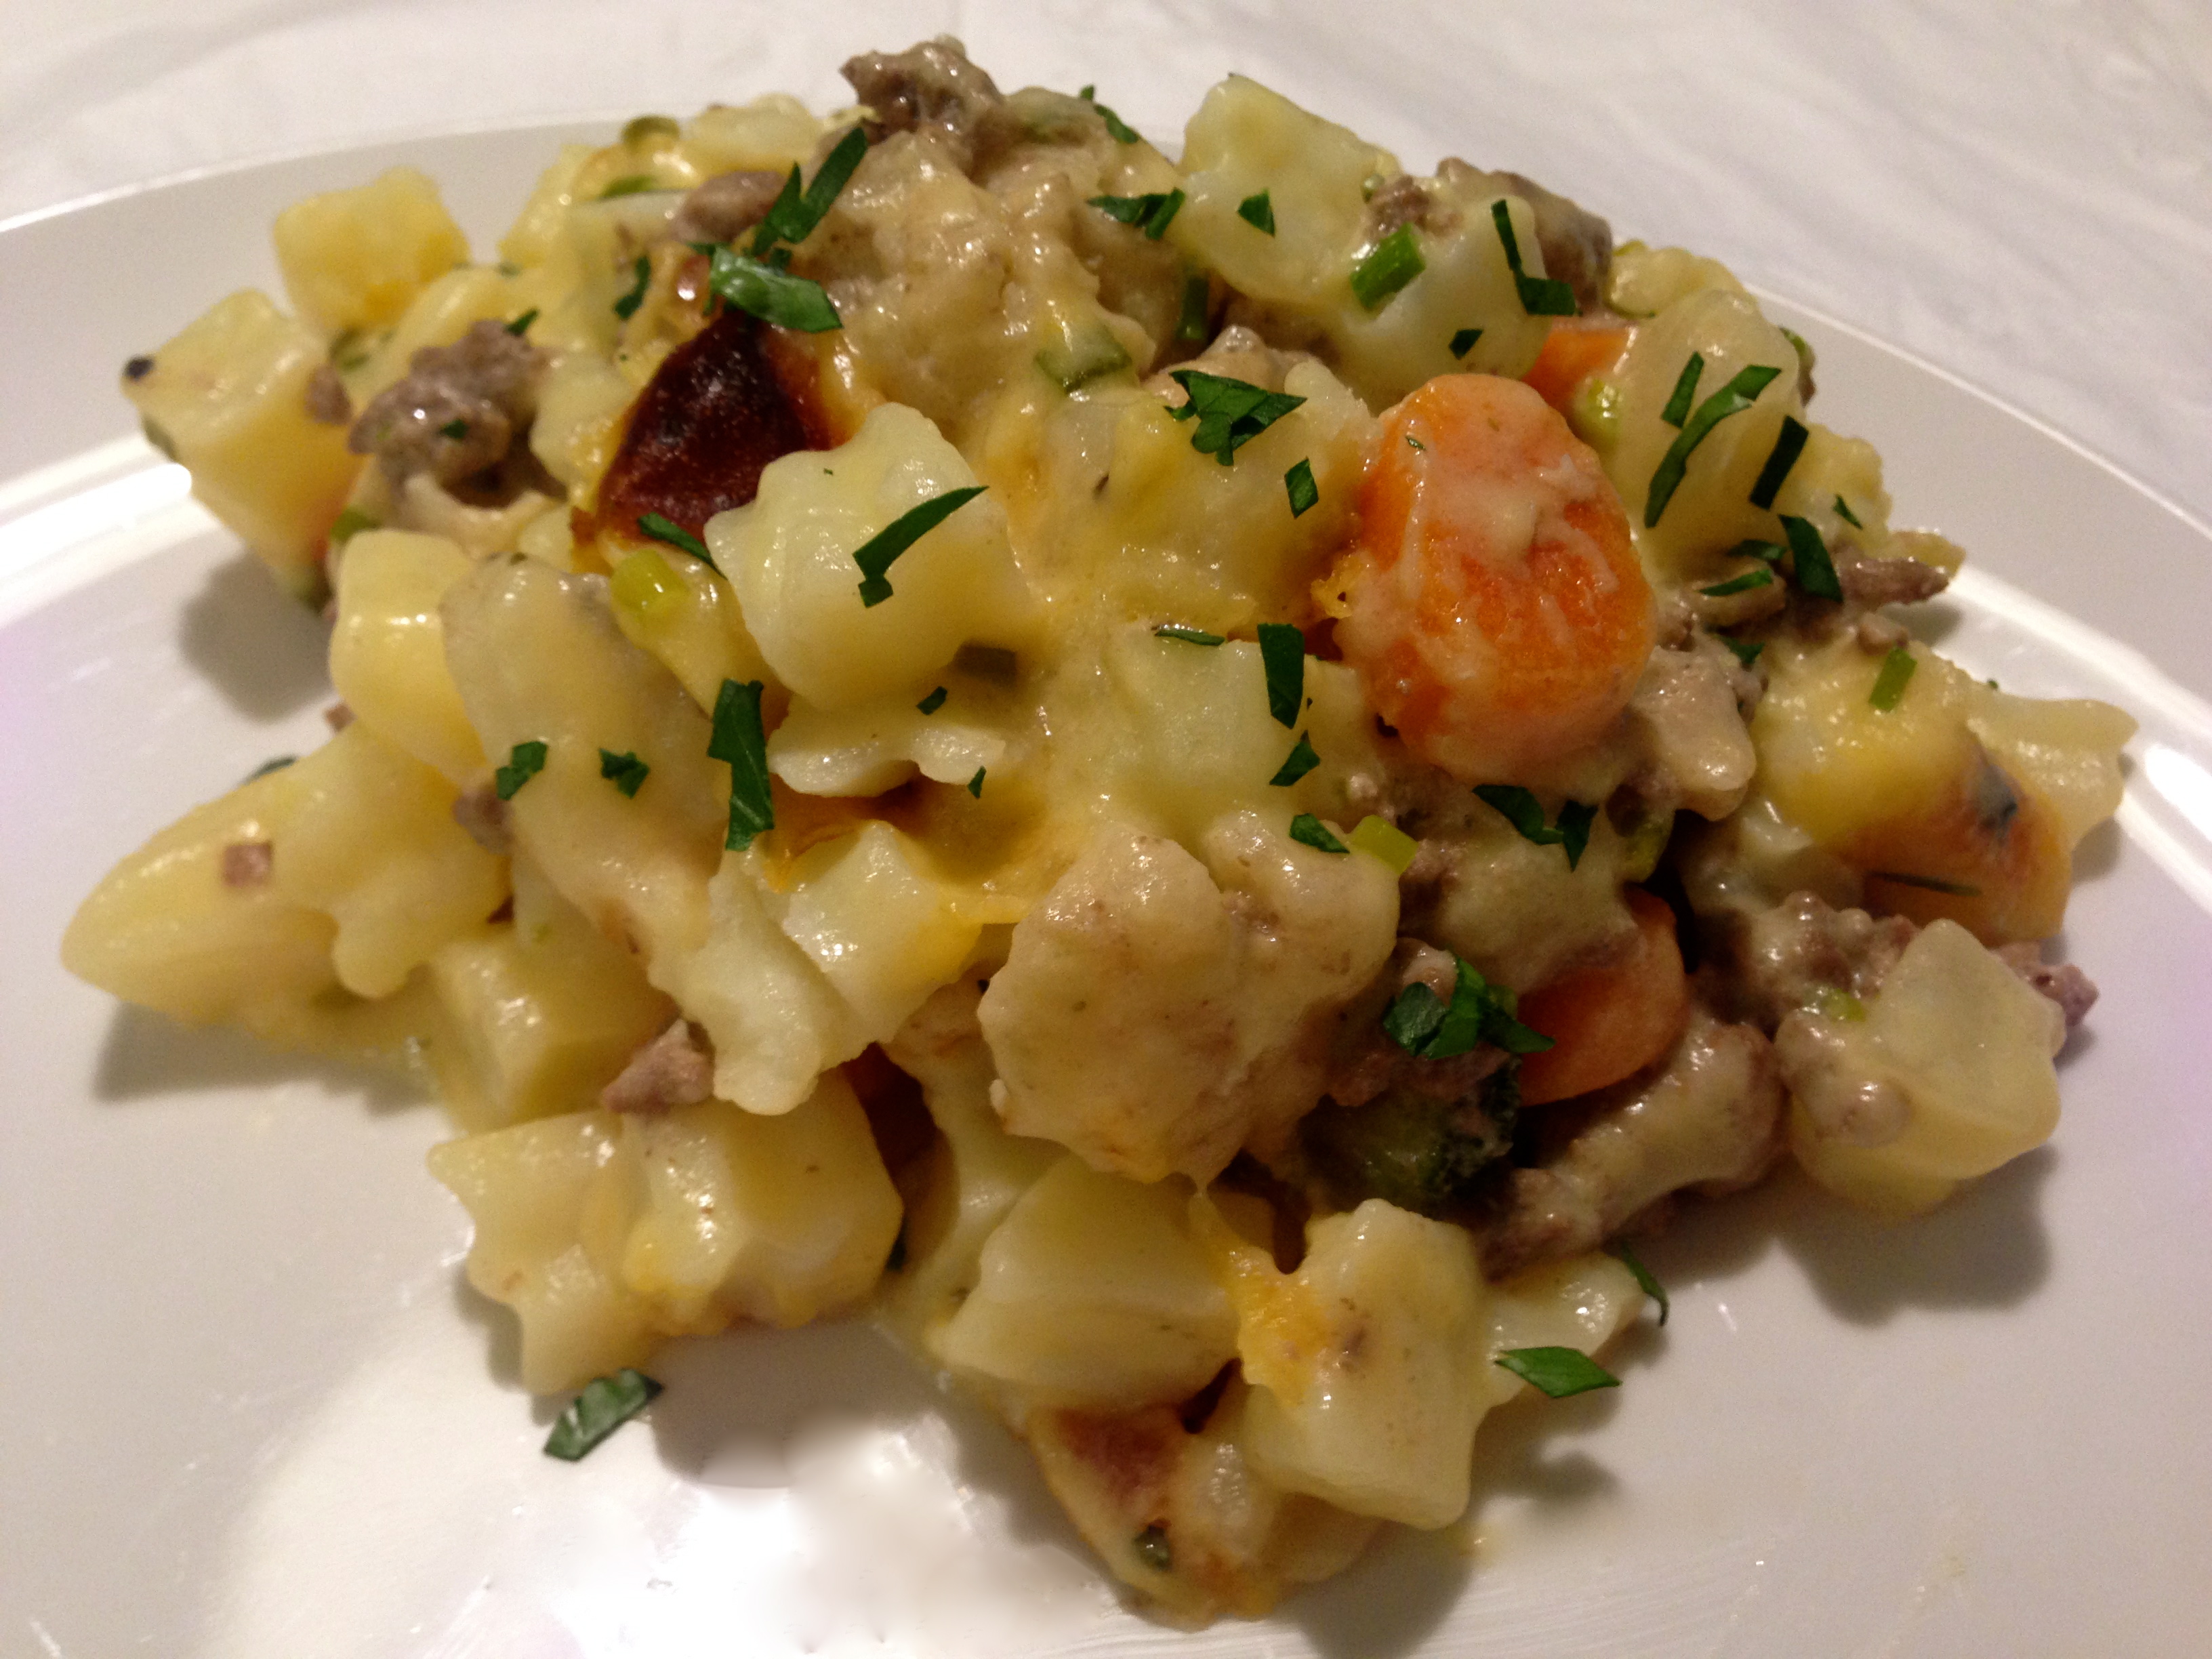
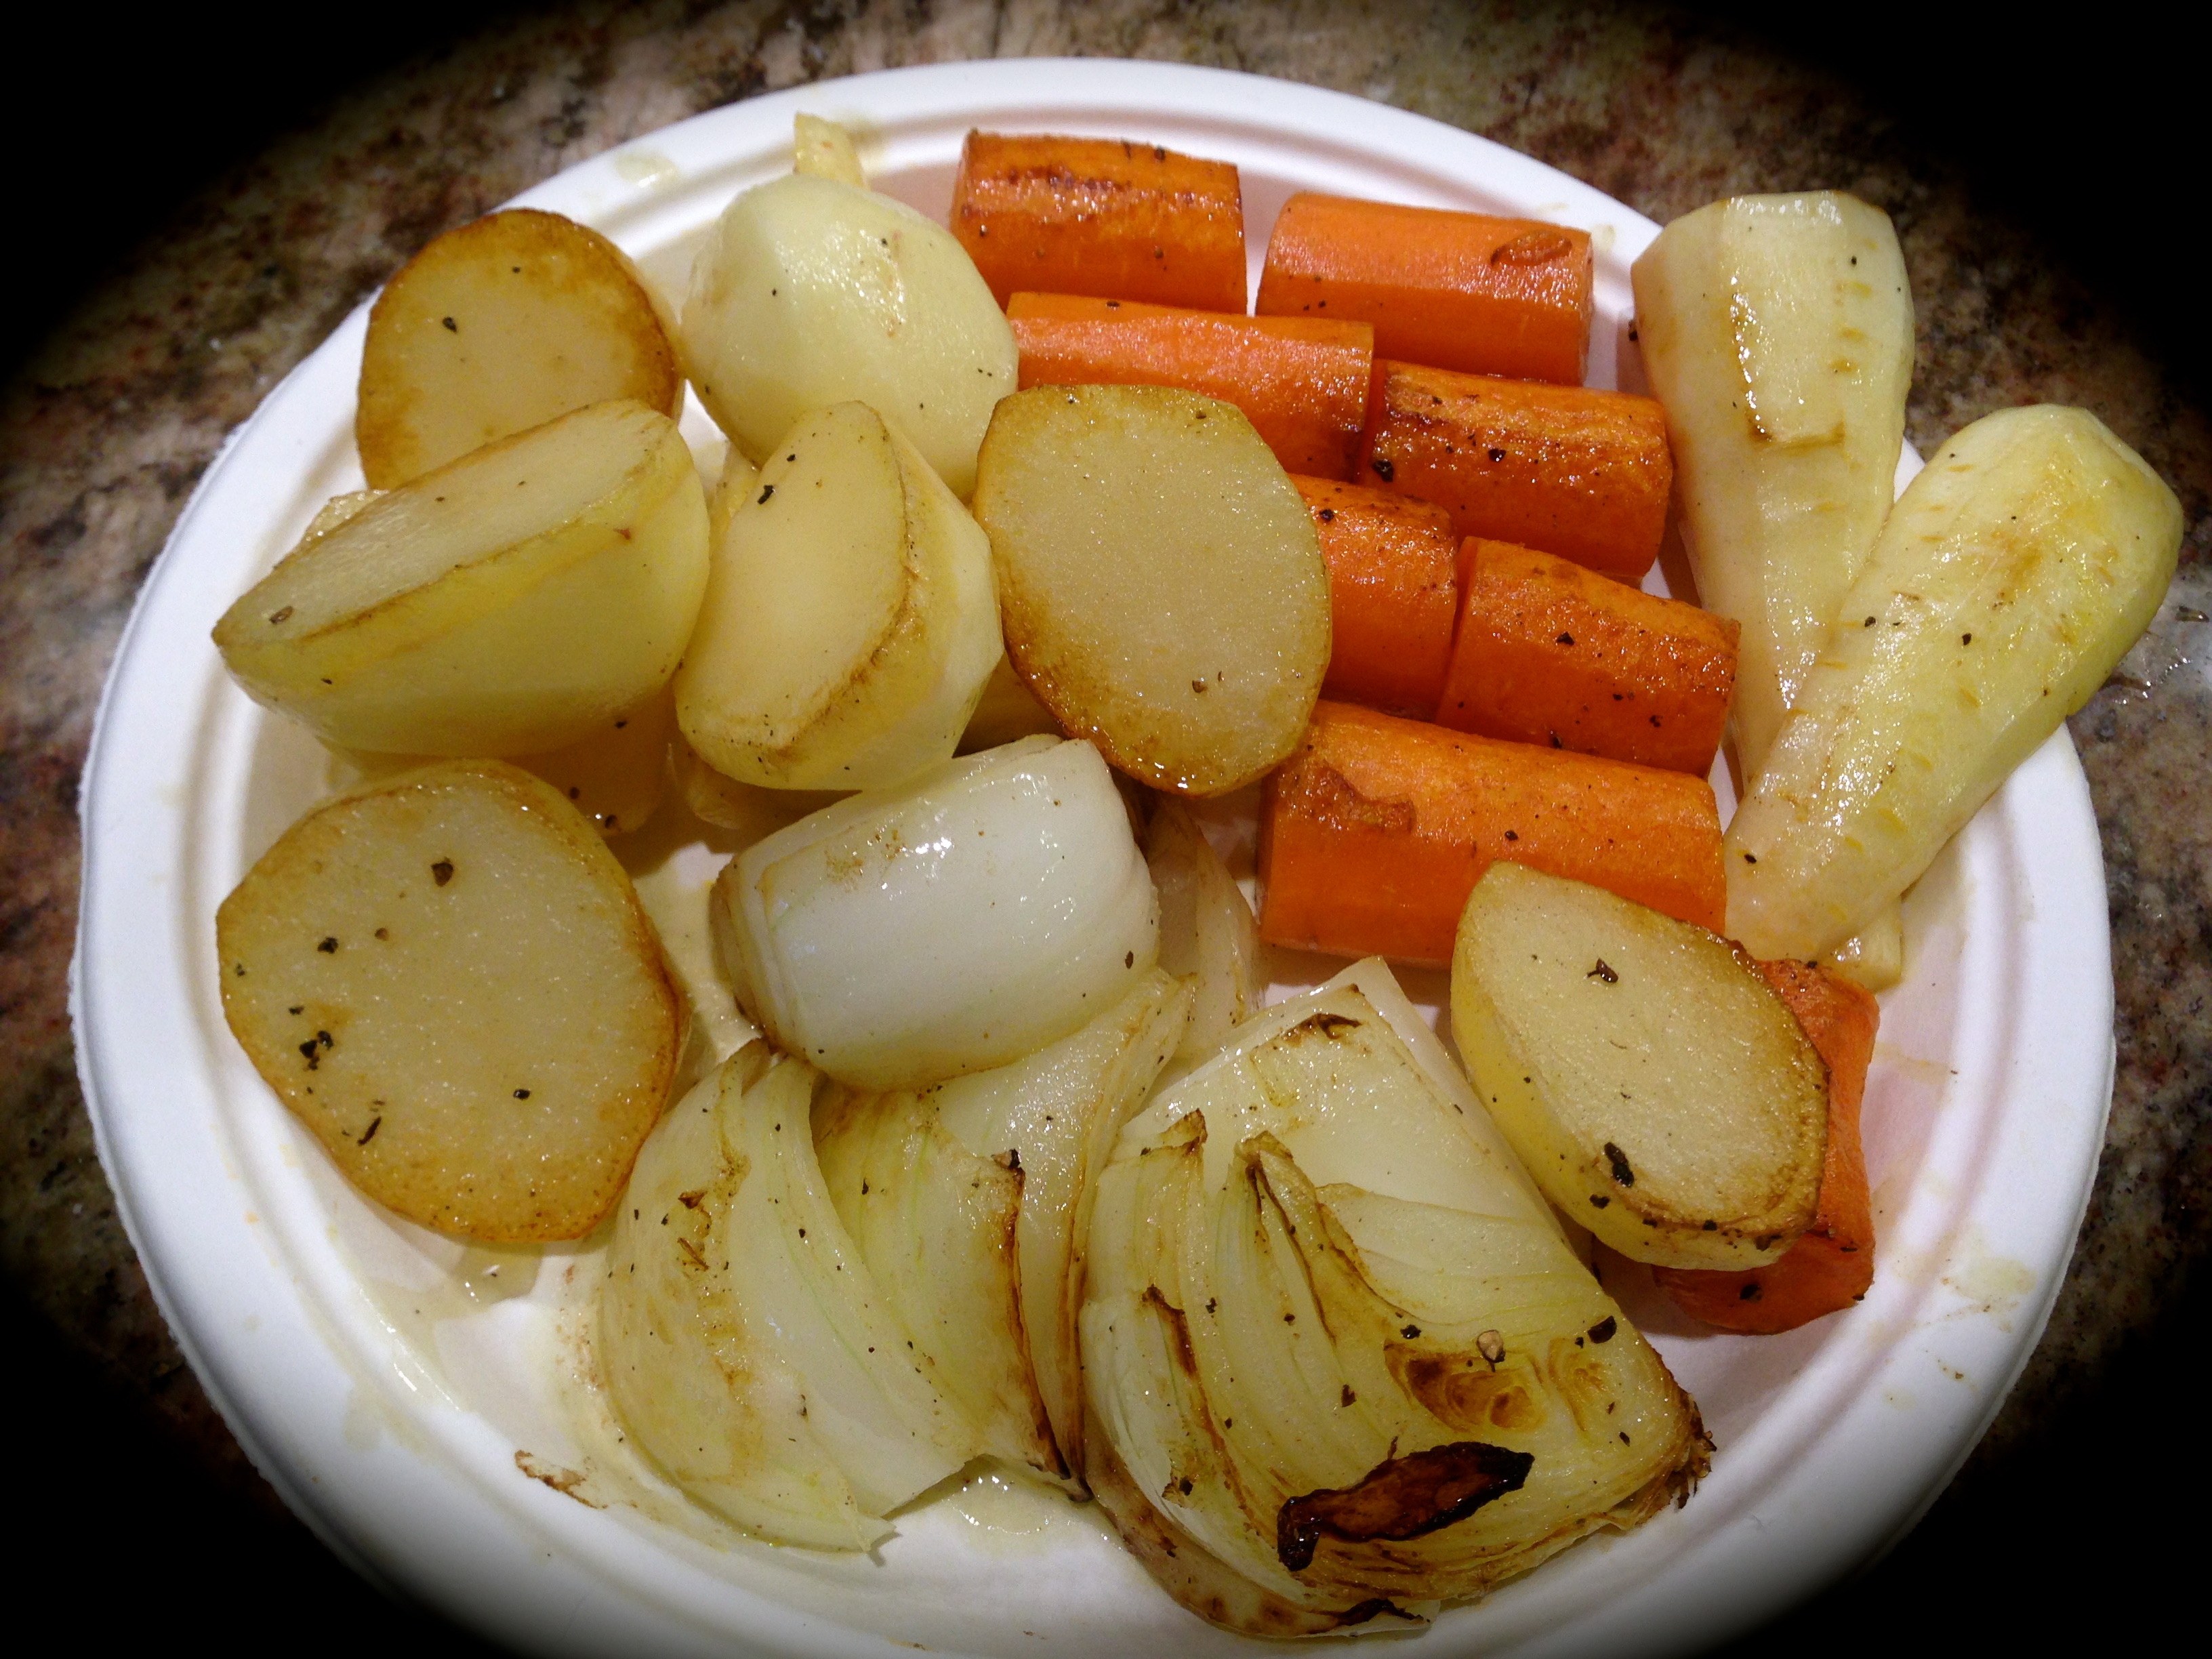
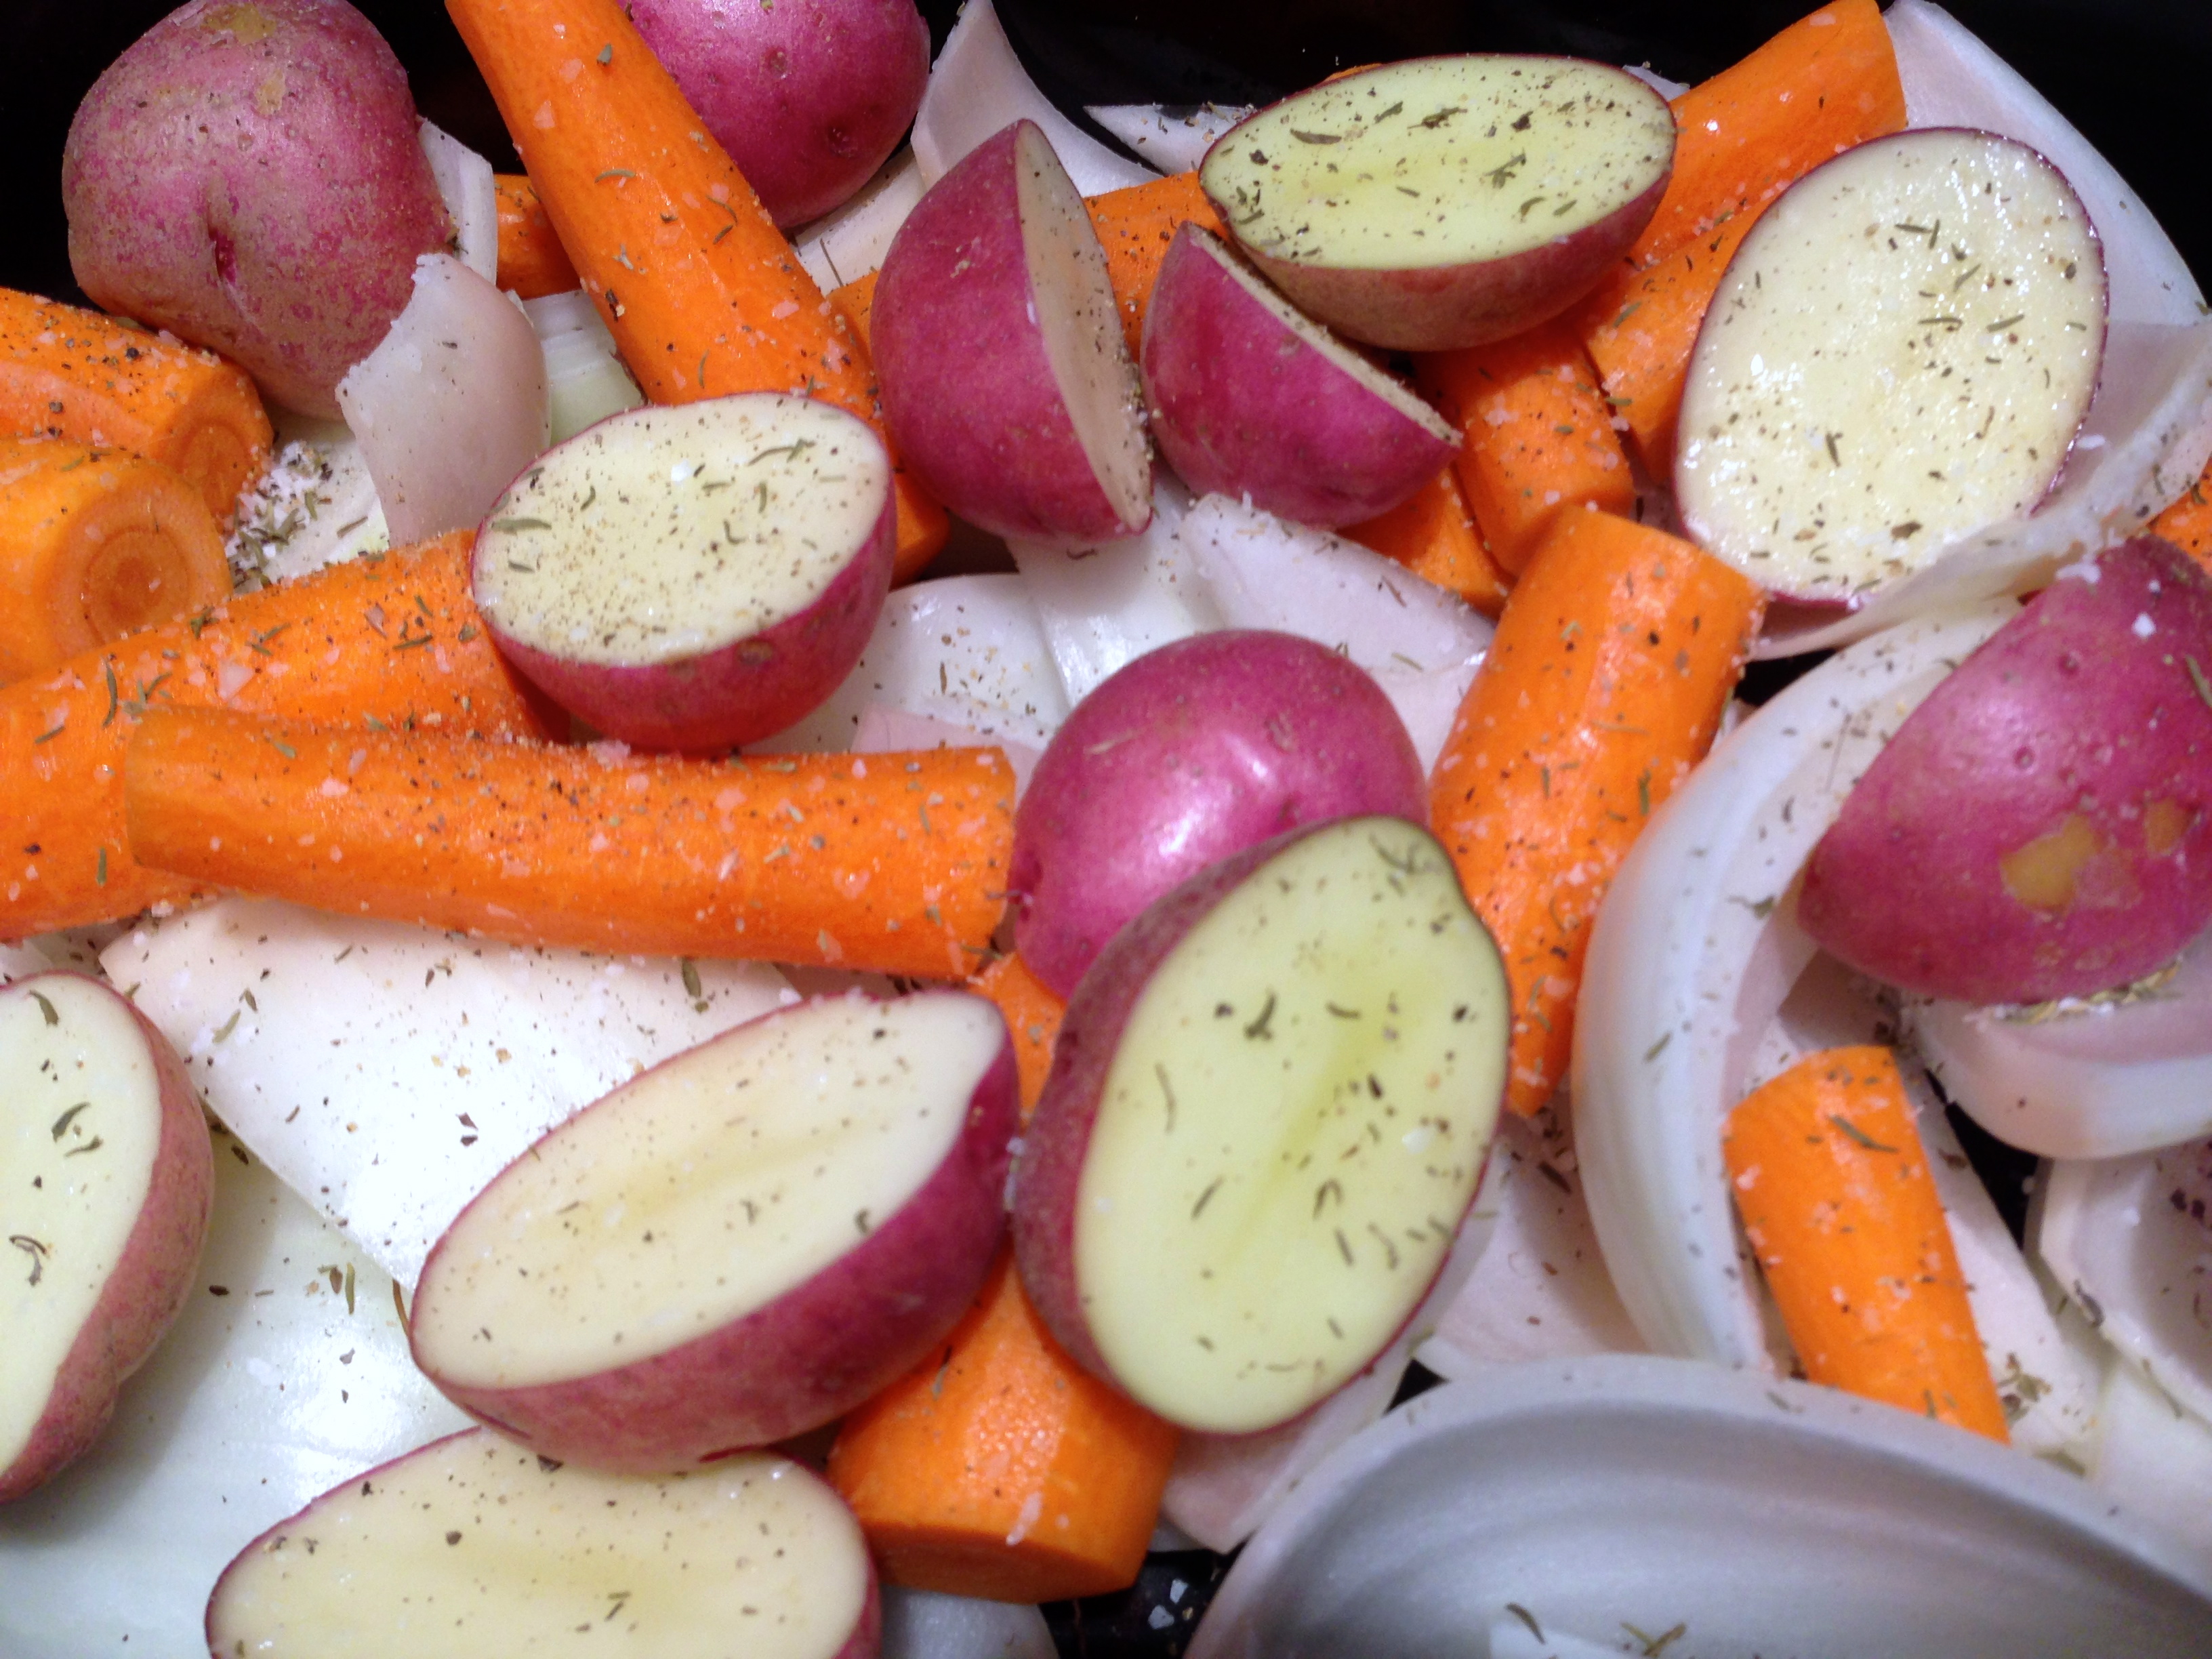
Lesson Learned 1: Slightly par boil your potatoes before roasting them: I don’t know about you but I’ve found that roasting potatoes can be tricky. I usually wind up with hard or semi hard potatoes that are not cooked through. In this recipe it is important to cut the potatoes as evenly as possible (mine were approximately one inch squares). Once I do that I put them in a pot with water, bring the water to a boil and boil the potatoes for about 5 minutes or just until they start to turn tender around the edges. Then I drain the potatoes and let me cool slightly in the strainer. I’ve found when I do this my potatoes come out perfectly when making this recipe. After I strain off the water I transfer them into a bowl so that I can coat them with the balsamic mixture before putting them in the roasting pan. It’s a little extra work, but definitely worth it.

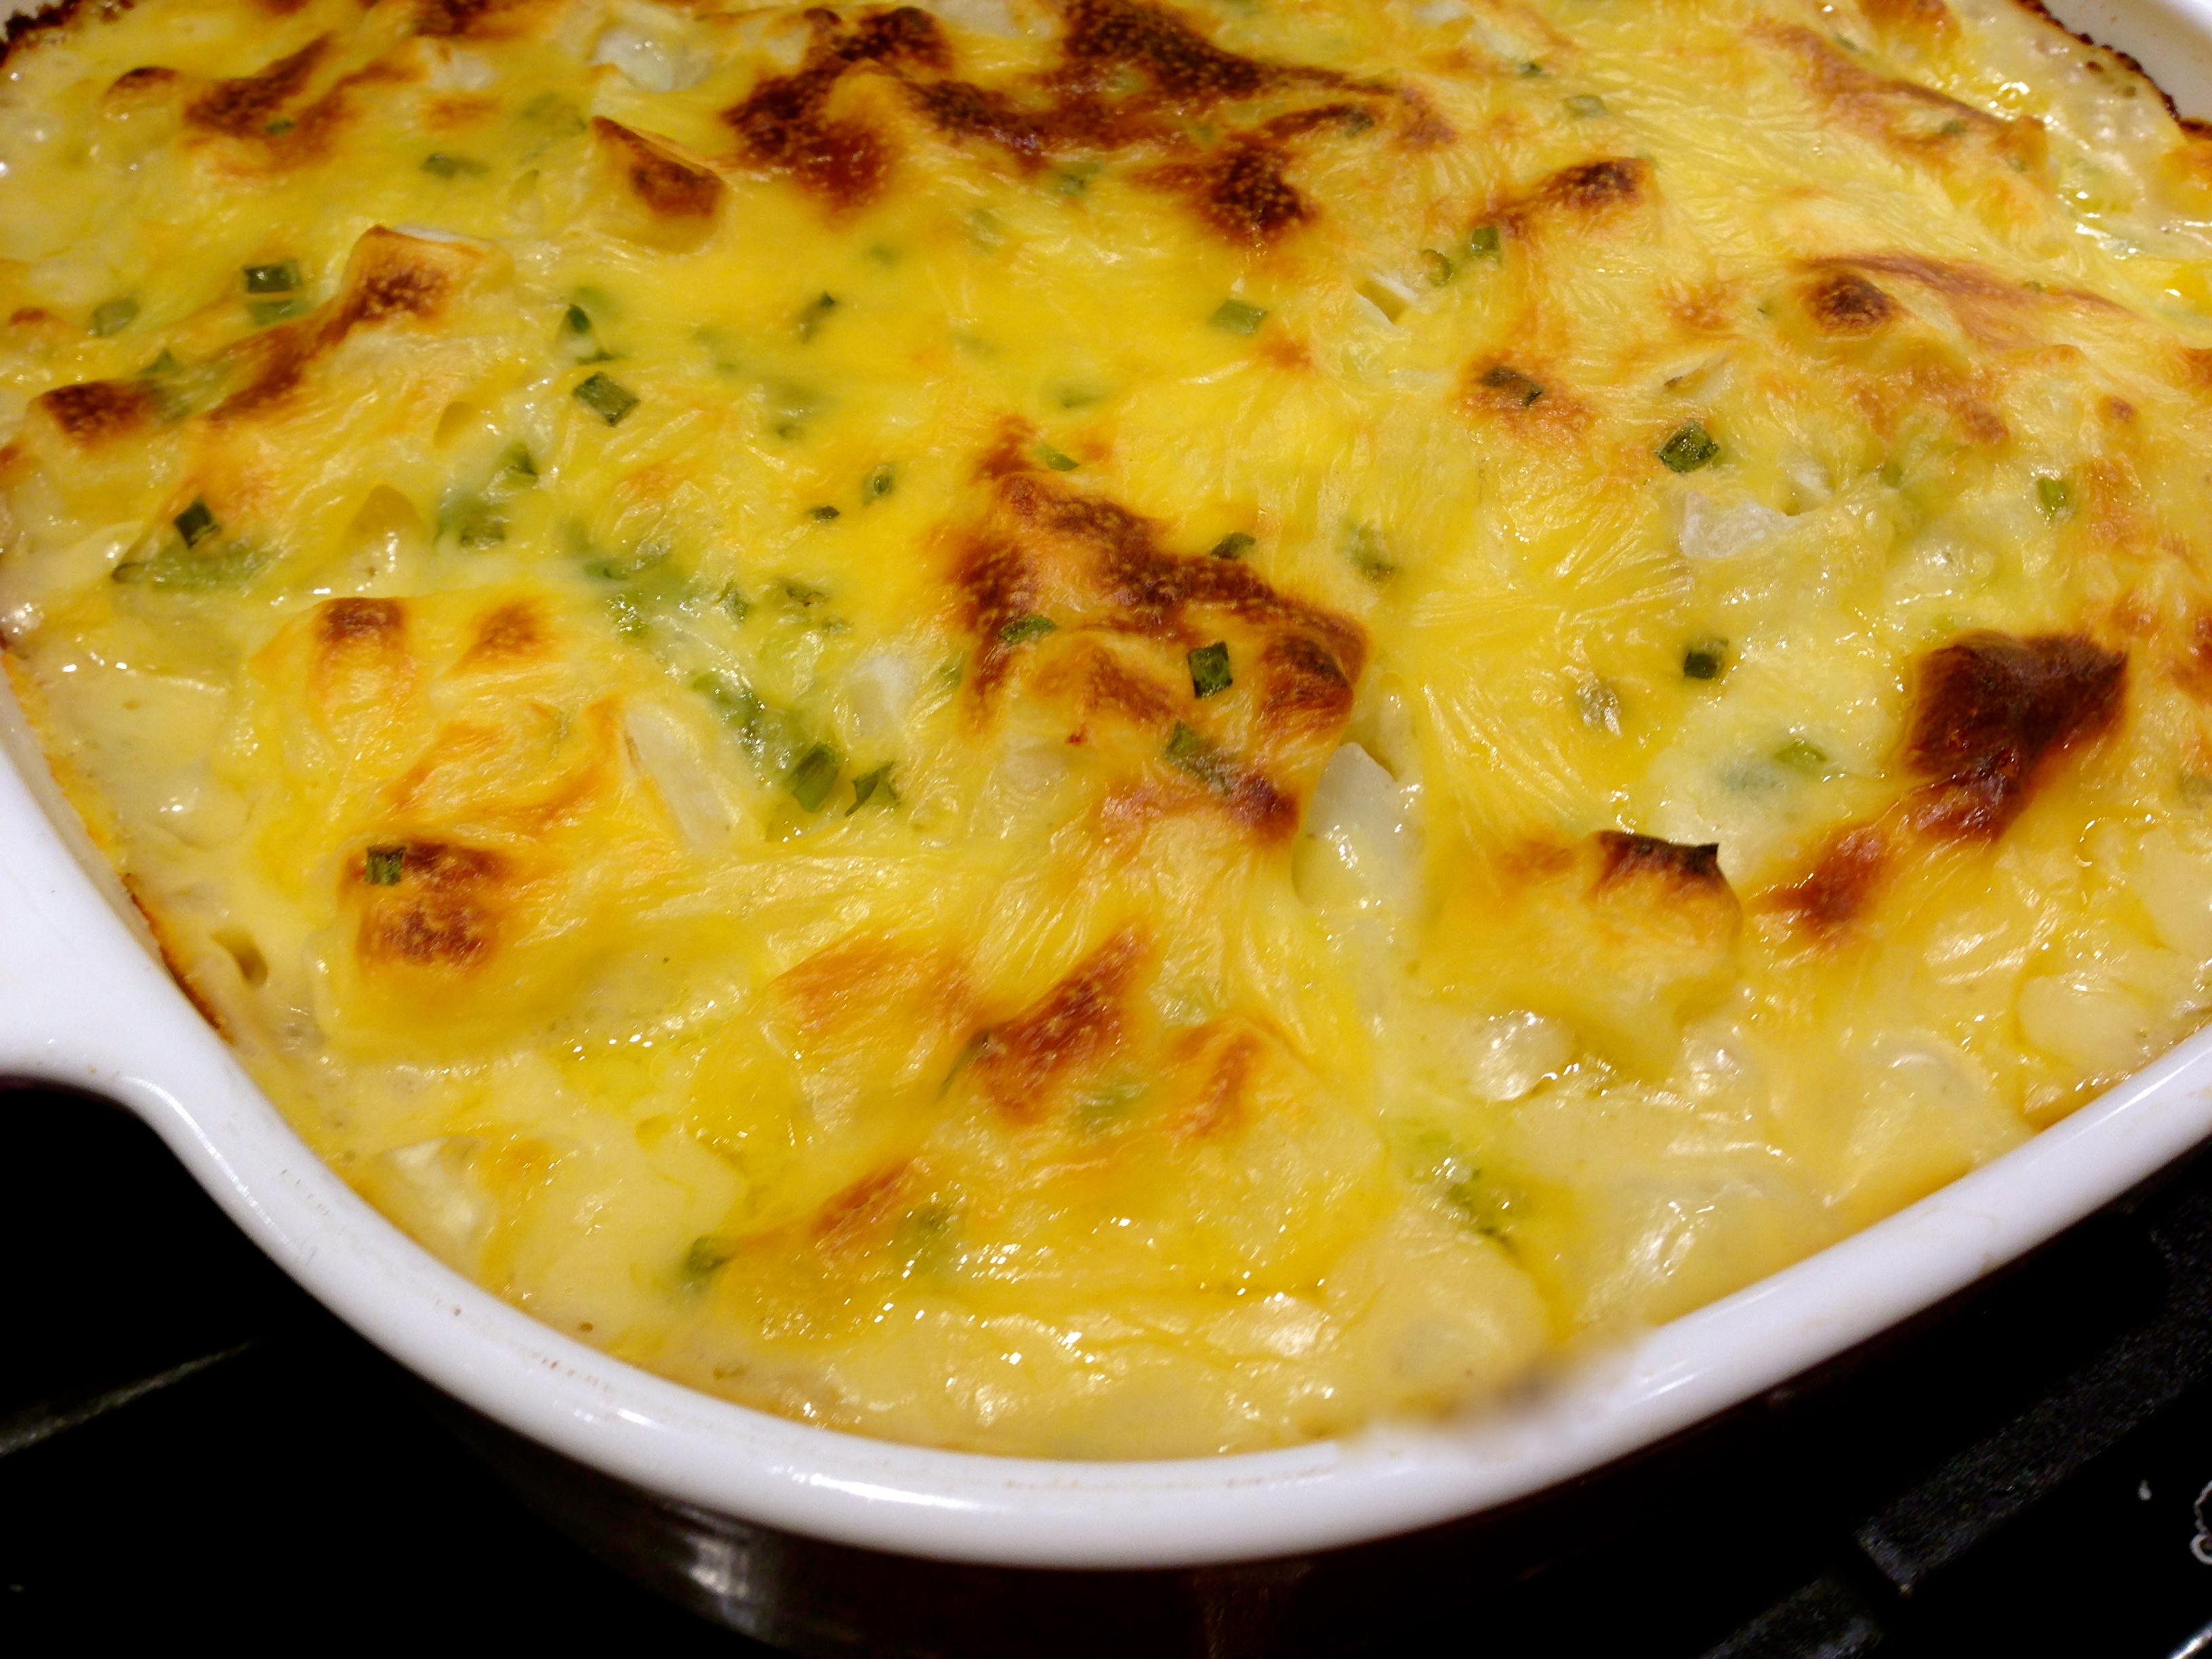
The same rule applies for when I use sliced potatoes in a casserole. I used my mandolin slicer to get even slices. Then I par boil them just for a couple of minutes before adding them to a casserole dish that is ready to go into the oven. Try this little trick and you’ll have beautifully roasted potatoes all the time.

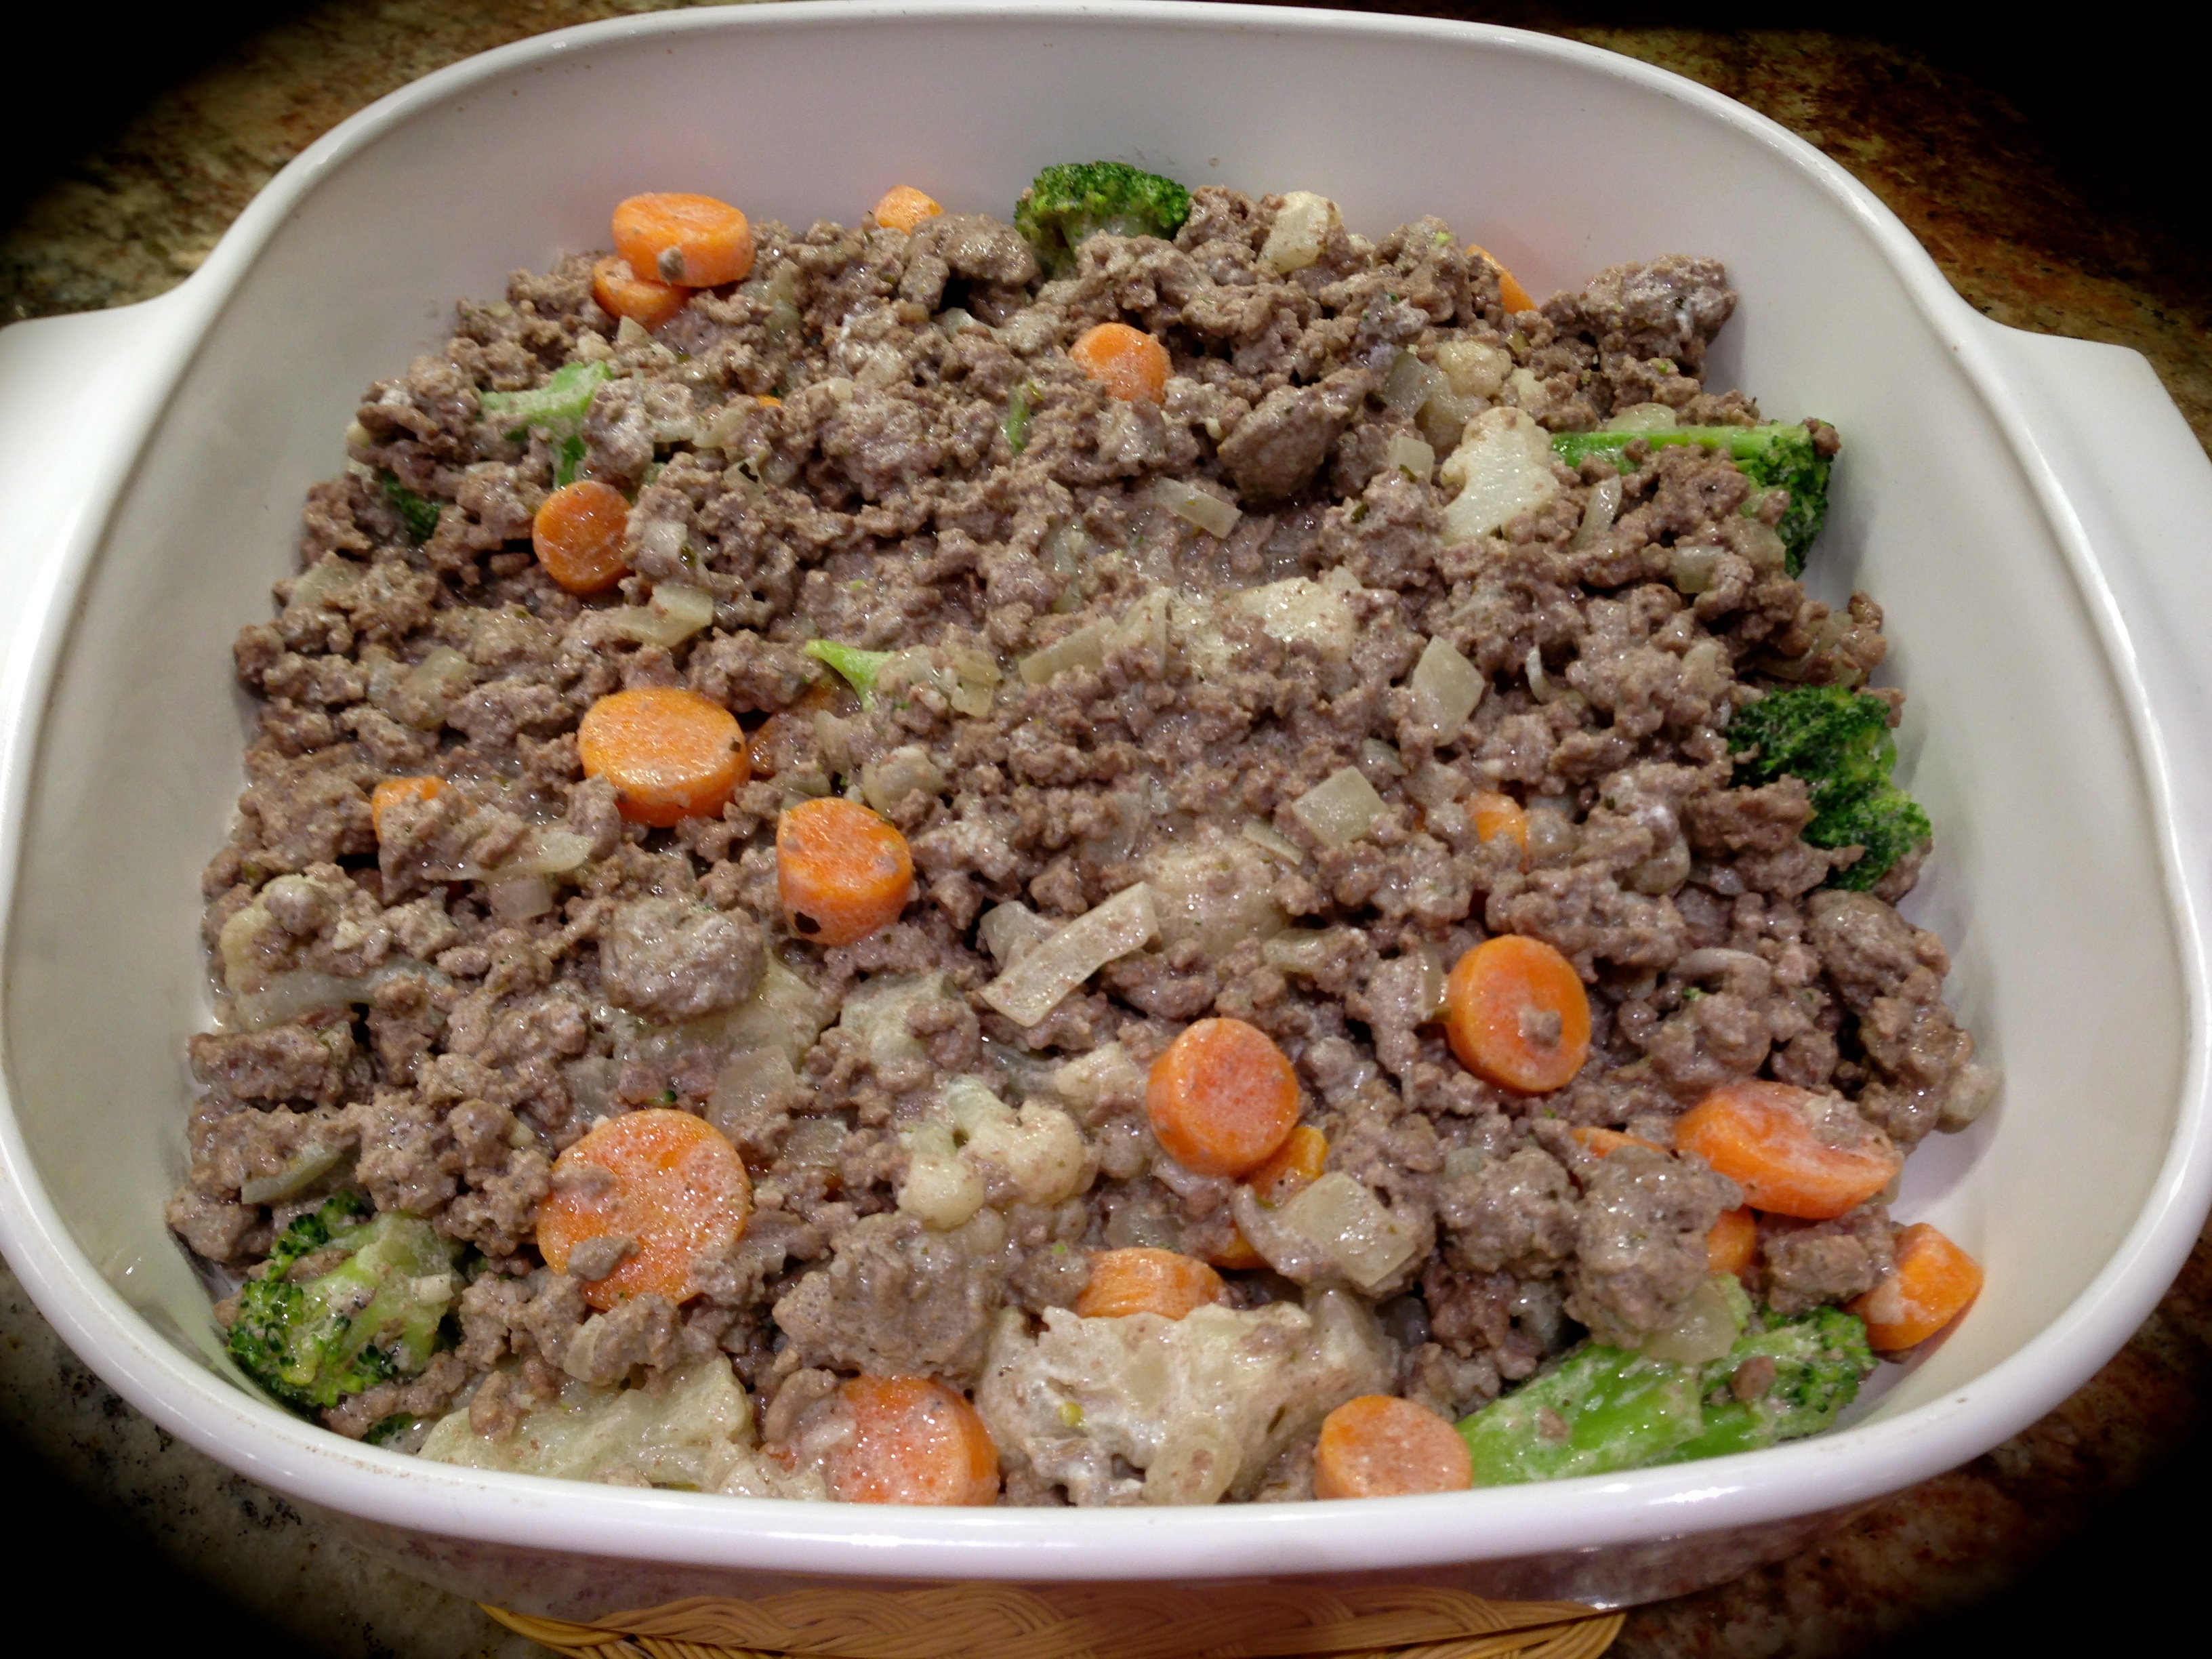
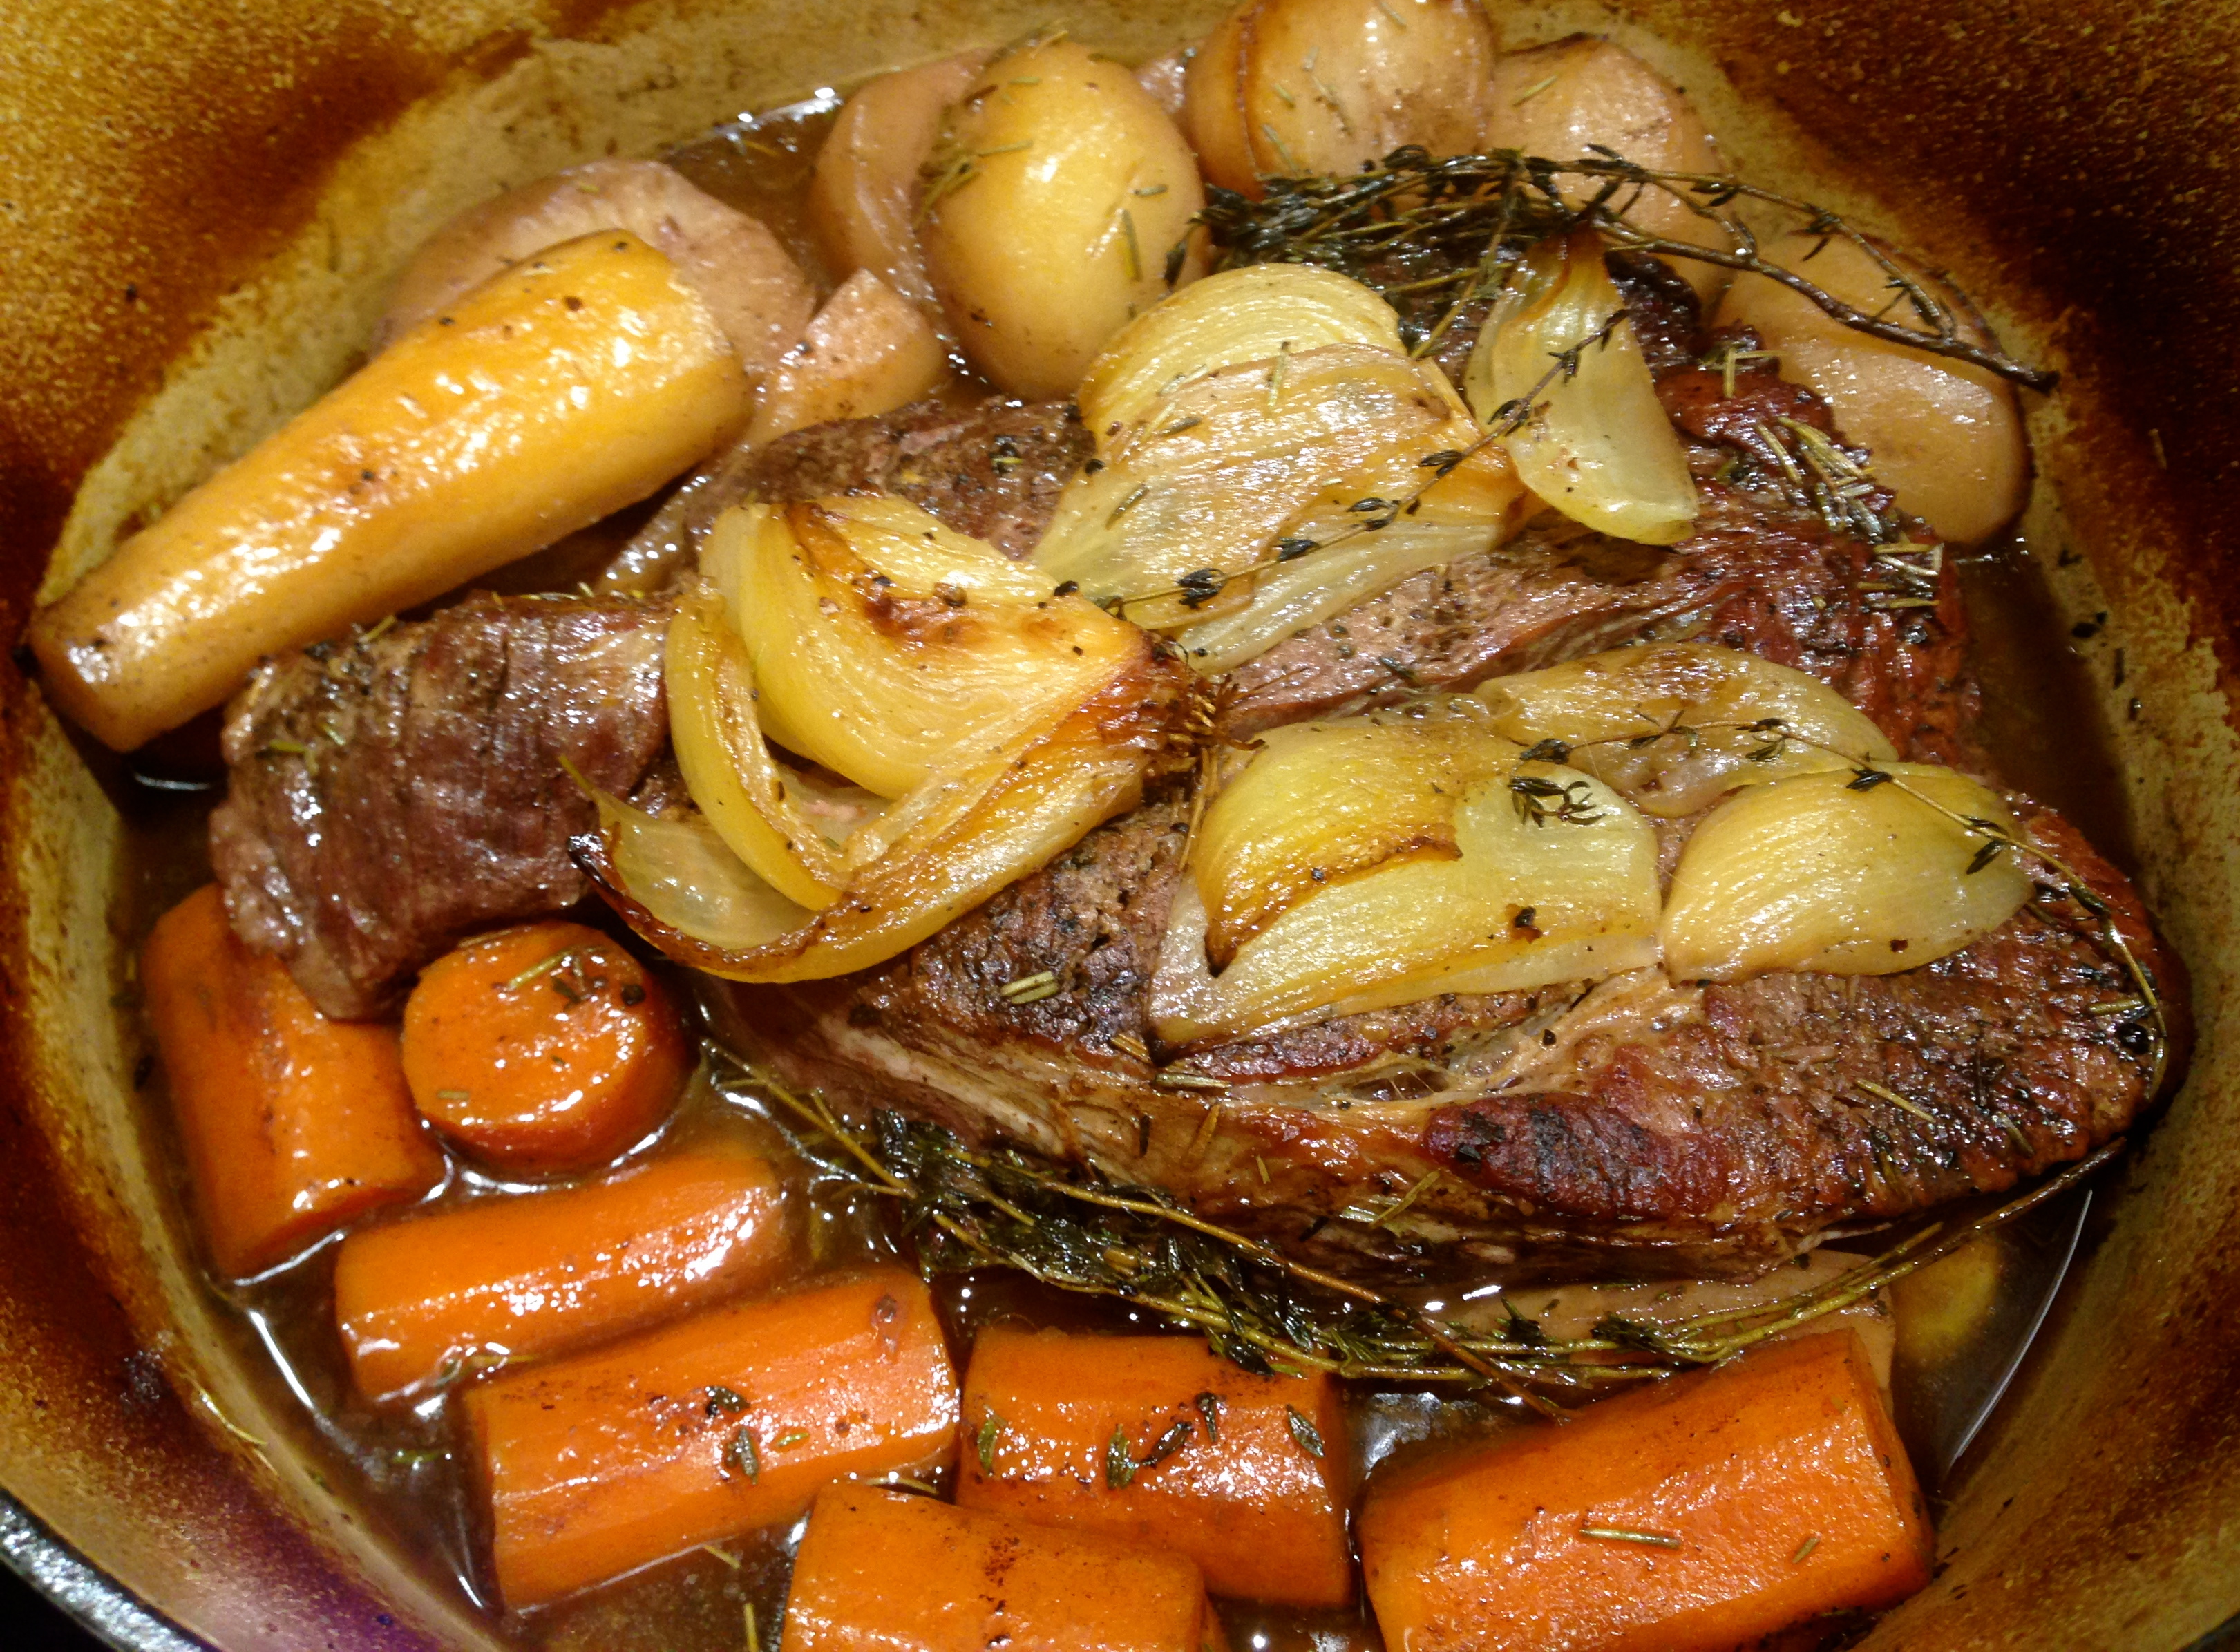
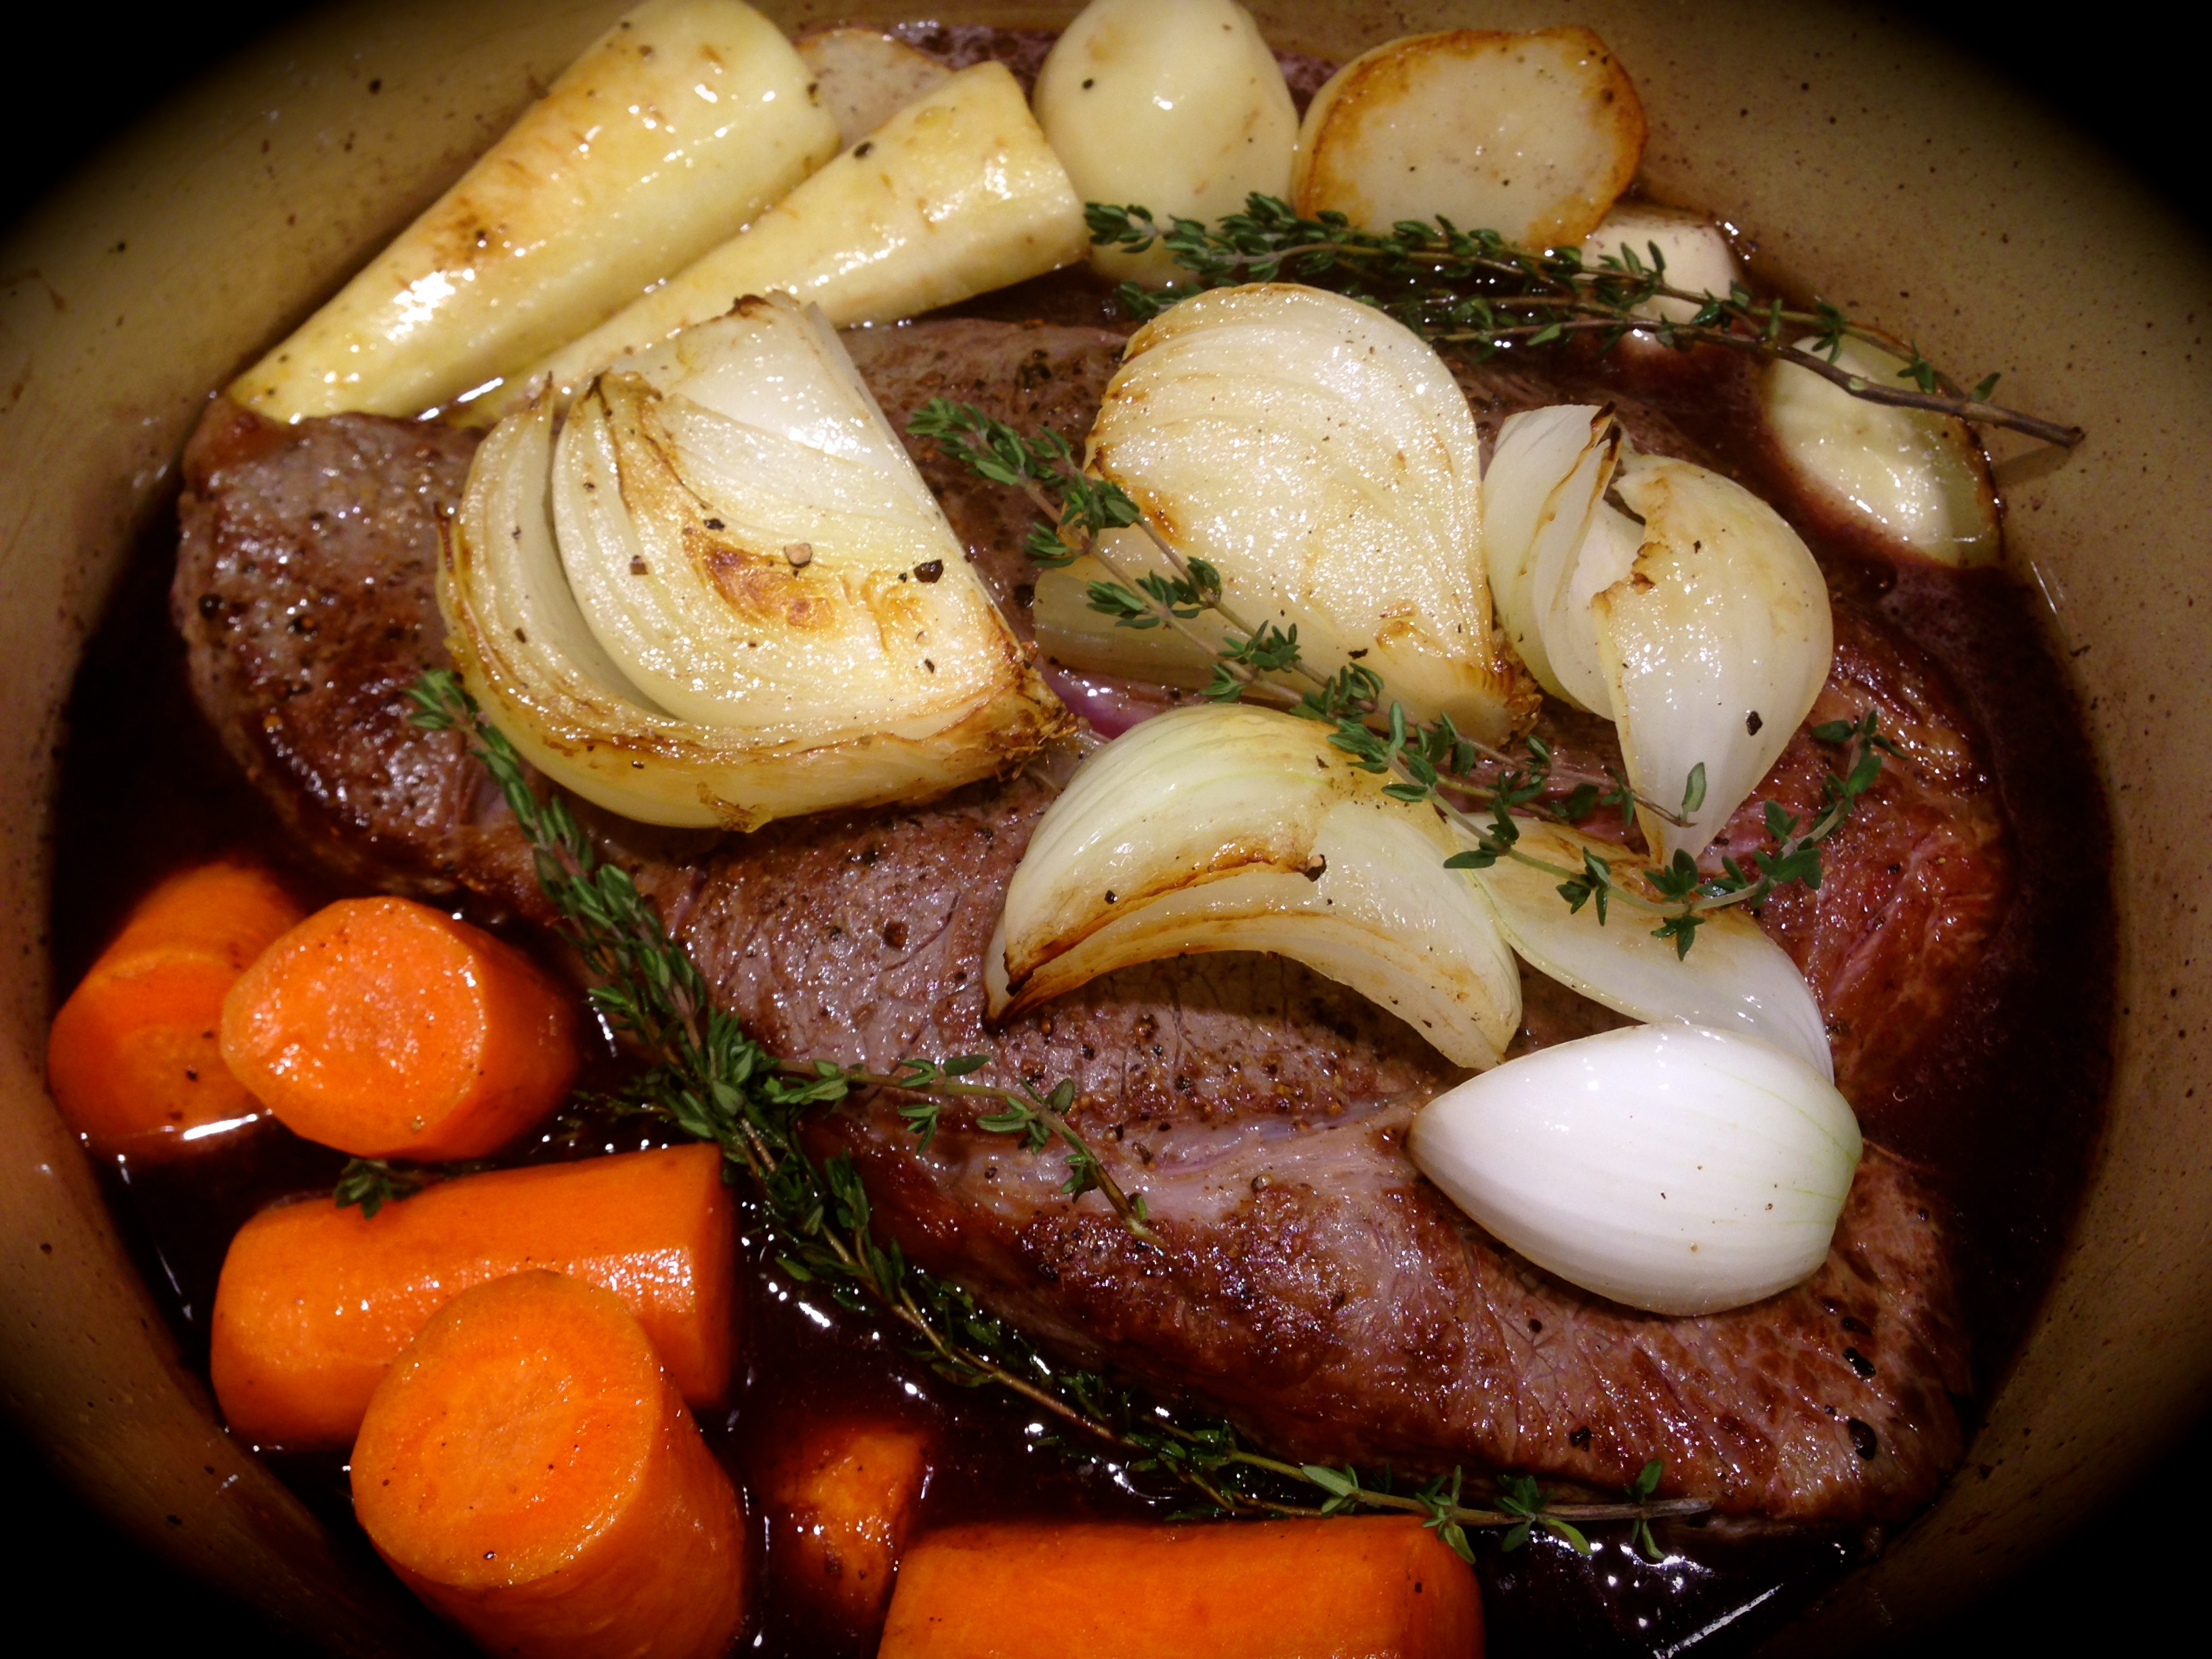
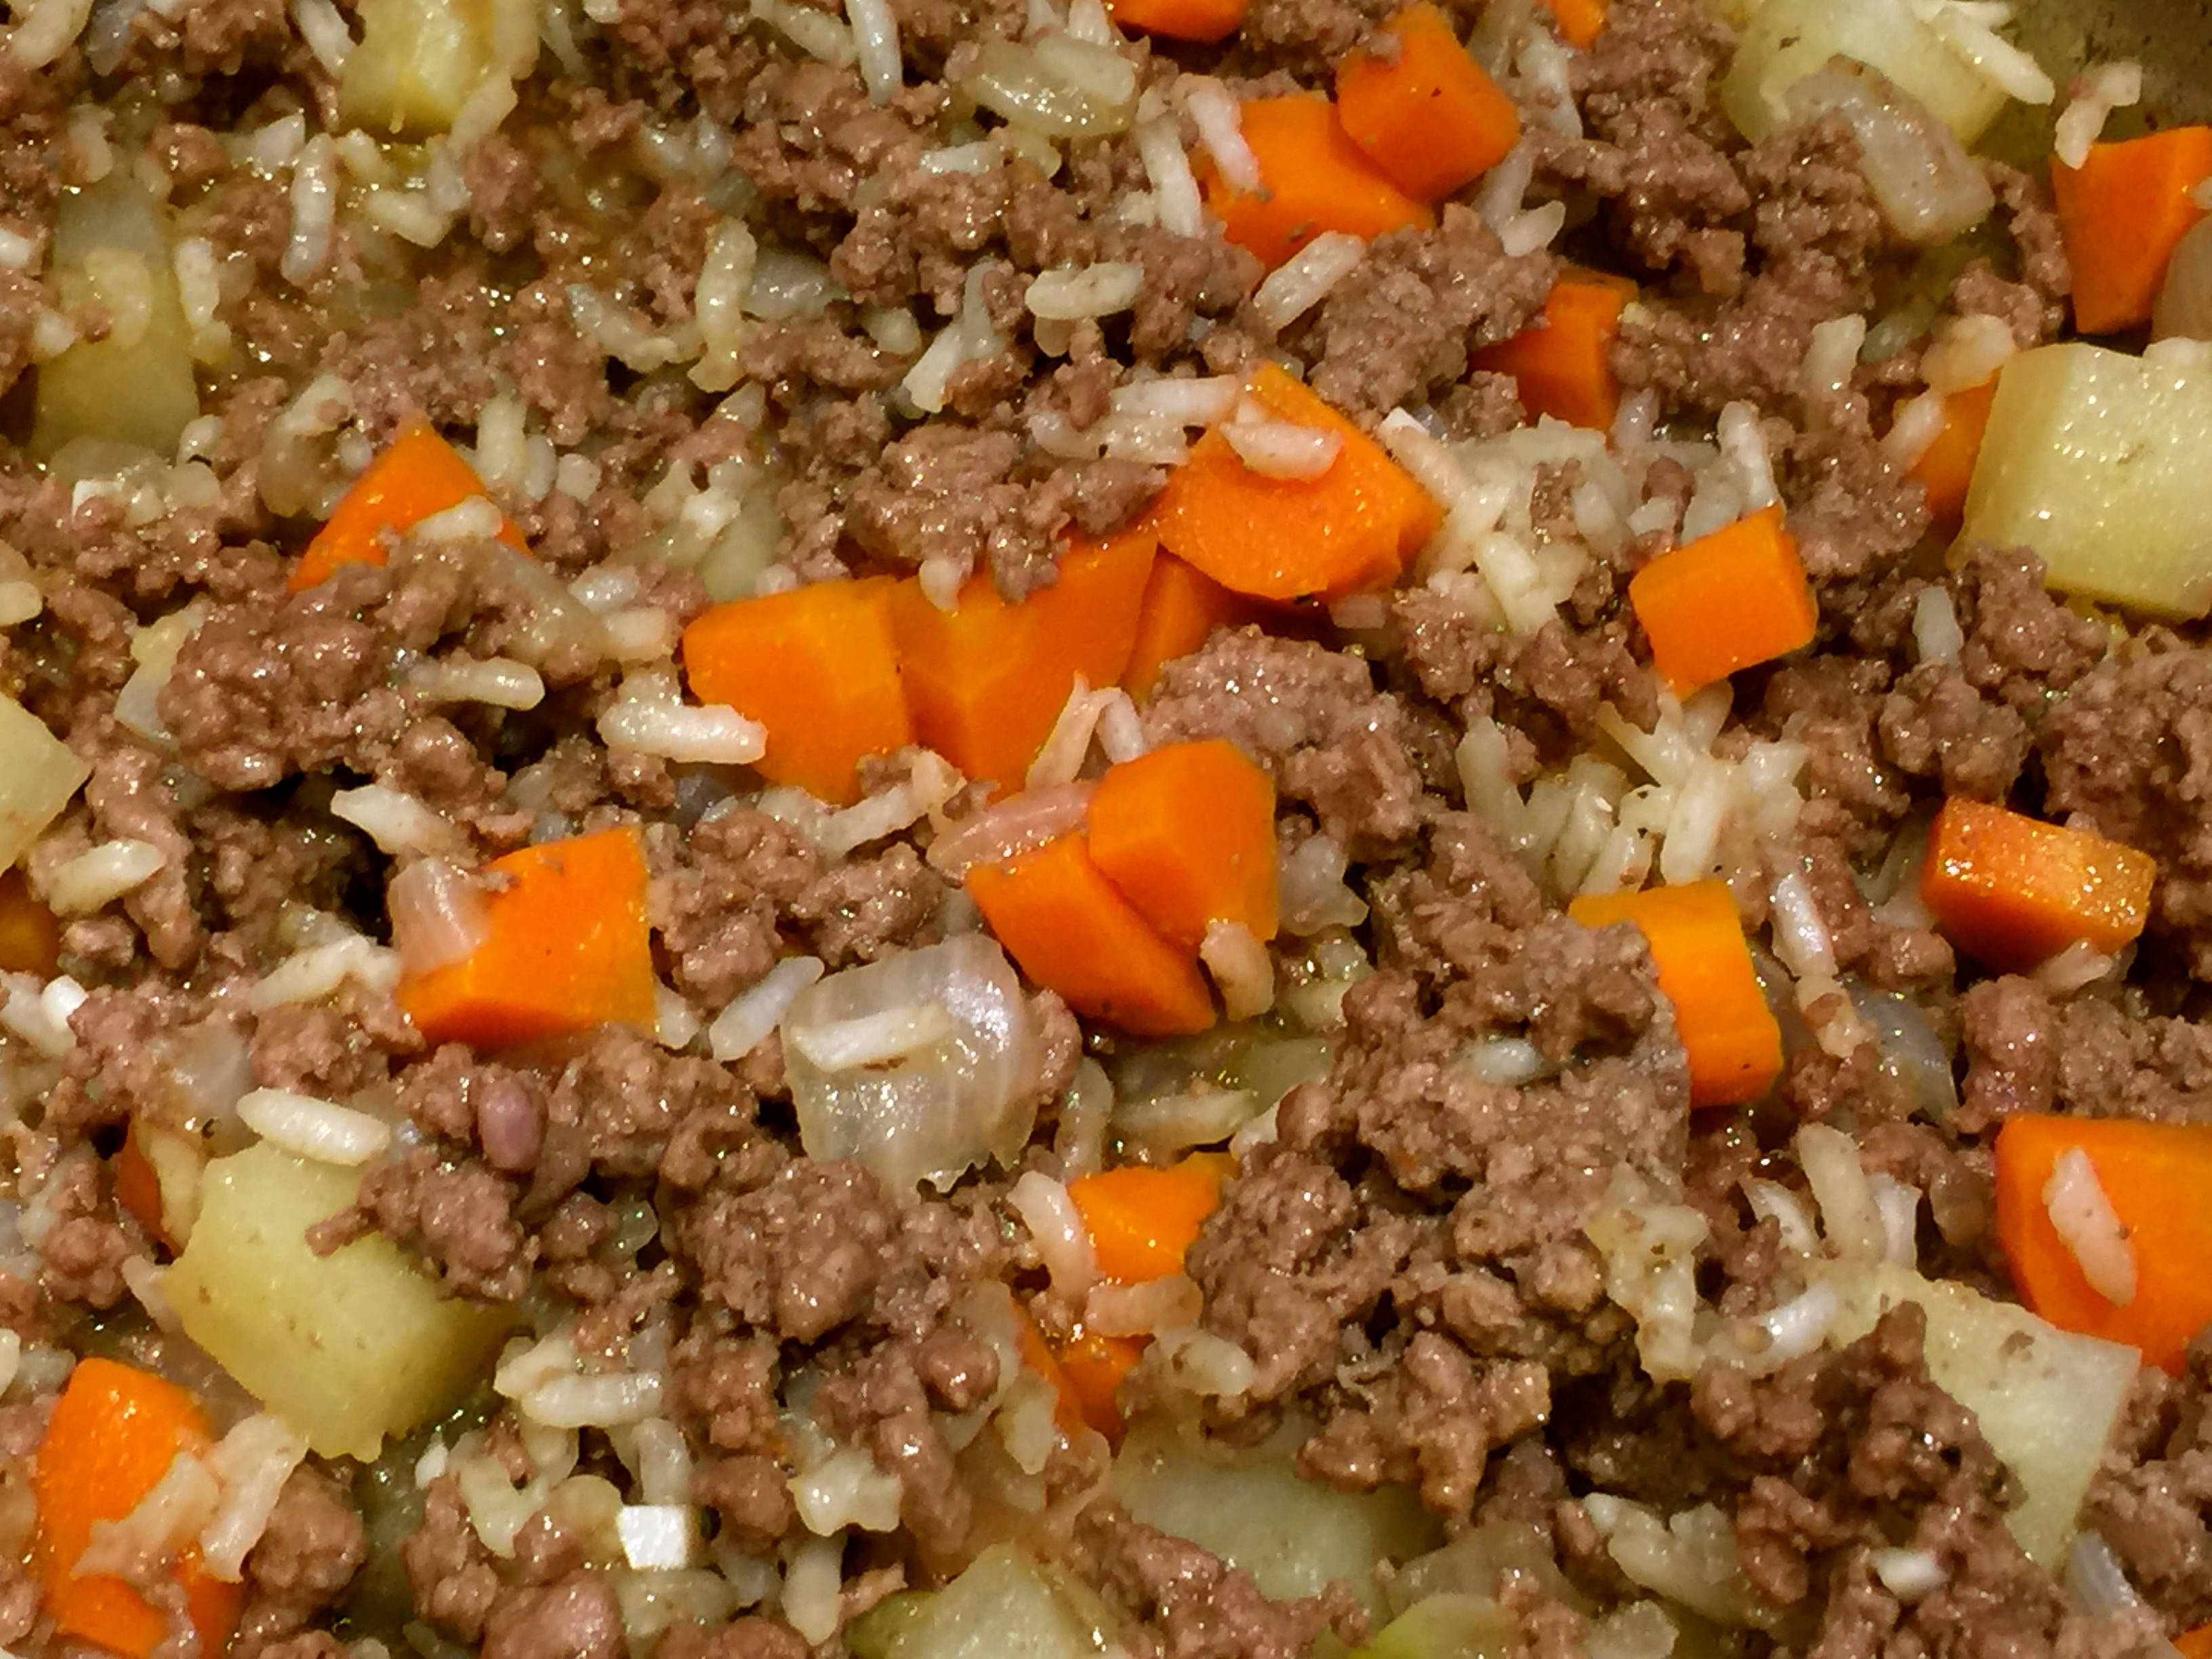
Lesson Learned 2 – This recipe roasts the carrots to crisp tender: Carrots are also tricky to cook and although I prefer mine to be crisp tender, some people prefer their carrots to be soft. If soft is your preference roasting them this way will not give you that consistency unless you either cut them into thin rounds or use small baby carrots. I cut my carrots into about 2 inch chunks, cut each chunk into half and then half again. This produced a somewhat softened crisp tender carrot, which I love.

You can also do the par boiling trick described above for larger carrots if you want them to be soft. That might be a little too much muss and fuss for one recipe. But it’s totally up to you. Just something to think about…

Lesson Learned 3 – Browning the pork loin is totally your preference: Some recipes call for browning your pork loin before roasting it. It helps to seal in the juices. The reason I say this is totally your preference is that if you cook your pork loin according to my directions you will always get a juicy pork loin without browning it ahead of time. Plus when you add the balsamic mixture you cannot tell if the roast has been browned or not. So why bother. The choice is yours.

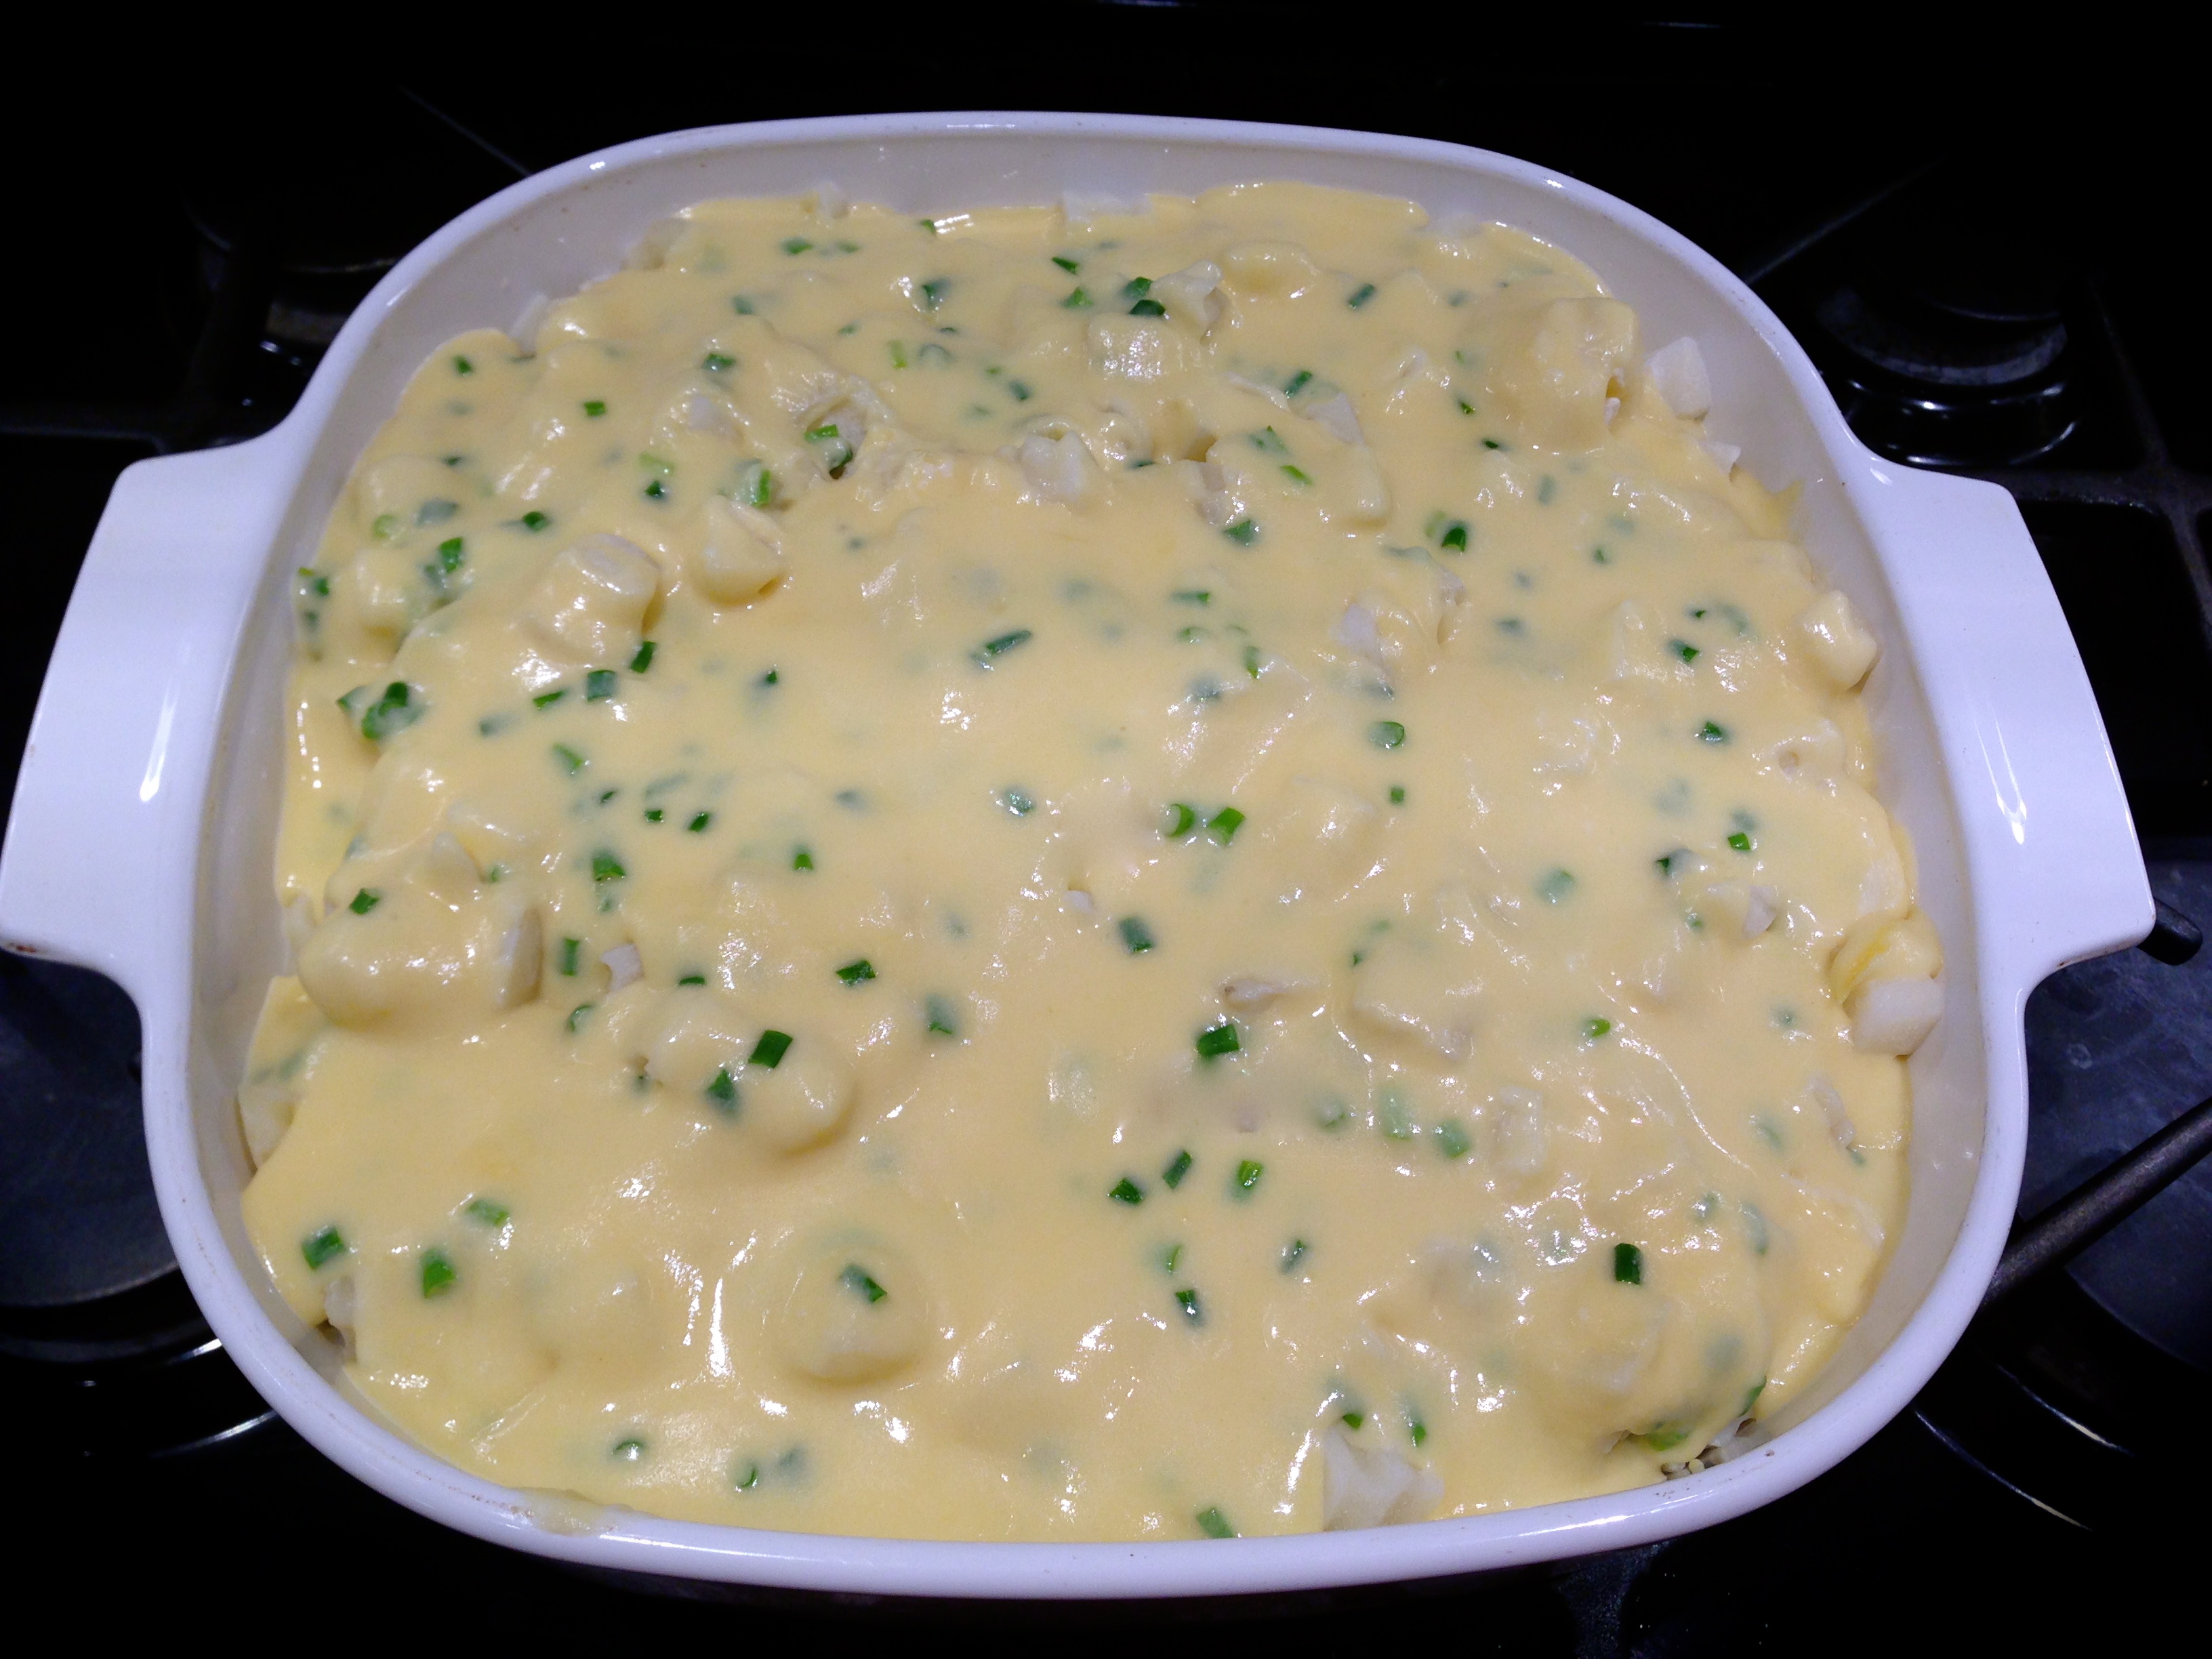
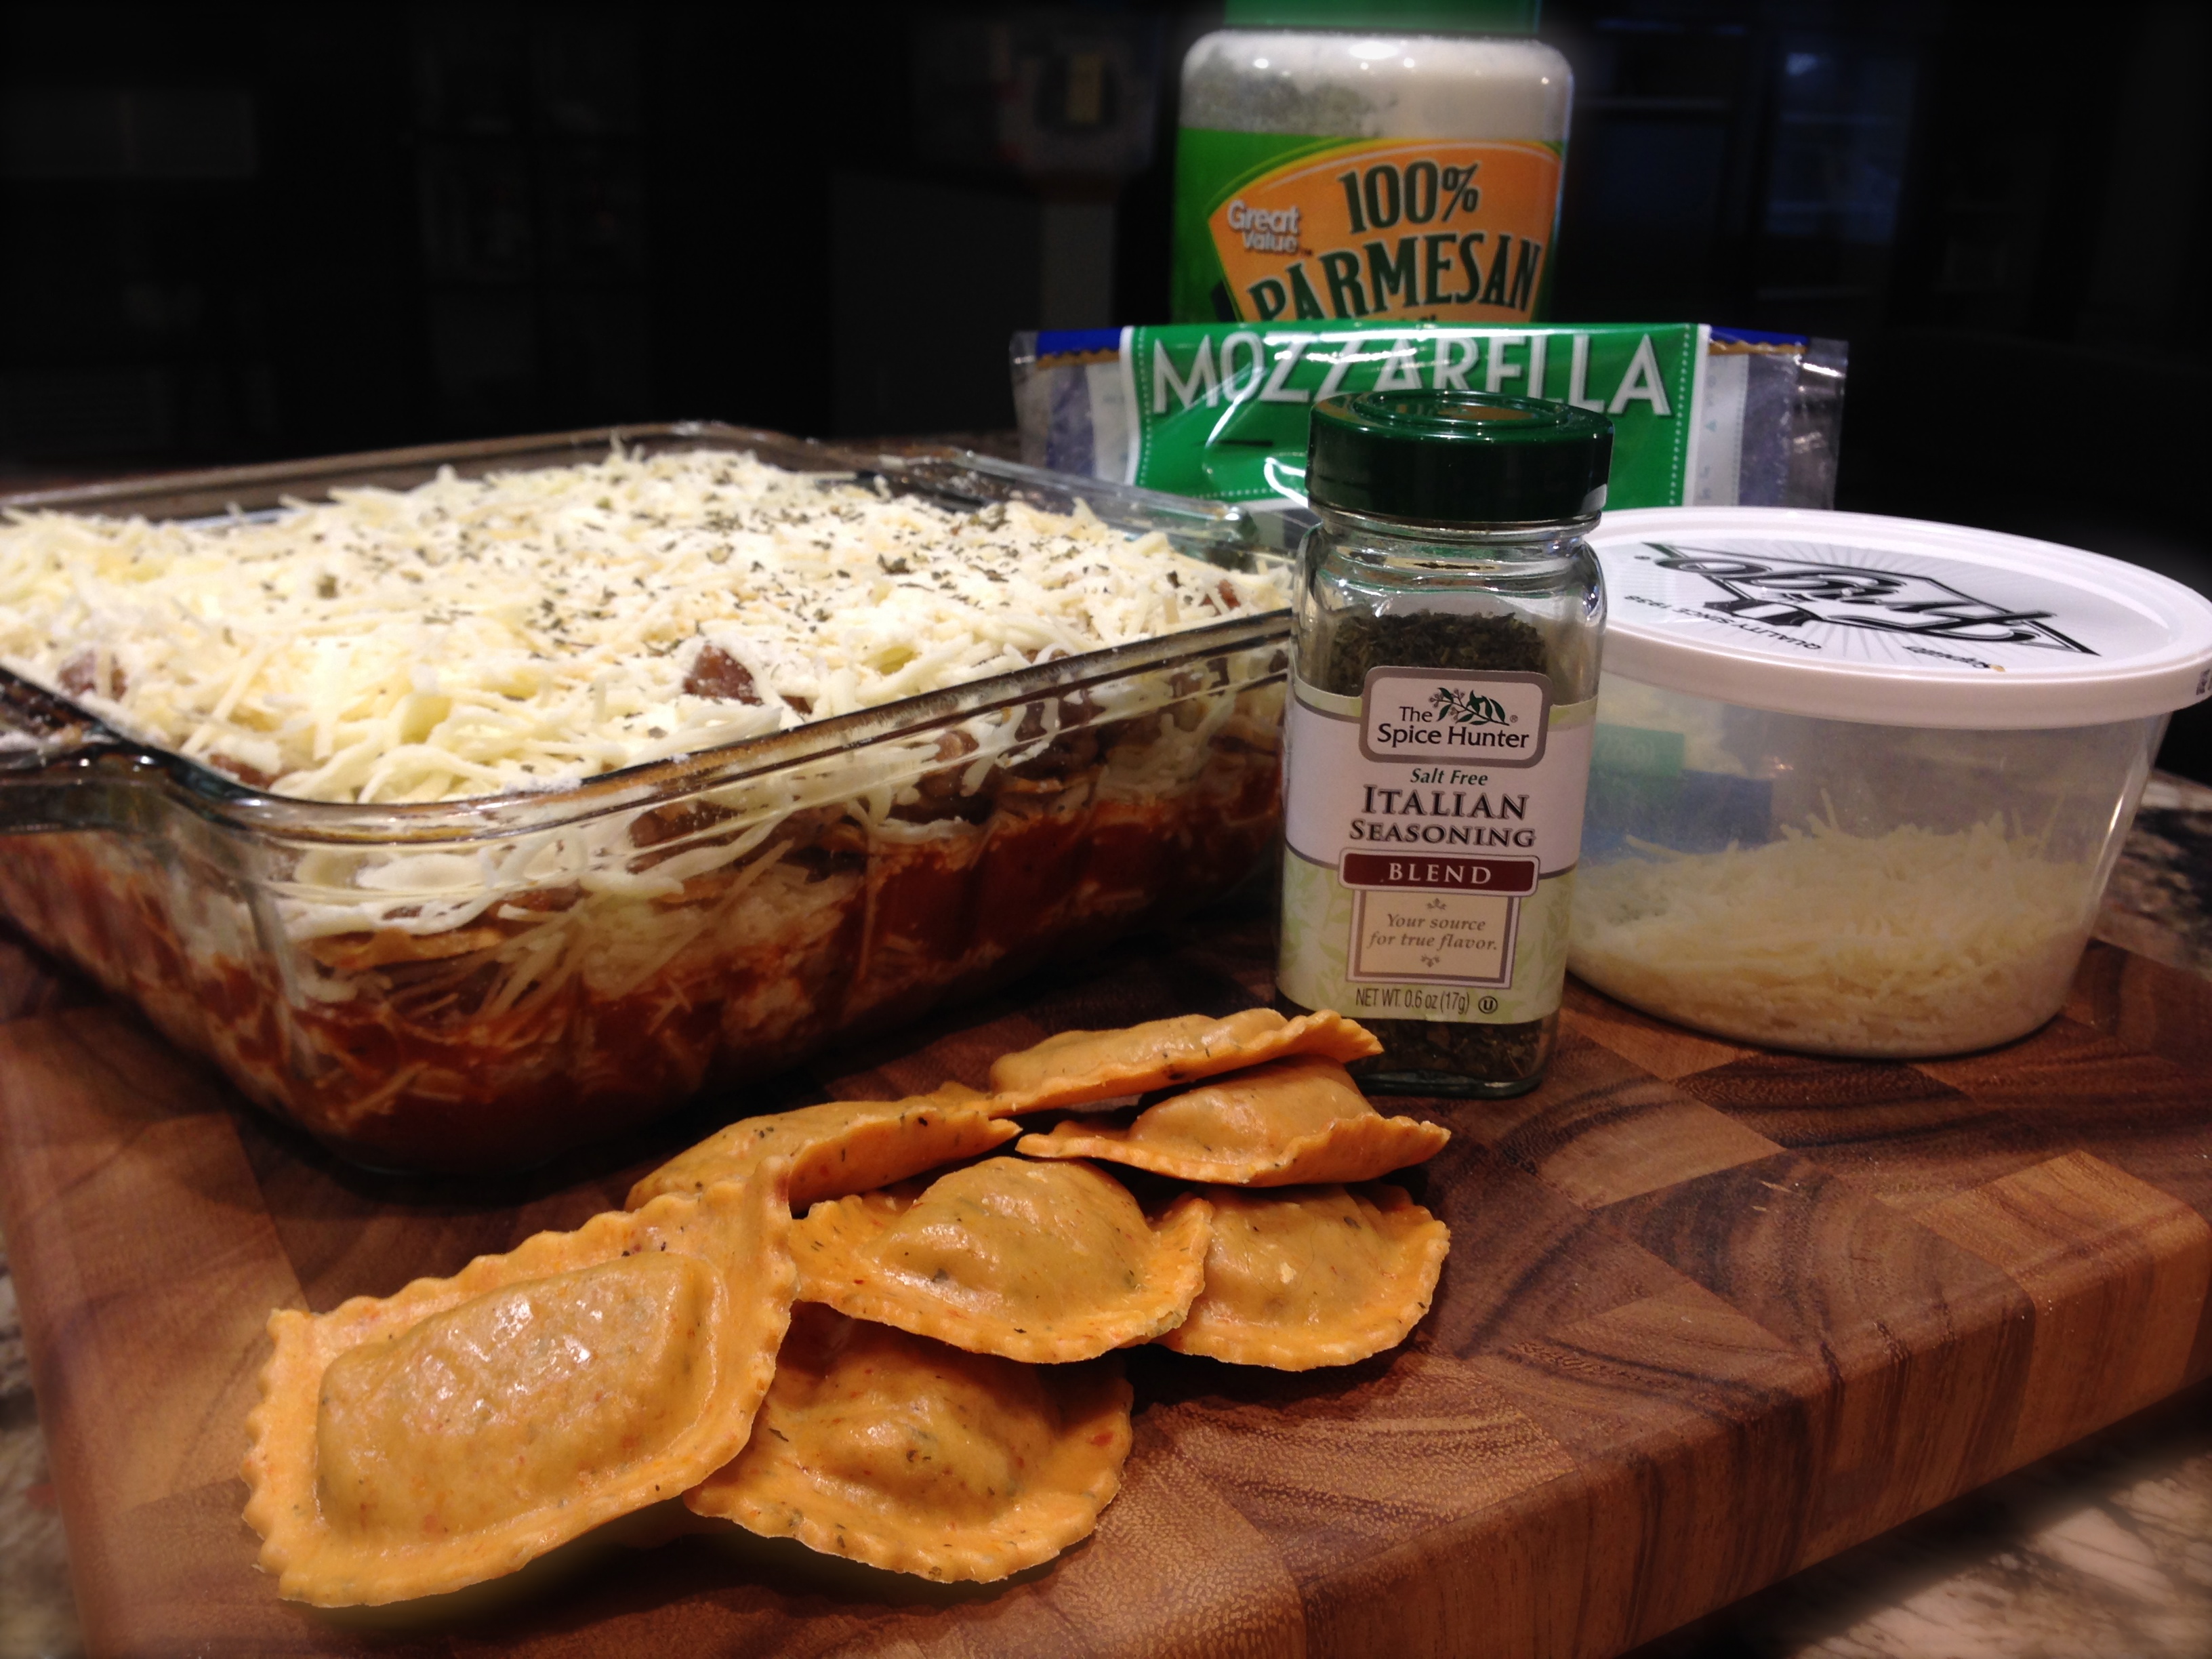
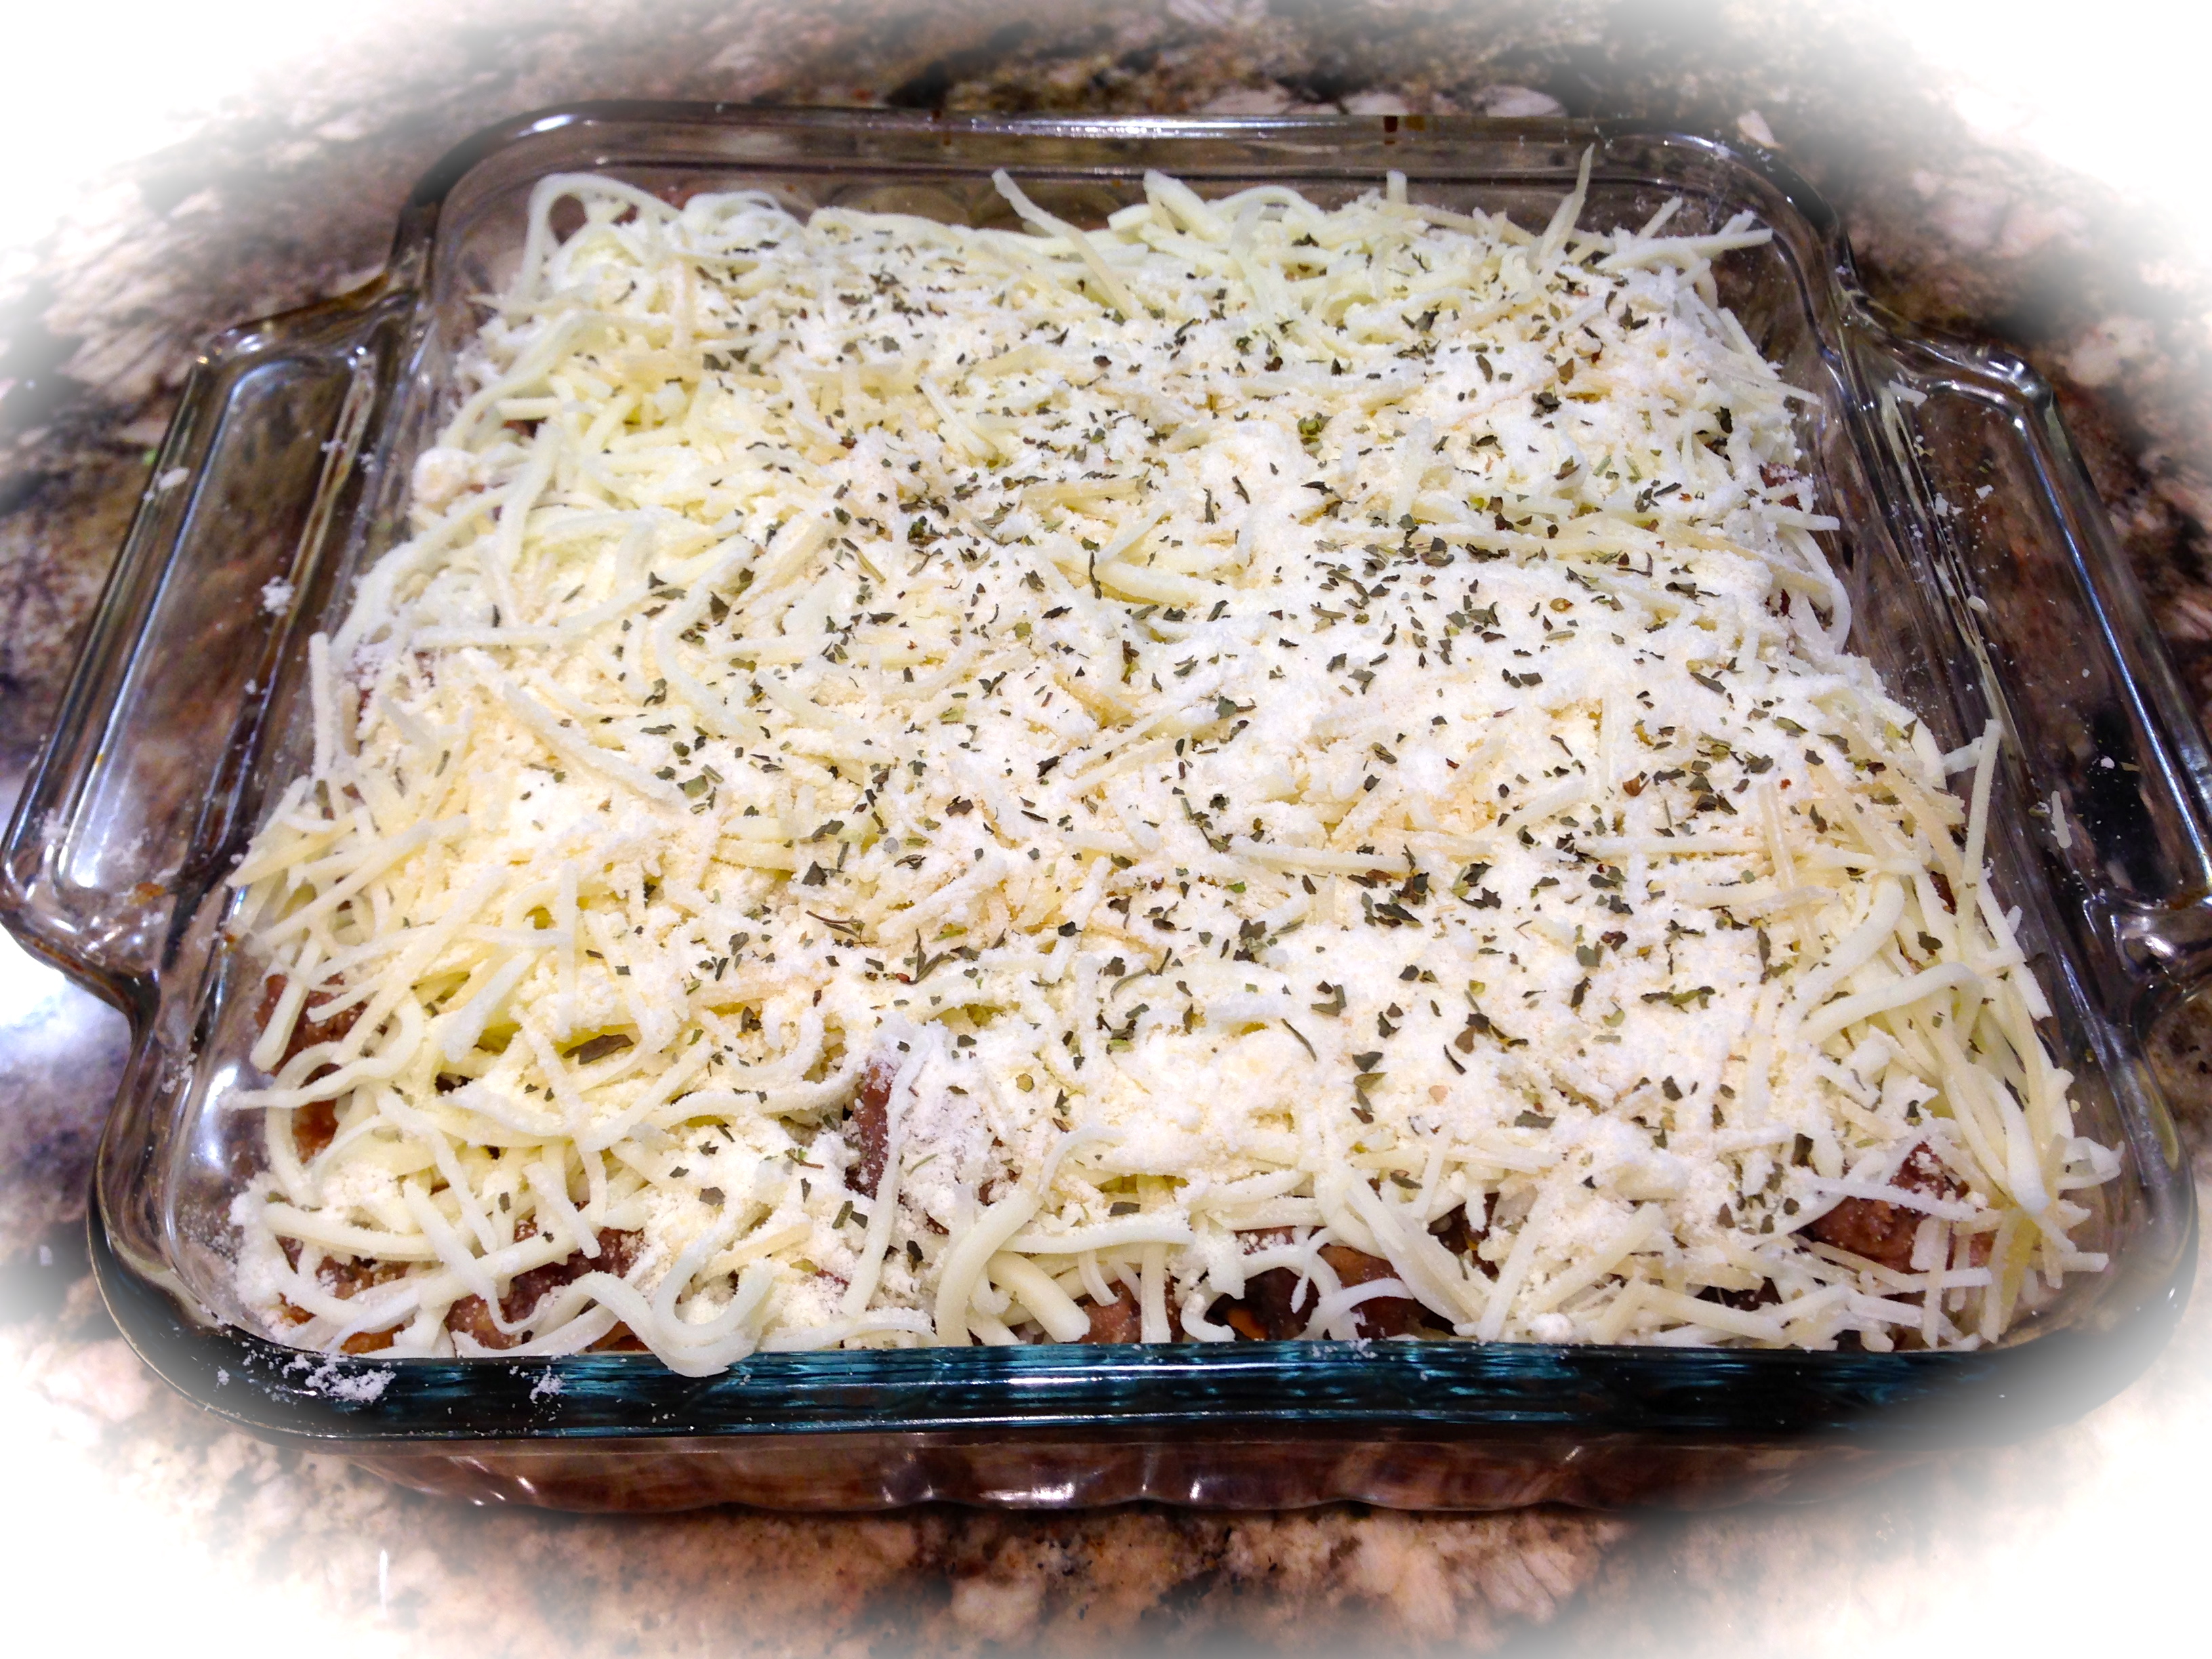
Lesson Learned 4 – Make the balsamic mixture in your mini food processor: This is really the easiest way to ensure all the ingredients are well combined. Combine them in the processor until the mixture becomes paste-like as seen below. Then you’re ready to go…

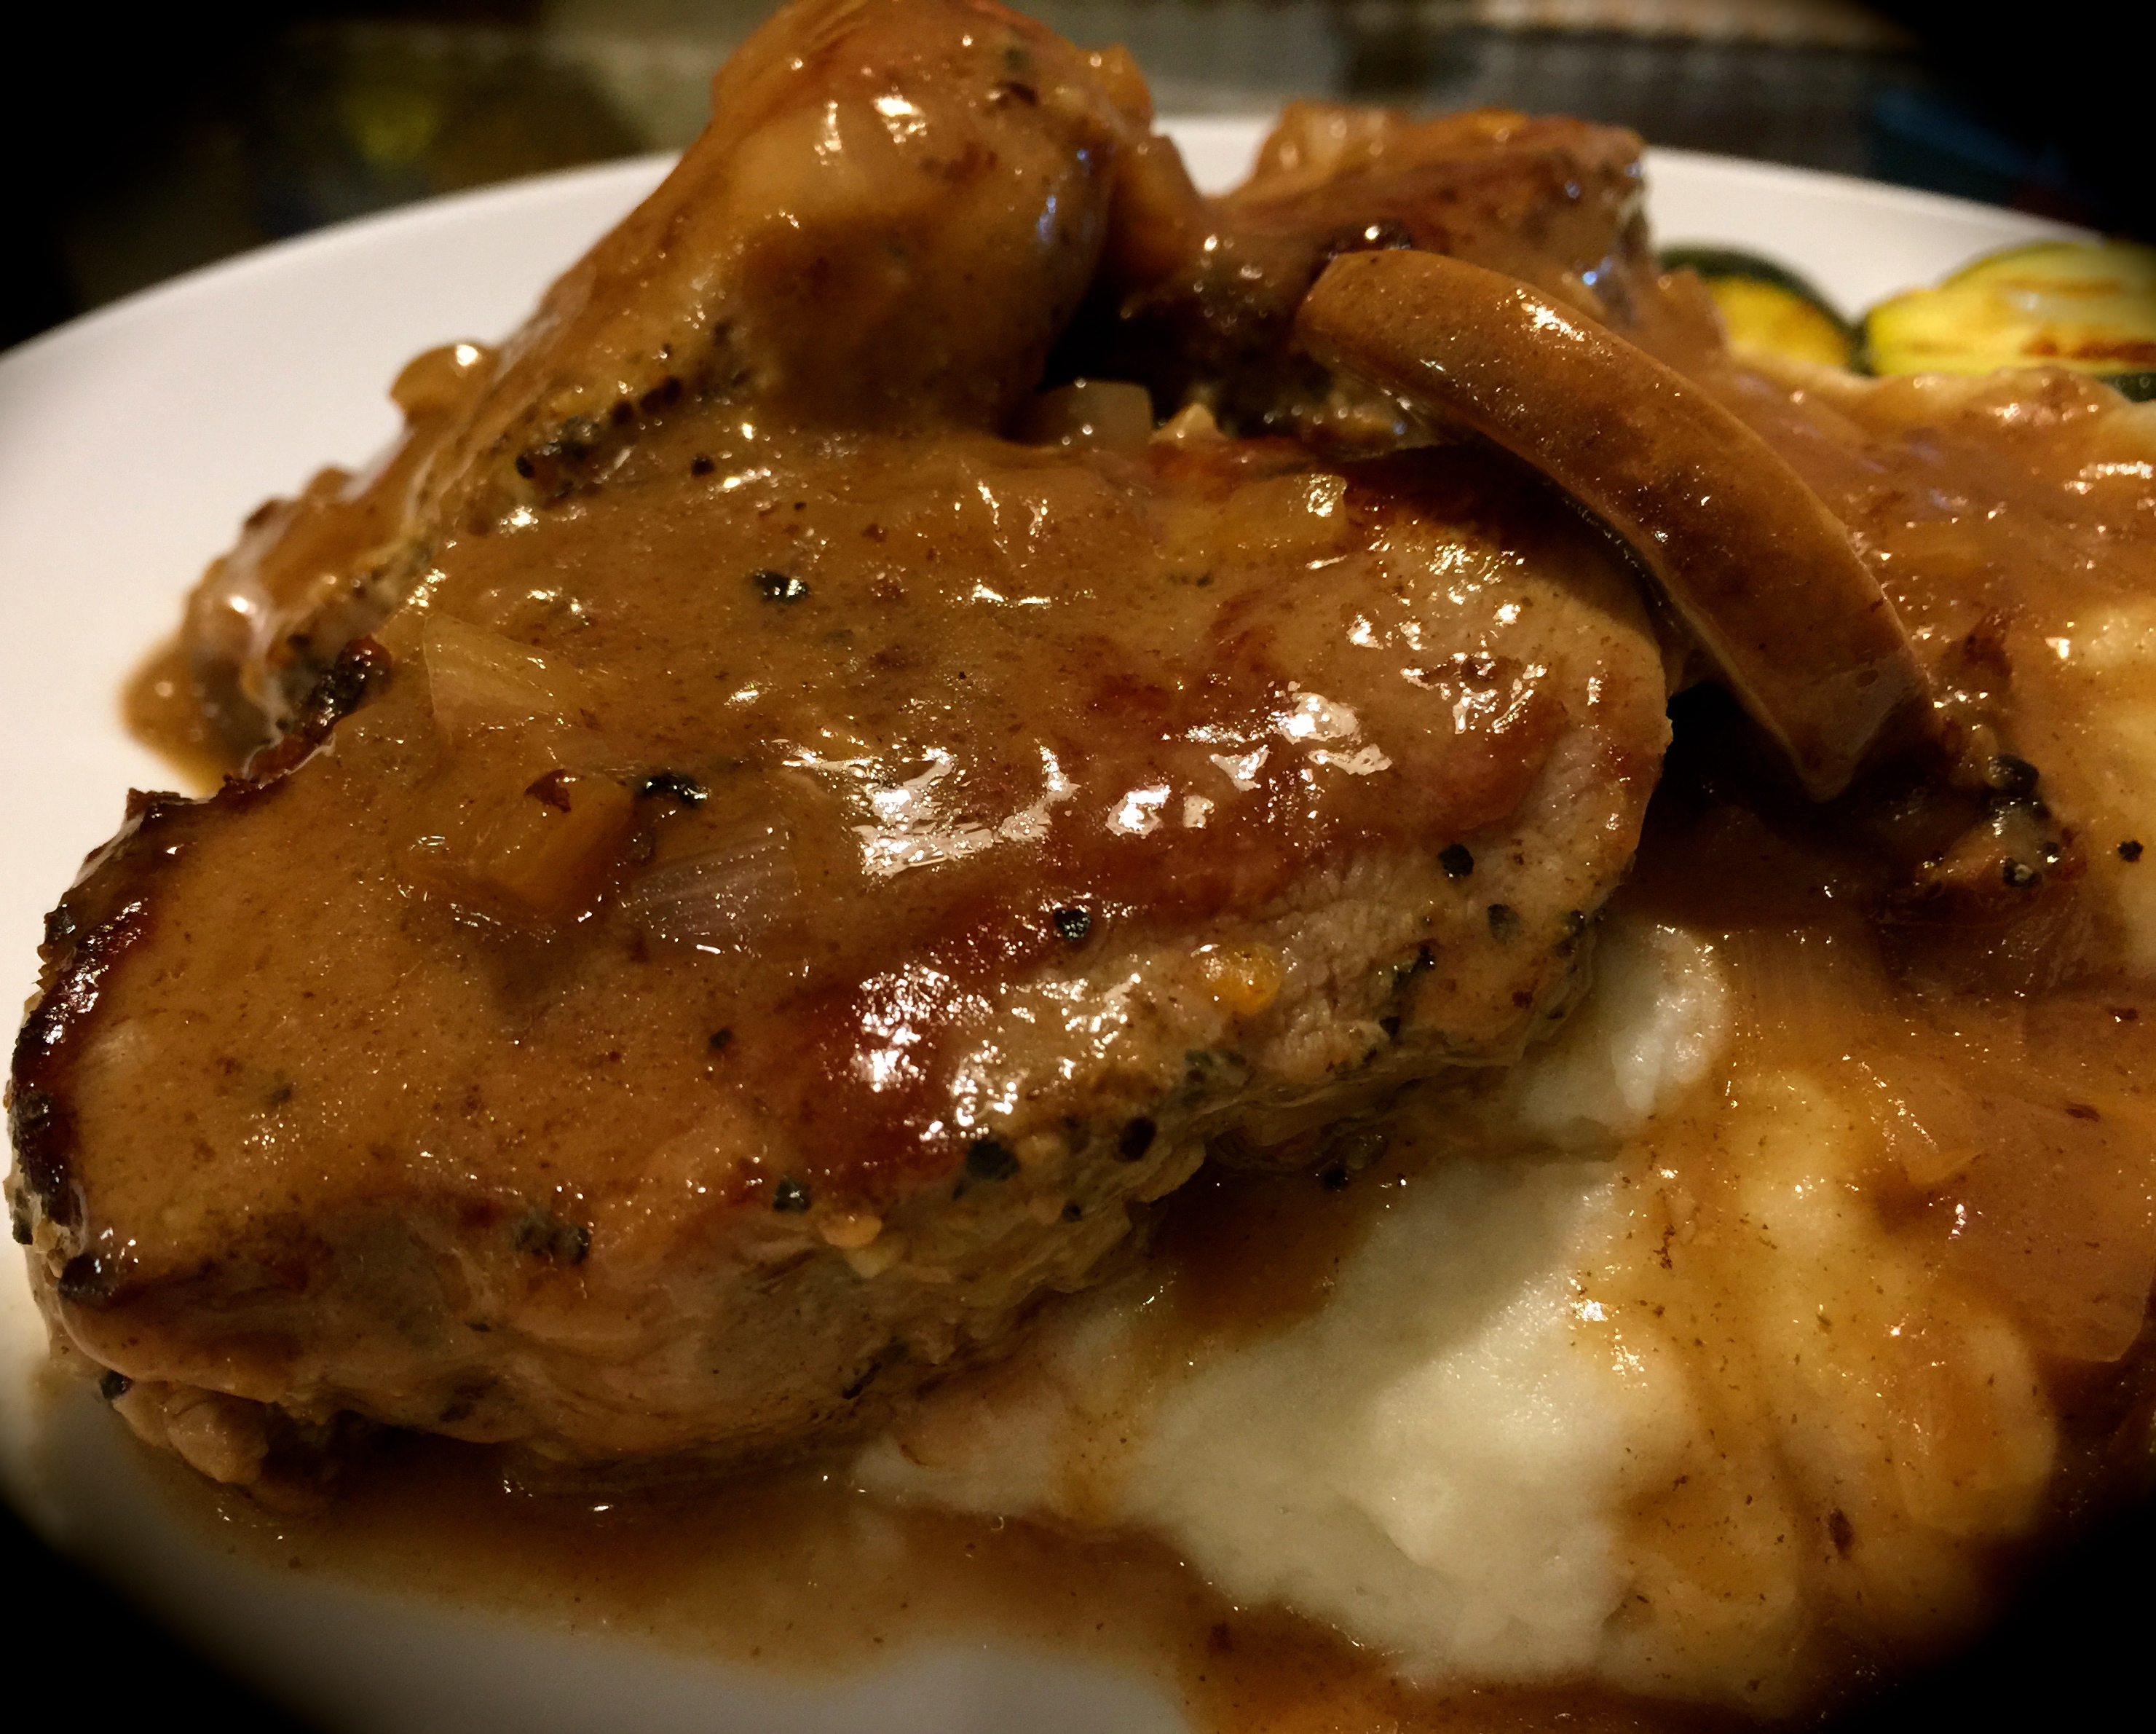
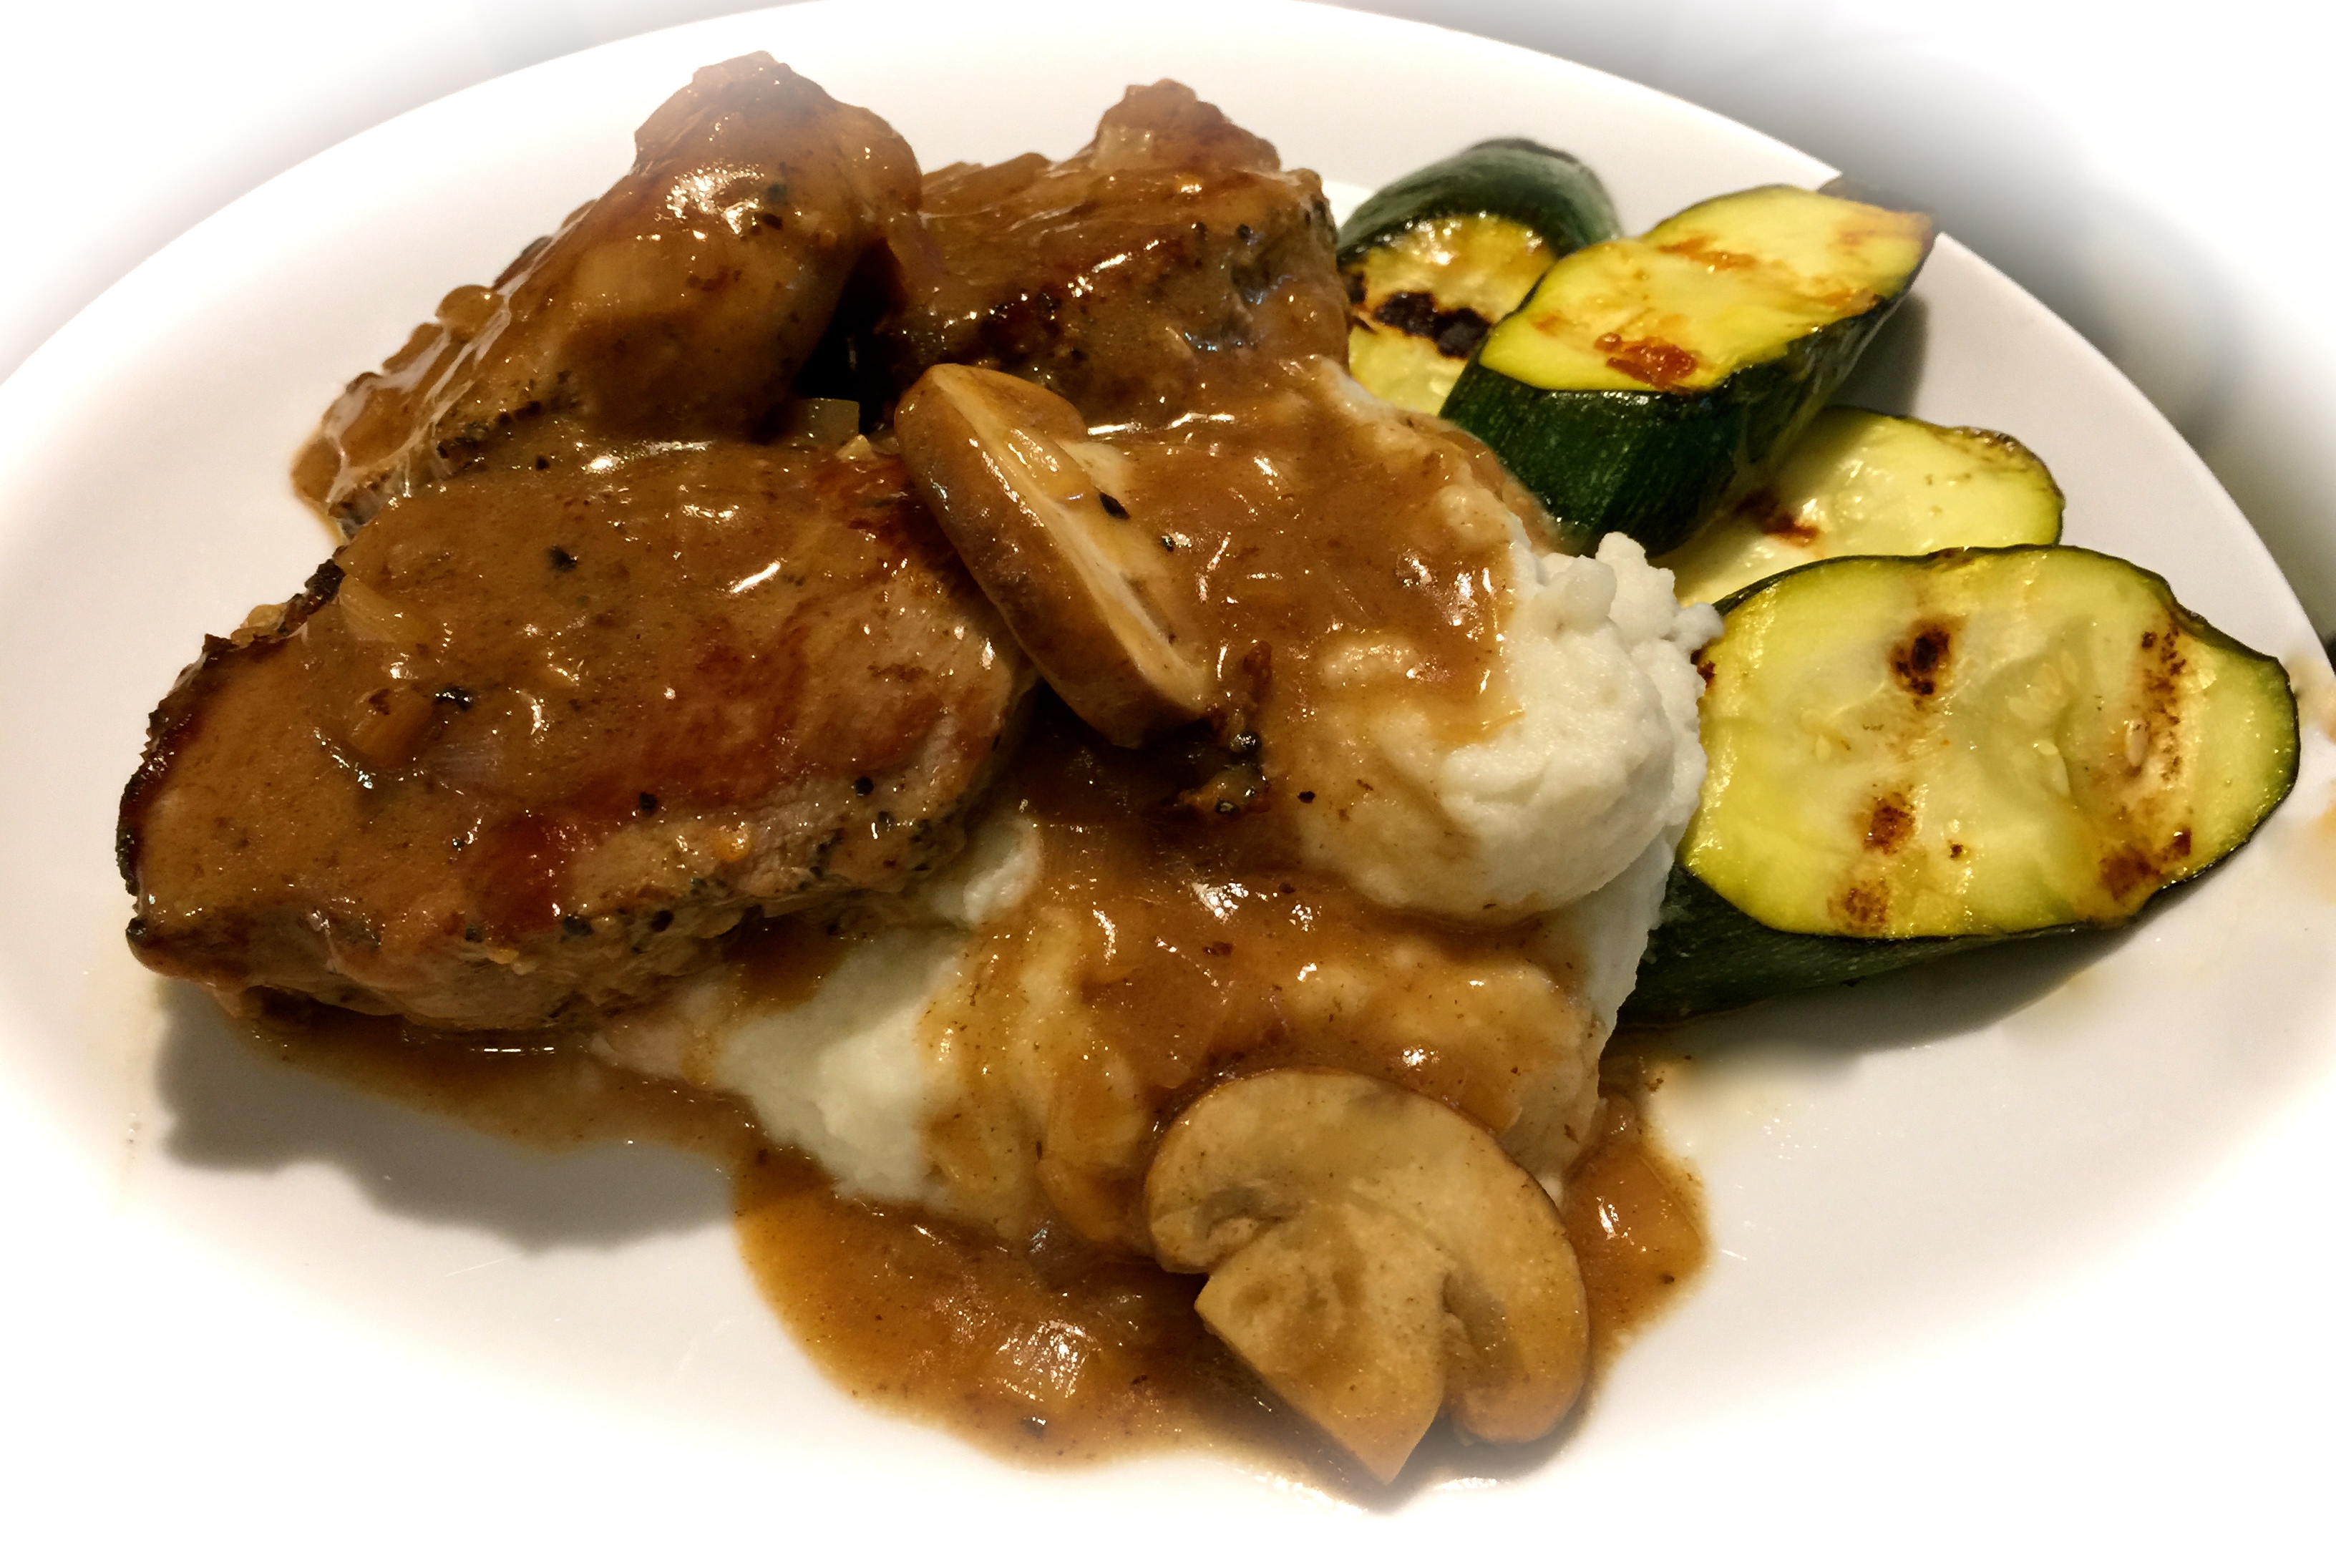
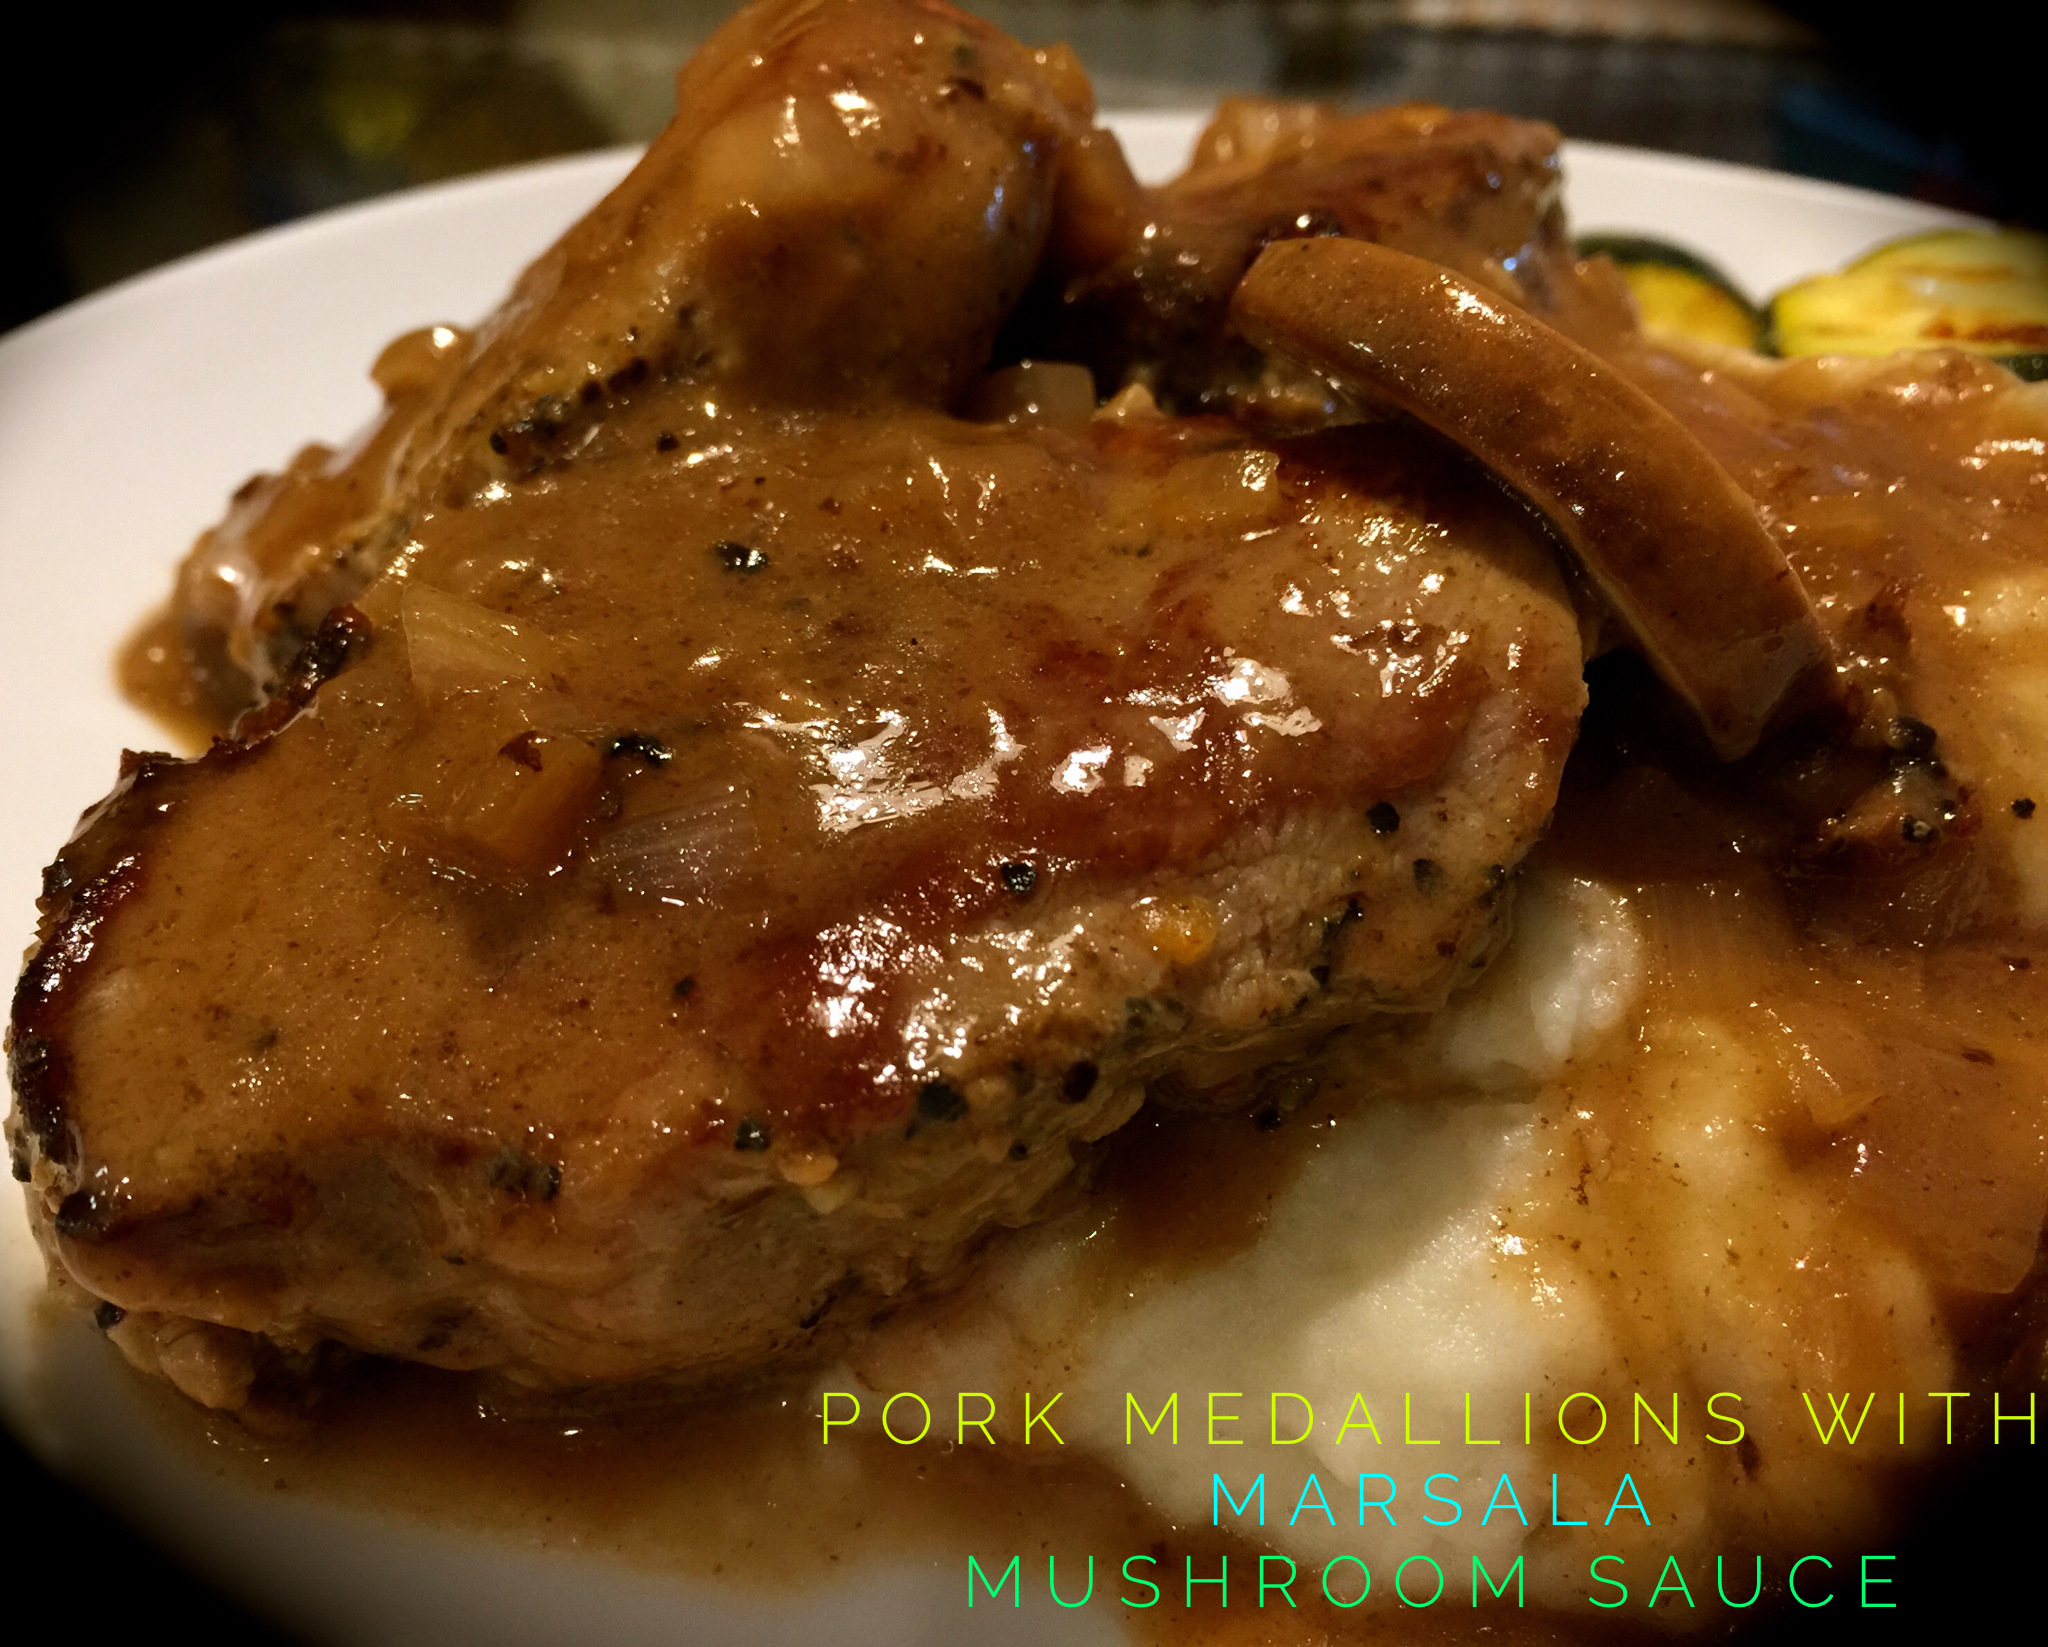
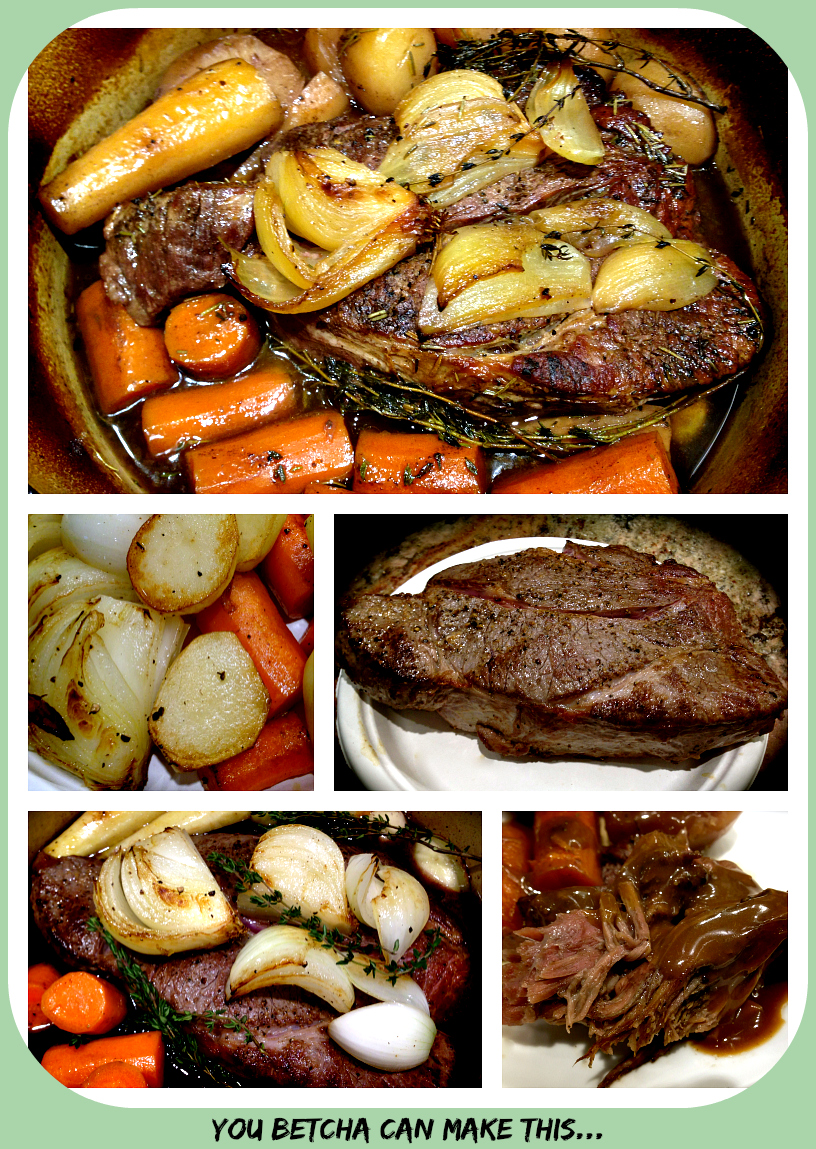
And that’s it. This recipe is a Fall classic. Try it and tell me what you think…

Garlic & Rosemary Balsamic Roasted Pork Loin & Potatoes...

  • Servings: 6
  • Difficulty: Medium
  • Print

INGREDIENTS:

1 1/2 pound boneless pork loin

3 large russet potatoes, peeled and diced into 1 inch square pieces (can also use 2 pounds of baby reds)

3-4 large carrots cut into chunks, then halved and halved again (or 1 bag of small baby carrots not cut)

1/4 cup good olive oil, plus 1 Tb. for the carrots

3 Tbs. balsamic vinegar

5 large garlic cloves (or 10 small), smashed

1/2 cup fresh rosemary leaves

Kosher salt and freshly cracked black pepper to taste

1 tsp. Herbs De Provence

Cooking spray

DIRECTIONS:

Preheat the oven to 375. Peel, chop and par boil the potatoes for 5 minutes. Drain and set aside.

Combine olive oil, vinegar, garlic, rosemary, salt and pepper in a food processor until it forms a paste.

Coat the pork loin on all sides with the balsamic mixture. (You will have some left over for the potatoes). Lightly grease a large roasting pan with cooking spray. Place the pork loin in the center of the roasting pan. Coat the potatoes with the remaining balsamic mixture. Place them on one side of the pork loin.

Coat the carrots with olive oil and season them with salt and pepper and Herbs De Provence. Place the carrots on the other side of the pork loin.

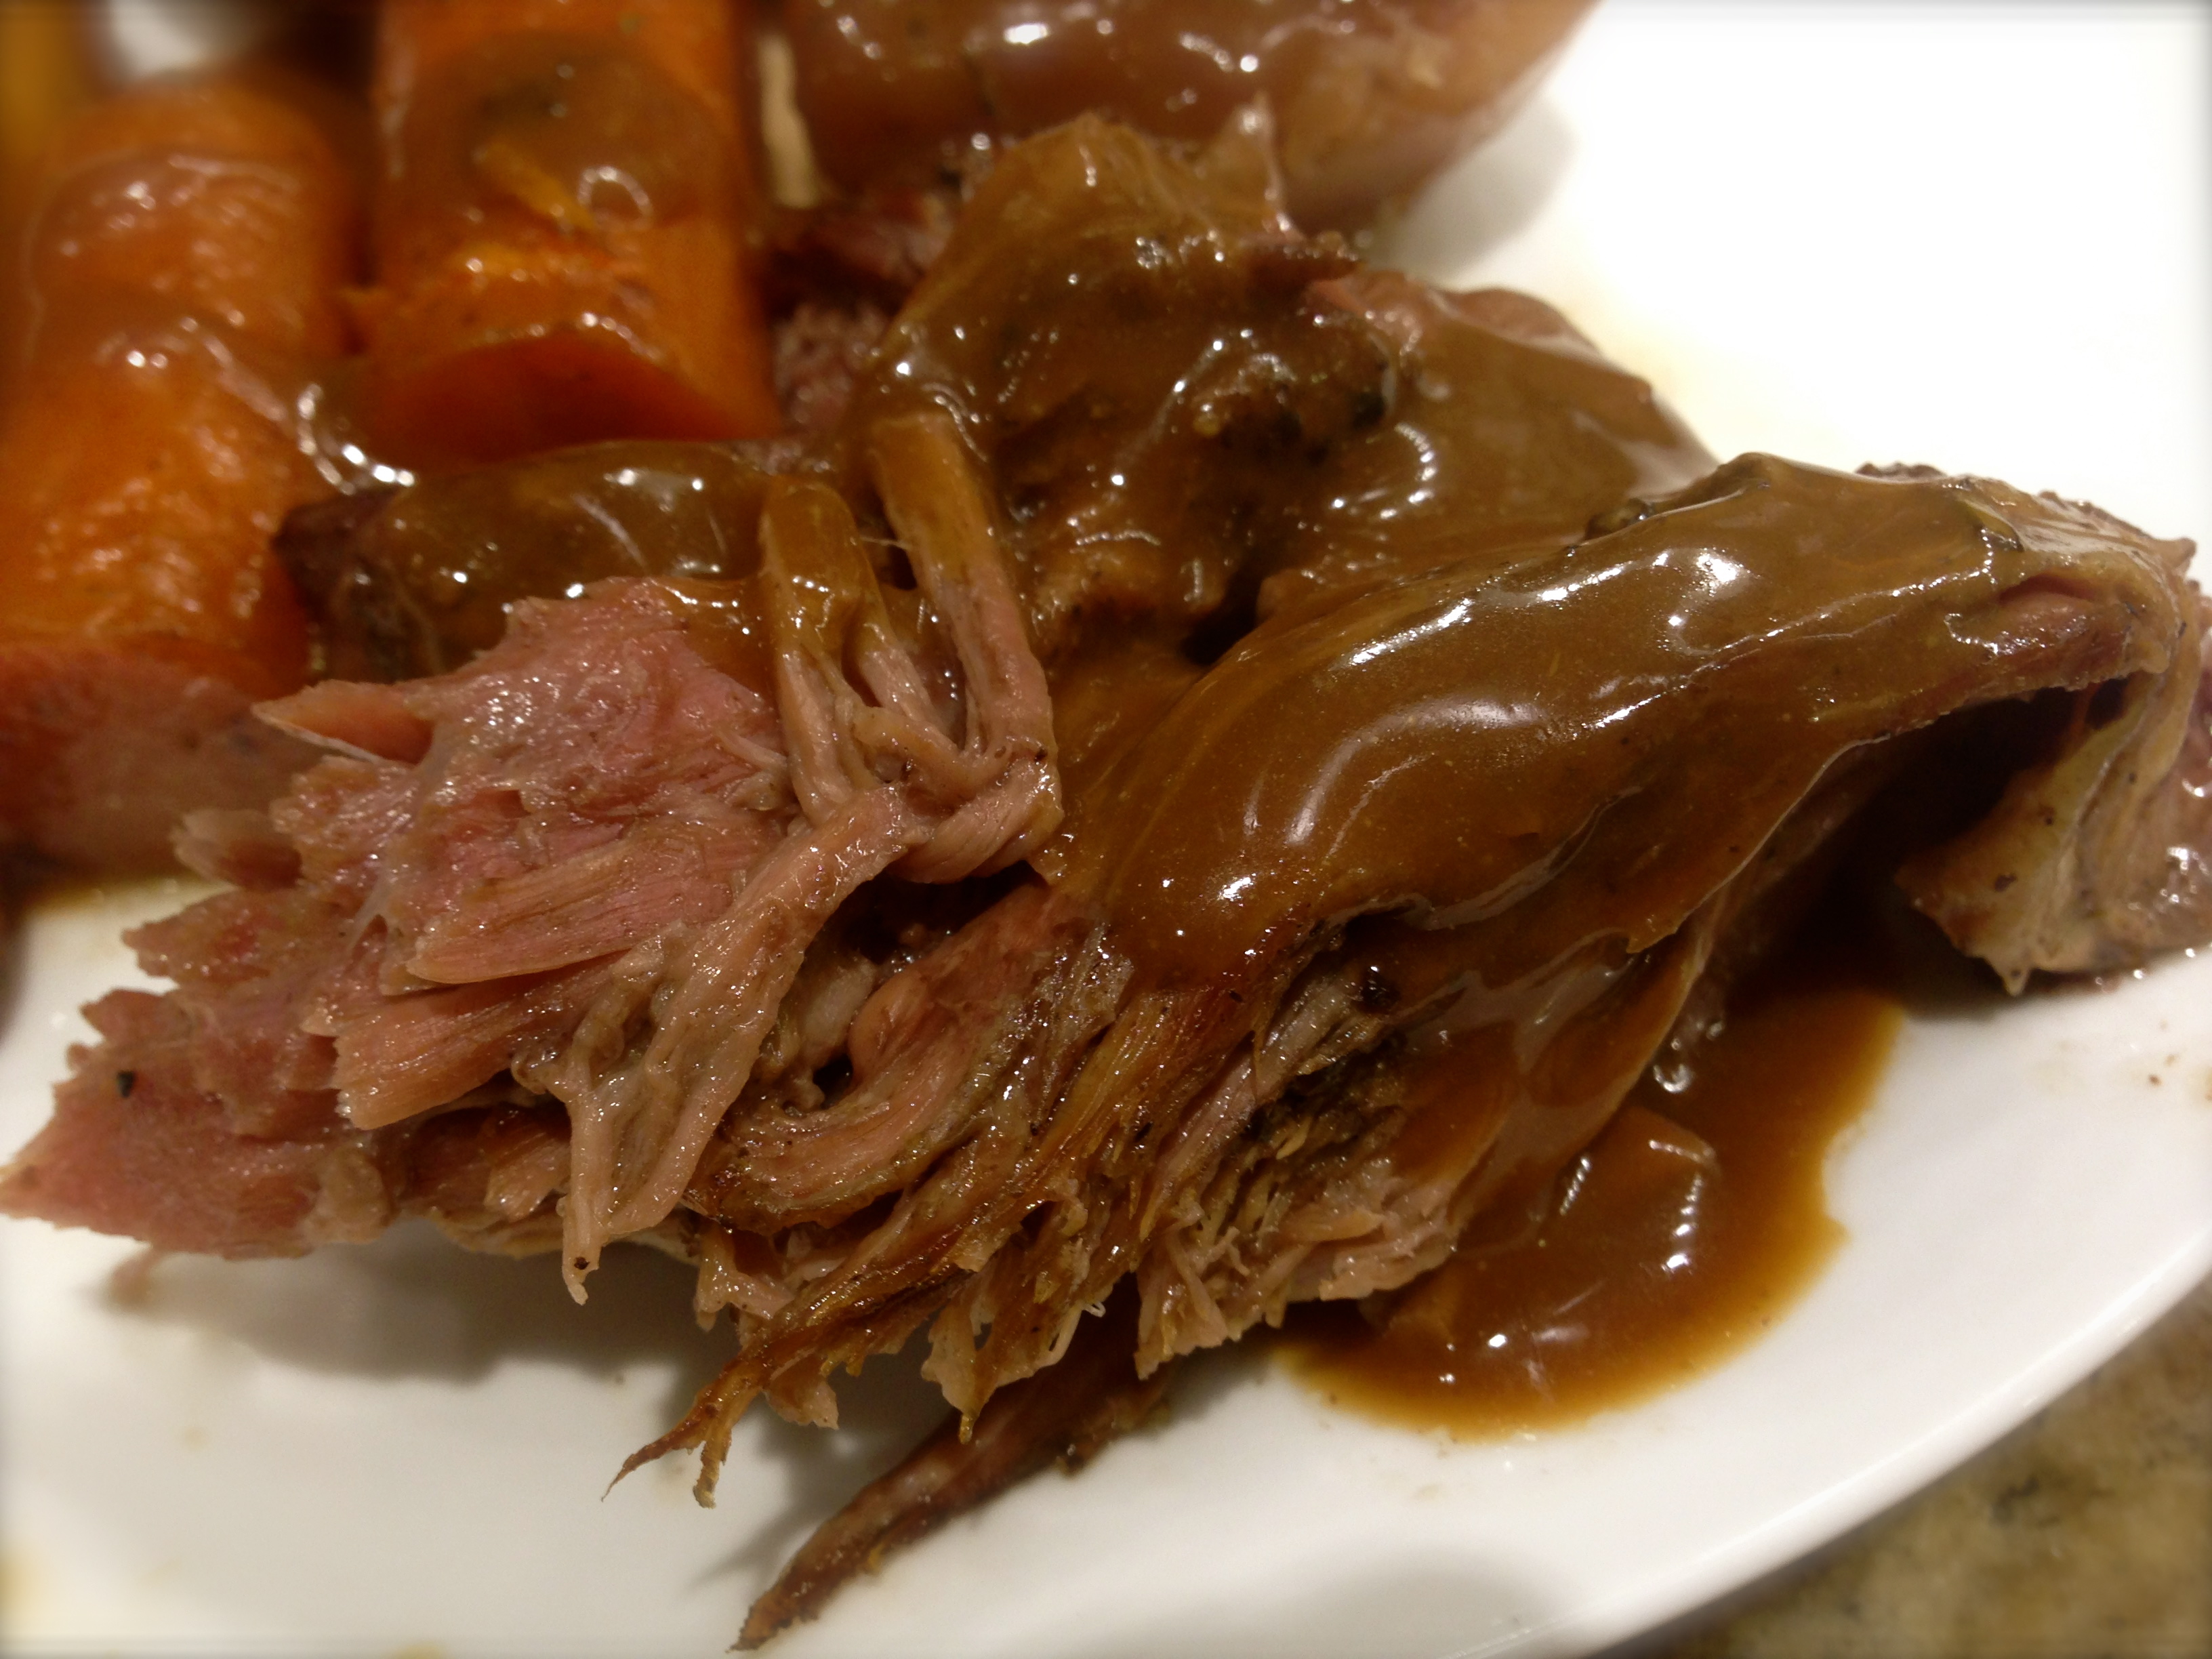
Roast for 1 hour. Remove from the oven and cover with foil for 5 minutes. Transfer the roast to a cutting board, slice and serve with the potatoes and carrots.


Slow Cooker Pork Tenderloin With Vegetables And Apple Butter Gravy…

I’ve been offline for a little bit. I was having technology issues and found out that my trusted Mac has now become so old that it cannot support html 5 which is the platform now used by WordPress. Oh well… but I’ve developed some work arounds and should be fine now.

Summer is in full swing, and that includes those warm summer temperatures. During Summer I like to grill but not every day. But what do you do when it is so hot and you don’t want to heat up the house when making dinner? That’s when I rely on my trusty slow cooker. You can have a great meal and never create more heat in the house.

I am a big fan of pork loin. Like beef tenderloin, it is the the most tender, flavorful and versatile cut of pork. Cooking it in the slow cooker is so easy, but you need to pay attention not to overcook it. So let’s talk pork loin with vegetables and apple butter gravy…

Lesson Learned 1 – Brown the pork and potatoes before putting them into the slow cooker: The slow cooker cooks food but doesn’t create crust or color. If that is not a big deal for you than you can skip this step. But I’ve always espoused that you eat with your eyes first and so I like to provide that extra step to make the meal even more pleasurable.

I put a little canola oil in a cast iron skillet and browned the pork loin – about 4-5 minutes on each side. Doing that gives it a nice brown crust as you can see from the picture above. I also brown the potatoes a little. I don’t brown the carrots. I don’t think that’s really necessary. The potatoes also take about 4-5 minutes per side and I usually do two sides just enough to give it great color.

Lesson Learned 2 – Cut your carrots small or use baby carrots: This recipe will only cook for 6 hours on low so you need to consider how tender you want your carrots. If you want them crisp tender you can cut them in larger pieces. If you want them fork tender you will need to cut the pieces small or use baby carrots. I like to use the larger sized carrots and I buy only what I need for the recipe, about 3 carrots. If the carrot has a thick base, I cut it into a log and then I cut the log in half down the middle. That way I minimize the thickness and the carrots come out fork tender. When you come down to it, it all depends on how you like your carrots.

Lesson Learned 3 – Do not cook this for more than 6 hours on low: That is plenty of time to cook the pork loin without drying it out. And the sauce made with apple butter is a great accompaniment to the pork.

This is a great meal that is easy to prepare and will not heat up your kitchen on these warm Summer days. Try this recipe and let me know what you think.

Slow Cooker Pork Loin With Vegetables And Apple Butter Gravy

  • Servings: 4
  • Difficulty: Easy
  • Print

INGREDIENTS:

1 1/2- 2 pounds pork loin

4 yukon gold potatoes, peeled and sliced into chunks

3 large carrots, cut into small chunks (you can use baby carrots as well)

I medium size yellow onion, peeled and cut into large chunks

3 large garlic cloves, minced

1 9.5 ounce jar of apple butter

1/3 cup dijon mustard (you can mix dijon with seeded mustard)

1/3 cup low sodium soy sauce

1 cup beef broth

1-2 Tbs. canola oil

Non-stick cooking spray

Salt and pepper to taste

DIRECTIONS:

Heat a large cast iron skillet. Add 1 Tbs canola oil. Salt and pepper the pork loin and put that side down in the hot skillet. Salt and pepper the other side of the pork loin. Let the pork loin sear for 4-5 minutes. Turn it over and sear it on the other side. Remove from the pan and set aside.

Check to see if the skillet needs more oil and add it if it does. Place potatoes in the pan being careful not to crowd them. Let them sear for 5 minutes and flip them to another side. Let them sear for an additional 5 minutes and remove them from the pan.

Spray the crock of the slow cooker with non-stick spray. Add the onions, potatoes and carrots into the crock. Place the pork loin on top of the vegetables.

In a small bowl whisk to together the garlic, apple butter, mustard, soy sauce and beef broth. Pour the mixture over the pork and vegetables.

Cook on low for six hours. Remove the pork and vegetables from the crock. Slice the pork and plate it with the vegetables. Taste the gravy in the crock and add more salt and pepper if needed. Pour the gravy over the pork.


Slow Cooker Honey BBQ Pulled Chicken Sandwiches…

If you are looking for an easy, and I do mean easy, meal to prepare look no further. I served this meal a couple of times now and it always turns out perfectly and it’s always super delicious. I have to admit I was initially skeptical about how this would turn it, but it was absolutely fabulous. When you know you’re going to have a busy day and you still want to have a good meal at dinnertime, this recipe is the answer to that dilemma.

So let’s talk slow cooker honey bbq pulled chicken sandwiches…

Lesson Learned 1 – Try to use chicken breasts with the skin on: I normally buy chicken breasts with the skin on and rib portions attached. First they are cheaper when purchased that way and second it’s easy to remove the rib portion and you’re left with a skin-on breast. Chicken can dry out very easily in a slow cooker and often can get overcooked. With the skin on it gives the breast meat more moisture during the cooking process and that is what you’re looking for. But sometimes you just can’t find them that way and that’s ok as well. Both times I made this recipe I had skinless breasts in the freezer and so I used them. But in my experience with other recipes, skin on breasts are preferred when cooking them in a slow cooker.

It’s also important to season them as well. I seasoned mine with kosher salt, pepper and McCormick’s Perfect Pinch Rotisserie Chicken seasoning blend. I really like this blend as it gives the chicken a great rotisserie chicken flavor. Try it and I’m sure you’ll agree.

Lesson Learned 2 – Use a slow cooker liner for this recipe: The sugar and honey in the bbq sauce can cause a mess that is very hard to clean up if it burns into your ceramic crock. Personally I am not a fan of slow cooker liners but I use them for this recipe. If you use one, clean up is a breeze and you don’t wind up with burnt bbq sauce all over your crock.

Lesson Learned 3 – Don’t overcook the chicken: I know, easier said then done, but most people overcook chicken breasts no matter what cooking method they are using. Chicken breasts can be moist as well as cooked through but there is a fine line between when that occurs and dried out chicken.

My rule of thumb is I never cook half breasts (and the ones I used were quite large) for more than 6 hours on low in my slow cooker. A lot of recipes say to cook chicken between 6-8 hours. In my opinion a two hours difference in cooking times is huge. Whenever I’ve cooked chicken in a slow cooker for 8 hours it always turned out dry. But the other variable is your slow cooker. Not all slow cookers are created equal. Know your slow cooker and if for some reason you can cook chicken for 8 hours and it does not dry out that’s fine. But I bet if you cook it for only 6 hours you’ll get a much better result.

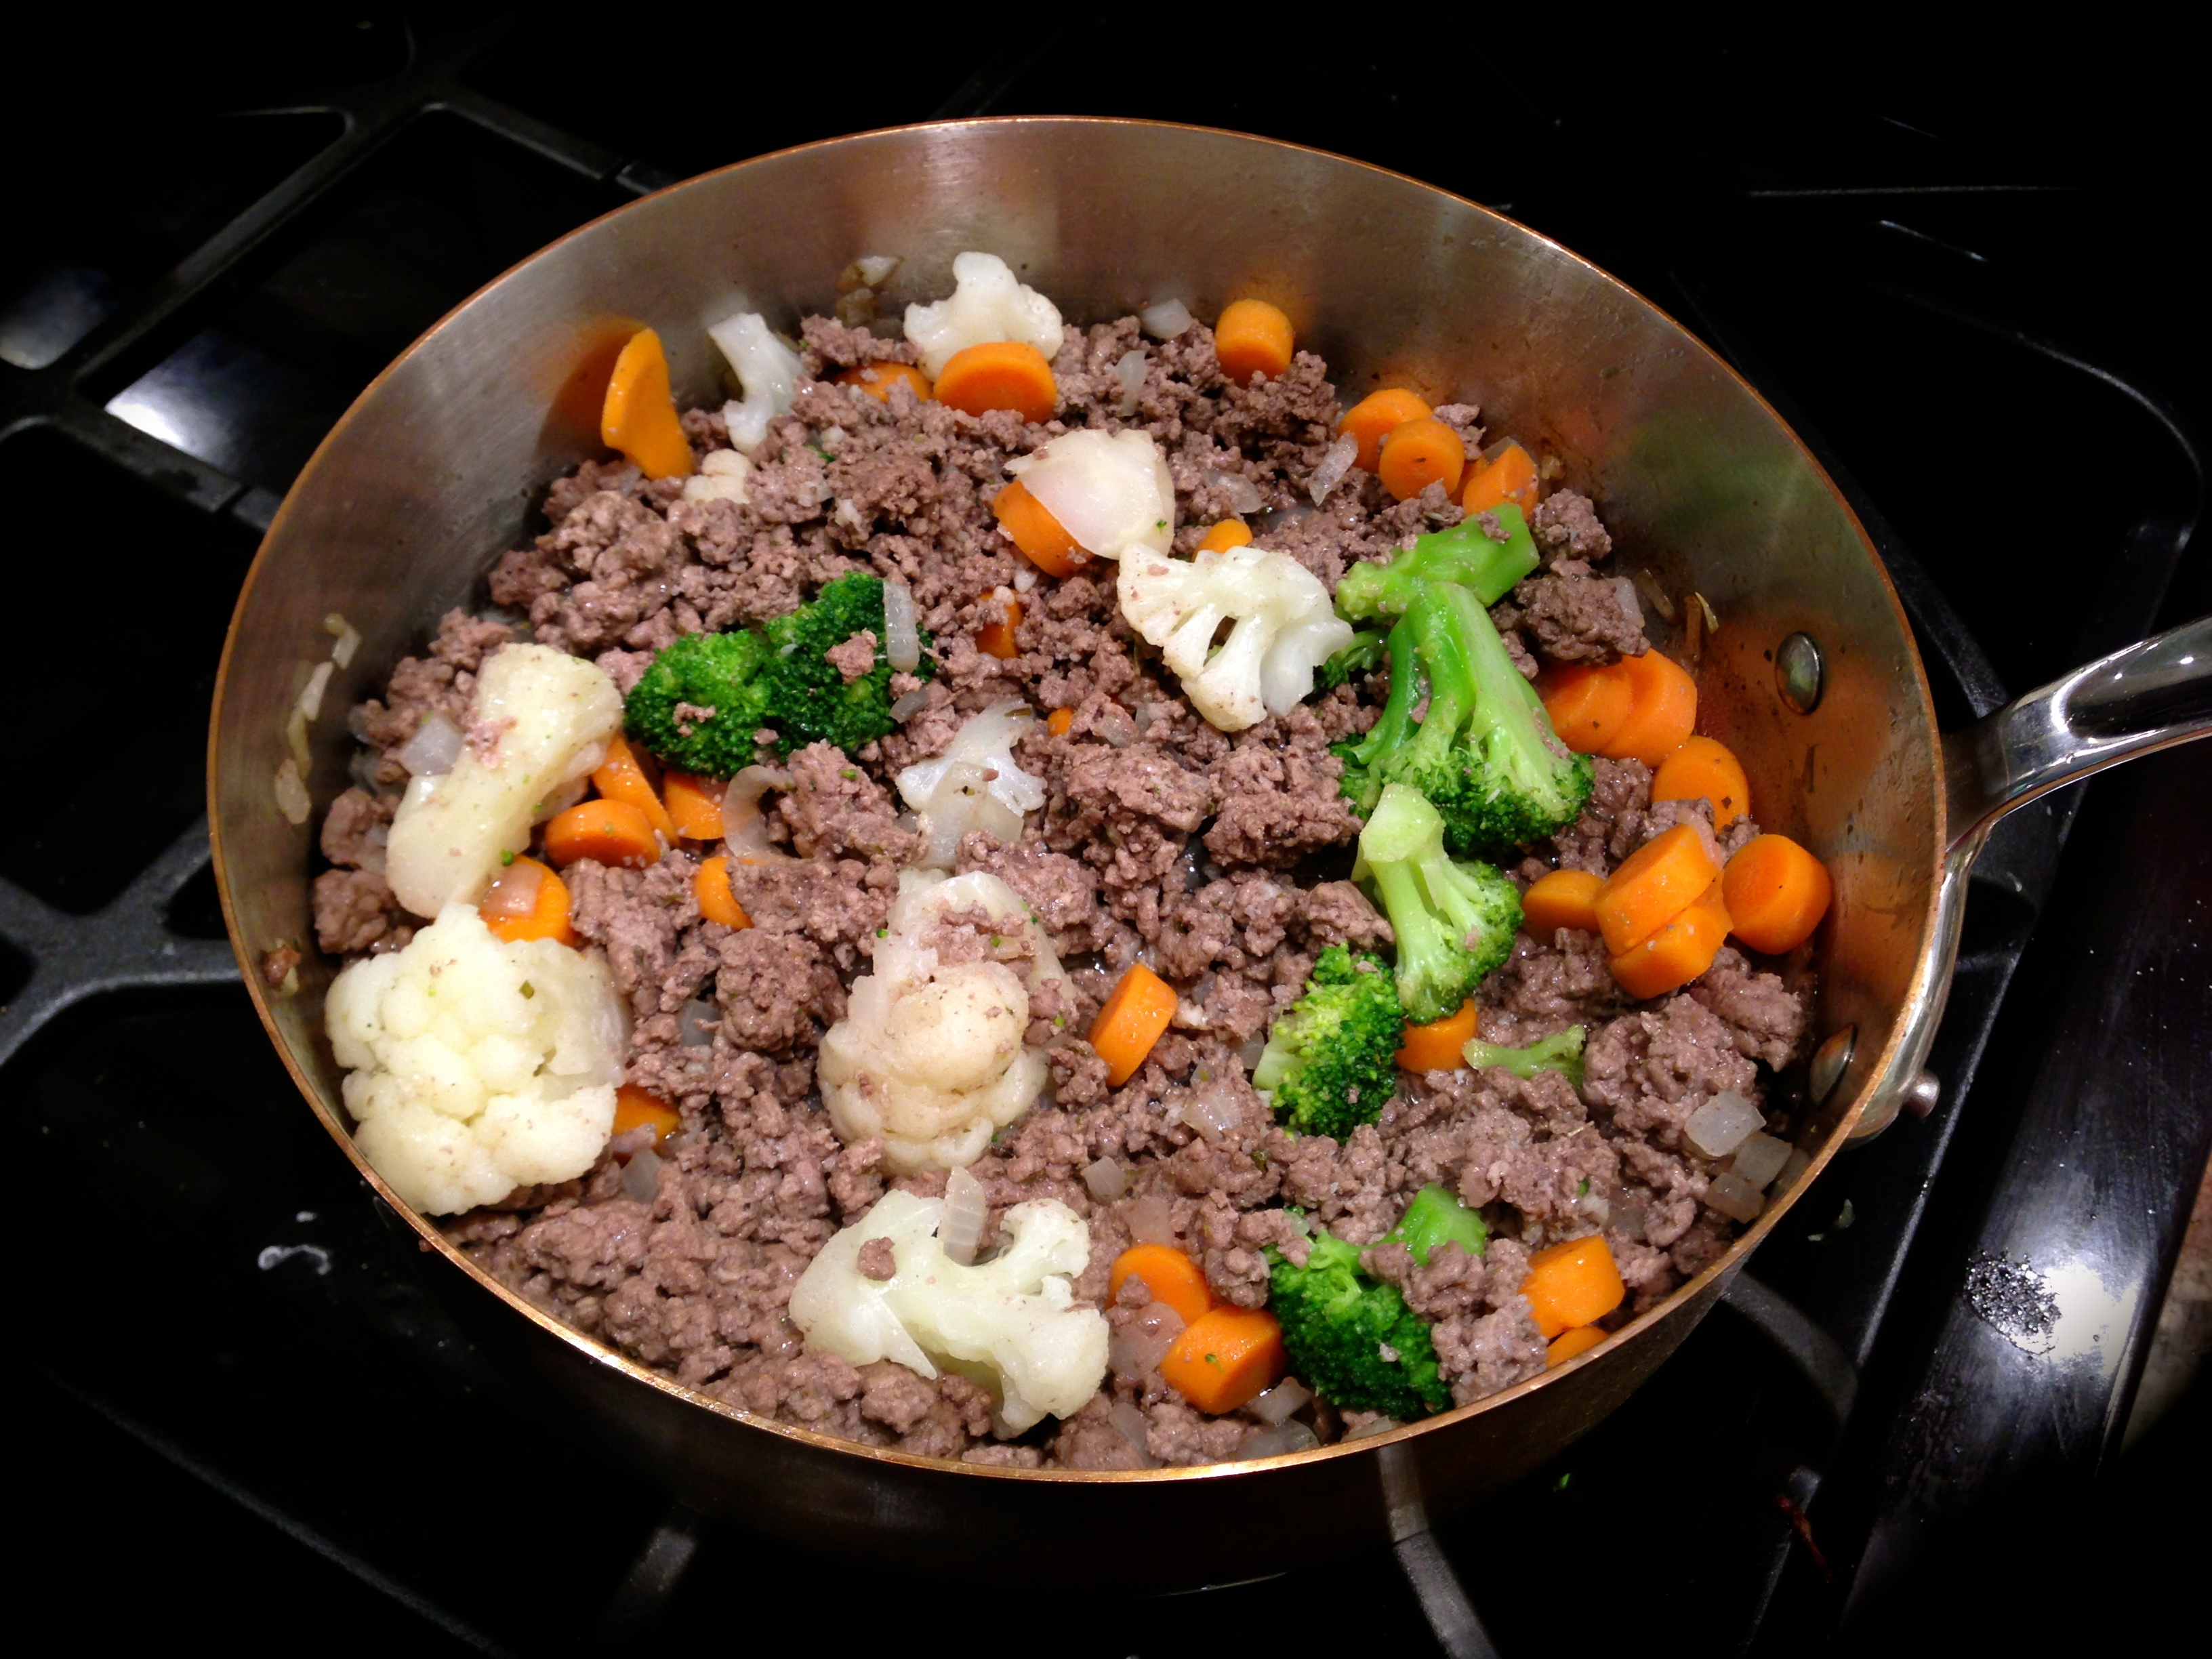
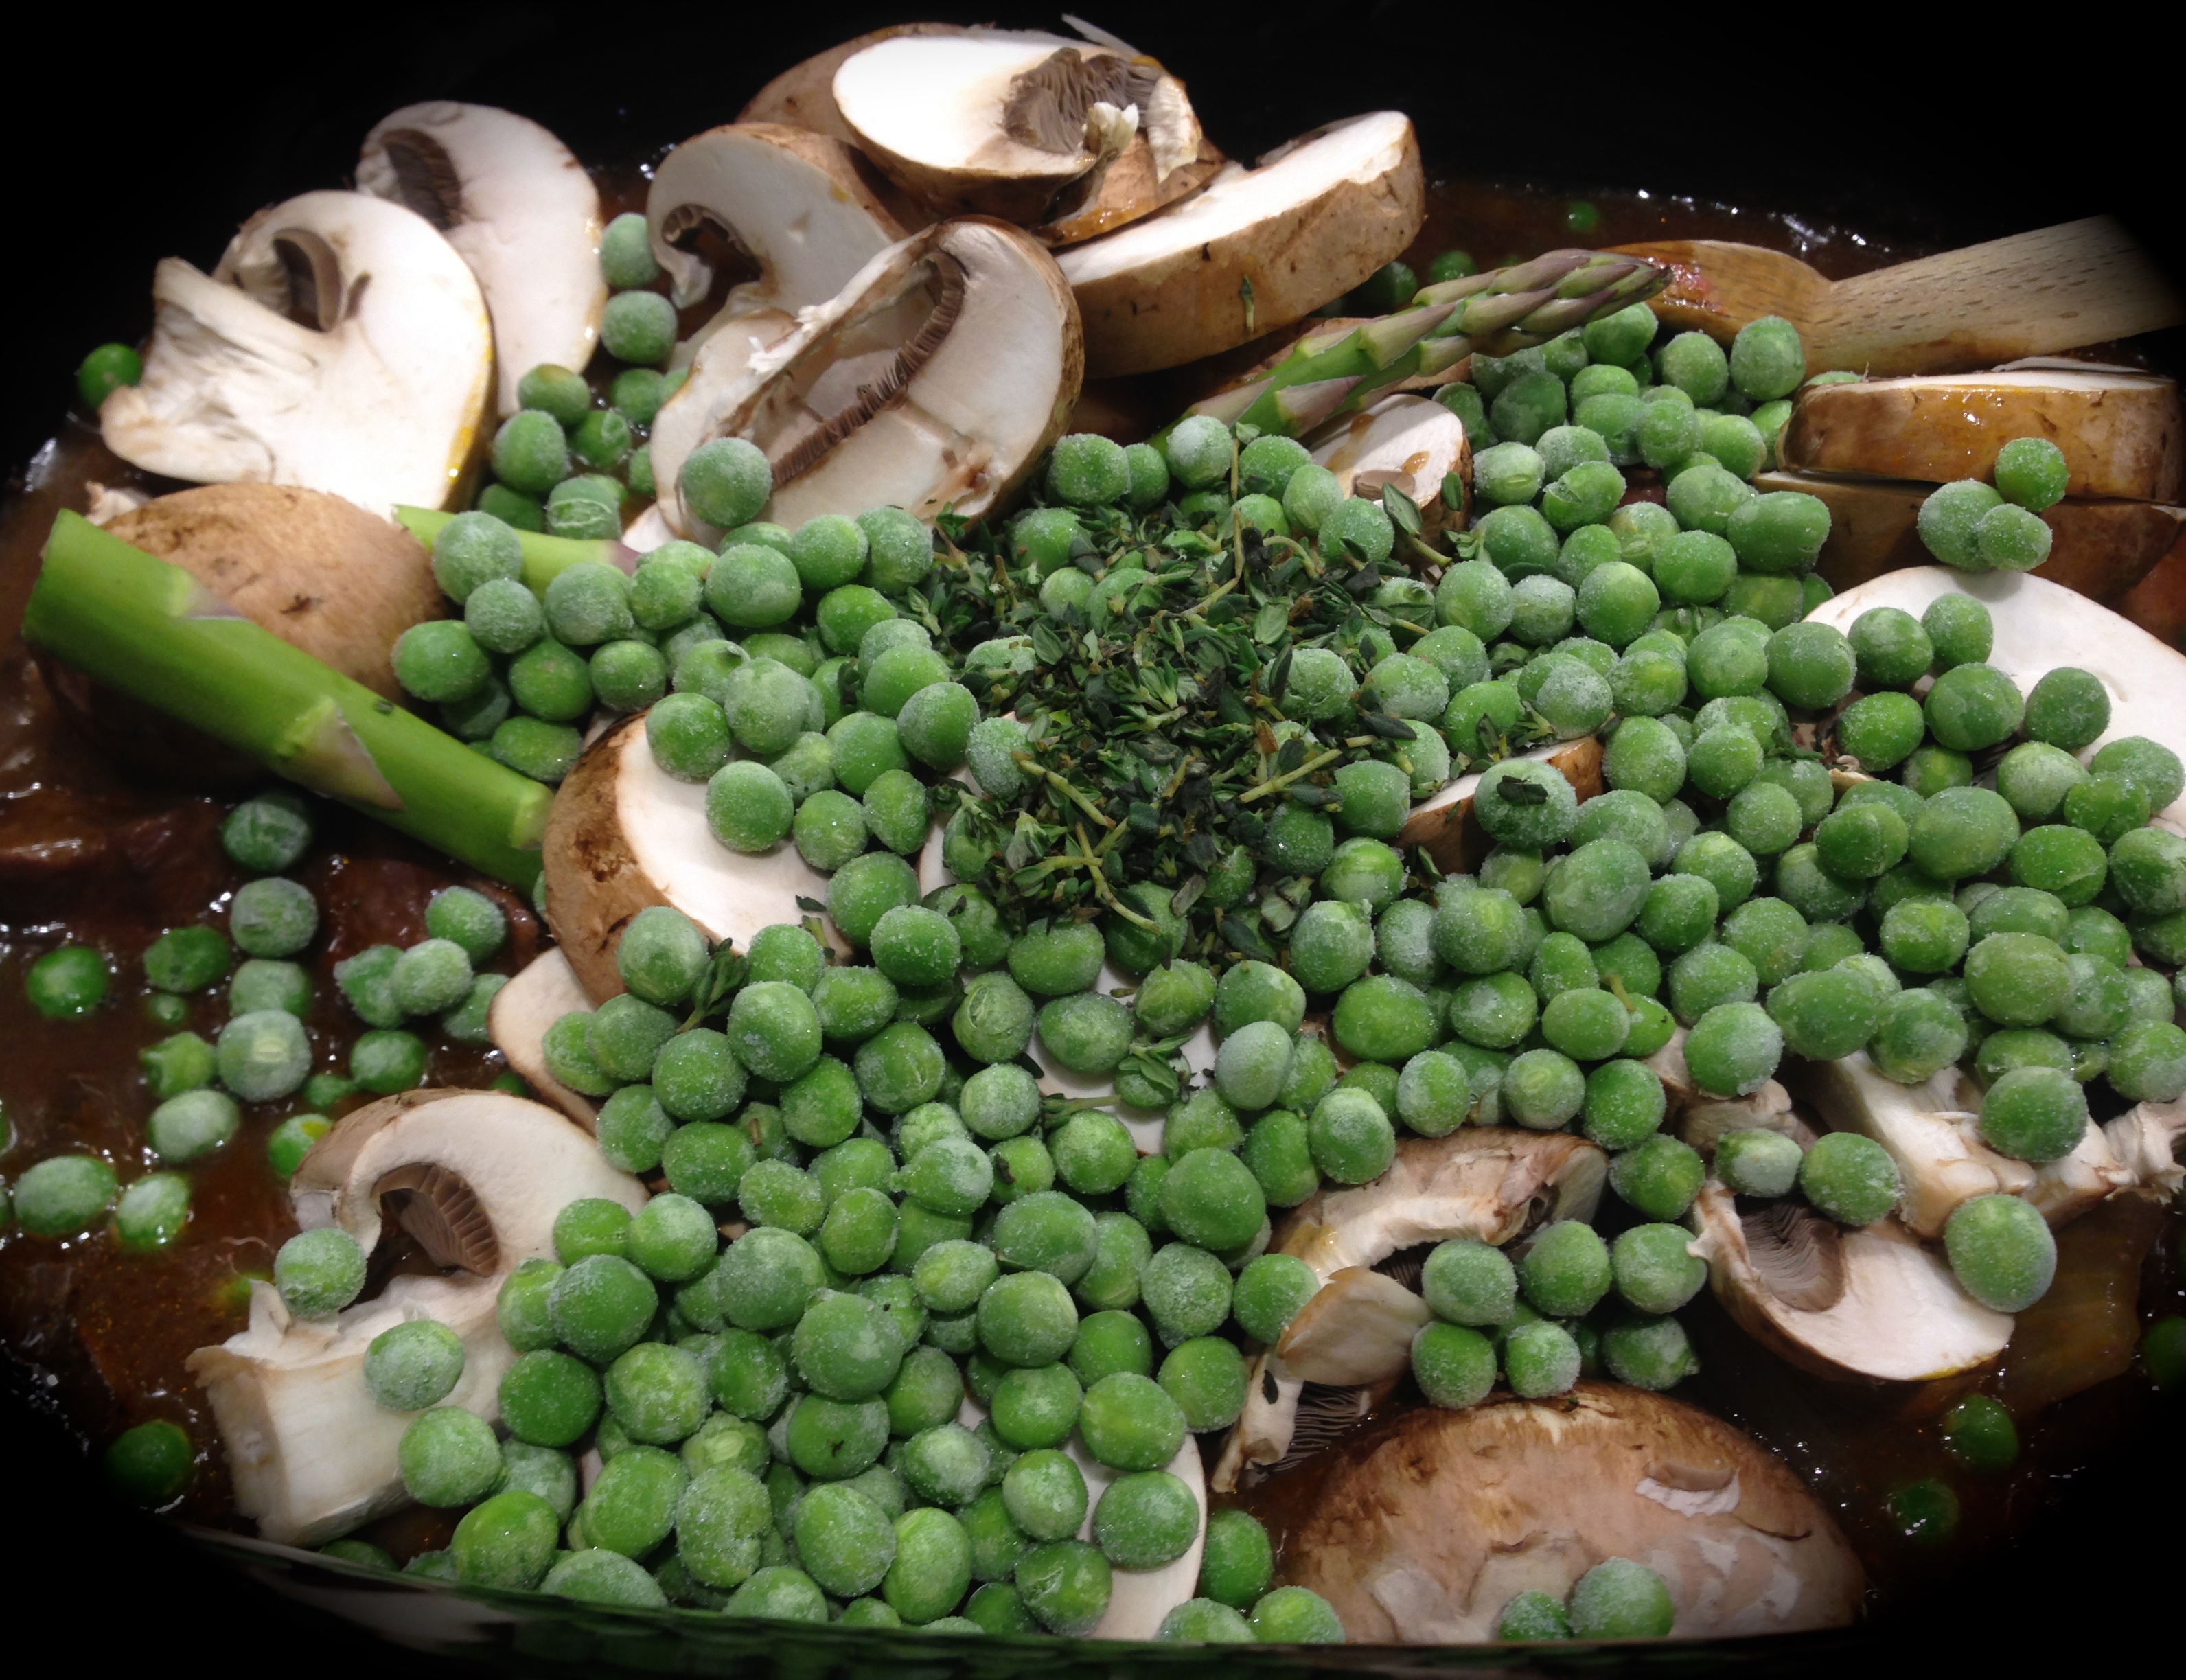
Lesson Learned 4 – You can cook a veggie with the chicken if you want to: The first time I made this recipe I only cooked the chicken in the bbq sauce mixture. The second time I added carrots. When it came time to shred the meat I just pulled out the carrots, put them on a baking sheet lined with foil and sprayed with cooking spray and kept them in a warm oven until dinner was served. Make sure you use cooking spray on the foil as the remnants of the bb sauce on the carrots will stick to the foil and you don’t want the carrots sticking. Also make sure you don’t use overly thick carrots – they won’t cook through in six hours.

Lesson Learned 5 – Serve the chicken on good sandwich rolls: The sandwich rolls are also important. I served my chicken on brioche buns. I found them at Whole Foods and I have to admit they were a little pricey, $4.99 for six rolls, but boy were they worth it. They were just the perfect compliment to the bbq chicken. I’m not saying you need to invest that much in dinner rolls, but make sure they are fresh and soft. It makes a difference. I served the sandwiches with cole slaw and sliced tomatoes and the meal was a hit!

An easier, more delicious recipe you’d be hard pressed to find. Try it and let me know what you think…

Slow Cooker Honey BBQ Pulled Chicken Sandwiches...

  • Servings: 6
  • Difficulty: Easy
  • Print

INGREDIENTS:

3 large chicken breasts, skin on preferred

1 18-ounce bottle of bbq sauce (I used Sweet Baby Ray’s)

1/2 cup Italian salad dressing

1/4 cup brown sugar

2 Tbs. Worcestershire sauce

1-2 Tbs. Perfect Pinch Rotisserie Chicken seasoning

2-3 large carrots, peeled and cut into 2 inch logs (optional)

Salt and Pepper to taste

DIRECTIONS:

Line the slow cooker with a slow cooker liner. Place chicken in slow cooker. (Place veggies in with the chicken). Season with salt, pepper and rotisserie chicken seasoning.

In a separate bowl combine bbq sauce, Italian dressing, brown sugar and Worcestershire sauce. Pour over chicken. Place lid back on top of the slow cooker.

Cook on low for 6 hours. If cooking veggies, remove them onto a foil lined baking sheet sprayed with cooking spray. Keep in a warm oven until serving.

Remove chicken, take off any skin and shred the breasts using two forks. Place shredded chicken back in the slow cooker and cook on high for 15 minutes to 1/2 hour. Serve on dinner rolls.

Prime Rib Roast…

Happy New Year! I hope your new year is filled with good health and happiness. Mine started off with a bang as I finally ventured into making a prime rib roast. It’s been on my list of “ok, now you have to try this… you betcha can do this” and I decided to jump into the deep end of the pool on the first day of 2017 and tackle this one.

I’ll admit now I was a little nervous. After all prime rib, even when it’s on sale is expensive. And the last thing you want to do is ruin an expensive cut of meat. So you see, even the cooks who have been at it for a while can still get nervous in the kitchen.

And talk about expensive… I decided to check out a prime rib roast at Whole Foods. I only needed a small one, just enough for me and my husband. So, I asked for a two rib roast, between 4-5 pounds. That would give me enough for two people with one dinner of leftovers. The butcher handed me a package for a 4.4 pound roast and the price tag on it was $68.00! I almost choked. As I walked through the store I had many internal conversations with myself trying to see if I could rationalize spending $68 on a cut of meat, albeit prime. When I finally got to the cash register I handed the roast to the checker and said I was sorry but I just couldn’t rationalize spending that much for a roast for two people. She couldn’t have been any sweeter. She said not to worry, it was no big deal and that Whole Foods wants its customers to be comfortable and satisfied with what they purchase. She was great. She took all my guilt away.

Two-Rib Rib Roast
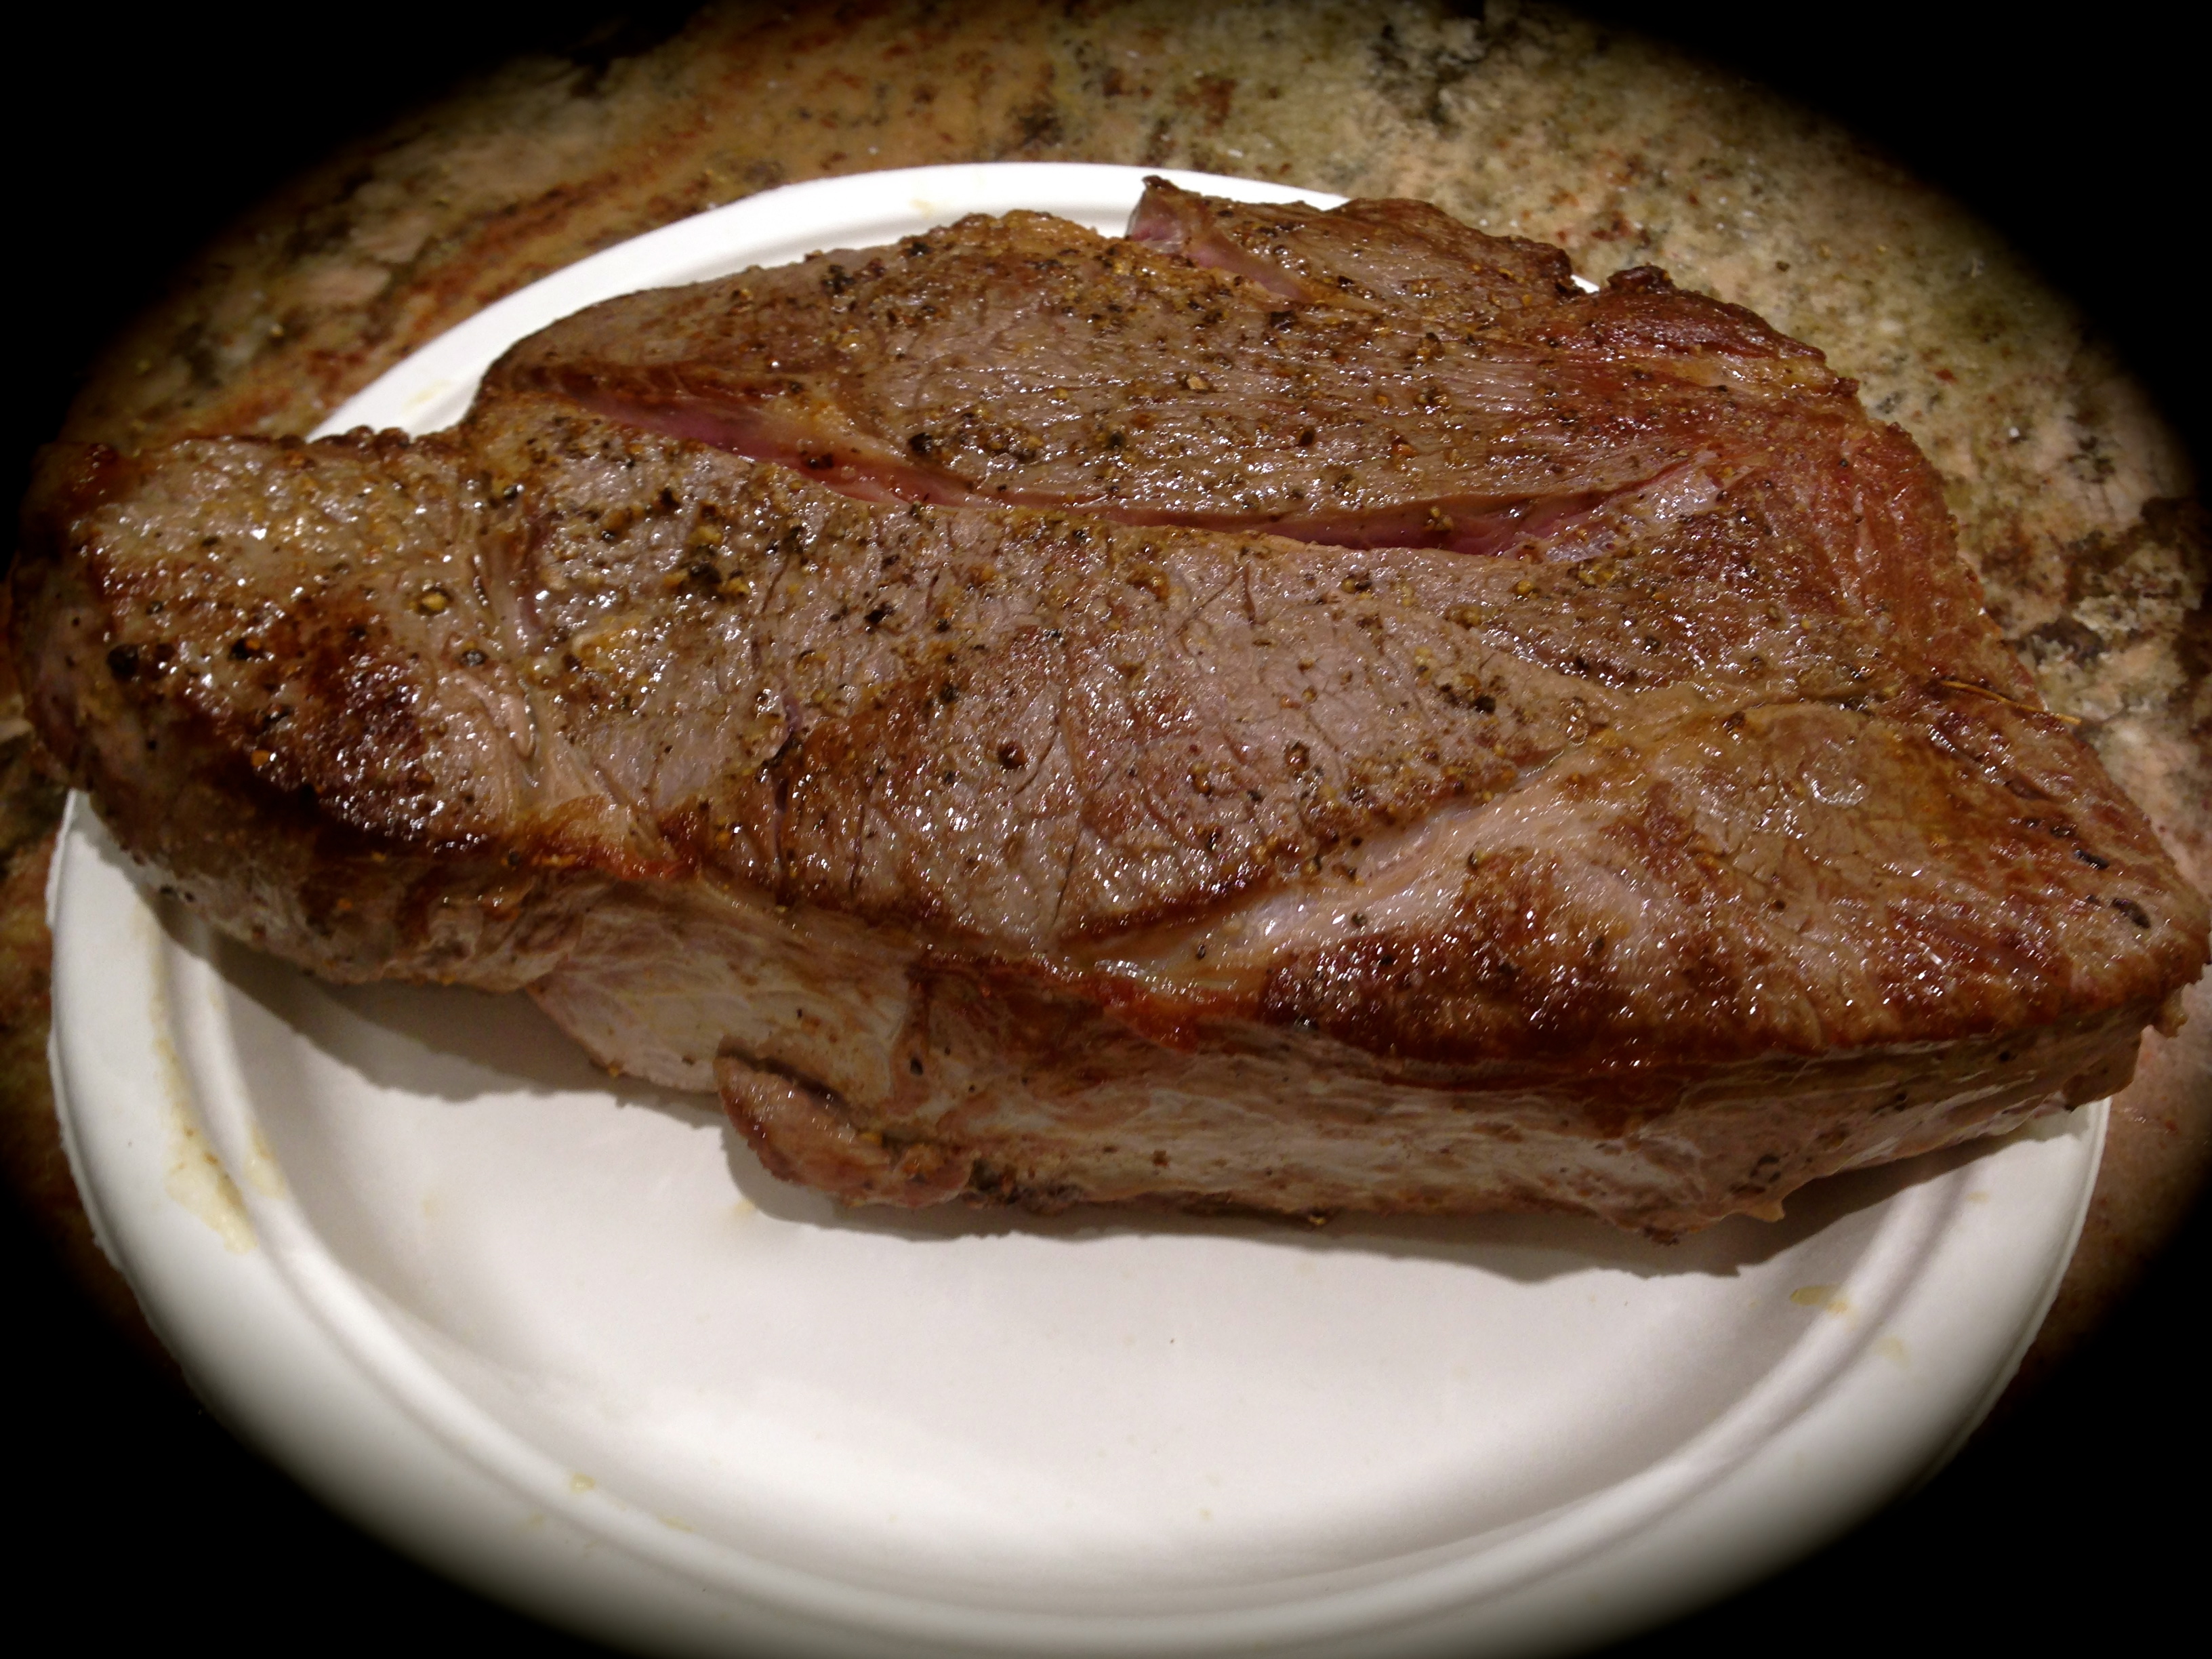
I finally worked with a butcher at Safeway who cut me a two rib roast and tied the bones to the bottom as I requested. The roast coast $44 for a 4.3 pound roast. Still expensive, and choice but not prime, but I could rationalize that for a special meal more than $68.00. In the end the roast was fabulous so I was glad I opted for the less expensive cut. My next step was researching various cooking methods and determining what I felt would work for me. So I have some really good lessons learned to share with this blog…

Lesson Learned 1 – Let the roast sit out and get to room temperature: Many people are afraid to do this as they think the meat will spoil. Nothing can be further from the truth. In order to ensure that your roast cooks evenly you have to get it to room temperature. For my 4.3 pound roast I let it sit on the counter for 4 hours. Obviously the larger the roast the longer the time. I spoke with a co-work who made a 9 pound roast over the holidays and she kept hers out for 6 hours. Don’t be afraid to do this. You will be rewarded with an evenly cooked roast and it is perfectly safe.

Lesson Learned 2 – Choose the roasting method that is right for you: When I researched various roasting options, two methods seemed to be most prevalent. Both required cooking the roast at a very high heat for about 20-30 minutes. The difference was the next step. Some recipes suggested turning off the heat in the oven and letting the roast sit in there for several hours, making sure not to open the oven. Others suggested lowering the heat and cooking the roast at a lower heat for a certain amount of minutes per pound. Since everything takes longer to cook in high altitude, I chose the latter. I just didn’t see my roast cooking to medium rare with the oven turned off.

Lesson Learned 3 – Make sure your oven is clean: I cooked my roast at 450 degrees (some recipes call for 500 degrees) for the first 25 minutes. I have a brand new oven and it is really clean. I still set off my smoke alarm. (I forgot to put on the hood fan). My point is, at this high heat the roast will smoke and if you have a dirty oven everything baked on to the walls of your oven will smoke as well, just adding to the problem. So don’t forget to turn on your hood fan and make sure that oven is clean.

Prime Rib With A Garlic, Rosemary & Thyme RubLesson Learned 4 – A rub on the roast makes a difference: I used a rub consisting of olive oil, fresh garlic, fresh rosemary, thyme, and salt and pepper. What I found is the rub creates a delicious crust when cooked at those initial high temperatures. It added a fabulous flavor to the meat. I highly recommend the rub in this recipe. It tasted divine!

Lesson Learned 5 – Use a meat thermometer: The only way to truly know what’s going on with your roast is to use a meat thermometer. I like mine medium rare which means an internal temperature of between 130 – 135 degrees. Keep in mind when you take the roast out of the oven it will continue to cook as it rests, at least another 5 degrees. So if you want medium rare, take the roast out at 130 and you will be fine. This time I chose to make it rare as my husband likes it that way. That is an internal temperature of 120-125. You can easily just put a rare piece in a pan on the stove and heat it gently to bring it up to medium rare. Just keep an eye on it, as it will not take long to get it to medium rare.

Lesson Learned 6 – Let the meat rest: The roast looks so good when it comes out of the oven but you need to give it time to let its juices redistribute before you slice it. Otherwise all the juices will be on your plate and not in the meat. So let the roast sit for 20 minutes. Cover it with foil during that time and after 20 minutes it will be a perfect temperature for serving with the juices redistributed.

Lesson Learned 7 – Make your horseradish cream sauce to taste: Is there any better combination than prime rib and horseradish sauce? If you’ve never tried it you simply must. I will provide some basic guidelines for making this cream sauce but I found when I made mine that I needed to add a lot more horseradish. The jarred horseradish that I had was not overly spicy and so I needed more to get the flavor combination that I liked. But start out with a little horseradish and add from there. Depending upon the type of prepared horseradish you are using, a little may be enough. That was not the case for me.

As you can see there are many things you need to consider in order to make the perfect rib roast. But if you follow these lessons learned you will wind up with a flavorful roast cooked to perfection. Don’t be afraid to do a prime rib roast. You betcha can make this!

PRIME RIB ROAST...

  • Servings: 4
  • Difficulty: Medium
  • Print

INGREDIENTS:

Prime Rib Roast1 4-5 pound rib roast, bones tied to the bottom

1 cup red wine (I used merlot)

1 cup beef broth

2 Tbs. garlic, minced

2 Tbs. garlic infused olive oil (you can use plain olive oil)

2 Tbs. fresh rosemary, minced

2 Tbs. fresh thyme, minced

1 Tbs. kosher salt

1 tsp. freshly cracked black pepper

Horseradish Sauce:

1/4 cup sour cream

1 -2 Tbs. prepared horseradish

DIRECTIONS:

Remove the roast from the refrigerator and let stand for at least 4 hours. Preheat the oven to 450 and arrange the racks so that the roast will be in the center of the oven. Add the beef broth and wine to the bottom of the roasting pan.

Mix together the olive oil, garlic, rosemary, thyme salt and pepper. Spread the mixture on top of the roast. Place the roast on a rack on top of the beef broth/wine mixture. (At this point if you have an oven safe meat thermometer you will want to put it into the center of the meaty part of the roast making sure to avoid contact with the bones. If you only have an instant meat thermometer you will need to check the roast at various intervals at 1 1/2 hours after lowering the temperature of the oven).

Roast at 450 for 25 minutes. Turn the oven temperature down to 350 and continue to roast for approximately 15 minutes per pound (at high altitude I found I needed 20 minutes per pound). For medium rare remove the roast when the internal temperature is 130 degrees. Let the roast stand covered with foil for at least 20 minutes.

While the roast is resting place the roasting pan on a burner with the rack removed. Heat the beef broth/wine mixture and remove any fat from the drippings. This can be used as au jus for the roast or gravy for mashed potatoes if you are serving them as a side dish.

For the horseradish sauce, mix the ingredients together, tasting the sauce to ensure you have the right amount of horseradish. Add more if necessary. Chill the mixture until it’s time to serve.

rub

rub ingredients


beef broth and wine bath

Prime Rib Roast

Prime Rib Roast

prime rib dinner

Grilled Rosemary Garlic Lamb Chops With Roasted Italian Potatoes…

I know I have been remiss in posting recipes. As I’ve stated many times, my goal is one new recipe a week. Well, there is a very good reason that I’ve not been able to keep up. My husband and I downsized and moved from a house to a condo in July. It didn’t take us long to figure out that the look and functionality of the kitchen were not what we wanted. And so it began… shopping for granite, replacing appliances (stove top, microwave, oven and dishwasher – the refrigerator is ok so it may get a reprieve for a while). And now we are in the midst of taking it all apart and putting it back together again. You’ll feel my pain when you look at the picture below.

my torn apart kitchen

The good news is that I’ve lived through these types of remodels before and my husband always does a fabulous job. It was hard for us to move away from the home we lived in for over 15 years but it was a smart move. And once we tried to settle in we knew there were some things  preventing us from feeling like this was home. By making these changes our condo will definitely become our home with the kinds of conveniences and appliances we like.

One last thing about the remodel. The condo had quartz on the island and countertops. Although quartz is nice, we are granite people. We loved the granite that we had in our previous home. It was called Crema Bordeaux. When we went granite shopping we decided to be open to new possibilities. We walked through aisles and aisles of various types of granite. Wouldn’t you know it, we kept coming back to the slab of Crema Bordeaux. We decided not to fight it and went with what we’ve loved for a long time. The slab (which weighs 2 1/2 tons by the way) is pictured below.  The templates for the granite will be drawn at the end of this week with installation to occur right after Thanksgiving. Thank goodness we are going out to dinner on Thanksgiving! We should be up and running for Christmas. After all, there are cookies to be made!

Crema Bordeaux

So, this has been a very long winded way of saying that I’ve had to rely on my grill, built in oven (that will be removed when my gas stove is installed) and microwave to do the heavy lifting for meals.

My preferred way of cooking lamb chops is on the grill so this was a no brainer. With a hot grill you get a great sear and the chops take less time to cook. The potatoes are made in the oven and are so easy to prepare and they taste divine!  So here are a few lessons learned making the lamb chops and potatoes…

Lesson Learned 1 – The longer you can marinate the lamb chops the better. I always use loin chops and I find them meatier and juicier, but you can also use rib chops. I found that I can get between 6 – 8 one inch thick chops at a really great price at either Sam’s Club or Costco.

When buying lamp chops, try to pick ones that have a substantive tenderloin. Obviously, that is the most tender part of the chop. Marinating them overnight is optimum, but you can marinate them for as little as an hour as well.

Marinated Lamb Chops

Lesson Learned 2 – Don’t forget to let the lamb chops rest after you cook them: Lamb like beef needs to rest when your done grilling so that the juices can redistribute. Although they will look divine resist the temptation to cut into them right away. Cover them with foil and let them rest for 5 minutes and you will have tender, juicy chops.

Mint JellyLesson Learned 3 – If you’ve never had it, try some mint jelly with your lamb chops: I was introduced to lamb chops with mint jelly when I was a kid. I was at a friend’s house for dinner and this is what was served. I never had lamb before and didn’t know what to think. At the time I was not all that enamored with the flavor but was afraid to say anything to my friend’s mom so I just said it was fabulous. Because of that, she made lamb with mint jelly every time I came over for dinner. I learned to love it, and now it is one of my all time favorites. Just use a little jelly with a piece of lamb. The flavor combination is to die for!

Lesson Learned 4 – Not all types of potatoes cook at the same rate: I’ve found that if I am roasting yukon gold or red potatoes they take less time to cook than russets. In this recipe I used small yukon gold potatoes and halved them. At 425, these potatoes were fully cooked and beautifully crisped in one hour. They were heavenly.

Roast Italian Potatoes

So, if you want a quick, easy meal without using your stovetop this one’s for you. I roasted some cauliflower florets in the oven with the potatoes (I only roasted them for 1/2 hour) and had a fabulous meal. So try this one and let me know what you think.

Grilled Rosemary Garlic Lamb Chops...

  • Servings: 4
  • Difficulty: Easy
  • Print

INGREDIENTS:

8 one inch thick loin lamb chops

4-6 cloves garlic, minced

1 Tbs. fresh rosemary, chopped

Zest of one small lemon

1/4 cup garlic infused olive oil (you can also use plain EVOO)

Salt and Pepper

DIRECTIONS:

Salt and pepper both sides of the chops. In a small bowl, combine garlic, rosemary, lemon zest and olive oil. Put the chops in a bag and pour the marinade over them. Seal the bag and turn it over several times to make sure the chops are coated on both sides. Marinate for at least one hour up to overnight, turning the bag at regular intervals to make sure both sides of the chops are evenly marinated.

Heat your grill to medium high heat (I have a Webber gas grill). Remove the chops from the marinade and sear them for 2 minutes on each side. Lower the temperature of the grill to medium heat and continue to cook for 5 minutes total. This cooking time will give you medium rare chops. Let the chops rest for 5 minutes before serving.

Roasted Italian Potatoes...

  • Servings: 4
  • Difficulty: Easy
  • Print

INGREDIENTS:

15 small yukon gold potatoes, halved but not peeled

6 whole cloves of garlic

2 Tbs. dried oregano

1/4 cup basil infused olive oil (you can also use plain EVOO)

Flat leaf parsley for garnish, optional

Salt and pepper

DIRECTIONS:

Cover a large baking sheet with foil and spray the foil with cooking spray. In a large bowl, combine the halved potatoes, whole garlic cloves, oregano and olive oil. Spread the potatoes and garlic cloves on the baking sheet making sure not to crowd the potatoes (they won’t crisp if they’re crowded). Salt and pepper the potatoes.

Roast at 425 for one hour turning the potatoes half way through the roasting time. Serve immediately.

Grilled Rosemary Garlic Lamb Chops

Grilled Rosemary Garlic Lamb Chops With Roasted Italian Potatoes

Meatballs With A Surprise Inside…

My “Best Ever Meatballs” is my go-to recipe for an hors d’oeuvre but I wanted to experiment with a meatball recipe that could serve as a entree and not an appetizer. I definitely wanted them to taste differently from the appetizer version and I also wanted to have some fun with them. So I decided to make these meatballs and I think they’ll be my go-to entree recipe.

This is a great recipe for a variety of reasons. I love it because the meatballs are easy to make, they’re delicious, they cook quickly, the cheese inside is a delightful surprise and it makes great leftovers! I have to say I cheated when I made these, I used pre-made mashed potatoes instead of making them from scratch. But by doing that I could have dinner on the table in 30 minutes. So it was worth the short cut.

So let’s talk meatballs with a surprise…

ground beef mixtureLesson Learned 1 – It doesn’t take many ingredients to make the meatballs flavorful: basically you’re mixing the meat with an egg yolk, some panko, minced onion, worcestershire sauce and dijon mustard – that’s it. Combined with the cheese inside and the beef gravy you get flavorful meatballs without a lot of work! The key is to make sure you combine all of the ingredients but not over work the meat. If you do you’ll have tough meatballs and you don’t want that.

Cheese Inside the MeatballLesson Learned 2 – A little bit of cheese goes a long way: You can use any kind of good melting cheese in the center of your meatballs. I chose one called Buttrekase, a cheese that originated in Switzerland and now produced in Wisconsin. It’s American name is “butter cheese” although it has no butter in it. It melts luxuriously and has a mild buttery flavor. This was a perfect choice for these meatballs.

You will get approximately 15 meatballs out of one pound of ground beef. You don’t want your meatballs to be too big, maybe an inch to an inch and a half in diameter. Make sure you cut pieces of cheese that are small enough to support a meatball that size. Then just take the meat mixture and wrap it around that cheese, pressing the meat together to try to minimize any holes. But don’t worry if cheese leaks out when you bake them. There will still be more inside.

Lesson Learned 3 – Don’t over bake your meatballs:  Although the meatballs look large, remember that there is a good amount of cheese inside them. So I would not bake them any longer than 15-18 minutes. Keep in mind you will also be simmering them for a few minutes in the gravy once you take them out of the oven, so they have plenty of time to get cooked through.

The amount of meatballs you get with a pound of ground beef.

This has got to be one of the easiest recipes ever and produces a great meal in a short amount of time. I love topping a mound of mashed potatoes with these meatballs and then drizzling the beef gravy on top. Add a sprinkling of fresh cut flat leaf parsley and you’ve got a meal that looks as good as it tastes. Enjoy!

MEATBALLS WITH A SURPRISE INSIDE...

  • Servings: 4
  • Difficulty: Easy
  • Print

INGREDIENTS

(For The Meatballs)

1 pound 93% lean ground sirloin

2 Tbs. minced onion

1 egg yolk

3 Tbs. panko bread crumbs

1 Tbs. worcestershire sauce

1 tsp. dijon mustard

4 oz. good melting cheese (I used Butterkase cheese)

Chopped flat leaf parsley for garnish

(For The Sauce)

4 – 6  cremini mushrooms, sliced

1 small onion sliced

2 cloves garlic, minced

3 Tbs. unsalted butter

2 1/2 cups beef stock, divided and unsalted

2 Tbs. corn starch

2 Tbs. ketchup

2 Tbs. worcestershire sauce

Salt and pepper to taste

DIRECTIONS:

Heat the oven to 400 degrees. Line a lipped baking sheet with foil and spray with cooking spray.  Cut the cheese into about 15 small pieces. Combine onion, egg yolk, minced onion, bread crumbs worcestershire sauce and mustard until well combined. Add the ground beef and mix until just combined.

Divide the ground beef mixture into about 15 equal sized pieces. Flatten each piece, add a piece of cheese into the center and roll the meat around the cheese sealing it to the best of your ability.

Bake 15-18 minutes. While the meatballs are baking, make the sauce.

Melt the butter in a large skillet. Add the onions and mushrooms and cook until tender (5-8 minutes). Add the garlic and cook until fragrant (approx. 1 minute). Pour all but 1/4 cup of the beef stock into the pan. Mix the remaining stock with the cornstarch, making sure that the cornstarch is completely absorbed into the stock. Add that to the pan along with the ketchup and worchestershire sauce. Cook until thick. Salt and pepper to taste.

Take the meatballs out of the oven and add them to the sauce. Simmer them in the sauce for about 3 minutes. Serve warm.

Cooked onions and mushrooms

Simmer Meatballs In The Sauce

Meatballs With A Surprise

Meatballs With A Surprise Inside

Juicy Oven Baked Pork Chops…

For a very long time I had not idea how to cook pork chops. When I was a child my mother would make a roast pork dinner and she always wanted to make sure it was cooked thoroughly so of course her roasts were always dried out. (sorry Mom…) That’s the way I grew up thinking how pork should be cooked. Needless to say, I was not a big fan of pork at the time – too dry and tasteless.

It’s only been within the last couple of years that I’ve learned how to cook pork. Most people think the meat has to be opaque white which is a fallacy. Once it gets to that point it is overdone and will most likely be dry and tasteless. When pork is done perfectly it should look like the picture below…

Juicy Oven Baked Pork Chops

Look at how juicy this piece of pork is. Pork that is done correctly will have a little bit of pink marbling in the meat as you can see in the picture. Most people, including myself, used to think that pork was not cooked thoroughly when it had a little pink in it. That couldn’t be further from the truth. I tested these chops in their thickest part with a meat thermometer and it read 140 degrees which is ideal. Let me tell you this pork chop was melt in your mouth delicious. And preparing it this way was not all that difficult. I want to share this recipe because it is so easy and I guarantee perfect results every time. But there are a couple of little secrets you need to be aware of and I’ll share them in my lessons learned.

So let’s talk juicy oven baked pork chops…

lodge-cast-iron-skilletLesson Learned 1 – Take my advice and buy a cast iron skillet: Recently I’ve been doing a lot of cooking in my cast iron skillet and I’ve learned to  love it! Cast iron is your best method for cooking. It may take a little longer to heat up (and really not all that much longer) but once it does it provides even heat that will not dissipate quickly. Plus it moves seamlessly from stove top to oven. And if that isn’t enough it is also one of the cheapest skillets you can buy. Depending on what size skillet you get you’ll pay somewhere between  $15 – $30. Now that’s a bargain! The main downside to a cast iron skillet is that it’s heavy to lift. But in my mind that does not outweigh the benefits. Just look at it as building up your upper body strength while preparing an absolutely delicious meal!

I have a 10 inch skillet and that is big enough for two pork chops the size required for this recipe so I’m writing this recipe for two. If you get a larger skillet you can easily do four chops. Nothing else in the recipe has to be adjusted significantly. Just make sure you know how many chops will fit in your skillet without crowding them.

You need to use center cut bone-in chops for this recipe. They should be about 1 inch thick. Chops of that size take up quite a bit of room in the skillet. So if you want to do more than two chops in one skillet get a skillet larger than 10 inches.

Handy Trick: One other trick I learned was to put the skillet in the oven and leave it there while the oven is preheating. Once the oven has reached 400 degrees you take the skillet out of the oven (make sure you use mitts because the pan will be hot) put it on the stove over medium high heat and then sear the chops one one side before turning the chops over and putting the skillet back in the oven. It’s a pretty nifty trick.

Lesson Learned 2 – Try brining your chops: If you’ve never tried brining you really should. Brining basically is marinating meat in a salt based liquid that has optional ingredients you can add to enhance the flavor of the meat. The purpose of brining is to break down the fibers in the meat ergo making it more tender. I recommend brining your chops for at least 4 hours, but even if you can only do it for 30 minutes it will make a difference in the meat.

Brining Your Pork Chops

Depending on the type of dish you use to brine the chops you may need more water than I suggest to make sure they’re covered. The chops need to be completely covered for the brining process to work. If you need to add more liquid than what I specify in the recipe just remember to add a tablespoon of salt for every additional cup of water. Also make sure that the salt is completely dissolved in the water before putting it over the chops.

The rest of the recipe is so simple it’s almost funny. This is quick and easy way for making the most unbelievably moist and tender chops you’ll ever have. Try it and tell me what you think.

Juicy Oven Baked Pork Chops…

  • Servings: 2
  • Difficulty: Easy
  • Print

INGREDIENTS:

Juicy Oven Baked Porch ChopsFor the Brine:

3 cups water, divided

3 Tbs. Kosher Salt

2 Garlic cloves, smashed

1/2 tsp. black peppercorns

1 bay leaf

For The Pork Chops:

2 center cut bone-in pork chops, 1 inch thick each

1 Tbs. olive oil, optional

Salt and Pepper

DIRECTIONS:

Approximately 4 hours ahead of time brine the chops. Take 1 cup of water and bring it to a boil. Add the salt, garlic cloves, peppercorns and bay leaf. Stir continuously until all the salt is dissolved. Take the mixture off the heat. Add the remaining two cups of cold water. Do not put the pork chops in the brining liquid until the liquid has come to room temperature (this make take about 5 minutes or so). Place the chops in a shallow dish and cover them with the brining liquid. (the liquid should completely cover the chops). If you need to add more liquid refer to lessons learned above. Cover with plastic wrap and refrigerate until time to cook.

Put the cast iron skillet in the oven. Close the oven door and preheat the oven to 400 degrees. While the oven is heating remove the pork chops from the brine and pat them dry. Salt and pepper both sides of the chops.

When the oven has preheated remove the skillet and place it on top of the stove. Turn the heat under the skillet to medium high. At this point you can add a little olive oil to the pan if you desire. (I have a well seasoned skillet and did not need to add any olive oil. If you’re not sure how well seasoned you skillet is, add a little olive oil so the chops won’t stick to the pan). Sear the chops on one side for 3-4 minutes.

Turn the chops over and put the skillet back in the oven. Continue roasting the chops for an additional 7-9 minutes (the chops should register 140 -145 degrees in the thickest part of the meat). Remove the chops from the pan and place them on a plate to rest for about 5 minutes. Cover the chops with foil during this resting period. Serve immediately after the resting period.

Juicy Oven Baked Pork Chops

Juicy Oven Baked Pork Chops

Hearty One Skillet Dinner…

I’m always looking to make something different but sometimes it needs to be different and fast. For those wanting that too, this recipe is for you. I was actually amazed how flavorful this was given the simplicity of the recipe. This recipe accompanied by a small salad and some crusty bread can be just what the doctor ordered.

There is nothing particularly fancy about this recipe. Probably the most unique thing about it is it contains both potatoes and rice. Surprisingly enough, the rice gives the dish a creamy texture and the potatoes, carrots and onions give it depth and bulk. There’s not even a lot of prep work involved and once everything is combined you just simmer everything for thirty minutes and voila, dinner is served!

Hearty One Skillet Dinner

So let’s talk hearty one skillet dinner…

Lesson Learned 1 – It’s important to cut the carrots and potatoes into small pieces: You want to make sure that the carrots and potatoes cook through and so they need to be diced a little smaller than usual. With the carrots I peeled them, cut them in half lengthwise and then each piece in half lengthwise again. Then I diced the carrots into about 1/4 inch size pieces.

With the potatoes I also tried to cut them into 1/4 inch sized chunks. It’s not necessary to drag out the ruler to make sure you have the correct size. Just know that you want the pieces small but not too small that they disintegrate during the cooking process.

Lesson Learned 2 – Check on the dish for moisture during the simmering process: You want to make sure that the beef stock reduces completely when you’re done but not so quickly as it causes the rice not to cook through and the rest of the mixture to stick to the bottom of the pan. Check on the liquid during the simmering process. If the beef stock has completely reduced and you still have more time to cook add some more stock. The amount of additional stock you add will depend on where you are in the 30 minute simmer process. I would start with a couple of tablespoons to a quarter cup and go from there. The main point is you don’t want the dish to dry out during the simmering process nor do you want to be left with soup after 30 minutes.

Lesson Learned 3 – If you want to shorten the overall time for this recipe prep most of the ingredients ahead of time: You can prep the onions, garlic, and carrots ahead of time – even the night before. Keep them in air tight containers or covered tightly in plastic wrap. I would wait until you begin cooking the meal to chop up the potato. The only way to keep the potato from oxidizing once it is cut is to put it in cold water. I’m not sure you’re going to want to have your potato sitting in water overnight or all day. Prepping ahead of time will take a good 15 minutes from the total time to make this dish.

Not only is this dish delightful the first time around but it is also great reheated. Try this one the next time you are short on time but still want something good. I think it just might become one of your go to favorites.

Hearty One Skillet Dinner…

  • Servings: 6
  • Difficulty: Easy
  • Print

INGREDIENTS:

Hearty One Skillet Dinner1 1/2 pounds ground beef, preferably 93% lean

1 medium onion, diced

1 clove garlic, minced

1 cup chopped carrots

1 medium russet potato, diced

1 cup reduced sodium beef stock

1/2 cup uncooked long grain rice

1 Tbs. soy sauce

1 Tbs. olive oil (I used garlic infused olive oil)

salt and pepper to taste

flat leaf parsley, chopped for garnish, optional

DIRECTIONS:

Add the olive oil to a large preheated skillet. Saute the onions until they are slightly translucent. Salt and pepper the onions while they are cooking. Once the onions are translucent, use a wooden spoon to push them to the side of the pan and add the ground beef, separating the beef with the spoon. Spoon the onions over the ground beef while it is cooking. Salt and pepper to taste.

Once the ground beef is no longer pink drain any excess fat, if necessary. Stir the garlic into the beef and onions. Cook until the garlic becomes fragrant – approximately one minute. Stir in the carrots, potatoes and rice. Pour the beef stock over the mixture and stir to combine.

Lower the heat, cover and simmer for 30 minutes or until the rice and vegetables are tender. (Make sure to check the level of moisture and add a little extra beef stock if it has completely reduced before the end of the cooking process). Stir in the soy sauce. Taste. Add any additional salt or pepper as needed.

Hearty One Skillet Dinner

Hearty One Skillet Dinner

Hearty One Skillet Dinner

Salisbury Steak Smothered In A Mushroom Onion Sauce…

Want a meal that is a step up from just a regular hamburger? Try making salisbury steak. The key to the flavor in this recipe is the ingredients mixed in with the ground beef and the wonderfully decadent sauce. This recipe doesn’t take much longer to make than just a plain old hamburger and it adds a little flair to serving ground beef. So jazz it up next time. I’m sure your family will love it.

I first saw the Pioneer Woman make Salisbury Steak on her television program and she has a recipe for it in one of her books. I looked at her recipe and changed a few things up and both my husband and I said this was the most flavorful ground beef we’ve had in a long time.

So let’s talk making Salisbury Steak.

Lesson Learned 1: I found two secret weapon flavor enhancers – in her recipe, the Pioneer woman uses beef bouillon cubes in her ground meat and Kitchen Bouquet in her sauce to add depth of flavor. I found this stuff called “Better Than Bouillon” which is a roasted beef sauce made with seasoned roasted beef. It has a gel-like consistency. I used it instead of bouillon and I really believe it boosted the flavor – tons! I now use it even when I make hamburgers to kick the flavor up a notch. I think it’s great stuff. You should try it.

Flavor Enchancers

I used Country Bob’s original all purpose sauce to enhance the flavor of the sauce and the sauce was divine. I guess what I’m trying to say here is try different substitutions in recipes you make. You might find that you like the recipe with the substitutions even better than the original.

Lesson Learned 2: Try using seasoned panko bread crumbs instead of just regular seasoned bread crumbs: I think the panko gives the meat a nice texture as well as flavor and I found I could use a slightly lesser amount than regular bread crumbs.

IMG_9180
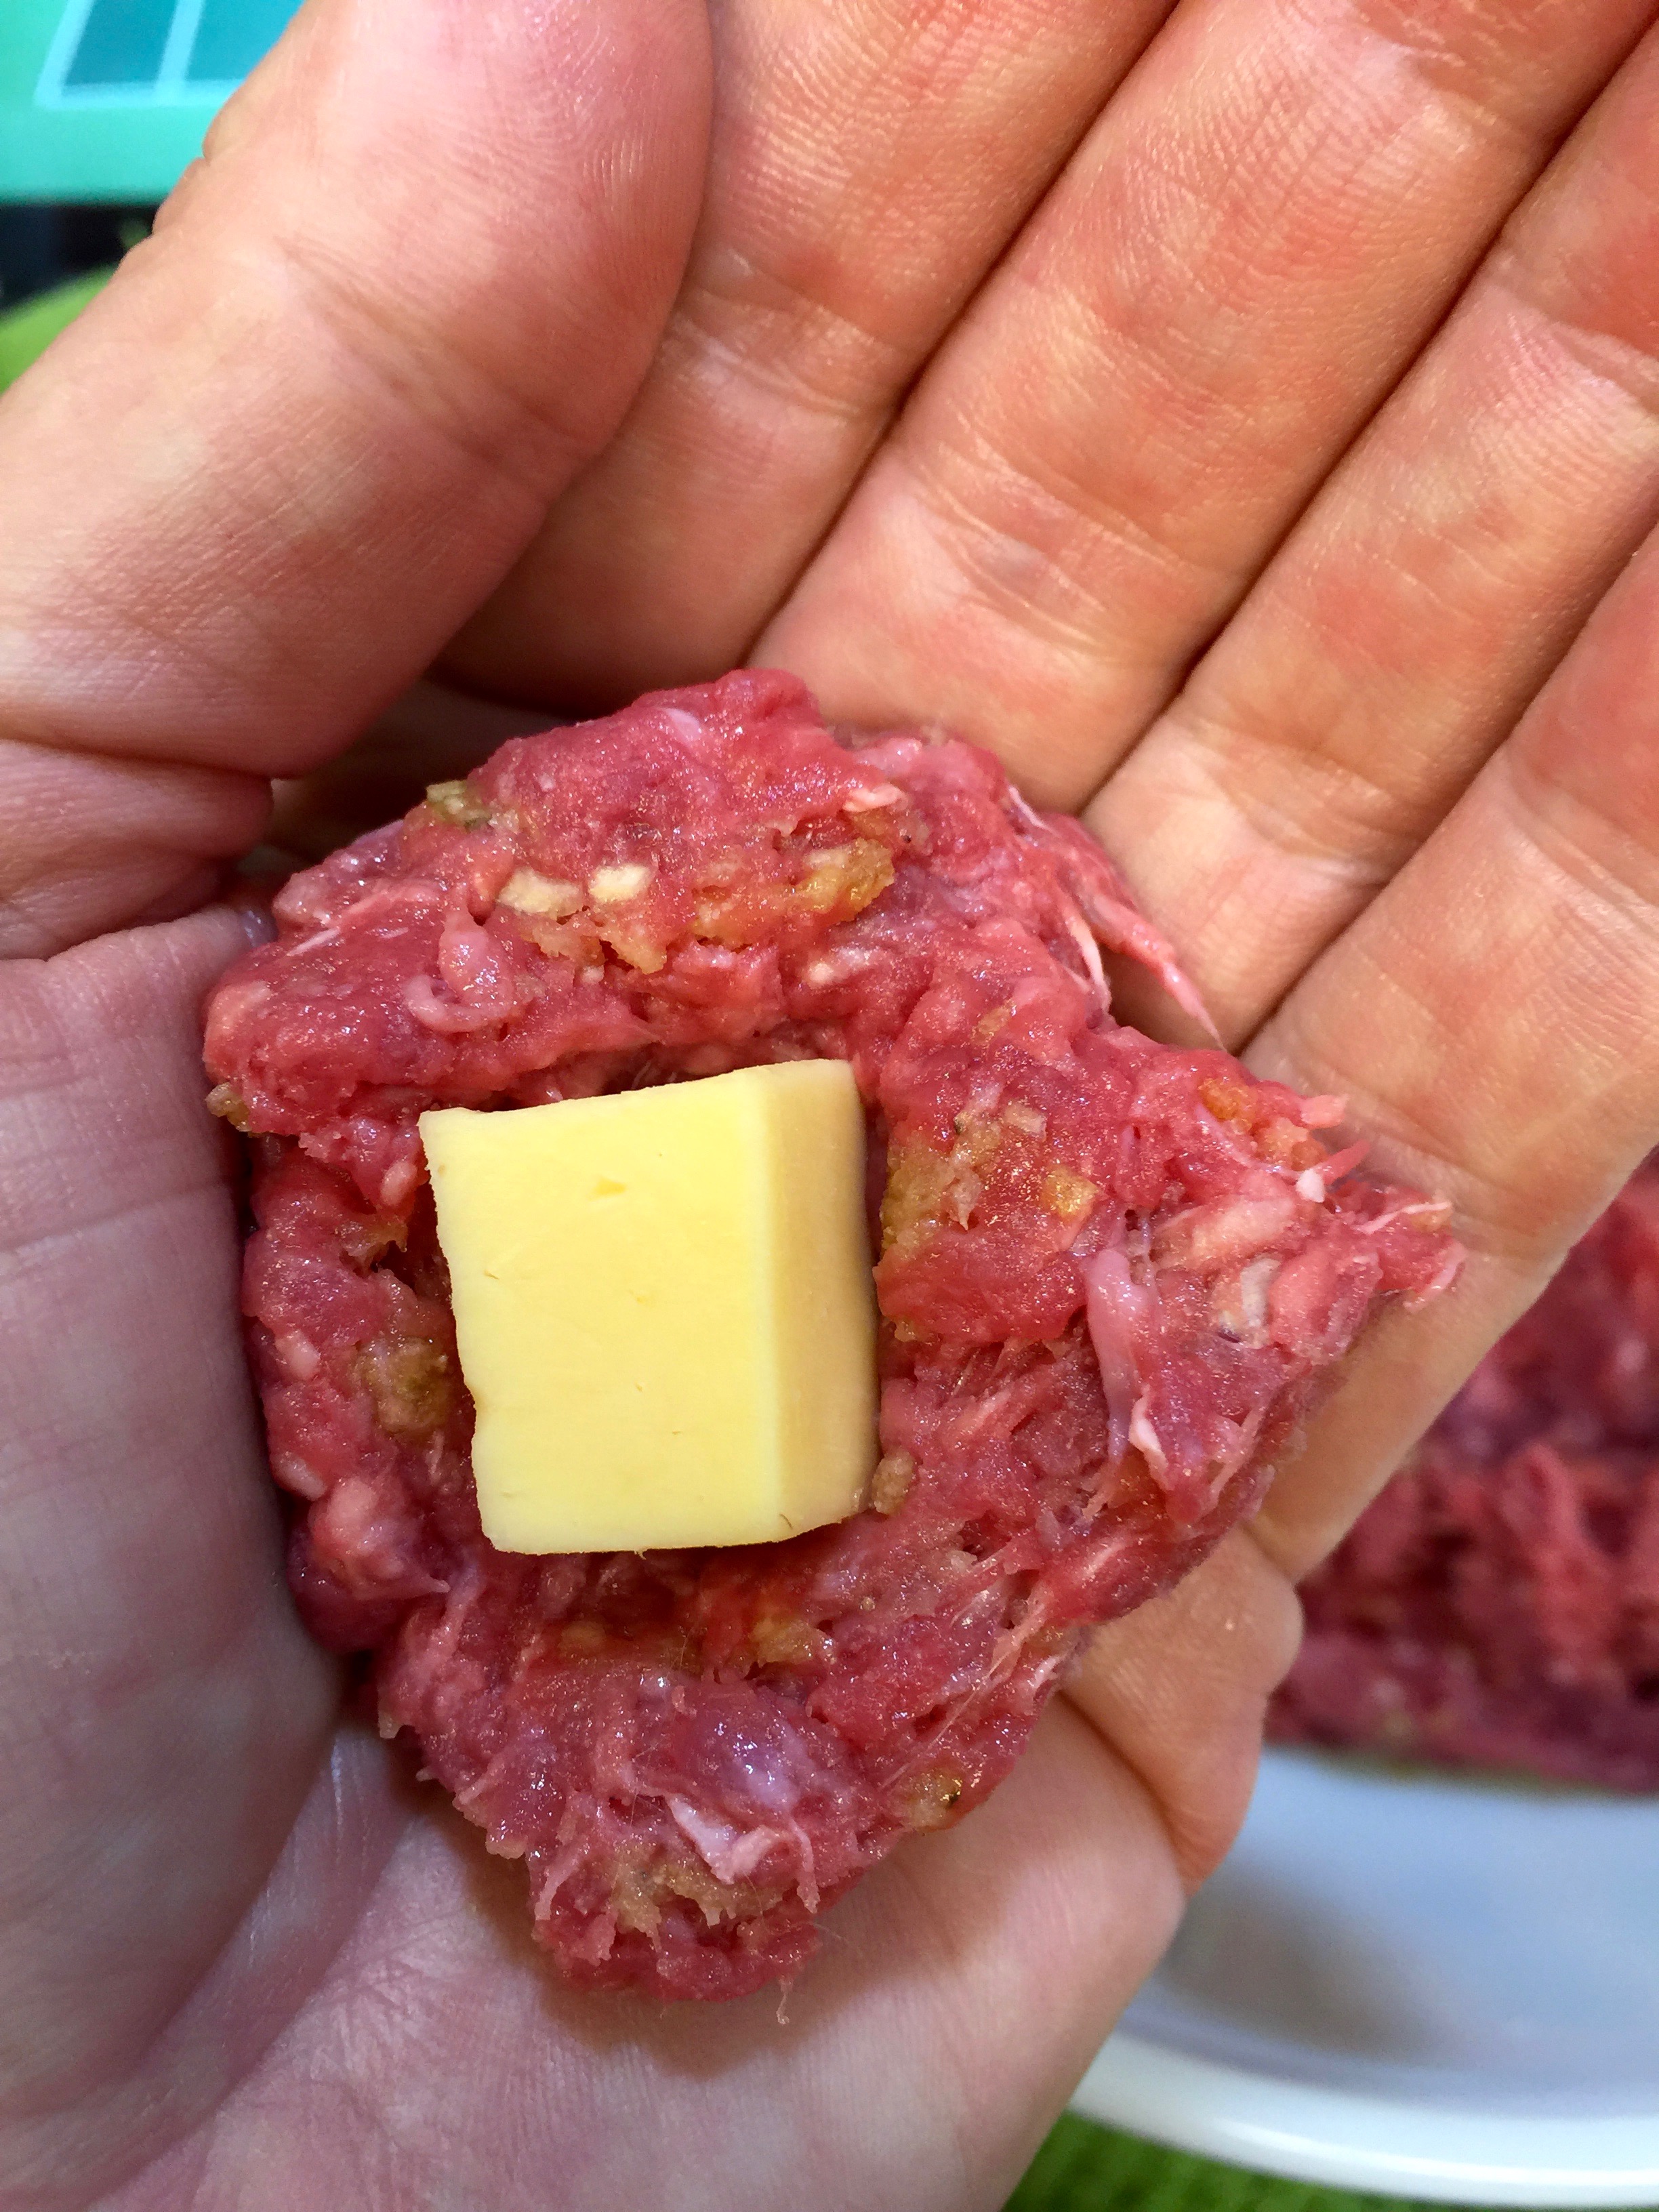
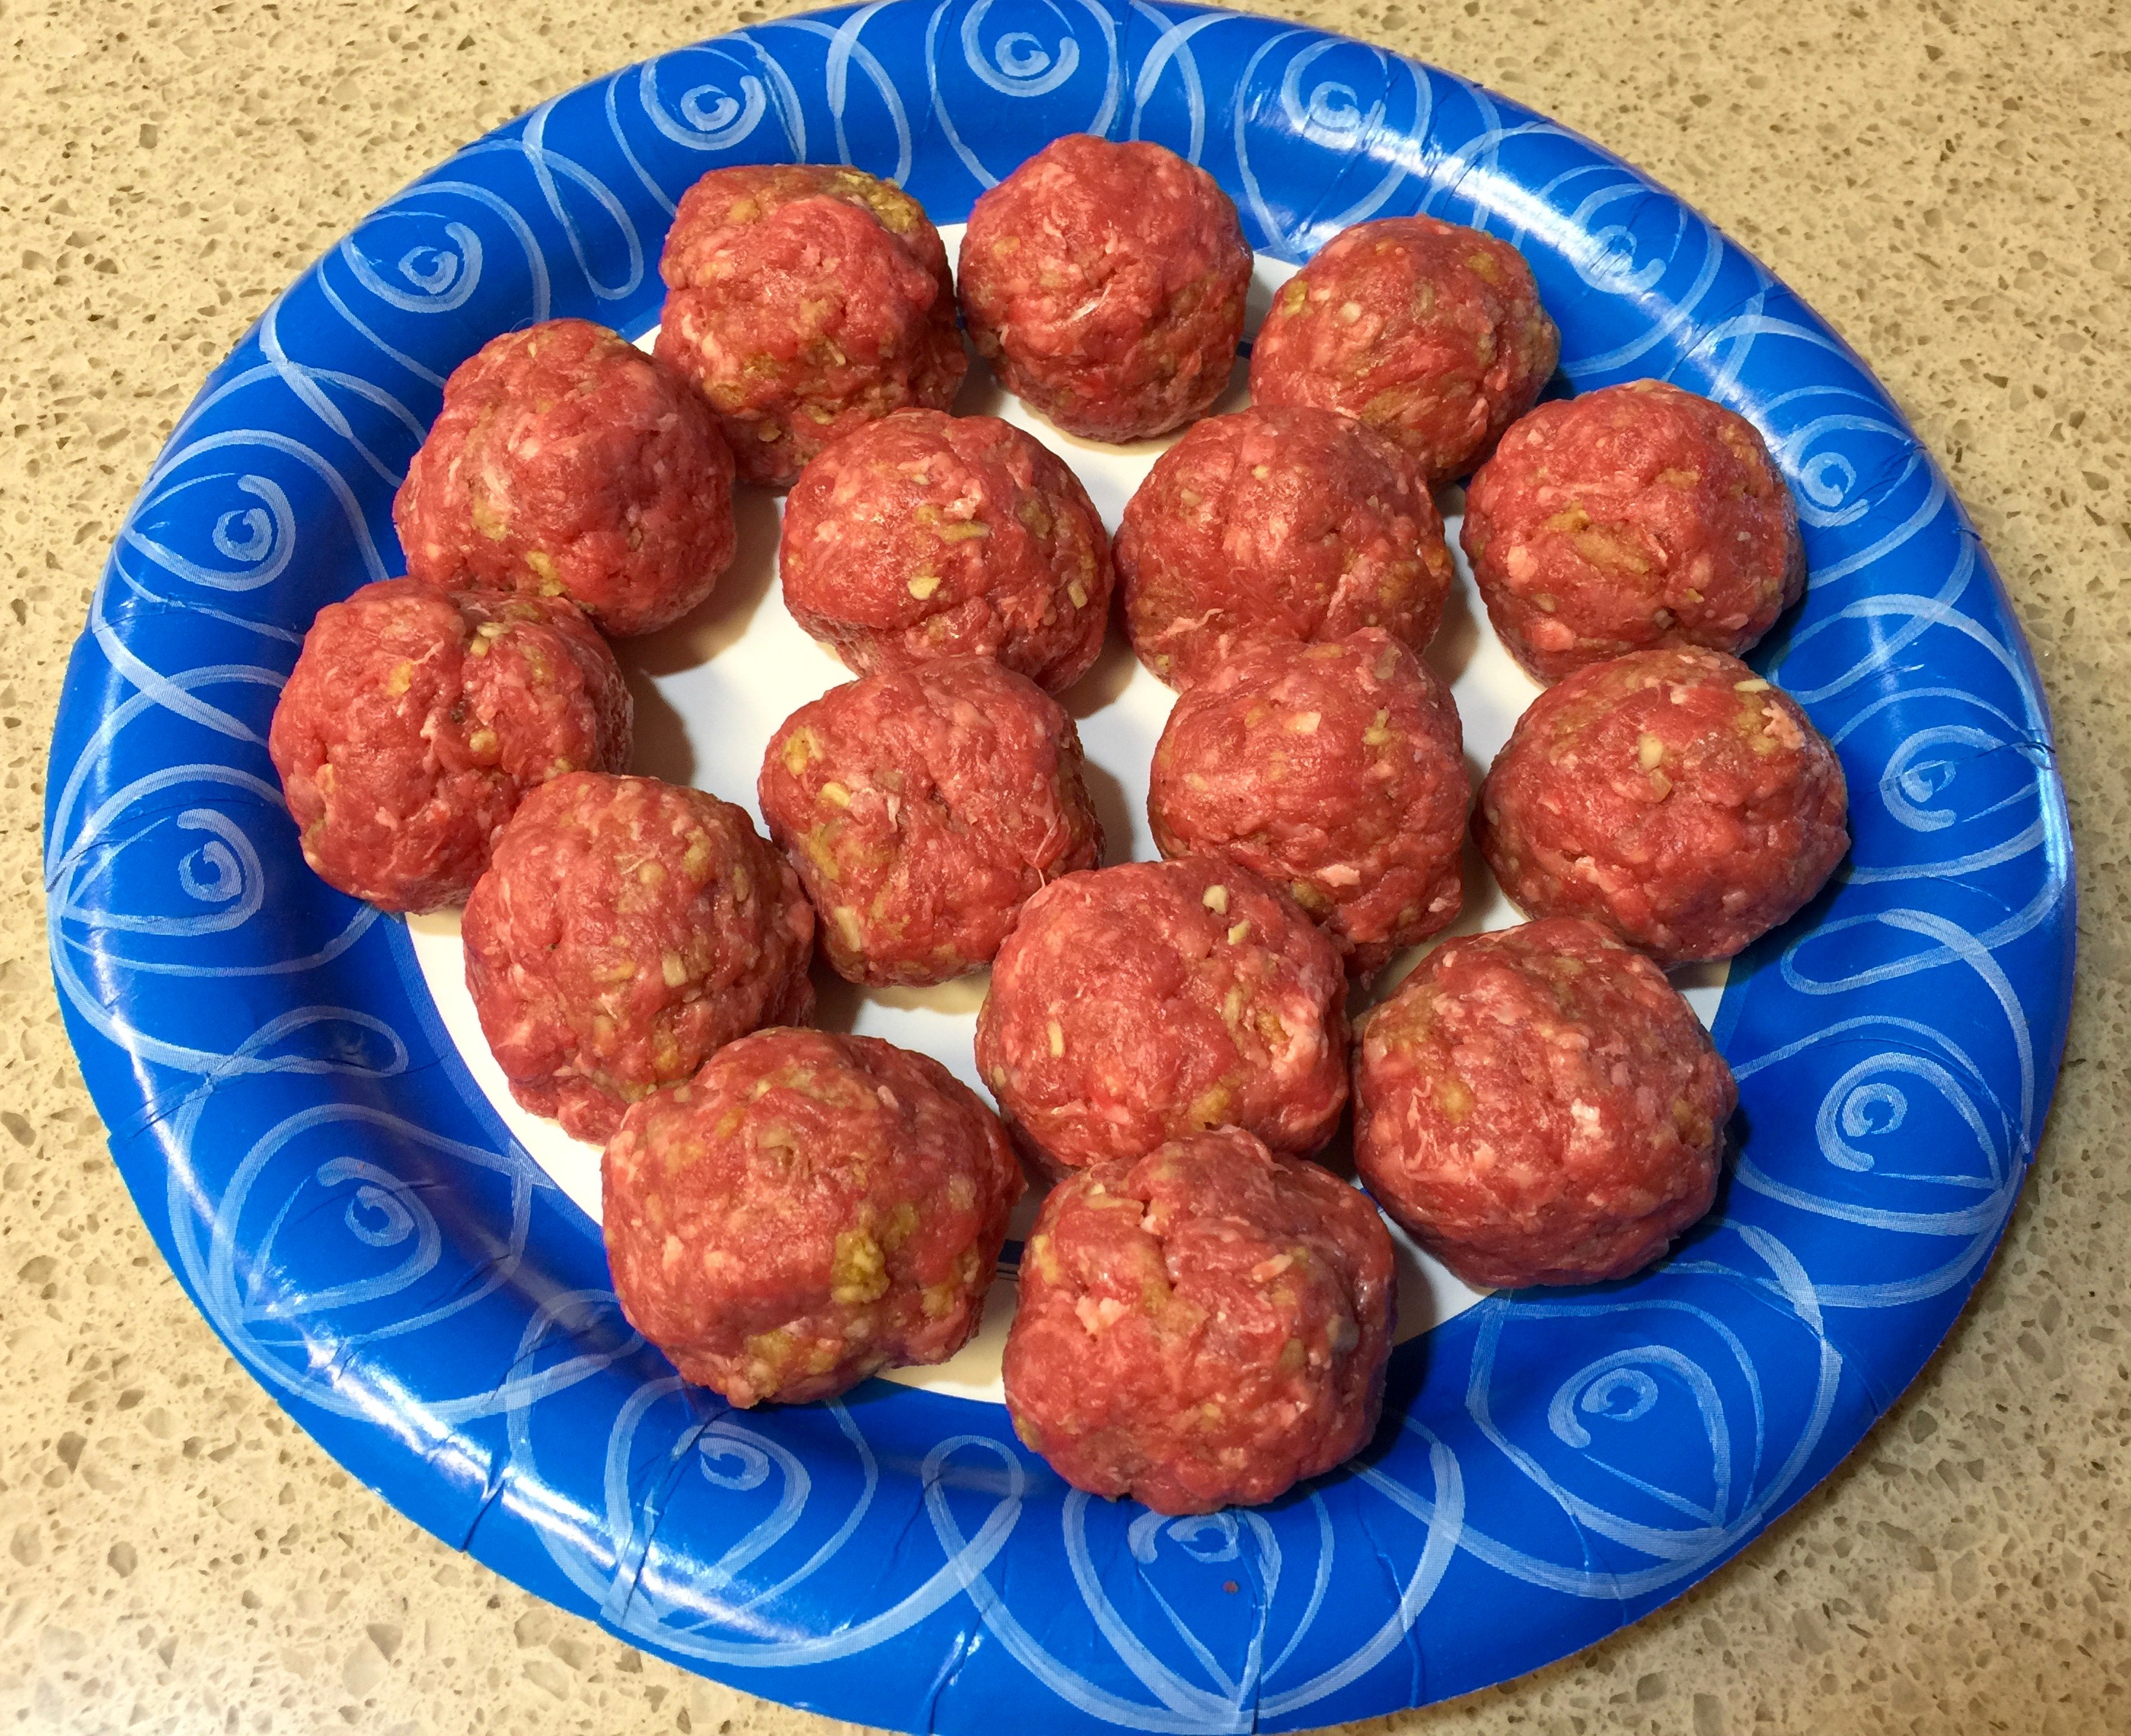
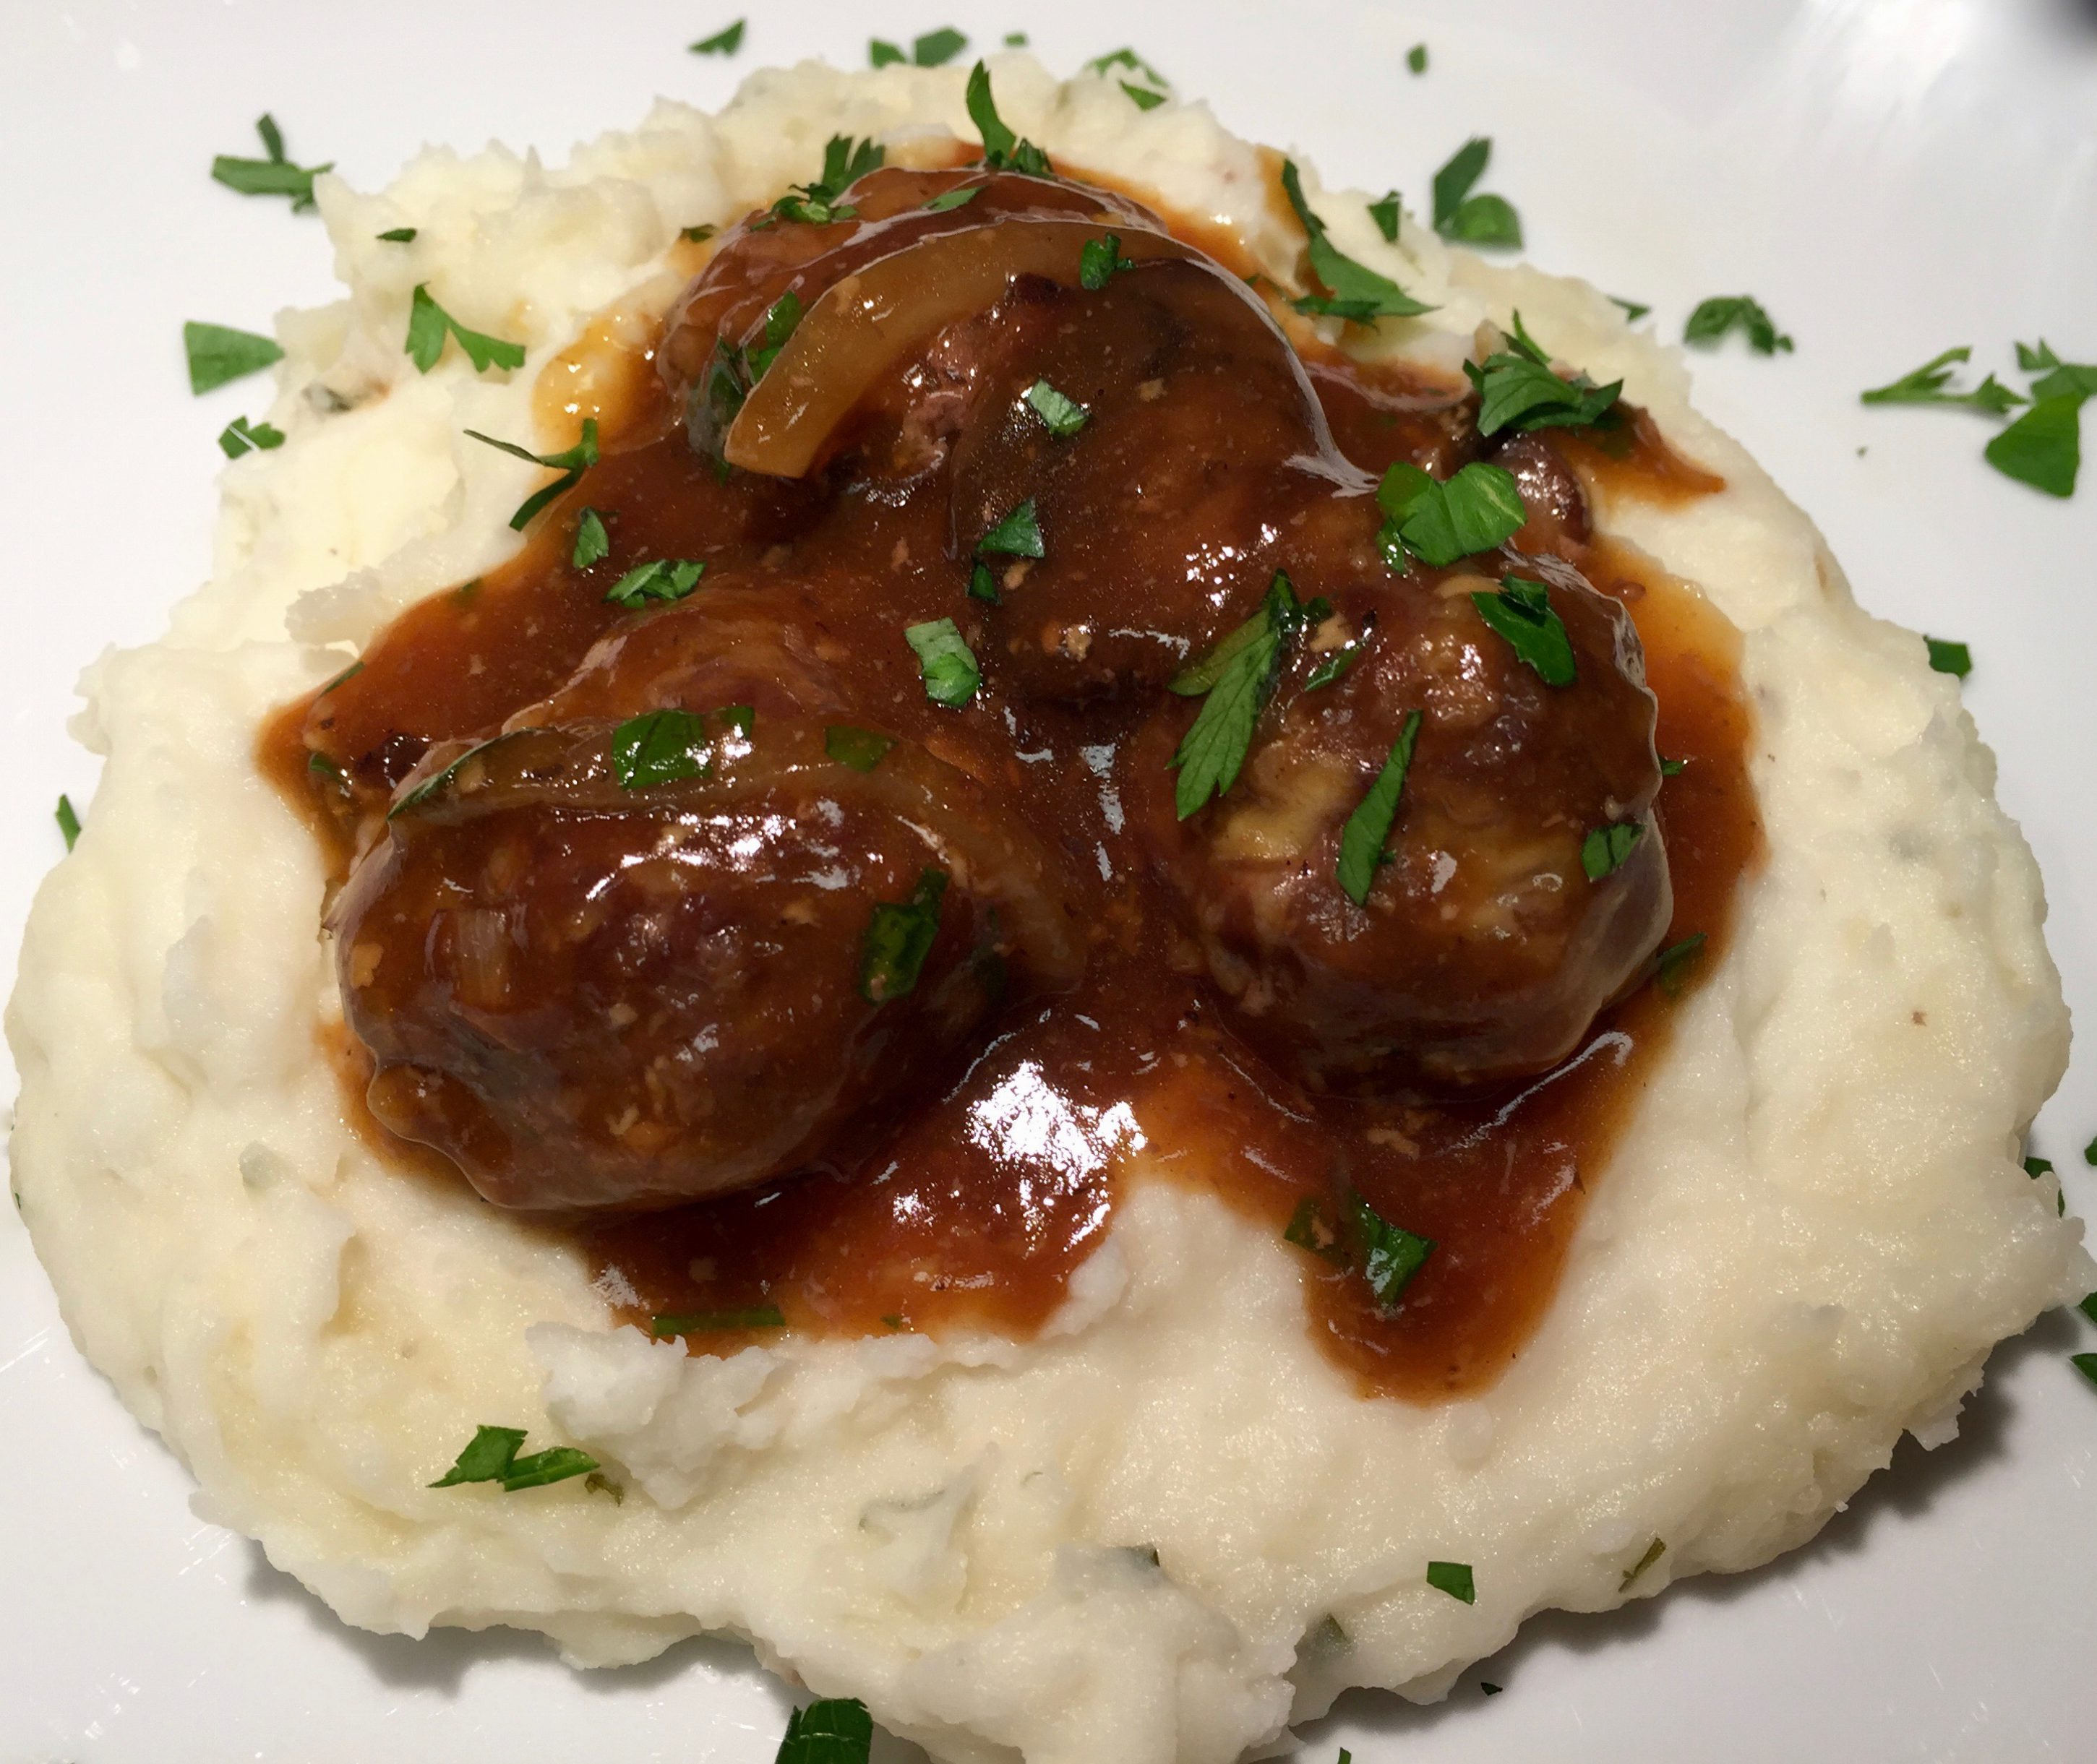
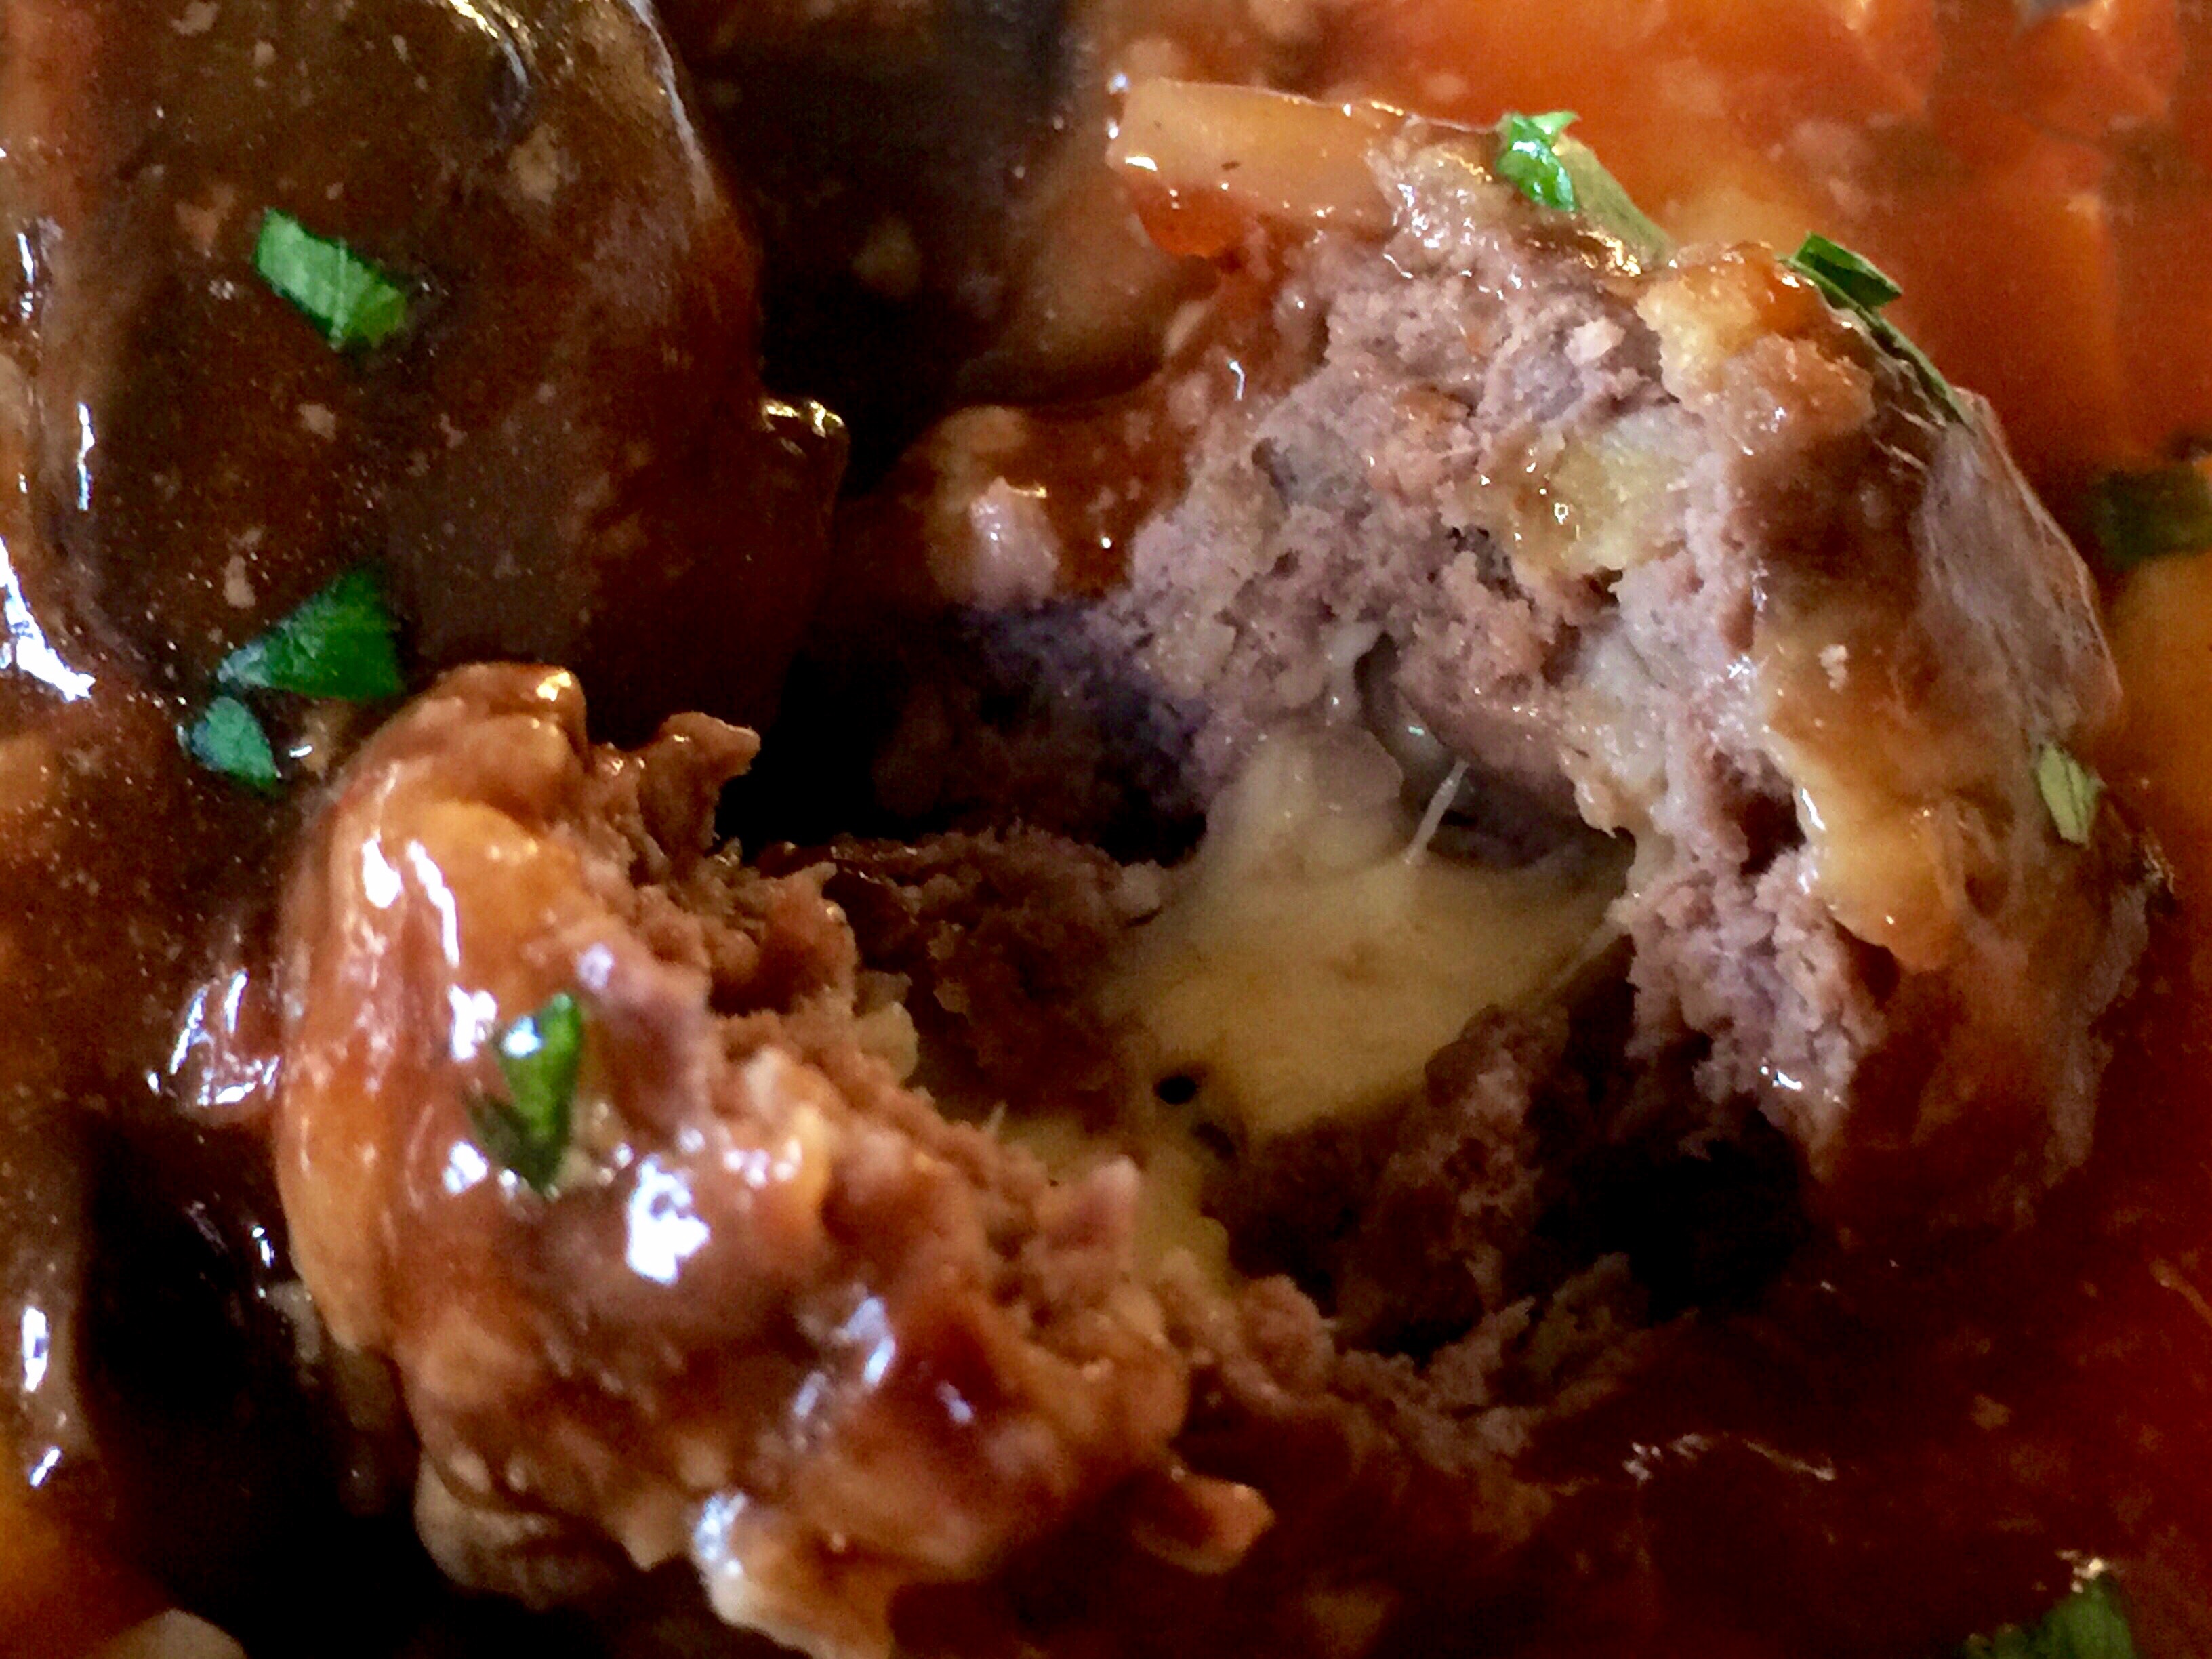
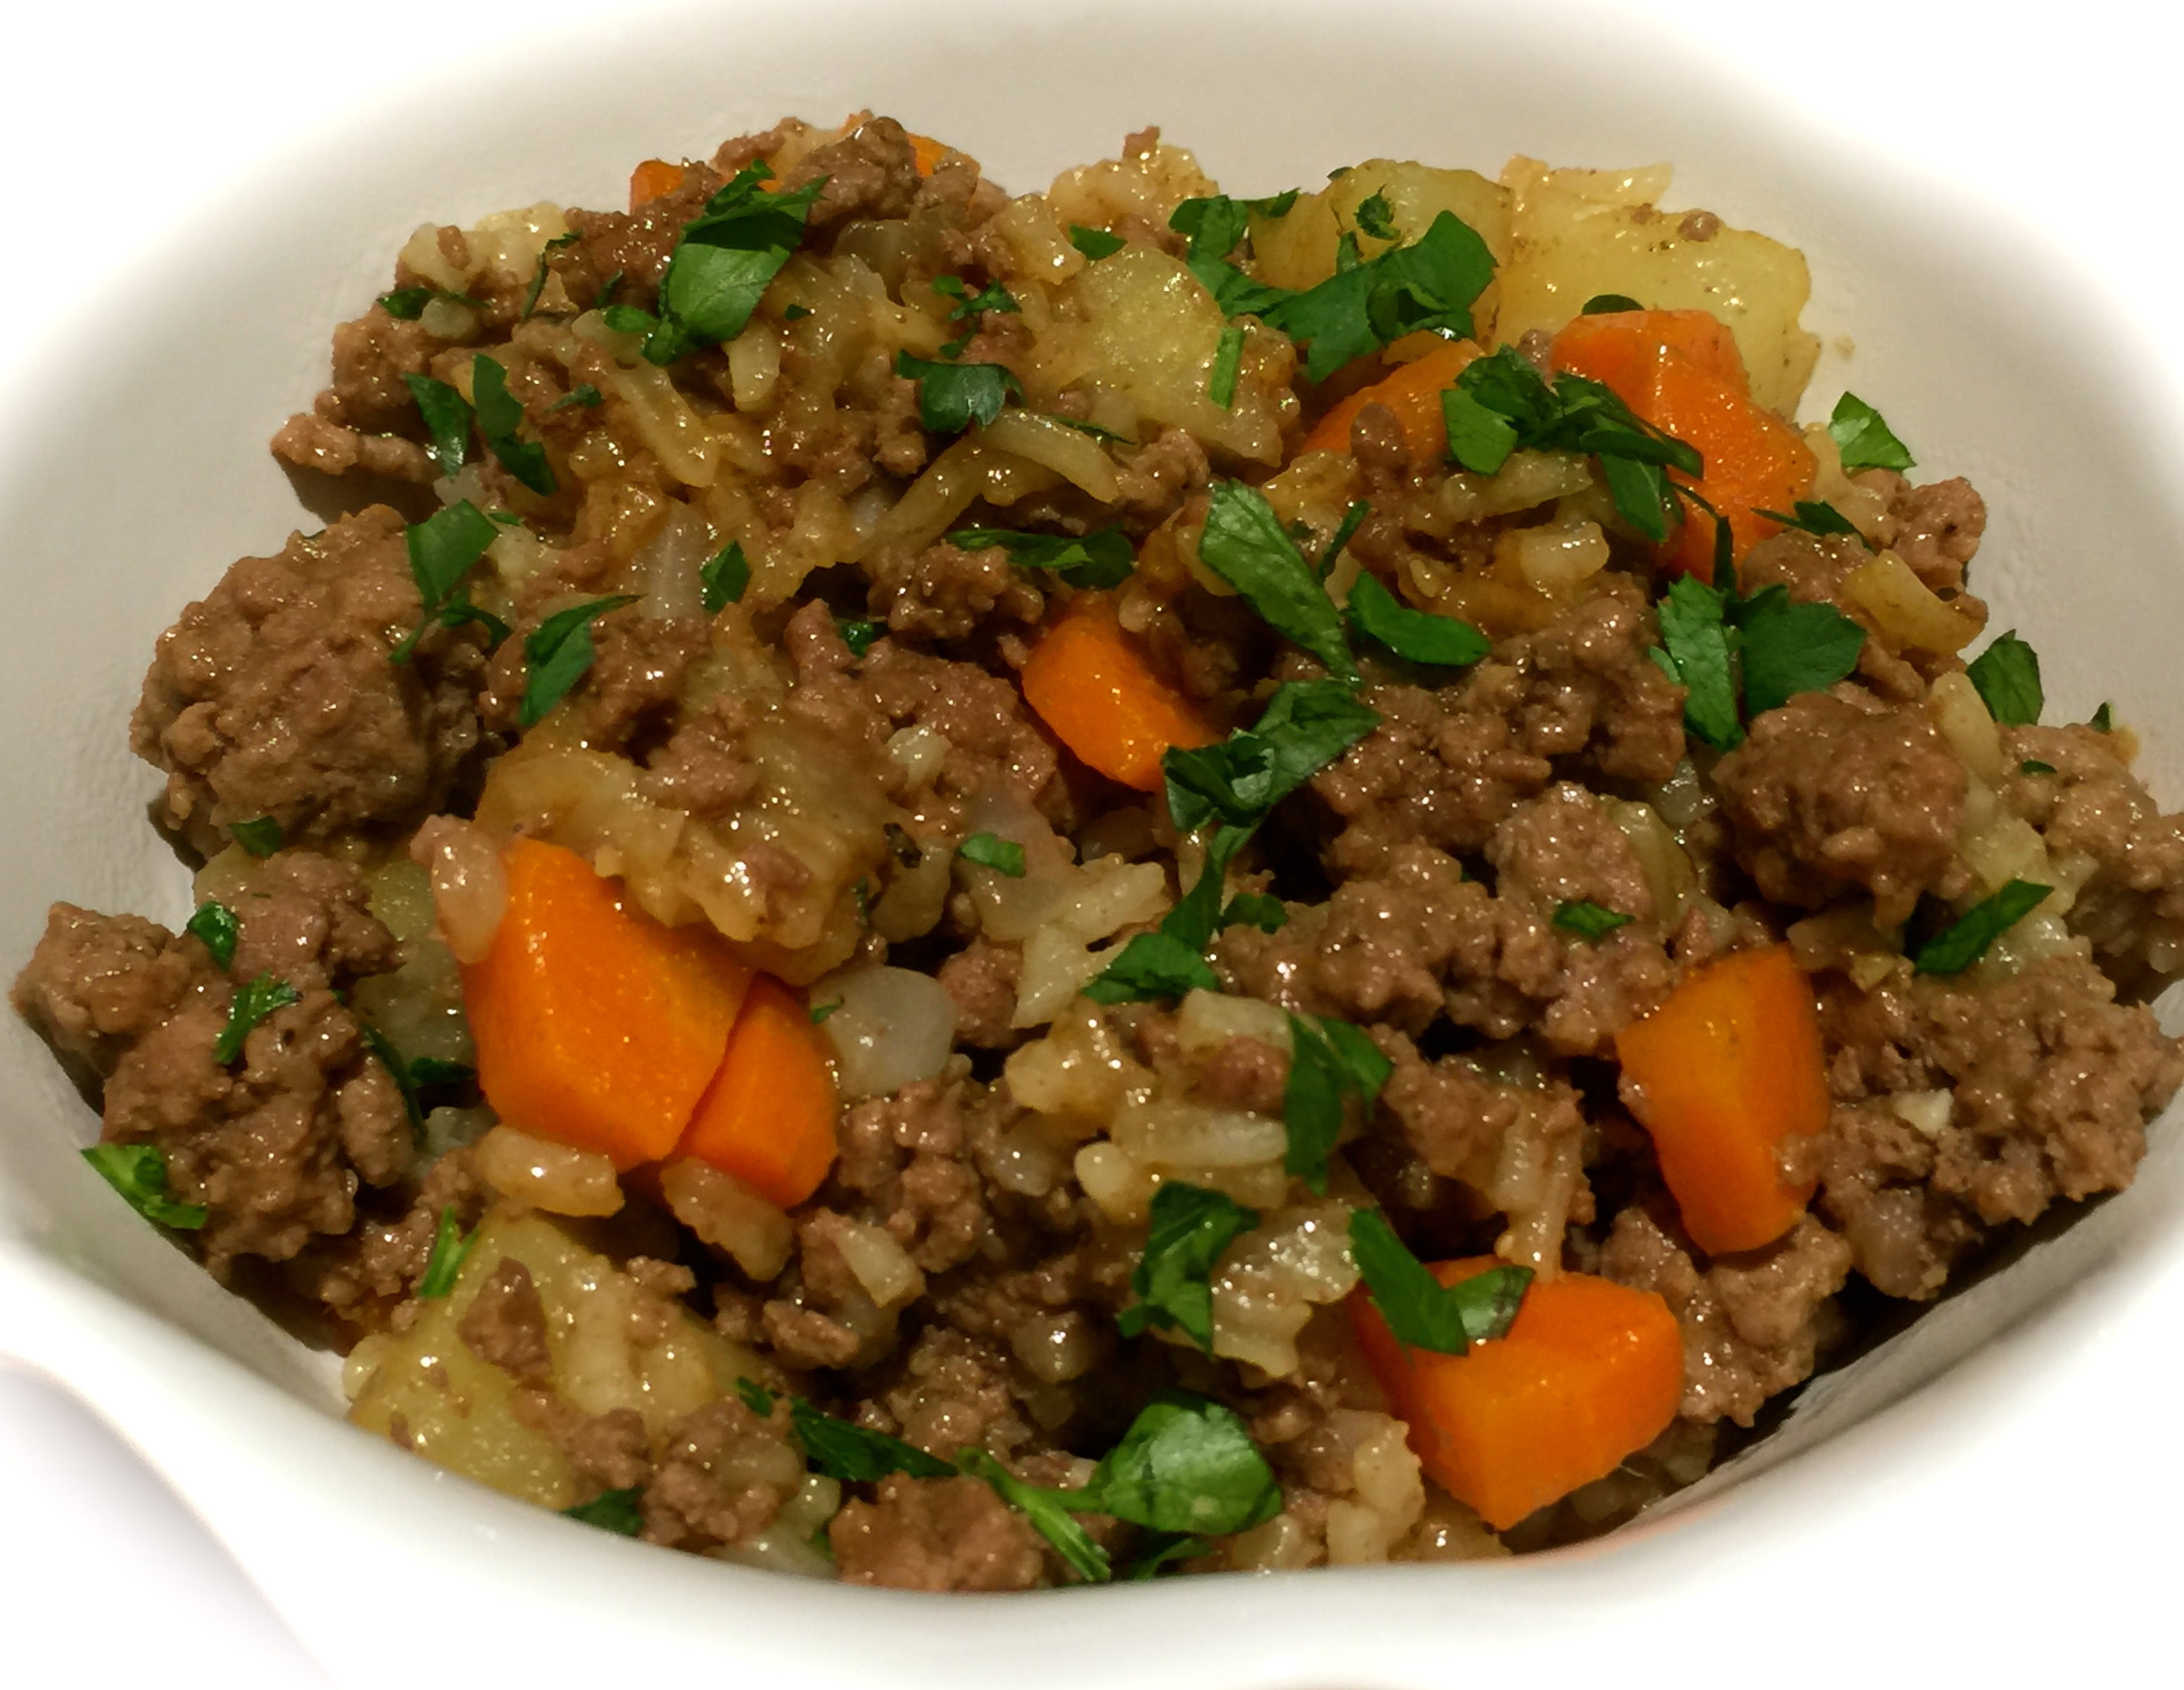
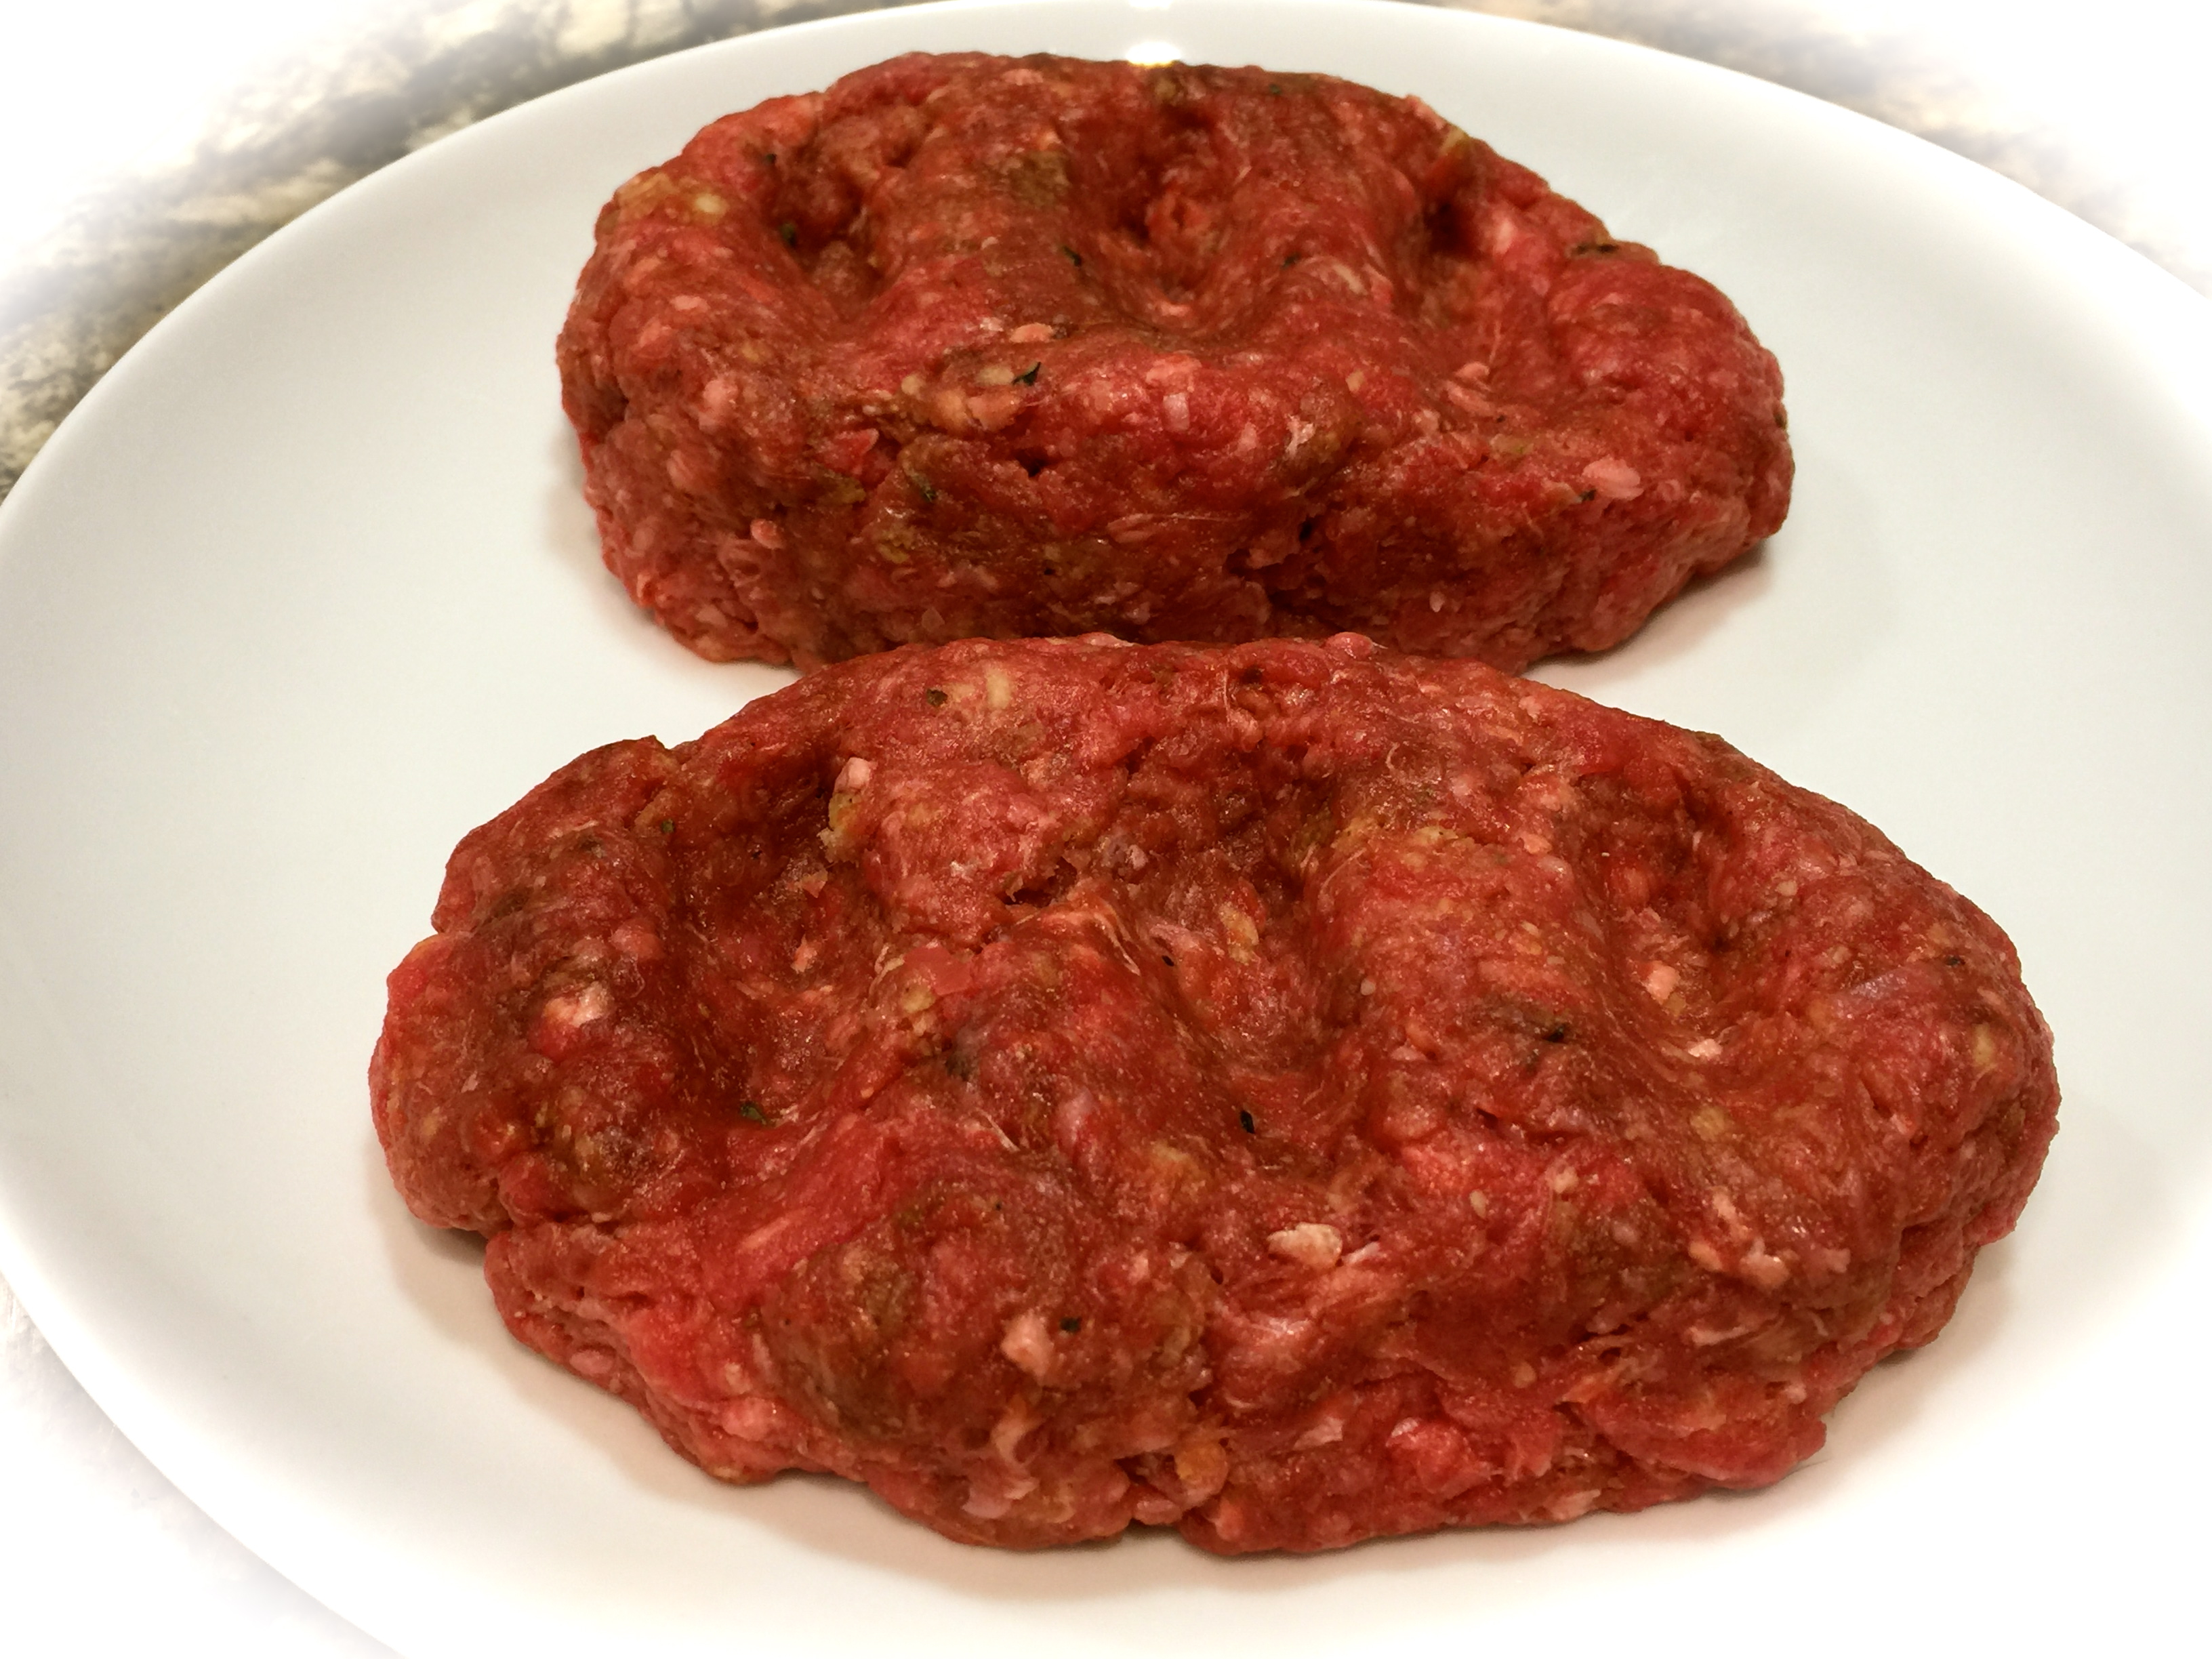
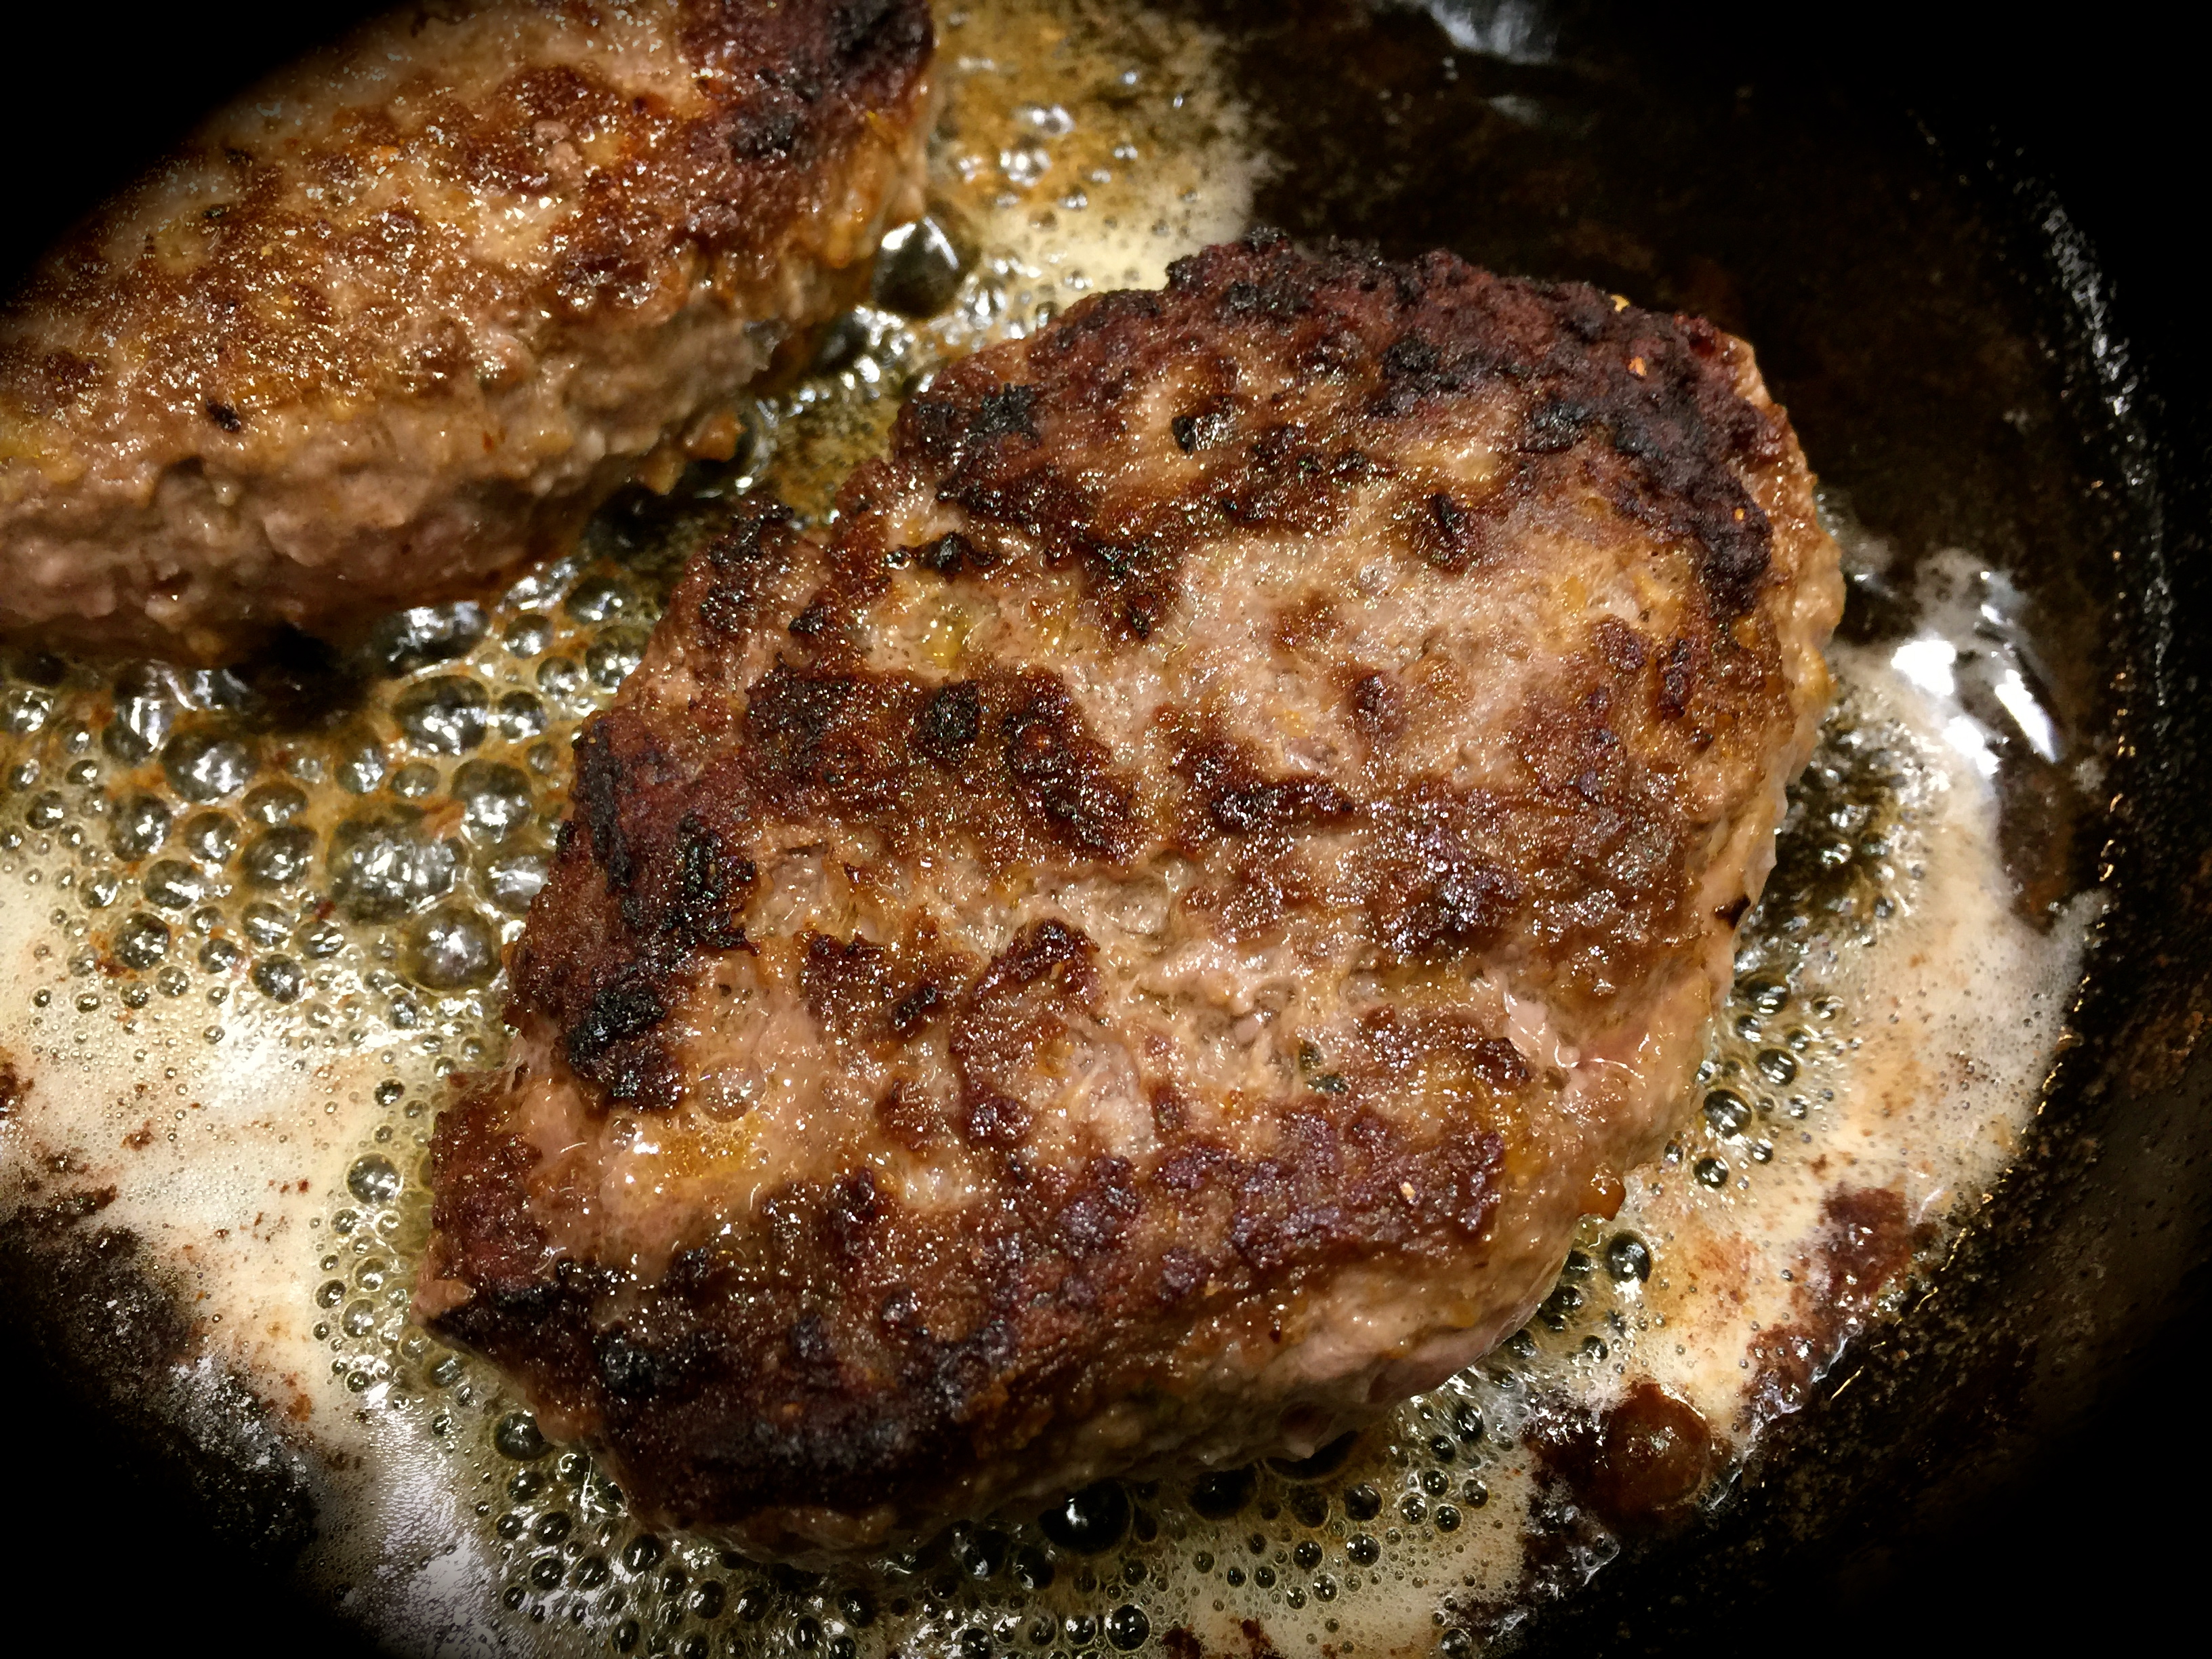
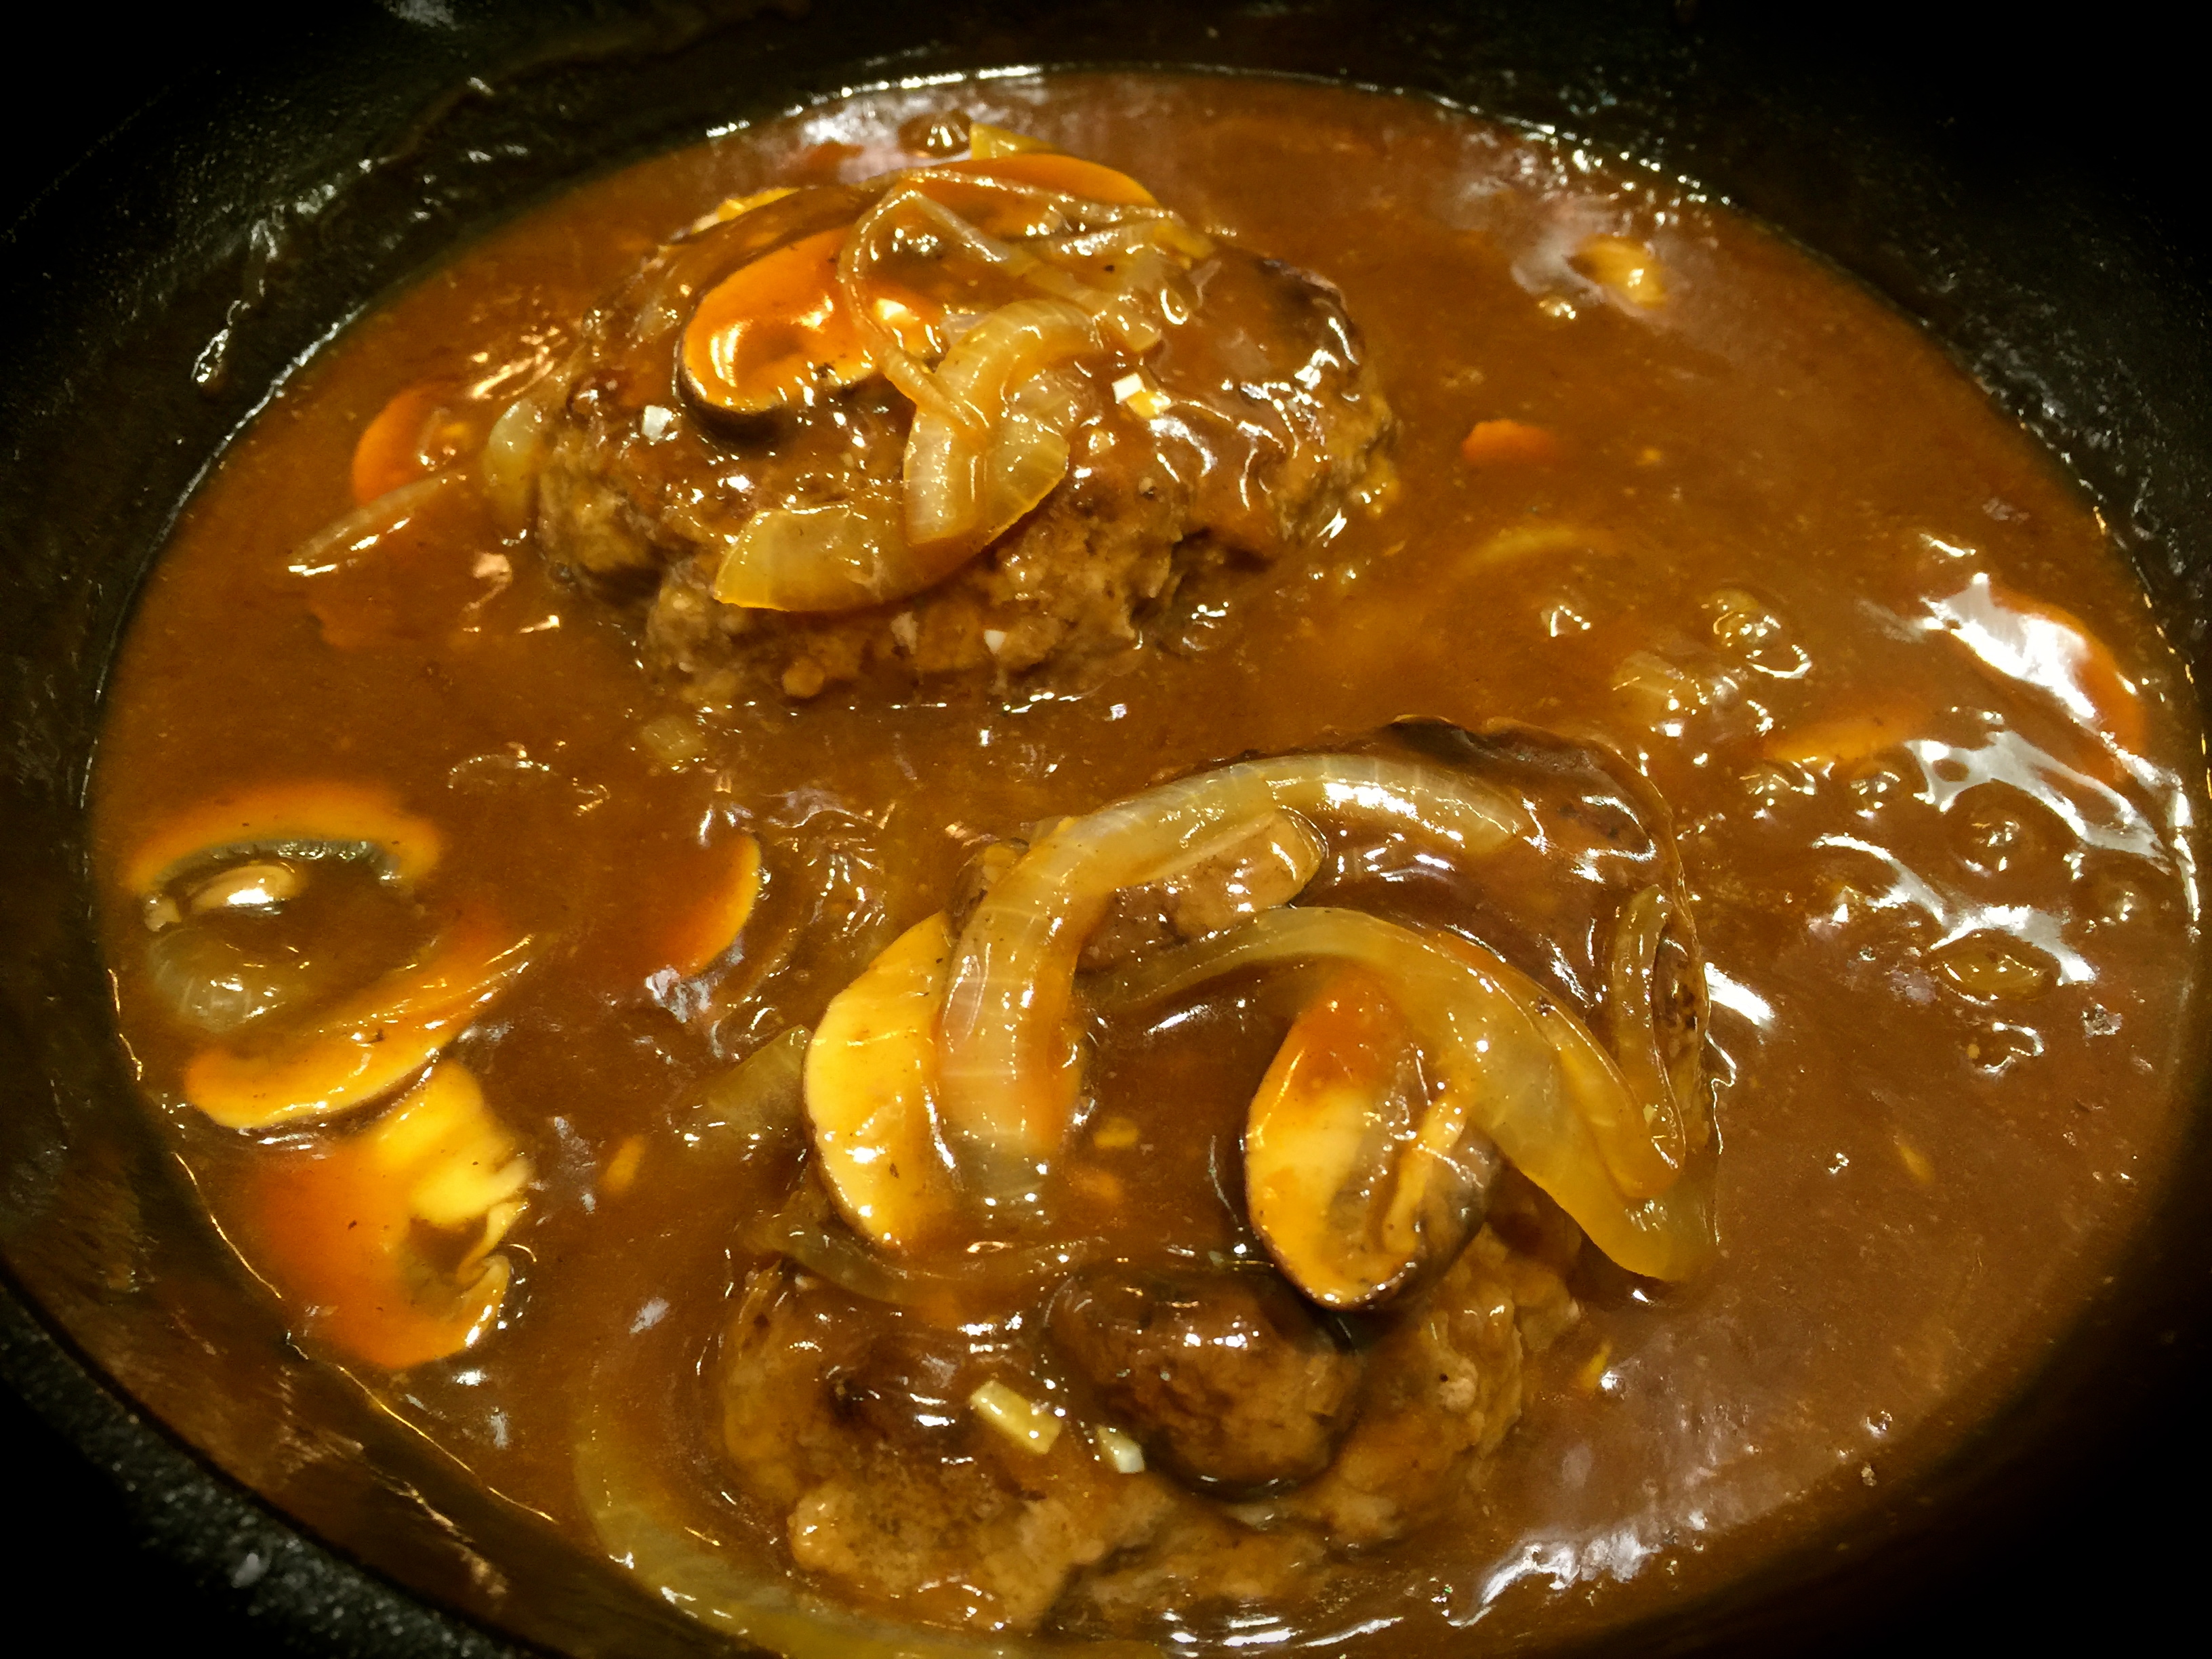
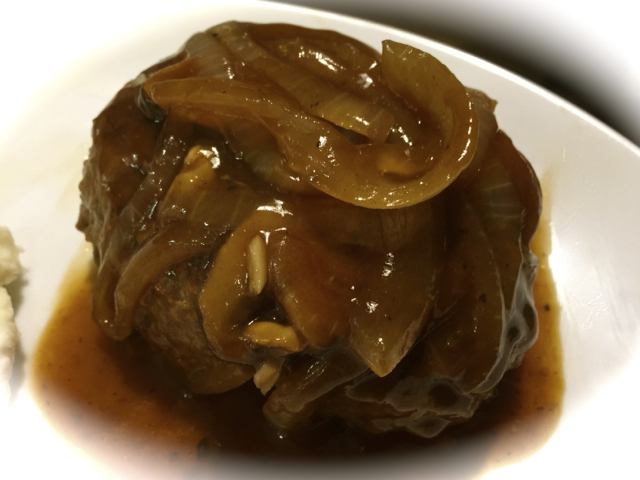
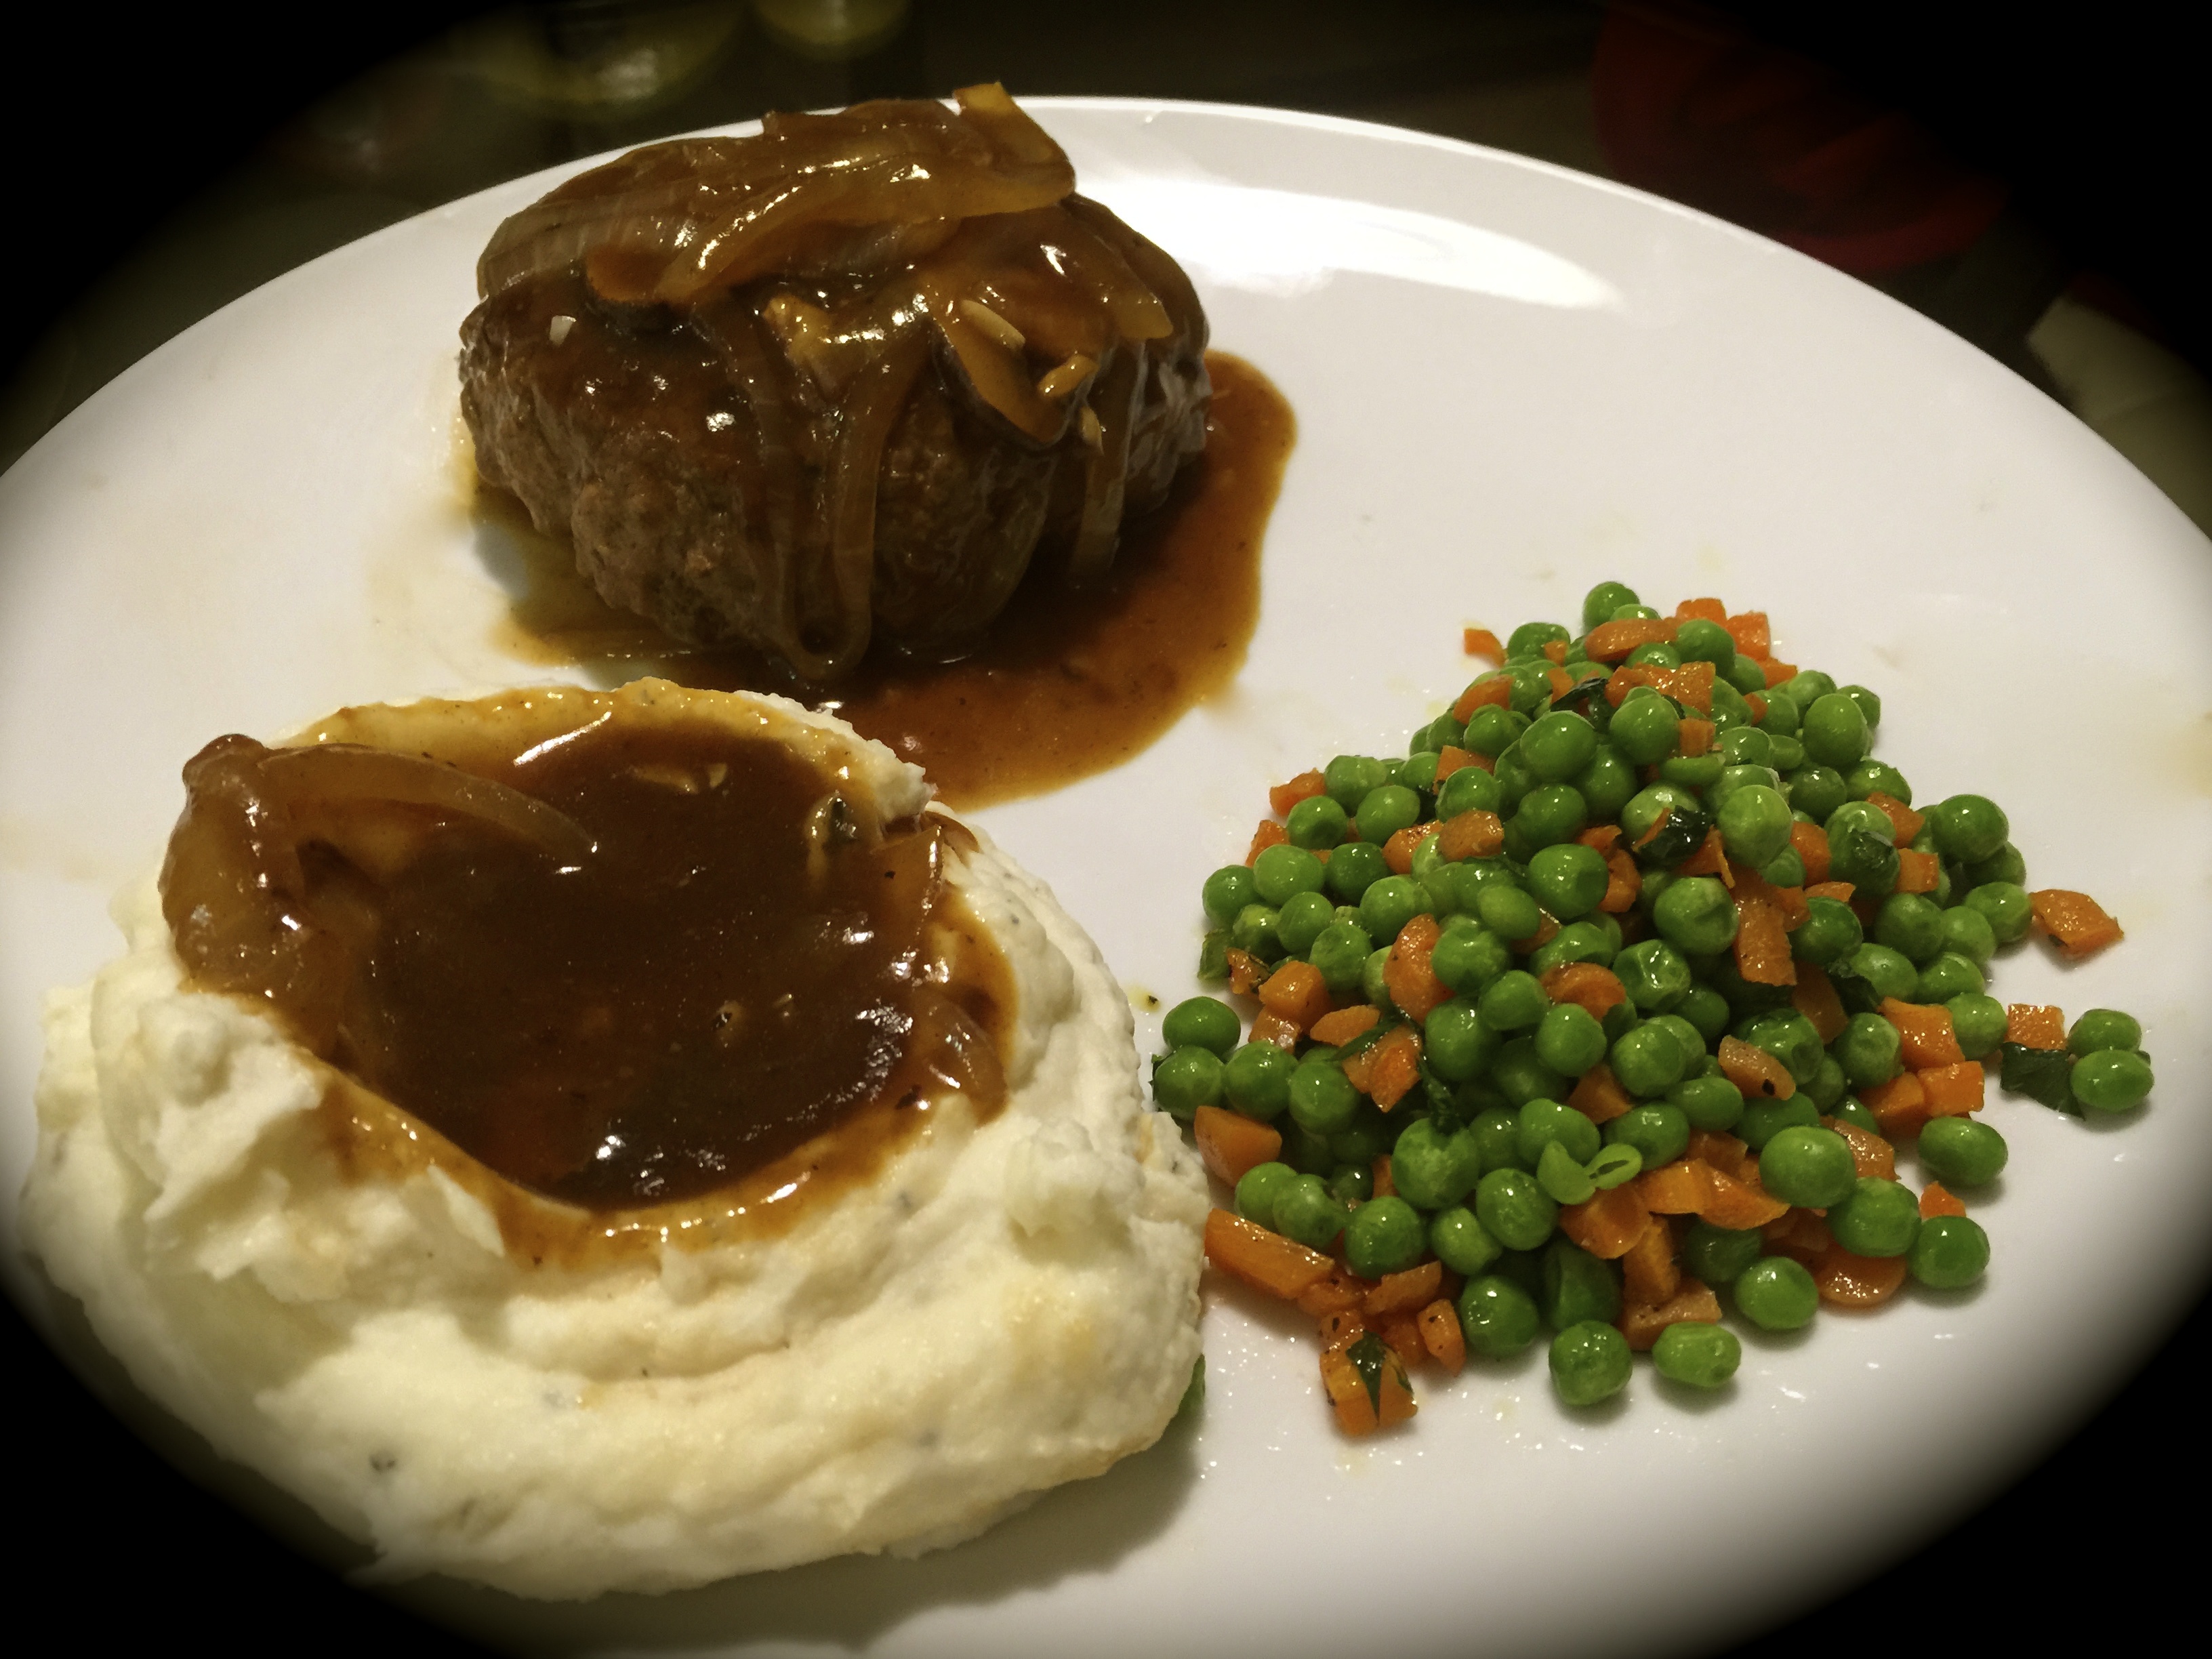
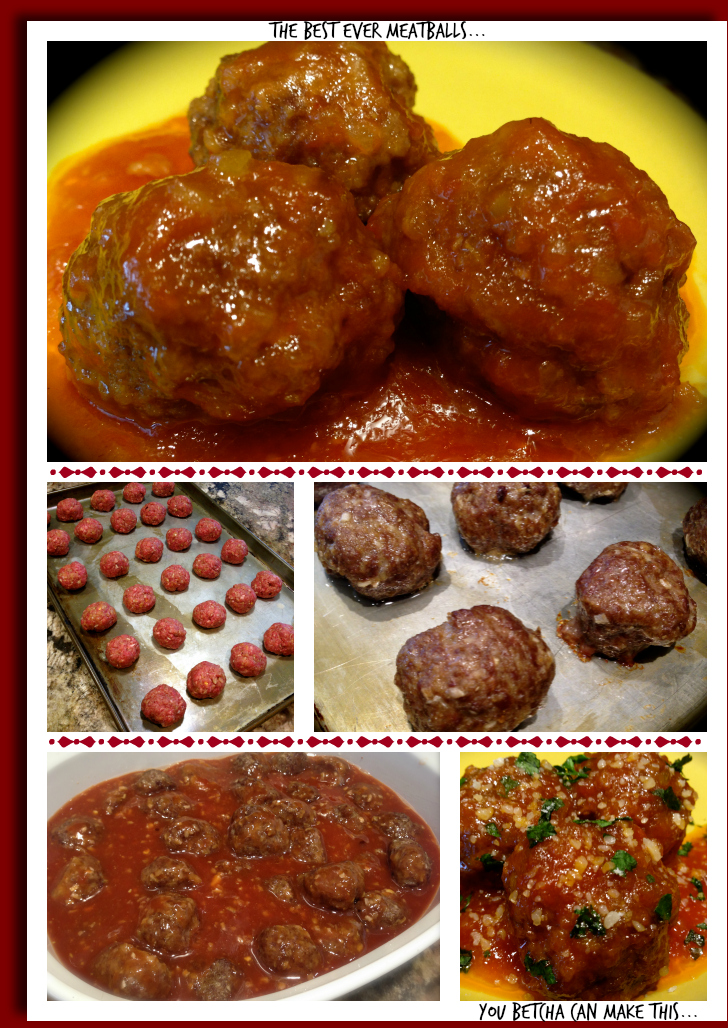
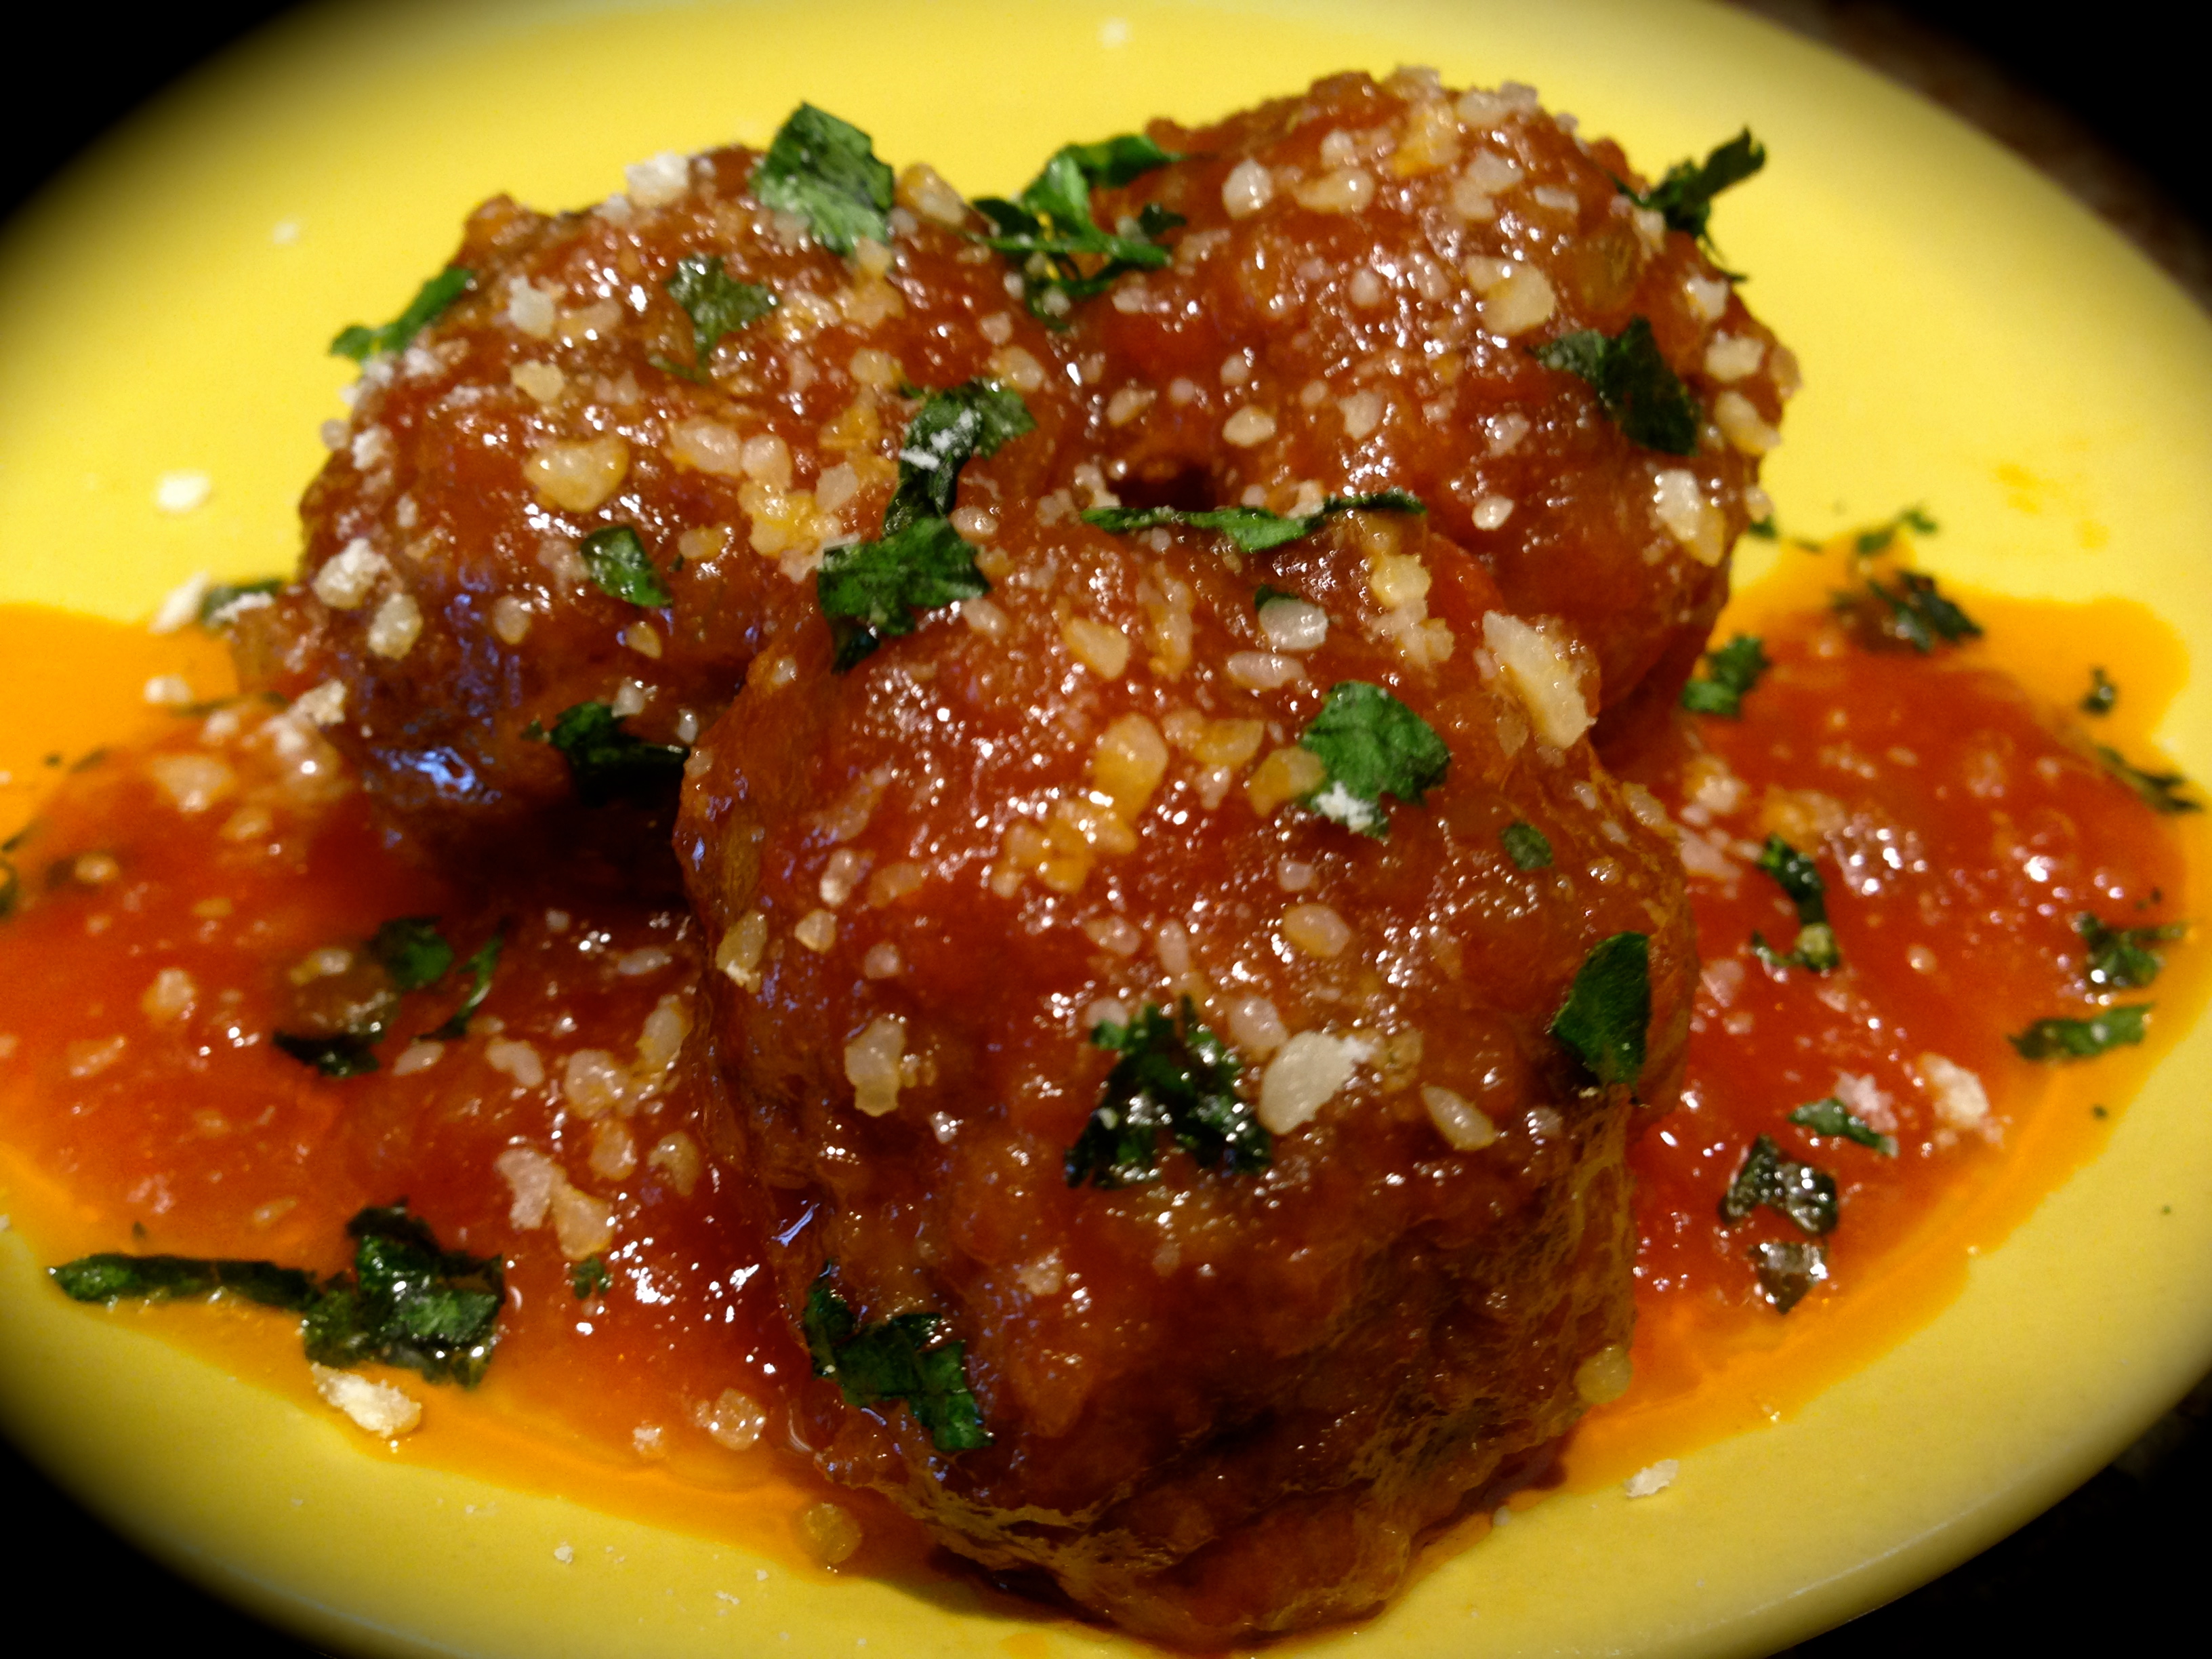
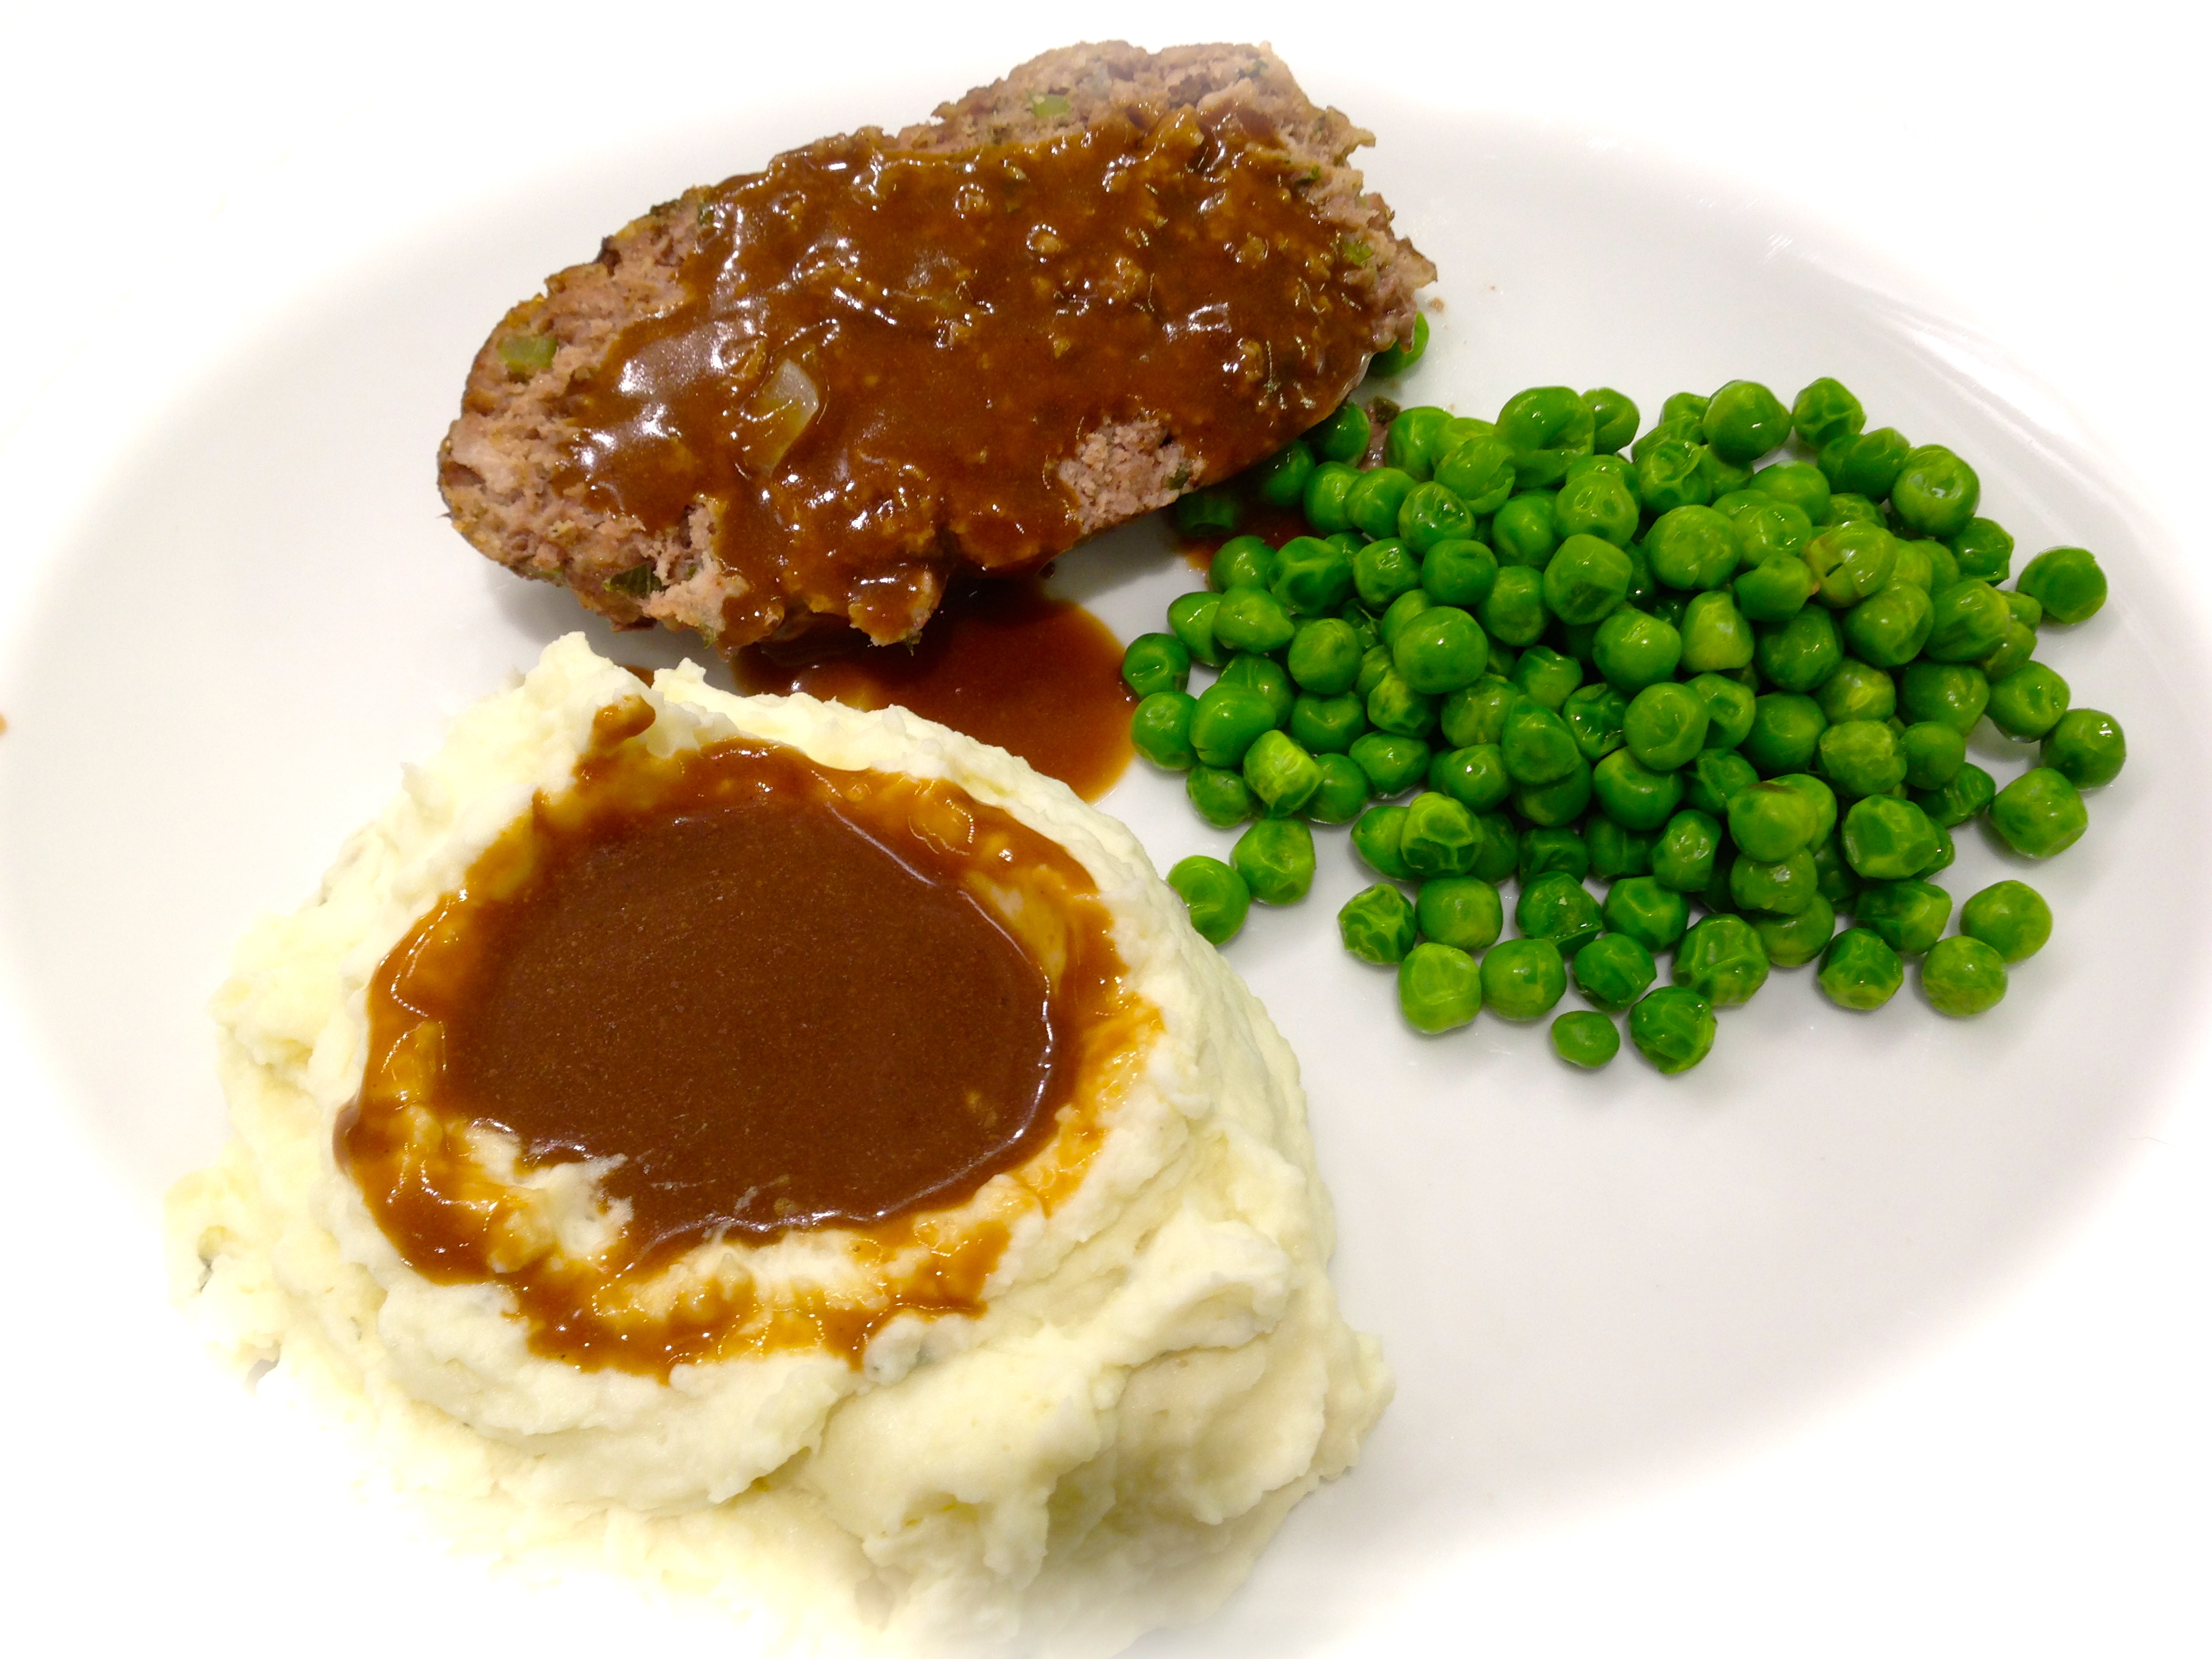
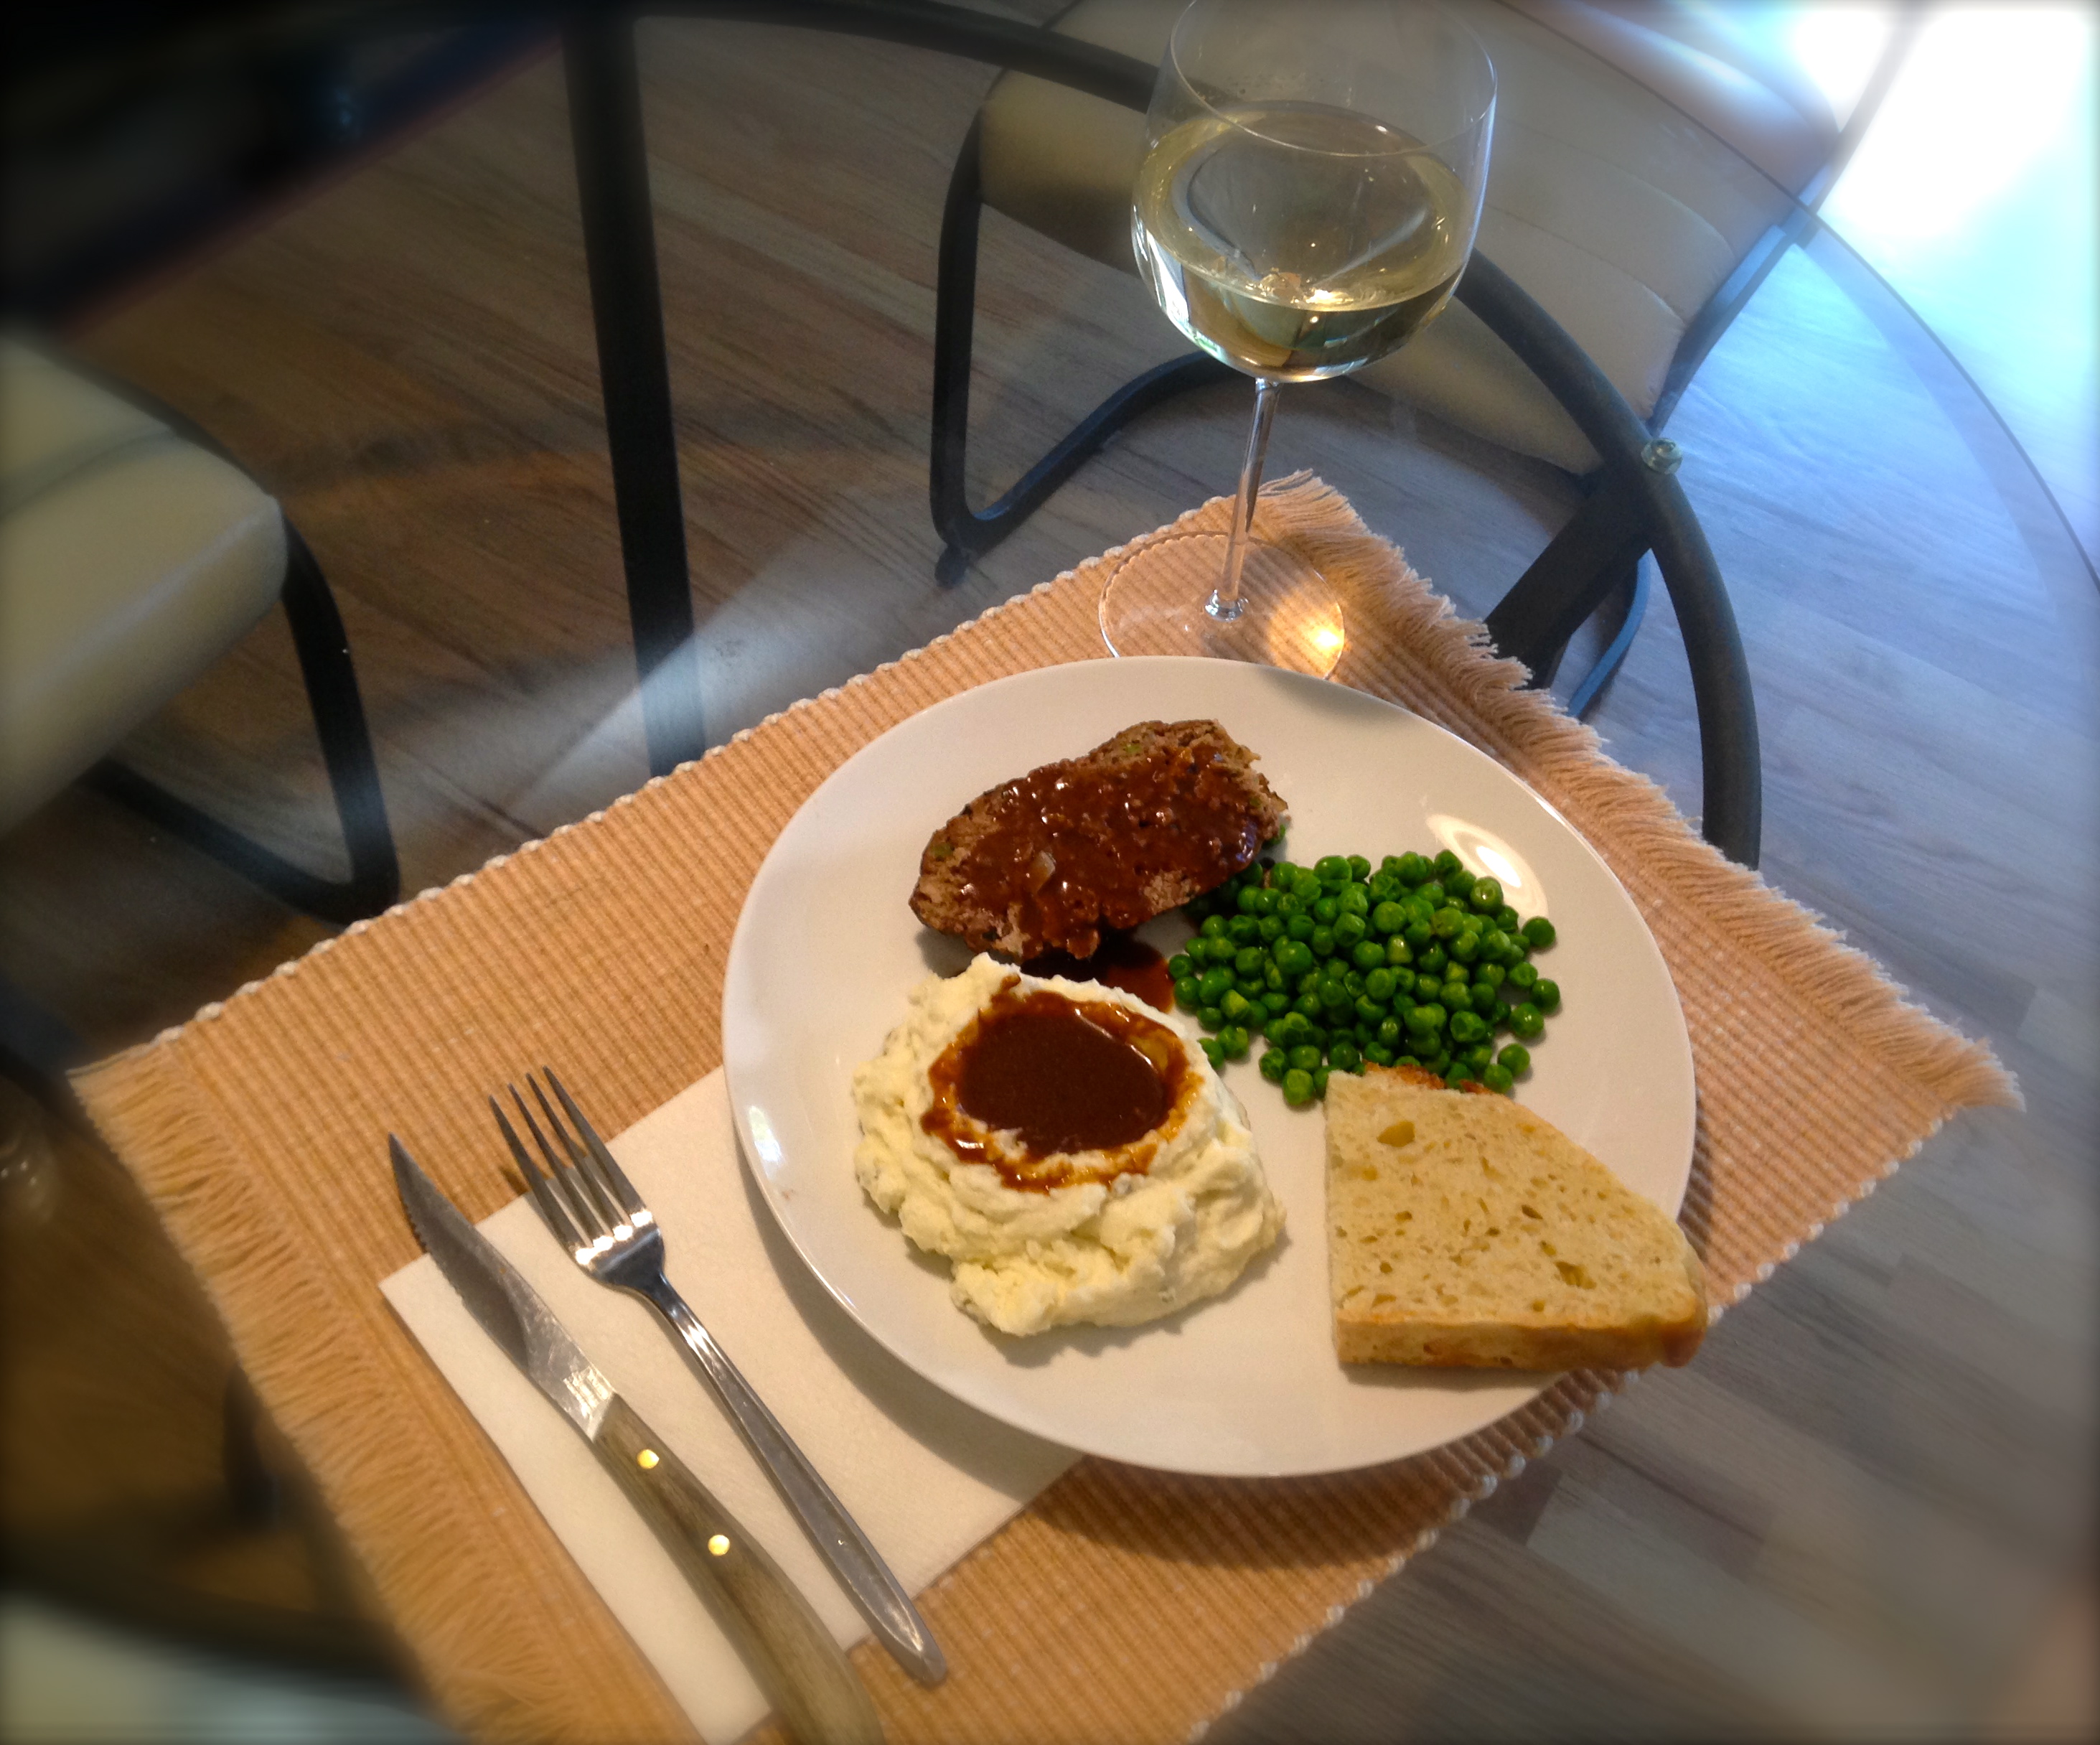
You want to be careful not to overload your ground beef with bread crumbs. You’ll dry it out. After making hamburgers and meatloaf for years and now salisbury steak, I know how the beef should feel so that it will not be overly dry. It should feel moist but not overly sticky. This is something you’ll get a feel for over time. Don’t worry about it.  I always add about half the amount of bread crumbs the recipe calls for to begin with and add more from there. You can always add more and you don’t want to wind up with too much bread crumbs in the mix.

Elongated PattiesLesson Learned 3: Make sure you sufficiently elongate the patties:  Just like a hamburger, these patties will shrink and rise in the center if you don’t elongate them sufficiently and then put an indentation in the center to prevent them puffing up. You can see by my pictures that I didn’t quite nail that process. It doesn’t matter from a flavor perspective, just from a visual perspective. And visually you want to create a different look than that of just a plain old hamburger.

Lesson Learned 4: Used a cast iron skillet for this recipe if you have one: Cast iron provides you with the most even heat which I think is important when you’re cooking everything on the stove but especially ground beef patties. Invest in a basic no frills cast iron skillet. Depending on the size you choose, it could cost you between $15-$25 and will probably be one of the best cooking investments you’ll ever make that you will hand down to your grandchildren.

Patties cooked in a cast iron skillet

This recipe is a nice way to dress up ground beef. Try it and let me know what you think.

Salisbury Steak Smothered In A Mushroom Onion Sauce

  • Servings: 4
  • Difficulty: Easy
  • Print

INGREDIENTS:

PATTIES:

1 pound ground beef

1/2 cup panko bread crumbs (I used parmesan herb)

2 Tbs. heavy cream

2 tsp dijon mustard

1 Tbs. Better Than Bouillon Roasted Beef Base

1 Tbs. Worcestershire sauce

1 Tbs ketchup

Salt and pepper

1 Tbs. butter

1 Tbs. garlic infused olive oil (you can substitute plain olive oil)

SAUCE:

1 medium onion, sliced

2 cloves of garlic, minced

6 – 8 baby bella mushrooms, sliced

2 1/4 cups beef broth (save 1/4 cup to mix with the corn starch)

1 Tbs. Worcestershire sauce

1 Tbs. ketchup

1 Tbs. Country Bob’s all purpose sauce (or you can substitute a different steak sauce)

2 Tbs. corn starch

Salt and Pepper

DIRECTIONS:

Make the patties by combining all of the ingredients for the patties except the butter and olive oil. Make sure to sufficiently flatten the patties into an oblong shape and make an indentation in the center so they keep their shape.  Add the butter and olive oil to a cast iron skillet. Cook the patties on both sides. about 3 minutes per side.

Remove the patties to a plate and cover them with foil to keep them warm. In the same skillet (you can add a little more butter or oil if you feel you need it) sauté the onions and mushrooms until the onions start to brown slightly. Add the garlic and sauté another minute until the garlic becomes fragrant. Whisk together the two cups beef broth, worcestershire sauce, ketchup and all purpose sauce and add it to the onions and garlic. Cook for a couple of minutes.

Whisk together the remaining beef broth and corn starch until there are no lumps. Add to the sauce. Cook on higher heat until the sauce bubbles and starts to thicken.

Put the patties back in the pan and cover them with the sauce. Let them simmer for a couple of minutes. Serve immediately.

Salisbury Steak Patties Smothered In Sauce

Salisbury Steak Patties Smothered In Sauce

Salisbury Steak

Serving Suggestion: With Garlic Mashed Potatoes and Peas and Carrots

Serving Suggestion: With Garlic Mashed Potatoes and Peas and Carrots


Pork Medallions with Marsala Mushroom Sauce…

There’s almost nothing that beats a good pork tenderloin. I’ve mastered the art of cooking this very tender cut of meat and am always looking for new ways to prepare it. I made this recipe the other day and it hit the spot. It’s a shining example of what comfort food is all about.

You can easily find pork tenderloins in the grocery stores packaged in a variety of marinades or plain. For this recipe I chose a lemon pepper marinated loin. You can choose whatever you want. Just make sure whatever marinade you choose will blend nicely with the marsala mushroom sauce.

What’s also great about this dish is it’s pretty easy and quick to prepare, so instead of having the same old boring thing for dinner you can make this and get it on the table in half an hour. I served it over store bought pre-made mashed potatoes (I like the Bob Evans brand the best) with a side of marinated grilled zucchini. it was fabulous!

So lets talk pork medallions with marsala mushroom sauce…

Two Inch Thick Medallions...Lesson Learned 1 – Cut the tenderloin into 2 inch medallions: Two inches is the perfect thickness to cook in the allotted time. Remember pork tenderloin is just like a boneless, skinless chicken breast. Both can be extremely flavorful and tender but most people tend to overcook them. A slight pink in the center of the pork is perfectly fine. Overcooking a piece of meat that has minimal to no fat like this can be a little tricky. If you cut the medallions to two inches in thickness, three minutes on each side should do the trick (you will also simmer them in the sauce for a couple of minutes at the end).

Make sure you start with a hot pot. That is why you use a combination of both butter and oil in the pan. Butter has a lower smoke point and the oil offsets that so you can get the pan warmer without burning Nicely Seared Medallionthe butter while still getting the butter flavor. You want the pork to get a nice sear. At about three minutes you should easily be able to turn the medallion over without it sticking to the pan. If not, let it cook a little while longer. Don’t force the meat from the pan. When the meat is adequately seared it will automatically release itself from the pan and you will be able to turn it over easily. The picture on the left shows the type of sear you want to get on your medallions. Don’t worry, the pan will do all the work for you if you are patient. The second side should cook within 2 -3 minutes.

Simmer the medallions in the wine sauce for a few minutes before servingLesson Learned 2 – Don’t crowd the medallions while searing them: If you have to, cook the medallions in batches. If you overcrowd them in the pan they will steam instead of sear. Once you return the medallions to the sauce you will simmer them for a couple of minutes to complete the cooking process (picture to the right). Searing will insure that you keep all those wonderful juices in the meat.

Lesson Learned 3 – Shut off the heat and take the pan off the stove when adding the Marsala and white wine to the pan: Recipes quite often forget to mention this, and this is an important safety tip. Any type of alcohol added over a heat source can cause a fire flare up. You want to avoid burning yourself or setting the house on fire. So be on the safe side. Take the pan off the heat source, add the wine and then return the pan to the heat. It’s better to be safe than sorry.

I cut the entire tenderloin into medallions used six for this recipe and froze the rest. This recipe is designed to serve two bigger or three smaller appetites but you can easily increase the ingredients to serve more.

Pork Medallions With Marsala Mushroom Sauce

  • Servings: 2-3
  • Difficulty: Easy
  • Print

INGREDIENTS:Pork Medallions in a Marsala Mushroom Sauce

2 Tbs. unsalted butter

2 Tbs. olive oil

6 two inch thick pork medallions (I chose a lemon pepper marinated tenderloin)

1 large shallot, minced

1/2 cup Marsala wine

1/4 cup chicken stock

1/4 cup dry white wine (I used chardonnay)

2 Tbs. heavy cream

1 Tbs. cornstarch

Salt and pepper to taste

4 ounces baby bella mushrooms, sliced

DIRECTIONS:

Heat olive oil and butter over medium – high heat. Add pork medallions and brown on both sides – approximately three minutes on each side. Remove medallions from pan to a plate and cover with foil to keep them warm.

Add shallots and mushrooms to the pan and stir until coated with the pan drippings. After the mushrooms have slightly softened, remove the pan from the heat. Add the Marsala wine, chicken stock and white wine. Place back on the heat and continue to cook until the liquid has reduced by half. Combine heavy cream and cornstarch. Mix until thoroughly combined.

Add the cream mixture to the pan and whisk into the sauce until it starts to thicken. Taste the sauce to see if it needs salt and pepper. Season to taste. Return the pork medallions to the pan an simmer in the sauce for about 3 minutes. Serve immediately.

Serving Suggestion: Pork Medallions Over Mashed Potatoes With Grilled Zucchini

Serving Suggestion: Pork Medallions Over Mashed Potatoes With Grilled Zucchini…

Pork Medallions With Marsala Mushroom Sauce: so easy and great for any week night meal!

Oven Baked BBQ Ribs…

The Fourth of July is less than a week away and that normally means outdoor parties and lots of barbecuing – hamburgers, hot dogs, chicken wings and ribs. And quite often if Mother Nature decides to rain on your parade, you’re left with a conundrum of how to get that great barbecue taste without using the grill –  especially for those ribs. Fear no more. I have a great recipe that can be made all year round. This recipe provides great barbecue flavor without the use of a grill (if you so choose).

My oven baked barbecue ribs are made in the oven and finished off either on a stove top grill, broiler or outdoor grill. I guarantee you, you’ll think these cooked on the grill the whole time. The trick to getting that barbecue flavor without cooking on the grill is pretty simple, liquid smoke. And cooking the ribs low and slow in the oven keeps them moist and tender. Try this recipe and you’ll enjoy barbecue ribs all year long!

Rub Ingredients

Rub Ingredients

Lesson Learned 1 – Less is more with liquid smoke: Liquid smoke is what gives the rub for these ribs that barbecue flavor. But be careful because it can be an overpowering ingredient. I get pretty heavy handed with it because I love a heartier flavor and smell, but be aware that might not be your preference. I would try 2-3 drops initially with the rub ingredients. After mixing all the ingredients together take a test whiff. If you cannot smell smokiness or you want more smokiness then add a little more. I use about 6-8 drops but I would not recommend it for everyone initially, especially if you’ve never used liquid smoke before. You can always add more.

You can also brush the ribs with liquid smoke before applying the rub. This will give them an even deeper smoky flavor. Either way be careful until you are comfortable with the amount of liquid smoke that is right for you to use.

Lesson Learned 2 – Peel off the tough membrane that covers the bony side of the ribs: You may not readily see it but you will know it’s there when you try to eat the ribs. I am referring to the tough membrane that covers the bones. I’ll warn you up front, it can be a challenge to remove it. For me, there are times it comes off easily and other times I have to fight with it. Take a sharp paring knife and start at the large end of the bones. Insert the paring knife between the membrane and the bones working it back and forth until you get enough membrane that you can easily grab. You can also use the end of a spoon or kitchen sheers to loosen the membrane. First try and loosen the membrane all the way across the top. Then begin pulling it downwards over the bones until you’ve removed it.

If you buy your ribs at a butcher shop you can ask the butcher to do this for you. Some butcher shops do this automatically before putting the ribs in the meat case. Make sure you ask the butcher if the membrane has been removed. If it hasn’t have the butcher do it for you. That should be an expected service. If you buy your ribs prepackaged you’ll have to do this yourself. Can you leave it on? Certainly, but you will get a crispy tasteless substance on the bottom of your ribs. If you encounter a stubborn membrane just leave it on. You don’t have to eat it. It’s just a slight nuisance when you’re eating your ribs.

IMG_5753Lesson Learned 3 – Foil is your best friend while making this recipe: Besides making the foil packet for the ribs I recommend you also line the jelly roll pan you bake them on with foil. That way if any liquid leaks out of the packet it will not burn into your pan. Remember you are working with a brown sugar rub, and if the brown sugar leaks out it will create a baked on nightmare. If you line your pan with foil clean up is a breeze.

Lesson Learned 4 – You have three ways to finish off this recipe: Once you remove the ribs from the oven you can either finish them off on a grill, under the broiler or on a stove top grill. I always finish mine off on the grill because I have a gas grill and it’s easy to use on short notice. If you finish them off under the broiler or on a stove top grill remember to protect your pans. Either use foil (if you’re finishing them off under the broiler) or cooking spray if you’re finishing them off on a stove top grill. At clean up time you’ll be glad you did.

Oven Baked BBQ Ribs…

  • Servings: 6
  • Difficulty: Easy
  • Print

INGREDIENTS:

4 lbs. of pork ribs

3/4 cup brown sugar

Liquid Smoke, to taste (I use 6-8 drops)

1 Tbs. paprika

1 Tbs. garlic powder

Your favorite barbecue sauce

DIRECTIONS:

Preheat the oven to 300 degrees. Peel the tough membrane off the back side of the ribs (see lessons learned above). Mix together the brown sugar, liquid smoke, paprika and garlic powder. Apply the rub to both sides of the ribs.

Lay ribs on a sheet of foil (with substantial overlay) shiny side out and meat side down. Lay another layer of foil on the top of the ribs. Join the top and bottom pieces of foil together and crimp. Crimp the edges all the way around the ribs facing up. Line a jelly roll pan with foil. Place the ribs packet(s) on the foil lined pan.

Bake for 2 – 2 1/2 hours or until the meat starts to shrink away from the bone. Remove from oven. If using a grill, during the last half hour of oven baking light your grill and get it up to a temperature not exceeding 375 degrees. (If using a grill you might leave the ribs on for a little less time than if using a broiler. You don’t want the ribs to burn). If using a broiler, set it on high with the oven rack a good 10 – 12 inches from the heat source.

Place ribs on the grill bony side up. Brush on the sauce. Cook for a couple of minutes. Turn the ribs over. Brush on sauce. Cook for another couple of minutes. Take off the grill and serve.

The Ribs Right Out Of The Oven

The Ribs Right Out Of The Oven

Oven Baked BBQ Ribs

Oven Baked BBQ Ribs

Ground Beef and Crispy Potato Casserole…

Lately I have been posting a lot of baking recipes so I thought this time I’d go for something savory. I had some ground beef in the refrigerator and I started to think about how I could prepare it in ways other than more traditional faire like burgers, meatloaf or tacos. Then I thought about Shepherd’s Pie. I’ve made Shepherd’s Pie with left over pot roast (the traditional recipe) and I’ve also made a Turkey Style Shepherd’s Pie but I didn’t have any left over mashed potatoes and didn’t feel like making some.

What I did have was a bag of frozen diced potatoes and a bag of frozen vegetables and the recipe grew out of that. I also had a hodgepodge of shredded cheeses in my refrigerator and I decided to try to incorporate that – sort of a clean out your fridge and freezer type of recipe. I never could have imagined how tasty this would be. After we had this for dinner my husband was already looking forward to eating the leftovers.

The most time consuming part of this recipe is assembling the ingredients but once that’s done, like any other casserole, all you do is pop it in the oven and wait for it to do its thing. This recipe requires using two pots and a casserole dish but believe me the end result is worth it. Try it out and see what you think!

IMG_4961Lesson Learned 1 – There is some prep to this recipe: But tell me now, what from scratch recipe does not require some prep. You brown the onions, add the meat and seasonings, add the veggies and cook thru till warm while in another pot you make the homemade cheese sauce. But at least this way you know every ingredient that is going into the recipe and that’s the beauty of making it from scratch – you control all of the ingredients.   There are ways you can shorten the prep time by perhaps using a prepared cheese sauce but  now that I’ve mastered making my own sauces and gravies I very seldom, if ever, revert to buying them packaged or jarred. And really, you have to admit, homemade tastes so much better. So take the time to do the prep – it’s worth it.

kicproductimage-120658Lesson Learned 2 – It’s easy to adapt this to a meatless recipe: Quite often I post on my Facebook page a picture of the next recipe I will blog as a teaser for what’s to come. This time when I posted a picture for this dish I got two very specific comments. The first was that I should write a recipe book and I am seriously thinking about doing an ebook. (Have any of you done that – would love to hear your story). The second was that you could substitute veggie crumbles for the ground beef in this recipe. To be honest, I had never heard of veggie crumbles before and I wondered why you would substitute the meat for veggies when veggies are already included in the recipe. But I was thankful to learn about this. A few of my friends who are not carnivores say they use these crumbles when making chili or tacos and they tell me it’s a great substitute. So I wanted to offer that piece of information here. This is definitely the kind of recipe that could use the crumbles as a substitute for the ground beef. I am not recommending any particular brand. Both MorningStar Farms and Boca make the crumbles. I just wanted to give you an example of what you might consider.

Lesson Learned 3 – Any frozen vegetables will do: I had some frozen broccoli, cauliflower and carrots and I add them to the recipe. You can also use frozen mixed vegetables (peas, carrots, green beans and corn). Just remember to make sure the pieces are not too large. I found I had very large cauliflower pieces so I cut them in half to make sure they would cook. You can also add fresh vegetables. I would cook them until slightly softened and then put them in the casserole. I think I am going to try fresh vegetables the next time I make this. Regardless, my husband told me that this recipe is definitely a keeper!

IMG_5019Lesson Learned 4 – This recipe makes great leftovers: The recipe as written serves 6 and my husband and I could not eat the whole thing the first time. We had it two days later as leftovers and it tasted equally as delicious as when it was first made. The best way to reheat this is to first take the casserole out of the refrigerator and let it sit on the kitchen counter for an hour. That takes the chill off. Then reheat at 375 for 45 minutes. (maybe 30 minutes at sea level). Make sure you reheat it covered in foil as the cheese will burn if you don’t. The ends result is piping hot and just as delicious as the first time around. This recipe is a winner out of the gate and as leftovers.

Ground Beef And Crispy Potato Casserole…

  • Servings: 6
  • Difficulty: Easy
  • Print

INGREDIENTS:

1 1/2 pounds ground beef

1/2 large onion, diced

1/2 tsp. oregano

salt and pepper to taste

2 cloves garlic, minced

1 1/2 – 2 cups frozen vegetables

3 Tbs. butter, divided

2 Tbs. flour

2 cups milk

1 cup shredded cheese (I had a white cheddar and gruyere blend)

1/c cup sour cream

1/4 cup fresh chives, chopped

Frozen, diced potatoes (enough to cover the top – not quite a full 32 oz. bag)

Flat leaf parsley, chopped for garnish (optional)

DIRECTIONS:

Preheat the oven to 400 degrees. Spray a 10 x 10 casserole dish with cooking spray. Set aside.

In a large skillet heat 1 Tbs. of butter. Add the onions and cook until they start to become translucent (about 5 minutes). Salt and pepper the onions during this process. Add the ground beef and oregano. Cook until the meat is mostly cooked through. Add the garlic and vegetables and cook until the vegetables are slightly heated. Taste the mixture and add salt and pepper if needed. Once the vegetables are slightly heated, remove the mixture from the heat and set aside.

In another skillet melt the remaining 2 Tbs. of butter. Add the flour and whisk for about a minute. Add the milk and continue to whisk so the mixture stays smooth. Once the milk heats it will start to thicken. When the milk reaches a desired thick consistency (this takes about 5 minutes), turn off the heat and add the cheese. Whisk until the cheese melts. Once the cheese is incorporated into the milk mixture add the chives and stir to combine. Taste the cheese mixture and add salt and pepper, if needed.

Add the sour cream to the meat mixture and stir to combine (You need to do this when the meat has slightly cooled so the sour cream does not curdle). Spread the meat mixture into the bottom of the prepared baking dish. Cover the meat mixture evenly with the frozen diced potatoes. Pour the cheese mixture over the potatoes.

Bake for 45 – 60 minutes. For the first 20 minutes cover the casserole with foil, then remove the foil and bake for the remaining time. Remove the casserole from the oven and let it rest for 5 minutes before serving.

Add the sour cream to the meat mixture and spread in the bottom of the dish...

Add the sour cream to the meat mixture and spread in the bottom of the dish…

Arrange an even layer of frozen potatoes over the meat...

Arrange an even layer of frozen potatoes over the meat…

Pour the cheese sauce over the potatoes...

Pour the cheese sauce over the potatoes…

Fresh out of the oven...

Fresh out of the oven…

Ground Beef and Crispy Potato Casserole...

Ground Beef and Crispy Potato Casserole…

The Best Ever Meatballs…

You know how some recipes catapult from being just something you try to a family and friends favorite that spans generations? Well this I can assure you is one of them. I first started making this recipe when I was in my twenties. At that time I could barely cook myself out of a paper bag. But I needed to make an appetizer for a family gathering and I decided to make meatballs.

Almost everyone I know has their tried and true meatball recipe and quite a few say to me that theirs is alright but not particularly special. Well search no more. This one is special and it’s been passed down from family to friends and friends of friends for decades. Every time I serve it at least one or more people ask me how to make it. This recipe is now multi-generational!

The first time I made this I was not very adept in the kitchen. I wasn’t learned about certain ingredients, proportions, substitutions, doneness – you name it, I didn’t have a clue. But my naiveté was the factor in making a mistake that kicked this recipe to the next level and made it ever so popular.

IMG_3579The original recipe came from a grocery store bought book, you know the ones you always see at the checkout counter. This one was called Pillsbury’s Cookbook of Family Favorites. You can see how old it is just by looking at the price, $1.25. When was the last time you spent that small of an amount of money on a book or magazine?

When I first read the ingredients there were two things that I did not have on hand. One was cracker crumbs and my husband suggested using bread crumbs instead. The second was sweet pepper flakes. I thought to myself hmm…, that shouldn’t be too hard to find. So off to the store I trudged in search of them.

When I got to the store, lo and behold, there were no sweet pepper flakes to be found. I endlessly looked and looked at the spices and herbs and the only thing I saw with “flakes” labeled on it was red pepper flakes. So I thought to myself, “well green peppers and red peppers are considered sweet peppers so that must be it” (you see what I mean). I bought the red pepper flakes and used them in the recipe.

Now I grew up in a household where very bland food was served. My father was not one for any kind of spices, he totally shied away from garlic and onions, and any kind of “heat” was never put in what we ate. But my husband’s family loves food with a kick, the more heat the better. So little naive me went on to make this recipe substituting red pepper flakes for sweet pepper flakes and it became a huge hit. The first time I made it I used two tablespoons of red pepper flakes and that produced some spicy meatballs, let me tell you. Since then I’ve toned it down to one tablespoon which gives a very nice kick and doesn’t leave you running for something cold to drink. But if you really like to bring on the heat use two tablespoons. It won’t hurt the meatballs that’s for sure.

Meatballs

I’ve been trying to think if I could share any lessons learned in making this recipe but it’s very straightforward even for the novice chef. Just follow the directions and you’ll be able to serve meatballs that will always be a big hit.

The technique is easy. All you need to do is mix the ingredients for the meatballs, form them into one inch rounds and bake them for 30 minutes. Then you put them in a casserole dish, add the sauce, cover and bake them for another hour. Now what’s easier than that?

I know in other blogs I’ve said that you just have to try this recipe, but you really must make this. It’s been tried and true over decades and its popularity came about because I, the cook who never could, made the most advantageous mistake I’ve ever made in the kitchen. Enjoy this one and share it with all of your friends!

The Best Ever Meatballs…

  • Servings: 2-2 1/2 dozen
  • Difficulty: Easy
  • Print

INGREDIENTS:

MEATBALLS:

1 lb. ground beef (I use 85% lean)

2 eggs, slightly beaten

2/3 – 3/4 cup bread crumbs (use a smaller amount and first and see if you will need more)

2 Tbs. organic minced onion flakes

1 Tbs. red pepper flakes (for really spicy meatballs add 2 Tbs)

9 drops Tabasco Sauce (you can add more if you like)

Dash of salt

SAUCE:

3/4 cup catsup

1/2 cup water

1/4 cup white vinegar

1/3 cup light brown sugar, firmly packed

1 1/2 Tbs. organic minced onion flakes

1 tsp. prepared mustard (I use Grey Poupon but you can use yellow mustard)

1 1/2 tsp. kosher salt

4 tsp. Worcestershire Sauce

6 drops Tabasco Sauce (you can use more if you like)

DIRECTIONS:

Preheat the oven to 325 degrees. Mix all of the ingredients for the meatballs. Shape them into one inch balls and layer them in an ungreased jelly roll pan. (You need a sheet pan with a lip on it so the grease does not run off). Bake at 325 for 30 minutes.

Combine all of the ingredients for the sauce. Place the meatballs in a casserole dish that you can cover. Pour the sauce over the meatballs, cover and bake for 1 hour. Enjoy!

IMG_3590

IMG_3610

Serving Suggestion: sprinkle with parsley and parmesan cheese…

Tips ‘N Tricks: Making A Juicy Pork Tenderloin

I’ve always loved pork ever since I was a kid. My mother, who was not the cook (nor was she ever really interested in it), would often make it for Sunday dinner. The problem with that is she would make a pork and beef roast together in the same pan, roasting them both for the same amount of time. I know, I know, it boggles the mind doesn’t it. But I did say my mother wasn’t the cook now didn’t I (all apologies to my wonderful mother).

I never really had a flavorful, juicy pork tenderloin roast until I was much older and that only came about through trial and error in learning how to roast it. Pork can be fabulous when it is roasted properly or it can taste like the Sahara Desert – there really is no in between.

Pork tenderloin roasts are easy to find. You see them all the time in the grocery store wrapped in vacuum packaging. You can get them plain or pre-marinated. I find most people shy away from these roasts because they hardly have any fat. You may find a thin layer of skin on one side, but all in all it is very lean meat almost reminiscent of boneless skinless chicken breasts (which most people tend to overcook as well).

My mother believed that meat needed to be completely cooked through. And some people like their meat that way. Not me. Don’t get me wrong, I don’t want my meat raw but I’ve found, especially with pork tenderloin, that many cooks think the pork is done when the meat is white completely throughout. Nothing could be further from the truth. Pork tenderloin can be slightly pink in the middle and the meat is still thoroughly cooked. The internal temperature should be between 140 – 145 degrees in the thickest part of the meat when you take it out of the oven. Don’t forget some carry over cooking will occur when the meat is resting.

With the technique I use I don’t even need a meat thermometer. As a matter of fact, I haven’t used one to test the doneness of these roasts in years. I simply roast the pork tenderloin at 375 degrees for one hour. Period. After an hour I take it out of the pan, cover it with foil and let it rest for 10 minutes. Then I slice and serve it. That’s all. It comes out perfectly every single time!

I prep the roast by taking it out of the vacuum packaging and drying it thoroughly with paper towels. There is a lot of gel-like substance in the package and I want to make sure the roast is completely clean and free of it. Then I season it, skin side up, with salt and pepper, brush it lightly with some olive oil (I mostly used garlic infused olive oil) and then add some sort of dry herb that goes well with pork. The herb in the picture below is dried thyme.  I place the roast on a rack in a small roasting pan and roast it for an hour, and voila – I get a juicy roast every single time.

I haven’t had a dry pork tenderloin in years. This technique is so easy to do and yet, as you can see by the picture, the roast looks so elegant and good (and juicy). So follow my little trick for these small tenderloin roasts and you will be successful every single time!

Juicy Pork Tenderoin

Juicy Pork Tenderoin


Old Fashioned Pot Roast…

Was there ever a comfort food that will chase away the blues on a cold, snowy Winter day better than a simple pot roast? Making a pot roast reminds me of home, with great smells in the kitchen and the anticipation of that roasted goodness that only comes from cooking something low and slow.

le-creuset-signature-7.25-qt.-flame-round-french-ovenThere are various ways to cook a pot roast. Although I’ve made them several times in a slow cooker, I prefer to use an enameled cast iron pot (I use Le Creuset but there are many different varieties out there). I find that enameled cast iron provides an even, controlled heat and I think that consistently  allows for a more tender pot roast.

I also find enameled cast iron to be easy to clean, especially after something has been cooking for a long period of time. The main drawback with enameled cast iron is that it is heavy. I mean after all, it is cast iron. So just be prepared to flex your muscles a little bit and you will be fine. Enameled cast iron can be expensive, but I’ve had some of my pots for over 20 years and although the enamel may be slightly stained, they still work like a charm. In the end, you only get what you pay for…

The beauty of making pot roast is that it is so simple to make and your entire meal winds up being in one pot. The oven does all of the work and you are rewarded for your patience with one of the best comfort food meals of all time. So, here are some lessons learned that will make you a master at making the perfect pot roast:

IMG_2702Lesson Learned 1 – Brown the meat and veggies before putting them in the pot: The cooking method used for making pot roast is called braising. When you braise something you cook it for a long period of time in liquid. In the end, this technique does not provide eye pleasing color although it renders deliciously moist meat and vegetables. Taking a few minutes to brown the meat on all sides and to brown the vegetables will provide something that not only tastes divine but is also eye pleasing. It is worth the time to do it. Remember, you eat with your eyes first.

IMG_2711Lesson Learned 2 – Cut the veggies into big chunks: Regardless of the size of the pot roast, you will be braising the dish for several hours. You don’t want your veggies to fall apart in the process. Make sure you cut them into big chunks. That way the will stand up to the braising time.

Lesson Learned 3 – THE ONLY WAY IS LOW AND SLOW: The only way to wind up with a tender, moist pot roast is to cook it low and slow. Pot roasts are tough cuts of meat (I used a chuck roast in this recipe) and if you don’t take the time to slowly break down the fibers in the meat you will wind up with a tough, uneatable meal. Most recipes that I researched called for cooking a 4-5 pound roast for four hours. I’ve also seen cooking temperatures vary from 275 to 325. I live in high altitude and I’ve learned the hard way that everything takes longer to cook here. I cooked my pot roast for 4 hours at 275 and the last hour I raised the temperature to 300. The pot roast texture turned out perfectly.

The pot roast will tell you when it is done. If you go into the pan and stick your fork in the roast and it does not go in and out easily, the pot roast is not done. I tried this trick after 4 hours of cooking and the fork did not go into the meat easily. After 5 hours the fork went into the meat like the meat was butter. At that point I knew it was done.

I prefer cooking the roast at 275 and cooking it a little longer. I find the lower temperature and the longer braising time does not annihilate the vegetables. Everything turns beautifully.

Lesson Learned 4 – Braise with red wine and beef stock: Once again I’ve seen various suggestions on the type of braising liquid to use with pot roast. I can tell you from experience that nothing beats a combination of red wine and beef stock. This combination not only gives you fabulous drippings from which you can make a homemade gravy, but it also fills the house with the most delightful smells during the cooking process. Part of the comfort of making a pot roast are the smells you get while the roast is braising. Use red wind and beef stock and you won’t regret it.

When you braise a roast you fill the pan with liquid until it reaches half way up the sides of the meat. Don’t cover the meat completely with liquid. If you do, you will poach the roast and not braise it. You don’t want to do that.

potroast2

All of these tips will help you make the most delicious pot roast you’ve ever tasted. If you’ve never made a pot roast before, try to be a little flexible in your cooking time until you figure out the time and temperature that works for you. I highly recommend you keep your oven temperature at 275. If you live at sea level, a 4-5 pound roast may only take 4 hours to braise. That did not work for me in high altitude. I will include both of these recommendations in the recipe.

Try this one the next time you are in need of some old fashioned comfort food. It truly hits the spot!

Old Fashioned Pot Roast

  • Servings: 6-8
  • Difficulty: Easy
  • Print

IMG_2731INGREDIENTS:

1 4-5 pound pot roast

1 large sweet onion peeled and cut into quarters

4 carrots peeled and sliced into 2-3 inch pieces

4 parsnips peeled and sliced into 2-3 inch pieces

3-4 red potatoes (depending on size) washed and cut into large pieces

1 cup dry red wine

3 cups beef broth

2-3 Tbs. of olive oil (I used garlic infused olive oil)

Salt and pepper, to taste

3 sprigs of fresh thyme

dried (or fresh rosemary) 1 tsp. or 2 sprigs

DIRECTIONS:

Preheat the oven to 275 degrees. Heat a large cast iron dutch oven over medium-high heat. Salt and pepper the pot roast. Once the dutch oven has heated, add the oil and make sure the bottom of the pan is completely coated. Sear the roast on all sides for about a minute or two. Remove the roast from the pan and set aside.

Add more oil to the pan if needed. Add the carrots and parsnips to the pan and sear until lightly browned on both sides, about a minute or two. Remove and set aside. Add the potatoes to the pan, flat side down and sear for a couple of minute until tops are lightly browned and slightly crisped. Remove from the pan and set aside.

Add the wine to the pan. Stir with a whisk to remove all of the bits from the bottoms of the pan. Once that is done add the roast back to the pan. If using dried herbs instead of fresh, add to the beef stock and combine.  Pour in the beef stock into the pan making sure that the liquid only goes half way up the sides of the meat. Arrange the carrots, parsnips and potatoes on the side of the roast. Place the onions on top of the roast.

Cover and roast for 4 hours (if high altitude roast at 4 hours at 275 and one more hour at 300).  The roast is ready when it is fall apart tender and a fork inserted into the meat goes in and out easily.

IMG_2728

Browned and ready to go into the oven…

IMG_2731

A beautifully braised pot roast…

IMG_2740

Serving suggestion…

Meatloaf For Two…

Just about every family has their version of how to make meatloaf. I think meatloaf may have been with us since the dawn of time. And although my vegetarian friends may cringe at the thought, I still enjoy eating meat every now and then but now I try to balance my diet so that I am not solely relying on red meat as my main protein. But every once in a while I need some good old comfort food and I turn to things like roast chicken, pot roast or some good old meatloaf.

As I’ve mentioned before, I grew up in a meat and potatoes household. So today’s blog takes me back to my childhood where meals like these were often the family faire for dinner. And if you’re not a beef fan, you can skip this recipe as my goal is to try a wide variety of recipes and I’m sure at some point I will post something that will pique your interest.

This is one of my husband’s favorite meals from when he was a child – meatloaf, mashed potatoes and peas. Meatloaf was something his mother didn’t totally annihilate in the oven and the art of scooping up a bunch of peas with a wad of mashed potatoes is a skill he has well honed over the years. As a matter of fact, no other vegetable will do for him in this meal – it has to be peas and of course there must also be mashed potatoes. My husband is one of those that does not like to combine his food and eats one thing on his plate till he’s finished with it and then moves on to something else. But for this meal the combination of meatloaf, mashed potatoes and peas compels him to break his habit and mix them all together. We all have our little idiosyncrasies don’t we?

This recipe comes from a book my husband got back in the 1970’s called The Complete Family Cook Book. It was a cook book that was offered by a chain grocery store to its customers. On your first visit to the store you got the recipe book binder and chapter 1. Every week after that, if you spent “x” amount of dollars you received an additional chapter. That continued every week until the book was complete. You could also purchase a chapter if your grocery bill was not large enough to warrant a free chapter. The book is so old now that the back of the binder is held together with duct tape, but it is an amazing book with so many recipes that we’ve used many times over the years. This one has to be our all time favorite from that book. I’ll share my rating and lessons learned over many, many years of making this recipe.

RATING: A+ what can I say, we’ve made this recipe for years and it continues to be our favorite. It’s simple, straightforward and very satisfying. You’ve simply got to try this one. And being it’s only recently that I’ve improved my cooking skills, I guarantee you this recipe can be made by even the worst cook and still turn out great. I can also tell you that from many years of experience!

Mini Loaf Pan

Mini Loaf Pan

LESSON LEARNED 1: MAKING MEATLOAF FOR TWO – The recipe as I will share it makes a very big meatloaf that serves 6. Since it is only me and my husband I wanted to figure out a way to eliminate as much waste as possible and still enjoy this meatloaf recipe. A local grocery store used to sell meatloafs in mini loaf pans (3.25 W x 2″D x 5.75L). I got the idea of trying to see how this recipe might translate into filling mini loaf pans. Well, it worked beautifully – this recipe will make 3 complete mini meatloafs. So when I want meatloaf for dinner I make the recipe, fill the mini pans, freeze two of them for a later date and cook one of them that evening. There you have it  – meatloaf for today and two others for future dinners. The mini pan gives you 3 good sized slices so you can each have one slice for dinner and if you don’t take seconds have a slice leftover to make a meatloaf sandwich the next day (remember those?).

LESSON LEARNED 2: FREEZING THE LOAFS – If you plan on having your loafs “live” in the freezer for a while I recommend first wrapping the loaf pan in plastic wrap and then wrapping them with aluminum foil. That tends to hold off freezer burn for quite some time. The mini loaf will thaw in a couple of hours so you can take it out of the freezer and put it in your refrigerator in the morning, take it out when you come home from work and just pop it in the oven. Take off the aluminum foil when you place it in the refrigerator from the freezer – the foil tends help maintain the cold and you want the loaf to thaw. I also recommend minimally letting the loaf stand on the counter at least while you preheat the oven. Any chill you can reduce will assist with the cooking time.

LESSON LEARND 3: MILK OR CANNED TOMATOES – The recipe says you can use 3/4 cup milk or 3/4 cup canned tomatoes. I’ve tried this recipe both ways and prefer making it with milk versus canned tomatoes. I think the flavor is richer and more full bodied with milk. I think the tomatoes tend to take over as the dominant flavor and I prefer the dominant flavor to be the meat itself.

IMG_8195

LESSON LEARNED 4: PREPARING THE MEATLOAF – the recipe in itself is pretty self explanatory. The one thing I’ve learned over the years is to resist the urge to over mix. Mix all the ingredients until just combined and then STOP! Mixing a meatloaf is like mixing cake batter – the more you do it the tougher the end product. Be careful not to over mix.

LESSON LEARNED 5: BREAD CRUMBS – although the recipe calls for 3/4 cup of bread crumbs, I only add 1/2 cup to begin with and then add more if I think it’s needed. It just seems sometimes the mixture is drier than others and I would rather err on the side of caution and not add all the bread crumbs at the beginning to ensure getting a moister mixture than just dumping it in all at once and being stuck with what I’ve got. This was something learned over many years of practice.

IMG_8160LESSON LEARNED 6: DRAIN THE GREASE – Once you take the meatloaf out of the oven make sure you drain the grease before slicing and serving. I tend to use the leanest ground beef I can find and I still have grease in the pan. There’s nothing worse than serving a greasy slice of meatloaf.

LESSON LEARNED 7: MAKE IT IN YOUR TOASTER OVEN – With a mini loaf you don’t have to use your oven. Cook this in your toaster oven at 350 for 1 hour and voila, you’ll have meatloaf! And you can have meatloaf any time of year, including the summer, without heating up your house.

This is definitely not a difficult recipe to master. Give it a try and tell me what you think. This has been our go-to meatloaf recipe for a long time and I hope you will enjoy it. If you’ve got a family favorite meatloaf recipe – please share it. Would love to try it and compare the two. Enjoy this one!

Meatloaf For Two…

  • Servings: 2-6
  • Difficulty: Easy
  • Print

(This recipe, with it’s noted adjustments can be made to serve two or serve 6)

INGREDIENTS:

1 1/2 lbs. ground beef

1/2 lb. ground pork

1/3 cup finely chopped onion

3 Tbs. celery (two small stalks)

3 Tbs. italian parsley (or you can chop the leaves from the celery stalk)

1-2 cloves minced garlic (personal preference)

3/4 cup bread crumbs

3/4 cup milk or canned tomatoes

1 beaten egg

1 1/2 tsp salt

1/2 tsp pepper

1/2 tsp poultry seasoning

DIRECTIONS:

Mix all ingredients together until fully blended. If making one loaf, shape in a 9×5 inch loaf pan and bake at 350 for 1 1/2 hours. If making mini loafs, divide mixture into 3 mini loaf pans. Bake at 350 for 1 hour. Take out of the oven and remove the grease from the pan. Cover with foil and let sit for 5 minutes. Serve with mashed potatoes and peas.

IMG_8176

IMG_8182

Easy Cheesy Stuffed Peppers…

I’d never made stuffed peppers before. I always bought them either frozen or pre-prepared at the grocery store. But in my quest to do one new recipe a week I decided to try my hand at making stuffed peppers. As you can imagine there are so many variations of stuffed pepper recipes out there but I wanted to do something that was simple but also interesting.

I came across a recipe called “Make Me Stuffed Peppers” from the website genaw.com. It was quick, easy and in my mind adaptable to what I already had in the refrigerator and so I chose it over a plethora of others.  Here is my rating and lessons learned.

Rating: B for the recipe, C for how the recipe was written. The recipe although good needed, in my estimation, a little something. It lacked depth of flavor. The next time I might try adding a little BBQ sauce or worcestershire sauce to the ground beef or maybe some red pepper flakes or smokehouse beef seasoning just for a little more kick. Don’t get me wrong, it’s not a bad recipe. It just needs a little more substance to it. And if you like things a little more mellow don’t add anything. I think the beauty of this recipe is its adaptability to one’s personal tastes.

Lesson Learned 1: CHEESE. The recipe mentioned something that I never knew.  It calls for cheese to be mixed with the ground beef and also for some cheese on the top. It specifically states not to use pre-shredded cheese as the powdery coating doesn’t allow it to melt properly. I never heard that before, but I have experience pre-shredded cheese not melting properly. Who knew? Good thing to remember for next time. The recipe called for using cheddar cheese both mixed in with the ground beef and on top. I mixed the ground beef with a cheese blend that contained three different types of cheeses mixed with cream cheese and that melted nicely. I also had some provolone slices and I used those to put on top of the stuffed pepper. That melted nicely as well. The beauty of this recipe is that you can use whatever cheese you have available – it doesn’t matter. The cheese blend gave the ground beef a nice silkiness and I liked that.

stuffed peppersLesson Learned 2: PARBOILING THE PEPPERS. It is important to cook your peppers in boiling water for 3 minutes before you cut them and fill them. Bring a pot of water to a boil, put in the peppers and cook for only 3 minutes. Take them out, let them cool slightly and then prepare them to be stuffed. If you don’t do this step they won’t cook properly. Don’t cook them any longer than 3 minutes or else you’ll have mush on your hands at the end of the process. Cooking them for 3 minutes gives them just enough of a head start to be done perfectly when they come out of the oven.

Lesson Learned 3: BROWN BUT DO NOT COOK THE GROUND BEEF. The ground beef will be in the oven for a half hour after you stuff the peppers. There is no need to cook the meat all the way through when preparing ground beef mixture. Cook it about three quarters through (so you still see a little bit of pink). The oven will take care of the rest. I also recommend using a fattier ground beef for this recipe. That way the meat will not dry out in the oven. Be sure to thoroughly drain off the grease after you brown the meat and before you stuff the peppers.

Lesson Learned 4: CUTTING THE PEPPERS. I recommend cutting the peppers in half as shown in the picture above versus hallowing out the pepper and trying to make it stand on end. If you cut the pepper lengthwise you don’t have to worry about the peppers falling over in the oven. You also are serving half a pepper per portion versus a full one. Personally I think that is a much more reasonable portion size.

My husband, my very own in-house recipe critic, liked this recipe but told me not to be afraid to jazz it up a bit. That was a very clear message that, yes it was good, but it needed just a little more umph! I’ll write the recipe as I made it and I encourage you to experiment with some additional things to add depth of flavor. This is definitely a recipe that, with your own personal tweaking, can be a staple in your recipe repertoire. I would love to hear of any adjustments you make and how it turned out. I always love to hear new ideas! 

Easy Cheesy Stuffed Peppers

  • Servings: 4
  • Difficulty: Easy
  • Print

INGREDIENTS:

2 large sweet peppers halved lengthwise

1 pound ground beef

1 TBS butter

1/4 cup of onion, chopped

2 cloves of garlic, minced

1/2 cup chopped fresh tomato

Salt and pepper to taste

4 ounces of cheese (to be mixed with the ground beef)

2 ounces of cheese for the topping

DIRECTIONS:

Preheat the oven to 350. Bring a large pot of water to a boil. Once the water is boiling put in the peppers and cook for only three minutes. Immediately remove the peppers from the water and set aside to cool slightly for easy handling.

In a saute pan, melt the butter and cook the onions until they become translucent. Salt and pepper the onions during the cooking process. When onions become translucent add the garlic and cook until fragrant (between 30 seconds and one minute). Push onions and the garlic to the side of the pan and add the ground beef. Break up the ground beef and spoon the onions and garlic on top of it. Let cook over medium heat until browned (approximately 5 minute). Turn the meat over and cook for a few more minutes. It is ok if there is some pink in the meat, it will finish cooking in the oven. Add the tomatoes and cook only until warmed (no longer than a minute). Stir in the cheese, combine until the cheese is melted and take the mixture off the heat to cool slightly.

Cut the peppers in half lengthwise and remove seeds and any white pith. Fill the hallowed out peppers with the meat mixture. Top with cheese.

Place the stuffed peppers on a greased (or you can use nonstick spray) baking sheet. Bake at 350 degrees for 30 minutes. Serve immediately.

Easy Cheesy Stuffed Pepper

Easy Cheesy Stuffed Pepper

Slow Cooker Country Style Pork Ribs…

I just love the slow cooker, don’t you? All the work is done up front and that allows you to be about your day knowing that you will still have a good meal for dinner with minimal work needed when you get home. But the slow cooker can also produce bland, mushy food. You need to know what adapts itself well to slow cooking and the correct cooking time for every recipe. I’ve found over the years that the biggest mistake I’ve made with a slow cooker is cooking something too long.

Layer the Vegetables On The Bottom of the Slow Cooker

Layer the Vegetables On The Bottom of the Slow Cooker

The beauty of this recipe is that it truly takes 8 hours to cook. You often see slow cooker recipes that say to set the timer on low for 8-10 hours or high for 4-6 hours. Don’t be fooled. Two extra hours can make a big difference. So I will warn you up front – be prepared to have a few slow cooker failures until you get the hang of your machine and the appropriate cooking time needed for a particular recipe. Unfortunately, it’s just a reality when using a slow cooker.

This recipe is another one of my favorite go-to slow cooker recipes. These fall off the bone ribs get their down-home flavor from vegetable juice, molasses and seasonings. It also takes very little prep to get this going and so it’s great for one of those crazy busy days. The basis of this recipe came from a Better Homes and Gardens magazine I purchased in 2005. I’ve adapted it over the years and am sharing my version of it. I’ve never had a failure with this recipe, even when I made it for the first time. So I feel pretty confident that you will have the same success I did. Enjoy!

Place the Ribs On Top of the Vegetables

Place the Ribs On Top of the Vegetables

RATING: A. This recipe is so easy and the sauce is very flavorful. You can serve this with just about anything. Quite often I will get some of the pre-made mashed potatoes, heat them in the microwave and serve them with the ribs and a steamed vegetable. The sauce makes a great gravy for the mashed potatoes. You can also serve this over rice as well.  I’ve never made this with pasta. The recipe may be too robust for pasta but give it a try if you’re a pasta lover.

Lesson Learned 1: Make sure to set aside a cup of sauce at the beginning to serve over the ribs when they are done. You can use the sauce that is in the slow cooker if you forget but the reserved sauce gets much thicker when you heat it on the stove and has less grease. I think you’ll find that extra step more than worth it.

Lesson Learned 2: I love this recipe because it uses a whole can of tomato paste. I hate it when you are asked to put in a few tablespoons of tomato paste into a recipe and wind up having a half-used can sitting in your refrigerator until you throw it out. I know you can purchase tomato paste in a tube, but sometimes I have difficulty finding it in the store or they’re out of them. This way you have no worries, you use the entire can.

Cover With The Vegetable Juice Mixture

Cover With The Vegetable Juice Mixture

Lesson Learned 3: Vegetables can always be tricky in a slow cooker as they can disintegrate or become overly mushy if you don’t prepare them correctly. Make sure to cut the onion into large rings. I usually cut the rings almost an inch thick and then cut the rings in half length-wise before separating them. Onions should always be cut rather thick if you are putting them in a slow cooker. The same applies to the carrots. Cutting them into large logs helps them stand up better to the slow cooking process.

This also applies to the mushrooms. Since you are putting them in for only one half hour you don’t need to cut them overly thick. But only put them in for a half hour. That way your mushrooms will have a perfect consistency. If you put them in at the beginning they will become way too mushy.

Lesson Learned 4: Make sure you rub the thyme and rosemary into your palm to break up the dried seasonings and release some of the natural oils before you add them to the vegetable juice mixture. That will provide greater depth of flavor to the sauce.

Lesson Learned 5: You can use just about any type of vinegar you have on hand for this recipe. I normally use red wine vinegar, but plain white vinegar or any other type will work just as well.

Lesson Learned 6: Spray a measuring cup with cooking spray before you measure out the molasses. That way when you pour the molasses it will come out easily and quickly. (This is a great tip when using an ingredient like molasses or honey)

Lesson Learned 7: Never lift the lid during the cooking process. The only time the lid can be lifted is when you add the mushrooms. If you lift the lid during any other point, you will throw off the cooking time and will be faced with adding more time to the process.

Add The Mushrooms During the Last Half Hour

Add The Mushrooms During the Last Half Hour

Slow Cooker Country Style Pork Ribs

  • Servings: 4
  • Difficulty: Easy
  • Print

INGREDIENTS:

3 pounds pork country-style ribs (don’t use baby back ribs for this recipe)

1 large onion sliced into thick rings

4 large carrots cut into one 2 inch logs

3 cups of vegetable juice

1 can of tomato paste

1/2 cup of molasses

6 TB. vinegar (I use red wine vinegar for this)

2 tsp. dried mustard

1/4 tsp. kosher salt

1/4 tsp. freshly ground black pepper

1 tsp. dried thyme

1/8 tsp. dried rosemary

8 oz. baby portobella mushrooms, sliced.

DIRECTIONS:

Slice onion into thick rings and separate. Peel and cut carrots into 2 inch logs. Place them in the slow cooker. Remove any excess fat from the ribs and place on top of the onions and carrots.

In a medium size bowl stir together vegetable juice, tomato paste, molasses, vinegar, dry mustard, salt, and pepper. Rub the seasonings in your hand to release the natural oils, add to the mixture and combine. Reserve one cup of the vegetable juice mixture for sauce, cover and refrigerate it. Pour remaining mixture over the ribs and onions covering completely.

Cover and cook on low for eight hours. During the last half hour of cooking, add the sliced mushrooms and stir mixture to combine. Meanwhile on the stove put the reserved sauce in a small saucepan and bring to a boil. Once the mixture comes to a boil, lower the heat and simmer uncovered for 10 minutes. Cover the ribs with the sauce when serving.

Serve with rice, mashed potatoes or pasta and the vegetable of your choice.

Serving suggestion: Over Rice

Serving Suggestion: Over Rice

Slow Cooker Red Wine Beef Stew…

I’ve been making beef stew for years and have experimented making it in a variety of ways. I’ve tried low and slow on the stovetop, low and slow in the oven using enameled cast iron and low and slow in the slow cooker. After many years and many iterations I’ve finally decided on the process and the recipe. And the winner is (drum roll) slow cooker red wine beef stew.

The Basic Ingredients

The Basic Ingredients

The keys to success in this recipe, and virtually any recipe in a slow cooker, is having a good slow cooker (and understanding its temperature controls), knowing the appropriate cooking time and making sure that the ingredients can withstand the cooking process.

Where this recipe is concerned, I have finally figured out how to make it flavorful and tender but not mushy. So here is my rating and lessons learned:

Rating: A+++++ Believe me, those pluses have only been earned over time. I’ve had a variety of failures over the years, namely tough meat, mushy vegetables and bland flavor. Hopefully my recipe and lessons learned will help you avoid years of trial and error in making easy and delicious beef stew in your slow cooker.

Lesson Learned 1: To brown or not to brown the meat and veggies before putting them in the slow cooker, that is the question. I have done them both ways. I’ve come to the conclusion that pre-browning is not necessary for this recipe to be eye as well as palate appealing (as seen in the final picture below). So save some time and skip that part.

Cut the vegetables into large chunks...

Cut the vegetables into large chunks…

Lesson Learned 2: Cutting the vegetables and potatoes to the appropriate size is important. Since you will cook this for 8 hours you need to cut the vegetables and potatoes in big chunks. I used one very large sweet onion cut in half and then into thirds separating the layers, the thickest carrots I could find, cutting them into two inch logs, and new red potatoes about two inches in diameter cut in half. If you’re not sure, err on cutting the pieces larger instead of smaller. All of these ingredients cut to large sizes will hold up nicely to this cooking process.

Lesson Learned 3: Buy a tough cut of meat like a chuck or eye of round roast and cut it into pieces yourself. If you purchase pre-cut “beef stew” meat, the pieces can vary in size and result in some being tough after cooking while others mushy. By cutting the meat yourself you save money and get evenly sized pieces. I usually cut the meat into 2 inch cubes. I find that to be the best for the 8 hour cooking process.

Red Wine Sauce

Red Wine Sauce Flecked with Instant Tapioca

Lesson Learned 4: Use red wine to flavor the cooking sauce. Not only will you have delightful smells in your house all day long but it goes a long way in adding flavor to the sauce. I used two cans of golden mushroom soup as the base and red wine is a perfect compliment to that. I normally fill one of the empty cans to the top with merlot and mix it with the undiluted soup. A little more or less won’t matter and it’s a great opportunity to take a sip yourself. After all, it’s five o’clock somewhere, right?

Lesson Learned 5: Here’s a great tip to use in all your slow cooker sauces. A perfect ingredient for thickening sauces in slow cookers is instant tapioca. I use two heaping tablespoons of it in the mixture and it yields a sauce that has body to it. This is a great trick to keep in your back pocket.

Lesson Learned 6: Not all vegetables are created equal. I used to think that I needed to put all the ingredients into the slow cooker at the beginning, and I happen to like mushrooms and peas in my beef stew. Well, if you add those at the beginning I guarantee you they will be mush by the end of 8 hours. Another trick I learned was to add these two ingredients 1/2 hour before the end of the cooking process. That way they will cook to just the right consistency.

bs6Lesson Learned 7: This lesson I just learned when making the recipe the other day. I had some asparagus spears in my refrigerator that I needed to use. I also threw them in with the mushrooms and the peas and they turned out perfectly, crisp tender. So if you have any of the more delicate veggies that you want to use, just pop them in during the last half hour and they will be perfect. I also threw in some fresh thyme at the end and it stood up well.

I’ve gotten this recipe to the point that it is my favorite beef stew recipe and it could not be easier to make. The bulk of the time is in the prep and I don’t know about you but there is something very comforting to me about slicing, dicing, mincing and chopping. Serve this in a crock style bowl with some garlic bread and a salad and you have one of the all time great comfort food meals.

Slow Cooker Red Wine Beef Stew

  • Servings: 6-8
  • Difficulty: Easy
  • Print

INGREDIENTS:

1 4 lb. chuck roast

8 large carrots

8 large baby red potatoes (2 inches in diameter)

1 large sweet onion

8 ounces baby portobella mushrooms

2 cans golden mushroom soup

1 cup frozen petite sweet peas

Additional vegetables as desired (cooking times may vary see below)

2 TBS of worcestershire sauce

1 cup dry red wine, preferably merlot

2 TBS. instant tapioca, heaping

2 TBS dried thyme

2 TBS fresh thyme

Salt and Pepper

DIRECTIONS:

Cut the roast into 2 inch square cubes, set aside. Peel and cut the onion in half and cut the halves into thirds. Separate the layers and put into the slow cooker. Peel carrots and cut into 2 inch lengths, place into slow cooker. Wash the potatoes and cut them into halves, place in slow cooker. Season this layer with salt, pepper and dried thyme.

Place meat on top of the vegetables. Season with salt, pepper and thyme.

Mix together two cans of golden mushroom soup, add 1 can (about one cup more or less, no need to be exact) of merlot and mix until combined and smooth. Add 1 TBS of dried thyme, the worcestershire sauce and tapioca. Mix until combined. Pour over the meat and vegetables making sure they are completely covered. Cover and set the slow cooker on low for 8 hours.

Slice the mushrooms into 1/2 inch thick slices. Remove the leaves from the fresh thyme and chop. (For this recipe I used some asparagus I had in the refrigerator. I simply chopped off the woody stems and added them with all of these ingredients). Remove the cover from the slow cooker and add the peas, mushrooms, (asparagus), and fresh thyme. Stir until combined. Cook for an additional half hour.

Serve in a crock style bowl with a green salad and garlic bread.

Slow Cooker Red Wine Beef Stew

Slow Cooker Red Wine Beef Stew

Polar Vortex = Pot Roast

A friend of mine on Facebook said it pretty clearly, when was the last time, if ever, that you heard of a polar vortex? This is the first time for me but these two little words connote a nasty large band of sub zero temperatures that is currently enveloping a large portion of the country. And although our temps in Colorado today will be in the 40’s my home town, Chicago, is experiencing arctic cold the likes of which have not been seen for years.

Outside my window about 5 inches of snow rests on my deck, the sun struggling but not succeeding to show its face. It’s one of those days that a hot cup of Jo, a good book and a nice thick down comforter beckons. And when it finally comes time to think of sustenance, the only fitting thing that comes to mind is pot roast.

Just about everyone has their own pot roast recipe, so I will share mine. I’ve been making pot roast for years – on the stove, in the slow cooker, in the oven – and I think I finally found the way that bests suits us and also produces the tenderest meat. Pot roast can be tricky. There is nothing more savory and delicious than a good pot roast and there is nothing worse than a tough, dry one. My mother, bless her soul, had the theory that you cooked meat until it begged for mercy. Our special Sunday meal would be a pork and beef roast cooked together in the same roasting pan. Of course it never worked, you’re talking two very different types of meat and two very different cooking times, but we didn’t know any better and we chomped on the dried-out hunks and enjoyed them as if they were filet of beef.

Now that I am older and have a more refined pallet, I could never imagine doing something like that but can appreciate the challenge for taking a tough cut of meat and making it tender. The cooking shows would make you think the process is simple – just throw it in a slow cooker or oven and cook for hours on a low temperature. Been there, done that. With my slow cooker, and I have one of the top-rated ones, if I am not careful I can still dry out the meat, especially if there is not enough liquid in the crock and I cook it too long. So I now opt for enameled cast iron and the oven to do the trick.

I prefer enameled cast iron because of its ability to hold a consistent temperature. It does take a little longer to heat up, but once you get to the desired temperature it maintains it evenly which, I think, is the key to a tender savory pot roast. I’ve basically given up on having a tender pot roast and crusty oven browned potatoes all in one pot – to achieve the latter you tend to dry out the former. So if crusty oven browned potatoes are what you want, I suggest cooking them separately. But for me, nothing is better than having the meat, potatoes, carrots and onions slowly simmering away all in one pot. The end result is fabulous. So here is how I achieve it, my rating and lessons learned.

Rating: A – if you do it correctly. Although it may seem easy, I think achieving a perfect pot roast takes trial and error. Figuring out the perfect temperature and roasting time is important and in my experience one size does not fit all. But make this meal a mission – once your perfect it, it’s more than worth it. I also have the challenge of living in high altitude and because the air is drier cooking times tend to be longer. If you are at sea level times can be shorter. It is something you will need to determine.

Lesson Learned 1: Brown the meat. Take the time, about 4-5 minutes per side and give the roast a good sear. Searing is important in trapping natural juices which is key to any type of tender meat especially the tough cuts.

Browned Chuck Roast

Browned Chuck Roast

Lesson Learned 2: Use red wine in your braising liquid. I use a combination of both red wine and beef stock. It produces a much more flavorful gravy and creates a heavenly smell while the pot roast is cooking – and that is part of the joy of pot roast – the smells it produces in the kitchen. Make sure the liquid comes at least half way up the side of the roast for the best braising. Then pile on all the ingredients. Once that is done baste everything with the braising liquid.

Pot Roast Ingredients

Pot Roast Ingredients

Lesson Learned 3: Put the lid on and leave it alone. Resist the temptation to open the lid and constantly check on it. If you must, check on it once half way through the cooking time, but then take the roast and flip it over at that time. That way each side will have the benefit of being submerged in the braising liquid. This is not a necessary step but one I recommend if you have to take a peak at how it looks.

Lesson Learned 4: Relax and let it do its thing. The beauty of this type of meal, similar to my ravioli lasagna, is that most of the work goes into the prep. After that your oven does all of the heavy lifting.

Pot Roast and Vegetables

Pot Roast and Vegetables

Lesson Learned 5: Use the braising liquid to make homemade gravy. It will be out of this world, I promise.

Pot Roast and Gravy

Pot Roast and Gravy

My recipe is a compilation from many sources so I guess this one is my own. I also serve this with a homemade horseradish sauce and that truly complements all the flavors. Try this – I am sure you will enjoy it as much as we do!

Jan's Pot Roast With Zesty Horseradish Sauce

  • Servings: 4-6 people
  • Difficulty: Easy
  • Print

INGREDIENTS:

1  4 pound chuck roast

All purpose flour for dusting and for the roux

3 TBS. extra virgin olive oil

I large onion, peeled

2-3 garlic cloves, peeled (optional)

3-4 large carrots, peeled

3-4 medium sized potatoes (I use red potatoes, but Yukon Gold  potatoes are good as well – peeling them is optional)

1 cup dry red wine (whatever you drink is fine as long as it is a dry and not sweet wine)

1/2 – 1 cup beef broth

2 TBS worcestershire sauce

Thyme – you can use fresh twigs, bundle them and drop in braising liquid or 1/2 tsp. dried for braising liquid and 1/4 tsp. for flour mixture

2 bay leaves

DIRECTIONS:

Preheat the oven to 300. (next time I make this, I may even try 275 and add a little extra time). Trim some of the excess fat off of the roast if necessary. Mix flour with salt, pepper and dried thyme. Dredge the roast in the flour mixture. Heat olive oil in a skillet and sear the roast, 4-5 minutes on each side. (I also take my tongs and sear the edges for about 20 seconds on each edge). Peel the onion, carrots and potatoes. Cut the onion into quarters and carrots and potatoes into large chunks.

Combine wine, beef broth and worcestershire sauce. Pour into cast iron pot and add the thyme and bay leaves. (You could even drop a couple of garlic cloves into the braising liquid if you desire). Rest the roast in the braising liquid. Place the carrots and potatoes around the roast and the onions on top. Baste the vegetables with the braising liquid.

Cook in the oven for 3 hours. Mid-way through the cooking process turn the roast over. (this is optional but do it if you are one of those who just has to take a peak at it).

Using a baster, syphon braising liquid out of the pan. Put the cover back over the roast and vegetables to keep them warm. In a large skillet under medium high heat make a roux (equal parts flour and water – I use two TBS. each). Cook for a minute whisking continuously so that the “floury” taste is removed. Add the liquid and continue whisk. Initially the mixture will be very “liquidy” but it will thicken as you continue to cook.

Once the gravy has thickened, carve the meat and serve with the carrots and potatoes and a loaf of crusty bread.

HORSERADISH SAUCE:

2-3 TBS. of prepared or fresh horseradish

1 cup sour cream

1 TBS. dijon mustard

Combine all ingredients. Let chill for several hours so the flavors can meld. Serve with the pot roast.

Ravioli Lasagna…

Ravioli Lasagna

My part-time job at Crate and Barrel requires me to work longer than normal hours over the holidays. No worries, I love the hustle and bustle of the holidays and there’s no better place to experience that than working retail. The challenge for me is how to plan dinners that don’t consist of take-out, pizza or soup and sandwiches. That menu faire gets boring rather quickly. I found one solution in a Costco cookbook – that’s right a Costco cookbook!

Ingredients

Ingredients

If you are a Costco shopper you know that every year they give away a pretty substantive cookbook. The recipes in the book are designed to use the products they sell, but all in all there are some pretty decent recipes included. Over the years they’ve even featured recipes by prominent celebrity chefs such as Ina Garten, Sandra Lee, Ree Drummond and Michael Symon. What I like about the cookbook is that every recipe has a picture of the finished product. I am not a big fan of recipe books that don’t have pictures. I need something visual to help me understand what I am trying to achieve. The books provide a myriad of recipes from appetizers, main courses, celebrity chef favorites, desserts and beverages. And the fact that it is free is just icing on the cake. They usually give the books away at holiday time, so be on the look out for them. This year they started giving them away on Black Friday and continued as long as quantities lasted. I made my husband make a special trip to get ours as every year I have been able to glean a couple of family favorites from each of them.

The recipe I’m going to share comes from a book they produced three years ago. The title of the book is always the same, “Creative Cooking the Costco Way,” and this recipe is called Baked Ravioli (Lasagna Style). I like this recipe because it is simple, it can be adapted in a variety of ways, and it’s one that can be made a day ahead so it’s perfect for those nights when you want something more for dinner without a lot of thought or effort. I’ve been making a version of this for over three years now so I’ve got this one down pat. Here is my rating and lessons learned:

Rating: A – a great go to recipe, can be adapted in a variety of ways, easy to prepare and definitely something your better half can start while you’re still at work (with my husband I write the directions on a post-it and put it on the door of the microwave so it’s there in plain view for him to see).

Lesson learned 1: Don’t be afraid to play with this recipe. You can basically use any type of ravioli you like. I first started out using Bertoli four cheese ravioli and then branched off into some of the more gourmet-type blends. The ravioli used in the pictures in this blog were half-moon mushroom and cheese ravioli, but you can use any kind you want. This time I also added some additional left over mushrooms that I partially sauteed as well as some partially cooked italian sausage that I crumbled, cooked and put in the layers. No need to cook your additional ingredients completely through as the dish will bake in the oven for at least an hour. Depending on the ingredients you use, this dish can also be meatless.

Before baking...

Before baking…

Lesson Learned 2: If you are making it the day before, make sure you take it out of the refrigerator and let it sit on your counter for at least an hour and a half before baking it. If you don’t it will take much longer to bake and will not cook evenly.

Lesson Learned 3: I like to make sure that my oven is not only preheated but at the desired temperature for at least 10-15 minutes. That way I feel I have a true temperature. My oven takes about 15 minutes to get to 400 so I usually plan on a preheat time of 25 minutes.

Lesson Learned 4: Don’t forget to use a little bit of cooking oil and sauce to cover the bottom of the pan before doing the layering. If you don’t you won’t be able to get the finished product cleanly out of the pan.

Lesson Learned 5: I like to make sure that the ravioli is positioned tightly together, even with a slight overlap. That way you have a nice firm layer when it’s cooked.

Lesson Learned 6: Make sure to tent the foil over the dish for at least the first 50 minutes of the cooking process. After that, remove the foil so that the cheese can become golden brown.

You can make this recipe as simple or as intricate as you want. All of the work goes in to putting it together. Once that is done it’s simply a matter of popping it in the oven, baking it and enjoying it. Serve this with some garlic bread and a salad and you’ve got a delicious and easy meal. Try this one – I guarantee you will use this as a go-to recipe just like I do!

Ravioli Lasagna...

  • Servings: 4-6
  • Difficulty: Easy
  • Print

THE INGREDIENTS:

Cooking oil (I use olive oil) – just enough to very lightly grease the bottom of your pan

1 – 29 ounce jar of a red sauce of your choice

1 large package of ravioli (again your choice, the ingredients and shape – square or half moon – do not matter)

Italian sausage or meatballs (again the amount your choice, depending on how much you want in the recipe. I normally take two sausage links, crumble and partially cook the meat, drain it on paper towels and then put it over the ravioli when I make the layers).

Other ingredients to taste – (I often add partially sauteed mushrooms or peppers. No need to cook them through, just give them a good start).

Mozzarella, Parmesan and Romano Cheeses

Italian seasoning

DIRECTIONS:

Preheat oven to 400 degrees. Grease the bottom of your pan (for the two of us I use an 8 inch square pan) and spread a layer of sauce over the bottom. (You don’t need a lot, just enough to lightly coat it). Put down a layer of ravioli flat side up on the sauce. Position the ravioli close together, even with a slight overlap. Add any additional ingredients you have prepared (I did mushrooms and italian sausage on this one). Put another layer of sauce on top and then add a layer of mozzarella, romano and parmesan. Sprinkle with italian seasoning and pat the layer down lightly. Repeat the layering. Pat down again and cover with tented aluminum foil. (If you are making ahead, just cover with foil and put in the refrigerator. Just don’t forget to tent the foil before putting it in the oven as you don’t want all the cheese to stick to the foil).

Bake for one hour or until completely heated through. For the last 10 minutes of the baking process, remove the foil so that the cheese can brown. Let stand for five minutes before serving.

Ravioli Lasagna

Ravioli Lasagna

Stir Fry Beef with Vegetables and Pea Pods…

I loved my my mother dearly, but let’s face it she was right up there when the world’s worst cook award was being passed out. I guess it simply was the fact that she did not have time, especially when she went back to work full time. My father was runner up for the award as he hardly cooked a day in his life, that was woman’s work you know. So I grew up with a bland palate consisting of meat (always overcooked), peas, corn and potatoes. Yep, that was about it.

During my career I too never had time to cook. Thank goodness my husband was adept in the kitchen. And boy did he have trouble moving me away from the staples I grew up with. And eating any type of ethnic food, well that was just not acceptable. So how did it all change.

Well, the Food Network for one – once I started watching it I was hooked. I learned so much watching those shows that no on ever taught me. Then once I retired, I finally had the time to explore cooking. I took cooking lessons, I experimented with various dishes, I started working at Crate and Barrel where a lot of their mainstay merchandising relates to dining and entertaining. And I became a student of the art.

Now I am not saying I am a master chef by any means, but I really enjoy the process. I enjoy learning about different foods, learning new techniques, experimenting with recipes. Who would ever believe that. It’s fun when you can accomplish something new and interesting in the kitchen. At least for me…

So, every once in a while in my blog I will be posting recipes. I hope that you try them and give me feedback about them. And if you have some you want to share, join the party – the more the merrier.

Today I posting my stir fry beef and pea pods recipe. It cooks up in 15 minutes or less and it is fabulous. Most of the work involved in the recipe is the chopping and dicing (which I like to do, I find it therapuetic).  Enjoy, and please let me know what you think.

Stir Fry Beef and Pea Pods

  • Servings: 4
  • Difficulty: Easy
  • Print

INGREDIENTS:

  • Flank steak or beef tenderloin
  • Beef broth
  • Soy Sauce
  • Vermouth
  • Baby Bella Mushrooms
  • Pepper (red or green)
  • Roma Tomatoes
  • Pea Pods (fresh or frozen, I prefer fresh)
  • Garlic (I-2 cloves)
  • Cornstarch, 3 TBS total
  • Olive Oil or Vegetable Oil

BEEF MARINADE:

Flank Steak or Beef Tenderloin (if beef tenderloin, marinate for only ½ hour, if flank steak the longer the better, I found 4 hrs. minimum to be the best)

  • 1TB cornstarch
  • 2 TB soy sauce
  • 4TB vermouth

DIRECTIONS:

Chop vegetables and garlic– a bigger chop for vegetables stands up better to stir frying (this can be done well in advance)

Heat wok. Add enough oil to lightly coat the bottom. (I use an electric wok so it heats up very quickly)

Add beef and stir fry until almost at desired doneness. (We most often use beef tenderloin so I like to have a little pink in the meat – with flank steak I would cook longer)

Remove beef and set aside, cover with foil to keep warm

Mix together:

  • 1 cup beef broth
  • 2TB soy sauce
  • 2TB cornstarch (make sure cornstarch is completely absorbed by the liquid)

Add mixture to wok and let simmer for a short time (1/2 minute to 1 minute)

Add peppers and mushrooms

Cook until almost crisp tender, 3-5 minutes

Add tomatoes and pea pods, cook for about 1 minute

Add garlic and cook until fragrant (30 seconds to minute)

Add beef back into the mixture and cook for an additional 30 seconds.

Serve over rice

Image

SaveSave