Some Of My Favorite Holiday Recipes…

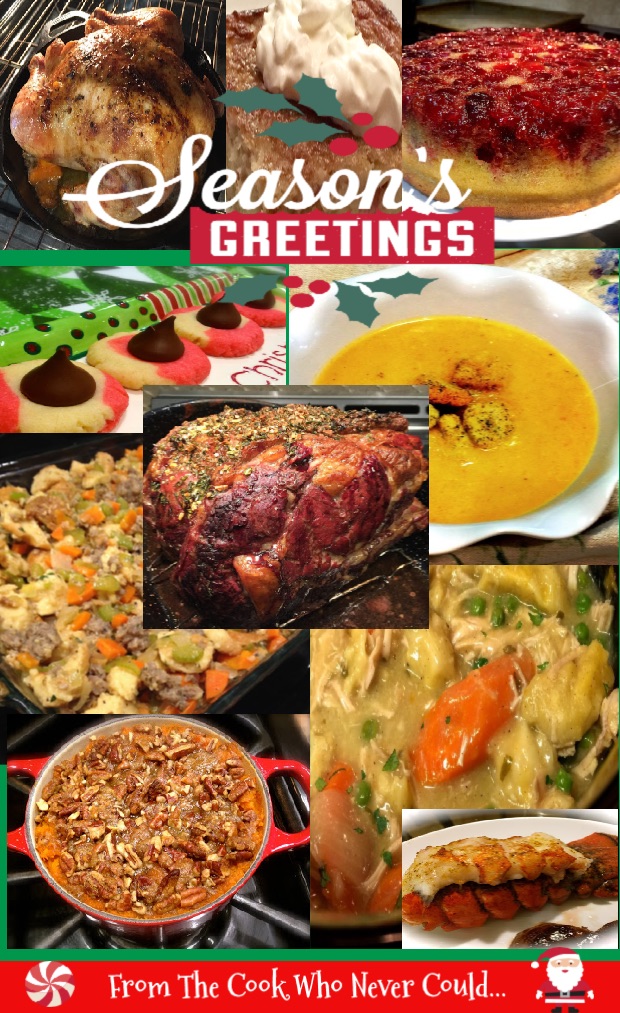
Over the next week or so I am going to be taking a hiatus from posts to my blog but I didn’t want to leave my readers high and dry. So I thought I’d look through my posts and put together a one-stop-shop of some of my favorite holiday recipes.

What I like about this blog is it includes a wide range of recipes from cookies, to main dishes, to appetizers, vegetables and sides and all are tested and true. And this compilation is based on what many people tend to serve during this time of year. So look through what I’ve put together and simply click on each picture to be redirected to the original posts and the recipes. Happy Holidays all! I’ll be back right before New Years with a great appetizer recipe!
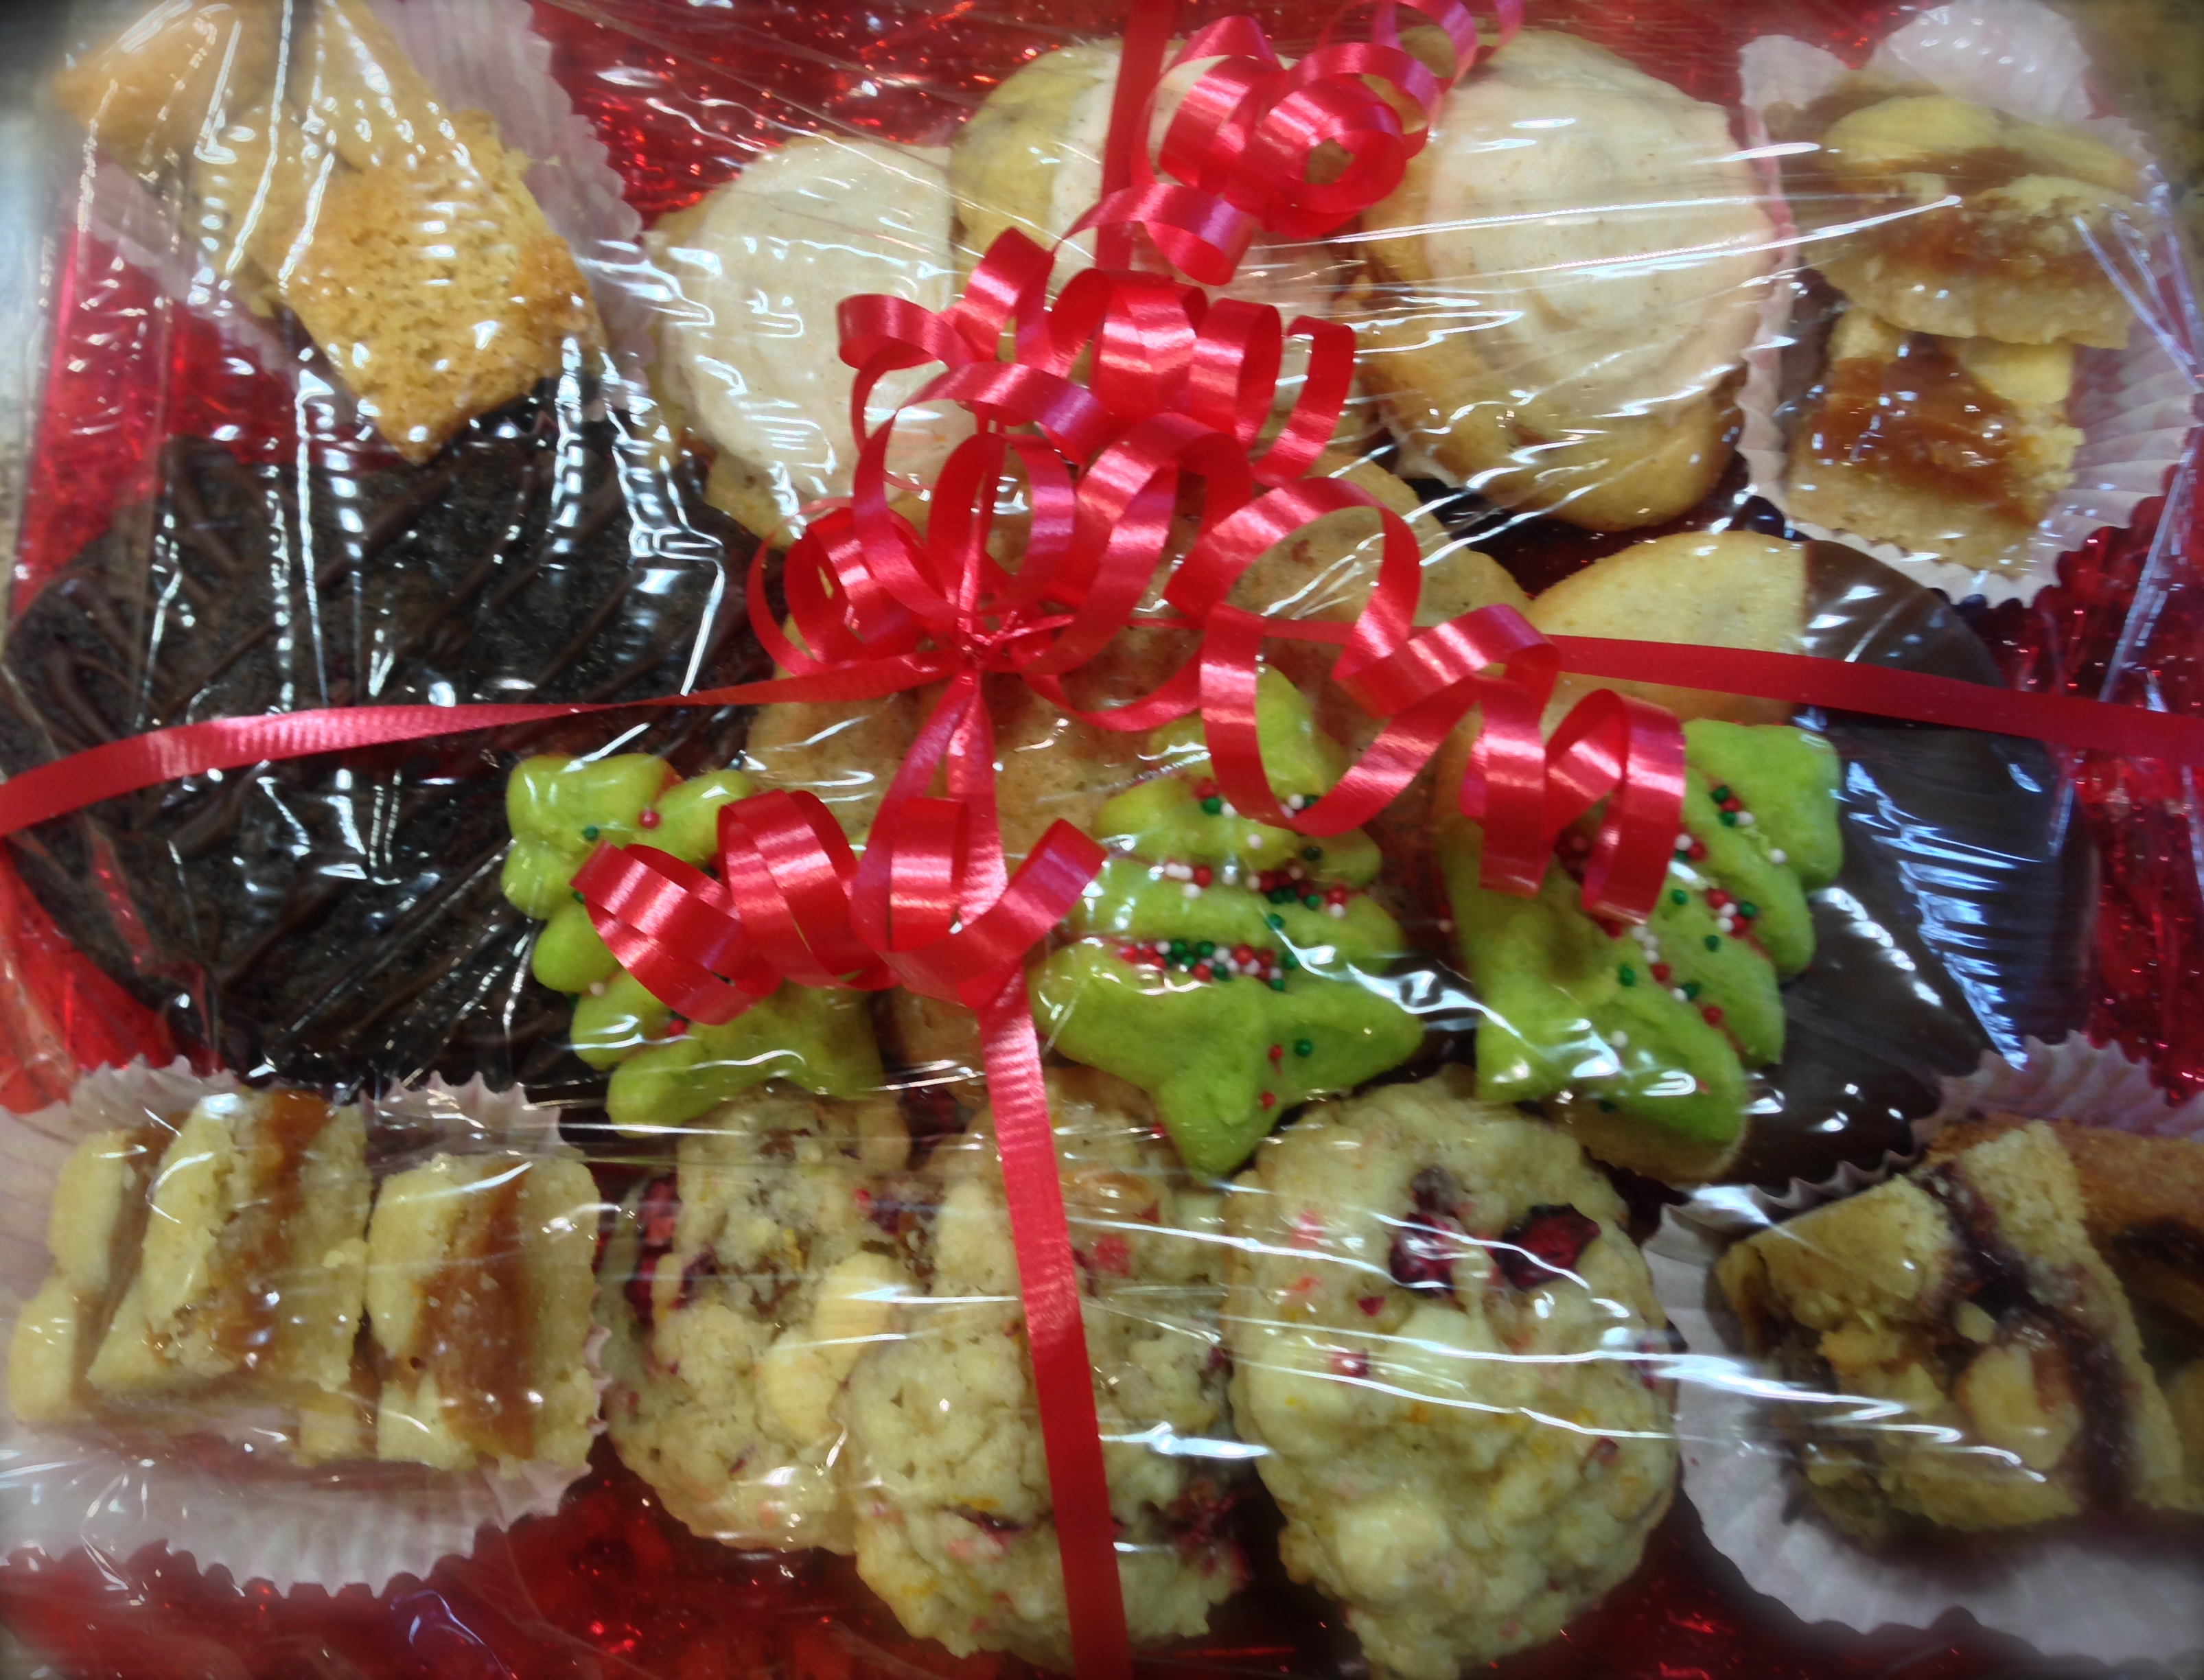
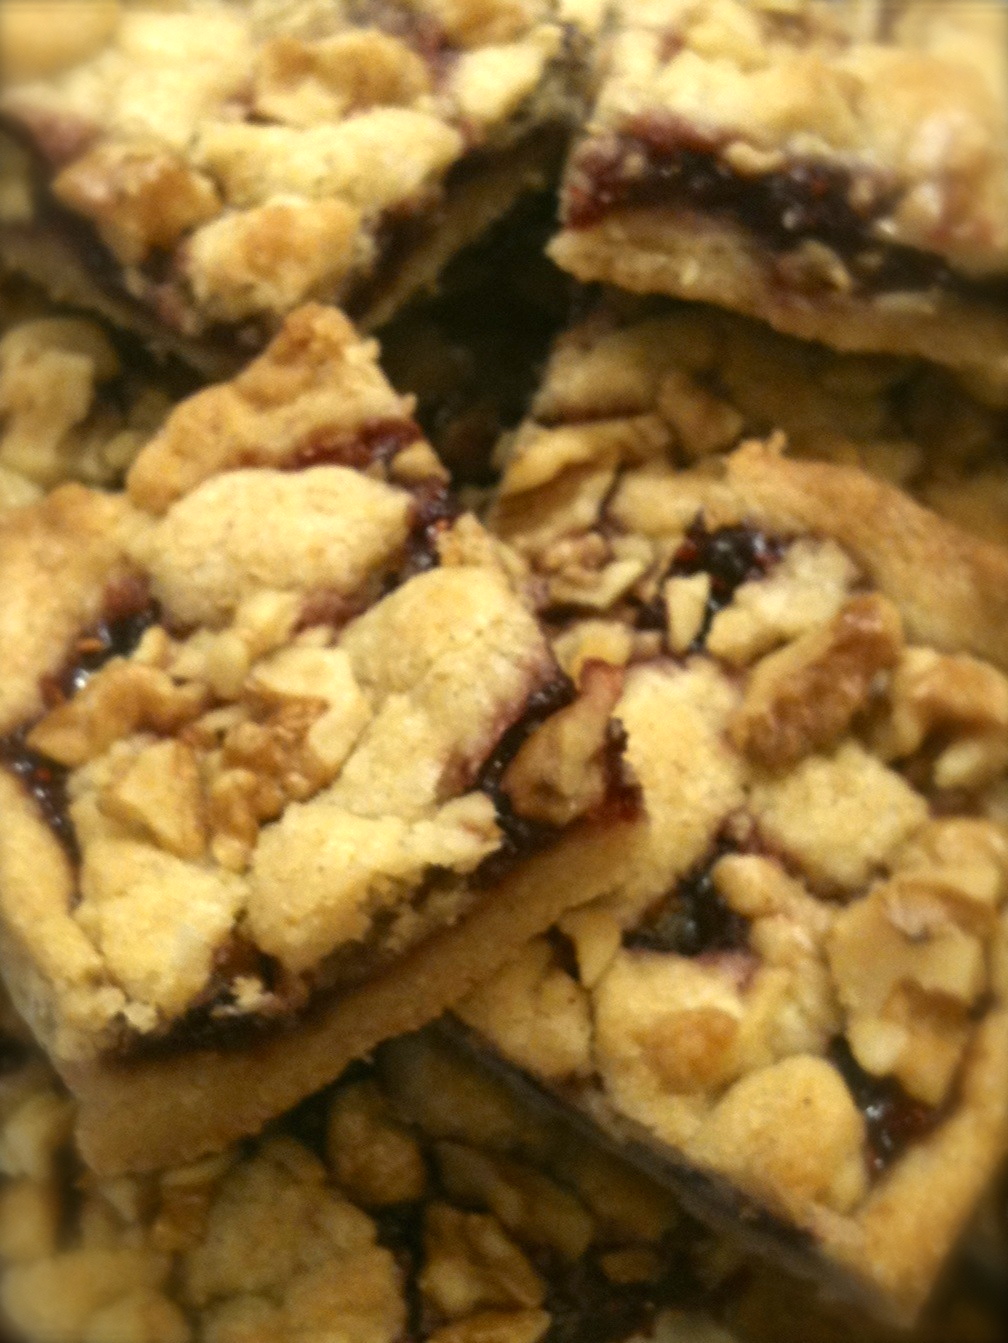
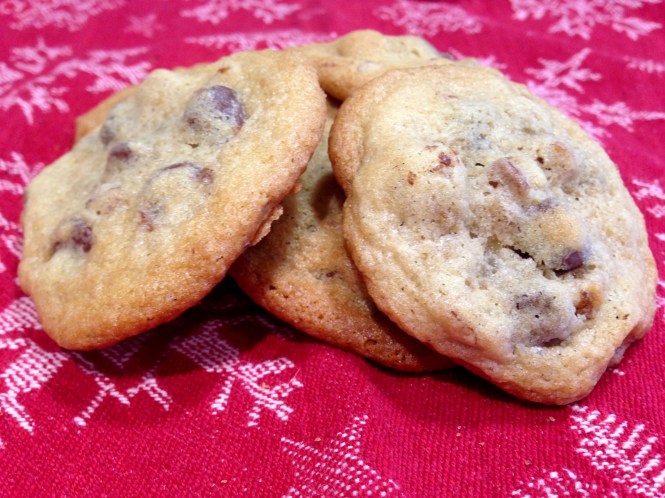
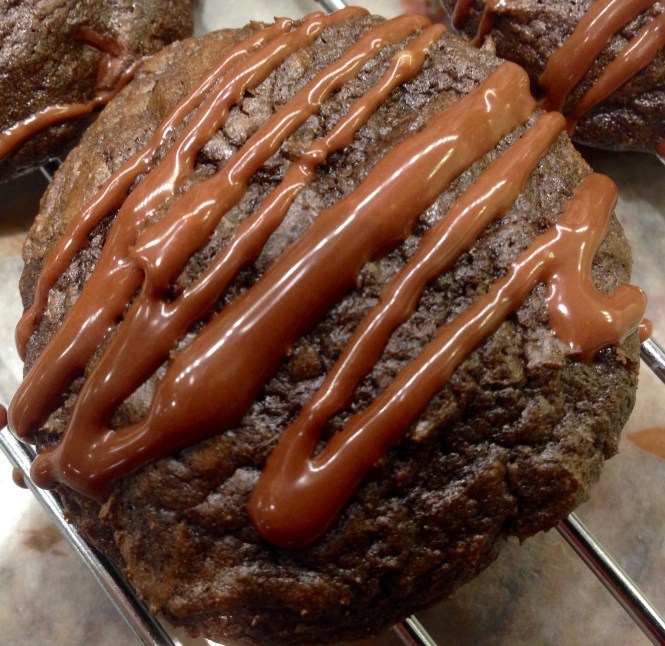
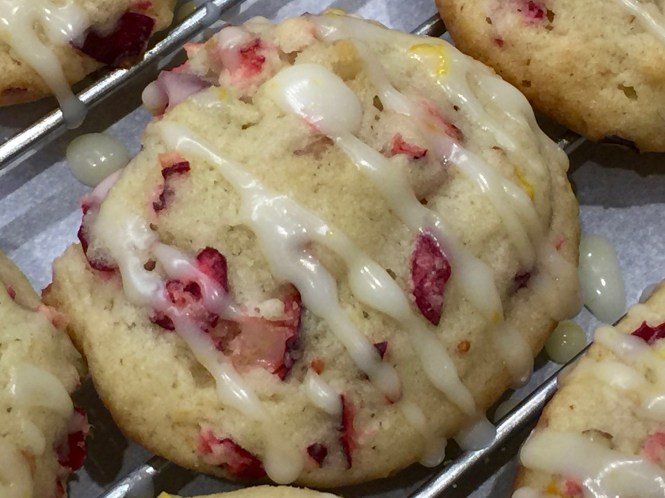
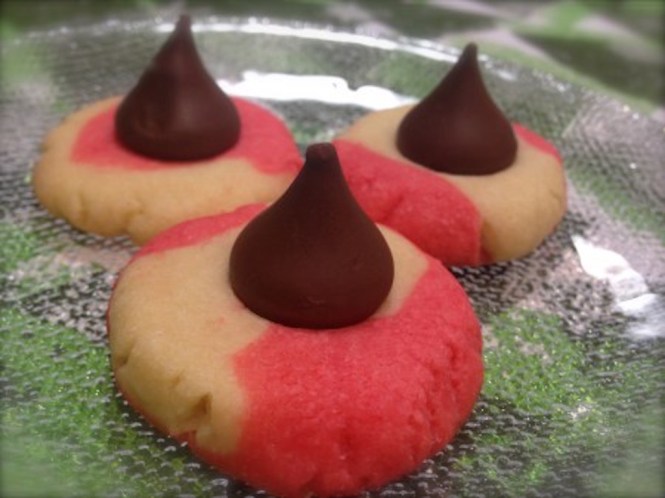
COOKIES

Lets start with cookies. Cookies are what I am known for over the holidays. I’ve been baking cookies at this time of year ever since I was in high school. I’ve made many different varieties but the link I am providing here is to my all time favorites. You’ve got plenty to choose from. Just click on the picture below and happy baking!
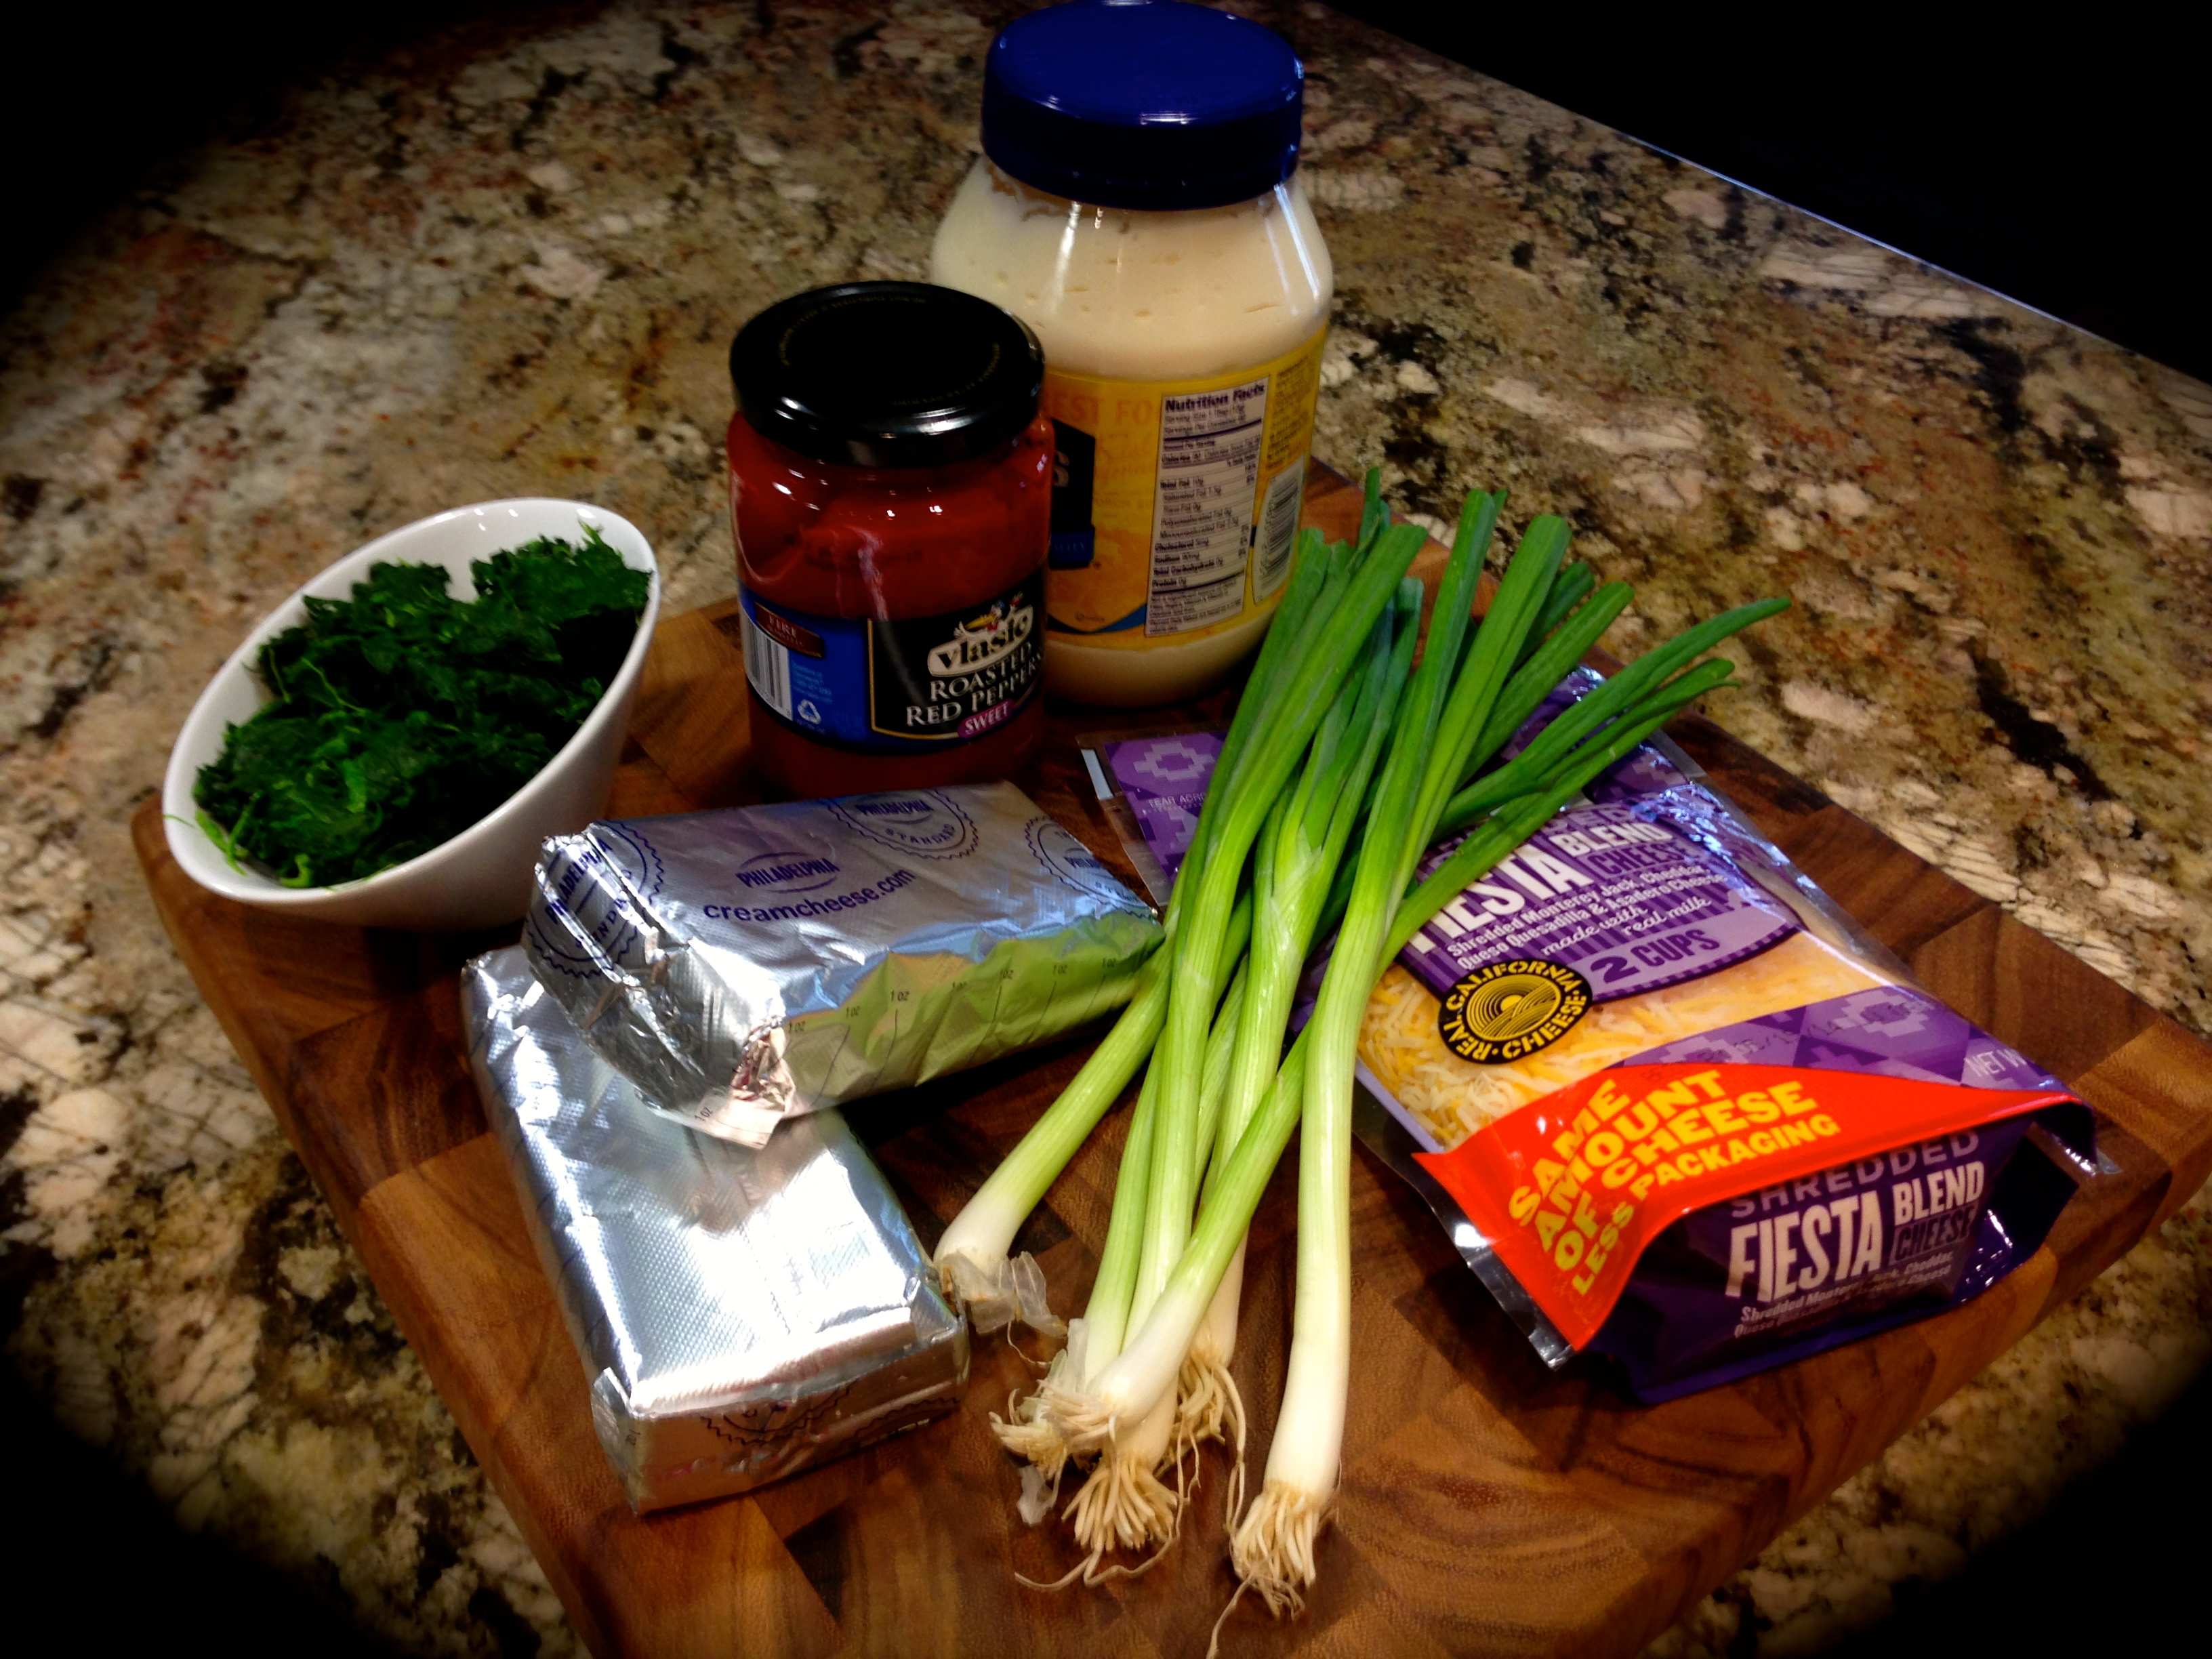
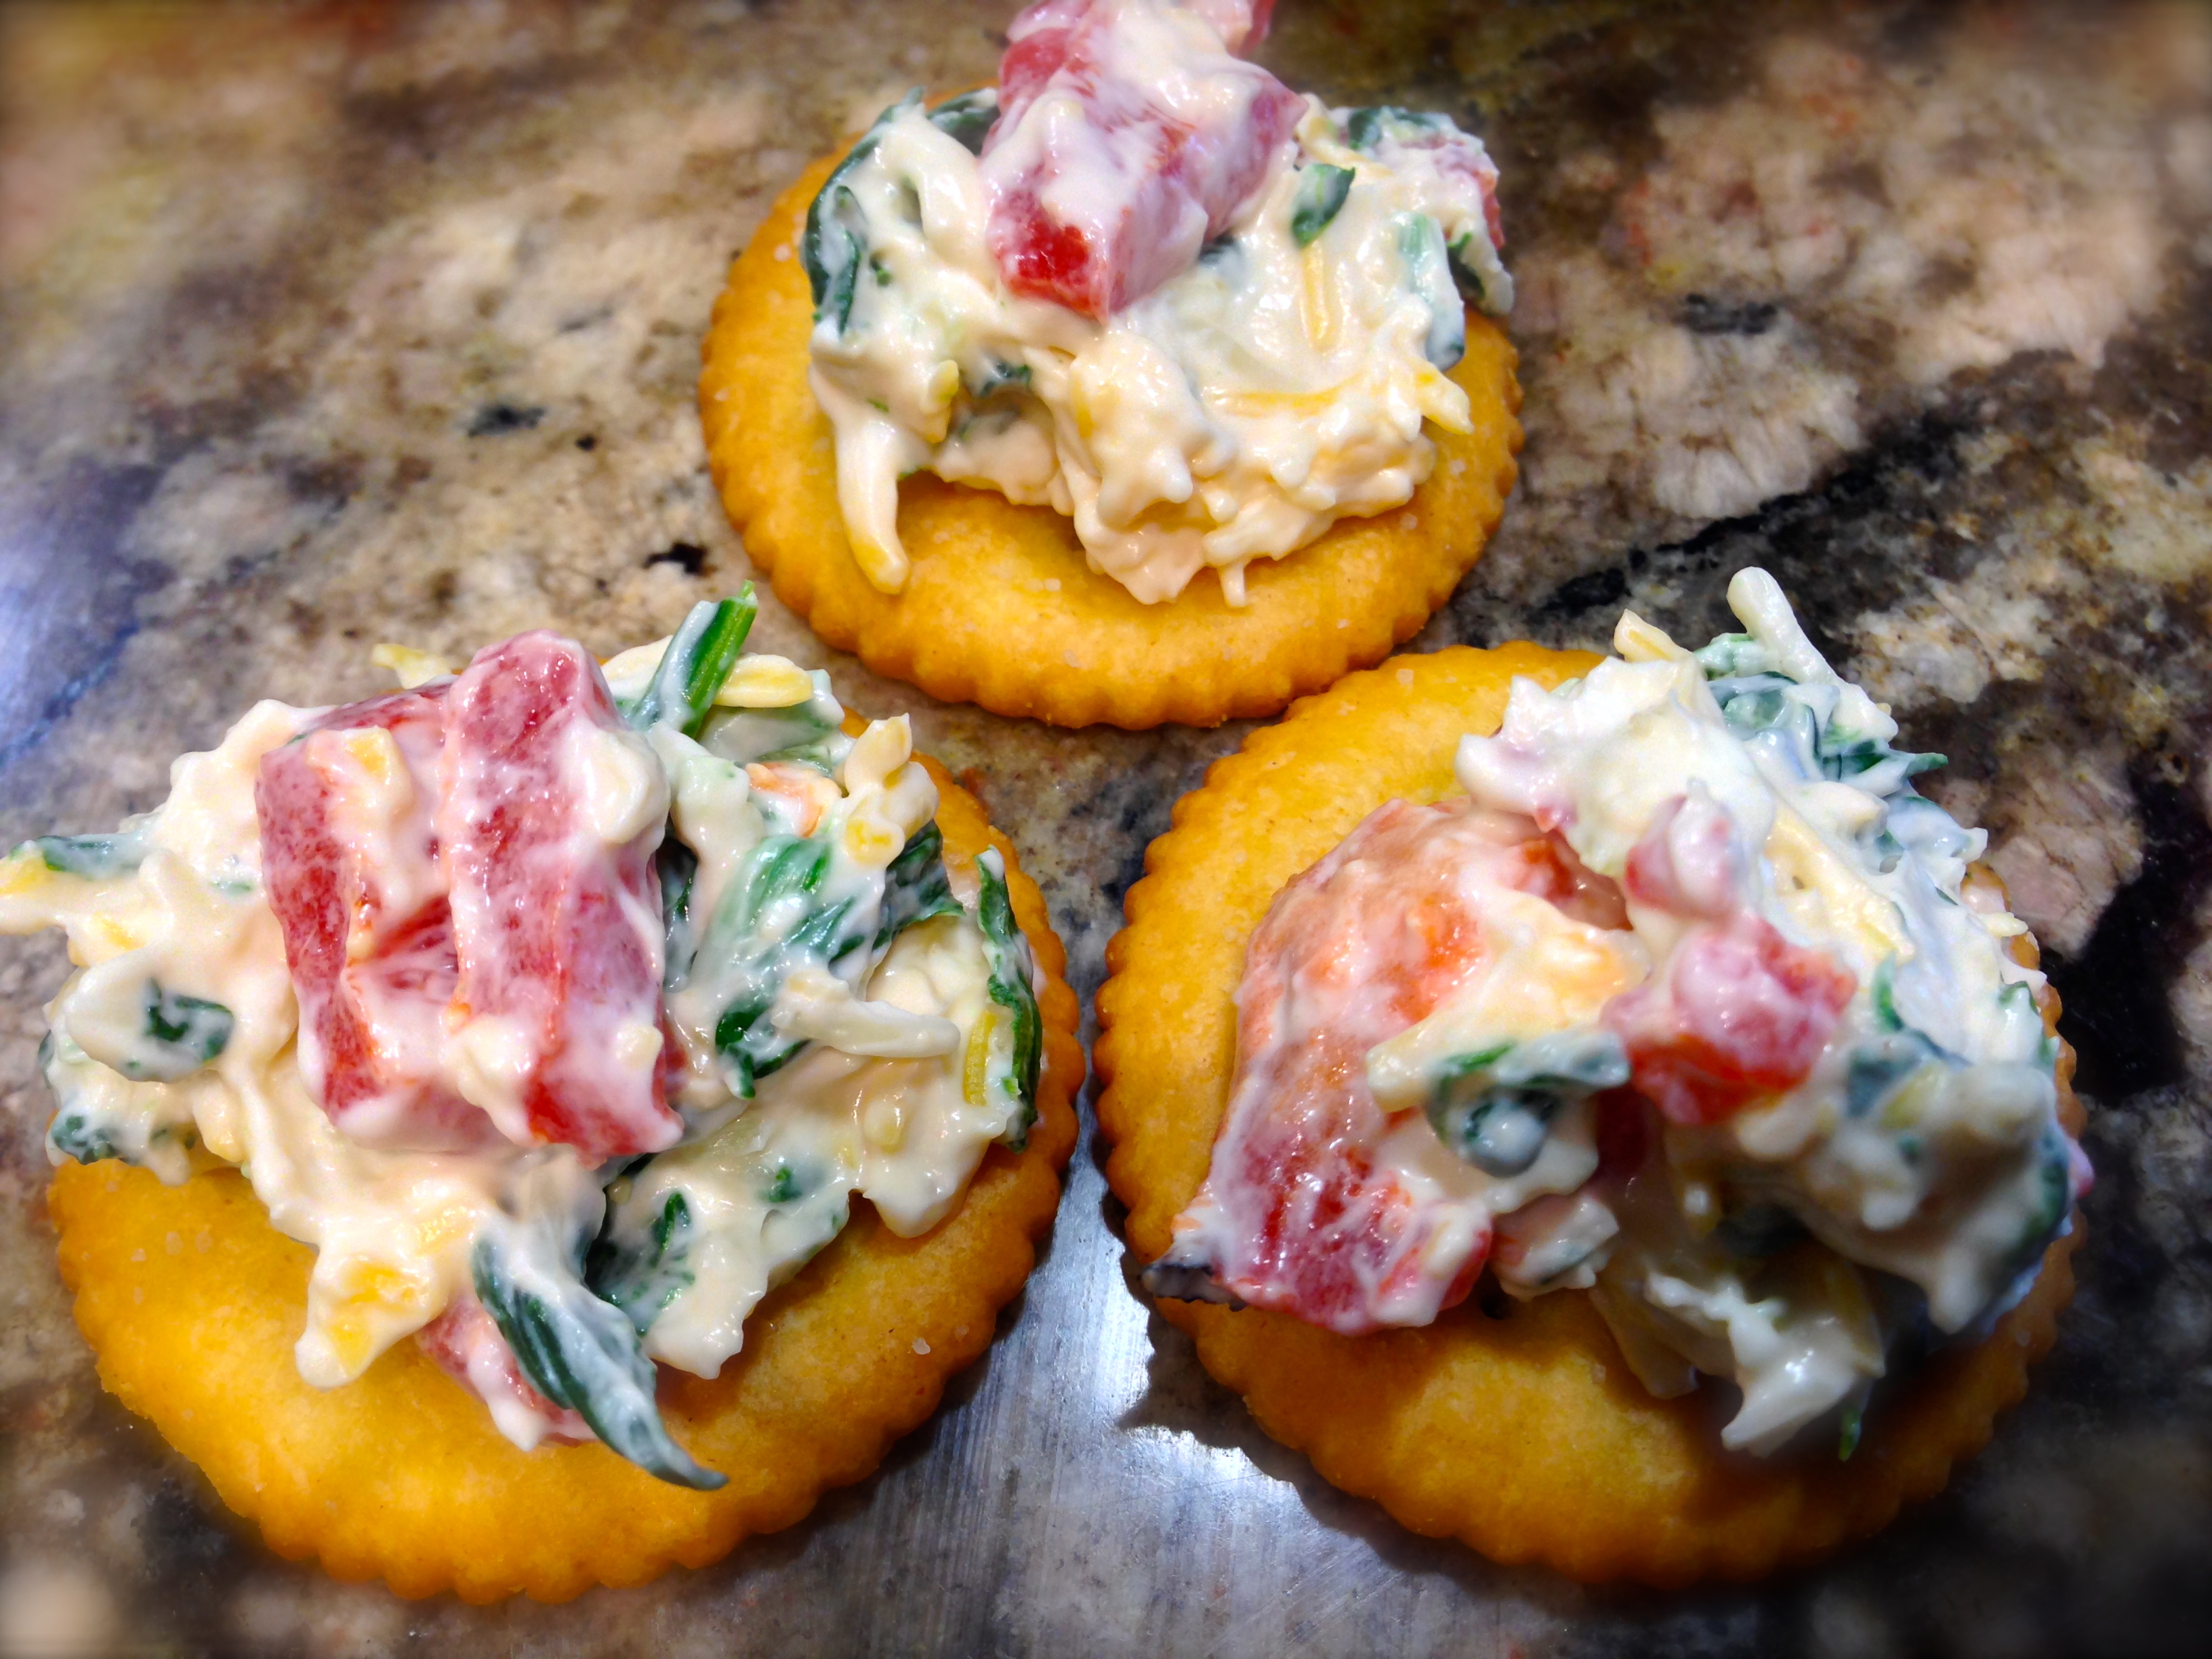
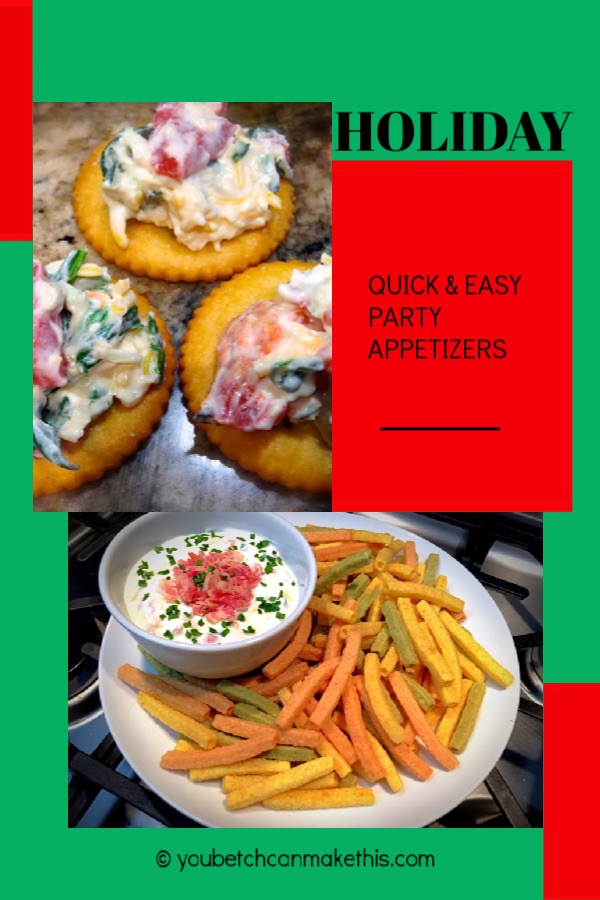
APPETIZERS

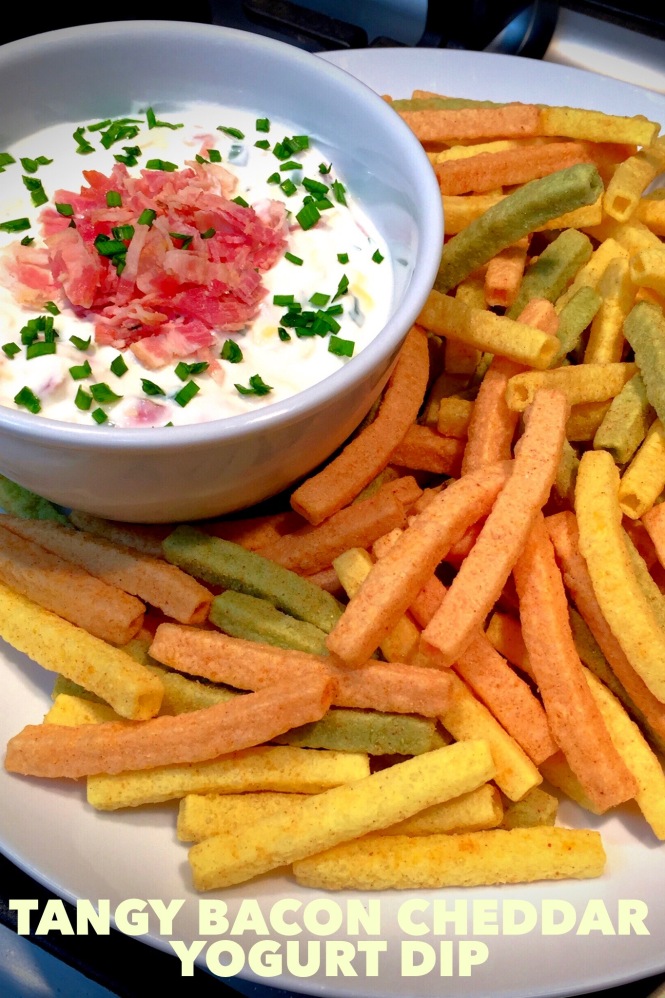
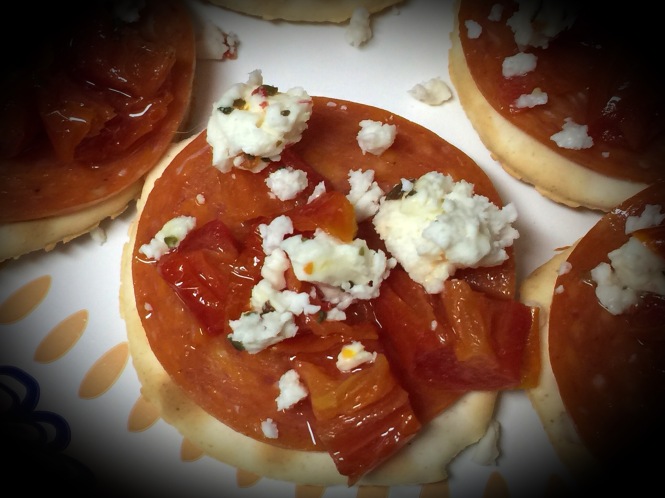
Next let’s look at some holiday appetizers. Holiday parties and family get-togethers tend to have a main meal adorned with great appetizers. Click on the picture below to see a compilation of my favorite holiday appetizers with links to each one. And if you don’t see anything you like, check out my recipe index to see a complete list of the appetizers I’ve blogged about.
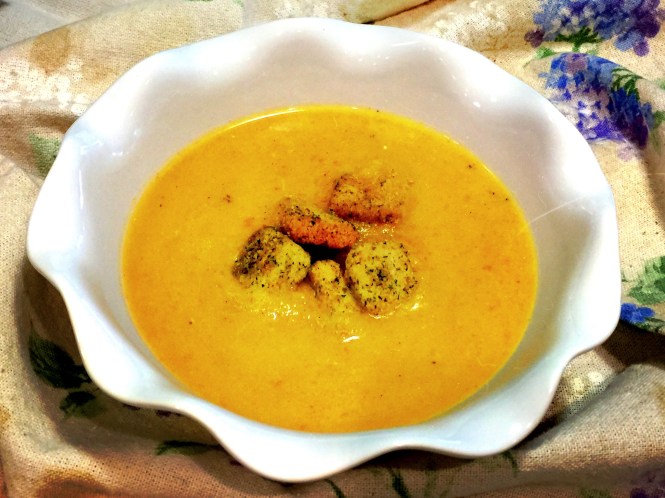
SOUP

There’s nothing so satisfying as a hot bowl of soup during the holidays. And whether you choose to serve it with your holiday meal or simply as a cozy supper, you can’t ignore soups at the holidays. I chose to feature my butternut squash soup but there are others in my recipe index as well. To me this soup just screams the holidays. And if you don’t serve this with your holiday meal try it with a salad and some crusty bread anytime.

MAIN DISHES

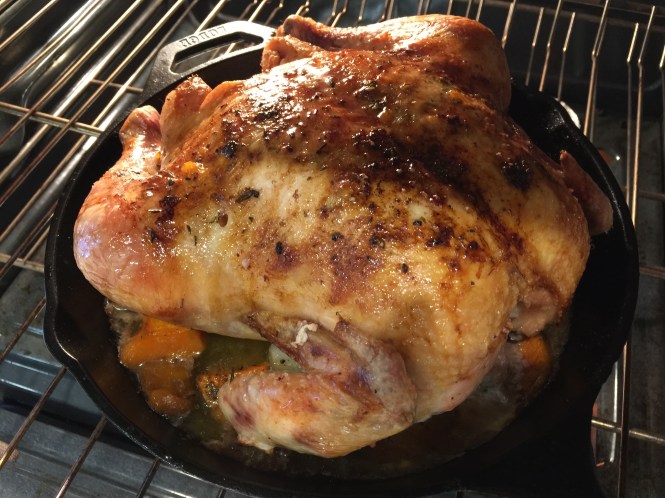
Let’s move on to main dishes. I chose to focus on four of my recipes. The first is roast chicken in a cast iron skillet. If you want something a little different than turkey, this is a great recipe. The chicken cooks evenly in the cast iron and comes out juicy and delicious. Try this one over the holidays or anytime and, if you’re a chicken lover like me, this may be your go to recipe for roasting a whole chicken.

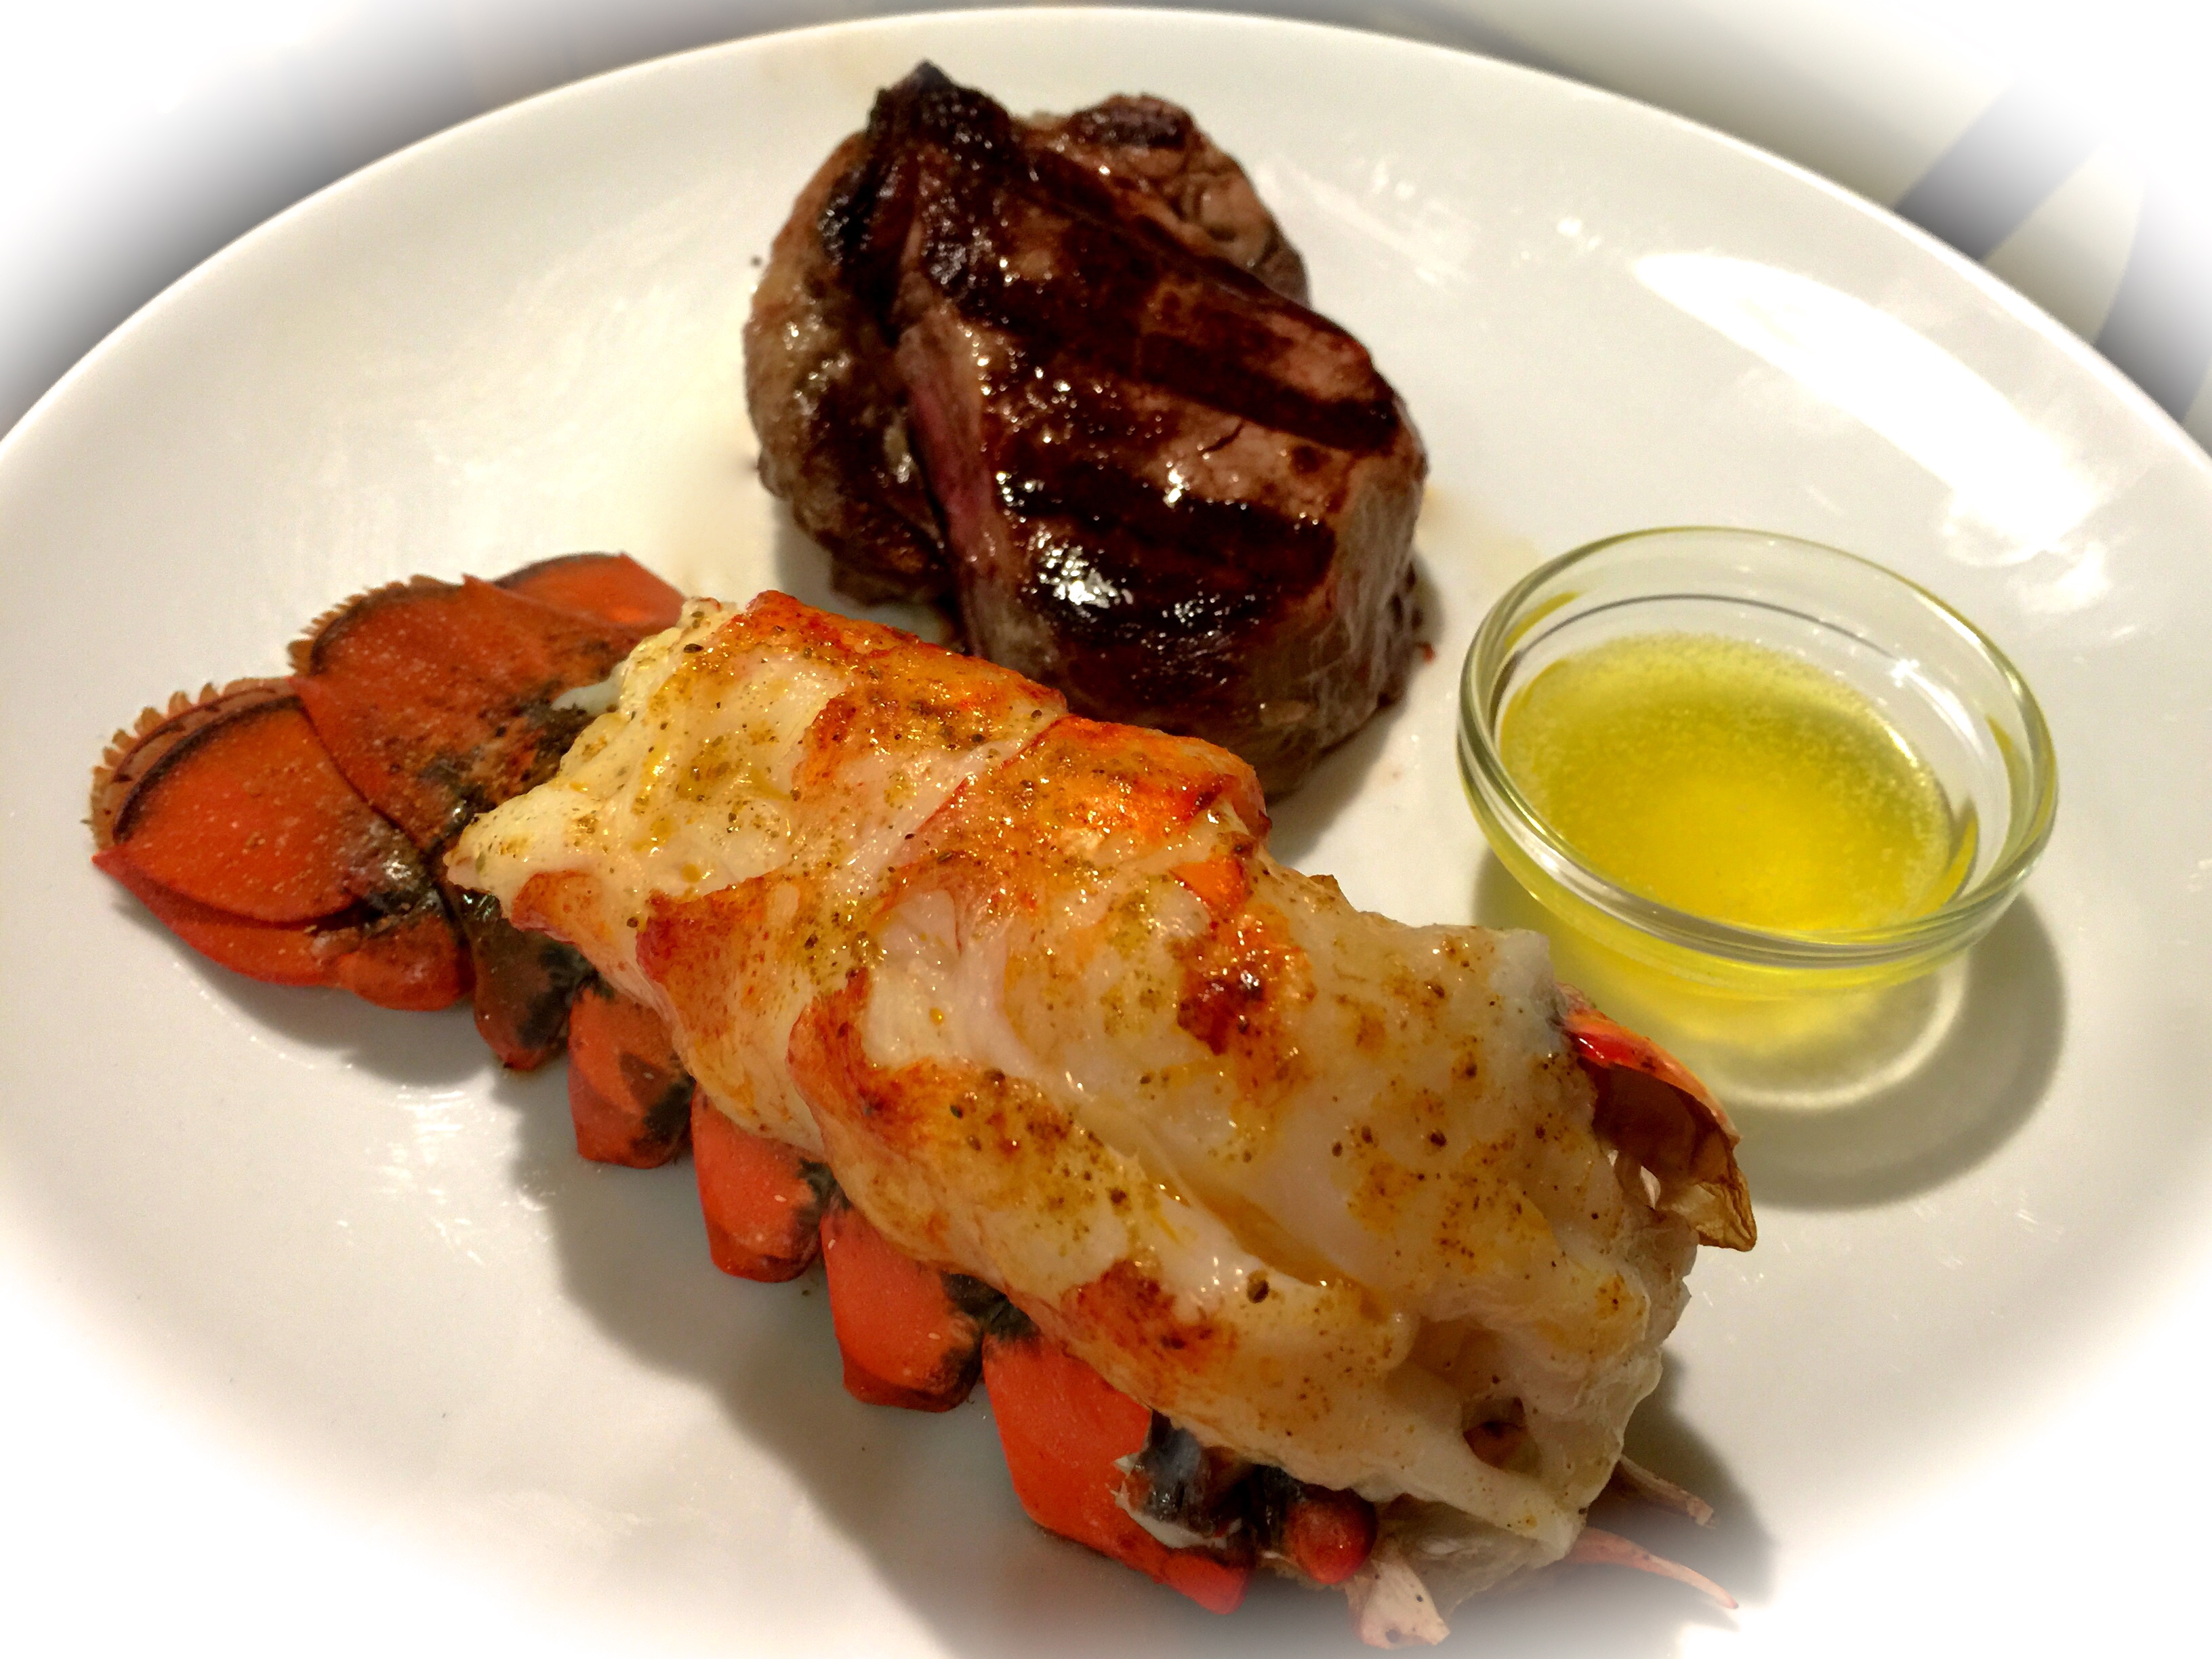
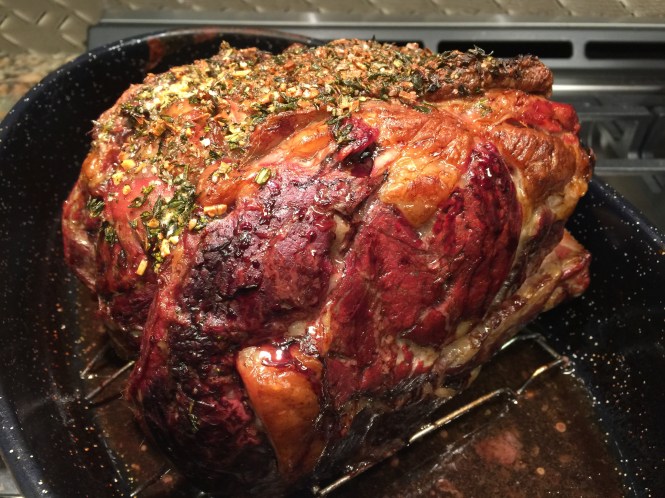
Next is my prime rib recipe. Many times my family would make this for Christmas because we just had turkey a month before. Or sometimes if we were feeding a huge crowd we’d make turkey and prime rib. Or prime rib became the center of attention on New Year’s Eve. Either way, over the holidays it’s always good to have a go-to prime rib recipe. Just click on the picture below.

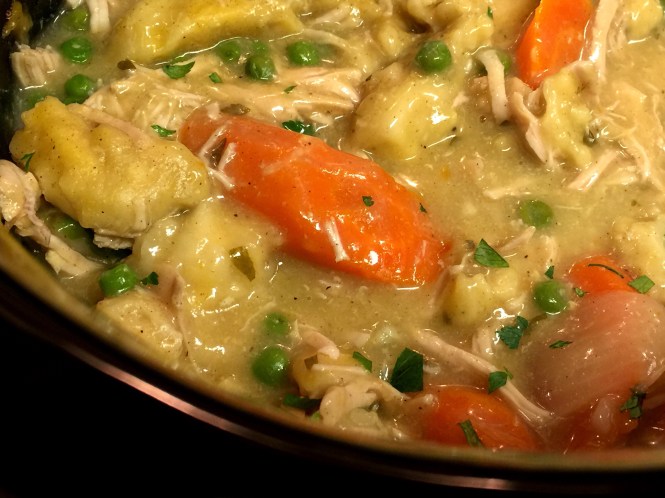
Next I’m including a turkey recipe but not the type of turkey recipe you might think. Since Thanksgiving this recipe has been getting a ton of hits on my blog which leads me to believe that readers are looking for alternative ways to serve the bird. This is a slow cooker recipe and it is delicious. So if you’re looking for an alternative way to serve turkey, this recipe is for you!

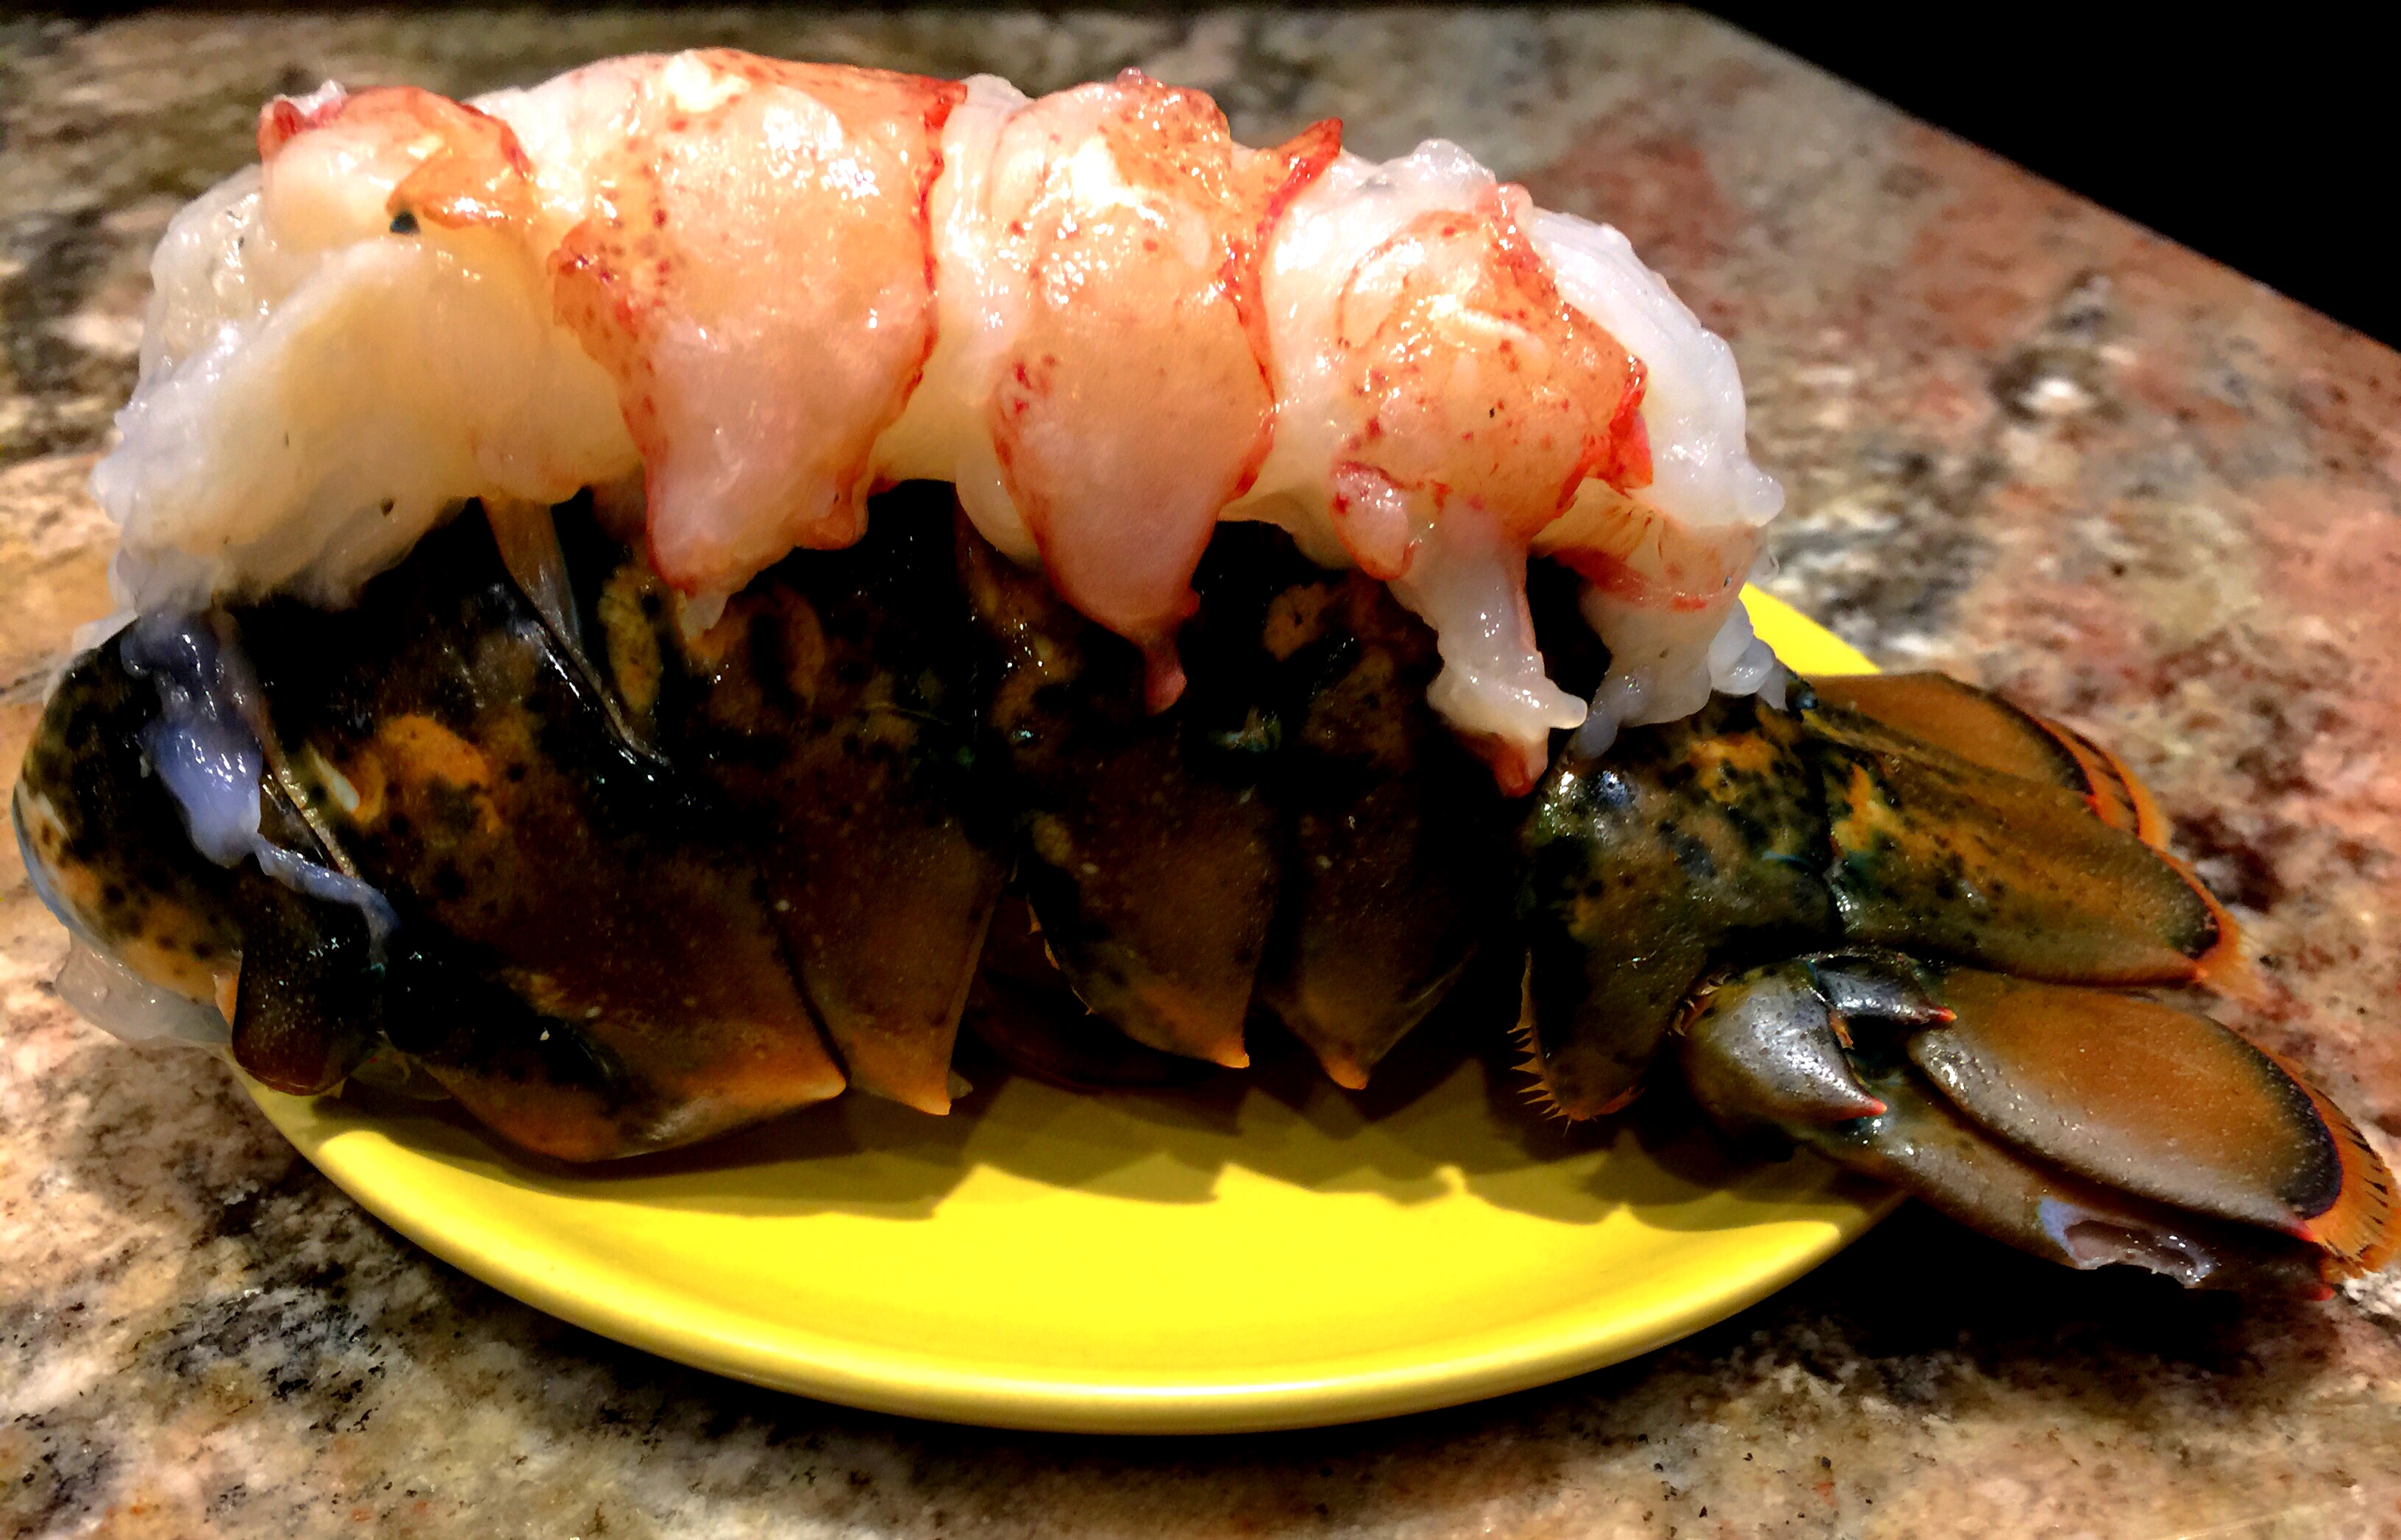
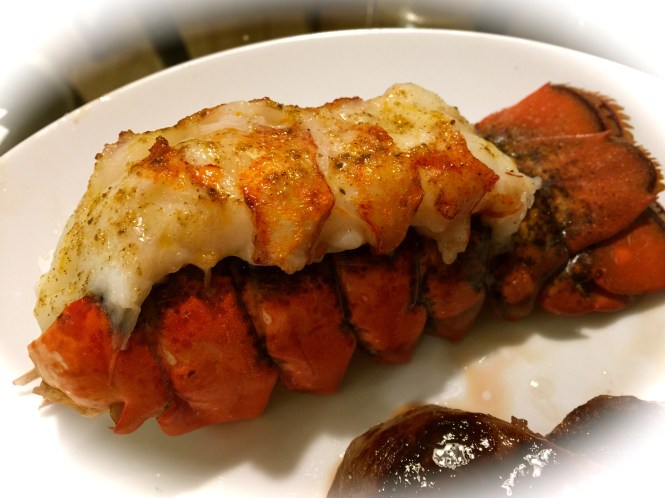
And last but not least, so many people use the occasion of the holidays to dapple in making lobster tails. Because they are so expensive and are not good overcooked many shy away from making them. But you shouldn’t. They are surprisingly easy to make if you follow the lessons learned in my blog. So go ahead, splurge and enjoy some lobster tails over the holidays!

SIDES

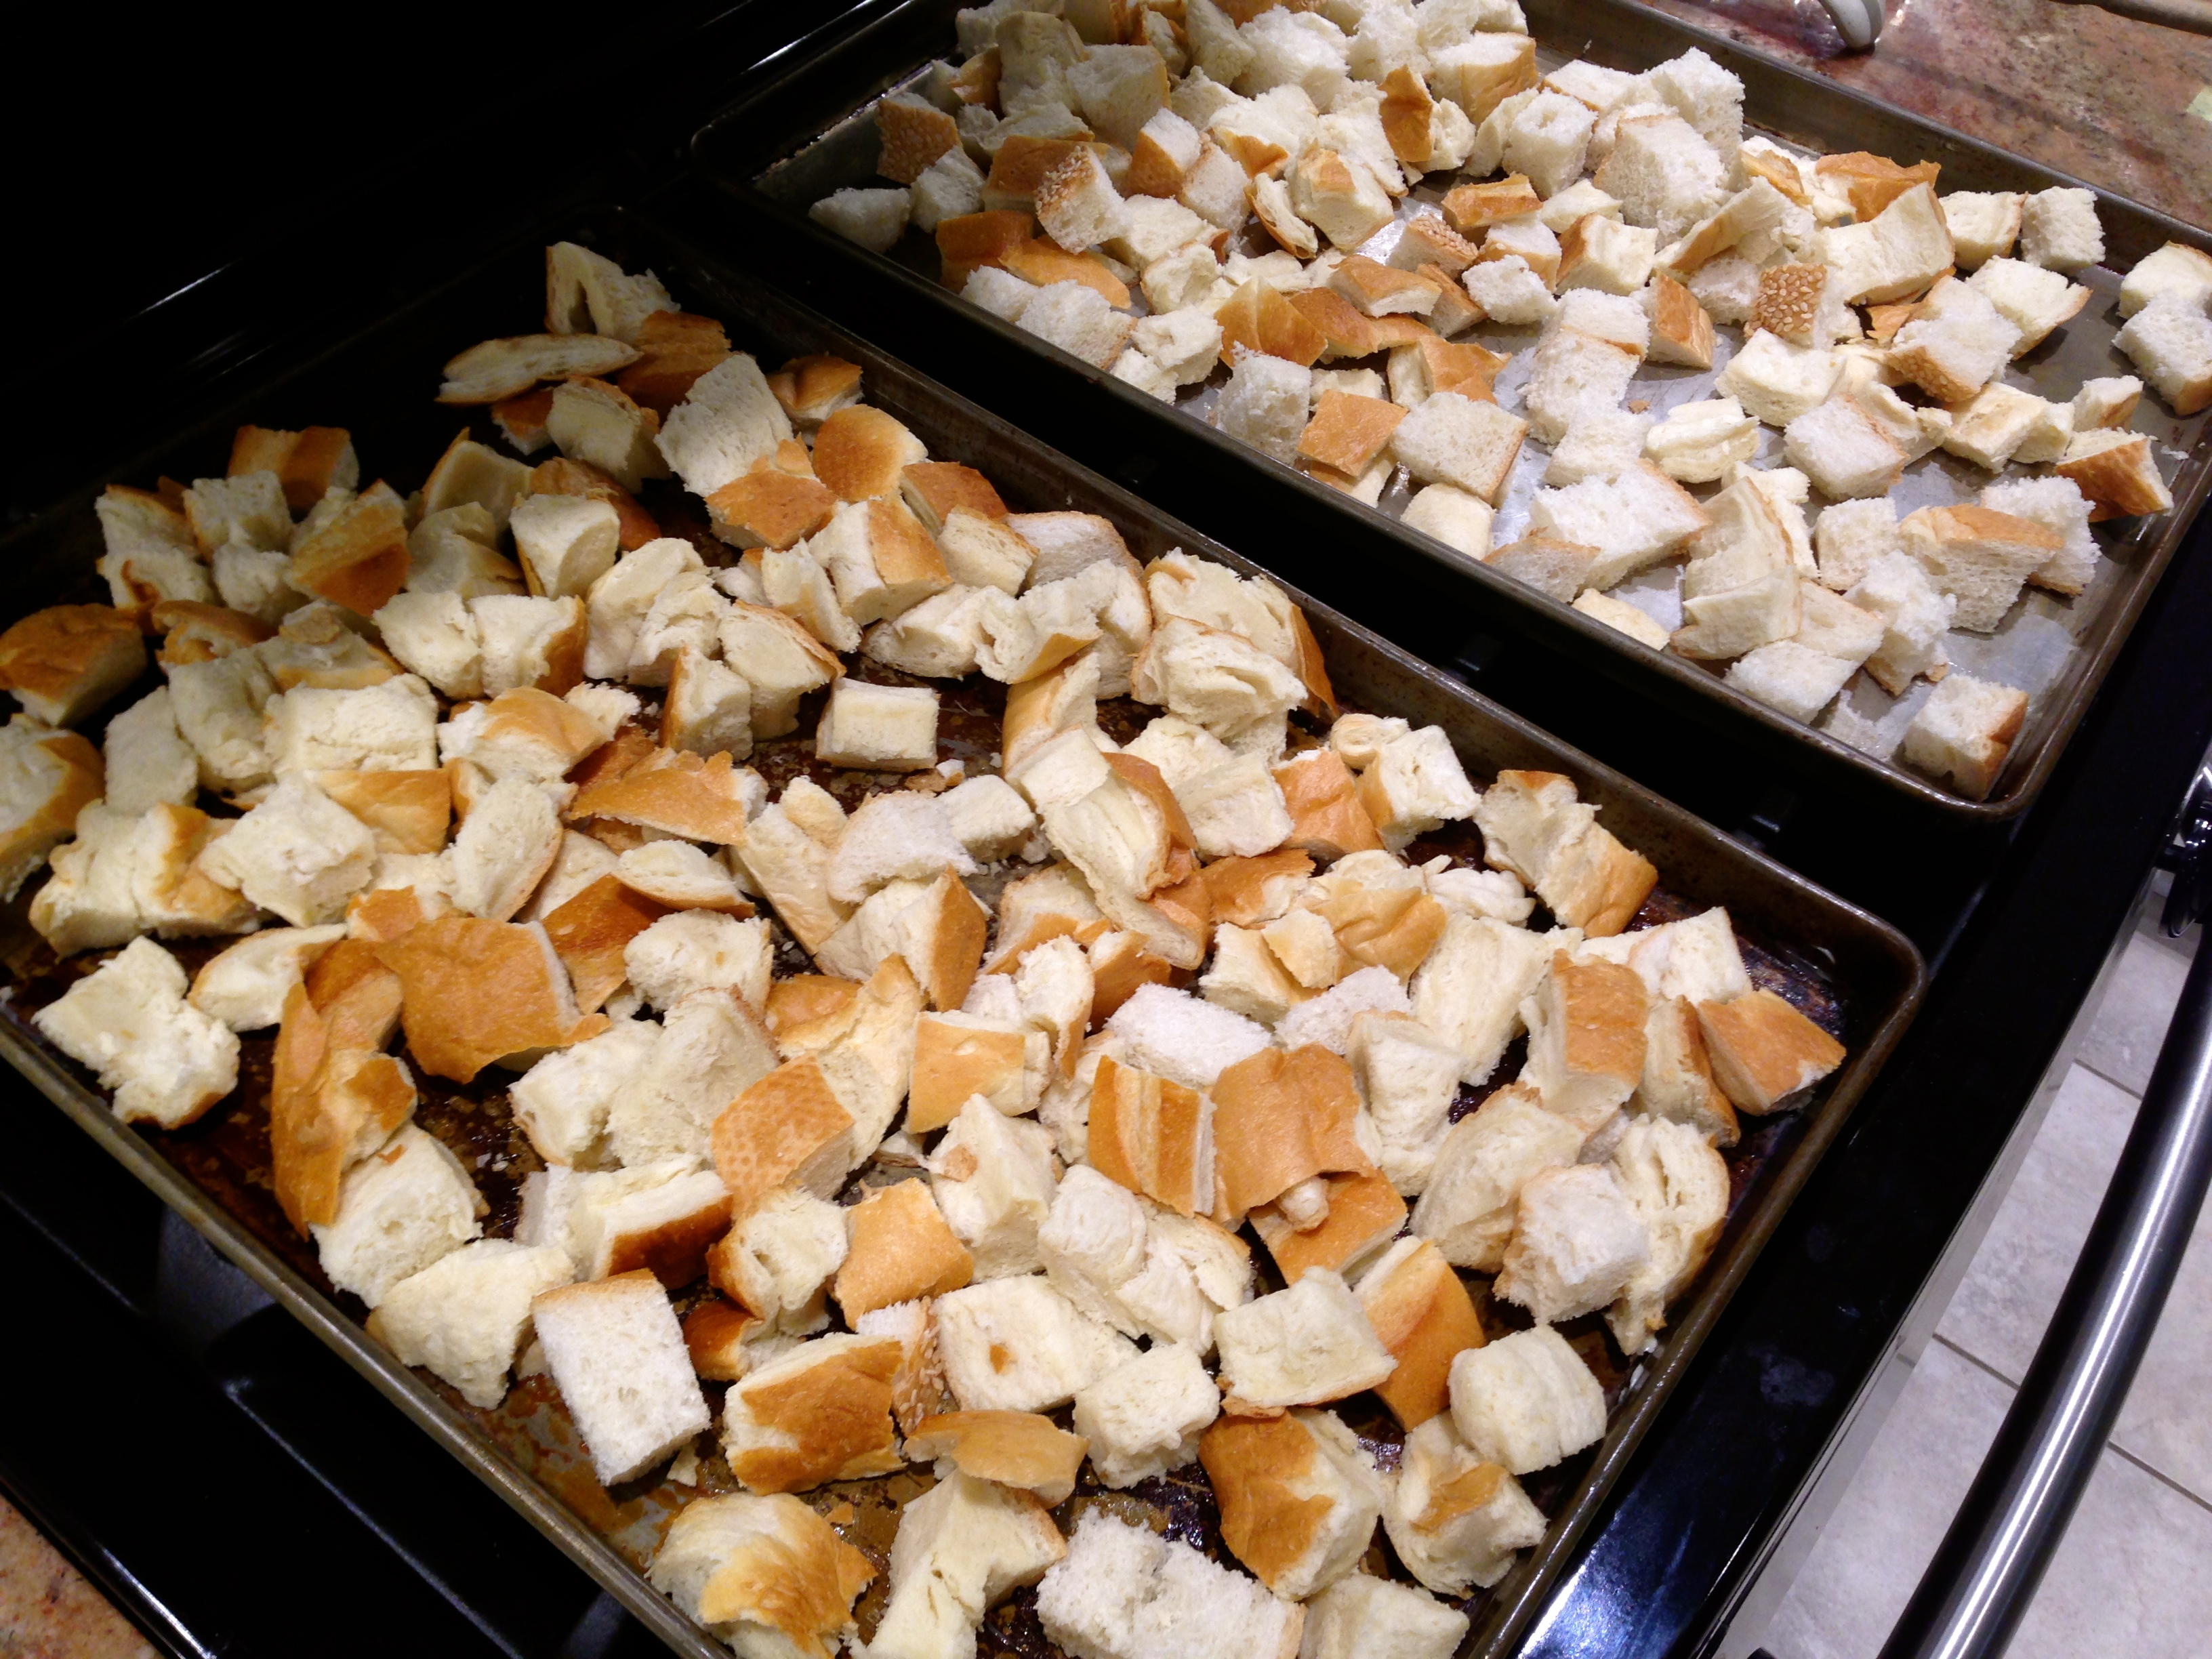
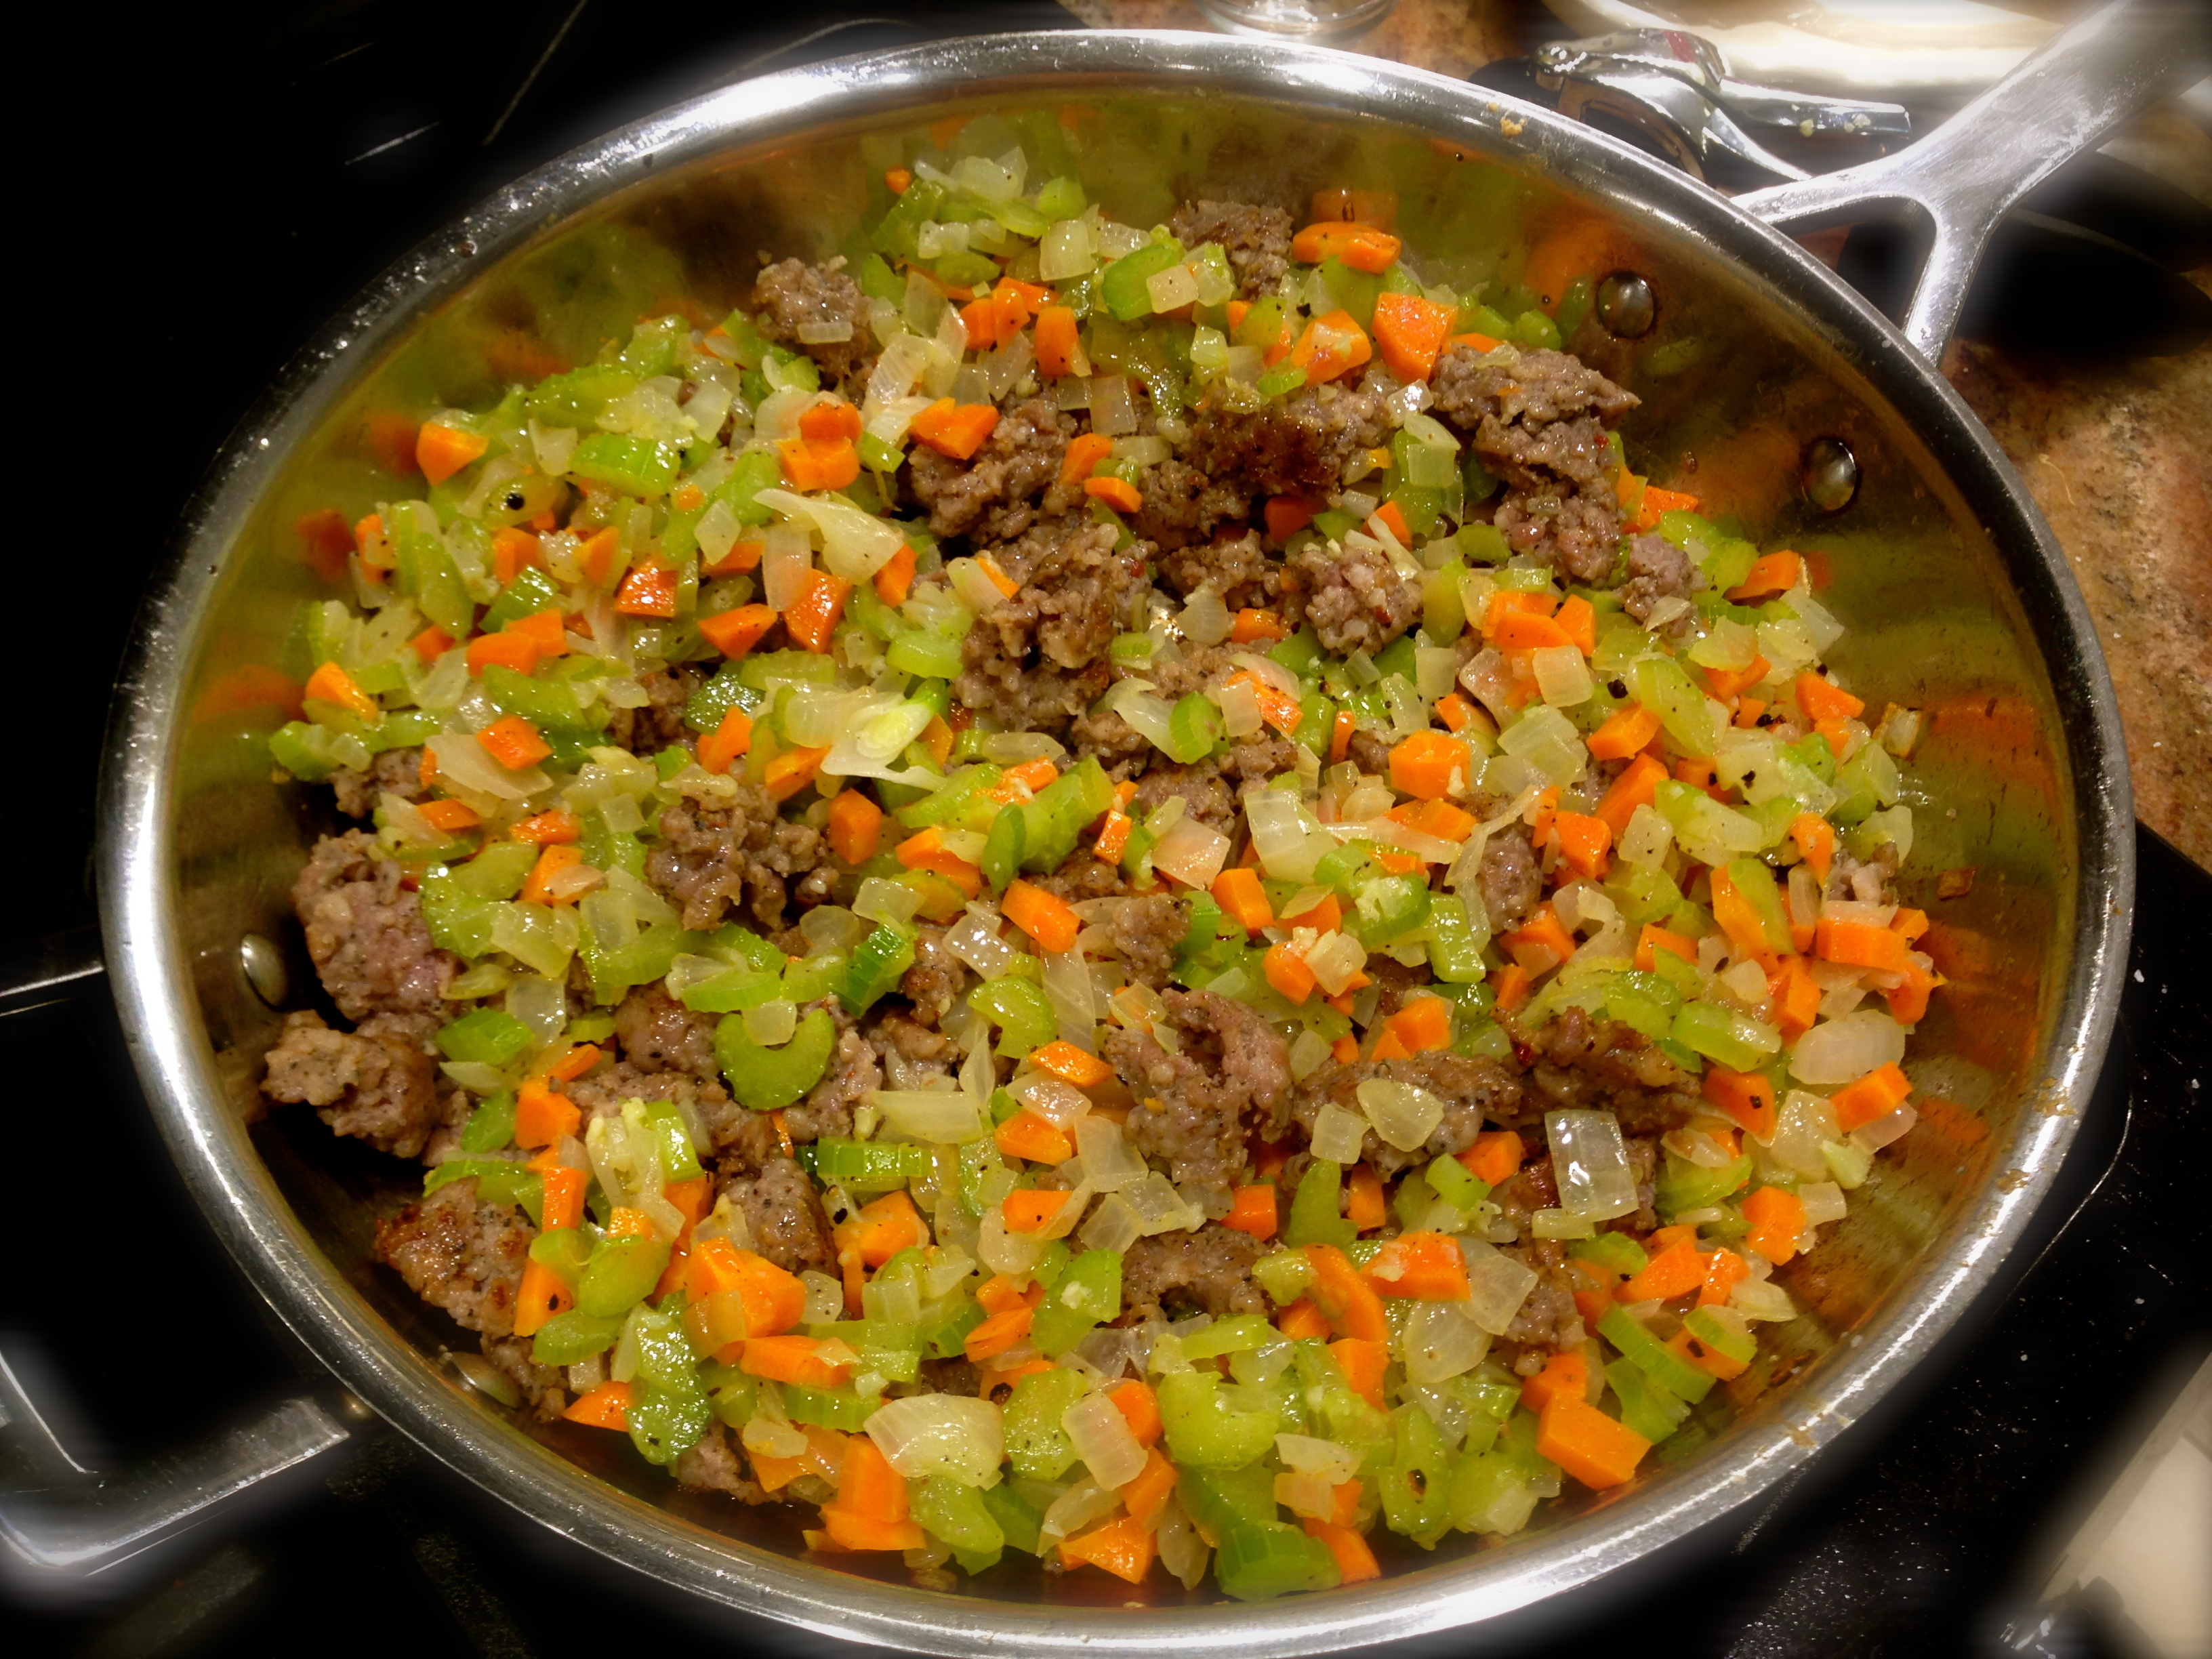
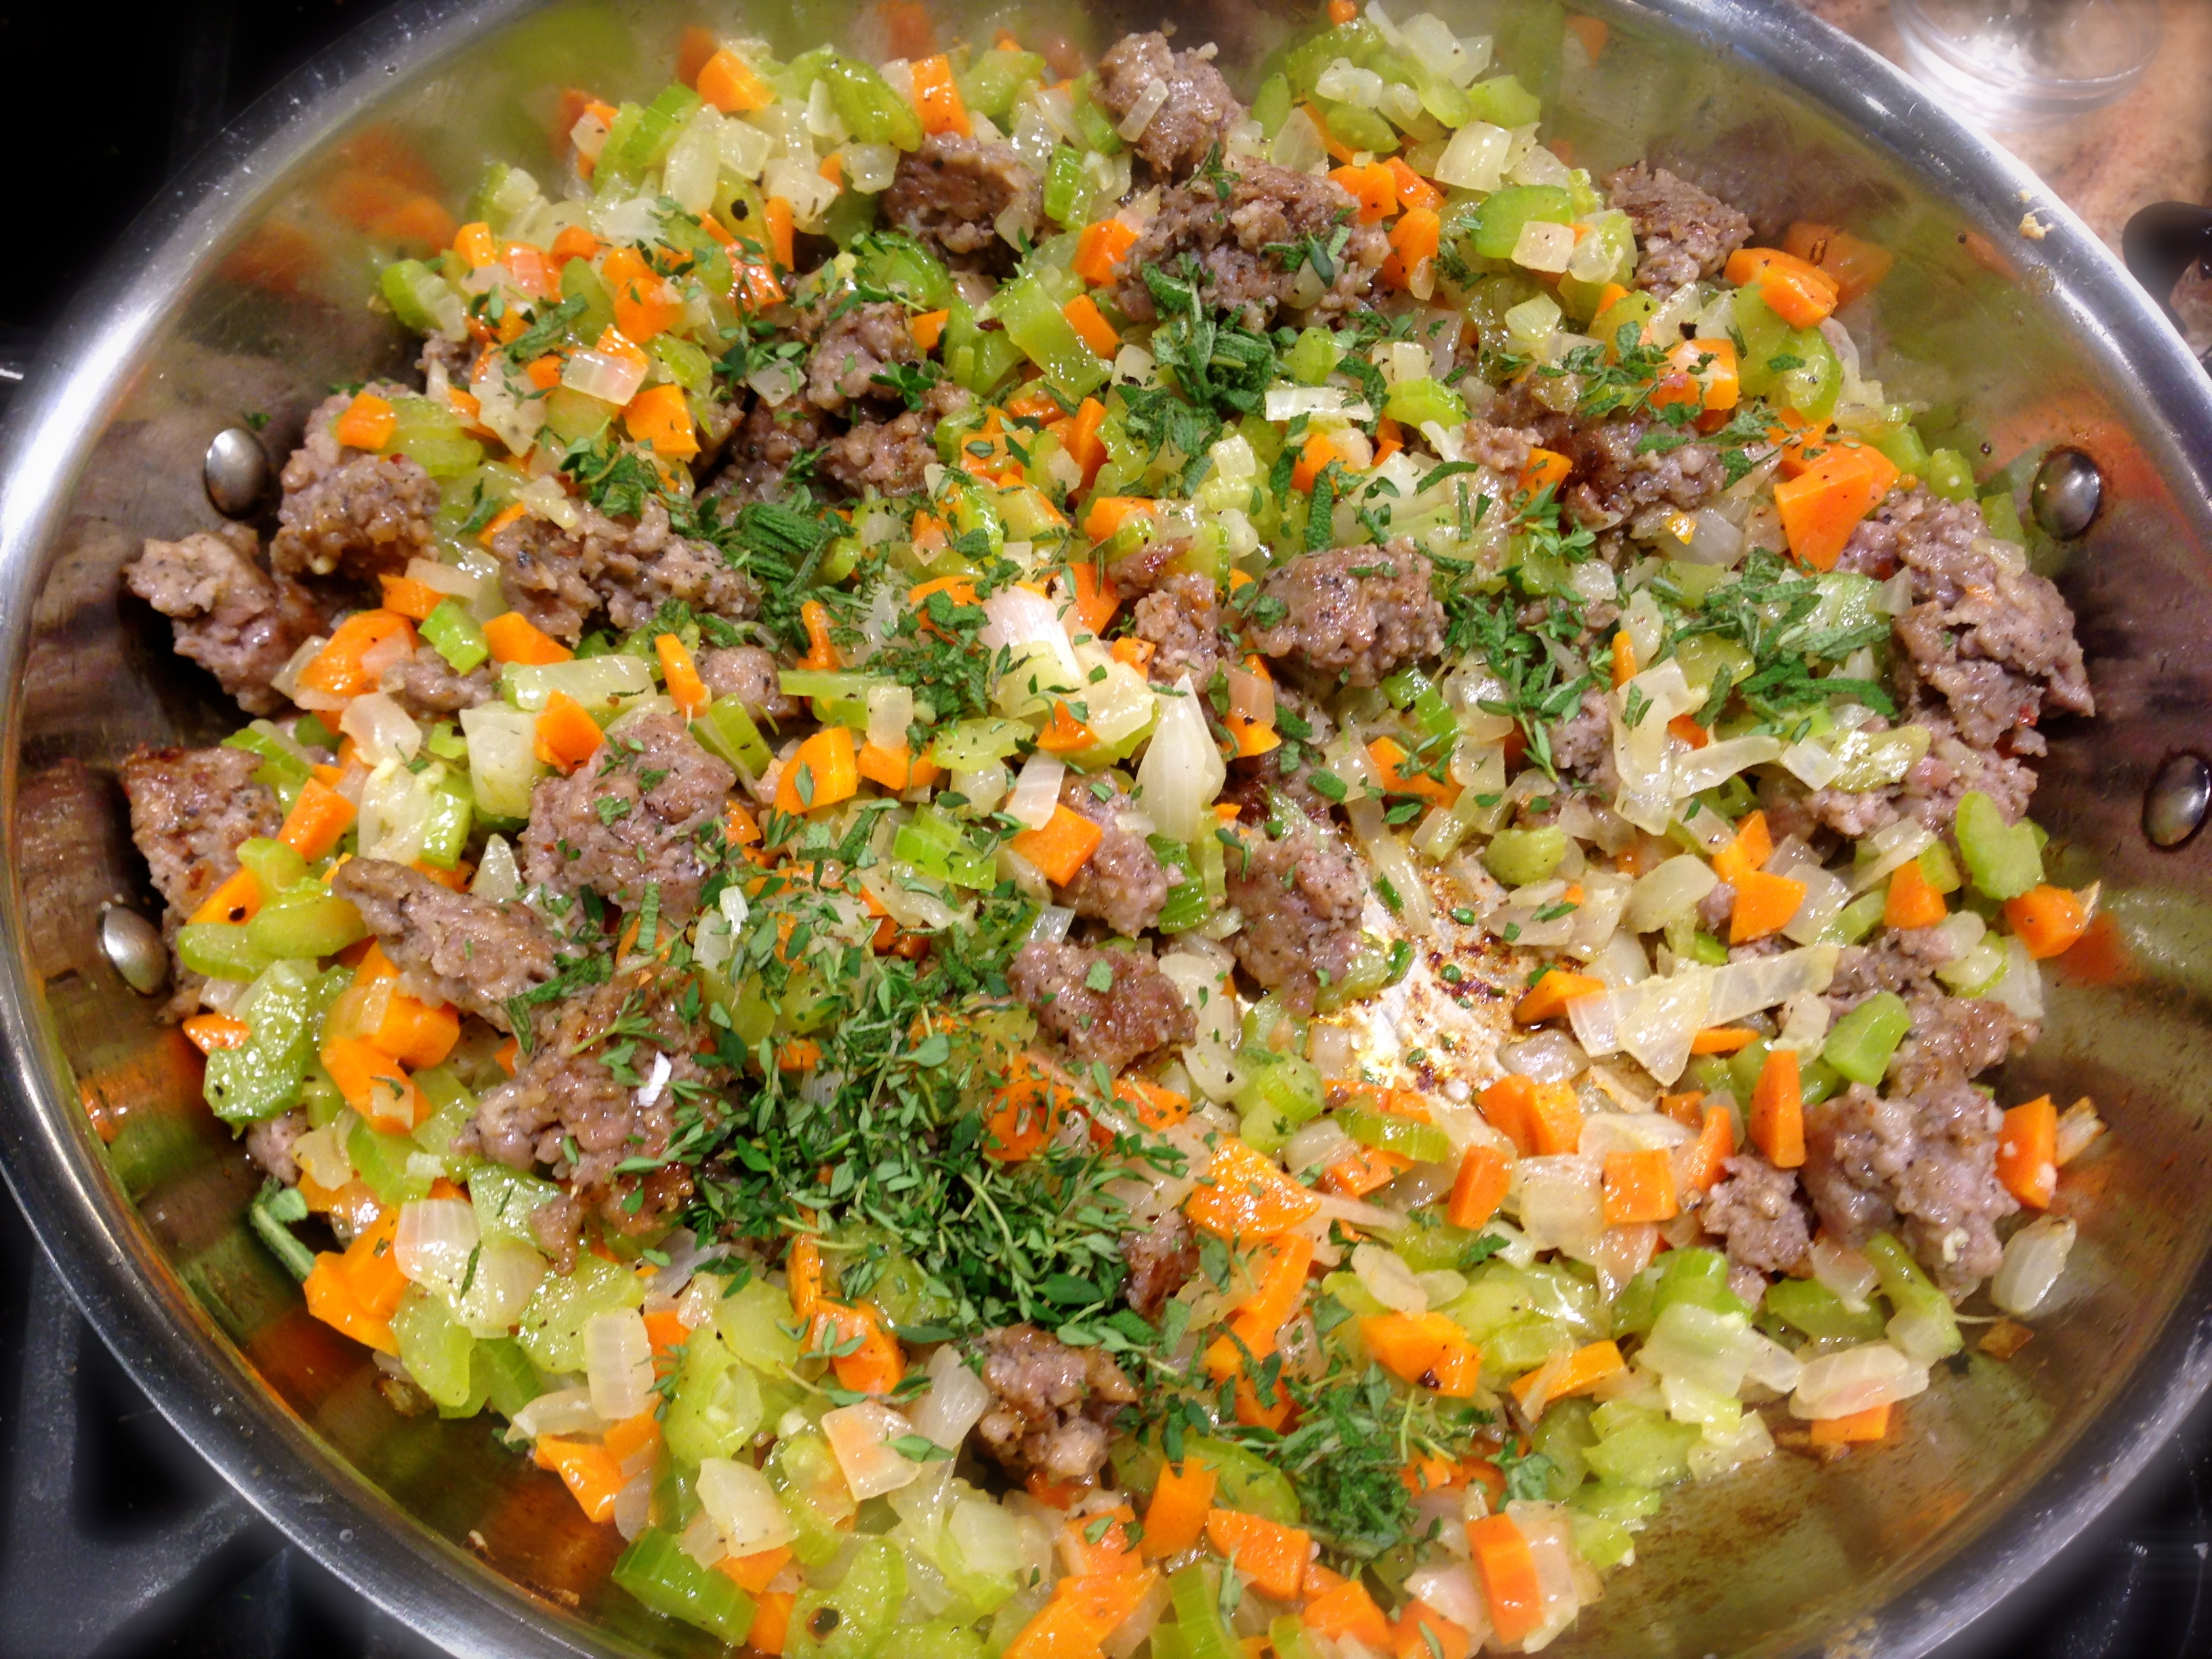
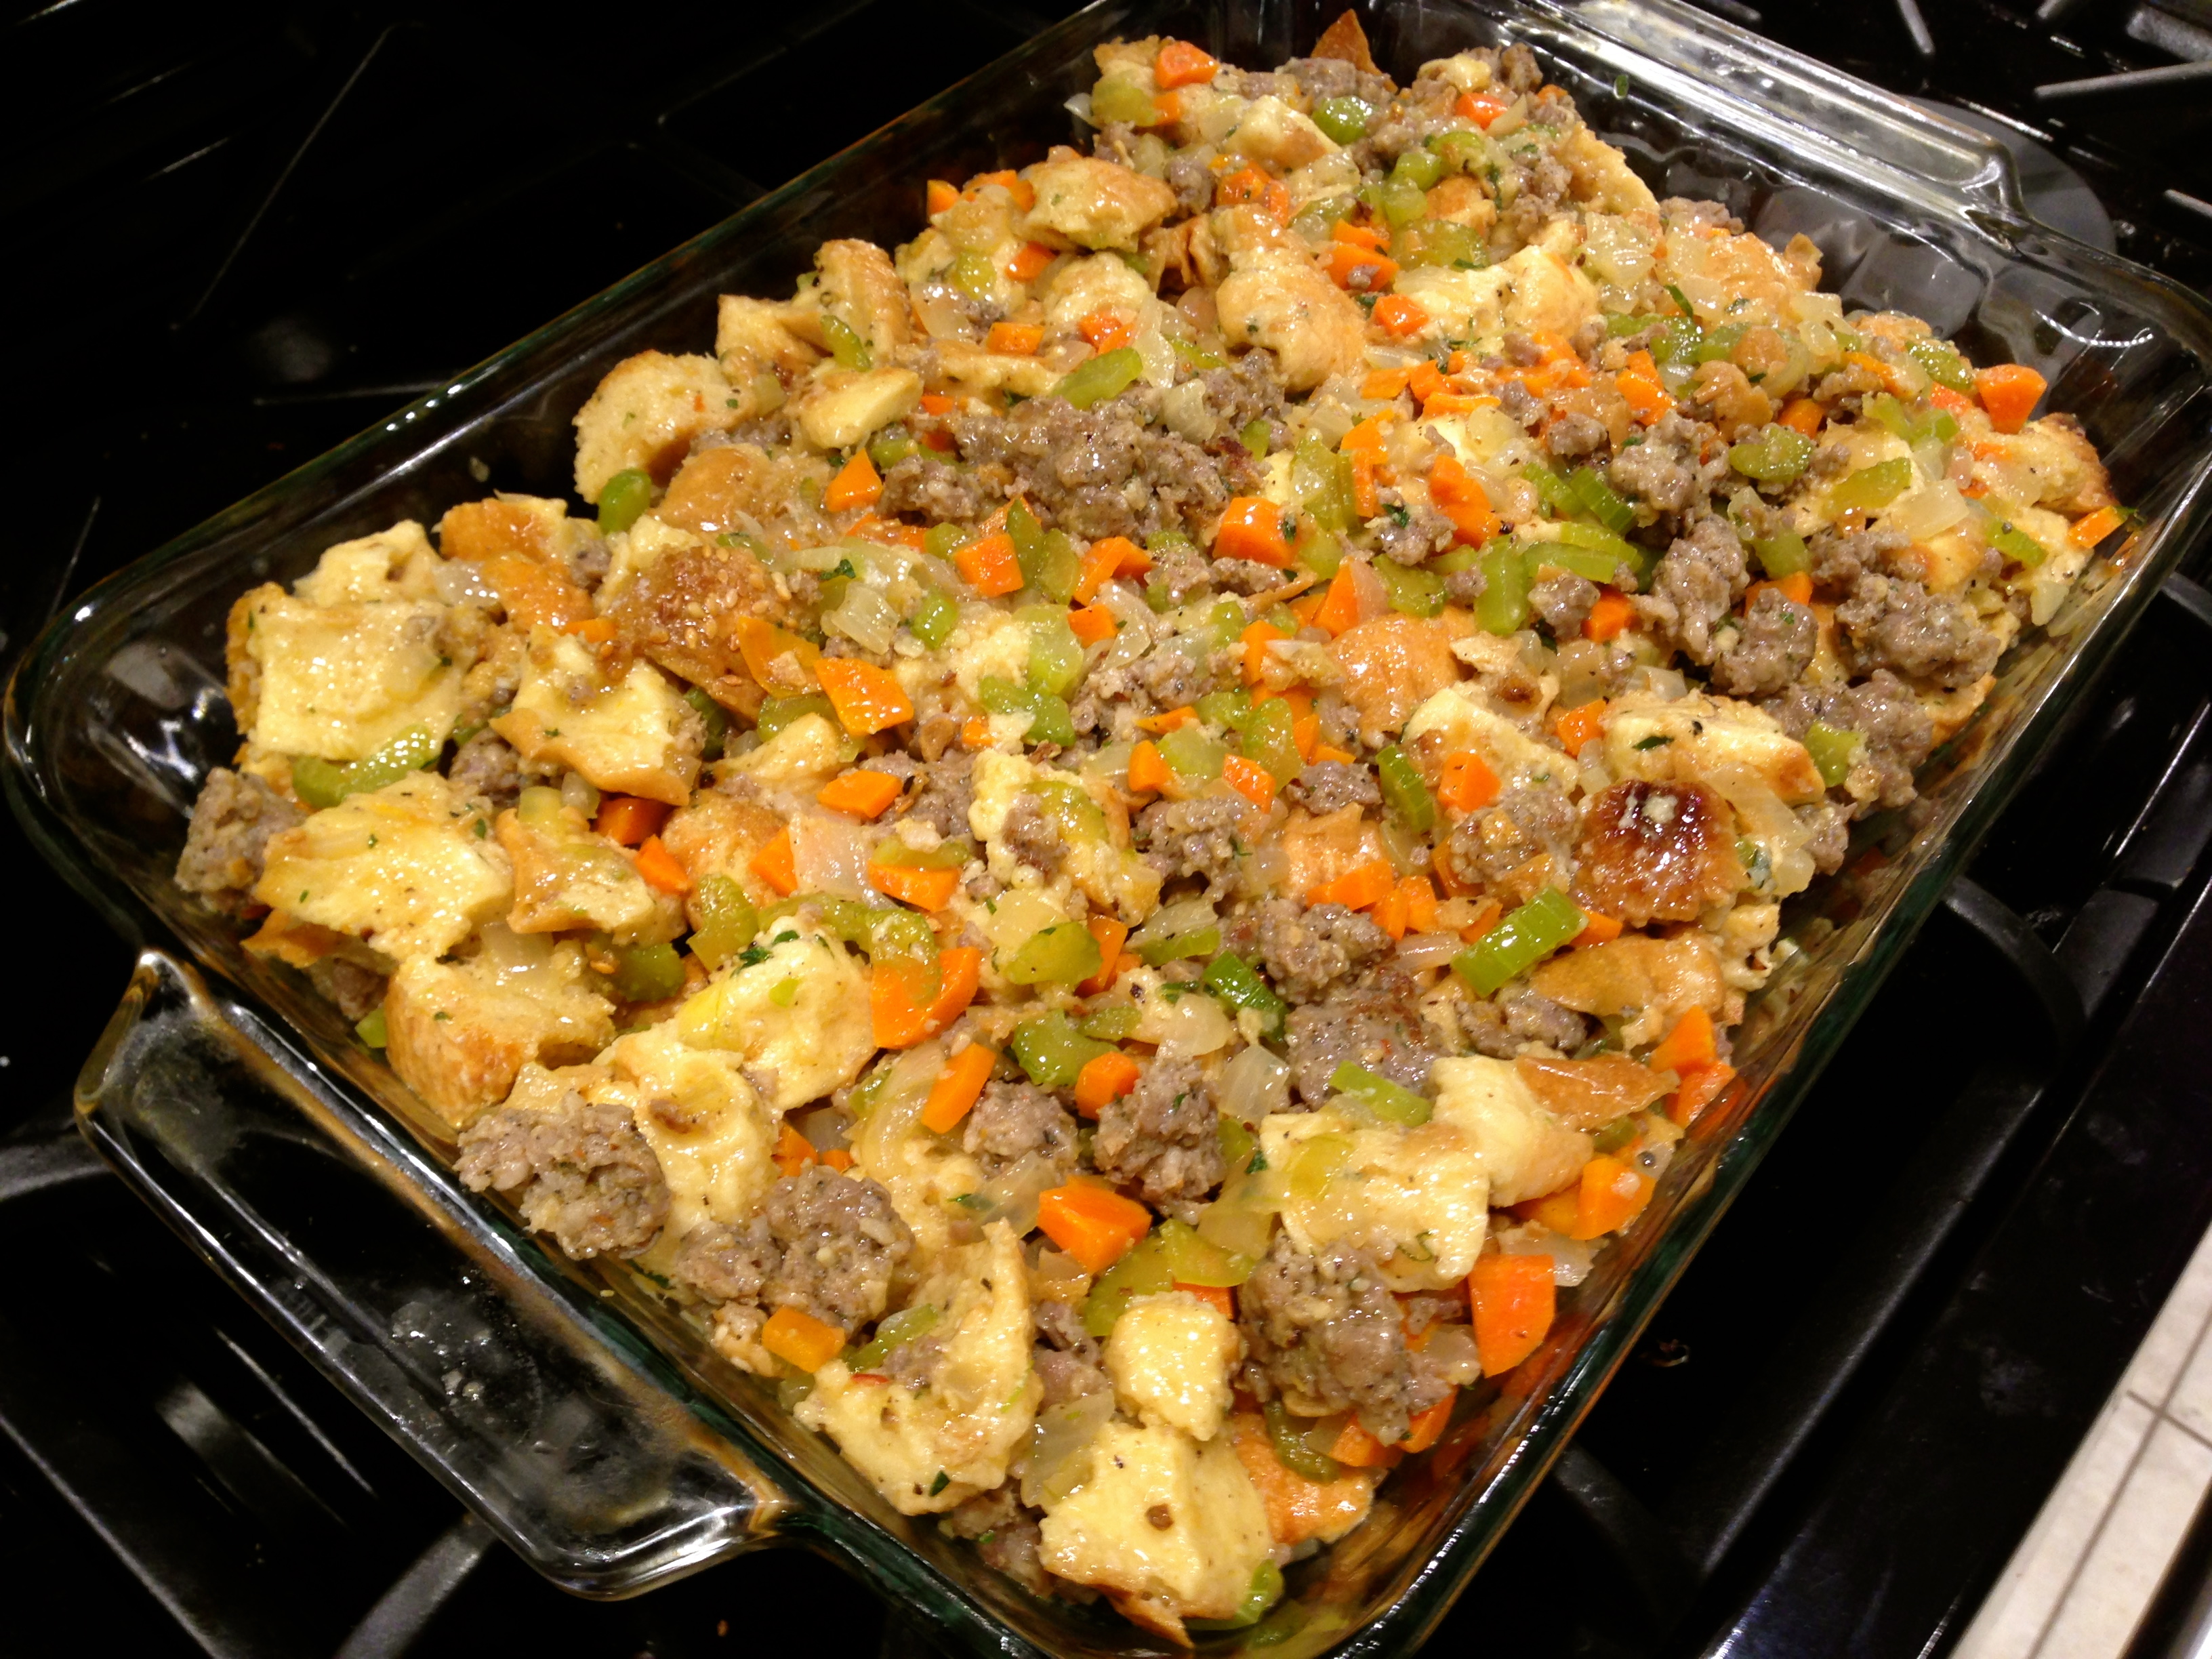
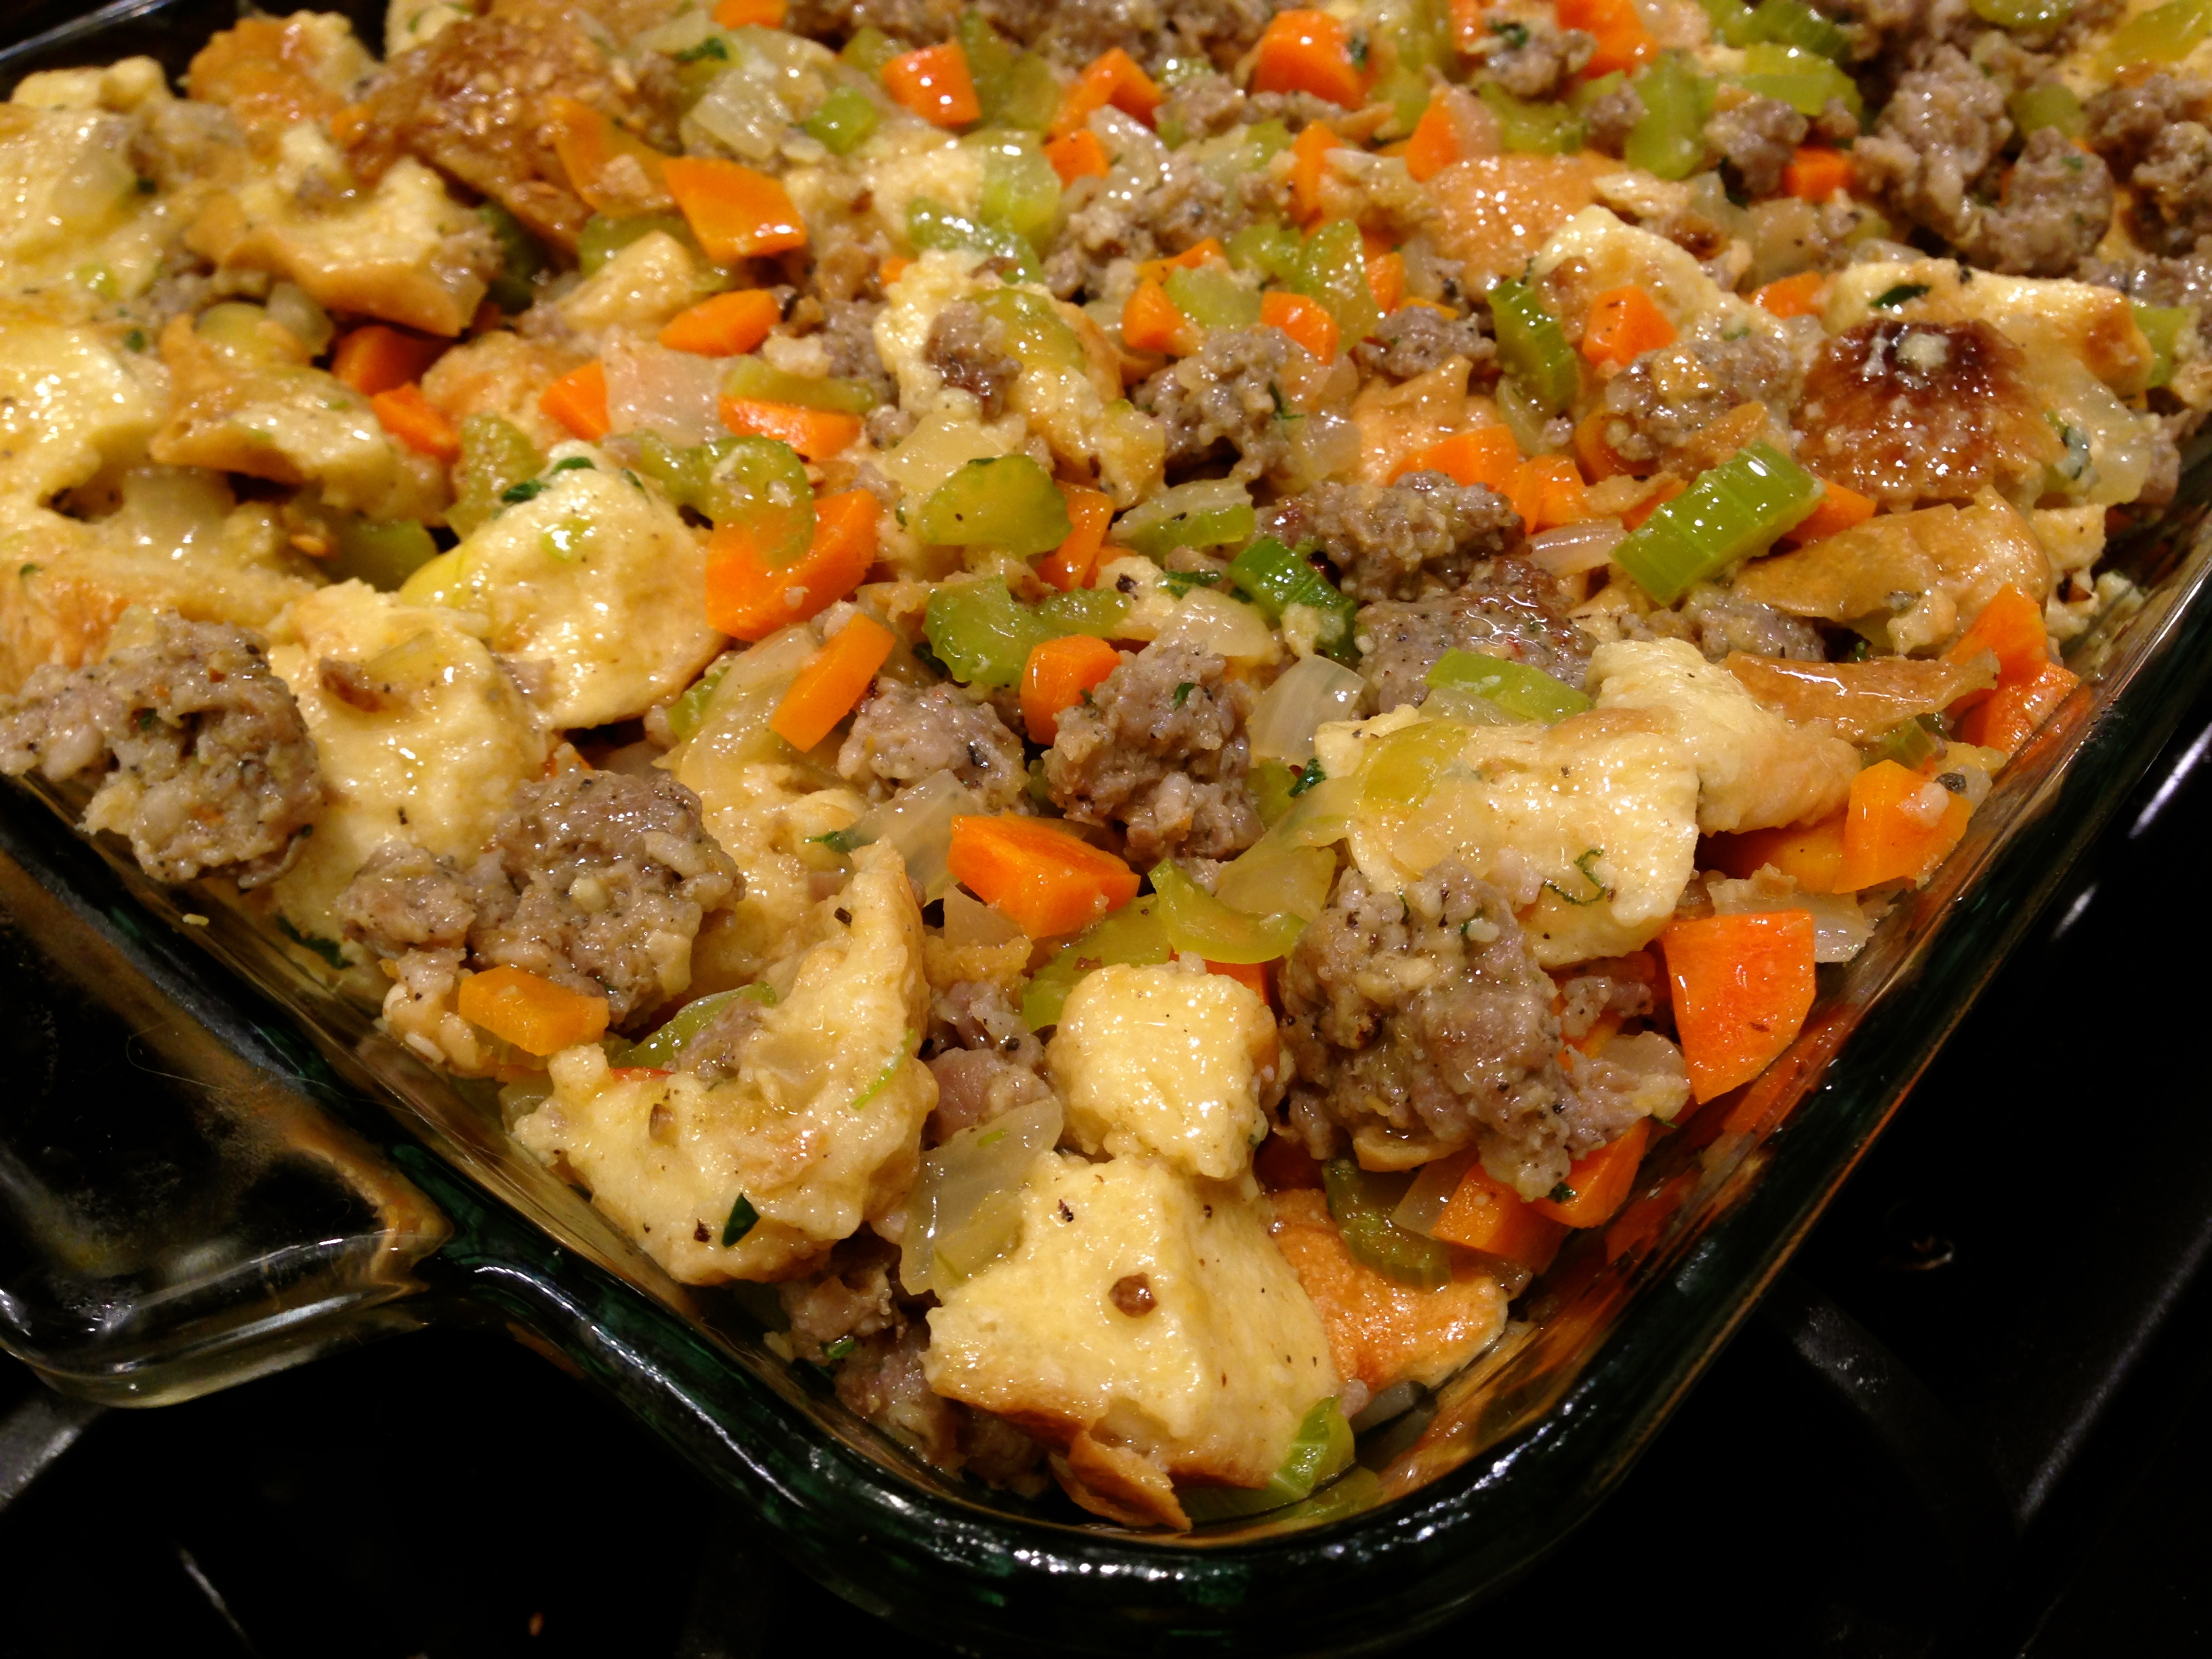
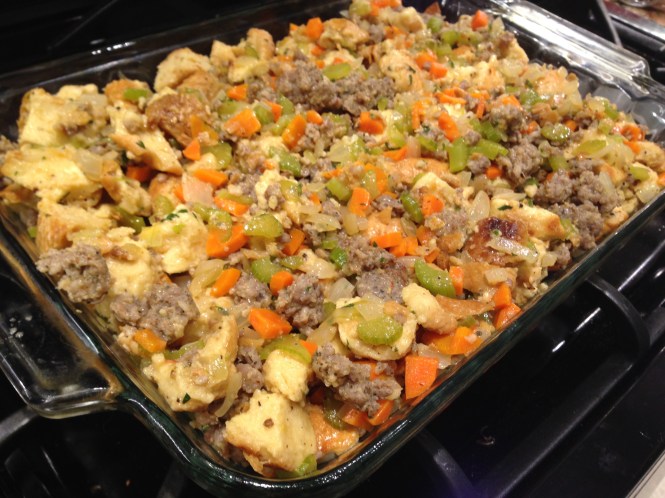
What would the holidays be without a stuffing/dressing recipe. So many times I hear from people that their family’s recipe is the best. But sometimes people are looking for a change or just for a good stuffing/dressing recipe. Well here it is! This is not my mother’s stuffing which I did love but never got from her. So in my quest to find a great substitute I landed on this recipe. It is fabulous and tastes even better if made the day before and reheated the next day.

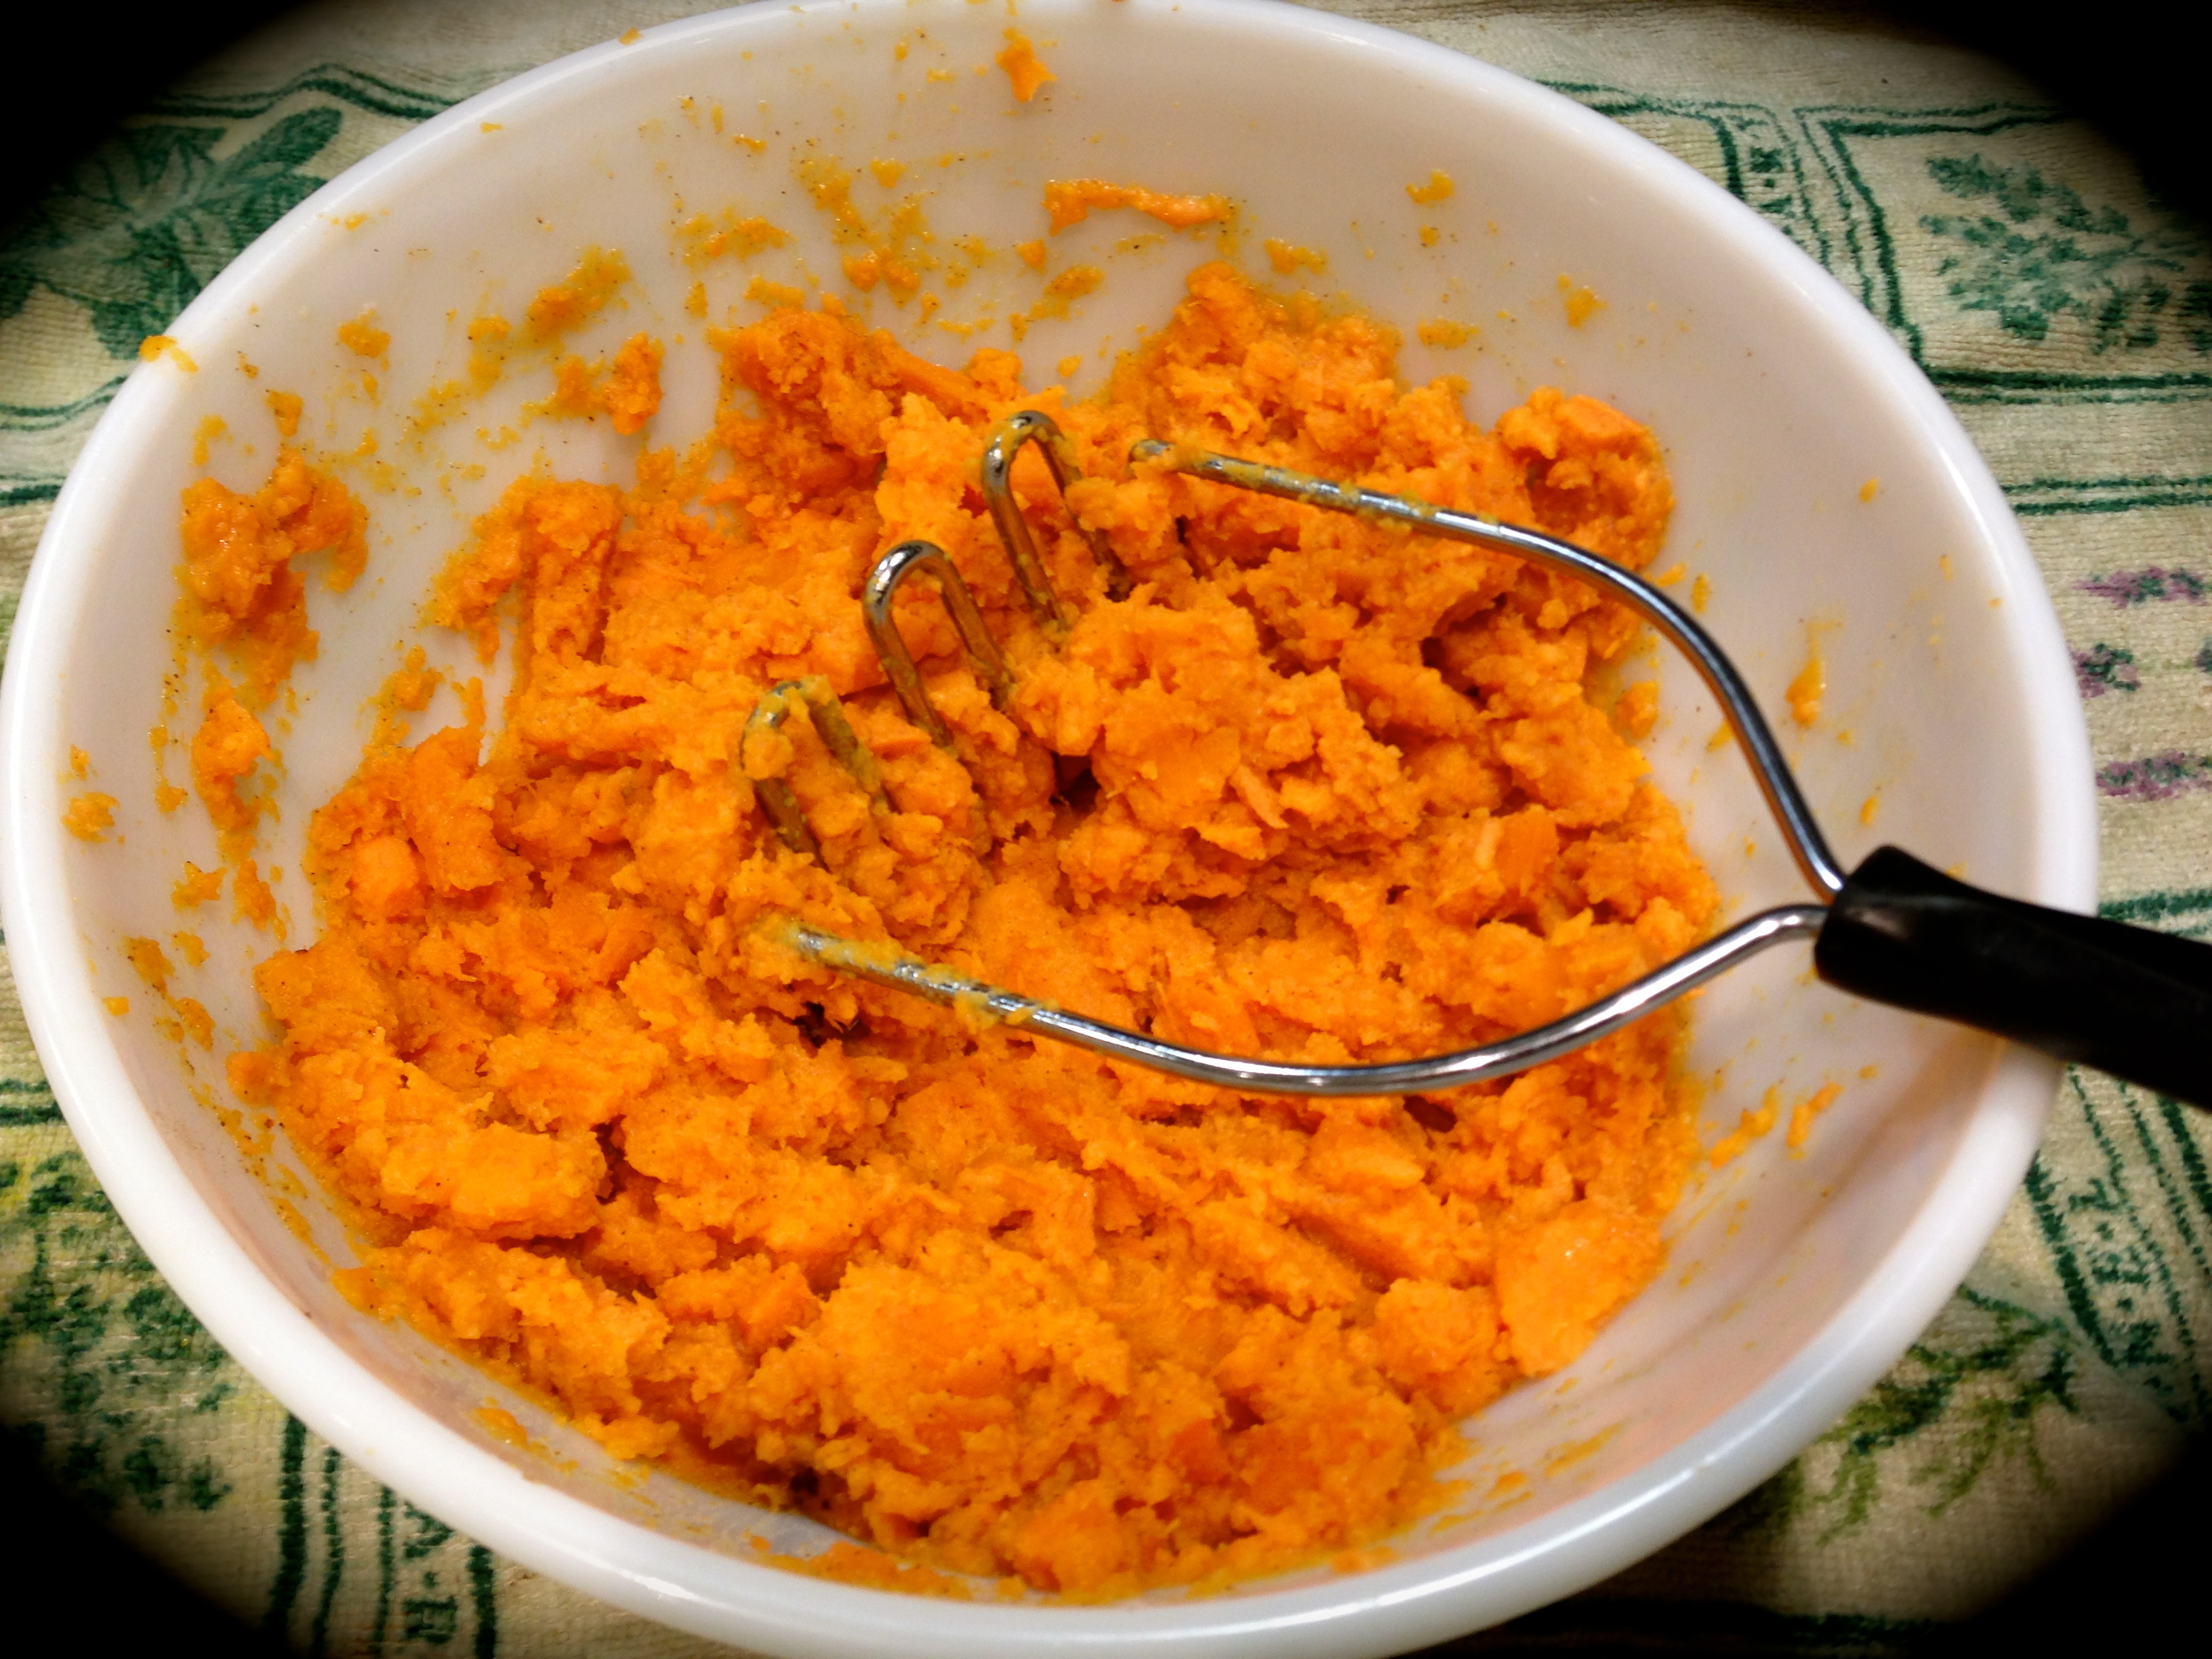
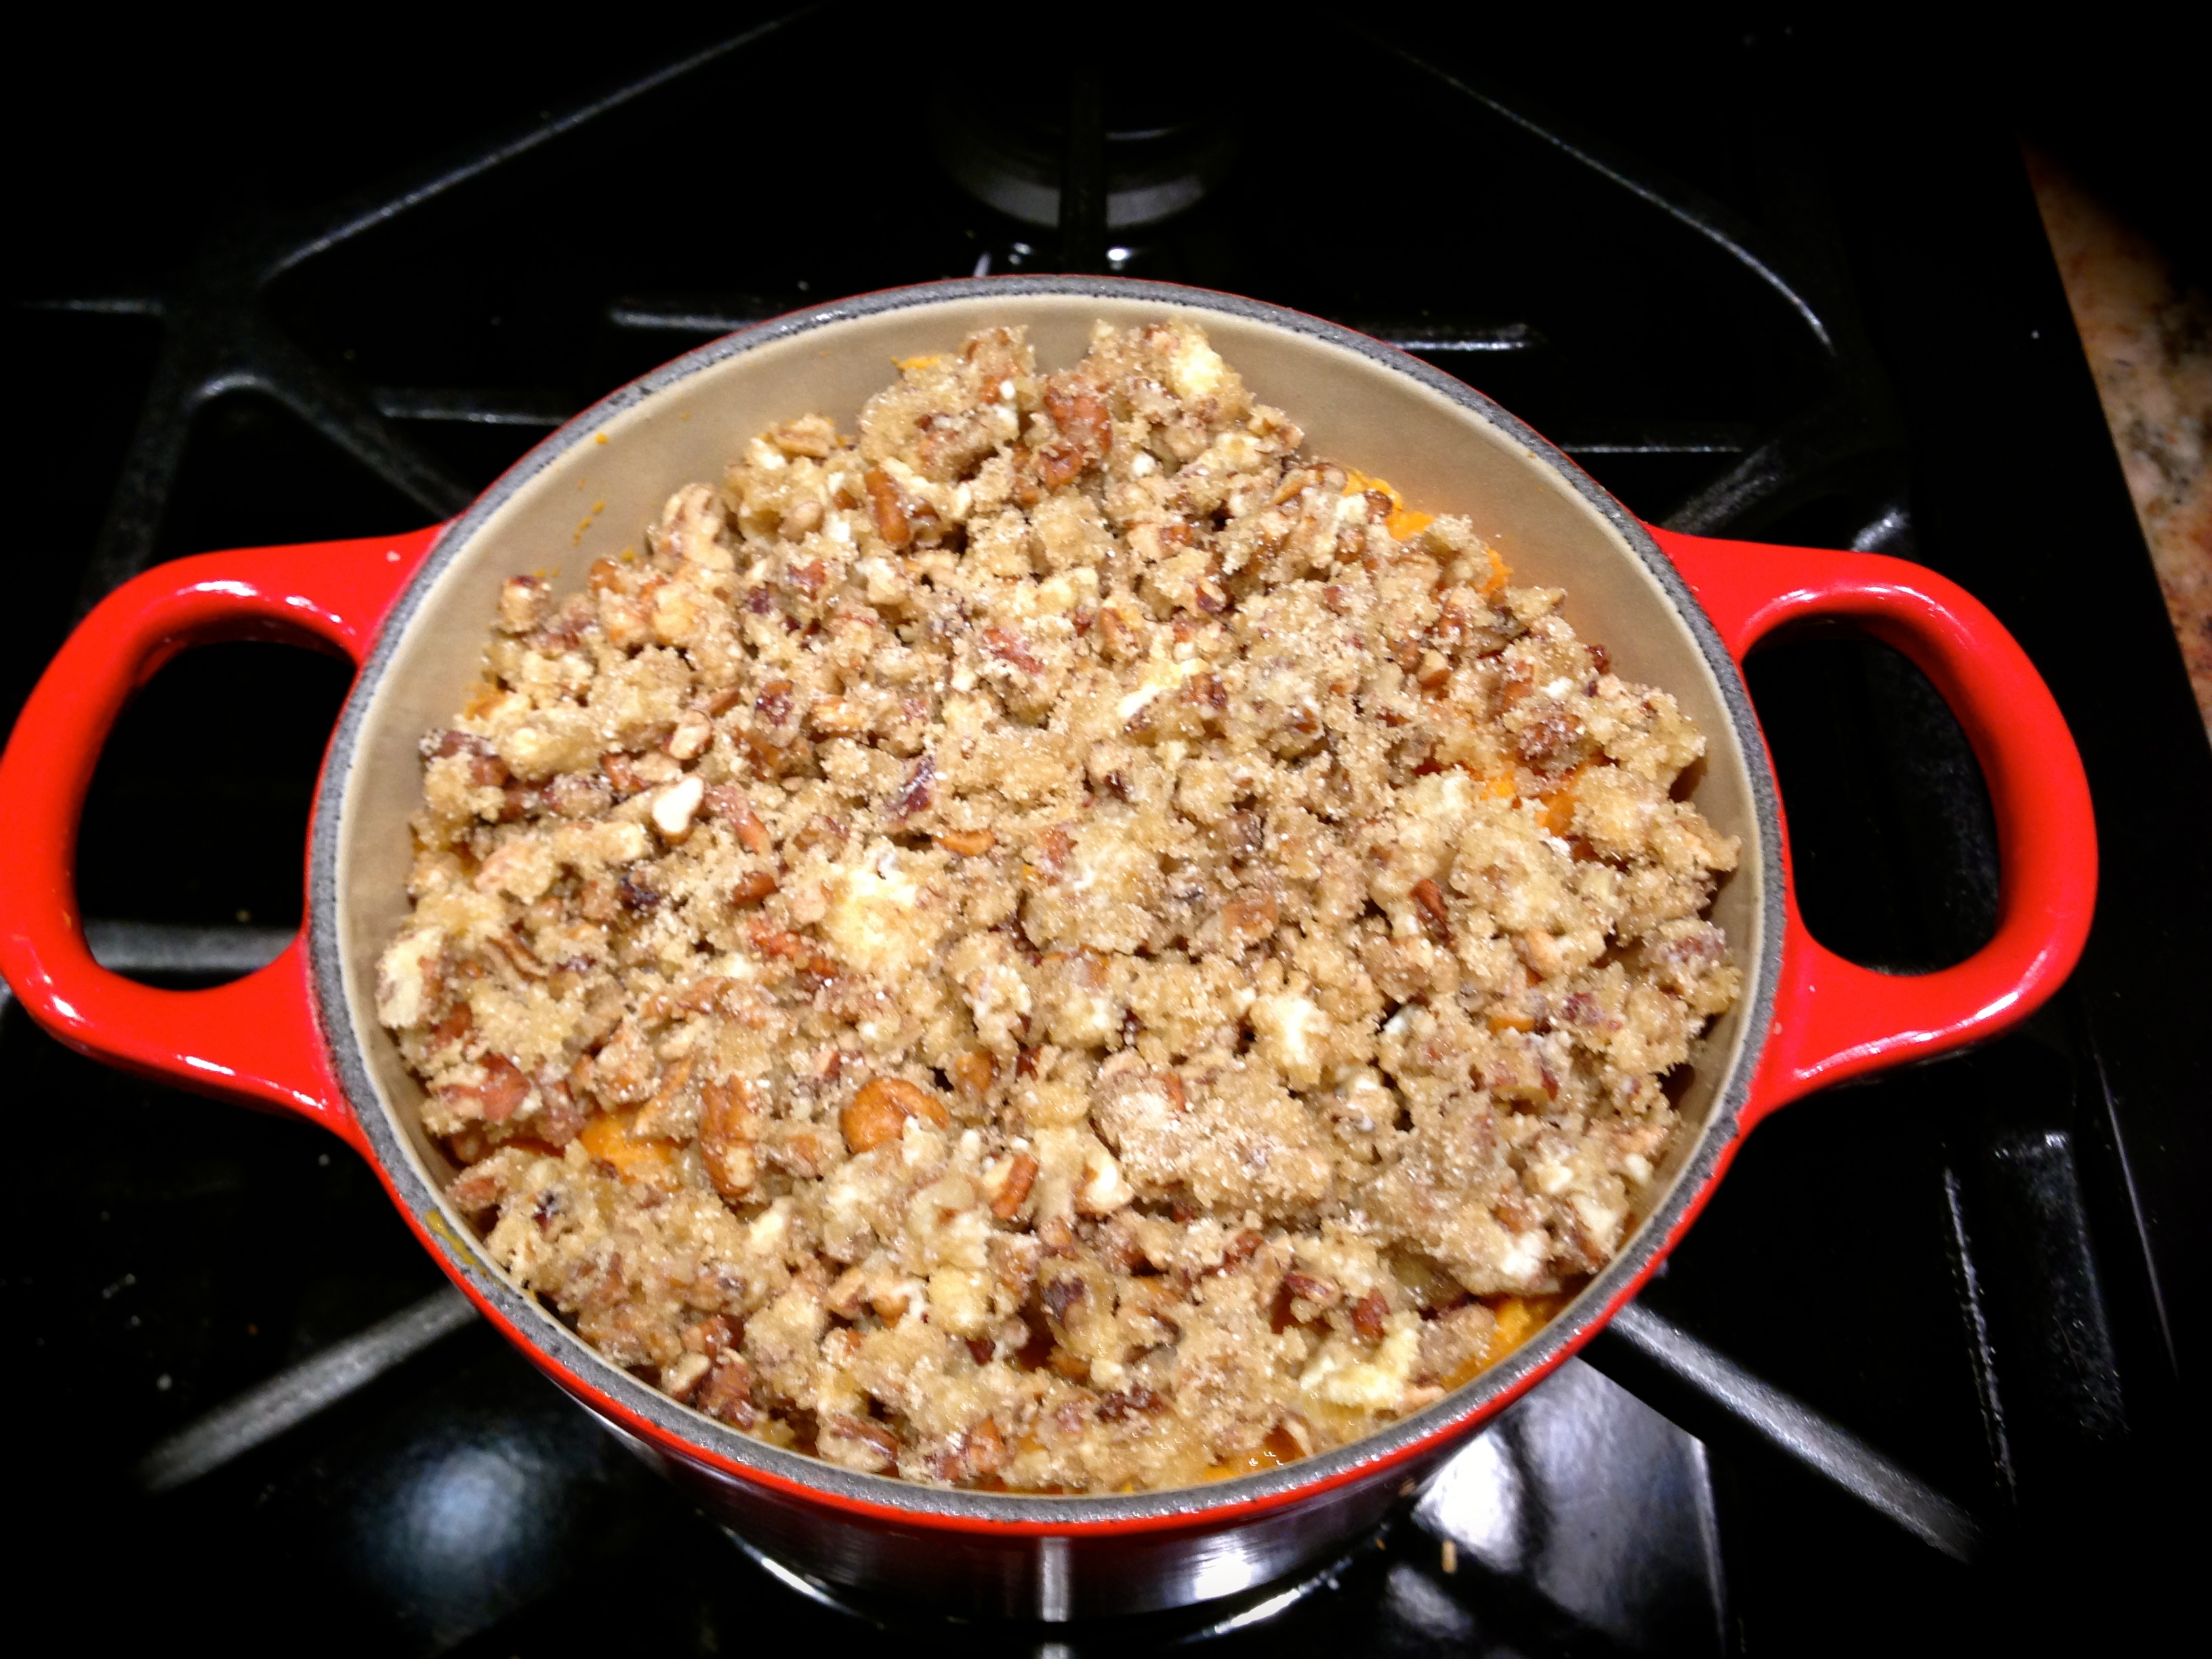
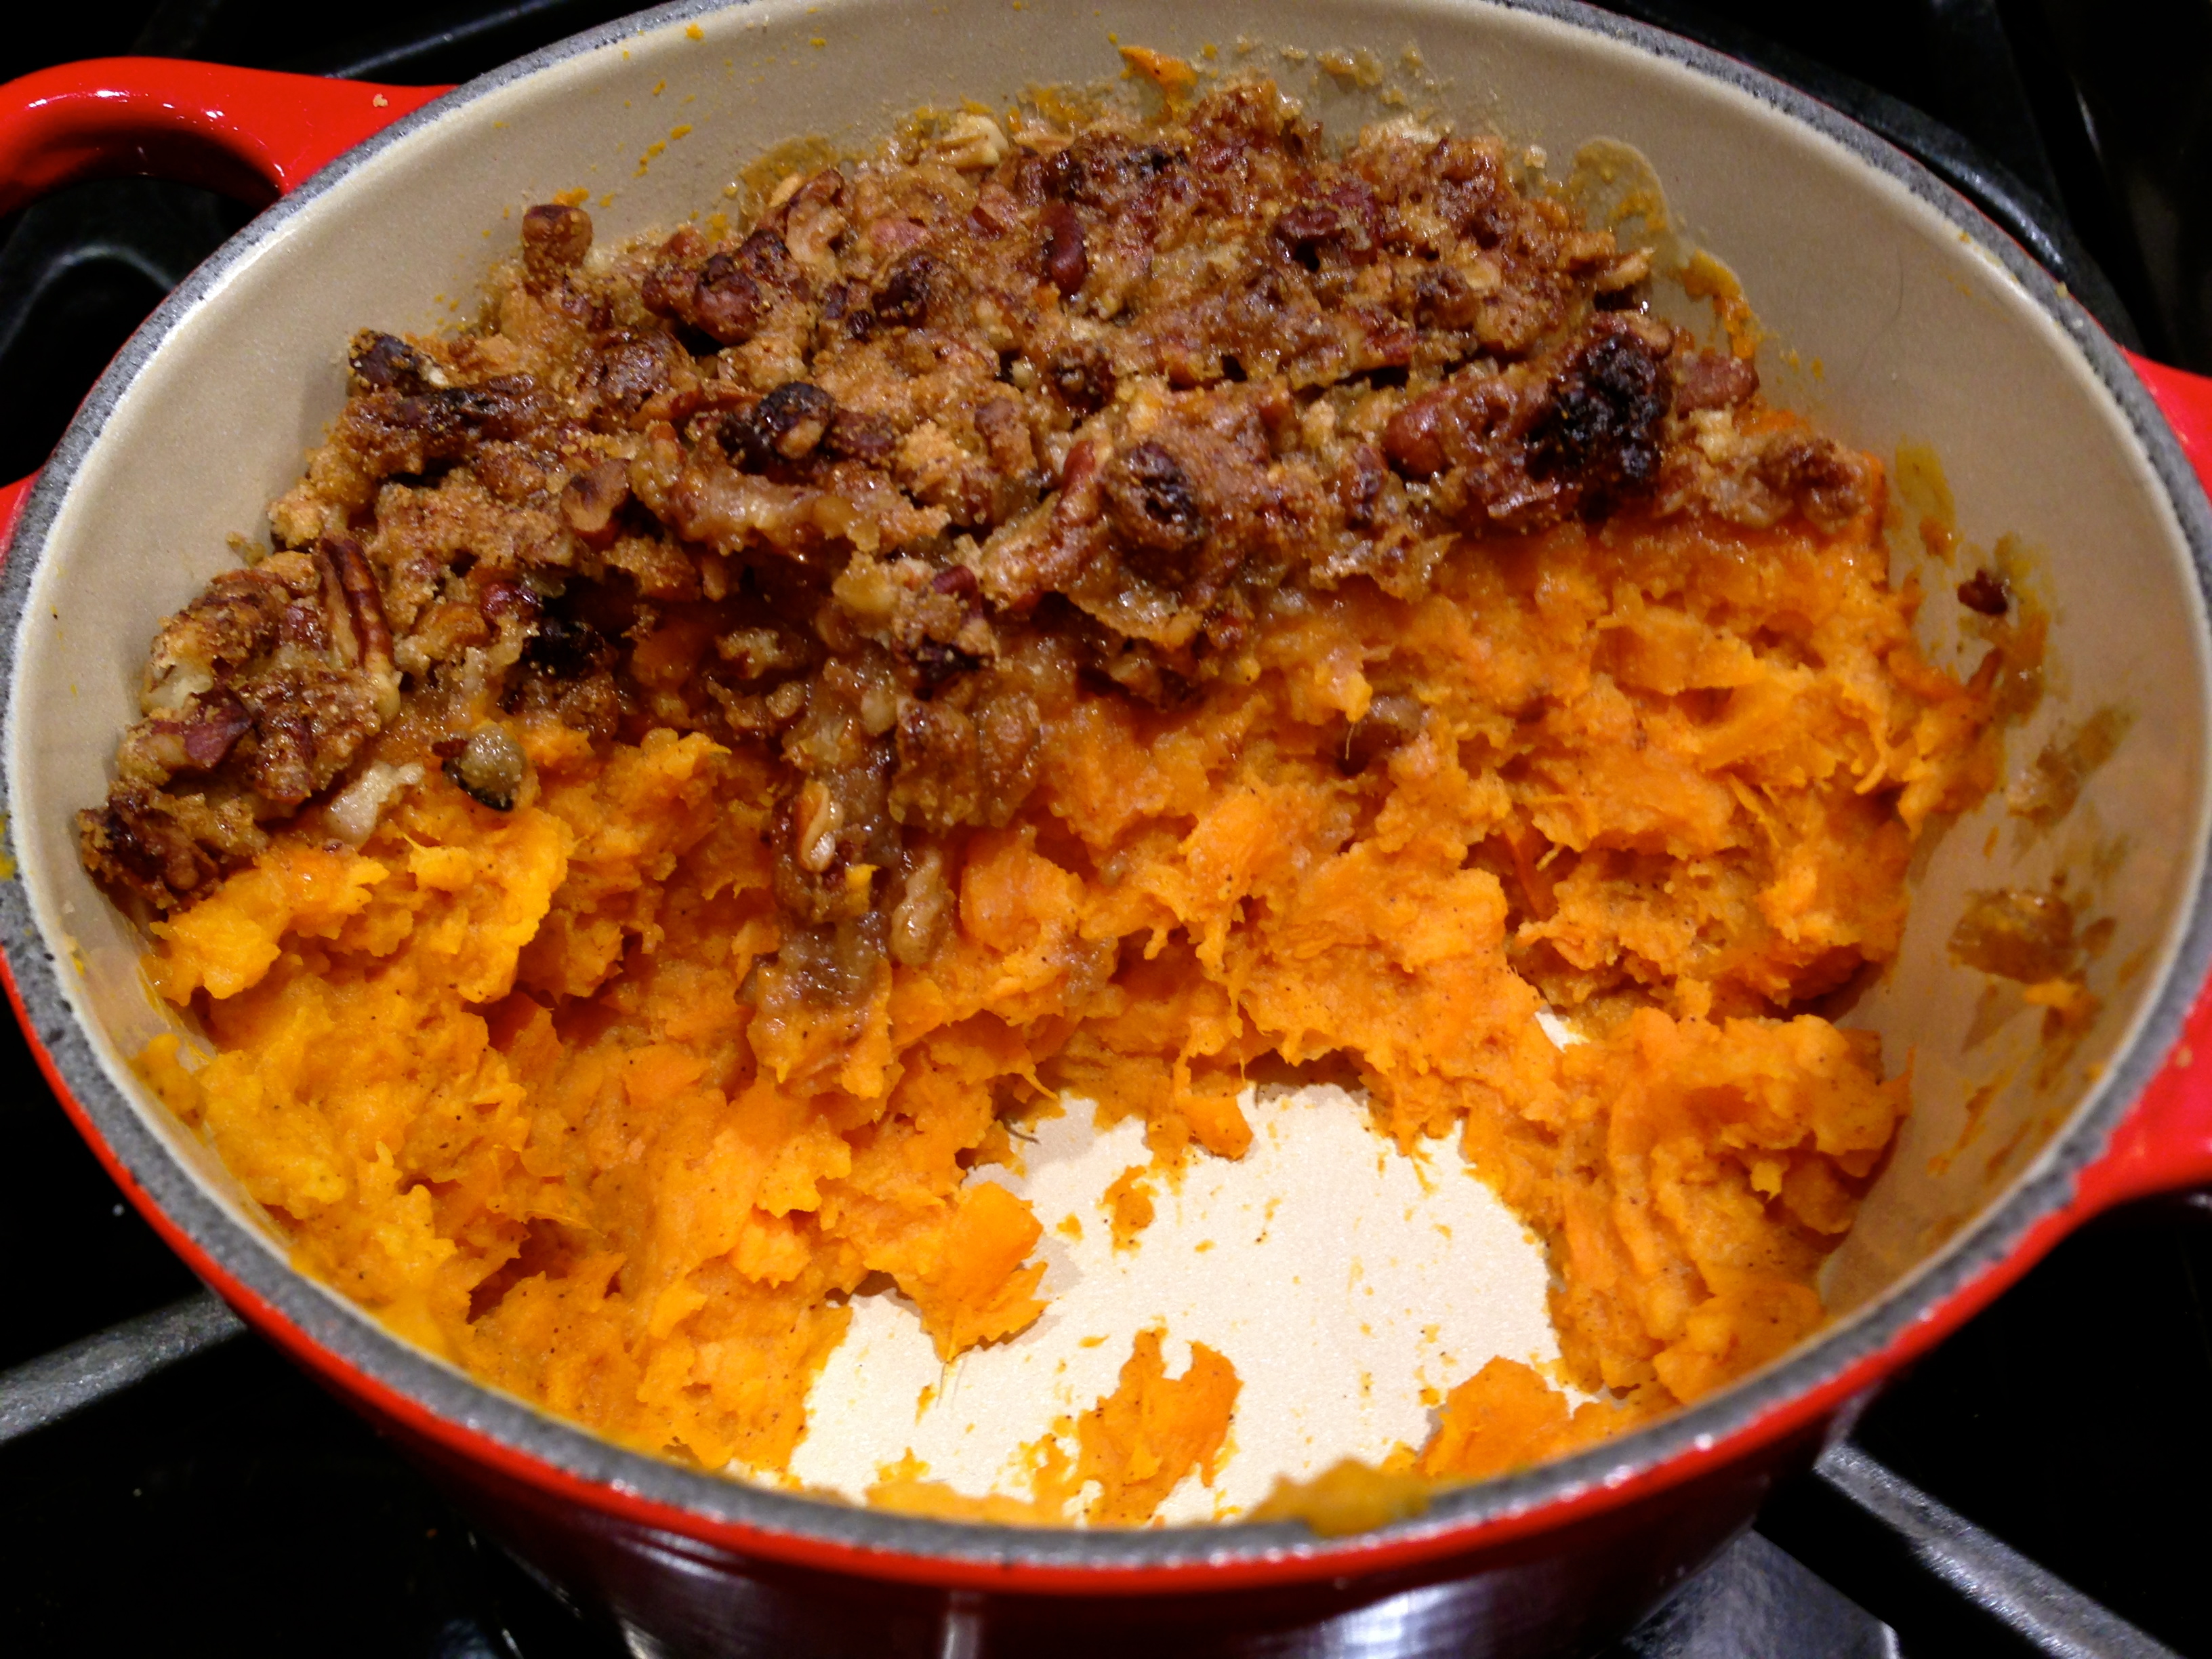
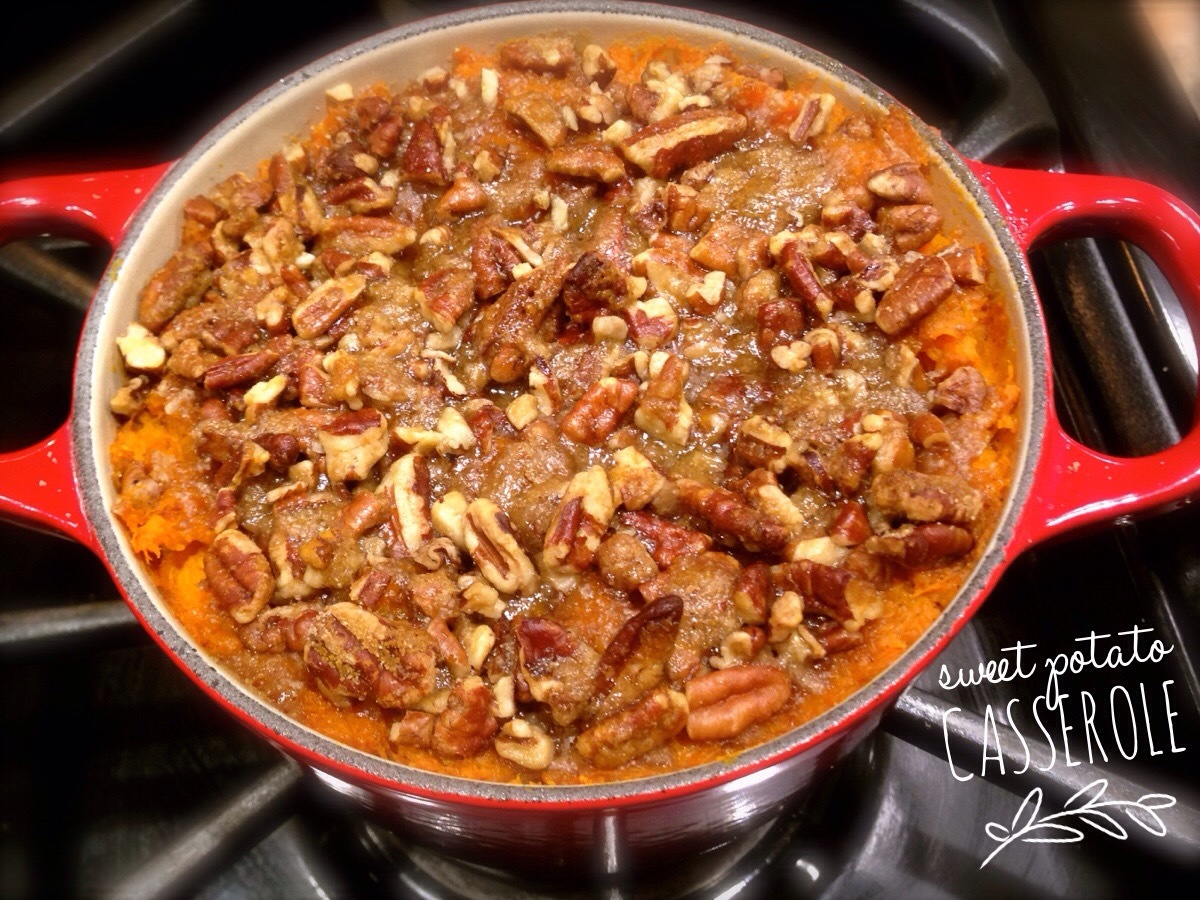
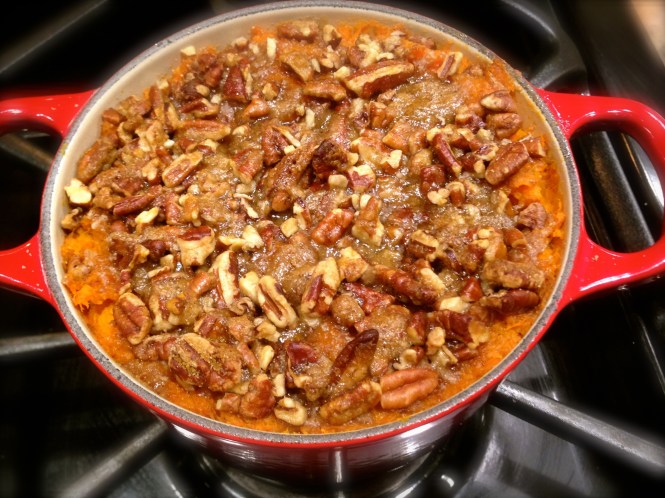
And what are the holidays without sweet potatoes. Personally I’m not a big fan of sweet potato recipes that include a marshmallow topping so you won’t see that here. This particular version has a great combination of flavors, from orange juice, to cinnamon, to maple syrup – you just can’t beat this one. I make this often during the year. Try it, I’m sure you’ll love it!

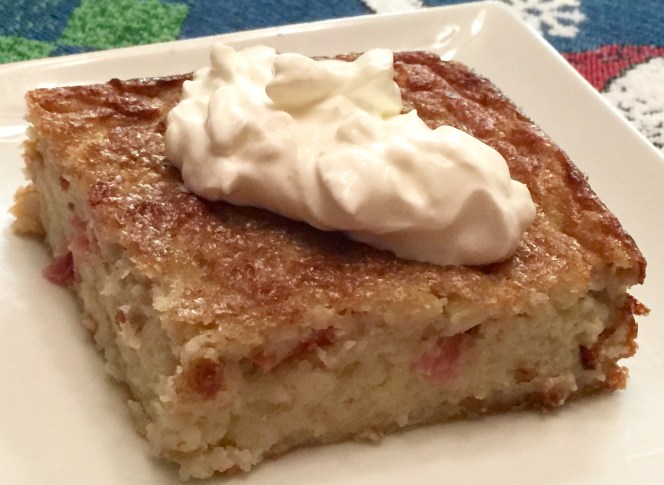
My last side is an ethnic side. My ancestors came from Lithuania and this recipe was a staple at all of our holiday meals. I remember when I first posted this recipe, I didn’t think it would generate much interest. Surprisingly it continues to be one of the more popular recipes on my blog. Keep in mind that this recipe is not very heart healthy. Years ago people were only concerned about making food that was cheap and filling and this certainly fits the bill. But every once in a while you can let go and enjoy a dish like this. So enjoy my grandmother’s Lithuanian Kugelis recipe (or potato pudding as some people now call it). If there is a food that can conjure up beautiful holiday memories, this is the one for me!

VEGETABLES

This is one of the most popular vegetable recipes on my blog. It uses a variety of veggies and roasts them in the oven with some olive oil. Couldn’t be simpler, it’s delicious and provides an array of festive colors for your holiday table.

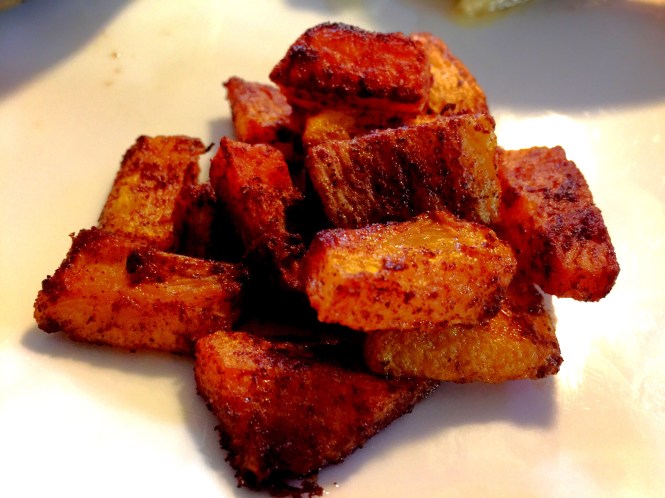
I’m a big fan of butternut squash. To me there’s nothing better than roasted butternut squash. And when you pair it with a little cinnamon, it’s to die for. Butternut squash is a great accompaniment to almost anything you could possibly serve for your holiday dinner. This recipe is full proof and will probably become one you use all year long

DESSERTS

It’s hard to believe that after a holiday meal there is still room for dessert, but no holiday meal would be complete without one, or two, or… So I am including a few of my favorite desserts that are not only delicious but look like they belong on a holiday table.

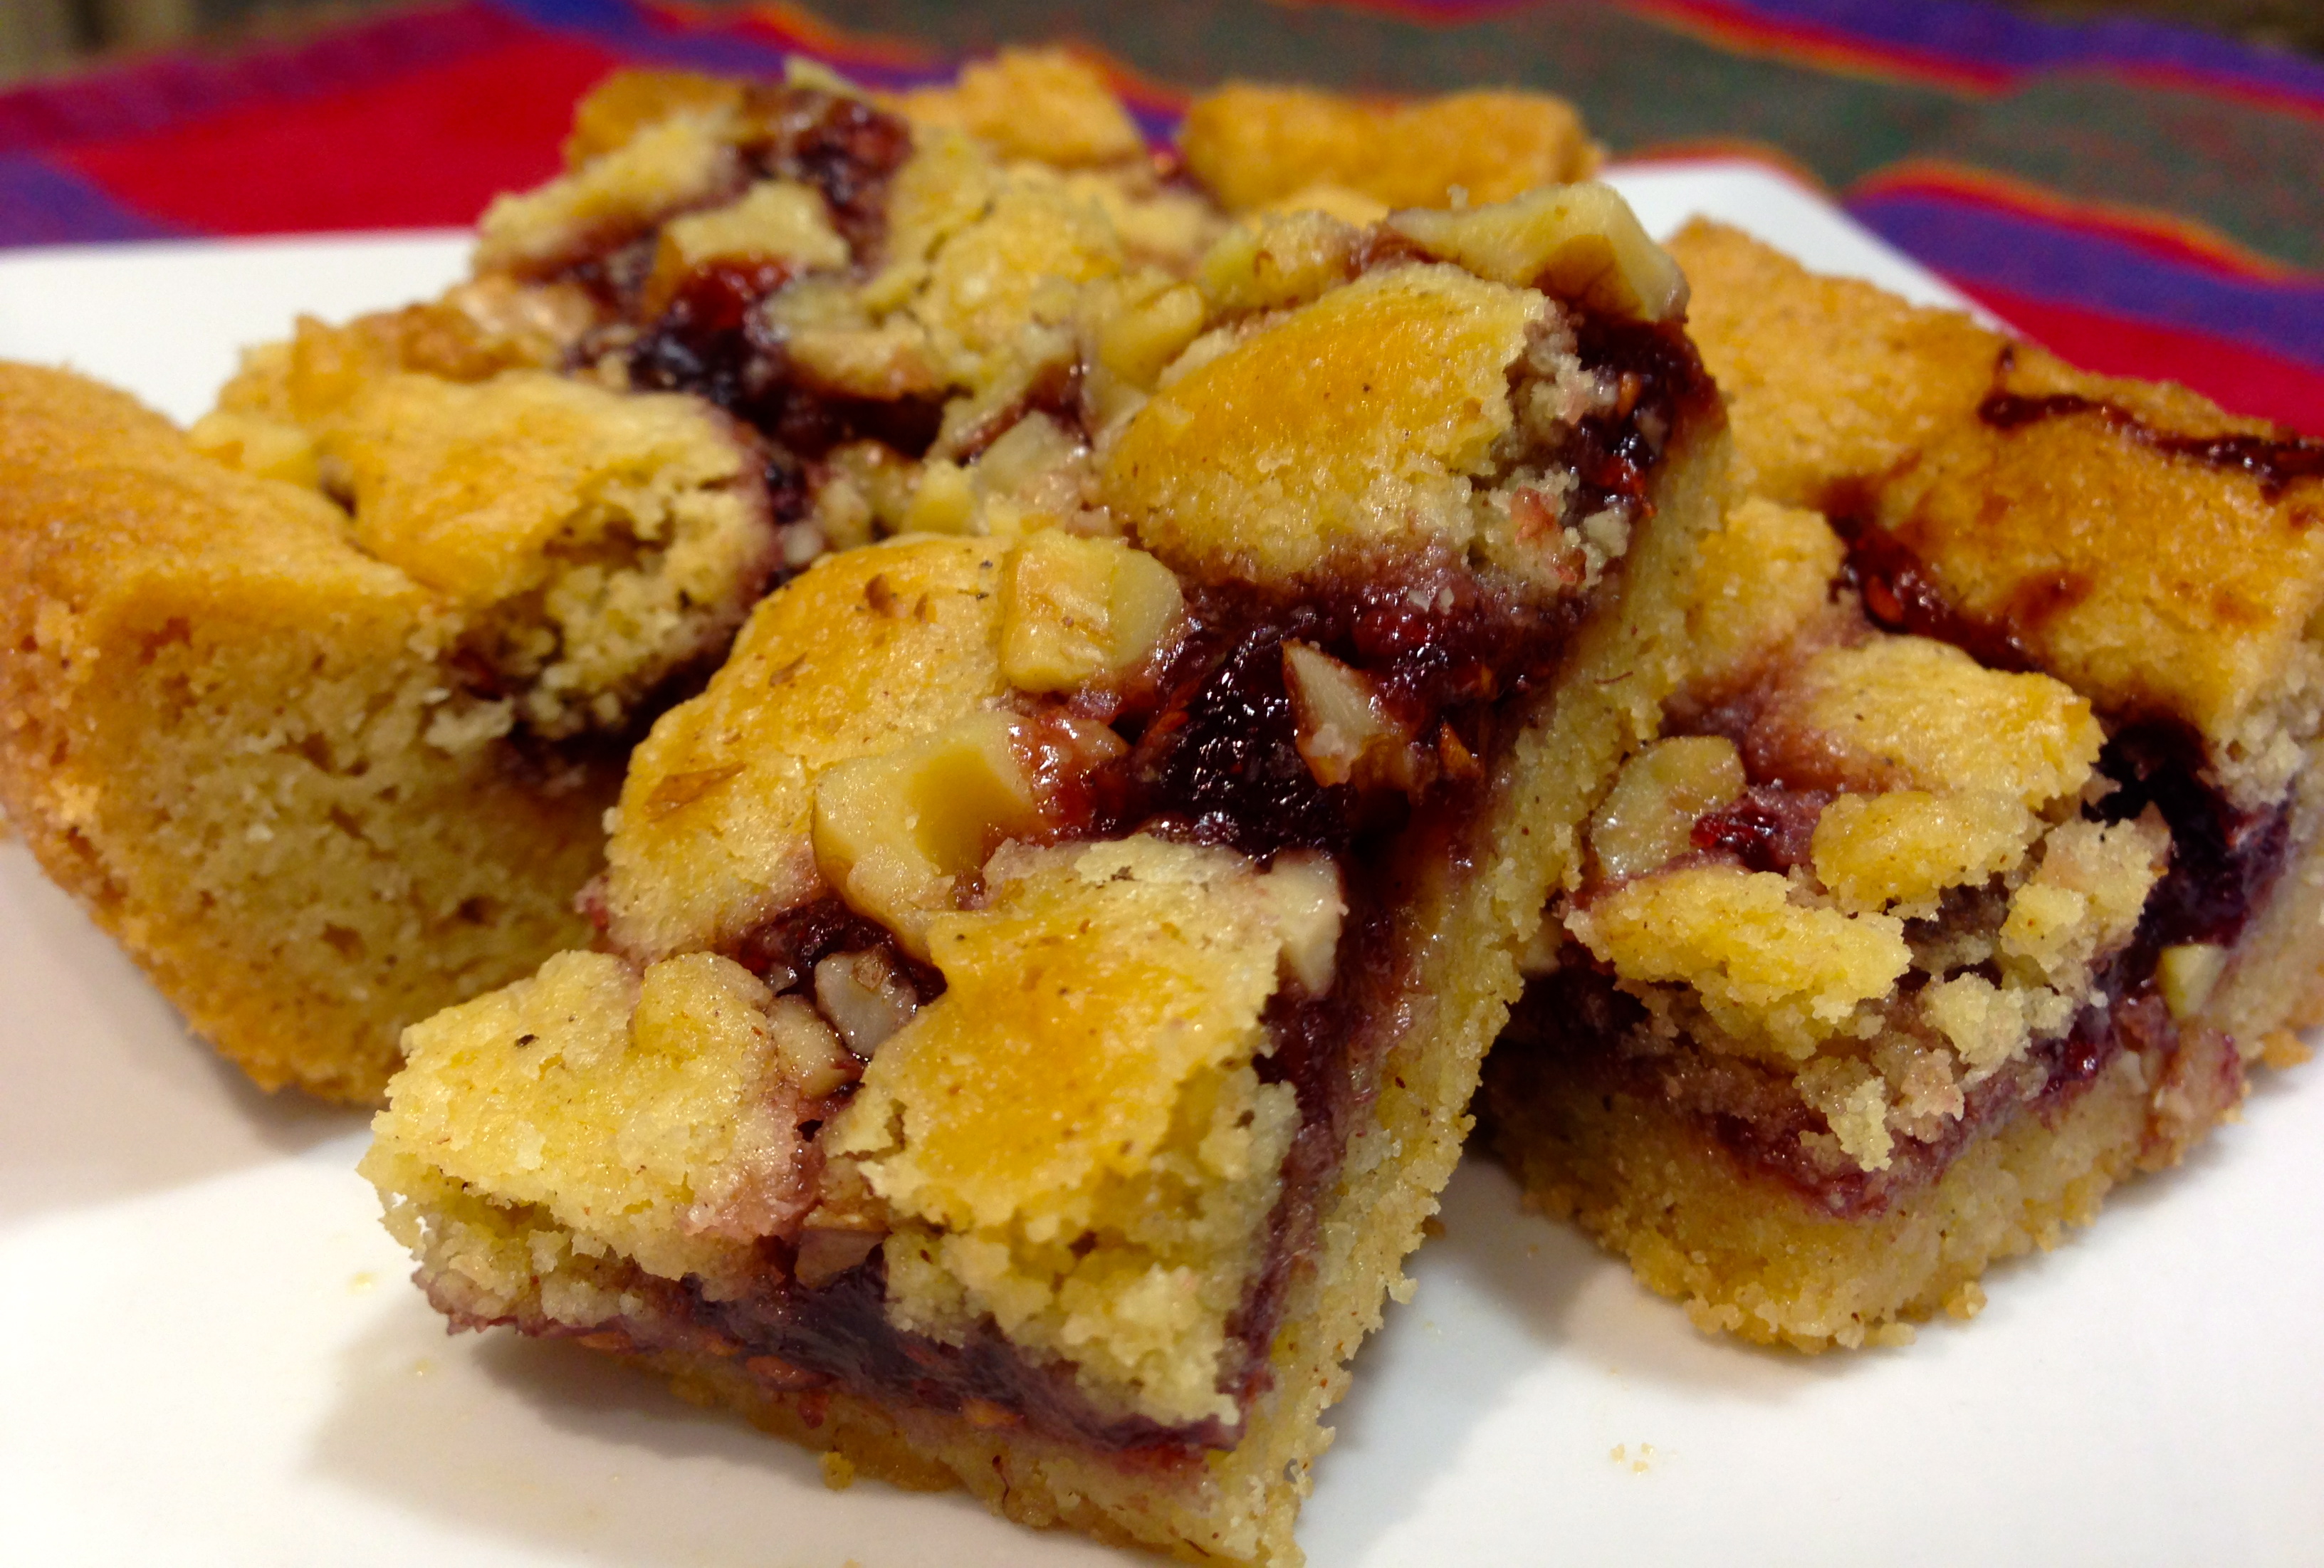
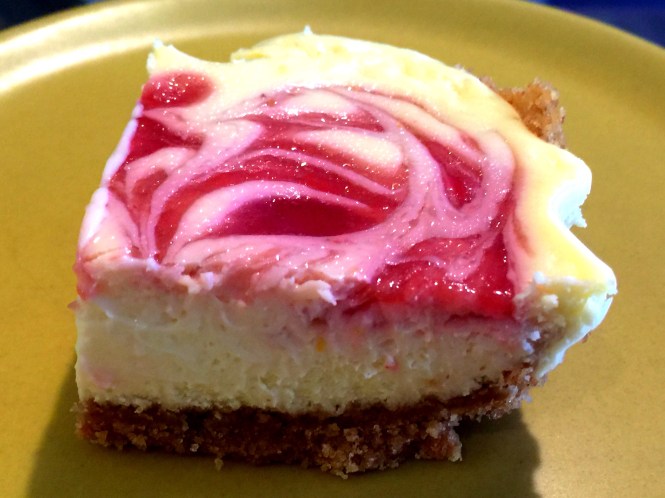
First are my lemon raspberry cheesecake bars. This happens to be one of my husband’s favorites. It is easy to make, delicious and it’s decorative raspberry swirls scream the holidays. Because it is light and airy, this is a great dessert to serve after a robust holiday meal.

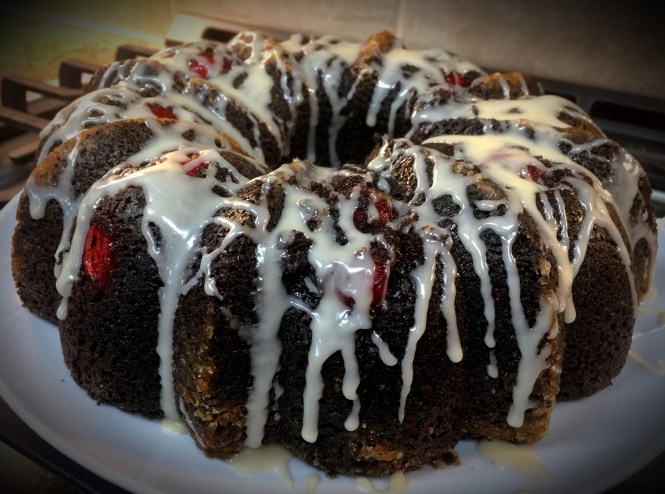
My chocolate cherry cream cheese cake is a great addition to any holiday dessert table. Not only does it combine the delectable flavors of rich chocolate, cream cheese and cherries but it boasts of holiday colors and looks unbelievable. It does require a few steps to get that special dotted cherry look, but believe me this cake is worth the effort.

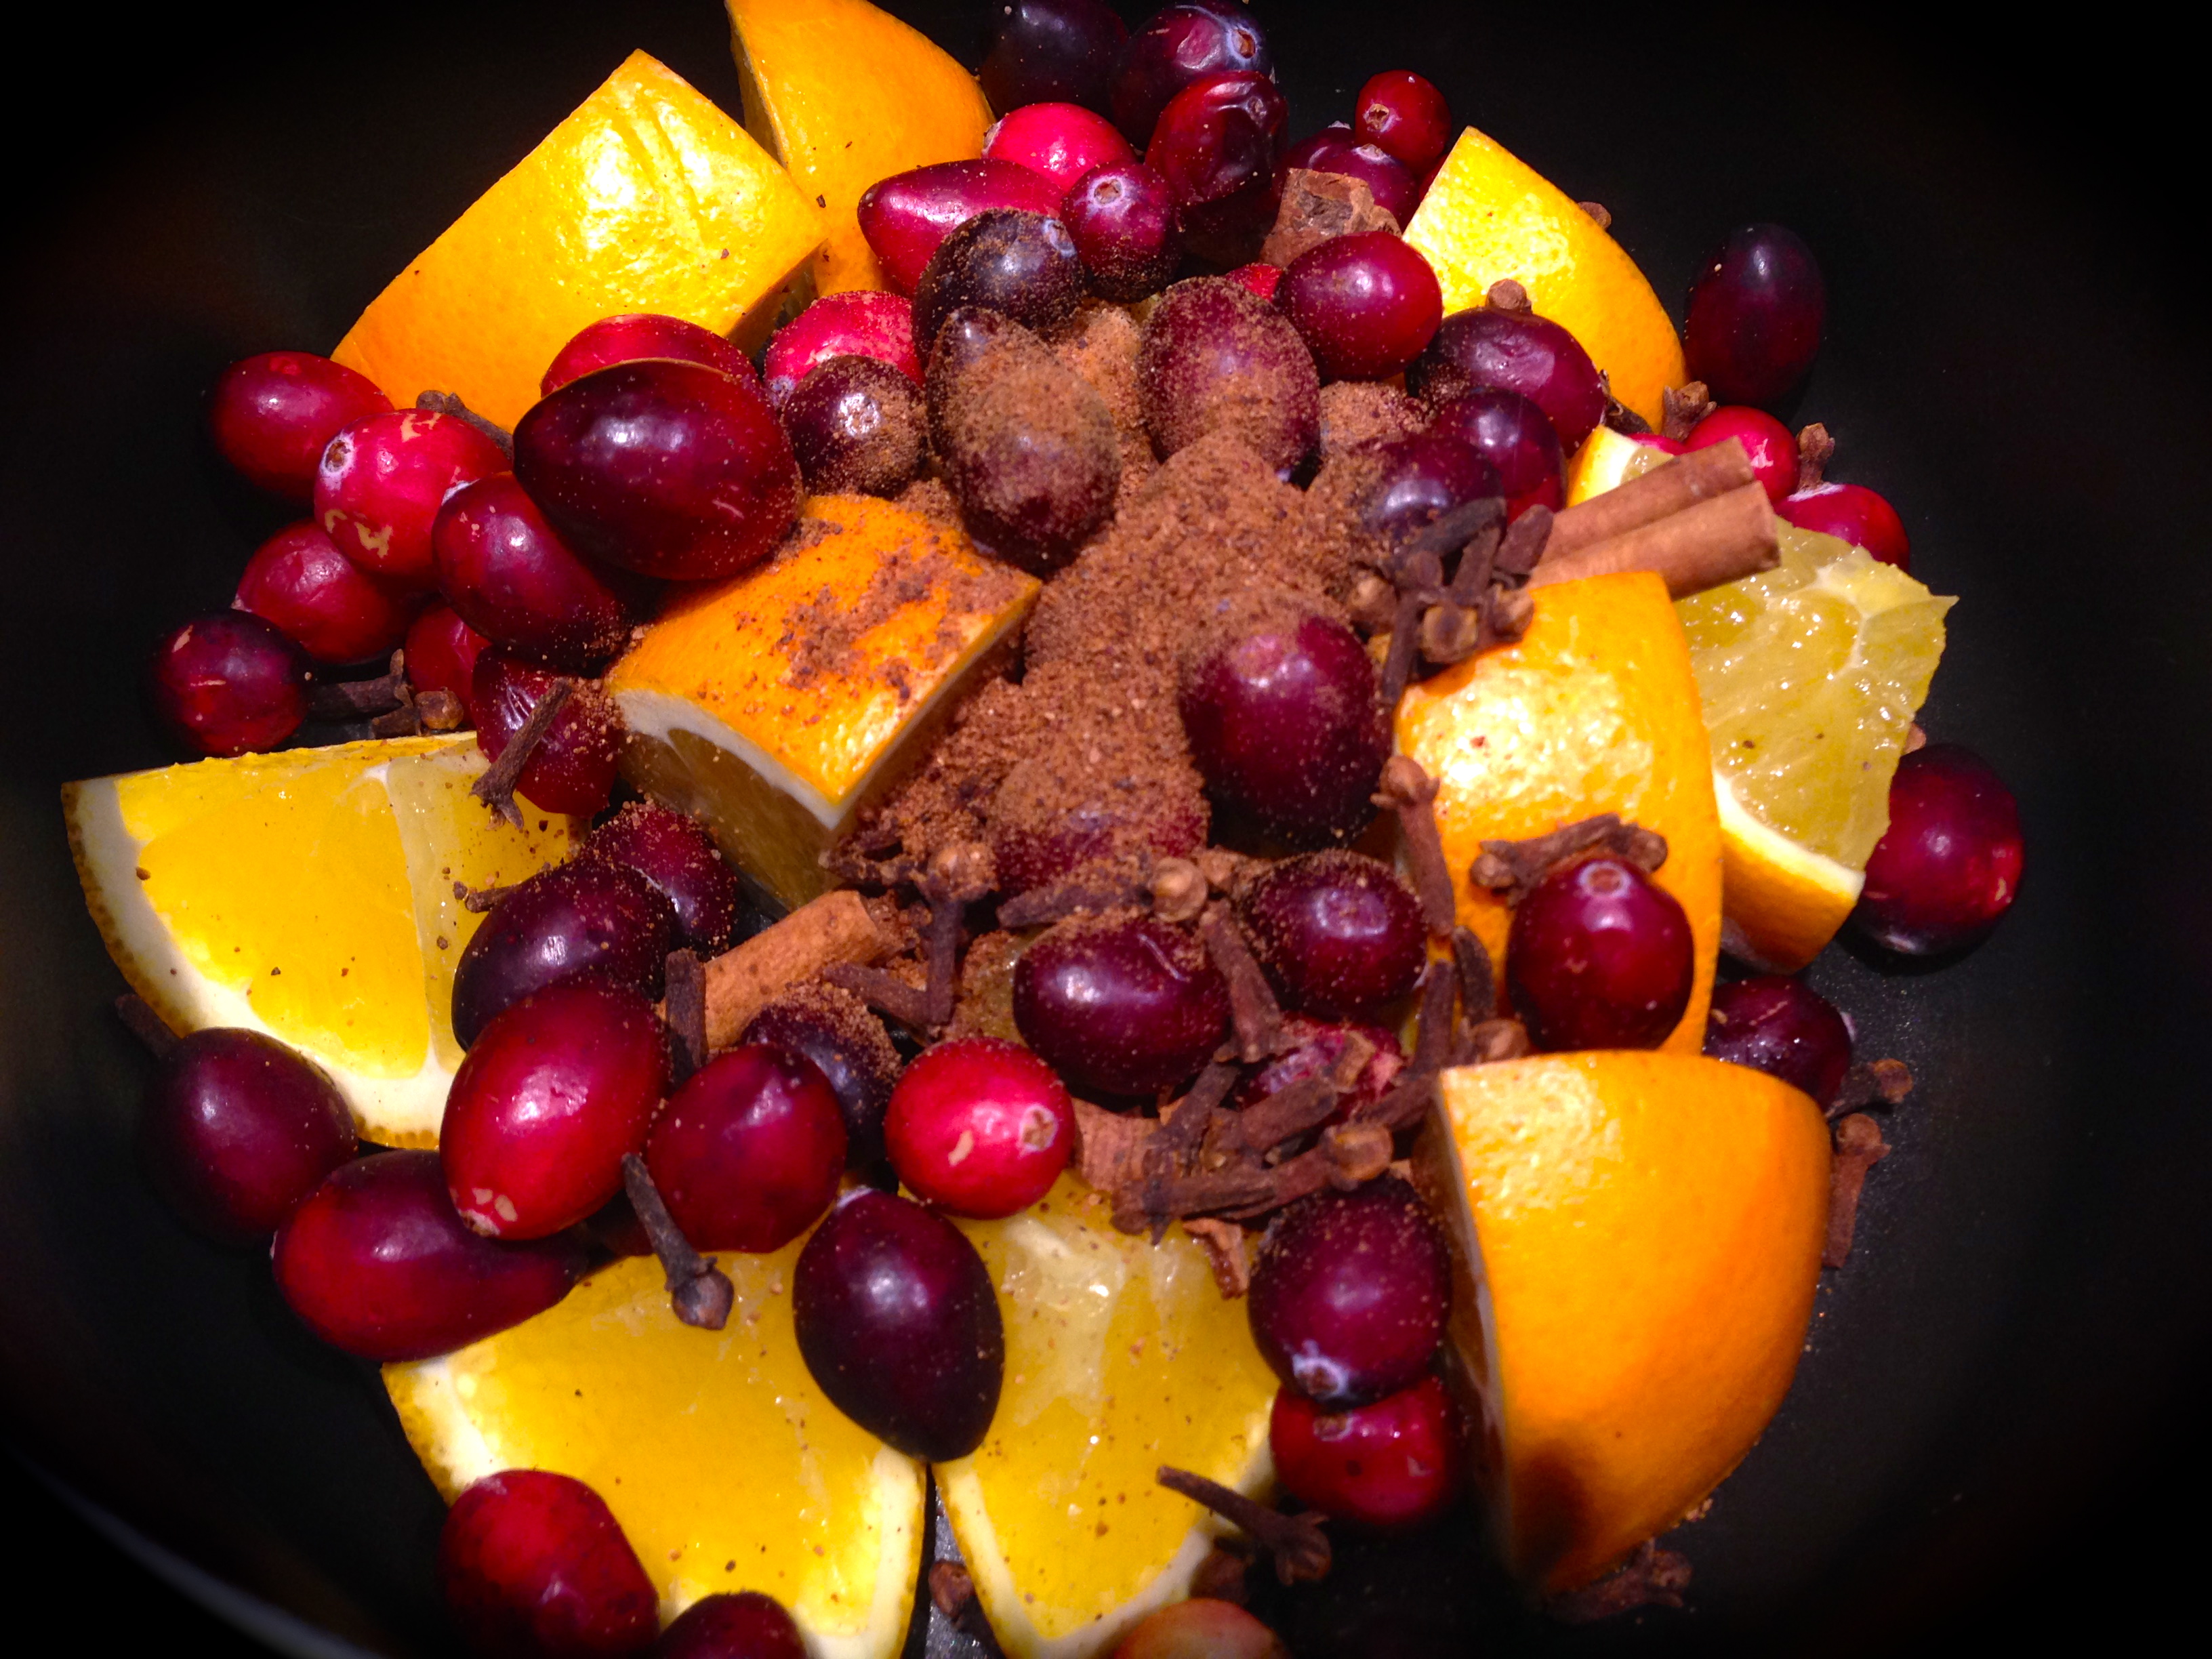
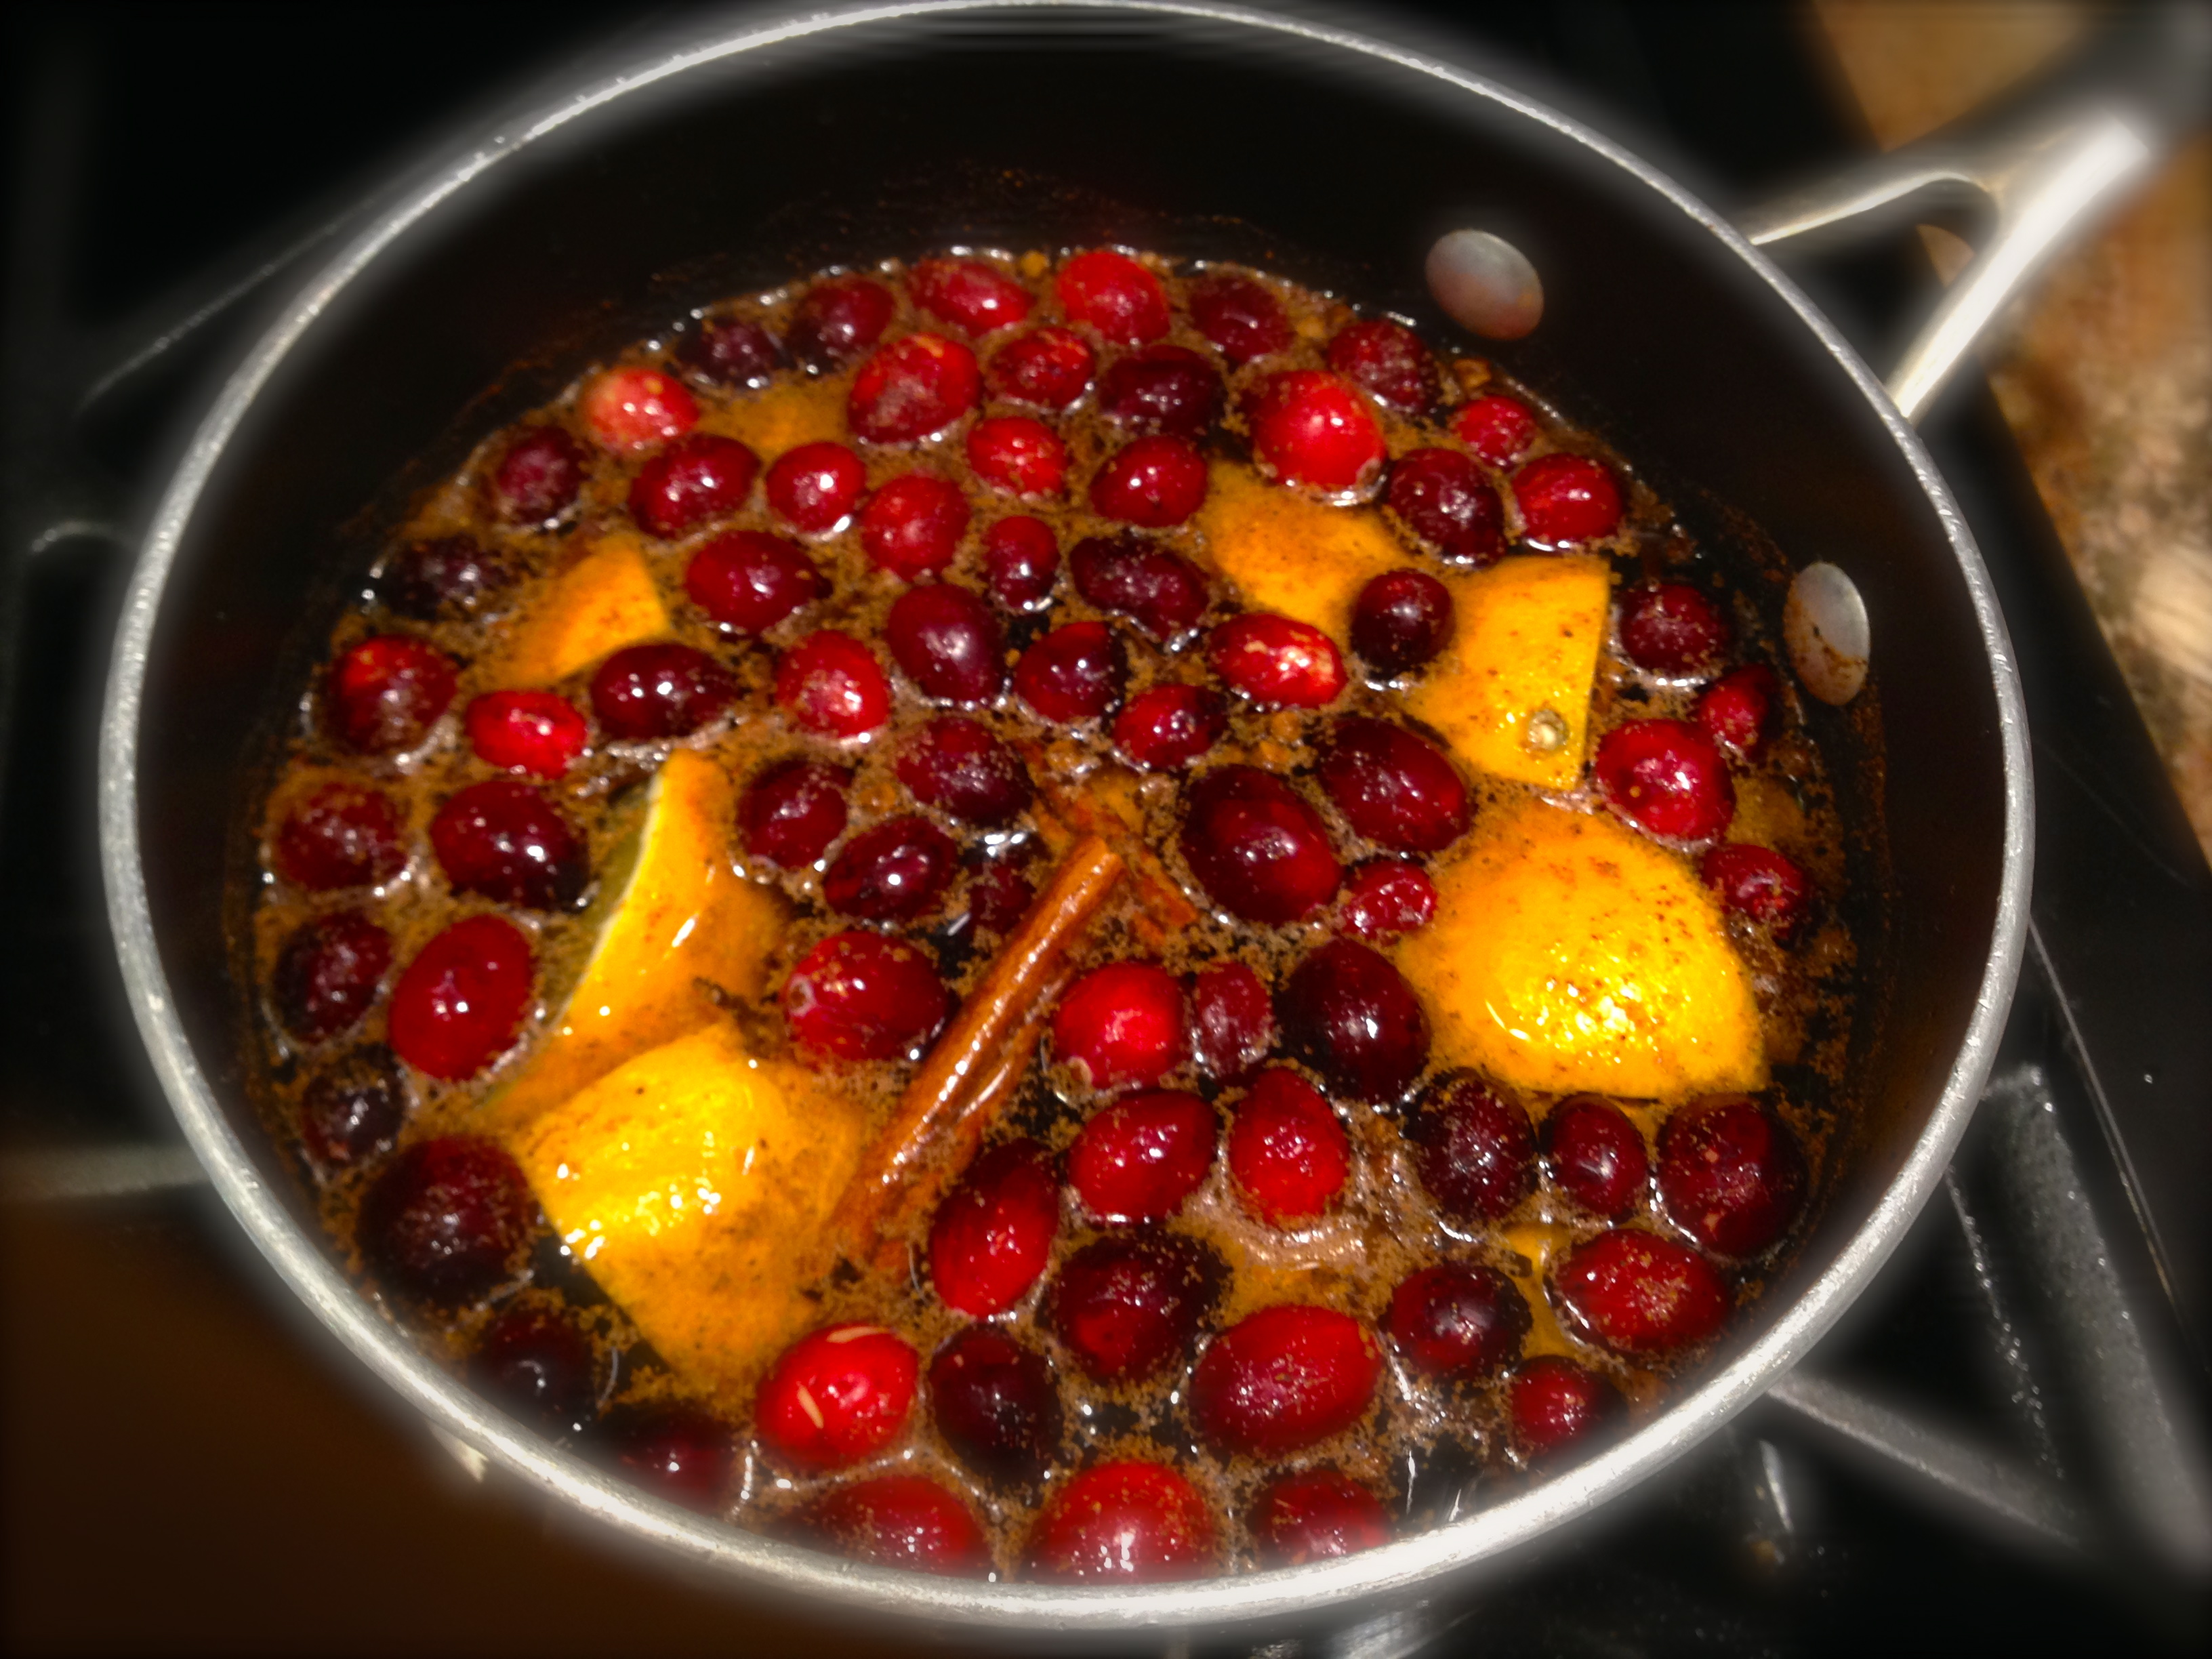
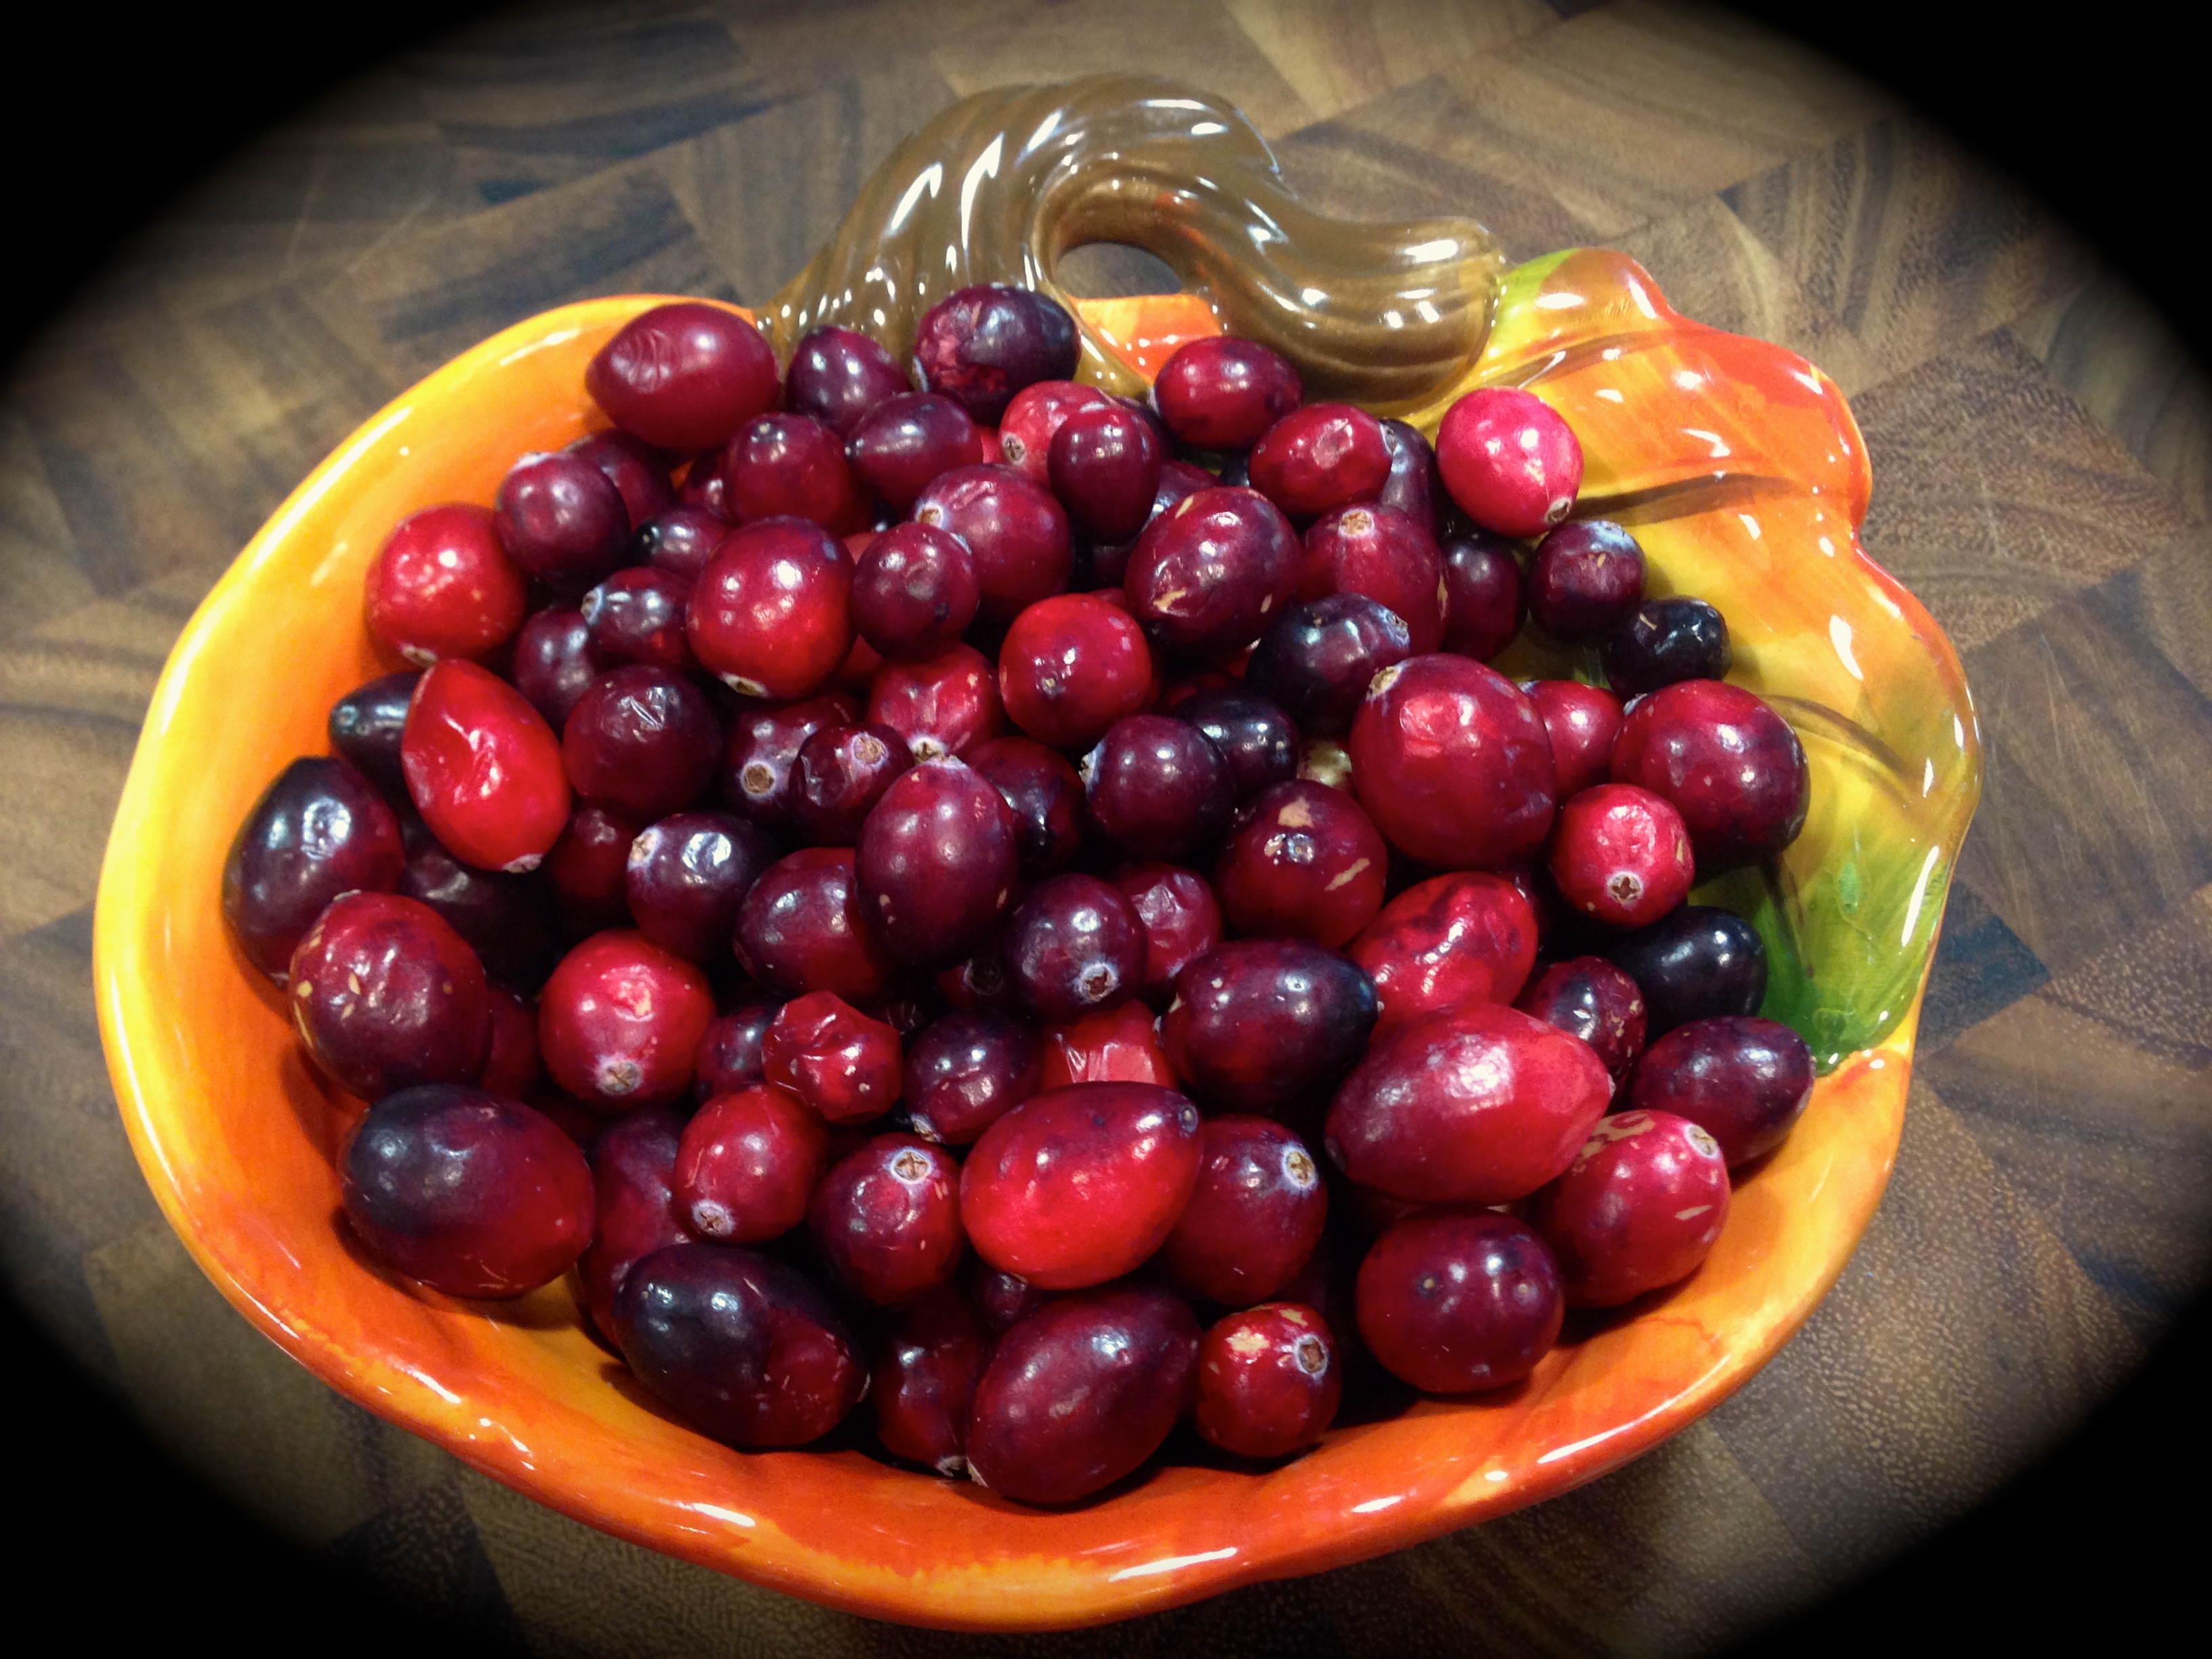
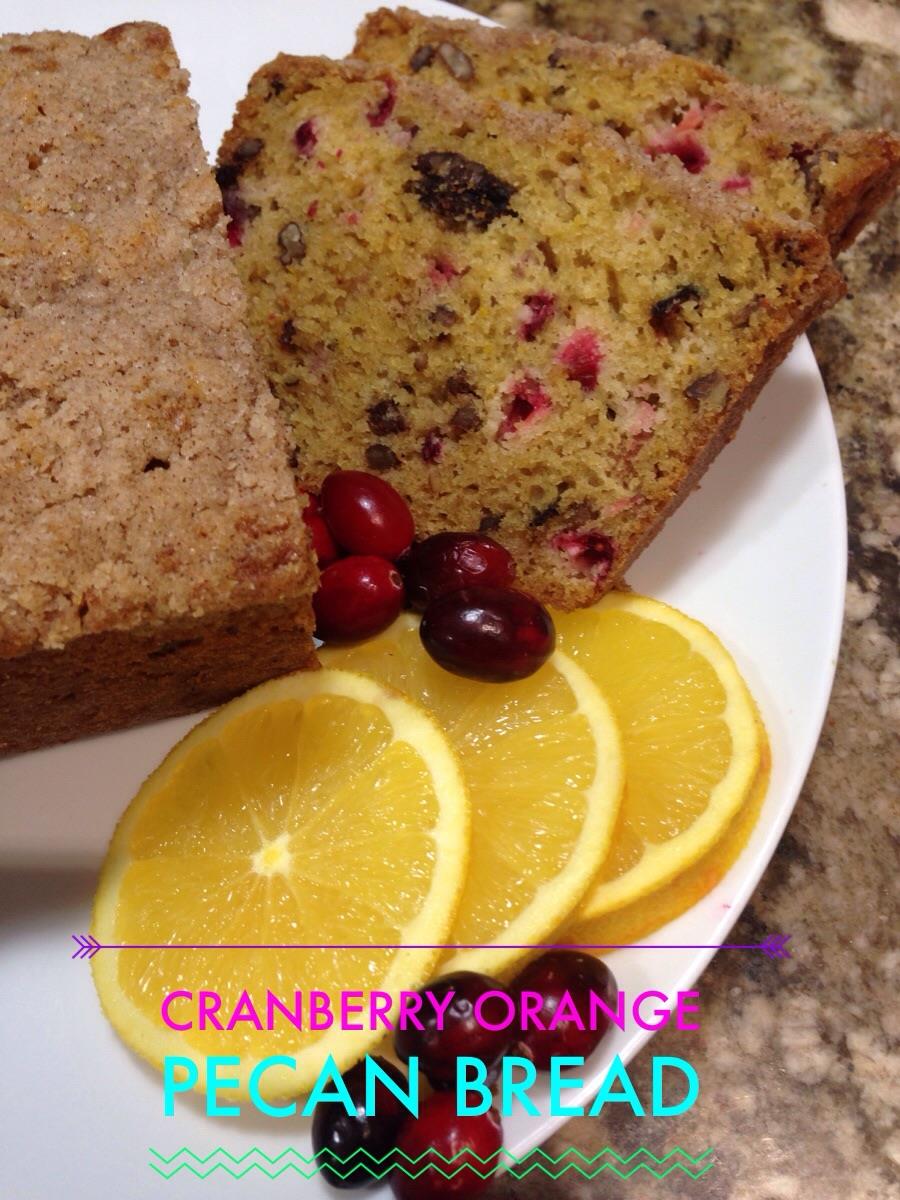
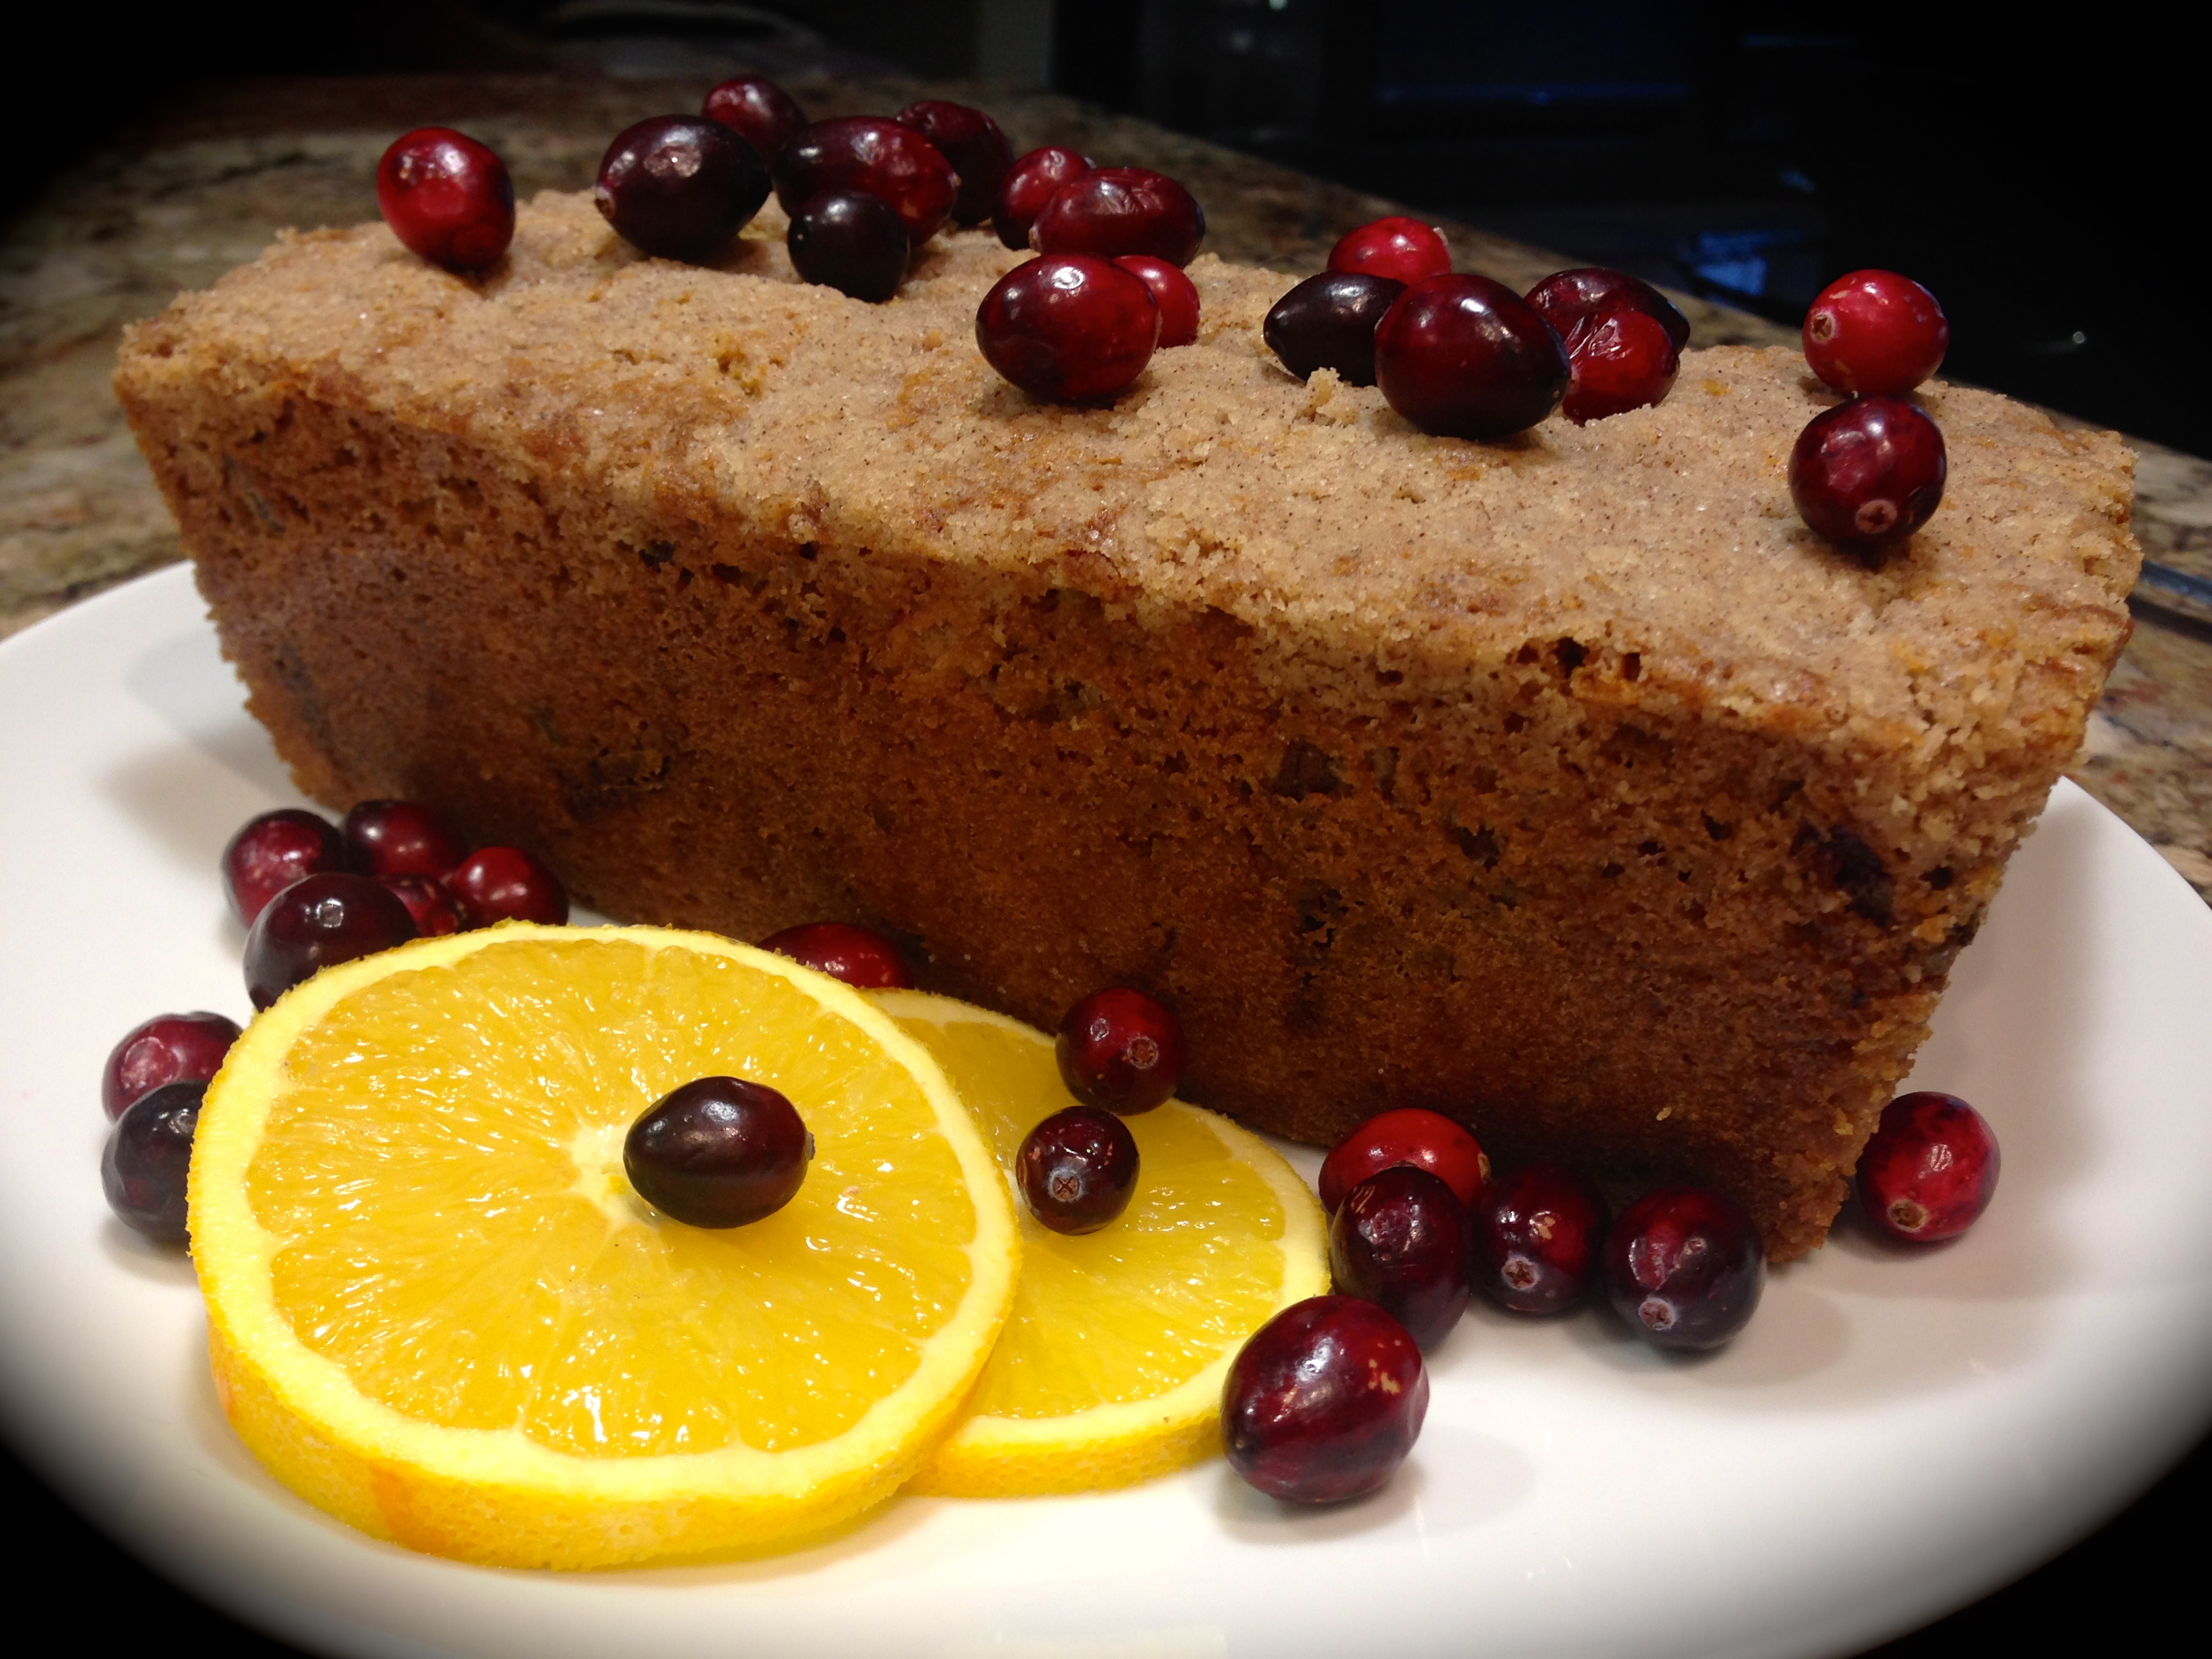
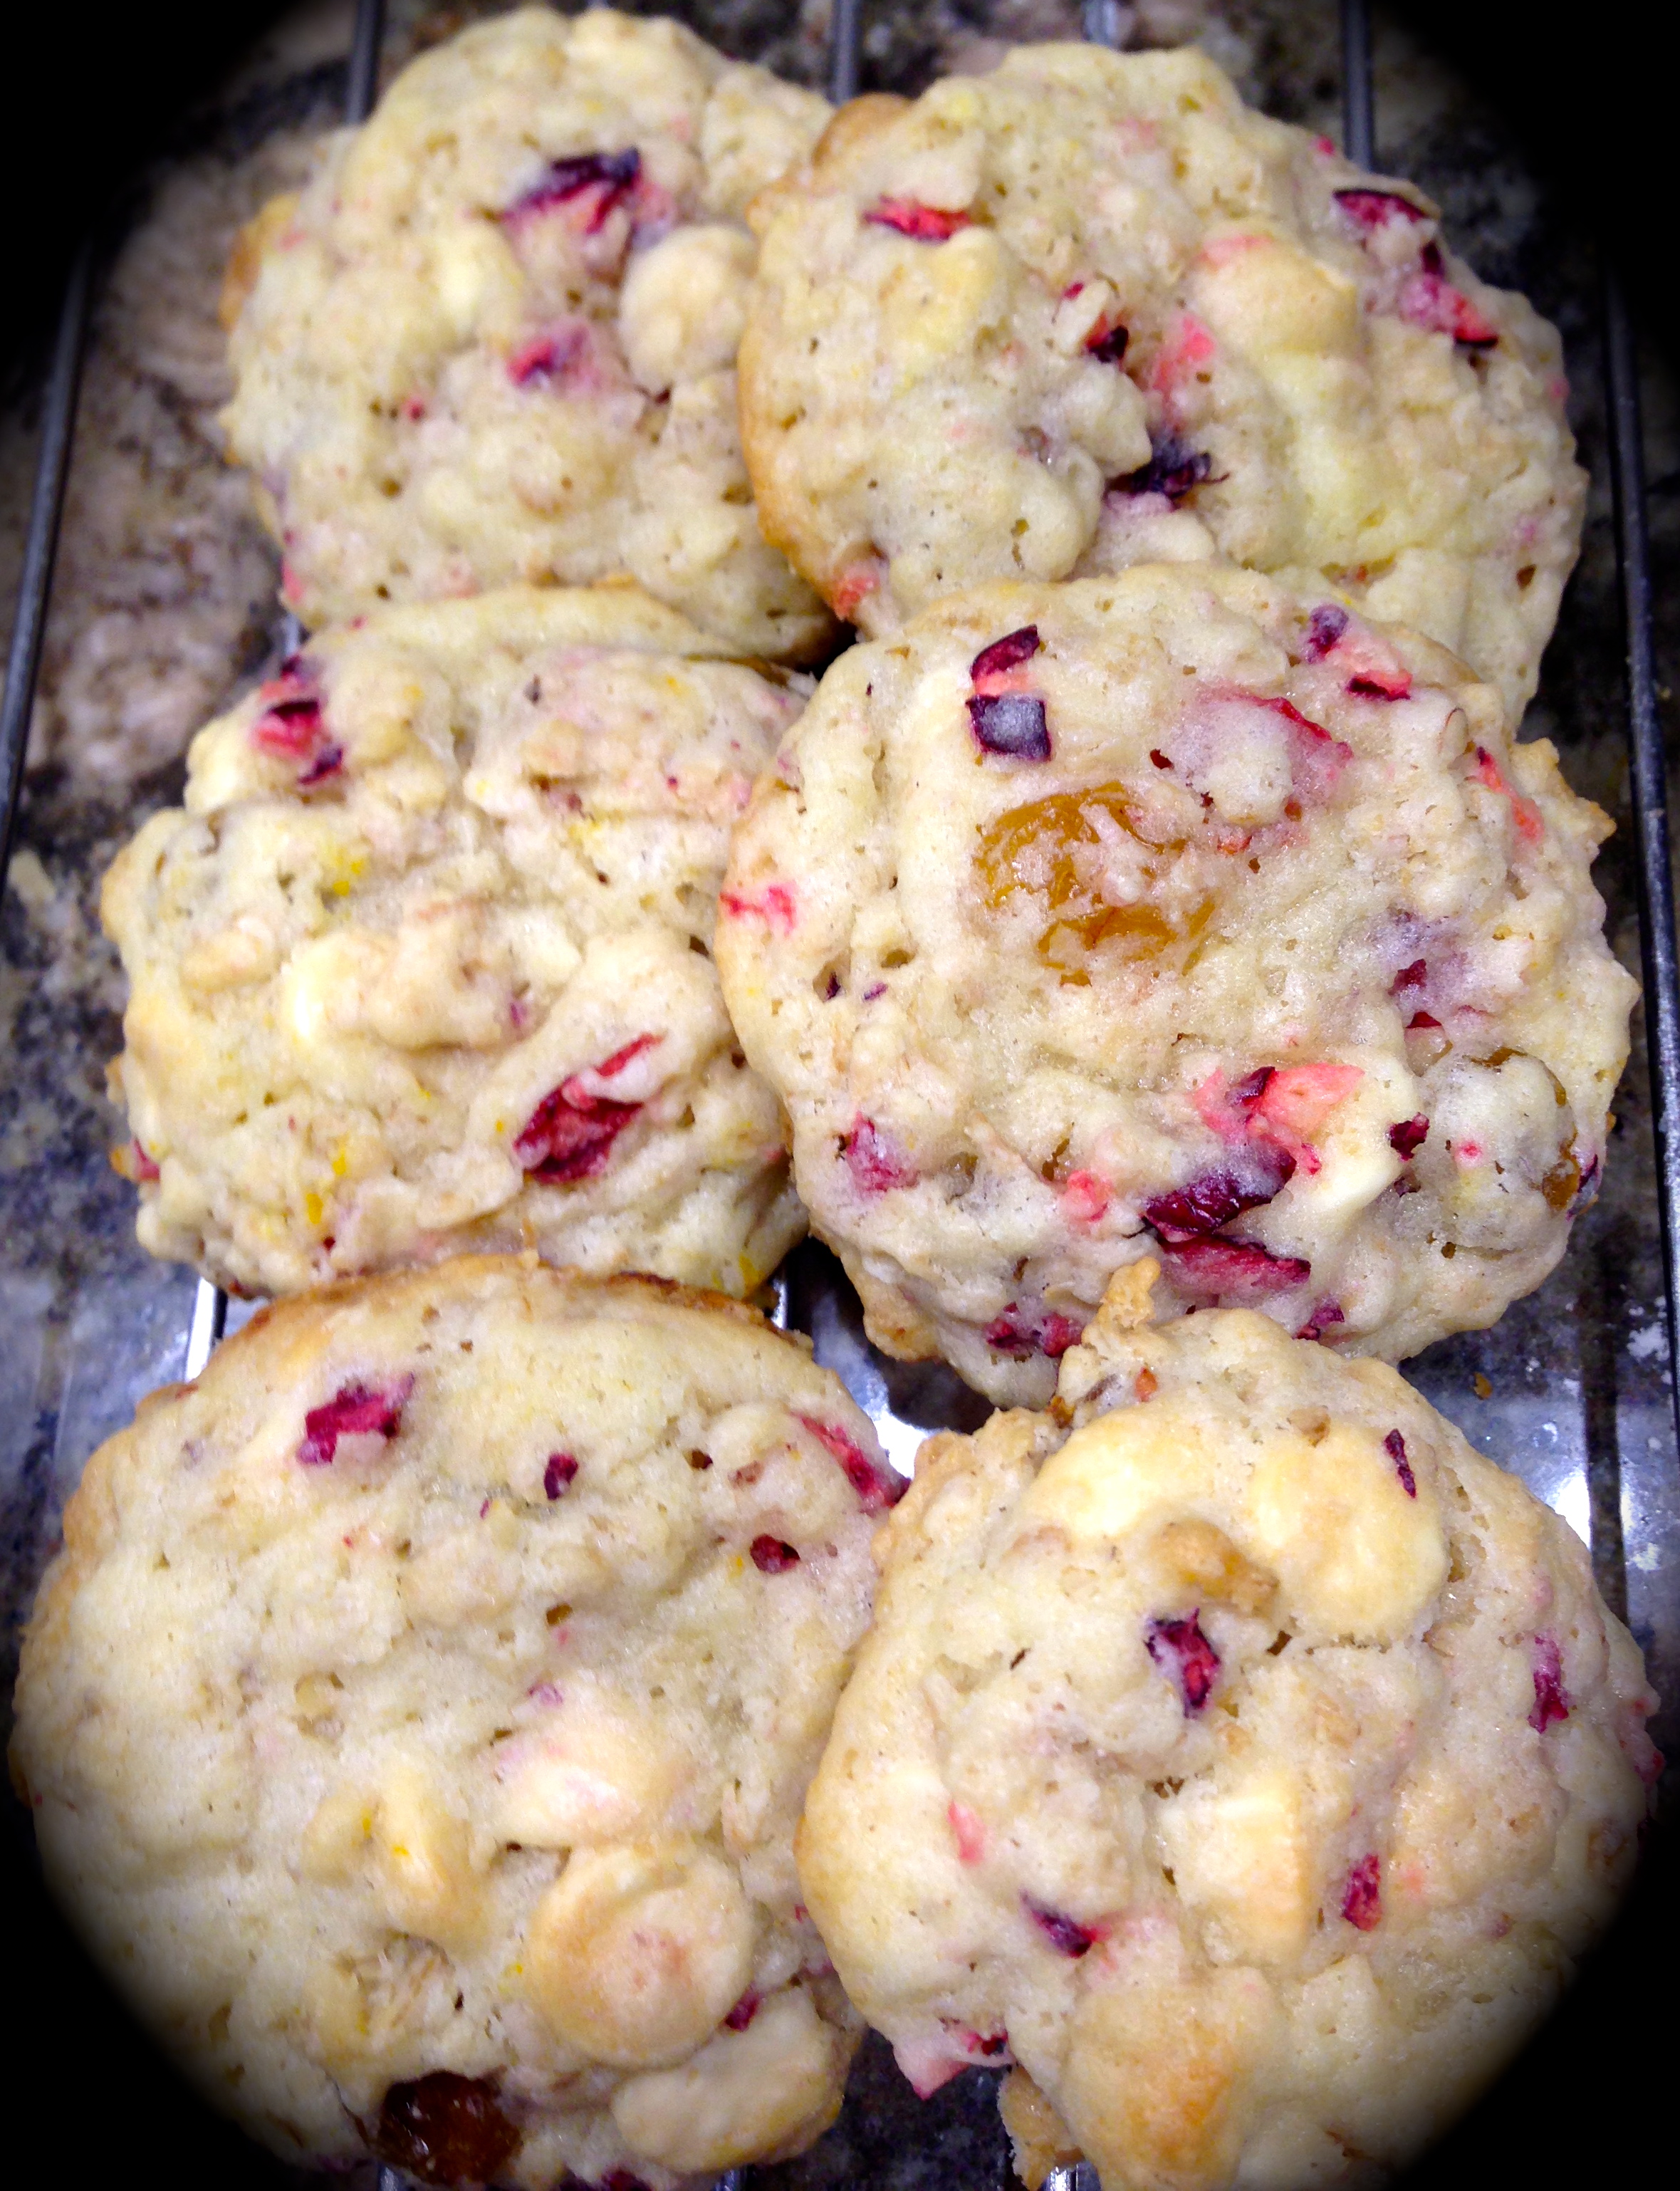
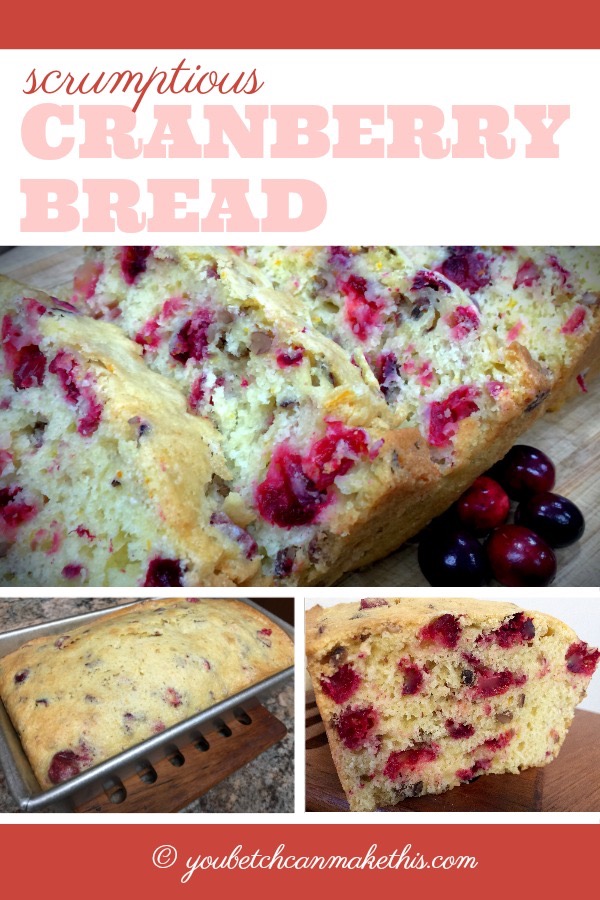
I make cranberry bread every year when fresh cranberries hit the grocery store. And for several years I’ve played around with this recipe until now that I feel I finally perfected it. There’s nothing that says the holidays like cranberries, and this sweet bread is a nice finish to a holiday meal.

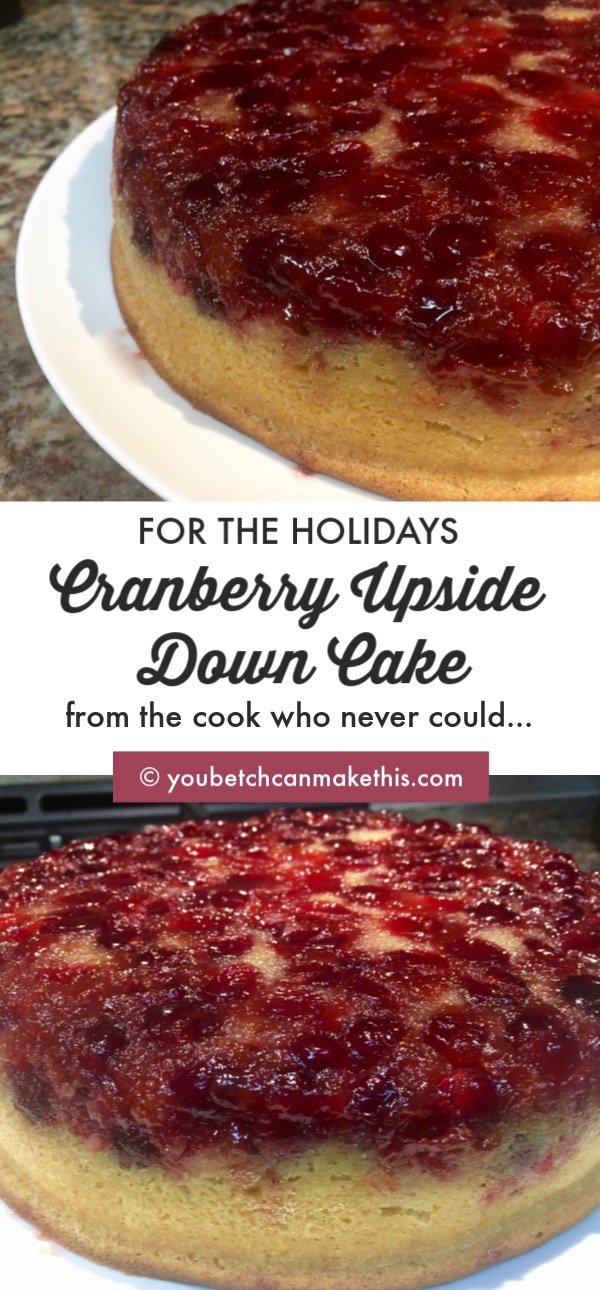
Last but certainly not least is my cranberry upside down cake. I made it for the first time this year and fell in love with it. Color me crazy, but the joy of baking this and then turning it over to see the gorgeous display of cranberries on top is a joy second to none. It looks so festive and is easy to make. This was my first try at making it and look how gorgeous it is. If you make any of my suggested desserts, I would recommend this one. It was fun to make and fun to eat!

And that’s it, my 2018 holiday recipe compilation. I hope you find this one-stop-shop of recipe links helpful as you make your final preparations for the holidays.

I will be taking a two week hiatus from posting to enjoy the holidays as well. I wish you a very Merry Christmas and I’ll touch base right before the New Year.  Here’s looking forward to what we can accomplish in the kitchen in 2019!


Best Ever Shrimp Dip (No Lie)…

I know, there are so many shrimp dip recipes out there and to me they all seem to taste the same. Well I’ve officially broken that mold. True, in order to achieve star status for this dip you have to do a little more work but it’s not that hard and it’s so worth it!

What’s the key? Well the combination of flavors for sure creates this great shrimp dip. But one of main differences I think is I prepared the shrimp from scratch. It all started with having most of a 16 ounce bag of uncooked jumbo shrimp in the freezer that I wanted to use. So instead of buying cooked shrimp or using mini cocktail shrimp (I found a lot of dip recipes call for them) I prepared the shrimp by hand.

In my mind that was the key. It gave the shrimp so much more flavor and the texture was much more robust. You could tell and taste that there was shrimp in the dip. Don’t get me wrong, the ingredients in total played a significant role in the dip’s flavor, but preparing and cooking the shrimp by hand was, for me, the key.

So let’s talk the best ever shrimp dip…

Lesson Learned 1 – This is MAJOR – prepare the shrimp from scratch: Don’t use precooked shrimp. Now of course if you have precooked shrimp on hand you can use it. But the flavor is so much more intense when you cook the shrimp and rough chop it yourself. I used frozen uncooked jumbo shrimp. The shrimp was already de-veined but there were still a few remnants of shell on the flesh. Once the shrimp was defrosted I removed the shells, cut off the small tails and cooked them before chopping them up. I seasoned the shrimp with Old Bay seasoning and garlic infused olive oil.

Shrimp Dip Ingredients

The result was flavorful, meaty chunks of shrimp in the dip. That combined with the other seasonings set the dip over the top. And once you let the dip sit (I made mine the day before) the flavors become more fully developed and the dip is out of this world. I remember tasting it the next day and then going back for a couple more spoonfuls because it was so delicious.

Lesson Learned 2 – Shrimp cooks really fast: Once I put the shrimp in the pan I cooked them on medium high heat for 2 minutes on one side and about 2 minutes on the second side. Now remember I was using jumbo shrimp. If you use smaller shrimp the cook time may be a little less.

When the shrimp is cooked it will be loosely curled. If the shrimp is tightly curled you’ve overcooked it and it will be tough. Shrimp is like calamari – it gets tough when you overcook it. So don’t let it worry you if you think the cooking time is short. If the shrimp has a nice light coral color and is loosely curled you’ve cooked it perfectly.

Lesson Learned 3 – This recipe tastes the best when it’s made the day before: When I made this dip I tasted it right after I made it and it was good. But when I tasted it the next day I thought the flavor was over the top. I actually saved some of this dip and made a sandwich out of it, it was that good. And it disappeared quickly at the gathering where I served it. So do yourself a favor – let this one sit for a day. You won’t regret it!

Lesson Learned 4 – Another key factor in the flavor is pimento cheese: If you’ve never had pimento cheese you’ll see it has a slight kick to it. That combined with the horseradish gives the dip some zip. The zip is ever so slight so don’t worry about people not being able to eat it because it’s too spicy. You could also use a sharp cheddar, but I don’t think it will provide the depth of flavor that the pimento cheese does. I found it in the specialty cheese section in my local supermarket. If you don’t see it, ask for it. I’ll bet it’s there you just never noticed it.

Preparing, seasoning and cooking the shrimp from scratch makes all the difference in this recipe. I am anxious to hear your thoughts on this one. Make it and let me know what you think. You won’t be disappointed.

The Best Ever Shrimp Dip (No Lie)...

  • Servings: Party Size
  • Difficulty: Easy
  • Print

INGREDIENTS:

1 – 16 ounce bag frozen raw peeled and de-veined large/jumbo shrimp, thawed

1 -2 Tbs. garlic infused olive oil

1/4 tsp. Old Bay seasoning

1 – 8 ounce package of cream cheese, softened

1 heaping Tbs. horseradish

1 Tbs. shallots, minced

1 cup pimento cheese

1 Tbs. chopped Italian parsley for garnish, optional

DIRECTIONS:

Thaw the shrimp. Remove any remaining shells on the flesh of the shrimp. Cut the tails off (or you can keep it on, basically it’s your choice). In a medium sized bowl combine the shrimp, olive oil and Old Bay seasoning. Stir to make sure all of the shrimp is coated with the oil and seasoning.

On medium heat cook the shrimp for 2 minutes on one side and 1 1/2 -2 minutes on the other. The shrimp is done when it gets a soft coral color and is loosely curled. Cool the shrimp and cut it into small chunks.

In a separate bowl combine the cream cheese, horse radish, shallots, and pimento cheese. Add the shrimp. Stir until well combined. Refrigerate overnight. (you can serve immediately or chill for a short period of time but overnight is the ideal). Garnish and serve with crackers, chips or veggies.


Glazed Almond Cookies…

Every year when I bake cookies for the holidays I try one new recipe. I’ve been making cookies for so many years and have countless choices but I always like to experiment with at least one new recipe while I decide what others in my arsenal to make. A few recipes I make every year because they are just my classics. But there are others I switch out or switch around and I always add one new variety to the bunch. This is my new cookie for 2018.

Most of the cookies I make are pretty traditional with straightforward processes. This one varied a little and tested my ability to problem solve. But once I figured it out I was good to go. So I recommend you read my lessons learned carefully   because if you do you’ll be successful right out of the gate. And just in case you’re wondering these cookies taste divine and are well worth the little extra attention you need to pay to them.

So let’s talk glazed almond cookies…

Lesson Learned 1 – This recipe does not use any eggs: I know, I thought it was strange too but don’t worry the combination of ingredients works. You’ll find the dough looks a little different than most cookie dough – sort of like mashed potatoes (see the picture below). That’s ok – that’s what the dough needs to look like.

Lesson Learned 2 – You MUST use parchment paper on your cookie sheet: I have a professional grade non stick cookie sheet and found I still needed to use parchment paper. The cookies did not stick to the sheet, that’s not why parchment paper was necessary. The challenge arose when I tried to place the sliced almonds on top which I will address in another lesson learned. Just make sure you use parchment paper regardless of whether you’re using a non-stick sheet or not.

Lesson Learned 3 – I discovered the best process for prepping the cookies to go in the oven: With this recipe you roll the dough into small balls and then flatten the balls. I found the easiest way to do this was to roll the cookies all at once and then flatten them with the bottom of a tumbler glass. By doing this I was able to not only have a smooth flowing process but also was able to make the cookies a uniform size by using the bottom of the glass as a guide for pressing out the dough. Keep in mind that you’ll need a little bit of flour on hand to dust the bottom of the glass. I placed about 1/4 cup of flour on a small plate and dusted the bottom of the glass regularly. Sometimes the cookies stuck to the bottom of the glass but I was able to peel them off easily because of the flour. Once I had the cookies all flattened I dusted off any residual flour that was on them with a pastry brush.

Lesson Learned 4 – How to make the almond slices stick to the cookies: This is the rub! It’s not as easy as you might think… I found the best way to make the almonds stay on the cookies is to put them directly on the dough the very second they came out of the oven and before transferring them to a wire cooling rack. If you wait any longer they won’t stick. So as soon as you take these cookies out of the oven have the almonds ready. Place them on top of the cookie and gently press them into the cookie. That way as the cookie cools it bonds around the almond slices.

That is also why you want to have your cookie sheets lined with parchment paper. The first batch I made I took the cookies off the sheet, transferred them to a cooling rack and then tried to put on the almond slices. As I pressed them down into the cookie, the bottom of the cookie went slightly through the gaps in the cooling rack so when I took the cookies off the rack they no longer had flat bottoms and the cookies wobbled. Also by that time the cookies had cooled enough that the almonds did not stick. Ugh… When you press the almonds onto the cookie while they’re still on the baking sheet they are still warm enough, the parchment paper prevents them from sticking to the sheet as you press down and you still maintain a flat bottom.  It took me my first failed batch to figure this out.

Also I found if some of the slices were a little loose or did not want to stick, when I applied the glaze and let the glaze set on the cookie, the glaze acted as a binder and the almonds stayed on the cookie. So you really have two ways to secure the almonds. But first try putting them on while the cookies are still hot. That’s the best way.

Lesson Learned 5 – Glaze the cookies on a wax paper lined cookie sheet: Place your cookies on the lined cookie sheet and then with a teaspoon drizzle the glaze over the top of the almonds. Not only does it create a rustic look but also helps to secure the almonds on top of the cookie. Once the cookies are glazed put the baking sheet in the refrigerator for about 10-15 minutes to let the glaze harden. Then you can serve them or freeze them. The glaze has a wonderful almond flavor that accentuates the almond flavoring in the cookie. In the end you have one delicious and festive looking cookie!

Glazed Almond Cookies...

  • Servings: Approximately 3 Dozen
  • Difficulty: Medium
  • Print

INGREDIENTS:

Cookie Dough

1 cup unsalted butter

3/4 cup sugar

1 tsp. almond extract

2 cups flour

1/2 tsp. baking powder

1/4 tsp. salt

Glaze

1/2 cup confectioners sugar

1 tsp. almond extract

3 teaspoons water

DIRECTIONS:

Preheat the oven to 400 degrees. Line cookie sheets with parchment paper. Set aside

In a stand mixer, mix together well the butter, sugar and almond extract.

In a separate bowl combine the flour, baking soda and salt. Whisk to combine.

Add the flour mixture to the butter mixture only a couple tablespoons at a time until fully incorporated before adding more.  Otherwise the flour will not incorporate fully into the dough.

Roll the dough into small one inch balls. Dust the bottom of a glass tumbler with flour and flatten each ball. (You will need to dust the bottom of the glass frequently). Bake for 7 minutes only . Although the cookie may not look done, it is. Do not remove the cookies from the baking sheet and immediately take a few sliced almonds and press them into each cookie. Once you’ve finished putting the almonds on top of the cookies transfer them to a wire cooling rack to cool.

After the cookies have cooled mix the glaze ingredients together. With a teaspoon, drizzle the glaze over the cookies. Put the cookies in the refrigerator for about 10-15 minutes to allow the glaze to set. Serve or freeze.


Cranberry Upside Down Cake…

There’s nothing that screams the holidays like cranberries. Did you know that 20% of cranberries grown are consumed over the holidays? The fresh ones are only around this time of year and their bright red color makes you want to burst into a Christmas song. And because I love them so much, I’m always looking for new ways to cook or bake with them. This particular recipe hits the jackpot as far as I’m concerned.

I’ve seen various iterations of upside down cakes but this one, in my estimation, surpasses them all. It is so much fun to take this cake out of the oven, let it cool for 10 minutes, and then turn it over and see this gorgeous burst of holiday color decorating the top of the cake. This cake will stand out on any holiday dessert table. And besides looking fabulous, it tastes fabulous! And it isn’t that difficult to make. You just need to follow a few tips and the cake will turn out perfectly. This is the very first time I made this cake and just look at it – holiday perfection! So let’s talk cranberry upside down cake…

Lesson Learned 1 – Grease the bottom and sides of the pan generously: If you don’t do this you’re dead in the water. The cake will never come out clean. Now by generously I don’t mean you need a build up of grease in the pan.  Just make sure your pan (and this recipe calls for one 9 inch round cake pan) is thoroughly greased on the bottom and the sides. And make sure you only use butter to grease the pan, nothing else.

Lesson Learned 2 – Can you make this in an 8 inch round pan: The answer is yes and no. This recipe makes a lot of batter and really calls for a 9 inch pan that is at least two inches high up the sides. Once you put the cranberries in the entire batter will come close to the top if you use it all. I wound up leaving a small amount of batter out as I was afraid the cake would spill over the sides of the pan. I left a little less than 1/2 inch of space along the sides.

I’m glad I did. The picture below shows what the cake looked like right out of the oven. You can see the cake is all the way up to the top of the sides of the pan. Next time I make the cake I may add a few less cranberries (the original recipe called for 12 ounces of cranberries – I did not use that either. I used about 10 ounces of the 12 ounce bag). The key to getting a nice top is making sure the cranberries are evenly spread over the brown sugar and butter base. Piling the cranberries slightly on top of each other also results in a few cranberries rising with the cake and creating some nice color throughout the cake, which I liked.

I think you could use an 8 inch pan but keep in mind you will need less cranberries and you will have more batter left over. Either way, leave yourself a little less than 1/2 inch of space along the sides so your cake does not flow over the sides of the pan.

Lesson Learned 3 – Don’t let the cake cool in the pan longer than 10 minutes: You want the cake to rest for a short time when it comes out of the oven. But you also want to make sure you can get the cake out of the pan. Remember what you have on the bottom is really sticky. Cool the cake for no longer than 10 minutes. Then take a butter knife and run it all along the sides of the pan. If you do this, your cake will come out easily. Mine did and it looked gorgeous. Let the cake cool in it’s “upside down” form.

If you follow these simple lessons you should have no problem making this cake. And as always I will include sea level and high altitude amounts for the baking powder. I know you will love this one!

Cranberry Upside Down Cake...

  • Servings: 10
  • Difficulty: Medium
  • Print

INGREDIENTS:

Base:

3/4 cup packed brown sugar

4 Tbs. unsalted butter

10 ounces of fresh cranberries (you will not use an entire 12 ounce bag)

Cake:

1 3/4 cups flour

2 tsp. baking powder (1 tsp. for high altitude)

1/2 tsp. salt

1/2 tsp. ground ginger

1/4 tsp. ground cinnamon

Very small pinch of ground cloves

1/2 cup unsalted butter, room temperature

1 1/2 cups sugar

3 eggs, room temperature

1 Tbs. orange zest (the zest of a large orange)

1/2 cup sour cream

1/4 cup milk

DIRECTIONS:

Preheat the oven to 350 degrees. Generously butter the bottom and sides of a 9 inch round cake pan. Set aside.

In a small saucepan, melt together the butter and brown sugar for the base. Make sure they are mixed well. Pour this mixture into the bottom of the cake pan.

Spread the cranberries evenly over the butter/brown sugar mixture. Set aside.

Whisk together the flour, baking powder, salt, cinnamon, ginger and cloves.

In another bowl beat the butter for the cake until it is light and fluffy. Add the sugar and mix thoroughly. Add the eggs in one at a time and mix until combined. Stir in the orange zest.

Mix 1/3 of the dry ingredients into the butter/egg mixture. Once combined beat in 1/2 of the sour cream until combined. Beat in the next third of the dry mixture until combined. Add the remaining half of the sour cream and beat until combined. Add the last third of the dry ingredients and beat until combined. Finally add the milk and beat until combined.

Pour the batter over the cranberries making making sure to leave a little less than 1/2 inch of room from the top of the pan.

Place in preheated oven and lower the temperature to 325 degrees. Bake anywhere from 55 minutes to 70 minutes. (mine took 70 minutes – it will depend on your oven and your altitude). Cake is done when a toothpick inserted in the center comes out clean.

Cool the pan on a wire rack for 10 minutes. Run a butter knife all around the edges of the pan. Place a plate on top of the pan and invert it. Let the inverted cake cool on the plate.


Party Appetizers

Thanksgiving and Christmas are right around the corner and that means family gatherings and parties with friends. And if you’re like me whether serving a meal or simply a wine and appetizer affair there’s always a need to have in your arsenal some simple, impressive appetizers. So I’ve created for you a one stop shop blog with seven of my favorite appetizers.  These appetizers will brighten up any of your holiday get-togethers. All you need do is click on the individual picture(s) of the one(s) you like and it will direct you back to the blog I wrote about it that includes a printable recipe. It couldn’t be easier.

I specifically picked these appetizers out of the many in my recipe index for a few reasons. First they are incredibly easy to make. That is key as the holidays are busy enough as it is. Second I picked them for how they look. As I’ve stated over and over in my blogs you eat first with your eyes. I wanted these appetizers to have that holiday wow factor. And last I wanted them to be easy for your guests to put on a plate and eat.

Let me take you through my choices in the picture above by starting with the upper left corner of the collage. First is my tangy bacon cheddar yogurt dip. Next to it are my hard salami roll ups with olive garnish. In the center row left is my salted caramel cheese ball. Next is my Christmas creamy spinach and red pepper dip followed by my no bake pizza bites. Last on the bottom left is my vegetable pizza and finally my basic bruschetta. Make any or all of these and your party will be a hit. So let’s take each one individually…

TANGY BACON CHEDDAR YOGURT DIP:

I like this appetizer for a few reasons. First you have the option of making it as spicy as you like. Hot or mild it is absolutely delicious. Second if you use precooked bacon making this dip is even easier. Third I found that people really go for the veggies straws instead of the traditional crackers. It’s fun, tasty and easy to eat making it a great party appetizer.

HARD SALAMI ROLL UPS WITH OLIVE GARNISH:

I found this appetizer to be very popular not only because it’s tasty but also because of its pop in your mouth and go factor. All you have to do it grab it by its decorative pick and put it in your mouth. You don’t even need a plate for this one. You can just walk by and grab it. For the holidays you can add a little pzazz by using holiday themed picks. Any way you serve it, this appetizer will quickly disappear.

SALTED CARAMEL CHEESE BALL:

This one is a show stopper and a crowd pleaser! This appetizer touts the killer combo of granny smith apples, caramel sauce, cheese, lemon juice and nuts. And if that isn’t enough, drizzling caramel sauce over it takes this cheese ball over the top. Also, this can be made ahead of time so you don’t have to fiddle around with it the day of your party. And last but certainly not least, this can be served as an appetizer or dessert. You can’t go wrong with this one.

CREAMY SPINACH AND RED PEPPER DIP:

I will admit up front I got this recipe from another site. I acknowledge that in my blog and include a link to the recipe. I normally don’t do this but it was such a hit when I served it I just had to share. I also like it because it features the colors of Christmas. So if you’re looking to inject the color of the holidays not only in your decorations but also in your food, this is the recipe for you. Oh, and one last thing, it tastes divine!

NO BAKE PIZZA BITES:

This is one of my personal favorites. You can’t beat a simple to assemble appetizer that tastes like you’re eating a piece of pizza. You can be somewhat flexible in the ingredients you use (I used a basil and pepper feta cheese instead of just adding mozzarella cheese and fresh basil) and the results were fabulous. I’ve found that this particular appetizer is very popular with the younger set. It can be assembled in no time and you’ll be amazed at how flavorful it is!

VEGETABLE PIZZA:

Earlier this year when I first posted this recipe I got a lot of comments. People mostly said that they use to make this appetizer “back in the day” but have not made it in a long time and were not sure why. But how can you resist making something that looks as good as this and tastes even better. I also found this is a great way to use up some of stuff lying around in your refrigerator. This is another appetizer that allows your guests to just pick up a piece and go. But I guarantee you one thing. They will be back for more!

BASIC BRUSCHETTA:

And last but certainly not least my basic bruschetta. We tend to eat a lot over the holidays and that can lead to feeling full and bloated. This appetizer is different. It is refreshing, light and filled with simple clean ingredients your guests will love while not feeling stuffed. This is definitely an appetizer you should consider.

And there you have it – some of my favorite appetizer recipes just in time for your holiday get-togethers. I also have other appetizer recipes that you can find under my recipe index tab on the top of this page. I hope you make one or all of these during the holidays and as always, I would love to know what you think of them.


Homemade Cranberry Jam…

I don’t know about you but it seems after the holidays I always have at least one bag of fresh cranberries that I haven’t used. In the past the bag would jut sit in the refrigerator until I threw it out. I always felt it was such a waste as you can only get fresh cranberries around the holidays. But I finally discovered how to use those cranberries in a way I never considered before. That is, to make a wonderful jam. I tried it on my morning toast the other day and just loved it!

There are only a few ingredients, cranberries, brown sugar and water. No need to add any pectin to this recipe as cranberries are a natural source of it. Pectin is a starch that occurs naturally in the cell walls of fruits and vegetables. When these fruits and vegetables are cooked to a high temperature in combination with acid and sugar, a gel is formed. This is what gives jams and jellies their set when they cool. Pectin by itself can be used in other dishes that require food to gel or thicken. It’s also used as a fat substitute in some baked goods. But the cranberries naturally release pectin when they are boiled. That pop, pop you hear is the cranberry splitting open and releasing the pectin.

Now I realize you probably have already either used your remaining cranberries or thrown them out (like I used to do) but this is a good recipe to have in your back pocket for next holiday season. I promise I’ll remind you of it then so don’t worry.

So let’s talk cranberry jam

Lesson Learned 1 – You can control the sweetness of the jam: The recipe uses brown sugar. I suggest using the least amount and tasting the mixture before you reduce the heat and begin the stirring process. You can always add more sugar. I liked this recipe on the tangy side so I only added the least amount of brown sugar.

Lesson Learned 2 – For the last 10-15 minutes you need to stir the mixture constantly: You need to make the cranberries release the maximum amount of pectin. You also need to break down the berries for the jam. Cooking them the last 10-15 minutes accomplishes that. As I was stirring I was also taking some of the larger berries and pressing them against the side of the pan with a wooden spoon. That helped to break the berries down as well. After a while you will see a noticeable difference in the texture of the mixture – more jam-like. That is when you can stop.

Lesson Learned 3 – You can adjust this recipe: Depending on how much cranberries you have left you can adjust this recipe to that amount. So if you have a little or a lot, you can still make this wonderful jam.

I’m so pleased to know that I no longer need to waste any fresh cranberries after Christmas. This recipe makes a delightful unique jam that you will enjoy or toast, pancakes, or in any other way you use jam.

Homemade Cranberry Jam...

  • Servings: 16-18 Portions
  • Difficulty: Easy
  • Print

INGREDIENTS

4 cups of whole fresh cranberries

1 – 2 cups brown sugar, packed (start with 1 cup)

1 cup water

DIRECTIONS:

Bring the cranberries, sugar and water to a boil. Reduce the heat and let cook for 10 minutes stirring occasionally. At this point taste the mixture to see if it needs more sugar. Add more if necessary.

Reduce heat to a very low setting. Cook for an additional 10-15 minutes, stirring constantly. Break apart larger cranberries against the side of the pan with a spoon if necessary.

Cool in the pan for about 30 minutes. Transfer the mixture to a mason jar, cover and chill.

SaveSave

SaveSave

SaveSave

SaveSave

SaveSave

SaveSave

SaveSave

SaveSave

SaveSave

SaveSave

SaveSave

My Best Holiday Cookie Recipes…

Ever since I can remember I’ve made cookies for the holidays. My mother started me out when I was in high school (I think she wanted to transition the job to someone else) and the rest is history. As you can imagine I’ve had many successes and failures over the years but I’ve also developed a short list of my all-time favorite cookie recipes. And that is what this blog is all about – sharing my favorites with you. Just click on the pictures and they will link you to my recipes. I hope you enjoy them and make all of them. I guarantee you, they will all be a big hit.

The first cookie I’ve made for as long as I can remember and it’s stayed tried and true through several decades – the Nestle Toll House Chocolate Chip Cookie recipe. There is no better chocolate chip cookie recipe and I’ve tried a lot of them. I was having coffee with a friend the other day and we both agreed that if you’re going to make chocolate chip cookies this is the only recipe to use. And every year it has been my tradition to begin holiday baking by making these cookies. The cookie dough is divine (admit it, you eat this cookie dough), the cookie is to die for and they freeze beautifully so you can enjoy them for several weeks. I’m including the link to this recipe below the picture.  Making Toll House Chocolate Chip Cookies means Christmas to me.

Chocolate Chip Cookies

Here’s the link to the recipe: allrecipes.com/recipe/174864/original-nestle-toll-house-chocolate-chip-cookies/

I love all of the cookies in this blog but I definitely have my favorite. In my estimation nothing beats my iced cinnamon chip cookie. The tartness of the cinnamon combined with the sweetness of the cookie topped with a cinnamon cream cheese frosting is as good as it gets. The challenge with making these cookies is finding cinnamon chips. My local grocery stores used to carry them but not anymore, so I have to order them online. But they’re so good it’s totally worth it. If you try any of these recipes, try this one. It is my absolute favorite!

Cinnamon Chip Cookie

Iced Cinnamon Chip Cookie

The iced cinnamon cookie recipe displaced my next cookie recipe as my all time favorite. For many years it was my triple chocolate brownie cookie. If you love chocolate, this is definitely the cookie for you. The three kinds of chocolate, the brownie-like consistency of the cookie and the semi-sweet chocolate drizzle are simply to die for. I make this cookie every year and it’s alway a hit.

Triple Chocolate Brownie Cookie

I also love my iced cranberry orange walnut cookies. The combination of cranberry and orange just screams the holidays to me. I love the tartness of fresh cranberries combined with the flavor of orange and the sweetness of the cookie dough. Add some walnuts and you have a killer combo! These cookies look festive and are easy to make. Drizzle them with some glaze and you have a holiday delight!

Iced Cranberry Orange Walnut Cookies

No respectable holiday cookie compilation would be complete without something that looks and tastes like peppermint. These cookies fit the bill. My peppermint twist kisses cookies not only boast the holiday colors but also bring together that great holiday combination of peppermint and chocolate. These cookies tastes divine and dress up any holiday cookie tray.

Peppermint Twist Kisses Cookie

And my last favorite is technically not a cookie, it’s fudge. I tried making fudge last year and could not believe how easy it was. This fudge brings together the classic combination of chocolate and peanut butter for a delightful holiday treat.

Chocolate Peanut Butter Fudge

Home made cookies make great holiday gifts. Just put a few of them into a holiday bag, tie with some festive ribbon, and you’ve got a gift that’s better than most anything you can buy. Enjoy making them, enjoy eating them, enjoy sharing them.

I’d like to take this opportunity to thank everyone who checks out my blog. I hope the recipes are fun and the information helpful. I wish you, your family and all of your friends a very Merry Christmas and a Happy New Year! And in the immortal words of Tiny Tim, “God Bless Us, Everyone!”

SaveSave

SaveSave

SaveSave

SaveSave

SaveSave

SaveSave

SaveSave

SaveSave

SaveSave

SaveSave

SaveSave

SaveSave

SaveSave

SaveSave

SaveSave

SaveSave

SaveSave

SaveSave

SaveSave

SaveSave

SaveSave

SaveSave

SaveSave

SaveSave

SaveSave

SaveSave

SaveSave

SaveSave

My Best Holiday Appetizers…

Yahoo – the holidays are here. And with them come the parties and the food, and the singing and the making merry and bright. And you can’t deny food is definitely a key part of making holiday gatherings memorable.

I’ve been doing this blog for several years now and have posted a wide variety of recipes. Undoubtedly some of the more popular ones I’ve posted are the appetizers. And what’s a holiday party without appetizers. So this blog is dedicated to putting in one place all of my most popular appetizer recipes. Make one or make them all but I guarantee you anyone one of them will be a hit at your holiday parties.


CREAM CHEESE, BACON, SPINACH AND SCALLION PINWHEELS

This recipe is perhaps on of the most popular recipes I’ve ever posted. I almost didn’t post it because it’s so rudimentary I thought people would think I was selling out. Much to my surprise it was and continues to be a big hit. The most difficult part of making this recipe is choosing your favorite kind of tortilla. The rest is so easy you won’t believe. A former colleague of mine called the recipe “red neck sushi”. Call it what you like, it’s fabulous and will always be a hit!

Cream Cheese, Bacon, Spinach and Scallion Pinwheels.

SALTED CARAMEL CHEESE BALL

Lately I’ve experimented with making cheese balls. Once again I was certain cheese ball recipes would not be popular with my readers. I was wrong. Seems like people still like them. A friend told me one of her husband’s favorite sayings is “the party does not end until the cheese ball is gone”. This particular recipe is special as it can double as an appetizer or a dessert. And the drizzle of caramel sauce on the top gives it a special festive touch for any holiday party.

Salted Caramel Cheese Ball

THE BEST EVER MEATBALLS

When I say BEST EVER, I mean BEST EVER! The recipe was actually an accident. I found a recipe for meatballs that called for vegetable flakes. In my naiveté I used red pepper flakes, because after all a red pepper is a vegetable, right? (those were the days when I was mostly lost in the kitchen). Well, the rest was history. I’ve been making this recipe for years and it has been passed down to family and friends many times over. I know you’ll just love these meatballs and they will be a big hit at your holiday party!

The Best Ever Meatballs

HOLIDAY CRAB DIP

This particular recipe is my holiday staple. It’s so special and so flavorful it dresses up any holiday gathering. I’ve actually had people ask me to pack leftovers of this one. I’ve also used leftovers to make a quick sandwich.  Just toast up some bread and away you go. I guarantee you will enjoy this one.

Holiday Crab Dip

SPINACH ARTICHOKE RED PEPPER DIP

I love this particular recipe not only because it tastes so good but it looks so festive when put in a bread bowl. Remember you eat first with your eyes, and my serving suggestion for this one plays right into that. This is a great vegetable dipper recipe that will keep them coming back for little bites over and over again. I served this one for New Year’s Eve last year and it was a huge hit!

Spinach Artichoke Red Pepper Dip

CANDIED PECANS

I had never made candied pecans until last year. I guess I thought they’d be hard to make. Boy was I wrong. And they are so yummy, you’ll wonder why you never made them before. These are good not only as an appetizer but also as a gift. Just put some in a mason jar and add a festive bow and you have a great gift. You simply have to try this one.

Candied Pecans

CHEESE BALL

My last recipe is another cheese ball. This is a savory cheese ball and has killer flavor. I brought it to a pot luck at work and it got devoured in no time. The key to this one is letting the ingredients meld overnight. What I like about this cheese ball is that it looks so professional but is so easy to make. It will be a hit at a holiday party or any gathering  you have during the year. Enjoy!

Cheese Ball

I hope you’ve found this appetizer compilation helpful. Make any of them, make all of them. They are all fabulous!

SaveSave

SaveSave

SaveSave

SaveSave

SaveSave

SaveSave

SaveSave

SaveSave

SaveSave

SaveSave

SaveSave

SaveSave

SaveSave

SaveSave

SaveSave

SaveSave

SaveSave

SaveSave

SaveSave

SaveSave

SaveSave

SaveSave

SaveSave

SaveSave

SaveSave

SaveSave

SaveSave

SaveSave

SaveSave

SaveSave

SaveSave

SaveSave

SaveSave

SaveSave

Salted Caramel Cheese Ball…

I know it was just recently I posted a cheeseball recipe. And frankly I didn’t think that post would get much of a response as I thought cheese balls were a thing of the past when it comes to party appetizers. Boy was I wrong. That post was quite popular.

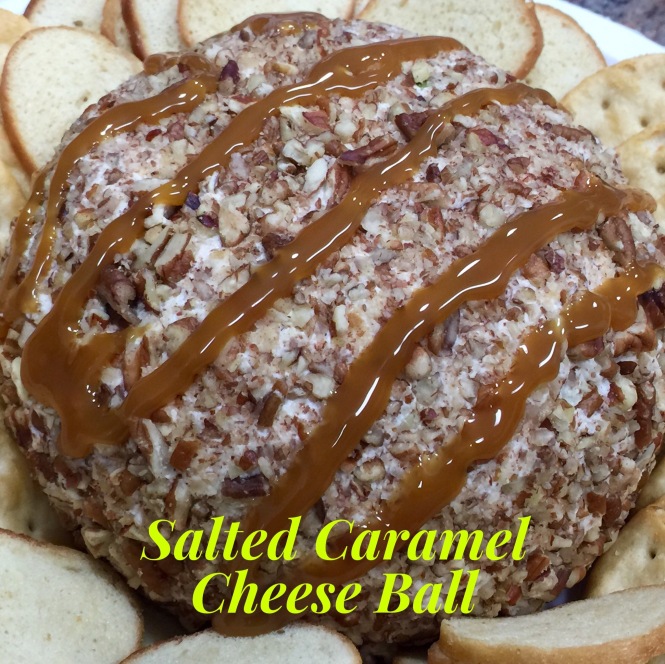
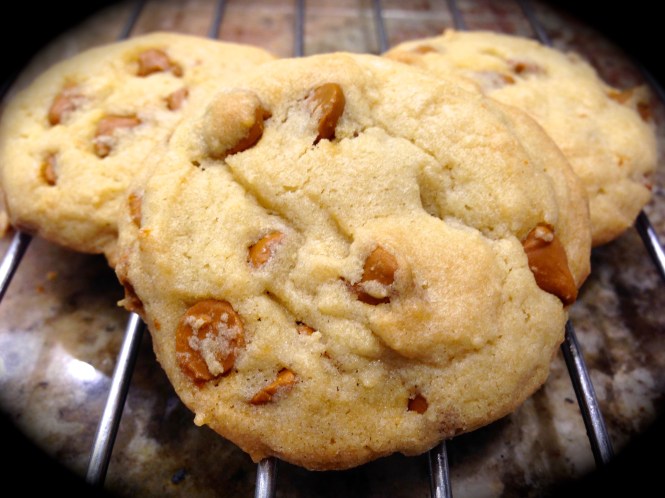
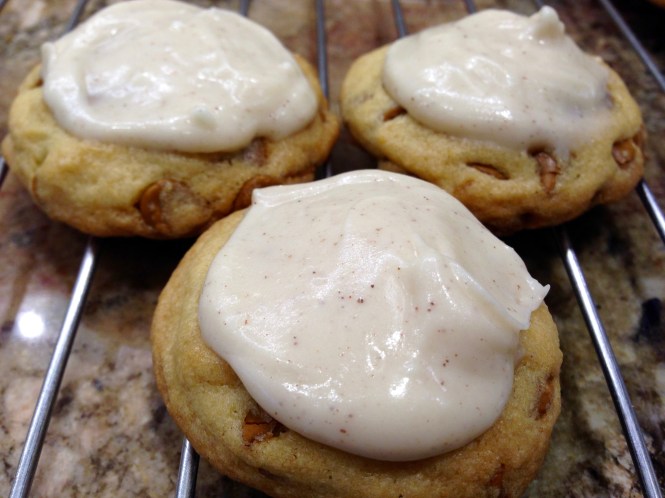
So when we had the first meeting of our book group in my condo community I thought what a great time to experiment with another type of cheese ball. This time with a little salted caramel flare. And once again it was a huge hit!

My renewed love of cheese balls stems from the fact that it’s one heck of an easy way to bring a great appetizer to an event. Mostly it’s just mixing everything together, chilling and serving. Plus cheese balls are so portable you can easily bring them anywhere.

So let’s talk salted caramel cheese balls…

Lesson Learned 1 – This cheese ball can be an appetizer or dessert: You have a great combination of sweet and savory going on with this cheese ball. The combination of the tartness of the apples and cinnamon, along with the savory of the sharp cheddar cheese and the sweetness of the caramel sauce all meld into a killer combo making this cheeseball more versatile than most.

Lesson Learned 2 – Leave the skin on the apple and dice it into small pieces: I always love when recipes state “dice the apple into 1/4 inch pieces. Do people really expect cooks to stand with a ruler measuring the size of the pieces they cut up? (ok, I’ll admit it I’ve done it in the past but no more)… The key here is to keep the pieces slightly smaller than bite size. Trust your instincts. You want the apple pieces to blend in and not overpower the look and taste of the cheese ball.

Also only use a granny smith apple for this recipe. The granny smith apple has that wonderful tartness that compliments the savory cheddar cheese and sweet caramel sauce. Now if you have another apple on hand do you need to run out to the grocery store to get a granny smith? No. But believe me when I say the best flavor combination is achieved when you use a granny smith apple in this recipe.

Lesson Learned 3 – As with any cheese ball, the longer you chill it and let the flavors combine the better: I like this cheese ball because you can chill it for only a short time and it’s still wonderfully flavorful. But if you have the time, letting the cheese ball flavors marry overnight is always preferable but not altogether necessary.

The holidays are fast approaching and if you’re thinking of entertaining this recipe is flavorful, impressive looking and a guaranteed hit!  It will make a wonderful addition to your holiday table. Try it and tell me what you think!

Salted Caramel Cheese Ball...

  • Servings: Lots
  • Difficulty: Very Easy
  • Print

INGREDIENTS:

2 – 8 oz. packages of cream cheese, softened

1/4 cup salted caramel sauce, plus approx. 1/8 cup caramel for drizzle

1 Tbs. fresh squeezed lemon juice

pinch of kosher salt

1 tsp. cinnamon

1 cup freshly grated sharp cheddar cheese

1 medium granny smith apple, chopped (leave the peal on)

2 cups pecan pieces

Crackers for serving

DIRECTIONS:

Shred the cheddar cheese and set aside. Remove the core from the apple and dice into small pieces, leaving the peal on. Set aside.

In a medium sized bowl, using a hand mixer, mix together the softened cream cheese, caramel sauce, lemon juice, salt and cinnamon. By hand, fold in the cheddar cheese and apple. Place on a sheet of plastic wrap and roll into a ball. Place in the freezer and chill for 1/2 hour.

Place the pecan pieces on a large plate. Remove the cheeseball from the plastic wrap and roll it in the pecans until the ball is completely covered. Wrap the ball in plastic wrap and chill until ready to serve.

Drizzle the caramel sauce on the cheese ball right before serving.

SaveSave

SaveSave

SaveSave

SaveSave

SaveSave

SaveSave

SaveSave

SaveSave

SaveSave

SaveSave

SaveSave

SaveSave

SaveSave

SaveSave

Quick And Easy Baked Lobster Tails (no lie)…

I don’t know about you but for years I lived in fear of making lobster tails. Everything you read warns you not to overcook them because they will turn rubbery (much like calamari and shrimp) but because they tend to be pricier the fear factor increases exponentially.

Well no more! I decided over the holidays that I would tackle my fear of making lobster tails. In the past, I tried to make lobster tails mostly by broiling them. Sometimes I would be successful and other times not. But this time I tried baking them and I can tell you it will be my preferred method from now on. It is soooo easy and takes out almost all the guesswork (I wish I could say it takes out all of the guesswork but I would be lying) that you need not fear making lobster tails anymore. All you need is your oven set to 350 degrees and a good instant read thermometer.

So let’s talk oven baked lobster tails…

  1. What most people think is the hardest part – getting the tail out of the shell: This used to be one of my biggest challenges. All I can say is thank goodness we have YouTube – I found this video about removing the lobster meat from the tail and it was the absolute key to my success. I encourage you to watch it because this method works and is so easy. I baked my tails on top of the shell and this video shows you exactly how to get the meat out and rest it on the shell.

2. Let the lobster meat rest on the counter for about 15 minutes before baking: First and foremost it is absolutely essential that the lobster tail be completely thawed if frozen. I put my lobster tails in the refrigerator the night before and that did the trick. Most people are afraid to let fish rest a little on the counter like red meat. Of course you would never leave fish out to get to room temperature, but I found if you take the fish out of the refrigerator and let it sit on the counter for just 15 minutes before you cook it, it really helps the cooking time hold true. Don’t leave it out any longer than that, just enough to take the cold edge off the fish.

Baking lobster tails is so easy you’ll want to make them more often. Keep this recipe in your back pocket for when you want to impress, because impress you will!

Quick And Easy Baked Lobster Tails (No Lie)…

  • Servings: 4
  • Difficulty: Medium
  • Print

INGREDIENTS:

4 six ounce lobster tails

1 stick butter, melted for seasoning and dipping

Old Bay Seasoning

DIRECTIONS:

Preheat oven to 350 degrees. Remove lobster meat from tail and rest the meat on the tail. Brush lobster meat with melted butter. Lightly sprinkle the seasoning on top of each tail.

Bake in oven for 15 – 20 minutes. (Check the tails at 15 minutes with an instant read thermometer. If the temperature reads 140-145 degrees, the tails are done). My tails baked in 17 minutes but I live in high altitude and food generally takes slightly longer to cook.

Serve immediately with drawn butter.

Lobster Tail

Lobster Tail and Filet Mignon


Sweet Potato Casserole…

For the longest time I associated sweet potato dishes with the holidays. Turns out I was missing something wonderful and nutritious all year long. That being said, I’d like to share with you a recipe that certainly can be made over the holidays but is wonderful with any meal any time of year.

I like this recipe because it’s designed to serve four (or two very large appetites) so you can either finish it off at one meal or have one serving of leftovers. It reheats beautifully. It’s simple to prepare, a colorful addition to any plate, flavorful and good for you. So throw away your preconceived notions of sweet potato casseroles being something only relegated to the holidays and enjoy them all year round!

IMG_4412Lesson Learned 1 – Cut the sweet potato into evenly sized chunks: This is very important for the cooking time. You don’t want some pieces to be mushy while other pieces are hard. I cut mine into one inch chunks. Also keep in mind sweet potatoes cook faster than russet or red potatoes. So be aware of that and start checking them for doneness at about 10 minutes. You want them to be fork tender, not mushy.

Lesson Learned 2 – To mash or not to mash in the same pot you cook them in: I am a student of the game and so I do a lot of research into cooking methods. There is a train of though out there that suggests once you’ve drained the sweet potatoes it’s best to mash them in the same pot you boiled them in. That way any excess water left on the potatoes will evaporate from the heat of the pan. That’s all well and good, but I find if I do that my potato masher scratches the heck out of the bottom of my pan, and I have some really high quality pans. IMG_4415So I’ll leave this up to you. You can certainly mash them in the same pan, but I wanted to warn you about what might happen if you did. This is what I do. Once I’ve drained the sweet potatoes, I prefer to mash them in a bowl. After I do that (and they mash quite quickly) I put them back in the pot they were boiled in and just stir them around for about a half of a minute or so (you can even use some low heat while you’re doing this). That way I get the same effect without playing havoc with the finish on my pans.

Lesson Learned 3 – You can make this recipe in individual serving sizes: Another way to prepare this dish is to divide it up equally into four ramekins and bake it off. That way your guests can have their own individual portions. This recipe adapts well in that regard and the individual ramekins are pretty cute. You can also use ramekins even when there are only two of you. Just cook two of them off for one meal and refrigerate the other two for another meal. Just make sure if you refrigerate some ramekins, or if you have leftovers in a one quart casserole, that you take the dishes out of the refrigerator and let them sit on your counter for about an hour before reheating them. That way you’ll take the chill off and the cooking time will be shorter. Also if just reheating, cover the casserole in foil. Since it’s already been cooked once you can burn the pecans if you don’t cover them.

My husband just loves this recipe. He asks me to make it all the time. Try it. I’m sure it could easily become on of your go-to potato recipes!

Sweet Potato Casserole…

  • Servings: 2-4
  • Difficulty: Easy
  • Print

INGREDIENTS:

2 large sweet potatoes, peeled and cubed

3 Tbs. butter, divided (2 Tbs. cut into cubes)

1 Tbs. maple syrup

2 Tbsp. orange juice

1/4 tsp. salt

1/2 tsp. ground cinnamon

1/2 cup pastry flour

1/2 cup chopped pecans

1/4 cup light brown sugar

1 Tbs. vegetable oil

1/2 tsp. shortening, to grease the casserole dish

DIRECTIONS:

Preheat oven to 375 degrees. Lightly grease a 1 quart casserole dish. (I use an enameled cast iron dish for this recipe). Set the dish aside.

Place cubed sweet potatoes in a saucepan and cover with water by about an inch. Bring to a boil, reduce the heat slightly and continue to cook until the sweet potatoes are fork tender (10-15 minutes). Drain the sweet potatoes and put them in a bowl (or back in the saucepan if you prefer – see lessons learned above). Add 1 Tbs. butter, the maple syrup, orange juice, salt and cinnamon. Mash until you reach your desired consistency. (At this point, if you mash in a bowl, you can put the potatoes back in the pot the cooked in, turn on a low heat and stir for about a minute to remove any excess water). Put the mashed sweet potatoes into the greased casserole dish.

In a small bowl whisk together the flour, pecans and brown sugar. Cut the butter into the flour mixture until it resembles course sand. Add the vegetable oil and mix until well combined. Sprinkle this mixture evenly over the mashed sweet potatoes.

Bake for 20 – 30 minutes or until the potatoes are hot and the top is golden brown.

Ready To Go Into The Oven...

Ready To Go Into The Oven…

Makes Enough For 2-4 People...

Makes Enough For 2-4 People…

Image

The Best Holiday Stuffing…

I know both Christmas and New Years are over and it’s time to move on to non-holiday recipes. But I just have to blog this one, mainly because I want to make sure I chronicle the recipe for my future use. Most people are pretty fussy about stuffing. My mom made a stuffing that I just loved but did I ever write down the recipe – well of course not. And try as I may I could never replicate it. So for years I have tried various recipes without much success. I just wasn’t satisfied with what I made. This year it was different. I actually put together a stuffing recipe that I loved and although it is not my mom’s it will be the recipe that I use.

The stuffing is a delightful combination of “the trinity”, which is onions, celery and carrots along with sage breakfast sausage, egg bread and herbs. It was a hit at the dinner table and made great leftovers. The guests at my holiday dinner asked if they could have some to take home. Now that is the mark of a good stuffing recipe. I was so happy to finally create a stuffing that I actually enjoyed and will make again. And I learned a few lessons while making it…

Lesson Learned 1 – Make it the day before: I will share a secret with you. When I first made it and tasted it I thought, ugh… this one’s not going to thrill me. But I made it a day ahead of time and let it sit the refrigerator until the following day. When I tasted it the next day it was unbelievably good. I would not recommend making this stuffing the day of your holiday feast. The flavors in this recipe need time to get fully acquainted. It makes all the difference. And, if you are planning a holiday feast, how good is it to be able to make something in advance so that you are not scrambling around on the big day. With this recipe you put it all together, let it sit over night, and then take it out and let it get to room temperature before baking it in the oven.

I also like this recipe because it bakes at 350. I do not have a double oven and so I planned my holiday dinner with dishes that could all be made at the same temperature, including the turkey. This stuffing recipe made my meal preparation easier. I was able to make it a day ahead and bake it in the oven with the turkey. You can’t beat that!

IMG_2542Lesson Learned 2 – Use a good quality egg bread: Like anything else, the quality of what you put into a recipe will determine the quality of what comes out of it. Most recipes call for just plain white bread. I used a egg bread, called a shepherds bread, and it was divine. But if all you have is white bread, use it. I had some extra white bread that I also cubed and I didn’t think it toasted as well as the egg bread. As a matter of fact, the crust burned on many of the pieces. I wound up picking them out and discarding them.

But please, don’t use the prepackage stuffing cubes you find in bags at the grocery store. I’ve never had any luck with those, and who knows what they put in them to get them to last as long as they do. It takes no time to cut the bread into cubes and toast them in the oven.  And the result is so much better.

Lesson Learned 3 – Dice the trinity into equal size pieces: Make sure to finely dice your onions, celery and carrots. If you do, it should take about 8 minutes for them to start to soften and begin to brown. Otherwise it will take a lot longer and chances are by the time your carrots are done your celery and onions will be overcooked.

Lesson Learned 4 – Use fresh herbs in the recipe: I use dried herbs all the time but I think fresh herbs do more to enhance the flavor of this recipe. If you can’t get them, you can use dried. Just remember that with dried herbs you always use less as their flavor is much more concentrated. If you use dried herbs, press the herbs into the palm of your hand with your fingers or slightly crush them with a mortar and pestle to release some of the oil in the herbs before you add them to the recipe. That being said, I still would opt for fresh herbs if at all possible.

Lesson Learned 5 – Cover the stuffing with foil for the first half of the baking process: This is more a matter of taste. I’ve always preferred a softer stuffing while some people prefer a crispy stuffing. I found that by covering the stuffing for the first half hour of baking you get a moist stuffing with just the right amount of crispiness on top. But if you like crispy stuffing, bake it uncovered for the entire hour. Just be sure that if you make this the day before you let the stuffing get to room temperature before baking it off in the oven. I took the stuffing out of the refrigerator and let it sit on the counter for 2 hours before I put it in the oven. The end result was perfect.

This recipe is not difficult to make and only tastes better the more time the ingredients meld. I’m so glad to have finally concocted a stuffing recipe that I like. Keep this one in your file for next year. You won’t be disappointed.

The trinity mixed with breakfast sausage...

The trinity mixed with breakfast sausage…

The Best Holiday Stuffing

  • Servings: 16
  • Difficulty: Easy
  • Print

INGREDIENTS:

1 stick of butter, plus a little extra to coat the baking dish

16 cups of good quality egg bread, cut into 1 inch cubes

4 celery stalks finely diced

2 large carrots, peeled and finely diced

1 medium size sweet onion, finely diced

1 pound sage breakfast sausage

2 Tbs. chopped fresh sage

2 Tbs. chopped fresh thyme

2 – 3 cups unsalted stock (if you can find turkey stock use that. If not substitute chicken stock)

Salt and pepper to taste

DIRECTIONS:

Preheat the oven to 350. Cut the bread into 1 inch cubes and spread out on a baking sheet. Toast for 20-25 minutes stirring occasionally until lightly browned and crisp. Set aside to cool.

Finely dice the celery, carrots and onion. In a large deep skillet melt the butter. Once the butter is melted, pour half of it into a dish and set aside. Add the celery, carrots and onions to the pan and cook over medium high heat until they soften and begin to turn brown. Scrap the vegetables into a bowl and set aside. Add the sausage into the skillet, breaking it up into pieces. Cook until lightly browned and cooked through.

While the sausage is cooking, chop the sage and thyme and set aside. Grease a large 9 x 13 baking dish with butter and set aside. When the sausage is done cooking, add back the vegetables, sage and thyme. Cook for about 1 minute to incorporate the herbs. Add 1 cup of the broth and deglaze the bottom of the pan. Cook until the broth is nearly evaporated, approximately 5 minutes.

Scrape the sausage mixture into a large bowl. Add the toasted bread cubes and remaining stock. Stir until the bread is moistened. Season with salt and pepper. Spread into the prepared baking dish and brush the top with the reserved melted butter.

(Here is where you stop if you are making this ahead. Cover the pan with foil and refrigerate. Take the pan out of the refrigerator at least two hours before baking it in the oven. Remove the foil and cover with plastic wrap while it is coming to room temperature).

Cover the stuffing with foil and bake for 30 minutes. Remove the foil and continue to bake for an additional 30 minutes or until the stuffing is heated through and browned. Let the stuffing stand for 10 minutes before serving.

Add fresh sage and thyme...

Add fresh sage and thyme…

IMG_2573

IMG_2576

Holiday Stove Top Potpourri…


Whenever the holidays roll around I look to fill my house with the scents of the season. There is nothing like a candle filling a room with the aromatic scent of balsam or pine. I love scented candles but with a young cat in the house I worry about what might happen while he prowls the upper reaches of the cabinets and countertops. So until I can break him of his curiosity, no scented candles this holiday season. Bummer…

I began to research something I could do to create those holiday smells in a way that I was able to provide more controlled monitoring. Low and behold on Facebook, of all places, I found a “recipe” for holiday smells I could simmer on my stove while doing my many hours of holiday baking.

I tried this yesterday and with a few tweaks it worked like a charm. I used water in the mixture yesterday, but next time I will substitute apple cider for water. The “recipe” couldn’t be easier and provides hour upon hour of warm, inviting holiday smells. Enjoy this little trick for the upcoming season!

Holiday Stove Top Potpourri…

1 small pot

1 orange, cut up in chunks

1 cup fresh cranberries

1/8 cup cloves

3 large or six small sticks of cinnamon, broken in half

2 tsp. nutmeg

Cover ingredients with water or apple cider – liquid should cover the dry ingredients and be about 1 inch from the top of the pot

Simmer on stove for hours of wonderful holiday smells

IMG_1439

IMG_1447

Cranberry Orange Pecan Sweet Bread…

It’s cranberry time of year again! I so love cranberries. Not only do I make a simple but killer homemade cranberry sauce  for the holidays, but I enjoy baking with cranberries – they have a tartness that lend themselves well to making delicious breads, pies and cookies. So this past week when I saw my first bag of cranberries at the grocery store I just had to buy them and bake something.

IMG_1318Years ago I used to buy box mixes to make cranberry bread. No more. It is so easy to make it yourself and I like the fact that you control what goes into it. Box mixes have become a thing of the past for me. If I can’t make it fresh, I don’t make it.

This particular recipe I did not find on Pinterest. This time I did a Google search and looked at various cranberry sweet bread recipes and their ingredients. A couple of things intrigued me about the recipe I chose. First, it used buttermilk in the batter and I’ve found that buttermilk tends to give you moister cakes/breads. Second, you don’t need a mixer for this recipe so no need to drag out the heavy KitchenAid, and I was loving that. The original recipe called for the bread to be glazed. I did not glaze my bread but I will include the glaze recipe in case you want to try it.

Recipe Rating: A+ This recipe is easy to make, and the combination of ingredients brings out the full flavor of the cranberries, pecans and orange zest – a killer combo in my estimation.

IMG_1415Lesson Learned 1 – Weighing Ingredients: I’ve read so many recipes where the author spoke of the importance of weighing ingredients, specifically flour. I never thought much off it. Normally I make sure my flour is aerated in the canister (swirling a knife in it does the trick) and then scoop out what I need and level it off. This recipe calls for 2 cups of flour or 250g. I recently purchased a kitchen scale and thought I’d try measuring the flour instead. I was surprised at how much “extra” flour I had in my measuring cup when I weighed it. It was eye opening. If you can, invest in a kitchen scale and use it when a recipe lists grams. You’ll be amazed at how much extra you may be putting into your recipe.

I did not weigh the sugar because I know how to adjust that measurement for high altitude so the bread will not fall in on itself. I do that adjustment by sight, but I will include the grams measurement for the sugar and flour in the recipe for those who do not live in high altitude. Use those measurements when at all possible. It really does make a difference

IMG_1310Lesson Learned 2 – Mixing the streusel: I don’t know about you but I have a difficult making streusel even with a pastry cutter. The butter always seems to collect on my pastry cutter and not fall off. This time I cut the cold butter (and it needs to be cold) into small cubes and just mixed it with my hands. I pretty much got the desired consistency. Next time I think I will mix it in my small food processor and see how it turns out. I am including a picture of the consistency of the streusel that worked well on top of the cake.

I’ve made many different versions of cranberry nut breads over the years but I have to say that so far this one is my favorite. The tartness of the cranberries, the hint of orange from the zest combined with the pecans is heavenly. Next time I make this (and this will be made at least one time if not more this holiday season) I will try adding the glaze. But I can assure you, even without the glaze this is a fabulous sweet bread!

Cranberry Orange Pecan Sweet Bread…

  • Servings: 12
  • Difficulty: Easy
  • Print

INGREDIENTS:

Streusel:

1/4 cup (31g) flour

2 Tbs. (30g) sugar

1 tsp. cinnamon

3 Tbs. (45g) cold, unsalted butter

Bread:

2 cups (250g) flour

1 tsp. baking soda

1/2 tsp. salt

1 cup (110g) chopped fresh cranberries (you can also use unthawed frozen cranberries)

1/2 cup (65g) chopped pecans or walnuts (I used pecans)

1 large room temperature egg

1/2 cup (105g) light brown sugar (loosely packed for high altitude)

1/2 cup (100g) sugar (slightly less for high altitude)

1 cup (240ml) buttermilk (no substitutions)

1/3 cup (80ml) vegetable oil (or melted coconut oil – I used vegetable oil)

1 tsp. vanilla extract

2 Tbs. orange zest

Glaze:

1 cup (120g) confectioners sugar

1 -2 TBS orange juice

Orange zest to taste

DIRECTIONS:

Preheat oven to 350. Spray an 8×4 pan with cooking spray. (I use a professional grade non-stick pan and do not have to do this. Invest in one if you can – it’s worth it).

First make the streusel by tossing the flour, sugar and cinnamon together. Cut in the cold butter with a pastry cutter or food processor until you get a crumbly looking mixture. Set aside.

In a large bowl mix the flour, baking soda, salt cranberries and nuts together. Set aside. In another bowl whisk the egg and sugars until well combined with no lumps. Whisk in the buttermilk, oil, vanilla and orange zest.

Make a well in the center of the dry ingredients and pour in the wet ingredients. Stir together until combined being careful not to over mix. Pour the batter into the prepared pan. Add the streusel on top and press it gently into the batter.

Bake for 50-60 minutes or until a toothpick inserted in the center comes out clean. Cool in the pan for 15 minutes and then remove the bread from the pan.

This bread is great without the glaze. If you choose to glaze it, mix all of the glaze ingredients together and pour on top once the bread has completely cooled.

cranb IMG_1361

IMG_1380

Salted Caramel Butter Bars…

Holiday Cookie Platter

Holiday Cookie Platter

Today I am going to a neighbor’s house for a holiday party and am bringing a platter of my holiday cookies. This year I made eight different kinds and along the way have posted updates of my baking endeavors on Facebook and Pinterest. The cookie recipe that I am going to share with you today stole the show in terms of favorable comments and requests for the recipe.

As part of my holiday baking tradition I always try at least one new recipe. This year I tried two, salted caramel butter bars and iced cinnamon chip cookies. Both turned out fabulously and will probably become future holiday staples. At some point I will have to pick and choose since eight different types are about all I can handle in one holiday season.

The salted caramel butter bars were a big hit when I posted a picture of the finished product on FB. What I like about them, besides the fabulous flavor, is that they are relatively easy to make. My husband gave them two thumbs up which is a real vote of confidence for a new holiday cookie and although the iced cinnamon chip cookies topped my list of the new recipes (that recipe to be posted in the near future) these certainly will wind up a keeper. So here is my rating and lessons learned making this recipe.

Rating: A – hard to top a cookie that not only looks bone chilling delicious but is easy to make and tastes as good as it looks!

Lesson Learned 1: The recipe calls for one bag of caramel candies or 50 individual pieces. The bag I bought was 11 ounces and had 40 pieces in it. I bought two bags. In my estimation you need the 50 pieces to have enough caramel filling to spread so buy either a 14 ounce bag or two 11 ounce bags.

Lesson Learned 2: The most labor intensive part of this recipe is unwrapping the individually wrapped pieces of caramel. It took me about 7 minutes just to do that. If you can buy a slab of caramel that would definitely be easier, just make sure you have a sufficient amount to spread over a 9×13 pan.

Lesson Learned 3: The ingredients to make the crust call for a whole pound of butter. Although I used that, I am wondering if that couldn’t be cut down just a little bit. When I cut the bars the bottoms appeared to be a little greasy. Next time I make these I may experiment with using a little less butter. But beware, you have to be careful when experimenting with cookie recipes as the amounts need to be more exact than they do when you are just cooking something.

Lesson Learned 4: This recipe makes a lot of dough. The instructions call for using 1/3 of the dough for the base. I used more than that and still had a lot of dough to dot the top with a lot left over. Next time I make this I may reduce the portions by twenty-five percent. That still should provide plenty of dough for the crust and the top.

Lesson Learned 5: I had to make these a little earlier in the month and put refrigerate them to keep them fresh. If you do that, pull them out of the refrigerator and let them get to room temperature before serving. They are very hard when taken immediately from the fridge and you don’t want anyone cracking a tooth on them.

Lesson Learned 6: I made this recipe without the sea salt but next time I am going to try it with the salt. Either way the bars were still delicious.

I cannot take credit for this recipe. I found it posted on Facebook and discovered it comes from the website http://www.cleverhousewife.com. I will still post the recipe here so you don’t have to link to the site but I want to give credit where credit is due. Enjoy this recipe. I am sure it will become a holiday staple for you as well!

Salted Caramel Butter Bars

Salted Caramel Butter Bars

Salted Caramel Butter Bars

  • Servings: 2 dozen
  • Difficulty: Easy
  • Print

INGREDIENTS:

Crust:

1 lb. salted butter at room temperature

1 cup sugar

1 1/2 cups powdered sugar

2 TBS. vanilla

4 cups flour

Filling:

1 bag caramel candies (you will need a 14 ounce bag) or about 50 pieces

1/4 cup milk or cream

1/2 tsp. vanilla

1 TBS. sea salt (optional)

DIRECTIONS:

Preheat the oven to 325 and grease a 9×13 pan (or use cooking spray).

In a large bowl combine the butter and sugars and beat until creamy. Add the vanilla and beat until combined. Add the flour and mix until a smooth dough forms.

Press one third of the dough evenly into the pan. Wrap the remaining dough in plastic wrap and refrigerate. Bake the crust approximately 20 minutes or until firm and the edges are lightly browned. Transfer the dish to a wire rack and cool for 15 minutes.

While the crust is baking make the caramel filling. Place the unwrapped caramels and cream in a microwave safe bowl and cook on high for 1 minutes. Stir and continue to cook for 30 second intervals until the mixture is combined and smooth. Once the caramel is melted add the vanilla and stir until combined. Pour and smooth the caramel filling over the somewhat cooled crust. If you are going to use sea salt, now is the time to add it on top of the caramel. Take the remaining chilled dough and crumble it over the entire top.

Return the pan to the oven and bake until the filling is bubbly and the crumbled topping is firm and lightly golden, about 25 – 30 minutes.  Let cool before cutting into squares.

Raspberry Walnut Bars…

I made three holiday cookies recipes yesterday and posted pictures of the final results on Facebook. Without a doubt two of the three were big hits with my friends. (The third, chocolate chip cookies, are such a traditional favorite that they did not get much attention). The biggest hit as determined by the number of recipe requests I received were the Raspberry Walnut Bars followed by the Triple Chocolate Brownie Cookies. The latter will be the subject of an ensuing blog, but today we’re focusing on the media favorite.

Raspberry Walnut Bars

Raspberry Walnut Bars

There’s a lot of reasons for this recipe being so popular. First, and probably foremost, it looks so darn delicious. Second, and not known by those requesting the recipe, it is sinfully easy to make. And third, the recipe turns out perfect first time, every time. I can’t take credit for the recipe, it was one I found a few years ago, I simply can’t remember where I found it. So up front I apologize to whomever I am not giving credit to for the actual recipe. And, as with all the recipes I make these days, I will give it may rating and share my lessons learned making it.

Recipe Rating: A++++++++++ (get the message)? I just can’t say enough about this recipe. I remember the first time I saw a picture of it. It looked so good but I thought it would be hard to make. Was I ever wrong. This recipe couldn’t be simpler and it has turned out perfectly every time I’ve made it, including the first time. And it’s not all that often that a recipe turns out picture perfect the first time you make it. So you definitely have to try this one. You will love it.

Lesson Learned 1: Perhaps the hardest thing about this recipe is preparing the pan. The recipe calls for lining a 8 inch square pan with parchment paper allowing some overhang on both sides. Trying to keep parchment paper from popping back out of the pan when you allow for overhang can be tricky. I found the easiest way to make the parchment paper behave is to take two heavy cans of anything and weigh down the paper in the pan while making the dough. That way when it’s time to spread the dough out on the bottom the paper has been somewhat trained and doesn’t jump around as much.

Lesson Learned 2: It is important to follow the directions of using the parchment paper, having the overhang and spraying the parchment paper with cooking spray. I can’t image what you would wind up with if you didn’t. But if you take the time to do it, it comes out of the pan easily and absolutely nothing sticks to the parchment paper.

Lesson Learned 3: This recipe gives you plenty of dough so don’t worry about using it to fill up the bottom. It says to use two thirds of the dough for the crust and one third to dot the top. I found that gave me way too much dough for the top. You need a lot less dough to dot the top then you think, so don’t be afraid to use more than two thirds of the dough for the crust.

Lesson Learned 4: Avoid the temptation to use too much raspberry jam. A nice even thin coat is all you need. Stick to the amount called for in the recipe.

Lesson Learned 5: Depending on how many bars you want to give out, you may have to make this recipe a couple of times. You can make the bars big or small, but the most you’ll probably get out of this recipe is 24 small bars.

I guarantee these bars will be a hit with your family and friends. You simply must try them!

Raspberry Walnut Bars

  • Servings: 2 dozen
  • Difficulty: Easy
  • Print

INGREDIENTS:

Non stick baking spray

1 3/4 cups flour

1/2 tsp. kosher salt

1/2 tsp. ground cinnamon

1/8 tsp. nutmeg

3/4 cup unsalted butter, room temperature

1 cup sugar

2 large egg yolks

1 tsp. vanilla

2/3 cup raspberry jam

1 cup chopped walnuts

DIRECTIONS:

Preheat oven to 350. Line an 8 inch square baking pan with parchment paper leaving an overhang on both sides. Spray the parchment paper with cooking spray. (I do this right before I am ready to put the dough into the pan).

In a medium bowl whisk the flour, salt, cinnamon and nutmeg. Set aside. Beat the butter and sugar until fluffy. (This does take a little time, most people do not do this thoroughly enough so make sure to take the time to make the mixture fluffy). Beat in the egg yolks and vanilla. Gradually add the flour mixture until combined. Do not over mix. Transfer two thirds of the dough into the prepared pan and press down evenly. Spread the jam on top. Crumble the remaining dough and dot it over the jam. Sprinkle the top with the walnuts. Bake until golden 35-45 minutes. Cool completely in the pan. (this is very important).

Holding both sides of the parchment paper, lift out of the pan, transfer to a cutting board and cut into rectangles. Store in an airtight container at room temperature for up to 5 days.

Raspberry Walnut Bars

Raspberry Walnut Bars

The Elves Are In The Kitchen…

Cranberry Oatmeal Cookies

Cranberry Oatmeal Cookies

It’s December 3rd. There’s a winter storm warning, clouds are ominously thickening overhead, the temperature is dropping and so naturally my thoughts are turning toward holiday baking. Making holiday baked goodies is something I’ve done since I was in college. It started out as somewhat of a lark and has now turned into a hard-and-fast holiday tradition. The cookies have to be made somewhat early these days as a batch needs to be shipped to my aunt in Chicago, but making and freezing cookies is just as good as having them fresh. The challenge is deciding what the 2013 cookie menu will be?

There are a few things I know I cannot fool around with, these cookies must be made every year – no questions asked. Namely they are the chocolate dipped sugar cookies, the chocolate chip cookies and the triple chocolate brownie cookies. Over the past couple of years another cookie has almost worked it’s way into must-have tradition status, the cranberry oatmeal cookie.  It is quickly becoming a real favorite with family and friends. My personal favorite has not quite yet  caught on, that is the raspberry walnut bars but I’m sure before long it will become a holiday staple as well. And every year there is an unwritten law that at least one new cookie recipe must be attempted. That’s the law and it must be obeyed!

So with the weather promising that tomorrow will be a day indoors, it’s time to start baking – but before that comes the planning. What will the cookie gift plates consist of this year? At this point a preliminary list has been developed. It is always up for adjusting, except for the big must-have three, but it provides a starting point for the cookie onslaught. So here it is, the unveiling of the preliminary 2013 holiday cookie list (with more additions or exclusions to follow):

Chocolate Dipped Sugar Cookies

Chocolate Dipped Sugar Cookies

THE BIG THREE: (can you see a chocolate theme going on here?)

THE PRELIMINARY MENU:

THE ON-THE-FENCE MENU:

  • Peanut Butter Blossom Cookies
  • Spritz Cookies
  • Any Other Cookie Recipe I See As I Skim Pinterest or Facebook

So there you have it.  It took me two hours and two different grocery stores to amass all of the ingredients I’ll need but at least I have a solid plan for tomorrow, snow or no snow.  As I continue on my holiday baking journey I will post pictures of the cookies along with the recipes and any lessons I’ve learned along the way while making them. Up to this point, the biggest lessons I’ve learned deal with how to adjust these cookie recipes for high altitude. I won’t share those tips unless you ask for them. With over 30 years of making some of these cookies I’d say I have many of them down pat. Some I personally like more than others and I’ll share those opinions along the way. One thing never changes, though, and that is the joy of this time of year and the fun that I have making holiday cookies.

Raspberry Walnut Bars

Raspberry Walnut Bars

Dip-etty Do Dah…

Macy’s Thanksgiving Day Parade – check. Football games – check. Thanksgiving dinner reservation – check. Santa Claus is coming to town – check. And so it begins (although one would argue that it began some time ago), the Christmas season is upon us. Time for the insanity of gift buying, decorating, baking, holiday parties and the annual fear of whether you will survive yet another holiday season. The pressure is on to have your house look like a picture posted on Pinterest, your home filled with home-baked goodies and your gifts wrapped with a professional flair. No wonder so many people say bah humbug at this time of year.

But it doesn’t have to be all that bad, especially if you get a little help from your friends. So let me introduce myself, I am your holiday friend. Now I can’t decorate your home or purchase and wrap your gifts, but I can give you some great great recipes that I have either tested or used over the years to help you with some food decisions for your parties and family gatherings.

Creamy Spinach and Red Pepper Dip Ingredients

Creamy Spinach and Red Pepper Dip Ingredients

I already started with a great holiday recipe for a crab dip in a previous post, but just in case you missed it just click here and it will take you to that blog with a link to the recipe. Today I was challenged to make something for a pot luck we are having at work (I work at Crate and Barrel and we will be at the store in full force this holiday weekend) and I wanted to make something that could be enjoyed by all, especially since we have quite a few vegetarians on staff. I have a great recipe for holiday meatballs, which I will share some time within the upcoming days, but I knew that would not fit the bill. So once again I journeyed to Pinterest and did a search for cold dips. There I found a great recipe for Creamy Spinach and Red Pepper Dip from the tastykitchen.com website. The ingredients fit the bill and the rest was history.

As always, with recipes I try from other sites, I do my self-claimed rating and lessons learned in the hopes that if I made any mistakes or learned any valuable lessons while making the recipe it will help you make it perfectly on your first try. This one was relatively simple so definitely something to keep in your hip pocket if you need to bring something to a party or want an appetizer for a holiday meal.

Recipe Rating: A – the ingredients are simple, fresh and the recipe is easy to make. The most work you have to do is chopping the green onions and the roasted red peppers.

Lesson Learned 1: This is something I already knew but if you don’t it could definitely save you time and aggravation. The recipe calls for a 10 oz. package of frozen spinach. I was surprised how long it took for the spinach to thaw. I put it in the refrigerator the day before and then put it out on the counter this morning and left it there until 1:00 p.m. After thoroughly draining it (which really requires you to put the spinach in a towel and squeeze until no water comes out at all) I noticed there was still some ice particles in the spinach. So I separated the leaves, put them between two paper towels and pressed down on them. A lot of water still came out. The lesson here is to make sure it is thoroughly defrosted and as totally dry as possible (it will take longer than you think). Otherwise you will have a runny dip.

Lesson Learned 2: The recipe does not call for it but I added a pinch of salt at the end. After tasting it, it seemed like it was lacking a little something and the salt brightened up the flavor. Once it sits for a while, the flavors will be even more dynamic.

Lesson Learned 3: I am a big fan of roasting my own red peppers, but the roasted red peppers in a jar are just as good and a great time saver. So no need to do the process on the stove, just buy a jar and chop them up.

Lesson Learned 4: The recipe says that the prep time is only 3 minutes. I’m not sure what speedy chef decided that but by the time you assemble all the ingredients, do the chopping and mix the dip, I would say it takes about 10-15 minutes of your time. The nice thing about this recipe is that it serves 30 so for a large crowd like I have at work this is a great and inexpensive recipe to make.

Lesson Learned 5: This is a easy, flavorful recipe and the green of the spinach and the red of the roasted red pepper also provides the traditional holiday colors for which we have become accustomed – a nice decorative touch to your table.

So, get ready to deck the halls with this recipe. It is easy, colorful, impressive and will actually give you time to focus your energies on other things during the upcoming holiday season. Enjoy!

Creamy Spinach and Red Pepper Dip

Creamy Spinach and Red Pepper Dip

Hiawatha Means Holidays…

One of my most precious memories, or years of memories, I have of the Christmas holiday season was producing the annual holiday shows at Hiawatha Park. The shows started out as small plays and evolved into Christmas musical extravaganzas. For me, the fall and winter seasons are still defined in my mind by the rigid schedule we kept to get a show up the second week in December. It was always the second week in December for several reasons, mostly so it would not conflict with the myriad of other holiday activities planned by schools and families. But I also arranged my schedule so that once the show was done I was on vacation until the first of the year. Ah, those were the days…

We did many full scale musicals including Babes in Toyland, Cinderella and Peter Pan and we also did shows consisting of holiday skits and dancing. But, regardless of what we chose to do, it was always a magical way to ring in the holiday season. Auditions started early in September and the competition was always fierce for the lead roles. Once the show was cast rehearsals began and the tried and true schedule we was put into motion. Rehearsals were two to five days a week, depending on the size of your role. At least once, if not twice, during the course of the rehearsal period I would tell the students the show was canceled, not because I intended to do it but it was a weapon to get them to behave. It worked for a while and then became just another element of patterns of the rehearsal schedule. The first complete run through was always the Wednesday before Thanksgiving. I would always dreaded that day but more often than not was surprised that the kids could actually pull it all together.

After that, I would spend rehearsal times focusing on weak areas and ensuring that we did a few more complete run throughs before we moved into the gym. The Hiawatha Park gymnasium was the venue where we staged all of our shows. We could never get into the space until the Monday before the show so we literally had only two days to rehearse in the performance space before the show opened, and one of those days was dress rehearsal with no stopping and starting. So technically we had only one rehearsal to get it all down.

The Monday of show week was perhaps the day I dreaded the most. Moving from the small room where we rehearsed for two months and trying to get sixty kids to adjust their blocking to the much bigger space was always interesting. The more seasoned students learned quickly and adapted very well. The newer students had difficulty but always seemed to find their way by show time. Monday was also the day that we staged the major dance number of the show that involved every single student in the program. It was the first time all of them danced the dance together and it was a technical nightmare – sixty kids doing different things at different times weaving in and out of each other while watching in awe the dancing of the Dance Company. How we all got through it I will never know, but the result was spectacular. The Monday rehearsal  always seemed like it would never end. Having to restage the entire show, adapt the choreography and do a complete run through with lights and sound for the first time was a daunting task. But we all pulled through.

Then came Tuesday, dress rehearsal night, and you could feel the tension in the air. This was it – regardless of what happened, the show would be done in its entirety without stopping. I had strict back stage rules for the cast but trying to keep a slew of excited grammar school children behaving was perhaps the biggest task of all. I spent as much time keeping them seated, preventing them from peaking out from behind the bookfolds, and not talking as I did stage managing. Quite often I would snap my fingers and point at someone misbehaving with a glare that I hoped would stop them in their tracks. Some times it work and some times it didn’t. There were even a few surprise rump taps to keep them in check. If I were teaching today, that definitely would not have occurred. And eventually we made it through dress rehearsal and on to three nights of performances.

Wednesday, Thursday, Friday – performance days. The first night you could cut the tension with a knife, the second night the kids were old pros and the third night they were just plain having fun. And then there were the flowers. Every closing night they gave me flowers. For fourteen years I got flowers and for fourteen years each group that gave them went through elaborate measures to make sure that I didn’t know I was getting flowers – or so they thought. And although I knew, I cherished each gift because I knew it reflected the love they had for me, which I also had for them.

And then came Saturday. This holiday play producing tradition was capped off by the annual Christmas Party at Hiawatha Park which always occurred the day after our show closed. And every year the dancers would perform at least two of dances they performed in the holiday show. And that was it, the auditions, the rehearsals, the canceling of the show, the pre-Thanksgiving run through, the first day in the gym, the dress rehearsal, the three nights of shows, the flowers, the Christmas Party – all culminating in the second week of December.

Today is Saturday in the second week of December, the day of the annual Christmas party. And in my mind today, the show is over, the holiday songs are being sung (accompanied by Rita Utz on the piano) and the dancers for one last time are performing some dances from the holiday show. The flowers they gave me the night before are in a vase in a prominent place in my house, serving as a beautiful reminder of what we all accomplished together. Those beautiful flowers, those precious flowers. They are so vivid in my mind even though you don’t bring me flowers anymore…

Singing Holiday Songs…

Holiday songs underscore all of my holiday experiences. You only get a chance to pull them out for a very short window of time but the memories they create last forever. My love of music was instilled in me by my father – he loved music and loved to dance and handed down those passions to me. I also found out at quite an early age that I had a pretty decent singing voice and had an ear for musical harmonies. The nuns at my grammar school loved that and hence the holiday memory I am about to share.

I have a few very strong memories of grammar school but one that always rises to the top was gathering around the piano during music class (how many schools have music classes anymore) and singing Christmas songs. My sixth grade teacher had a penchant for The Little Drummer Boy and was elated to find out that I had a range that could support doing the bass rum pum pums in the song. I also had an ear to be able to sing that on pitch so that assignment was always relegated to me. I never wound up singing the lyrics to that song but I was the best background singer my sixth grade teacher had ever know. And what is that song without that background refrain? My sixth grade teacher would boast to other teachers that she had a student that could sing the bass part of Little Drummer Boy on pitch and they were always surprised to learn that it was actually a girl who was doing it.

But I also had a range that allowed me to sing soprano and that gave me a starring role in the song “Angels We Have Heard on High?” I could belt out the Glo ooooo ooooo oooo oria like no one’s business and finally got the chance to sing a lead vocal in a song in the holiday concert. To this day that song holds a very special place in my heart. I can still see this little sixth grader, strong and proud, singing with gusto and faith – truly an magical and angelic time. I can still see my class gathered around the piano, divided by our vocal ranges, smiling and singing, having the time of our lives. A special time of year with special songs to sing.

I’m not sure why to this day this one particular grammar school memory stands out for me. But I can still clearly see the room we were in, the piano in the back of the room, the winter sun streaming the windows, the uniforms we wore, the big blackboards with examples of palmer method cursive writing above them – I can even remember the smell of Maurice Lenell cookies wafting through the hallways – the hallways always smelled like that in our school. And I distinctly remember the pure joy I felt every time I sang a rum pum pum or a Gloria. It felt like Christmas time would last forever and that I was the luckiest kid in the world. Pure happiness, a precious memory.

I don’t sing these song much anymore. I don’t know why. Maybe I should…