Crab Salad Tea Sandwiches…

My life has changed a lot since I retired. And it’s changed so much more this past year with the Covid 19 pandemic. One thing that’s kept me sane is a small group of neighbors who get together with me every Monday to play cards. We started this weekly get together before the pandemic and we all are committed to following the same safety protocols so luckily we’ve been able to maintain our games (often masked for extra precaution). It’s managed to keep all of us sane.

Every week we meet at a different condo and once a month everyone has the opportunity to host. Hosting involves serving lunch. I love my turn to host because it’s an opportunity to try out new recipes on my guests. They’ve informed me they don’t mind at all being my guinea pigs and it gives me an opportunity to create an even greater arsenal for my blog.

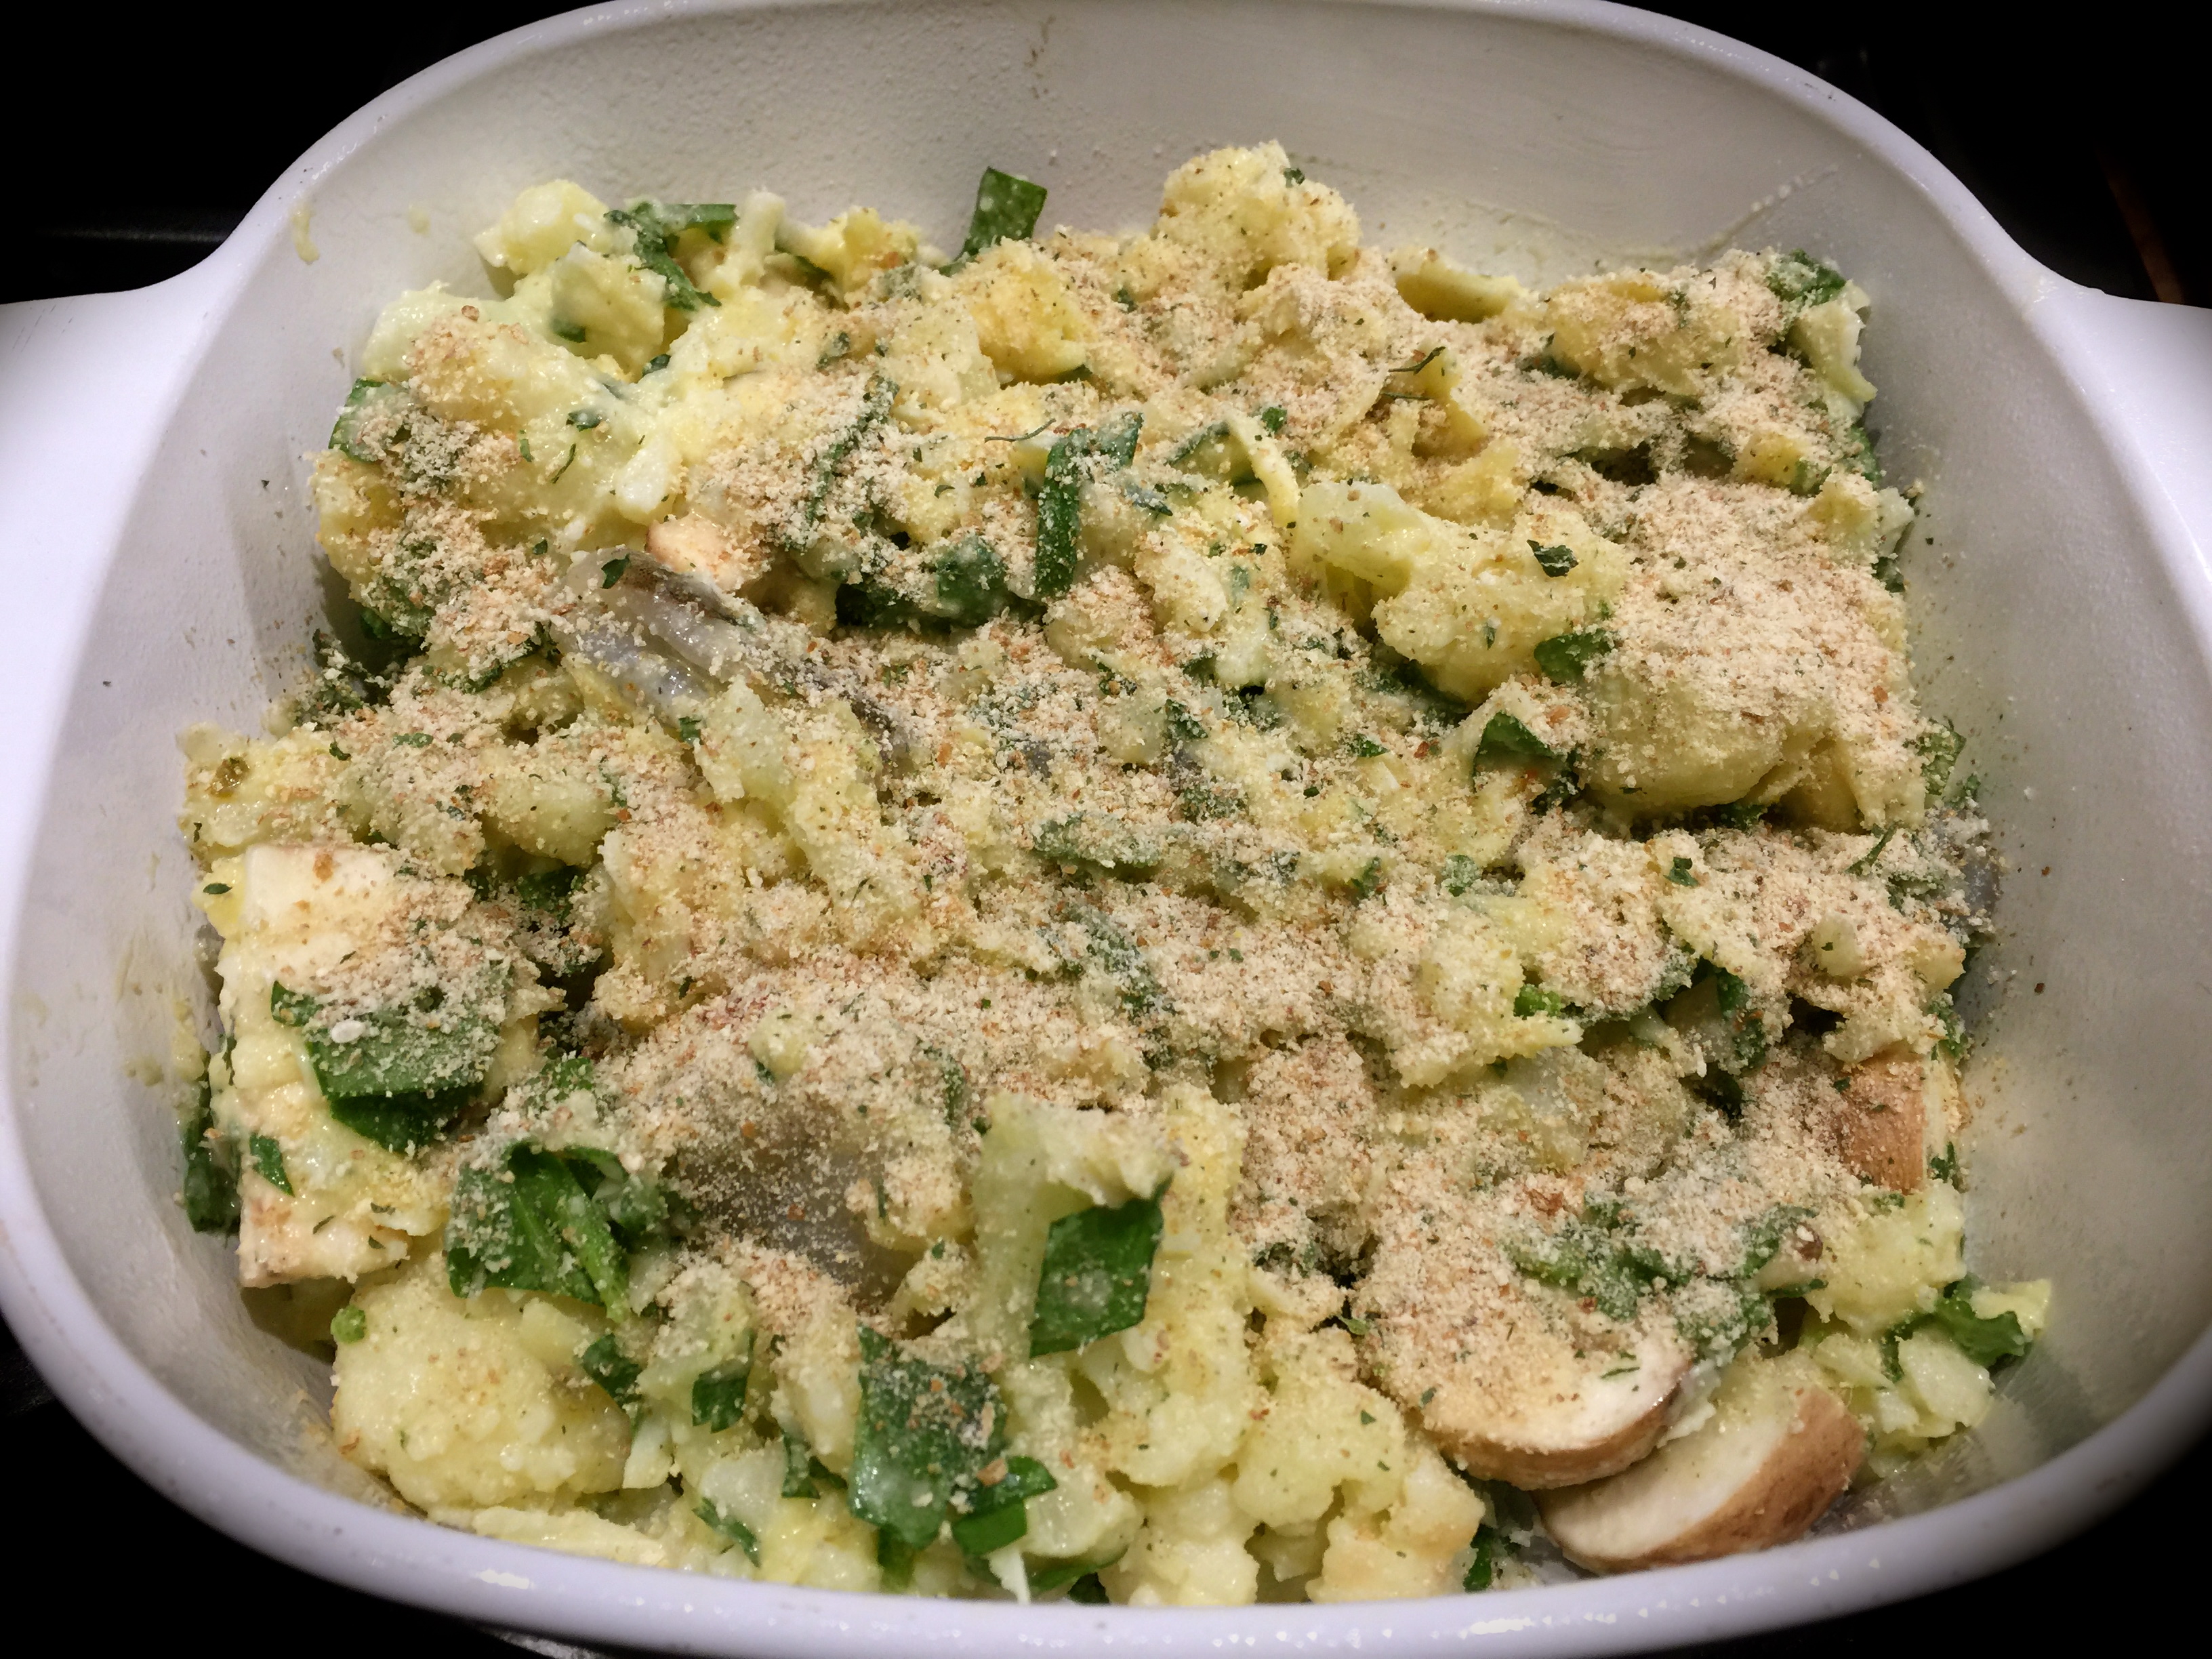
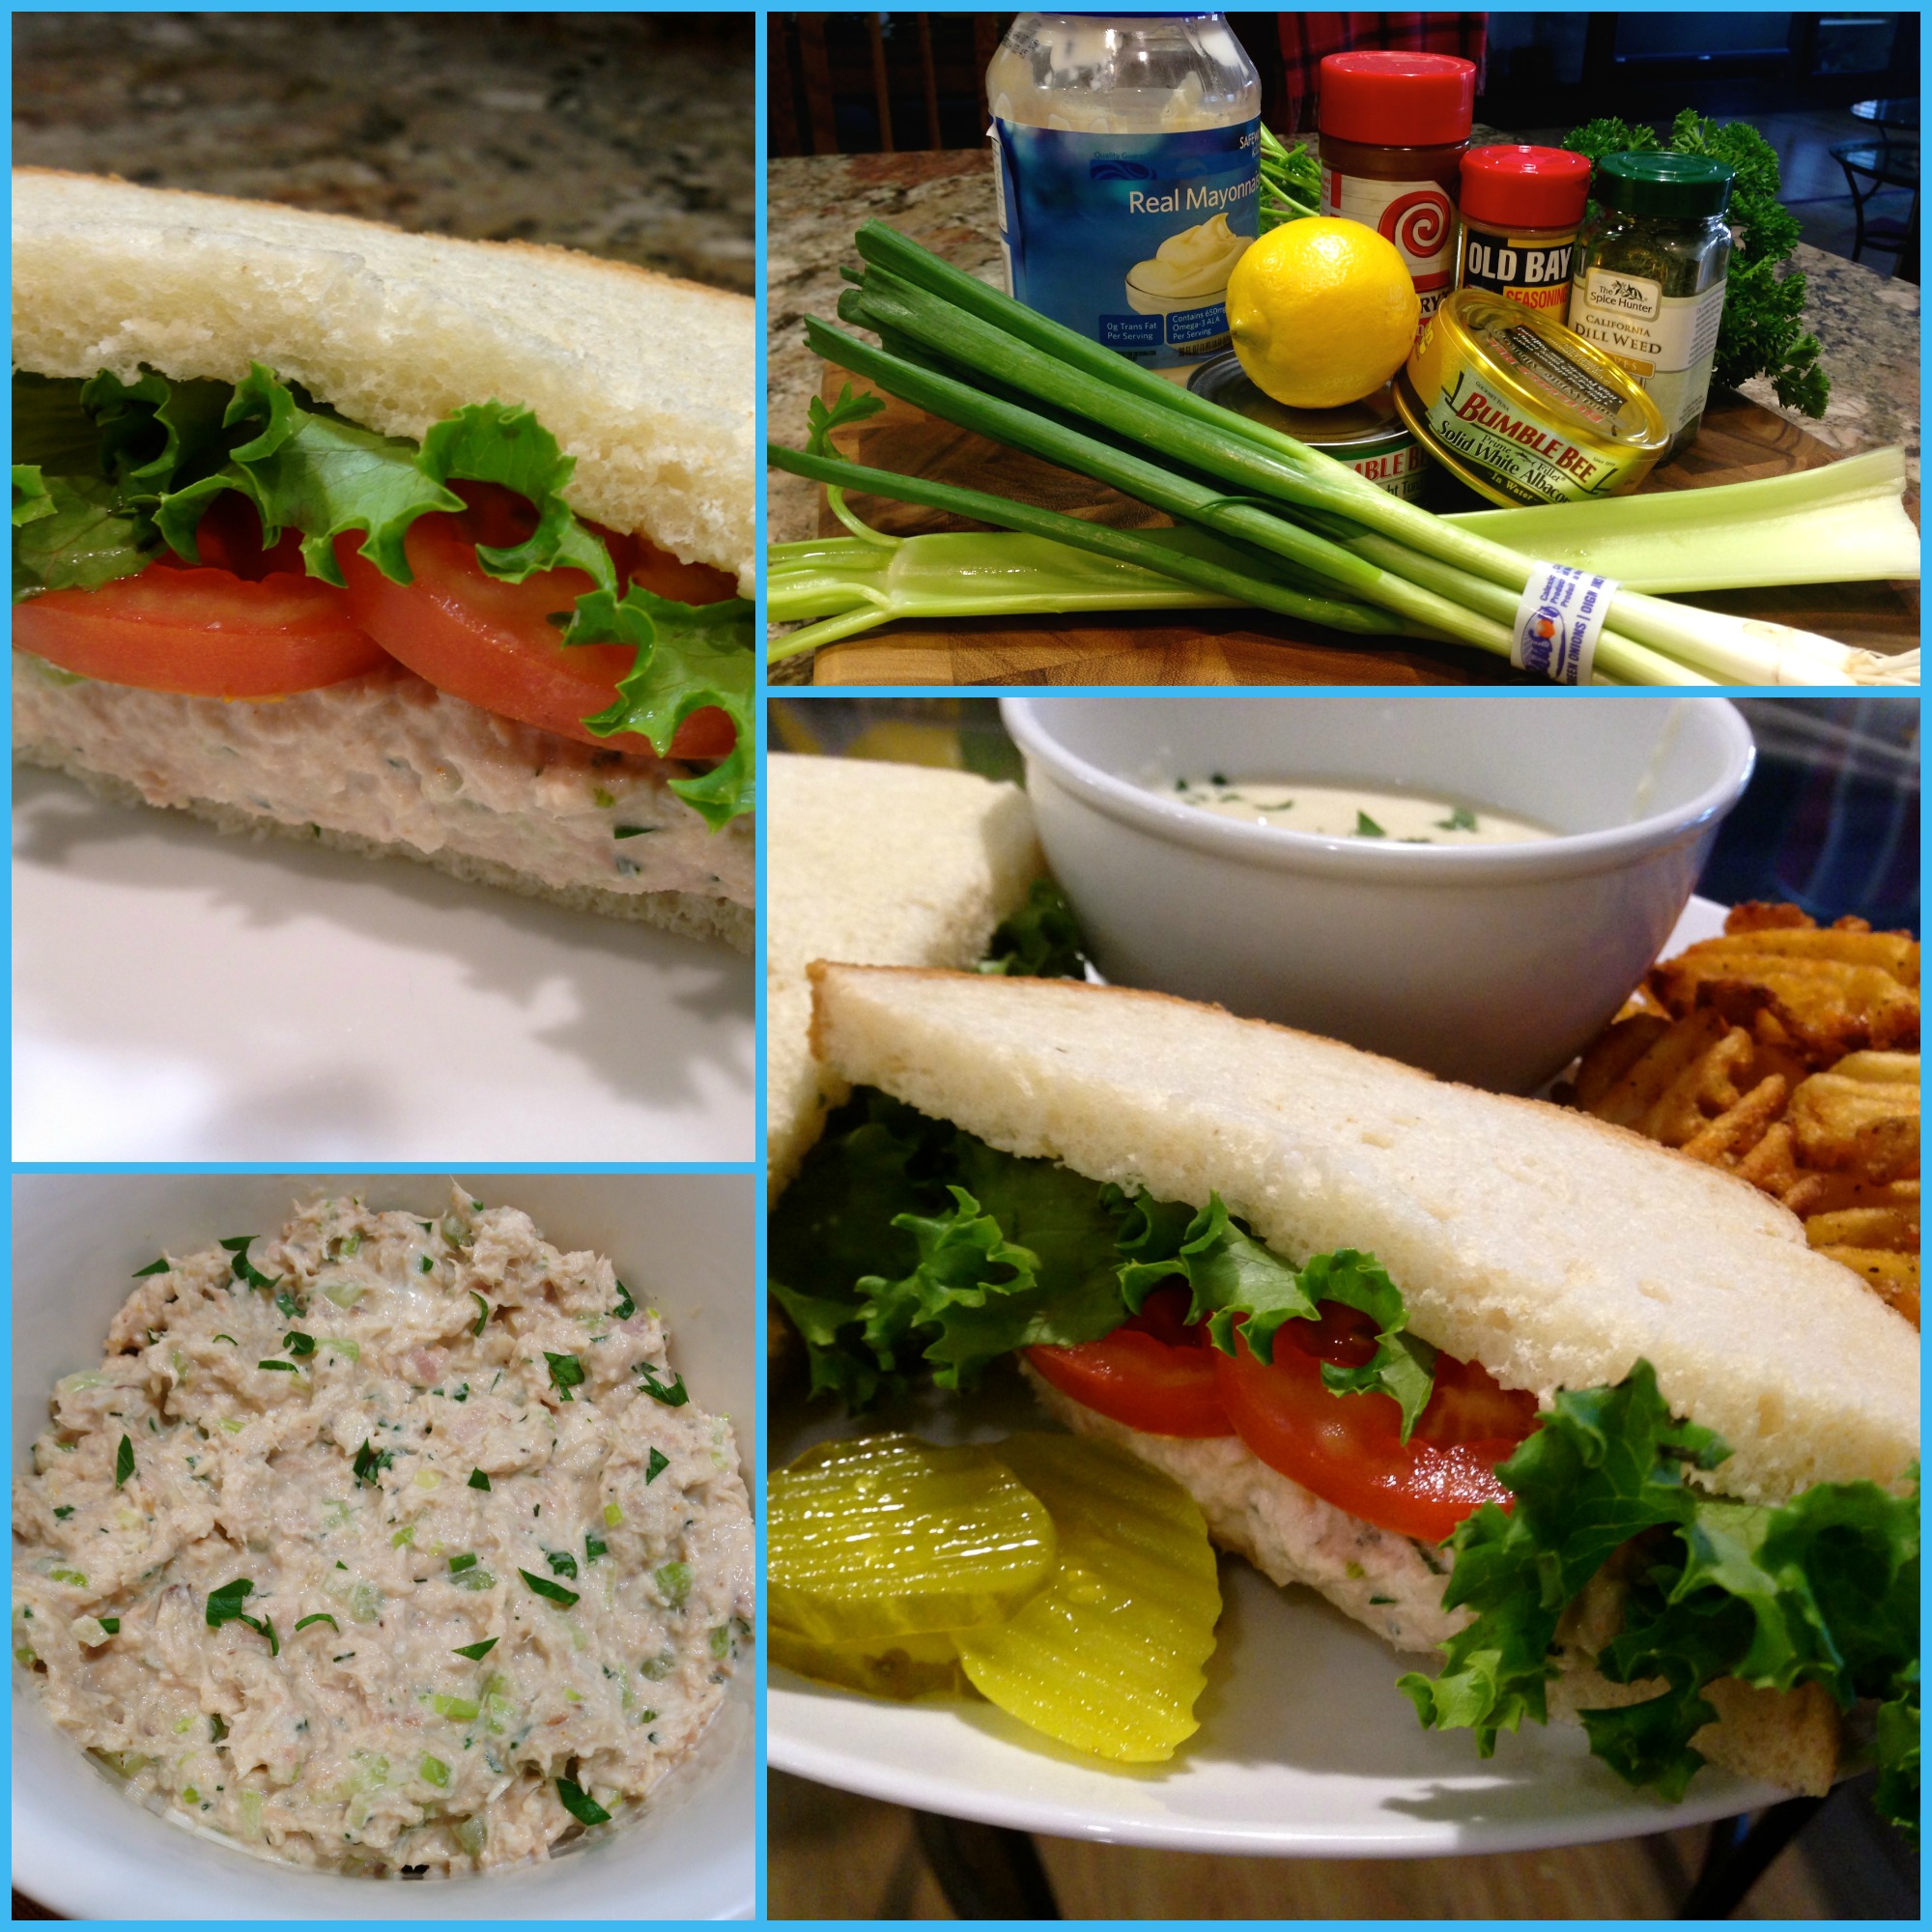
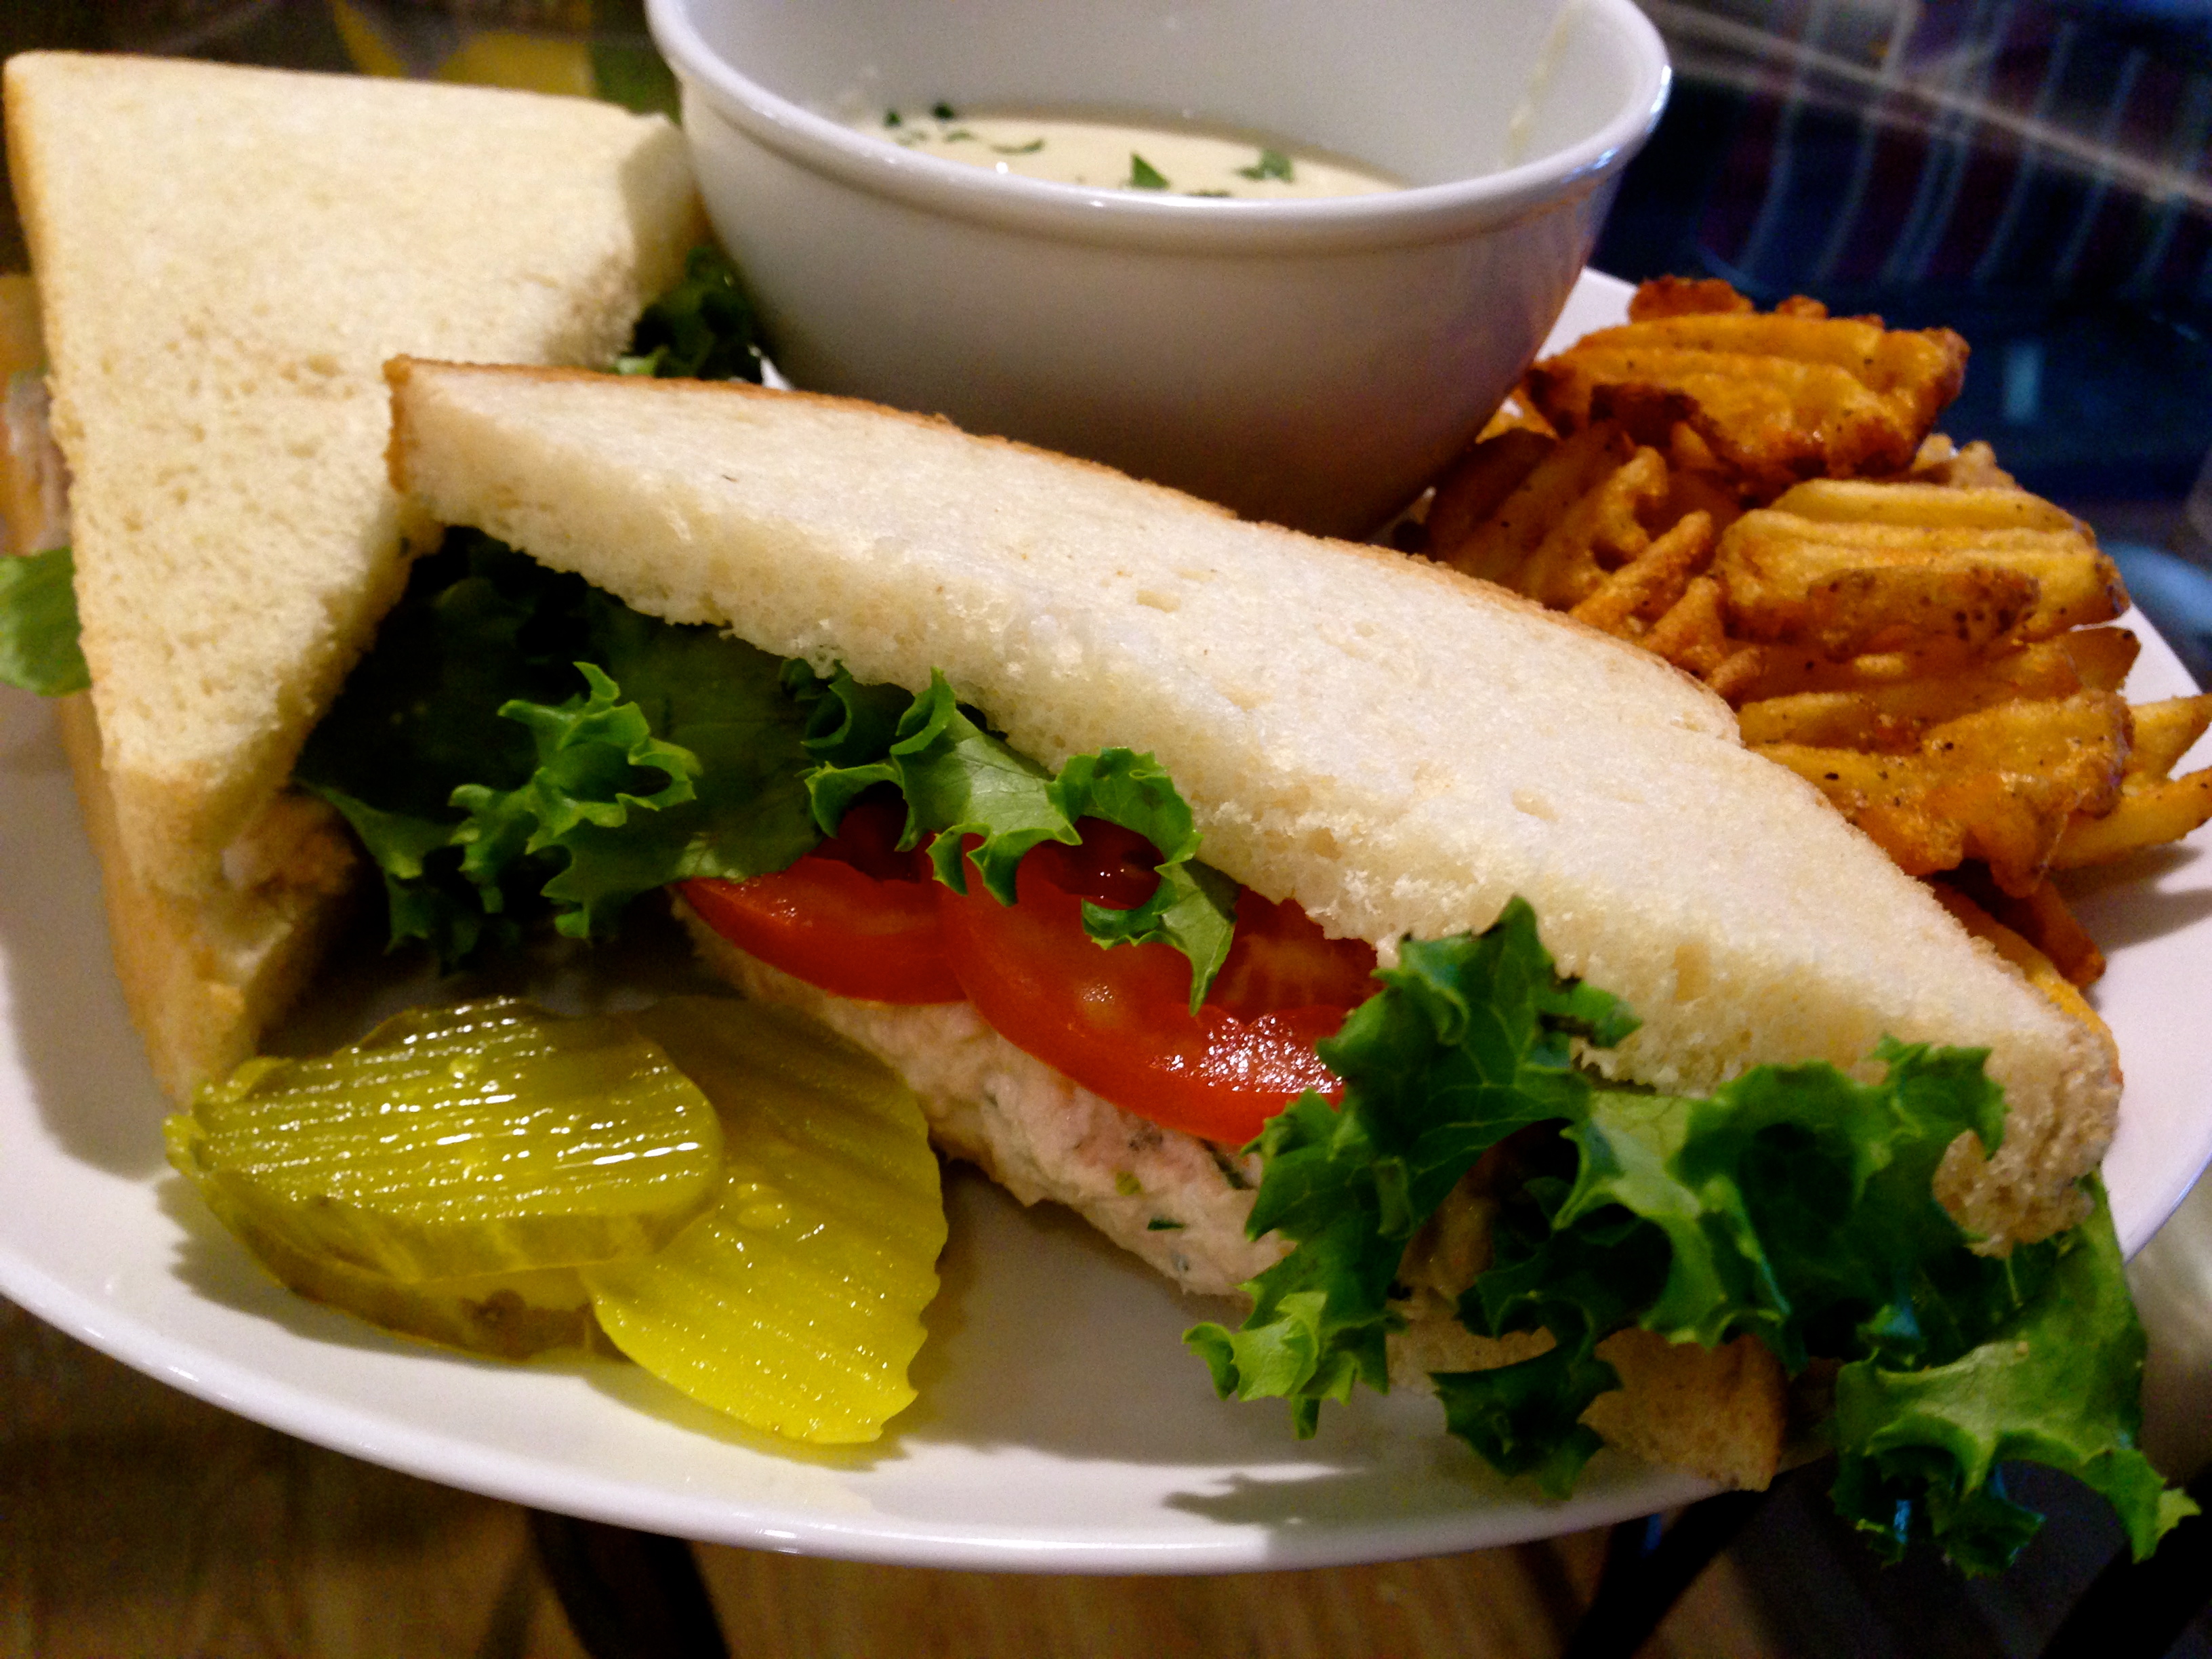
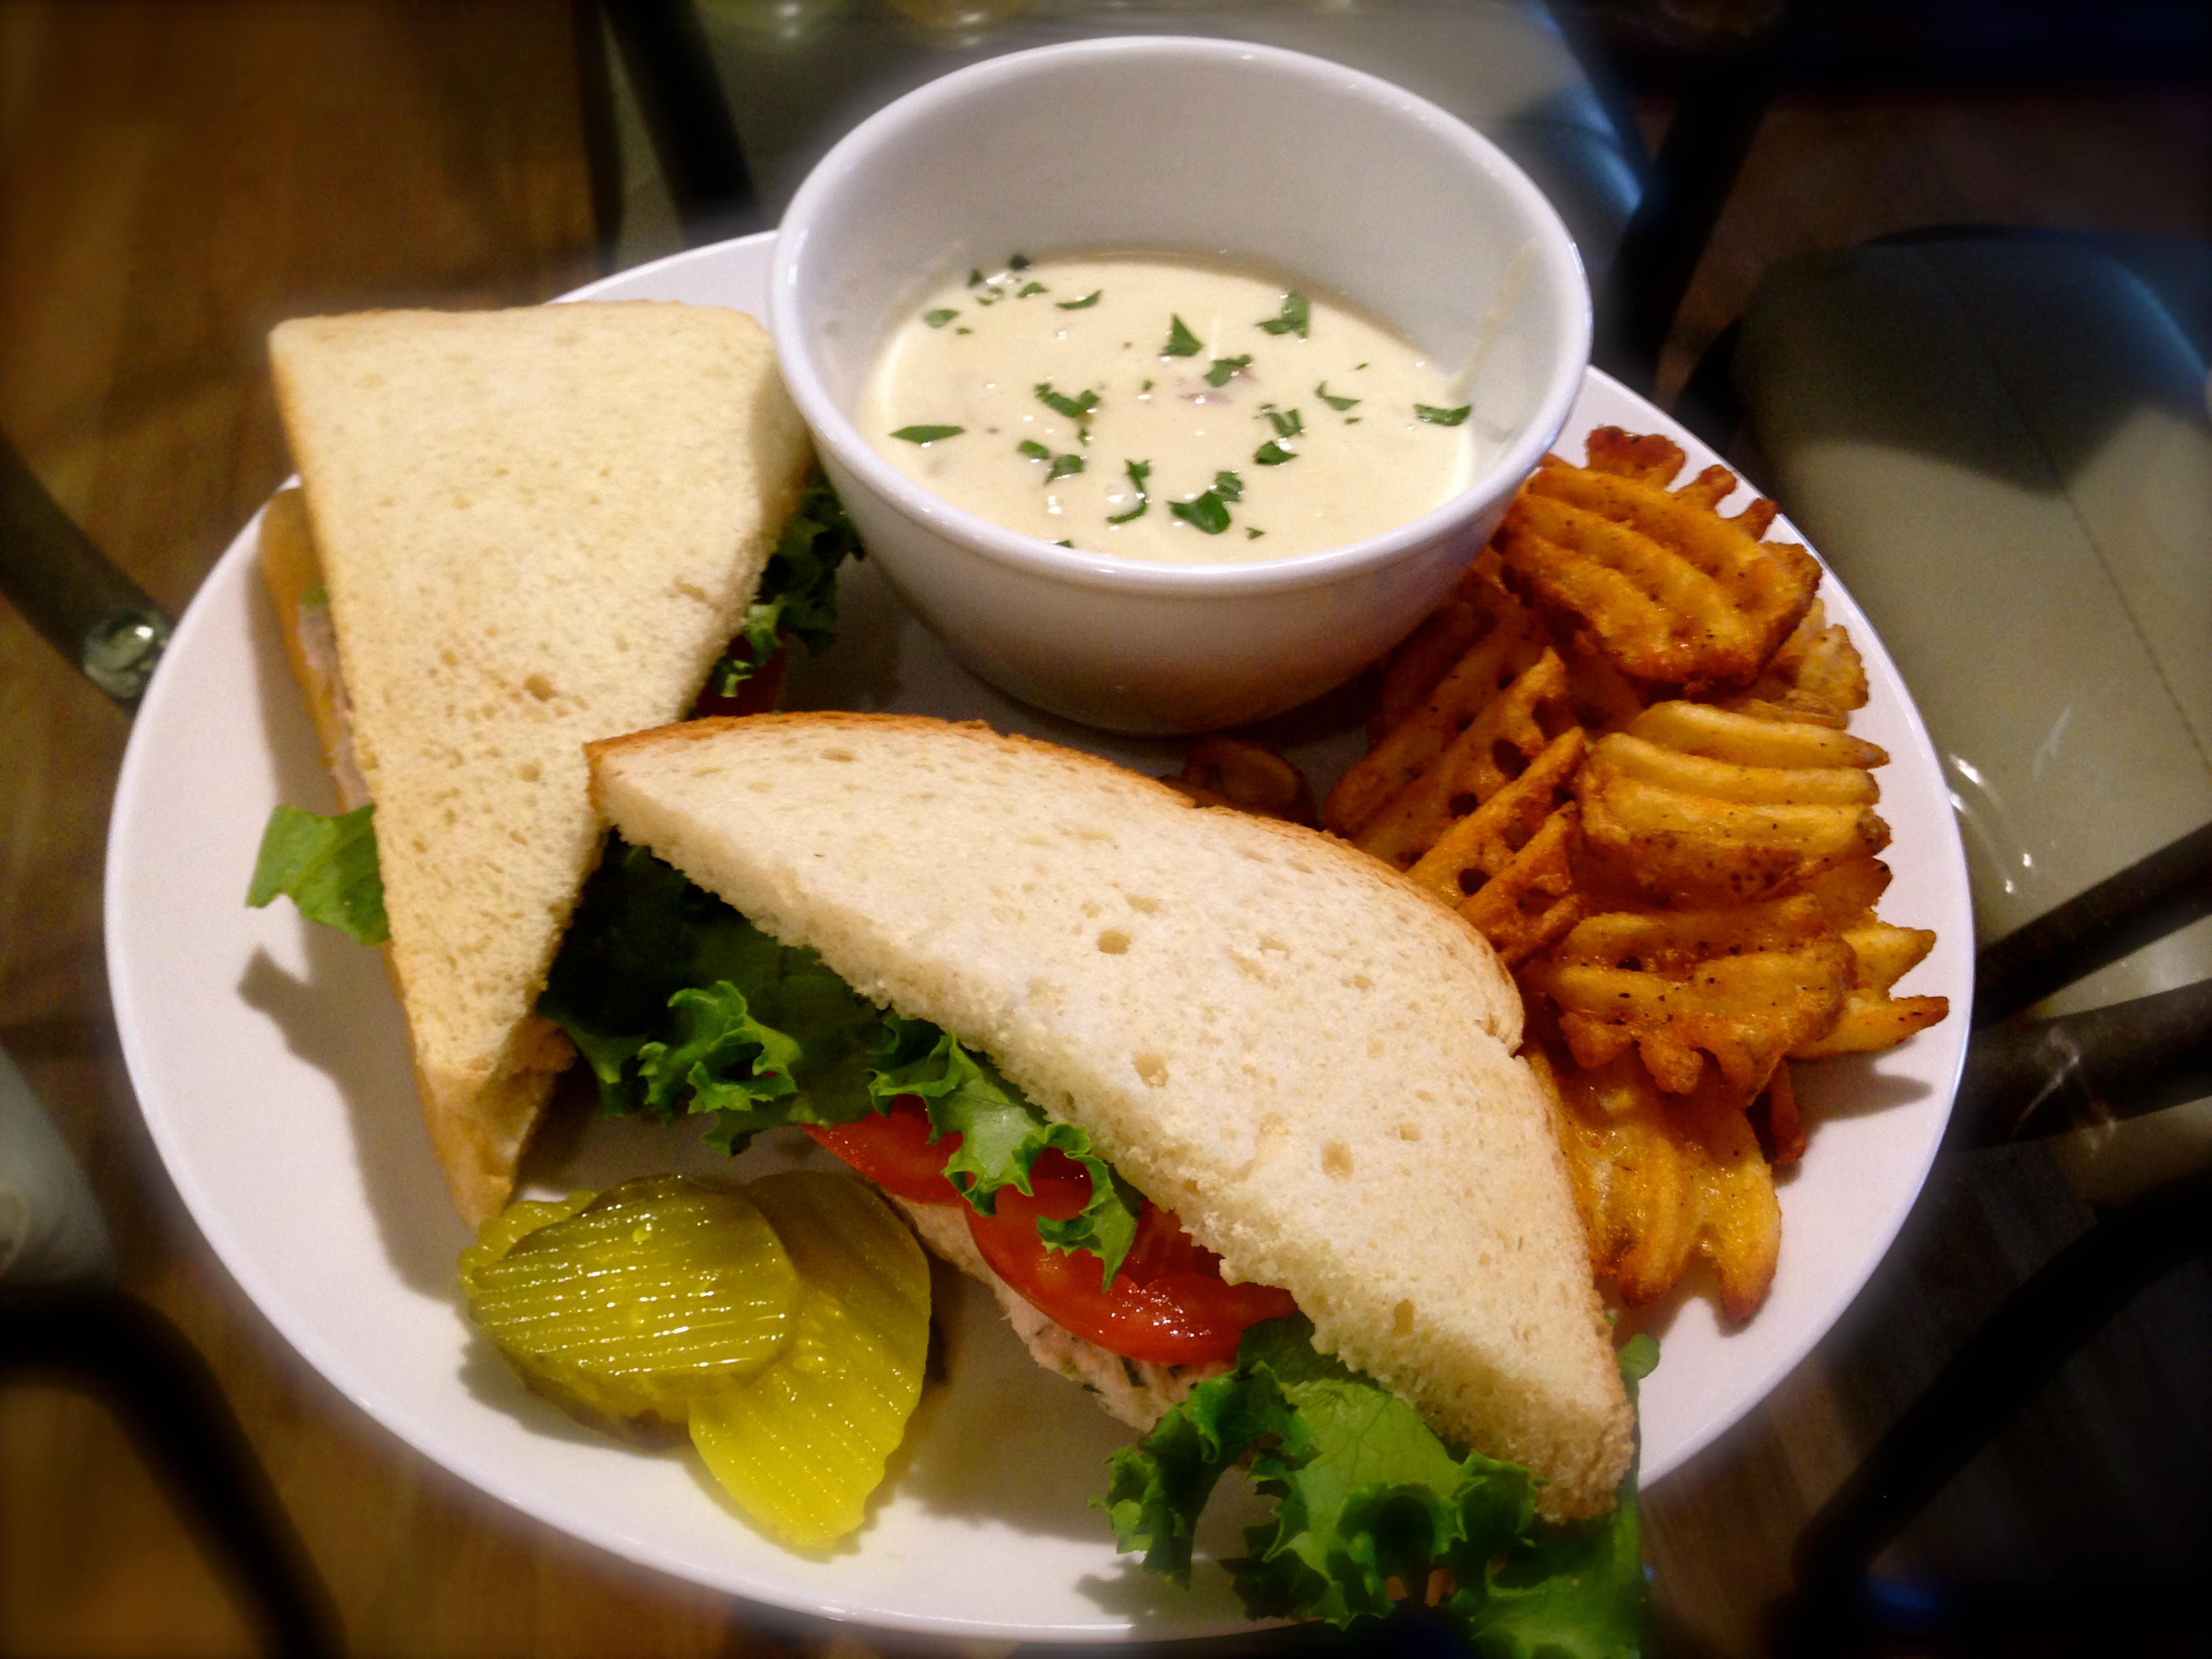
I usually like to make something that I can prepare the day before and just heat up the following day. Normally that consists of soups, stews, casseroles and the like. A while back when I knew it was going to be cold outside I decided to make a creamy chicken and mushroom soup (recipe is forthcoming) and to add to it these crab salad tea sandwiches. I could make the crab salad the day before and the day of simply assemble and serve them.

So let’s talk crab salad tea sandwiches…

Lesson Learned 1 – Make the crab mixture the day before: With almost any type of salad like this, shrimp salad, chicken salad, crab salad, etc., it’s always best to make it ahead of time and allow all the ingredients to get sufficiently acquainted. The end result tastes notably different and better when the flavors get some time to gel. Plus an added benefit is you don’t have to scramble the day of your party because most of the work is already done. Take the time to make stuff ahead. It is well worth it.

Lesson Learned 2 – Use good crab meat and not the fake stuff: I know crab meat is expensive. The can I bought was on sale and I paid about $18.00 for it. But the flavor profile is so much better using good ingredients. A viable alternative is crab claw meat which is less expensive but I prefer the actual crab meat

Lesson Learned 3 – Rinse the crab meat with water: I found this is a great way to remove any gel or liquid that was on the crab in the can. Also go through the crab with your fingers and check for any shells. Sometimes small bits of shells can be on the crab and you want to remove them before mixing them with other ingredients.

Lesson Learned 4 – The trick to cutting nice small round sandwiches: I used a 3 inch biscuit cutter to make the sandwiches. I found I could make one sandwich, top and bottom, out of one slice of bread. I also discovered a little secret. Initially when I was cutting out the circles I swirled the biscuit cutter like you would when you cut dough. That created somewhat scraggly edges on the bread. Since the bread is so soft anyway, all you need to do is press down with the cutter. The round will form, you can easily pop it out of the biscuit cutter and you wind up with nice smooth edges. Live and learn…

These are very easy and fun to assemble and they are impressive looking and delicious. So try these out and tell me what you think…

Crab Salad Tea Sandwiches...

  • Servings: 14
  • Difficulty: Easy
  • Print

INGREDIENTS:

8.5 ounce can of crab meat, drained and checked for shells

1/4 cup English cucumber, diced

1/4 cup orange bell pepper, finely chopped

1/4 cup red onion, finely chopped

1/4 cup celery, finely chopped

1/4 cup mayo

1 Tbs. sour cream

1/2 tsp. dijon mustard

1 tsp. freshly squeezed lemon juice

1 generous Tbs. of fresh dill, chopped

1/2 tsp. salt

1/4 tsp. paprika

1/4 tsp. white pepper

A couple of dashes of Worcestershire sauce

1 loaf of soft white bread

softened butter

fresh dill for garnish

DIRECTIONS:

Mix the crab, cucumber, bell pepper, onion and celery together. Set aside.

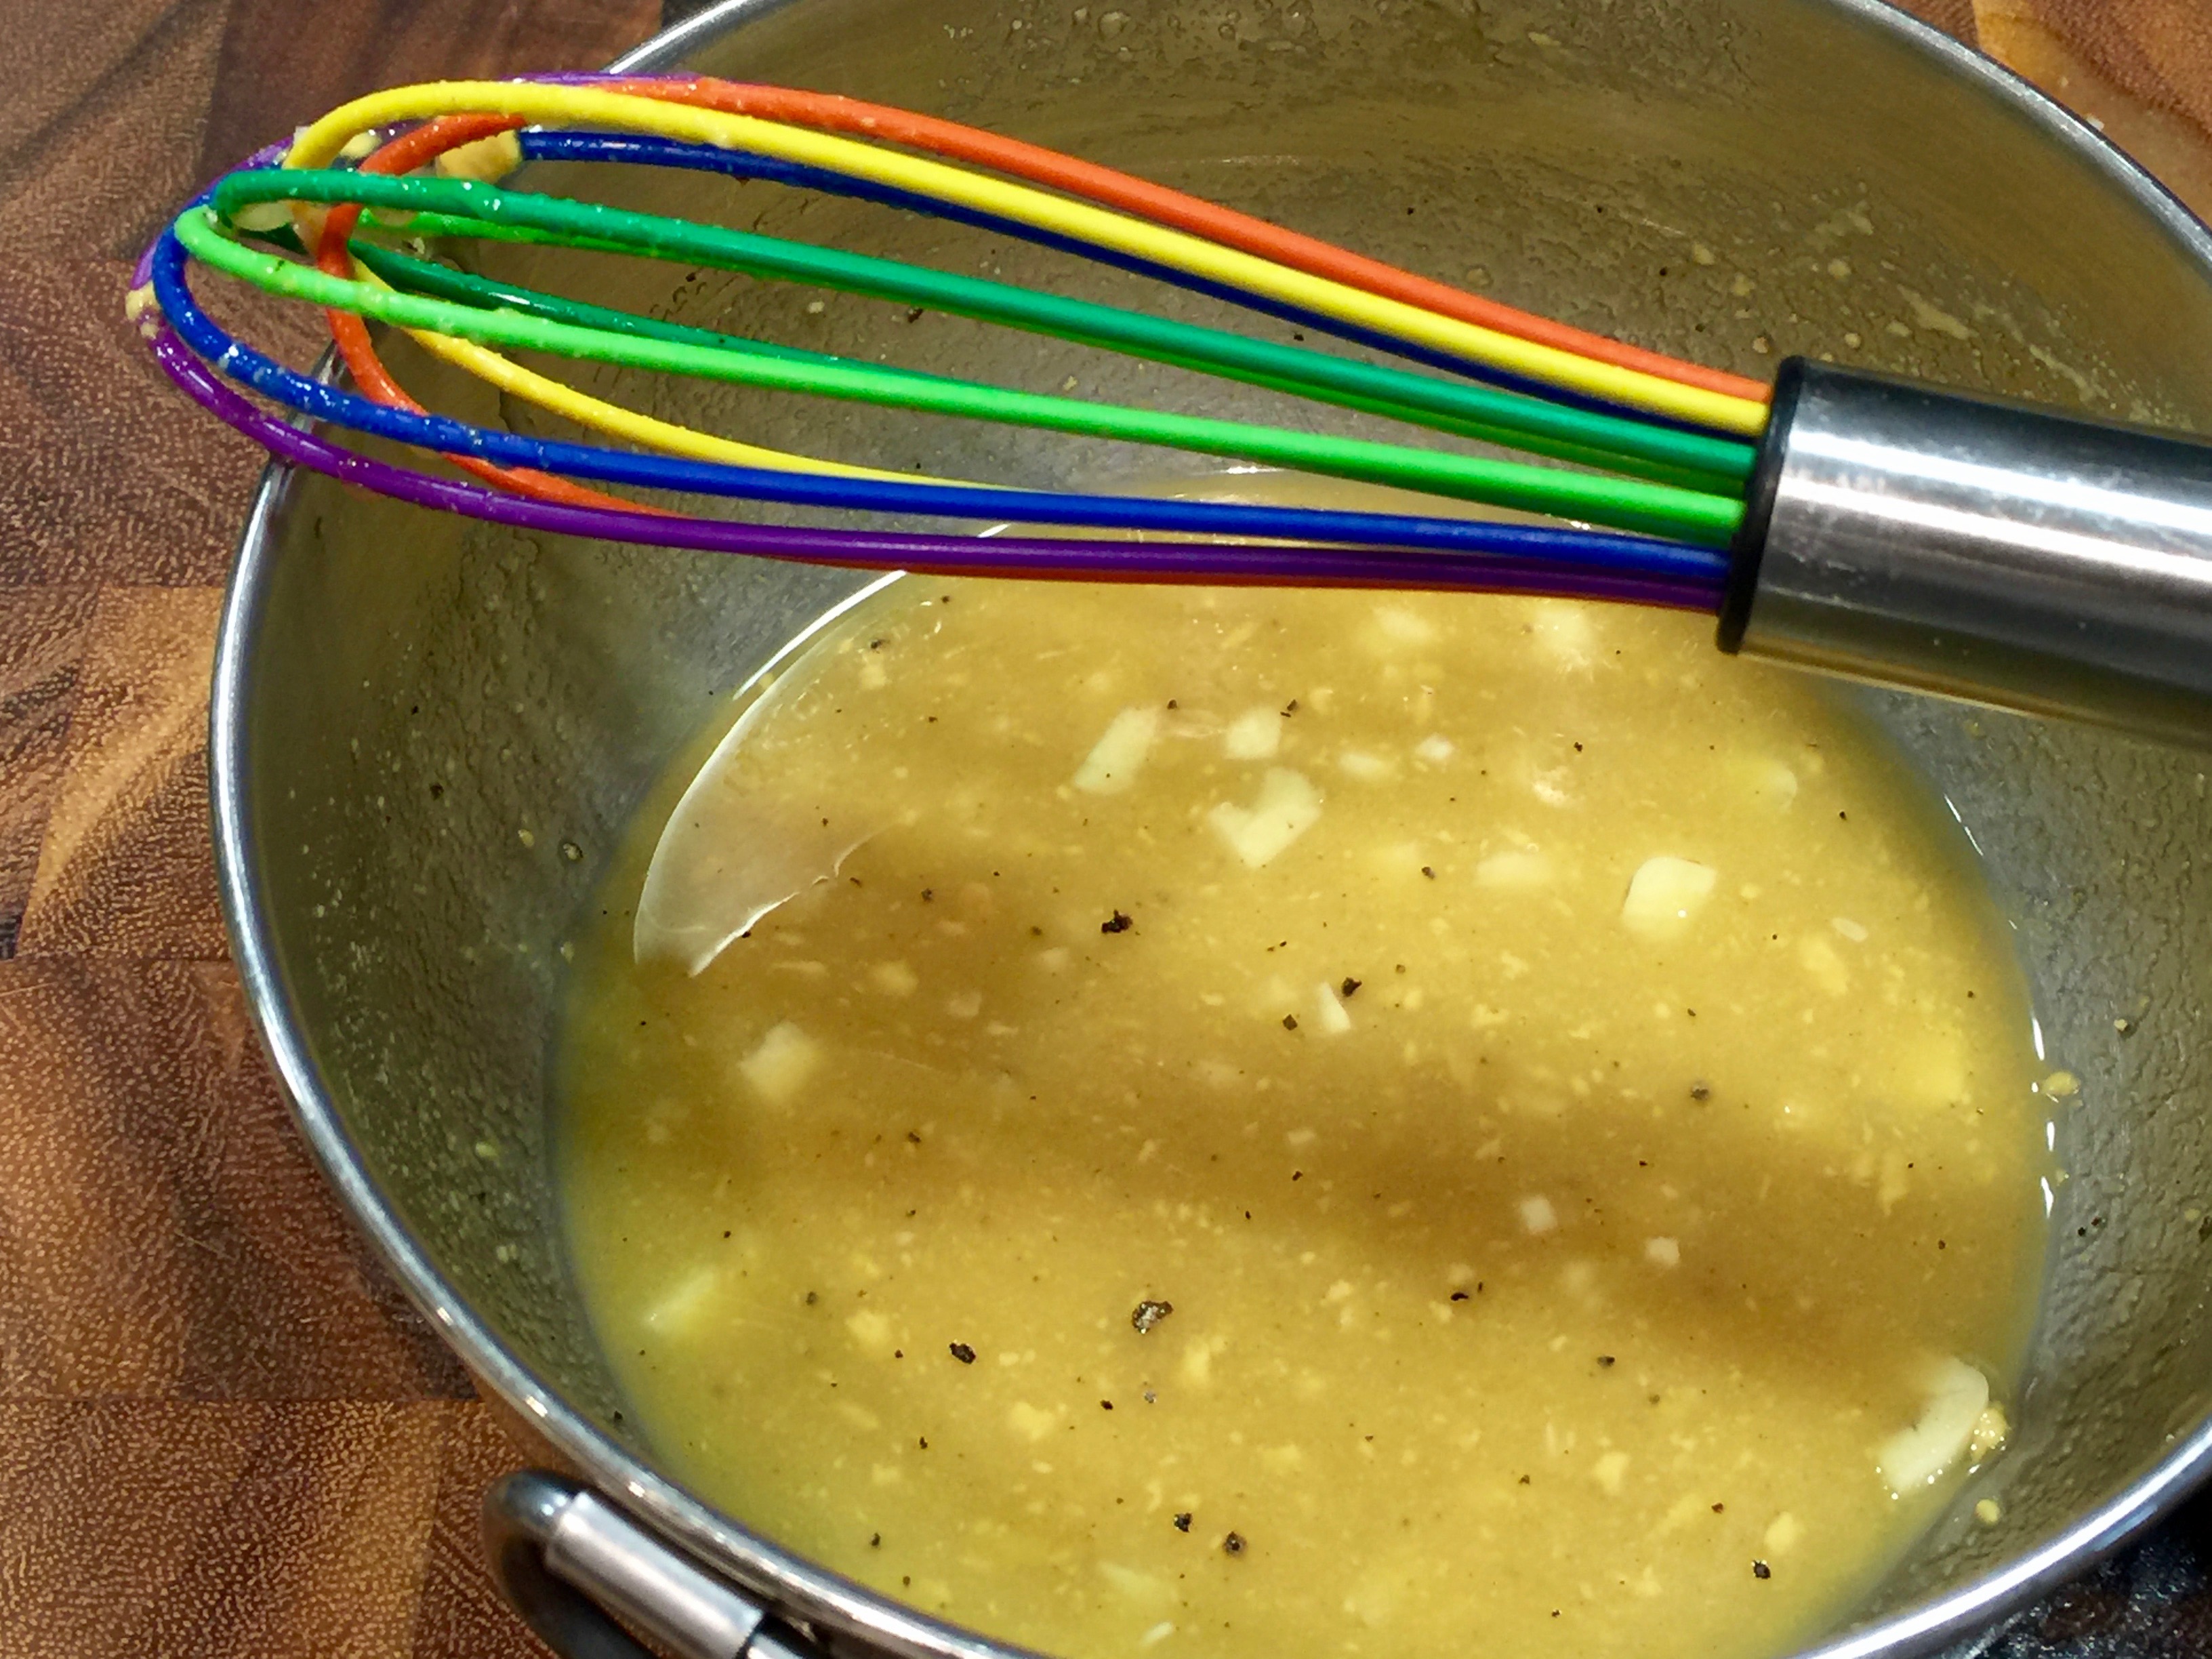
In a small bowl whisk together the mayo, sour cream, mustard, lemon juice, dill, salt, pepper, paprika and Worcestershire sauce.

Pour the dressing over the crab mixture and carefully fold to combine. Cover and let chill for at least one hour, overnight is preferable.

Slice the bread using a biscuit cutter to create three inch rounds.

Butter one side of each piece of bread (this will help the sandwiches from becoming soggy). Place a helping of crab salad on top of one buttered slice. Put the other slice on top buttered side down.

Press down on the bread to push the crab salad to the edges of the bread. Garnish with a dill sprig. You can serve immediately or store covered in plastic wrap in the refrigerator for no more than one hour.


Honey Teriyaki Baked Cod…

I know, I know I haven’t written in a while. Summer seems to have gotten a hold of my priorities and I’ve had a lot less time to spend in the kitchen. But I will try to be as faithful to my posting goals as I can – just be aware there may be a little more time between posts during the summer. After all, summer is the time to be out and about, right? So be patient with me and I promise to continue to deliver some great, no nonsense recipes.

And speaking of great, no nonsense recipes – this is definitely one of them. I recently read an article that talked about how Americans are still eating too much processed meats and should make an effort to add more fish to their diets. I know that’s something that my husband and I have been trying to do. Neither one of us grew up eating a lot of fish – it was just either too expensive or not something that was a regular part of the diets in our families.

My doctor told me there is a lot of research regarding when you were born, the diets that existed at the time and how that has affected your weight and health as you age. I grew up in a household where carbs were king, bread and potatoes mostly, and we know now the affects of too many carbs on weight and health. So my doctor said the same thing – try eating more fish. And you know what, it’s been quite pleasant actually.

I guarantee you this recipe will have you eating more fish. It is so simple to make and so flavorful you’ll wonder why you waited so long to bring more fish to the table. So let’s talk honey teriyaki baked cod…

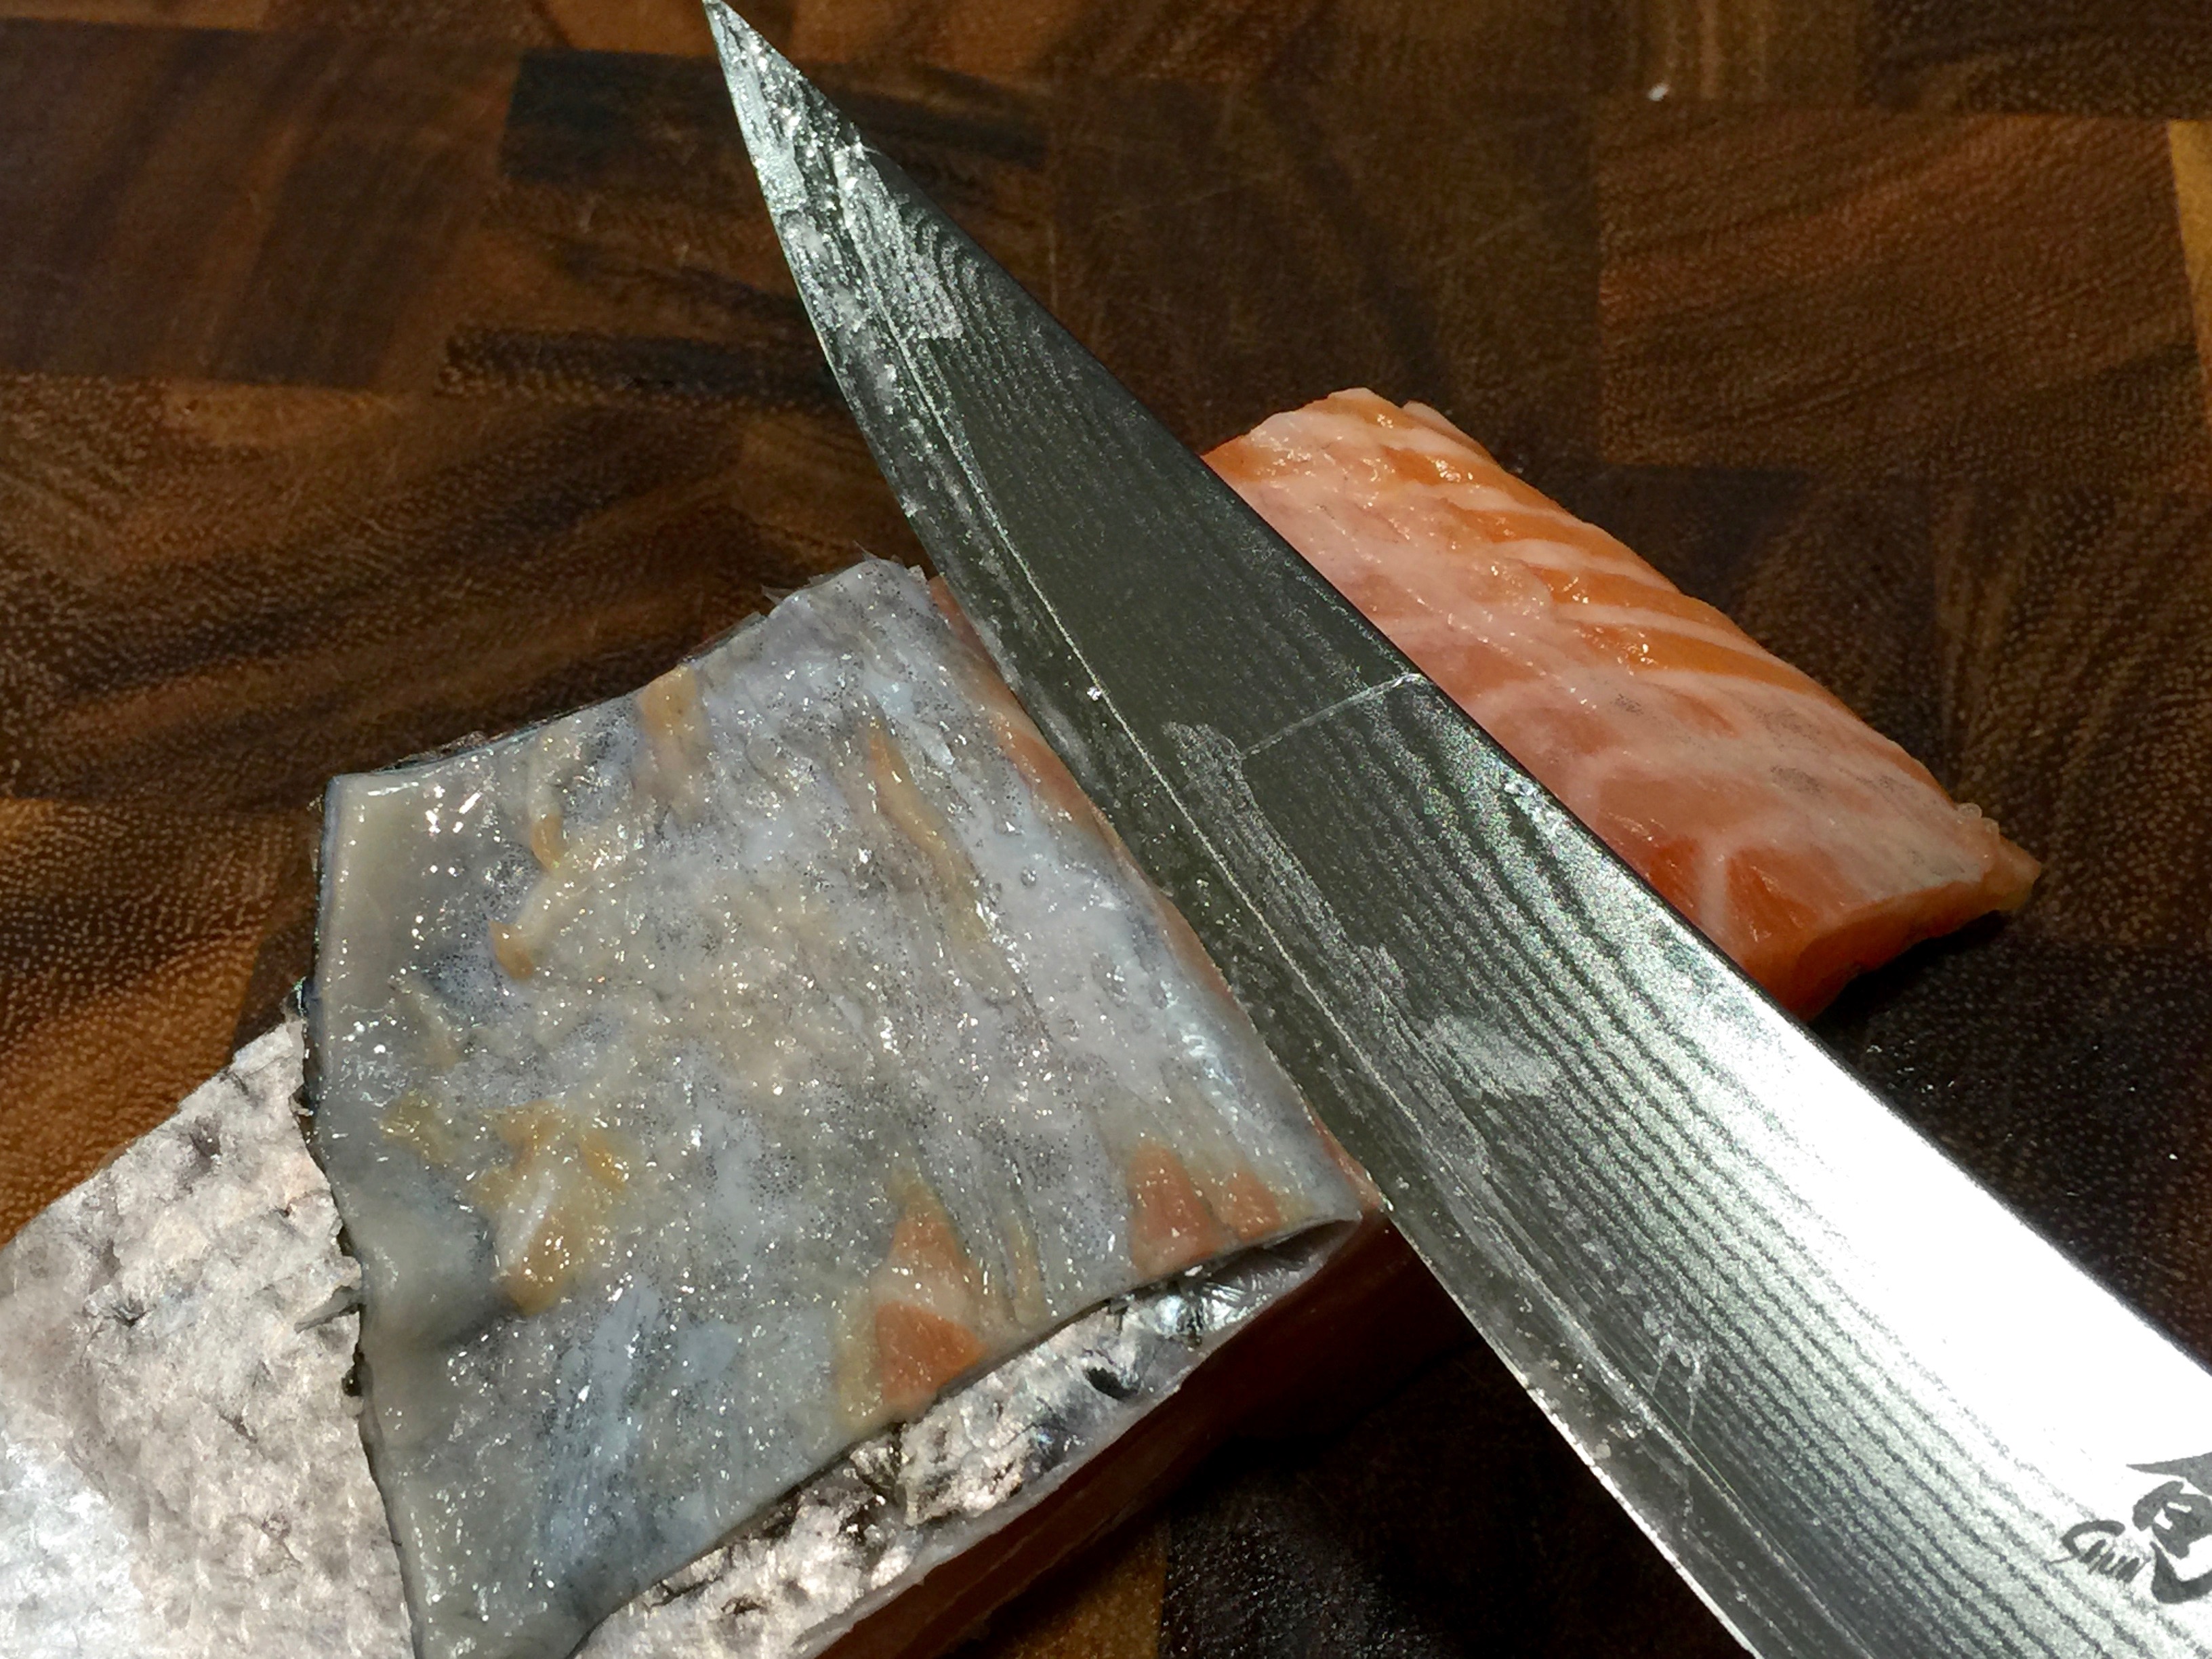
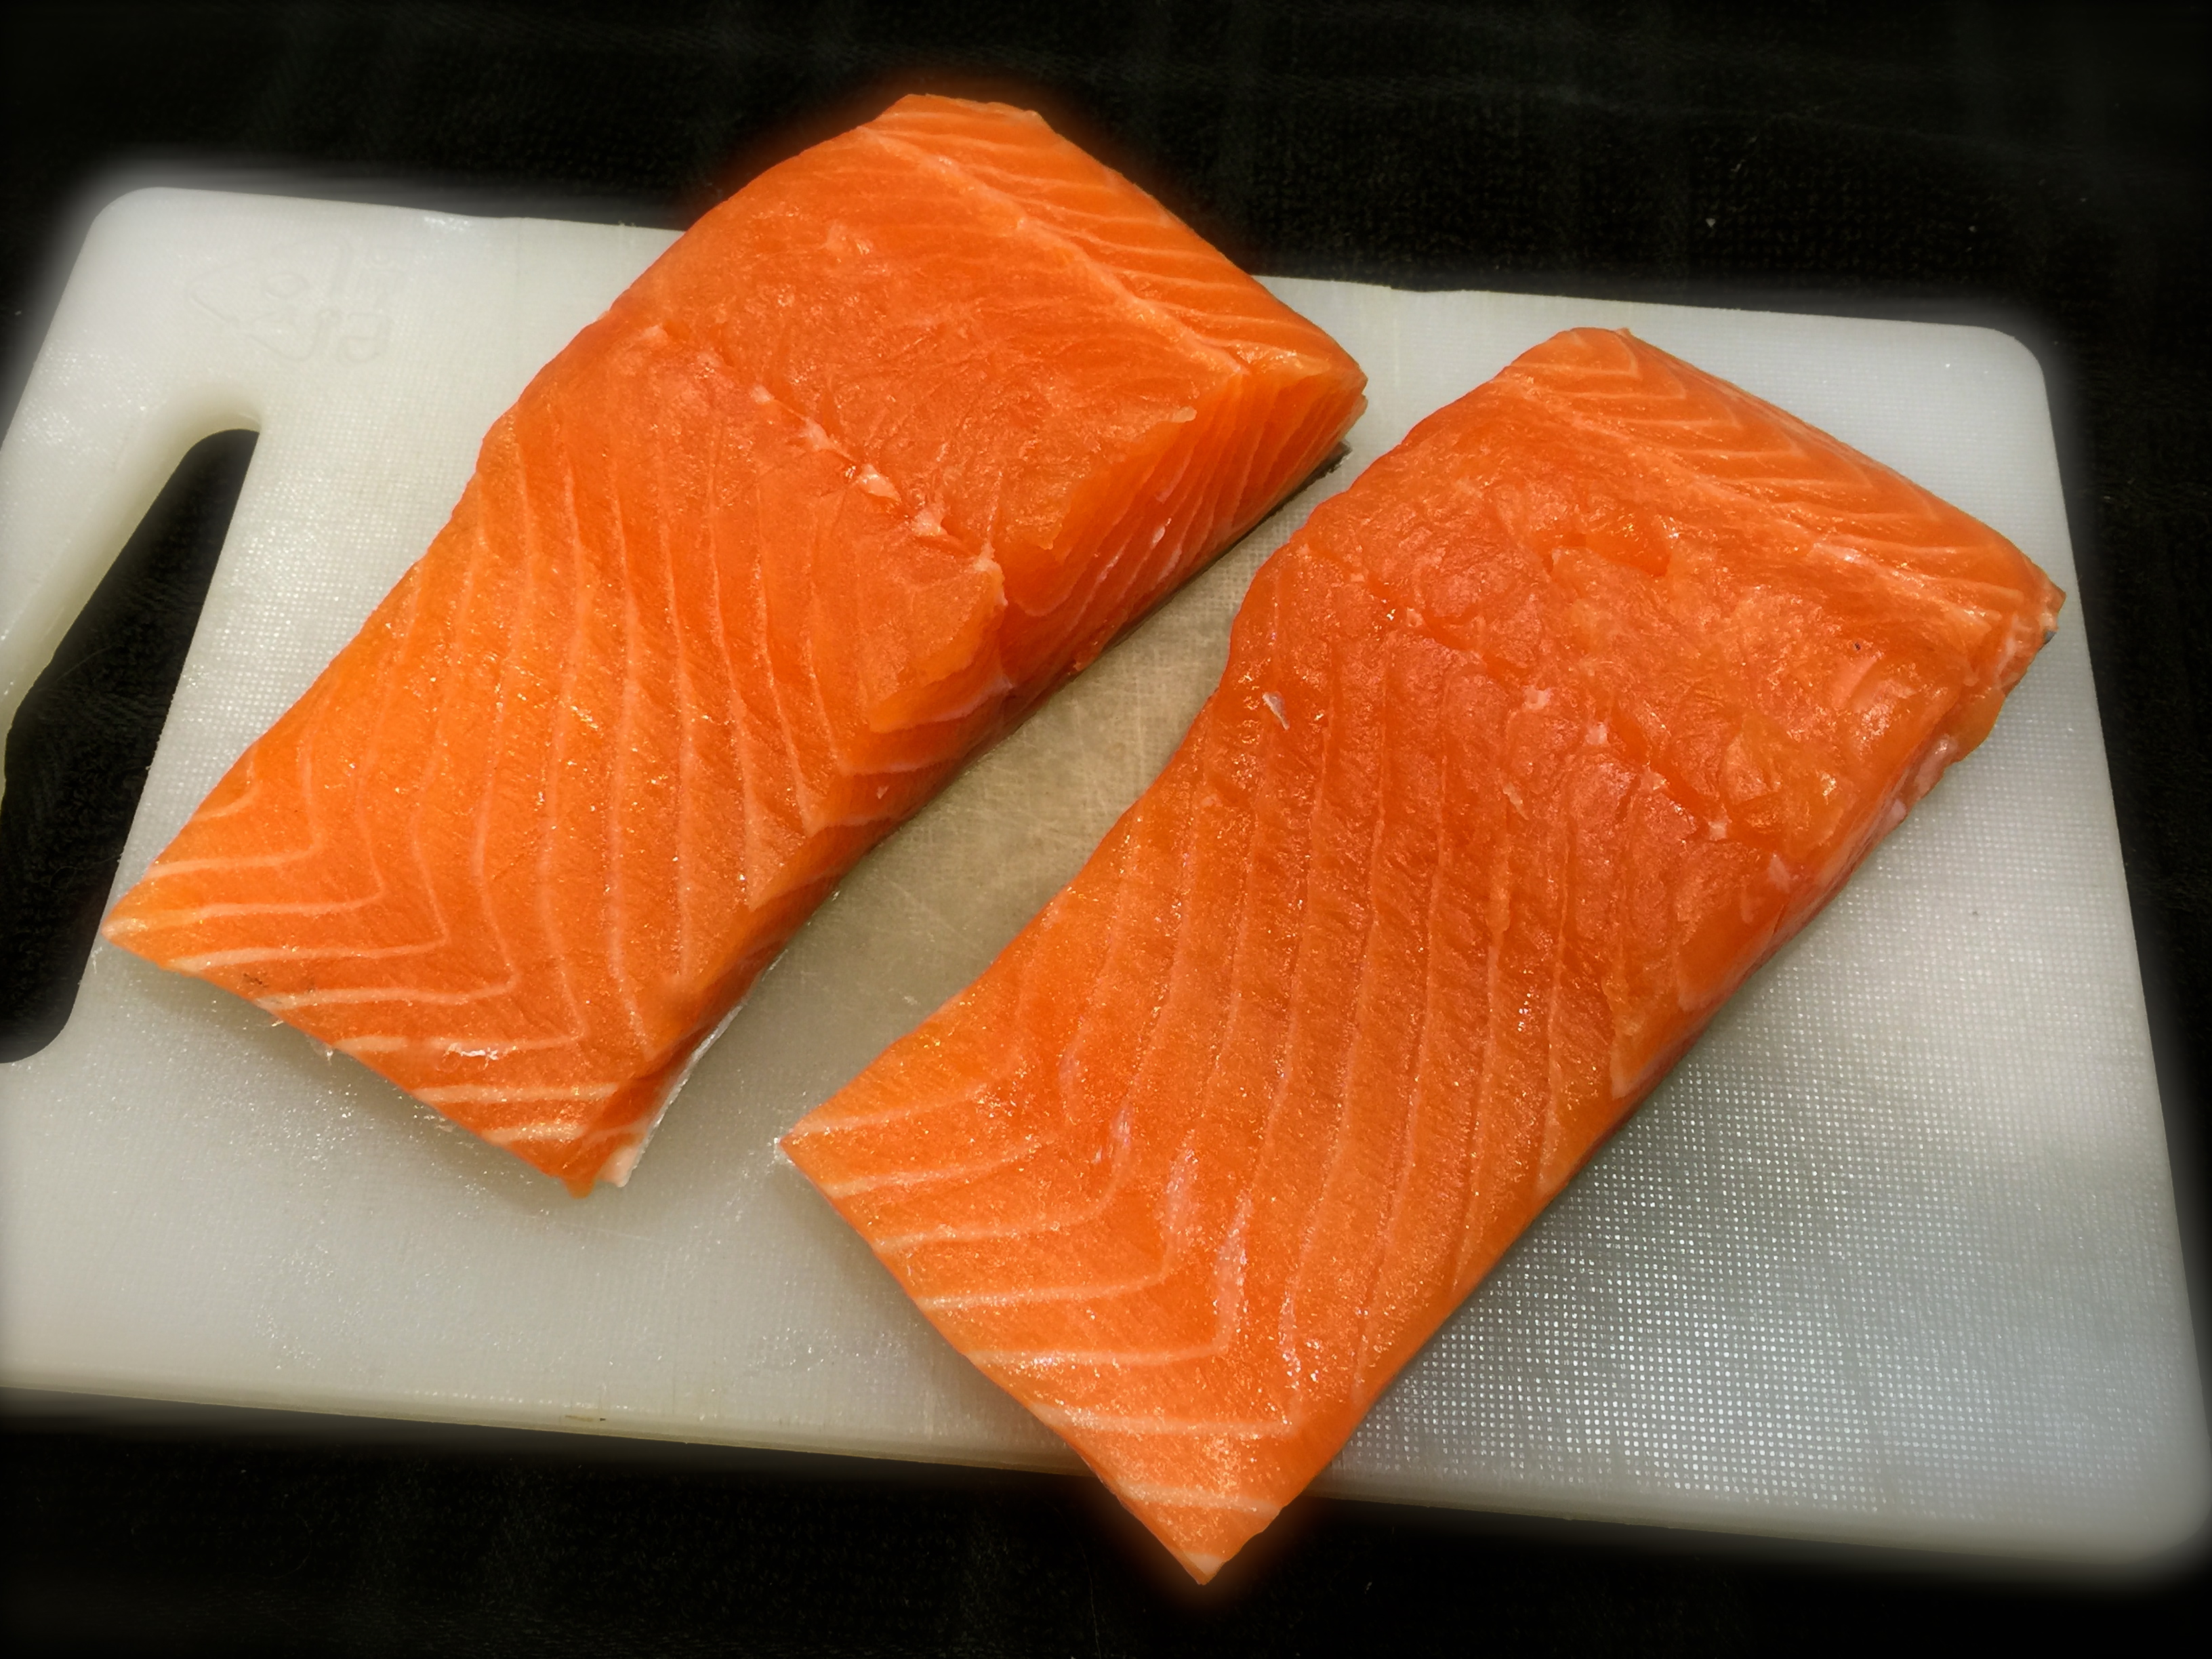
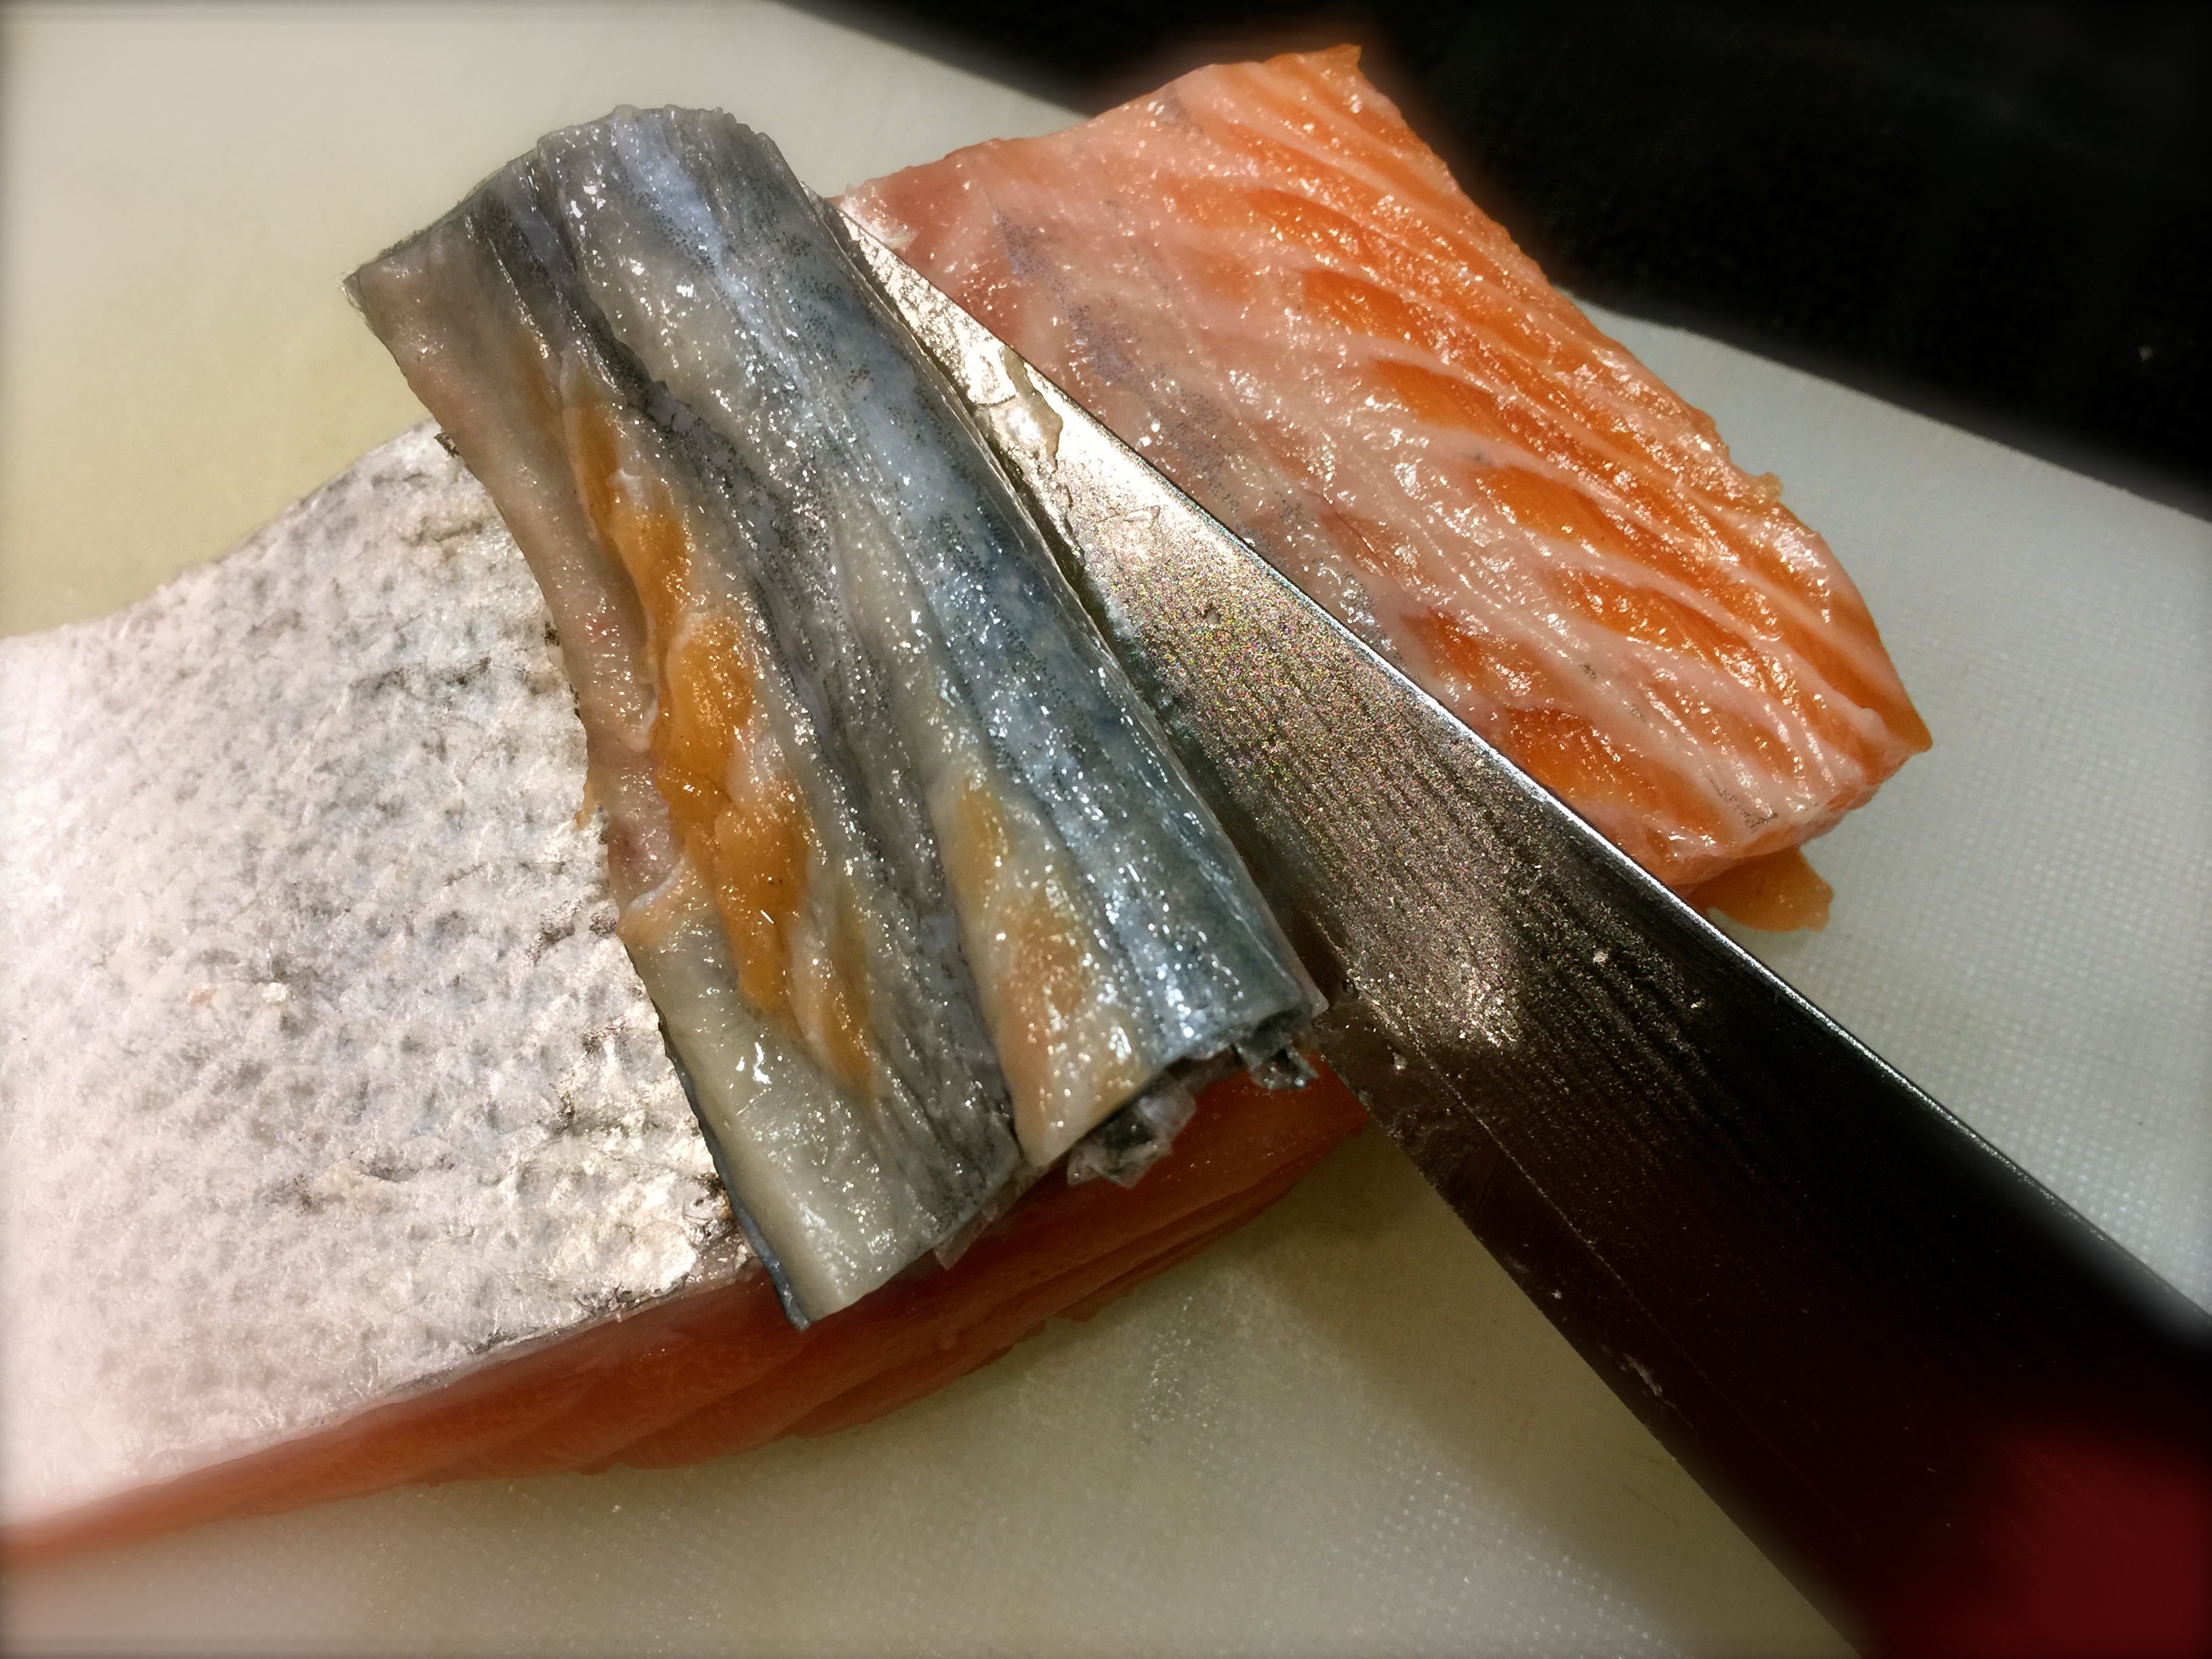
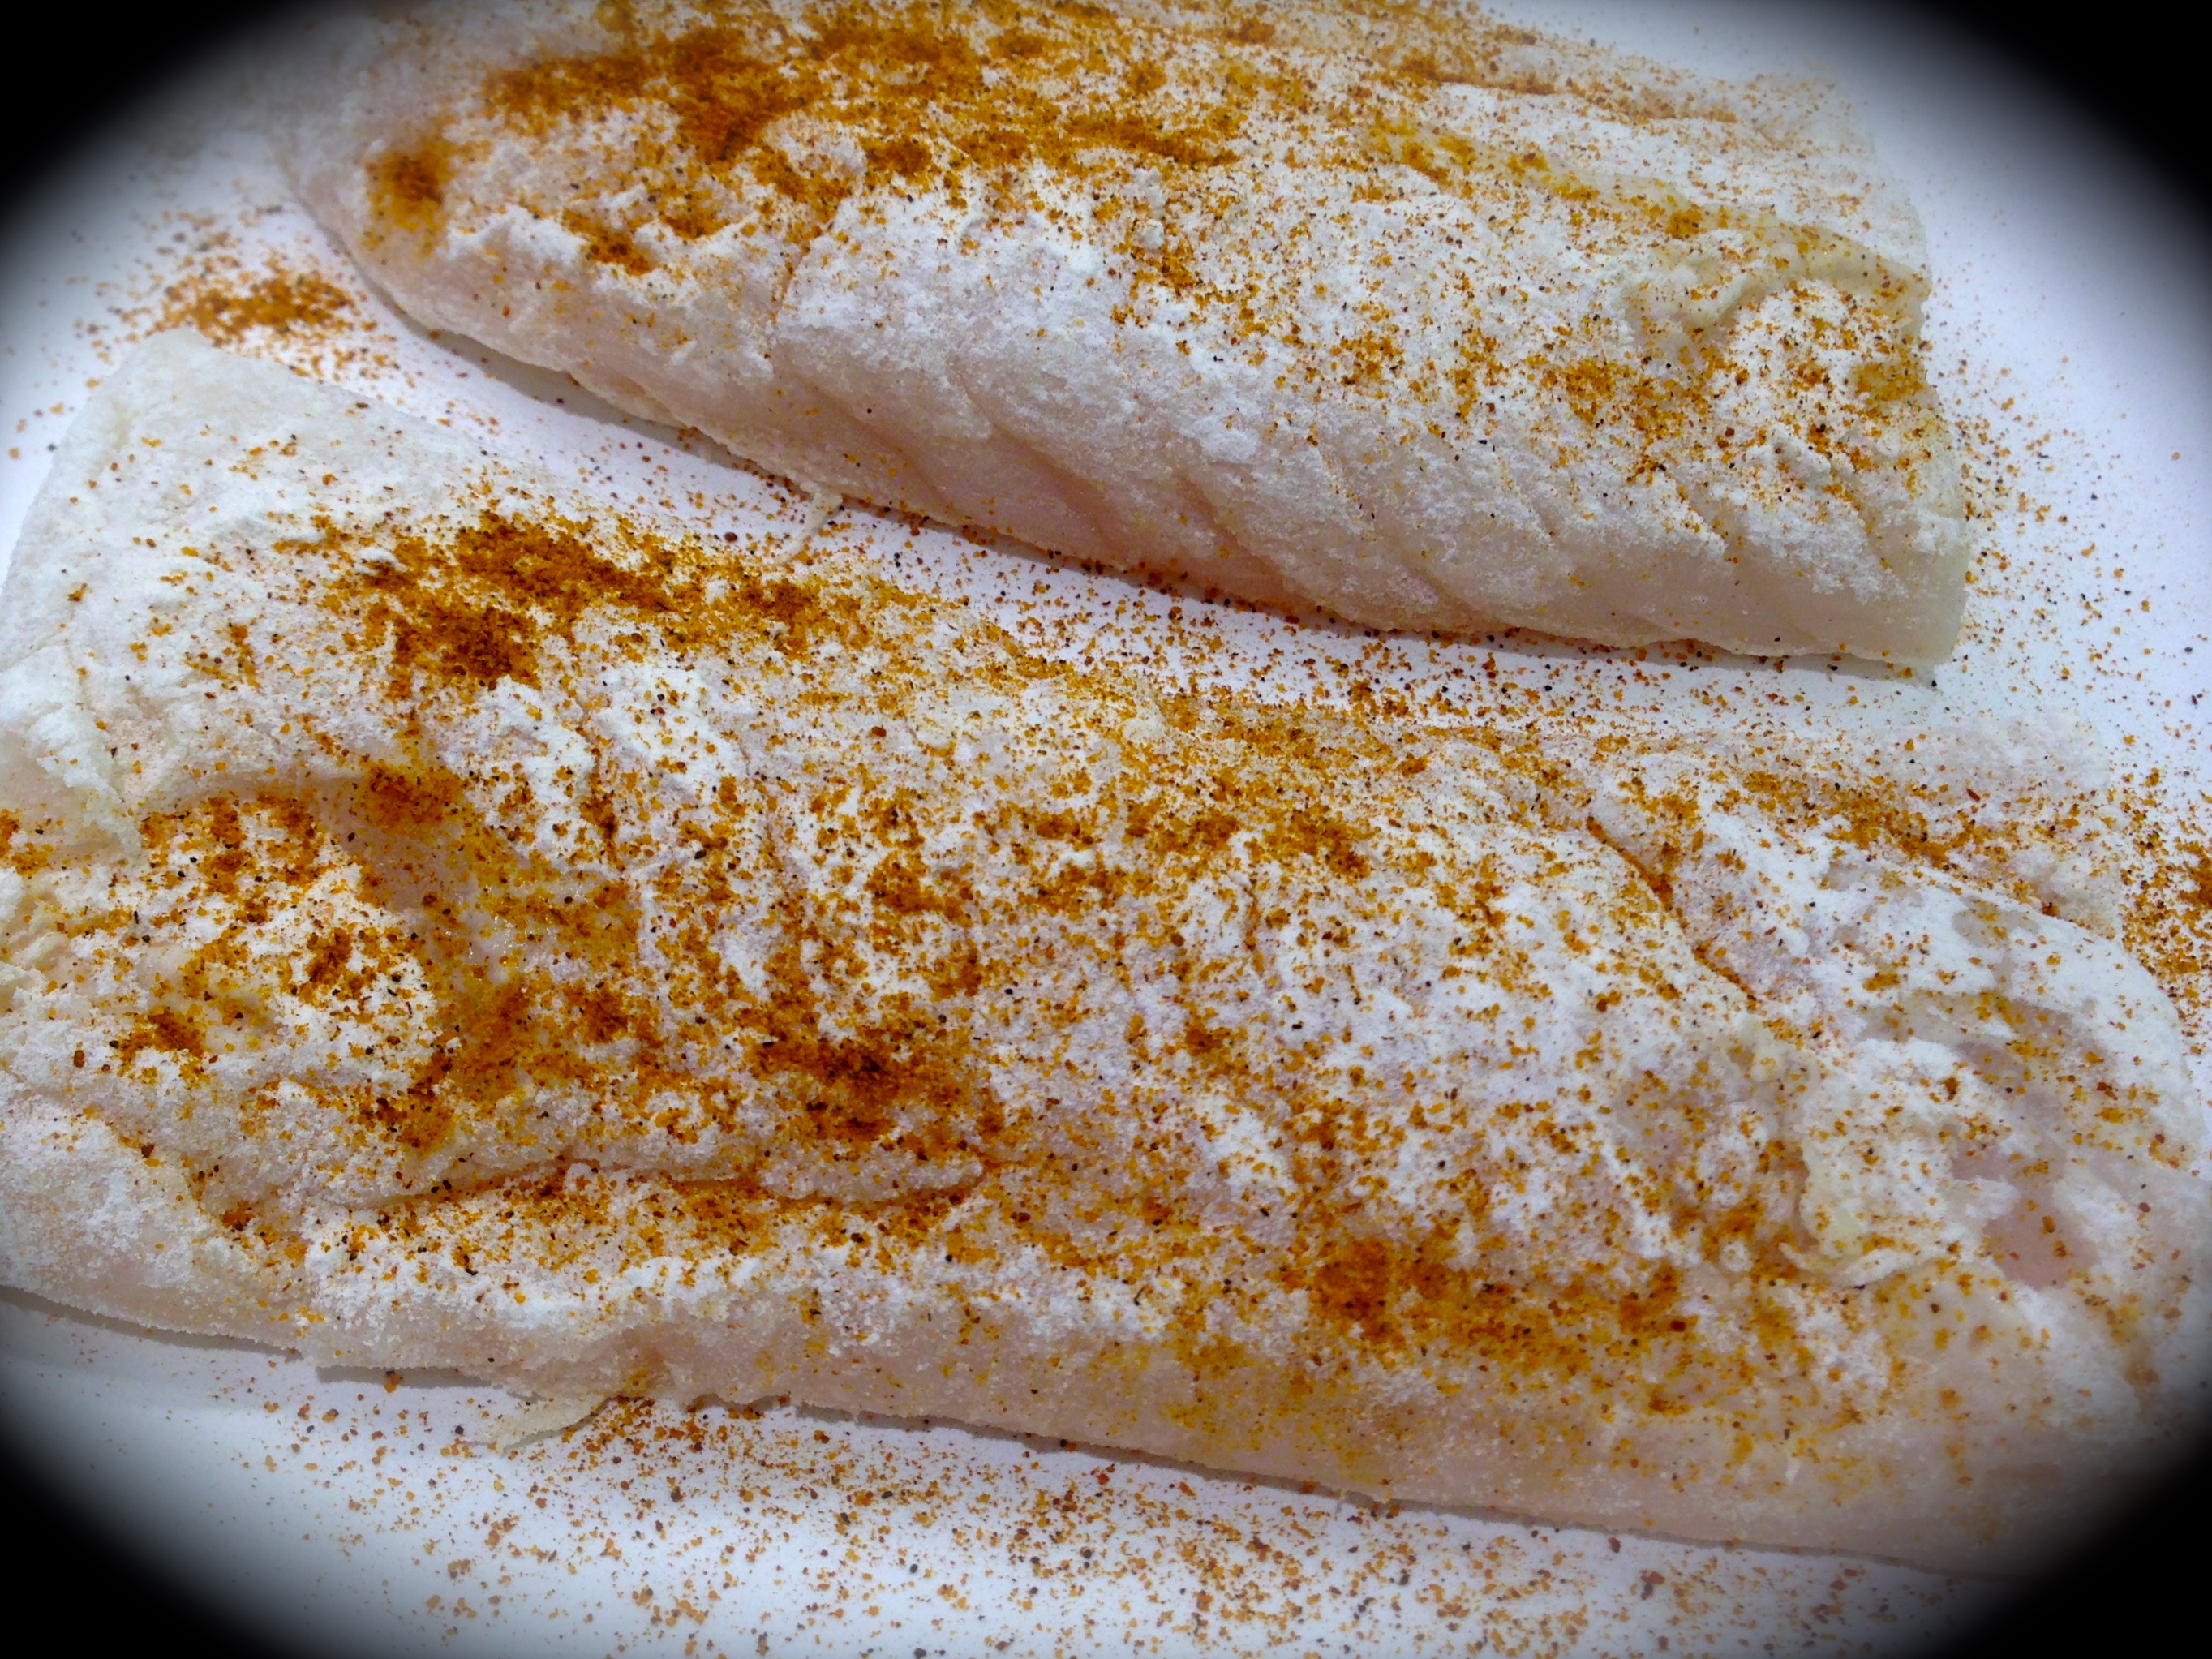
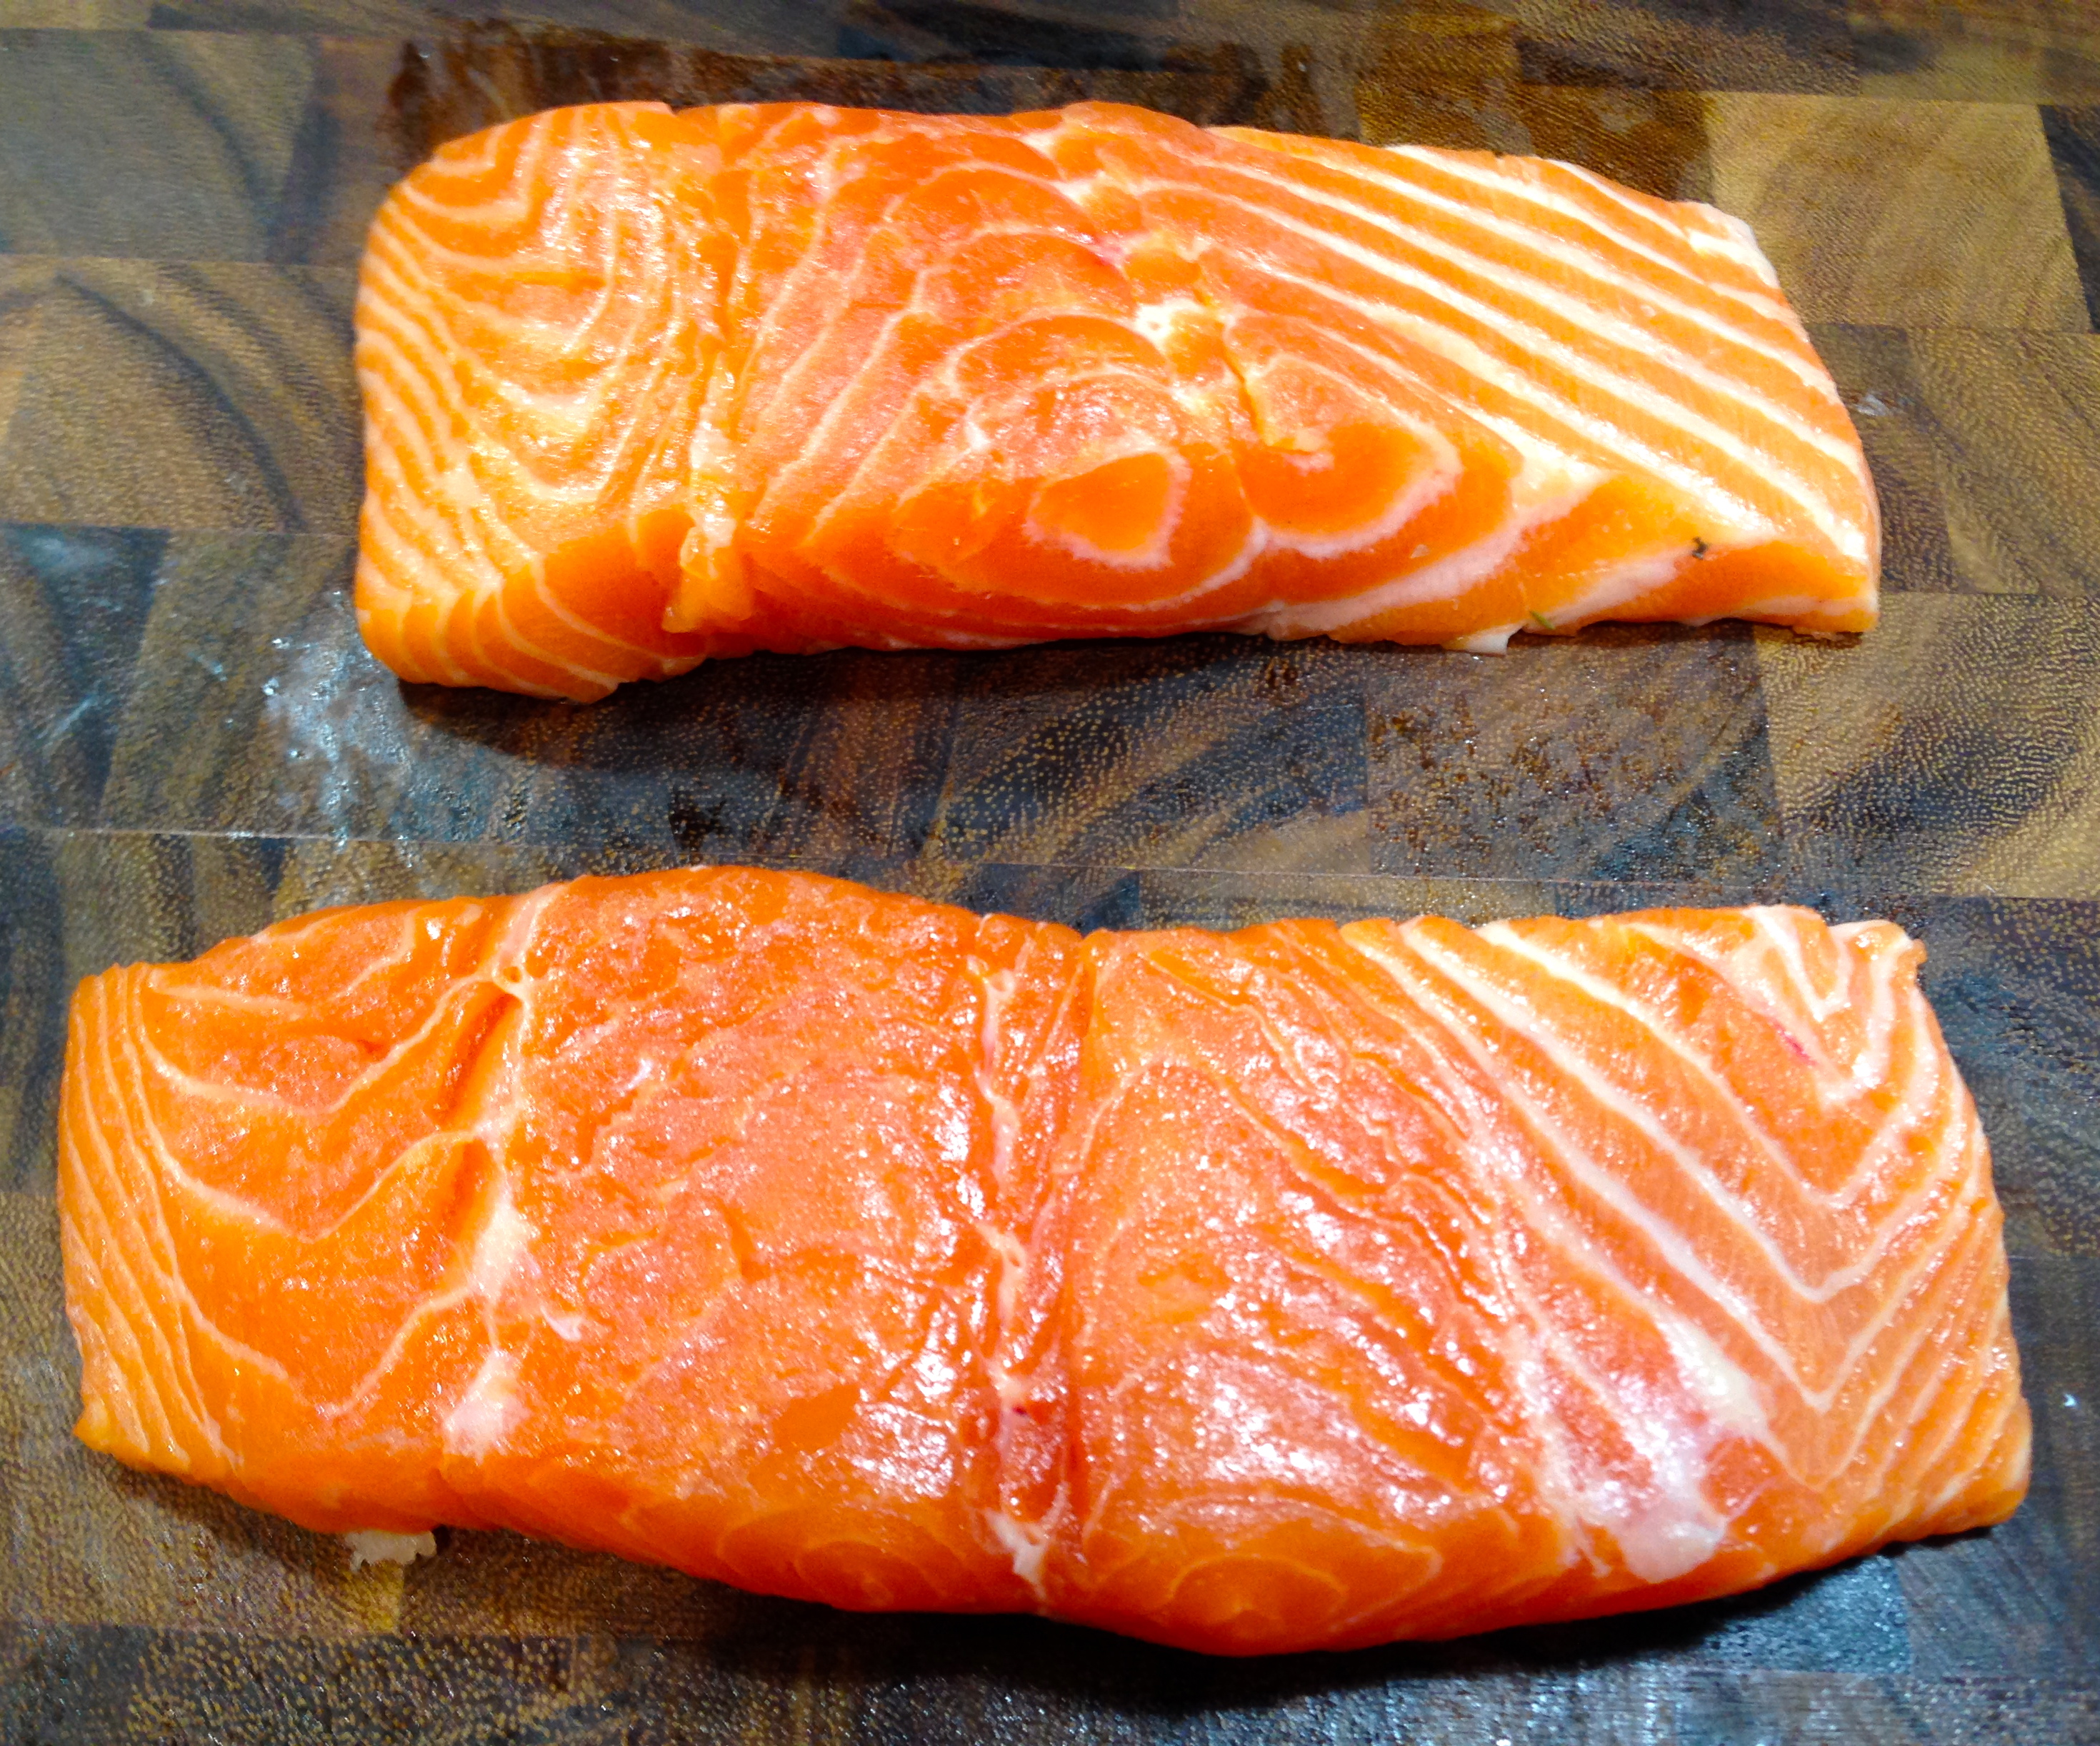
Lesson Learned 1 – All fish are not created equal when it comes to cooking them: I think that’s the part of cooking fish that makes people shy away from doing it. So it’s important, if possible, to cut your fish into equal sized portions to determine a somewhat standard cooking time for it. I usually cut 4 to 6 ounce portions. That way I am relatively sure how long to cook my fish.

Keep in mind that portion size is only one factor. The type of fish also contributes to the equation. I’ve found that a 6 ounce portion of salmon has a different cooking time than a 6 ounce portion of cod. Cod cooks in less time. The main thing to remember is you can always put the fish back in the oven or pan if it is not cooked well enough, but once it dries out you’re stuck – you can’t take it back. So err on the side of caution and I guarantee you’ll get the hang of it. I’ve been doing it so often now that I can tell when fish is done by how it looks – but that took a lot of time, so be patient with yourself.

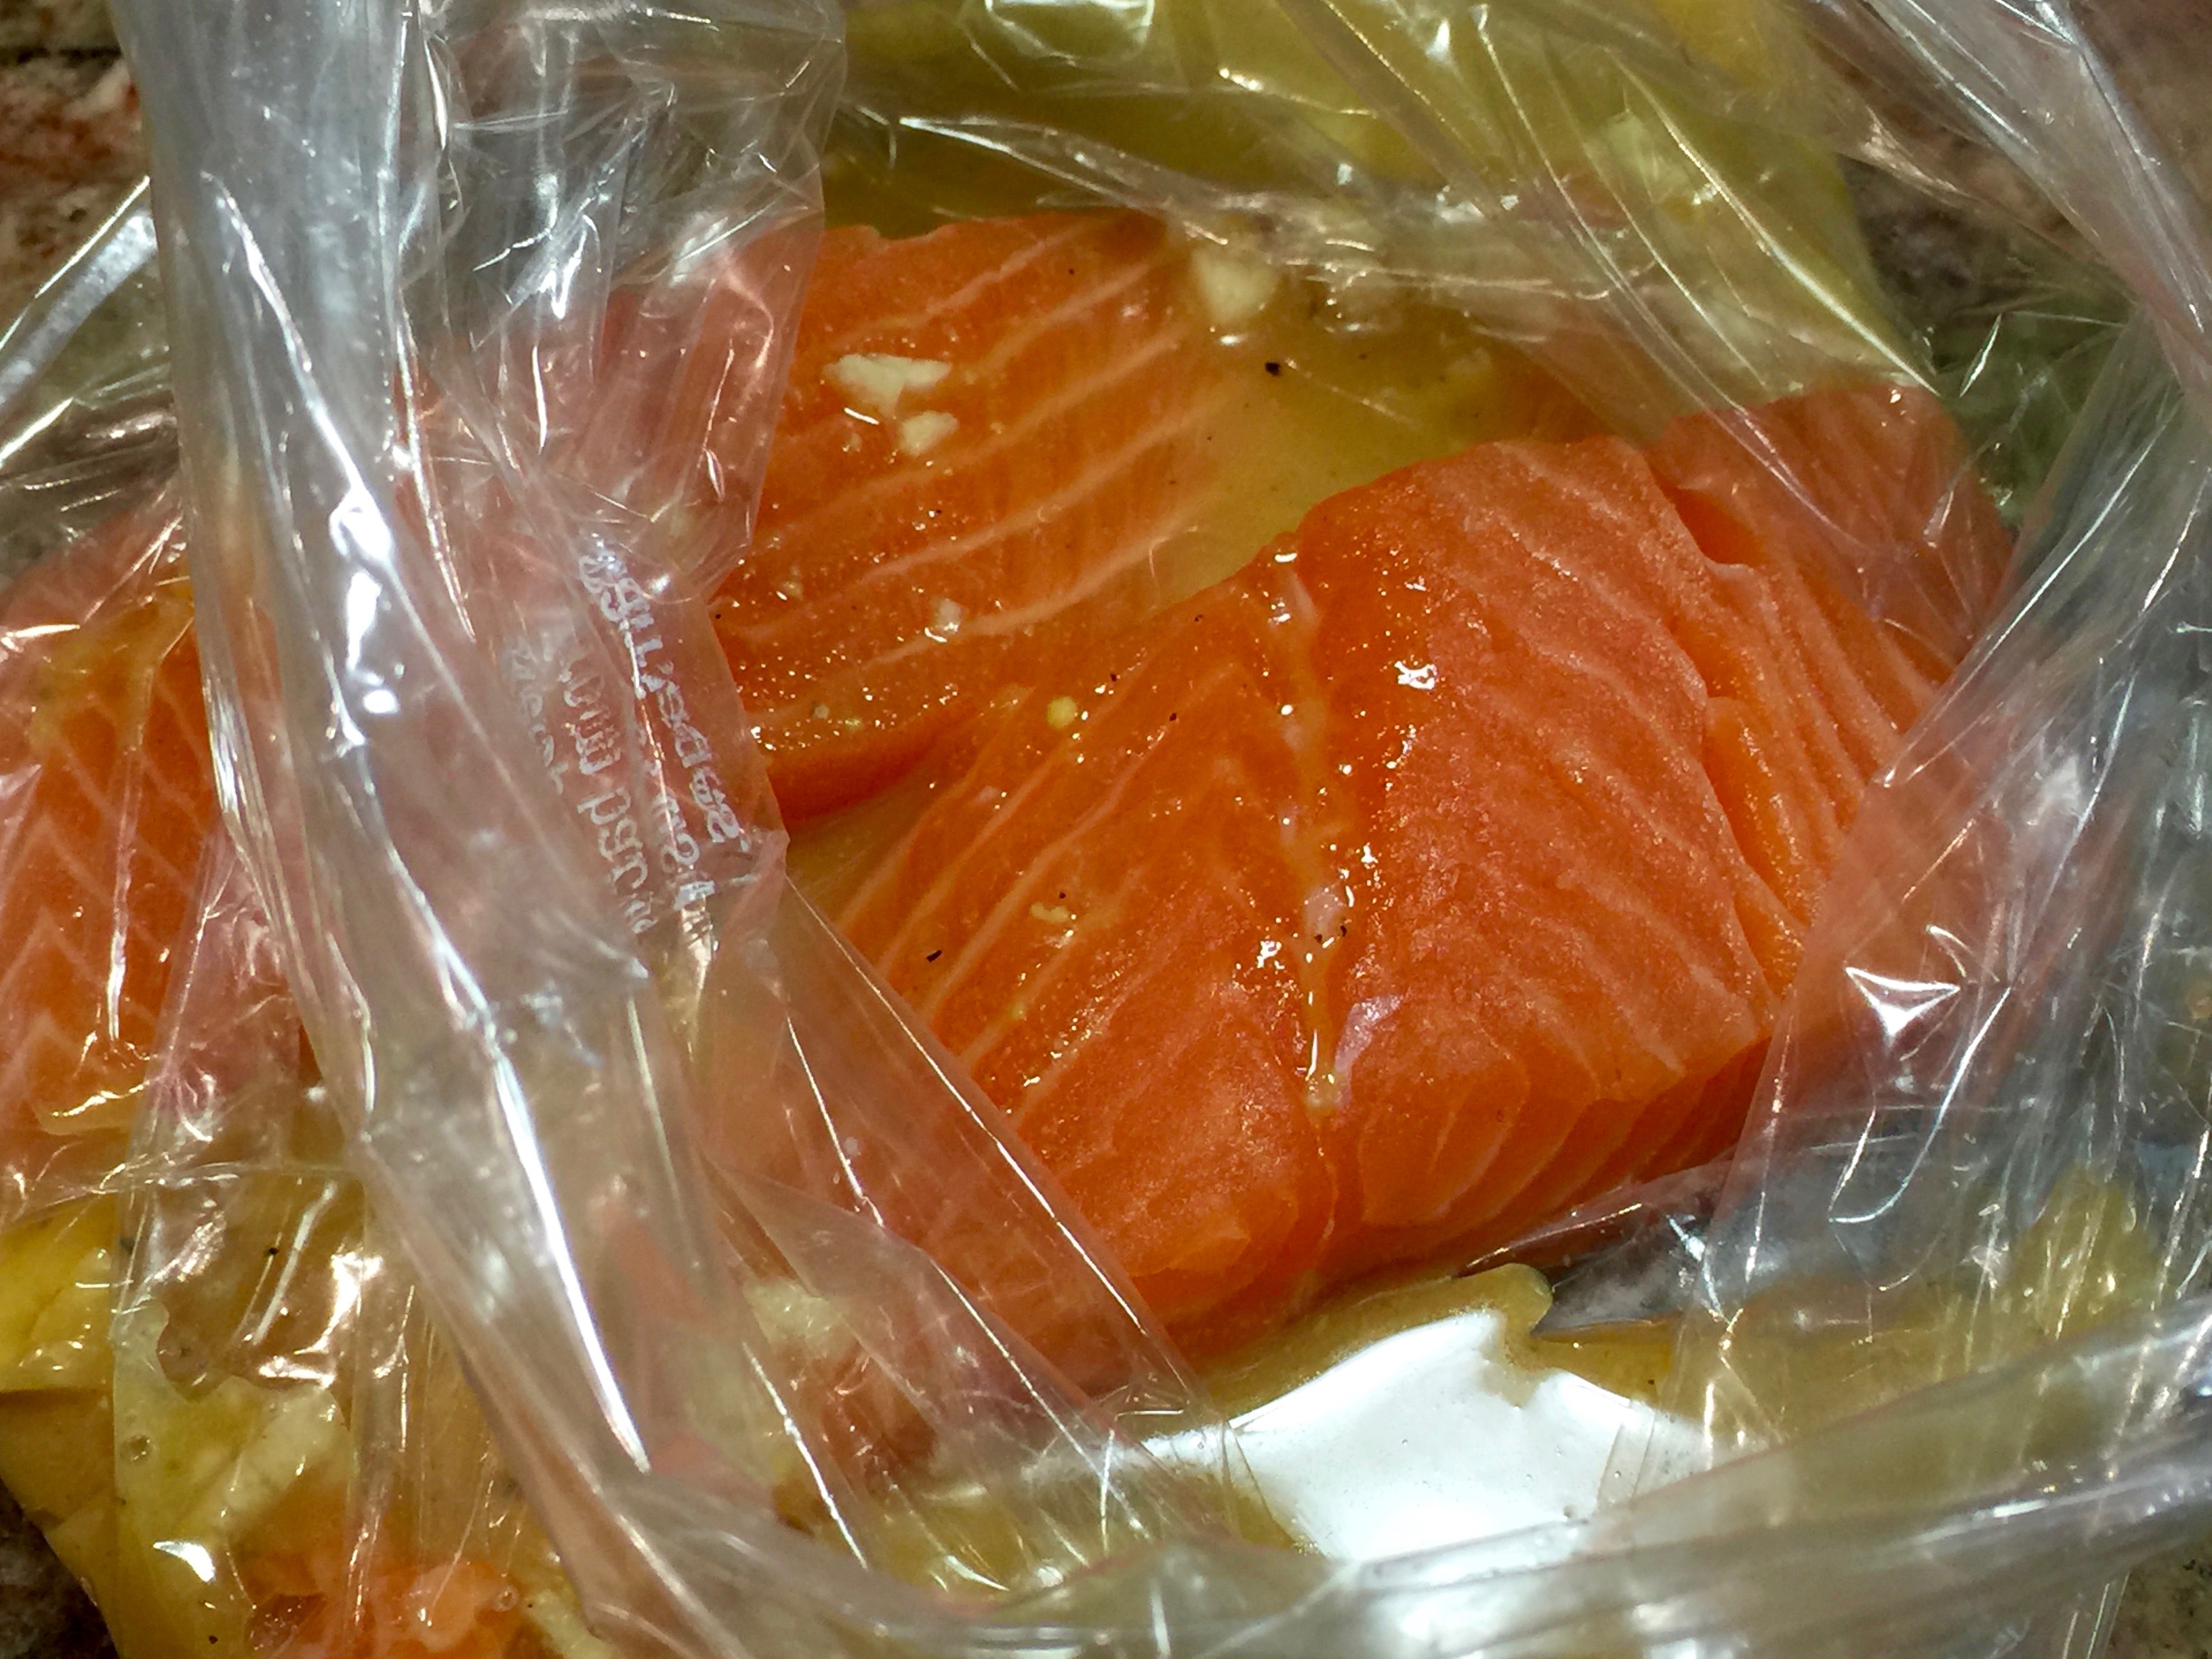
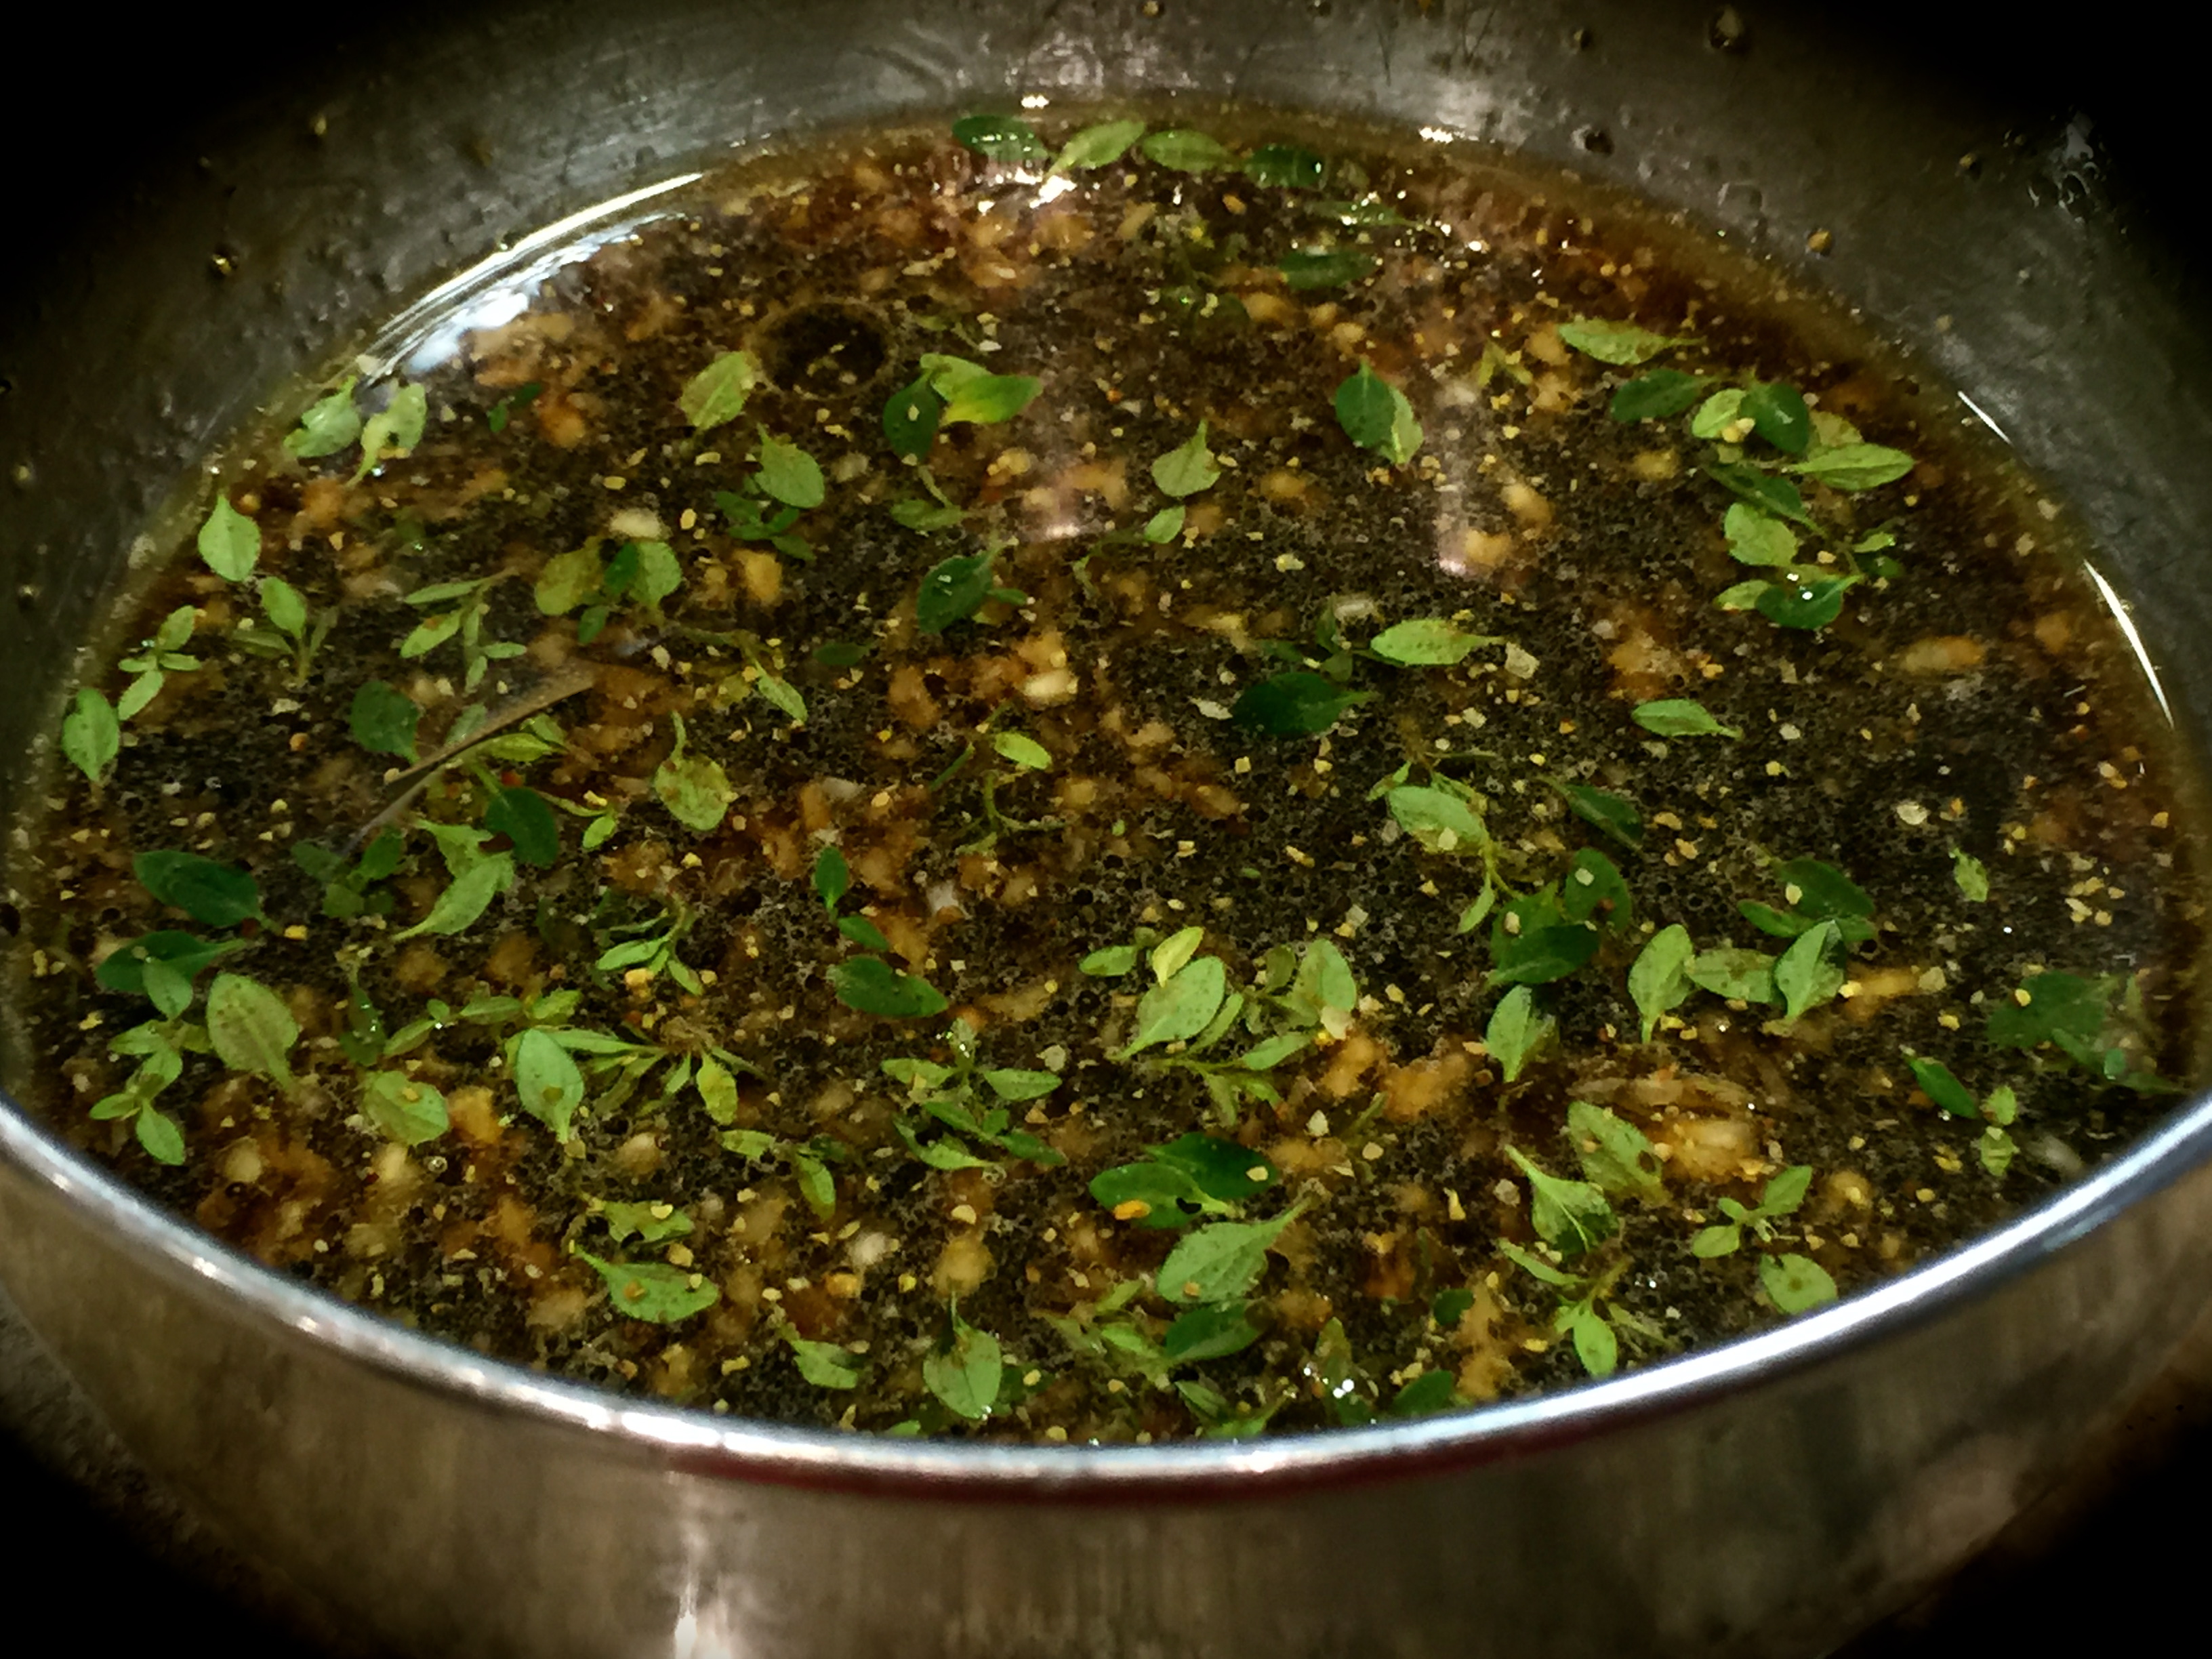
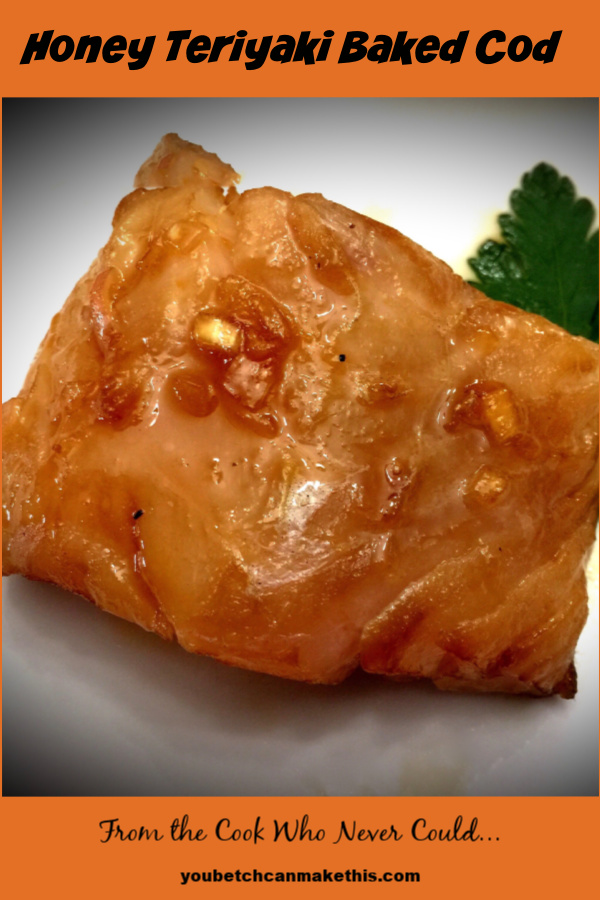
Lesson Learned 2 – The longer you marinate the cod in this recipe, the better: I marinated mine for about 7 hours but you can go up to 24 hours on this one. I may try that next time if I have the time, but it was quite flavorful after being marinated for 7 hours. I wouldn’t marinate it for less than 6 hours – I don’t think the fish will absorb the flavors of the marinade that well if you only marinate it for a short while. And don’t forget to turn the bag over every once in a while to make sure both sides of the fish are getting the marinade.

Marinade Ingredients

Lesson Learned 3 – Working with fresh ginger: I know a lot of people use fresh ginger quite regularly but I’m not one of them. But there is no substitute for it when you need it. What I learned is that you can freeze the ginger root. I put mine in a vacuum sealed bag and freeze it. That way when I need it, it’s as fresh as it can be. And I don’t have to buy ginger root every time I need it. It keeps beautifully in the freezer. So use what you need and freeze the rest. You’ll increase the lifetime of the ginger root substantially.

Lesson Learned 4 – Avoiding a big mess when baking this fish: Something important to remember is there is honey in this marinade – and honey will burn in the oven. So whenever I cook fish with a honey based marinade I put the fish on a foil lined pan and spray the pan with cooking spray before I lay out the fish. That way you eliminate or greatly minimize any sticking and the pan is easy to clean with no burnt on mess.

This recipe is extremely simple – the only challenge initially may be feeling comfortable with how to cook it correctly. If you use my directions you’ll be fine, or at least you will not overcook your fish and can judge if you need a little extra time. I doubt that you will need a lot more, but it’s always good to err on the safe side. All you need to remember is that the fish is done if you can flake it with a fork. Just test the edges if you’re not sure. Enjoy this one – it’s a keeper!

Honey Teriyaki Baked Cod...

  • Servings: 4
  • Difficulty: Easy
  • Print

INGREDIENTS

4 – six ounce pieces of fresh cod

3/4 cup honey

1/2 cup soy sauce

1/3 cup sesame oil

1/3 cup apple cider vinegar

1 small shallot, minced

1 tsp. fresh ginger

1/2 tsp. freshly cracked black pepper

Cooking spray

Lemon wedge, for garnish, optional

DIRECTIONS

In a small bowl mix the honey, soy sauce, sesame oil, cider vinegar, shallot, ginger and black pepper. Place the cod filets in a gallon size resealable plastic bag. Pour the marinade over the cod (use a spatula to scrape in any remaining honey from the bowl). Seal the bag and marinate the fish in the refrigerator from 6 – 24 hours, turning the bag over every once in a while.

Preheat the oven to 375 degrees. Place the marinated cod on a foil line baking sheet sprayed with cooking spray. Spoon a little of the marinade on top of each piece. Bake for 10-12 minutes. Serve immediately.

Dijon Crusted Halibut…

Although we try to eat a lot of fish, I don’t usually buy halibut because it can be quite pricey. But the other day when I was at the grocery store they had just cut some fresh halibut and it looked so good I had to buy some.

I’m always a little nervous about making halibut because I don’t want to overcook it. It’s somehow easier for me to rationalize making a mistake with salmon (although I have that pretty much down to a science) than with halibut. But I just couldn’t resist how good and fresh the halibut looked and decided to try this recipe for making it.

So let’s talk Dijon crusted halibut…

Lesson Learned 1 – Do you leave the skin on or not: That is the perennial question, isn’t it? I prefer removing the skin but you can certainly leave it on. Some think that by leaving the skin on the fish tends to be more moist. In my experience I don’t know that to be the case. So the decision is up to you. I prefer removing the skin but the choice is up to you. Either way, it doesn’t seem to affect the overall cooking time of the fish.

Lesson Learned 2 – The hardest thing about this recipe is determining when the fish is done: The best way to determine that is to take a fork and try flaking off a small piece on the end of the fish. If it flakes off, it is done. The only advice I can give with cooking fish is it takes time and practice to perfect that skill. Basically you have to get to know the type of of fish you’re using and how your oven functions. I realize that may be little comfort where a more expensive fish like halibut is concerned, but once you’ve got the hang of it, you’ve got it!

The end of the fish is flaky – the fish is done.

Always cook the fish for the least amount of time that a recipe calls for and go from there. You can always put the fish back in the oven but you can’t change things when it’s overcooked. I know in my oven a 4-5 ounce salmon filet is cooked the way we like it at 375 for 20 minutes. (keep in mind I am at high altitude and cooking temperatures on average can be 15-25 degrees higher than on any given recipe designed for sea level).

Also, the cooking process determines the oven temperature and cooking times. This particular recipe is done entirely in the oven. Sometimes I make fish (and you can certainly do this with halibut) where I lightly brown the fish on both sides in a skillet on top of the stove and finish off the cooking process in the oven. Doing that normally changes the oven temperature and cooking time. So the cooking process will determine what temperature and how long you cook the fish.

This particular recipe is done entirely in the oven. When I made the fish I cooked it at 365 for 15 minutes and it turned out great. Again, keep in mind I am at high altitude and most recipes are not written that way so for my sea level friends I recommend baking the fish at 350 for 15-18 minutes. If you are unsure for any reason check the fish at 15 minutes. You should be just fine if you do.

And that’s it. Just a few last thoughts – I’m writing this recipe for 2 people put you can certainly make it for more.  Just increase the crust ingredients proportionately. Also, the combination of mayo, horseradish and lemon creates a wonderfully flavorful crust for the halibut. Once you make this, I’m sure you’ll want to make it again. It’s just that good! And guess what – the crust works equally as well on cod so you have a less expensive choice as well. Enjoy!

Dijon Crusted Halibut...

  • Servings: 2
  • Difficulty: Medium
  • Print

INGREDIENTS

1/8 cup mayonnaise

1 tsp. Dijon mustard

1 tsp. prepared horseradish

1 tsp. fresh lemon juice

1/4 cup bread crumbs, separated

2 tsp. grated Parmesan, separated

2 4-5 ounce halibut filets

1 Tbs. butter, melted

Olive oil cooking spray

DIRECTIONS:

Preheat oven to 350 degrees (365 for high altitude). Line a baking sheet with foil. Set aside.

In a small bowl mix together the mayo, mustard, horseradish and lemon juice. Stir in 1/8 cup (half) of the bread crumbs and 1 tsp. (half) of the Parmesan cheese. Spray the foil lined baking sheet with cooking spray. Arrange the filets on the baking sheet and spread the mayo/crumb mixture on top of them.

In a small bowl mix together the remaining bread crumbs, Parmesan and melted butter until thoroughly combined. Sprinkle this coating on top of the halibut filets.

Bake for 15-18 minutes, checking the filets at 15. The fish is done when it flakes easily off the end of the fish with a fork.

Coat The Fish With The Mayo/Bread Crumb Mixture

Add The Buttered Bread Crumbs On Top And Bake


Parmesan And Garlic Herb Baked Cod…

Fish has become a staple in our household. Years ago I hardly ever made fish – I was too afraid of it and frankly not all that enamored with it. But now it has become a mainstay in our diet. Not only is it good for you but there are also a variety of ways to cook fish that make it super delicious. This recipe is one of those.

I’ve mostly cooked cod, red snapper, halibut, tilapia, trout, swordfish, and salmon. The main kind of fish I cook for me and my husband is salmon. I’ve got cooking salmon down to such a science that if I prepare it a certain way it always comes out perfect. This is a recipe for cod and I am still perfecting my cod prowess. But I made this the other night and it turned out wonderful so now I have a baseline to work from.

So let’s talk Parmesan and garlic herb baked cod…

Lesson Learned 1 – Cod is plentiful, easy to find and a great choice for this type of recipe: Whenever I go to the grocery store I can always get salmon, tilapia (although lately I’ve shied away from this because of everything that has been written about it) or cod. Finding other fish can be iffy for me. Trout is somewhat plentiful, halibut and red snapper are iffy (and halibut is very expensive) and swordfish I normally can only find frozen. But I’m in Colorado and not near the ocean so I’m sure in various parts of the country availability of various types of fish is much different.

I’d like to stop for a moment here and talk about frozen fish. Years ago frozen fish was not very good. The freezing process tended to dry out the fish and so you basically started out with dry fish once it was thawed – not good. Today the flash freezing methods they use keep the fish extremely fresh which makes frozen fish rival fresh fish and at a much better price. So don’t be afraid of frozen fish anymore.

The Herb Mixture

I also found that thawing frozen fish matters. I’ve been in a hurry and just put the frozen fish on the counter to thaw. That tends not to be a recommended process but when you’re in a hurry you do what you can do. But I found that if I thaw the fish in the refrigerator overnight the fish tends not to dry out in the baking process. Now I’m not sure if that’s true or if it’s just me, but I recommend thawing your fish overnight in the refrigerator if you can.

I found a package of six flash frozen 4-5 ounce cod pieces at Whole Foods at a great price. But cod is easy to find just about anywhere and often you can find it fresh. And no matter what way you make it, cod is the type of fish that easily takes on any flavor palate you choose. That’s what makes it so versatile.

One last point – don’t be afraid to let the fish sit outside of the refrigerator a bit before you bake it. I normally let my fish sit out for about one half hour. That way some of the chill is taken out of the fish. I find it bakes better that way.

Lesson Learned 2 – The art of cooking fish: As I mentioned earlier, I used to shy away from fish and one of the main reasons why was the fear of over or under cooking it. And when you have two pieces of halibut that cost over $20 you really don’t want to mess up. But even if you pay much less, cooking fish can be tricky and if you have enough failures you may just say enough is enough. But don’t do that. Once you get the hang of it, you’ll make great fish meals more and more.

If you’re really nervous just keep in mind that baked cod should be cooked to an internal temperature of 155 degrees. To test the temperature just use a food thermometer and stick it in the thickest part of the fish keeping the tip near the center of the filet. I’ve cooked fish enough that I’ve learned to eyeball it by either looking at the sides to see how opaque the color of the fish is or by sticking a fork on the edge to see if it’s flaky. But that skill comes with time and I recommend using a food thermometer if you’re new at it.

And while we’re talking food thermometer I would recommend getting a good one. The more inexpensive ones can work but they can register temperatures incorrectly, especially over time. Invest in a good food thermometer and it will become you’re best friend.

Ready To Go Into The Oven

Lesson Learned 3 – Grate your own Parmesan for this recipe: There is a BIG difference between jarred Parmesan cheese and grating your own. First the quality of the cheese can be much better as you choose what kind of Parmesan wedge you’ll use. Second the consistency is different. Homemade grated Parmesan tends to have slightly bigger pieces, tastes more robust and stands up better to the melting process in the oven. Now I know it takes a little extra time to do it but it is so worth it. I just zip out my little mini food processor, cut my Parmesan into small pieces and let the food processor do the rest. It’s so easy really and so worth it. I always make more than I need and use it for other things. Once you grate your own you may find that you’ve become a Parmesan snob and always grate your own versus buying it in the jar. It wouldn’t surprise me.

And that’s basically it. The recipe I am sharing is for two but you can certainly make more – just increase the amounts for the mayonnaise mixture. Also if you use larger sized filets you’ll need to increase the baking time. I served this with my cinnamon roasted butternut squash, a side salad and some garlic knots. It was a fantastic meal. Try it and tell me what you think!

Parmesan And Garlic Herb Baked Cod...

  • Servings: 2
  • Difficulty: Easy
  • Print

INGREDIENTS:

2 four to five ounce cod filets

1/2 cup mayonnaise

1/2 cup freshly grated Parmesan

1 scallion chopped, including the green parts (you can substitute 2 Tbs. shallots)

1 garlic clove, grated

1 Tablespoon fresh Italian parsley, chopped

DIRECTIONS:

Preheat oven to 375 degrees. Line a baking sheet with foil and spray the foil with cooking spray. Place the cod filets on the foil and set aside.

In a small bowl mix together the remaining ingredients. Spread the mixture evenly over the top of the fish. Bake for 8-10 minutes or until the fish starts to look opaque and will flake.

If you desire the topping to be more browned, at 8 minutes switch the oven to broiler and brown the tops of the fish until lightly golden (not longer than 2 minutes). Remove from oven and serve.


Mustard Herb Salmon With Oven Roasted Butternut Squash…

Although this recipe may sound difficult it is incredibly simple to make. Even non-fish lovers will find this recipe hard to resist. Couple that with delectable butternut squash and being able to cook both at the same time – well the result is you have one heck of any unbelievably easy,  flavorful meal!

My husband and I have been trying to incorporate more fish into our diet and salmon is one of our favorites for a few reasons: 1.) It has a nice, mild, non-fishy flavor, 2.) Salmon is a reasonably priced fish, and 3.) Salmon can be made in a wide variety of ways. And what can I say about butternut squash? When you roast it the sides caramelize and give a nutty/sweet flavor to the squash. You definitely can’t beat that!

So, lets talk mustard herbed salmon with roasted butternut squash…

Lesson Learned 1 – Use a piece of salmon that is at least 1 1/2 to 2 inches thick at its widest part. A thinner piece will not stand up to this roasting time. You want the fish to flake but you don’t want it to dry out. My husband and I tend to opt for approximately 4 ounces each and you can go up to 6 ounces. Just make sure that the filet is not thicker than two inches at the widest part or thinner than 1 1/2 inches. The length of the piece does not matter.

Also keep in mind the cost of your filets will be less if you buy them with the skin on. For this recipe I remove the skin. As long as you have a sharp boning knife that should not be a problem whatsoever.

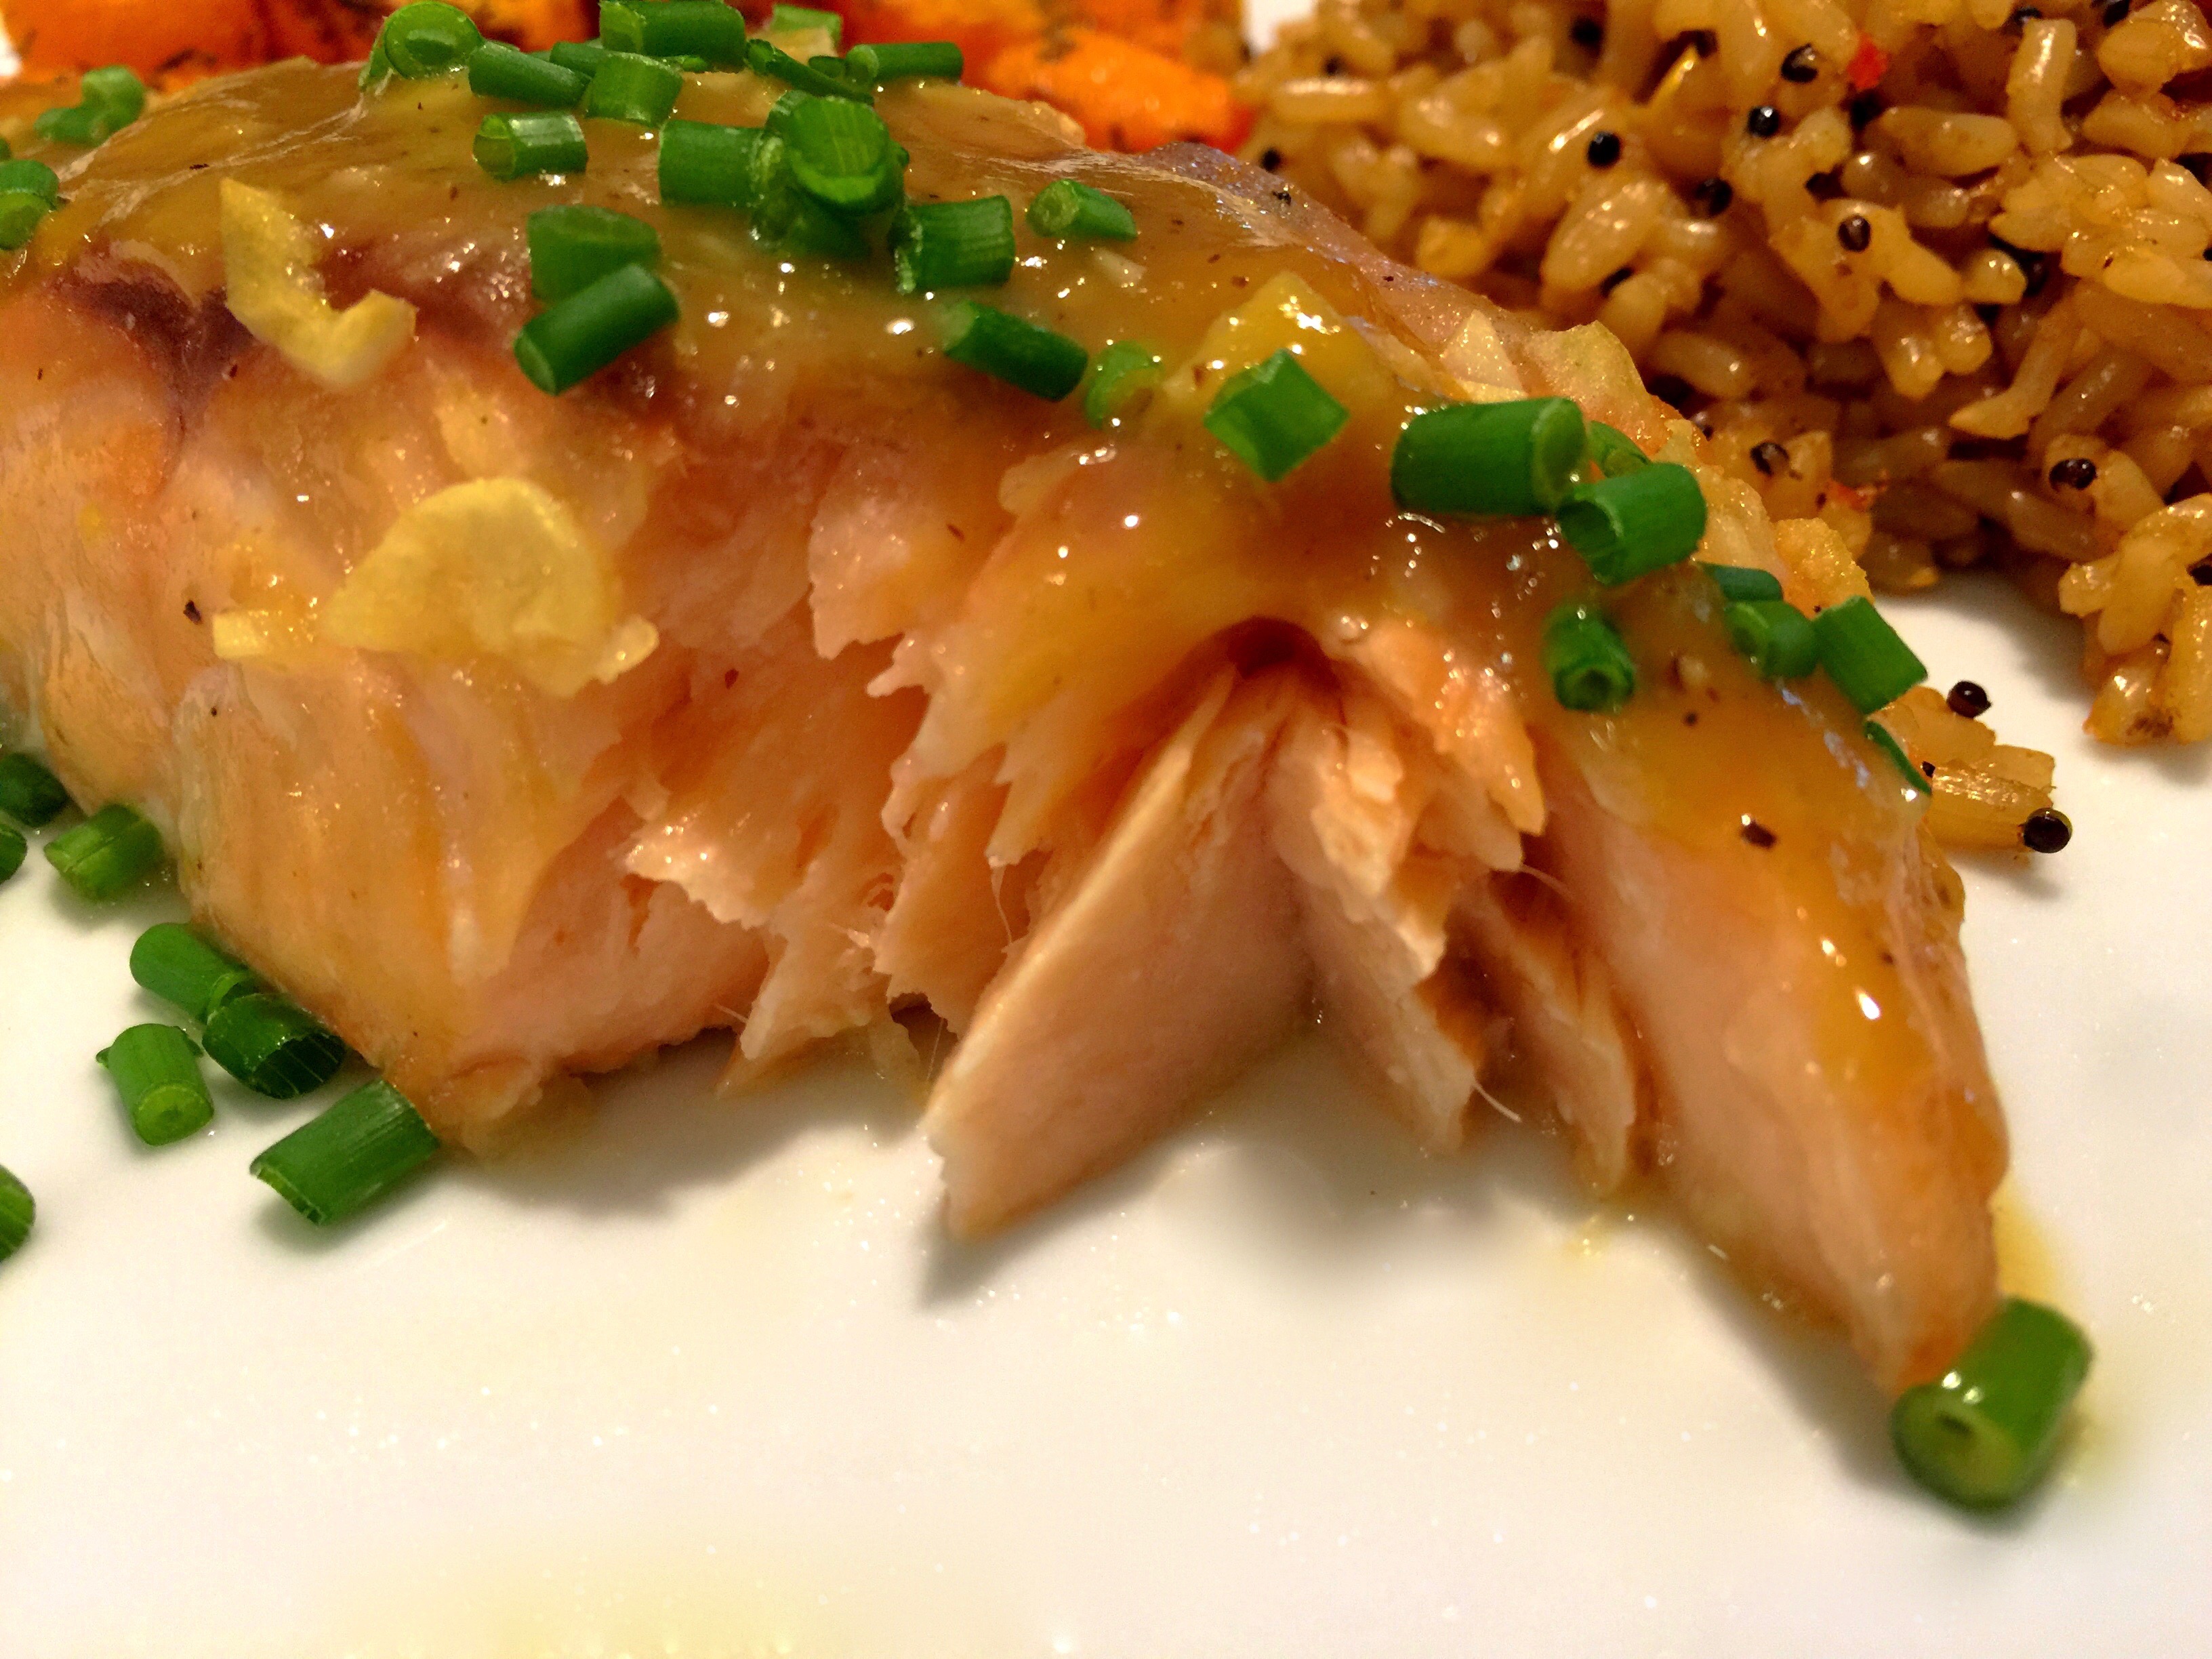
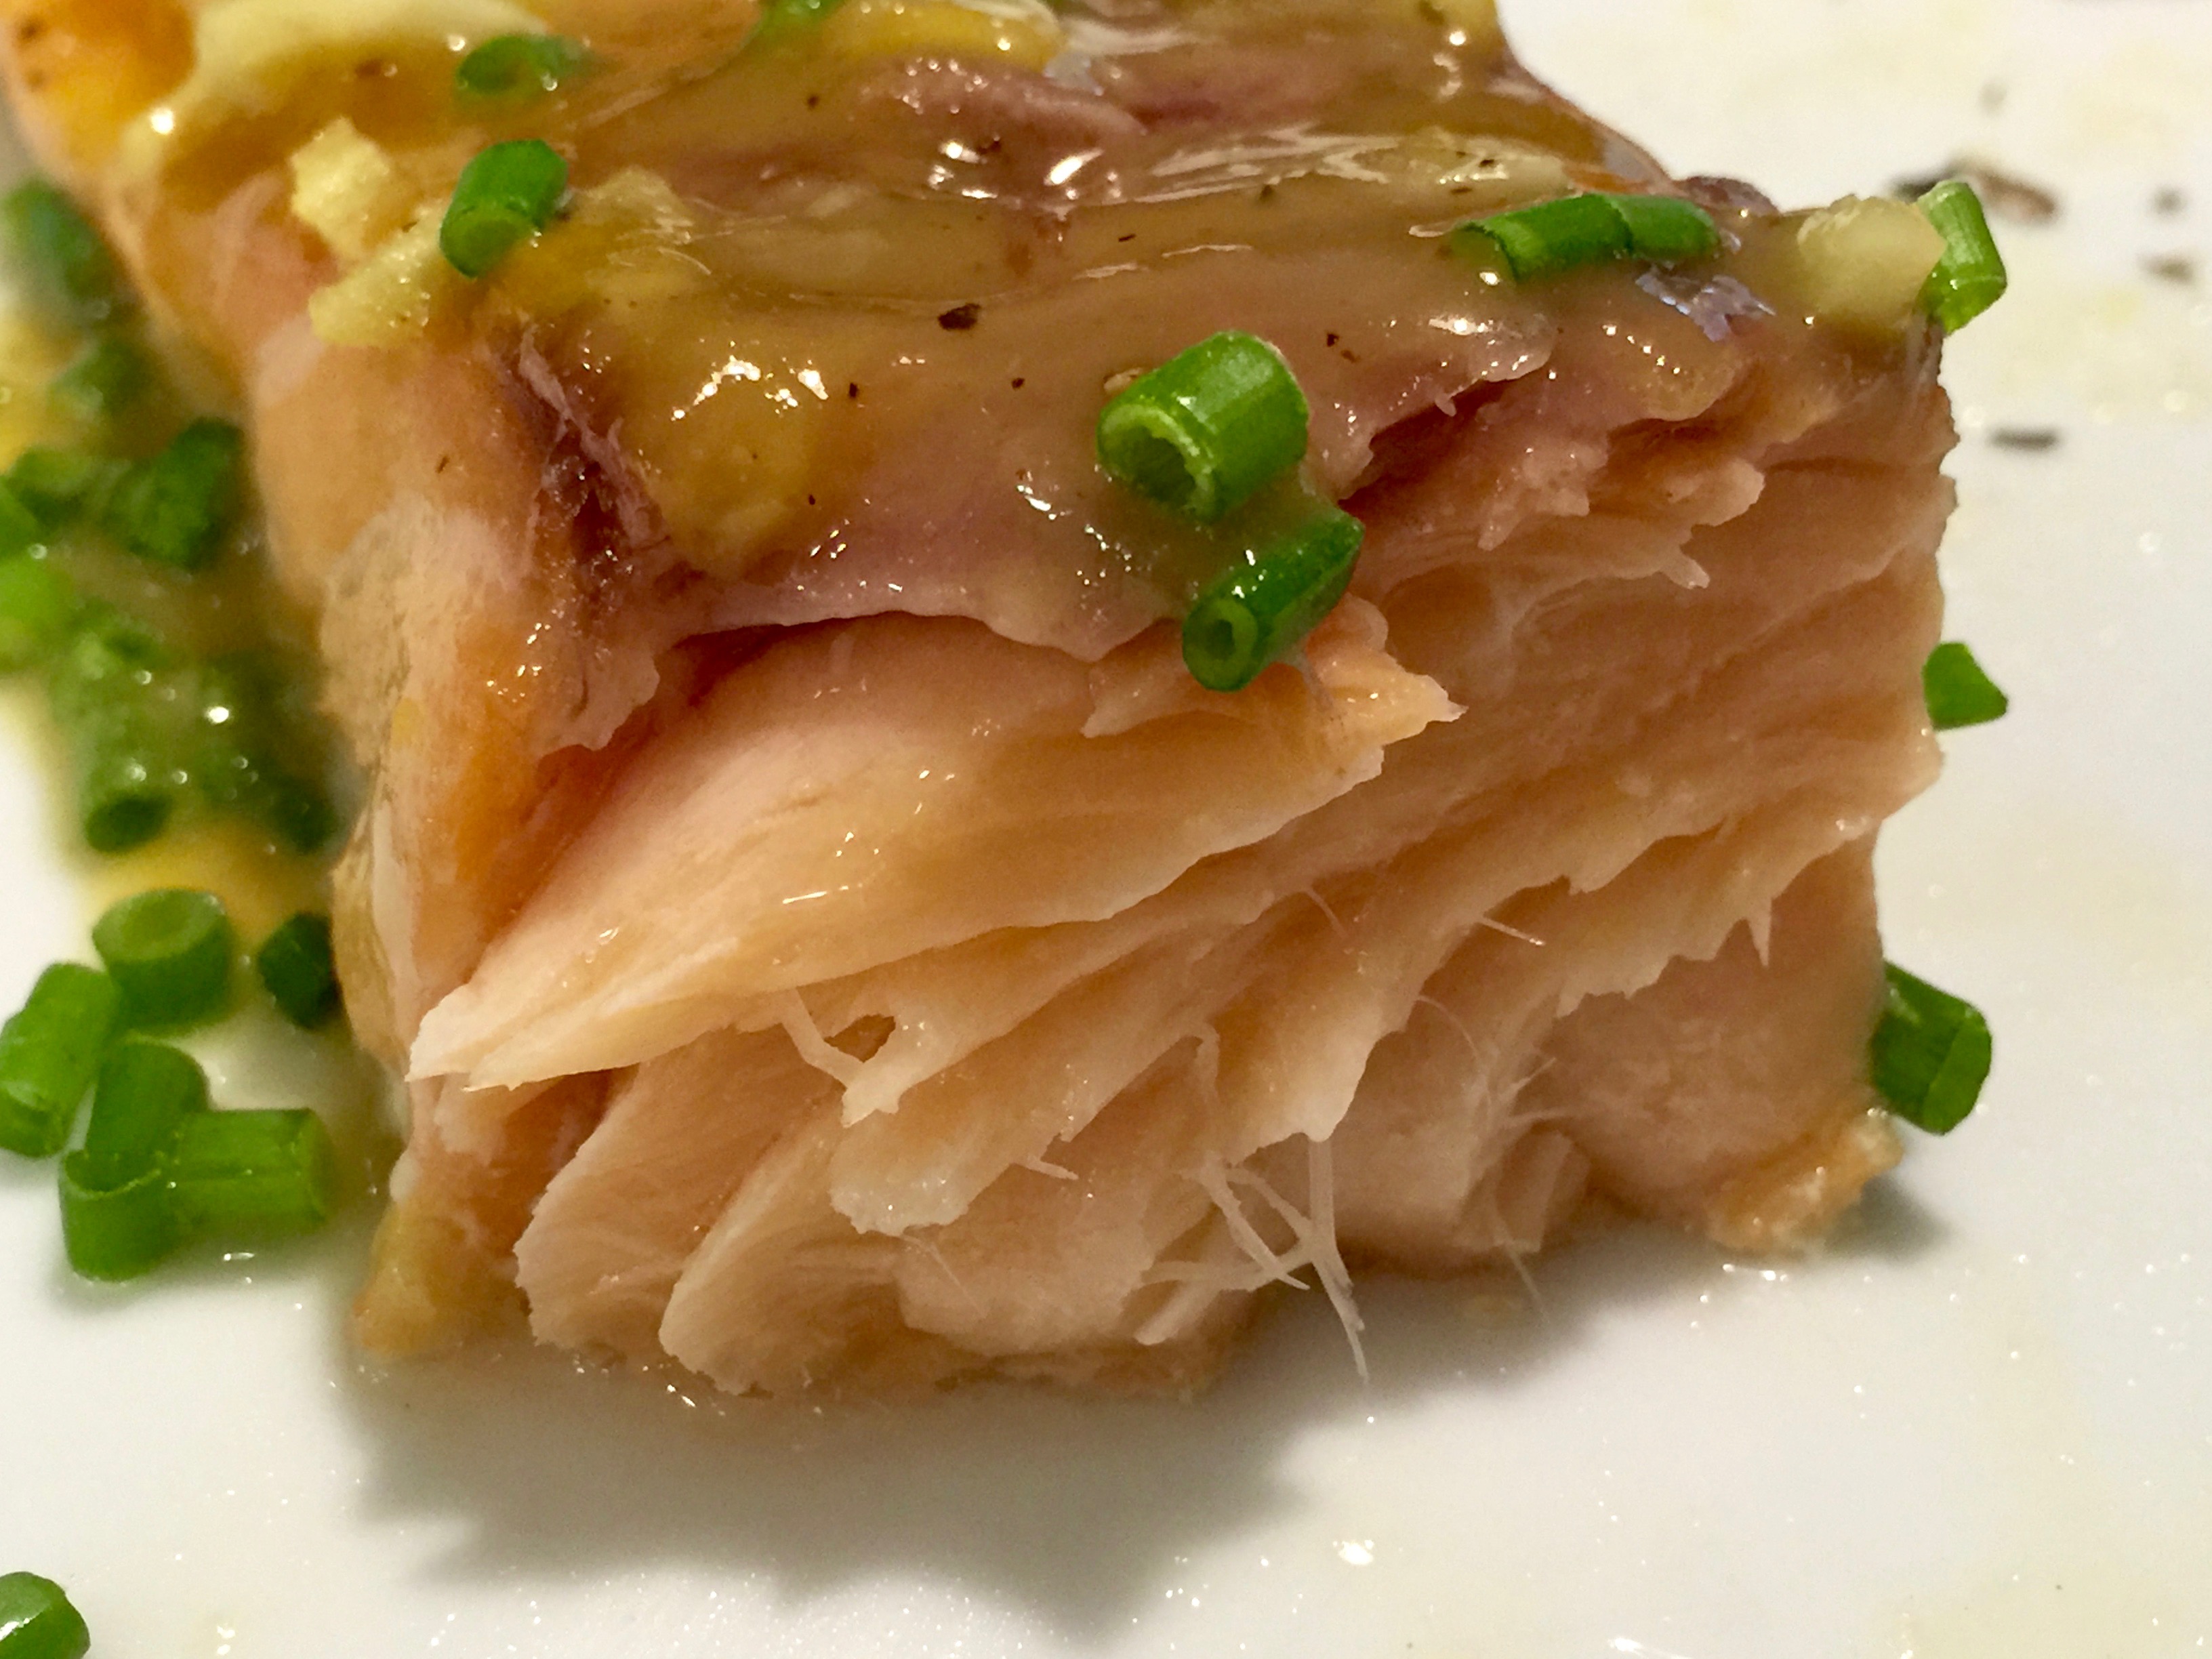
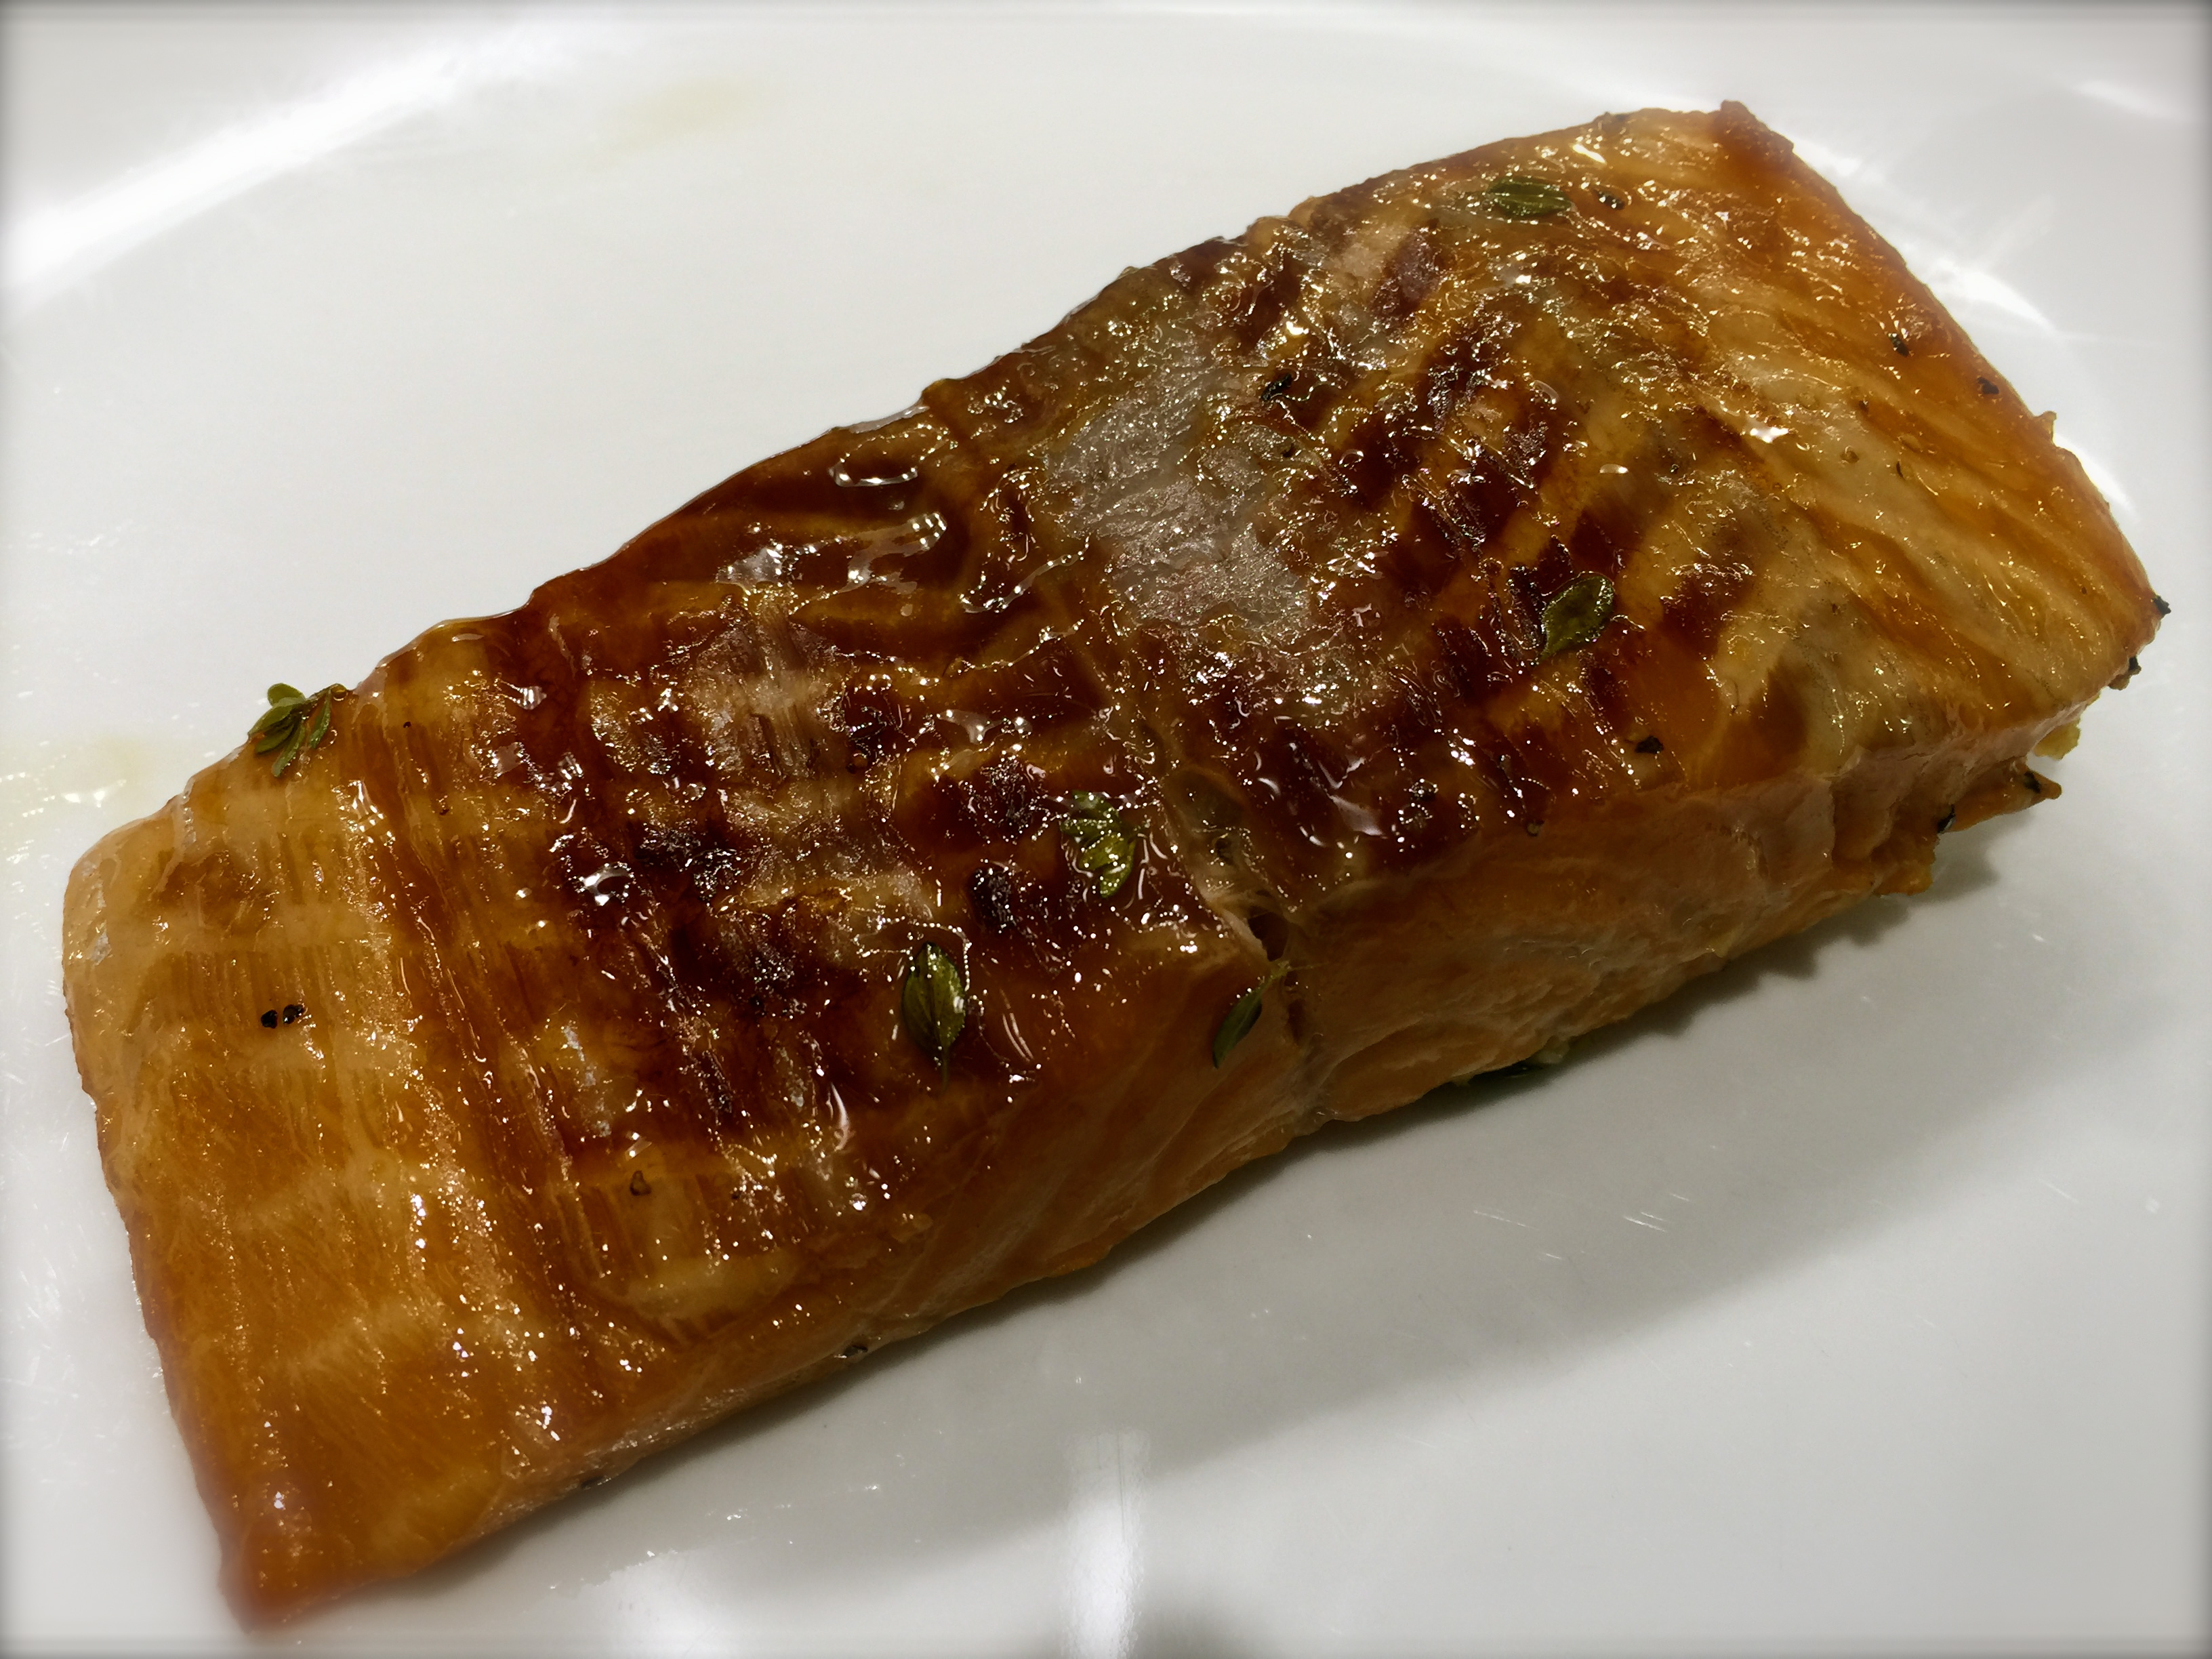
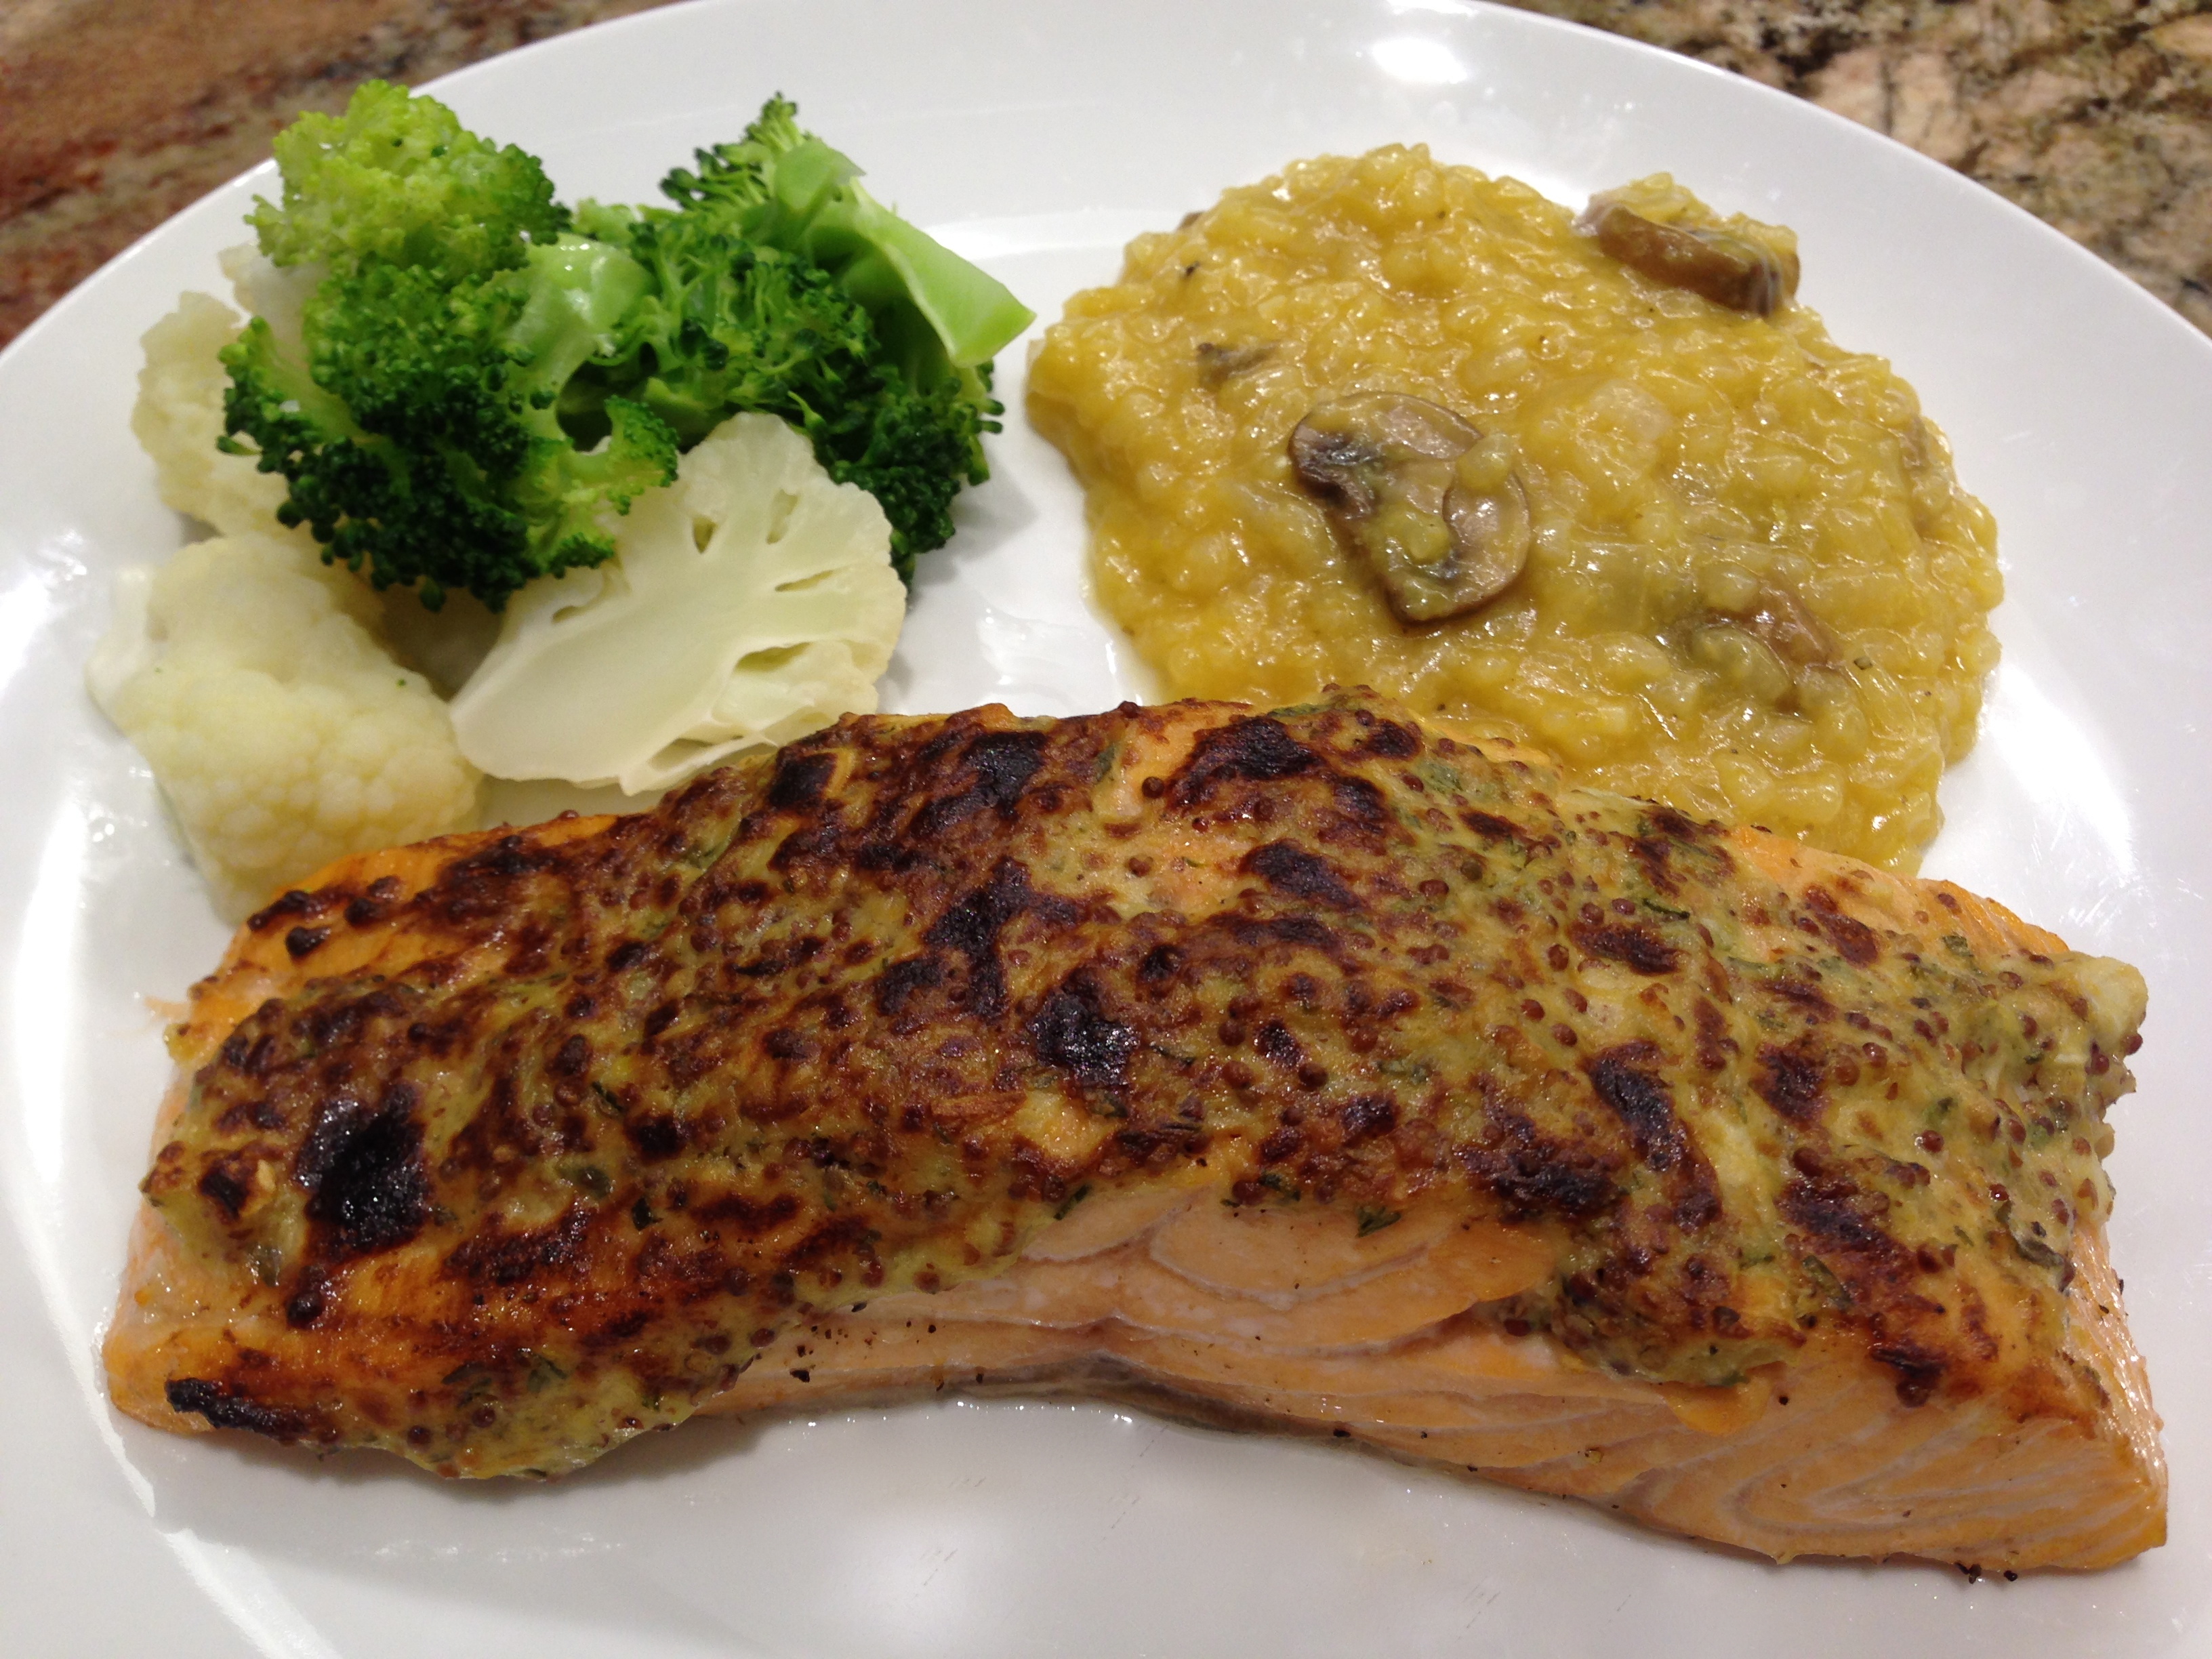
2. Choose any herb blend you think will work well with salmon: I used a Tuscan Garlic Seasoning Blend. It contains onion, garlic, spicy red pepper and lemon peel. I like it because it gives a gentle spicy kick to the salmon. If you’re not sure what to use read the label on the jar your considering. Quite often it will tell you whether it works best with meat, poultry or fish. Think of the herbs you enjoy and find a blend that resembles that. Or mix up a blend of your own.

When using herbs in any recipe always start from the standpoint that less is more. With the herb blend that I use if you add too much the salmon gets overpowered and the fish is too spicy, at least for us. I’ve found that as you repeatedly make a recipe you get a good feel for the amount of herbs to add. I lightly coat the mustard with the herbs and the combination of both gives a wonderful zing to the fish. So start out with less, you can always add more.

Lesson Learned 3 – Cut the butternut squash into 1 inch square pieces: Now I know that is easier said than done and there will be variances in your pieces but you want to make sure the pieces are large enough so the squash cooks through but does not become mushy. The beauty of this recipe is that you can roast both the fish and squash together, albeit you put the squash in the oven ten minutes prior to the fish. That way they are both ready to come out of the oven at the same time. Here’s at tip – check out any pre-prepared butternut squash you might find in your grocery store. I can get squash that is already peeled and cut into large chunks. I only have to do minimal prep when I buy my squash that way. Believe me, it saves a lot of time and effort.

I normally roast the fish on the middle rack of the oven on a foil lined baking sheet sprayed with cooking spray. I roast the squash on the lower rack, also on a foil lined baking sheet. Because I use olive oil in the prep of the squash there is no need to use cooking spray on that sheet pan.

Lesson Learned 4 – My secret for getting a nice caramelized squash – don’t flip it: So many recipes tell you to flip the squash half way through the roasting process. I found that if you don’t you get one side with a gorgeous caramelization, sort of like creating a crust on each piece. That caramelization provides a sweeter taste that permeates the entire piece. So be brave, don’t flip the squash. I guarantee you’ll love it!

As I mentioned earlier, the beauty of this recipe is that you can prep both the fish and squash and roast them together in the oven at the same temperature. How easy is that. This is one of my go-to week night meals and if you try it, I’m sure it’ll be one of yours as well. Enjoy!

Mustard Herb Salmon With Oven Roasted Butternut Squash

  • Servings: 2
  • Difficulty: Medium
  • Print

INGREDIENTS:

Mustard Herb Salmon:

2 four to six ounce salmon filets, skin removed

2 tsp. dijon mustard, I use Grey Poupon

1/2-1 tsp. herb blend, I used tuscan garlic blend

Olive oil cooking spray

Roasted Butternut Squash:

12 oz. butternut squash cut into 1 inch. cubes (I get mine pre -packaged and cut)

1 Tbs. dried thyme (you can use a little more if you need to evenly apply it to the squash)

Garlic infused olive oil

Kosher salt, to taste

Freshly cracked black pepper, to taste

DIRECTIONS:

Preheat oven to 400 degrees. Pat salmon dry and place it on a foil lined backing sheet sprayed with cooking spray. Dollop one tsp. of dijon mustard on each piece. Spread the mustard to coat the entire top of the salmon. Sprinkle the herb blend over the mustard. Set aside.

Place squash pieces on a foil lined baking sheet. Drizzle olive oil over the squash. With your hands mix the squash pieces to make sure all are covered with the olive oil. Spread the pieces apart so they do not touch. Sprinkle pieces with salt, pepper and thyme.

Place the squash on the bottom rack and roast for 10 minutes prior to putting the salmon in the oven. After 10 minutes put the salmon on the center rack in the oven and roast both the salmon and squash for and additional 20 minutes. Remove from oven and serve immediately.


SaveSave

SaveSave

SaveSave

SaveSave

SaveSave

SaveSave

SaveSave

SaveSave

SaveSave

SaveSave

SaveSave

SaveSave

SaveSave

SaveSaveSaveSave

SaveSave

SaveSave

SaveSave

SaveSave

SaveSave

SaveSave

SaveSave

SaveSave

SaveSave

SaveSave

Lemon Red Snapper With Herb Butter…

A couple of weeks ago a new Whole Foods store opened near my home. I’m not particularly a big fan of Whole Foods as some of their prices, in my opinion, are completely outrageous. But I do like the fact that if I need something, especially something out of the ordinary, I can always find it there. I also like the fresh seafood they carry. They often carry varieties of fish I can’t find in my local grocery stores. And the fishmongers will filet and debone any whole fish for you on the spot.

I went to the store on opening day and it was crazy. The place was packed but there were so many great things to see and sample. At one point they were cooking lobster tails and giving away samples of them. I actually found yellow grapefruit, which is my favorite. Most stores only carry pink grapefruit  and I prefer the tanginess of the yellow.

And when I walked by the seafood department I was so impressed with the variety of fish they had. For months I had been looking for red snapper filets and there they were, beautiful specimens, right in front of my eyes. I was so excited that I was finally going to be able to try out this recipe.

Now if you’ve not made a lot of fish and are unsure of your skill in this area, I would not start by making a recipe like this using red snapper as the fish. Not that this recipe is all that difficult but snapper is expensive (it cost me $20 for two filets). You might want to hone your fish making skills on less expensive types of fish like tilapia or cod before you venture into making red snapper. This recipe would work very well with either of those types of fish.

But lets talk about lemon red snapper with herb butter…

Lesson Learned 1 – Cut the lemon slices at least 1/4 inch thick: I cut my lemon slices about 1/8 inch thick and they cooked down more than I would have liked. They still infused the fish with great flavor, but you also use the lemon as a garnish when you serve the fish. By cutting the lemons 1/4 inch thick they will have more body after the cooking process.

Lemon Red Snapper With Herb Butter

Lesson Learned 2 – Not all filets cook the same: It’s never one size fits all when cooking fish filets. Some may be longer and thinner while others are shorter and thicker. The trick is to try to get filets that are similar in size so that they all cook for the same amount of time. The last thing you want to do is overcook an expensive cut of fish like red snapper.

My filets were longer and thinner but still about 1/4 inch thick at the center. When I researched how to cook the snapper the overall consensus seemed to be at 425 for about 13 minutes. But you can’t always follow that. It is important when making fish to develop an eye for determining when the fish is cooked. I judge my fish by looking at the thickest part. It will start to look opaque at each edge and as the fish cooks the opaqueness fills in. When it is almost completely opaque on the side I know my fish is done. These particular filets only took about 10 minutes. So learn how to develop that eye. The filets you choose may have to cook for 13 minutes. I can only tell you that it will take time as well as trial and error to get good at cooking fish.

Lemon Red Snapper With Herb Butter

Lesson Learned 3 – Don’t be afraid to make fish: I think the key to making fish is to err on the side of underdone. You can always put the fish back in the oven but you can’t do anything with an overdone dried out piece of fish. Be prepared to do that a few times.  It’s no big deal. I guarantee you that after a while you will develop that eye and become a master at cooking fish.

If you are looking to add more fish in your diet, this is a great recipe to start you on your way. Try it and let me know what you think…

LEMON RED SNAPPER WITH HERB BUTTER...

  • Servings: 4
  • Difficulty: Medium
  • Print

INGREDIENTS:

2 lemons

Lemon Red Snapper With Herb Butter

Lemon Red Snapper With Herb Butter

Non-stick cooking spray

4 (6 ounce) red snapper filets

1/4 tsp. salt

1/4 tsp. paprika

1/4 tsp. garlic powder

1/4 tsp. freshly cracked pepper

2 Tbs. butter, softened

2 Tbs. fresh thyme, chopped

1 Tbs. lemon zest (the zest of a medium sized lemon)

DIRECTIONS:

Remove the filets from the refrigerator and let them stand for about 20 minutes. (this will take the chill off of them and make the cooking time more true. It is completely safe).

Zest one lemon and set aside. Cut lemons into 8 quarter inch pieces. Place slices in pairs on a rimmed baking sheet covered in foil and coated with cooking spray.  Place 1 filet on top of each pair of lemons. Combine salt, paprika, garlic powder and pepper and sprinkle over the filets. Bake for 10-13 minutes or until the fish flakes easily when tested with a fork.

While the fish is in the oven, combine the butter, lemon zest and thyme in a small bowl.

When fish is done, plate fish and lemon slices. Top each filet with the herb butter, spreading it to allow it to melt. Serve immediately.

Herb Butter Mixture

Herb Butter Mixture

Herb Butter Mixture

Herb Butter Mixture

Lemon Red Snapper With Herb Butter

Lemon Red Snapper With Herb Butter

Baked Honey Mustard Salmon…

Once again I apologize to my readers and subscribers. I’m in the process of moving and have not been able to devote the time I would like to my goal of one new recipe a week. Hopefully within another month I will be back on track. Until then, I will publish when I can.

Today I want to write about honey mustard salmon. I’ve come to the conclusion that I’ll eat just about anything that’s honey mustard. To me that combination of flavors is second to none. I’ve often made chicken with it. So why not try marinating and baking one of my favorite types of fish, salmon, in a honey mustard sauce.

I like flavorful and simple recipes. I truly believe that the more simple the ingredients the better. This particular recipe fits that mold. One of my most popular posts these days is my recipe for Pan Fried Cod In Lemon Butter Sauce. I bet this one will become a reader favorite as well.

So let’s talk baked honey mustard salmon…

Remove the skin from the salmonLesson Learned 1 – Cut the skin off the back of the salmon: Salmon has a very thick skin that will prevent the marinade from completely permeating the filet. You need to remove it to get the best results. Because the skin is so thick it can be easily removed but you’ll need a very sharp knife to do the job. Don’t try removing the skin with a dull knife. You’ll wind up getting very frustrated and could potentially hurt yourself. Remember most knife accidents occur because of dull knives. Sharp knives are actually much safer to use and cause less kitchen accidents.

Honey Mustard MarinadeLesson Learned 2 – It’s best if you can marinate your fish for at least 3 hours: Although you can marinate this fish for a minimum of 30 minutes, I found that the honey mustard is better absorbed by the salmon the longer you marinate it. So if you can marinate the salmon for 3 hours.

Mix the marinade in a small bowl. Then take a gallon sized plastic bag, place the salmon filets in the bag and pour the marinade over the fish. Seal the bag, place it on a small plate and refrigerate. REMEMBER to turn the bag over several times while it’s in the refrigerator to insure the fish gets uniformly coated on both sides.

Marinate Salmon In A Plastic Bag

Lesson Learned 3 – Prepare your baking dish so that the salmon doesn’t stick to it: Keep in mind that this marinade contains honey and some of it will get dark and thicken during the baking process. If you ever tried to remove baked on honey from a baking dish you know how difficult it can be. That’s why it is so important to pretreat your pan. I usually line the pan with foil and then spray the foil lightly with olive oil cooking spray. That way the fish will lift off the pan without any trouble.

Let the salmon bake in the marinadeLesson Learned 4 – Use the marinade as a baking sauce: Once you put the filets on the baking sheet, cover them with the marinade. That way the marinade becomes a delicious sauce you can spoon over your filets before serving them. DO NOT use the marinade as a sauce directly out of the bag since it has been sitting over raw fish. But if you spoon that marinade over the filets and let it bake in the oven with the salmon, it thickens beautifully and becomes a safe and great sauce.

Don’t be afraid of making fish. The key is not to overcook fish. Follow this recipe cooking time to the letter and I guarantee you will have wonderfully moist and flavorful salmon filets. And as alway, why don’t you try this and tell me what you think…

BAKED HONEY MUSTARD SALMON

  • Servings: 4
  • Difficulty: Easy
  • Print

INGREDIENTS:

4 six ounce salmon filetsHoney Mustard Salmon

4 cloves garlic, chopped

6 tsp. dijon mustard

6 Tbs. honey

4 Tbs. dry white wine (I use Chardonnay)

1 small pinch of salt

1/4 tsp. cayenne pepper (you can use a little less if desired)

Chopped chives for garnish, optional

DIRECTIONS:

Preheat the oven to 400 degrees. If the salmon filets have skin, remove the skin and set aside. Whisk together the garlic, mustard, honey, wine, salt and pepper until smooth. Place the salmon filets in a gallon size plastic bag. Pour the marinade over the filets and seal the bag. Massage the bag with your fingers to make sure all of the filets are covered. Place the bag on a small plate and refrigerate for up to 3 hours (30 minutes minimum), remembering to turn the bag over in the fridge every once in a while during the marinating process.

Prepare a baking pan by lining it with foil and lightly spraying the foil with olive oil cooking spray. Place the filets on the baking sheet and pour the marinade over the filets. Bake for 12 – 15 minutes. Plate the salmon. Pour any of the remaining sauce (baked marinade) over the filets. Garnish with chopped chives and serve.

Baked Honey Mustard Salmon

Serving suggestion: salmon with southwestern rice and oven roasted butternut squash

Serving suggestion: salmon with southwestern rice and oven roasted butternut squash

Honey Mustard Salmon

Parmesan Crusted Halibut…

My husband and I have been trying to eat fish more regularly and so I’ve been experimenting with various methods of cooking different types of fish. Not all fish are created equal. I have to admit that it can be a little unnerving trying to master the art of cooking fish as it can go from underdone to overdone in the wink of an eye. But this particular recipe is very easy and if you follow the instructions you will have a delicious mouthwatering piece of fish.

Most of the work in this recipe is in the prep (that seems to be a recurring theme for me, doesn’t it). Creating the breading station and preparing the fish is what takes up the most time. But bottom line, within 20 minutes you can go from prep to table and that’s pretty quick. Your side dishes may take more time than it does to make this halibut recipe.

So let’s talk parmesan crusted halibut…

Lesson Learned 1 – Halibut is expensive: Compared to talapia, cod and catfish, halibut can be pricey. The filets I use in this recipe are frozen and between 5 and 7 ounces. They cost about $10 each. So depending on your budget halibut may be a special treat versus a dinnertime staple. I usually buy them when they go on sale at my local supermarket. Every once in a while they go on sale for 20% off and I stock at that time. Halibut freezes nicely so you don’t have to worry about getting it fresh which also tends to be more expensive than frozen. My advice is to check the specials at your local supermarket. Every once in a while halibut goes on sale and that is definitely the time to buy it.

Lesson Learned 2 – Follow the directions in this recipe: Although halibut is more expensive than other types of fish it has a nice meaty texture and is very flavorful if prepared correctly. That is why I cannot stress enough to follow the directions in this recipe. The overall tendency with fish (or maybe it’s just my tendency) is to cook it longer than you should. If you’re not sure it’s done, take a fork and try to flake off the end of one piece. If it flakes (as seen in the picture below) it’s done. Trust me, after you make fish more often you’ll be able to eyeball it to see if it’s done.  You can always put it back in the oven if it’s not but you don’t want to spend $10 for a piece of fish and overcook it.

Parmesan Crusted Halibut

If you’re planning on serving fish to company and are concerned about presentation make sure you are adept at cooking that type of fish so you don’t have to do the fork test. I can’t tell you how many times my husband got a piece of “forked” fish but never minded because he knew it would be cooked appropriately.

My husband absolutely loves this recipe and I think you will too. Try it and let me know what you think…

PARMESAN CRUSTED HALIBUT…

  • Servings: 4
  • Difficulty: Medium
  • Print

INGREDIENTS:

Parmesan Crusted Halibut4 five to seven ounce halibut filets, skin removed

1 extra large egg

1 Tbs. water

1 cup panko bread crumbs

1/2 cup parmesan cheese, grated

1 Tbs. fresh thyme (just take the leaves off the stem – no need to chop them)

1/2 cup all purpose flour

Zest of one lemon (you can cut the remainder of the lemon into wedges and serve with the fish)

2 Tbs. olive oil

DIRECTIONS:

Preheat the oven to 350. Make a three part dredging station. Part 1 is the flour. Part 2 is the egg and water whisked together. Part 3 is the panko, parmesan, lemon zest and thyme combined.

Dredge a filet in the flour on both side. Shake off the excess flour. Dredge the filet on both sides in the egg mixture. Place the filet onto the bread crumb mixture and cover both sides pressing down on each side to ensure the breading adheres to the filet. Repeat this process with the other three filets.

Heat an ovenproof pan (preferably a cast iron skillet) over medium high heat. Once the pan is heated pour the olive oil into the pan and make sure the bottom of the pan is completely coated. The pan is sufficiently hot if the oil smokes. Place the filets into the oil and brown them for 3 minutes. Turn them over and put them in the oven for an additional 5 – 7 minutes depending upon the size of your filets.

Remove the filets from the pan and serve immediately.

Parmesan Crusted Halibut

Parmesan Crusted Halibut


Quick And Easy Baked Lobster Tails (no lie)…

I don’t know about you but for years I lived in fear of making lobster tails. Everything you read warns you not to overcook them because they will turn rubbery (much like calamari and shrimp) but because they tend to be pricier the fear factor increases exponentially.

Well no more! I decided over the holidays that I would tackle my fear of making lobster tails. In the past, I tried to make lobster tails mostly by broiling them. Sometimes I would be successful and other times not. But this time I tried baking them and I can tell you it will be my preferred method from now on. It is soooo easy and takes out almost all the guesswork (I wish I could say it takes out all of the guesswork but I would be lying) that you need not fear making lobster tails anymore. All you need is your oven set to 350 degrees and a good instant read thermometer.

So let’s talk oven baked lobster tails…

  1. What most people think is the hardest part – getting the tail out of the shell: This used to be one of my biggest challenges. All I can say is thank goodness we have YouTube – I found this video about removing the lobster meat from the tail and it was the absolute key to my success. I encourage you to watch it because this method works and is so easy. I baked my tails on top of the shell and this video shows you exactly how to get the meat out and rest it on the shell.

2. Let the lobster meat rest on the counter for about 15 minutes before baking: First and foremost it is absolutely essential that the lobster tail be completely thawed if frozen. I put my lobster tails in the refrigerator the night before and that did the trick. Most people are afraid to let fish rest a little on the counter like red meat. Of course you would never leave fish out to get to room temperature, but I found if you take the fish out of the refrigerator and let it sit on the counter for just 15 minutes before you cook it, it really helps the cooking time hold true. Don’t leave it out any longer than that, just enough to take the cold edge off the fish.

Baking lobster tails is so easy you’ll want to make them more often. Keep this recipe in your back pocket for when you want to impress, because impress you will!

Quick And Easy Baked Lobster Tails (No Lie)…

  • Servings: 4
  • Difficulty: Medium
  • Print

INGREDIENTS:

4 six ounce lobster tails

1 stick butter, melted for seasoning and dipping

Old Bay Seasoning

DIRECTIONS:

Preheat oven to 350 degrees. Remove lobster meat from tail and rest the meat on the tail. Brush lobster meat with melted butter. Lightly sprinkle the seasoning on top of each tail.

Bake in oven for 15 – 20 minutes. (Check the tails at 15 minutes with an instant read thermometer. If the temperature reads 140-145 degrees, the tails are done). My tails baked in 17 minutes but I live in high altitude and food generally takes slightly longer to cook.

Serve immediately with drawn butter.

Lobster Tail

Lobster Tail and Filet Mignon


Creamy Shrimp and Cauliflower Casserole

My goal with this blog is to make one new recipe a week. Sometimes that can be an arduous task and other times I can make a few in the same timeframe. I made this recipe a couple of weeks ago and absolutely loved it. I had a taste for shrimp and decided to try a different way of preparing it.

Casseroles can be deceiving. We tend to look at them as the convenience of a one dish meal with lots of different ingredients, and that’s true. What one forgets is that normally there is a lot of prep that goes into making a casserole, and so if you are not a prep person like I am, casseroles may not be the ticket for you.

So let’s talk creamy shrimp and cauliflower casserole:

Fresh uncooked shrimpLesson Learned 1 – Is your shrimp really deveined? Most people like to buy shrimp that is deveined with the shell removed so that they don’t have to do as much prep. But is shrimp marketed as deveined really completely deveined?  What I didn’t realize early on is shrimp has veins on both sides, the top and the bottom and when you purchase “deveined” shrimp only the top vein is removed. Next time you buy deveined shrimp check out the bottom and you will see that little black vein running through the bottom as well. Some people leave it in, I remove it. That adds to the prep time but then I’m not eating this disgusting vein once the shrimp is cooked.

For this recipe I got fresh shrimp from my fishmonger that was deveined on top but still had the shell, tail and bottom vein. I removed all of that before adding the shrimp to the other casserole ingredients.

Steamed CauliflowerLesson Learned 2 – This is what the prep entails: Not only do you have to prep the shrimp, you need to cut up and steam the cauliflower, cut up the spinach, melt the butter, grate the cheese and chop the parsley. It doesn’t sound like a lot but it does take a little time. My advice here is to grate your own cheese versus using prepackaged shredded cheese. Prepackaged shredded cheese has an additive in it that prevents the cheese shreds from sticking together. Anytime you can eliminate any additives in your food the better. Sure it takes a little more time, but consider the cumulative effects of those additives in your body over several years. Isn’t it worth a couple of extra minutes to grate the cheese yourself and eliminate those additives?

Lesson Learned 3 – Like most casseroles, you can decide what cheese works best for you: When I made the casserole I used a combination of gruyere and pepper jack cheeses along with the romano. I wasn’t sure if using just pepper jack alone would overpower the casserole. Next time I’m only going to use pepper jack and romano. I like the tang pepper jack gives the casserole and I don’t think it will be too much. Experiment with the cheese you like. Just make sure you are using a good melting cheese.

All Casserole Ingredients Mixed Together

I really liked this casserole, and it was a new way for me to serve shrimp. Try it and tell me what you think.

Creamy Shrimp and Cauliflower Casserole

  • Servings: 4
  • Difficulty: Easy
  • Print

INGREDIENTS:

Creamy Shrimp and Cauliflower Casserole1 small cauliflower cut up and steamed until fork tender

1 cup fresh baby spinach, chopped

1/3 pound shrimp, peeled, deveined and chopped in large chunks

1/4 coconut milk

3 Tbs. melted butter, slightly cooled

1 extra large egg, beaten

4 baby bella mushrooms quartered

1/2 cup grated Romano

1 cup grated cheese (I used a combination of gruyere and pepper jack)

1 tsp. italian parsley, minced for the casserole and an extra tsp. or so for garnish

1 tsp. garlic powder

1/3 cup seasoned bread crumbs

Salt and pepper to taste

DIRECTIONS:

Preheat oven to 350. Grease a 1 quart casserole dish and set aside.

In a small bowl combine the egg, coconut milk, garlic, parsley. Sprinkle with a little salt and pepper. Put the cauliflower in another bowl and add the grated cheeses and egg mixture. Stir until the cauliflower is evenly coated. Add the shrimp, spinach and mushrooms and stir to combine.

Pour into prepared pan. Top with a light dusting of bread crumbs (you may not need the entire 1/3 cup). Bake for 25 – 35 minutes. (You want the cheese to be melted and the shrimp to be pink. I live in high altitude so it took me 35 minutes. At sea level I would start checking the casserole at 25 minutes).

Transfer to a plate and garnish with some additional chopped italian parsley and serve.

Ready for the oven

Fresh out of the oven

 Creamy Shrimp and Cauliflower Casserole

Grilled Salmon In Foil Packets

It’s getting close to the time when grilling food will be less and oven prepared food will be more. Well, this recipe gives you that grilled look from being baked in the oven in a foil packet. What I like about this recipe is it’s so easy to prepare and cook, so even if your a novice at cooking fish this recipe will turn you into a pro!

So let’s talk about grilled salmon in foil packets…

Two Six Ounce Salmon Filets

Two Six Ounce Salmon Filets

Lesson Learned 1 – The portion size for salmon: I had a butcher tell me that the correct portion size for salmon is eight ounces. I don’t agree with that. I think it is six ounces. If you’re feeding big eaters get eight ounce portions, but for most six ounces is more than enough. Both six and eight ounce portions cook for approximately the same time, give or take a few minutes for the larger size portion. Stick with a 6 ounce portion and the cooking time in the recipe and the salmon will turn out perfectly every time. I have a wonderful grocery store nearby that always has large pieces of salmon in the meat case. I get the butcher to cut them fresh for me every time. I also ask the butcher to cut the piece from the center and not from the ends.

Lesson Learned 2 – Removing the skin from the salmon: This is probably the most time consuming part of the entire recipe. You need to remove the skin of the salmon before baking it. Now you can always ask a butcher to do that, but I prefer doing it myself as I like to make sure that I am removing the skin with the least amount of flesh attached to it. But if you’re afraid to do it or feel like you don’t have the time, just ask your butcher.

Removing the skin from the salmonTo remove the skin you need to work with a very sharp knife. I use a boning knife. Start at the thick end of the filet and see if, by hand, you can slightly lift up part of the skin. Normally you can. Then place the blade of the knife up against the skin and slowly begin to move the knife down the skin. While your moving your knife, try to get as much of your hand holding the skin and pull toward the thin end of the filet as you move the knife.

This process may take a little time and you want to make sure you are removing mostly skin and not flesh. That is why you need a very sharp knife for this. Otherwise you may sacrifice a lot of the salmon to the skin. Take your time and don’t get frustrated. Just continue to methodically move the knife down the skin will pulling the skin toward the thin side of the filet.

That grilled look from baking in the ovenLesson Learned 3 – Getting the grilled on the salmon filet by using a foil packet: Once the salmon has marinated you just put it in a foil packet on a baking sheet and roast it in the oven for 15 minutes. No need to prep the foil in any way. Since the marinade has brown sugar in it, the bottom of the salmon will slightly caramelize. When removing the salmon from the packet simply flip it over when you put it on the plate and the salmon will look like it was made on the grill. It’s so easy and such a neat trick!

This is my go to salmon recipe. I love it because it is quick and easy and, by the way, did I tell you it’s pretty darn delicious. So try this one and tell me what you think…

Grilled Salmon In Foil Packets…

  • Servings: 4
  • Difficulty: Easy
  • Print

INGREDIENTS:

4 six ounce salmon filets, skin removed

1/3 cup firmly packed brown sugar

1/3 cup soy sauce

1/3 cup water

half of a third of a cup of vegetable oil

2 medium-large garlic cloves, minced

1 Tbs. fresh thyme leaves, slightly chopped (I used lemony thyme)

1 tsp. lemon pepper

DIRECTIONS:

Put the brown sugar, soy sauce, water, oil, garlic, thyme and lemon pepper into a bowl. Whisk completely making sure to incorporate all of the brown sugar into the liquid.

Place the salmon filets into a resealable bag. Pour the marinade over the filets. NOTE:  You may need to use a spatula to get the residual brown sugar from the bottom of the bowl into the bag. It is important that as much brown sugar as possible is in the marinade mixture while the filets are marinating. Marinate the filets for 3-4 hours.

Preheat the oven to 425. Line a baking sheet with foil. Using a piece of additional foil for each filet, loosely wrap the filet in the foil folding the edges up at the ends to make a packet. Place all the packets on the foil lined pan.

Bake for 15 minutes. When removing the salmon from the foil, make sure to flip it over so the caramelized side is on the top when serving. Serve immediately.

The Marinade

The Marinade

Marinate Filets In A Resealable Bag For 4 Hours

Put the salmon and marinade into a resealable plastic bag…

A Foil Packet

Salmon in a foil packet…

Serving Suggestion: Grilled Salmon with Panko Crusted Tomatoes and Roasted Baby Red Potatoes...

Serving Suggestion: Grilled Salmon with Panko Crusted Tomatoes and Roasted Baby Red Potatoes…

Pan Seared Halibut With Sweet Pepper and Mushroom Relish…

I never thought the day would come when I became more adept at cooking fish, but it has and there’s no one happier about it than me. The challenge now is to find a variety of ways to make fish more interesting. And I think this recipe does the trick.

Cooking any kind of fish can be tricky because there is a fine line between the fish being underdone and overdone. It takes time and experience to get a feel for cooking fish but it is a skill that is well worth the energy. We try to have fish a couple of times a week now and I am constantly researching creative but easy ways to serve it. I really like this particular recipe for its flavor, and the relish is easy to prepare and can accompany just about any kind of mild white fish (or even grilled chicken).

IMG_4276Lesson Learned 1 – When pan searing fish, use a combination of butter and olive oil to cook the fish: You use this combination for a reason. Olive oil has a higher smoke point than butter and by combining them you can cook the fish at a higher temperature without burning the butter and you’ll still be getting that rich butter flavor. For this particular recipe I had pieces of halibut that were 1 inch thick and about 2 inches by 1 1/2 inches in length and width. Obviously the thicker the piece of fish the longer the cooking time. These particular pieces took between 9 – 10 minutes to cook.

IMG_4266Lesson Learned 2 – You can be creative with the relish ingredients: I chose a relish that was a combination of a yellow sweet pepper, Roma tomato, shallots, baby crimini mushrooms and minced garlic. I liked the combination of flavors and colors. But really you can make it out of anything you have on hand. I decided to cook the relish and the fish in two separate pans versus cooking the fish and keeping it warm in foil while I made the relish in the same pan as the fish. This particular relish took about 10 minutes to cook so it closely matched the cooking time of the fish filets. I started out sautéing the peppers and mushrooms for about 4 – 5 minutes. Then I added the shallots and garlic and last the tomatoes. I was able to time it so that the fish and the relish were done almost at the same time. The trick is to know your relish ingredients and how long they take to cook so you can cook them in the proper time and order. If for some reason you can’t time them to be done closely together, my recommendation would be to cook the relish and keep it warm and cook the fish so that it can be served immediately.

If you think you’re not a fish lover then you definitely have to try this recipe. I’ve written this recipe to serve two but you can certainly adapt it for more servings. The relish is a great enhancement to the fish and will make you think differently about serving fish regularly. Give it a try and tell me what you think!

Pan Seared Halibut With Sweet Pepper and Mushroom Relish…

  • Servings: 2
  • Difficulty: Medium
  • Print

INGREDIENTS:

2 (6 ounce) halibut filets

3 Tbs. olive oil, divided

1 Tbs. butter

1/2 cup all purpose flour

1 -2 tsp. garlic powder

1 – 2 tsp. Old Bay Seasoning

salt and pepper (to taste)

1 shallot, sliced

1 – 2 cloves of garlic, minced (again to taste)

1/2 cup sweet pepper, any color

5-6 medium sized baby crimini mushrooms, sliced

1 medium – large size Roma tomato, seeded and chopped

1 Tbs. sherry cooking wine

1 Tbs. flat leaf parsley, chopped

DIRECTIONS:

Combine flour, garlic powder and Old Bay Seasoning. Dredge the fish filets on both sides in the flour, shaking off any excess. Set aside.

Heat 2 Tbs. of olive oil in a pan. Add peppers and mushrooms and sauté for approximately 3-5 minutes. Once you’ve started cooking the peppers and mushrooms, heat the remaining olive oil and butter in another pan until the butter is melted. Season the fish filets with salt and pepper and add them to this pan seasoned side down (I also added a touch of Old Bay Seasoning on top along with the salt and pepper). Season the other side of the filets with salt and pepper (and Old Bay, if desired). Let the filters cook for approximately 4-5 minutes before turning. Cook on the second side until the fish flakes easily when tested with a fork (approximately another 4- 5 minutes). Keep in mind that the thickness of the filet will determine the cooking time, obviously the thicker the filet the longer the time.

Once the peppers and mushrooms in the other pan have softened add the shallots and garlic and cook for an additional 2- 3 minutes. Add the tomatoes and sherry cooking wine and cooking for another couple of minutes. Turn off the heat, stir in the parsley and serve over the fish filets.

IMG_4297

IMG_4283

Deli Style Tuna Salad…

Sometimes I get so consumed with trying new things in the kitchen that I forget a simple meal like soup and a sandwich can be just what the doctor ordered. And so it was the other night. My husband purchased some gourmet soup at our local grocery store, New England clam chowder to be exact, and every night he kept saying, “Let’s have something to go along with that soup.”

For some reason I was hard pressed to think of something and so I held off for a couple of days. When he asked once again and I told him I was struggling with an accompaniment he said, “How about a tuna salad sandwich.” Bingo. It’s like those words just hit the spot. So off I went researching various tuna salad recipes until I figured out what bits and pieces of various recipes might work for us.

Tuna salad

I have to tell you it was a very satisfying meal. No frills, no fuss, just store bought soup and home made tuna salad on white sandwich bread. Sometimes all the bells and whistles just can’t compare to the simple pleasures of life. But even simple dinner fare can produce some lessons learned. Here are mine:

Lesson Learned 1 – Make the tuna ahead of time and let the flavors get acquainted: There is a big difference when the flavors have the chance to meld. I recommend making this and letting it sit in the refrigerator for at least 4 hours. Overnight is even better.

Lesson Learned 2 – Use a combination of tunas: For this recipe I used a combination of solid white and light tuna. What’s the difference you ask? Solid white is almost like a large flaked tuna filet. It is very full bodied but dry. Light tuna has almost a shaved consistency. It is slightly darker but more moist. The combination of the two gives the perfect consistency for tuna salad.

Lesson Learned 3 – Not all white breads are alike: I really wanted to serve the tuna salad “old school” and so I decided to serve it on plain white sandwich bread. Have you ever read the ingredients on packages of plain white sandwich bread? More and more I am shying away from processed foods made from names I cannot pronounce, names that sound like they should be in a beaker in a laboratory and not an ingredient in my food.  So I chose a more expensive organic white bread, Rudi’s country morning white to be exact. The ingredients in the bread were all organic and I could pronounce them all (I knew what all the ingredients were as well). I guess if I was really trying to eat cleaner I would have made some home made bread. I just didn’t have the time. I know how difficult it is to eliminate all kinds of processed foods from your life, but being diligent and making smart choices more often than not has to be better for your overall health, right?

Lesson Learned 4 – Once you make the tuna salad the possibilities are endless: I chose a more traditional way to serve the tuna salad. But you make a tuna melt, a tuna stuffed tomato, tuna salad lettuce wraps, tuna pasta salad, an avocado and tuna salad wrap, or tuna salad mixed with your favorite greens and veggies. The sky’s the limit on this one.

The next time you want to have something simple but satisfying make some tuna salad and experiment with various ways to serve it. But let me tell you, a plain tuna salad sandwich on white bread with some sliced tomato, lettuce and pickles really hit the spot the other night!

IMG_4255

Deli Style Tuna Salad…

  • Servings: 4
  • Difficulty: Easy
  • Print

INGREDIENTS:

2 (5 ounce) cans of solid white tuna packed in water, drained

2 (5 ounce) cans of light tuna packed in water, drained

1/2 cup mayonnaise

1/2 tsp. seasoning salt

1 tsp. Old Bay seasoning

1/4 cup celery, minced

1/4 tsp. dried dill weed

1 Tbs. fresh flat leaf parsley, minced

1 – 2 Tbs. fresh lemon juice

4 green onions, white parts only, chopped

Freshly cracked black pepper

Tabasco sauce (to taste, optional)

DIRECTIONS:

Combine all the ingredients in a bowl. Start out with only 1/4 cup mayo and add more to taste. Adjust salt, pepper, tabasco and lemon to taste. (I only used 1 Tbs. of lemon and found it added flavor but did not overpower the tuna).

Cover and refrigerate overnight or for a minimum of 4 hours. Serve on white bread with some sliced tomatoes, leaf lettuce and sandwich pickles.

IMG_4251

Pan Fried Cod With Lemon Butter Sauce…

My husband and I have gotten into eating more fish lately and so I’ve become a student of preparing fish. Baking, broiling, grilling – you name it, I’ve been trying it. I will be the first to admit fish is tricky and the only advice I can give is to keep making it until it becomes more intuitive. Don’t be afraid to flip it back on the heat if you find it is not cooked through. I would much rather do that than serve overcooked fish. You can’t take that back. Preparing fish in an art that comes about from trial and error. But I guarantee its worth the blood, sweat and tears.

Lately I’ve made a lot of fish filets, mostly pan frying them and I think I’ve got it to the point where I’ve learned how to judge when the fish is cooked. Normally I try to buy a filet that is between a 1/4 and 1/2 inch thick. That way I know that about 3 – 4  minutes on each side under medium high heat will do the trick.

What’s great is grocery stores are now stocking more fish both fresh and flash frozen. The filets I’ve been buying are flash frozen and shrink wrapped and I find they thaw and cook beautifully. The only fish that I’ve tried a fews times that doesn’t seem to hold up well in this process is swordfish. Regardless of what I do it always seem to turn out tough. So if I plan on serving swordfish I buy it fresh. Otherwise fish like, grouper, salmon, cod, flounder, halibut and the like all seem to hold up well being flash frozen. It’s a great convenience when you decide at the last minute that you want to make fish for dinner, which was the case with me last night.

Recipe Rating – A: I’ll clue you in, the first few times I tried recipes like this the results were not nearly as good. As I mentioned earlier, preparing fish is something of a acquired skill. The only thing I will tell you is to err on the side of undercooking versus overcooking. That way you can always flip it back in the pan if need be. I would also advise that if you are not a seasoned cook to avoid serving fish at a dinner party. Be patient. Wait until you’ve mastered the skill of preparing fish before you venture into doing that. Don’t set yourself up for failure. And don’t let what I’m saying make you shy away from fish. It is definitely worth it to master this skill!

IMG_1715Lesson Learned 1 – Preparing the fish: This recipe has a very simple preparation for the fish. After the fish thawed and I removed it from its shrink wrap, I took paper towels and dried the fish thoroughly. Then I dusted the fish with flour on both sides and seasoned it. This time I used a Penzy’s seasoned blend called “Forward”. The blend consists of black pepper, onion, paprika, garlic, turmeric and spice extracts of celery, rosemary, thyme and basil. Although it sounds like seasoning overload, the blend actually created a nice all-purpose seasoning and it worked well with the fish. Don’t be afraid to experiment here. What I do is open my seasoning blends and smell them. I can tell by the smell what might overpower the fish. A nice all purpose blend works well to compliment the taste of the fish, as it did in this case.

Shallot and Garlic Sauted in White Wine and Lemon Juice...

Shallot and Garlic Sauted in White Wine and Lemon Juice…

Lesson Learned 2 – Making the butter sauce: I have to admit making this sauce was rather easy. I discovered that starting it about 15 – 20 minutes before serving works well. I found it interesting that you sauté the shallots, and garlic in wine and lemon juice without using any oil or fat. You add heavy cream and butter near the end. At one point you are making the sauce while simultaneously cooking the fish, but at that point you’re only doing the finishing touch of adding the butter to the sauce, so it’s easy to multi-task. You can also make it ahead, just make sure to keep it warm on a very low flame. This is a very rich sauce. Be careful. You only want to add a little to the fish. You don’t want the taste of the fish to be lost in the sauce. Add just a little and you will have a decadent delight. The recipe below is more than enough for two people. You can easily double it if you plan to serve more people.

The Finished Butter Sauce...

The Finished Butter Sauce…

Lesson Learned 3 – The power of garnish: I’ve said this before but it’s worth repeating. You eat with your eyes first. I can’t tell you how many times I get comments like, “that looks delicious!” Now I can understand how something tastes delicious but I’m not sure how delicious can be determined by your eyes. But in reality it is, and I’ve found one of the best way to dress up a dish is to garnish it with parsley or chives. Just that pop of color adds to the “looks delicious” factor. Adding garnish is so easy and creates a visual excitement before the dish is ever tasted.

IMG_1742

I served steamed broccoli and cauliflower along with Trader Joe’s chicken fried rice with the cod (BTW, that chicken fried rice is very good and easy to prepare).  The meal was a hit. A friend of mine posted on Facebook that cod has a bad rap and I tend to agree. I’m not sure why. It is a mild white fish that can be prepared in a variety of ways, is complimented by a variety of seasonings and is relatively inexpensive compared to other fish. So, don’t shy away from it. This recipe will work well for any white fish like halibut or grouper. Just make sure you don’t overcook the fish. You want the fish moist, tender and flaky. And when you add that butter sauce, well all I can say is it’s to die for!

Pan Fried Cod With Lemon Butter Sauce

  • Servings: 2
  • Difficulty: Medium
  • Print

INGREDIENTS:

Lemon Butter Sauce:

1/2 cup dry white wine

1/4 cup fresh squeezed lemon juice

1 shallot. chopped

1 large clove garlic, minced

1 large dash of Worcestershire sauce

1/4 cup heavy cream

1 stick of butter

Salt and pepper to taste

A dash of hot sauce, if desired

For The Fish:

2 cod filets between 1/4 and 1/2 inches thick

1/4 cup all purpose flour

Spice Blend of Choice (I used Penzy’s spice blend called “Forward” – see reference in blog)

1 Tbs. olive oil

1 Tbs. butter

Salt and pepper

Fresh parsley or chives for garnish

DIRECTIONS:

Begin by preparing the butter sauce. Heat a sauce pan over medium high heat. Add the wine, lemon juice, garlic and shallots. Cook for about three minutes or until the shallots turn translucent. Add the Worcestershire (and hot sauce if desired – I did not add hot sauce) and simmer until the mixture becomes syrupy.

Stir in the cream and cook for about 1 minute. Whisk in the butter a few pats at a time until it becomes fully incorporated. Serve immediately or keep warm until ready to serve.

In a large skillet melt the butter and olive oil. On a plate mix the flour with some salt and pepper. Pat the fish dry with paper towels. Dredge both sides of the fish in flour. Shake off the excess. Sprinkle the spice blend on top of the filets. Once the skillet is heated and the butter melted add the fish seasoned side down. Season the other side with the season blend. Cook the fish for 3-4 minutes on each side.

Pour a little bit of the sauce on the bottom of the plate. Put the fish on top and pour a small portion of the sauce over the filet. Garnish and serve immediately.

IMG_1736

Pan Fried Cod With Lemon Butter Sauce...

Pan Fried Cod With Lemon Butter Sauce…

Pan Fried Cod With Steamed Vegetables and Chicken Fried Rice...

Pan Fried Cod With Steamed Vegetables and Chicken Fried Rice…

Baked Salmon and Cremini Mushroom Duxelle En Croute…

My husband and I have taken to eating more fish these days and so I’m experimenting with different ways of preparing it. I’ll admit it up front, fish can be tricky. You can’t eat it if it’s underdone and it tastes like the Sahara Desert if it’s overdone – and there is a very fine line of cooking time that separates fish from either one. But my job in this blog is to try to save you some of that uncertainty by my trial and error and not yours.

Duxelle Ingredients...

Duxelle Ingredients…

This fish recipe turned out very well the first time I made it, amazingly enough, and there is only one simple thing I would change from the original recipe and that would be the cooking time. The name of the dish sounds fancy but don’t let the terms en croute and duxelle frighten you. En croute simply means in a crust and a duxelle is merely mushrooms, shallots and herbs sautéed in butter and reduced to a paste. This particular duxelle also adds some vermouth and a tad of heavy cream to the paste just to make it extra decadent. As for the puff pastry, hardly anyone tries to make it from scratch anymore as the process is tedious and time consuming. Frozen puff pastry is just fine and adds to the mystique of the recipe with hardly any work on the part of the chef. The beauty of this recipe is that it really isn’t that hard to put together. So I’ll share my recipe rating and lessons learned in the hopes that you’ll give this one a try.

Recipe Rating- A-: The minus in the rating is really for the cooking time listed in the original recipe. I find it hard to believe that the salmon would be moist considering the amount of time the recipe suggested to cook it. But other than that, this recipe is very good and I think even someone who is not a big fan of mushrooms might like the flavor of the duxelle, which nicely compliments the flavor of the salmon.

Lesson Learned 1 – You can always put the fish back in the oven: I like to perfect fish recipes with just me and my husband as the guinea pigs before considering serving them to guests. That way I’m less worried about the presentation and more about perfecting the cooking time. So, if for some reason the fish is not done to your liking, just pop it back in the oven for a few more minutes (even if it is primarily encased in puff pastry). The original recipe called for baking the salmon at 400 degrees for 15 minutes and then lowering the temperature to 325 and baking it for an additional 15-20 minus. I simply could not imagine moist salmon being the end result of that process. My filets were 6 ounces each but only about 1/2 inch or slightly less thick. I am glad I followed my gut instinct and cooked them at 400 for 25 minutes. Even then the salmon was on the verge of being dried out but not bad (as a matter of fact those who like their salmon well done should bake it this way) – the next time I make it, I’ll bake the salmon at 400 degrees for 20 minutes and that should be perfect. You need the time and higher temps to cook the puff pastry so you need to be careful to bake a piece of salmon that is at least 6 ounces in order for it to withstand the cooking time. Any less than 20 minutes and I don’t think the puff pastry will bake to its full potential.

Finely chop the mushrooms for the duxelle...

Finely chop the mushrooms for the duxelle…

Lesson Learned 2 – To make the mushroom paste you need to finely chop the mushrooms: The duxelle consistency will not be achieved if you do not finely chop the mushrooms. As a matter of fact I don’t even recommend chopping them by hand. I would put them into a food processor and pulse them until they are finely chopped. I used my mini food processor for this and got the desired results without having to drag out the large food processor. I imagine this would be quite labor intensive if you tried to do this by hand.

Lesson Learned 3 – Remove the skin from the fish: I purchased wild caught salmon for this dish and was surprised at how thick and tough the skin was when I was removing it. You don’t want to battle with that while you’re eating so my advice is to invest in a good boning knife and remove the skin from the fish before preparing it.

Lesson Learned 4 – Working with puff pastry: Don’t be intimated. Working with puff pastry can actually be quite simple if you know a few things. First you’ll want to thaw a sheet in the refrigerator for about 3 hours before working with it. Lightly dust your prep station with flour, carefully unfold the pastry sheet (it’s folded in thirds) and roll it out to form more of a square shape. (Don’t roll it out too thin and be careful when lifting it if you need to add a little more flour to the surface). Don’t be afraid to adjust the salmon (scrunching it a little) to fit neatly into a folded pocket of puff pastry. For two filets you should only need one sheet of puff pastry. There will be two sheets in the box when you buy it. Keep the other sheet frozen and use it at a later time.

Lesson Learned 5 – An egg wash is puff pastry’s best friend: In order to enhance the color of your puff pastry, beat an egg with just a splash of water in a dish and then brush it all over the top of the puff pastry. The egg wash will help produce a beautiful golden color on the pastry. Once you’ve applied it, make a one inch slit in the center of the pastry to allow steam to escape during the baking process.

I know this recipe may look a little intimidating but really it isn’t. These salmon pockets can actually be made a couple of hours ahead of time and left in the refrigerator until they’re ready to be baked off. The original recipe states that these can also be frozen and then baked frozen but additional cooking time is necessary (not sure what that means but if you’re adventurous, try it). I can assure you this tastes delicious and is worth the little bit of extra time to put together. Enjoy!

IMG_9704

The duxelle paste…

Layer the duxelle and salmon on to the puff pastry...

Layer the duxelle and salmon on to the puff pastry…

Make the pastry pocket and crimp the sides with a fork...

Make the pastry pocket and crimp the sides with a fork…

Brush the pastry with an egg wash and cut a slit in the center to release steam

Brush the pastry with an egg wash and cut a slit in the center to release steam

Baked Salmon and Cremini Mushroom Duxelle En Croute

  • Servings: 2
  • Difficulty: Medium
  • Print

INGREDIENTS:

2 six ounce salmon filets, skin removed

1/2 cup mushroom duxelle

1 sheet of puff pastry, thawed

1 egg 1 tsp. water

(FOR THE DUXELLE)

6 ounces cremini mushrooms

2 TBS. butter

1/4 cup finely chopped shallots

1 TBS. vermouth (or dry white wine)

1/4 – 1/2 tsp. fresh thyme

3 TBS. heavy cream

salt and pepper to taste

DIRECTIONS: Thaw the puff pastry in the refrigerator for at least three hours. Preheat the oven to 400 degrees. Using a damp paper towel, wipe off any residue on the mushrooms. Don’t wash them directly under water as they can absorb too much moisture if you do that.

Put mushrooms in a food processor and pulse until they are finely minced. Mince the shallots and chop the thyme. Melt the butter and sauté the shallots until soft. Stir in the mushrooms and simmer for 7-10 minutes, stirring occasionally until their moisture evaporates. Add the wine, thyme and salt and pepper. Simmer for about another 5 minutes. Remove from the heat and add the whipping cream. Use immediately or refrigerate until ready to use.

Remove the skin from the salmon. On a lightly floured surface, open the puff pastry and gently roll it into the shape of a square. Cut the puff pastry into four equal squares to create an upper and lower portion of the pocket (I cut mine in half and just folded the pastry over the salmon – I had to scrunch the salmon a little to get it to fit in the pocket but it worked out just fine). Spread the duxelle on the puff pastry up to an inch from the edges of the pastry.

Place the salmon on top of the duxelle and fold over the pastry to create a pocket. Use a fork to crimp the edges shut. Beat egg with water and brush the top of the puff pastry pocket with the egg wash. Slit a hole in the center of the pastry pocket (about a inch) to allow steam to escape. Line a baking sheet with foil and spray lightly with non-stick spray. Place the salmon pockets on the baking dish and bake for 20 minutes. Serve immediately.

Pastry Pocket Right Out Of The Oven...

Pastry Pocket Right Out Of The Oven…

Salmon and Cremini Mushroom Duxelle En Croute...

Salmon and Cremini Mushroom Duxelle En Croute…

Broiled Salmon with Herb Mustard Glaze…

I’ve always been a big fan of salmon. It’s a mild fish that can be prepared in a variety of ways and, in my estimation, easier to cook than other types of fish. So this past weekend when a new high-end grocery store opened in our area, I decided to try some of their fresh fish. The salmon looked superb, as you can see from the photos, and that prompted me to look for an easy but flavorful salmon recipe.

Herb Mustard Glaze Ingredients

Herb Mustard Glaze Ingredients

I found a great recipe on, you guessed it…, The Food Network Site (thought I was going to say Pinterest didn’t you?) The basis for this is Giada’s recipe of the same name. I adapted it for my own needs and tastes. So here is my rating of the original recipe and lessons I learned when making it:

RECIPE RATING A. This is a very easy recipe, the glaze is easy to make and the flavors of the glaze provide a delightful compliment to the salmon. The only things I would have expounded on in the recipe is the reason why you put the glaze on after you’ve cooked the salmon for a couple of minutes and a more detailed reference to variations in cooking times for fish. I’ll explain in my lessons learned.

Lesson Learned 1 – Not all fish are created equal: This is true especially when it comes to cooking time. I am still trying to perfect the art of cooking fish to perfect doneness. The challenge is that fish can be expensive and you hate to pay good money for something and then ruin it. The beauty of salmon is that is can be prepared in various stages of doneness. Some like their salmon a little less done, sort of medium rare, will others like their salmon well done. It’s a little easier to work with salmon because of this. When I made this recipe I used two salmon filets that weighed between 6-8 ounces just as written in the recipe. Giada advised to cook the salmon for 7 minutes total. I cooked mine for 8 and my filet, as it was a little thicker, was medium rare to medium. My husband’s filet was thinner and his turned out medium. So just be aware that your forays into cooking fish may take several trials and also be aware that cooking time is so dependent on not only the weight but also the thickness of the fish. In my case, my filet was thicker than the one I served to my husband, ergo the difference in doneness. But don’t give up. Mastering the art of cooking fish will be something that, in the end, will provide you with some extraordinary meals.

Salmon Filets

Salmon Filets

Lesson Learned 2 – There is a reason you don’t glaze the fish before you put it under the broiler: This is where I wished the recipe would have been more specific. Granted I have become more adept in the kitchen but there are still some things that are not intuitive to me. The glaze will burn if you keep it on too long. If I had known that up front I probably would have applied the glaze at the three minute juncture instead of the two. As it was, I had a nicely browned glaze but I think I just made it before it started to burn. So keep that in mind. If you think you need more cooking time than the 7 minutes called for in the recipe, put your glaze on a little later.

Lesson Learned 3Remove the skin from the salmon: If there is skin on one side of the salmon filet remove it. The skin is tough and you won’t eat it. I find the filets cook more evenly with the skin removed. I use a very sharp knife, a Shun boning knife, and just run it up and down the edge of the skin until I can peel a little of it away. Then I hold the skin taught and keep moving the knife up and down close to where the skin meets the flesh, gently pulling on the skin as I go until all the skin as been removed. This will take a few minutes, but it’s worth it.

Herb Mustard Glaze

Herb Mustard Glaze

Lesson Learned 4 – The glaze is fabulous: I really liked the flavor of this glaze both on the fish and on its own. I imagine with a little bit of ingenuity it could be used on other things. The combination of the dijon and whole-grain mustard along with the herbs provides great depth of flavor and would probably taste good on chicken too.

I would highly recommend trying this recipe. Don’t be afraid to cook fish. If you’re concerned, err on the side of caution and take it out sooner rather than later. You can always throw it back on the cooking source but you can’t undo overcooking. Let me know what you think of this one.

Broiled Salmon with Herb Mustard Glaze

  • Servings: 4
  • Difficulty: Medium
  • Print

Ingredients:

2 cloves of garlic

3/4 tsp. finely chopped fresh rosemary

3/4 tsp. finely chopped fresh thyme

1 Tbs. dry white wine

1 Tbs. olive oil

2 Tbs. dijon mustard

2 Tbs. whole grain mustard

4 (6-8 ounce) salmon filets, skin removed

Salt and pepper

Directions:

Preheat the broiler (if you have an option of low or high, choose high). Place oven rack to be approximately 8-10 inches away from the broiler flame.

In a mini food processor combine garlic, rosemary, thyme, wine, oil, dijon mustard and 1 Tbs. of the whole grain mustard. Pulse until well combined. Transfer to a small bowl and stir in the remaining 1 Tbs. of whole grain mustard. Set aside.

Line a broiler pan with aluminum foil and spray with non-stick cooking spray. Arrange the salmon on the broiler pan (I arrange them vertically so that they nest completely under the broiler flames). Salt and pepper to taste. Broil for 2-3 minutes (depending on the thickness of the filets). Remove broiler pan from oven and spread the mustard glaze on top of the salmon filets. Put pan back in oven and continue to broil for about 5 minutes. Serve immediately.

Serving Suggestion: Salmon with Mushroom Risotto and Steamed Vegetables

Serving Suggestion: Salmon with Mushroom Risotto and Steamed Vegetables

design


Grilled Marinated Swordfish…

Probably the thing I dread cooking the most is fish. If you’re like me, you never know when it is done and because of that one of two things almost always happens – you undercook it or you overcook it. Undercooking fish, well lets not even go there, too scary to even think about the issues it can cause. And overcooking fish, well that’s even worse since normally you pay a pretty penny for the fish and eating dried out rubber is something no one savors.  But this week I hit the jackpot and actually cooked some swordfish steaks perfectly. What’s my trick… luck, total luck.

I find that at times cooking can be a waiting game, you wait and see how many times you can cook something before you get it right, that is if you don’t lose interest in it first. I’ve mastered the art of the juicy boneless chicken breast, the juicy and tender pork loin roast, the tender and crisp beef and pea pods stir  fry, but fish has always been the bane of my existence until just recently.

My saga began when I purchased a couple of swordfish steaks at Whole Foods (the pressure is already on because the wallet took a sizable hit on them). I began the process of pouring over recipes to determine the best way to cook them on my stove top grill pan. I found a great recipe at allrecipes.com (I will share below) for a simple marinade and started preparing the fish. The recipe was easy with clear cooking instructions. All you have to do is follow them, right? Wrong.

I have finally learned to trust my judgement when cooking and now have enough knowledge just to be dangerous. It occurred to me that the recipe was written for swordfish cooked on an outside grill with times of 5-6 minutes per side. Cooking it inside would take less time, how much to be exact I wasn’t sure. But gone are the days of just blindly following a recipe. I have arrived! After marinating them for an hour, I preheated my stove top grill and began grilling. I flipped them at 4 1/2 minutes and had fabulous grill marks. I cooked them for another 4 1/2 minutes and clear juices began to rise to the top of the steaks. Out of the pan they came and voila, perfect indoor grilled marinated swordfish steaks! The steaks were about an inch think and they were juicy, tender but not underdone.

So after many tries the formula for grilled swordfish steaks is emblazoned in my mind. Yahoo, one fish down, so many more to go. But I can tell you first hand that there is nothing as good as perfectly cooked grilled swordfish steaks. Enjoy the recipe!

Grilled Swordfish with pasta and parmesan roasted asparagus.

Grilled Swordfish with pasta and parmesan roasted asparagus.

Grilled Marinated Swordfish

  • Servings: 4
  • Difficulty: Medium
  • Print

INGREDIENTS:

4 cloves of garlic

1/3 cup of white wine

1/4 fresh squeezed lemon juice

2 TB soy sauce

2 TB olive oil

1/4 tsp salt

1/8 tsp pepper

1 TB poultry seasoning

4 swordfish steaks

1 TB chopped fresh parsley (optional)

lemon garnish (optional

DIRECTIONS:

In a glass baking dish combine the garlic, white wine, lemon juice, soy sauce, olive oil, poultry seasoning, salt and pepper. Mix just to blend. Place swordfish steaks into the marinade and refrigerate for 1 hour, turning frequently.

Preheat your stove top grill pan using medium high heat.

Place swordfish in grill pan and lower heat to medium. Grill 4 1/2 – 5 minutes on each side. Garnish with parsley and lemon wedges.