Ravioli Casserole…

Lately I found myself buying store bought food and doctoring it up. It’s a great way to get a quick meal on the table but with some fresh flavors you don’t often find in simple store bought food. This time I decided to take a package of chicken and mozzarella stuffed ravioli and create a casserole that was simply fabulous. I posted a couple of pictures online and got several requests to post the recipe. So here goes…

Lesson Learned 1 – Use a gourmet ravioli: Although the regular type ravioli (like Butoni) is fine, the type of ravioli I used was much bigger and more flavorful. I used a 9 ounce package of chicken and mozzarella stuffed ravioli that I bought at my local grocery store. 

Lesson Learned 2 – Don’t be afraid to experiment: I found a basic ravioli casserole recipe online and then added some additional agreements. Case in point, the recipe I used call for a 1/2 cup of cottage cheese. I substituted a half cup of whole milk ricotta. The ricotta/cream cheese mixture turned out divine and much better, at least in my estimation, by using the ricotta instead of the cottage cheese. But if all you have on hand is cottage cheese, use it. I also added some Italian seasoning both to the ravioli mixture and then on top of the casserole. And I cooked up some sweet Italian sausage and added it to the marinara sauce. I also added the mozzarella slices on top and that created a great gooey consistency to the casserole. So go ahead, be brave. It is so worth it. 

Lesson Learned 3 – Grate your own parmesan: Again, if you can, buy parmesan by the brick and grate it in your food processor. The texture and flavor is so much better.

I was so pleased with how this turned out. I hope you try this recipe. I know you will love it.

Ravioli Casserole...

  • Servings: 6
  • Difficulty: Easy
  • Print

INGREDIENTS:

1/2 pound sweet Italian sausage, cooked 

1 28 oz. jar of marinara sauce

1/2 cup whole milk ricotta

4 oz. cream cheese, room temperature

1/8 cup sour cream

1/2 tsp. garlic powder

2 Tbs. fresh flat leaf parsley

2 tsps. Italian seasoning, divided

1 Nine oz. package of gourmet ravioli

Packaged sliced mozzarella, 6 slices

1/3 cup grated parmesan

DIRECTIONS:

Preheat the oven to 375. Spray a 3 quart casserole dish with cooking spray. In a medium size skillet, cook the Italian sausage. Drain the grease and add the marinara sauce. Bring the marinara sauce to a simmer.

While the marinara sauce is simmering combine the ricotta, cream cheese, sour cream, garlic powder, parsley and 1 tsp. of the Italian seasoning. Stir to combine. Add the ravioli and gently toss it with the ricotta mixture until the ravioli is completely coated. 

Spread a small portion of the sausage and marinara sauce on the bottom of the casserole dish just to slightly coat it. Spread the ravioli mixture evenly into the dish. Pour the remaining marinara sauce over the ravioli mixture. Place the slices of mozzarella on top of the marinara sauce. Sprinkle the remaining Italian seasoning and grated parmesan over the mozzarella. 

Cover the casserole dish with foil and bake for 35 minutes. (you may want to place the dish on a foil lined baking sheet to prevent any spills on the bottom of your oven). Uncover the casserole and bake for an additional 10 minutes. 

Remove the casserole from the oven and let it sit for 5 minutes. Serve with a side salad and some crusty bread and butter. 


Chicken, Carrot and Fried Onion Casserole

I just love casseroles. During the winter months there’s nothing better than having a casserole baking away in the oven. The smells, the hot and bubbly goodness and the combination of flavors is simply comfort food heaven. And, if you know me, you know I also love chicken. So what can be better than a chicken casserole? Well, there is one thing and that’s a chicken casserole topped with fried onions – yummo!

I really do try to balance what I eat and so I’ll warn you up front this recipe has the potential to be an artery clogger. But I also know that the key to good living is moderation so every once in a while you can walk on the wild side with something like this. Plus this recipe is versatile, especially where adding vegetables is concerned. And making this is a good way to get come of those vegetables into your children – they are beautifully masked in the deliciousness of the casserole and fried onions.

So let’s talk chicken, carrot and fried onion casserole

Sauteed Carrots

Lesson Learned 1: I used carrots but you can be creative where the vegetables in this recipe are concerned: My husband prefers eating carrots, butternut squash, acorn squash and cauliflower – that’s why you’ll see me using a lot of them in my recipes. But you can use a variety of vegetables.

I chose fresh baby carrots and chopped them into 1/4 inch coins. You can add them to this recipe as is, but I chose to saute mine in butter before adding them to the other ingredients as my husband likes his carrots soft. The cooking time for this recipe will not achieve soft carrots (they will be crisp tender) so I had to give the carrots a head start. But if you like your carrots crisp tender just add them to the other ingredients and skip the sauteing part. The key is cutting them small enough so they’re not rock hard when the casserole is done baking.

You can also use frozen vegetables. Using frozen carrots or frozen mixed vegetables would work very well with this recipe in the allotted cook time. So do what your family loves or what you want your family to eat.

Shredded Chicken

Lesson Learned 2: This is a great recipe for using precooked chicken: Whether you’re trying to think about how to use some of your leftover cooked chicken, or buying a rotisserie chicken at the grocery store, using precooked chicken makes this recipe a breeze. My grocery store actually sells portions of precooked white meat chicken and I used that a lot in my recipes. You can either cut up the chicken into bite size pieces or shred it like I did. Either way will work.

For a quick and delicious week night meal you can’t beat this recipe. You can even assemble it the night before or before going to work and pop it in the oven when you get home. If you do that, I would recommend taking the casserole out of the refrigerator asap and letting it sit on the counter for about a half an hour before putting it into the oven. That will remove some of the chill. You’ll have a better chance of cooking the casserole in the allotted time if it’s not ice cold when you put it in the oven.

Ready For The Oven

Enjoy this one. It’s a keeper!

Chicken Carrot And Fried Onion Casserole...

  • Servings: 6
  • Difficulty: Easy
  • Print

INGREDIENTS:

4 cups cooked shredded chicken

2 cups sliced carrots (cut into 1/4 inch coins)

1 cup shredded cheddar cheese

1 cup sour cream

1 cup mayonnaise

1 can cream of chicken soup

1-6oz. can of french fried onions

1 Tbs. butter, melted

Salt and pepper to taste

Cooking spray

DIRECTIONS:

Preheat oven to 350 (365 high altitude)

In a large skillet melt the butter and saute the carrots for about 10 minutes, flipping them at regular intervals. Remove them from heat and set aside.

While the carrots are sauteing, mix together in a large bowl the cheese, sour cream, chicken soup and mayonnaise. Once the carrots are cooked and slightly cooled fold them into the sour cream mixture along with the chicken until combined. Taste and add any salt and pepper as needed.

Spray a 9 inch square pan with cooking spray. Add the mixture to the pan and bake for 35-45 minutes. Once the casserole is hot and bubbly add the fried onions on top and continue to bake for an additional 10 minutes.

Let the casserole stand for 5 minutes and serve.

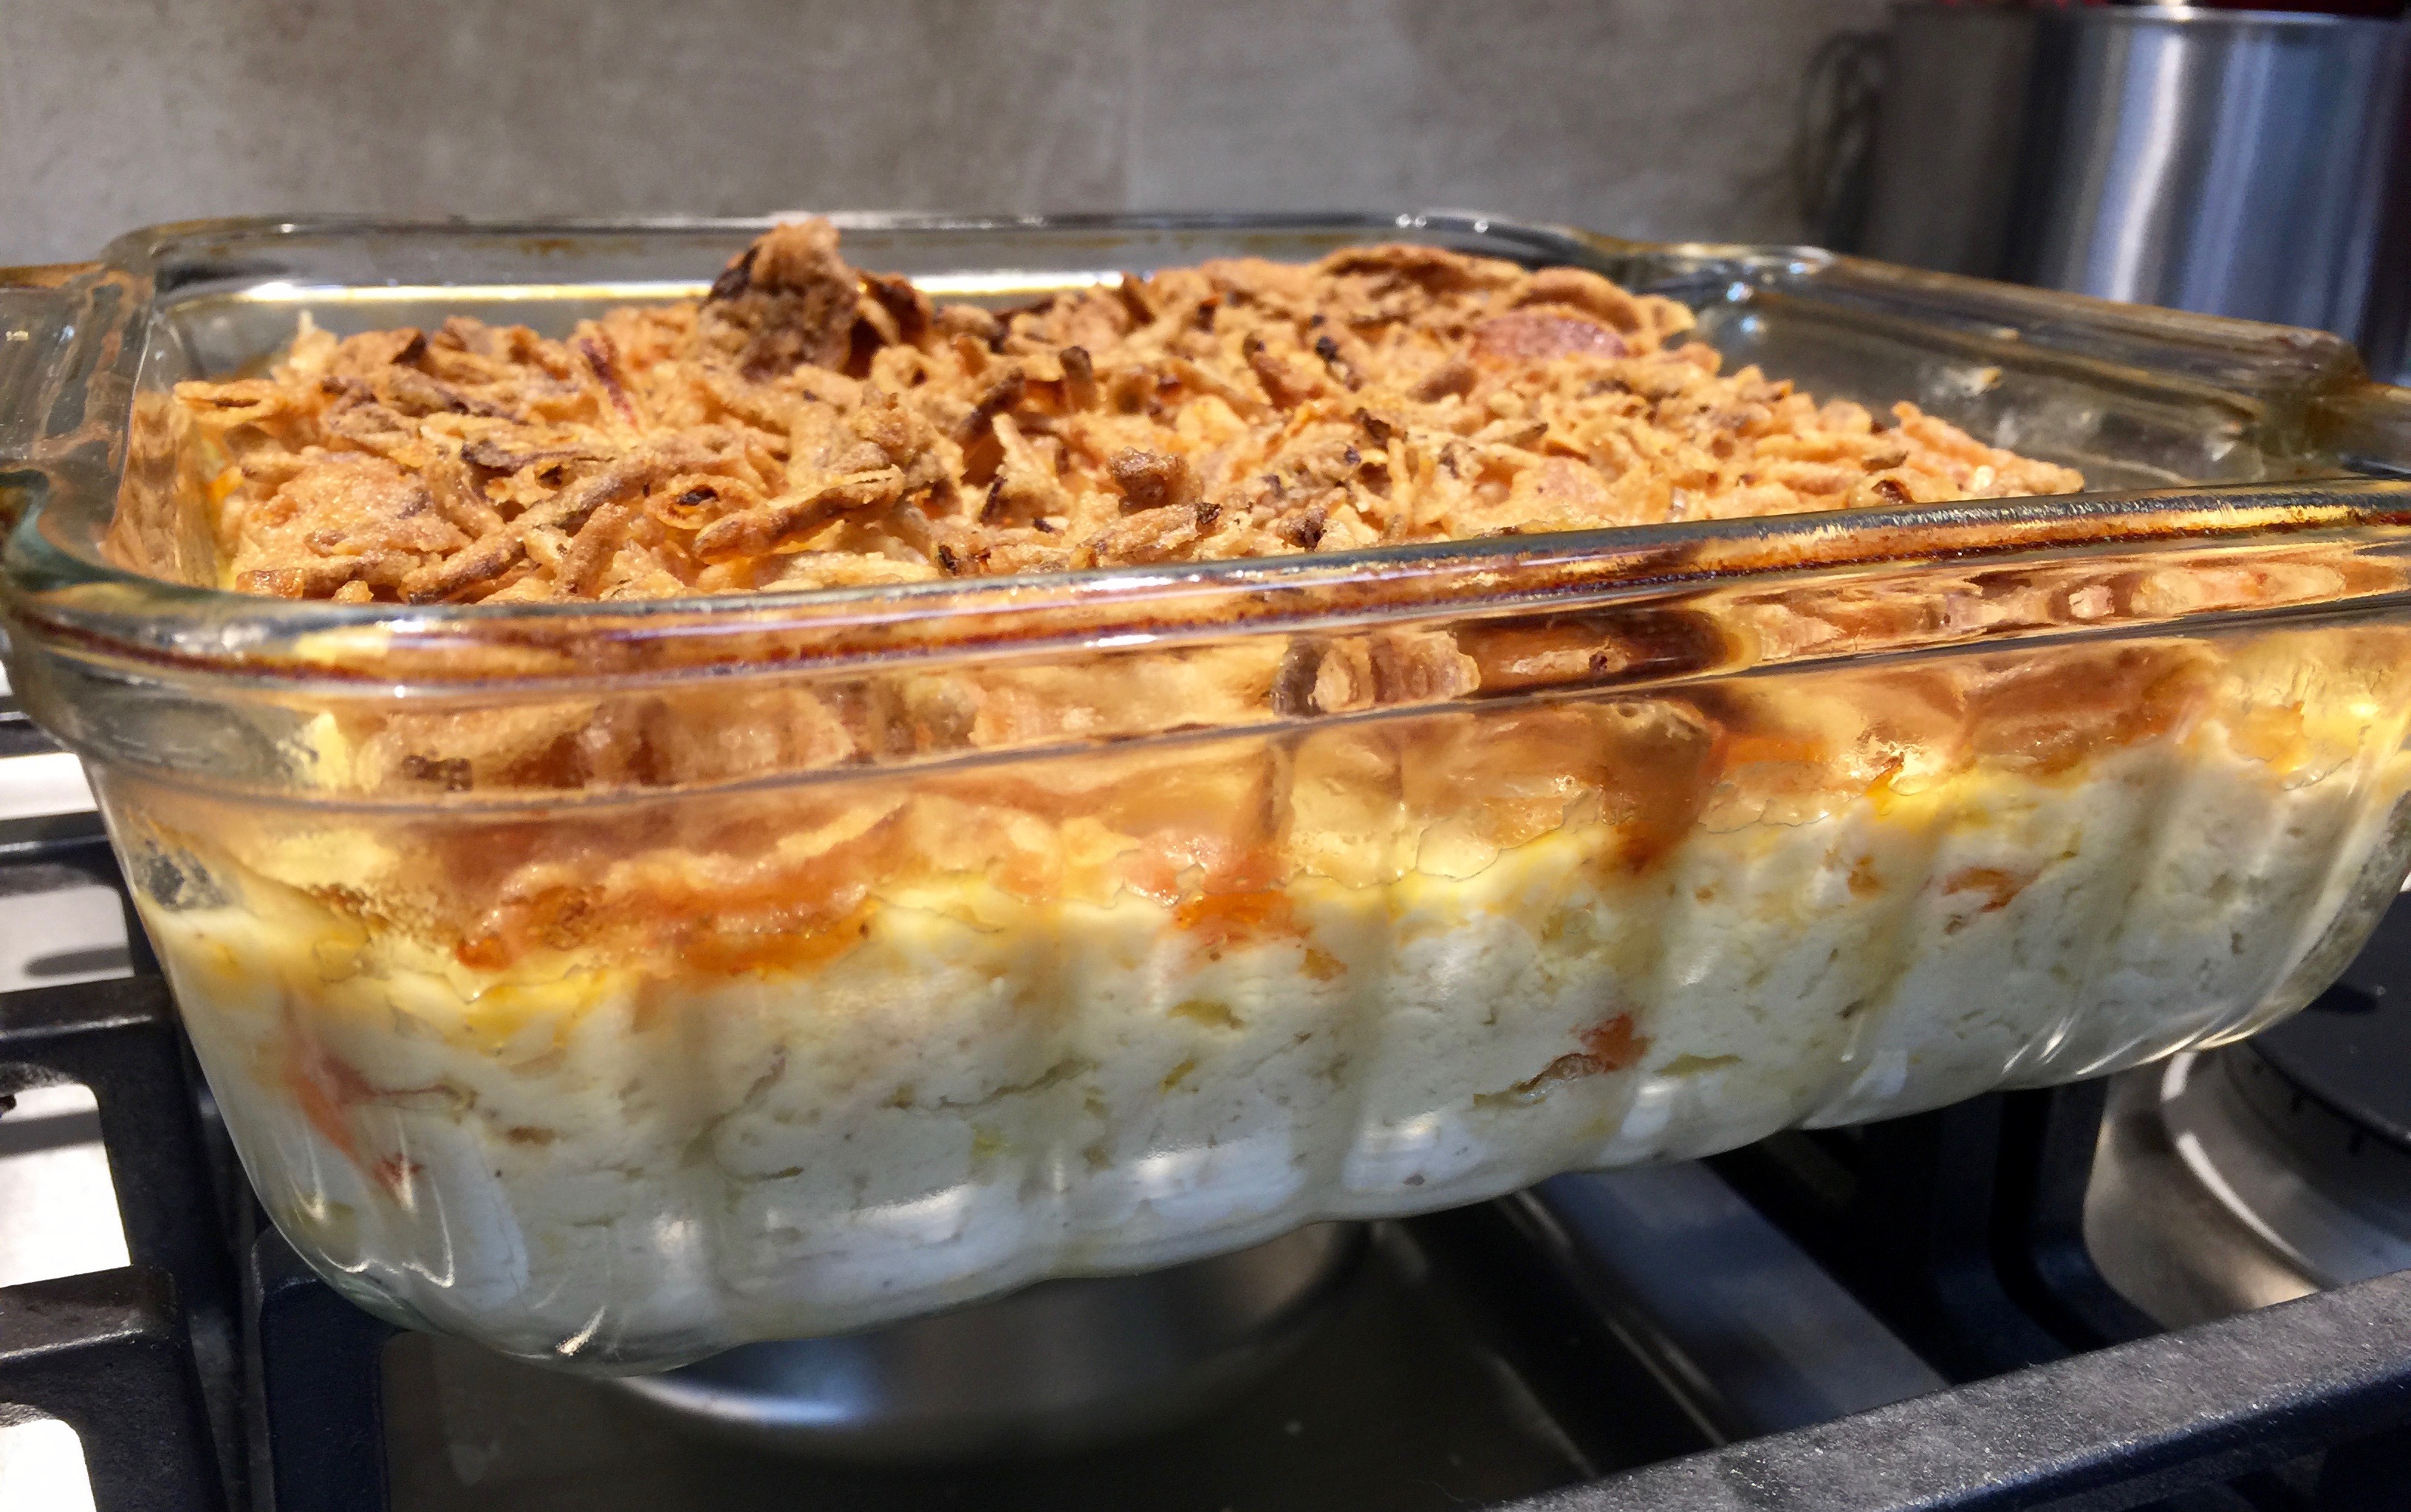
The Cooked Casserole

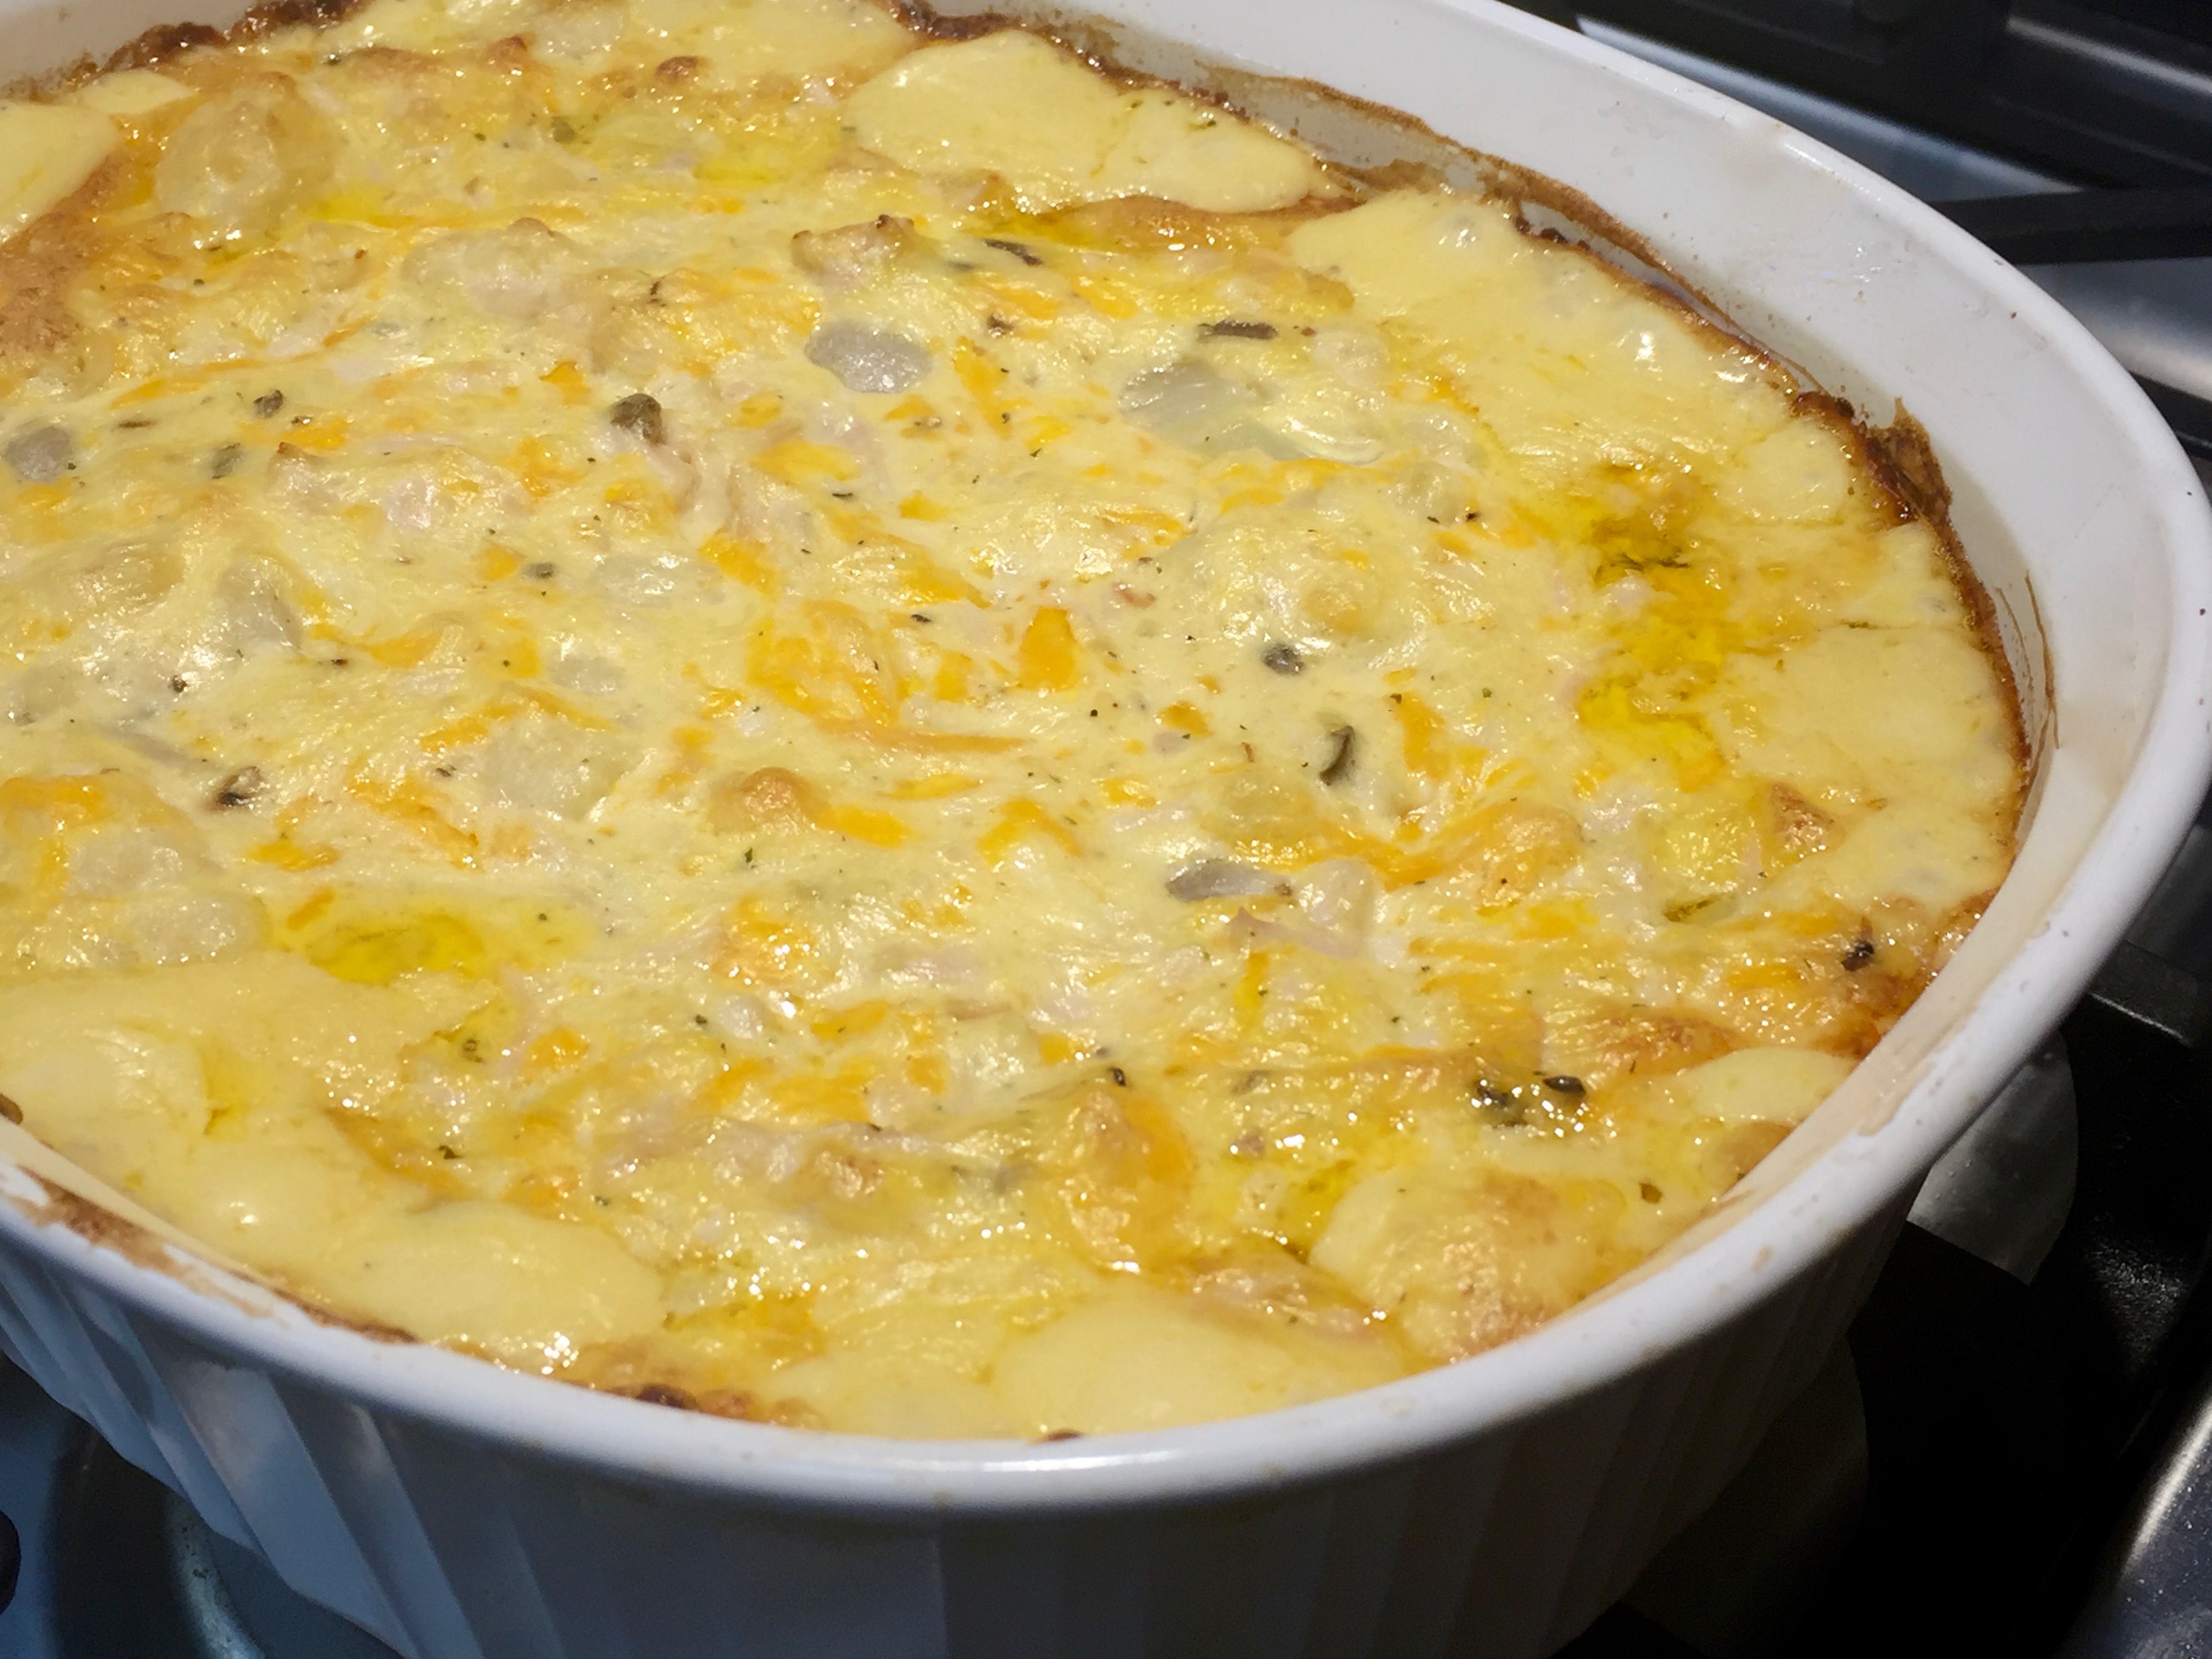
Creamy Chicken And Cauliflower Casserole…

I love casseroles, especially during the winter time. I find them to be the true definition of comfort food. And this particular recipe is definitely a throw back. It features all of the ingredients your grandma used to make a quick but delicious meal. And this meal is versatile – you can serve it with pasta or as the main feature in a loaded baked potato or even with rice.  Anyway you look at it, if you want something fast and delicious this is the recipe for you!

What I particularly like about this recipe is that it’s quick to throw together and it’s a great way to use leftover chicken, and there always seems to be a lot of that in my refrigerator. As a matter of fact, I bet you already have all of the ingredients in this casserole in your pantry.

So let’s talk Creamy Chicken And Cauliflower Casserole…

Lesson Learned 1: The ingredients in this casserole are not written in stone: Not only is this casserole easy to put together but it can be made with a wide variety of ingredients. Think of the recipe I’m providing as a base for your imagination. But you can certainly add other things.  You can add some sliced mushrooms if you like. You can substitute frozen broccoli for cauliflower or include a little of both. Frozen peas and carrots would be a great addition as well. Wherever your imagination and pantry take you – this will always be a scrumptious comfort food casserole.

Lesson Learned 2 – If using frozen cauliflower (or broccoli) make sure it is slightly (or completely) thawed. You only bake this for 35-45 minutes and you want to make sure your vegetables are warmed all the way through. Smaller frozen vegetables such as pearl onions or peas and carrots can be added frozen. They will cook through within the allotted time. And if you used frozen chopped cauliflower or broccoli you can simply add them as well since the pieces will be smaller.

Lesson Learned 3 – Use more chicken than you think: I will suggest a certain amount in the recipe since I found that after I made mine I wound up adding more chicken to the leftovers. I initially used a pound and a half of cooked chicken pieces that I got at my local grocery store. But I felt the recipe needed more. I am going to recommend getting a rotisserie chicken from your grocery store and shredding the whole chicken for this recipe. You want to be able to see and taste chicken as the main ingredient and when you shred chicken it just seems to be a lot less for some reason.  If you don’t use a rotisserie chicken then I recommend using 3 large chicken breasts.

There are not a lot of lessons learned to impart on this one as this recipe is super easy. And the extra added bonus is the leftovers are equally scrumptious. You can’t go wrong with this one. Enjoy this easy to make winter comfort food!

Creamy Chicken And Cauliflower Casserole...

  • Servings: 6-8
  • Difficulty: Super Easy
  • Print

INGREDIENTS

1 store bought rotisserie chicken, cut up and shredded

2 cans cream of chicken and mushroom soup

1 cup mayonnaise

1 cup cheddar cheese, shredded

1 cup colby and monterey jack cheese, shredded

1 1/2 cups frozen cauliflower, thawed

1 cup frozen pearl onions

Salt and pepper to taste

DIRECTIONS

Preheat oven to 375 degrees.

Mix all the ingredients (chicken, soup, mayo, cheeses, cauliflower and onions) together. Add salt and pepper as needed.

Transfer the ingredients to a lightly greased 2-3 quart casserole dish. Bake for 35-45 minutes or until the casserole is bubbly.  Serve.

Beefy Tater Tot Casserole…

Be careful when you send your husband to pick up something at the grocery store. You might be surprised at what he brings home. The other day I asked my husband to pick up a bag of tater tots for dinner. I thought he would go to the local grocery store but his brilliant idea was to go to Sam’s Club. He brought home tater tots all right – an 8 pound bag of them! What the heck was I going to do with all those tater tots? We’ve been systematically using them over time, but we were starting to get tired of them as simply a side. So I thought I’d try making a tater tot casserole.

This particular recipe is very easy and guaranteed to be a family favorite. If you have kids, I’m sure they will enjoy this. I mean ground beef, cheese and tater tots – what’s not to like? So let’s talk beefy tater tot casserole…

Lesson Learned 1 – This recipe serves 4 people: But don’t despair. You can easily change the ingredients for larger crowds – just double or triple the amounts depending upon what you need.

Lesson Learned 2 – Make sure you put the dish under the broiler for the last few minutes to get the tater tots crispy: The taters tots are cooking on top of bubbly beef and melted cheese so they will be slightly soggy at the end. Simply put the broiler on and keep the dish under the broiler for a few minutes and you’ll get your desired crispiness for the tater tots.

Lesson Learned 3 – Feel free to experiment with this recipe: Add ingredients to the ground beef that you and your family like. If you don’t like mushrooms, don’t use them. If you like sweet peppers, dice them up and use them. If you’re not a big fan of spicy don’t use the hot sauce. But if you want some real tang add some crushed red pepper to the beef. If you prefer pearl onions, add them. You can use cheddar cheese instead of muenster cheese (I find cheddar cheese to be somewhat greasy) or any melting cheese you prefer. The beauty is this recipe can be very versatile to include anything you enjoy.

The process for this recipe is pretty straightforward and I know it will be a family favorite. Try it and let me know what you think…

Beefy Tater Tot Casserole...

  • Servings: 4
  • Difficulty: Easy
  • Print

INGREDIENTS:

2 Tbs. olive oil, divided

1 1/2 pounds ground beef, 93% lean

1/4 cup brown sugar

2 heaping tsp. tomato paste

2 cloves garlic, minced

1/2 cup beef broth

1 medium onion, diced

2 Tbs. Worcestershire sauce

Muenster cheese slices – 4-6 depending on the dish you use

1 small bag of tater tots – you may have some leftover

2 dashes hot sauce

salt and pepper to taste

cooking spray

DIRECTIONS:

Preheat the oven to 375.

Over medium heat, add one tablespoon of olive oil to a large skillet. Add the onions and cook until translucent. Remove the onions and add the mushrooms. If you need more oil add it. Brown the mushrooms and remove them from the skillet.

Add the ground beef and cook until browned, breaking up the beef into crumbles while cooking it. Add the garlic and cook until fragrant, approximately 1 minute.

Add the Worcestershire sauce, brown sugar, tomato paste, hot sauce, beef broth and salt and pepper.  Cook until combined. Fold in the onions and mushrooms. Taste for seasoning and add more salt and/or pepper as needed.

Place the meat mixture into a 1 1/2 – 2 quart casserole dish sprayed with cooking spray. Cover the meat with the cheese slices. Take the tater tots out of the freezer and cover the top of the casserole with tater tots.

Bake in the oven for 30-40 minutes. Once nice and bubbly, turn on the broiler and place the dish under the broiler for approximately 3-5 minutes to crisp up the tater tots.

Serve and enjoy!

Salmon Casserole For Two…

No lie, my first taste of this casserole all I could say was “Oh My God”! It was unreal how good it was. My husband, who is a little less dramatic, said, “This is very good” which is high praise from him.

Over the years we’ve been eating more and more fish and so every once in a while I like to try to shake things up with my fish recipes. Well, I hit the jackpot this time. This is one of my best recipes ever and I don’t even hesitate to say that the non-fish lover in your home will like this as well. It’s a very versatile dish and can be amended in a variety of ways but for now I’ll share what I did and talk more about versatility in lessons learned.

One more note… from time to time I will also focus on making recipes for two. It’s just my husband and I that I cook for now unless we are having a party and sometimes I find if I make too much we either throw stuff out or eat leftovers. And some recipes are more conducive to leftovers than others. These days it is hard to cook for two since grocery stores seem to sell bigger portions. But I found this particular recipe can be adapted in many ways and one of them is the amount you make. So I am writing this recipe for two people but keep in mind you can increase the ingredients proportionally  to serve more.

So let’s talk salmon casserole…

(NOTE: All meals pictured in this video can be found in the recipe index on this site)

Lesson learned 1 – Choose your salmon wisely: I’ve found that the salmon filets you buy at the grocery store can vary in thickness. For this recipe you’re going to want to get the thickest piece you can find. Normally what you’ll see is a piece that is about one inch thick at its widest part. Since this cooks for about 35-40 minutes you’re going to want to have a thicker piece so the salmon doesn’t dry out.

Most if not all prepackaged salmon pieces still have the skin on. You’ll need to remove that as well. I cut the salmon into approximately one inch chunks. They turned out perfectly. So keep in mind the thicker the piece the better. But don’t be afraid to also use the thinner part of your salmon filet. Because it is cooked in cream the salmon does retain its moistness.

I only used an 8 ounce salmon filet. Normally that is about enough for both of us. If you want a little more in your casserole, don’t be afraid to add it.

Lesson Learned 2 – Adapting this recipe: I originally wanted to use some spinach in this recipe but didn’t have it on hand and didn’t feel like going to the grocery store to buy some. But I did have some flat leaf parsley and so I used that. If you use spinach just saute it with the onions and only use a couple of handfuls. The spinach should act as the accompaniment to the recipe and shouldn’t overpower it. The same applies to flat leaf parsley. I only used a little more than a tablespoon (and of course I used some for garnish), just enough to enhance the flavor.

I also added butternut squash. The key to using that is to make sure you cut the pieces small, otherwise they won’t cook. I cut mine into about 1/8 inch cubes. But even cutting it that small a couple of pieces turned out a little more al dente than I would have liked but all the rest were perfect.

You can easily add peas to this, or carrots. If you add carrots I suggest you precook them until they start getting soft. You can do that while sauteing the onions. If you want to add cauliflower then I would steam them until they start turning soft. Or you can simply add a frozen vegetable medley and it should cook through during that time period. I prefer adding fresh vegetables but it can work either way.

Lesson Learned 3 – Those tricky potatoes: I don’t know about you but, for me, potatoes are tricky when using them in a casserole, specifically sliced potatoes. I’ve experienced many instances where they were hard and not cooked through. This time they turned out perfectly. This is what I did. I used two medium sized yukon gold potatoes and boiled them with their skins on until I could easily stick a fork in them. Then I put them in a colander and let them cool. It is important to let them cool. If you try to cut them when they’re hot they’ll fall apart. Once they cool you can easily peel and slice them. Can you leave the peel on? Of course you can. My husband prefers them with the peel off. I sliced potatoes into half inch thick rounds and they were delicious. One of the first things my husband said when he took is first bite was, “the potatoes are good”. Success!!

You can boil your potatoes early in the day or even the night before and leave them with the skins on in the refrigerator until you’re ready to use them. It doesn’t have to be a big deal or overly time consuming.

Lesson Learned 4 – The seasoning is so important: This recipe doesn’t have a lot of ingredients so the seasoning is very important. Once again this part lends to the adaptability of this recipe. Once you layer the fish and squash make sure you salt and pepper them. Once you add the onions and parsley then sprinkle your fish seasoning on top. You can use any type of seasoning that works well with fish. I used a tuscan garlic seasoning blend that includes onion, garlic, red bell pepper and lemon peel. I use this seasoning a lot when I bake salmon filets so I knew it would work well with the salmon. Just be careful not to overdo the seasoning. About a quarter of a teaspoon should do the trick, at least for the first time you make this dish. You can adjust as you fine tune your dish.

I was so pleased with how this recipe turned out and will definitely make it again. Try it and and let me know what you think.

Salmon Casserole For Two...

  • Servings: 2
  • Difficulty: Easy
  • Print

INGREDIENTS

2 medium sized yukon gold potatoes, pre-boiled

1 Tbs. garlic infused olive oil

1/2 red onion, diced

1 generous Tbs. flat leaf parsley, minced

1 Tbs. flour

1 thick 6-8 ounce salmon filet, cubed

1 cup butternut squash, cubed small

1/4 tsp. tuscan garlic seasoning

3/4 cup heavy cream

1 cup shredded gruyere

kosher salt

freshly cracked pepper

olive oil cooking spray

DIRECTIONS:

Preheat oven to 375 degrees. Saute the onions in olive oil for about 5 minutes. Add the flat leaf parsley and cook for another minute. Stir in the flour and cook for 1 – 2 minutes. Set the mixture aside.

Slice the potatoes into 1/2 inch rounds. Spray a 1 quart casserole dish with cooking spray. Put a layer of potatoes on the bottom of the dish. Put the salmon and squash on top of the potato layer. Put the onion/parsley mixture on top of the salmon and squash. Season with salt, pepper and tuscan garlic seasoning.

Put another layer of potato rounds on top. Pour the cream over the top of the potatoes. Sprinkle the top with the gruyere cheese.

Bake for 35-40 minutes until golden and bubbly.

Ready To Go Into The Oven


SaveSave

SaveSave

SaveSave

SaveSave

SaveSave

SaveSave

SaveSave

SaveSave

SaveSave

SaveSave

SaveSave

SaveSave

SaveSave

SaveSave

SaveSaveSaveSaveSaveSave

SaveSave

SaveSave

SaveSaveSaveSave

SaveSave

SaveSave

SaveSave

SaveSave

SaveSave

SaveSave

SaveSave

SaveSave

SaveSave

Hamburger And Potato Casserole…

Recently my husband has been having some issues with his mouth that prevents him from doing a lot of chewing. That presented a challenge for me in terms of thinking about meals where he can still get some protein into his system, have something that basically can be “gummed” when eating and still tastes good. And voila, this recipe fit the bill to a tee. The best thing is this is a great recipe all on its own, and it’s so easy to prepare you may find you’ll be making it often.

So let’s talk hamburger and potato casserole…

Lesson Learned 1: If at all possible use a mandolin slicer to cut your potatoes: Perhaps the trickiest part of this whole recipe is cutting the potatoes correctly. Cut them too thin and they will turn into mush in your casserole. Cut them too thick and they will never cook through. The best way to ensure you’ve cut the potatoes to the correct thickness is to use a mandolin slicer (as seen in the picture). A mandolin slicer can be a cook’s best friend if used appropriately. It can also be one of the easiest ways to chop off one of your fingers if used incorrectly. If you’re careful and use the safety features of your slicer you can slice just about anything quickly and consistently.

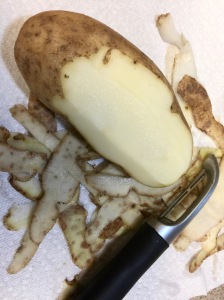
I cut my potatoes in 1/8 inch slices. I also used Yukon Gold potatoes in this recipe although you can use red or russet potatoes. I even peeled my potatoes but it isn’t necessary. When making the recipe, I prepped my potatoes first. In order to prevent them from oxidizing and turning dark while I was prepping the rest I soaked them in cold water. I left them there until I was ready to use them. Before I put them in the casserole I dried them off with paper towels to remove any excess liquid. Following this method the potatoes cooked perfectly.

This is probably the first recipe that included only one lesson learned. The reason being, I guess, is how simple this recipe is to prepare. Even the novice cook can be successful with this one. It does not require a lot of technique but it will score high marks in the comfort food arena. Enjoy this super easy recipe and let me know what you think after you’ve made it.

Hamburger And Potato Casserole

  • Servings: 4
  • Difficulty: Easy
  • Print

INGREDIENTS:

1 lb. 93% lean ground beef

3 cups thinly sliced potatoes, peeled or unpeeled

1/2 cup sweet onion, chopped

2 cloves garlic, minced

2 Tbs. garlic infused extra virgin olive oil (you can also use plain olive oil)

1 12 oz. can Cream of Mushroom soup

3/4 cup milk

2 cups shredded cheese, (I used Jarlsberg and Mild Cheddar)

Salt and pepper to taste

DIRECTIONS:

Preheat oven to 375 degrees. Spray a 9 x 13 baking dish with cooking spray. Set aside.

In a skillet, heat olive oil and cook the onions until they are translucent. Add the ground beef and cook until only a little pink remains. Add the garlic, stir into the meat and onions and cook for another minute. Take off the heat and set aside.

Mix together the soup, milk, salt and pepper.

Layer half the potatoes on the bottom of the casserole dish. Salt and pepper the potatoes. Spread half the soup mixture on top of the potatoes. Add half the cheese and top with half the ground beef mixture.

For the second layer, add the potatoes, salt and pepper them, then the soup and ground beef and lastly top with the remaining cheese.

Cover the dish with foil and bake in the oven for 1 1/2 hours or until the potatoes are done. Uncover the dish and place under the broiler for a couple of minutes to get the cheese golden brown. Serve immediately.

Layer the potatoes on the bottom of the dish

Layer with the ingredients

Right out of the oven

SaveSave

SaveSave

SaveSave

SaveSave

SaveSave

SaveSave

SaveSave

SaveSave

SaveSave

SaveSave

SaveSave

SaveSave

SaveSave

Holiday Breakfast Casserole…

I’m so sorry I haven’t posted in a while. The holidays are always hectic and it is tough to sit down at the computer and document the things I’ve been making. The good thing is there will be lots to come after the first of the year! And just in case you didn’t see it on my home page, the picture below is a link to some of my all time favorite holiday recipes (mostly cookies but there are other things as well). Just click on the picture and you’ll have some great recipes to try this holiday season.

17 Favorite Holiday Recipes

17 Favorite Holiday Recipes

The recipe I’m sharing today is one I made the other night for dinner. After I made it I thought, wow – this would make a great Christmas morning breakfast. You can make it the night before, refrigerate it and just pop it in the oven in the morning. It is very flavorful and it couldn’t be easier to make.

So let’s talk lessons learned when making this holiday breakfast casserole…

Cooked breakfast sausageLesson Learned 1 – You probably will not need an entire tube of breakfast sausage: This recipe is made in an 8 x 8 pan and serves four. Double it if you want to make it in a 13 x 9 pan. In the smaller pan you probably will not need the entire tube of sausage. Use as much as you like and if you are a true meat eater use the whole thing. We only needed about three quarters of the tube. We froze the rest to use later.
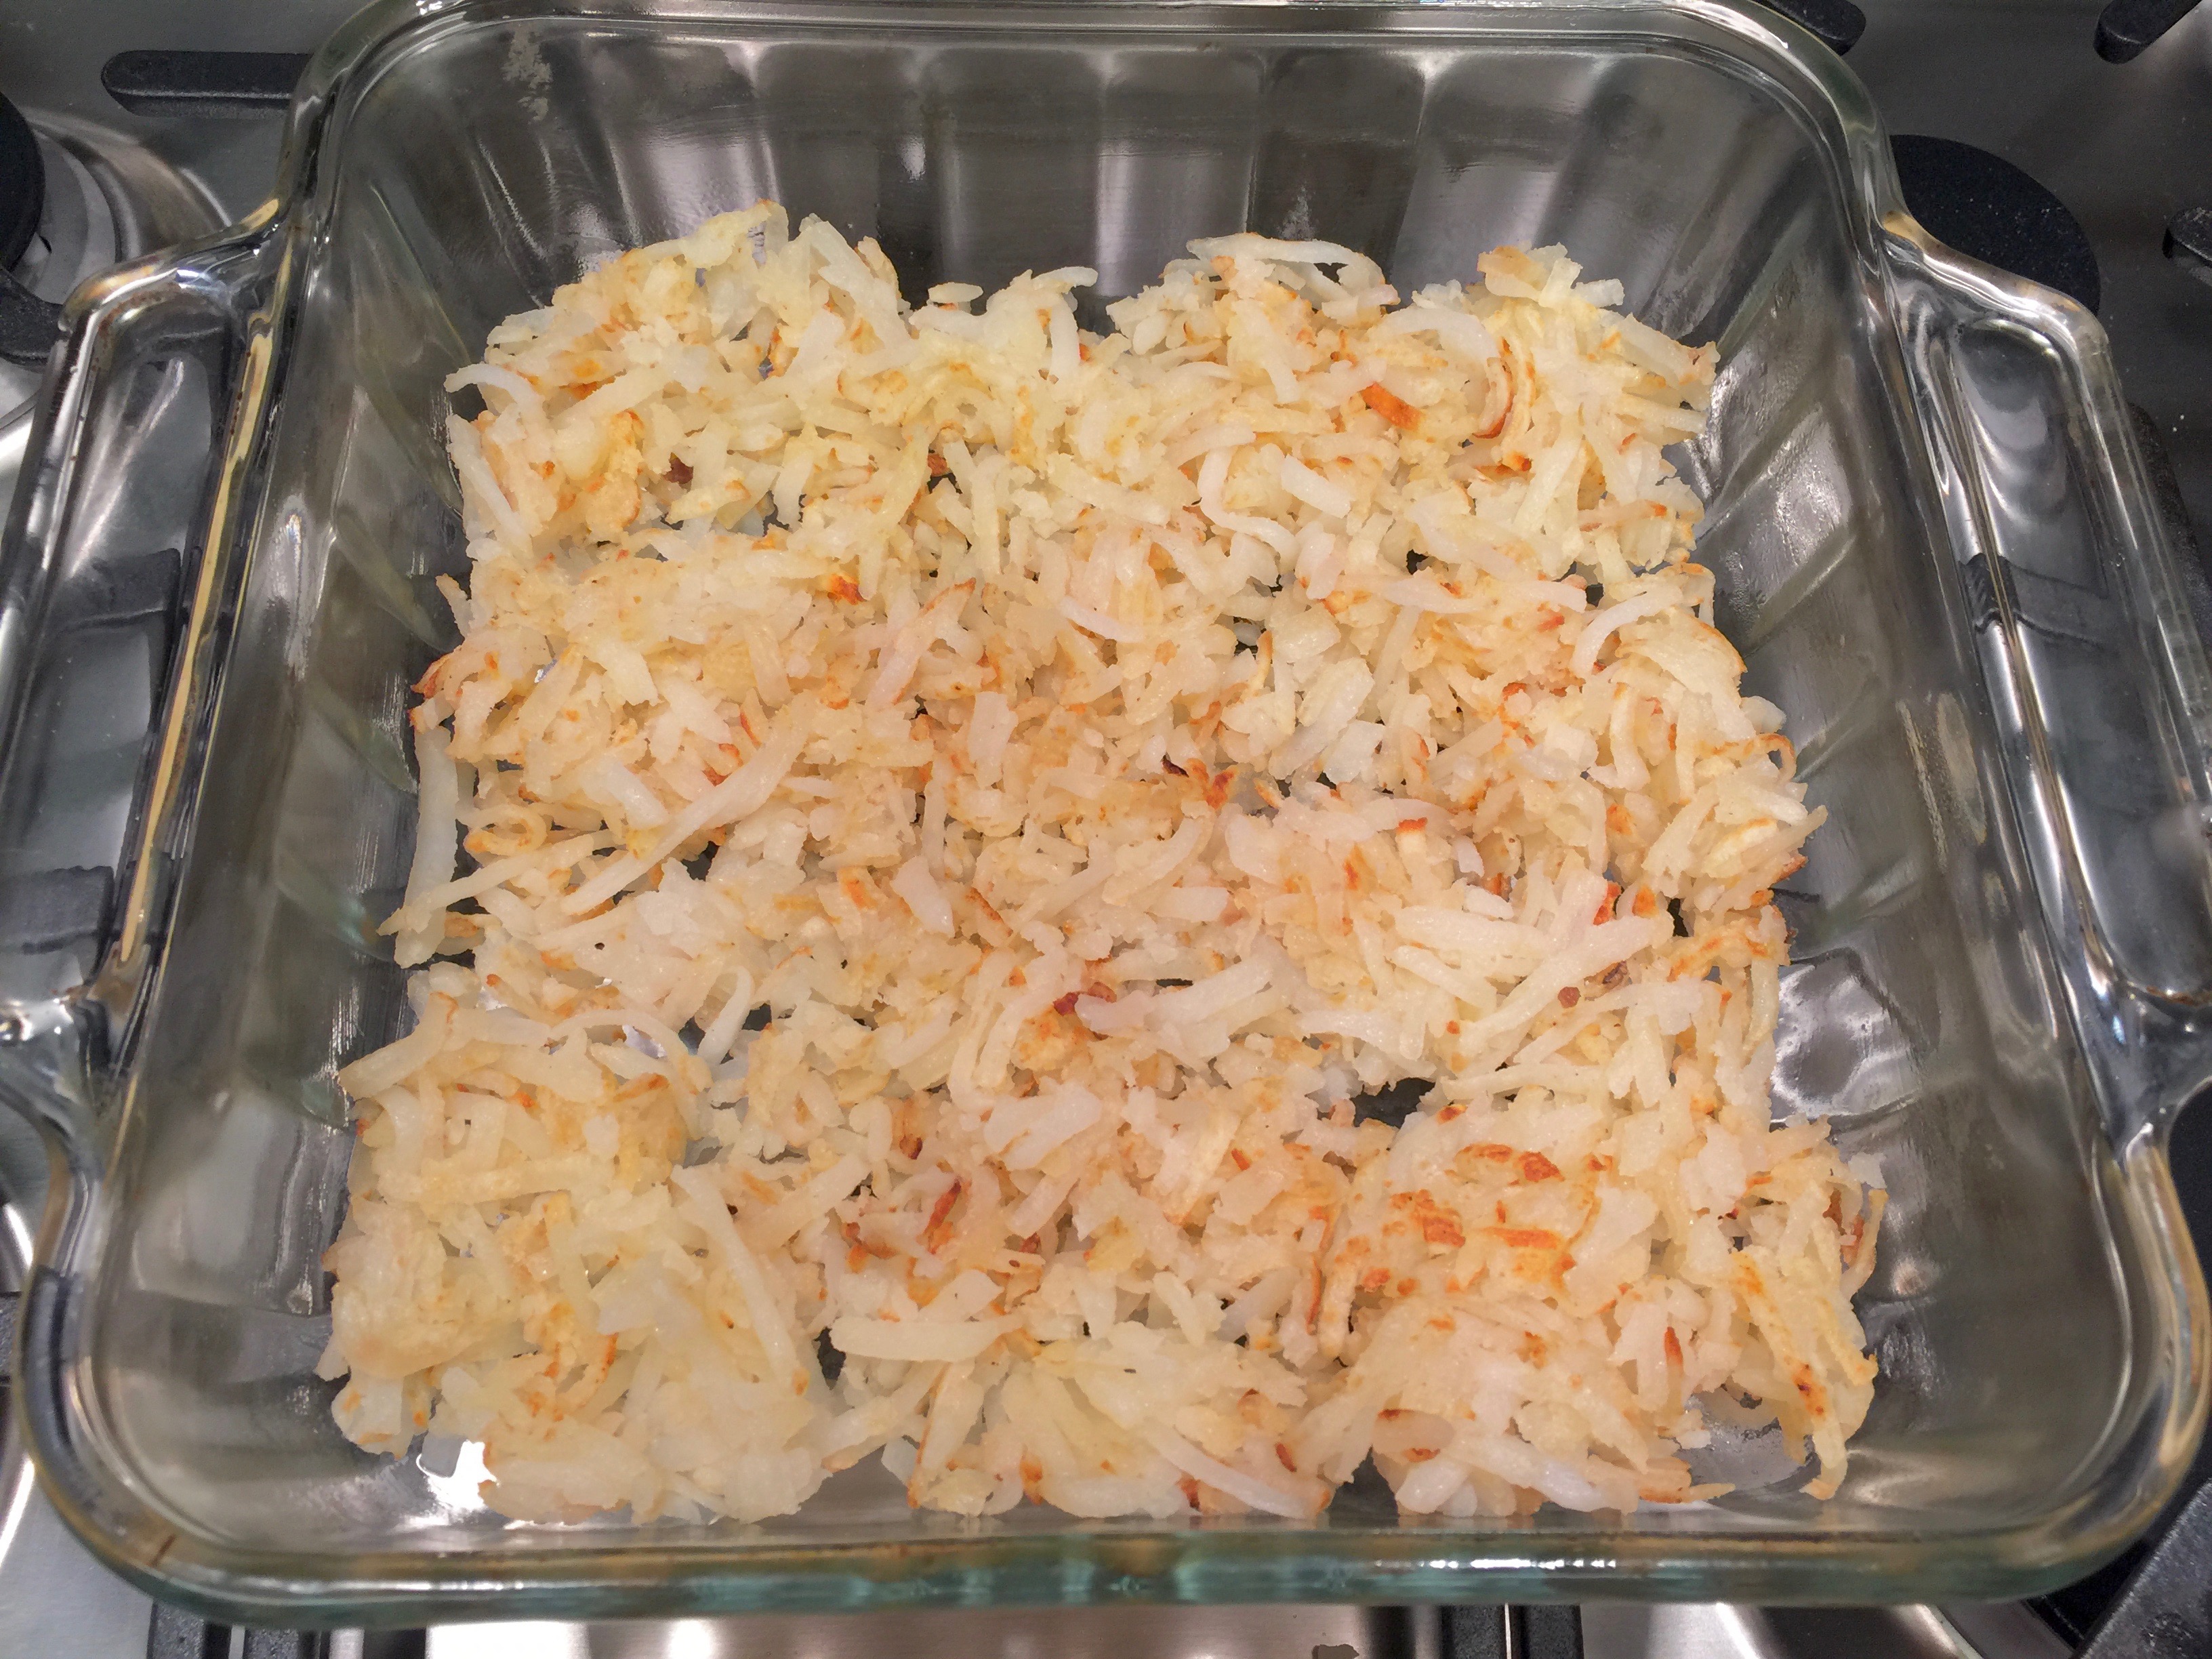
Lesson Learned 2 – Get the hash browns nice and crispy: The hash browns will soften in this recipe. By getting them crispy you add a nice flavor. If you don’t crisp them up they will get too soggy on the bottom of the casserole.

Crispy Hash Browns

Lesson Learned 3 – Substitute for fresh whenever you can: The recipe I based this on called for both onion and garlic powder. If you are in a rush you can certainly use them, but I used minced fresh garlic and chopped green onions instead. I think it made a world of difference in the flavor of the casserole.

Lesson Learned 4 – Add more cheese if you like: I made this recipe with a cup of shredded Jarlsberg. Next time I will use a cup and a half as I wanted it to be just a little cheesier. A cup works just fine. This is something you can experiment with and see what works best for you. But don’t use any less than one cup.

This casserole couldn’t be any easier, and as I mentioned earlier I actually made this for dinner but I felt with the holidays coming this recipe might be a good trick to have up your sleeve. Happy Holidays!

HOLIDAY BREAKFAST CASSEROLE...

  • Servings: 4
  • Difficulty: Easy
  • Print

INGREDIENTS:

1 pound breakfast sausage

1 20 oz. bag of unfrozen hash browns (I used Simply Potatoes)

1 large garlic clove, minced (you can use 1/4 tsp. garlic powder as a substitute)

2-3 green onions, chopped (you can use 1/4 tsp. onion powder as a substitute)

1 cup shredded cheese (use any good melting cheese – I used Jarlsberg)

4 extra large eggs (use 5 if they are small)

1 cup milk

Salt and pepper to taste

DIRECTIONS:

Preheat the oven to 375. In a large skillet cook the breakfast sausage until it is no longer pink. Add the garlic and cook until fragrant. Set sausage mixture aside.

In the same pan cook the hash browns until slightly crispy. Place them in the bottom of a lightly greased 8 x 8 pan. Top with sausage and cheese.

In a separate bowl combine the eggs, green onions and milk. (If using onion and garlic powder you would add them into this egg mixture). Pour over the hash browns, sausage and cheese. (Cover and refrigerate at this point if you plan on making this the next day.)

Bake for 35- 40 minutes or until the top is set and the edges start to brown. Let the casserole sit for 5 minutes and serve.

The Hash Browns Layer

The Hash Browns Layer

The Meat Layer

The Meat Layer

The Cheese Layer

The Cheese Layer

The Egg Mixture

The Egg Mixture

Ready To Go Into The Oven

Ready To Go Into The Oven

Holiday Breakfast Casserole

Right Out Of The Oven

Holiday Breakfast Casserole

Holiday Breakfast Casserole

Holiday Breakfast Casserole

Holiday Breakfast Casserole

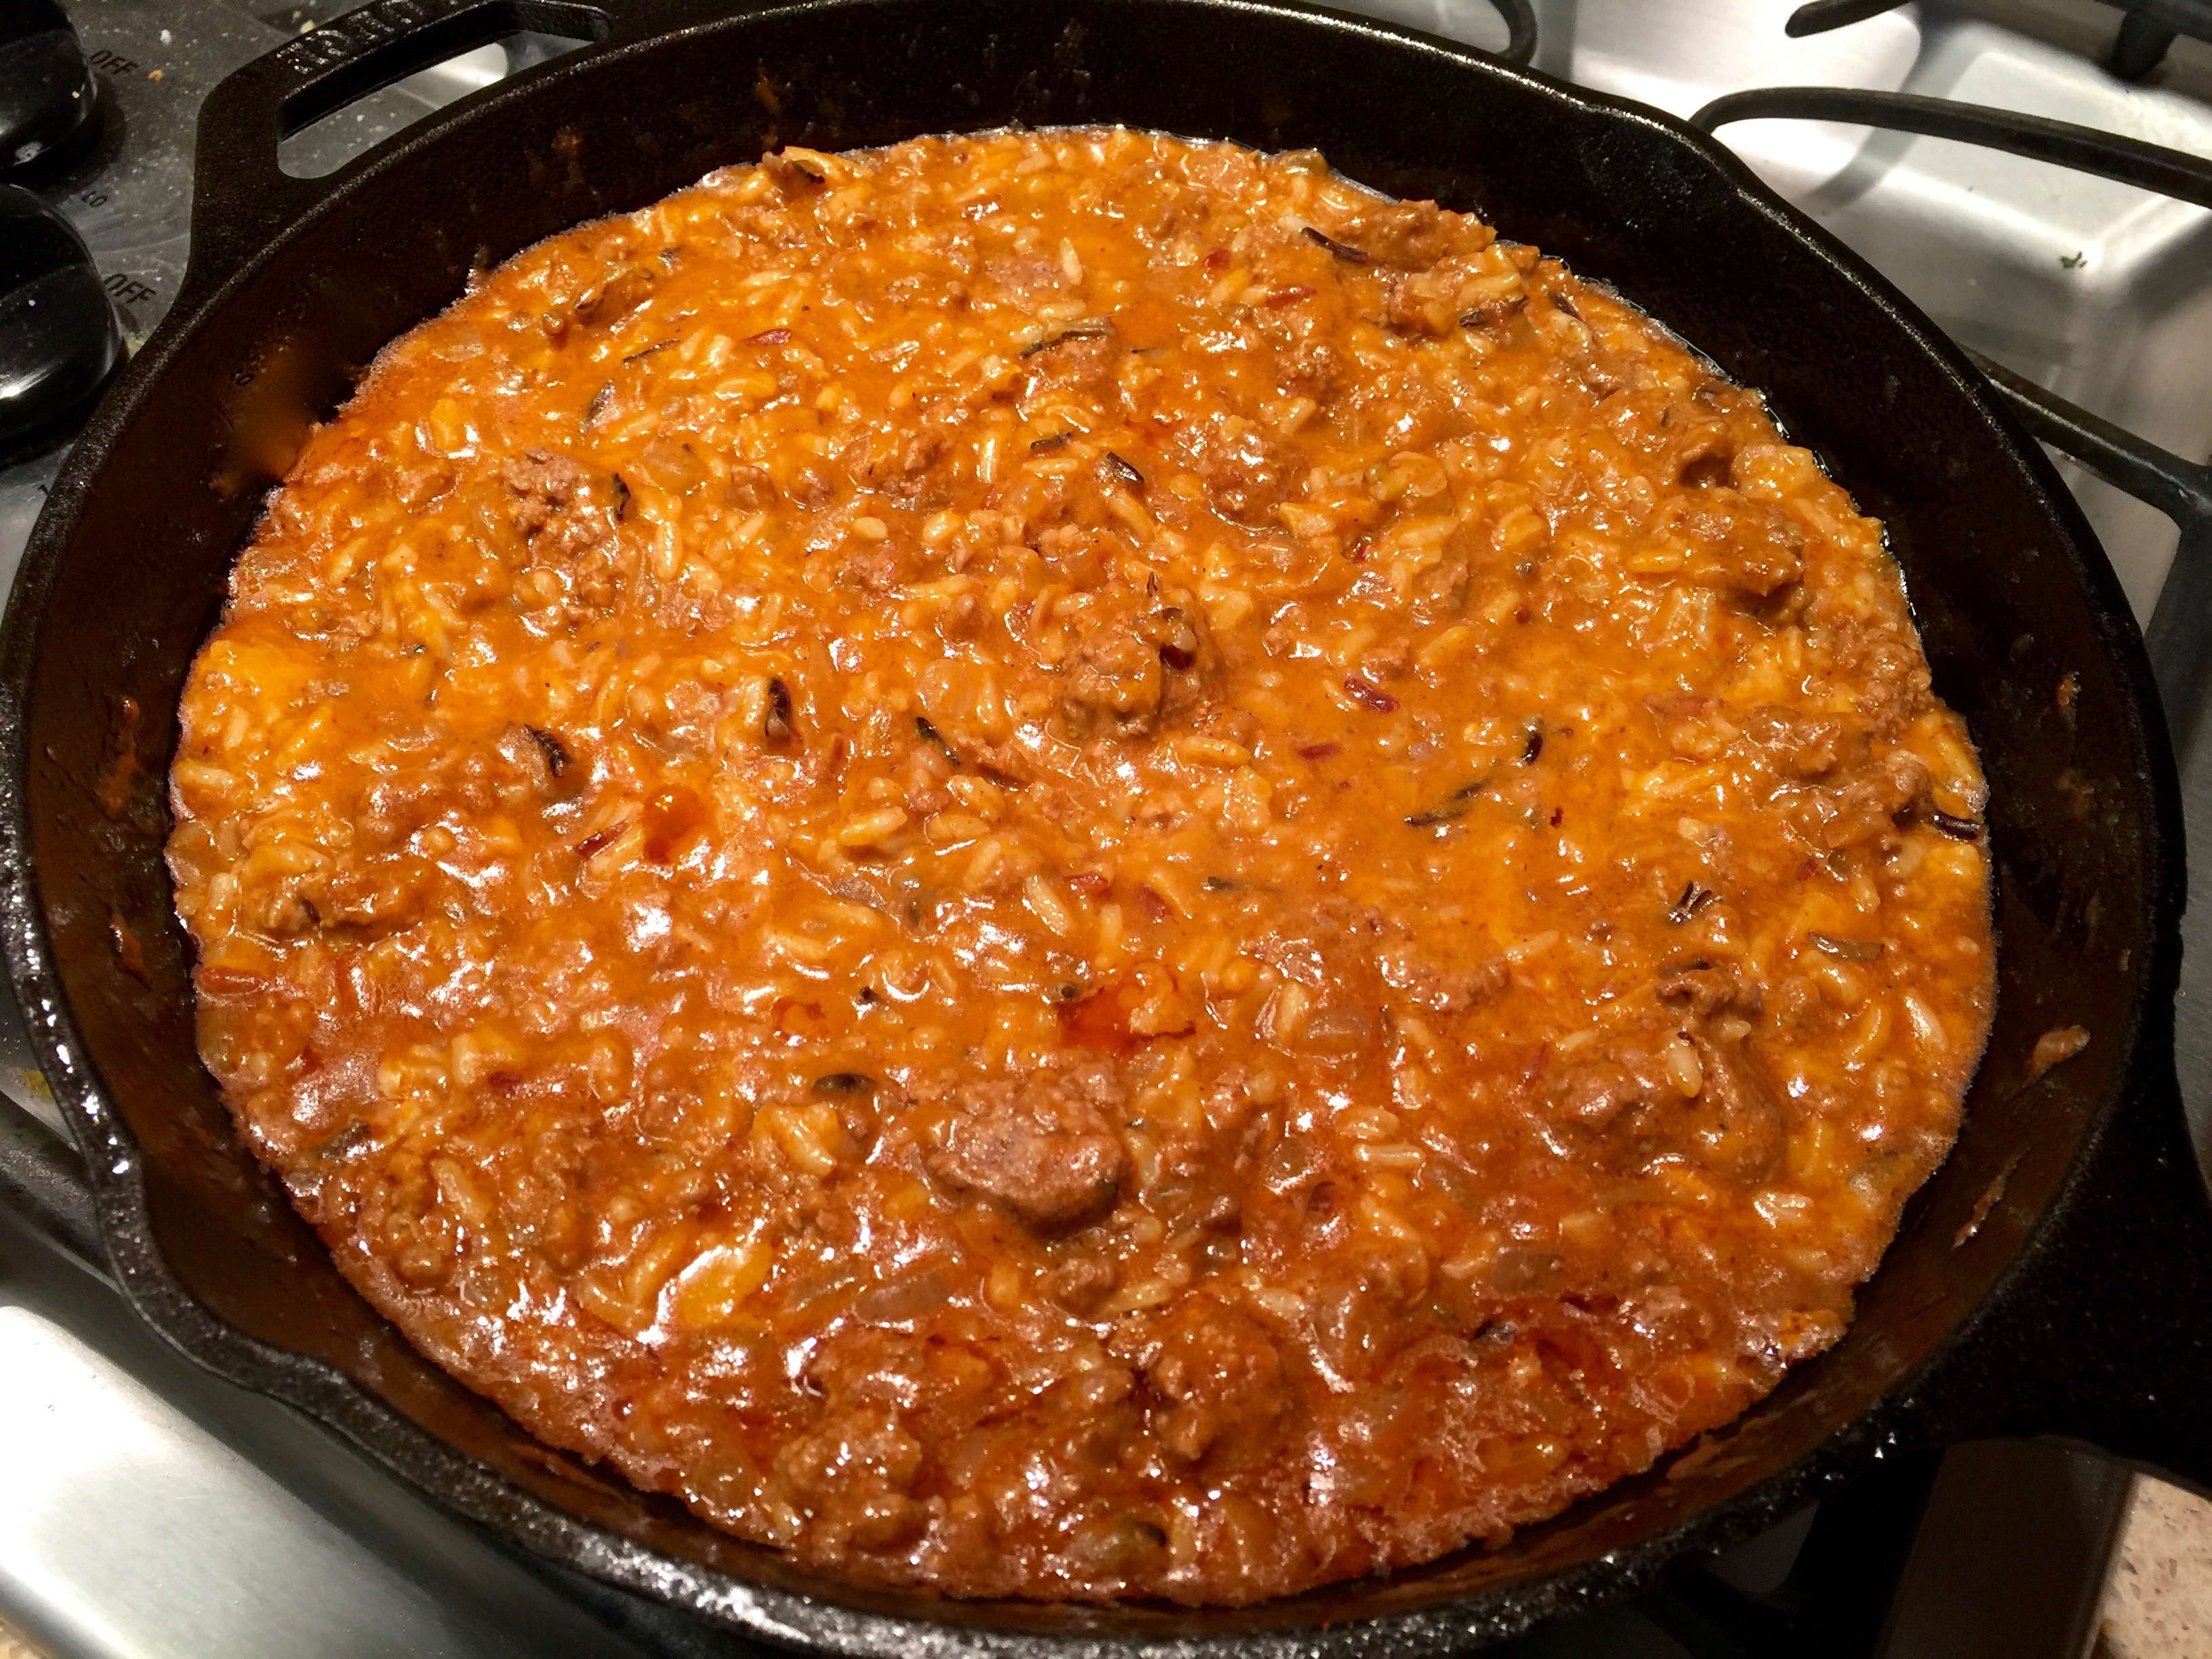
Skillet Taco Casserole…

I am always amazed at the versatility of a cast iron skillet. I used to think they were just cheap and heavy cookware but now I think they are the best thing out there when it comes to cooking in the kitchen.  And I am always looking for ways to make a one pot meal so when I decide to make one I go first to my trusty cast iron skillet before anything else. There is nothing that compares to using a cast iron skillet when you have a recipe that goes from stovetop to oven. And that is the kind of recipe I am sharing today.

This particular meal is so easy and so tasty you’ll want to keep it in your arsenal of go-to meals. When you don’t have the time or energy to make tacos the traditional way, you can still get that “taco feel” without a lot of major prep. It’s basically everything in one pan. Serve it with a salad and some tortilla chips, or slather it into a soft tortilla shell with some lettuce and jalapeños and it will be a hit!

So let’s talk skillet taco casserole…

Lesson Learned 1 – Get creative with the rice you use: Of course you can always use the old standby white rice. But don’t be afraid to get creative. I used a rice blend of texmati white, brown, wild and red rice for this recipe and found it added great depth of flavor. But you could use basmati rice, paella rice or any short or medium grain rice to this dish. And if all else fails you can even use quick cooking rice. The point is, don’t be afraid to experiment. As long the rice is precooked you’ll be just fine.

Lesson Learned 2 – Don’t forget to add the flour: As I’ve become a little more proficient as a cook I’ve come to learn that flour and corn starch are my best friends. If you want to thicken a sauce or a gravy, you need to use one or the other. And along the way, as I have experimented with both, I’ve wondered what the difference is between the two of them.

Flour Versus Cornstarch – What’s The Difference?

The First Difference – Appearance: Flour makes a gravy opaque and can dull or lighten the   color, while cornstarch (when used properly) yields a clear, shiny sauce.

Sauce Thickened With Flour

Sauce Thickened With Flour

The Second Difference – Flavor: flour needs to be cooked enough to lose its raw flavor; cornstarch doesn’t have much flavor on its own so you don’t need to cook it through. And if you use a cooked flour (such as a long-cooked Cajun-style roux, or roasted flour), you can add a roasty-toasty flavor you can’t get with cornstarch.

The Third Difference – Cooking Time: Flour needs to be cooked to lose its raw flavor and to unleash its thickening powers. Cornstarch needs only a short cooking time to thicken. In fact, if you cook cornstarch too long, it lets go and the sauce thins out again. So if you are anticipating a longer cooking time, stick with flour.

What thickening agent do I prefer? Well the answer it easy –  for me, it’s flour. Although you do need to cook it for about a minute, I find it is easier to work with, doesn’t lose it effectiveness over longer cooking times and it always does a great job of thickening. The only time I prefer cornstarch is when I want clear, shiny sauce.

Ready To Go Into The Oven

Ready To Go Into The Oven

Lesson Learned 3 – Judge how much tomato sauce you need: I bought a small can of tomato sauce and after I poured in some I thought using the whole can might make the dish too runny even with using flour. So I only added about 3/4 of the can. But judge for yourself. If you add the whole can and find it reduces the affect of the flour, just mix a little flour with water (thoroughly) and add it in. The sauce will thicken up again in no time.

And that’s it. The recipe is very easy and you’ll have a great dinner on the table in no time. Enjoy!

SKILLET TACO CASSEROLE...

  • Servings: 4
  • Difficulty: Easy
  • Print

INGREDIENTS:

1 Tbs. Garlic Infused Olive Oil (you can substitute EVOO)

1 medium onion, chopped

1 pound 85% lean ground beef

2 Tbs. flour

1 pkg. taco seasoning

1 cup chicken stock

1 small can tomato sauce

3 cups cooked rice

1 cup sharp cheddar cheese, shredded and divided

1 cup Jack cheese, shredded and divided

1/4 cup sour cream

Green onions or flat leaf parsley for garnish (optional)

Salt and pepper to taste

DIRECTIONS:

Preheat oven to 375 degrees. In a large cast iron skillet (or any other type of oven proof skillet) on the stove saute the onions, stirring occassionally, until they just begin to caramelize (about 7 minutes). Salt and pepper the onions while sautéing. Move the onions to the side of the pan and add the ground beef, breaking it up with a spoon and spooning the onions on top. Cook until the beef is cooked through. Salt and pepper to taste. Once cooked drain any excess grease out of the pan.

Stir in the taco seasoning and flour and cook for at least 1 minute. Add the chicken stock and tomato sauce. Bring the mixture to a boil, reduce the heat and simmer for about 10 minutes.

Stir in the cooked rice, half the cheeses and sour cream. Cooked until combined. Add the remaining cheese to the top of the mixture, put in the oven and bake until cheese is golden brown and bubbly, approximately 15 minutes.

Garnish with sliced green onions or chopped flat leaf parsley and serve.

Skillet Taco Casserole

 Skillet Taco Casserole

Easy Potato Casserole…

Are you a rice or potato person? In my experience you are either one or the other. There is no doubt when it comes to me. I am definitely a potato person. Born and raised on potatoes, I barely had rice until I was an adult. And although I like rice and find it very adaptable in recipes, my starch of choice is and always will be potatoes!

And that it why I am always thinking about new ways of making those spuds. I think this recipe fits the bill of not only being incredibly easy but also incredibly delicious. When I get a, “these potatoes are good” from my husband, I know I’ve hit the jackpot.

Easy Potato CasseroleNow I will admit I made this recipe twice. The first time I tried it I felt the potatoes were not done as well as I would have liked. The first time I used my mandolin slicer and cut the potatoes to 3/16 of an inch. The second time I cut them to 1/8 inch and there was a world of difference in the result.

As I’ve share before, I live in high altitude so recipes often take longer to cook. I cooked this potatoes casserole for 2 hours, 1 hour and 40 minutes covered with foil and the last 20 minutes uncovered. If you’re not at high altitude it will probably only take one and a half hours total.

So let’s talk easy potato casserole…

Lesson Learned 1 – The thickness of the potato slices is very important: As I just mentioned, the potato slices should be even in thickness and not overly thick. I used 1/8 inch slices and the casserole turned out perfectly. The thicker the slice the longer the cooking time. And it’s very important that all slices have a consistent thickness. Otherwise some parts will cook while others won’t. The best way to ensure even slices is to use a mandolin slicer. But be careful when using one. The blades are very sharp and you can easily slice your finger if you are not careful.

Easy Potato CasseroleAlso, remember to slice your potatoes as the very last bit of prep. Potatoes will oxidize (turn brown) when they are left in the open air too long. And in this case you don’t want to soak the potatoes to prevent them from oxidizing. You want the potatoes as dry as they can be. After slicing my potatoes I dried them off with a paper towel to get out as much moisture as I could. You don’t want a soggy potato casserole. So make sure your very last bit of prep is slicing the potatoes. From there you want to begin assembling your casserole layers right away.

Lesson Learned 2 – Use a good smokey thick cut bacon for depth of flavor: If you have a Trader Joe’s near your home, go to meat section and get a package of uncured bacon pieces. These pieces have been a tremendous find for me. Quite often they are from thick cuts and I found their flavor to be much better than the bacon you find in stores in half pound packages. They’re great and convenient when you want to add some bacon pieces to a recipe, much better than the jarred fake kind. If you can’t find them, then I would recommend any thick cut bacon cooked and crumbled into small pieces. The flavor really permeates the potatoes when the bacon is a thicker cut.

This recipe is pretty straightforward so not many lessons learned to share with this one. I can’t emphasize enough the importance of making the potato slices thin. Other than that this recipe is not only delicious, it’s full proof! Enjoy!

EASY POTATO CASSEROLE...

  • Servings: 6-8
  • Difficulty: Easy
  • Print

INGREDIENTS:

2-3 russet potatoes, peeled (if the potatoes are large you will only need 2)

1 cup cheddar cheese, shredded

Easy Potato Casserole1 cup monterey jack or havarti cheese, shredded

4 slices thick cut bacon, cooked and crumbled

1 cup milk

1 large egg, room temperature

2 green onions, diced (include some of the green parts)

Salt and pepper to taste

Fresh flat leaf parsley for garnish

DIRECTIONS:

Preheat oven 375 degrees. Butter or spray a 9 inch pie pan.

Layer potato slices in the pie pan, slightly overlapping the slices. Season with salt and pepper. Sprinkle half the cheeses over the potatoes and add half of the crumbled bacon and green onions. Repeat the entire process ending with the top layer being the cheeses.

In a small bowl whisk together the milk and egg. Pour the mixture over the potatoes.

Cover with foil and cook for 1 1/2 – 2 hours. Remove the foil during the last 20 minutes of baking.

Allow the dish to rest for 5 minutes. Serve immediately.

Easy Potato Casserole

 Easy Potato Casserole

Easy Potato Casserole

Easy Potato Casserole

Chicken, Cauliflower and Mushroom Casserole…

Casseroles can be deceptive. On the outside what you see is a one dish meal – couldn’t be easier right? But upon closer inspection you see a wide variety of ingredients that have to be “bake-off” ready in order to assemble the casserole. And if you don’t have those ingredients on hand, there’s a lot of work involved in putting a casserole together.  Just be aware of that, especially if you are prepping ingredients from scratch. Let’s face it, casseroles are basically designed to help you use your leftovers – sort of a “fooled you, you ate this the other night for dinner and here it is again, just dressed up differently!” But whether you are using leftovers or preparing ingredients from scratch there is nothing as comforting as a casserole. And besides, I’d rather be relaxing an hour before the meal than scrambling right up to the last minute before you put the meal on the table. For me, that is the beauty of a casserole.

Casseroles also feed my love of prepping things. So I’ll admit I made this the other day without using any leftovers. This was a from scratch casserole. But if you’re a prep nut like me who gets satisfaction out of chopping, mincing, dicing and slicing than it really is no big deal.

So let’s talk about making a chicken, cauliflower and mushroom casserole…

Casserole IngredientsLesson Learned 1 – Get all the individual ingredients prepped first: This is pretty much a rule of thumb for almost any recipe, but since there are so many different types of ingredients in a casserole I’ve found the best thing to do is to get everything “assembly ready” first. That way you’re much more organized and the casserole assembly process is a breeze. That means have the chicken cut up or shredded, slightly steam the cauliflower, sauté the mushrooms, either use leftover rice or cook your rice, and shred all of your cheeses.

And by the way, it is always better to shred your own cheese. Packaged pre shredded cheese has an “ingredient” in it, cellulose, designed to keep the shreds of cheese from sticking together. And guess what – cellulose is made from wood pulp. So unless you want to have a regular amount of wood pulp in your diet, I’d recommend shredding your cheese by hand. It’s not that hard and obviously healthier for you.

Lesson Learned 2 – A chicken casserole’s best friend – store bought rotisserie chicken: You can always roast the chicken you need ahead of time in your own oven, but it’s so much simpler just to buy store bought rotisserie chicken and use that. I bought a small chicken, removed and discarded the skin and shredded the meat. It saved a lot of time and believe me, no one knew the difference.

Lesson Learned 3 – Use any melting cheese you have on hand: I had gruyere and havarti on hand so I just combined those two for this casserole. To top the casserole I found a specialty cheese called buffalo wing artisan cheddar cheese. That cheese was great because it had a nice kick to it and added a unique flavor to the top of the casserole. Really, you can be inventive with your cheeses. You just want to make sure that whatever cheese(s) you use it is good melting cheese.

Lesson Learned 4 – Just slightly steam the cauliflower: I steamed mine for about 5 minutes. Really all you want is for them to just show the first signs of cooking. Remove them from the heat. No need to shock them. Just don’t feel that you have to steam them for a long time. All you really need to do is give them a little nudge.

Lesson Learned 5 – Once everything thing is prepped, assembly is a snap: Here is what the assembly looks like in pictures.

Line the bottom of a pan treated with non stick cooking spray with rice

Line the bottom of a pan treated with non stick cooking spray with rice

Put the cauliflower florets on top of the rice

Put the cauliflower florets on top of the rice

Spread the chicken mixture on top of the rice and cauliflower

Spread the chicken mixture on top of the rice and cauliflower

Spread chicken mixture over the rice and cauliflower

Top with cheese

Top with cheese and pop into the oven

And there you have it. Forty-five minutes to an hour later you will be in casserole heaven. So try this one, play with the ingredients and as always let me know what you think…

CHICKEN, CAULIFLOWER AND MUSHROOM CASSEROLE

  • Servings: 8
  • Difficulty: Easy
  • Print

INGREDIENTS:

1  Four pound rotisserie chicken, skin removed, cubed or shredded

1 small head of cauliflower cut into florets and slightly steamed (4 cups of florets)

8 large cremini mushrooms, sliced and sautéed in 1 Tbs. of  butter

1 1/2 cups cooked rice (cooked in low sodium chicken broth for additional flavor)

1 ten ounce can of condensed cream of mushroom soup

1 cup of sour cream

1/2 cup mayonnaise

1 Tbs. fresh lemon juice

2 1/2 cups shredded melting cheese (I used a combination of havarti and gruyere)

1 – 1 1/2 cups shredded buffalo wing artisan cheddar cheese (for the top)

Salt and pepper, to taste

DIRECTIONS:

Preheat oven to 375 degrees. Grease a 6 quart casserole dish with butter or spray it with cooking spray. Line the bottom of the dish with the cooked rice. Arrange the cauliflower florets on top of the rice.

In a large bowl combine the chicken, sautéed mushrooms, mushroom soup, havarti and gruyere cheeses, sour cream, mayonnaise and lemon juice. Salt and pepper to taste.

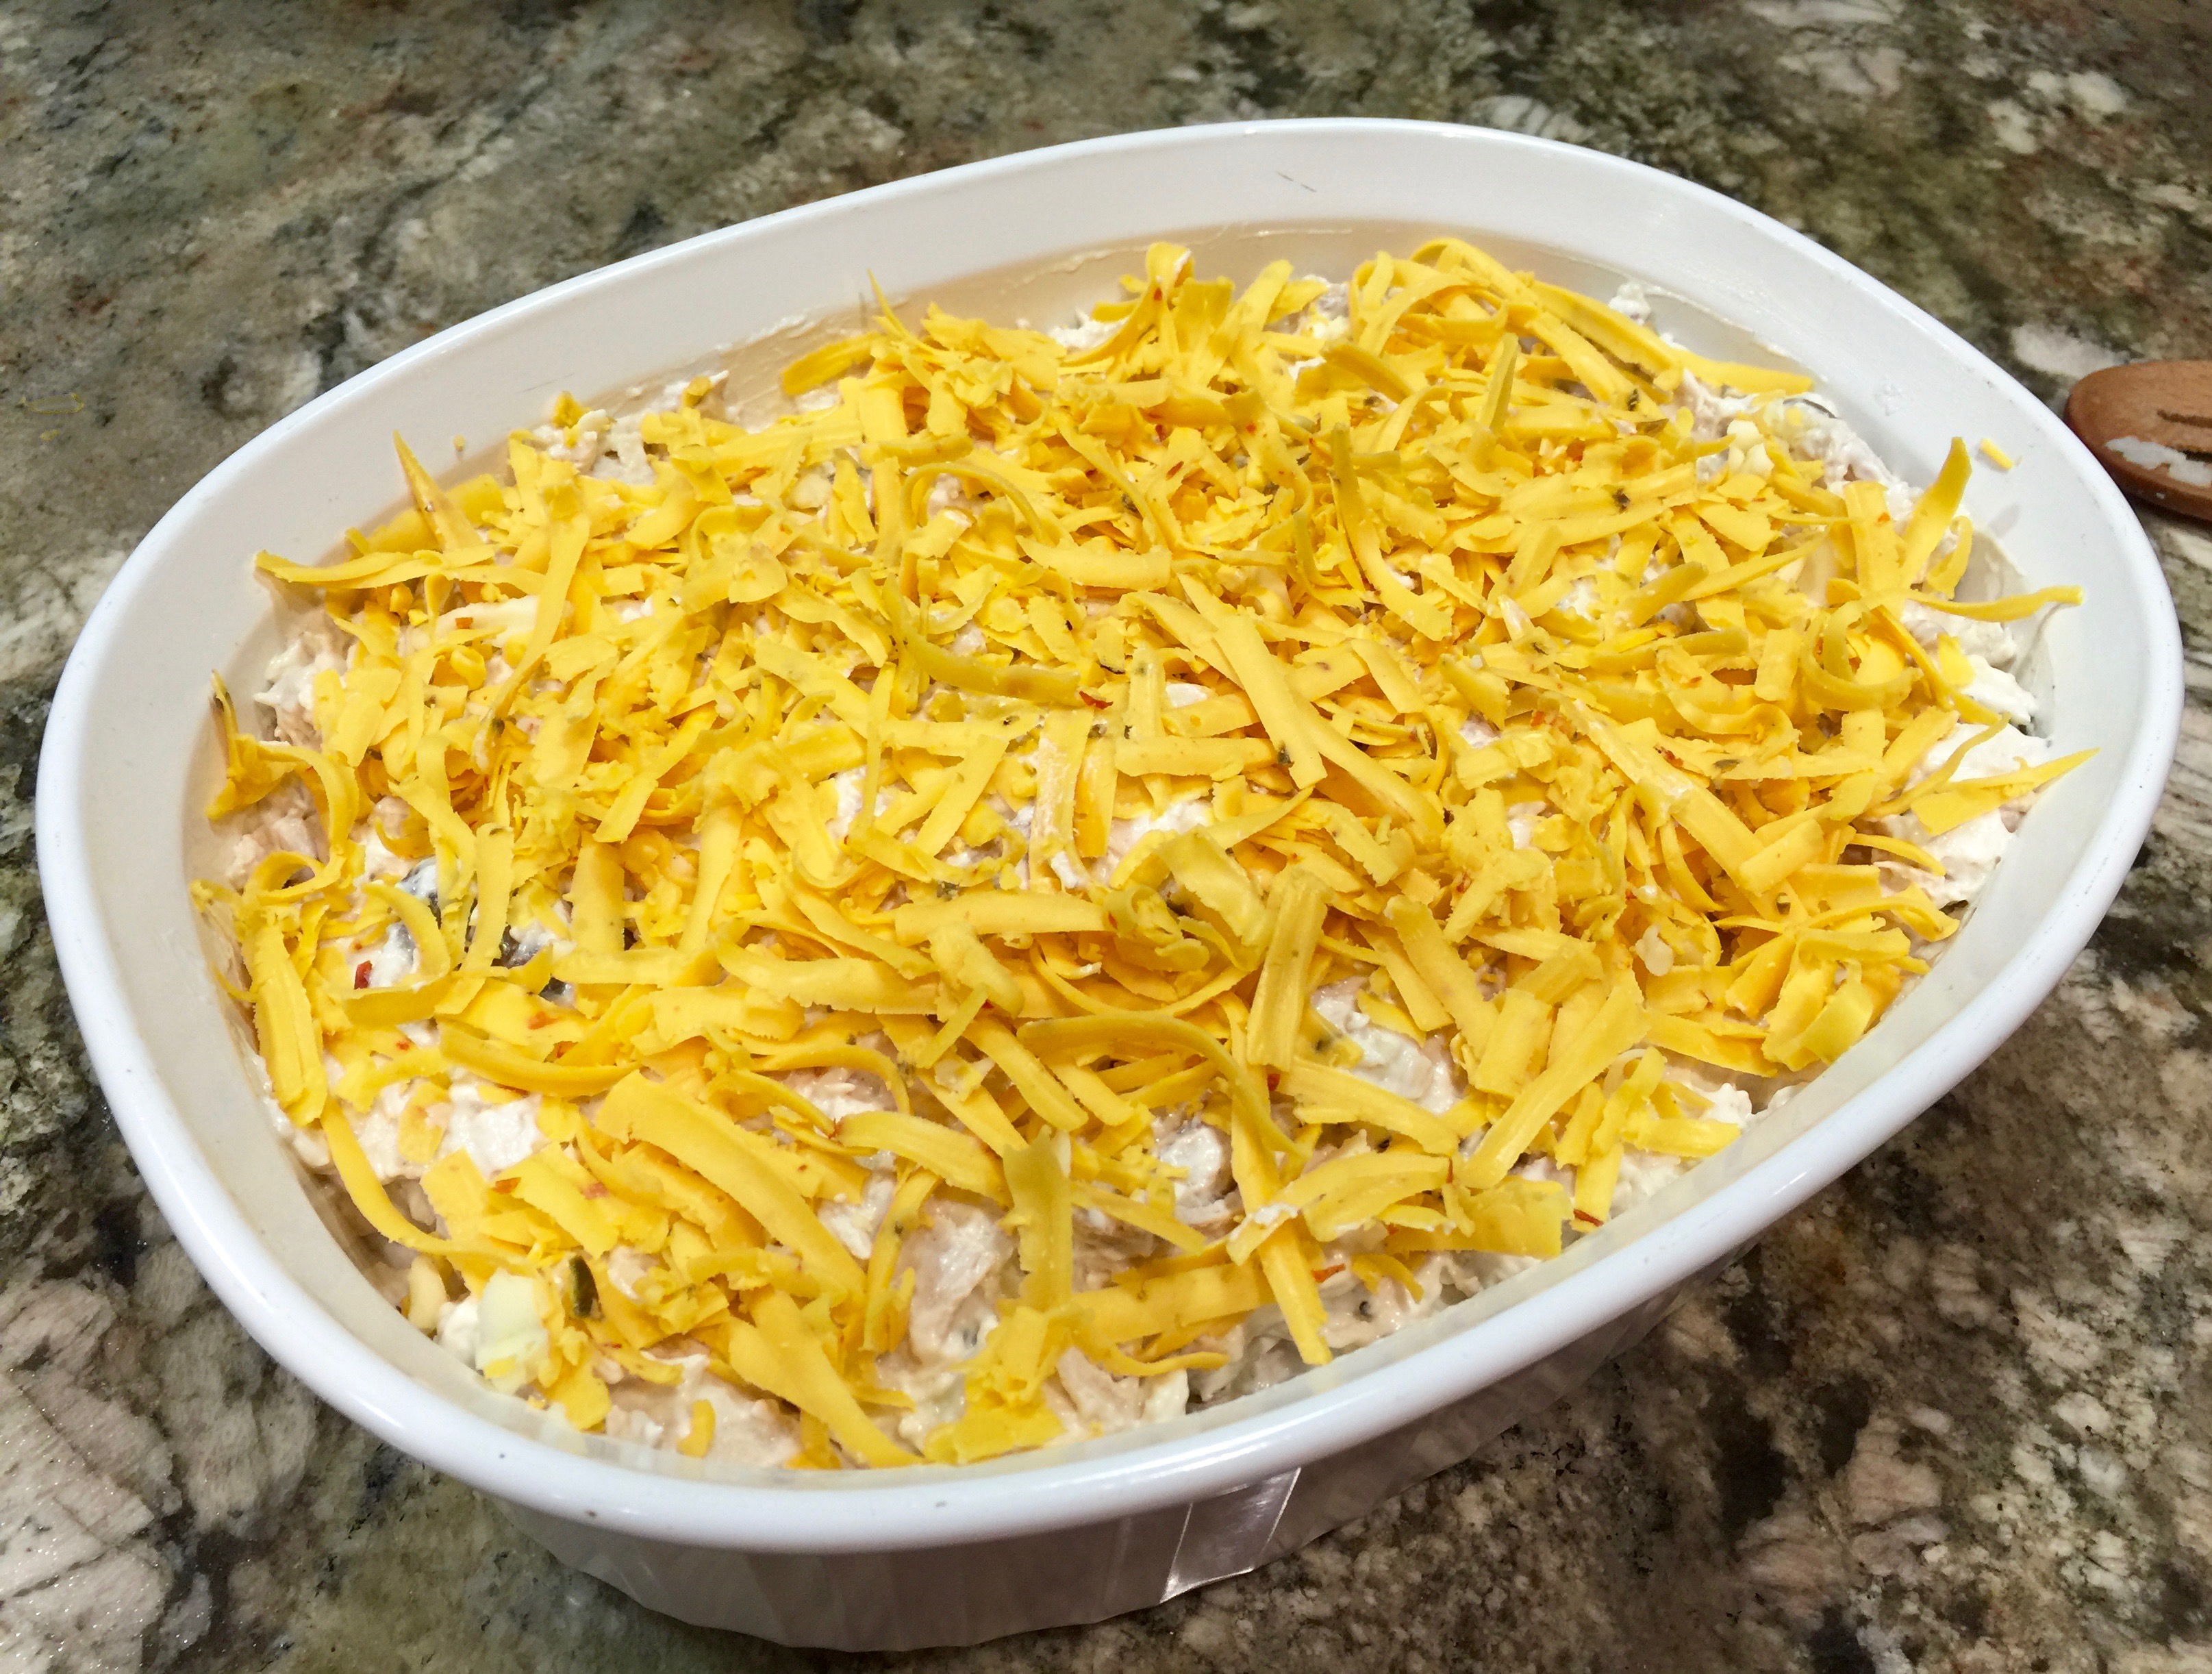
Spread the chicken mixture on top of the rice and cauliflower. Cover the casserole with the buffalo wing cheddar cheese.

Bake in the oven for 45 minutes. If need be, cook up to an additional 15 minutes longer. Casserole is done when the cheese on top is melted and the casserole is bubbly. Remove the casserole from the oven and let it stand for 5 minutes before serving.

Chicken, cauliflower mushroom casserole

Chicken, cauliflower and mushroom casserole

Chicken, cauliflower and mushroom casserole

Chicken, Cauliflower and Mushroom Casserole


Creamy Shrimp and Cauliflower Casserole

My goal with this blog is to make one new recipe a week. Sometimes that can be an arduous task and other times I can make a few in the same timeframe. I made this recipe a couple of weeks ago and absolutely loved it. I had a taste for shrimp and decided to try a different way of preparing it.

Casseroles can be deceiving. We tend to look at them as the convenience of a one dish meal with lots of different ingredients, and that’s true. What one forgets is that normally there is a lot of prep that goes into making a casserole, and so if you are not a prep person like I am, casseroles may not be the ticket for you.

So let’s talk creamy shrimp and cauliflower casserole:

Fresh uncooked shrimpLesson Learned 1 – Is your shrimp really deveined? Most people like to buy shrimp that is deveined with the shell removed so that they don’t have to do as much prep. But is shrimp marketed as deveined really completely deveined?  What I didn’t realize early on is shrimp has veins on both sides, the top and the bottom and when you purchase “deveined” shrimp only the top vein is removed. Next time you buy deveined shrimp check out the bottom and you will see that little black vein running through the bottom as well. Some people leave it in, I remove it. That adds to the prep time but then I’m not eating this disgusting vein once the shrimp is cooked.

For this recipe I got fresh shrimp from my fishmonger that was deveined on top but still had the shell, tail and bottom vein. I removed all of that before adding the shrimp to the other casserole ingredients.

Steamed CauliflowerLesson Learned 2 – This is what the prep entails: Not only do you have to prep the shrimp, you need to cut up and steam the cauliflower, cut up the spinach, melt the butter, grate the cheese and chop the parsley. It doesn’t sound like a lot but it does take a little time. My advice here is to grate your own cheese versus using prepackaged shredded cheese. Prepackaged shredded cheese has an additive in it that prevents the cheese shreds from sticking together. Anytime you can eliminate any additives in your food the better. Sure it takes a little more time, but consider the cumulative effects of those additives in your body over several years. Isn’t it worth a couple of extra minutes to grate the cheese yourself and eliminate those additives?

Lesson Learned 3 – Like most casseroles, you can decide what cheese works best for you: When I made the casserole I used a combination of gruyere and pepper jack cheeses along with the romano. I wasn’t sure if using just pepper jack alone would overpower the casserole. Next time I’m only going to use pepper jack and romano. I like the tang pepper jack gives the casserole and I don’t think it will be too much. Experiment with the cheese you like. Just make sure you are using a good melting cheese.

All Casserole Ingredients Mixed Together

I really liked this casserole, and it was a new way for me to serve shrimp. Try it and tell me what you think.

Creamy Shrimp and Cauliflower Casserole

  • Servings: 4
  • Difficulty: Easy
  • Print

INGREDIENTS:

Creamy Shrimp and Cauliflower Casserole1 small cauliflower cut up and steamed until fork tender

1 cup fresh baby spinach, chopped

1/3 pound shrimp, peeled, deveined and chopped in large chunks

1/4 coconut milk

3 Tbs. melted butter, slightly cooled

1 extra large egg, beaten

4 baby bella mushrooms quartered

1/2 cup grated Romano

1 cup grated cheese (I used a combination of gruyere and pepper jack)

1 tsp. italian parsley, minced for the casserole and an extra tsp. or so for garnish

1 tsp. garlic powder

1/3 cup seasoned bread crumbs

Salt and pepper to taste

DIRECTIONS:

Preheat oven to 350. Grease a 1 quart casserole dish and set aside.

In a small bowl combine the egg, coconut milk, garlic, parsley. Sprinkle with a little salt and pepper. Put the cauliflower in another bowl and add the grated cheeses and egg mixture. Stir until the cauliflower is evenly coated. Add the shrimp, spinach and mushrooms and stir to combine.

Pour into prepared pan. Top with a light dusting of bread crumbs (you may not need the entire 1/3 cup). Bake for 25 – 35 minutes. (You want the cheese to be melted and the shrimp to be pink. I live in high altitude so it took me 35 minutes. At sea level I would start checking the casserole at 25 minutes).

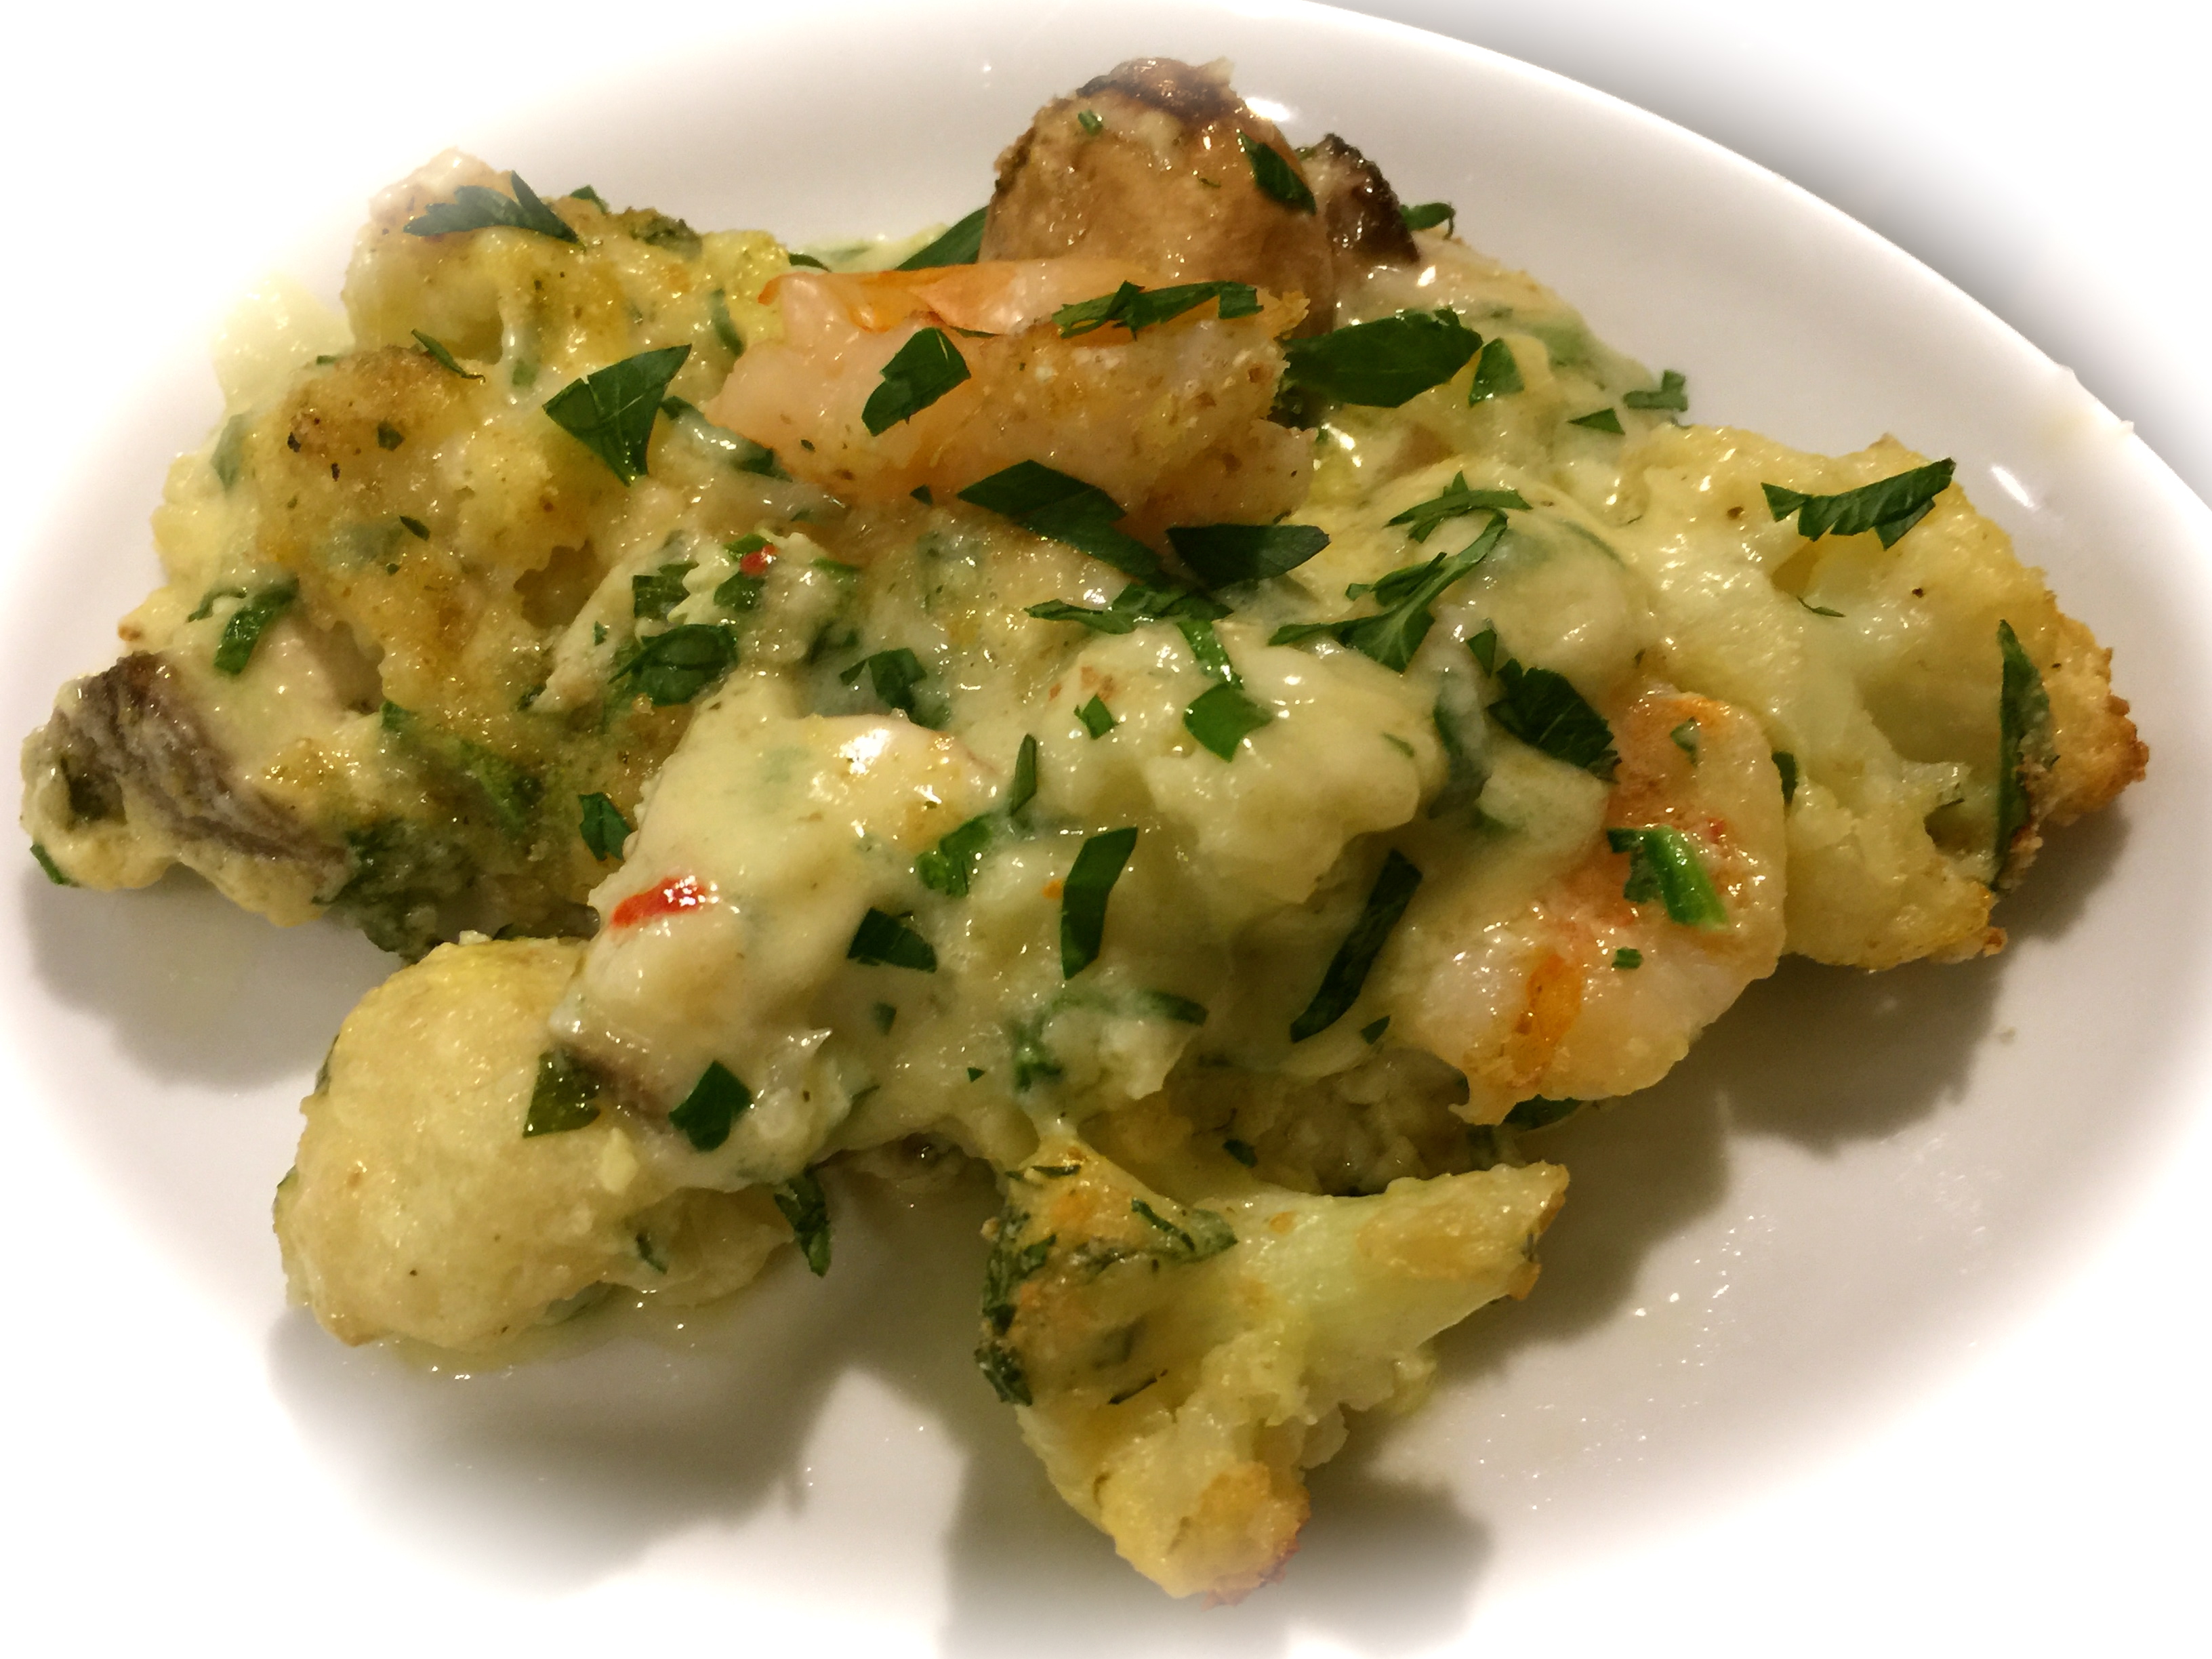
Transfer to a plate and garnish with some additional chopped italian parsley and serve.

Ready for the oven

Fresh out of the oven

 Creamy Shrimp and Cauliflower Casserole

Sweet Potato Casserole…

For the longest time I associated sweet potato dishes with the holidays. Turns out I was missing something wonderful and nutritious all year long. That being said, I’d like to share with you a recipe that certainly can be made over the holidays but is wonderful with any meal any time of year.

I like this recipe because it’s designed to serve four (or two very large appetites) so you can either finish it off at one meal or have one serving of leftovers. It reheats beautifully. It’s simple to prepare, a colorful addition to any plate, flavorful and good for you. So throw away your preconceived notions of sweet potato casseroles being something only relegated to the holidays and enjoy them all year round!

IMG_4412Lesson Learned 1 – Cut the sweet potato into evenly sized chunks: This is very important for the cooking time. You don’t want some pieces to be mushy while other pieces are hard. I cut mine into one inch chunks. Also keep in mind sweet potatoes cook faster than russet or red potatoes. So be aware of that and start checking them for doneness at about 10 minutes. You want them to be fork tender, not mushy.

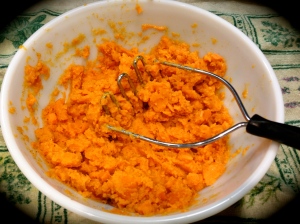
Lesson Learned 2 – To mash or not to mash in the same pot you cook them in: I am a student of the game and so I do a lot of research into cooking methods. There is a train of though out there that suggests once you’ve drained the sweet potatoes it’s best to mash them in the same pot you boiled them in. That way any excess water left on the potatoes will evaporate from the heat of the pan. That’s all well and good, but I find if I do that my potato masher scratches the heck out of the bottom of my pan, and I have some really high quality pans. IMG_4415So I’ll leave this up to you. You can certainly mash them in the same pan, but I wanted to warn you about what might happen if you did. This is what I do. Once I’ve drained the sweet potatoes, I prefer to mash them in a bowl. After I do that (and they mash quite quickly) I put them back in the pot they were boiled in and just stir them around for about a half of a minute or so (you can even use some low heat while you’re doing this). That way I get the same effect without playing havoc with the finish on my pans.

Lesson Learned 3 – You can make this recipe in individual serving sizes: Another way to prepare this dish is to divide it up equally into four ramekins and bake it off. That way your guests can have their own individual portions. This recipe adapts well in that regard and the individual ramekins are pretty cute. You can also use ramekins even when there are only two of you. Just cook two of them off for one meal and refrigerate the other two for another meal. Just make sure if you refrigerate some ramekins, or if you have leftovers in a one quart casserole, that you take the dishes out of the refrigerator and let them sit on your counter for about an hour before reheating them. That way you’ll take the chill off and the cooking time will be shorter. Also if just reheating, cover the casserole in foil. Since it’s already been cooked once you can burn the pecans if you don’t cover them.

My husband just loves this recipe. He asks me to make it all the time. Try it. I’m sure it could easily become on of your go-to potato recipes!

Sweet Potato Casserole…

  • Servings: 2-4
  • Difficulty: Easy
  • Print

INGREDIENTS:

2 large sweet potatoes, peeled and cubed

3 Tbs. butter, divided (2 Tbs. cut into cubes)

1 Tbs. maple syrup

2 Tbsp. orange juice

1/4 tsp. salt

1/2 tsp. ground cinnamon

1/2 cup pastry flour

1/2 cup chopped pecans

1/4 cup light brown sugar

1 Tbs. vegetable oil

1/2 tsp. shortening, to grease the casserole dish

DIRECTIONS:

Preheat oven to 375 degrees. Lightly grease a 1 quart casserole dish. (I use an enameled cast iron dish for this recipe). Set the dish aside.

Place cubed sweet potatoes in a saucepan and cover with water by about an inch. Bring to a boil, reduce the heat slightly and continue to cook until the sweet potatoes are fork tender (10-15 minutes). Drain the sweet potatoes and put them in a bowl (or back in the saucepan if you prefer – see lessons learned above). Add 1 Tbs. butter, the maple syrup, orange juice, salt and cinnamon. Mash until you reach your desired consistency. (At this point, if you mash in a bowl, you can put the potatoes back in the pot the cooked in, turn on a low heat and stir for about a minute to remove any excess water). Put the mashed sweet potatoes into the greased casserole dish.

In a small bowl whisk together the flour, pecans and brown sugar. Cut the butter into the flour mixture until it resembles course sand. Add the vegetable oil and mix until well combined. Sprinkle this mixture evenly over the mashed sweet potatoes.

Bake for 20 – 30 minutes or until the potatoes are hot and the top is golden brown.

Ready To Go Into The Oven...

Ready To Go Into The Oven…

Makes Enough For 2-4 People...

Makes Enough For 2-4 People…

Image

Ground Beef and Crispy Potato Casserole…

Lately I have been posting a lot of baking recipes so I thought this time I’d go for something savory. I had some ground beef in the refrigerator and I started to think about how I could prepare it in ways other than more traditional faire like burgers, meatloaf or tacos. Then I thought about Shepherd’s Pie. I’ve made Shepherd’s Pie with left over pot roast (the traditional recipe) and I’ve also made a Turkey Style Shepherd’s Pie but I didn’t have any left over mashed potatoes and didn’t feel like making some.

What I did have was a bag of frozen diced potatoes and a bag of frozen vegetables and the recipe grew out of that. I also had a hodgepodge of shredded cheeses in my refrigerator and I decided to try to incorporate that – sort of a clean out your fridge and freezer type of recipe. I never could have imagined how tasty this would be. After we had this for dinner my husband was already looking forward to eating the leftovers.

The most time consuming part of this recipe is assembling the ingredients but once that’s done, like any other casserole, all you do is pop it in the oven and wait for it to do its thing. This recipe requires using two pots and a casserole dish but believe me the end result is worth it. Try it out and see what you think!

IMG_4961Lesson Learned 1 – There is some prep to this recipe: But tell me now, what from scratch recipe does not require some prep. You brown the onions, add the meat and seasonings, add the veggies and cook thru till warm while in another pot you make the homemade cheese sauce. But at least this way you know every ingredient that is going into the recipe and that’s the beauty of making it from scratch – you control all of the ingredients.   There are ways you can shorten the prep time by perhaps using a prepared cheese sauce but  now that I’ve mastered making my own sauces and gravies I very seldom, if ever, revert to buying them packaged or jarred. And really, you have to admit, homemade tastes so much better. So take the time to do the prep – it’s worth it.

kicproductimage-120658Lesson Learned 2 – It’s easy to adapt this to a meatless recipe: Quite often I post on my Facebook page a picture of the next recipe I will blog as a teaser for what’s to come. This time when I posted a picture for this dish I got two very specific comments. The first was that I should write a recipe book and I am seriously thinking about doing an ebook. (Have any of you done that – would love to hear your story). The second was that you could substitute veggie crumbles for the ground beef in this recipe. To be honest, I had never heard of veggie crumbles before and I wondered why you would substitute the meat for veggies when veggies are already included in the recipe. But I was thankful to learn about this. A few of my friends who are not carnivores say they use these crumbles when making chili or tacos and they tell me it’s a great substitute. So I wanted to offer that piece of information here. This is definitely the kind of recipe that could use the crumbles as a substitute for the ground beef. I am not recommending any particular brand. Both MorningStar Farms and Boca make the crumbles. I just wanted to give you an example of what you might consider.

Lesson Learned 3 – Any frozen vegetables will do: I had some frozen broccoli, cauliflower and carrots and I add them to the recipe. You can also use frozen mixed vegetables (peas, carrots, green beans and corn). Just remember to make sure the pieces are not too large. I found I had very large cauliflower pieces so I cut them in half to make sure they would cook. You can also add fresh vegetables. I would cook them until slightly softened and then put them in the casserole. I think I am going to try fresh vegetables the next time I make this. Regardless, my husband told me that this recipe is definitely a keeper!

IMG_5019Lesson Learned 4 – This recipe makes great leftovers: The recipe as written serves 6 and my husband and I could not eat the whole thing the first time. We had it two days later as leftovers and it tasted equally as delicious as when it was first made. The best way to reheat this is to first take the casserole out of the refrigerator and let it sit on the kitchen counter for an hour. That takes the chill off. Then reheat at 375 for 45 minutes. (maybe 30 minutes at sea level). Make sure you reheat it covered in foil as the cheese will burn if you don’t. The ends result is piping hot and just as delicious as the first time around. This recipe is a winner out of the gate and as leftovers.

Ground Beef And Crispy Potato Casserole…

  • Servings: 6
  • Difficulty: Easy
  • Print

INGREDIENTS:

1 1/2 pounds ground beef

1/2 large onion, diced

1/2 tsp. oregano

salt and pepper to taste

2 cloves garlic, minced

1 1/2 – 2 cups frozen vegetables

3 Tbs. butter, divided

2 Tbs. flour

2 cups milk

1 cup shredded cheese (I had a white cheddar and gruyere blend)

1/c cup sour cream

1/4 cup fresh chives, chopped

Frozen, diced potatoes (enough to cover the top – not quite a full 32 oz. bag)

Flat leaf parsley, chopped for garnish (optional)

DIRECTIONS:

Preheat the oven to 400 degrees. Spray a 10 x 10 casserole dish with cooking spray. Set aside.

In a large skillet heat 1 Tbs. of butter. Add the onions and cook until they start to become translucent (about 5 minutes). Salt and pepper the onions during this process. Add the ground beef and oregano. Cook until the meat is mostly cooked through. Add the garlic and vegetables and cook until the vegetables are slightly heated. Taste the mixture and add salt and pepper if needed. Once the vegetables are slightly heated, remove the mixture from the heat and set aside.

In another skillet melt the remaining 2 Tbs. of butter. Add the flour and whisk for about a minute. Add the milk and continue to whisk so the mixture stays smooth. Once the milk heats it will start to thicken. When the milk reaches a desired thick consistency (this takes about 5 minutes), turn off the heat and add the cheese. Whisk until the cheese melts. Once the cheese is incorporated into the milk mixture add the chives and stir to combine. Taste the cheese mixture and add salt and pepper, if needed.

Add the sour cream to the meat mixture and stir to combine (You need to do this when the meat has slightly cooled so the sour cream does not curdle). Spread the meat mixture into the bottom of the prepared baking dish. Cover the meat mixture evenly with the frozen diced potatoes. Pour the cheese mixture over the potatoes.

Bake for 45 – 60 minutes. For the first 20 minutes cover the casserole with foil, then remove the foil and bake for the remaining time. Remove the casserole from the oven and let it rest for 5 minutes before serving.

Add the sour cream to the meat mixture and spread in the bottom of the dish...

Add the sour cream to the meat mixture and spread in the bottom of the dish…

Arrange an even layer of frozen potatoes over the meat...

Arrange an even layer of frozen potatoes over the meat…

Pour the cheese sauce over the potatoes...

Pour the cheese sauce over the potatoes…

Fresh out of the oven...

Fresh out of the oven…

Ground Beef and Crispy Potato Casserole...

Ground Beef and Crispy Potato Casserole…

Loaded Baked Potato Casserole…

I LOVE potatoes. As a friend of mine once said, “I never met a carb I did’t like.” That’s so true, but these days we know you need to balance your carb intake in order to stay healthy. Not an easy task for someone who was raised on meat and potatoes. But I’m trying.

I wanted to try a recipe like this for a while, so I justified it by serving it with baked cod and oven roasted asparagus. It turned out great and I was careful not to over indulge. So for all of my carb lovin’ friends out there, here’s one that you can add to your arsenal of recipes.

IMG_3125Lesson Learned 1 – Give the potatoes a head start: I know this and I still didn’t do it. It’s always best when making a potato casserole to cook the potatoes for about five minutes in boiling water. That takes the edge off of them. Because you cook this casserole for an hour and three quarters I didn’t think I would need to do that. Wrong. The potatoes were done but not as tender as I would have liked. So remember, give your sliced potatoes a bath in boiling water just until they start to soften slightly (no more than 5 minutes). Then drain them, being careful not to break them, and then put together your casserole. You’ll get great results.

IMG_3116Lesson Learned 2 – There can never be too much cheese: Originally I though this recipe would need two cups of cheese (1 of each type). Once I began to put together the layers I added even more (1/2 cup each). Make sure you get a good melting cheese like gruyere, havarti or monterey jack and generously cover the potatoes. You can combine that with some sort of cheddar or better yet be your own chef and experiment. I used a white cheddar gruyere blend combined with a marbled cheddar. It was delish.  I am writing the recipe from what I used, but you can certainly make substitutions.

This recipe is so easy and so good. It’s a great way to get the flavors of a loaded backed potato in casserole form. The leftovers are great as well. Just heat them in the microwave and serve. Enjoy!

Loaded Baked Potato Casserole 2

Loaded Baked Potato Casserole…

  • Servings: 4-6
  • Difficulty: Easy
  • Print

INGREDIENTS:

All natural cooking spray for the dish

2 large russet potatoes, sliced

1 large clove of garlic minced

3 green onions sliced diagonally

1 1/2 cup gruyer/cheddar blend, shredded

1 1/2 cup marbled cheddar cheese, shredded

6 slices hickory smoked bacon – cooked, drained and crumbled

1 cup whole milk

1 large egg

Salt and pepper to taste

2 tsp. fresh parsley

DIRECTIONS:

Preheat the oven to 375 degrees. Cook, drain and crumble the bacon. Slice the potatoes to 1/4 inch thick (use a mandolin slicer for the best results). But potatoes in a pan with cold water. Bring to a boil and cook for no longer than 5 minutes. Drain the potatoes immediately being careful not to break them.

Spray a stoneware tart pan with all natural cooking spray. Layer the potatoes in the dish, overlapping slightly. Sprinkle half the onions and garlic on top and season with salt and pepper. Cover the potatoes with half the cheese and sprinkle the top with half the bacon. Repeat with another layer.

In a separate bowl whisk the milk and egg. Add some salt and pepper. Pour the mixture over the potatoes. Sprinkle with parsley.

Cover and back for 75- 90 minutes or until the custard is cooked. Uncover and cook for an additional 10-15 minutes. Let rest for a few minutes before serving.

IMG_3172 2

 IMG_3184

Cheesy Potato and Green Onion Casserole…

For years I bought boxed potatoes to make potato casseroles to accompany a meal. The boxes contain a sleeve of freeze dried potatoes that look like petrified potato chips with a pouch of powdered cheese and flavorings, depending upon what kind you purchased (scalloped, au gratin, sour cream and onion, etc). To that you add some butter, water and milk, mix the conglomeration together and bake it in the oven. I never really thought about it, I just did it for the convenience of it all. NEVER AGAIN!

In previous blogs I’ve mentioned how over time I’ve begun to realize that there are many things you can easily make from scratch versus buying them pre-prepared at the grocery store. Things like applesauce, cranberry sauce, rouxs, pickles, soups, gravies, macaroni and cheese – the list can go on and on. The point is when you make something from scratch you control what goes into it. You control the sugars and sodium. You control the color naturally versus using dyes to achieve the desired affect. I’ve never made anything from scratch that included ingredients I could not pronounce much less spell, but I see them all the time on the packages at the grocery store.

I think we’ve come to believe that in the name of convenience it is ok to use prepackaged pre-prepared foods. And I am not one to point a finger at them, I’ve used them all my life. I guess what I’m trying to say here is that as I’ve become more adept in the kitchen I realize how easy it is to make things from scratch and in the end how much better that is for you. Don’t worry, I am not a purist. I’m sure in the name of convenience I will use a pre-prepared item myself from time to time. But more and more I’ve moved away from them and haven’t noticed a big difference in the time it takes to make certain things. Hence this recipe I am about to share.

oxo-hand-held-mandolineWhat makes this recipe so easy to make is a simple tool known as a mandolin slicer. There are tons of varieties out there, and the one in the picture to the right is what I use. When I publish something like this I always have to use the disclaimer that I work at Crate and Barrel. We carry a few varieties of mandolin slicers and this one is pretty affordable. I like it because it gives you a couple of different slicing widths, works well and it has the hand protector. But you can get a mandolin slicer just about anywhere and they can range in price from being extremely cheap to very expensive. If you invest in one, just make sure you at least get one that has some sort of hand protector.

One thing I have to stress here – if not used properly a mandolin slicer can be VERY DANGEROUS. You can slice a piece of your finger off just as easily as a piece of potato if you are not careful. Even with a hand guard you have to be very mindful when using one. The blades on these slicers are very sharp and before you know it, if you are not careful, you can really hurt yourself. So always use a mandolin slicer with the utmost care.

That being said, it is a great tool for quickly slicing things like potatoes, carrots, onions, etc. and getting even slices all the time. The key to success in this potato casserole recipe is the thin evenness of the potato slices. A mandolin slicer can give you that in no time flat (see the picture below). It would take much longer to do this by hand and the discs would not be nearly as precise in width.  So let’s talk a little bit about the lessons I learned developing this recipe.

IMG_2270

Lesson Learned 1 – Always use the mandolin slicer with the utmost care: I can’t help it, this just bares repeating. You won’t believe how easy it is to hack off a chunk of skin with this device. Please be careful using it. But when you use it safely, you will be amazed at how quickly you can produce nice even sized pieces of whatever you are slicing.

Lesson Learned 2 – This recipe is adaptable to a wide variety of cheeses: Normally some sort of cheddar cheese is a staple for this recipe. But over the holidays I had a disc of brie that I’d bought to make a holiday appetizer and I just mixed some of the remaining brie with the cheddar. Divine is all I can say about that. Gruyere is also a good cheese to use as well. Any good melting cheese or combination of compatible melting cheeses will do.

And speaking of melting cheese, don’t use prepackaged grated cheese. Those cheeses have an ingredient in them that keeps the grated pieces from sticking together. That ingredient also makes those cheeses difficult to melt. Grate the cheese yourself. You’ll get a much better consistency and much better flavor

The consistency of a roux

The consistency of a roux

Lesson Learned 3 – The formula for making any roux: Making a roux is the key to almost any homemade sauce or gravy. And you won’t believe how easy it is. All you have to do is remember one simple formula: equal parts butter and flour. This particular recipe uses three tablespoons of butter and 3 tablespoons of flour to create the roux. The amount you use can vary based on the size of the recipe. But remember it is always equal parts of each. The picture on the left shows what the consistency should look like, almost that of a thick, creamy paste.

I could not believe how simple this was to make and so much better than the boxed varieties. Play around with this one to see if you can create the flavor of cheese sauce you prefer the most. Right now I’m a cheddar and brie girl so that is how I am writing the recipe. But don’t be afraid to experiment with this one. I promise anything you do will be so much better than the boxed version of what you make. Enjoy!

Ready to pop into the oven...

Ready to pop into the oven…

Cheesy Potato and Green Onion Casserole…

  • Servings: 4
  • Difficulty: Easy
  • Print

INGREDIENTS:

2-3 large white russet potatoes, unpeeled

3 Tbs. butter

3 Tbs. flour

3-4 green onions, diced (use the green parts of the onion as well)

2 cloves garlic

1 tsp garlic powder

1 1/2 cups milk

1 cup grated cheddar cheese

1/2 cup brie cheese, cut into small pieces

Salt and pepper to taste

DIRECTIONS:

Preheat the oven to 375. Remove the skins from two cloves of garlic and drop them in a pot of cold water. Bring the pot of water to a boil on the stove, making sure the water is well salted. While the water is heating, cut the russet potatoes into 1/8 inch slices and put them in a bowl of cold water so they do not begin to brown. Slice the green onions and set aside. Grate the cheddar cheese and cut the brie into small pieces. Set both of them aside.

Once the water is boiling, put the potato slices in the water and cook them for about 5 minutes or until they just begin to soften.  When the potatoes begin to soften, gently remove them from the pan, drain them and pat them dry removing as much excess water as possible. Remove the discard the garlic cloves.

In a saucepan under medium heat, melt the butter. Add the flour and stir for about a minute until the mixture becomes a creamy paste (make sure to cook for about a minute so that there will be no flour taste). Add the milk and raise the heat to medium high. Once the milk begins to bubble you will notice it starting to thicken. Keep stirring the milk until it becomes thick. Once it thickens, add the garlic powder and cheeses. Stir until the cheeses are completely melted. Add the green onions and combine. Taste the mixture and add salt and pepper as needed. Remove the mixture from the heat.

Place the potatoes in a 1 1/2 quart casserole dish that was sprayed with cooking spray. Pour the cheese mixture over the potatoes. Bake at 375 for 50-55 minutes or until the potatoes are cooked through. For a finishing touch, at the end place the casserole dish under the broiler for a minute or two to brown the cheese.

IMG_2291

IMG_2308

Happy Thanksgiving Leftovers…

Happy Thanksgiving to all. And as you begin to wonder what you’ll do with the mound of turkey leftovers you’ll soon have in the refrigerator, think about making Shepherd’s Pie Turkey style(click on the red colored link for the recipe and lessons learned). 

Shepherds Pie Turkey Style...

Shepherds Pie Turkey Style…

I am thankful for everyone who takes the time to read this blog. Hopefully my lessons learned have helped you become more adept in the kitchen. Have a great Thanksgiving Day and thanks again for following this blog. It means a lot!

Soon I will venture into my holiday cookie baking ritual. Much more to come. Please feel free to share your favorite holiday recipes with me. I’d love to try some of them. Happy Thanksgiving!

And don’t forget:

cooking


Italian Sausage Tortellini Bake…

When I start to feel that Fall nip in the air I tend to think casserole. There’s just something about taking a bunch of ingredients mixing them together, sprinkling them with cheese and baking them off until they’re golden brown and bubbly. That says Fall to me.

IMG_0723I’m fond of this particular casserole for a variety of reasons. It’s one that helps you empty out the refrigerator, it’s easy to prepare and it also makes great leftovers. It started out with a package of cheese tortellini that I needed to use and then I morphed it into a dish that added a sautéed vegetable trinity, mushrooms, Italian sausage and a variety of cheeses. Needless to say that for a refrigerator clearing recipe it turned out mighty fine. And as with any casserole, all the work is in the prep. Once you’ve got it all together the oven does the rest.

Recipe Rating: A – easy to make, tons of great flavor – a stick to your ribs kind of dish.

IMG_0740Lesson Learned 1 – The beauty of this recipe is its adaptability: The basis for this recipe is tortellini, spaghetti sauce, mozzarella and parmesan cheese. You can do a down and dirty quick casserole with just those ingredients. Cook the tortellini according the packaged instructions, combine with sauce, top with cheeses and bake at 375 for 30 minutes. That’s it.  I had some celery, red pepper and mushrooms that I wanted to use. And I alway like to include onions and garlic whenever I can. To give the casserole more protein I added some italian sausage and I wound up with a “souped-up” casserole.

IMG_0748Lesson Learned 2 – The importance of deglazing: I prepped the ingredients for this casserole in the same pot in stages. I cooked the Italian sausage, browned the mushrooms, sautéed the onions, celery and pepper along with the garlic and at this point I had some lovely crusty bits on the bottom of the pan. I’ve learned over time that you never neglect those crusty bits. I’ll fill you in on a secret – that’s where all the flavor resides! I took a small amount of red wine (maybe one turn around the pan’s worth) and this nice cloud of smoke arose. After that I grabbed my trusty wooden spoon and voila – the crusty bits easily came off the bottom of the pan and combined with the other ingredients. Heaven!

IMG_0743Lesson Learned 3 – All ovens are not created equal: The cooking time in this recipe is based on my oven. When I researched similar recipes they said to bake this in the oven anywhere from 10 minutes to 30 minutes. I baked mine for 50 minutes and it turned out nicely browned, bubbly and hot all the way through. Get to know your oven and adjust the baking times accordingly. Since I live in high altitude I know that just about anything I cook in the oven will take longer than what is written in most recipes. So check your casserole at about 30 minutes and go from there.

This is a great fall supper. I served with with some roasted asparagus and crusty bread and it was a hit. Enjoy!


[recipe: title=”Sausage and Tortellini Bake…” servings=”6-8″ time=”1 1/2 Hrs. Including Prep” difficulty=”easy”]

Fresh out of the oven...

INGREDIENTS:

1 lb. ground Italian sausage, cooked – drained on paper towels

1 9 oz. package of tortellini, cooked according to packaged instructions and drained

1 medium sized onion chopped

3 medium sized celery stalks diced

1 sweet pepper, chopped

1-2 cloves of garlic, chopped

1 8 oz. package baby bella mushrooms, sliced

1-2 cups shredded mozzarella (half queso mozzarella preferred)

1/4 cup grated parmesan cheese or half parmesan, half romano

1 24 oz. jar of spaghetti sauce

Olive oil

1/8 cup dry red wine

Salt and pepper to taste

DIRECTIONS:

Preheat oven to 375. Cook tortellini according to packaged instructions. While the water is coming to a boil for the tortellini, add 1 Tbs. of olive oil to a hot pan. Cook Italian sausage until there is hardly any pink left in the meat. Drain sausage on paper towels and set aside.

In the same pan saute the mushrooms until lightly golden. Remove from pan and drain on paper towels. In the same pan add a little more olive oil and sauté the onions, celery and garlic. Salt and pepper to taste. Once slightly soft and translucent, add the chopped garlic and cook until fragrant – about 1 minute or less. Add the red wine and deglaze the pan. Add back the Italian sausage and mushrooms and heat through.

Drain the tortellini. In a large bowl combine the tortellini and sausage mixture until well combined. Pour mixture into a 3 quart casserole dish. Top with mozzarella cheese and then with grated parmesan (I used a grated parmesan and romano mixture as I had both cheeses in the refrigerator) Bake at 375 for 50 minutes (depending on where you live you may want to start checking this at 30 minutes) or until casserole is browned and bubbly.

[/recipe]


Ready to pop into the oven...

Ready to pop into the oven…

Fresh out of the oven...

Fresh out of the oven…

IMG_0806


IMG_0814


Baked Ziti With Sausage and Pancetta…

The weather is starting to turn. The temperatures are dropping and you can definitely feel Fall in the air. And for me Fall means cranking up the oven. I love grilling and I love dining al fresco but there is nothing like the smell of a pot roast slowing cooking in the oven. The aromas throughout the house make you want to curl up in front of the fire place with a glass of wine and just be glad you’re alive. I guess that’s why so many of these Fall dishes are called comfort food. They make you feel warm and cozy inside, even while they’re roasting away in the oven.

And this time of year I am also scrambling to figure out how to use my tomato crop. I never know from year to year how my tomato plants will fare but this year, due to the great growing conditions, I got a bumper crop. I was also fortunate this year. Just as the zucchini production began to wane the tomato production came into full force. And there are only so many salads you can make. So with all of these tomatoes I was on the hunt for a recipe that would not only warm the house but help me use a bunch of them. When I saw that this recipe called for 28 ounces of crushed tomatoes I thought to myself, heck – no need to buy a can, I can cut up what I have and that will do the trick. And did it ever. I got a delicious casserole and was able to use quite a few of my tomatoes in the bargain.

IMG_0031

I will say I was a little surprised at how long it took to assemble this casserole. But I think the main reason was that I hand chopped all of the tomatoes and that took the bulk of the time. I was also able to use some of my remaining fresh basil so that was a plus. I substituted bacon for pancetta (our local grocery store was out of it) and that worked well too. So all in all, a flavorful recipe that helped me use some of my garden bounty. Here is my recipe rating and lessons learned:

Recipe Rating: A- Great comfort food recipe: This a such a good recipe on a variety of levels – not only does it taste great but being able to use garden tomatoes and basil was definitely a plus. If you don’t have the tomatoes or the time to chop them just use a 28 ounce can of crushed tomatoes. That will work equally as well and will be much quicker.

IMG_0383Lesson Learned 1- You can substitute bacon for pancetta: You probably know already that when you don’t have or can’t find pancetta you can use bacon as a substitute. But did you know the difference between them? Both are made from pork belly and both are cured for a length of time. The major difference is that bacon is smoked after it’s cured and pancetta is not. So using bacon as a substitute will add a slightly smokier flavor to the dish. Needless to say, I used bacon and it turned out great. And I will definitely try this using pancetta to see if can discern a noticeable difference.

Lesson Learned 2 – How to perfectly align the stovetop cooking time: I found that if you start out by boiling the water for the ziti and then start the other ingredients right after you put the ziti into boiling water you can align the cooking times of all the ingredients. Keep in mind that this means that all the chopping and non-cooking prep is done prior to this, but once that’s done both the non-pasta and pasta ingredients cook within a similar timeframe. That allows you to do the final casserole assembly easily.

IMG_0404Lesson Learned 3 – The fresher the ingredients the better: Granted this is the first time I tried this recipe but I think the garden fresh tomatoes and basil made the flavor superb. I realize that having garden tomatoes in most areas is a once a year treat. If you have to use canned tomatoes I would recommend San Marzano tomatoes as they are known for their sweet flavor. At least don’t substitute dried basil for fresh basil in this recipe. If you don’t have basil in your garden buy some fresh at the grocery store. It will make a difference.

Lesson Learned 4 – The wonder of queso mozzarella: In the grocery store with the ethnic cheeses I found something called queso mozzarella. Using it I found it gives a creamier texture to recipes calling for mozzarella cheese. What I do is blend half queso and half regular shredded mozzarella when recipes calls for mozzarella. I think it melts better. And keep in mind, any prepackaged shredded cheese has an ingredient in it that keeps the shredded cheese from sticking together. That same ingredient also prevents it from melting as thoroughly as freshly shredded cheese. So the queso mozzarella helps to combat that. It’s very soft and takes no time whatsoever to grate.

Ready to pour into the casserole...

Ready to pour into the casserole…

Lesson Learned 5 – Take the time to grate fresh parmesan: We all love the convenience of pre grated parmesan cheese. I’ve used it over and over again in recipes, that is until I discovered the difference between packaged and freshly grated parmesan cheese. Freshly grated parmesan melts better and is bolder in flavor. And it is very easy to do, especially if your have a mini-prep processor like I do. All you have to do is cut the parmesan into small pieces, put it in the mini-prep and process it until is is grated. If you haven’t  tried it you really should. It makes a noticeable difference.

Lesson Learned 6 – Using a garnish: Garnishes are just that, something that dresses up the look of a dish but not essential to the recipe. I love Italian parsley for this purpose. I grew Italian parsley in a container on my deck this summer and it grew like a weed. I loved being able to go and snip off a bunch when I needed to.  That way I could control the amount I had versus buying a big bunch at the grocery store and throwing half of it away. Italian parsley is great as a garnish. Simply chop a little and sprinkle it on top of a dish and voila, it looks like the work of a professional chef. Never underestimate the power of a garnish. It can make a dish look fancy with no effort at all!

Ready to pop into the oven...

Ready to pop into the oven…

If you’re like me and you like casseroles you will love this dish. It’s also reheats well and is great for leftovers. Warm your house up with this one. You won’t regret it!

Baked Ziti With Sausage and Pancetta

  • Servings: 6-8
  • Difficulty: Easy
  • Print

INGREDIENTS:

12 ounces of ziti pasta

4 ounces pancetta or bacon, diced

1 large onion, diced

2-3 cloves of garlic (to taste)

1 pound ground Italian sausage

1 cup dry red wine

1 can of diced tomatoes (28 ounces), or diced garden tomatoes

Generous handful of fresh basil (approx. 1/2 cup)

1/2 tsp. kosher salt

1/2 tsp. crushed red pepper flakes (optional)

1 cup ricotta cheese

1 cup mozzarella cheese, divided  (1/2 cup queso and 1/2 cup shredded preferred)

1/2 cup freshly grated parmesan cheese

1 Tbs. Italian seasoning

Italian parsley for garnish

DIRECTIONS:

Preheat oven to 350 degrees. Do all the prep work first: slice the bacon into lardons, chop the onion, mince the garlic, and grate the parmesan and mozzarella cheeses.

Bring a large pot of water to a boil. Add the ziti and cook according to the package directions. Meanwhile in a large pan cook the pancetta for about 3 minutes (you don’t want to crisp it). Add the onion and sauté for an additional 3 minutes. Add the garlic and sauté until fragrant (30 seconds to 1 minute). Add the sausage and cook until the meat is no longer pink. Add the wine and cook for approximately 3 minutes. Use the wine to deglaze the pan.  Stir in the tomatoes and basil. Reduce the heat and cook for only a couple of minutes.

Drain the pasta and add it to the pan. Stir in the ricotta and half of mozzarella. Put into a 9×13 baking dish. Sprinkle the top with the remaining mozzarella and parmesan. Sprinkle Italian seasoning on top of the cheese.

Bake at 350 for 25 to 30 minutes or until the casserole is bubbly and the cheese is nicely browned.

Straight Out Of The Oven...

Straight Out Of The Oven…

Baked Ziti With Sausage and Pancetta

Baked Ziti With Sausage and Pancetta

Serving Suggestion: Baked Ziti with Garlic Bread...

Serving Suggestion: Baked Ziti with Garlic Bread…


Cheesy Zucchini Mushroom Bake…

I guess at this point you can probably tell that I’ve been a little fixated on zucchini recipes and with good reason. The zucchinis just keep coming and coming. Every day it seems I’m harvesting two to three new zucchinis. Last year my zucchini plant (I only have one as I have limited space in my garden) hardly produced anything. This year my plant is producing prolifically. Go figure. Mind you, I am not complaining. The challenge is to determine ways to use all this zucchini as I won’t let any go to waste. I know I can give them away if I need to, but most of my neighbors are looking to give their zucchini away as well. Some have even gone to the lengths of just leaving them on neighbor’s door steps. The whole neighborhood must be over run. So my challenge – how can I not only use my zucchini but also make it exciting when having it several times a week.

IMG_9540The latest recipe I tried was a side dish.  Those are probably the easiest recipes to find. This recipe came off of a website that featured 35 different zucchini recipes and I always like to one stop shop. This one seemed relatively easy and so I thought I’d try it. The original recipe called for paring zucchini with yellow squash and I think that would have been perfectly fine, but I had so much zucchini that I wanted to use and so I just skipped the yellow squash. I did add some mushrooms that I had and that worked very well (I always seem to have mushrooms in my refrigerator). My point is that this recipe is adaptable and I am all for adaptable. Bottom line, this is an easy recipe to prepare and it’s actually quite good. I had some issues with how the recipe was written and I will share those in my lessons learned.

Recipe rating: B+ – most of my issues came from how the recipe was written as I am a stickler for detail and how to achieve success the first time you make something. In my experience even the best of recipes are seldom tried again if they can’t be done well the very first time. These days everyone is so busy that recipe success the first time around is just about a given for making a recipe again. This one had one critical piece of information missing that, in my estimation, made the dish look great as well as taste great.

IMG_9550Lesson Learned 1 – prepping ahead: The beauty of this recipe is that it can be prepped ahead and put into the oven when needed. I prepped all of the ingredients about an hour ahead of time and simply covered them in plastic wrap and put them into the refrigerator. The only other thing I did was to take it out of the fridge about 15 minutes before putting it into the oven to take the chill off. Right before putting it in the oven I topped it with some additional cheese. I am thinking this is something that can be prepped in the morning and then finished off when you get home from work – a nice little advantage especially for a busy day.

Lesson Learned 2 – use fresh herbs whenever possible: The original recipe called for 1/2 teaspoon of dried thyme. I have thyme growing in my garden and I used that. You always need to add more of an herb if it is fresh, so I substituted 1 teaspoon of fresh thyme and I felt it gave the side dish a great flavor boost.

Ready to go into the oven

Ready to go into the oven

Lesson Learned 3 – you eat with your eyes first: How often have you heard someone say, “Oh that looks delicious!” When you think about it, it’s really a sort of oxymoron since something can only taste and not look delicious. But the truth of the matter is we eat with our eyes first. If something looks great, we automatically assume it will taste great. And this is probably my biggest bug-a-boo with the original recipe. That recipe called for baking the ingredients uncovered for 25-30 minutes then adding the remaining cheese and baking it for an additional 10-15 minutes. I would never have gotten the rich color on the cheese by doing that. What I wound up doing is putting the dish under the broiler for the last 5 minutes thereby getting those nice brown bits of color on the cheese. If I had not done that, the top would’ve just looked gooey white. Getting the browning from the broiler, in my estimation, makes the dish look much more inviting. Believe me, it did not look nearly as inviting when I followed the directions in the original version of the recipe. At 350 degrees you would have to cook the cheese much longer to get it to brown on top.

I realize that my rant about using the broiler may be very picky, and it probably is. Don’t let that deter you from trying this recipe. It’s a great way to use up some of that extra zucchini and I’m pretty sure it will be a family pleaser as well.

Right Out Of The Oven

Right Out Of The Oven

Cheesy Zucchini Mushroom Bake

  • Servings: 6
  • Difficulty: Easy
  • Print

INGREDIENTS:

4 medium zucchini

4-6 ounces of baby portobella mushrooms sliced

3 Tbs. chopped fresh basil (this can be adjusted depending upon personal taste)

2 green onion spears thinly sliced (white and green parts)

1 tsp. fresh thyme chopped (1/2 tsp. dried thyme)

3/4 tsp. garlic powder

1 cup cheese, divided (I used a combination of mozzarella and pizza cheese – you can use more cheese if you like, I think I actually used 1 1/2 cups of these cheeses all total)

1/2 cup parmesan, divided

salt and pepper to taste

DIRECTIONS:

Preheat the oven to 350 degrees. Wash and cut the zucchini into half moons. Slice the mushrooms into thick slices. Finely chop the basil. Thinly slice the green onions. Chop the fresh thyme.

Combine the sliced squash, mushrooms, basil, onion, thyme garlic powder and half of each of the cheeses. Stir carefully to combine all of the ingredients making sure that the cheese and herbs are well distributed. Season with salt and pepper. Put the mixture in an 8 x 8 baking dish that has been sprayed with cooking spray. (At this point I added a little more cheese on the top). Bake uncovered for 25 minutes.

Take the dish out of the oven and sprinkle with the remaining cheese. Let bake for an additional 5 – 10 minutes then place casserole under the broiler for the last 5 minutes. Let stand for a few minutes and serve.

Cheesy Zucchini Mushroom Bake

Cheesy Zucchini Mushroom Bake

Serving Suggestion: With Grilled Chicken Breast and Oven Baked Potato Chips

Serving Suggestion: With Grilled Chicken Breast and Oven Baked Potato Chips

Zucchini Mushroom Gratin…

It’s that time of year again. I’ve already harvested five zucchinis from my one zucchini plant and by the looks of things there are plenty more to come. This is the time of year that I start scrambling to locate as many zucchini recipes as I can find so that I don’t waste one precious home-grown squash. And although I am always on the lookout for new recipes, I also have some tried and true ones that I look forward to making every year at this time as well.

A zucchini from my garden...

A zucchini from my garden…

One of my all time favorites is a version of a recipe from Ina Garten. I’ve mentioned Ina several times in this blog. She is a cook that inspired me not only to make new and different things but to believe that I can and be successful at it.

I’d never heard the term gratin before I made this recipe and it’s a term that I found is not in most fledgling cooks’ vocabularies. A gratin originated in French cuisine and it simply means a dish that is topped with a browned crust achieved either through a baking or broiling process. You can make a gratin out of just about anything, potatoes, artichokes, cauliflower – you name it. I especially like to make a zucchini gratin since it is not only delicious but also another recipe in my arsenal to deal with the onslaught of zucchini I get at this time of year.

My very happy zucchini plant...

My very happy zucchini plant…

I saw Ina make her recipe on a Food Network episode and I’ve been making it ever since. I have amended it to appeal to my personal tastes but the basis of the recipe is Ina’s (if you want to see her recipe it is on the Food Network site). So I will rate her recipe and then include my version of it for you to try.

Recipe Rating: A++++++++ This is definitely one of the best recipes ever. It is easy to make and a great accompaniment to any meal. A hint of nutmeg gives wonderful flavor to this recipe. I highly recommend trying this one!

Saute the zucchini and mushrooms gently...

Saute the zucchini and mushrooms gently…

Lesson Learned 1- Sautee the zucchini and mushrooms gently: Ina’s recipe calls for cooking the zucchini covered for about 10 minutes before making the white sauce. In my experience, cooking the zucchini for that amount of time made it limp before you even put it in the oven. I cook my zucchini and mushrooms for five minutes just to take the “edge” off of them and let the oven do the rest. That way when you serve the gratin the vegetables still have some body.

Lesson Learned 2- Making a white sauce: This recipe includes making a simple white sauce for the zucchini and mushrooms to simmer in. The first step is to add flour to the zucchini/mushroom mixture. Make sure you cook that flour for at least a minute before you add the milk. It will create a whitish looking goo on the vegetables but don’t worry about that. Just keep stirring until it’s time to add the milk. The reason you cook it for a minute is to get rid of any floury taste. You certainly don’t want your white sauce to taste like flour. Once you add the milk the whitish goo will begin to disappear right before your eyes and you will wind up with a rich, thick white sauce.

Cook until the sauce becomes rich and thick...

Cook until the sauce becomes rich and thick…

Lesson Learned 3 – Bread crumbs versus croutons: Last week I made a hash brown casserole that called for a crushed crouton topping. I loved it so much on that recipe that I tried it on this one and it turned out perfectly. The original recipe stipulates to cover the top with bread crumbs mixed with grated Gruyere cheese. Maybe if you made home made bread crumbs the end result would be similar to that of using croutons, but I thought the croutons added a greater crunch and more flavor. You can try topping it either way but at this point I prefer the crushed croutons.

Lesson Learned 4 – A little nutmeg goes a long way: I’d never cooked with nutmeg before I made this recipe and I can tell you it adds a great depth to the gratin but you need to be careful when you use it. A little bit of nutmeg goes a long way and it can easily overpower a dish if you use too much. My advice is to use exactly what the recipe recommends. Then in subsequent bakings try to vary the proportion. My guess is that if you choose to vary it, it will be for a lesser rather than a greater amount.

Lesson Learned 5 – Oven times vary: This seems to be a regular “lesson learned” in my recent posts but rarely does a dish come out of my oven the way it is supposed to in the time written in a recipe. I assume that part of the issue is living in high altitude and the other is how my oven is calibrated. The original recipe says to bake the gratin in the oven for 20 minutes. In order for me to get a nice bubbly casserole I have to bake mine for 40-45 minutes. This is where it can get somewhat frustrating for the fledgling cook. But never fear, in time you will learn the ins and outs of your oven and be able to plan accordingly.

Place the croutons in a bag and crush with a rolling pin...

Place the croutons in a bag and crush with a rolling pin…

The beauty of this recipe is that it’s not difficult to make but tastes like you slaved all day in the kitchen. Over time, because the directions are so true to form, I’ve not gleaned a lot of lessons learned making it and I view that as the beauty of the recipe. It is the kind where you can be successful making it the first time and every time. If you’re like me at this time of year, desperately searching for various ways to cook my zucchini crop, this recipe is a must. Try it – I know you’ll like it as much as I do.

Zucchini Mushroom Gratin

  • Servings: 4-6
  • Difficulty: Easy
  • Print

Brown and bubbly out of the oven...

Brown and bubbly out of the oven…

INGREDIENTS:

3 Tbs. butter (plus some for on top of the crushed croutons)

1 medium size onion, diced

2-3 medium zucchini cut in to 1/4 inch rounds

4-6 ounces of portobella mushrooms cut in thick slices

1/8 tsp. nutmeg

2 Tbs. flour

1 cup warm milk

3/4 cup crushed croutons or bread crumbs

1 cup grated Gruyere cheese, divided

Salt and pepper to taste

Flat leaf parsley for garnish

DIRECTIONS:

Preheat the oven to 400 degrees. Pour the milk into a saucepan and warm under a very low heat (you don’t want the milk to boil, you just want to get the chill out of it). Grate the Gruyere, dice the onions and slice the zucchini and mushrooms and set aside. Put the croutons in a plastic bag, seal the bag and crush them with a rolling pin. Set the bag aside.

Melt the butter in a large sauté pan. Add the onions and cook under low to medium heat until translucent (about 5-7 minutes). Add the zucchini and mushrooms, cover the pan and cook for about 5 minutes (you do not want the zucchini to be limp). Uncover, salt and pepper to taste and add the nutmeg.

Stir in the flour. Cook for at least one minute. Add the warm milk and 1/4 cup grated Gruyere cheese and cook over a low heat until the sauce thickens. Pour the mixture into a 1 1/2 – 2 quart baking dish.

Combine the croutons (or bread crumbs) with the remaining Gruyere and sprinkle on top of the zucchini mixture. Dot with small amounts of butter and bake until bubbly and browned. (the original recipe called for the casserole to bake for 20 minutes, I had to bake mine for 40-45 minutes).

Let sit for 5 minutes, garnish with chopped flat leaf parsley and serve.


Ready to go into the oven...

Ready to go into the oven…


Brown and bubbly out of the oven...

Brown and bubbly out of the oven…

Serving Suggestion: garnish with flat leaf parsley...

Serving Suggestion: garnish with flat leaf parsley…

Hashbrown Casserole…

Pasta is ok, rice really does nothing for me but give me potatoes and I’m all over it. There is no way that you can cook a potato that I won’t like. Potatoes were a staple at just about every meal I had growing up and my so my love affair with this root (yes it is neither a fruit nor a vegetable but a root) has spanned my entire life. So when I find a potato recipe that intrigues me, I have to try it.

The original recipe from which I’ve based my version in this blog comes from a website called thefrugalgirls.com. I liked the recipe concept because it appeared easy to prepare and was a different way of making potatoes than the traditional ways of baking them, mashing them or grilling them. Coupled with the fact that I already had most of the ingredients plus I needed to fulfill my goal of one new recipe a week, this became no brainer – I had to make this casserole and blog about it. So without further adieu, here is my recipe rating, lessons learned and my version of the recipe.

Hash Brown Casserole Ingredients...

Hash Brown Casserole Ingredients…

Rating A+ – not only is this very easy to make but it smells heavenly when it’s baking in the oven. Anything that combines flavorful potatoes and good kitchen smells is always a hit with me. You really have to try this one.

Lesson Learned 1 – This recipe adapts easily: The original recipe filled a 13 x 9 baking dish. Cutting it in half allowed me to put it in an 8 inch square dish which was just enough for me and my husband with leftovers for an additional meal. But if you have a large family to feed just double everything in the recipe and use the larger pan.

Lesson Learned 2 – Topping a casserole with crushed croutons: Recipes like this are quite often topped with bread crumbs. This recipe called for topping the casserole with crushed croutons. I LOVED IT! The croutons gave a perfect crispiness to the top of the hash browns, just as if the potatoes had been browned in a frying pan. I found the crushed croutons had a much crispier texture than bread crumbs. I am definitely going to try topping other casseroles with crushed croutons instead of bread crumbs. I think it made a big difference.

Lesson Learned 3 – Use fresh garlic: The original recipe called for 1/8 teaspoon salt and 1/8 teaspoon of garlic salt. I didn’t like the idea of adding that much salt so I substituted one minced garlic clove for the garlic salt. It was fabulous. I figured if the potatoes needed more salt you can always salt them at the table while you’re eating versus adding a lot in the recipe itself.

Lesson Learned 4 – Shred the cheese by hand: The recipe called for shredded cheddar cheese. I’ve recently learned that the shredded cheese bags you buy at the grocery store have an additive in them that is designed to prevent the cheese from clumping together. But that additive also prevents the cheese from melting smoothly. Plus it is an additive and the more you can eliminate additives from your life the better. So take the few extra minutes buy a hunk of good cheddar cheese and use a grater to shred it yourself. The result is so much better in the recipe and better for you as well.

Ready To Go Into The Oven

Ready To Go Into The Oven

Lesson Learned 5 – Make caloric adjustments where you can: This is a very rich recipe so any places where you can make adjustments to lessen the fat or salt will still produce a great casserole that is full of flavor while also having less calories. I used light sour cream, fat free milk, low sodium soup and substituted fresh garlic for garlic salt. The recipe turned out perfectly.

Lesson Learned 6 – Use butter and not a butter substitute or margarine: I know this may seem to go against what I just said in the previous lesson learned, but just take a minute to look at the ingredients in butter and then compare them to the ingredients in margarine or any butter substitute. Tell me if you can pronounce some of the ingredients in the substitutes. It’s scary to think about what you might be eating. If you have to use a fat, use the one that has the purist of ingredients which in this case is none other than good old fashioned butter.

Lesson Learned 7 – Not all baking times are created equal: The original recipe called for baking the casserole at 350 degrees for 35-45 minutes. My long standing experience with high altitude made me leery of not only the timeframe but also the temperature. I will include in the recipe below the original cooking instructions but will tell you that I had to crank my oven up to 375 and cook this for an hour and it turned out perfectly. What I’m basically saying here is you may have to adjust your cooking time based on your oven and where you live. Just be aware of that.

Lesson Learned 8 – The leftovers are fabulous: The leftovers are equally as good if not better than when it was fresh out of the oven. Just reheat them covered in foil in a 375 degree oven for 30 minutes. The flavors have had some time to meld and the top and ends get even crispier. Can’t beat that!

Right Out Of The Oven

Right Out Of The Oven

Once again, the real work in this recipe is preparing it. Once you get the mixture together, all you have to do is pop it in the oven and let it do the rest of the work for you. This is a great accompaniment to almost any meal so try it. I know you’ll like it!

Hasbrown Casserole

  • Servings: 4
  • Difficulty: Easy
  • Print

INGREDIENTS:

1/2 pkg. frozen shredded hasbrowns (package size usually 1 lb. 14 oz.)

8 oz. light sour cream

1/2 can cream of mushroom soup (low sodium preferred)

4 oz. shredded cheddar cheese (freshly grated not packaged preferred)

1/8 cup milk (fat free or low fat preferred)

1/2 small onion, chopped

1/2 stick of butter, melted

1/8 tsp. salt

1/8 tsp. pepper

1 clove garlic, minced

1 cup seasoned croutons crushed

DIRECTIONS:

Preheat the oven to 375. (*The original recipe called for the oven to be set at 350 and to cook the casserole for 35-45 minutes. I live in high altitude so everything takes a little longer to cook and at a higher temperatures. Use what you think will fit your needs but I think keeping it in the oven a little longer gives it an even crispier crust). Thaw hashbrowns slightly for easier mixing. Crush the croutons (the easiest way to do this is to put them in a plastic bag and mash with a rolling pin or meat mallet). Set the croutons aside.

Combine the hashbrowns, soup, cheese, milk, onion, garlic, salt and half the melted butter. Grease a 8 x 8 pan with a very light coating of butter. Place the hashbrown mixture in the prepared dish. Spread croutons evenly over the top and drizzle them with the remaining butter.

Bake at 375 degrees for 45 minutes to an hour (*see notes at beginning of recipe). The casserole should be bubbly and the top should be golden and crisp. Let stand for a few minutes and serve.

Hashbrown Casserole

Hashbrown Casserole

Shepherds Pie Turkey Style…

I’ve always liked the concept of Shepherds Pie, it’s a great way to use leftover pot roast – but what about using poultry as the main protein? A grocery store near my home often features fresh half turkey breasts on the bone and I love them. Because of their smaller size, it’s a great way to have turkey more often than just during the holidays, it’s easy to cook and you still get great turkey leftovers to boot. The only difference is that now I don’t have all of the other holiday side dishes to serve with the leftover turkey, and I wanted to try something a little different than just a turkey pot pie.

Spread The Turkey Over The Bottom of the Dish

Spread The Turkey Over The Bottom of the Dish

I’m beginning to wonder what I would do without Pinterest. What great way to find recipes from sites I would probably never find otherwise. My blog now also links to my taste.com and there you can find a compilation of tons of recipes from a variety of different food blogs. I’ve just started connecting with that site and if you want to find my recipes (and there are only a few of them featured right now but there will be more to come) just type in “jan geden” in the search engine and my recipes will pop up.

But this time I found a recipe on Pinterest that I adapted and to my surprise it turned out great. I am now becoming a little more sure of myself in the kitchen with a better understanding of what will and will not work, especially in high altitude. And although this was adapted from a recipe called turkey potato casserole from all recipes.com, it is my version of it with several changes I made based on what I had in my refrigerator at the time. So, here are my lessons learned and recipe rating.

Saute the Veggies...

Saute the Veggies…

RATING: A+ – I wish I could give it a few more pluses but the only drawback was the casserole did not get as hot as I would have liked it even with the time I added on to the original recipe. Next time I will bake it longer and at a slightly higher temperature. Otherwise it was very flavorful and definitely a great way to use leftovers in a casserole.

Lesson Learned 1: COOKING TIME – and once again as I’ve stated several times before, things take longer to cook in high altitude. The original recipe called for the casserole to bake for 30-40 minutes at 350. 350 to me automatically means at least 365-375. I baked it for 50 minutes at 365 and it was warm, but this recipe needs to be served piping hot. Next time I will do 375 for an hour and I bet it will be perfect.

Layer The Veggies Over The Turkey

Layer The Veggies Over The Turkey

Lesson Learned 2: ADAPTABILITY – I love this recipe because it is easily adaptable. The original recipe called for adding only onion and frozen green beans. When I read the reviews, someone suggested that they used peas instead of the beans. I liked that idea better. I also had some mushrooms (don’t I always) and a lot of carrots in my refrigerator. I chopped the onions and carrots, sliced the mushrooms and sautéed them until the carrots were softened and added them to the mixture along with some frozen peas. The next time I might even add a little chopped celery. The vegetable medley really added to the flavor of the dish in my opinion.

Lesson Learned 3: PRE-MADE MASHED POTATOES – what a time saver they were. The pre- made mashed potatoes that you can get now in the grocery stores are really very good. I think I got a tub of Country Crock garlic mashed potatoes, but any brand will do. All I did was microwave them for about 3 minutes, stir them and spread them on top of the casserole. It worked out perfectly.

Spread Soup Mixture On Top Of Veggies

Spread Soup Mixture On Top Of Veggies

Lesson Learned 4: CHEESE – the recipe called for cheddar cheese to be mixed with the cream of mushroom soup and the mashed potatoes. I decided to get a three cheese blend and I only mixed it with the soup and not the mashed potatoes. That way you save a little on the calorie side and the cheese blend, in my opinion, melted better than just using cheddar cheese alone.

Lesson Learned 5: LEFTOVERS – this also makes great leftovers and warms up very nicely after a few minutes in the microwave.

On average I’ve found that although casseroles have the appeal of a one pot meal, they generally take some work to put them together. And although this version involves some chopping and sautéing, the finished product is well worth the time and effort. I plan on making this one often it was that good. Enjoy!

Fresh Out Of The Oven

Fresh Out Of The Oven

Shepherds Pie Turkey Style…

  • Servings: 4-6
  • Difficulty: Easy
  • Print

INGREDIENTS:

2 cups diced cooked turkey meat

1 onion chopped

1 large clove of garlic chopped

1 cup frozen peas

1 cup carrots diced small

4 ounces sliced baby bella mushrooms

1 can cream of mushroom soup

6 ounces shredded three cheese blend

3 TBS butter

1 tub (28 oz) pre-made mashed potatoes (or you can use leftover fresh mashed potatoes)

DIRECTIONS:

Preheat oven to 375. Dice turkey and put in the bottom of a 8×8 casserole dish. In a large pan, melt  the butter and sauté the onions and carrots for a few minutes before adding the mushrooms. Continue to sauté until onions are translucent and carrots have started to soften. During the last minute of cooking add the garlic until the garlic becomes fragrant. Remove from heat and set aside.

Microwave the mashed potatoes for approximately 3 minutes. While potatoes are in the microwave, mix the cheese and the soup together in a small bowl. After 3 minutes, take the potatoes out of the microwave and stir to soften.

Put the vegetable mixture over the turkey and spread the soup and cheese mixture on top of it. Spoon the softened mashed potatoes over the soup mixture and spread out evenly to cover the entire casserole.

Bake in the oven for 40-60 minutes or until heated through. Serve immediately.

Shepherds Pie Turkey Style...

Shepherds Pie Turkey Style…


Chicken, Broccoli, Mushroom, Cheese and Rice Casserole…

Casserole Ingredients

Casserole Ingredients

Right out of the gate I will tell you that I had a love-hate relationship with this recipe. I loved the way it tasted and I will definitely make it again. My husband gave it a two thumbs up so I know it’s a keeper. What I hated was how the recipe was written and that is always a big sticking point with me. I try to be empathetic toward recipe authors as I understand I live in high altitude and that changes the rules somewhat. But even with that, I find it hard to believe this recipe (I amended it for you in this blog) as originally written would even work at sea level. So for my non-intuitive cooking friends out there, beware. I suggest you do the recipe the way I’ve written it and I think you will be successful on the first try.

This recipe came from the website http://www.keyingredient.com. From what I can tell, it appears that people submit recipes and they are published on this site. This particular recipe was intriguing to me as I had all of the ingredients already and I was looking to try something different. My goal is to try one new recipe a week and blog about it. So this recipe helped me on both fronts. So here is my rating and lessons learned along with my version of the recipe. You can always search for the original recipe on the key ingredients website.

RATING: A: for flavor and ease of preparation, F: for how the recipe was written. With a few simple adjustments this recipe could easily get an “A” on both counts. But in my estimation it was not well written.

Saute the Mushroom and Onions First

Saute the Mushroom and Onions First

LESSON LEARNED 1: The original recipe called for either 3 cups of cooked rice or 1 cup of uncooked rice, with no differentiation in cooking time for either one. Even I know that there has to be some sort of a difference, right? You can’t expect uncooked rice to turn out the same as cooked rice without some adjustment to the cooking time. So adjust I did, and even with that the rice still turned out slightly crunchy. The original recipe called for a cooking time of 350 for 30 minutes. So for me, in high altitude, that normally means I set my oven to 365. But I just had a feeling that 30 minutes would not cut it, so I planned on a 45 minute timeframe. After 45 minutes I looked at the casserole and it still did not seem as hot and bubbly as I would like it so I cranked the temperature up to 375 and cooked it for another 15 minutes. And even with all that time, the rice was still not fluffy and in some instances slightly crunchy. Lesson learned for me: the next time I make this I will cook it at 375 for 1 hour using cooked rice. I will cover the casserole with foil for the first 45 minutes and leave it uncovered for the last 15 to get some good browning on top of it.  If you choose to use uncooked rice remember to adjust your time. What that time might be I cannot tell you as I have no clue. All I can tell you is that after an hour it was not completely cooked through for me.

LESSON LEARNED 2: This is also a big bug-a-boo of mine. In a recipe be clear about whether a dish should be covered or uncovered in the oven. Don’t assume I know. This recipe calls for cheddar to be put in the sauce as well as sprinkled on top and did not indicate anything regarding whether the dish should be covered or not. In my experience, cheddar cheese left uncovered on casseroles for a long time tends to look burnt. I covered the casserole with foil for the first 45 minutes and then left it uncovered for the last 15. It worked out beautifully.

Blend the cheddar cheese with soup mixture until completely melted

Blend the cheddar cheese with soup mixture until completely melted

LESSON LEARNED 3: The orignal recipe calls for sautéing the onions in margarine. Why margarine instead of butter? Butter is a much purer ingredient. I used butter instead.

LESSON LEARNED 4: I was surprised how long it took for the cheddar cheese to melt in the soup mixture. It took about 5 minutes and required constant stirring. So be patient, it will melt but it does take time. (This was probably the most labor intensive part of the process).

LESSON LEARNED 5: The original recipe called for 2 cups of frozen broccoli. Although frozen vegetables are of much higher quality than they used to be, why not use fresh? I used fresh broccoli chopped into bite size pieces. The broccoli turned out perfectly, crisp tender. So use fresh broccoli if you can. I think frozen broccoli might turn out mushy in this recipe.

The first layer of rice, broccoli and 1/3 of the soup mixture.

The first layer of rice, broccoli and 1/3 of the soup mixture.

Don’t get me wrong, I really liked this recipe. It would have been tremendous if the rice was cooked properly. So give this one a try and try it the way I am writing it. I think you will be much more successful that way.

Chicken Broccoli Mushroom Cheese and Rice Casserole

  • Servings: 4-6
  • Difficulty: Easy
  • Print

INGREDIENTS:

3 cups cooked rice

3 cups cooked chicken (rotisserie chicken or any other type of precooked chicken, drained)

2 cups broccoli (fresh or frozen – no need to thaw) chopped into bite size pieces

1 can cream of chicken soup (low sodium preferred)

1 can cream of mushroom soup (low sodium preferred)

3 TBS. butter

1/2 cup chopped onion (more if desired)

1 clove garlic, minced (more if desired)

1 cup sliced portobello mushrooms

8 ounces of shredded cheddar cheese

DIRECTIONS:

Preheat the oven to 375. Cook 1 1/2 cups of rice (this should yield 3 cups of cooked rice) according to package directions. (Minute rice is not advised for this recipe). Cut chicken and broccoli into bite sized pieces. Slice mushrooms, chop the onion and mince the garlic clove. Melt butter and sauté the mushrooms for a couple of minutes. Add the onions and cook until slightly translucent. Add the garlic and sauté until fragrant, about 30 seconds. Add both cans of soup and stir until combined and hot. Add 6 ounces of the cheddar cheese and stir until melted (this could take about 5 minutes before the cheese is completely melted).

Grease or spray a 3 quart casserole dish. Spread rice evenly on the bottom. Put broccoli on top of rice. Pour about 1/3 of the soup mixture over the broccoli and rice. Add chicken and top with remaining sauce. Top with remaining two ounces of cheese.

Cover with with foil and cooked covered for the first 45 minutes. Remove foil and return to oven for an additional 15 minutes. Let stand for 5 minutes before serving.


Ready to pop in the oven...

Ready to pop in the oven…


Fresh Out Of The Oven...

Fresh Out Of The Oven…

Chicken Broccoli Mushroom Cheese and Rice Casserole

Chicken Broccoli Mushroom Cheese and Rice Casserole