Garlic and Rosemary Balsamic Roasted Pork Loin and Potatoes…

The one thing I really love about Fall is cranking up the oven again. I do a lot of grilling over the Summer and I love that too. But those smells in the house when something is roasting in the oven just can’t be beat. It makes a house a home.

So I decided to crank up the oven the other day. I haven’t had pork in a while and I thought I’d try that. More often than not when I make a pork roast I use a pork loin. The meat is so tender and I perfected roasting it so that it’s cooked but not dried out. And if you want my secret for roasting a perfect pork loin every time just click on my blog’s tips and tricks post and you’ll never have a dry pork loin roast again.

But although pork loin is moist I find it always needs a little help in the flavor department. And whether you marinate it or use some sort of rub, that’s usually enough to up the flavor factor. And that’s exactly what this recipe does.

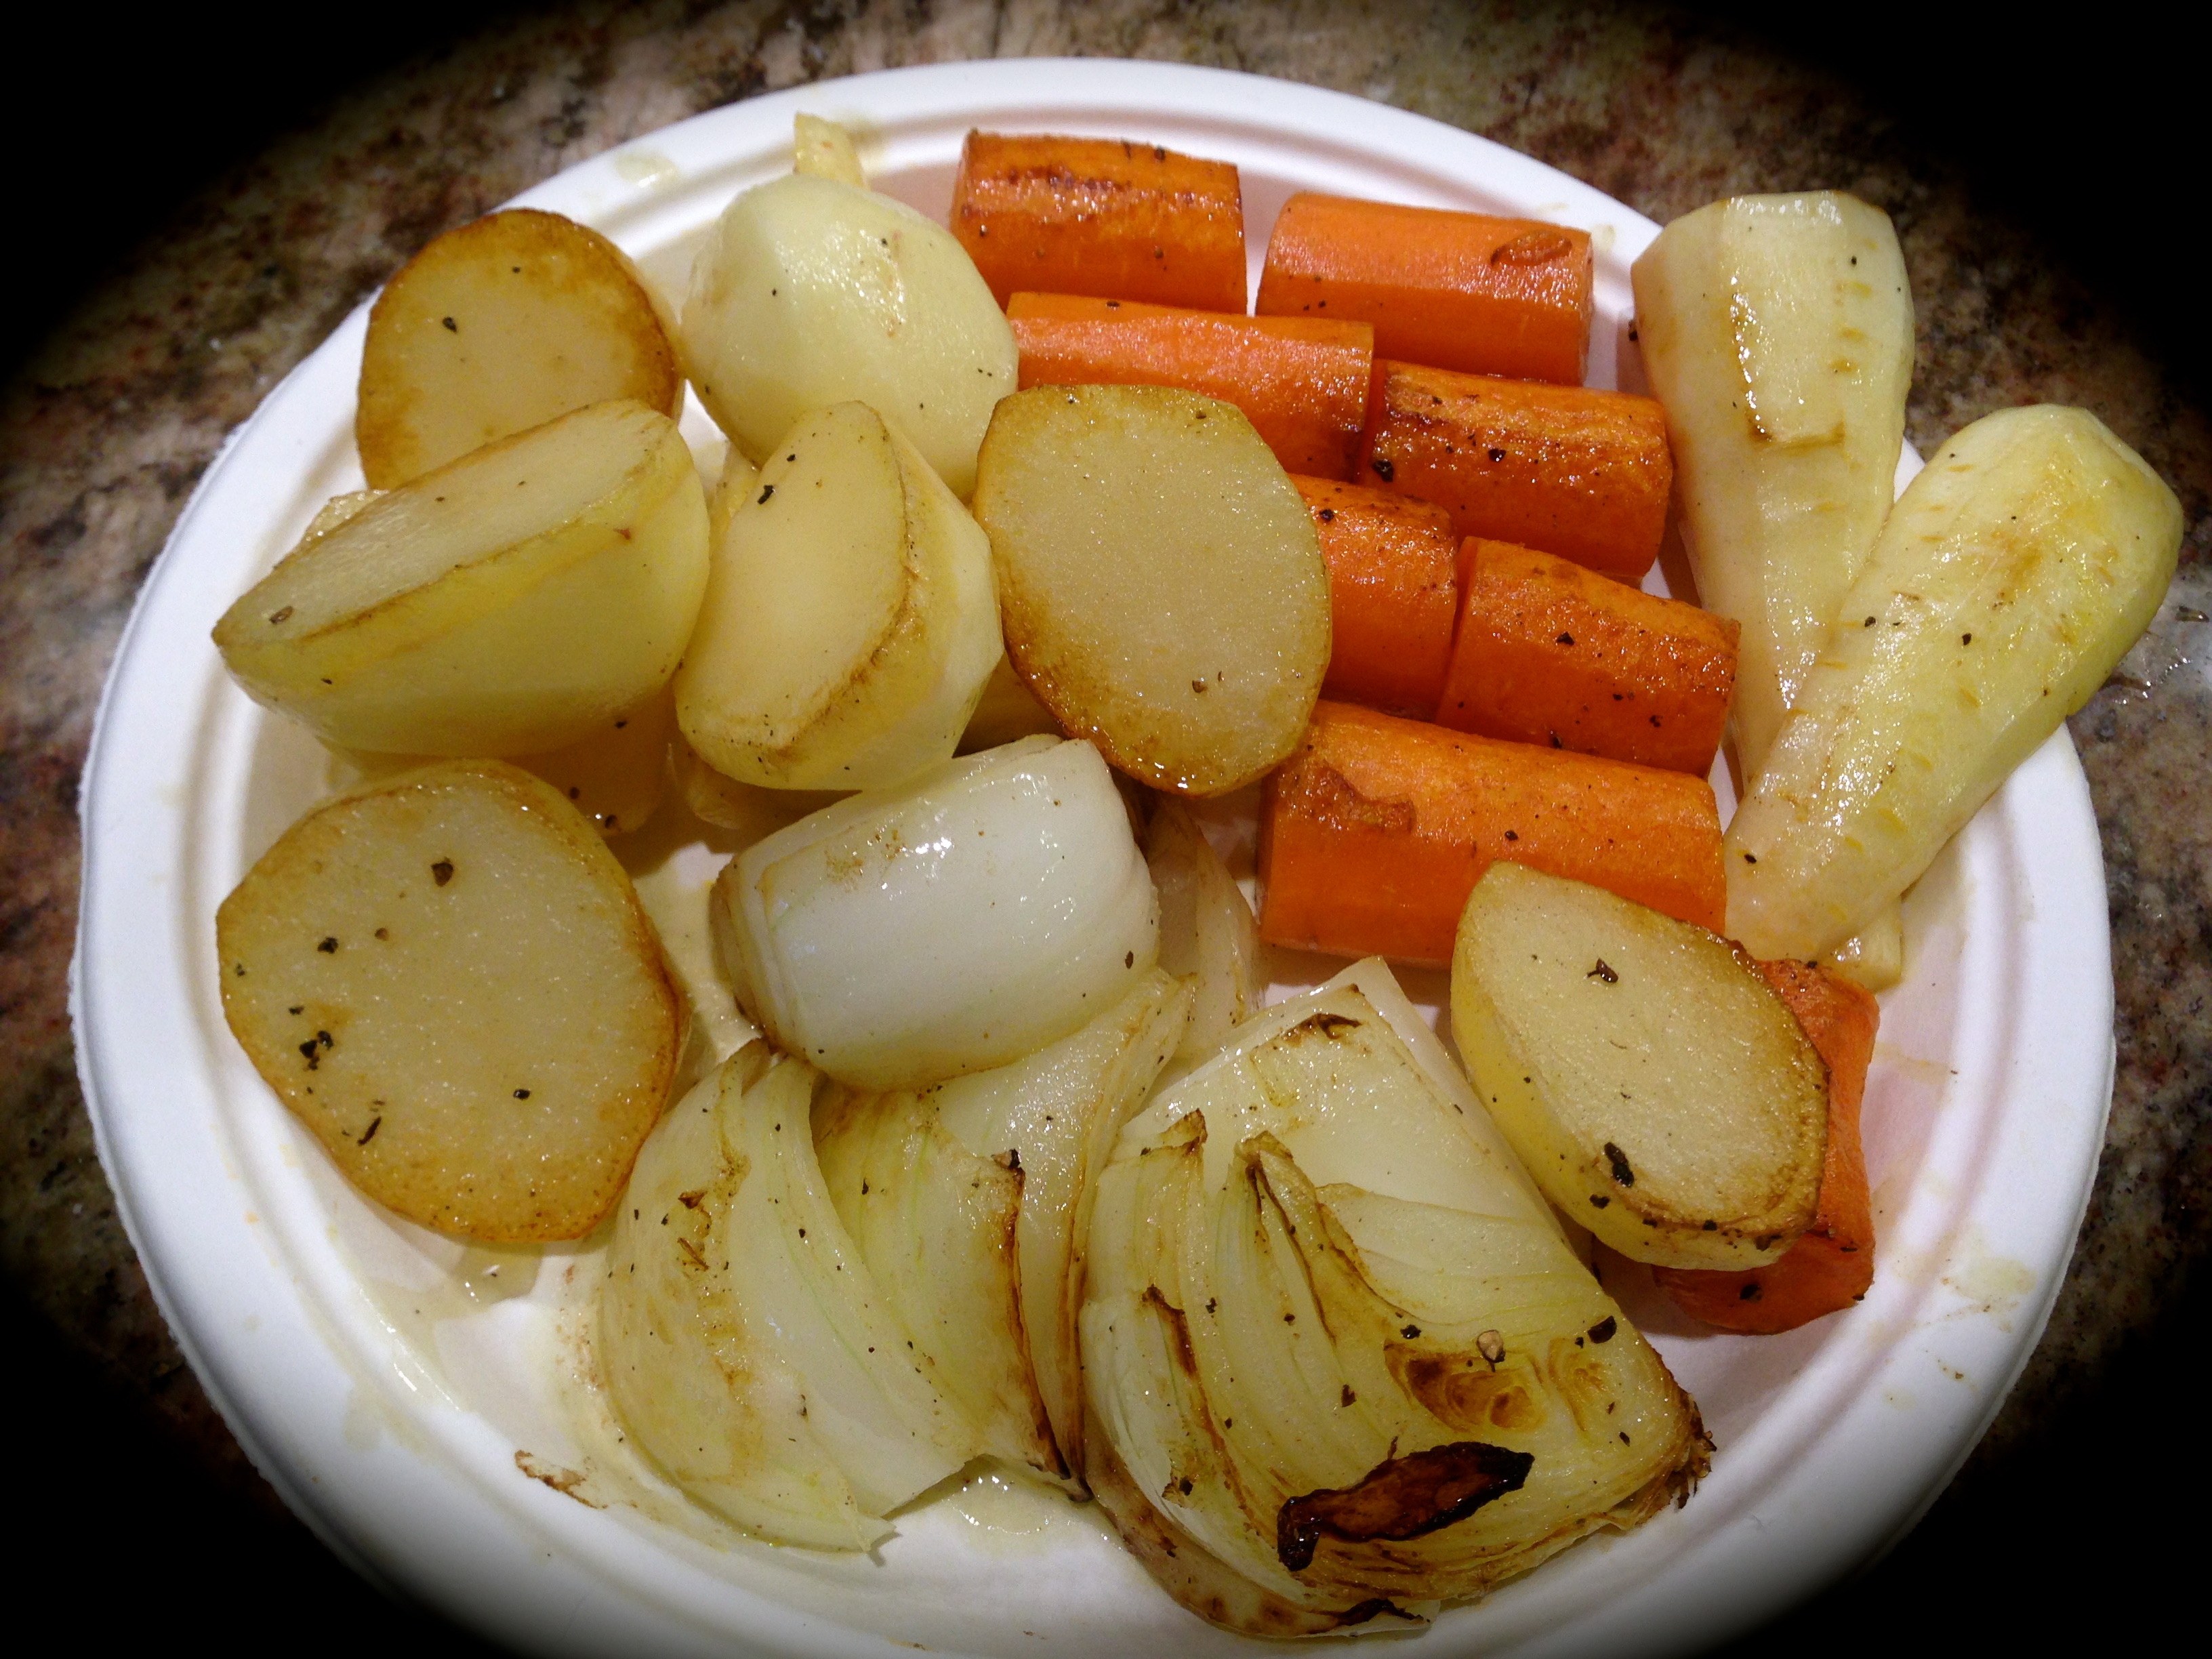
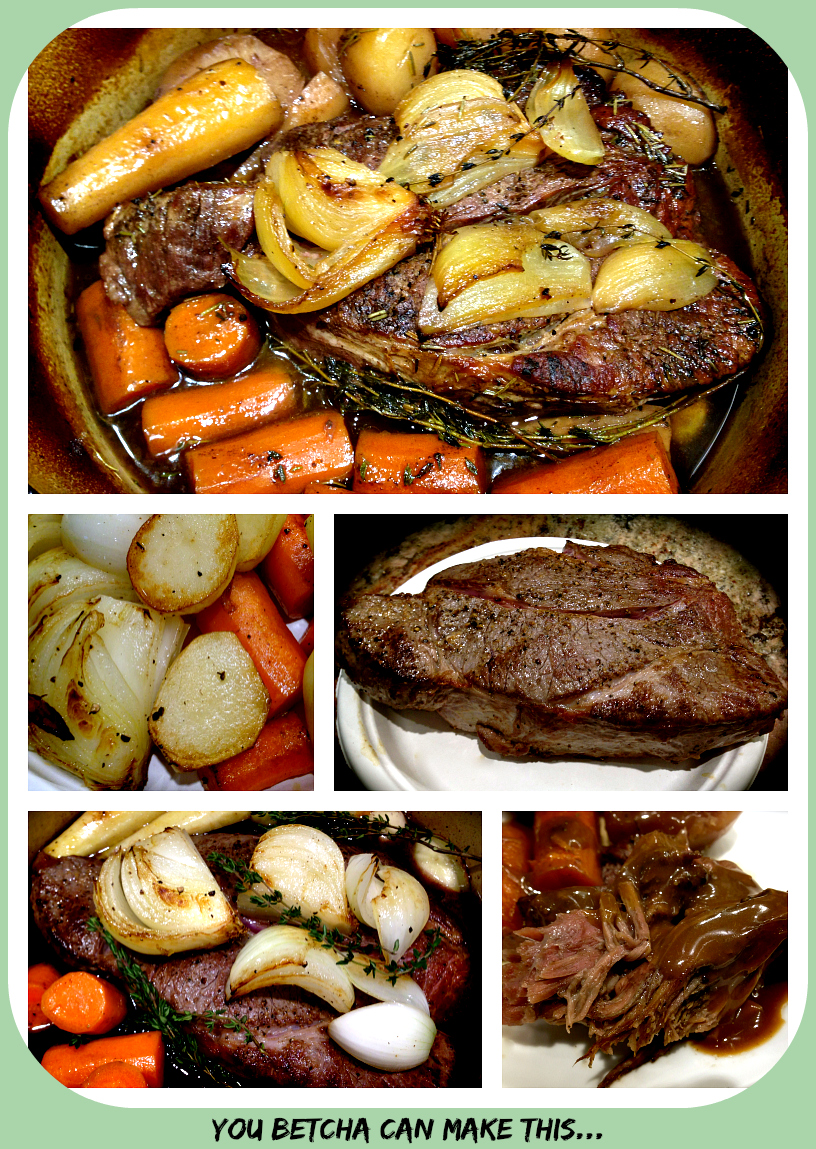
I also like this recipe because for all intents and purposes it is a one pot meal. You can also make your potatoes and carrots in the same roasting pan and I’ve always liked that convenience. You just have to follow a couple of tips in order to make sure they cook properly.

So let’s talk garlic and rosemary balsamic roasted pork loin and potatoes…

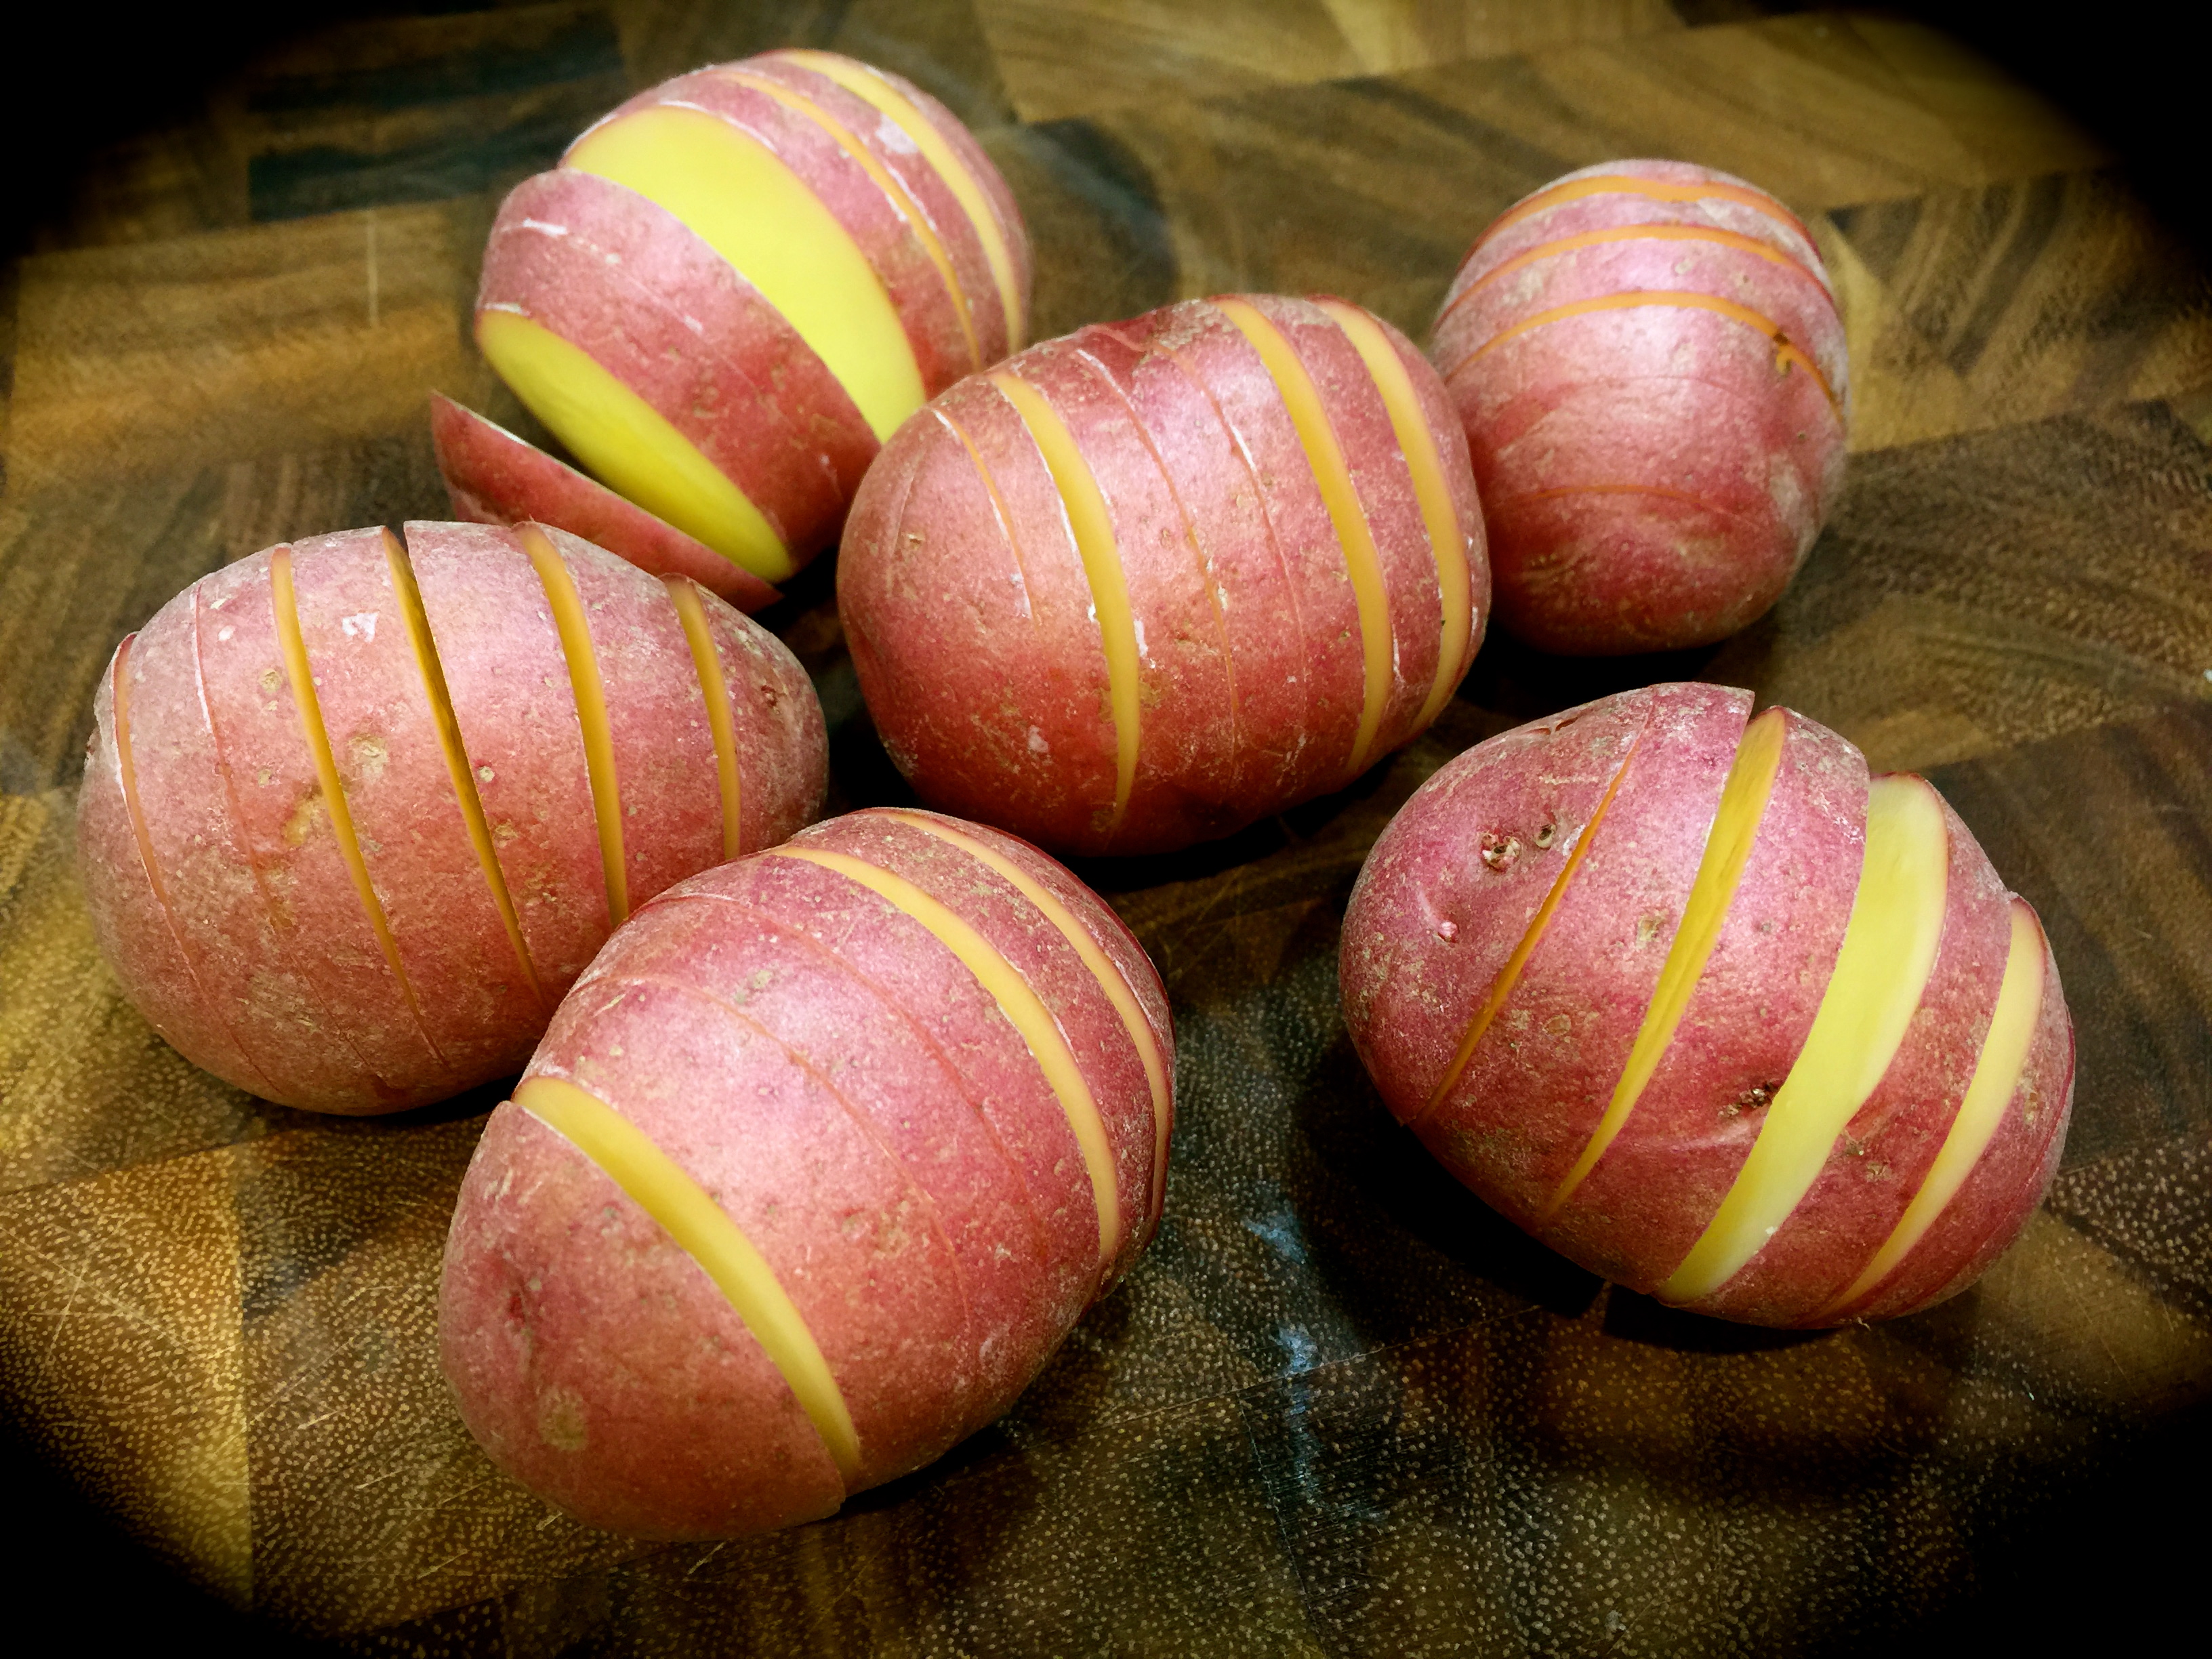
Lesson Learned 1: Slightly par boil your potatoes before roasting them: I don’t know about you but I’ve found that roasting potatoes can be tricky. I usually wind up with hard or semi hard potatoes that are not cooked through. In this recipe it is important to cut the potatoes as evenly as possible (mine were approximately one inch squares). Once I do that I put them in a pot with water, bring the water to a boil and boil the potatoes for about 5 minutes or just until they start to turn tender around the edges. Then I drain the potatoes and let me cool slightly in the strainer. I’ve found when I do this my potatoes come out perfectly when making this recipe. After I strain off the water I transfer them into a bowl so that I can coat them with the balsamic mixture before putting them in the roasting pan. It’s a little extra work, but definitely worth it.

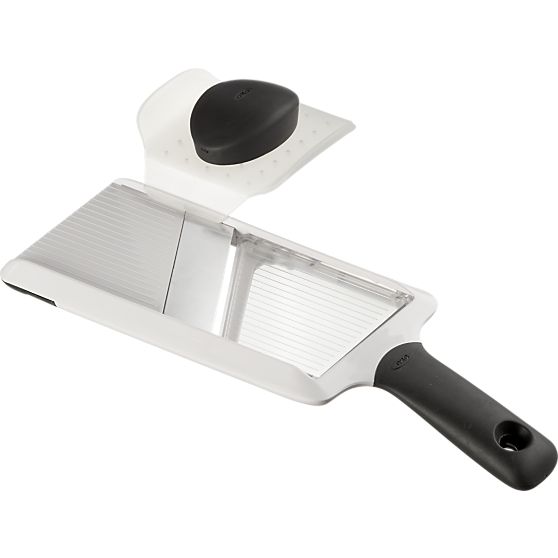
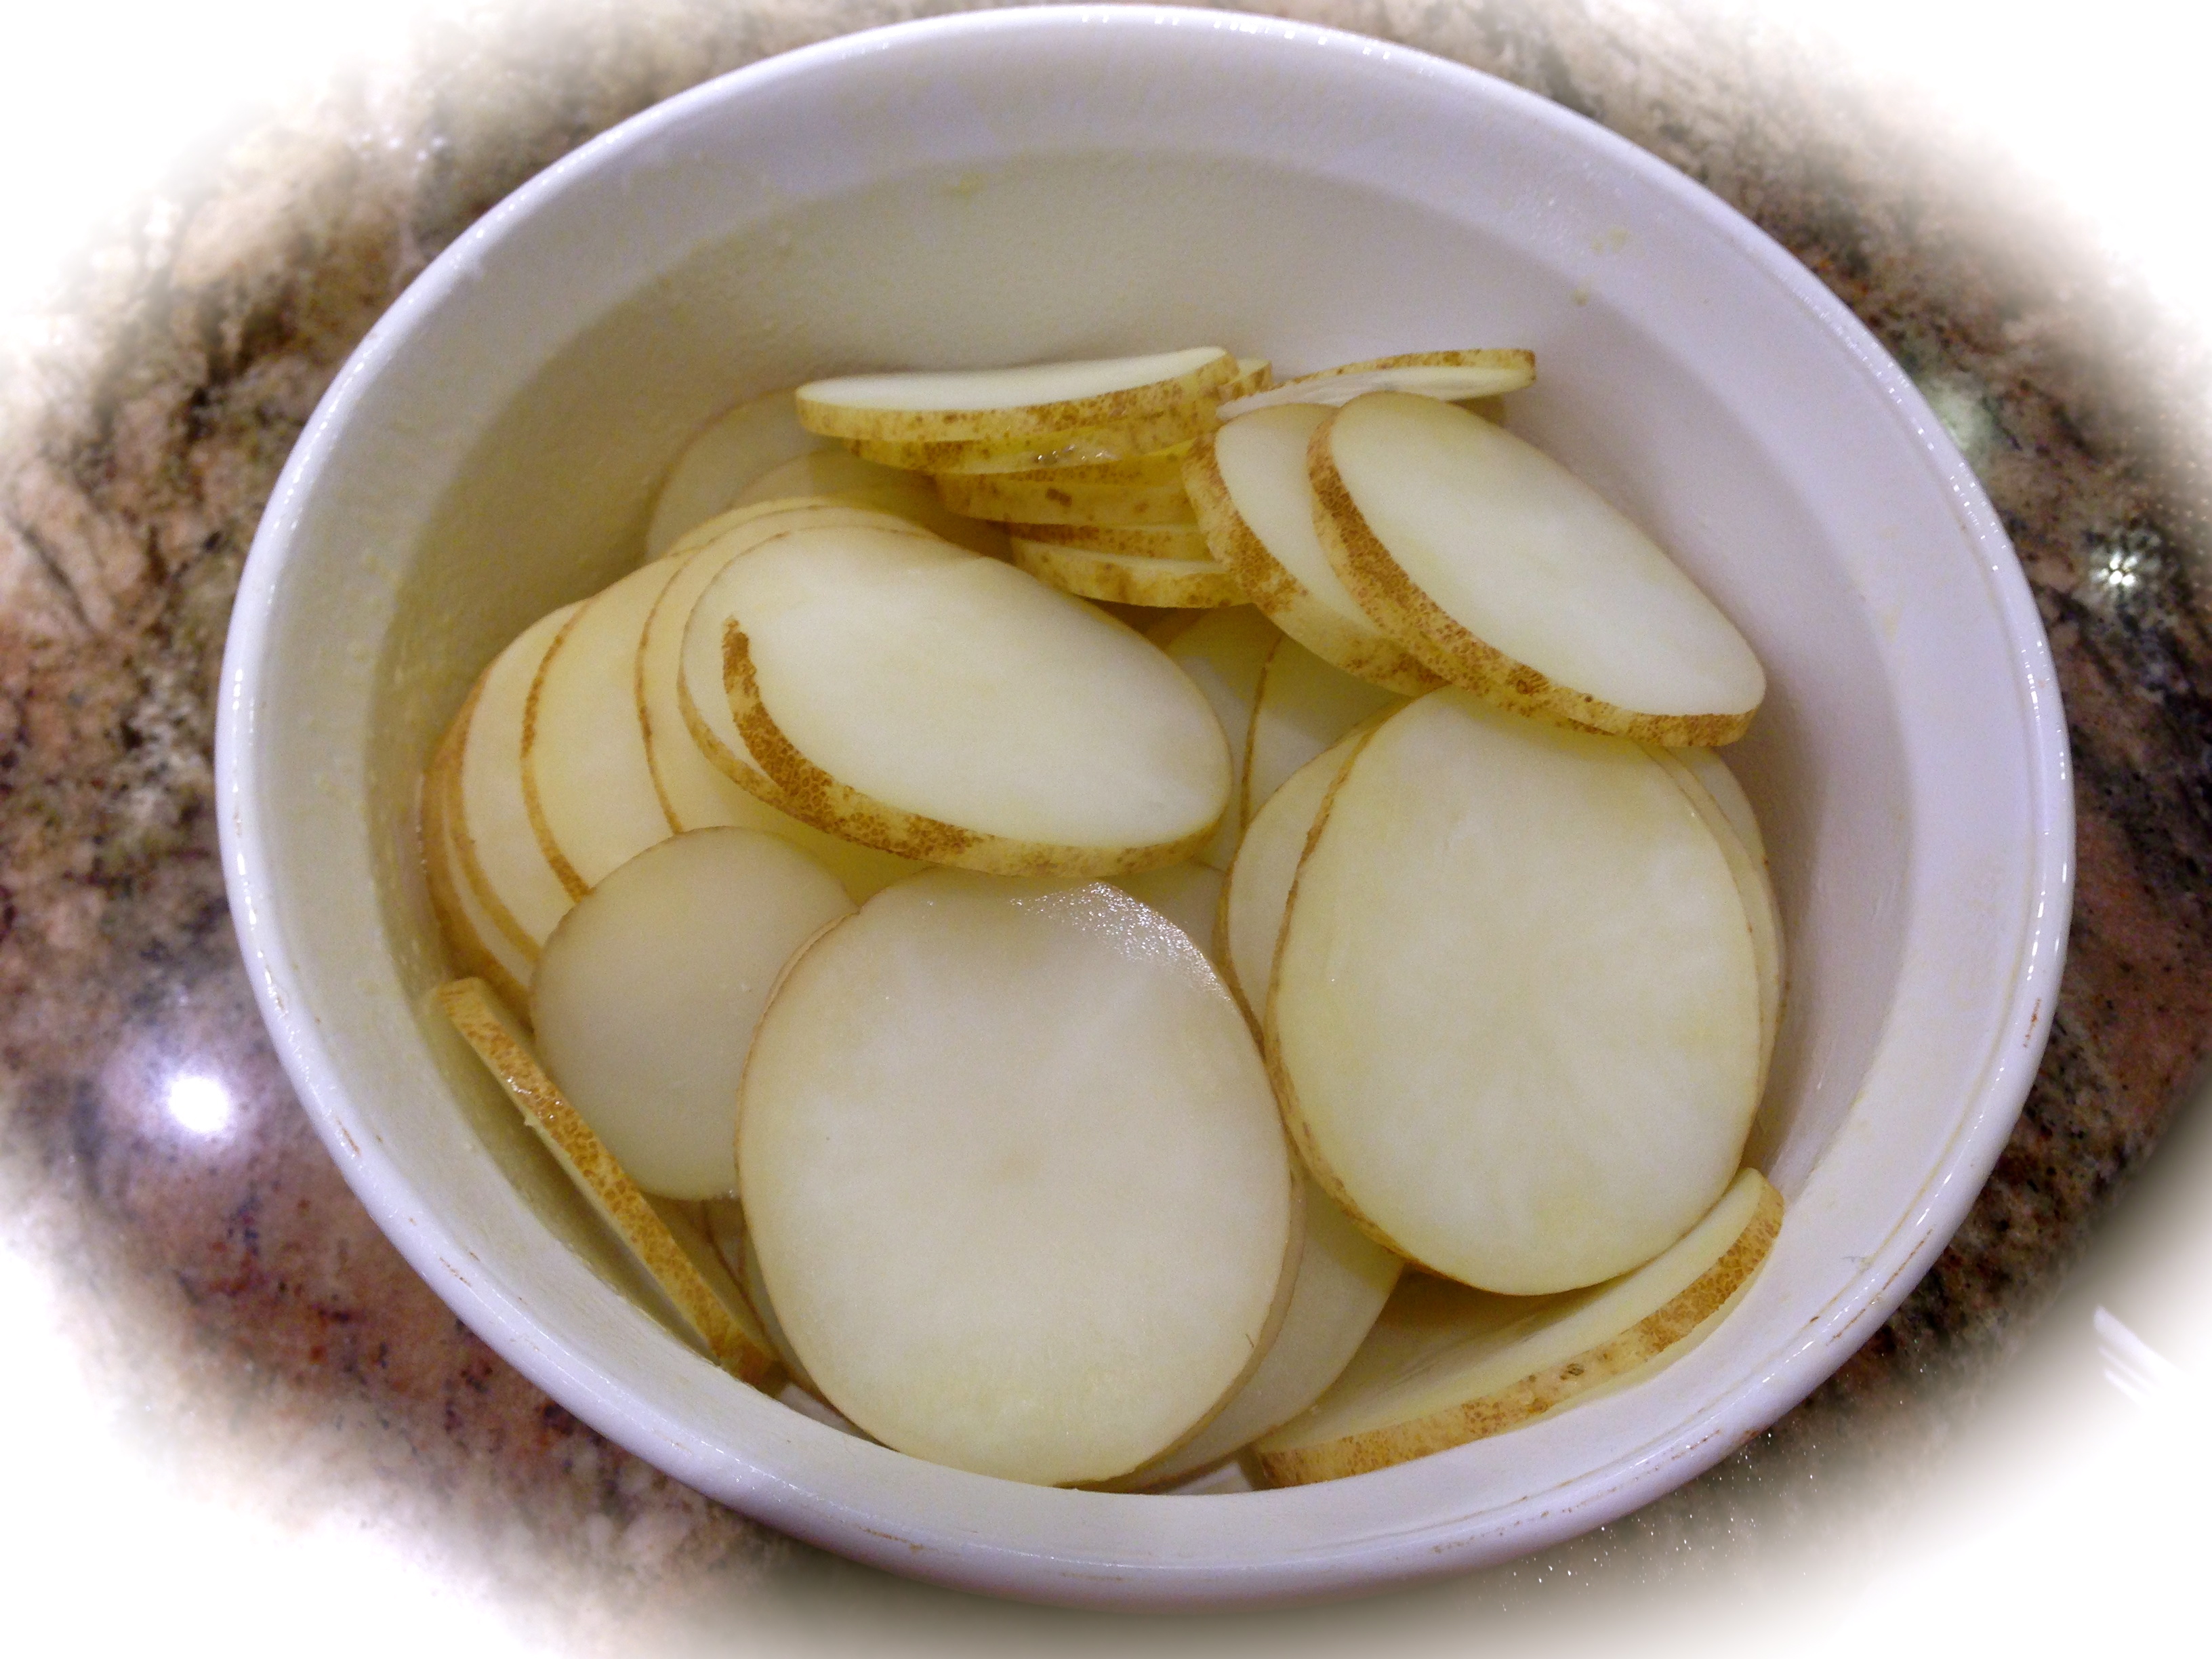
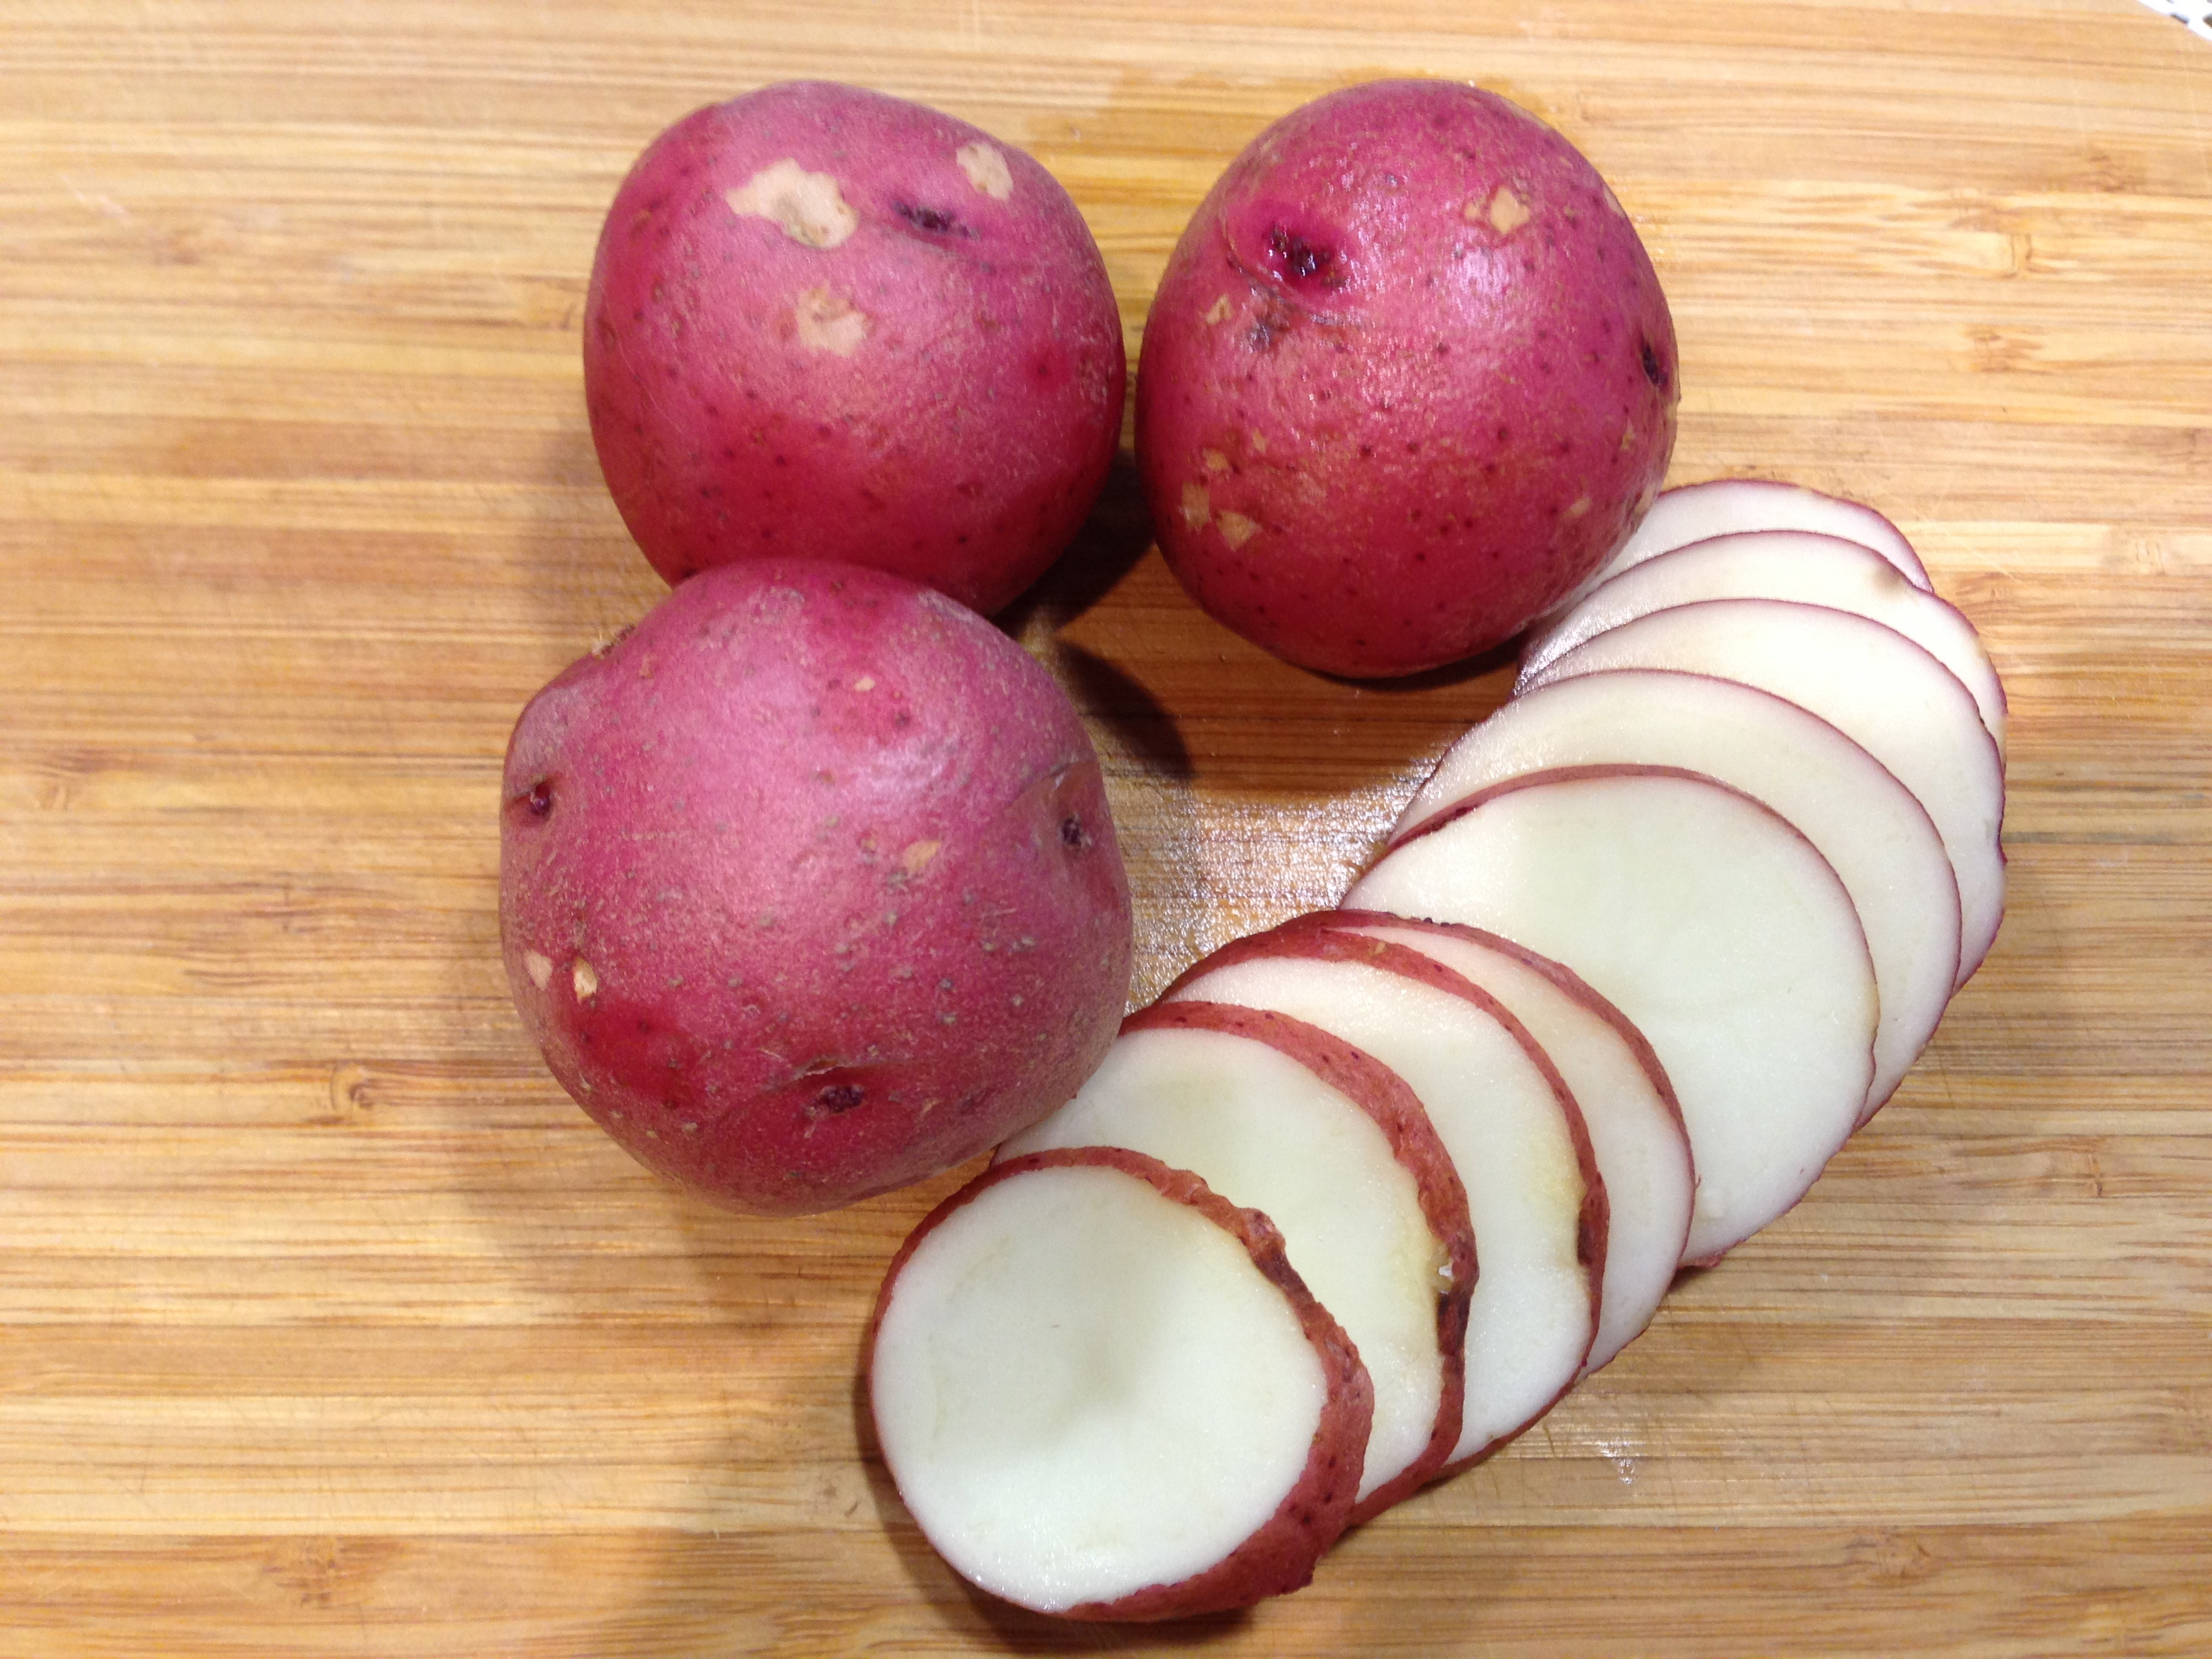
The same rule applies for when I use sliced potatoes in a casserole. I used my mandolin slicer to get even slices. Then I par boil them just for a couple of minutes before adding them to a casserole dish that is ready to go into the oven. Try this little trick and you’ll have beautifully roasted potatoes all the time.

Lesson Learned 2 – This recipe roasts the carrots to crisp tender: Carrots are also tricky to cook and although I prefer mine to be crisp tender, some people prefer their carrots to be soft. If soft is your preference roasting them this way will not give you that consistency unless you either cut them into thin rounds or use small baby carrots. I cut my carrots into about 2 inch chunks, cut each chunk into half and then half again. This produced a somewhat softened crisp tender carrot, which I love.

You can also do the par boiling trick described above for larger carrots if you want them to be soft. That might be a little too much muss and fuss for one recipe. But it’s totally up to you. Just something to think about…

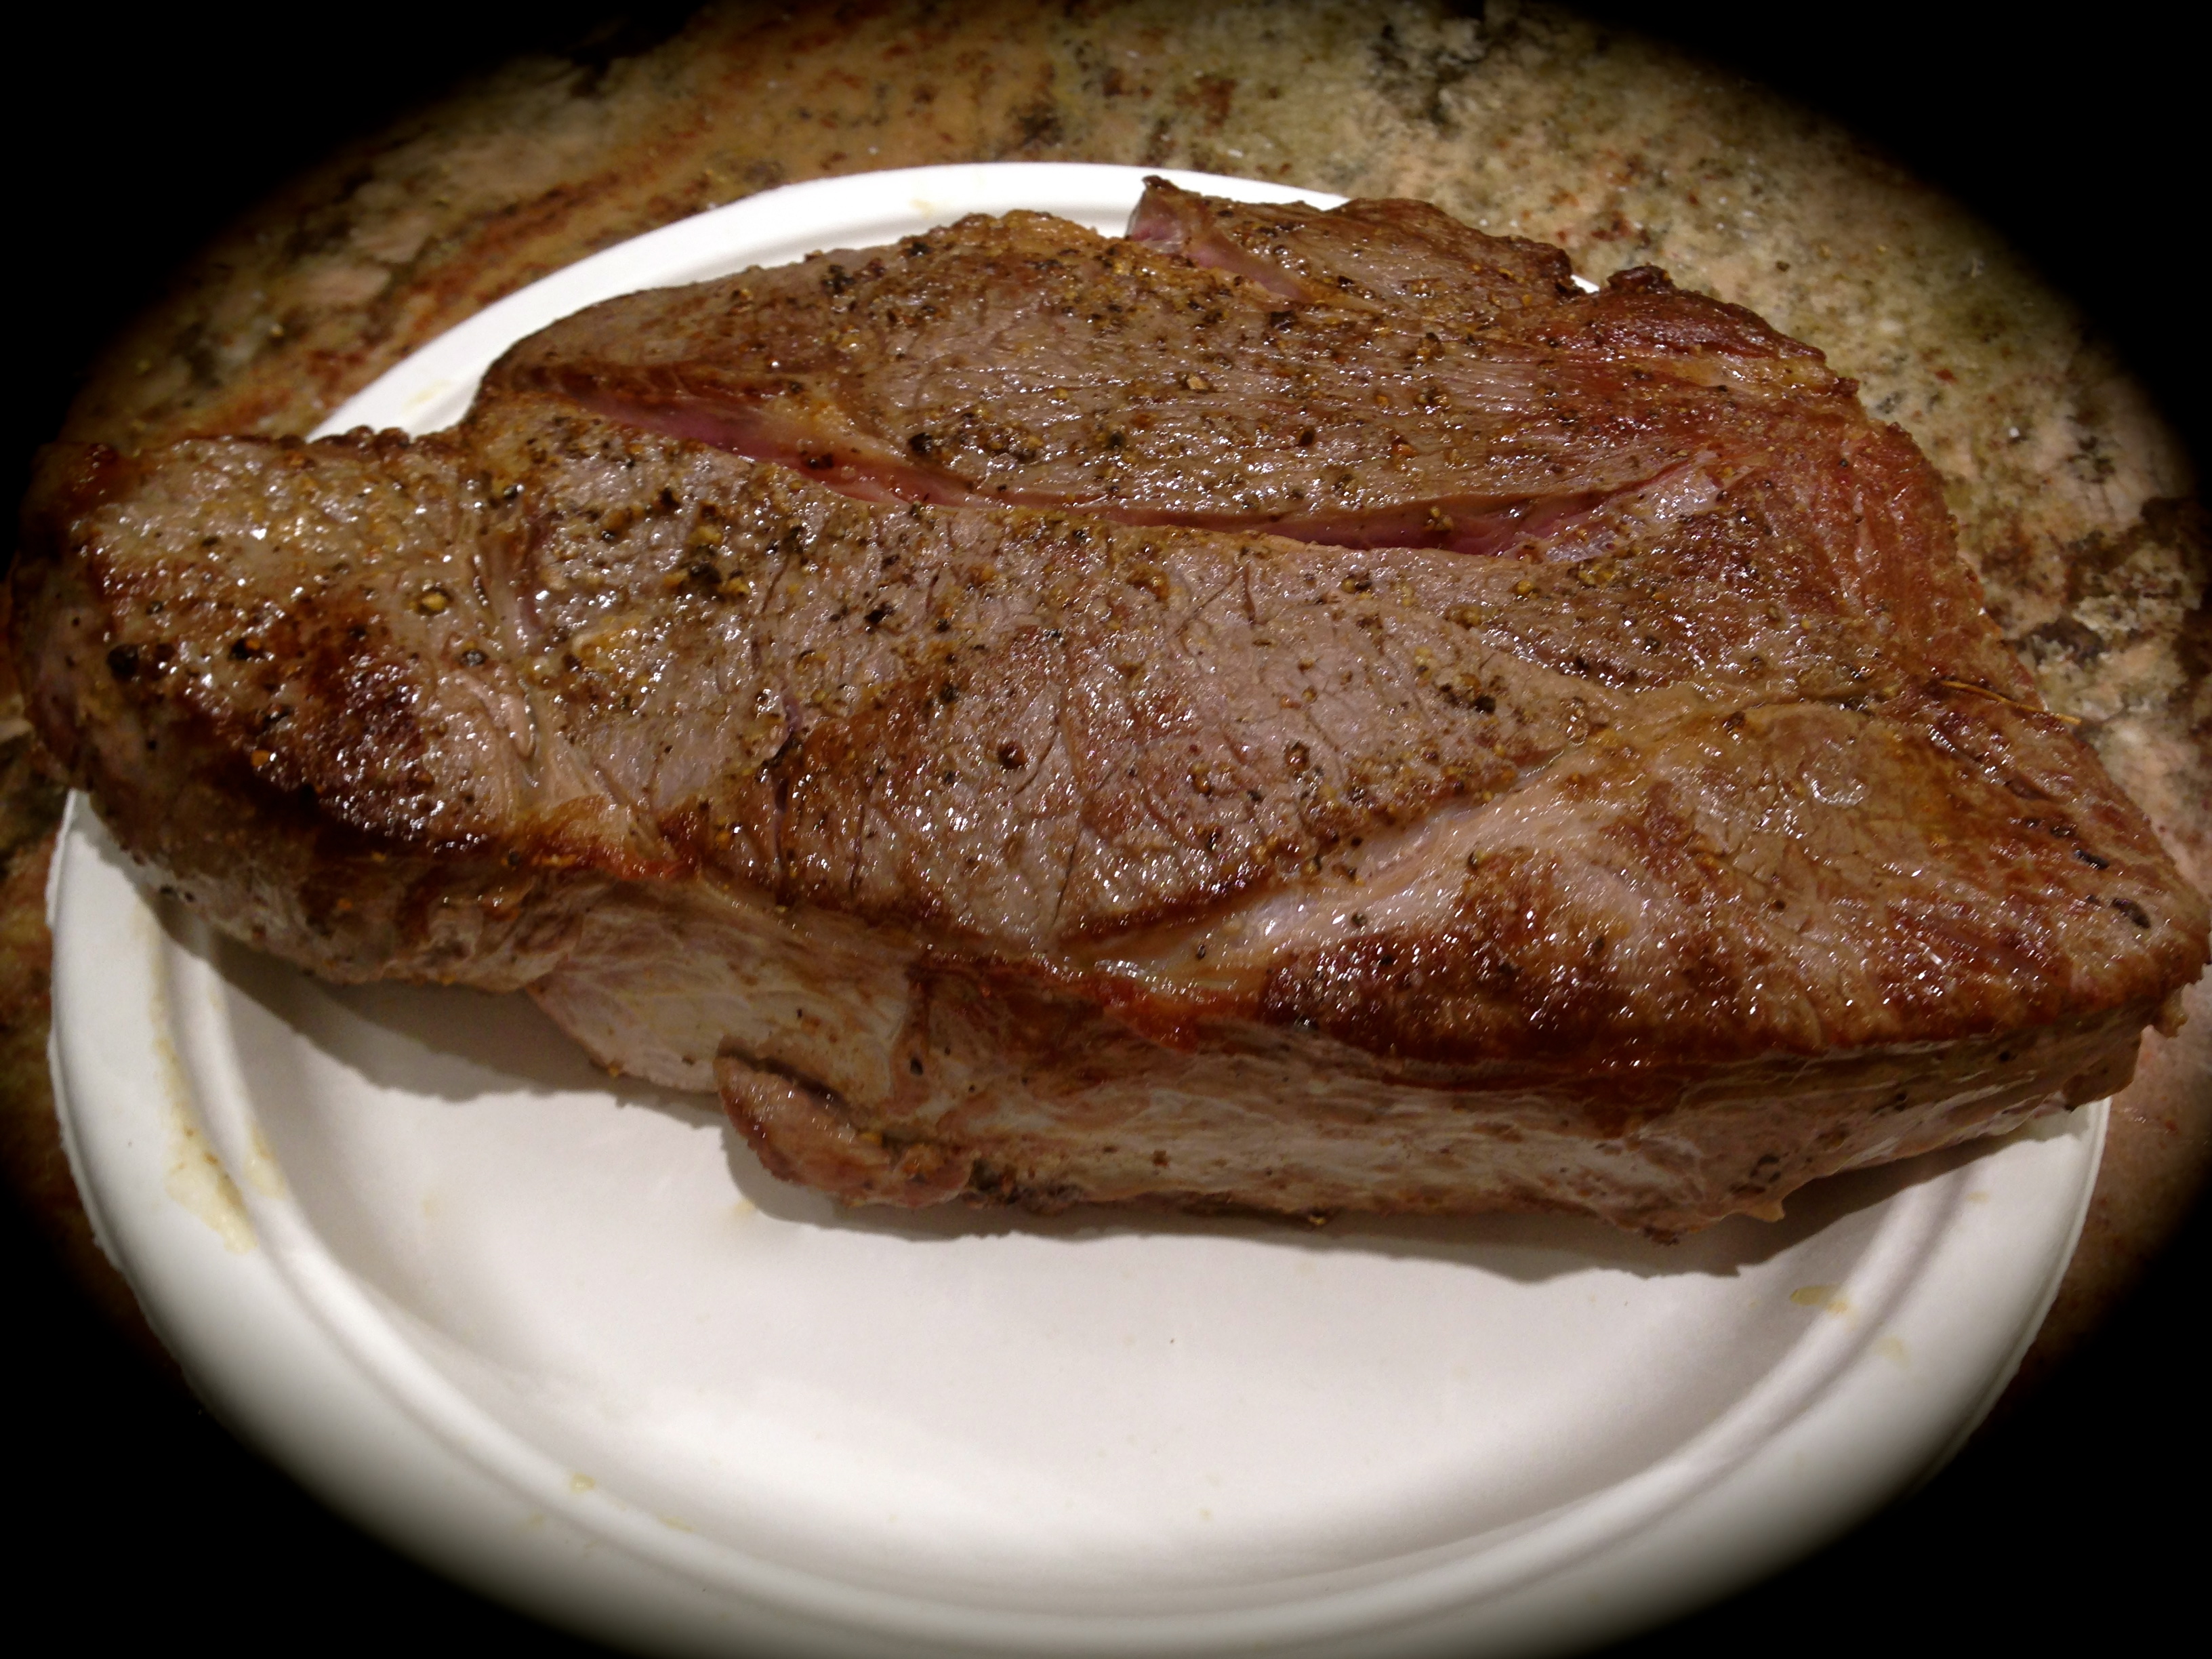
Lesson Learned 3 – Browning the pork loin is totally your preference: Some recipes call for browning your pork loin before roasting it. It helps to seal in the juices. The reason I say this is totally your preference is that if you cook your pork loin according to my directions you will always get a juicy pork loin without browning it ahead of time. Plus when you add the balsamic mixture you cannot tell if the roast has been browned or not. So why bother. The choice is yours.

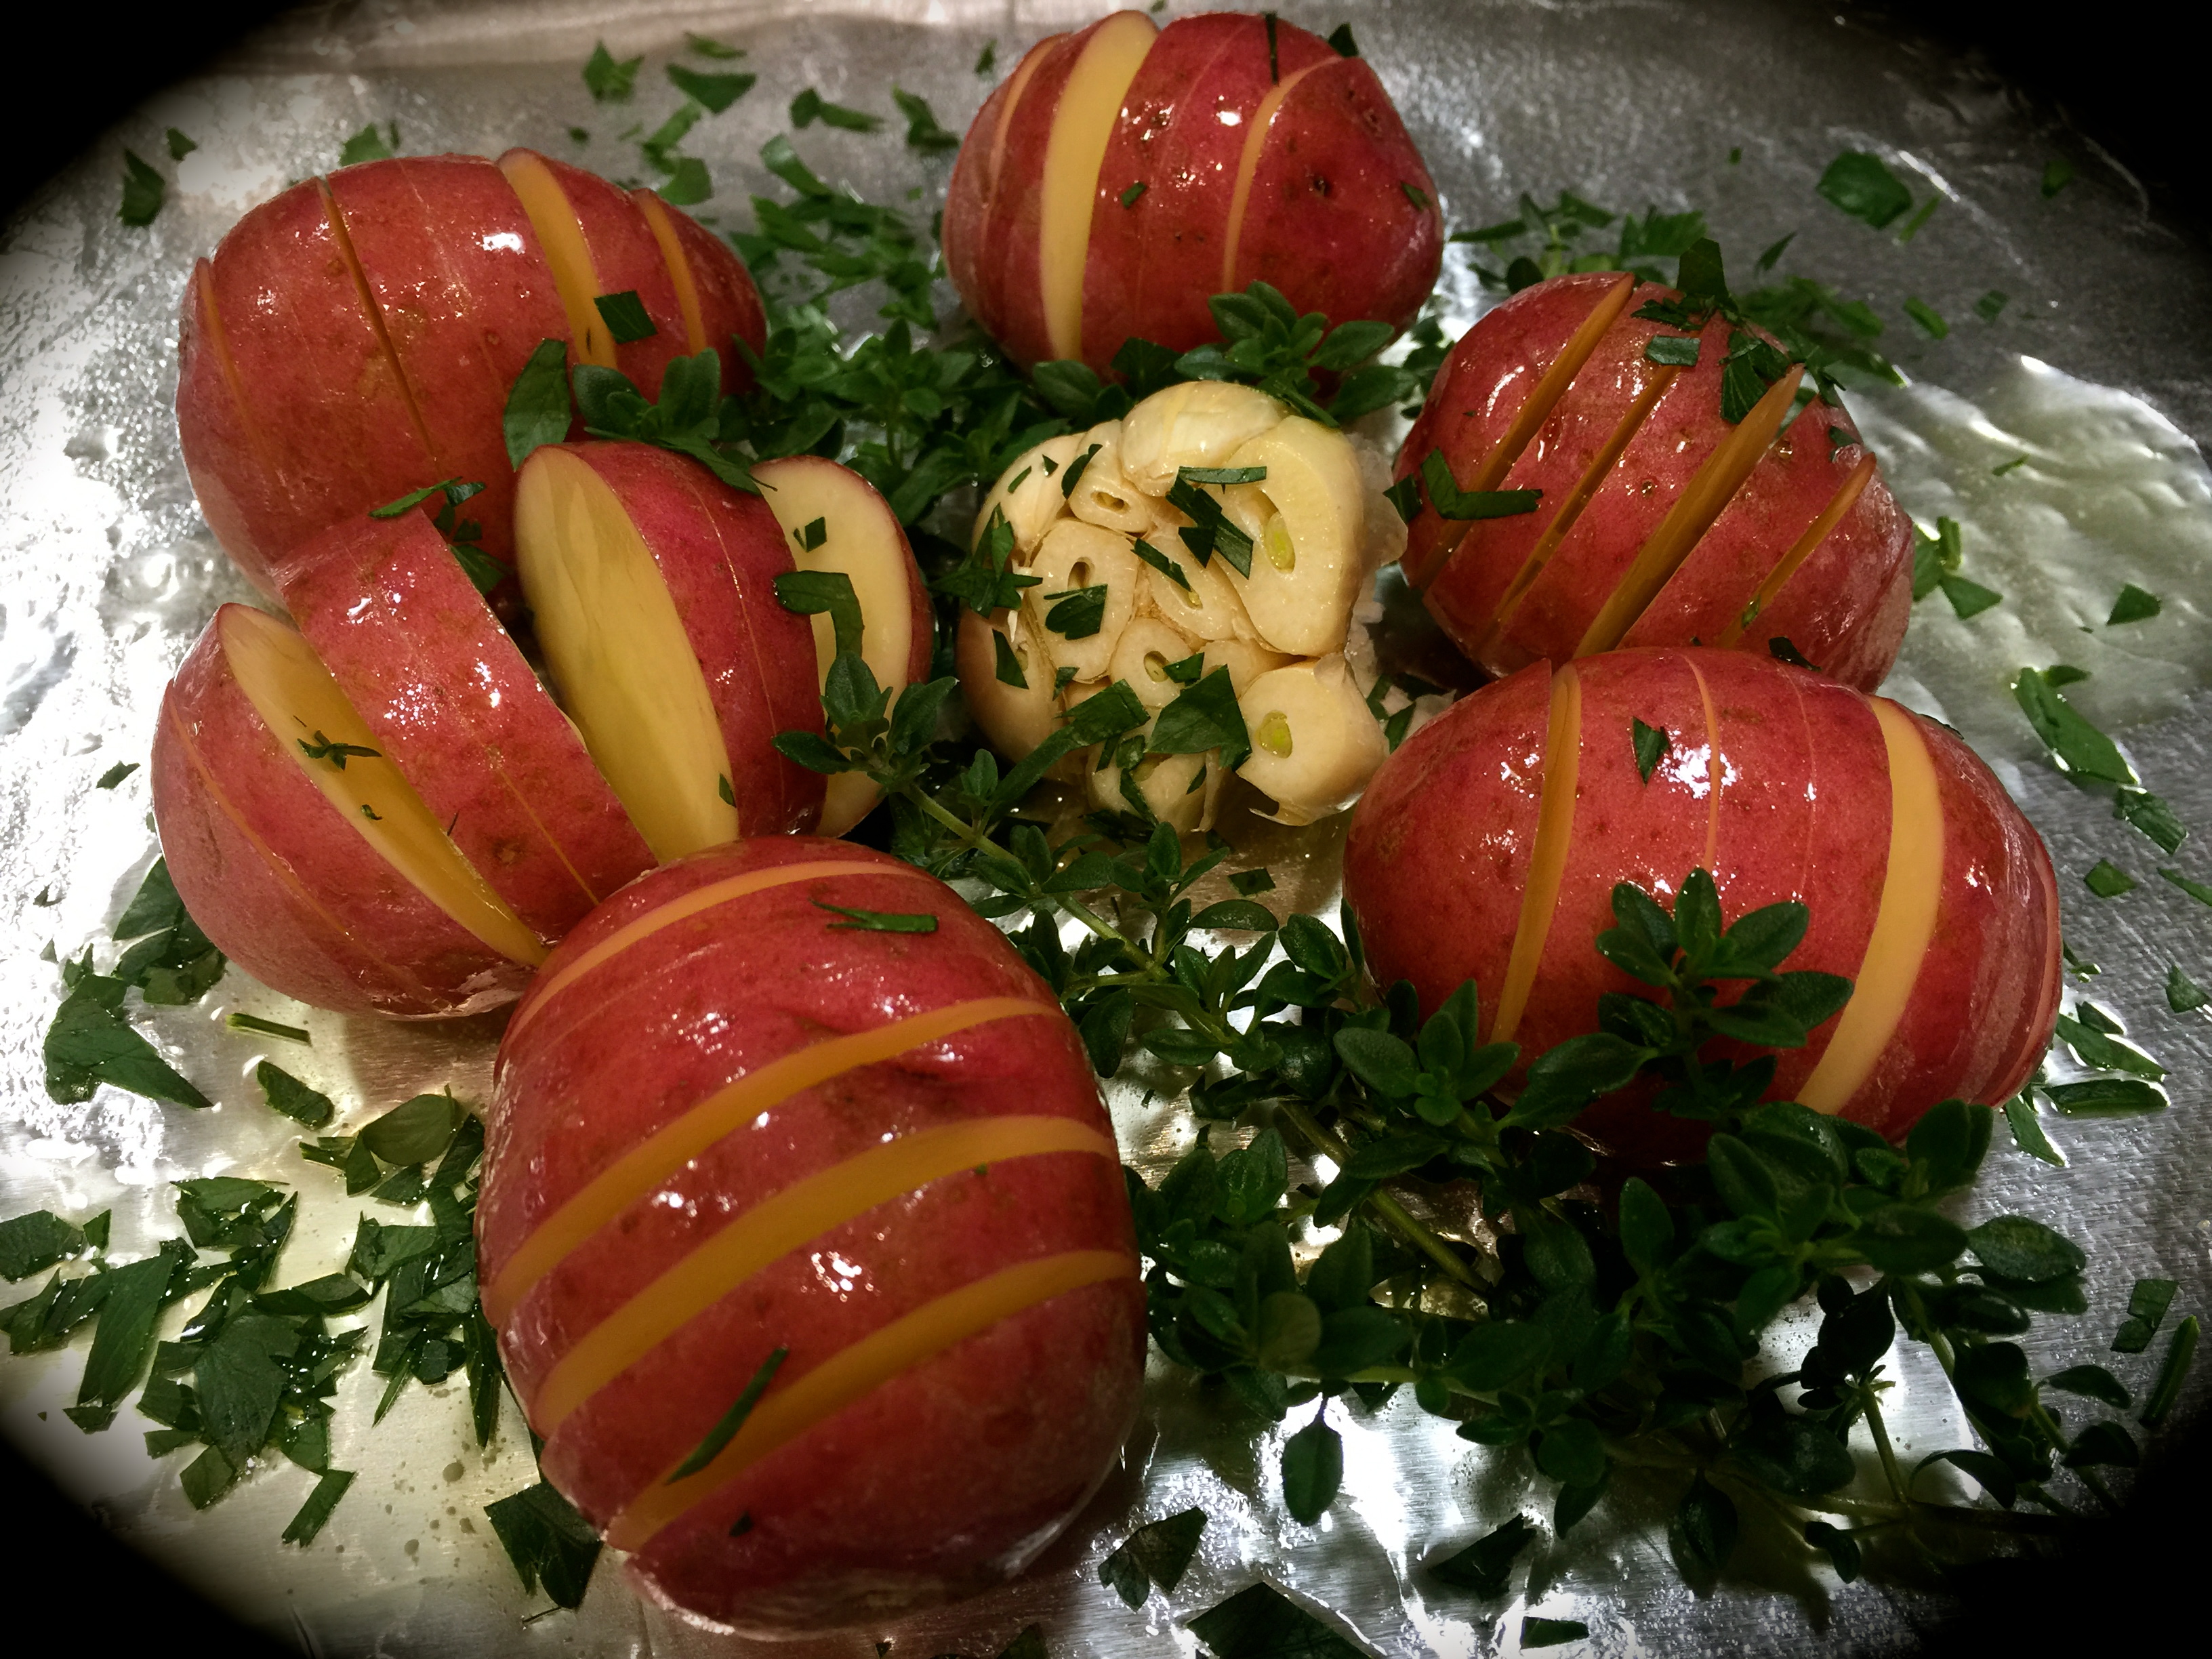
Lesson Learned 4 – Make the balsamic mixture in your mini food processor: This is really the easiest way to ensure all the ingredients are well combined. Combine them in the processor until the mixture becomes paste-like as seen below. Then you’re ready to go…

And that’s it. This recipe is a Fall classic. Try it and tell me what you think…

Garlic & Rosemary Balsamic Roasted Pork Loin & Potatoes...

  • Servings: 6
  • Difficulty: Medium
  • Print

INGREDIENTS:

1 1/2 pound boneless pork loin

3 large russet potatoes, peeled and diced into 1 inch square pieces (can also use 2 pounds of baby reds)

3-4 large carrots cut into chunks, then halved and halved again (or 1 bag of small baby carrots not cut)

1/4 cup good olive oil, plus 1 Tb. for the carrots

3 Tbs. balsamic vinegar

5 large garlic cloves (or 10 small), smashed

1/2 cup fresh rosemary leaves

Kosher salt and freshly cracked black pepper to taste

1 tsp. Herbs De Provence

Cooking spray

DIRECTIONS:

Preheat the oven to 375. Peel, chop and par boil the potatoes for 5 minutes. Drain and set aside.

Combine olive oil, vinegar, garlic, rosemary, salt and pepper in a food processor until it forms a paste.

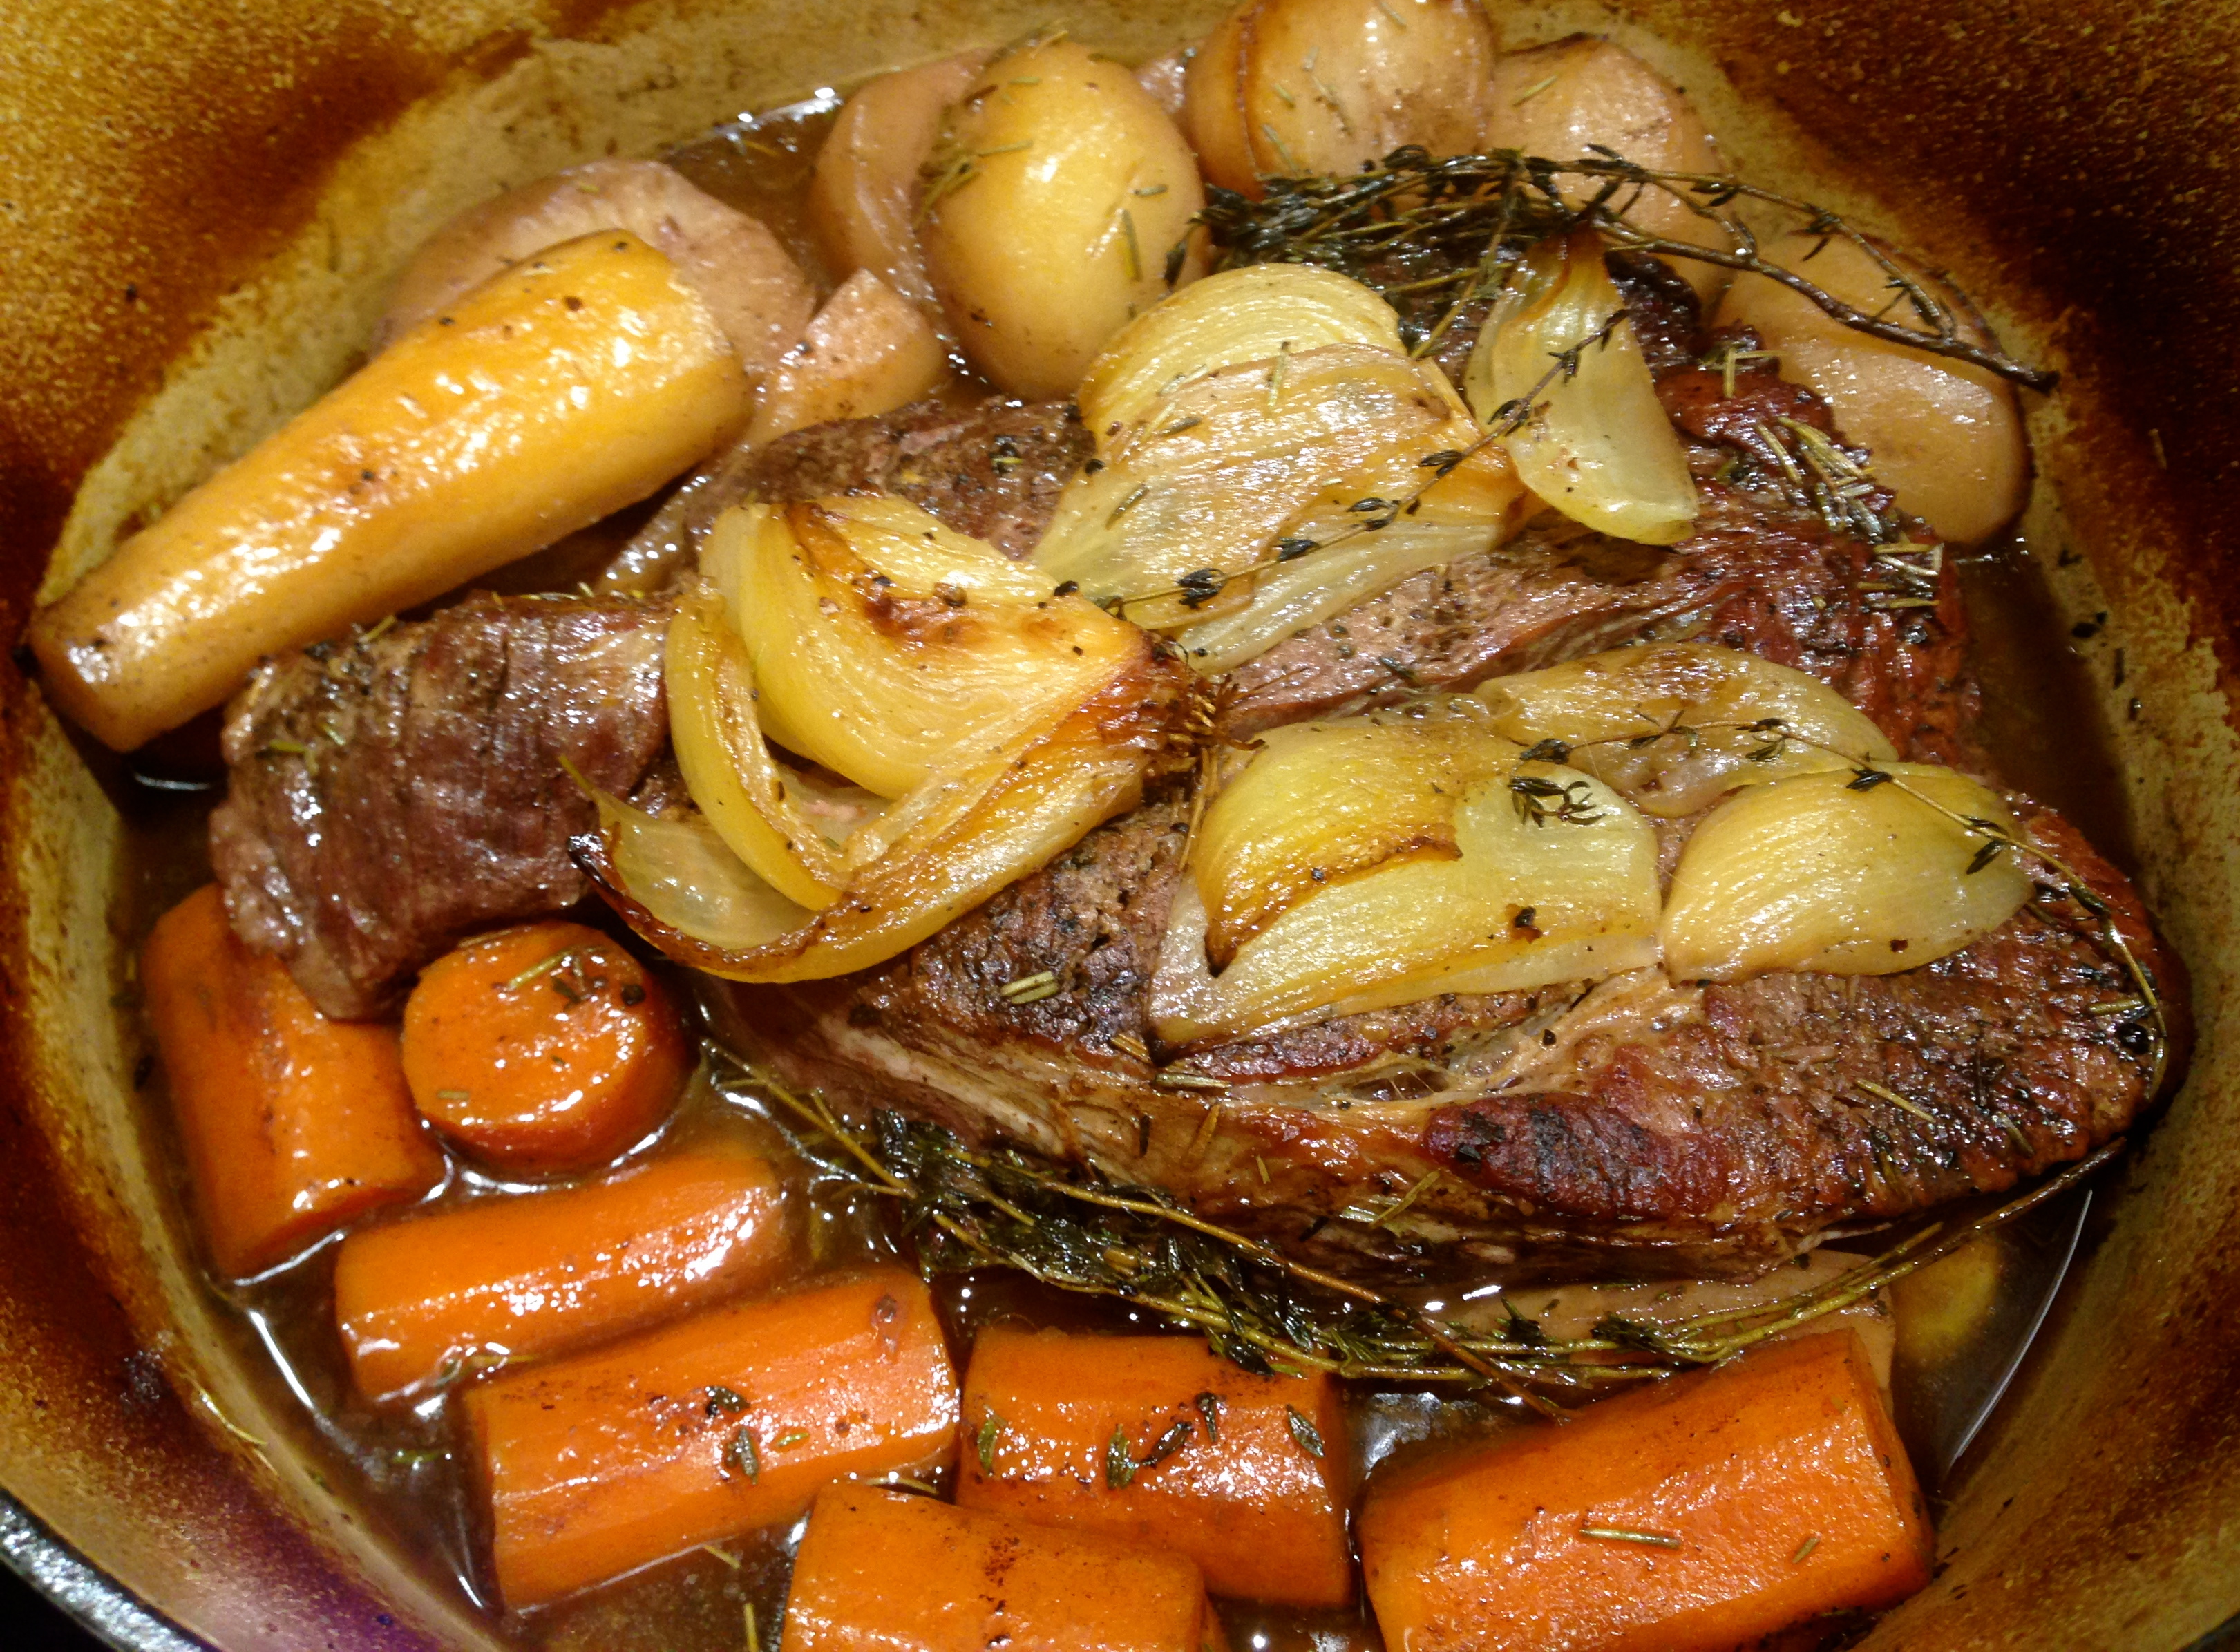
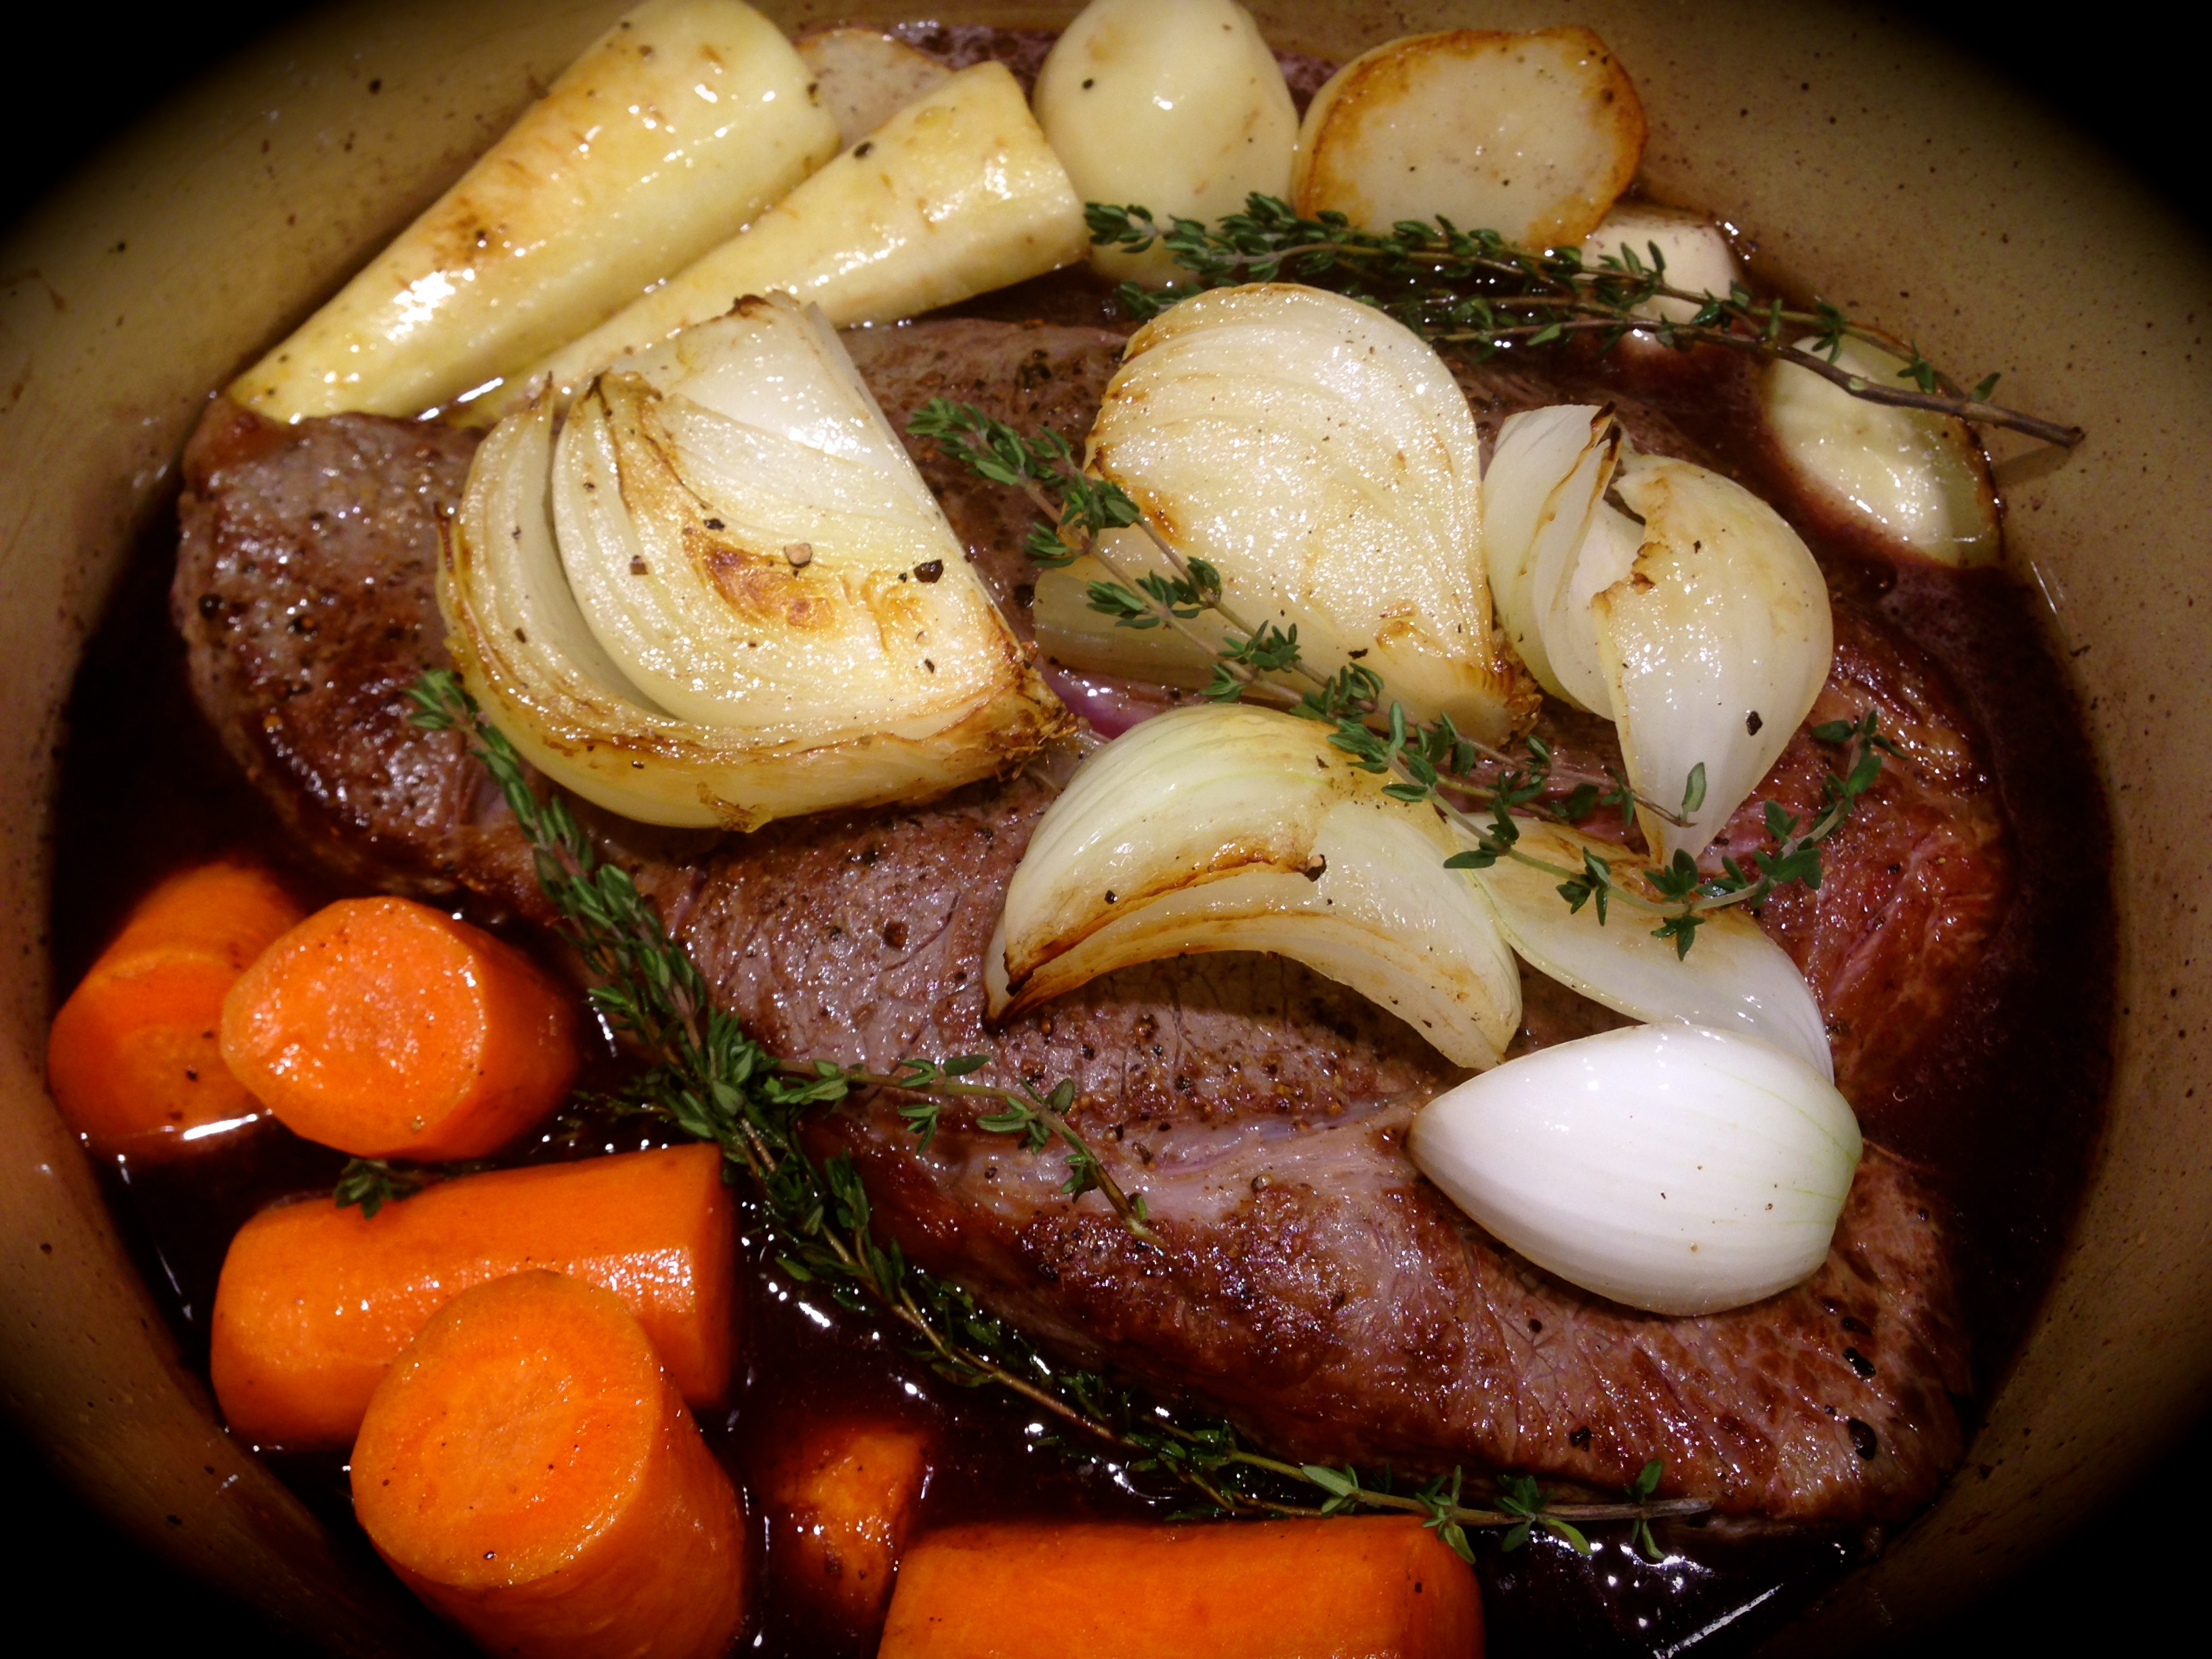
Coat the pork loin on all sides with the balsamic mixture. (You will have some left over for the potatoes). Lightly grease a large roasting pan with cooking spray. Place the pork loin in the center of the roasting pan. Coat the potatoes with the remaining balsamic mixture. Place them on one side of the pork loin.

Coat the carrots with olive oil and season them with salt and pepper and Herbs De Provence. Place the carrots on the other side of the pork loin.

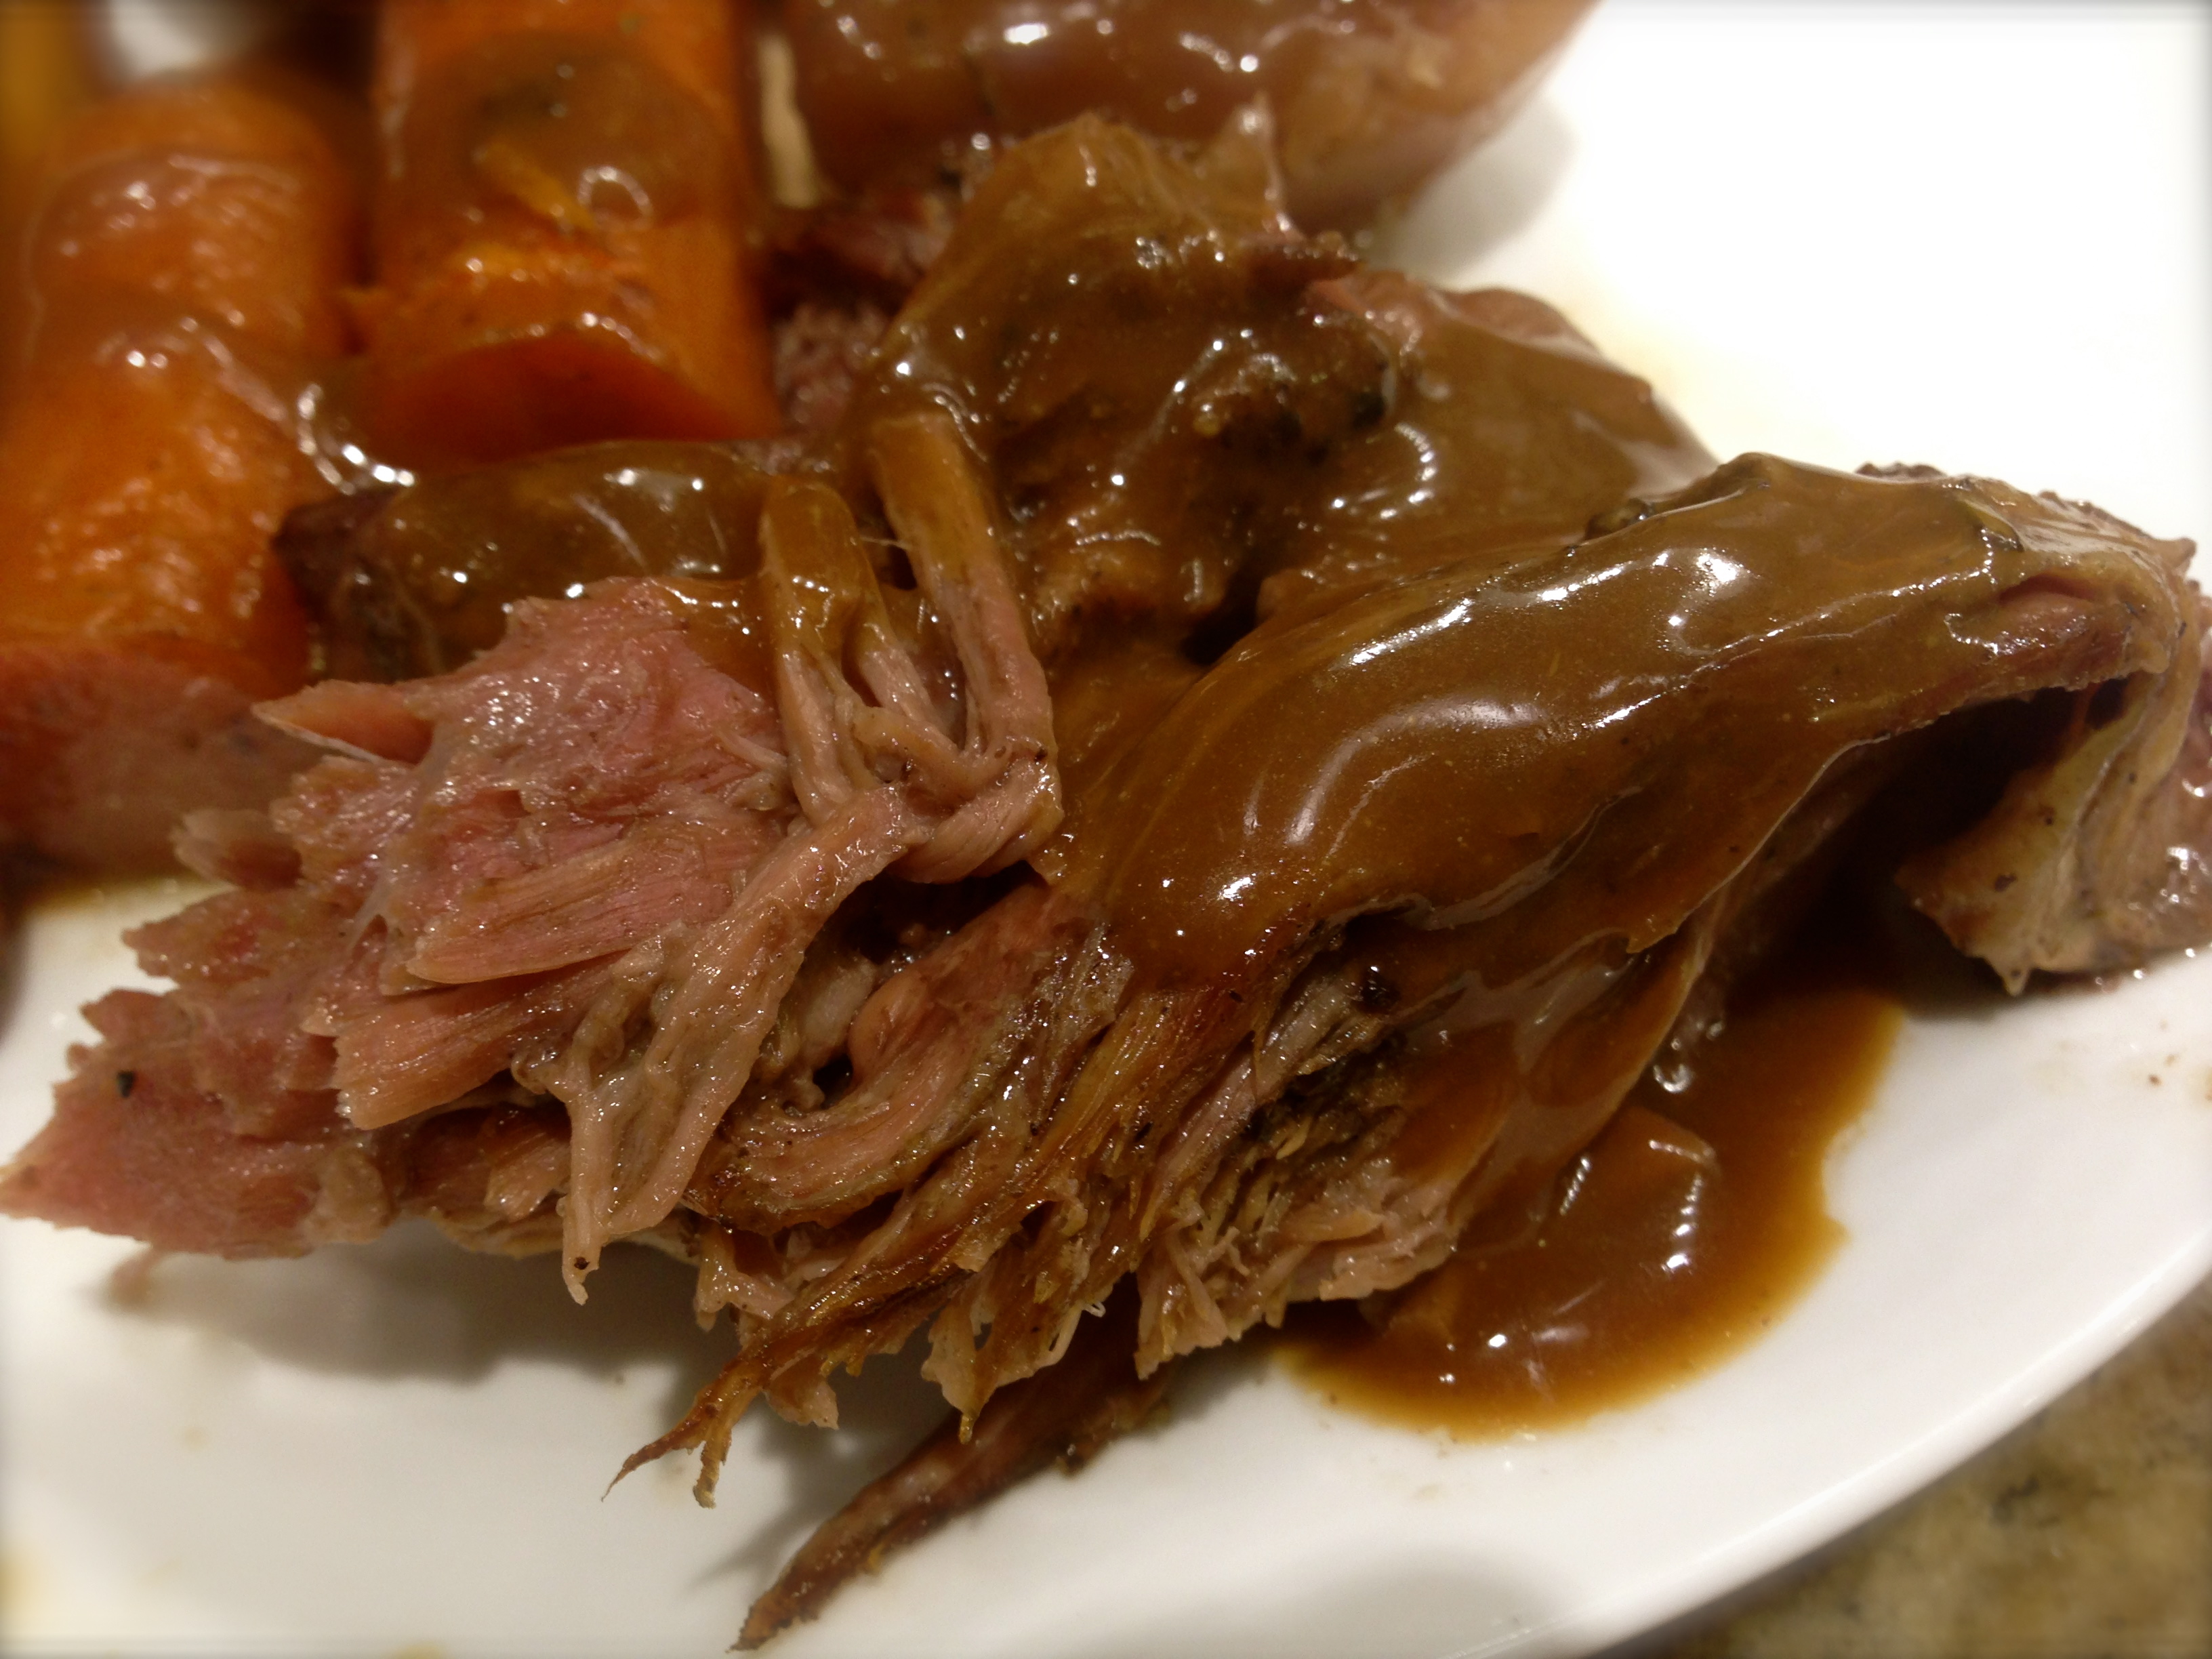
Roast for 1 hour. Remove from the oven and cover with foil for 5 minutes. Transfer the roast to a cutting board, slice and serve with the potatoes and carrots.


Home Fries…

I love my cast iron skillet. It only cost me about $20 and it’s one of the best skillets I have. But there’s a reason for that. Cast iron produces even, sustained heat and that’s the best for cooking just about anything. The only drawback to cast iron is it’s so darn heavy. But I just think of it as an upper body workout and move on from there.

This recipe uses the features of a cast iron skillet to produce the tastiest home fries. And making home fries is not all that complicated. The flavor of homemade sure beats the taste of the frozen kind.

So without further adieu, let’s talk home fries…

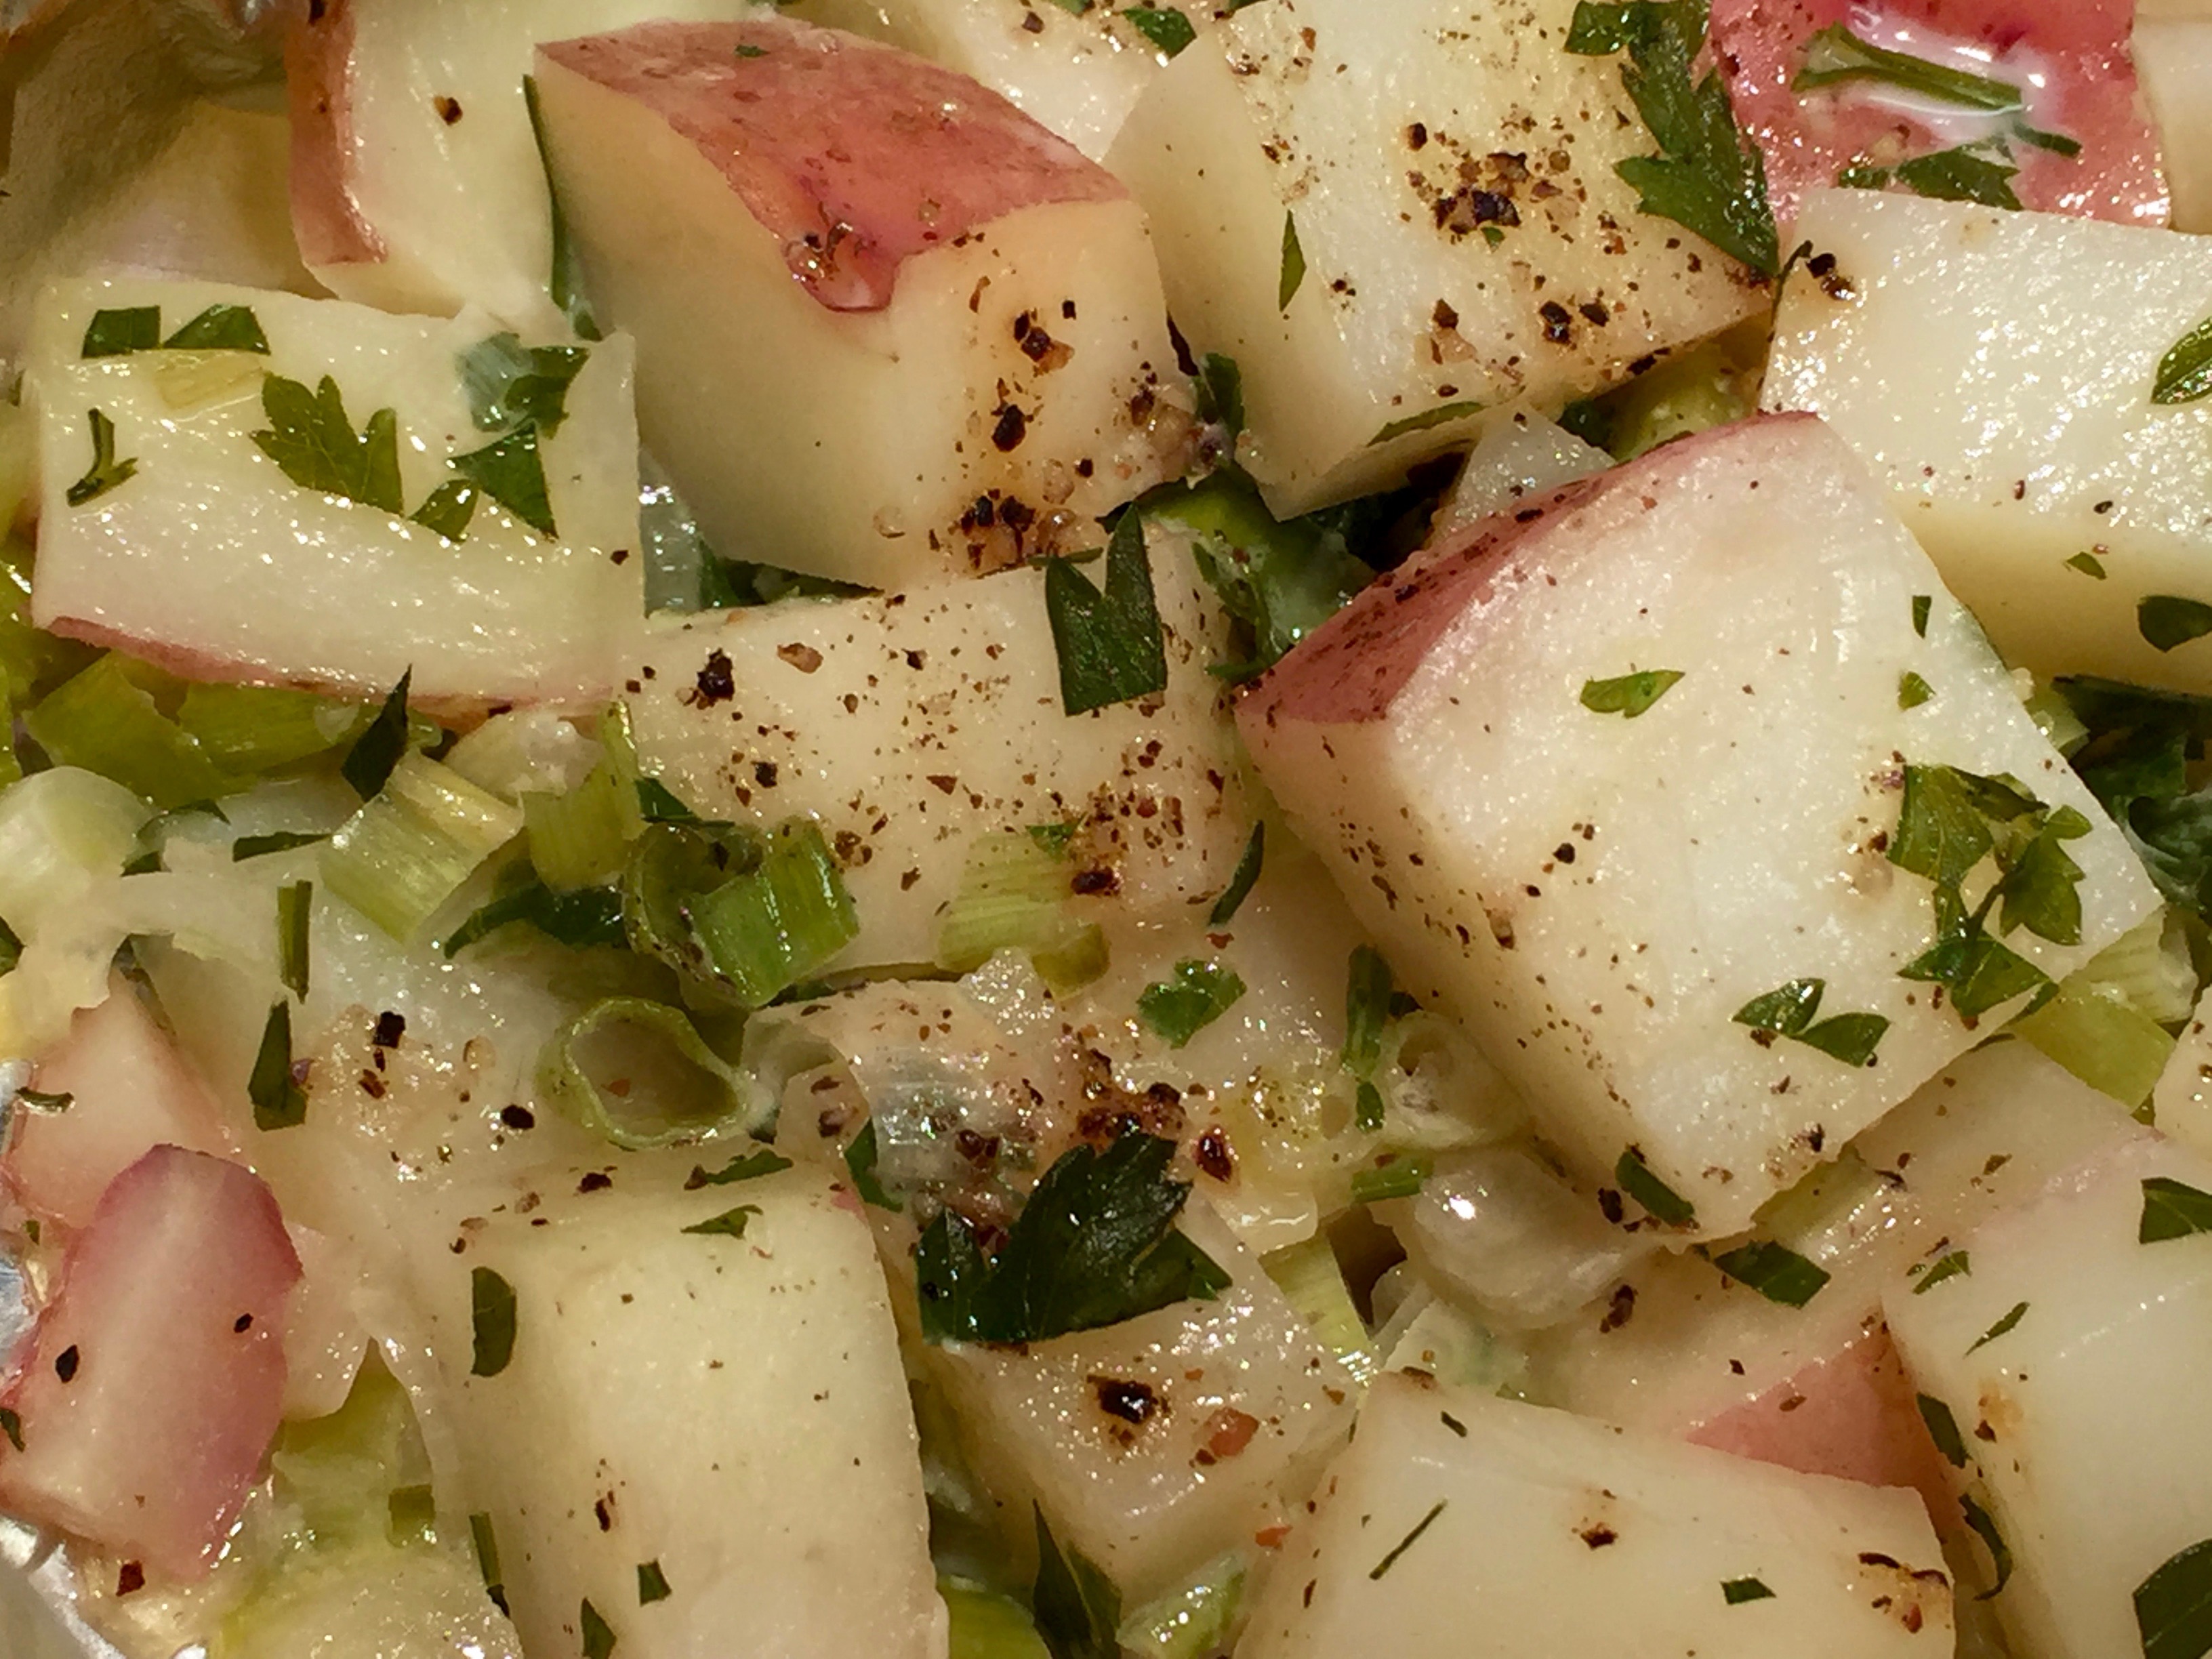
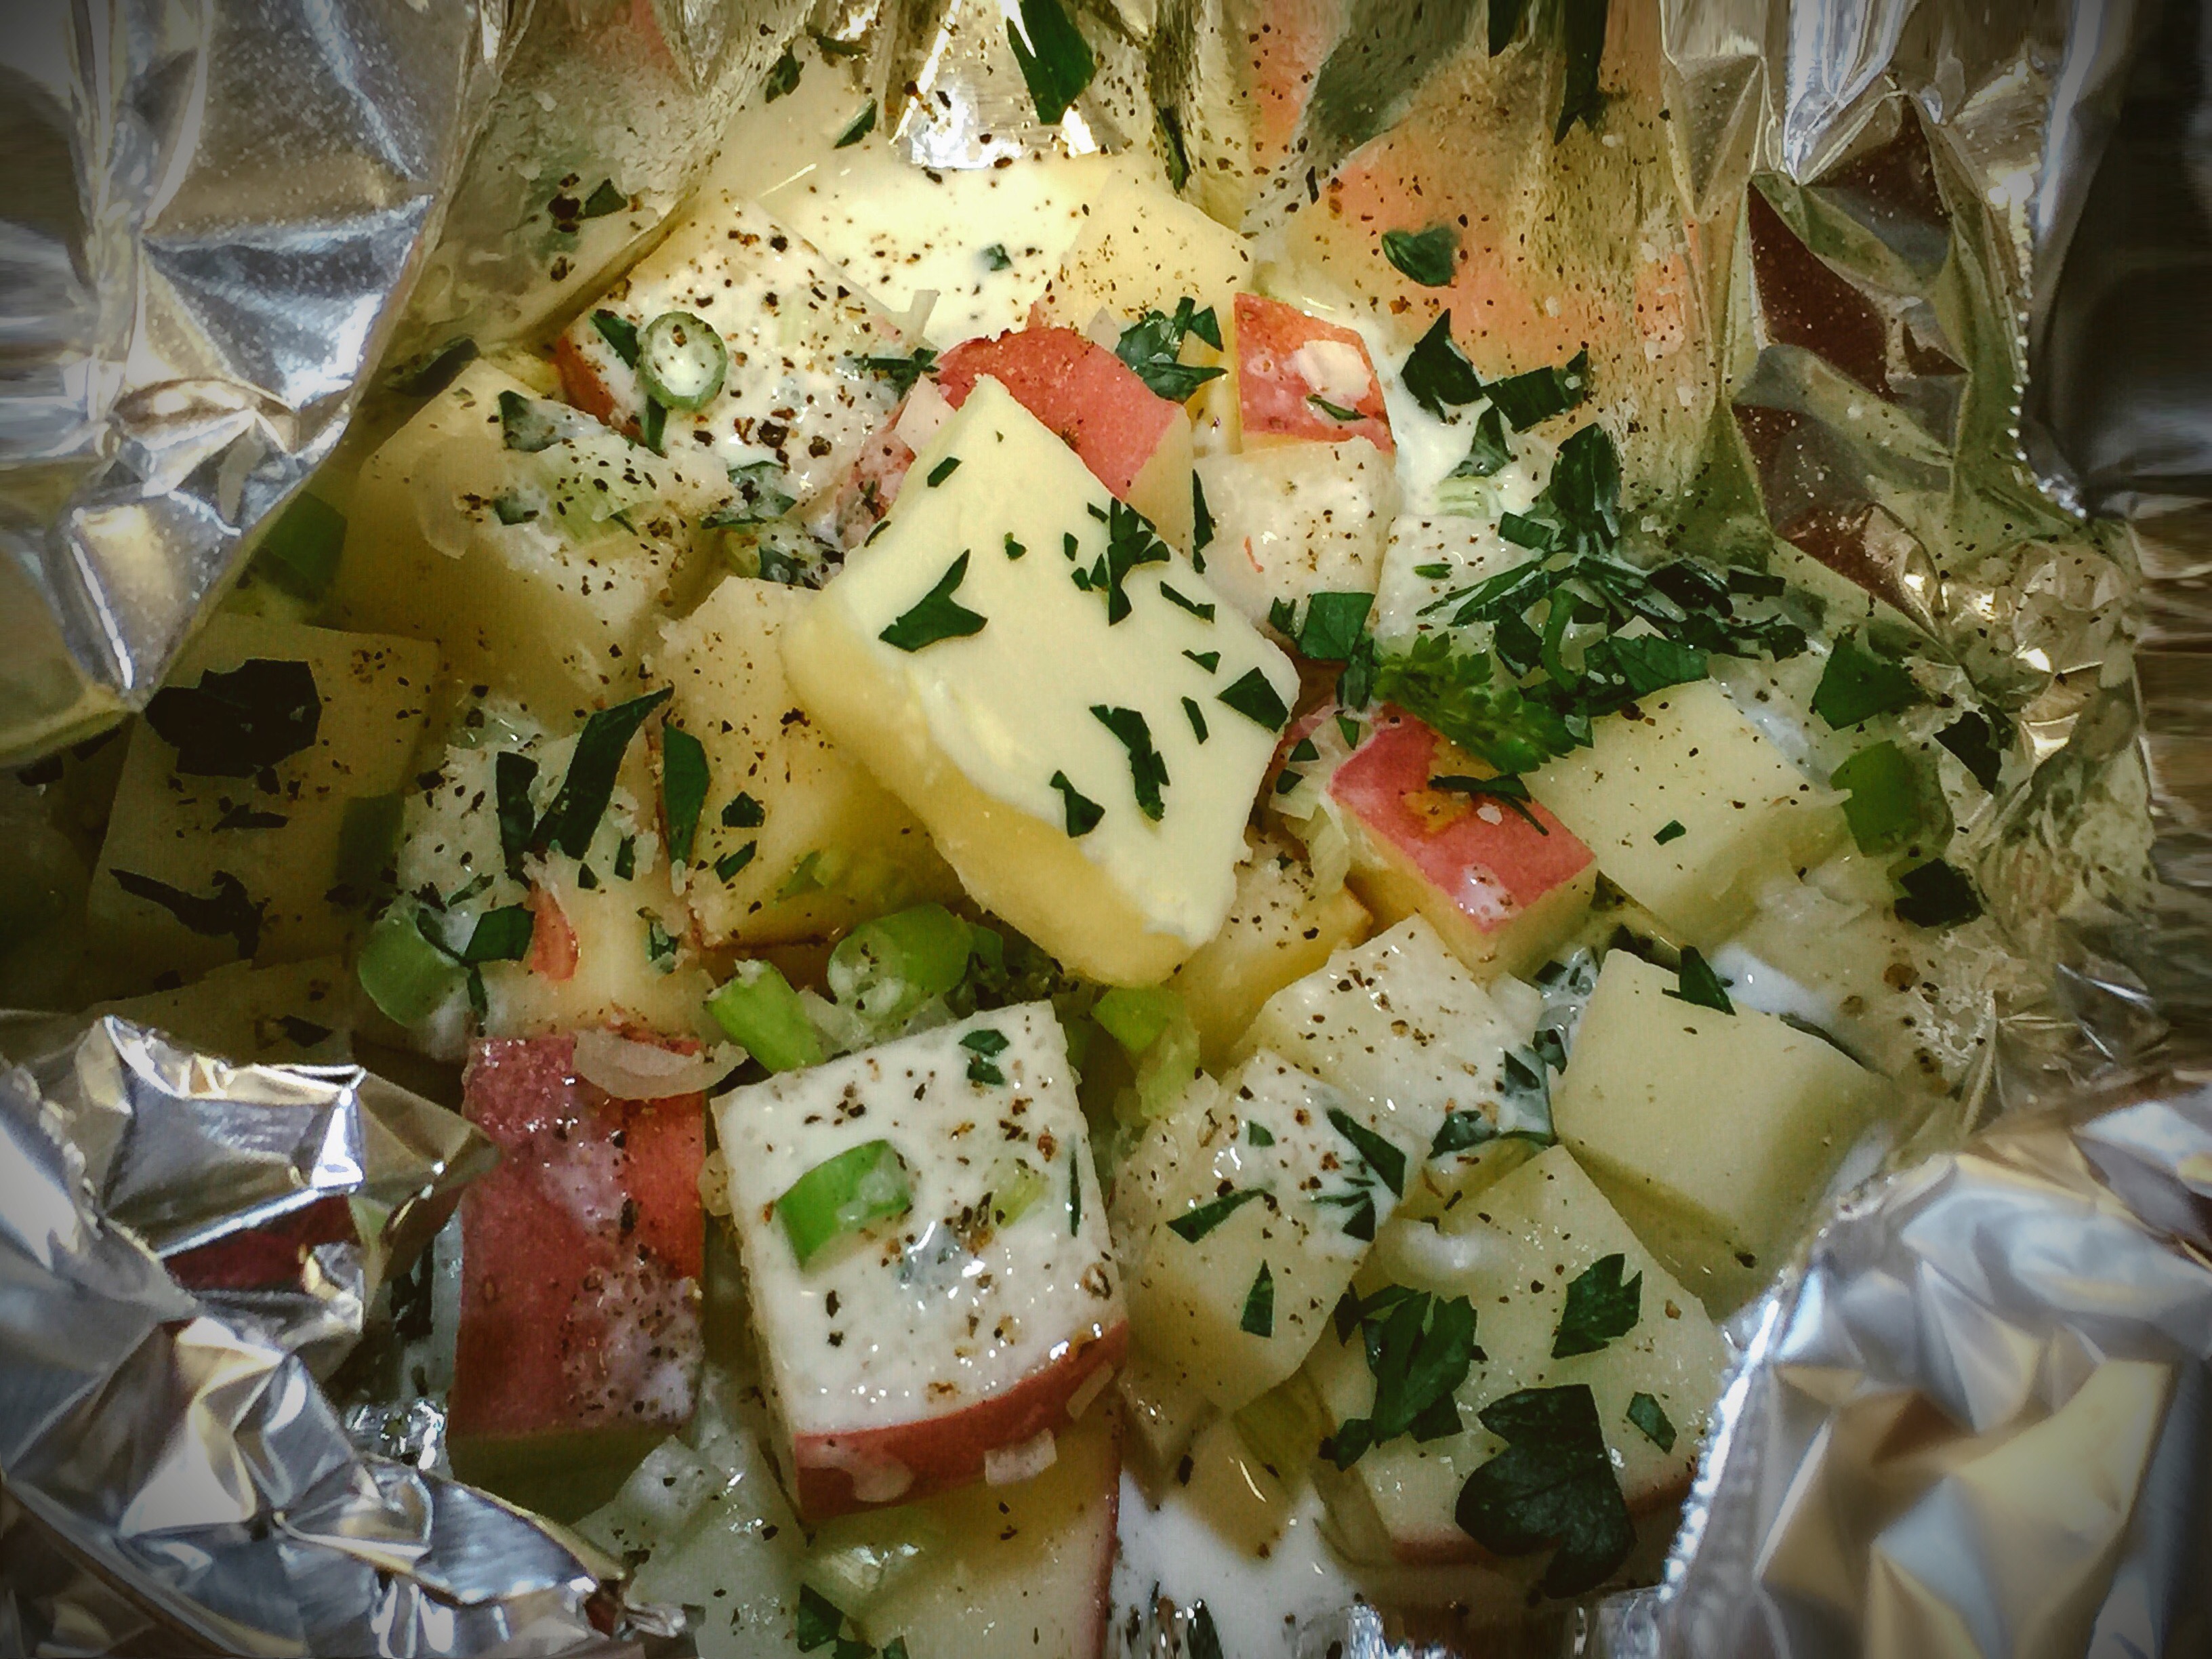
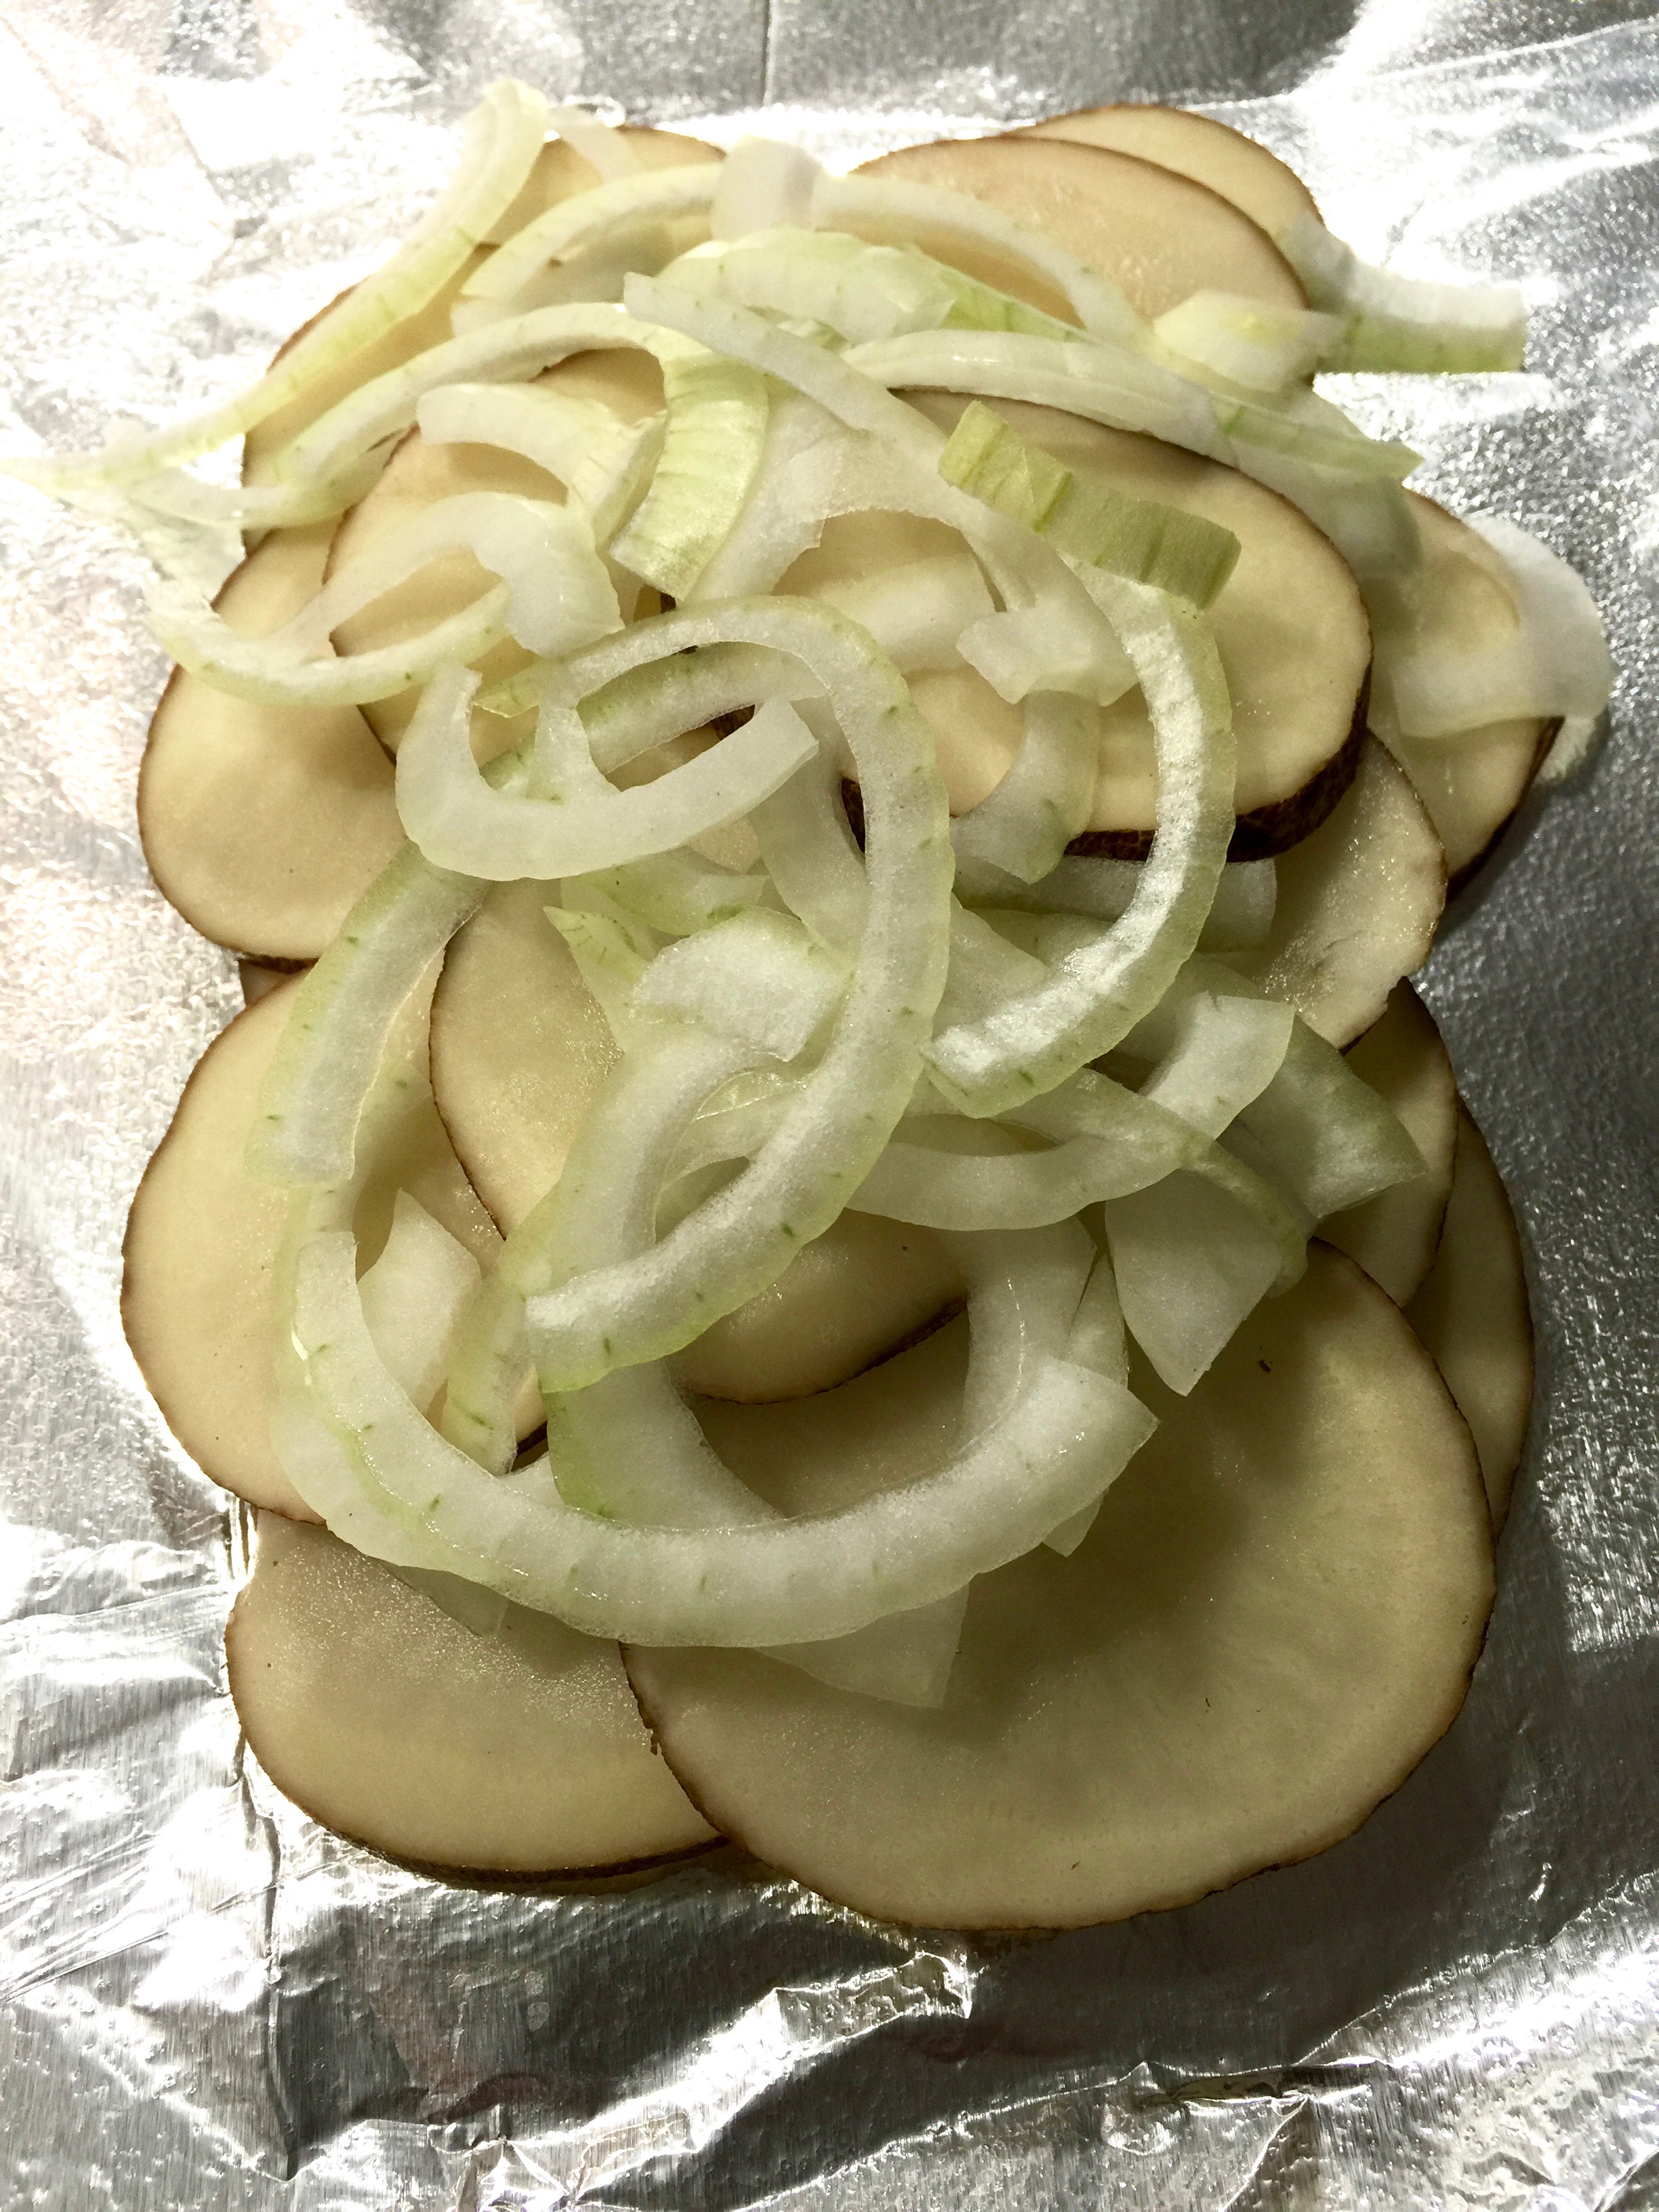
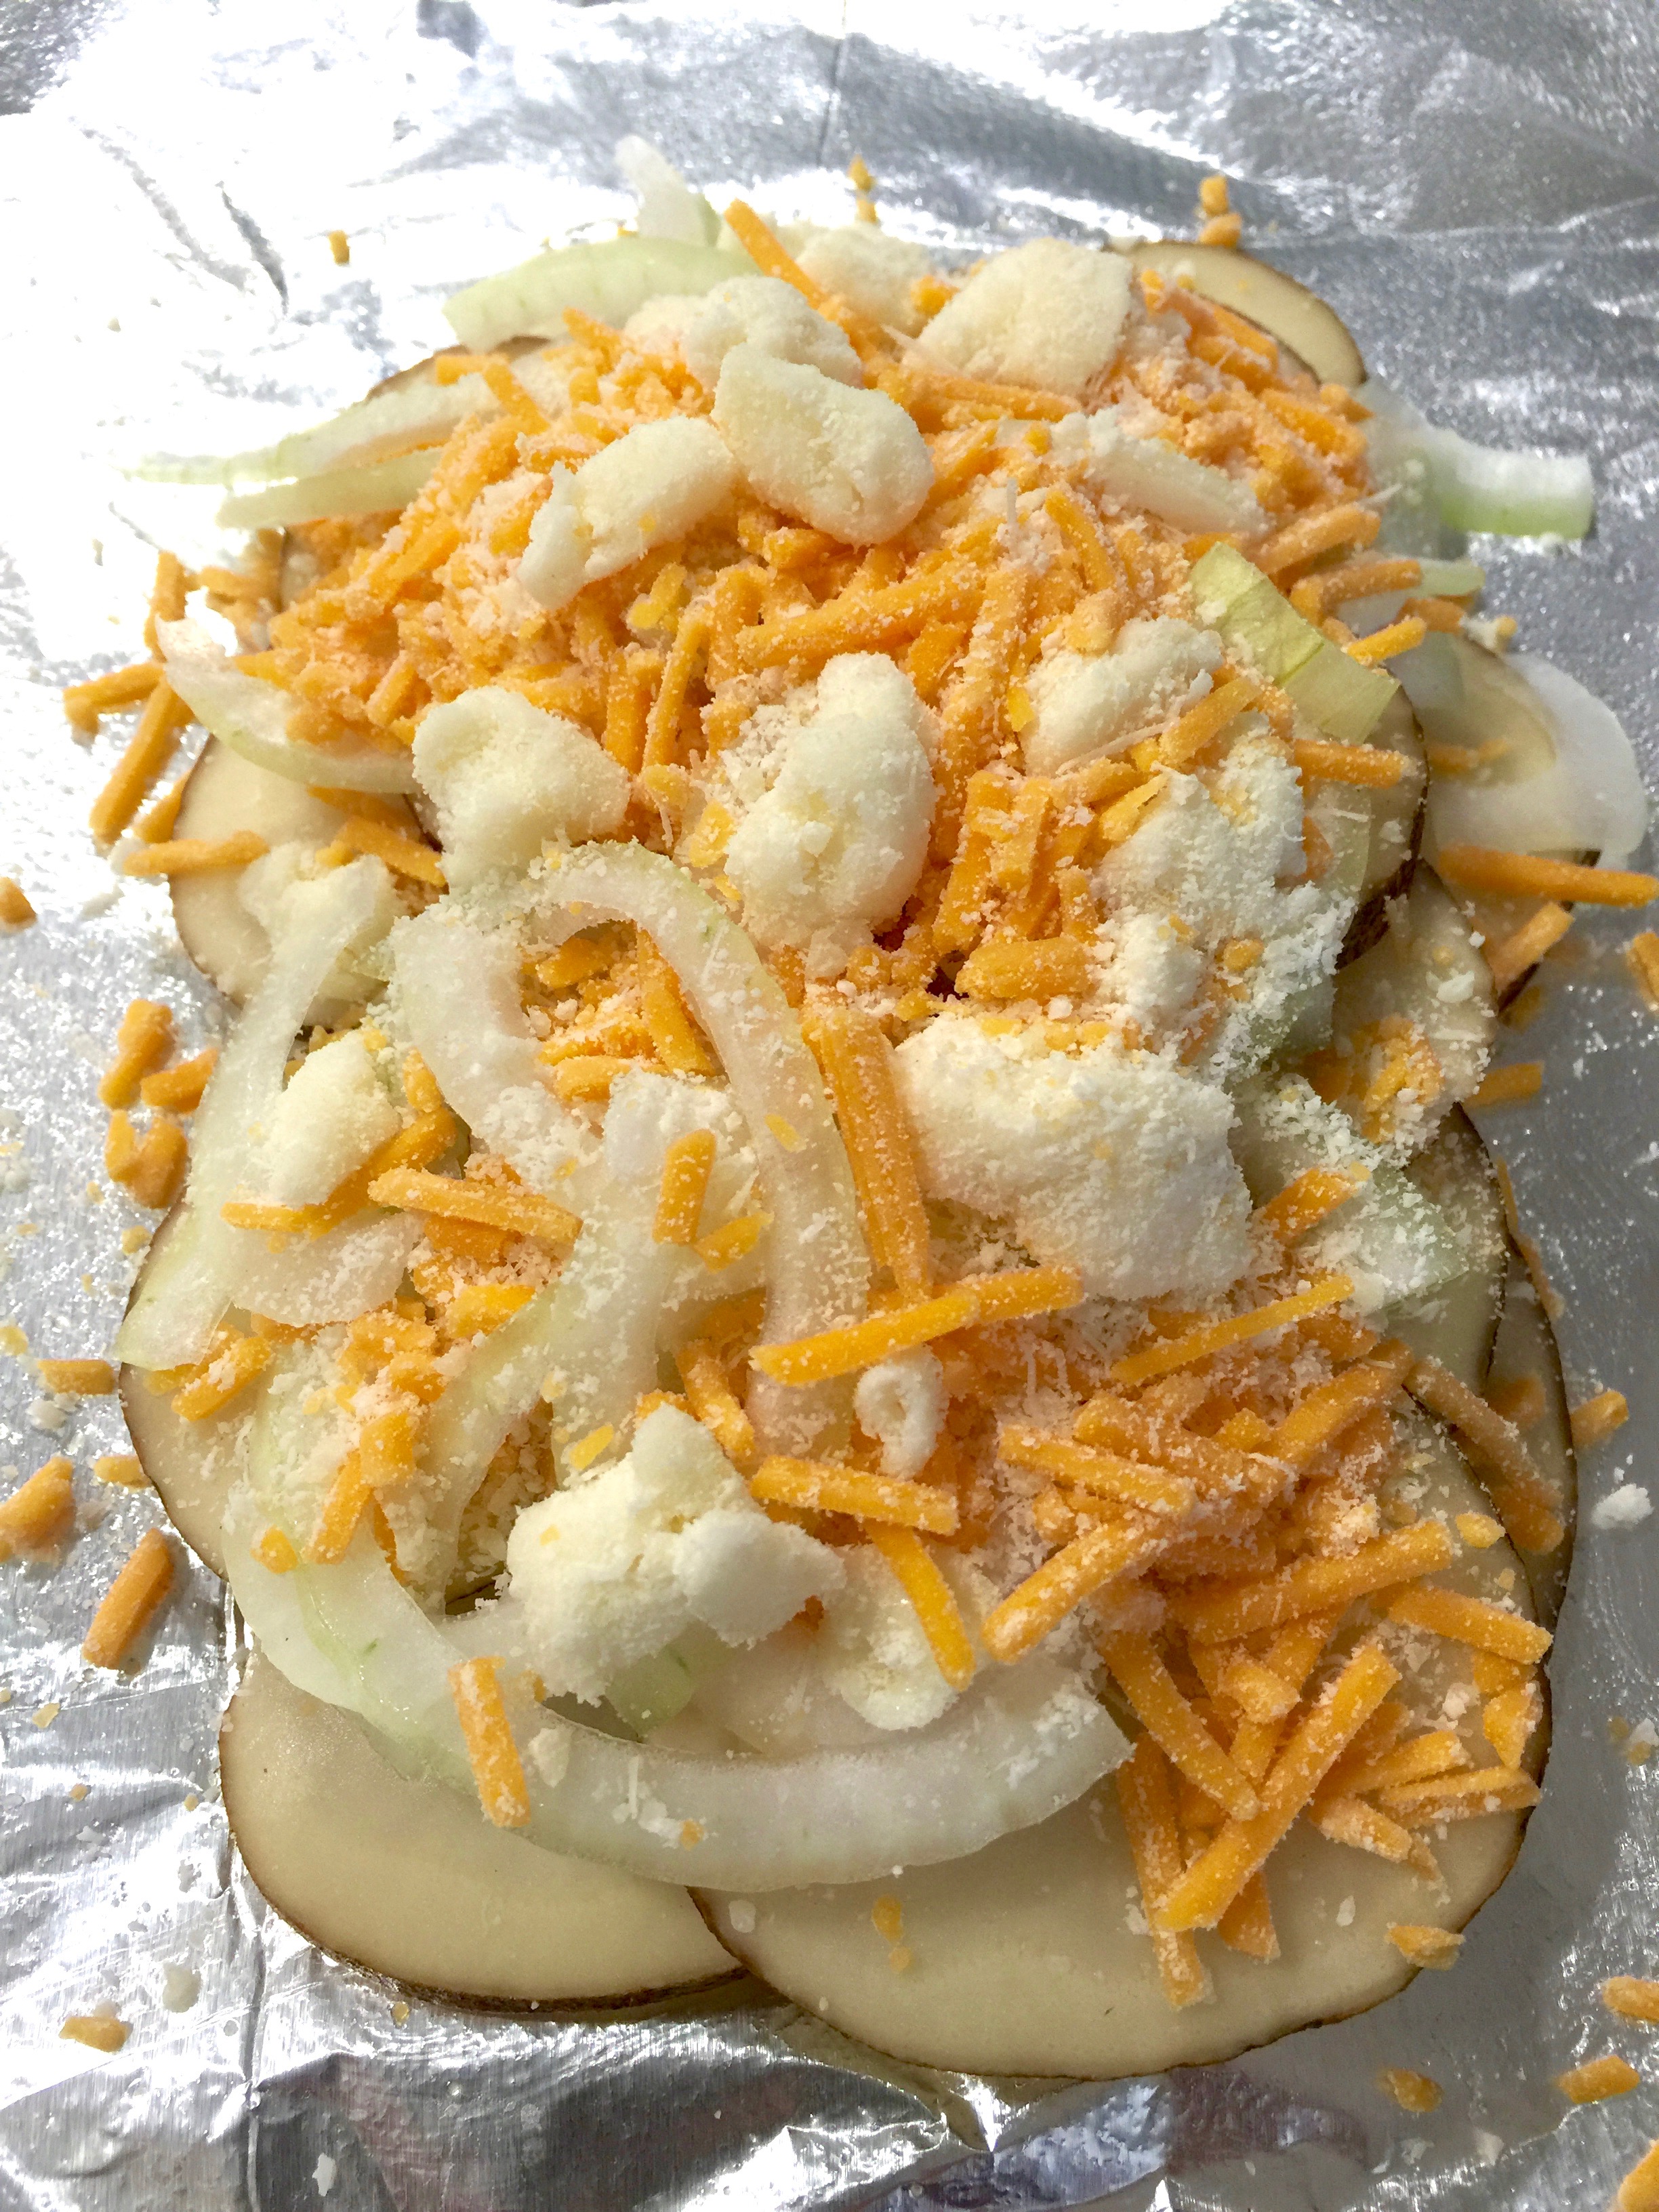
Lesson Learned 1 – Make sure to cut the potatoes to the correct size: For the purposes of this recipe you need to keep the pieces close in size (approx. 3/4 inch pieces). Here’s a little trick to help you achieve that. Using your chef’s knife cut a thin slice off of one of the longer sides of a peeled potato. Set the potato on the cut side and slice crosswise into even planks. Stack several planks and cut crosswise. Then rotate and cut crosswise again. This will give you evenly sliced potatoes.

Lesson Learned 2 – You can cook the pieces of potatoes two different ways, on the stovetop or in the microwave: (I will include both methods in the recipe printout). I chose to cook them on the stove. The process is not much different than making mashed potatoes. The only difference is you want to monitor the potatoes as they boil to make sure they don’t get overly soft, otherwise they’ll break apart. You want them to hold their shape. I would boil them for about 7-10 minutes and check their consistency. If they are still hard, check every couple of minutes until they are just becoming fork tender.

Lesson Learned 3 – If you choose to boil your potatoes first, let them cool a little in the strainer so they are as dry as possible when you put them in the cast iron skillet: In order to get your potatoes nice and brown you want them to be as free from water as possible. I would boil the potatoes first, strain them and let them sit in the strainer while you saute the onions and garlic. That way most of the moisture will drain off before you put them in the skillet.

Lesson Learned 4 – Once you saute the onions and garlic remove them from the pan and set them aside. The first time I made this recipe I kept them in the cast iron pan while I was browning the potatoes. Big mistake! They didn’t stand up very well through the browning process and wound up getting burned. Once you saute the mixture remove it from the pan and add it back in at the last minute just to get it warmed through again. That way you won’t get browned potatoes and blackened onions and garlic. Lessons learned from the cook who never could…

Lesson Learned 5 – Don’t continuously move the potatoes once they are in the skillet: In order to get the potatoes nice and brown you have to let them sit for a while in the skillet. The whole browning process can take about 20 minutes and you don’t want to be flipping the potatoes continuously during that time. If you want to check to see if they are ready to flip, turn one of the pieces or look on the sides of the pieces to see if the bottoms have started to to turn color. You’ll get a much better result if you are patient during the browning process.

And that’s it, couldn’t be any easier. I like these so much better than the frozen kind. Try them and see if you agree!

Home Fries...

  • Servings: 4
  • Difficulty: Easy
  • Print

INGREDIENTS:

2 large russet potatoes, peeled and sliced into 3/4 inch cubes

2 – 3 Tbs. vegetable oil

1 small-medium size onion, chopped

2 garlic cloves, minced

1 Tbs. fresh chives

Salt and pepper, to taste

DIRECTIONS:

In a high rimmed pot, boil the potatoes until they just fork tender. Drain the potatoes and set aside. (NOTE: you can also microwave the potatoes. Put 1 Tbs. oil, 1/2 tsp. salt and 1/2 tsp. pepper in a covered microwave safe bowl along with the potatoes. Stir. Cook 7-10 minutes stirring occasionally. Drain the potatoes well).

Heat a cast iron skillet over medium heat for about 3-4 minutes. Start with 2 Tbs. of oil (you may or may not need to add more later) added to the skillet and heated until shimmering. Add the onions and cook until lightly browned. Salt and pepper the onions. Add the garlic and cook until fragrant. Remove the mixture from the pan and set aside.

If needed, add the remaining oil to the pan. Add the potatoes and gently pack them into the skillet using the back end of a spatula. Cook, without moving for 7-10 minutes or until they begin to brown.

Flip the potatoes and lightly repack them into the skillet. (check to see if you need to add oil during this process). Continue flipping process until the potatoes are browned on all sides. Add the onions and garlic back to the pan, mix with the potatoes and heat until warmed through.

Season with salt and pepper, garnish with chives and serve immediately.

Potatoes during the browning process


SaveSave

SaveSave

SaveSave

SaveSave

SaveSave

SaveSave

SaveSave

SaveSave

SaveSave

SaveSave

SaveSave

SaveSave

SaveSave

SaveSave

SaveSave

SaveSave

Salmon Casserole For Two…

No lie, my first taste of this casserole all I could say was “Oh My God”! It was unreal how good it was. My husband, who is a little less dramatic, said, “This is very good” which is high praise from him.

Over the years we’ve been eating more and more fish and so every once in a while I like to try to shake things up with my fish recipes. Well, I hit the jackpot this time. This is one of my best recipes ever and I don’t even hesitate to say that the non-fish lover in your home will like this as well. It’s a very versatile dish and can be amended in a variety of ways but for now I’ll share what I did and talk more about versatility in lessons learned.

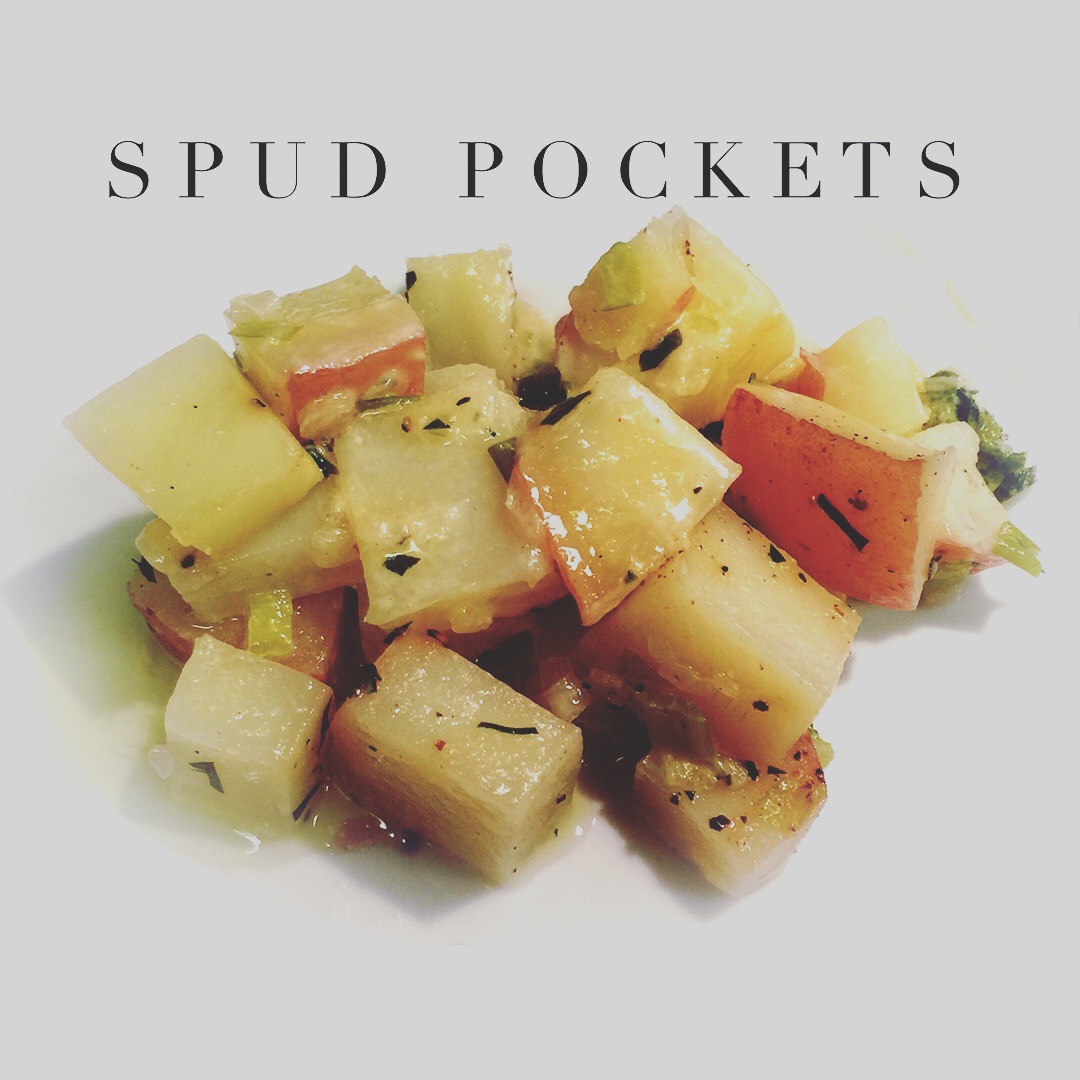
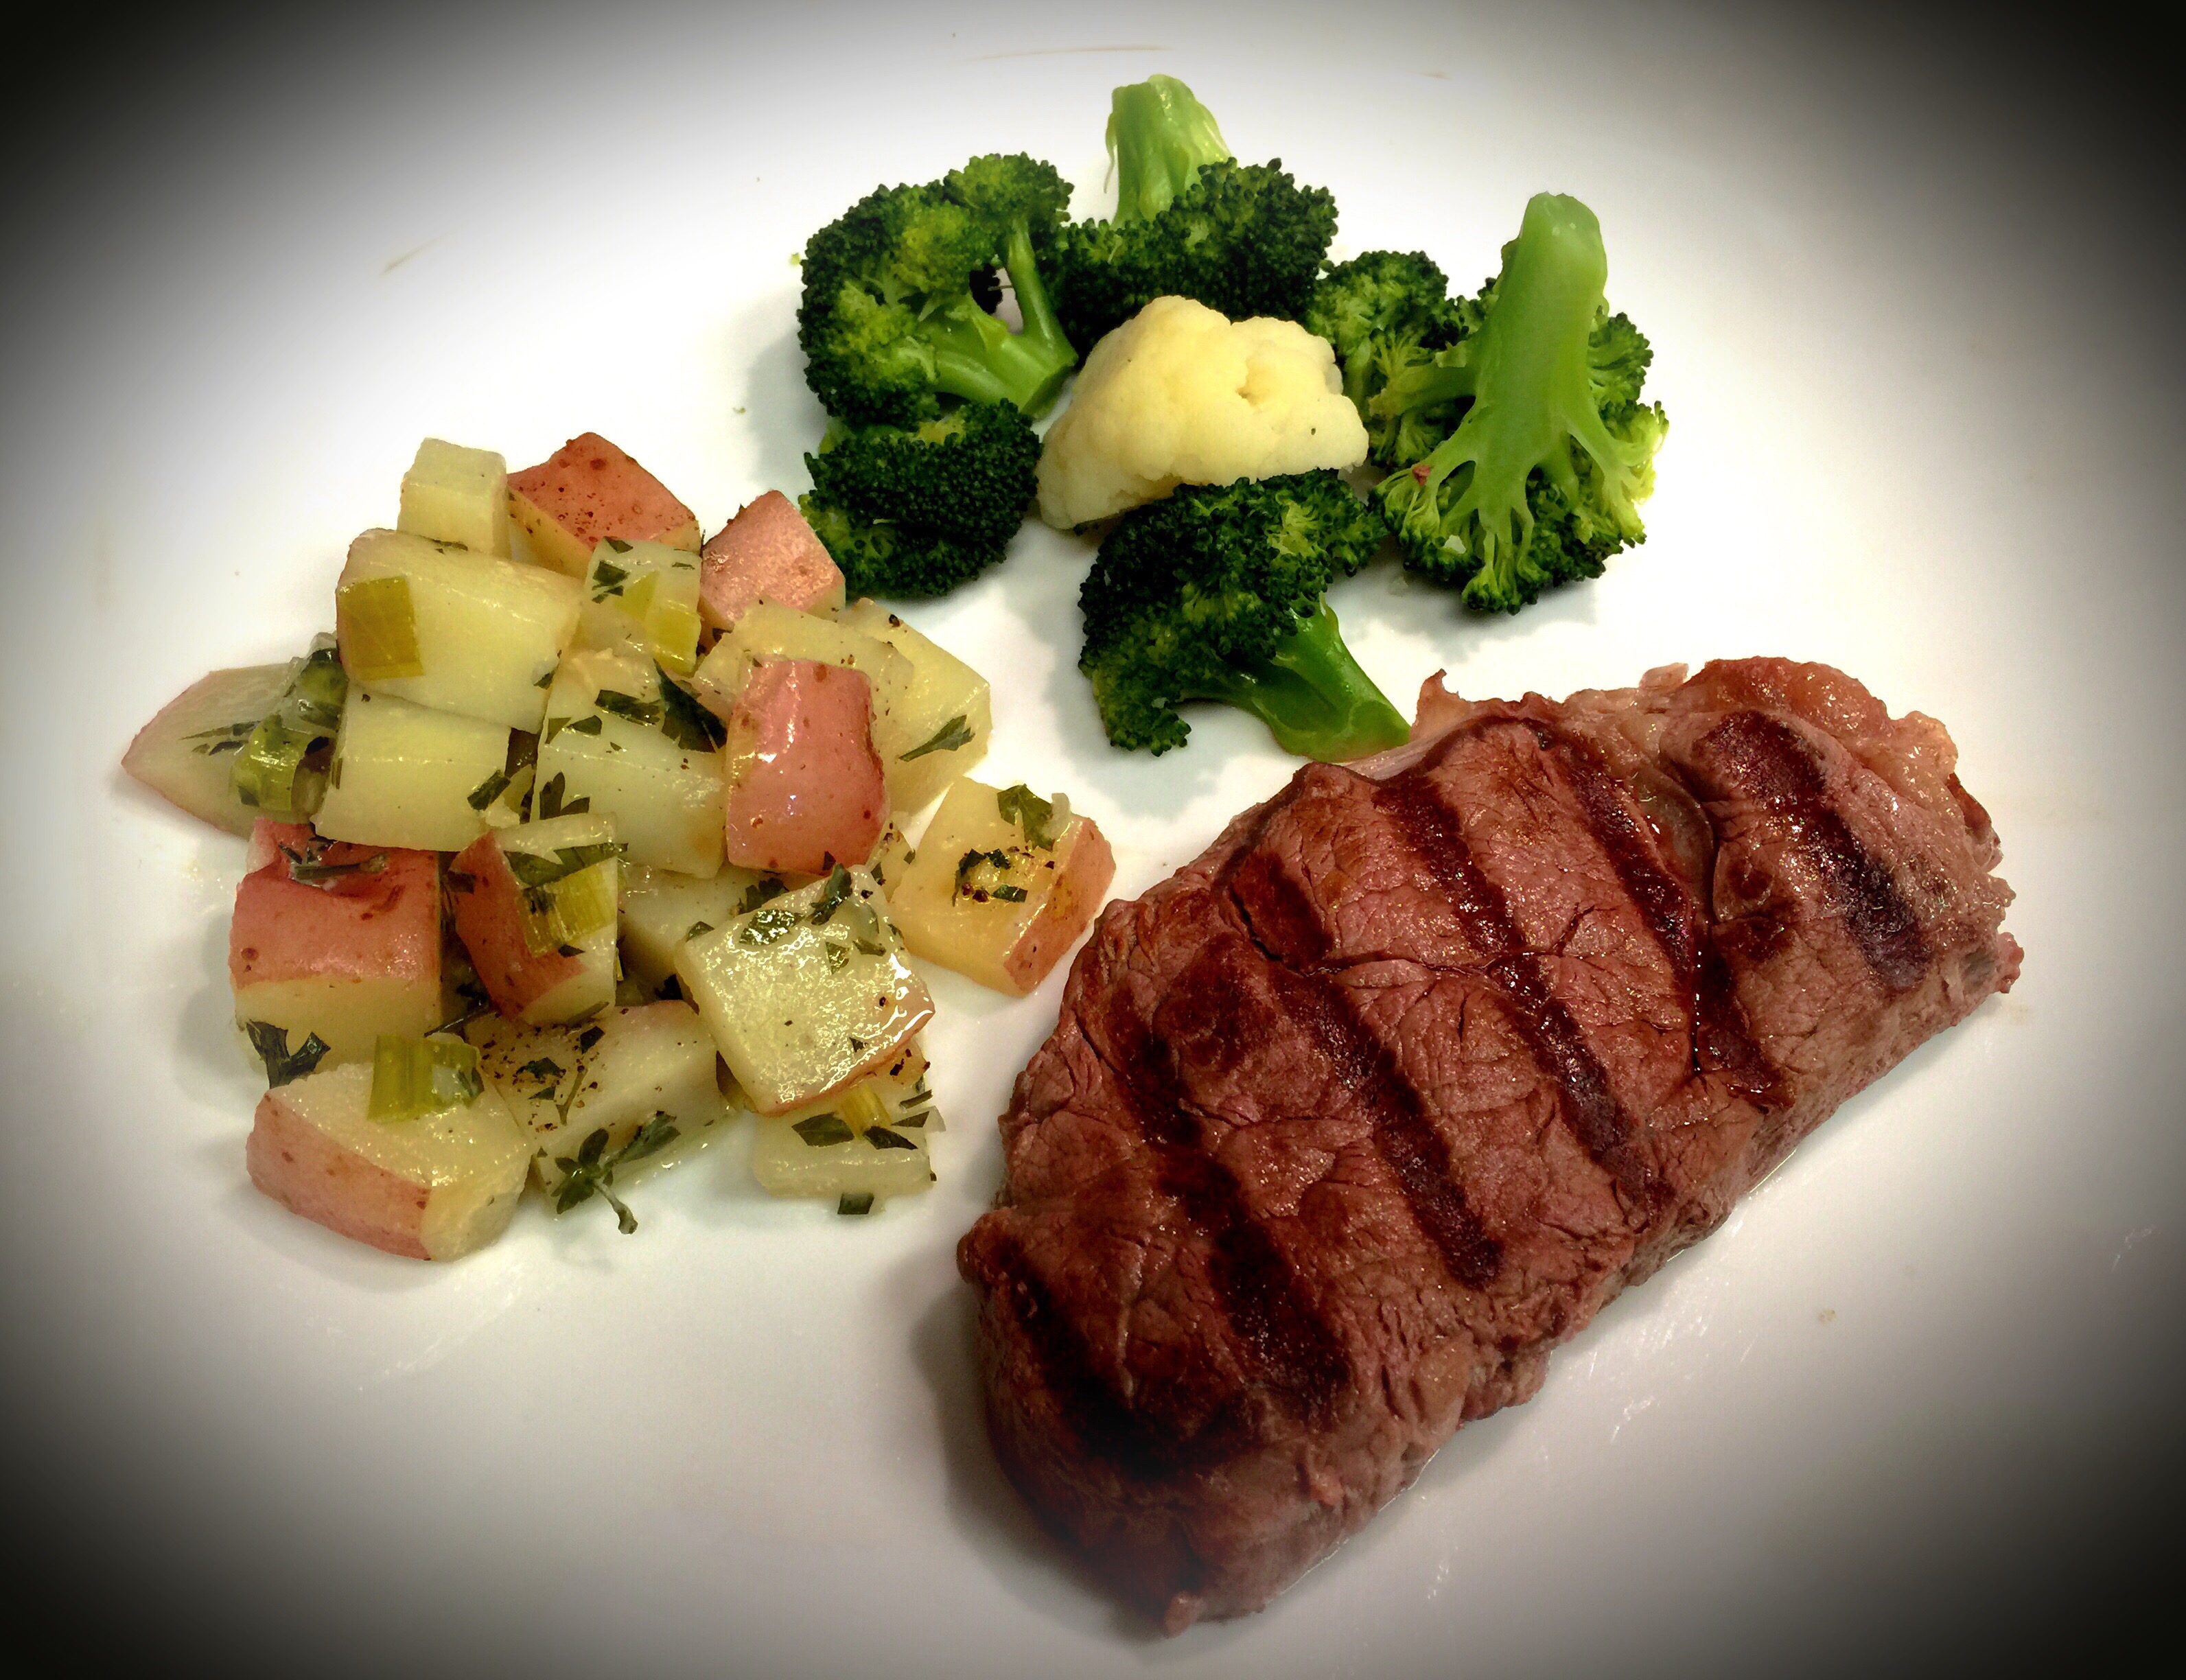
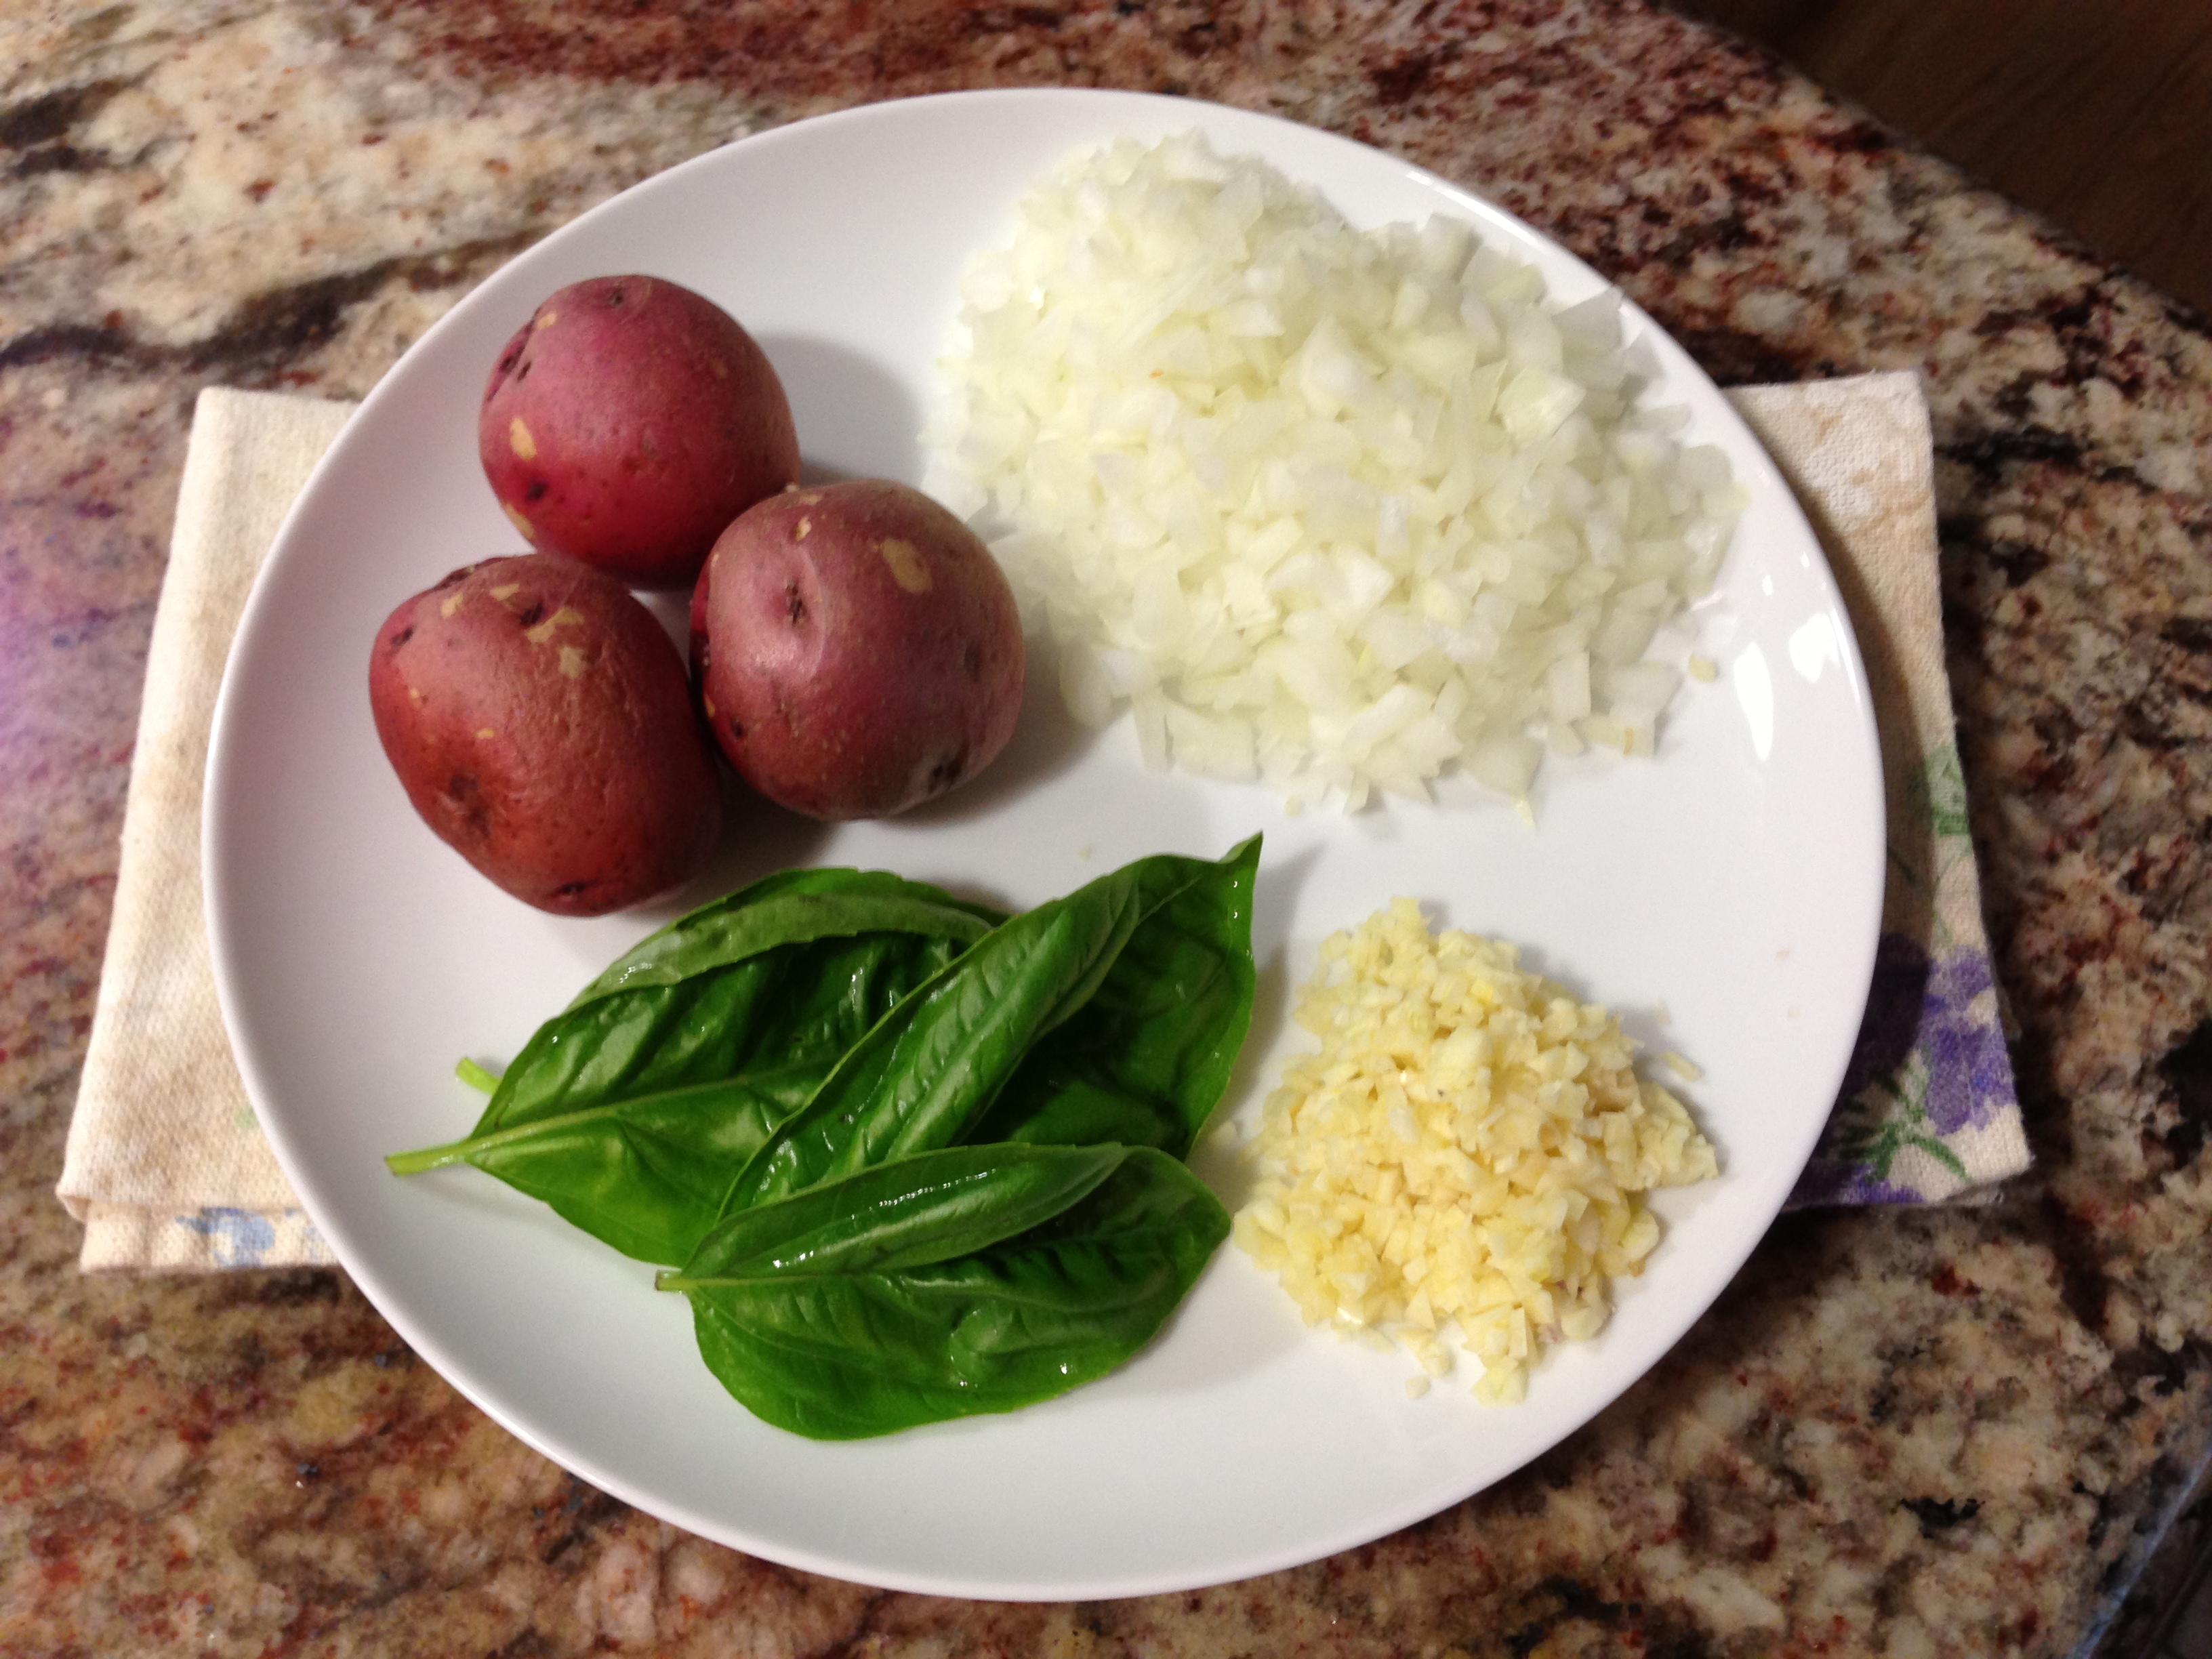
One more note… from time to time I will also focus on making recipes for two. It’s just my husband and I that I cook for now unless we are having a party and sometimes I find if I make too much we either throw stuff out or eat leftovers. And some recipes are more conducive to leftovers than others. These days it is hard to cook for two since grocery stores seem to sell bigger portions. But I found this particular recipe can be adapted in many ways and one of them is the amount you make. So I am writing this recipe for two people but keep in mind you can increase the ingredients proportionally  to serve more.

So let’s talk salmon casserole…

(NOTE: All meals pictured in this video can be found in the recipe index on this site)

Lesson learned 1 – Choose your salmon wisely: I’ve found that the salmon filets you buy at the grocery store can vary in thickness. For this recipe you’re going to want to get the thickest piece you can find. Normally what you’ll see is a piece that is about one inch thick at its widest part. Since this cooks for about 35-40 minutes you’re going to want to have a thicker piece so the salmon doesn’t dry out.

Most if not all prepackaged salmon pieces still have the skin on. You’ll need to remove that as well. I cut the salmon into approximately one inch chunks. They turned out perfectly. So keep in mind the thicker the piece the better. But don’t be afraid to also use the thinner part of your salmon filet. Because it is cooked in cream the salmon does retain its moistness.

I only used an 8 ounce salmon filet. Normally that is about enough for both of us. If you want a little more in your casserole, don’t be afraid to add it.

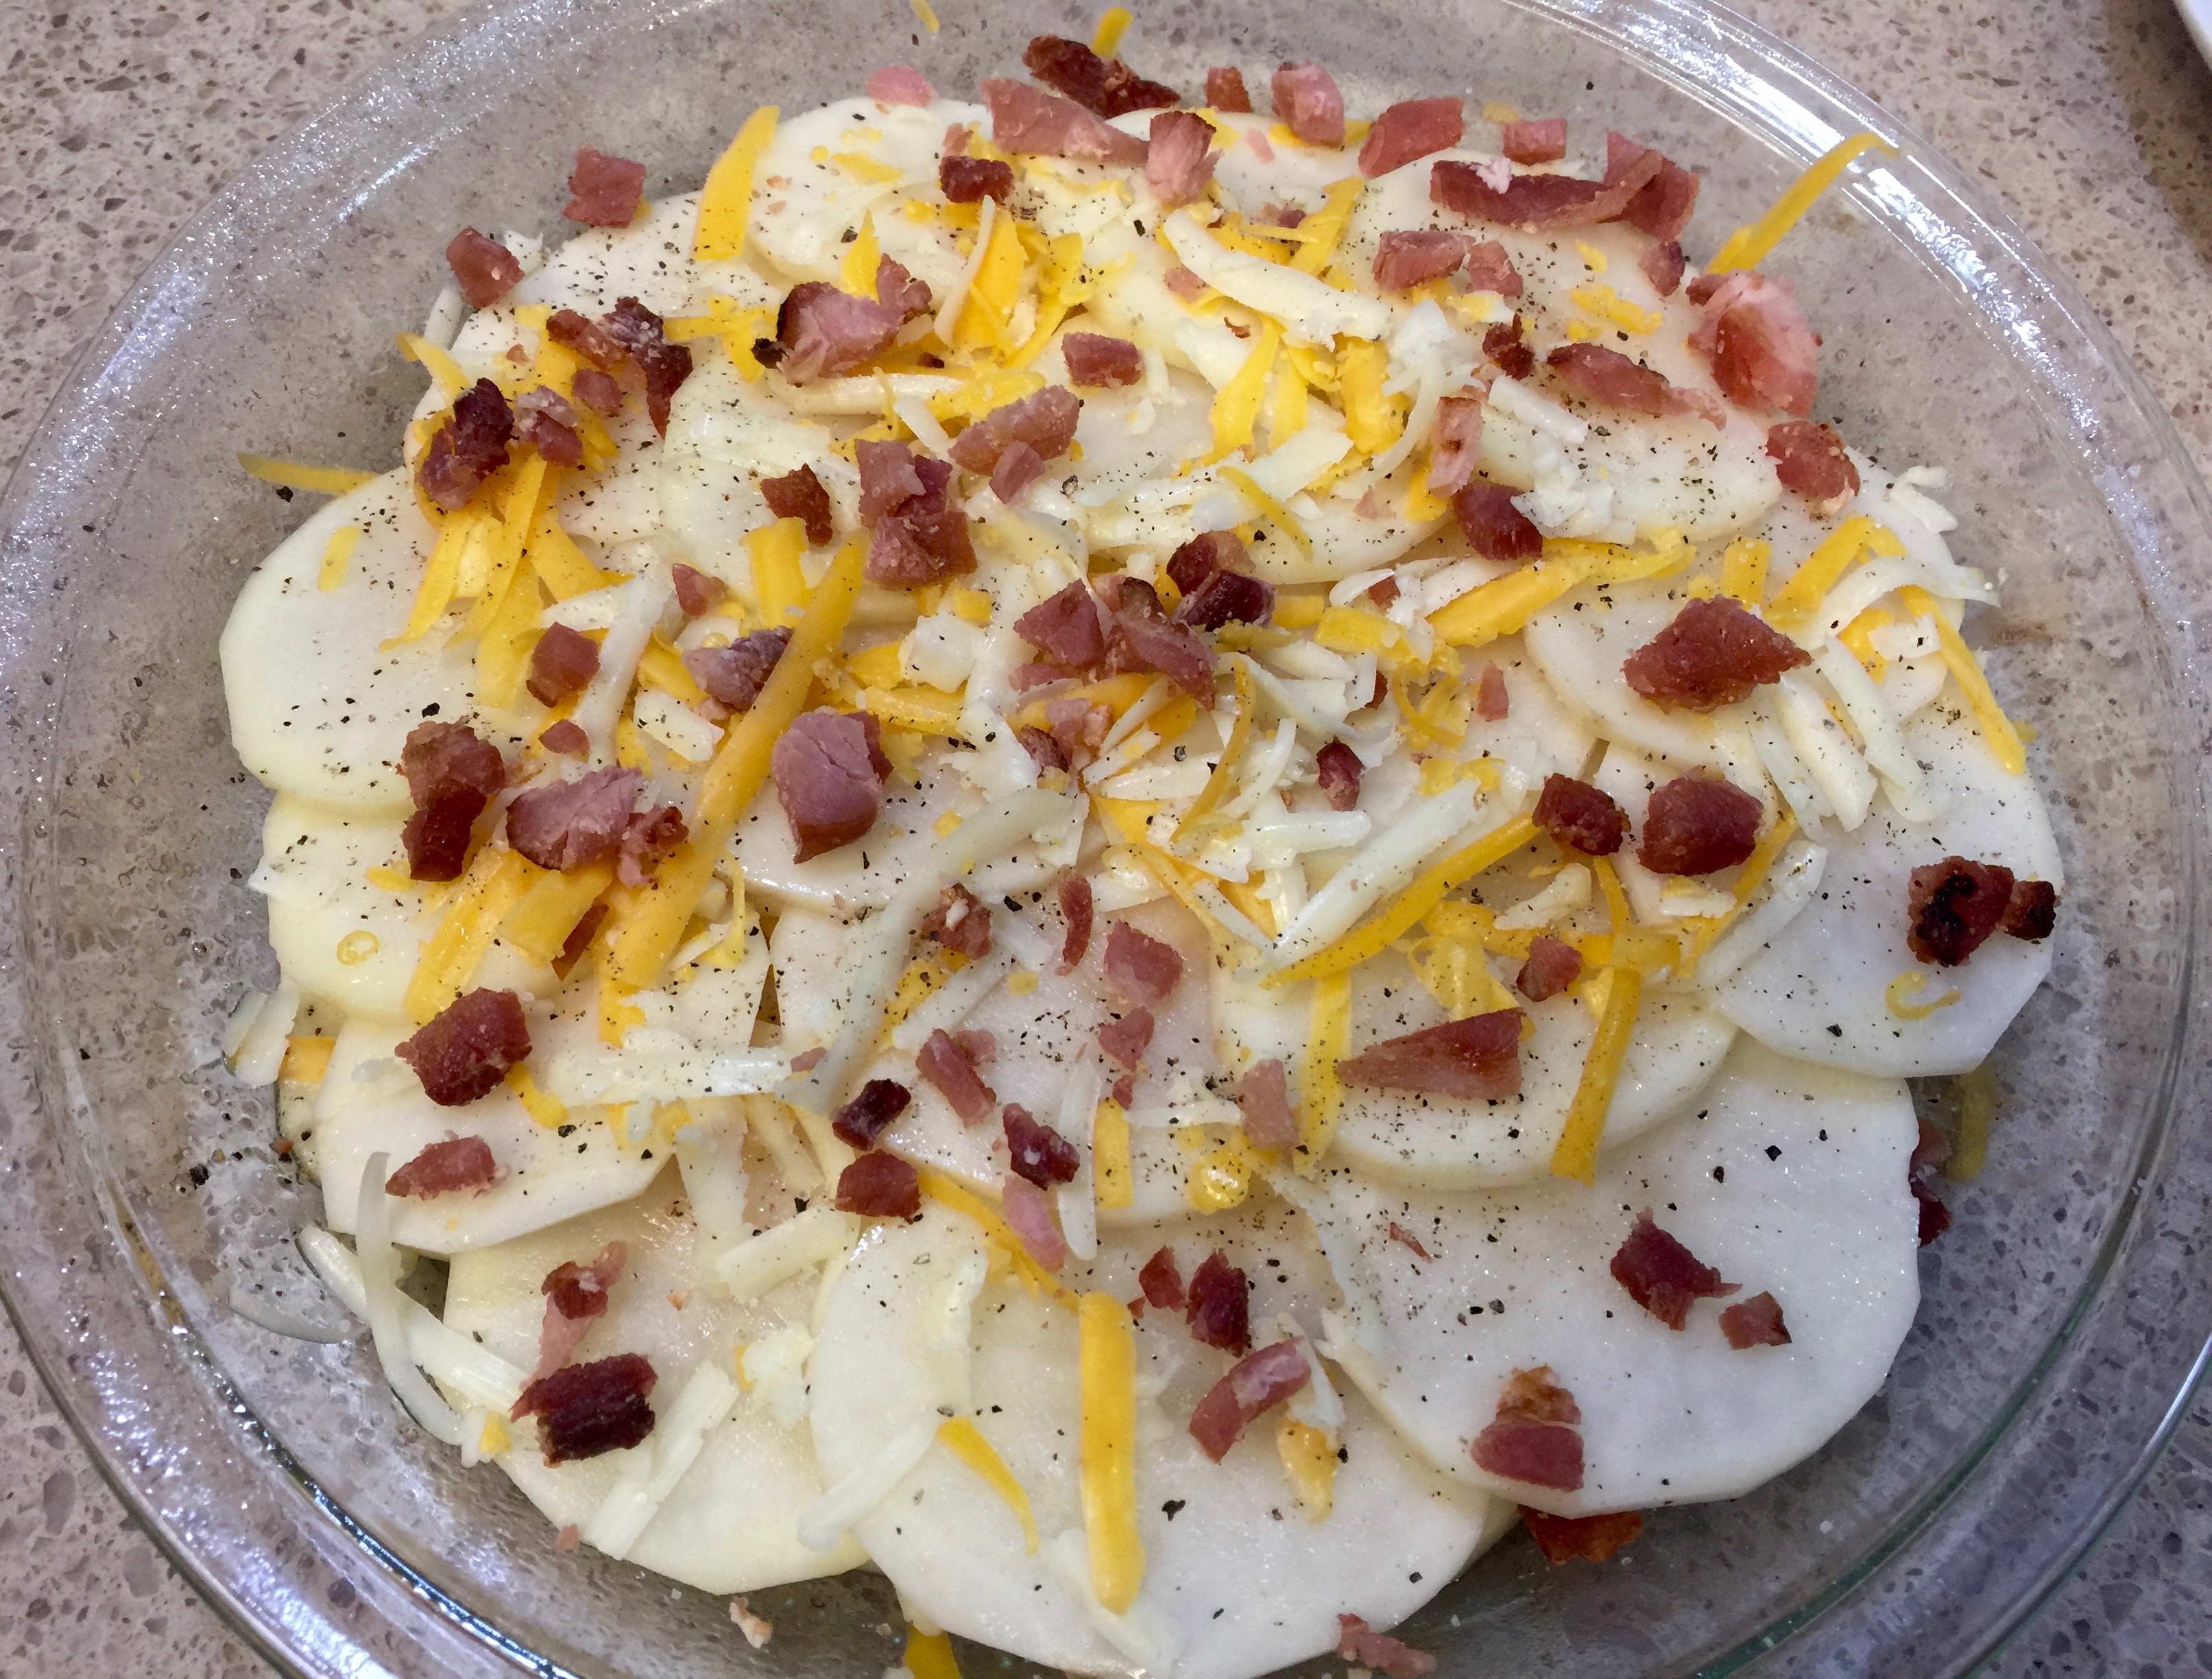
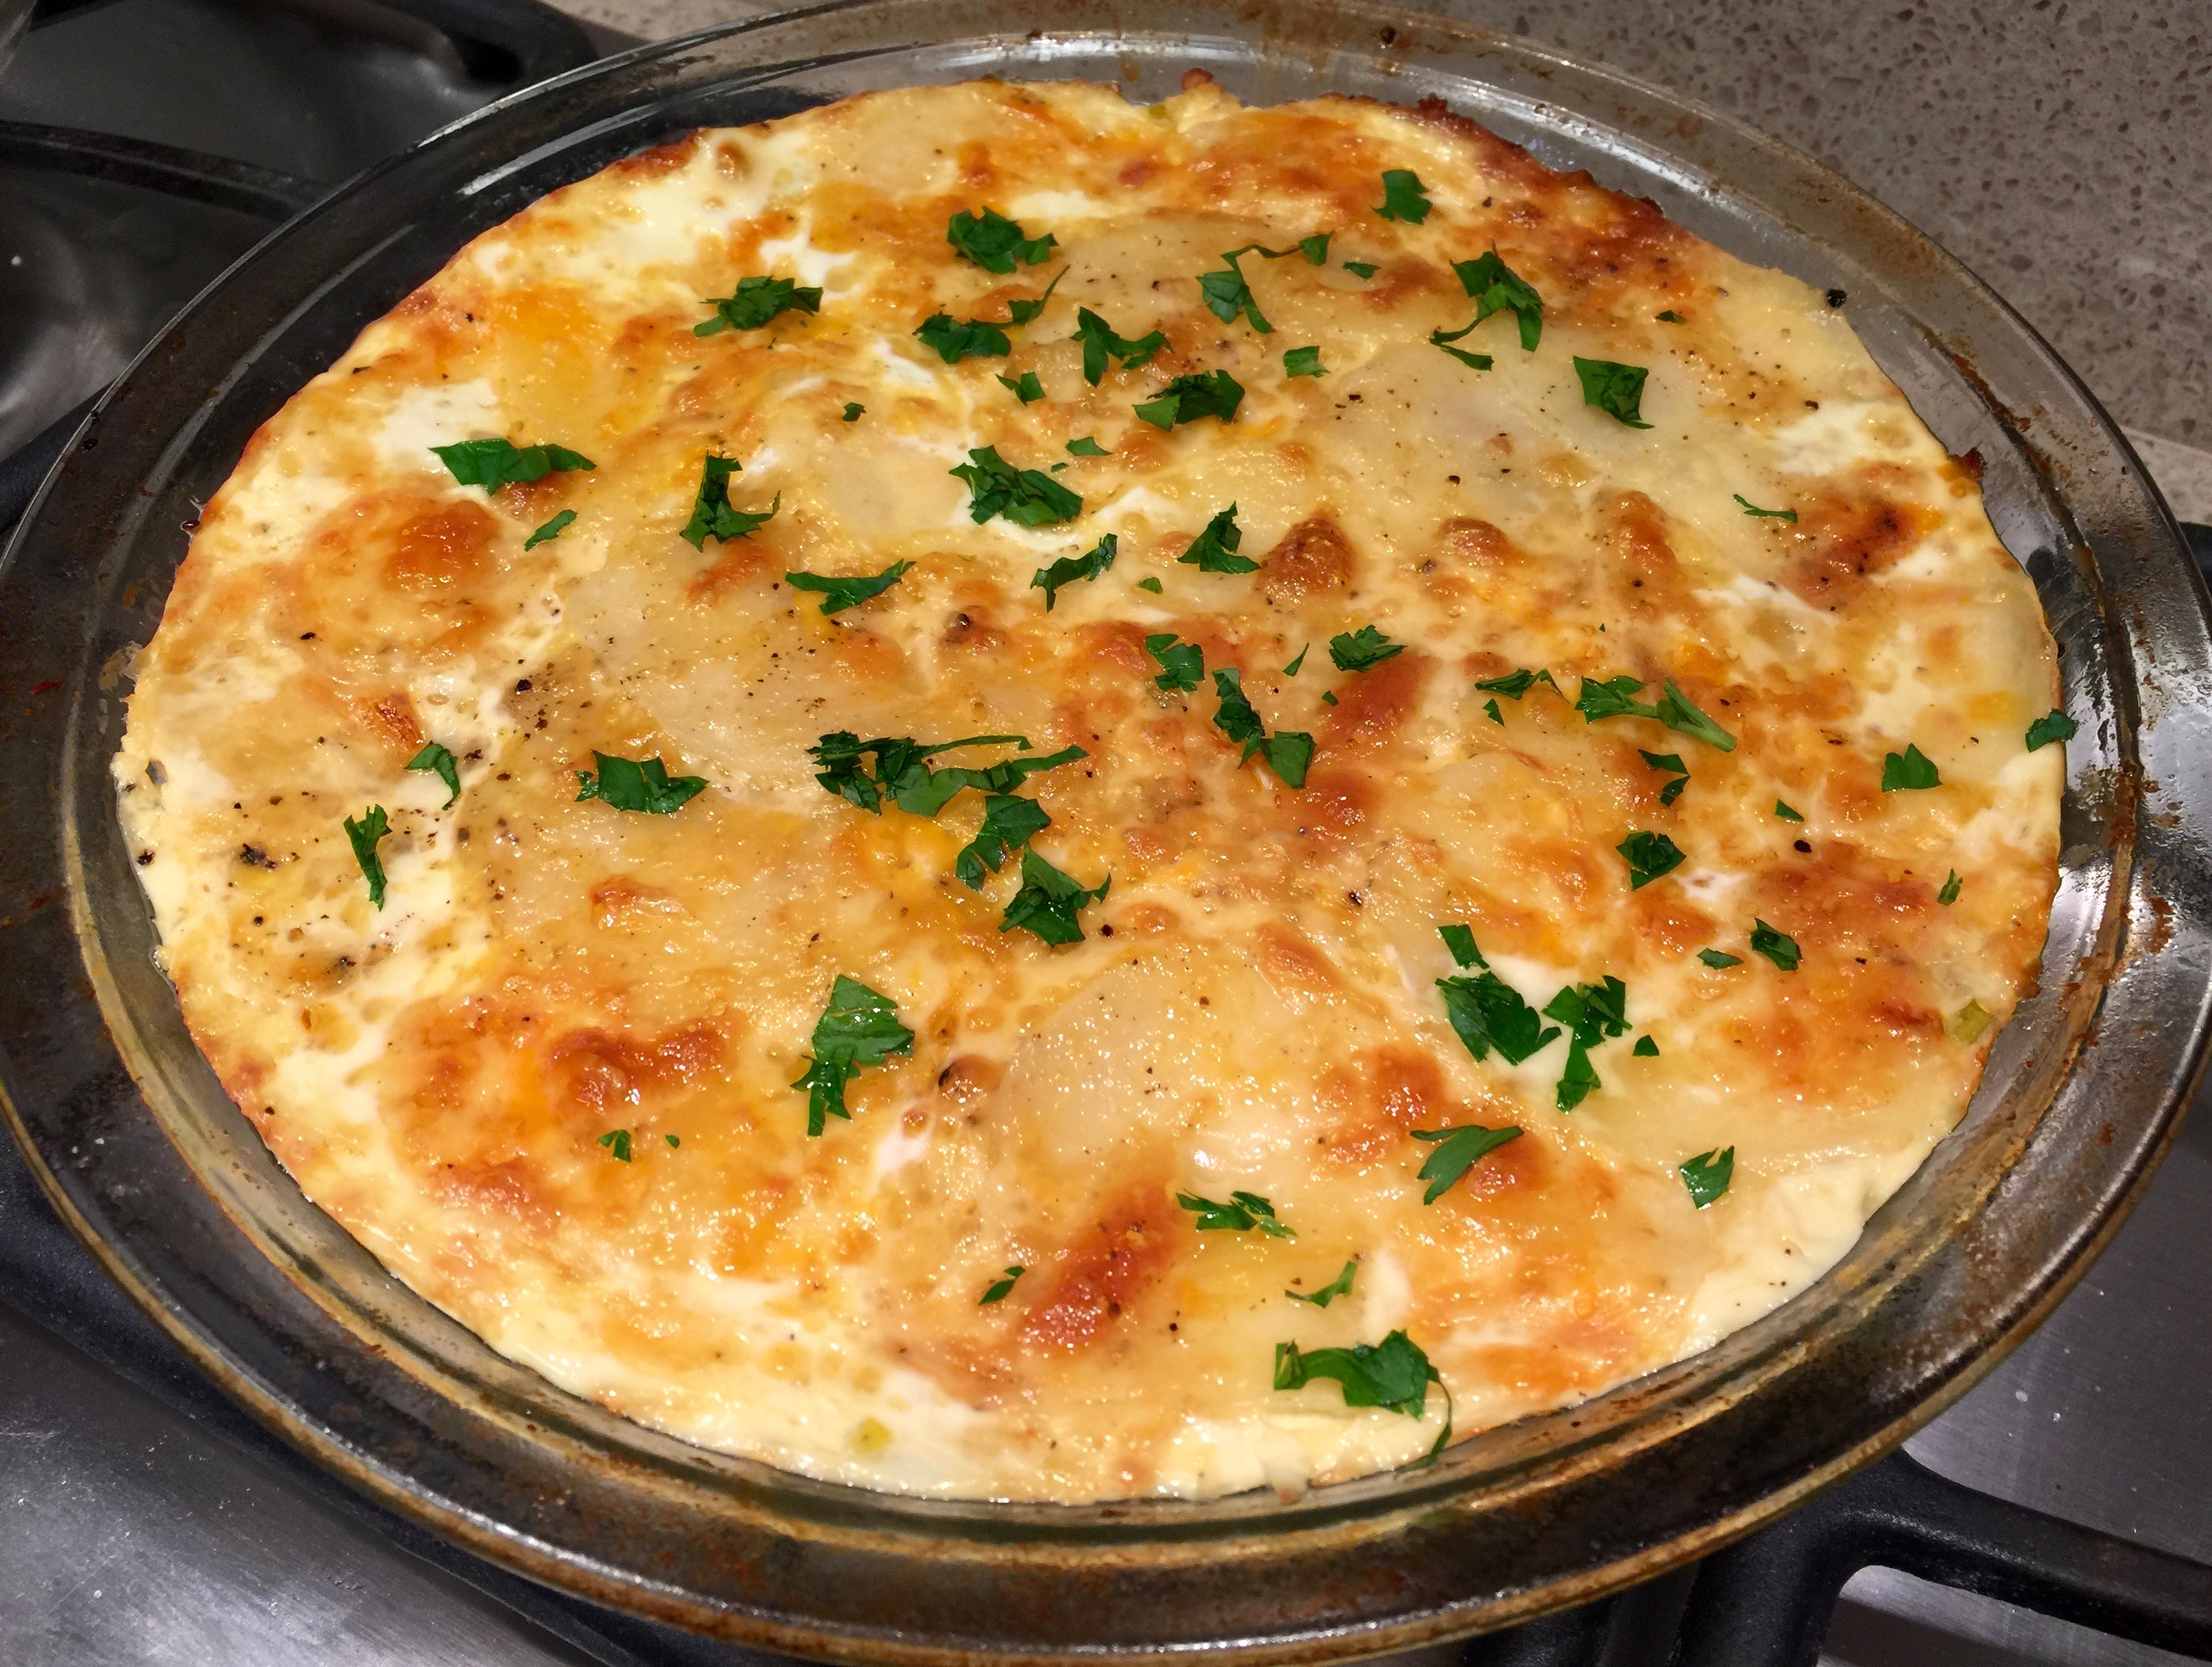
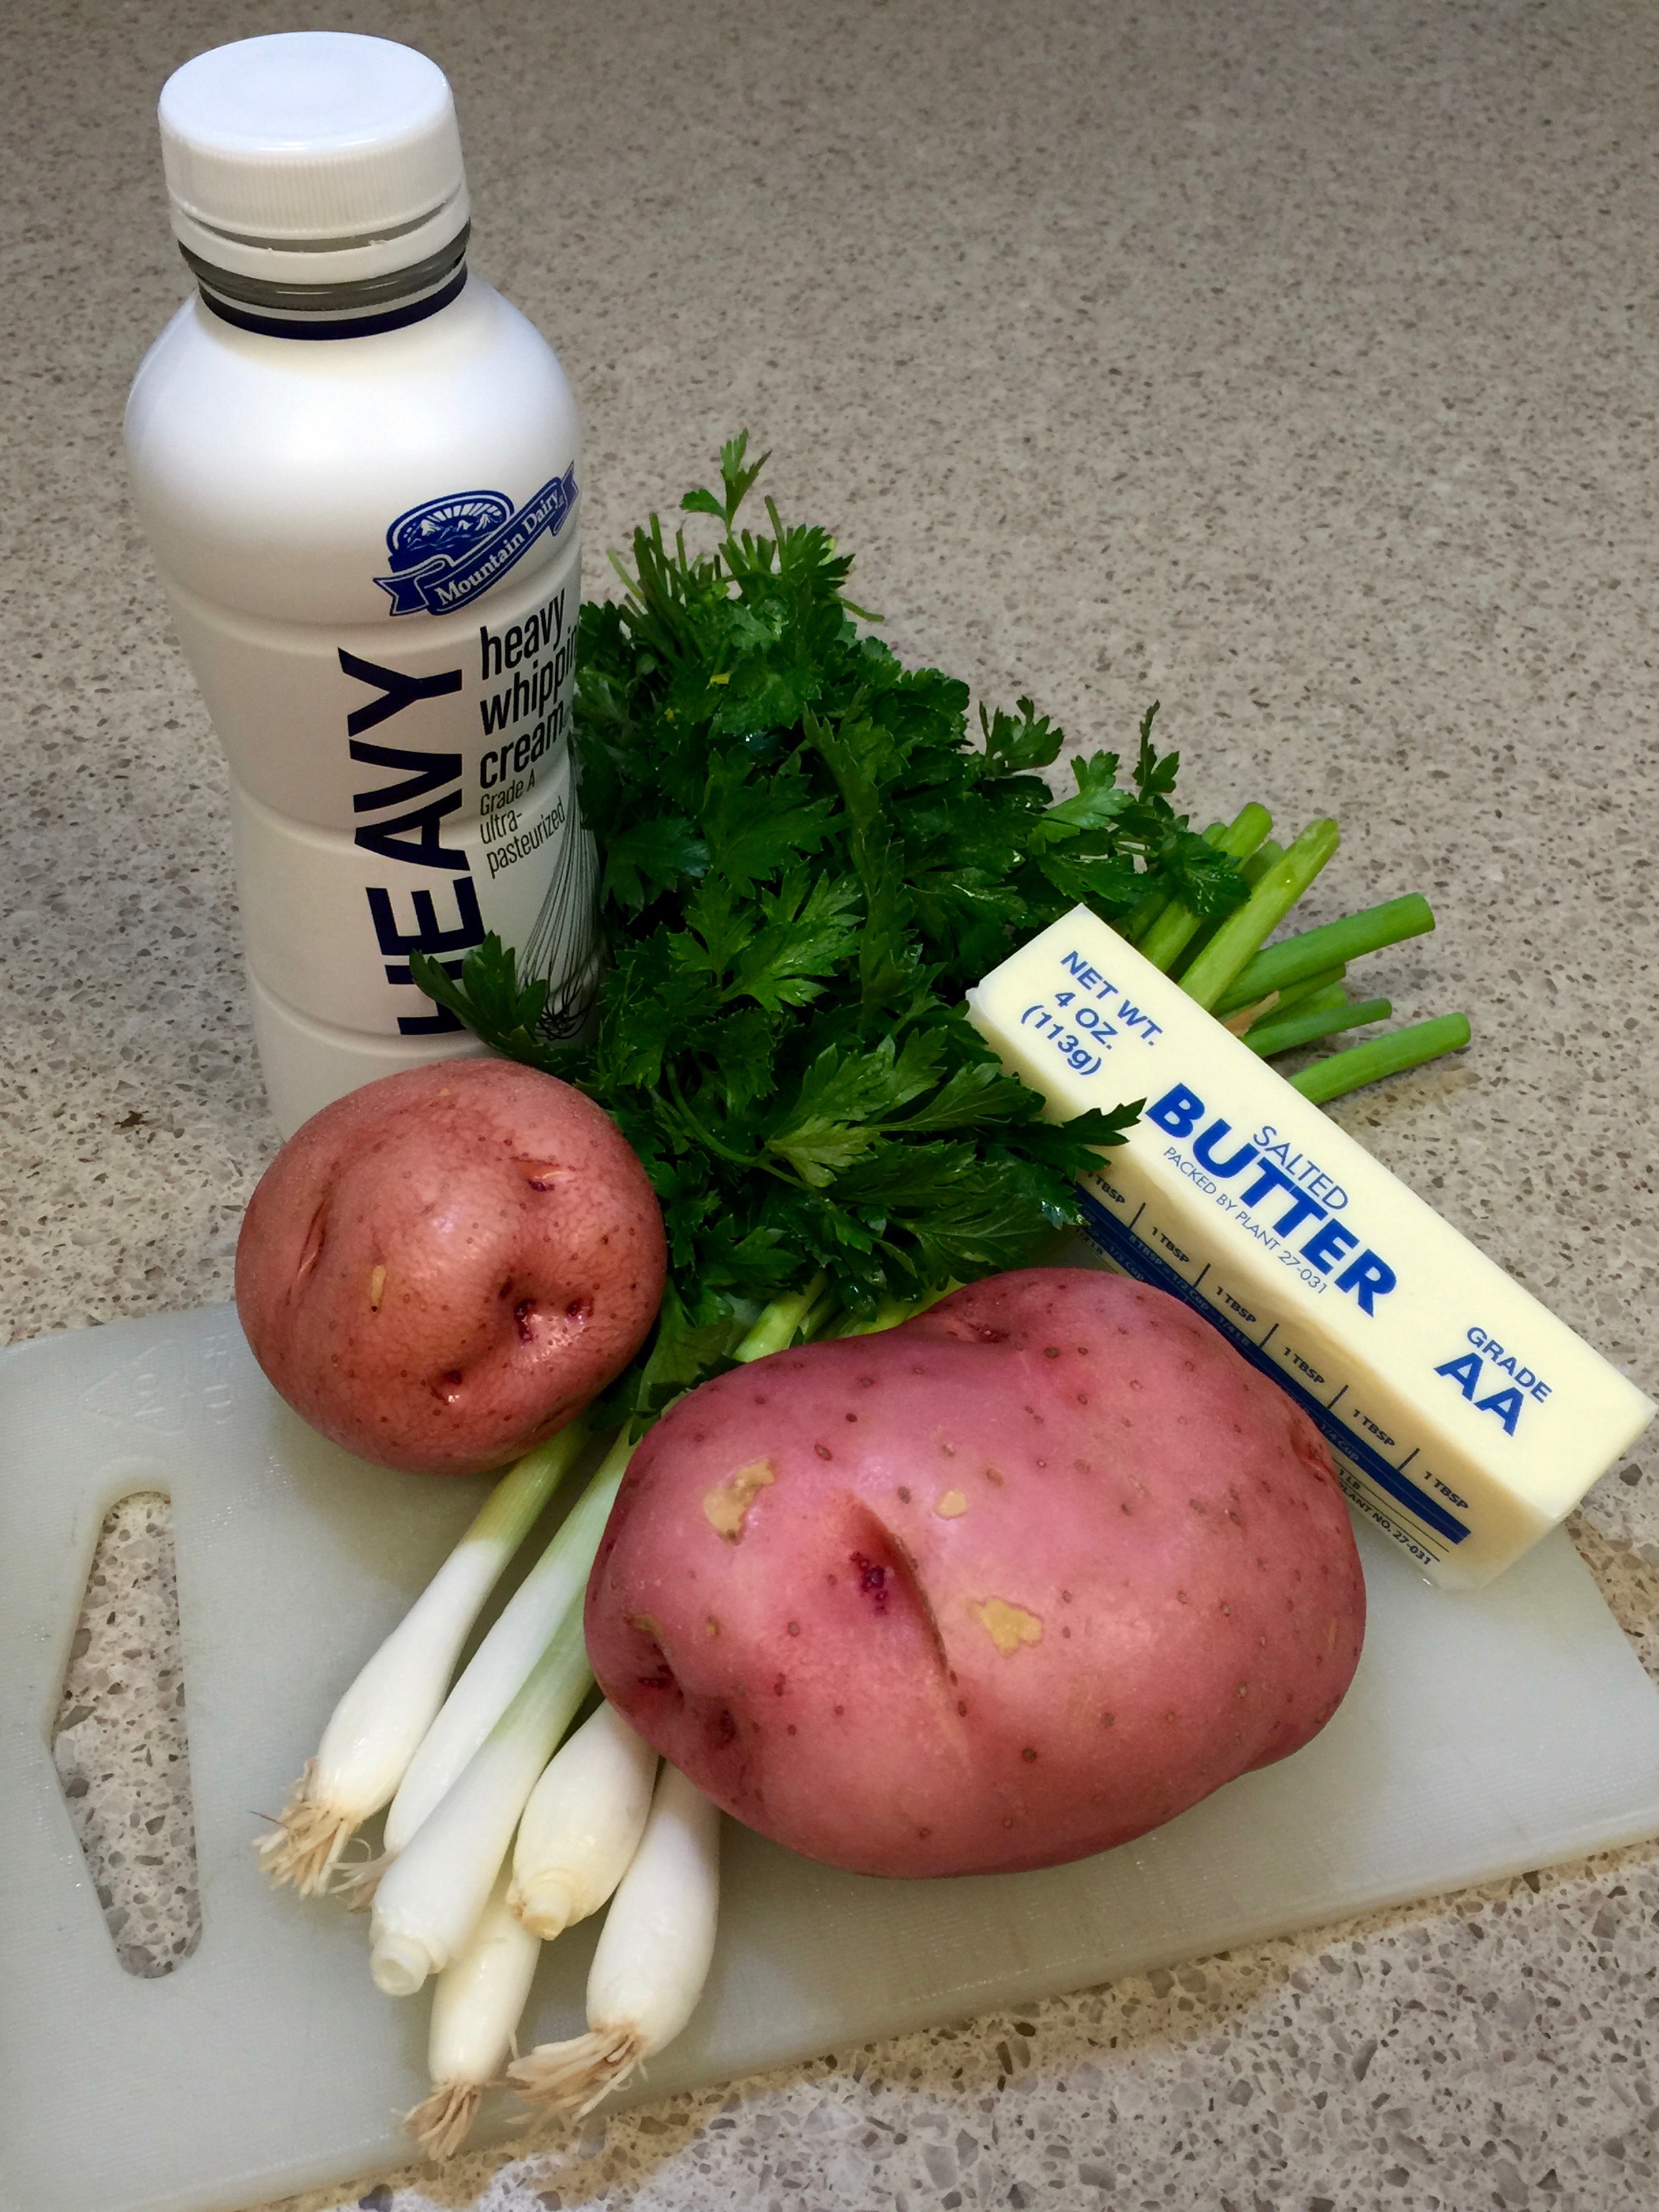
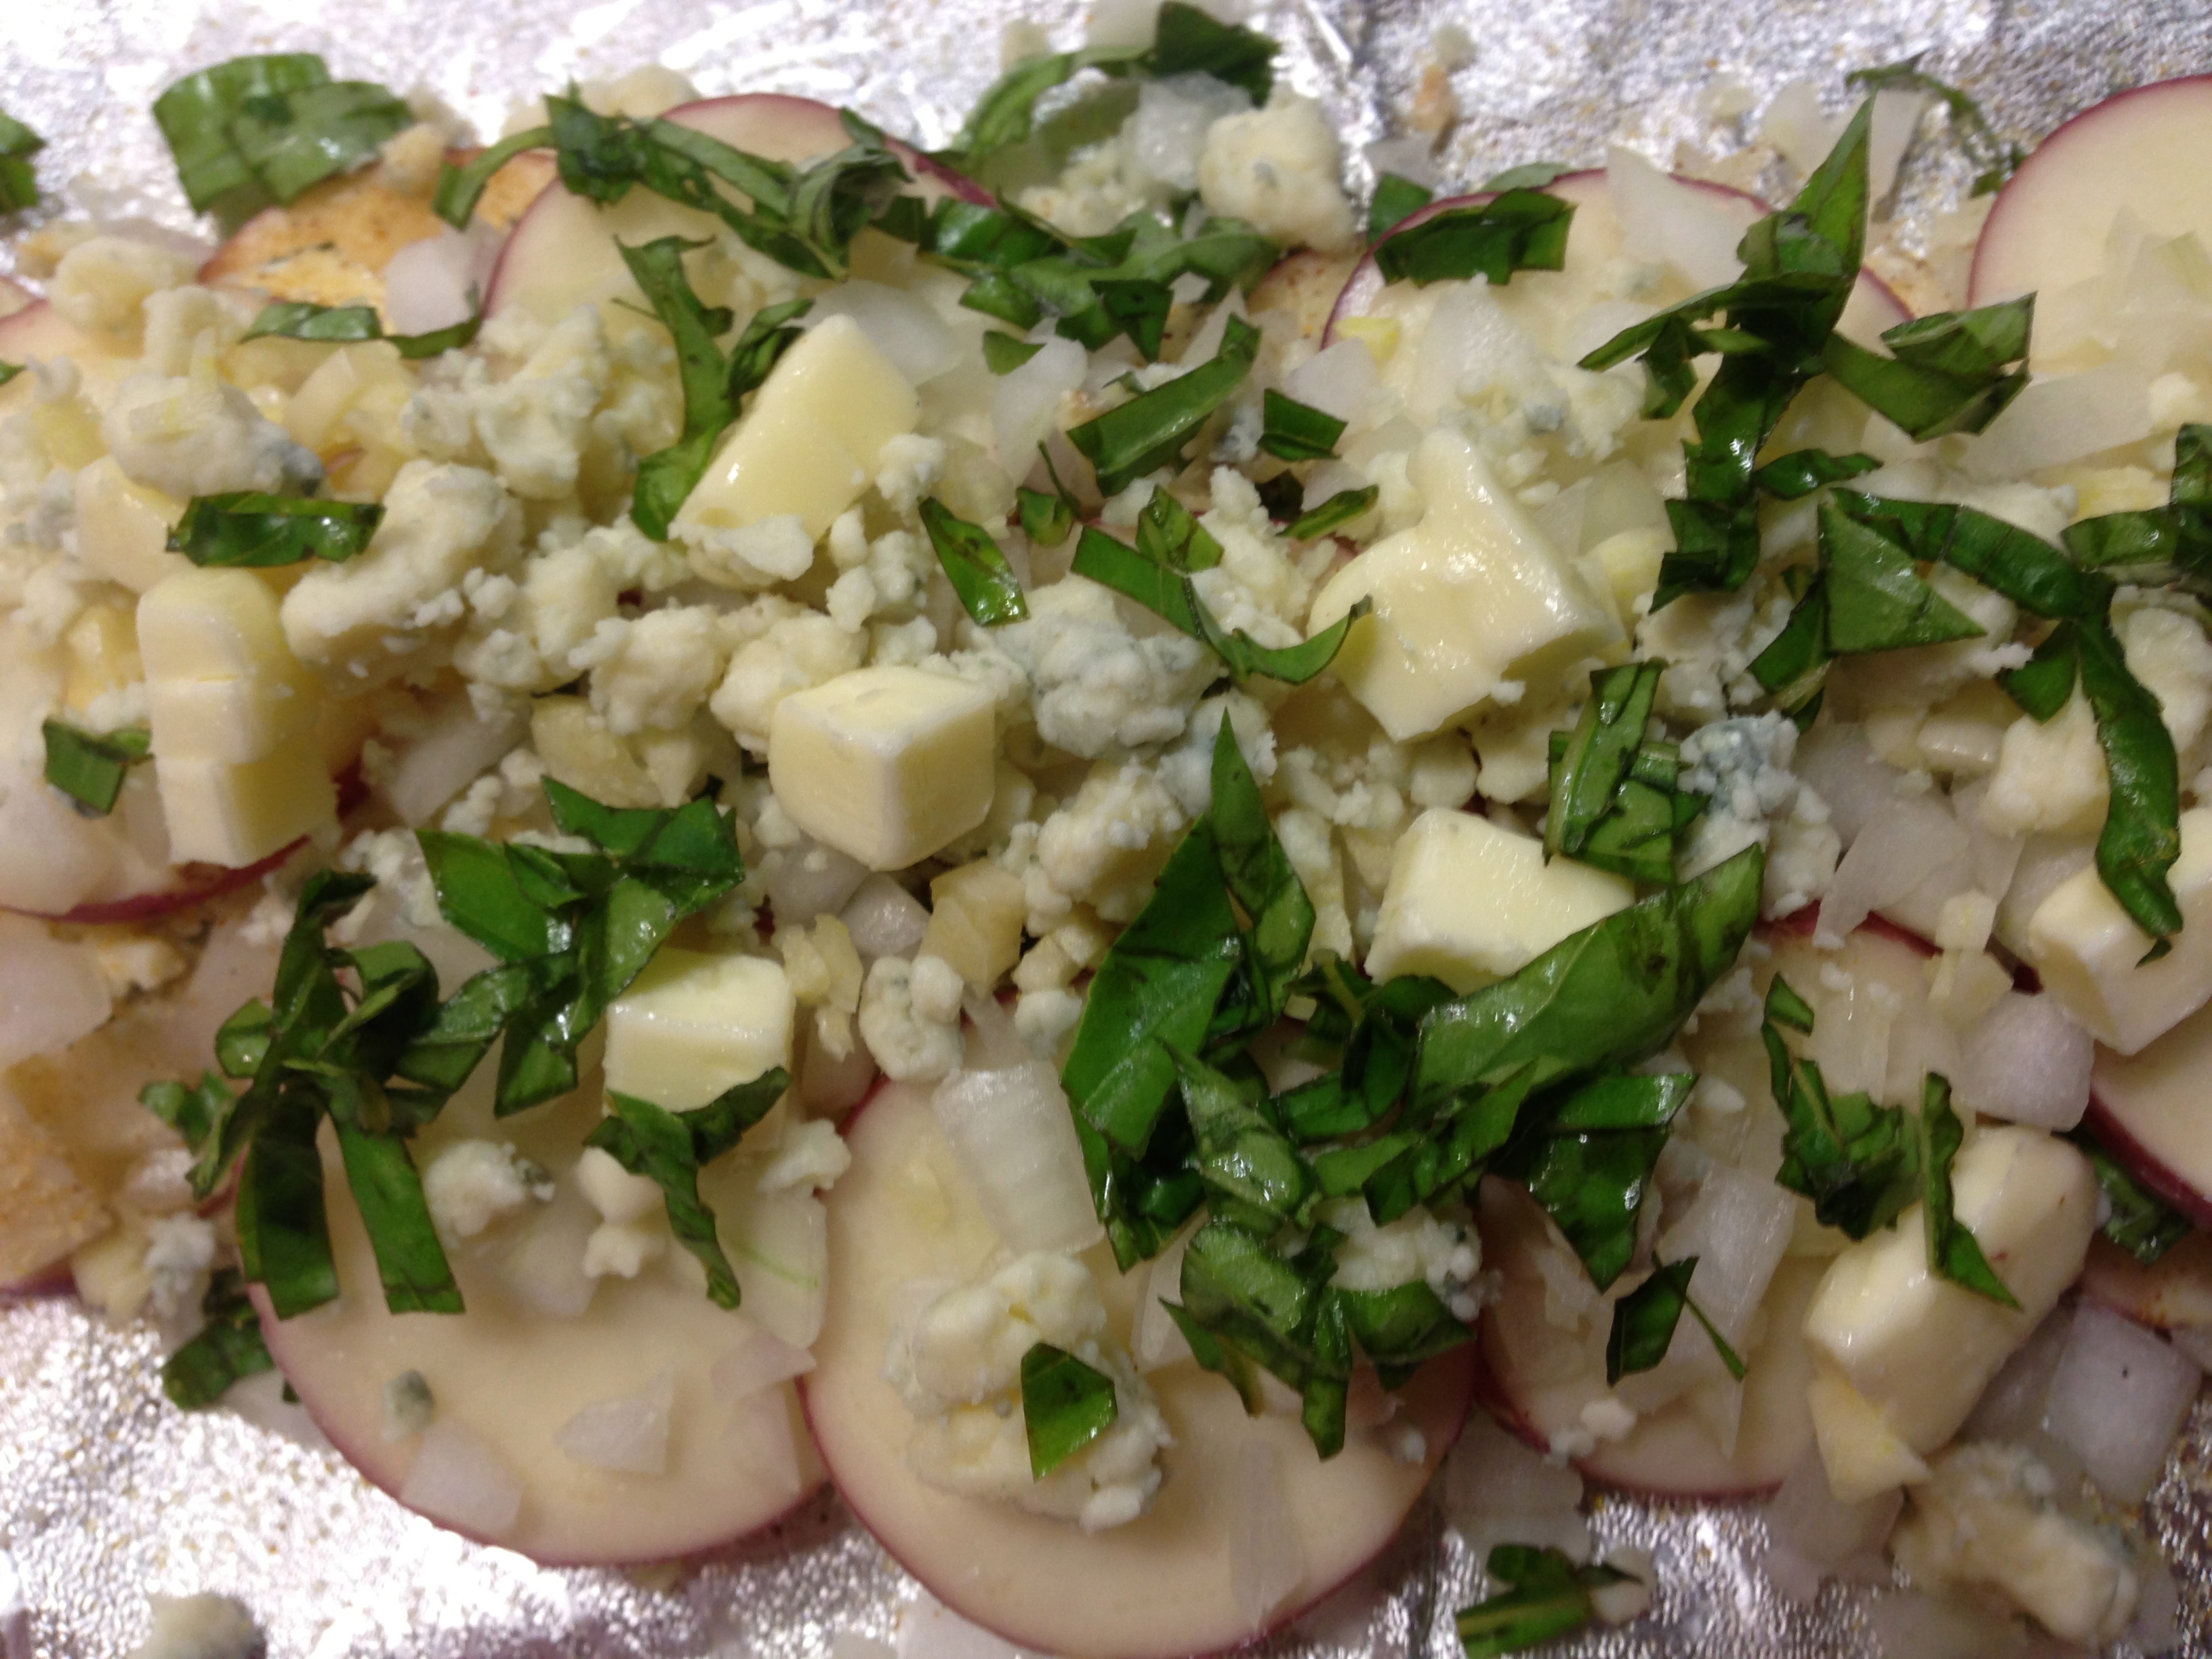
Lesson Learned 2 – Adapting this recipe: I originally wanted to use some spinach in this recipe but didn’t have it on hand and didn’t feel like going to the grocery store to buy some. But I did have some flat leaf parsley and so I used that. If you use spinach just saute it with the onions and only use a couple of handfuls. The spinach should act as the accompaniment to the recipe and shouldn’t overpower it. The same applies to flat leaf parsley. I only used a little more than a tablespoon (and of course I used some for garnish), just enough to enhance the flavor.

I also added butternut squash. The key to using that is to make sure you cut the pieces small, otherwise they won’t cook. I cut mine into about 1/8 inch cubes. But even cutting it that small a couple of pieces turned out a little more al dente than I would have liked but all the rest were perfect.

You can easily add peas to this, or carrots. If you add carrots I suggest you precook them until they start getting soft. You can do that while sauteing the onions. If you want to add cauliflower then I would steam them until they start turning soft. Or you can simply add a frozen vegetable medley and it should cook through during that time period. I prefer adding fresh vegetables but it can work either way.

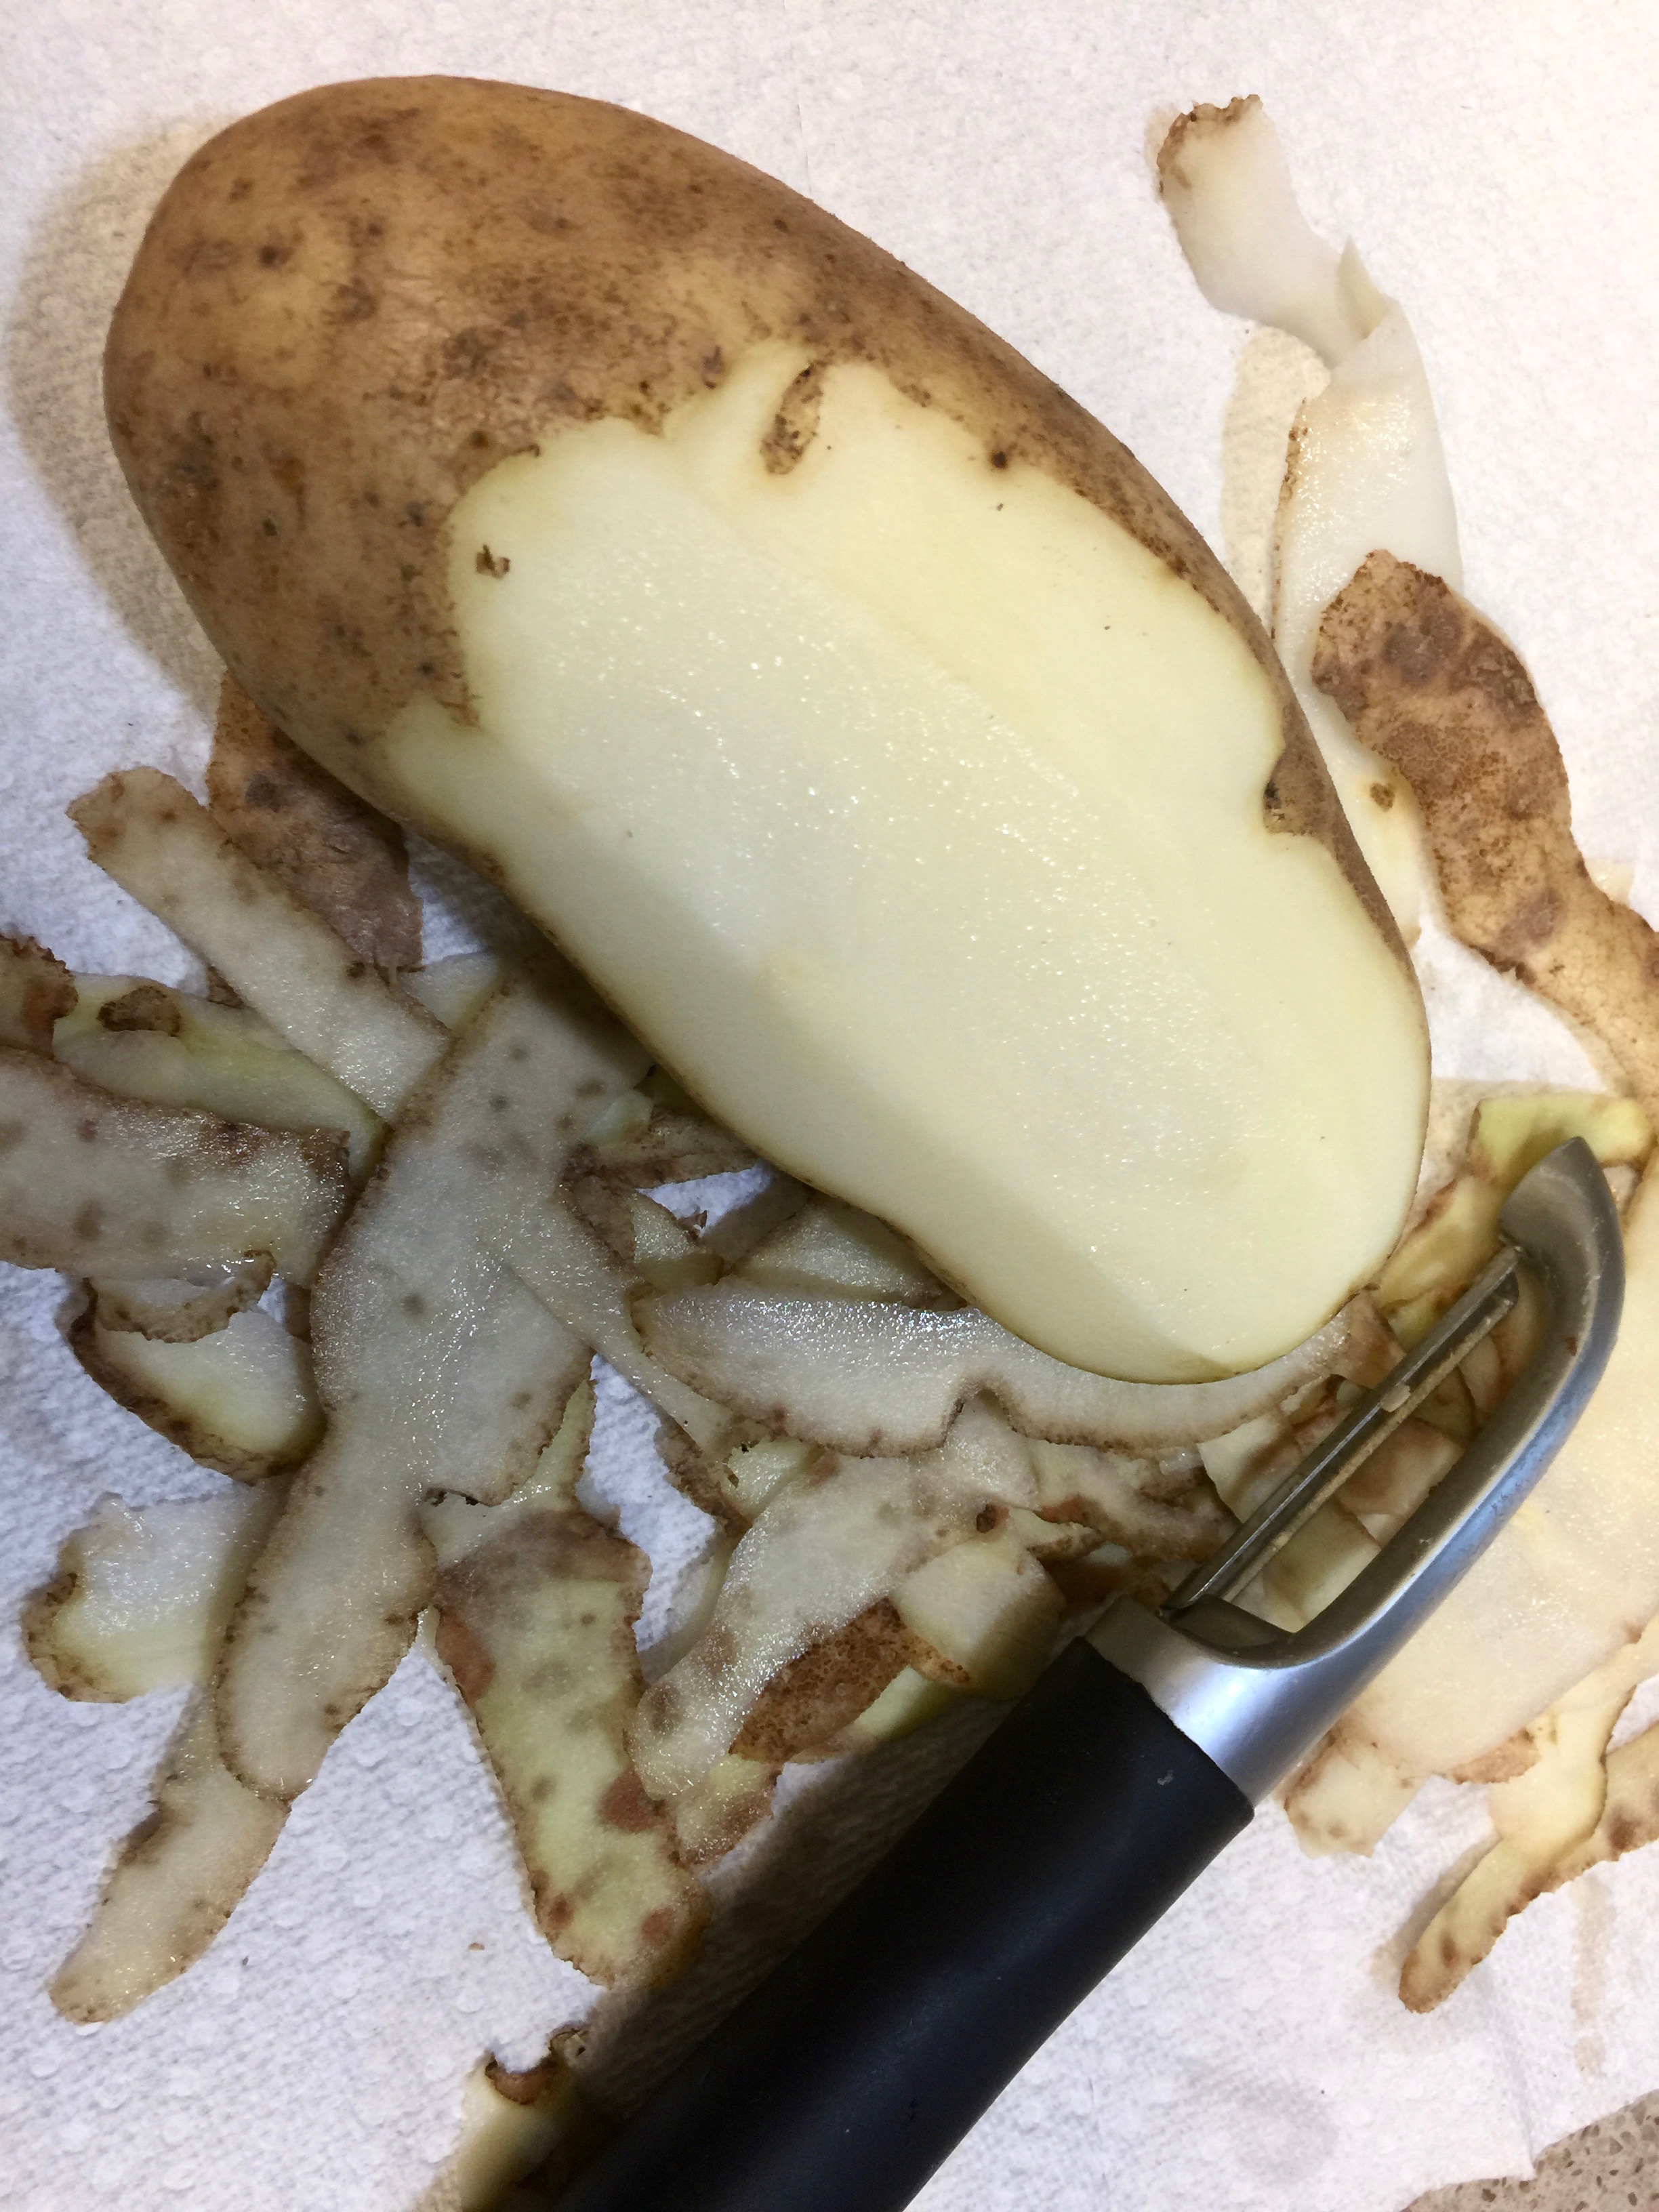
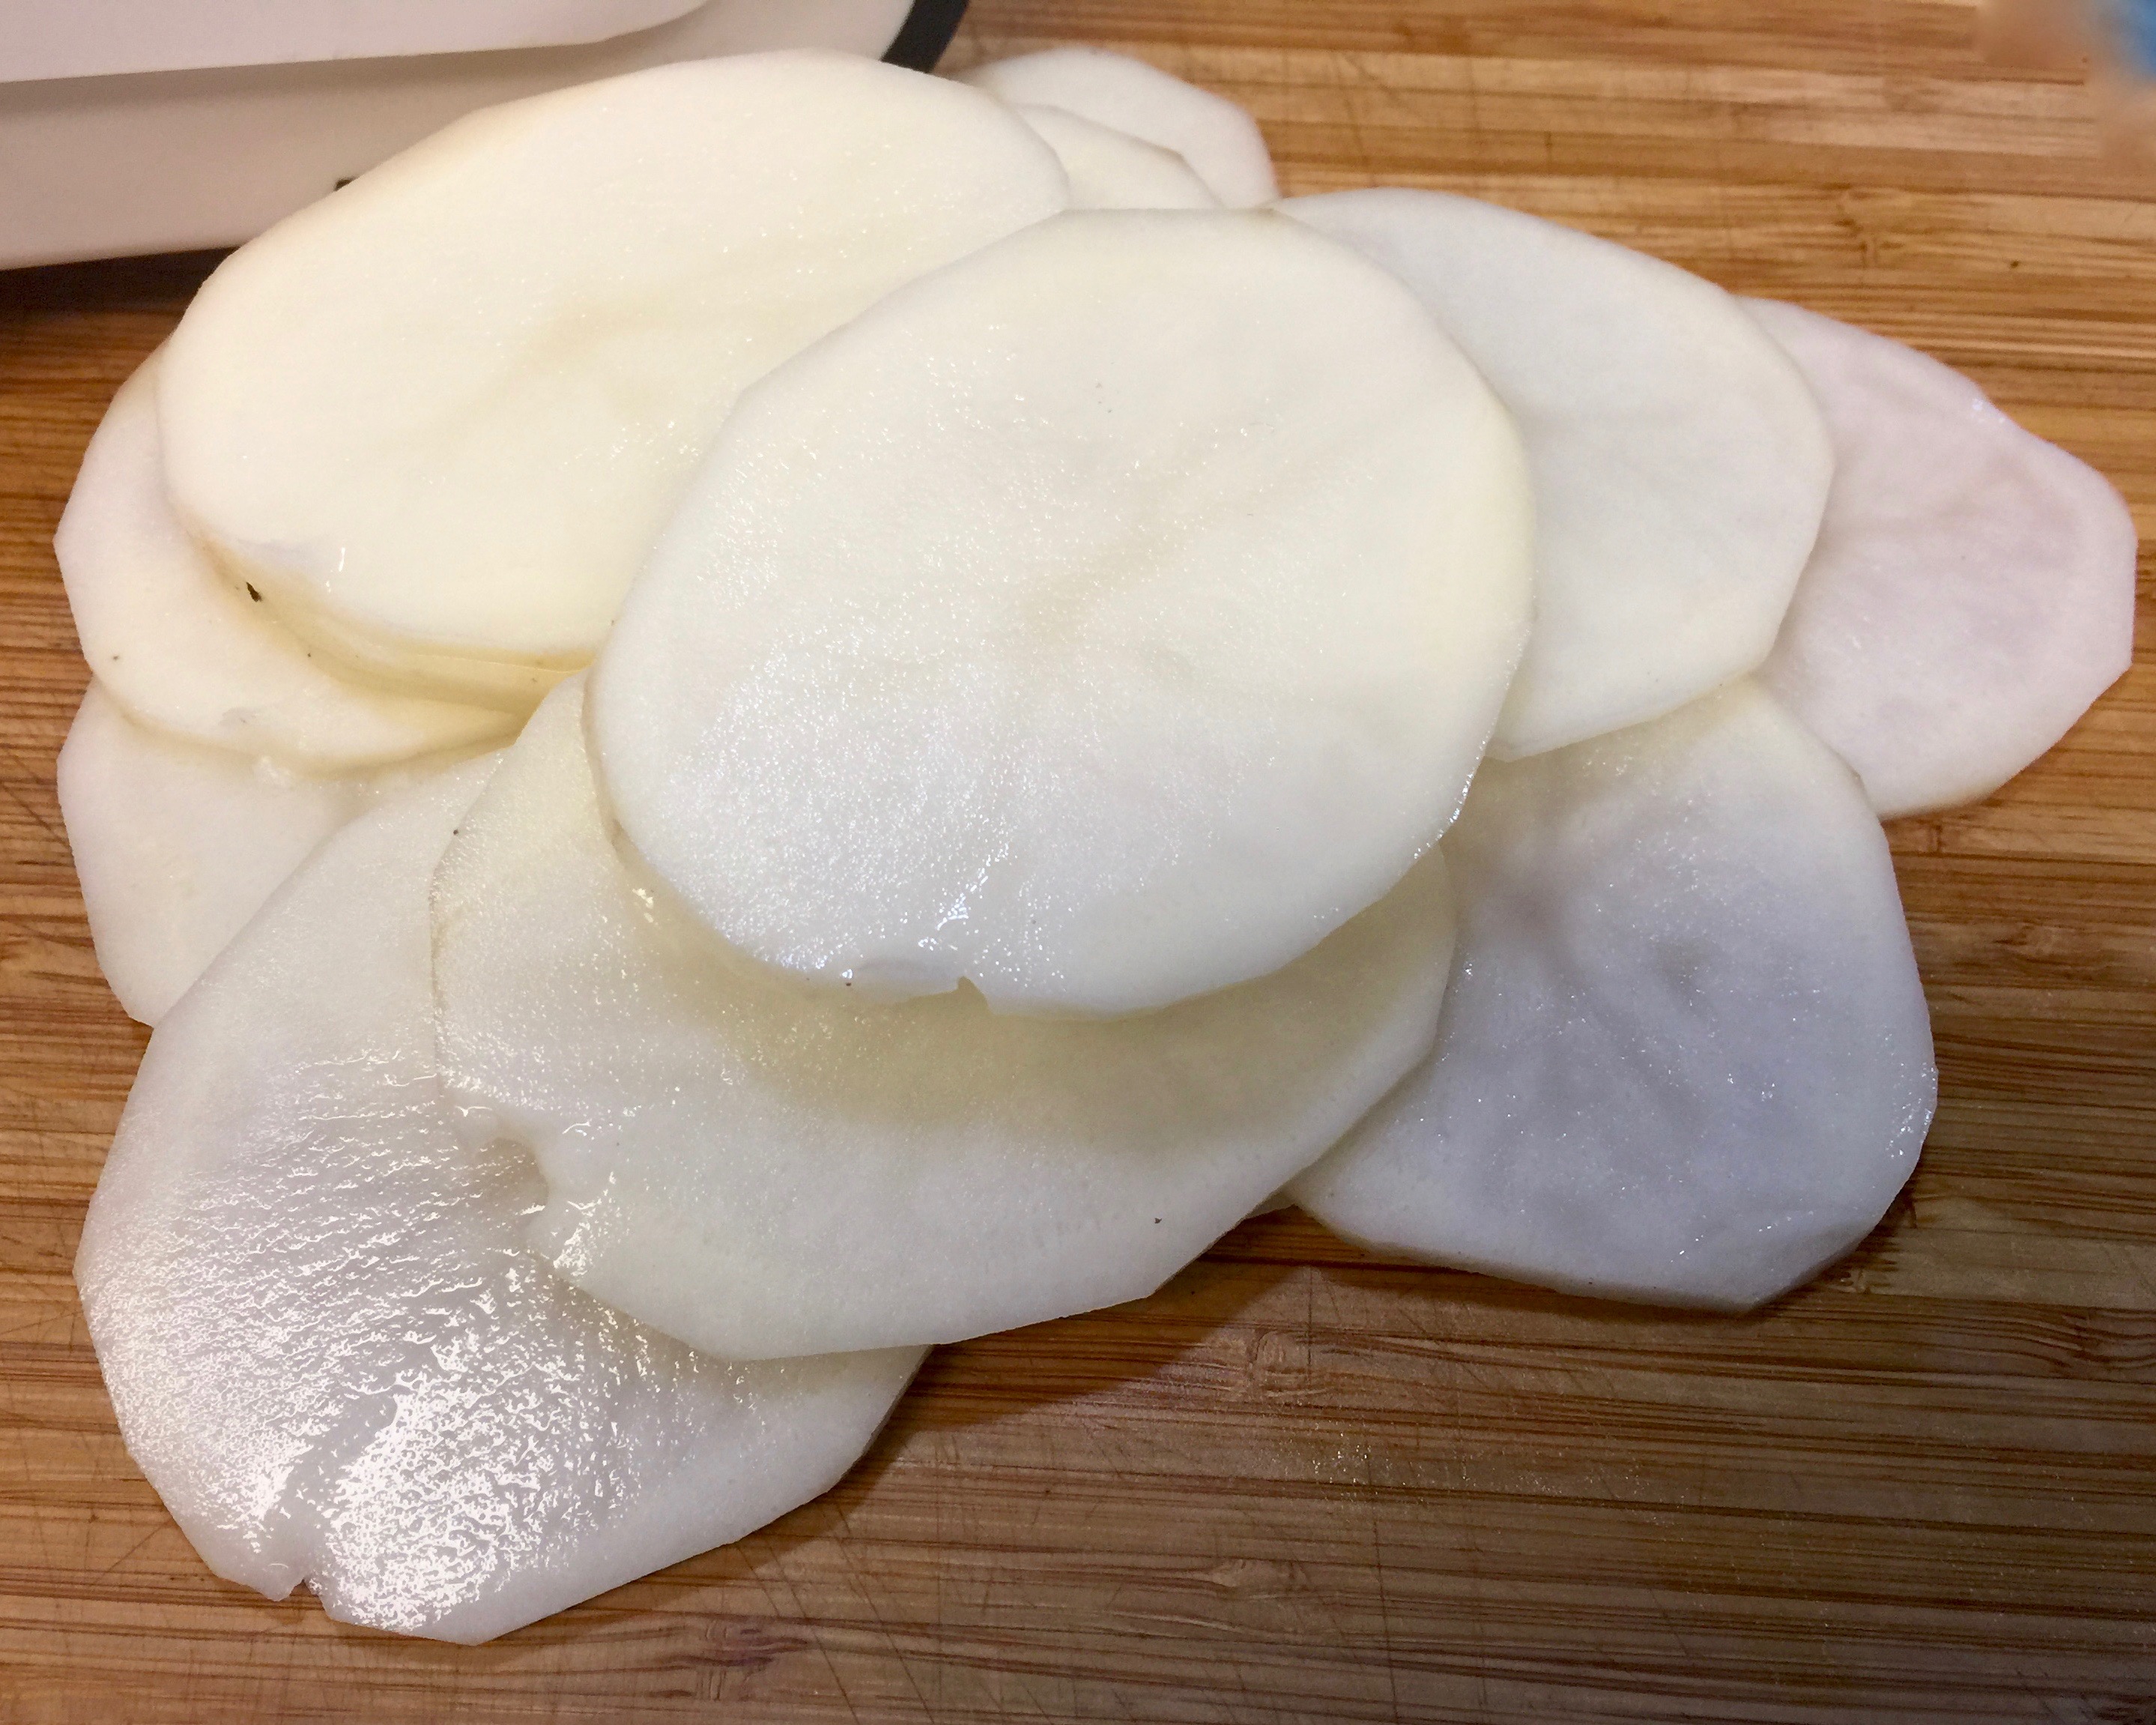
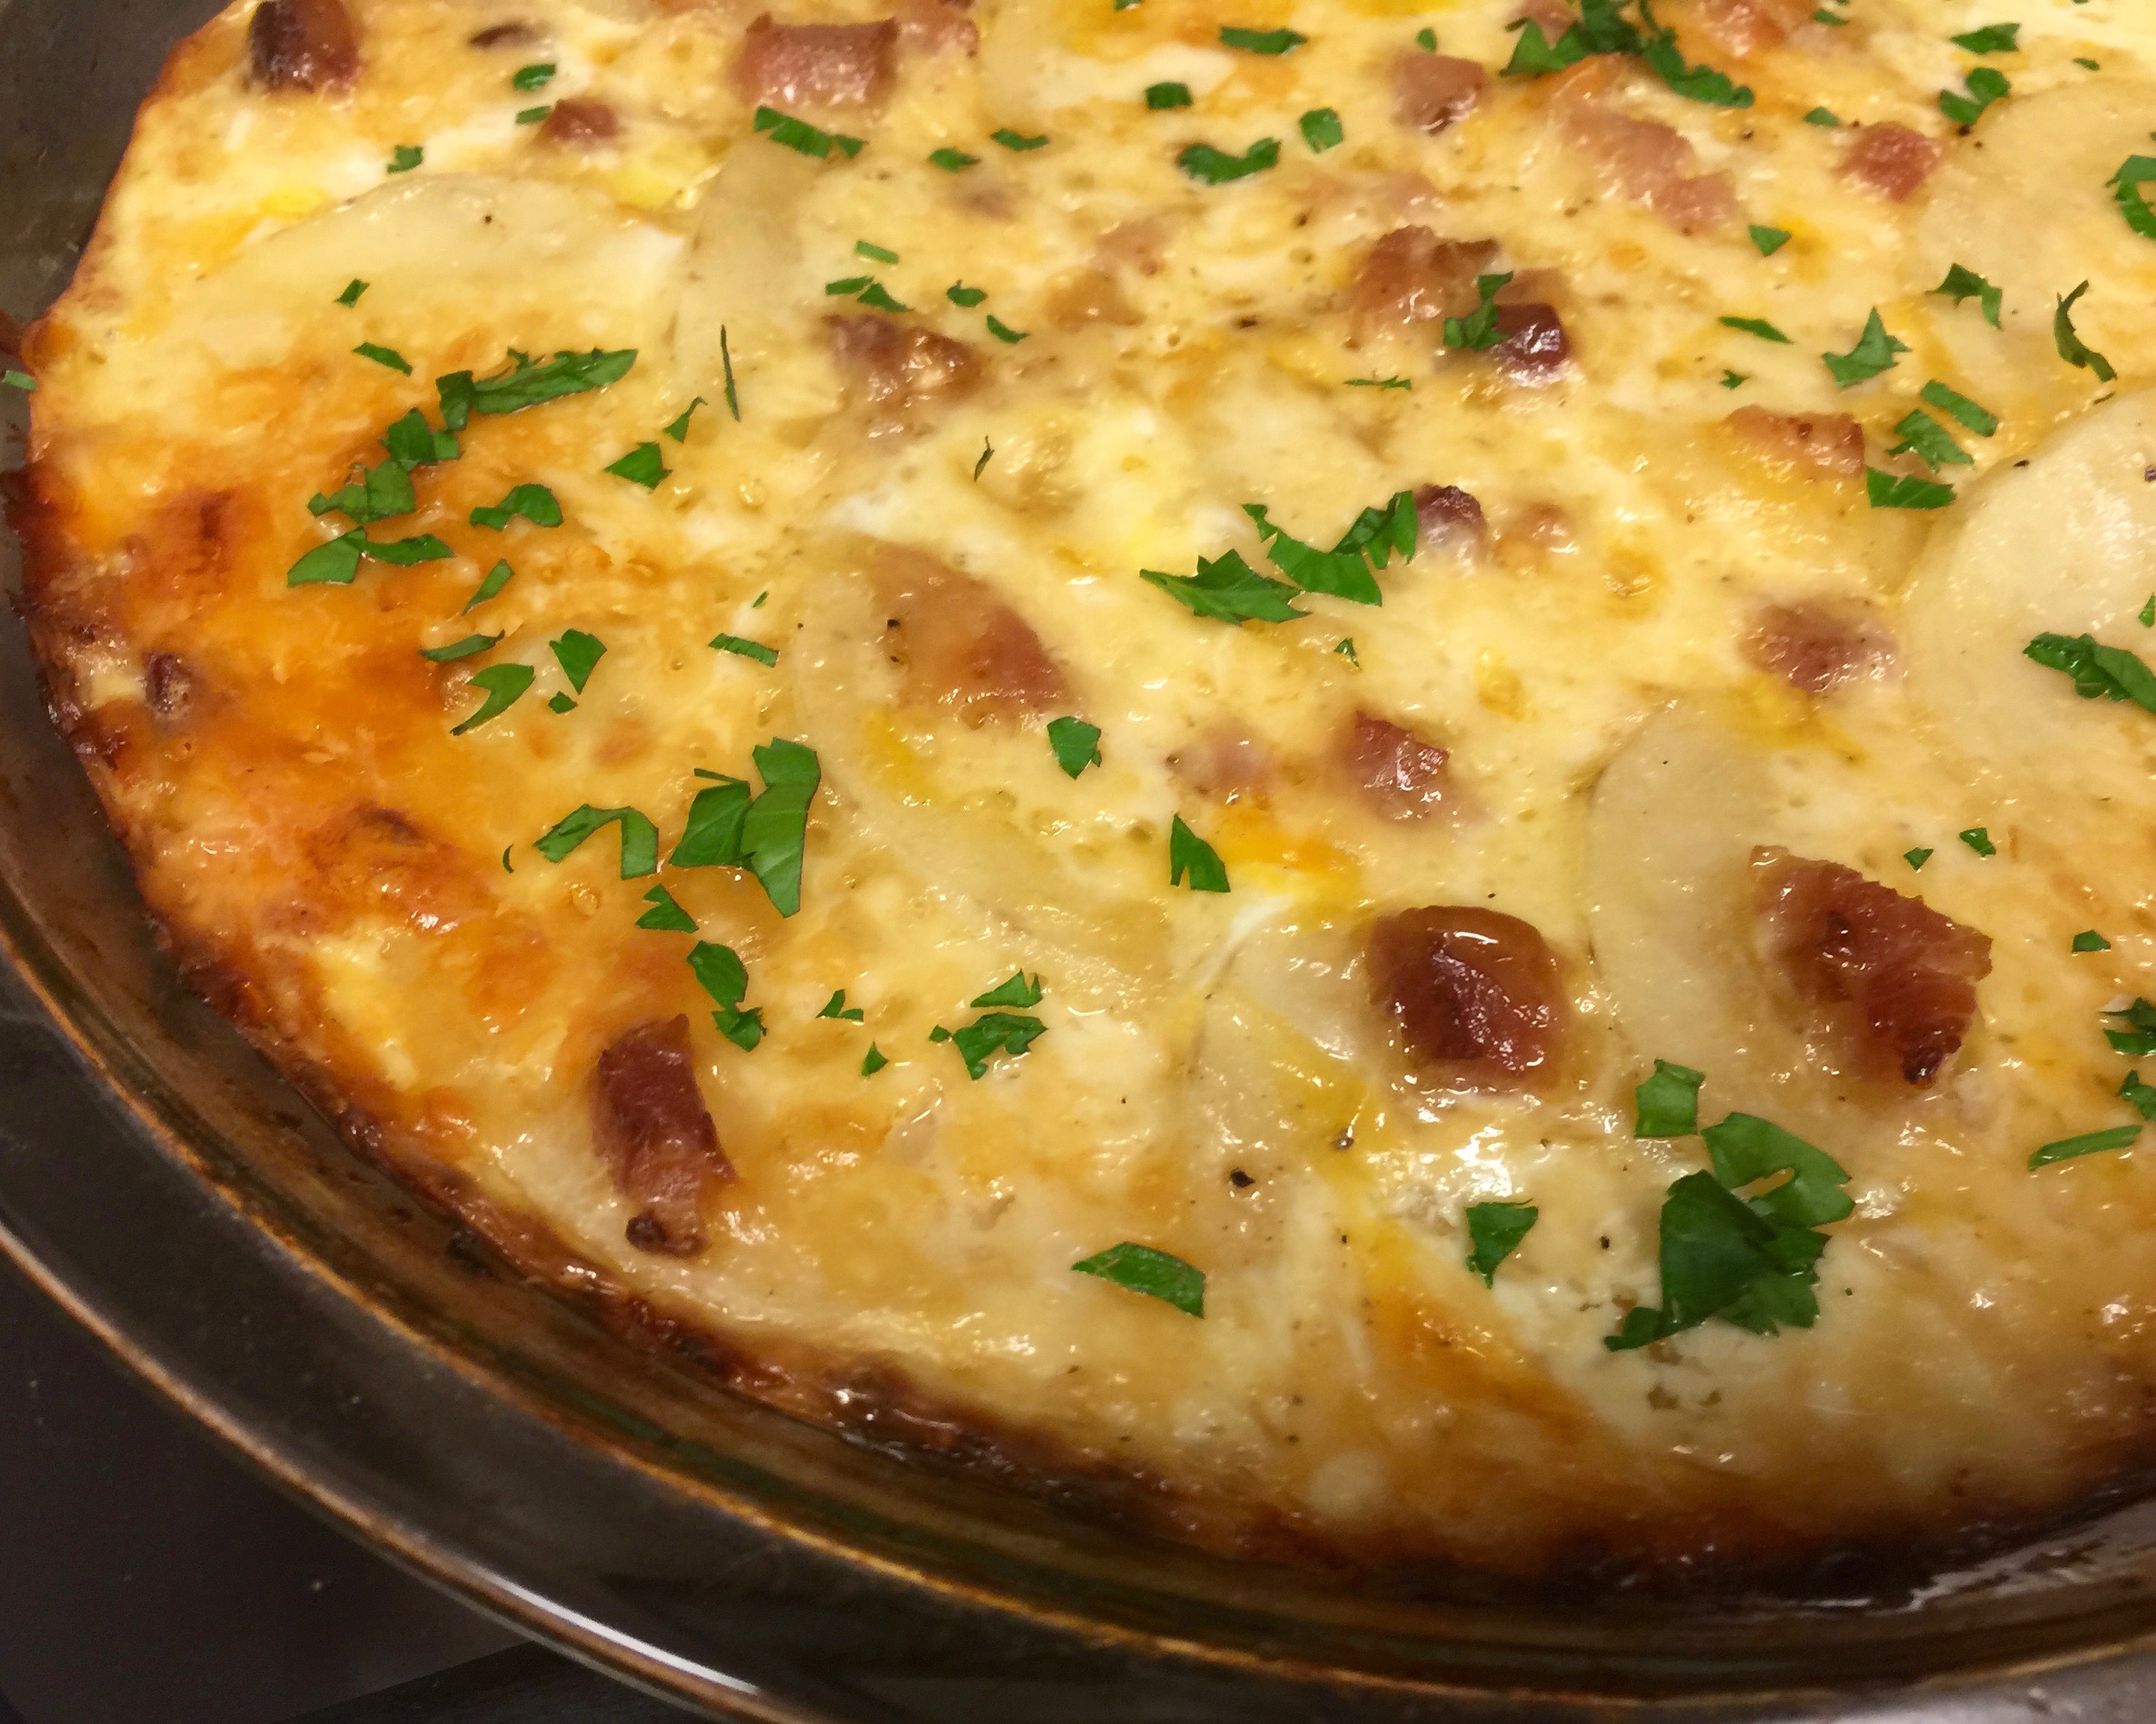
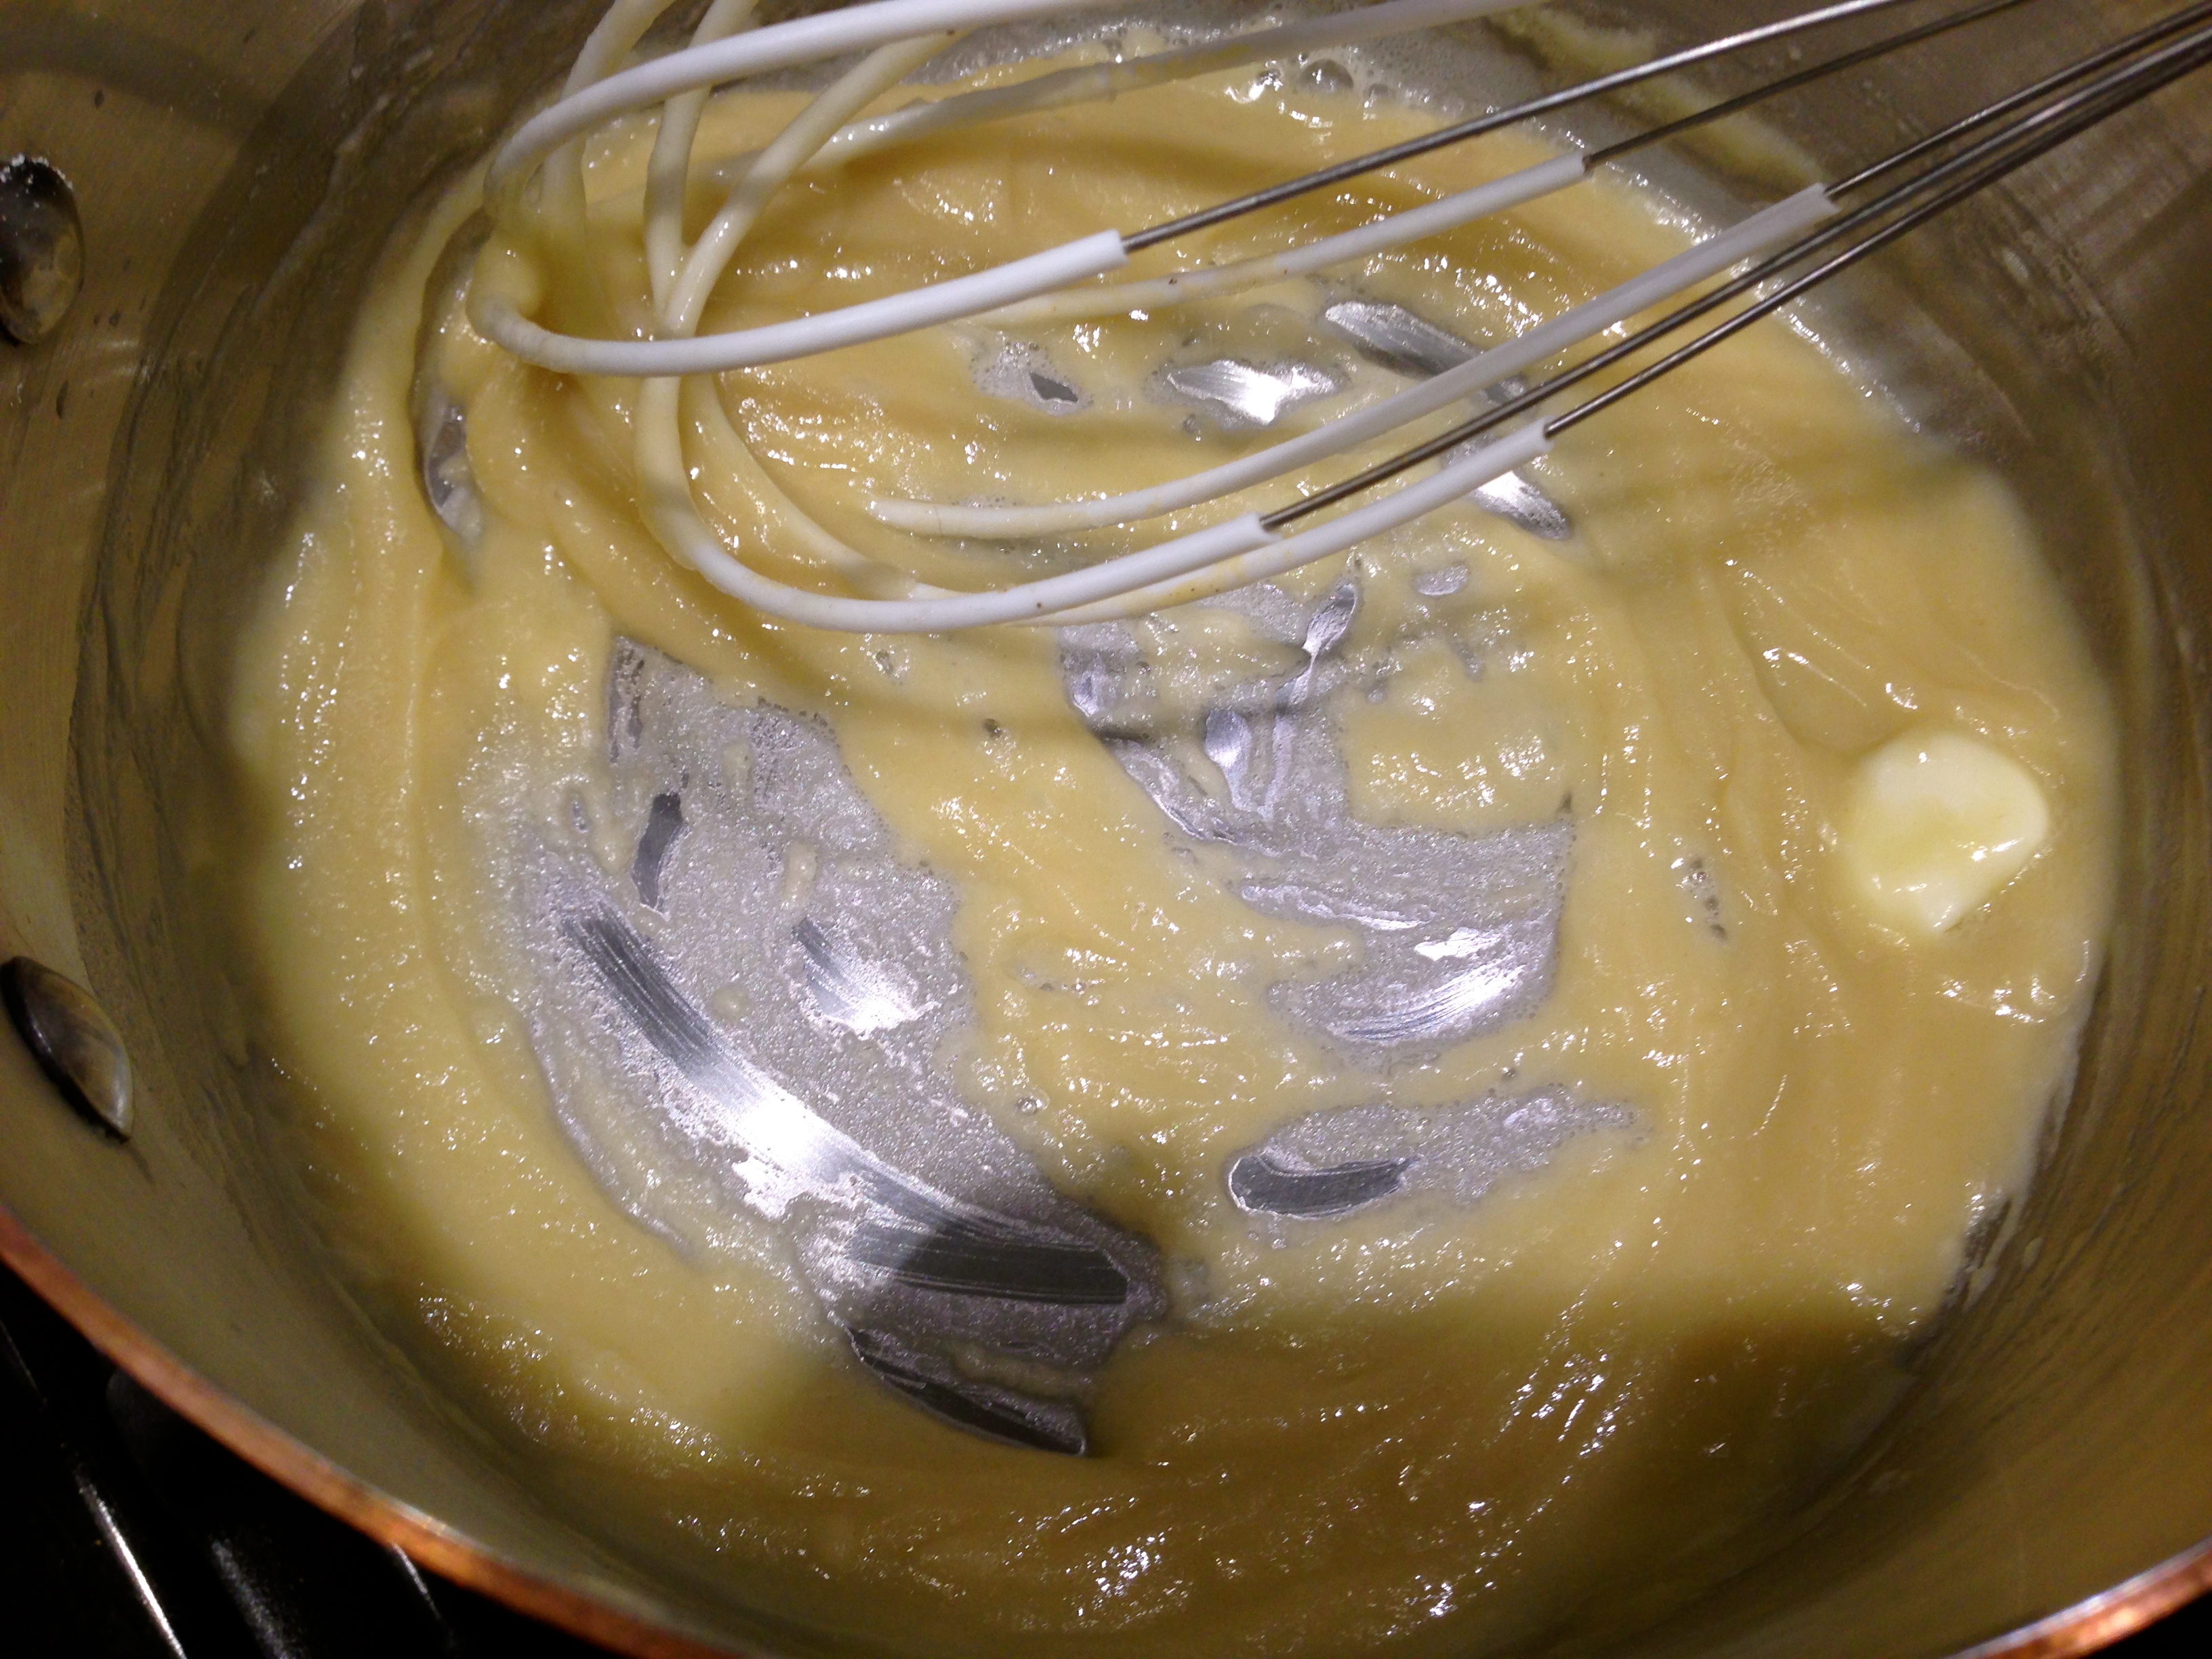
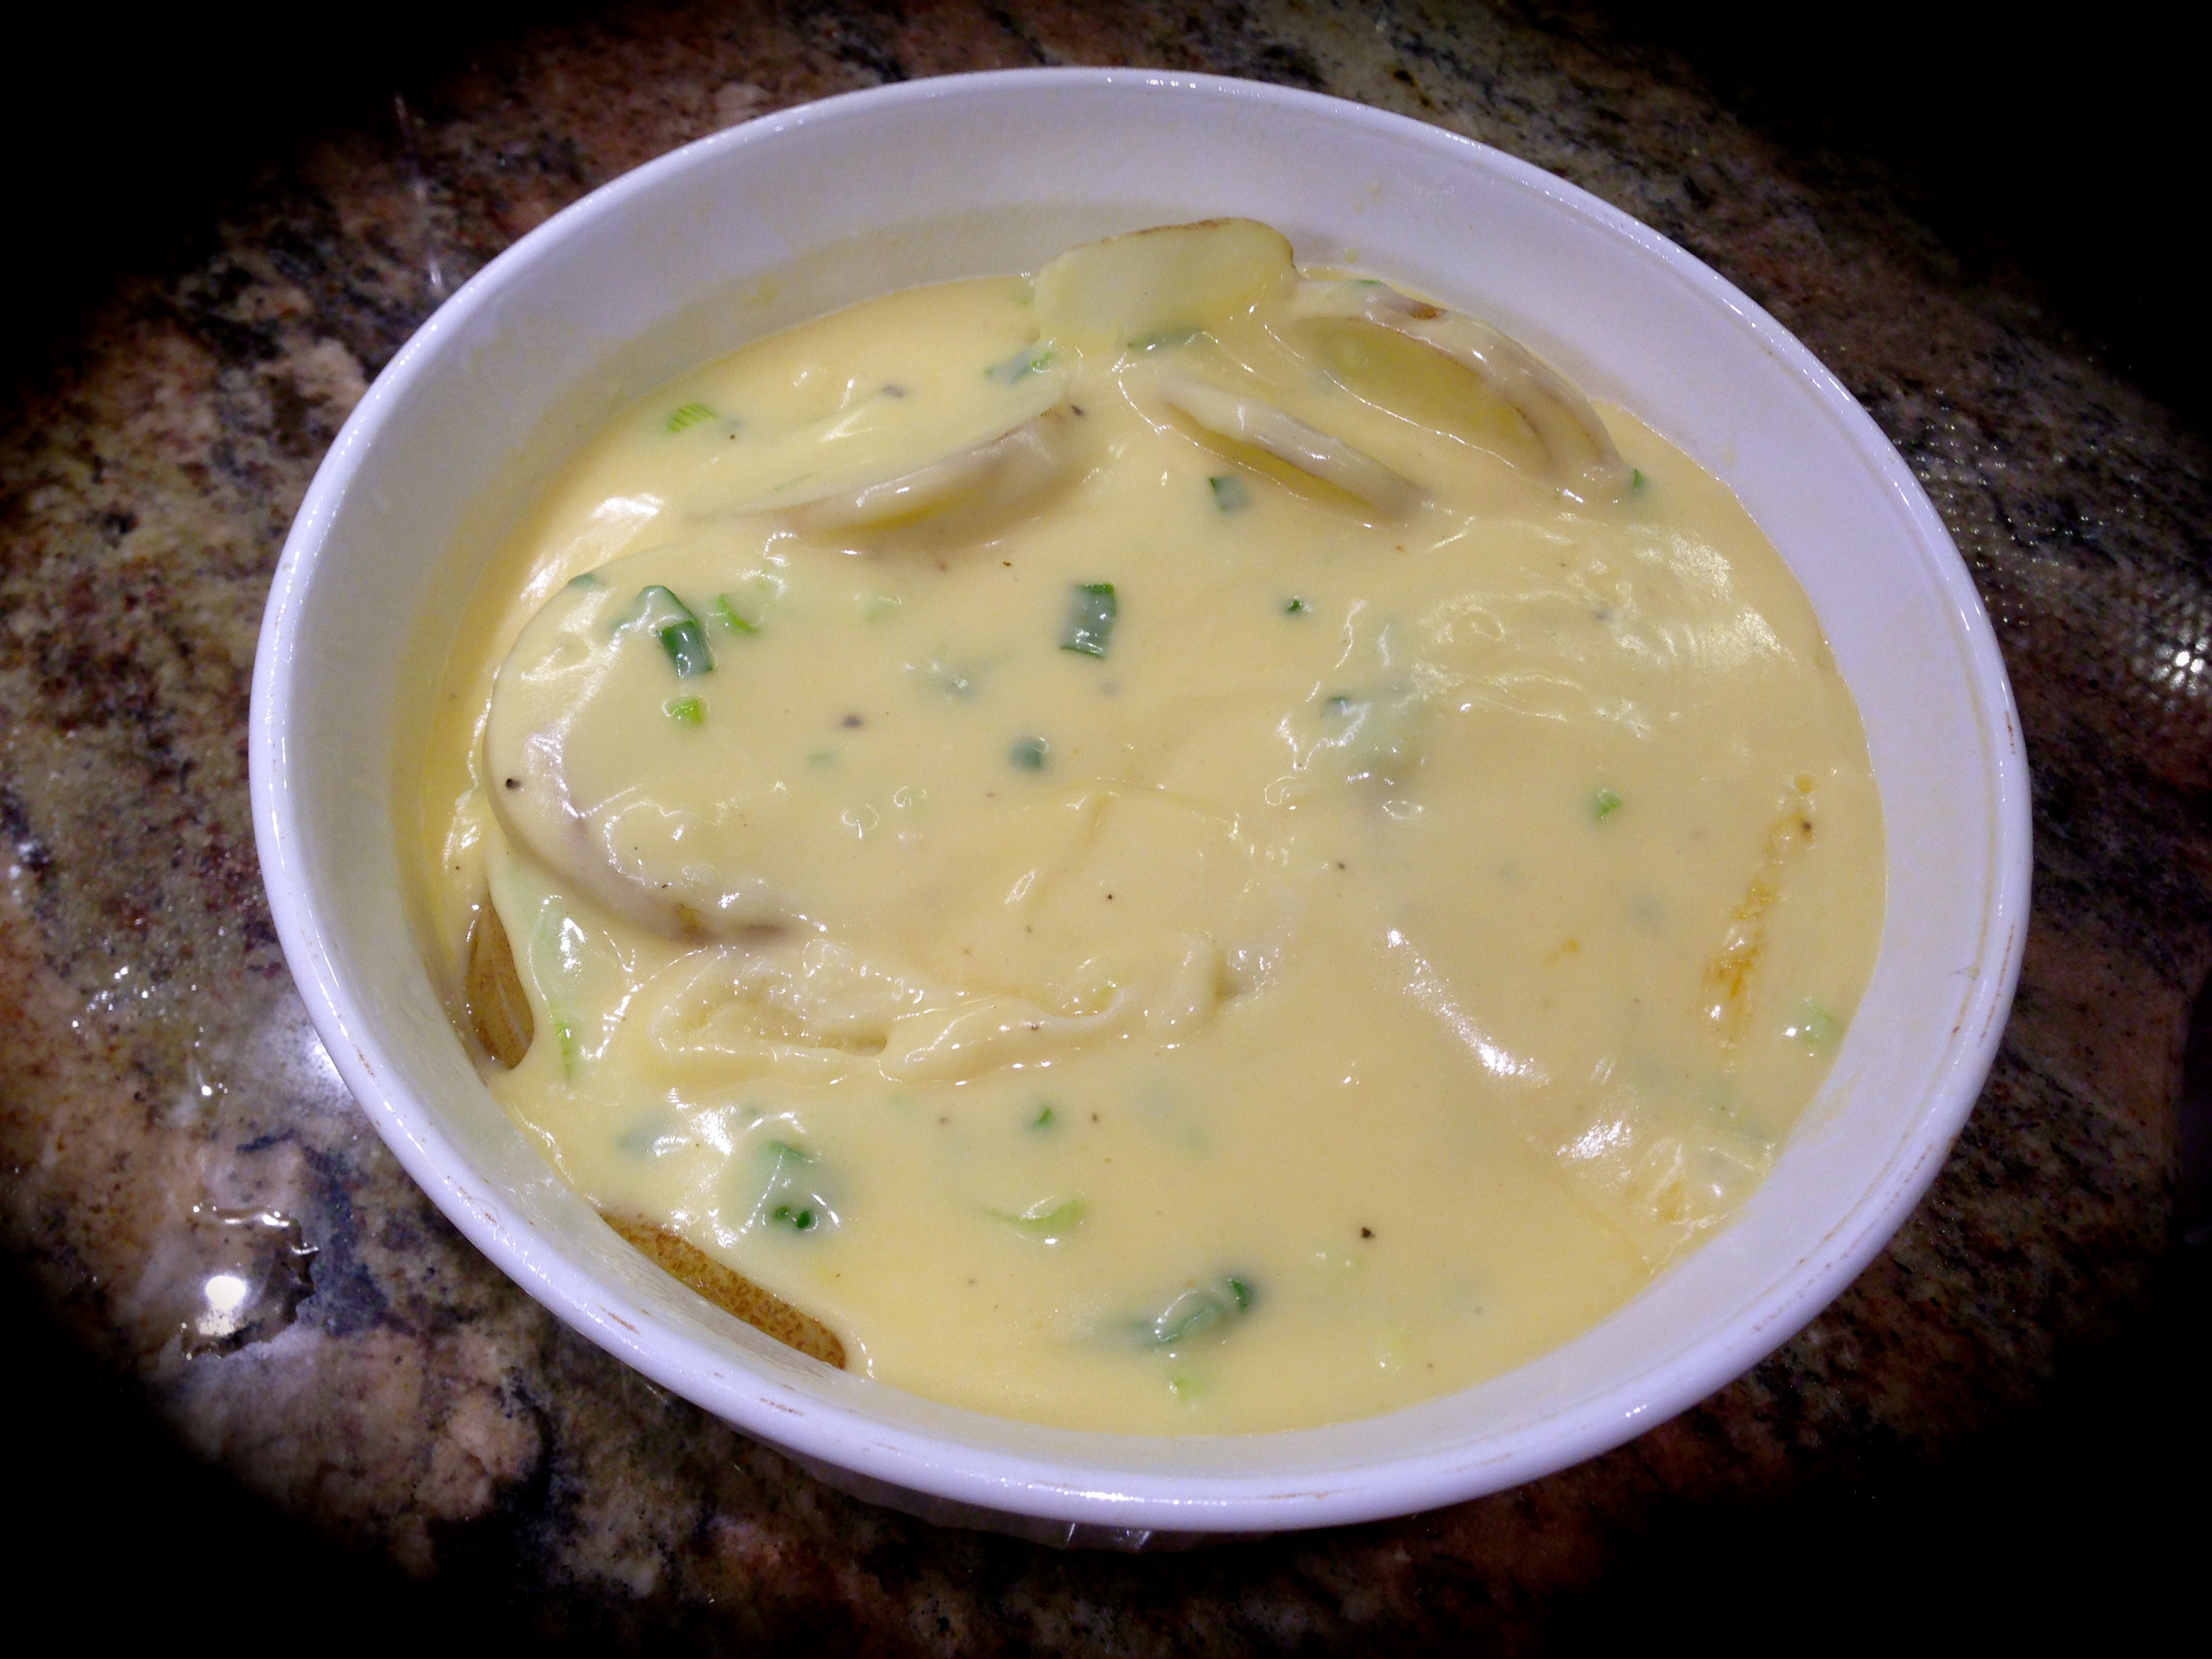
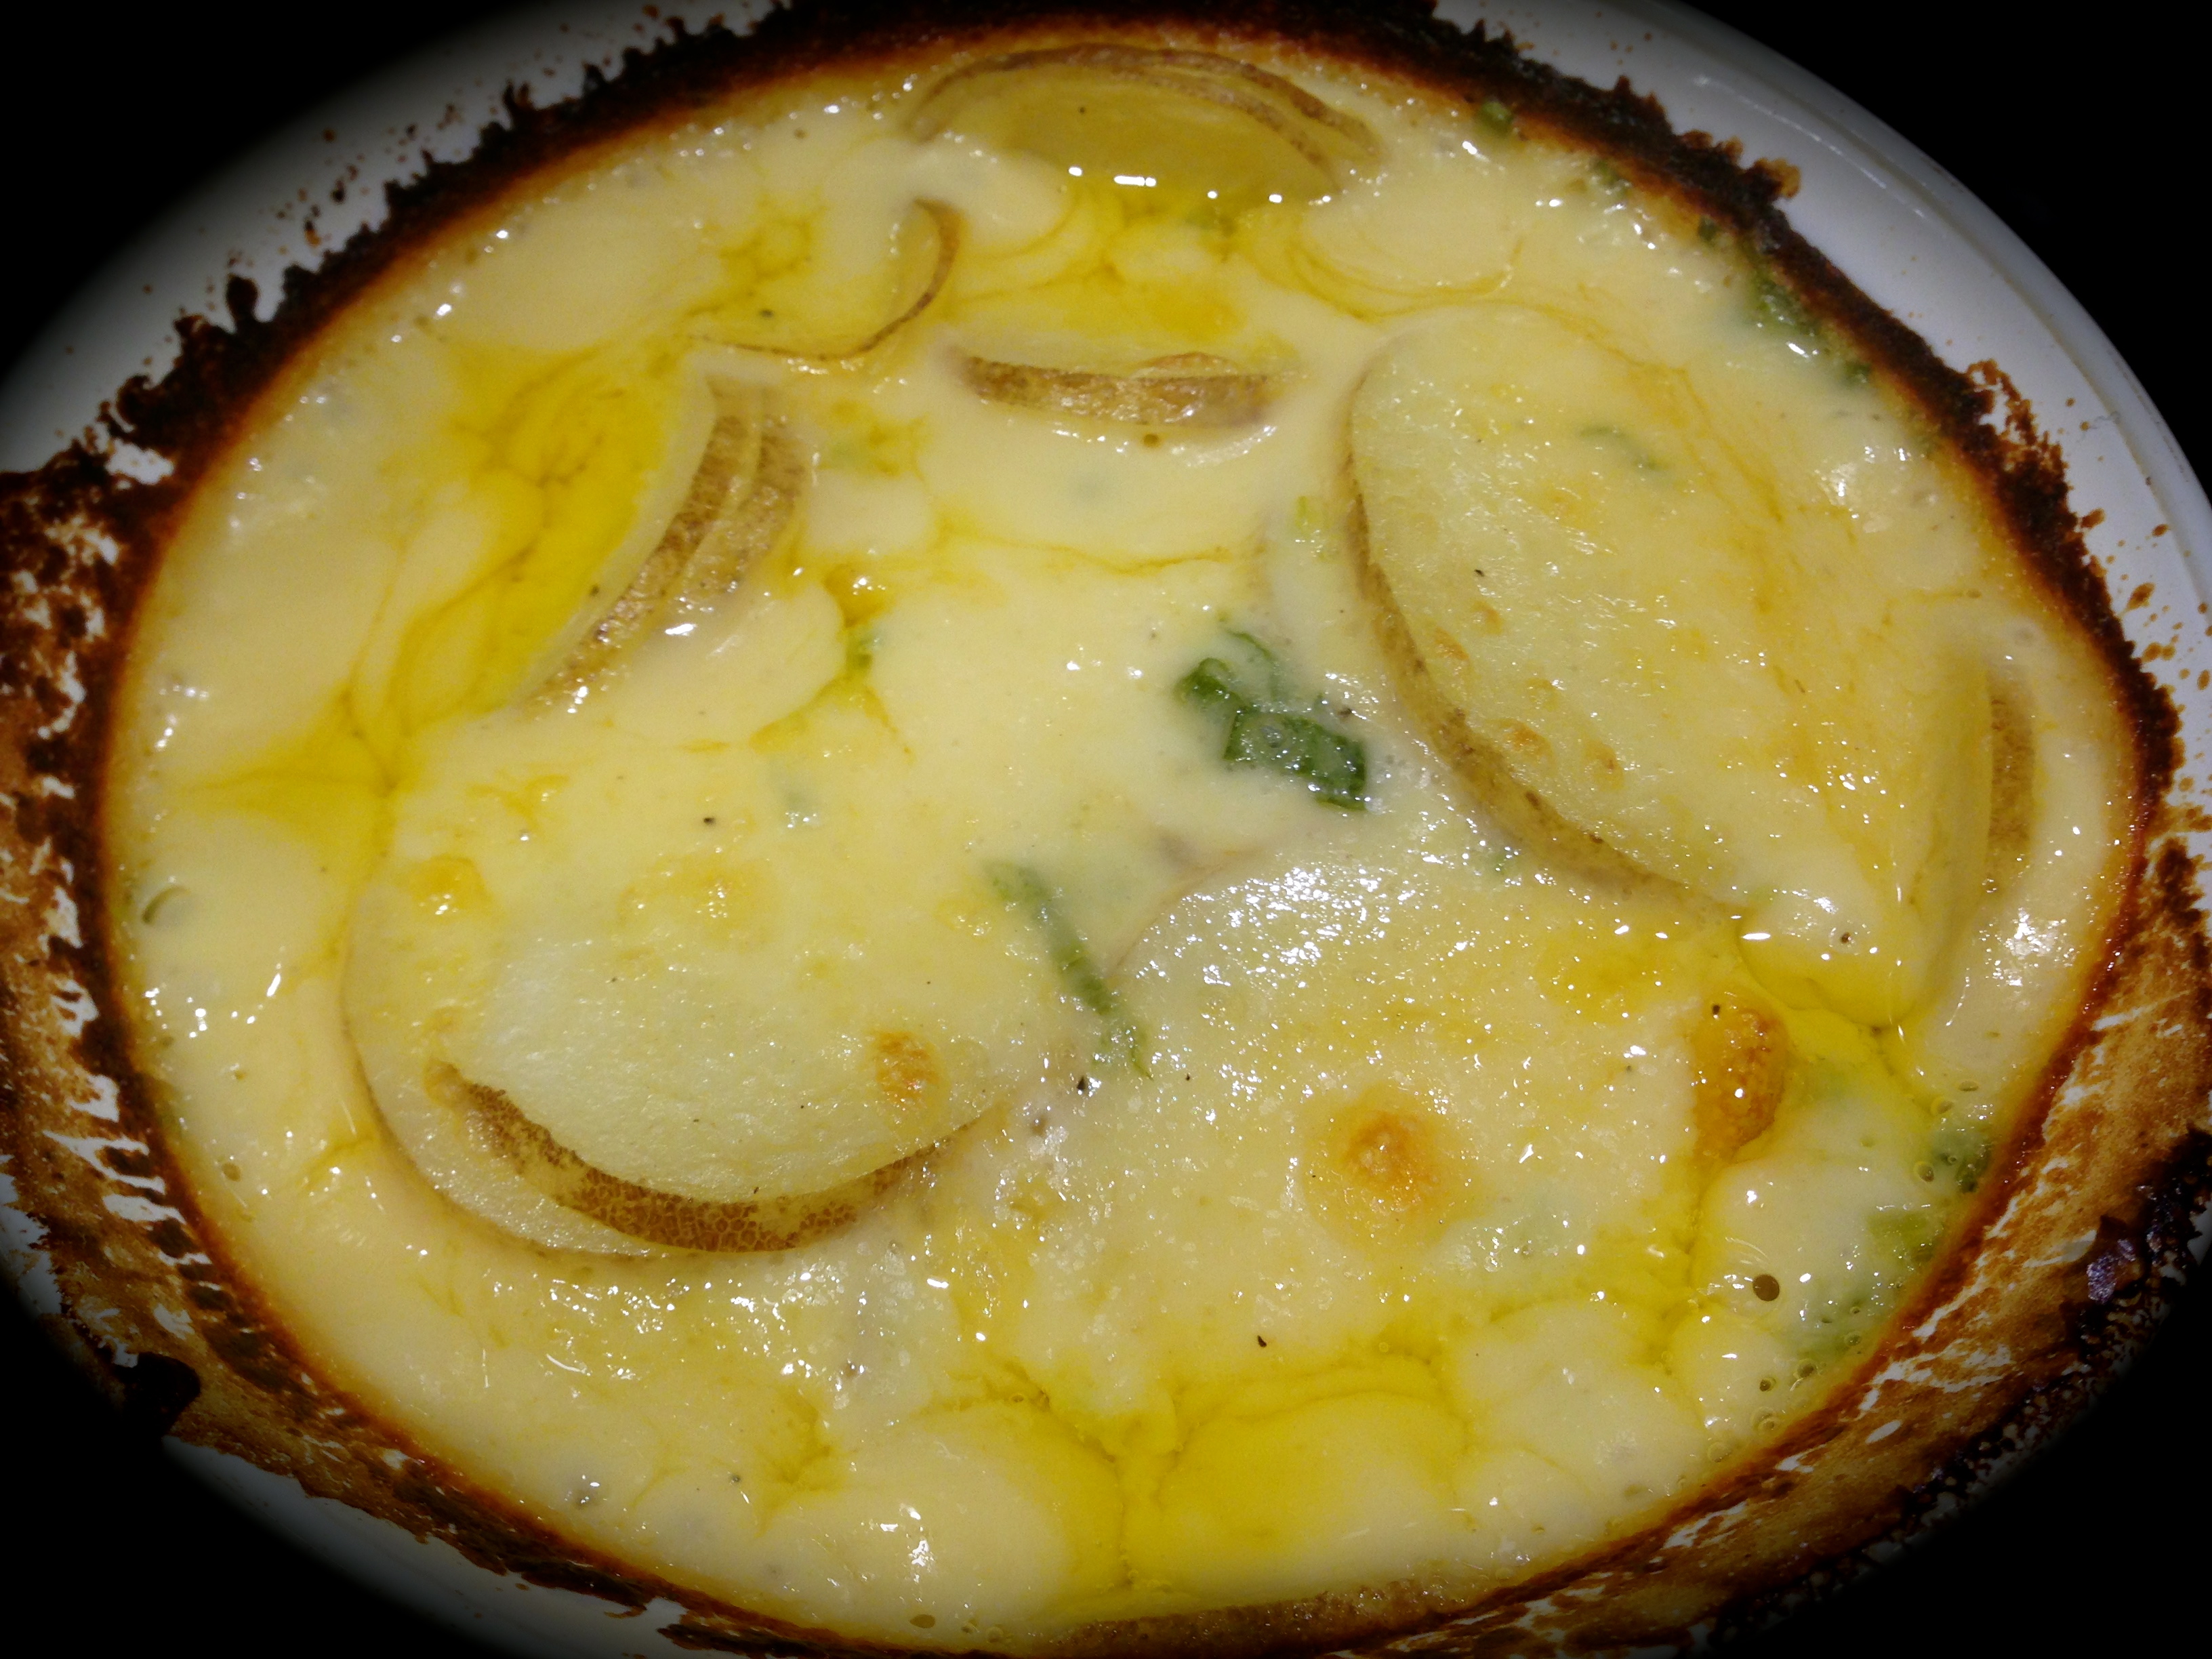
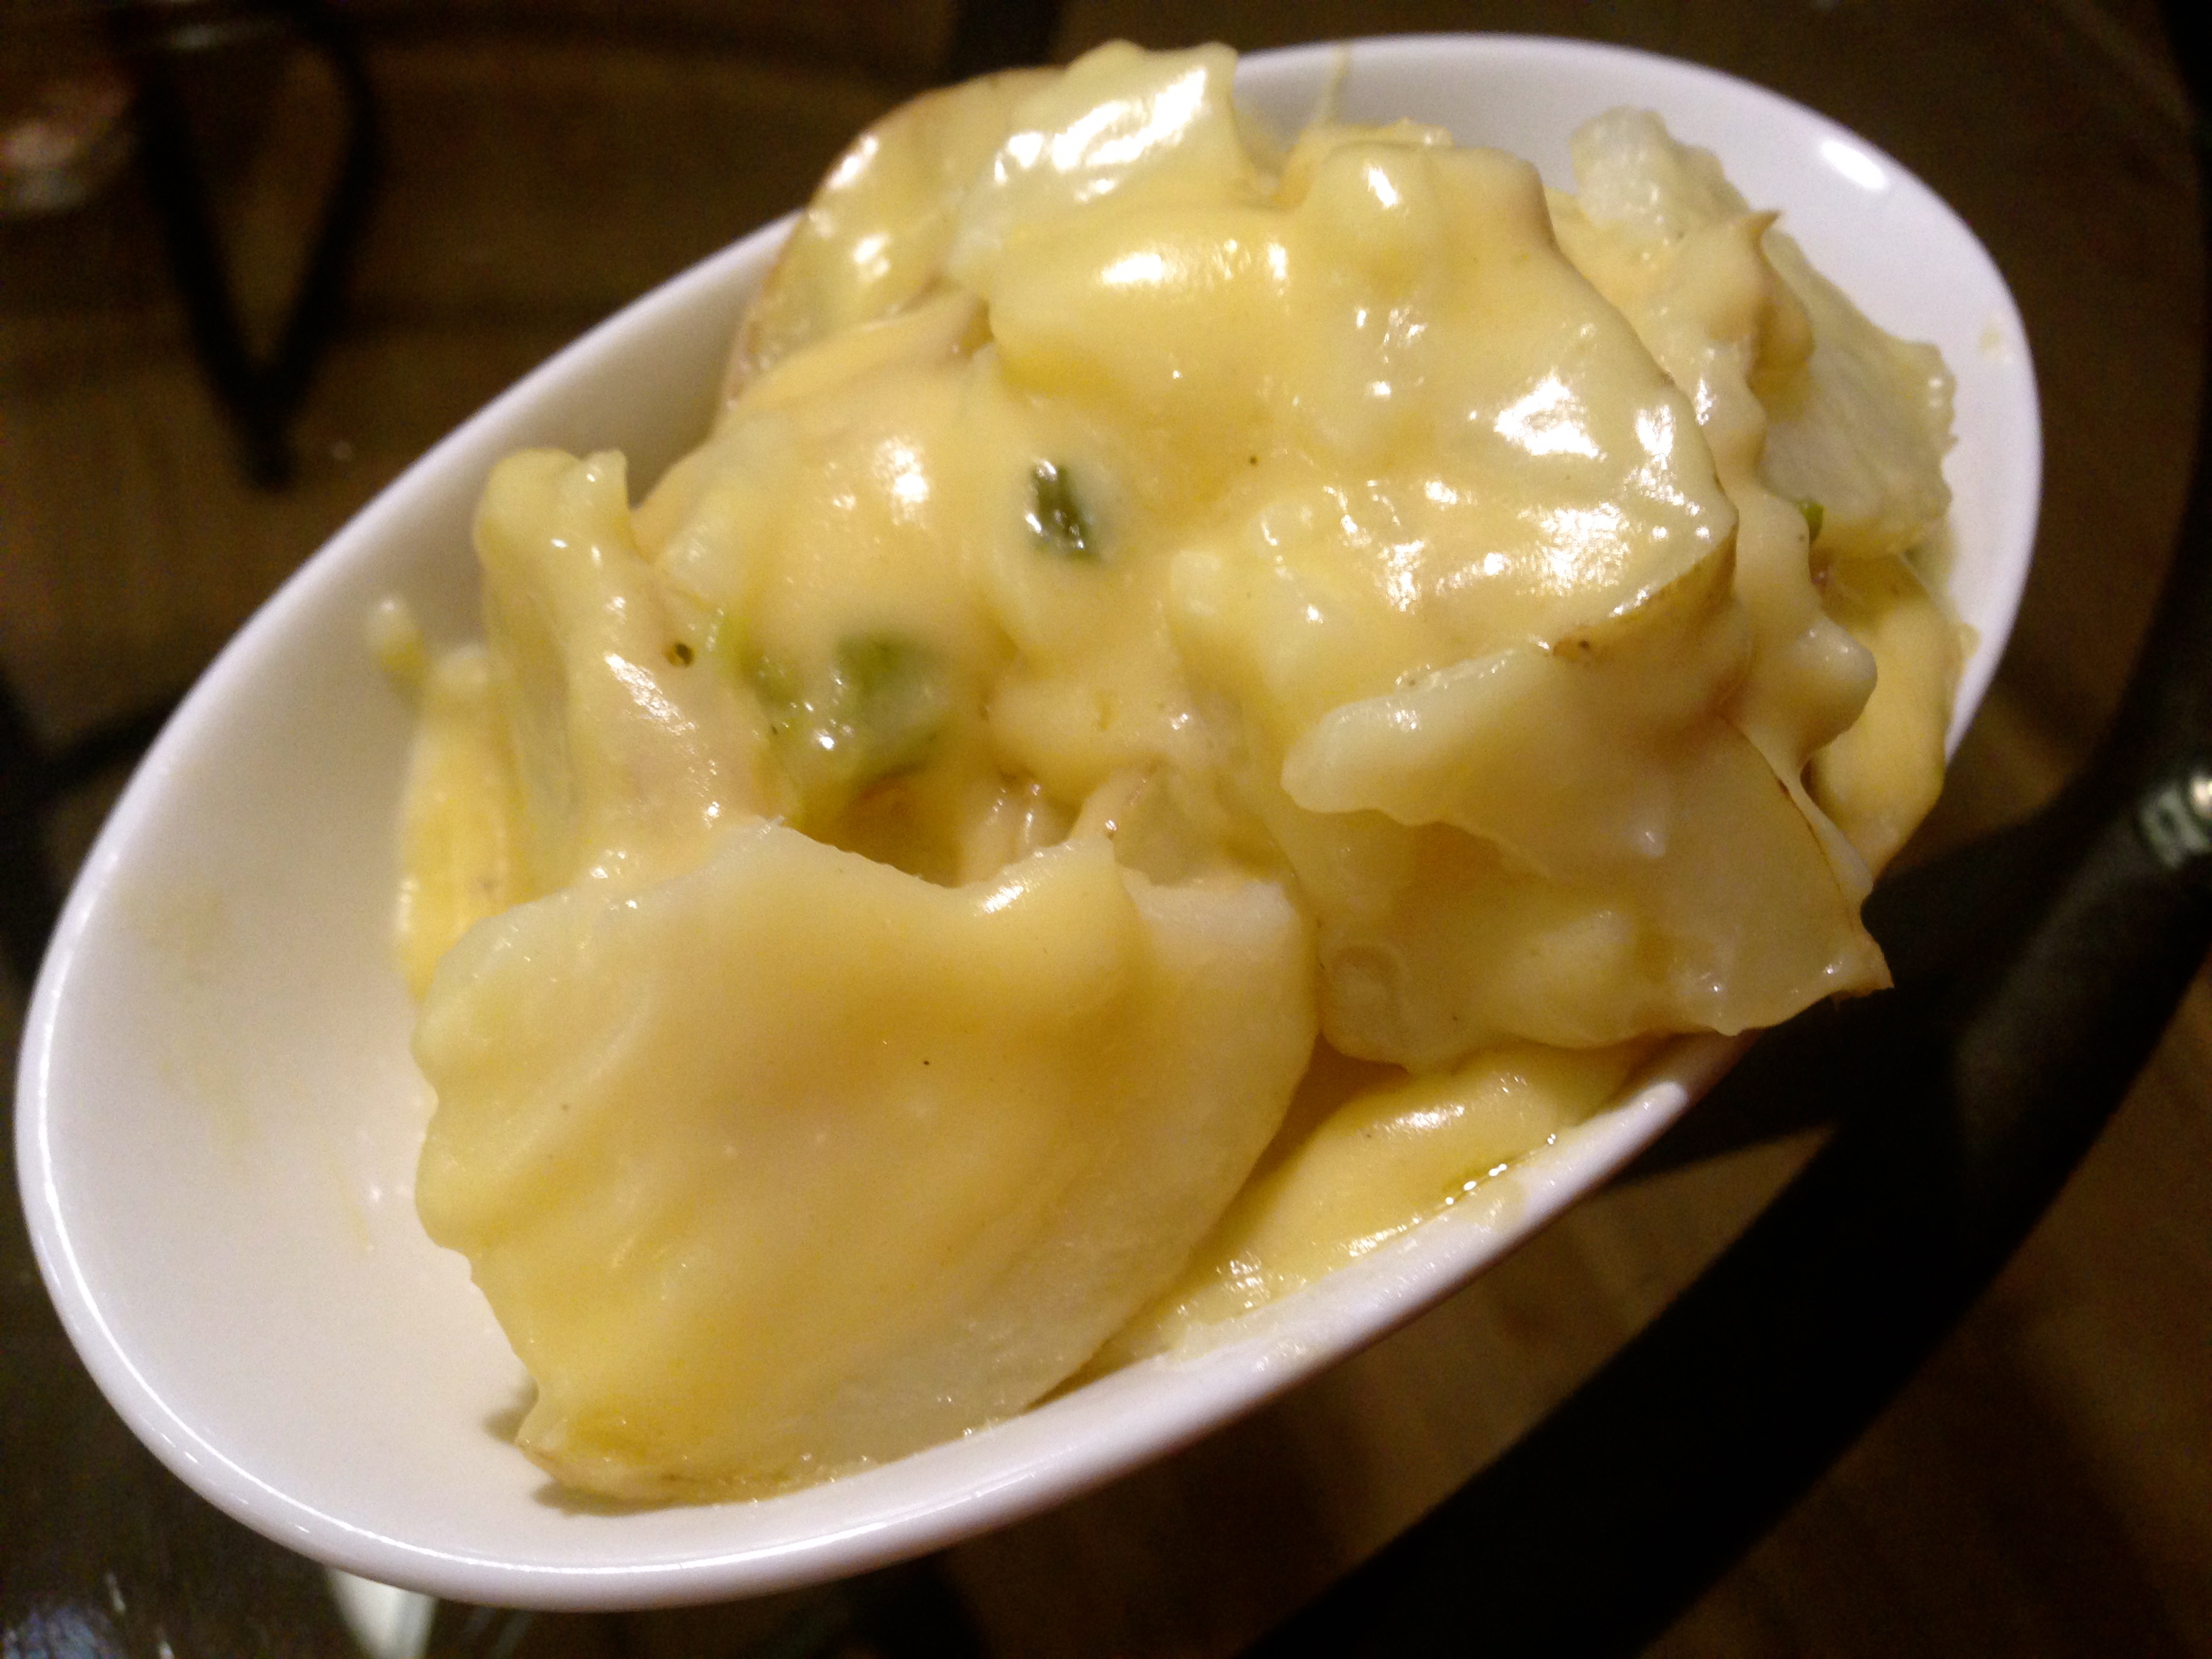
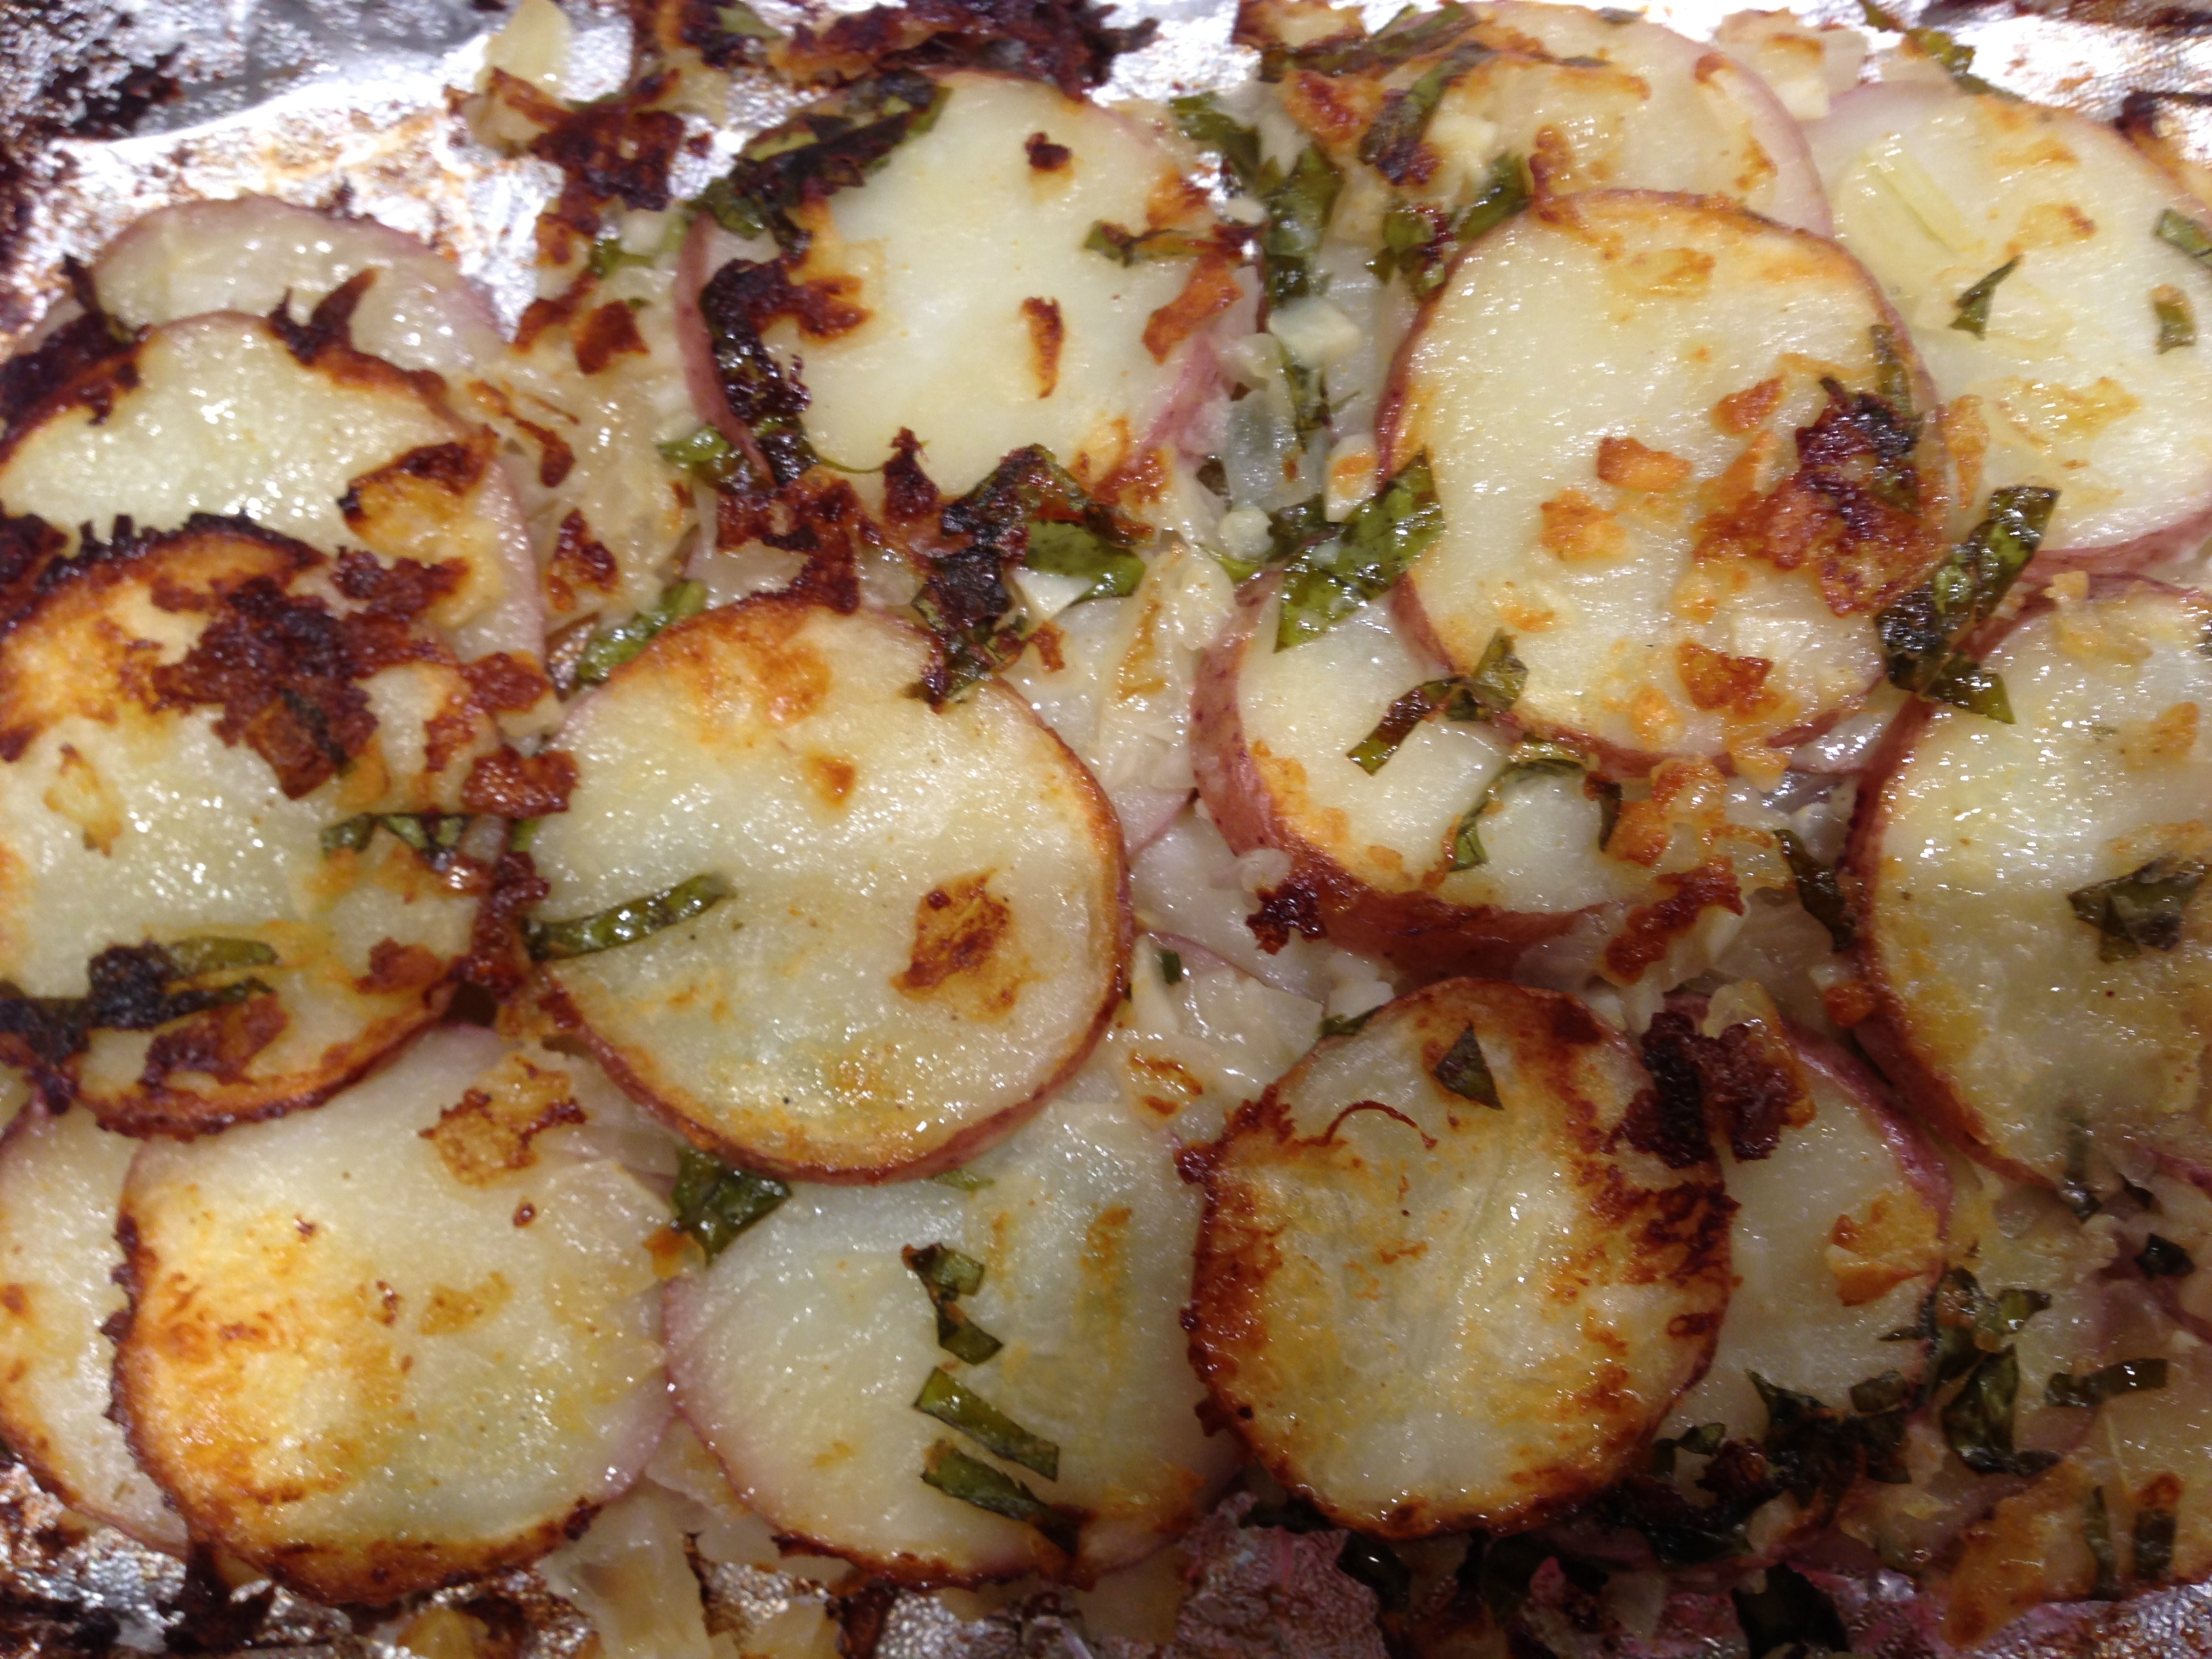
Lesson Learned 3 – Those tricky potatoes: I don’t know about you but, for me, potatoes are tricky when using them in a casserole, specifically sliced potatoes. I’ve experienced many instances where they were hard and not cooked through. This time they turned out perfectly. This is what I did. I used two medium sized yukon gold potatoes and boiled them with their skins on until I could easily stick a fork in them. Then I put them in a colander and let them cool. It is important to let them cool. If you try to cut them when they’re hot they’ll fall apart. Once they cool you can easily peel and slice them. Can you leave the peel on? Of course you can. My husband prefers them with the peel off. I sliced potatoes into half inch thick rounds and they were delicious. One of the first things my husband said when he took is first bite was, “the potatoes are good”. Success!!

You can boil your potatoes early in the day or even the night before and leave them with the skins on in the refrigerator until you’re ready to use them. It doesn’t have to be a big deal or overly time consuming.

Lesson Learned 4 – The seasoning is so important: This recipe doesn’t have a lot of ingredients so the seasoning is very important. Once again this part lends to the adaptability of this recipe. Once you layer the fish and squash make sure you salt and pepper them. Once you add the onions and parsley then sprinkle your fish seasoning on top. You can use any type of seasoning that works well with fish. I used a tuscan garlic seasoning blend that includes onion, garlic, red bell pepper and lemon peel. I use this seasoning a lot when I bake salmon filets so I knew it would work well with the salmon. Just be careful not to overdo the seasoning. About a quarter of a teaspoon should do the trick, at least for the first time you make this dish. You can adjust as you fine tune your dish.

I was so pleased with how this recipe turned out and will definitely make it again. Try it and and let me know what you think.

Salmon Casserole For Two...

  • Servings: 2
  • Difficulty: Easy
  • Print

INGREDIENTS

2 medium sized yukon gold potatoes, pre-boiled

1 Tbs. garlic infused olive oil

1/2 red onion, diced

1 generous Tbs. flat leaf parsley, minced

1 Tbs. flour

1 thick 6-8 ounce salmon filet, cubed

1 cup butternut squash, cubed small

1/4 tsp. tuscan garlic seasoning

3/4 cup heavy cream

1 cup shredded gruyere

kosher salt

freshly cracked pepper

olive oil cooking spray

DIRECTIONS:

Preheat oven to 375 degrees. Saute the onions in olive oil for about 5 minutes. Add the flat leaf parsley and cook for another minute. Stir in the flour and cook for 1 – 2 minutes. Set the mixture aside.

Slice the potatoes into 1/2 inch rounds. Spray a 1 quart casserole dish with cooking spray. Put a layer of potatoes on the bottom of the dish. Put the salmon and squash on top of the potato layer. Put the onion/parsley mixture on top of the salmon and squash. Season with salt, pepper and tuscan garlic seasoning.

Put another layer of potato rounds on top. Pour the cream over the top of the potatoes. Sprinkle the top with the gruyere cheese.

Bake for 35-40 minutes until golden and bubbly.

Ready To Go Into The Oven


SaveSave

SaveSave

SaveSave

SaveSave

SaveSave

SaveSave

SaveSave

SaveSave

SaveSave

SaveSave

SaveSave

SaveSave

SaveSave

SaveSave

SaveSaveSaveSaveSaveSave

SaveSave

SaveSave

SaveSaveSaveSave

SaveSave

SaveSave

SaveSave

SaveSave

SaveSave

SaveSave

SaveSave

SaveSave

SaveSave

Slow Cooker Ground Beef Stew…

It seems that lately I’ve been obsessed with my slow cooker. You have to admit it is a major convenience, especially when you have a busy day planned. Which was the case with me last week. But even when my calendar is full I still want to have something good and home made for dinner (unless I’m so exhausted I suggest we just go out to eat). The beauty of the slow cooker is that you get it ready early in the day when you have energy so that later in the day you go home to amazing smells and a dinner that is ready to serve without a lot of time and effort on your part. I just love my slow cooker!

I’m always experimenting with basic ingredients and I’ve really never used ground beef as the main protein in one of my slow cooker meals before. So I thought, what the heck, why not give it a try. And I have to say I really, really liked this meal. It’s hearty, flavorful and all you need do is serve it with some crusty bread, or corn bread or a salad and you’re done.

So let’s talk slow cooker ground beef stew…

Lesson Learned 1 – Use a lower fat ground beef in this recipe: I used 93% lean ground sirloin for this recipe. There are some recipes that I prefer a larger fat content but for this one you don’t. You don’t want the crock to be swimming in grease when it’s done. Believe me, it’s worth it to go higher end on the ground beef for something that is cooking for 7 hours.

Lesson Learned 2 – Partially cook the ground beef before putting it in the slow cooker: Many times I’ve talked about the importance of browning meat before you put it in the slow cooker. Slow cookers do not brown meats and so your meat can wind up looking grayish if you don’t brown it first. If that doesn’t bother you then just dump the meat in. But I say you eat with your eyes first and so you want the dish to look pleasing as well. Just cook the meat so there’s only a little pink left. The slow cooker can then handle the rest.

Lesson Learned 3 – Cut your veggies and potatoes into large chunks: I know I’ve said this over and over but it’s worth repeating. If you don’t you cut your veggies into large chunks they will turn into mush. Think about it. The veggies are cooking for 7 hours. Unless they are of substantial size they will break down. Below is the picture of my potatoes and veggies before I added the meat. You can see they are nice and chunky and that’s what you need in order for them to stand up to the cooking process.

Lesson Learned 4 – You can use any kind of potato you like: When I made this I used yukon gold potatoes. Yukon golds have a very thin skin so you don’t have to peel them. I always peel them because my husband has a hard time with the skins. Whether you do or not is totally your preference. You can use red potatoes or russets. I would suggest peeling either one of those if you decide to use them.

Lesson Learned 5 – Seasoning is very important when using a slow cooker: If you don’t season the ingredients well your food can turn out bland. You’ll want to salt and pepper the ground beef when you’re browning it. You’ll want to salt and pepper the onions, carrots and potatoes after you put them in the slow cooker. After you mince the garlic sprinkle it over the veggies and potato.  Add the oregano to the tomato sauce. Making sure you season this way will give you a flavorful result.

I will admit I wasn’t too sure about this recipe and I was very pleasantly surprised at how it turned out. Plus it provided some delightful smells in the kitchen will it was cooking. For a simple, no fuss, easy meal the recipe more than fits the bill. Try it and let me know what you think.

Slow Cooker Ground Beef Stew...

  • Servings: 4-6
  • Difficulty: Easy
  • Print

INGREDIENTS:

1 1/2 pounds 93% lean ground sirloin

2 large potatoes, peeled and sliced in large chunks

3 large carrots, cut in chunks

I medium yellow onion, sliced in chunks

2 garlic cloves, minced

1- 6 oz. can of tomato paste

1 15 ounce can tomato sauce

2 Tbs. Worcestershire sauce

1 tsp. dried oregano

Kosher salt to taste

Freshly cracked black pepper

Olive oil cooking spray

DIRECTIONS:

In a medium skillet, brown the ground beef until there is only a slight bit of pink left in the meat. Set aside. In a large bowl combine the tomato paste and sauce. Stir until completely combined and smooth. (This should give you a nice thick sauce). Add the Worcestershire sauce and oregano and stir to combine.

Spray the inside of the crock with cooking spray. Add the potatoes, carrots and onions. Season with salt and pepper. Sprinkle the minced garlic over the vegetables and potatoes. Add the meat on top. Pour the tomato sauce over the meat. Stir to combine.

Cover and cook on high for 7 hours. Do not lift the lid during the cooking process. Serve with a salad and some crusty bread.

SaveSave

SaveSave

SaveSave

SaveSave

SaveSave

SaveSave

SaveSave

SaveSave

SaveSave

SaveSave

SaveSave

SaveSave

SaveSave

SaveSave

SaveSave

SaveSave

SaveSave

SaveSave

SaveSaveSaveSave

Taters, Taters, Taters (Let’s Exchange Recipes)…

No matter what you call them, how you prepare them or how you serve them I love taters! Yes I know about carbs and yes there are some great alternatives but nothing in my mind compliments a meal like some delicious taters! Basically they are good for you, it’s all the stuff we put on them that causes the problems. But taters are one of my top guilty pleasures in life and that is not likely to change.

So I thought with this particular blog I’d try something a little different – basically suggest a tater exchange. I will give you a recipe that I’ve recently perfected and just love with the hopes that in the comments of my blog you share your favorite potato recipe. Then this blog can be a clearing house for a variety of great potato recipes – and what is better than that? Plus it will give me some new tater recipes to try.

So my recipe is for Greek Lemon Potatoes. These potatoes slow roast in the oven and the aroma of the garlic, oregano and lemon fill the air with a wonderful homey smell. So let’s talk Greek Lemon Potatoes

Lesson Learned 1 – How you cut the potatoes is important: I use Yukon Gold potatoes for this recipe and I actually peel them although it’s not necessary. Yukon Golds have a very thin skin and you can roast them either way. I try to pick out ones that are about the same size and thickness (not more than about 4 inches thick). I slice the potatoes in half and then I slice them down the middle lengthwise and into about six equal sized pieces widthwise. The picture below shows how I cut them.

Lesson Learned 2 – Be careful how much oil you use: When I originally tried this recipe I used 1/2 cup of olive oil. I found the potatoes came out too greasy. I’ve cut the amount down to a little over 1/4 cup but I found the amount of oil you use depends on the pan you roast the potatoes in. In a smaller high sided pan you will need less oil. In a larger pan where the potatoes are more spread out you’ll need more. Just make sure you’ve got at least 1/8 in of oil on the bottom. You may have to play around with the amount of oil. If you think the potatoes are coming out too greasy, just put them on paper towels for a couple of seconds before you serve them and you should be just fine.

Lesson Learned 3 – Your roasting time may vary depending on your oven: Once again I live in high altitude so the roasting process always takes a little longer. This recipe works well for me at 400 degrees for 1 1/2 hours but you may find your roasting time will be a little shorter. Keep in mind you’re cutting your potatoes into somewhat larger chunks so you will need some time to roast them completely.

Lesson Learned 4 – Salt the warm potatoes before you serve them: I’ve found that sprinkling a little bit of kosher salt on these potatoes right before you serve them gives them a little touch that really boosts the flavor. The warmth of the potatoes seems to incorporate the salt more fully. Try it and see what you think. These are not difficult at all to prepare and require very little monitoring but the end result c’est manifique… (I know that’s French and not Greek). Try these and share your favorite potato recipe with me. I’m always on the look out for a new way to make taters!

Greek Lemon Potatoes

  • Servings: 4-6
  • Difficulty: Easy
  • Print

INGREDIENTS:

2 pounds of Yukon Gold Potatoes sliced in medium sized chunks

2-3 cloves of garlic, minced

4 Tbs. freshly squeezed lemon juice, (about 1 medium sized lemon)

2 Tbs. dijon mustard

1 Tbs. dried oregano

1/4 cup olive oil (may need to adjust according to the size you use)

Kosher salt and pepper to taste

DIRECTIONS:

Preheat oven to 400 degrees. Slice potatoes into medium sized chunks and place in a bowl. In a separate bowl combine all of the other ingredients and mix thoroughly. Pour this mixture over the potatoes and thoroughly combine.

Spray a medium sized casserole dish (2 quarts or larger) with cooking spray. Put the potato mixture into the prepared pan, using a spatula to get all of the olive oil mixture out of the bowl. Cover with foil and roast for an hour, stirring the potatoes at the half hour mark.

Uncover the potatoes, stir them once again and roast for another half hour. Sprinkle with kosher salt and serve immediately.

I’LL START OFF THE RECIPE EXCHANGE!

And since I am suggesting the tater recipe exchange, I will start the process – here is a great cheesy potato recipe that I know you will just love Cheesy Potato and Green Onion Casserole

Cheesy Potato and Green Onion Casserole

Lithuanian Kugelis (Potato Pudding)…

Let me say right up front that this recipe is an artery clogger. That is why I make it once or maybe twice a year tops. The recipe has its roots in my family history. I am of both Lithuanian and Polish decent, and this recipe comes directly from my Lithuanian heritage.

My grandmother (my mother’s mother) was a great cook. She was one of those cooks who could never give you a recipe since everything she made was by look and taste. So it was with this kugelis recipe. I’ve played around with it and have gotten it to just about the way my grandmother made it. But lets face it, no one ever made it like Grandma or ever will.

Before I go into my lessons learned I think it only fair to share some memories of my grandmother. She came on a boat from Lithuania when she was only 16. Her passage was paid for by the man she was to marry. It was an arranged marriage. I can’t even begin to imagine how, at that young age, she had to courage to travel by herself to meet a man she had never met and marry him. But she felt it was her way out of abject poverty.

She got to the United States and immediately knew she did not want to marry this man. She was fortunate enough to meet another man she liked and convinced him to “buy-out” her marriage contract. He did and she wound up marrying him. They lived in Chicago which, at the time, had the largest Lithuanian population outside of Lithuania itself.

My Grandmother and Grandfather on their wedding day

My Grandmother and Grandfather on their wedding day

They were not rich by any stretch of the imagination and they had four children to feed. My mother told me there were times when my Grandmother went without food so the kids could eat. But they worked hard, watched their pennies and were finally able to make ends meet. They were the embodiment of the American dream but for a long time it was not easy.

Because they were so poor, my grandmother had to find ways to fill up the bellies of her kids while not spending a lot of money. A recipe like kugelis fit the bill. She could make good use out of a few potatoes, eggs, bacon and butter and turn them into a stick to your ribs kind of dish that would feed the whole family. In the end, she was noted for her kugelis and her home made bread, another inexpensive staple she made often during those times. I have not mastered her homemade bread and making bread from scratch is even trickier at high altitude, but I keep trying and someday I hope to post that recipe as well.

So let’s talk Lithuanian Kugelis…

Lesson Learned 1 – There is no one way to make kugelis: Just about every person of Lithuanian decent I’ve spoken to has their own family recipe for kugelis. And the ingredients can vary. Many recipes include onions (my grandmother did not use them), some recipes use condensed milk, (again, this recipe does not) and some do not use cream of rice or wheat (this recipe does). My point is there is not one full proof way of making kugelis. I am sharing the way my grandmother and mother made it.

Cream of RiceLesson Learned 2 – Use a little cream of rice or wheat: My grandmother used “farina” in her recipe. Farina used to be very popular when I was growing up but not so much now. As a substitute you can use either cream of rice or wheat. They are both a very creamy type of hot cereal and the little bit you use gives extra creaminess to the kugelis.

Lesson Learned 3 – Beat the eggs into submission: This is one of the tricks my mother taught me. You want your kugelis to be light and fluffy so you want a lot of air in your beaten eggs. You need to beat them for about 5-7 minutes with a hand mixer. I advise you not to guess when 5 minutes is up but to actually set a timer. You will not believe how long 5 minutes feels when you are beating those eggs. But you want a very airy consistency to the eggs as seen in the picture below.

Beaten eggs

Lesson Learned 3 – Keep the potatoes soaking in water until you are ready to grate them: You use quite a bit of potatoes in this recipe and it takes time to grate them. potatoes in waterThe last thing you want to have happen is for the potatoes to oxidize and turn brown while waiting to be grated. Once you peel them put them in a bowl of cold water until you are ready to grate them. That way they will not turn brown on you.

Lesson Learned 4 – Grate the potatoes by hand: My mother maintained that the only way to get the potatoes to a perfect consistency for kugelis is to grate them by hand. Let me tell you, that is quite an arduous task. Many people now use food processors to grate their potatoes, but my mother felt a food processor rendered the potatoes too watery. So, I do what my mother and my grandmother before always did and grate the potatoes by hand. You can really build up your upper body strength by grating the potatoes by hand, but the end result is so worth it. The pictures below show the gadget I use to grate the potatoes and the desired consistency of the grated potatoes.

Hand Grater

The desired consistency of the grated potatoes

The desired consistency of the grated potatoes

Lesson Learned 5 – Cut the bacon into lardons and cook until brown but not crisp: You want the bacon to have good color but you don’t want it so crispy that it won’t hold its shape when you mix it with the potatoes. So cut your bacon into lardons, as shown below, and cook them until they have a nice deep rich color.

bacon lardons

The desired color of the bacon

The desired color of the bacon

Lesson Learned 6 – Mix well and taste for enough salt: My mother used to say over and over again that you need to mix these ingredients really well. She usually mixed them for about 3-4 minutes and now so do I. This is not like other recipes that tell you not to over mix as the it will make the end result tough. So take your time and mix the ingredients thoroughly. You won’t be disappointed. My mother was also very specific about tasting the uncooked mixture for enough salt. Now keep in mind there is a lot of salt in the bacon so you don’t want the kugelis too salty. I always take a little taste before putting it in the baking dish just to make sure there is enough salt. I start out with one teaspoon at the beginning and add more after I’ve done my mixing if I think the kugelis needs it.

I guarantee you this recipe is over the top. A great recipe with a treasured heritage – nothing can beat that! Enjoy!

Lithuanian Kugelis...

  • Servings: 16 squares
  • Difficulty: Medium
  • Print

INGREDIENTS:

8 Large russet potatoes

1/2 pound of bacon, cut into lardons

1/2 stick of butter

3 Tbs. cream of rice or wheat

1-2 tsp. salt

8 large eggs

Sour cream, for topping

DIRECTIONS:

Preheat the oven to 375 degrees. Sauté the bacon and butter together. Set aside. Peel the potatoes and place into a large bowl of water until ready to use.

Beat the eggs with a hand mixer for 5-7 minutes or until extremely frothy. Set aside. Grate the potatoes. Add the eggs, bacon and melted butter, cream of rice and salt. Mix very well.

Pour the mixture unto a 13 x 9 x2 pan (no need to prepare the pan in any way).

Bake for 90 minutes or until the center is done. Serve warm with a dollop of sour cream.

Ready to go into the oven

Ready to go into the oven

Out of the oven

Out of the oven

Kugelis

Kugelis

Serving suggestion

Serving suggestion


Easy Potato Casserole…

Are you a rice or potato person? In my experience you are either one or the other. There is no doubt when it comes to me. I am definitely a potato person. Born and raised on potatoes, I barely had rice until I was an adult. And although I like rice and find it very adaptable in recipes, my starch of choice is and always will be potatoes!

And that it why I am always thinking about new ways of making those spuds. I think this recipe fits the bill of not only being incredibly easy but also incredibly delicious. When I get a, “these potatoes are good” from my husband, I know I’ve hit the jackpot.

Easy Potato CasseroleNow I will admit I made this recipe twice. The first time I tried it I felt the potatoes were not done as well as I would have liked. The first time I used my mandolin slicer and cut the potatoes to 3/16 of an inch. The second time I cut them to 1/8 inch and there was a world of difference in the result.

As I’ve share before, I live in high altitude so recipes often take longer to cook. I cooked this potatoes casserole for 2 hours, 1 hour and 40 minutes covered with foil and the last 20 minutes uncovered. If you’re not at high altitude it will probably only take one and a half hours total.

So let’s talk easy potato casserole…

Lesson Learned 1 – The thickness of the potato slices is very important: As I just mentioned, the potato slices should be even in thickness and not overly thick. I used 1/8 inch slices and the casserole turned out perfectly. The thicker the slice the longer the cooking time. And it’s very important that all slices have a consistent thickness. Otherwise some parts will cook while others won’t. The best way to ensure even slices is to use a mandolin slicer. But be careful when using one. The blades are very sharp and you can easily slice your finger if you are not careful.

Easy Potato CasseroleAlso, remember to slice your potatoes as the very last bit of prep. Potatoes will oxidize (turn brown) when they are left in the open air too long. And in this case you don’t want to soak the potatoes to prevent them from oxidizing. You want the potatoes as dry as they can be. After slicing my potatoes I dried them off with a paper towel to get out as much moisture as I could. You don’t want a soggy potato casserole. So make sure your very last bit of prep is slicing the potatoes. From there you want to begin assembling your casserole layers right away.

Lesson Learned 2 – Use a good smokey thick cut bacon for depth of flavor: If you have a Trader Joe’s near your home, go to meat section and get a package of uncured bacon pieces. These pieces have been a tremendous find for me. Quite often they are from thick cuts and I found their flavor to be much better than the bacon you find in stores in half pound packages. They’re great and convenient when you want to add some bacon pieces to a recipe, much better than the jarred fake kind. If you can’t find them, then I would recommend any thick cut bacon cooked and crumbled into small pieces. The flavor really permeates the potatoes when the bacon is a thicker cut.

This recipe is pretty straightforward so not many lessons learned to share with this one. I can’t emphasize enough the importance of making the potato slices thin. Other than that this recipe is not only delicious, it’s full proof! Enjoy!

EASY POTATO CASSEROLE...

  • Servings: 6-8
  • Difficulty: Easy
  • Print

INGREDIENTS:

2-3 russet potatoes, peeled (if the potatoes are large you will only need 2)

1 cup cheddar cheese, shredded

Easy Potato Casserole1 cup monterey jack or havarti cheese, shredded

4 slices thick cut bacon, cooked and crumbled

1 cup milk

1 large egg, room temperature

2 green onions, diced (include some of the green parts)

Salt and pepper to taste

Fresh flat leaf parsley for garnish

DIRECTIONS:

Preheat oven 375 degrees. Butter or spray a 9 inch pie pan.

Layer potato slices in the pie pan, slightly overlapping the slices. Season with salt and pepper. Sprinkle half the cheeses over the potatoes and add half of the crumbled bacon and green onions. Repeat the entire process ending with the top layer being the cheeses.

In a small bowl whisk together the milk and egg. Pour the mixture over the potatoes.

Cover with foil and cook for 1 1/2 – 2 hours. Remove the foil during the last 20 minutes of baking.

Allow the dish to rest for 5 minutes. Serve immediately.

Easy Potato Casserole

 Easy Potato Casserole

Easy Potato Casserole

Easy Potato Casserole

Spud Pockets…

A friend of mine, who is a professional chef, once said that when it comes to great recipes the simpler the better. Ain’t that the truth.  Over the course of the past six weeks my husband and I have been in the midst of a sell/buy process, selling our home of 15 years and downsizing to a condo. With downsizing comes a myriad of emotions but in the end it is quite cathartic as well as hugely stressful.

Spud Pocket IngredientsDuring this time I’ve not had the opportunity to uphold my goal of one new recipe a week, but I am back in the swing and will definitely try to post regularly, although I still cannot guarantee once a week. I do promise to get back to my routine, I just can’t determine when as of yet.

So, getting back to simpler is better, as you can imagine during a process like this you resort to very basic and quick meals. Often meals consisted of “eating out” but that gets to be a bit much after a while as well. So my challenge was to try to figure out how to make something fast but not just the same old thing. So I did a little experimentation with this recipe and my husband loved it. So let’s talk spud pockets…

Lesson Learned 1 – Simple is always the best: This recipe couldn’t be any simpler – potatoes, green onion, heavy cream, butter, fresh chopped parsley – that’s it! You could add some smoked paprika for additional color and flavor, but I haven’t unpacked my herbs and spices yet so I had to forgo the paprika. You would not believe how tender and flavorful the potatoes turn out.

spud pocketsLesson Learned 2 – Use whatever kind of potatoes you have on hand: When I went to the grocery store the red potatoes looked fantastic. So instead of using a russet potato I used red potatoes. I liked the fact that the skin added some nice color to the dish as well.

Lesson Learned 3 – Keep the potatoes in the oven longer if you want crispy bottoms: I made these potatoes two days in the row. The first day I kept the potatoes in the oven for 50 minutes, the second day for 65. Keeping them in for 65 minutes gave them a nice crispy bottom. Make sure you spray your foil with cooking spray to help get them out of the foil pocket. Even with the spray you may have to scrape a few out, but that nice crunch on the bottom of the potato is well worth it.

spud pocketsLesson Learned 4 – Use two sheets of foil so the pocket is reinforced: – I took two sheets of foil and placed one sheet on top of the other. Then I put the potato mixture in the center, crimped the two longer ends together and rolled the smaller sides upward. There was no leaking in the oven this way. And the smells that came out of the oven were divine!

Lesson Learned 5 – This is a very economical recipe: One large red potato is more than enough for two people. I happened to have some heavy cream in the refrigerator so I used that. You could use milk or half and half, but the heavy cream really gives more depth of flavor.  One bundle of green onions made four pockets and you only need a small dollop of butter on top of each. I had a small bundle of fresh parsley and I used only about a quarter of it for four servings. A little goes a long way.

I’m telling you this recipe could not be any easier. You just chop the potatoes into half inch cubes, dice the green onions (use the green parts too) and parsley. Combine them all together, put the potatoes on a piece of reinforced foil (I used two sheets of foil), add a dollop of butter, a splash of heavy cream, some salt and pepper and that’s it! If you want a quick recipe that is sure to please, this is the one for you. You can also serve these rustic style right in the foil. Either way this is an easy go-to recipe. Enjoy!

Spud Pockets

SPUD POCKETS...

  • Servings: 4
  • Difficulty: Easy
  • Print

INGREDIENTS:

2 large potatoes, cut into 1/2 inch cubes

1 bundle of green onions, chopped

4 Tbs. chopped fresh parsley

8 Tbs. heavy cream, 1-2 per pocket

2 Tbs. butter, 1/2 Tbs. per pocket

Salt and freshly cracked black pepper, to taste

Light sprinkle of smokey paprika per pocket, optional

Olive oil cooking spray

DIRECTIONS:

Preheat the oven to 400 degrees. In a large bowl combine the cubed potatoes, onions and parsley. Evenly distribute the mixture onto reinforced aluminum foil (two sheets, one on top of the other, per pocket- make sure to spray the foil with cooking spray first). Pull the sides up on the foil. Splash heavy cream over the potatoes. Put a pat of butter over each bundle. Close the foil by taking the large ends together and turning them over on each other to crimp them. Then pull up each smaller side and crimp the foil upward and toward the center of the bundle.

Bake for 45-65 minutes (you will get nice crispy bottoms if you cook them for 65 minutes). Remove the potatoes from the foil packet and serve immediately.

spud pockets

Serving suggestion: Filet of beef with steamed vegetables and spud pockets.

Serving suggestion: Filet of beef with steamed vegetables and spud pockets.

Grilled Three Cheese, Bacon and Chive Potatoes…

Summer time is grilling time. And I love to grill though I have to admit I’m not a purist. I grill on a gas grill. Some people like fooling around with coals and all that stuff. Not me. I like a grill that heats up on its own and can tell me the grilling temperature I am working with. That’s about how hard I want to work at grilling.

Things just taste better on a grill, don’t you think so? From chicken, to steak, to brats and burgers there’s nothing like it. So the other day I had it in my mind to grill a filet I’d had in my freezer for a while and I also decided to try grilling some potatoes in a foil packet. A few years ago I posted a recipe for a blue cheese, onion, garlic and basil potato packet. This time I tried for something that mimicked a steak house baked potato.

Now let it be known I love grilled steak, but this time I found the grilled potatoes to be the star of the meal. This recipe is so easy and so flavorful I bet it will become your go-to grilled potato recipe.

So let’s talk grilled three cheese and bacon potatoes…

coxo-v-blade-mandolineLesson Learned 1 – For uniformity in cooking, use a mandolin slicer to slice your potatoes: The mandolin slicer I use is pictured at the left. I like this particular one for a couple of reasons. First, it was reasonably priced. I just can’t see spending close to one hundred dollars on a mandolin slicer. This one is about half that amount. Second, it has a variety of blades and cutting options (slicing, julienne, french fries). It is a powerful tool that can cut your prep time significantly.

For me, the best part about a mandolin slicer is that you get uniform cuts. That’s important in this recipe. Having various thicknesses in your potatoe slices will skew the cooking time. You want all of the potatoes to be cooked through at the same time. I’ve found no better way to do that than with a mandolin slicer.

One other tip: You see that little round thing next to the slicing unit? That is a hand/finger guard. You should ALWAYS use that when cutting with a mandolin. The mandolin blade does’t distinguish between vegetable and human flesh. It will cut both easily and with equal proficiency. So be very careful when using a mandolin slicer if you cherish your fingers and hands.

Lesson Learned 2 – Keep the potatoes on a little longer for great crispiness on the bottom: This is the first time I tried these. When I checked the potatoes at 40 minutes at 400 degrees, they were done. But I still had more time left for finishing my filet. I left the packet on an additional 10 minutes and much to my surprise that created a wonderful crispy crust on the bottom of the pile of potatoes. It was almost like having a bottom layer of potato chips with the wonderfully soft and flavorful potatoes on top. I think I’m always going to do them this way. I loved the distinction between the crunchy bottom and the soft top. It was delightful!

Lesson Learned 3 – Bacon bits work really well with this recipe: Although you can fry and chop up your own bacon, I found that bacon bits work equally as well with this recipe and help save you some time. So don’t be afraid to use prepackaged bacon bits. Just remember to refrigerate what you don’t use

Lesson Learned 4 – The layering process is very simple: Here it is in pictures.

Place the potatoes and onion on a piece of foil sprayed with olive oil cooking spray

Place the potatoes and onions on a piece of foil sprayed with olive oil cooking spray

Top the potatoes and onions with the cheeses: cheddar, mozzarella and parmesan

Top the potatoes and onions with the cheeses: cheddar, mozzarella and parmesan

Top with bacon and chives

Top with bacon and chives

Crimp the top and sides of the foil and place on the grill

Crimp the top and sides of the foil and place the packet on the grill

Doesn’t the uncooked version look simply divine as well. I love the contrast of the colors. And this dish looks phenomenal both uncooked and cooked. And it’s really easy to put together. One potato serves two people so the dish is pretty economical as well. I loved this one so much I made it two nights in a row. I hope you love this too!

GRILLED THREE CHEESE BACON AND CHIVE POTATOES...

  • Servings: 4
  • Difficulty: Easy
  • Print

INGREDIENTS:

2 large russet potatoes, scrubbed and sliced to 1/8 inch thickness

1 medium onion, sliced

1/3 cup grated parmesan cheese

3/4 cup shredded cheddar

3/4 cup shredded mozzarella (I had unshredded mozzarella that I tore into small pieces)

1/3 cup bacon bits

2 Tbs. chopped chives

2 Tbs. of butter, cubed

Seasoned salt and black pepper

DIRECTIONS:

Light your grill to high heat. Divide the potatoes and onions up on two large sheets of foil sprayed with olive oil cooking spray.

Combine the cheeses and top the potatoes and onion with the cheese mixture. Top with bacon bit and chives. Dot the tops with butter. Season with seasoned salt and pepper.

Fold the foil over the top and crimp the edges. Fold the sides up and crimp the edges securely. Grill for 40 minutes (add an additional 10 minutes for a delightful crispy bottom).

Open the foil carefully and serve immediately.

Grilled Three Cheese and Bacon Potatoes

Grilled Three Cheese And Bacon Potatoes

Herb Roasted New Potatoes…

As you can imagine, I check out a lot of food blogs to see what others are making. I am impressed by the skill and creativity I see in a lot of them. And I say to myself, why can’t I be like that? But I am who I am, and what I make is based on my upbringing, my tastes, and sometimes even an adventurous spirit. But by and large, I am a pretty simple cook who likes to make simple things and be very successful at doing so.

Don’t get me wrong, my palate has matured over the years and I now enjoy many things I never would have dreamed of eating when I was younger. But when push comes to shove I’m basically a meat and potatoes girl (as is reflected by my recipes). So this recipe will come as no surprise.

Herb Roasted New PotatoesI like this recipe both for it’s simplicity and its flavor. Plus during the summer months I grow a lot of herbs and am always looking for ways use my fresh herbs in recipes. So this one fits the bill. I used my flat leaf parsley and lemon thyme as well as garlic to provide the aromatics. I love the added boost of the lemon thyme, but if you don’t have it or can’t find it, you can achieve the same affect by adding some lemon wedges to the roasting process. All in all, the hardest part of this recipe was making sure I didn’t slice the potatoes all the way through but just deep enough so they would fan out slightly. The rest was a breeze.

Lesson Learned 1 – Know your oven: I researched similar recipes to mine and many of them suggested baking the potatoes for an hour at 350. That would never work for me. At high altitude you often have to set your oven temperature higher and cook things longer. I set my oven temperature at 375 and for the last ten minutes cranked it up to 400. Next time I make this recipe I will start at 400 degrees and check the potatoes after 45 minutes. For me, I am thinking that 400 degrees for an hour will be optimum. At sea level, I would suggest starting at 375 and checking the potatoes for doneness at 45 minutes. If they are not done, make a decision from there whether to cook them longer at the same temperature or to crank up the oven.  Keep in mind the size of the potatoes matter. New potatoes are small but can still vary in size and that will affect the roasting time. The larger the new potatoes the longer the roasting time. Check your potatoes at 45 minutes and plan for at least an hour. That way you won’t go wrong.

Sliced New PotatoesLesson Learned 2 – Don’t throw out the garlic: I recommend using a full head of garlic when roasting the potatoes (you can even use more if you like). You don’t need to peel it, just cut off a small portion of the top. It will not only provide a delightful aromatic during the roasting process, but will also give you sweet soft garlic cloves that you can either spread directly on bread or use with butter to make a garlic herb butter that’s great for making garlic bread. You get that extra added benefit with this recipe.

If you  like rich, creamy potatoes infused with an herb and garlic flavor, this recipe is for you. Let me know what you think about the recipe after you make it.

Herb Roasted New Potatoes…

  • Servings: 4
  • Difficulty: Easy
  • Print

INGREDIENTS:

2 pounds new potatoes, scrubbed

1/4 cup olive oil (I used garlic infused olive oil)

2 Tbs. melted butter

1 Large head of garlic, top trimmed

1 – 2 Tbs. chopped flat leaf parsley

4 – 6 sprigs lemon thyme (if using regular thyme cut up half a lemon into wedges and add)

Salt and freshly cracked black pepper

DIRECTIONS:

Preheat oven to 375 (for high altitude 400 degrees). Melt the butter and add the olive oil to it. Cut slits into the potatoes being careful not to slice them all the way through. Place the potatoes in a roasting pan (I lined my with foil, but that is discretionary). Put the garlic head in the middle of the potatoes. Baste the potatoes and garlic with half of the butter/olive oil mixture. Sprinkle the potatoes with the chopped parsley and place the thyme sprigs in between the potatoes. Sprinkle with salt and pepper.

Half way through the roasting process baste the potatoes with the remaining butter/olive oil mixture. Check the potatoes for doneness at 45 minutes. If they do not appear to be almost fork tender raise the temperature of the oven to 400 degrees and roast at least an additional 15 minutes or until the potatoes are fork tender. Serve immediately.

Ready To Go Into The Oven

Herb Roasted New Potatoes

Herb Roasted New Potatoes

Old Fashioned Pot Roast…

Was there ever a comfort food that will chase away the blues on a cold, snowy Winter day better than a simple pot roast? Making a pot roast reminds me of home, with great smells in the kitchen and the anticipation of that roasted goodness that only comes from cooking something low and slow.

le-creuset-signature-7.25-qt.-flame-round-french-ovenThere are various ways to cook a pot roast. Although I’ve made them several times in a slow cooker, I prefer to use an enameled cast iron pot (I use Le Creuset but there are many different varieties out there). I find that enameled cast iron provides an even, controlled heat and I think that consistently  allows for a more tender pot roast.

I also find enameled cast iron to be easy to clean, especially after something has been cooking for a long period of time. The main drawback with enameled cast iron is that it is heavy. I mean after all, it is cast iron. So just be prepared to flex your muscles a little bit and you will be fine. Enameled cast iron can be expensive, but I’ve had some of my pots for over 20 years and although the enamel may be slightly stained, they still work like a charm. In the end, you only get what you pay for…

The beauty of making pot roast is that it is so simple to make and your entire meal winds up being in one pot. The oven does all of the work and you are rewarded for your patience with one of the best comfort food meals of all time. So, here are some lessons learned that will make you a master at making the perfect pot roast:

IMG_2702Lesson Learned 1 – Brown the meat and veggies before putting them in the pot: The cooking method used for making pot roast is called braising. When you braise something you cook it for a long period of time in liquid. In the end, this technique does not provide eye pleasing color although it renders deliciously moist meat and vegetables. Taking a few minutes to brown the meat on all sides and to brown the vegetables will provide something that not only tastes divine but is also eye pleasing. It is worth the time to do it. Remember, you eat with your eyes first.

IMG_2711Lesson Learned 2 – Cut the veggies into big chunks: Regardless of the size of the pot roast, you will be braising the dish for several hours. You don’t want your veggies to fall apart in the process. Make sure you cut them into big chunks. That way the will stand up to the braising time.

Lesson Learned 3 – THE ONLY WAY IS LOW AND SLOW: The only way to wind up with a tender, moist pot roast is to cook it low and slow. Pot roasts are tough cuts of meat (I used a chuck roast in this recipe) and if you don’t take the time to slowly break down the fibers in the meat you will wind up with a tough, uneatable meal. Most recipes that I researched called for cooking a 4-5 pound roast for four hours. I’ve also seen cooking temperatures vary from 275 to 325. I live in high altitude and I’ve learned the hard way that everything takes longer to cook here. I cooked my pot roast for 4 hours at 275 and the last hour I raised the temperature to 300. The pot roast texture turned out perfectly.

The pot roast will tell you when it is done. If you go into the pan and stick your fork in the roast and it does not go in and out easily, the pot roast is not done. I tried this trick after 4 hours of cooking and the fork did not go into the meat easily. After 5 hours the fork went into the meat like the meat was butter. At that point I knew it was done.

I prefer cooking the roast at 275 and cooking it a little longer. I find the lower temperature and the longer braising time does not annihilate the vegetables. Everything turns beautifully.

Lesson Learned 4 – Braise with red wine and beef stock: Once again I’ve seen various suggestions on the type of braising liquid to use with pot roast. I can tell you from experience that nothing beats a combination of red wine and beef stock. This combination not only gives you fabulous drippings from which you can make a homemade gravy, but it also fills the house with the most delightful smells during the cooking process. Part of the comfort of making a pot roast are the smells you get while the roast is braising. Use red wind and beef stock and you won’t regret it.

When you braise a roast you fill the pan with liquid until it reaches half way up the sides of the meat. Don’t cover the meat completely with liquid. If you do, you will poach the roast and not braise it. You don’t want to do that.

potroast2

All of these tips will help you make the most delicious pot roast you’ve ever tasted. If you’ve never made a pot roast before, try to be a little flexible in your cooking time until you figure out the time and temperature that works for you. I highly recommend you keep your oven temperature at 275. If you live at sea level, a 4-5 pound roast may only take 4 hours to braise. That did not work for me in high altitude. I will include both of these recommendations in the recipe.

Try this one the next time you are in need of some old fashioned comfort food. It truly hits the spot!

Old Fashioned Pot Roast

  • Servings: 6-8
  • Difficulty: Easy
  • Print

IMG_2731INGREDIENTS:

1 4-5 pound pot roast

1 large sweet onion peeled and cut into quarters

4 carrots peeled and sliced into 2-3 inch pieces

4 parsnips peeled and sliced into 2-3 inch pieces

3-4 red potatoes (depending on size) washed and cut into large pieces

1 cup dry red wine

3 cups beef broth

2-3 Tbs. of olive oil (I used garlic infused olive oil)

Salt and pepper, to taste

3 sprigs of fresh thyme

dried (or fresh rosemary) 1 tsp. or 2 sprigs

DIRECTIONS:

Preheat the oven to 275 degrees. Heat a large cast iron dutch oven over medium-high heat. Salt and pepper the pot roast. Once the dutch oven has heated, add the oil and make sure the bottom of the pan is completely coated. Sear the roast on all sides for about a minute or two. Remove the roast from the pan and set aside.

Add more oil to the pan if needed. Add the carrots and parsnips to the pan and sear until lightly browned on both sides, about a minute or two. Remove and set aside. Add the potatoes to the pan, flat side down and sear for a couple of minute until tops are lightly browned and slightly crisped. Remove from the pan and set aside.

Add the wine to the pan. Stir with a whisk to remove all of the bits from the bottoms of the pan. Once that is done add the roast back to the pan. If using dried herbs instead of fresh, add to the beef stock and combine.  Pour in the beef stock into the pan making sure that the liquid only goes half way up the sides of the meat. Arrange the carrots, parsnips and potatoes on the side of the roast. Place the onions on top of the roast.

Cover and roast for 4 hours (if high altitude roast at 4 hours at 275 and one more hour at 300).  The roast is ready when it is fall apart tender and a fork inserted into the meat goes in and out easily.

IMG_2728

Browned and ready to go into the oven…

IMG_2731

A beautifully braised pot roast…

IMG_2740

Serving suggestion…

Cheesy Potato and Green Onion Casserole…

For years I bought boxed potatoes to make potato casseroles to accompany a meal. The boxes contain a sleeve of freeze dried potatoes that look like petrified potato chips with a pouch of powdered cheese and flavorings, depending upon what kind you purchased (scalloped, au gratin, sour cream and onion, etc). To that you add some butter, water and milk, mix the conglomeration together and bake it in the oven. I never really thought about it, I just did it for the convenience of it all. NEVER AGAIN!

In previous blogs I’ve mentioned how over time I’ve begun to realize that there are many things you can easily make from scratch versus buying them pre-prepared at the grocery store. Things like applesauce, cranberry sauce, rouxs, pickles, soups, gravies, macaroni and cheese – the list can go on and on. The point is when you make something from scratch you control what goes into it. You control the sugars and sodium. You control the color naturally versus using dyes to achieve the desired affect. I’ve never made anything from scratch that included ingredients I could not pronounce much less spell, but I see them all the time on the packages at the grocery store.

I think we’ve come to believe that in the name of convenience it is ok to use prepackaged pre-prepared foods. And I am not one to point a finger at them, I’ve used them all my life. I guess what I’m trying to say here is that as I’ve become more adept in the kitchen I realize how easy it is to make things from scratch and in the end how much better that is for you. Don’t worry, I am not a purist. I’m sure in the name of convenience I will use a pre-prepared item myself from time to time. But more and more I’ve moved away from them and haven’t noticed a big difference in the time it takes to make certain things. Hence this recipe I am about to share.

oxo-hand-held-mandolineWhat makes this recipe so easy to make is a simple tool known as a mandolin slicer. There are tons of varieties out there, and the one in the picture to the right is what I use. When I publish something like this I always have to use the disclaimer that I work at Crate and Barrel. We carry a few varieties of mandolin slicers and this one is pretty affordable. I like it because it gives you a couple of different slicing widths, works well and it has the hand protector. But you can get a mandolin slicer just about anywhere and they can range in price from being extremely cheap to very expensive. If you invest in one, just make sure you at least get one that has some sort of hand protector.

One thing I have to stress here – if not used properly a mandolin slicer can be VERY DANGEROUS. You can slice a piece of your finger off just as easily as a piece of potato if you are not careful. Even with a hand guard you have to be very mindful when using one. The blades on these slicers are very sharp and before you know it, if you are not careful, you can really hurt yourself. So always use a mandolin slicer with the utmost care.

That being said, it is a great tool for quickly slicing things like potatoes, carrots, onions, etc. and getting even slices all the time. The key to success in this potato casserole recipe is the thin evenness of the potato slices. A mandolin slicer can give you that in no time flat (see the picture below). It would take much longer to do this by hand and the discs would not be nearly as precise in width.  So let’s talk a little bit about the lessons I learned developing this recipe.

IMG_2270

Lesson Learned 1 – Always use the mandolin slicer with the utmost care: I can’t help it, this just bares repeating. You won’t believe how easy it is to hack off a chunk of skin with this device. Please be careful using it. But when you use it safely, you will be amazed at how quickly you can produce nice even sized pieces of whatever you are slicing.

Lesson Learned 2 – This recipe is adaptable to a wide variety of cheeses: Normally some sort of cheddar cheese is a staple for this recipe. But over the holidays I had a disc of brie that I’d bought to make a holiday appetizer and I just mixed some of the remaining brie with the cheddar. Divine is all I can say about that. Gruyere is also a good cheese to use as well. Any good melting cheese or combination of compatible melting cheeses will do.

And speaking of melting cheese, don’t use prepackaged grated cheese. Those cheeses have an ingredient in them that keeps the grated pieces from sticking together. That ingredient also makes those cheeses difficult to melt. Grate the cheese yourself. You’ll get a much better consistency and much better flavor

The consistency of a roux

The consistency of a roux

Lesson Learned 3 – The formula for making any roux: Making a roux is the key to almost any homemade sauce or gravy. And you won’t believe how easy it is. All you have to do is remember one simple formula: equal parts butter and flour. This particular recipe uses three tablespoons of butter and 3 tablespoons of flour to create the roux. The amount you use can vary based on the size of the recipe. But remember it is always equal parts of each. The picture on the left shows what the consistency should look like, almost that of a thick, creamy paste.

I could not believe how simple this was to make and so much better than the boxed varieties. Play around with this one to see if you can create the flavor of cheese sauce you prefer the most. Right now I’m a cheddar and brie girl so that is how I am writing the recipe. But don’t be afraid to experiment with this one. I promise anything you do will be so much better than the boxed version of what you make. Enjoy!

Ready to pop into the oven...

Ready to pop into the oven…

Cheesy Potato and Green Onion Casserole…

  • Servings: 4
  • Difficulty: Easy
  • Print

INGREDIENTS:

2-3 large white russet potatoes, unpeeled

3 Tbs. butter

3 Tbs. flour

3-4 green onions, diced (use the green parts of the onion as well)

2 cloves garlic

1 tsp garlic powder

1 1/2 cups milk

1 cup grated cheddar cheese

1/2 cup brie cheese, cut into small pieces

Salt and pepper to taste

DIRECTIONS:

Preheat the oven to 375. Remove the skins from two cloves of garlic and drop them in a pot of cold water. Bring the pot of water to a boil on the stove, making sure the water is well salted. While the water is heating, cut the russet potatoes into 1/8 inch slices and put them in a bowl of cold water so they do not begin to brown. Slice the green onions and set aside. Grate the cheddar cheese and cut the brie into small pieces. Set both of them aside.

Once the water is boiling, put the potato slices in the water and cook them for about 5 minutes or until they just begin to soften.  When the potatoes begin to soften, gently remove them from the pan, drain them and pat them dry removing as much excess water as possible. Remove the discard the garlic cloves.

In a saucepan under medium heat, melt the butter. Add the flour and stir for about a minute until the mixture becomes a creamy paste (make sure to cook for about a minute so that there will be no flour taste). Add the milk and raise the heat to medium high. Once the milk begins to bubble you will notice it starting to thicken. Keep stirring the milk until it becomes thick. Once it thickens, add the garlic powder and cheeses. Stir until the cheeses are completely melted. Add the green onions and combine. Taste the mixture and add salt and pepper as needed. Remove the mixture from the heat.

Place the potatoes in a 1 1/2 quart casserole dish that was sprayed with cooking spray. Pour the cheese mixture over the potatoes. Bake at 375 for 50-55 minutes or until the potatoes are cooked through. For a finishing touch, at the end place the casserole dish under the broiler for a minute or two to brown the cheese.

IMG_2291

IMG_2308

Hashbrown Casserole…

Pasta is ok, rice really does nothing for me but give me potatoes and I’m all over it. There is no way that you can cook a potato that I won’t like. Potatoes were a staple at just about every meal I had growing up and my so my love affair with this root (yes it is neither a fruit nor a vegetable but a root) has spanned my entire life. So when I find a potato recipe that intrigues me, I have to try it.

The original recipe from which I’ve based my version in this blog comes from a website called thefrugalgirls.com. I liked the recipe concept because it appeared easy to prepare and was a different way of making potatoes than the traditional ways of baking them, mashing them or grilling them. Coupled with the fact that I already had most of the ingredients plus I needed to fulfill my goal of one new recipe a week, this became no brainer – I had to make this casserole and blog about it. So without further adieu, here is my recipe rating, lessons learned and my version of the recipe.

Hash Brown Casserole Ingredients...

Hash Brown Casserole Ingredients…

Rating A+ – not only is this very easy to make but it smells heavenly when it’s baking in the oven. Anything that combines flavorful potatoes and good kitchen smells is always a hit with me. You really have to try this one.

Lesson Learned 1 – This recipe adapts easily: The original recipe filled a 13 x 9 baking dish. Cutting it in half allowed me to put it in an 8 inch square dish which was just enough for me and my husband with leftovers for an additional meal. But if you have a large family to feed just double everything in the recipe and use the larger pan.

Lesson Learned 2 – Topping a casserole with crushed croutons: Recipes like this are quite often topped with bread crumbs. This recipe called for topping the casserole with crushed croutons. I LOVED IT! The croutons gave a perfect crispiness to the top of the hash browns, just as if the potatoes had been browned in a frying pan. I found the crushed croutons had a much crispier texture than bread crumbs. I am definitely going to try topping other casseroles with crushed croutons instead of bread crumbs. I think it made a big difference.

Lesson Learned 3 – Use fresh garlic: The original recipe called for 1/8 teaspoon salt and 1/8 teaspoon of garlic salt. I didn’t like the idea of adding that much salt so I substituted one minced garlic clove for the garlic salt. It was fabulous. I figured if the potatoes needed more salt you can always salt them at the table while you’re eating versus adding a lot in the recipe itself.

Lesson Learned 4 – Shred the cheese by hand: The recipe called for shredded cheddar cheese. I’ve recently learned that the shredded cheese bags you buy at the grocery store have an additive in them that is designed to prevent the cheese from clumping together. But that additive also prevents the cheese from melting smoothly. Plus it is an additive and the more you can eliminate additives from your life the better. So take the few extra minutes buy a hunk of good cheddar cheese and use a grater to shred it yourself. The result is so much better in the recipe and better for you as well.

Ready To Go Into The Oven

Ready To Go Into The Oven

Lesson Learned 5 – Make caloric adjustments where you can: This is a very rich recipe so any places where you can make adjustments to lessen the fat or salt will still produce a great casserole that is full of flavor while also having less calories. I used light sour cream, fat free milk, low sodium soup and substituted fresh garlic for garlic salt. The recipe turned out perfectly.

Lesson Learned 6 – Use butter and not a butter substitute or margarine: I know this may seem to go against what I just said in the previous lesson learned, but just take a minute to look at the ingredients in butter and then compare them to the ingredients in margarine or any butter substitute. Tell me if you can pronounce some of the ingredients in the substitutes. It’s scary to think about what you might be eating. If you have to use a fat, use the one that has the purist of ingredients which in this case is none other than good old fashioned butter.

Lesson Learned 7 – Not all baking times are created equal: The original recipe called for baking the casserole at 350 degrees for 35-45 minutes. My long standing experience with high altitude made me leery of not only the timeframe but also the temperature. I will include in the recipe below the original cooking instructions but will tell you that I had to crank my oven up to 375 and cook this for an hour and it turned out perfectly. What I’m basically saying here is you may have to adjust your cooking time based on your oven and where you live. Just be aware of that.

Lesson Learned 8 – The leftovers are fabulous: The leftovers are equally as good if not better than when it was fresh out of the oven. Just reheat them covered in foil in a 375 degree oven for 30 minutes. The flavors have had some time to meld and the top and ends get even crispier. Can’t beat that!

Right Out Of The Oven

Right Out Of The Oven

Once again, the real work in this recipe is preparing it. Once you get the mixture together, all you have to do is pop it in the oven and let it do the rest of the work for you. This is a great accompaniment to almost any meal so try it. I know you’ll like it!

Hasbrown Casserole

  • Servings: 4
  • Difficulty: Easy
  • Print

INGREDIENTS:

1/2 pkg. frozen shredded hasbrowns (package size usually 1 lb. 14 oz.)

8 oz. light sour cream

1/2 can cream of mushroom soup (low sodium preferred)

4 oz. shredded cheddar cheese (freshly grated not packaged preferred)

1/8 cup milk (fat free or low fat preferred)

1/2 small onion, chopped

1/2 stick of butter, melted

1/8 tsp. salt

1/8 tsp. pepper

1 clove garlic, minced

1 cup seasoned croutons crushed

DIRECTIONS:

Preheat the oven to 375. (*The original recipe called for the oven to be set at 350 and to cook the casserole for 35-45 minutes. I live in high altitude so everything takes a little longer to cook and at a higher temperatures. Use what you think will fit your needs but I think keeping it in the oven a little longer gives it an even crispier crust). Thaw hashbrowns slightly for easier mixing. Crush the croutons (the easiest way to do this is to put them in a plastic bag and mash with a rolling pin or meat mallet). Set the croutons aside.

Combine the hashbrowns, soup, cheese, milk, onion, garlic, salt and half the melted butter. Grease a 8 x 8 pan with a very light coating of butter. Place the hashbrown mixture in the prepared dish. Spread croutons evenly over the top and drizzle them with the remaining butter.

Bake at 375 degrees for 45 minutes to an hour (*see notes at beginning of recipe). The casserole should be bubbly and the top should be golden and crisp. Let stand for a few minutes and serve.

Hashbrown Casserole

Hashbrown Casserole

Grilled Blue Cheese Garlic Onion and Basil Potato Packets…

All my life I’ve been a potato girl, its just the way I was raised. We could probably go on for hours about the “carbs” factor, but when it comes down to it, at least in my estimation, when you say meat I say potatoes. And as I journey into augmenting my culinary skills I look for new and different ways to prepare  the old standby spuds. It becomes more of a challenge during grilling season, but I just happened upon a recipe that with some tweaking became an easy grilling hit.  I found a recipe for “Scalloped Potatoes for the BBQ” on Allrecipes.com and with a few little changes upped the wow factor substantially. It’s so easy, you just have to try it.

The Basics

The Basics

Grilled Potato Pockets

  • Servings: 2-4
  • Difficulty: Easy
  • Print

INGREDIENTS:

3–4 Red potatoes, thinly sliced

1 large onion

2 cloves of garlic (more if desired)

Chopped fresh basil (yum, and again to taste)

Butter cubed (again your desired amount)

Salt and pepper to taste

Crumbled blue cheese (the secret flavor factor)

As you can already see, most of this recipe is ingredients to taste. For me and my husband, I used three smaller sized red potatoes,  a medium sized onion, 6 big basil leaves, enough butter for flavor, no pepper, Lawry’s seasoned salt and about an eighth of a cup of crumbled blue cheese. The key is making sure the potatoes are thinly sliced otherwise they won’t cook. If you have a mandoline slicer that’s the best, otherwise use a good sharp knife and watch your fingers.

Thinly sliced potatoes

Thinly sliced potatoes

Now here comes the easy part, the directions:

1. Preheat your grill (mine was between 400 – 450 degrees).

2. Take a piece of foil and spray it with cooking spray (this way the potatoes won’t stick and you can use less butter).

3. Make a layer of potatoes and then layer the onion, garlic, basil and butter on top. I did not pepper my potatoes but used Lawry Seasoned Salt on top of these layers. Sprinkle with blue cheese and pat this layer down. Repeat with another layer. Once you’re done you should have something that looks like this:

Layered Ingredients

Layered Ingredients

4. Fold the foil around the layers to make a packet. I take an additional piece of foil and packet it one more time to prevent leaking. With just a single layer of packeting, I found the blue cheese leaked through the foil and onto the grill. You don’t want that to happen.

5. Place the potato packet on the grill and cook for 45 minutes turning the packet over halfway during the cooking time. The result is fabulous and if you try it, I’m sure it will become a new family favorite. Enjoy and feel free to share!

BBQ Blue Cheese, Onion and Basil Potatoes.

BBQ Blue Cheese, Onion and Basil Potatoes.