
Graduation parties and summer cookouts boast of fun and food. And if you’re in the position to be hosting one, you’re probably thinking about what you can do that is delicious but easy to make. That way you can spend more time with your guests and less time in the kitchen.
This recipe fits the bill. It’s a really easy dip that takes no time to make and is loaded with flavor. Serve it with a combination of chips, pretzels and crackers for an appetizer that looks casual but tastes decadent.
So let’s talk shrimp dip…
 Lesson Learned 1 – Use LOTS of shrimp: I used a 12 oz. bag of frozen cooked and deveined shrimp. I thawed the shrimp in the refrigerator overnight and then chopped it up into small bite sized pieces. I kept a couple of shrimp to garnish the top of the dip (of course you don’t have to do that) and all the rest went into the dip. My point being this is a shrimp dip – the more shrimp the better.
If you’re lucky like I was you can catch the shrimp on sale. The twelve ounce bag only cost me $7.99 so I got a deal. Keep a look out for sales on the frozen shrimp if you’re looking to keep the cost down on this dip. I already had all the other ingredients in my refrigerator and pantry except the celery so I was able to splurge a little with the shrimp.
Lesson Learned 2 – If your celery stalks still have the green leaves on them use them as well: For this particular recipe all you really need is one medium sized celery stalk chopped. Normally you can buy individual stalks at the grocery store instead of buying a whole head of celery. When I only need a little celery I always try to buy a stalk that has some leaves on it. Those leaves chopped up and put into the dip add additional depth of flavor. So don’t be afraid to use them as well.
 Lesson Learned 3 – If you can, make this recipe the day before: Like almost any dish, the more the ingredients are acquainted directly relates to upping the wow factor of the flavor. So it is with this dish. It is such an easy dish to make that it shouldn’t be too difficult to make it the day before and let it sit overnight in the refrigerator. But if you’re in a rush and need something quick, you can serve this the same day and it will still be very good.
The recipe itself is very straightforward so there’s not a lot of lessons learned to share with it. Just follow the directions, use some creativity in your presentation (you can dress it up with a combination of chips, pretzels and crackers) and watch it disappear. This one is a no brainer. Try it and tell me what you think.
Shrimp Dip...
INGREDIENTS:
 1 – 8 oz. package of cream cheese, room temperature
1 – 12 oz. package of frozen cooked and deveined medium sized shrimp, thawed and chopped
1/2 cup mayonnaise
1/4 tsp. garlic fleur de sel (you can substitute garlic salt)
juice of 1/2 lemon
1 lemon slice for garnish, optional
1/4 cup celery, chopped (one medium sized stalk)
1/4 cup scallions, chopped
1/8 tsp. paprika, for garnish, optional (you can also use some sprigs of fresh herbs like thyme)
Crackers, potato chips and/or pretzels for serving
DIRECTIONS:
With an electric mixer, beat the cream cheese until fluffy. Add the mayo, lemon juice and fleur de sel. Mix to thoroughly combine. With a wooden spoon stir in the shrimp, celery and scallions.
Place mixture in a serving dish. Garnish with paprika and a lemon slice or some sprigs of lemon thyme. Serve with pretzels, chips and/or crackers. (If making the day before wait to garnish the dip until you’re ready to serve.)

cut shrimp into small bite sized chunks


serving suggestion with fresh thyme sprigs as garnish


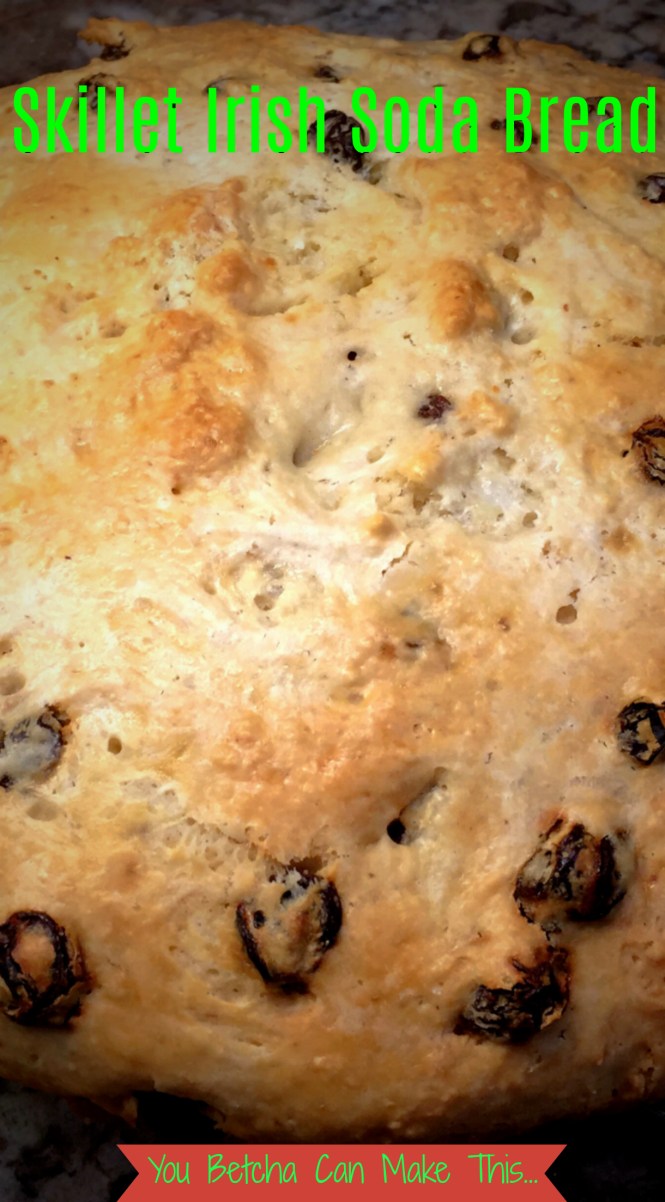
 I’ve tasted many iterations of soda bread over the years and, to be honest, most of them were less than stellar. There was only one other time that I can remember having fabulous soda bread. That was when I was working at the Chicago Park District and one of my co-workers, Carol Diver, brought some to work. Carol was Irish through and through with an infectious laugh and a heart as big as all outdoors. And her soda bread was to die for. Unfortunately Carol is not longer with us and I’d never asked her for her soda bread recipe. But from then on, her soda bread was the standard to which I held all others. As time went on none would ever compare, until now.


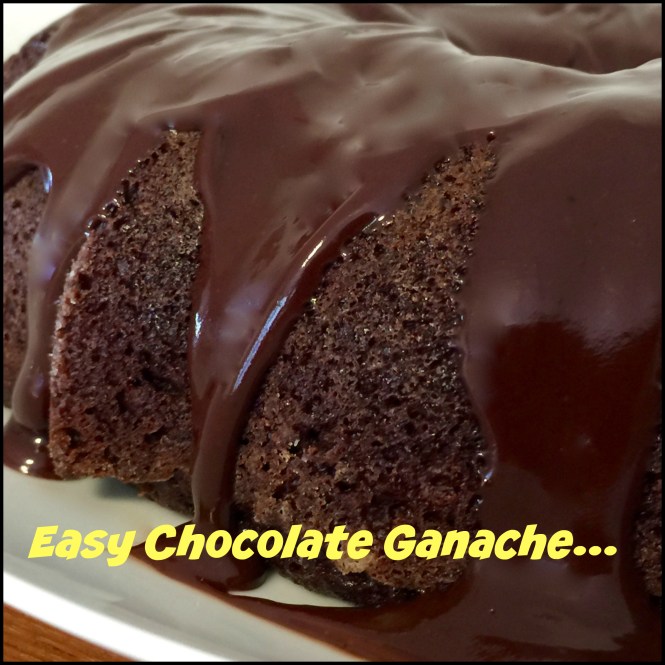
 Lesson Learned 1 – There are many ways to make ganache: I am going to share with you the simplest way. The ratio is easy to remember 1:1. Use as many ounces of heavy cream as semi-sweet chocolate. It couldn’t be easier.
 4 ounces semi-sweet chocolate squares cut into small pieces


 Lesson Learned 1 – Make sure to cut the potatoes to the correct size: For the purposes of this recipe you need to keep the pieces close in size (approx. 3/4 inch pieces). Here’s a little trick to help you achieve that. Using your chef’s knife cut a thin slice off of one of the longer sides of a peeled potato. Set the potato on the cut side and slice crosswise into even planks. Stack several planks and cut crosswise. Then rotate and cut crosswise again. This will give you evenly sliced potatoes.
 Lesson Learned 2 – You can cook the pieces of potatoes two different ways, on the stovetop or in the microwave: (I will include both methods in the recipe printout). I chose to cook them on the stove. The process is not much different than making mashed potatoes. The only difference is you want to monitor the potatoes as they boil to make sure they don’t get overly soft, otherwise they’ll break apart. You want them to hold their shape. I would boil them for about 7-10 minutes and check their consistency. If they are still hard, check every couple of minutes until they are just becoming fork tender.
 Lesson Learned 5 – Don’t continuously move the potatoes once they are in the skillet: In order to get the potatoes nice and brown you have to let them sit for a while in the skillet. The whole browning process can take about 20 minutes and you don’t want to be flipping the potatoes continuously during that time. If you want to check to see if they are ready to flip, turn one of the pieces or look on the sides of the pieces to see if the bottoms have started to to turn color. You’ll get a much better result if you are patient during the browning process.
 2 large russet potatoes, peeled and sliced into 3/4 inch cubes


 Lesson Learned 1 – Learn what parts of the asparagus spears you can use: Quite often you’ll see on television the way to trim asparagus is to bend it and where it breaks off is where you should trim your bunch. I’ve found that sometimes that wastes too much asparagus especially if you’re making soup. I learned early on that even with a very sharp knife, there can be a part of the spear that will very hard to cut – you almost always have to use two hands pressing down on the knife to cut it. That is the part you want to throw out. That still leaves some of the tougher parts of the asparagus, but as long as a knife will go through it without a lot of force you can use it in the soup. Keep in mind that soup is designed to use as much of the asparagus spear as you possibly can so don’t be afraid to use some of the tougher parts of the spear. As long as you can cut through it without a lot of force it will be perfectly fine for the soup.
 3 Tbs. butter, separated

