Beefy Tater Tot Casserole…

Be careful when you send your husband to pick up something at the grocery store. You might be surprised at what he brings home. The other day I asked my husband to pick up a bag of tater tots for dinner. I thought he would go to the local grocery store but his brilliant idea was to go to Sam’s Club. He brought home tater tots all right – an 8 pound bag of them! What the heck was I going to do with all those tater tots? We’ve been systematically using them over time, but we were starting to get tired of them as simply a side. So I thought I’d try making a tater tot casserole.

This particular recipe is very easy and guaranteed to be a family favorite. If you have kids, I’m sure they will enjoy this. I mean ground beef, cheese and tater tots – what’s not to like? So let’s talk beefy tater tot casserole…

Lesson Learned 1 – This recipe serves 4 people: But don’t despair. You can easily change the ingredients for larger crowds – just double or triple the amounts depending upon what you need.

Lesson Learned 2 – Make sure you put the dish under the broiler for the last few minutes to get the tater tots crispy: The taters tots are cooking on top of bubbly beef and melted cheese so they will be slightly soggy at the end. Simply put the broiler on and keep the dish under the broiler for a few minutes and you’ll get your desired crispiness for the tater tots.

Lesson Learned 3 – Feel free to experiment with this recipe: Add ingredients to the ground beef that you and your family like. If you don’t like mushrooms, don’t use them. If you like sweet peppers, dice them up and use them. If you’re not a big fan of spicy don’t use the hot sauce. But if you want some real tang add some crushed red pepper to the beef. If you prefer pearl onions, add them. You can use cheddar cheese instead of muenster cheese (I find cheddar cheese to be somewhat greasy) or any melting cheese you prefer. The beauty is this recipe can be very versatile to include anything you enjoy.

The process for this recipe is pretty straightforward and I know it will be a family favorite. Try it and let me know what you think…

Beefy Tater Tot Casserole...

  • Servings: 4
  • Difficulty: Easy
  • Print

INGREDIENTS:

2 Tbs. olive oil, divided

1 1/2 pounds ground beef, 93% lean

1/4 cup brown sugar

2 heaping tsp. tomato paste

2 cloves garlic, minced

1/2 cup beef broth

1 medium onion, diced

2 Tbs. Worcestershire sauce

Muenster cheese slices – 4-6 depending on the dish you use

1 small bag of tater tots – you may have some leftover

2 dashes hot sauce

salt and pepper to taste

cooking spray

DIRECTIONS:

Preheat the oven to 375.

Over medium heat, add one tablespoon of olive oil to a large skillet. Add the onions and cook until translucent. Remove the onions and add the mushrooms. If you need more oil add it. Brown the mushrooms and remove them from the skillet.

Add the ground beef and cook until browned, breaking up the beef into crumbles while cooking it. Add the garlic and cook until fragrant, approximately 1 minute.

Add the Worcestershire sauce, brown sugar, tomato paste, hot sauce, beef broth and salt and pepper.  Cook until combined. Fold in the onions and mushrooms. Taste for seasoning and add more salt and/or pepper as needed.

Place the meat mixture into a 1 1/2 – 2 quart casserole dish sprayed with cooking spray. Cover the meat with the cheese slices. Take the tater tots out of the freezer and cover the top of the casserole with tater tots.

Bake in the oven for 30-40 minutes. Once nice and bubbly, turn on the broiler and place the dish under the broiler for approximately 3-5 minutes to crisp up the tater tots.

Serve and enjoy!

Frosted Blueberry Muffins…

This time of year brings an abundance of fresh fruits and vegetables to your table. Sometimes its hard to pass them up, especially when the prices are low and the quality is high. And because of that, sometimes I find I buy more than I can actually use. Or sometimes I’m positive I don’t have what I want at home only to find after I buy it I have more than enough in the refrigerator already.

Such was the case the other day when I looked in my refrigerator and found and I had pints of blueberries – way too much for me to use by myself before they spoiled. My solution was to make frosted blueberry muffins…

I have to say I really like this recipe. The muffins are just the right texture and the cream cheese frosting is the perfect compliment to the tart blueberries. So let’s not waste any time and start talking about blueberry muffins…

Muffin Ingredients

Lesson Learned 1 – This recipe make A LOT of muffins: If you’re making muffins for a crowd or have large family the proportions in this recipe will be perfect for you. This recipe can make anywhere from 36-40 muffins, which for me with only two people in my household, was way too much. I didn’t realize how much the recipe made until I started filling the muffin cups. OOOPS!

But the good news is you can easily cut the recipe in half and have a more manageable amount of muffins for a smaller family. Either way, they will still come out tasting delicious.

Lesson Learned 2 – This recipe would also be good using fresh cherries: I chose blueberries for this recipe because they are more readily available during the course of a year and I had some I need to use. But you could also use fresh cherries. All you would need to do is make sure the cherries are pitted and chopped. For the full recipe I would add 4 cups of cherries.

Lesson Learned 3 – I recommend frosting these muffins: The frosting is a great compliment to the tartness of the blueberries. And although you can leave them plain the frosting, in my opinion, takes them over the top.

Lesson Learned 4 – You can also make jumbo muffins: If you’re worried about the amount of muffins this recipe makes try making jumbo muffins. You can make approximately 18-24 jumbo muffins from this recipe. The only difference will be in the baking time. Bake the jumbo muffins for approximately 25-30 minutes.

Other than that this recipe is pretty standard in terms of how it is structured. As always you need to use less leavening for high altitude (cut the baking powder by 1/2 Tbs.) but other than that you mix the ingredients, fill the muffin cups three quarters full and bake.

Since I had so many of these I brought some to hour community happy hour that we have each week. People raved about them. One person told me she only took one home with her and in retrospect she wished she had taken many more. I guarantee this will be a hit when you serve it. Or better yet, just keep them to yourself as a guilty pleasure. Enjoy!

Blueberry Muffins...

  • Servings: 36-40 muffins
  • Difficulty: Easy
  • Print

INGREDIENTS:

Muffins:

4 1/2 cups flour

2 Tbs. baking powder (1 1/2 Tbs. for high altitude)

1/2 tsp. salt

1 1/4 cups sugar

3/4 cup butter, room temperature

4 eggs

1/2 tsp. vanilla extract

1/2 tsp. almond extract

Zest of 1 lemon

2 Tbs. fresh lemon juice

3/4 cups milk

2 cups sour cream

1 cup chopped walnuts

1 pint fresh blueberries, washed and drained

Frosting:

1/2 cup butter, room temperature

1 – 8 oz. package of cream cheese, room temperature

1 tsp. vanilla

2 cups confectioners sugar

DIRECTIONS:

Preheat the oven to 375. Put paper liners into the muffin tins.

Combine the flour, baking powder, salt and sugar. Whisk until combined. Set aside.

Put butter, eggs, vanilla and almond extracts, lemon zest, lemon juice, milk and sour cream into a mixing bowl. Beat on medium speed until blended. (You can use a hand mixer for this).

Add the dry ingredients and mix by hand until combined. Fold in the nuts and blueberries. Do not over mix.

Spoon the batter into the muffin cups filling them 3/4 full. Bake for 15 – 18 minutes or until lightly browned on top. Let muffins cool on a rack before frosting.

To make the frosting, combine the butter, cream cheese and vanilla in a mixing bowl. Beat until smooth. Gradually add the sugar beating until smooth.


Luscious Zucchini Bread…

I know, I know, by now everyone has their own zucchini bread recipe. I mean, it’s a must especially if you grow zucchini or have access to a farmers market. It is definitely zucchini time of year, that glorious time when you are so grateful to have your first harvest but by the end of the season are looking for ways either to use them or get rid of them.

Fortunately (or unfortunately) for me, now that I live in a condo I can’t grow zucchini so I can control the amount of zucchini I am willing to use. So last week when I went to the farmers market I got a couple of them and used one as a vegetable side dish and the other to make a couple of loaves of zucchini bread.

So what makes this recipe better than most. A secret ingredient that I use to up the flavor factor. So let’s talk luscious zucchini bread…

Lesson Learned 1 – The secret ingredient is vanilla bean caviar: Most zucchini bread recipes call for vanilla, as does mine. But I decided to try adding the caviar from the inside of a vanilla bean to try to enhance the flavor. And let me tell you, it really ramped up the taste factor. That’s why I call this zucchini bread luscious.

These days you can buy vanilla beans at your local grocery store but not so long ago you had to go to a specialty spice store to get them. The picture below shows you what a vanilla bean looks like.

Step 1: The shaft of the bean is quite small and kind of hard so you’ll need a very sharp knife to extract the caviar from the pod. First you need to straighten out the pod.

Step 2: Using a sharp knife, cut a slit all the way up and down the bean pod


Step 3: Pry the slit open with your hands and scrape the tip of the knife up and down the open shaft of the pod making sure to get as much of the caviar out of the inside as you can.

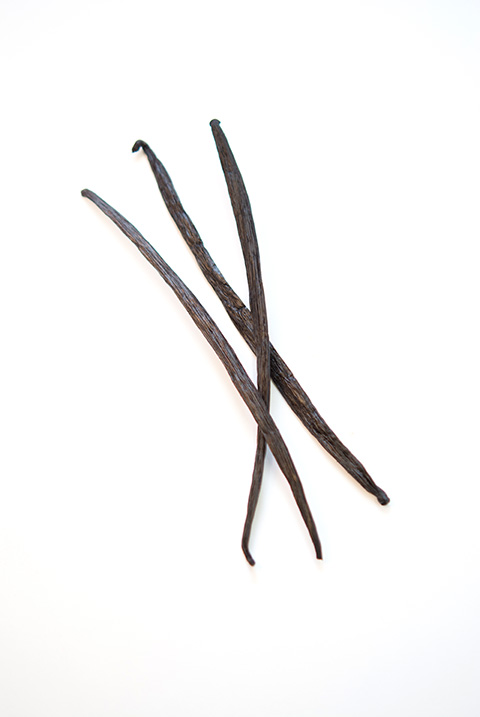
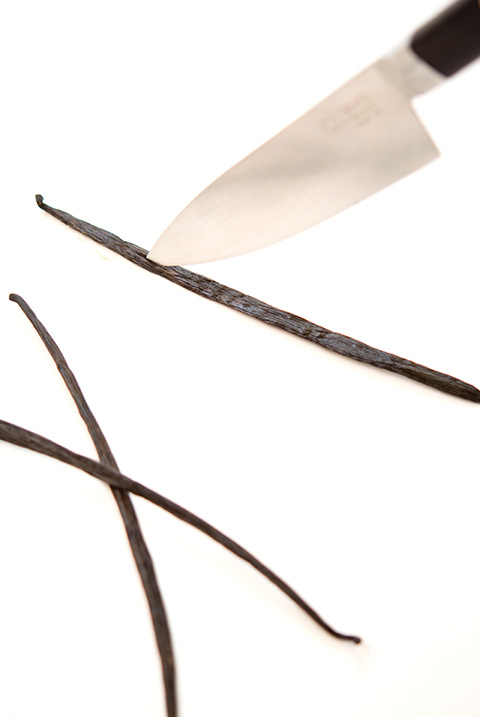
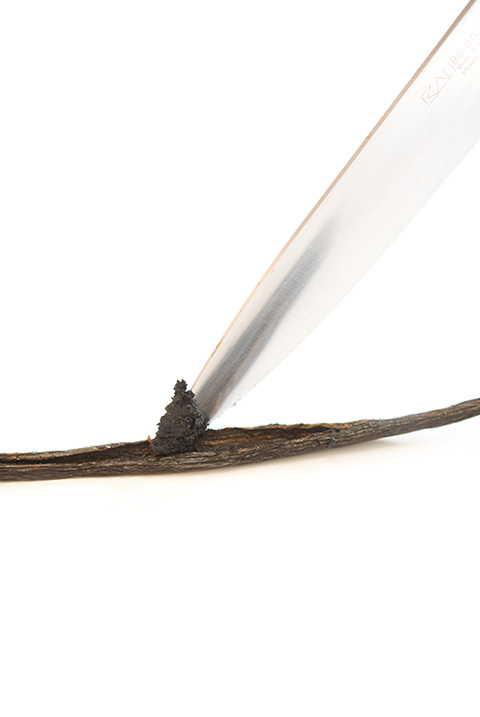
A whole vanilla bean will give you the equivalent of approximately one teaspoon of vanilla extract. Adding this to the two teaspoons of vanilla already in the recipe and it gives a wonderful but not over powering vanilla flavor to the zucchini bread. And that’s what makes it so luscious.

Now can you make this without the caviar? Of course… but I compare this to adding some espresso powder to a chocolate recipe. The recipe would be good without it but with it there is a fuller, richer flavor. Now I will warn you, vanilla beans are expensive, but they are worth it.

Lesson Learned 2 – Use a food processor to shred the zucchini: Although you can use a box grater, a food processor is a faster and easier way to shred the zucchini for this recipe. One medium to medium-large size zucchini will give you the two cups needed to make the bread. The food processor shreds the zucchini to just the right size so there are small strands in the bread. You don’t want to the zucchini shreds to be too big. They are designed to add moisture to the cake without providing any noticeable flavor. Also, make sure to pat down the zucchini shreds in your measuring cup. You want them slightly compacted.

Lesson Learned 3 – You can use shredded carrots in this recipe as well: I chose not to use carrots this time but you can add them as well. Just substitute one cup of shredded zucchini for one cup of shredded carrots. You can also add one cup of semi-sweet chocolate chips to this recipe. Try it a variety of ways and see what you think.

Try this version of zucchini bread and compare it to yours. I’d love to know what you think!

Luscious Zucchini Bread...

  • Servings: 8 Slices Per Loaf
  • Difficulty: Easy
  • Print

INGREDIENTS:

1/2 cup plus 2 Tbs. orange juice

1/2 cup canola oil

1/2 cup unsweetened applesauce

3 eggs, slightly beaten

1 tsp. vanilla bean caviar (the caviar from one pod)

2 tsp. vanilla

3 cups flour

2 cups sugar

5 tsp. ground cinnamon

1 1/4 tsp. baking powder (1 tsp. for high altitude)

1/2 tsp. baking soda  (1/4 high altitude)

1 tsp. salt

2 cups shredded zucchini, lightly packed

1 cup chopped pecans, optional

Cooking spray

DIRECTIONS:

Preheat oven to 350. In a large bowel combine orange juice, oil, applesauce, eggs, vanilla extract and vanilla caviar. In another bowl combine flour, sugar, cinnamon, baking powder, baking soda and salt. Mix to combine. Fold the wet ingredients into the dry ingredients. Stir to combine. Do not over mix.

Fold in the zucchini and pecans.

Pour the mixture into two 8 x 4 inch loaf pan coating with cooking spray. Check loaves at 45 minutes. Depending on your oven they may need to bake anywhere from 45 – 55 minutes. Loaves are done when a toothpick inserted in the center of a loaf comes out clean.

Let cool  in the loaf pan for 15 minutes. Remove loaves from the pans and let cool on a wire rack.

Zucchini Bread Batter