
Well, it’s just about 2019 – can you believe it? I can’t believe that I’ve been writing this blog for over 5 years with over 450 posts and am still going strong. It’s been quite a journey for me as I truly was (and to some degree still am) the cook who never could. But over the past five years I’ve learned so much and have become so much more confident in the kitchen – something I never would’ve believed early on.
Don’t get me wrong, I still make mistakes and sometimes my instincts aren’t as good as others. But when I get feedback from readers telling me that what I’m showing in pictures looks hard, I know that there are so many others out there like me who were never mentored in the kitchen and are looking to learn. Because, believe me, most of what I post is very easy.
So I will continue on with this theme, which in my mind is endless – there will always be someone who needs to learn something regarding cooking or baking. And I will continue to learn and share my lessons learned so when you make one of my recipes you can escape some potential pitfalls and be successful right out of the box.
It’s time to post the last recipe of 2018. Some of you may be aware that’s I’ve posted a lot of appetizer recipes this year. That’s because my condo association hosts a happy hour every week during the summer and bi-weekly over the winter and although no one is expected to bring anything, I always feel compelled to do so. And one of our members is a caterer and so my competitive nature kicks into gear to see if I can, at least every once in a while, outshine the professional. And in my mind, this particular recipe does. It looks so festive and is pretty easy to make – the vast majority of the work is the assembly and that certainly isn’t difficult.
So let’s talk Balsamic Cranberry and Brie Crostinis…
Lesson Learned 1 – This appetizer can be served warm or cold: I opted for cold and here’s why – I’ve found that unless you are personally hosting a party hot appetizers can be tricky, especially if they are at their best when they are hot. How to time it to get to another location with the appetizer still warm, the paraphernalia you may need to bring with you to keep it warm, timing how you bake it to ensure the quickest oven to table possible – all of this just seems like too much for me. Even though you can serve this warm, I decided to make the cranberries ahead of time and baked the baguette closer to the time of the party and the crostinis turned out great.
I also found that when I took the bread out of the oven and placed the cheese on top the cheese slightly adhered to the bread because it was warm. So that worked out well. Nothing wound up falling off the bread because the cheese was secure.
Lesson Learned 2 – Preparing the cranberries: I’ve always cooked cranberries on the stove top but this recipe calls for them to be cooked in the oven. So here’s a couple of tips that will save you a lot of aggravation:

- Use a lipped baking sheet because the cranberries will let out their juices and you want to keep them in the pan and not all over your oven
- Line your sheet with parchments paper – the cranberry mixture will be quite sticky and will be a nightmare to clean if you don’t protect the baking sheet
- Spray the sides of the baking sheet with cooking spray – although you’re using parchment paper juices will run to the sides and stick to the sides and that can be difficult to clean
- Clean your baking sheet asap – even with using these precautions some of the cranberry mixture will stick and the longer you let it sit the more difficult the clean-up will be
 Lesson Learned 3 – Working with brie: I love brie but it can be a pain in the butt to deal with, especially if you’re not fond of the outer skin and want to remove it. Brie is not easy to slice because it is so soft. Make sure you have a really sharp knife and watch out for your fingers.
You’ll want to cut the brie in small pieces – and for this you’ll have to use your judgment in terms of what that means. I cut the brie in squares and after putting some on the bread I could tell just how much I needed. I wound up making some of my pieces smaller or adding on to some of them. Don’t fret about this. After you top a couple of the pieces of bread you’ll get the feel for it.
I also used my fingers to spread the brie on the bread slices. That way I could push the brie down into the warm slices and spread it out with my fingers. You can also use a knife, but I had a better feel for it with my fingers. If you chose to use the finger method – make sure you have clean hands! I washed them before and once during the process. Your hands can be your best tools in the kitchen but if you use them they must be really clean.
Lesson Learned 4 – The original recipe called for 1 Tablespoon of rosemary: I thought that was way too much (I used dried rosemary since the grocery store did not have any good looking fresh rosemary). I wound up picking bits of rosemary out of the cranberries as I felt it was too overpowering. So I recommend a teaspoon of fresh rosemary chopped very fine, or 1/2 tsp. of dried rosemary, crushed. The rosemary does enhance the flavor of the cranberries – you just don’t want it to overpower the mixture. I would err on the side of caution – you an always add more if you need to but take my word for it, it’s a big pain trying to pick out the pieces of rosemary after the fact.
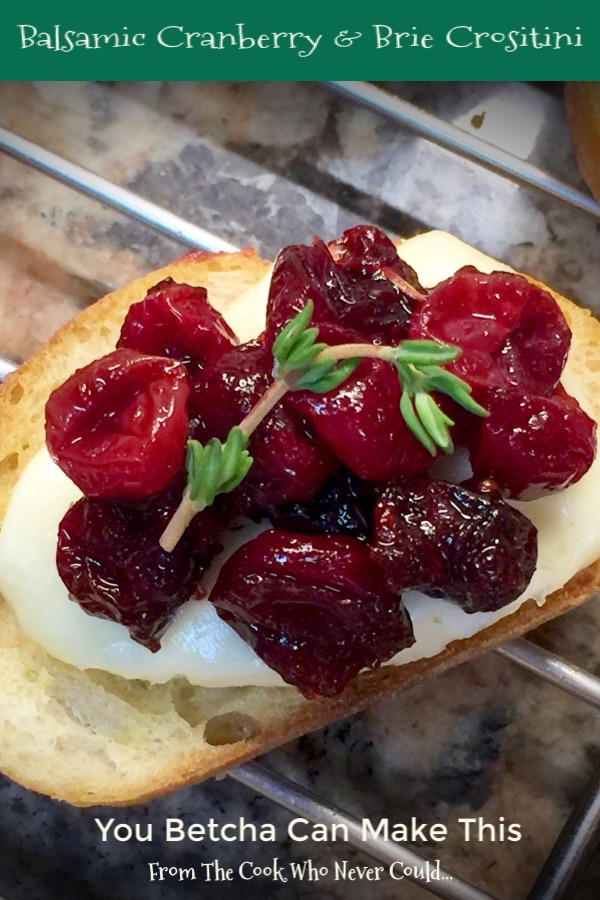
And the rest is just basic assembly – toast the bread in the oven, put the cheese on the bread, the cranberries on top of the cheese and for some extra flair add a small sprig of fresh thyme on top. This appetizer is delicious. I had people taking it home in doggie bags. So make this for your New Years celebration. You won’t regret it.
Happy New Year and all the best in 2019!

Balsamic Cranberry And Brie Crostinis...
INGREDIENTS:
2 Tbs. butter, melted
2 Tbs. garlic infused olive oil
1 french baguette, sliced thin
12 ounces fresh cranberries
2 Tbs. good balsamic vinegar
1/2 cup sugar
1 tsp. fresh rosemary, diced fine (or 1/2 tsp. dried and crushed fine)
6 ounces triple cream brie cheese
Fresh thyme, cut into small sprigs for garnish, optional
DIRECTIONS:
Preheat oven to 425. Cover a large lipped baking sheet with parchment paper. Spray the sides with cooking spray. Set aside. Take another baking sheet and line it with parchment paper. Set aside.
In a medium bowl combine cranberries, balsamic vinegar, sugar and rosemary. Spread the mixture onto the prepared baking sheet. Roast for 15 minutes. Remove from the oven. Transfer the cranberries into a bowl. Clean the baking sheet as soon as possible.
In a small pan, heat the butter and olive oil until the butter is melted. Stir to combine. Slice the bread into thin slices, about 1/8 inch thick. Brush the butter/oil on both sides of each slice and place them on the baking sheet. Bake in the oven for 6 minutes. Take the baking sheet out of the oven and turn over all of the slices of bread. Put them back in the oven and bake for an additional 4 minutes.
Transfer the slices of bread to a cooling rack. Take a small amount of brie and press it into each slice of bread, spreading the cheese with your fingers until it just about covers the bread. Take a teaspoon full of the cranberry mixture and place it on top of the cheese.
Decorate the tops of each with a small sprig of fresh thyme. Serve.

 This recipe came out of my desire to finally tackle making bruschetta and my need to bring an appetizer to a community event. Since I’d never made it before I decided to start out with a basic recipe that included only tomatoes, onion, sautéed garlic, garlic infused olive oil, some fresh lemon juice and fresh basil. It was divine! You can tell your appetizer is a hit when it’s completely gone while others still remain. This one was eaten up quickly.


 1 6oz. French baguette loaf, sliced in 1/4 inch slices


