Ok, I promise I won’t inundate you with bundt cake recipes, but since I’ve not had a bundt cake pan for years and just recently bought one I simply had to have one more go at it right away. This time I tried to make a chocolate cake, not only to test the pan again but to also foray into the world of making chocolate ganache. I learned some really interesting things along the way making this recipe and I want to share them with you.

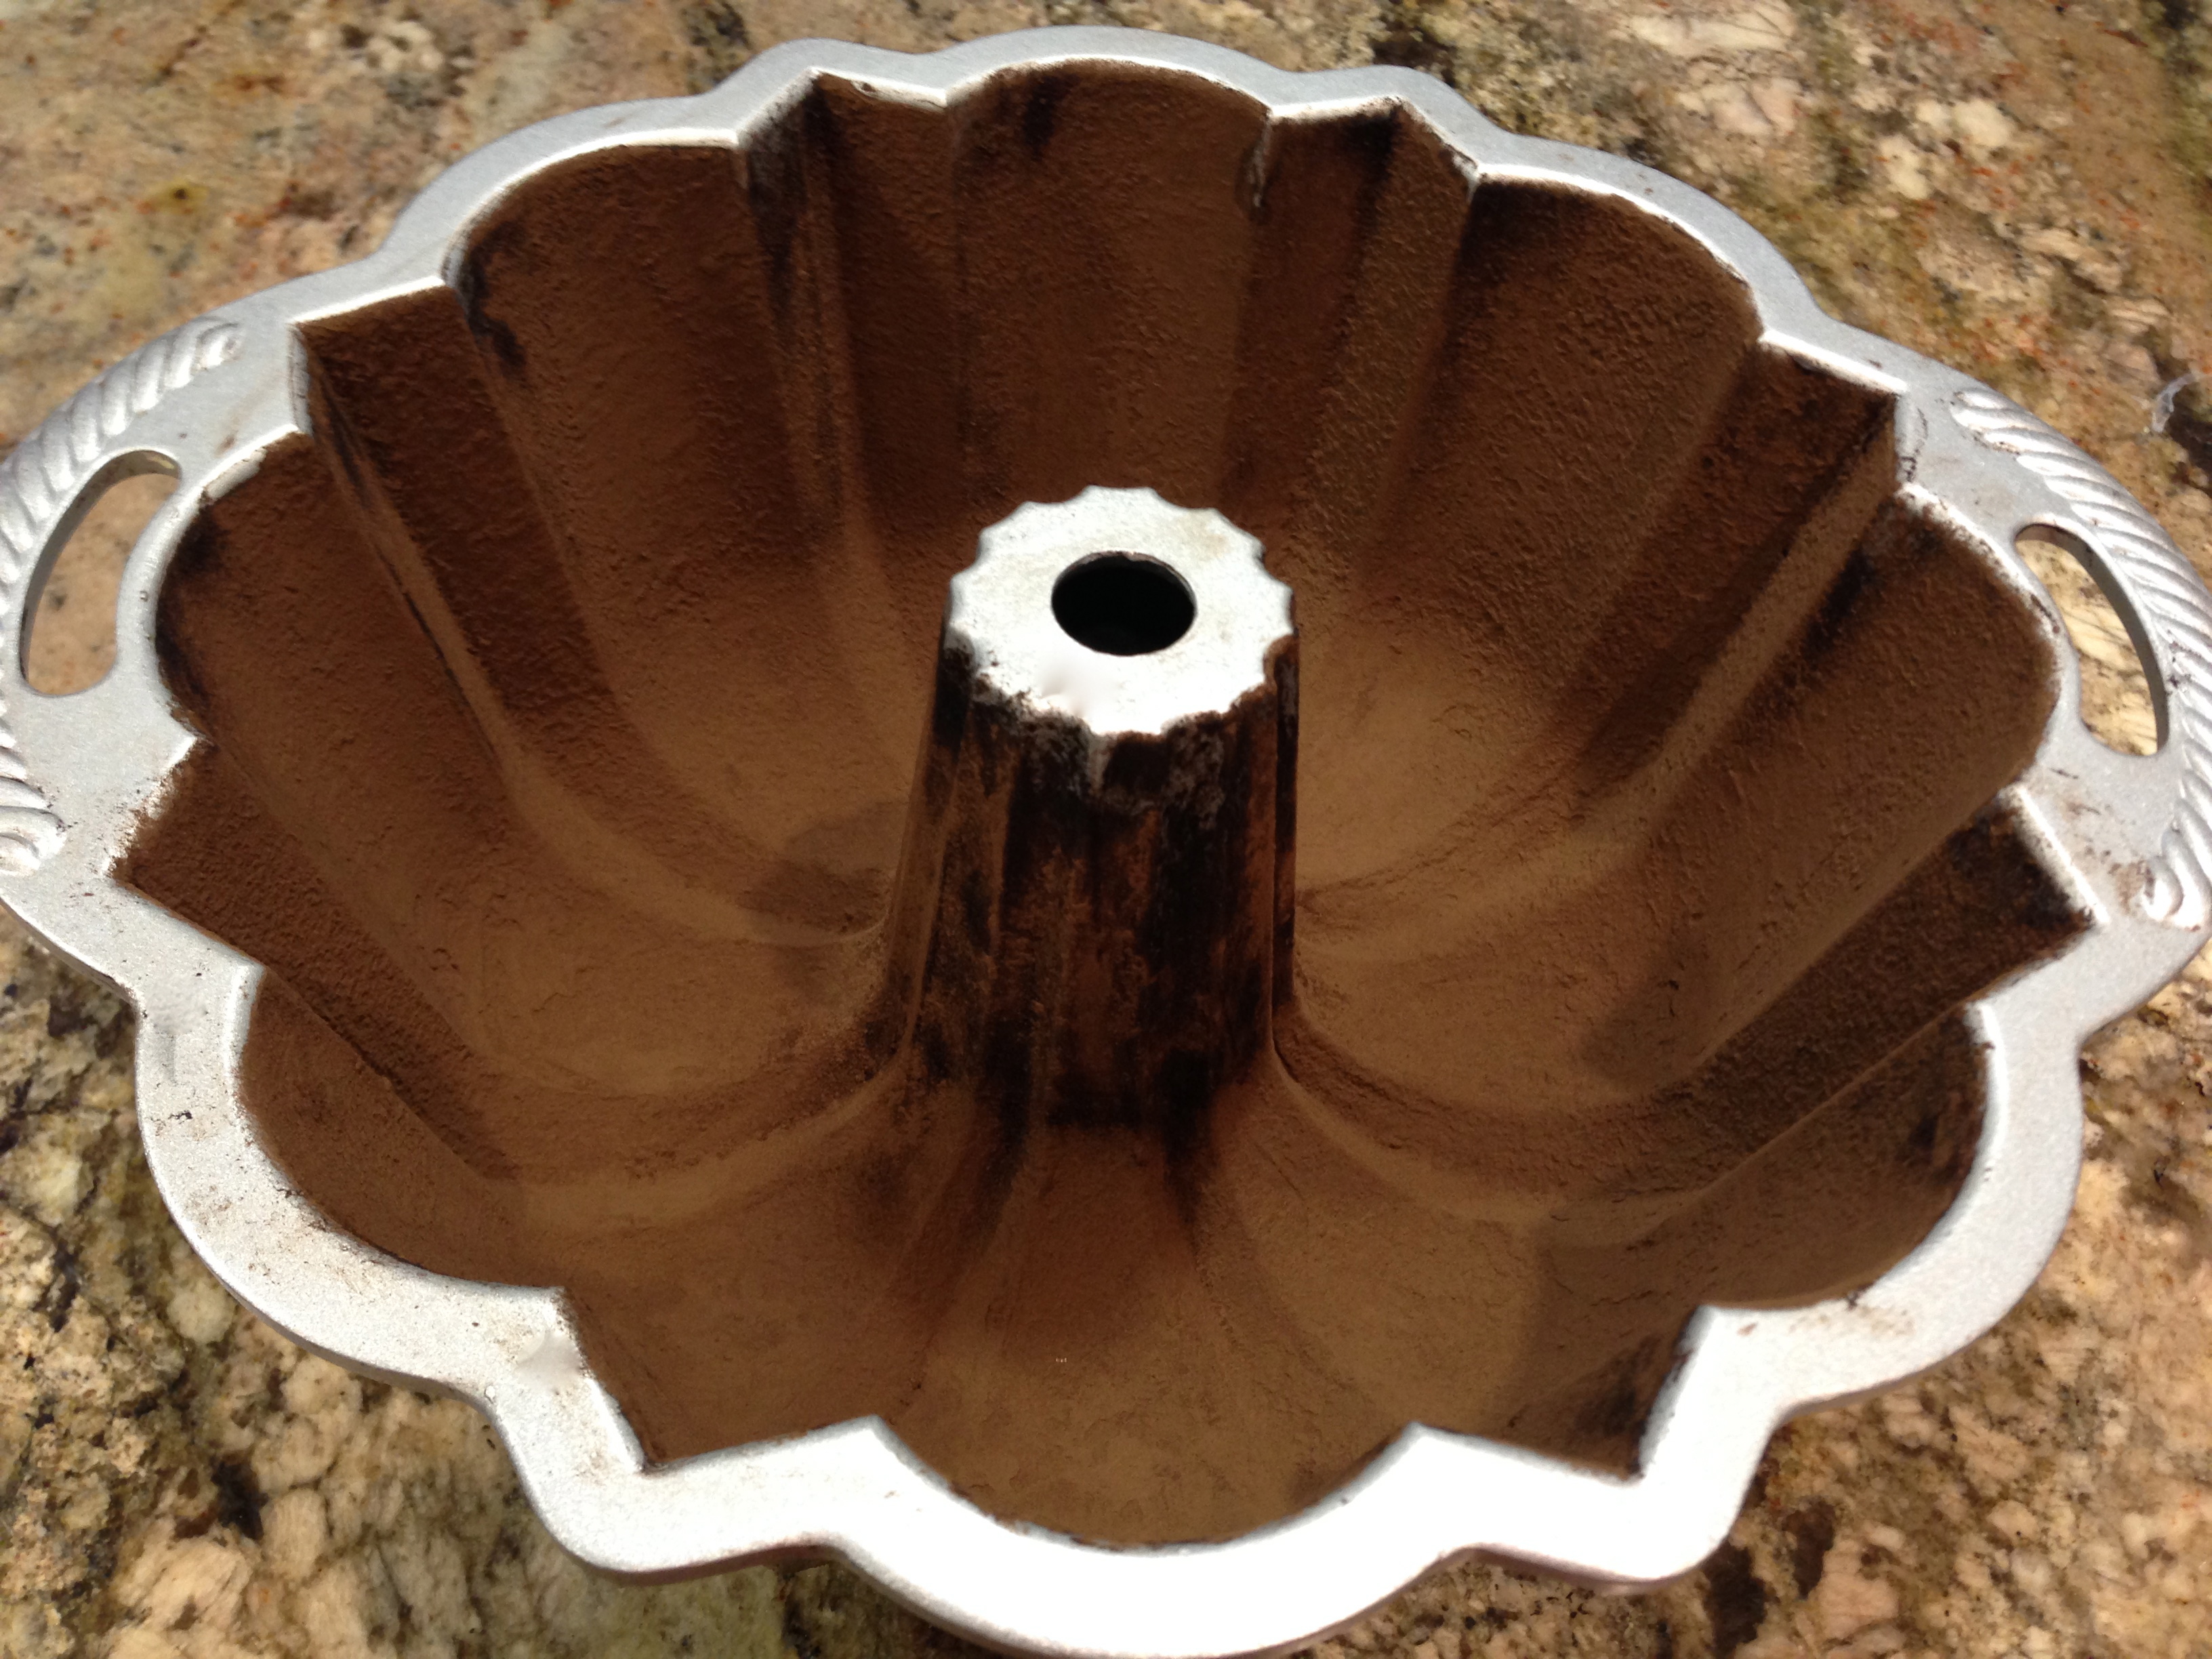
Bundt pan dusted with cocoa powder…
Lesson Learned 1: Dusting the bundt pan with cocoa powder instead of flour: As I mentioned in a previous post, it is imperative to take the time to grease and flour a bundt cake pan in order for the cake to come out cleanly and beautifully. You cannot skimp on this step. When I grease a bundt pan I use unsalted vegetable shortening but this time instead of dusting it with flour I dusted the pan with cocoa powder. To be honest, I’m not sure I would do it again for a couple of reasons. First, I found it very difficult to remove the excess cocoa powder from the pan much more so than removing excess flour. It seemed like not matter how hard I tapped the pan or slightly dropped it on my butcher block the cocoa powder would not dislodge to the degree I wanted. It definitely left a heavier coating in the pan. That’s not necessarily bad, but remember cocoa powder on its own has a bitter taste and that dusting will somewhat remain on the outside of the baked cake. If you dust the pan with cocoa powder you should frost the cake. That way none of the taste of raw cocoa powder will come through. If you decide to finish off your cake by sprinkling the top with powdered sugar then dust the bundt pan with flour.

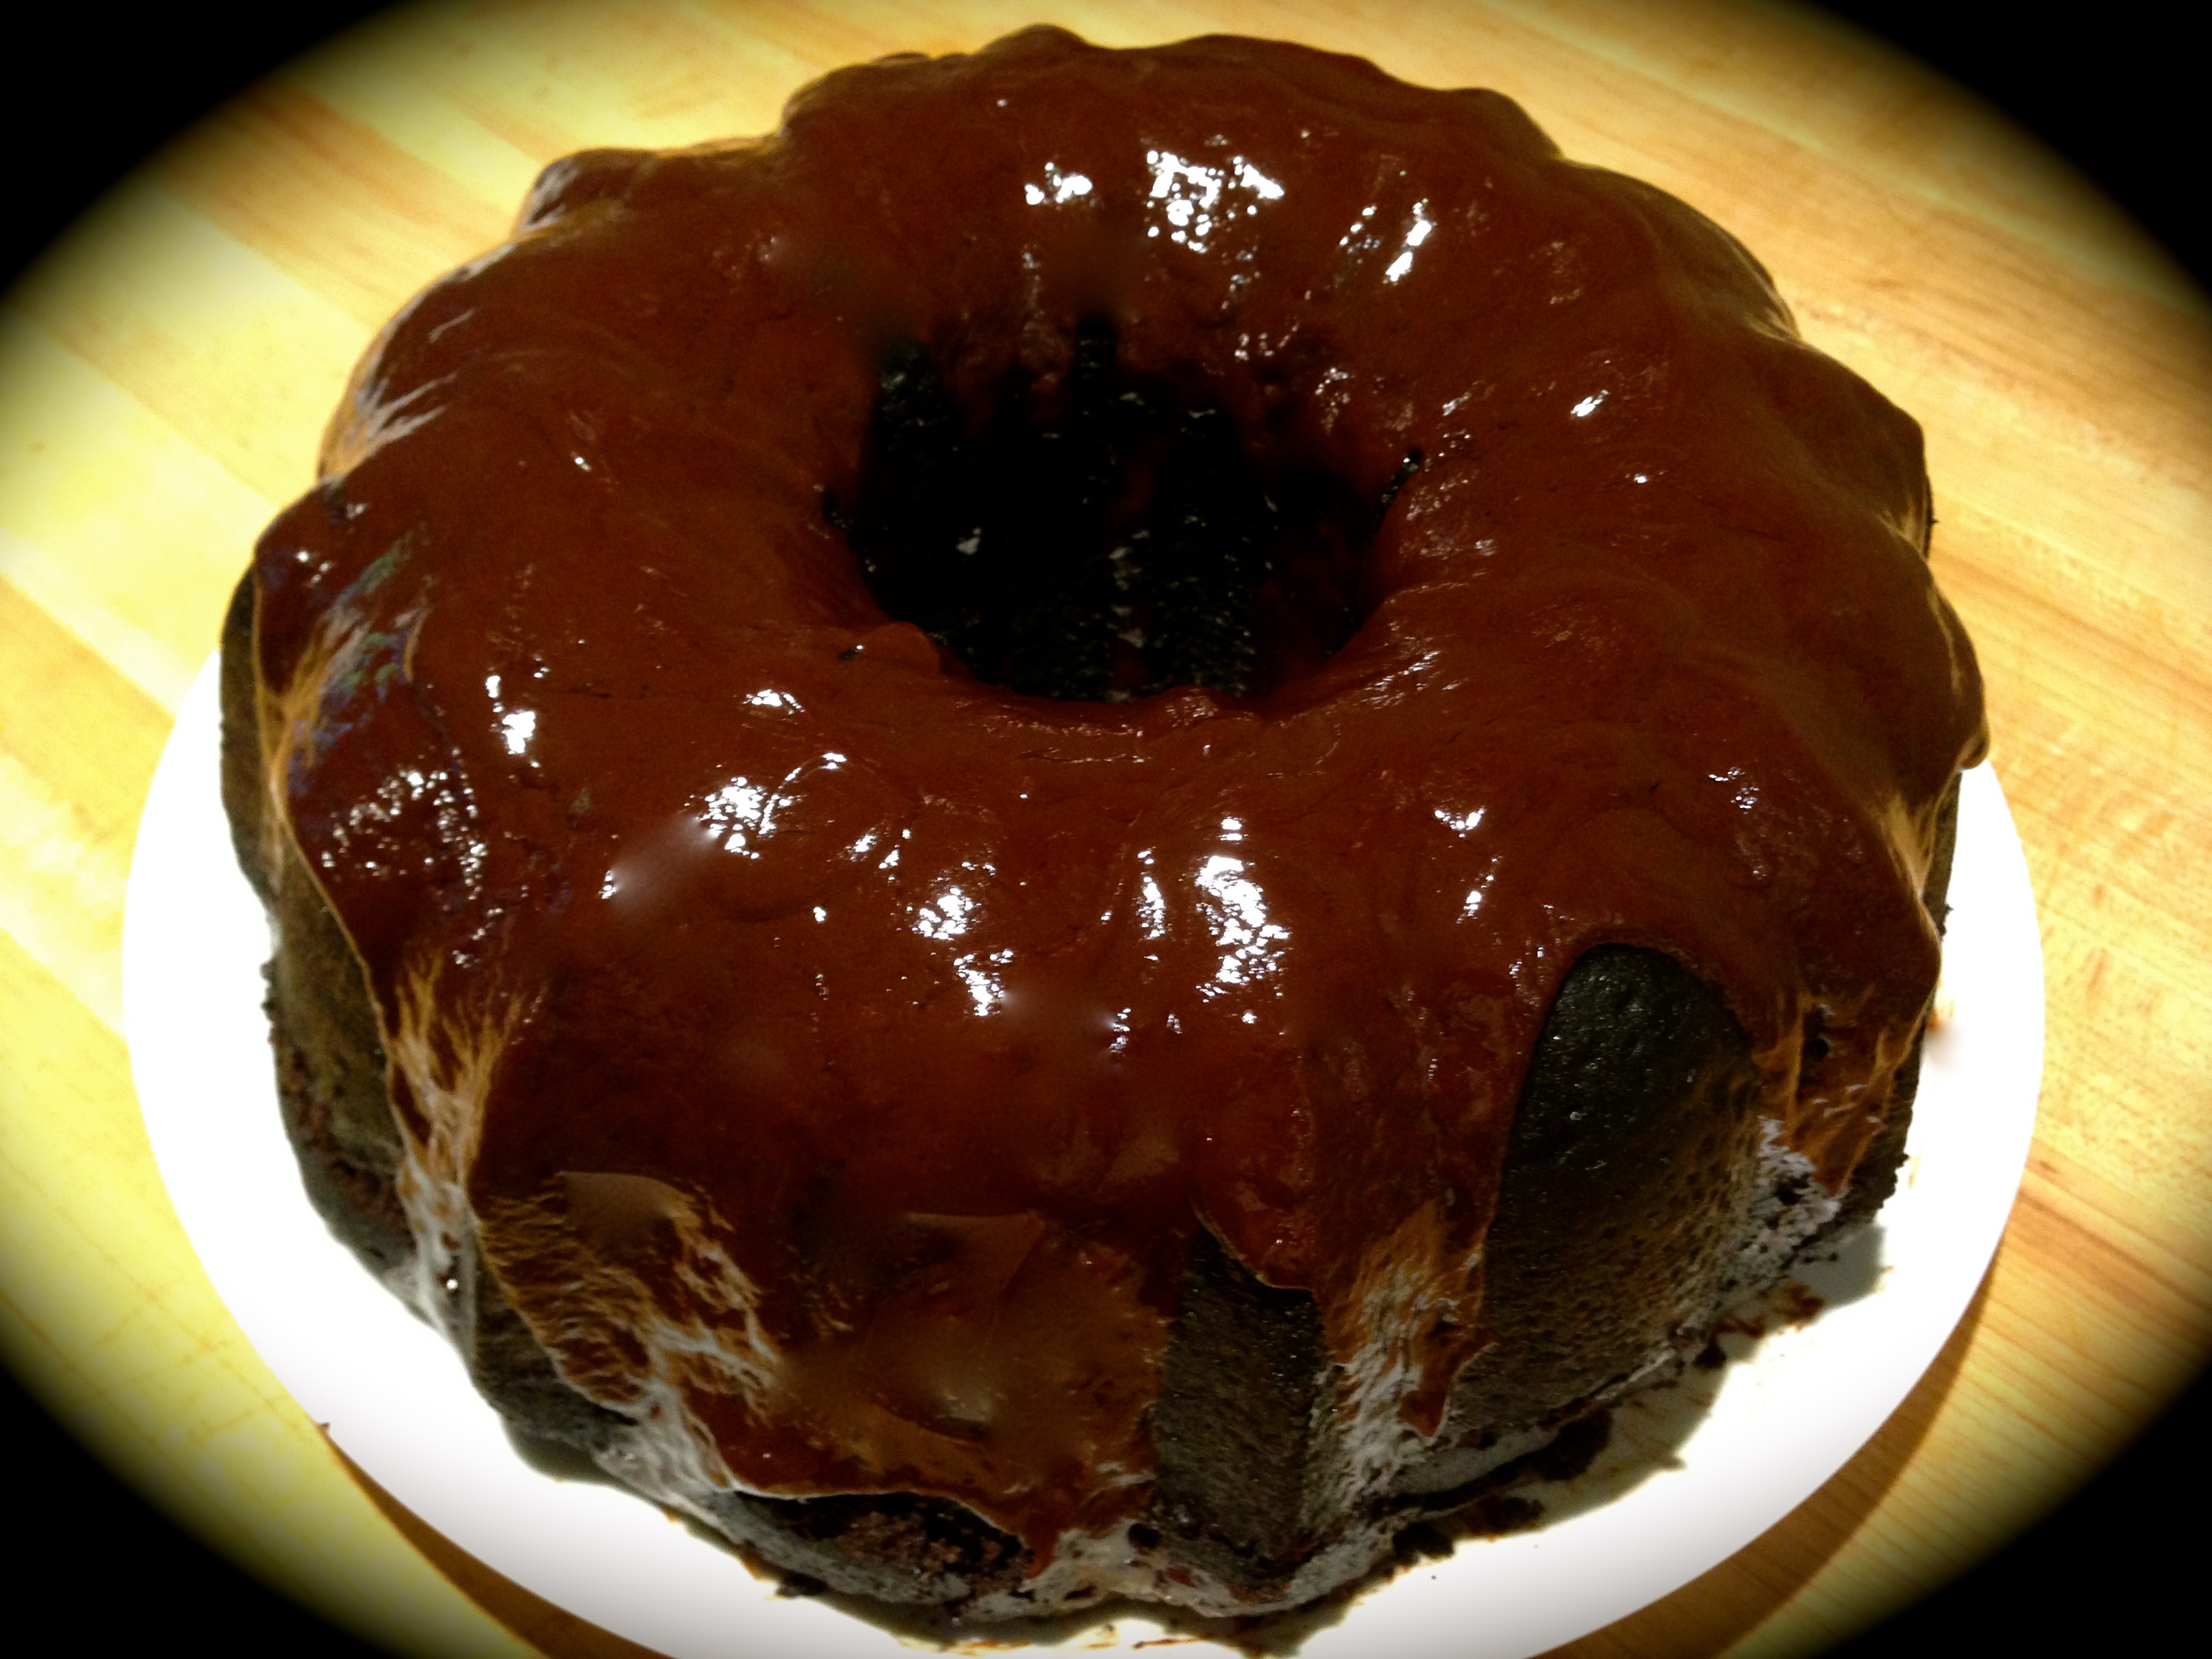
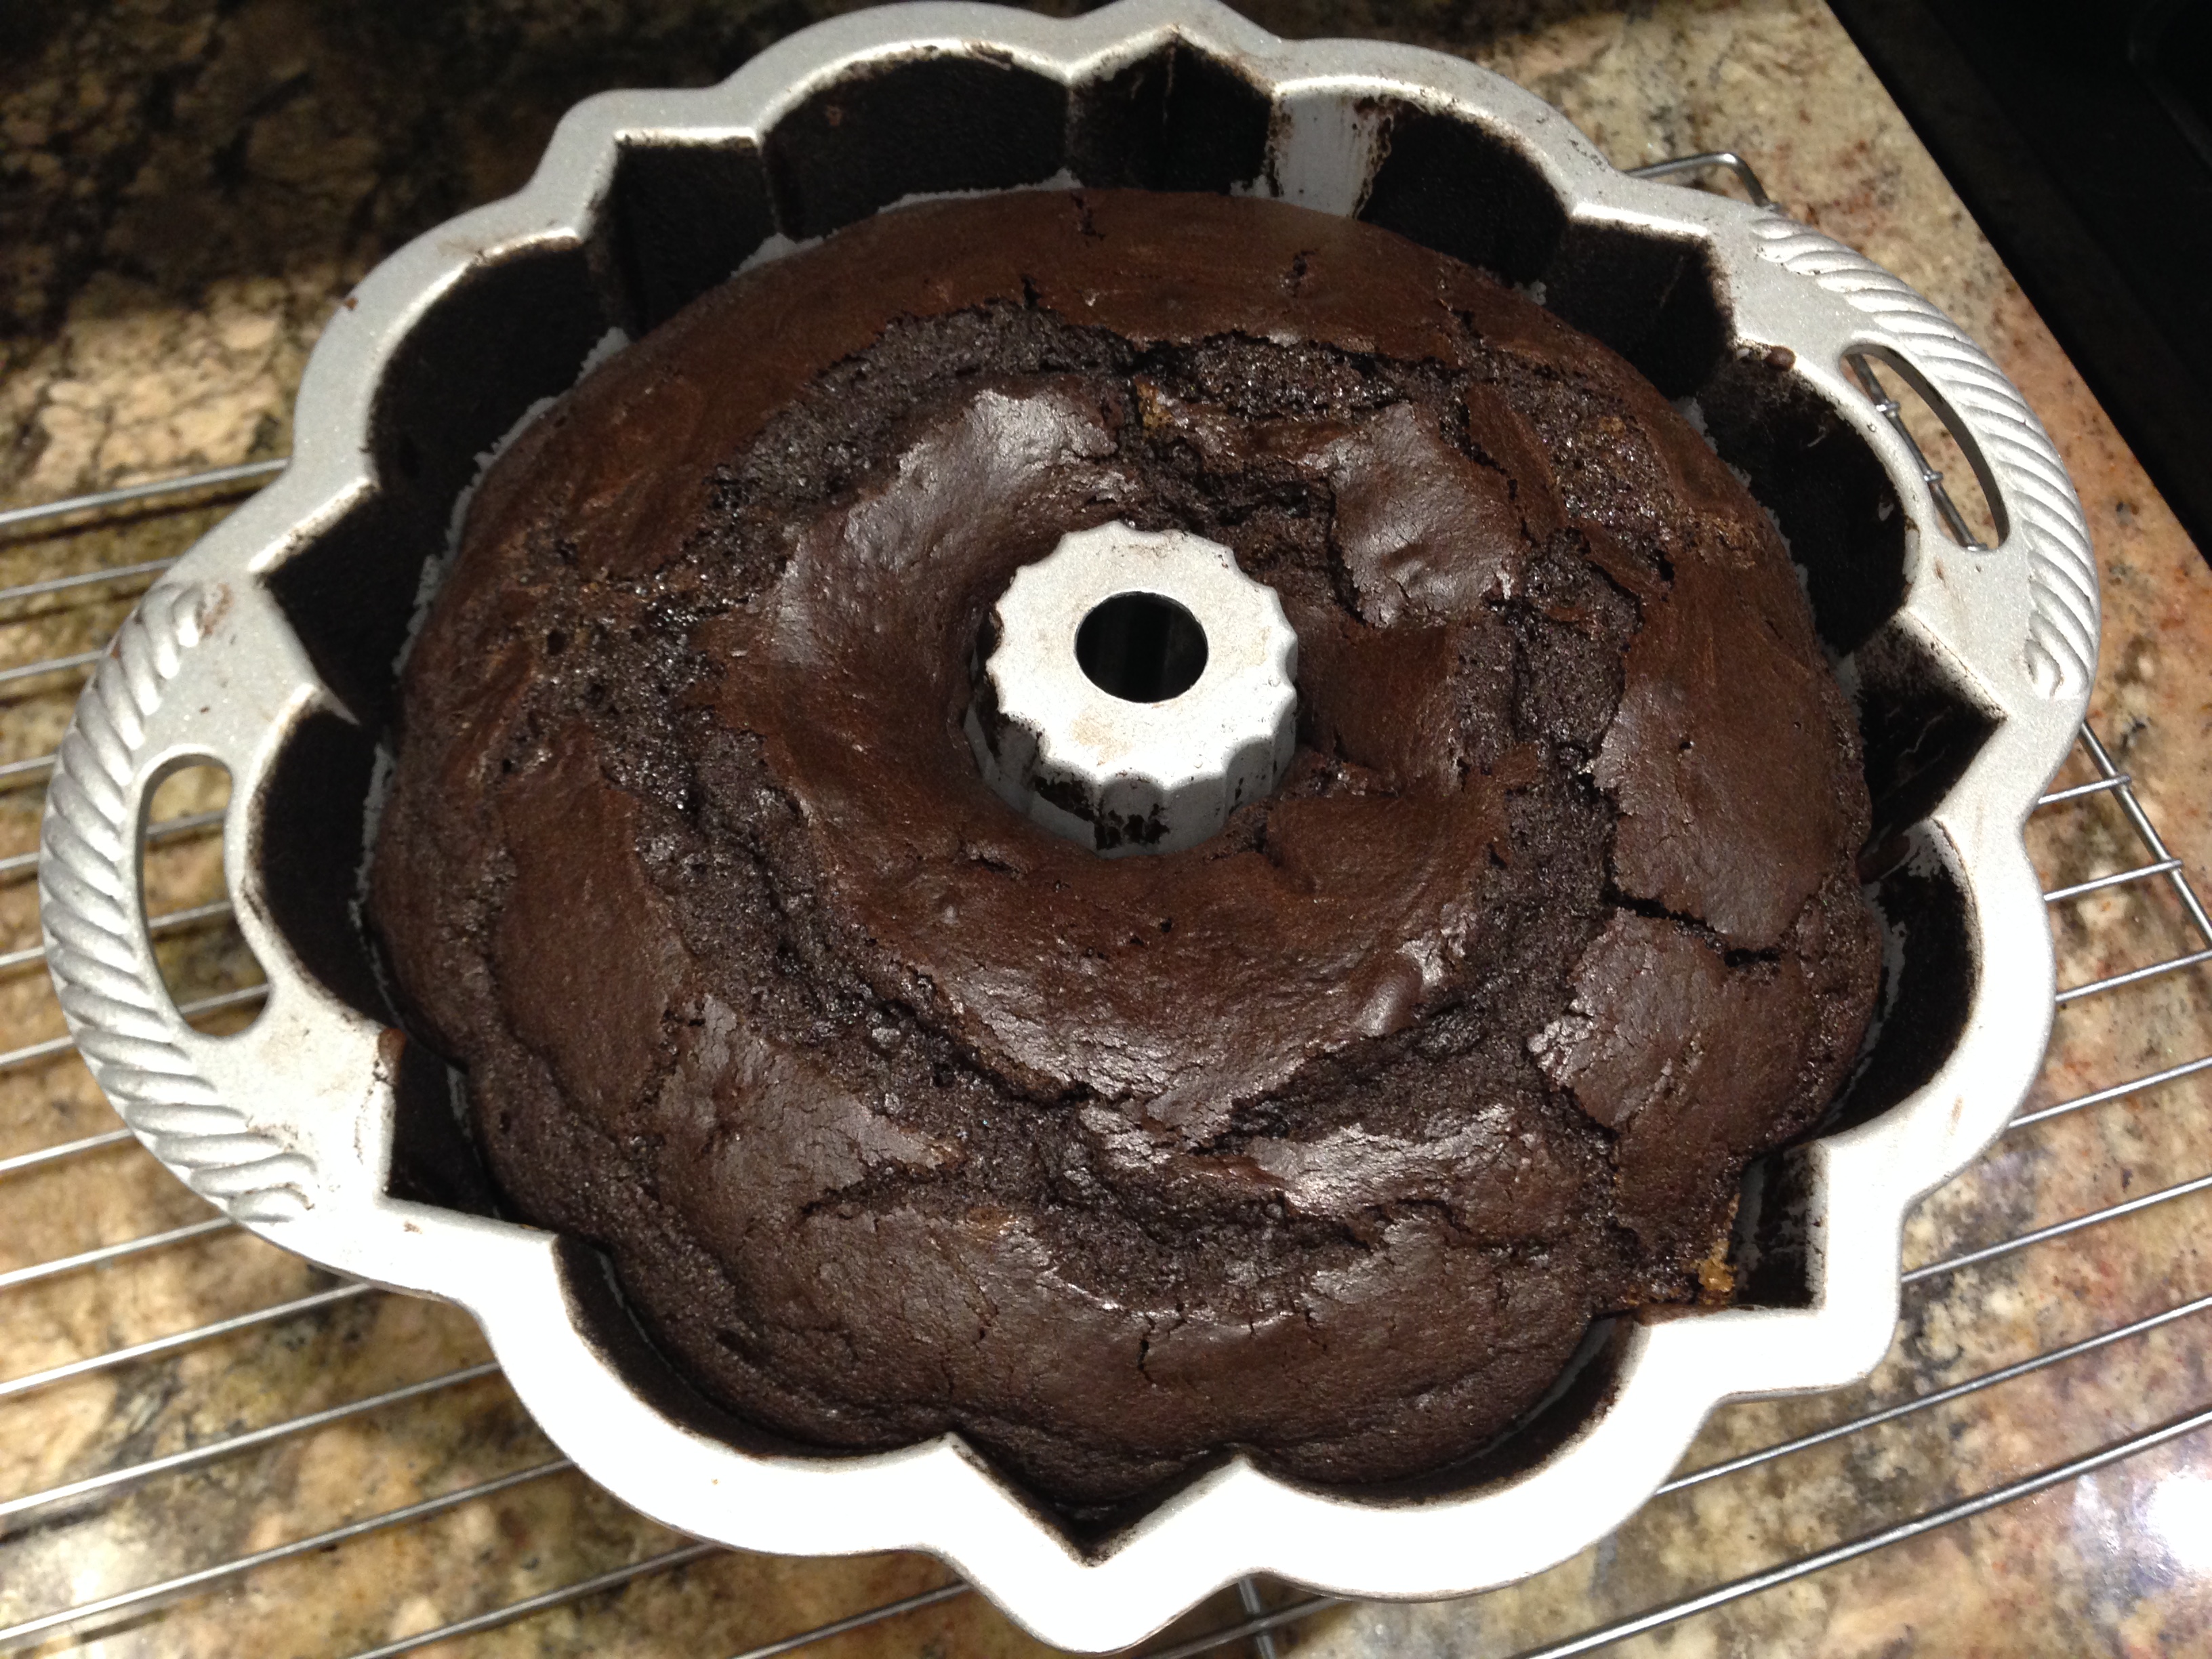
Baked cake from pan dusted with cocoa powder…
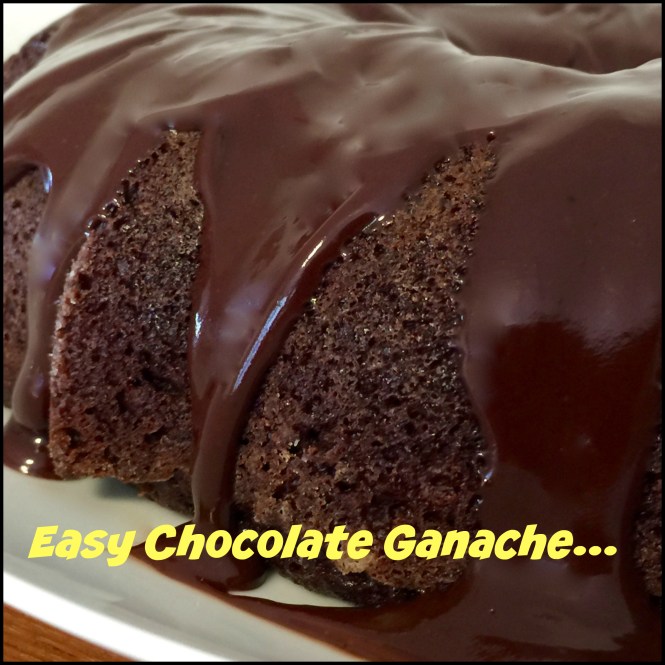
Second, I’m not sure I liked the look of the cake when I removed it from a pan dusted with cocoa powder. As you can see from the picture, the cake had, at least it seemed to me, an odd sort of matted look. I’m thinking that if I dusted the pan with flour, the cake would have looked more chocolatey brown versus looking like it had been sprayed with a light dulling lacquer. Also when I touched the cake, a darkish film would come off on my finger – I’m thinking that was a result of the combination of shortening and cocoa powder. I was not too fond of that. But, don’t get me wrong, none of this affected the tasted of the cake. The frosted cake was delicious and you could not taste the cocoa powder in anyway. I just thought I would try something a little more out of the ordinary, and though I was not 100% delighted with dusting the pan with cocoa powder, I still think this was one of the best chocolate bundt cakes I ever made!
Lesson Learned 2 – This recipe makes a lot of batter: This recipe is designed for a 15 cup bundt pan so be prepared for that. If you don’t have that large of a pan (mine is a 12 cup pan) then you will need to think of other ways to use the remaining batter. Because this recipe uses 5 eggs it rises a lot, so don’t fill your pan more than three quarters full or the batter will drip over the sides. You can do a couple of things with the rest of the batter. You can make cupcakes or you can make a small loaf cake. I chose to make a small loaf cake putting the remaining batter in a 5 x 3 x 1 mini loaf pan. I just sprayed that pan with baking spray and baked it with the bundt cake. The cake took 70 minutes to bake (remember I am at high altitude so it takes longer sometimes – at sea level you can probably bake it for 60-65 minutes) and the loaf pan took 45 minutes.
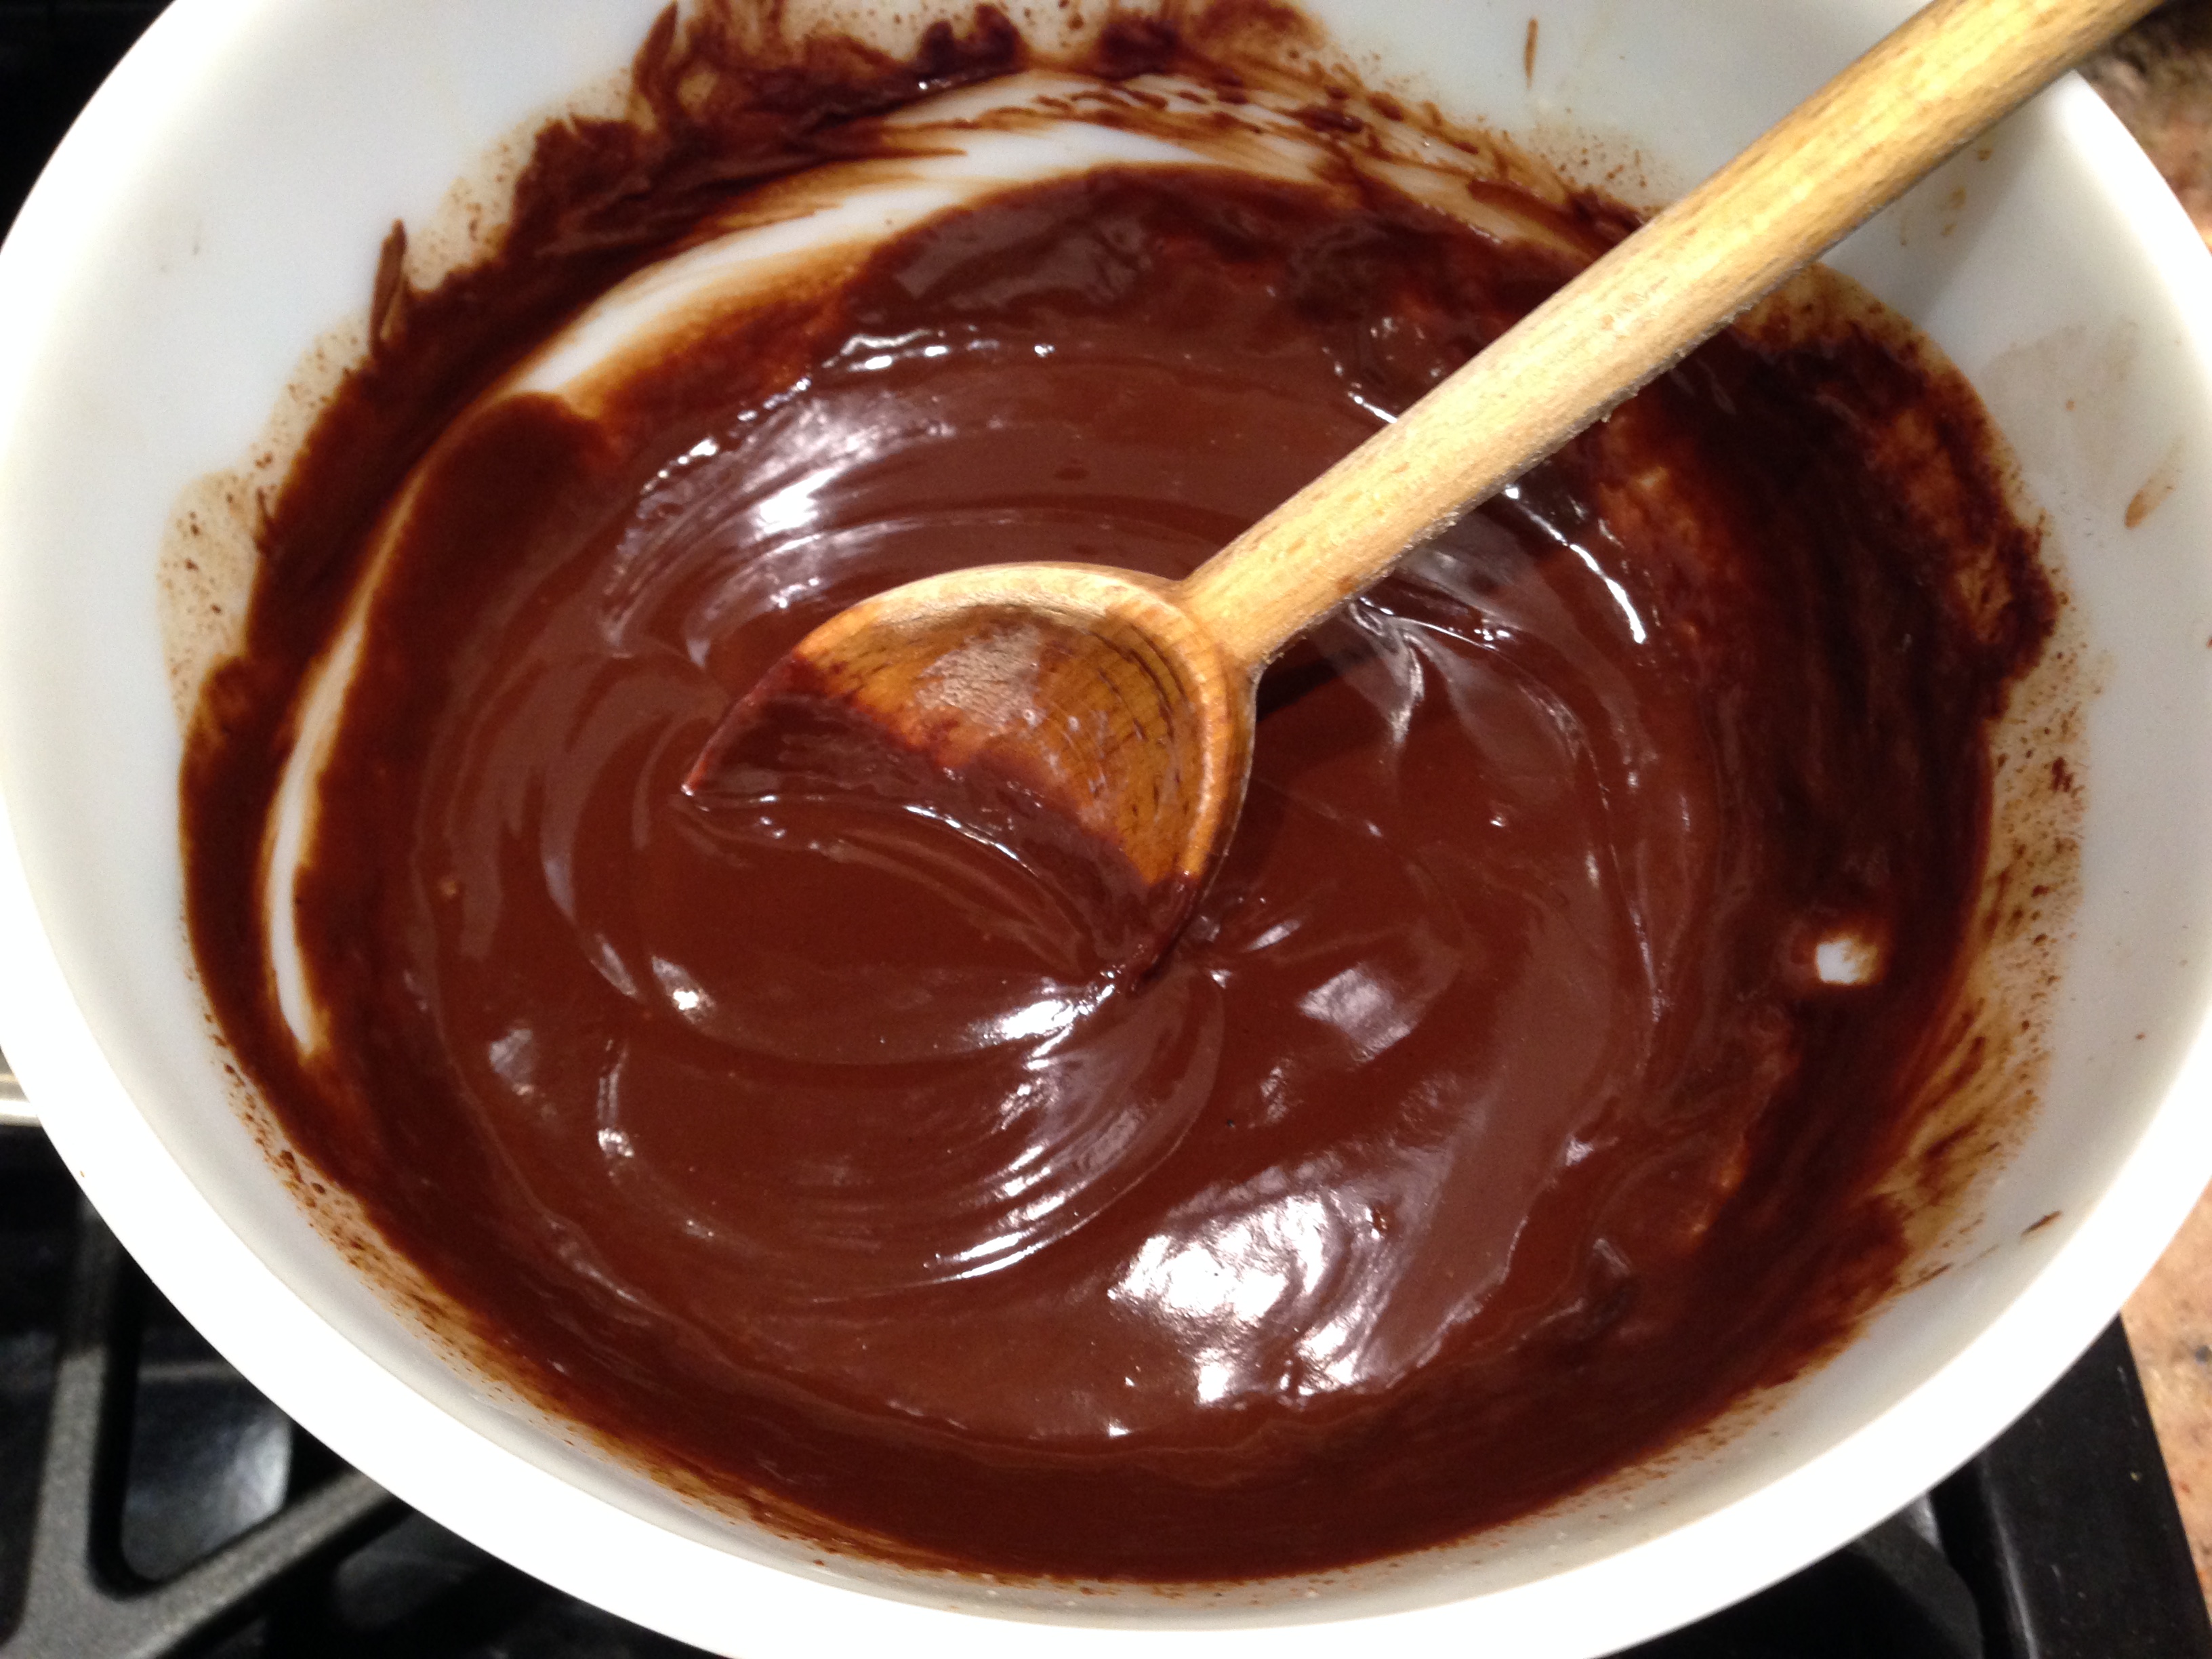
 Lesson Learned 3 – Making chocolate ganache: This was my first attempt ever at making chocolate ganache and I have to admit I should have researched it a little more before I made it. I found a process in one recipe and used it. And although the ganache turned out ok, it was not as silky as I would have wanted it. Then someone suggested I check out YouTube and I found a process I thought was better. I made my ganache over a double boiler, melting the chocolate and butter together and then adding heavy cream that has almost come to a boil and then combining the ingredients. The result is what you see in the pictures.

The Ganache…
Next time I make ganache I will use the process I learned on YouTube. It is very simple. Just put your chocolate in a bowl and heat heavy cream until it’s just about ready to boil. Pour the heavy cream over the chocolate and let the chocolate and cream sit for two minutes. Do not touch it. After 2 minutes stir to combine. Then add about a tablespoon of butter and a pinch of salt. Stir and then frost. I think the texture will be smoother and silkier making the ganache that way. I think my ganache was a little too thick but considering it was the first time I ever made it I think I did ok. It tasted wonderful, I just wanted it to be more glaze-like and smooth. And if you have any ideas on how to make the perfect ganache, I am all ears!
Lesson Learned 4 – Never quit trying: I almost didn’t post this recipe because I was not pleased with the way the ganache turned out. And then I thought, wait a minute, isn’t this blog not only about recipe successes but also things I learned along the way while making recipes? From my experience, the only way you learn is by trying. I don’t know of any cook or baker who has not had failures in the kitchen. And although the ganache wasn’t exactly a failure, it wasn’t what I wanted it to be. But hopefully what I am sharing when I post recipes will help minimize any slips ups you have when trying them and get you to success a lot quicker. To me, that is the purpose of this blog – to help those, like me, who never had anyone to mentor them and had to learn many things in the kitchen the hard way. And I have a feeling there are a lot of people like us out there, but just afraid to admit it.
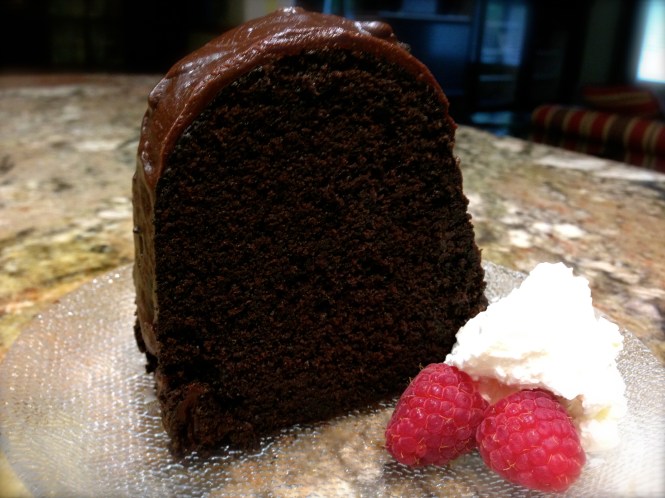
Since I made two bundt cakes within the timeframe of one week I had a lot of cake around the house. So I brought most of this cake to work yesterday. Within a couple of hours it was gone. Only a few chocolate crumbs remained on the plate in the break room. So no matter if your ganache is beautiful or not, in the end the only thing that really matters is the taste. And I’ll clue you in on a little secret – this cake tastes divine!
Here is the recipe as well as the adjustments I had to make for high altitude. Enjoy!
Chocolate Chocolate Chip Bundt Cake…
INGREDIENTS:
Cake:
1 cup cocoa powder, (more if you dust the pan with it – otherwise use 1 Tbs. of flour)
1 Tbs. unsalted vegetable shortening for greasing the cake pan
7 ounces semisweet baking chocolate, chopped finely
1 cup boiling water
2 1/4 cups flour (plus 4 Tbs. for high altitude)
1 1/2 tsp. baking soda (1 tsp. for high altitude)
1 1/4 tsp kosher salt
2 1/2 sticks unsalted butter, room temperature
2 1/2 cups firmly packed brown sugar (2 1/8 cups for high altitude)
5 eggs, room temperature and slightly beaten
1 Tbs. prepared coffee, room temperature
4 tsp. vanilla
1 1/2 cups sour cream
1 1/2 cups semisweet chocolate chips (1 cup high altitude)
1/8 cup flour for coating the chocolate chips
Ganache:
6 oz. semisweet chocolate chips
1 Tbs. butter
1/2 cup heavy cream
A pinch of salt
DIRECTIONS:
Preheat oven to 325 degrees. Grease and flour the bundt pan. Set aside.
Combine the cocoa powder and chocolate. Add the boiling water and whisk until blended and smooth. Set aside.
Sift together the flour, baking soda and salt. Set aside.
With an electric mixer, beat the butter until smooth and creamy (at least one minute). Add the brown sugar and beat until blended. Increase the mixer speed and beat until light and fluffy (about 5 minutes). Add the eggs one at a time and beat until each is incorporated. Add the vanilla and coffee and beat until combined.
Reduce the speed of the mixer and add the flour and sour cream in three additions beginning and ending with the flour. Pour in the chocolate, cocoa mixture and beat until the there is no light color in the batter. Combine the flour and chocolate chips and, by hand, fold the chocolate chips into the batter.
Pour the batter into the pan being careful not to fill it more than 3/4 full. Bake for 60-70 minutes (70 minutes high altitude) or until a toothpick inserted in the center comes out clean. Transfer the pan to a wire rack and let cool for 15 – 20 minutes (I cooled mine for 20 minutes). Invert the pan onto the wire rack and lift off the pan.
Let the cake cool for at least 1 hour before frosting.
FROSTING:
Put the chocolate chips into a heat resistant bowl. Heat the heavy cream until almost boiling. Pour the heavy cream over the chips and let that mixture stand without touching it for two minutes. After two minutes stir the mixture until the chocolate and cream are combined and smooth. Add the butter and salt and stir to combine. Immediately pour over the cooled cake.
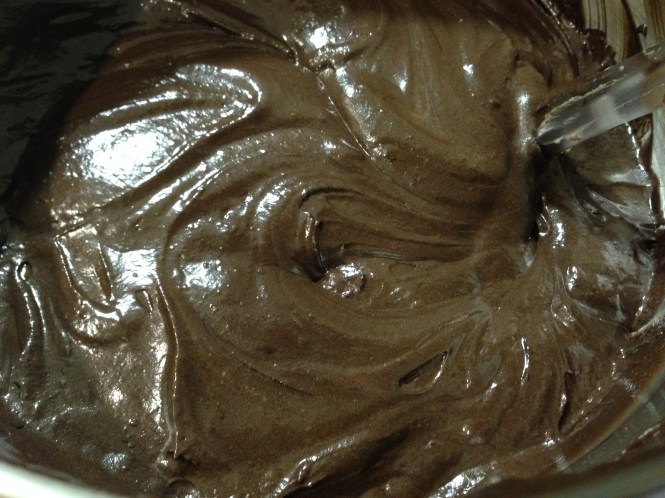
The cake batter…

The cake right out of the oven…
Chocolate Chocolate Chip Bundt Cake…

 Lesson Learned 1 – There are many ways to make ganache: I am going to share with you the simplest way. The ratio is easy to remember 1:1. Use as many ounces of heavy cream as semi-sweet chocolate. It couldn’t be easier.
 4 ounces semi-sweet chocolate squares cut into small pieces