Happy New Year! I hope your new year is filled with good health and happiness. Mine started off with a bang as I finally ventured into making a prime rib roast. It’s been on my list of “ok, now you have to try this… you betcha can do this” and I decided to jump into the deep end of the pool on the first day of 2017 and tackle this one.
I’ll admit now I was a little nervous. After all prime rib, even when it’s on sale is expensive. And the last thing you want to do is ruin an expensive cut of meat. So you see, even the cooks who have been at it for a while can still get nervous in the kitchen.
And talk about expensive… I decided to check out a prime rib roast at Whole Foods. I only needed a small one, just enough for me and my husband. So, I asked for a two rib roast, between 4-5 pounds. That would give me enough for two people with one dinner of leftovers. The butcher handed me a package for a 4.4 pound roast and the price tag on it was $68.00! I almost choked. As I walked through the store I had many internal conversations with myself trying to see if I could rationalize spending $68 on a cut of meat, albeit prime. When I finally got to the cash register I handed the roast to the checker and said I was sorry but I just couldn’t rationalize spending that much for a roast for two people. She couldn’t have been any sweeter. She said not to worry, it was no big deal and that Whole Foods wants its customers to be comfortable and satisfied with what they purchase. She was great. She took all my guilt away.
 I finally worked with a butcher at Safeway who cut me a two rib roast and tied the bones to the bottom as I requested. The roast coast $44 for a 4.3 pound roast. Still expensive, and choice but not prime, but I could rationalize that for a special meal more than $68.00. In the end the roast was fabulous so I was glad I opted for the less expensive cut. My next step was researching various cooking methods and determining what I felt would work for me. So I have some really good lessons learned to share with this blog…
Lesson Learned 1 – Let the roast sit out and get to room temperature: Many people are afraid to do this as they think the meat will spoil. Nothing can be further from the truth. In order to ensure that your roast cooks evenly you have to get it to room temperature. For my 4.3 pound roast I let it sit on the counter for 4 hours. Obviously the larger the roast the longer the time. I spoke with a co-work who made a 9 pound roast over the holidays and she kept hers out for 6 hours. Don’t be afraid to do this. You will be rewarded with an evenly cooked roast and it is perfectly safe.
Lesson Learned 2 – Choose the roasting method that is right for you: When I researched various roasting options, two methods seemed to be most prevalent. Both required cooking the roast at a very high heat for about 20-30 minutes. The difference was the next step. Some recipes suggested turning off the heat in the oven and letting the roast sit in there for several hours, making sure not to open the oven. Others suggested lowering the heat and cooking the roast at a lower heat for a certain amount of minutes per pound. Since everything takes longer to cook in high altitude, I chose the latter. I just didn’t see my roast cooking to medium rare with the oven turned off.
Lesson Learned 3 – Make sure your oven is clean: I cooked my roast at 450 degrees (some recipes call for 500 degrees) for the first 25 minutes. I have a brand new oven and it is really clean. I still set off my smoke alarm. (I forgot to put on the hood fan). My point is, at this high heat the roast will smoke and if you have a dirty oven everything baked on to the walls of your oven will smoke as well, just adding to the problem. So don’t forget to turn on your hood fan and make sure that oven is clean.
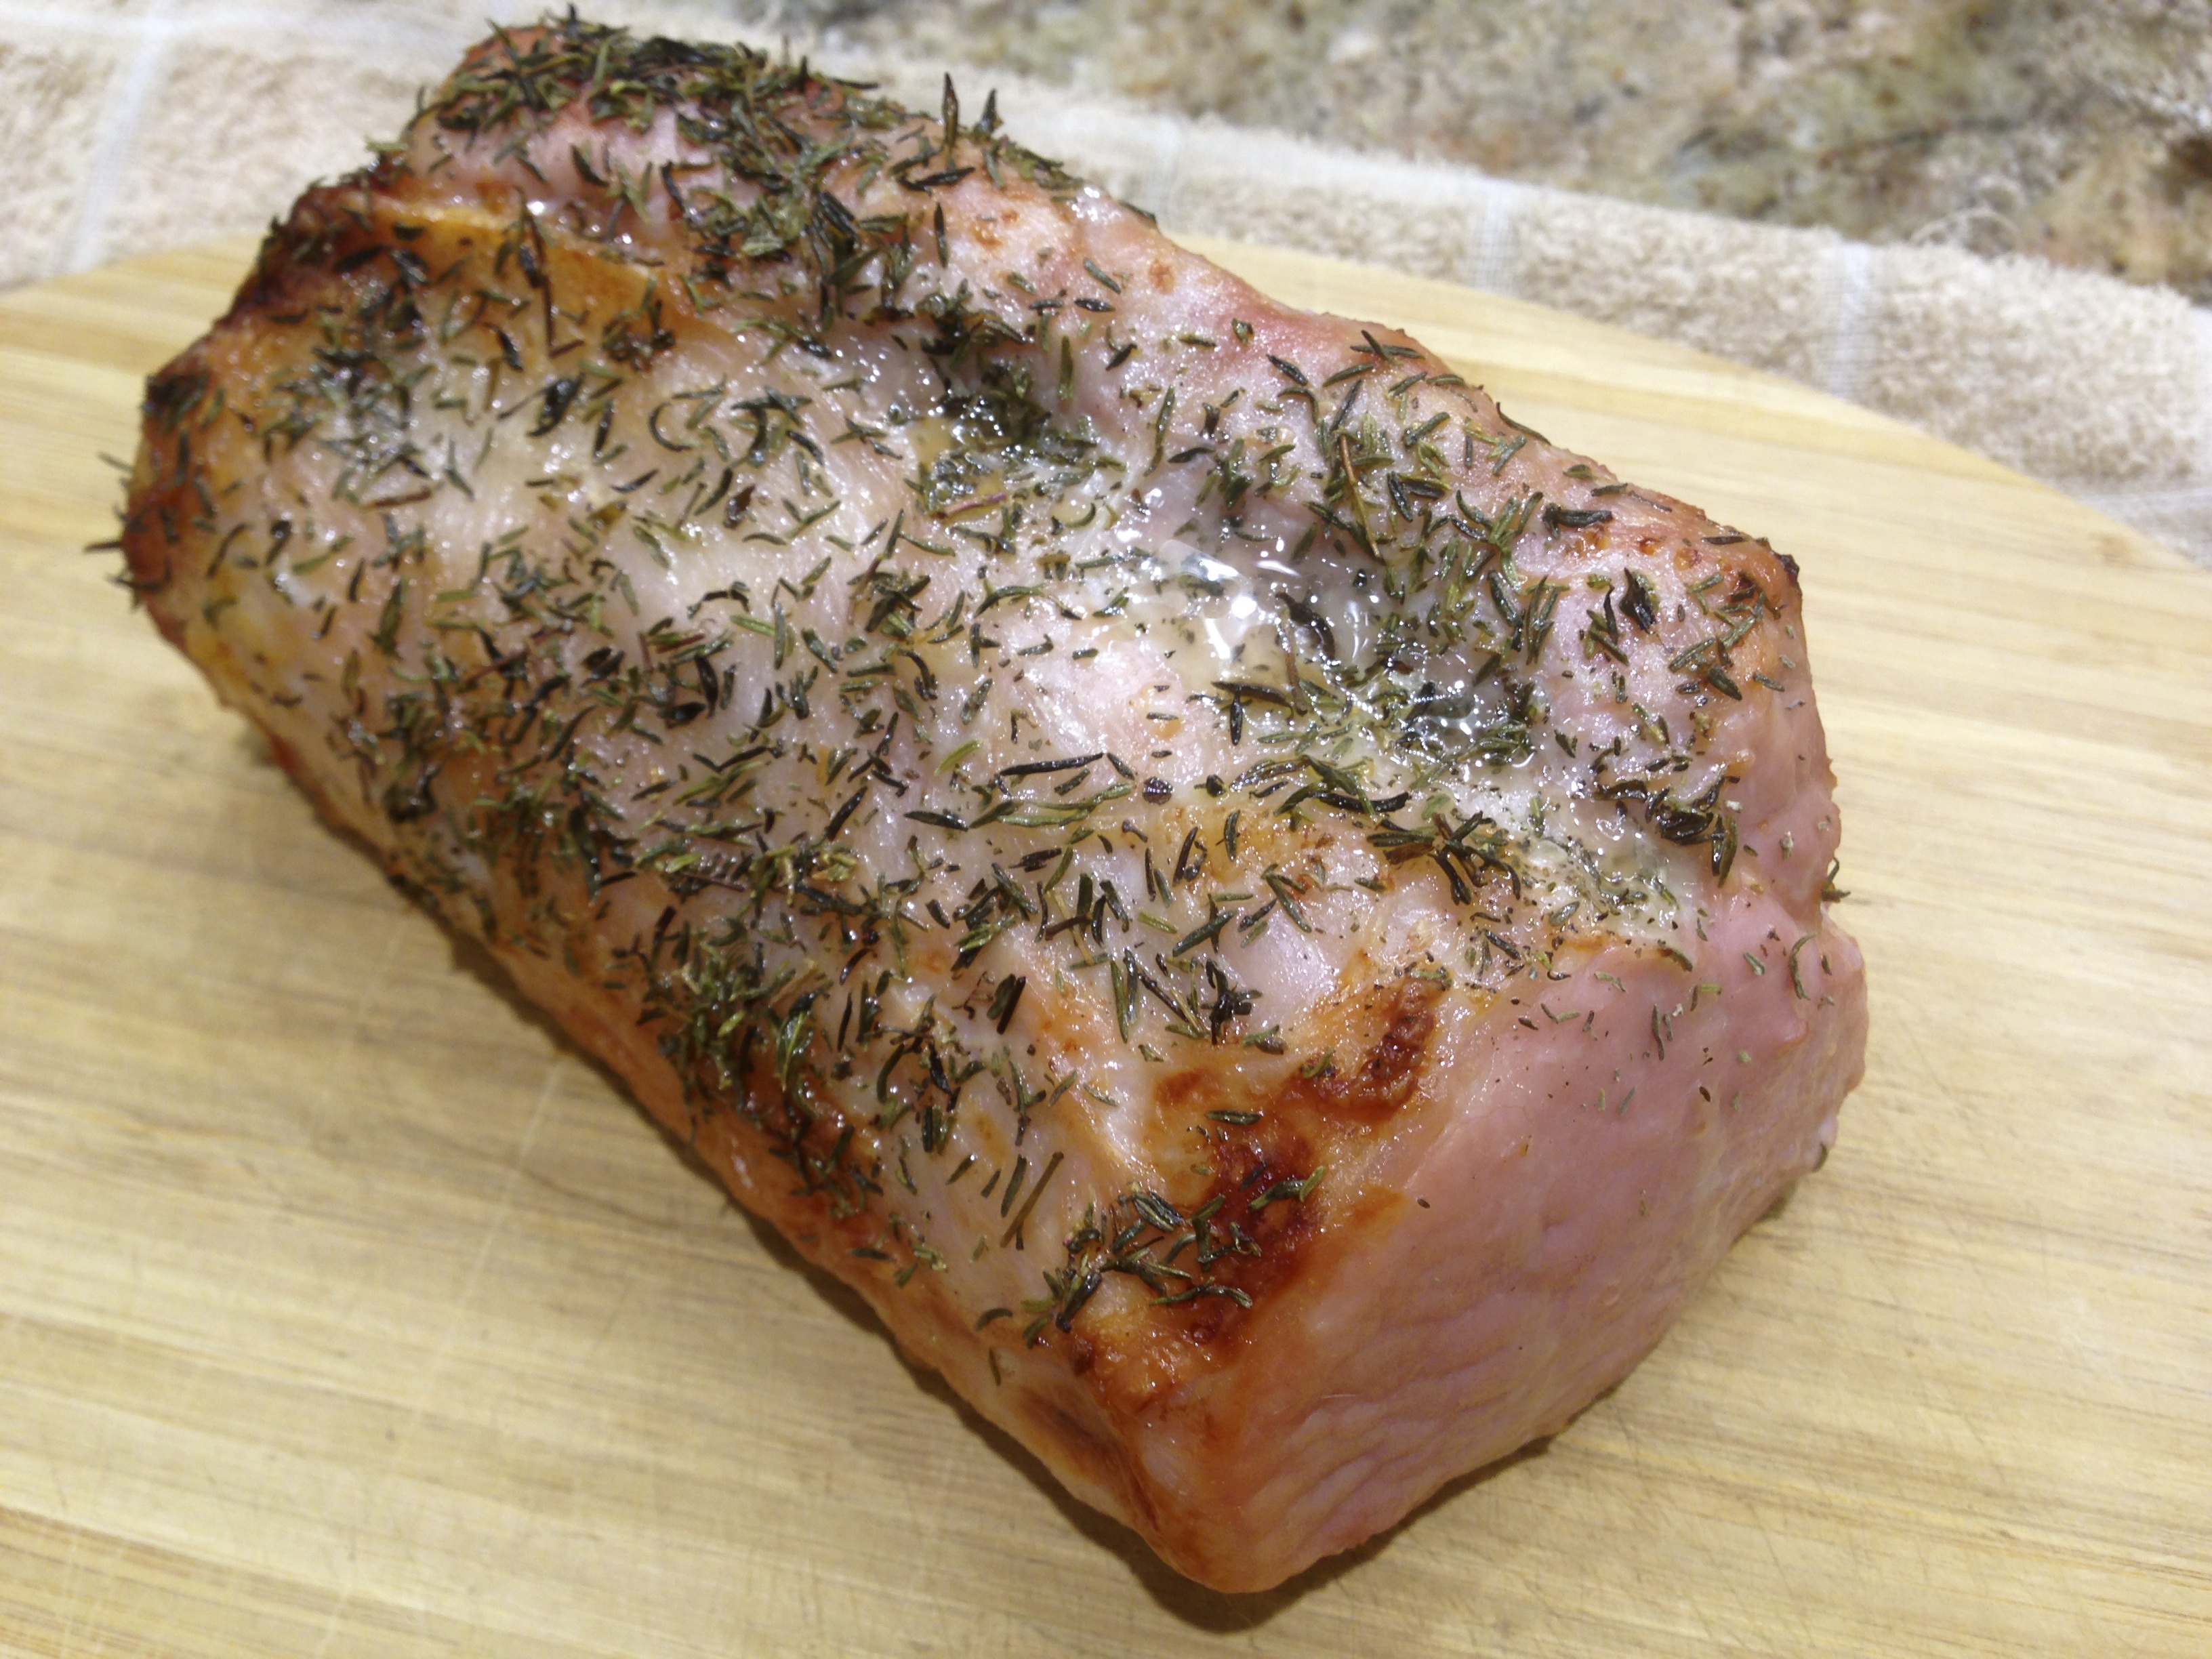
 Lesson Learned 4 – A rub on the roast makes a difference: I used a rub consisting of olive oil, fresh garlic, fresh rosemary, thyme, and salt and pepper. What I found is the rub creates a delicious crust when cooked at those initial high temperatures. It added a fabulous flavor to the meat. I highly recommend the rub in this recipe. It tasted divine!
Lesson Learned 5 – Use a meat thermometer: The only way to truly know what’s going on with your roast is to use a meat thermometer. I like mine medium rare which means an internal temperature of between 130 – 135 degrees. Keep in mind when you take the roast out of the oven it will continue to cook as it rests, at least another 5 degrees. So if you want medium rare, take the roast out at 130 and you will be fine. This time I chose to make it rare as my husband likes it that way. That is an internal temperature of 120-125. You can easily just put a rare piece in a pan on the stove and heat it gently to bring it up to medium rare. Just keep an eye on it, as it will not take long to get it to medium rare.
Lesson Learned 6 – Let the meat rest: The roast looks so good when it comes out of the oven but you need to give it time to let its juices redistribute before you slice it. Otherwise all the juices will be on your plate and not in the meat. So let the roast sit for 20 minutes. Cover it with foil during that time and after 20 minutes it will be a perfect temperature for serving with the juices redistributed.
Lesson Learned 7 – Make your horseradish cream sauce to taste: Is there any better combination than prime rib and horseradish sauce? If you’ve never tried it you simply must. I will provide some basic guidelines for making this cream sauce but I found when I made mine that I needed to add a lot more horseradish. The jarred horseradish that I had was not overly spicy and so I needed more to get the flavor combination that I liked. But start out with a little horseradish and add from there. Depending upon the type of prepared horseradish you are using, a little may be enough. That was not the case for me.
As you can see there are many things you need to consider in order to make the perfect rib roast. But if you follow these lessons learned you will wind up with a flavorful roast cooked to perfection. Don’t be afraid to do a prime rib roast. You betcha can make this!
PRIME RIB ROAST...
INGREDIENTS:
 1 4-5 pound rib roast, bones tied to the bottom
1 cup red wine (I used merlot)
1 cup beef broth
2 Tbs. garlic, minced
2 Tbs. garlic infused olive oil (you can use plain olive oil)
2 Tbs. fresh rosemary, minced
2 Tbs. fresh thyme, minced
1 Tbs. kosher salt
1 tsp. freshly cracked black pepper
Horseradish Sauce:
1/4 cup sour cream
1 -2 Tbs. prepared horseradish
DIRECTIONS:
Remove the roast from the refrigerator and let stand for at least 4 hours. Preheat the oven to 450 and arrange the racks so that the roast will be in the center of the oven. Add the beef broth and wine to the bottom of the roasting pan.
Mix together the olive oil, garlic, rosemary, thyme salt and pepper. Spread the mixture on top of the roast. Place the roast on a rack on top of the beef broth/wine mixture. (At this point if you have an oven safe meat thermometer you will want to put it into the center of the meaty part of the roast making sure to avoid contact with the bones. If you only have an instant meat thermometer you will need to check the roast at various intervals at 1 1/2 hours after lowering the temperature of the oven).
Roast at 450 for 25 minutes. Turn the oven temperature down to 350 and continue to roast for approximately 15 minutes per pound (at high altitude I found I needed 20 minutes per pound). For medium rare remove the roast when the internal temperature is 130 degrees. Let the roast stand covered with foil for at least 20 minutes.
While the roast is resting place the roasting pan on a burner with the rack removed. Heat the beef broth/wine mixture and remove any fat from the drippings. This can be used as au jus for the roast or gravy for mashed potatoes if you are serving them as a side dish.
For the horseradish sauce, mix the ingredients together, tasting the sauce to ensure you have the right amount of horseradish. Add more if necessary. Chill the mixture until it’s time to serve.