Nothing in this world compares to home made bread. There is something so comforting about it, it creates that feeling of “there’s no place like home” every time you smell it baking in the oven. And bread baking has progressed over the years from a process that took hours to much quicker and easier methods. To date I have made bread the traditional way (letting it rise over and over for hours and baking in a loaf pan), to making bread in an enameled cast iron dutch oven and now this third way of making it in a plain old cast iron skillet.
I’ve made this recipe a few times before I felt I perfected it and I’ll go through all of that in my lessons learned. But bottom line, even with the few blips I encountered I still wound up with wonderful homemade bread. The two versions I’m going to talk about in this blog are Cranberry Walnut Skillet Bread and Rosemary Parmesan Skillet Bread. Two very different varieties but two wonderful breads.
So let’s talk skillet breads…
Lesson Learned 1 – Use rapid rise yeast and make sure it is fresh: I had a jar of rapid rise yeast in my refrigerator and used it the first time I tried to make this bread. It never rose the way it was supposed to (the jar had been in the fridge for quite some time) and the bread wound up “doughy” as if it didn’t have enough air in it. The second time I made the bread I used fresh yeast and their was a marked difference in how much the dough had risen. Also make sure that you use warm but not scolding water when you activate the yeast. Scolding water will kill the yeast but very warm water will activate it.


The picture on the left shows the newly mixed dough. The one on the right shows what the dough will look like after it had risen in the bowl for one hour.
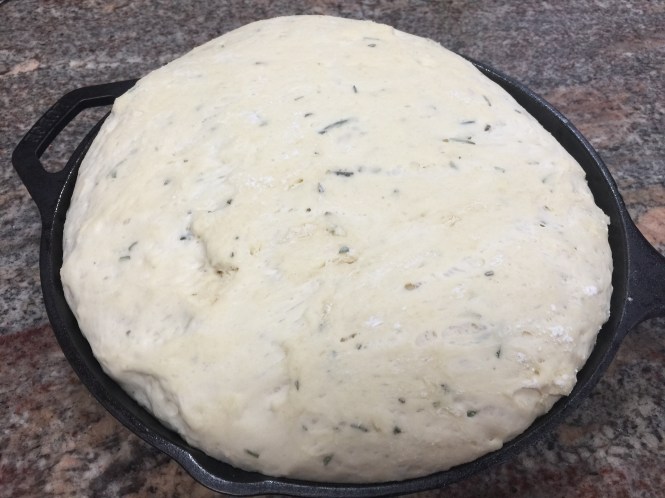
Skillet bread requires the dough to rise twice, once for an hour in the bowl and once for a half hour in the skillet. The picture above shows what the dough should look like after it has risen in the skillet for a half hour.
Lesson Learned 2 – Use only a small amount of olive oil to season the skillet and use good olive oil: What I really like about making bread this way is the crust you get from the cast iron skillet.  Take a silicone brush and lightly coat the bottom and sides of the skillet. You really don’t want a lot of oil sitting on the bottom. That will give you a greasy crust. And make sure you use a good quality olive oil. I used a garlic infused olive oil when I made the rosemary parmesan bread and a mild flavored premium olive oil for the cranberry walnut bread. If you don’t overdo the oil the crust will have just the right amount of crispiness and will taste heavenly. Just make sure you use a good olive oil. I prefer the crust in this method compared to the crust you get when using an enameled cast iron dutch oven (in the process you do not oil the pan). That crust, to me, is a little tougher. But don’t get me wrong, both methods produce wonderful bread.
Lesson Learned 3 – Some recipes tell you to cut an “X” in the center (called scoring) of the dough before you put it in the oven – for this recipe DON’T: I truly don’t think you need to score the bread using this method. When you put bread in the oven it continues to rise and a tension begins to exist between the top formed layer and the softer dough beneath. Scoring is done to assist with the bread rising consistently and predictably during this process.
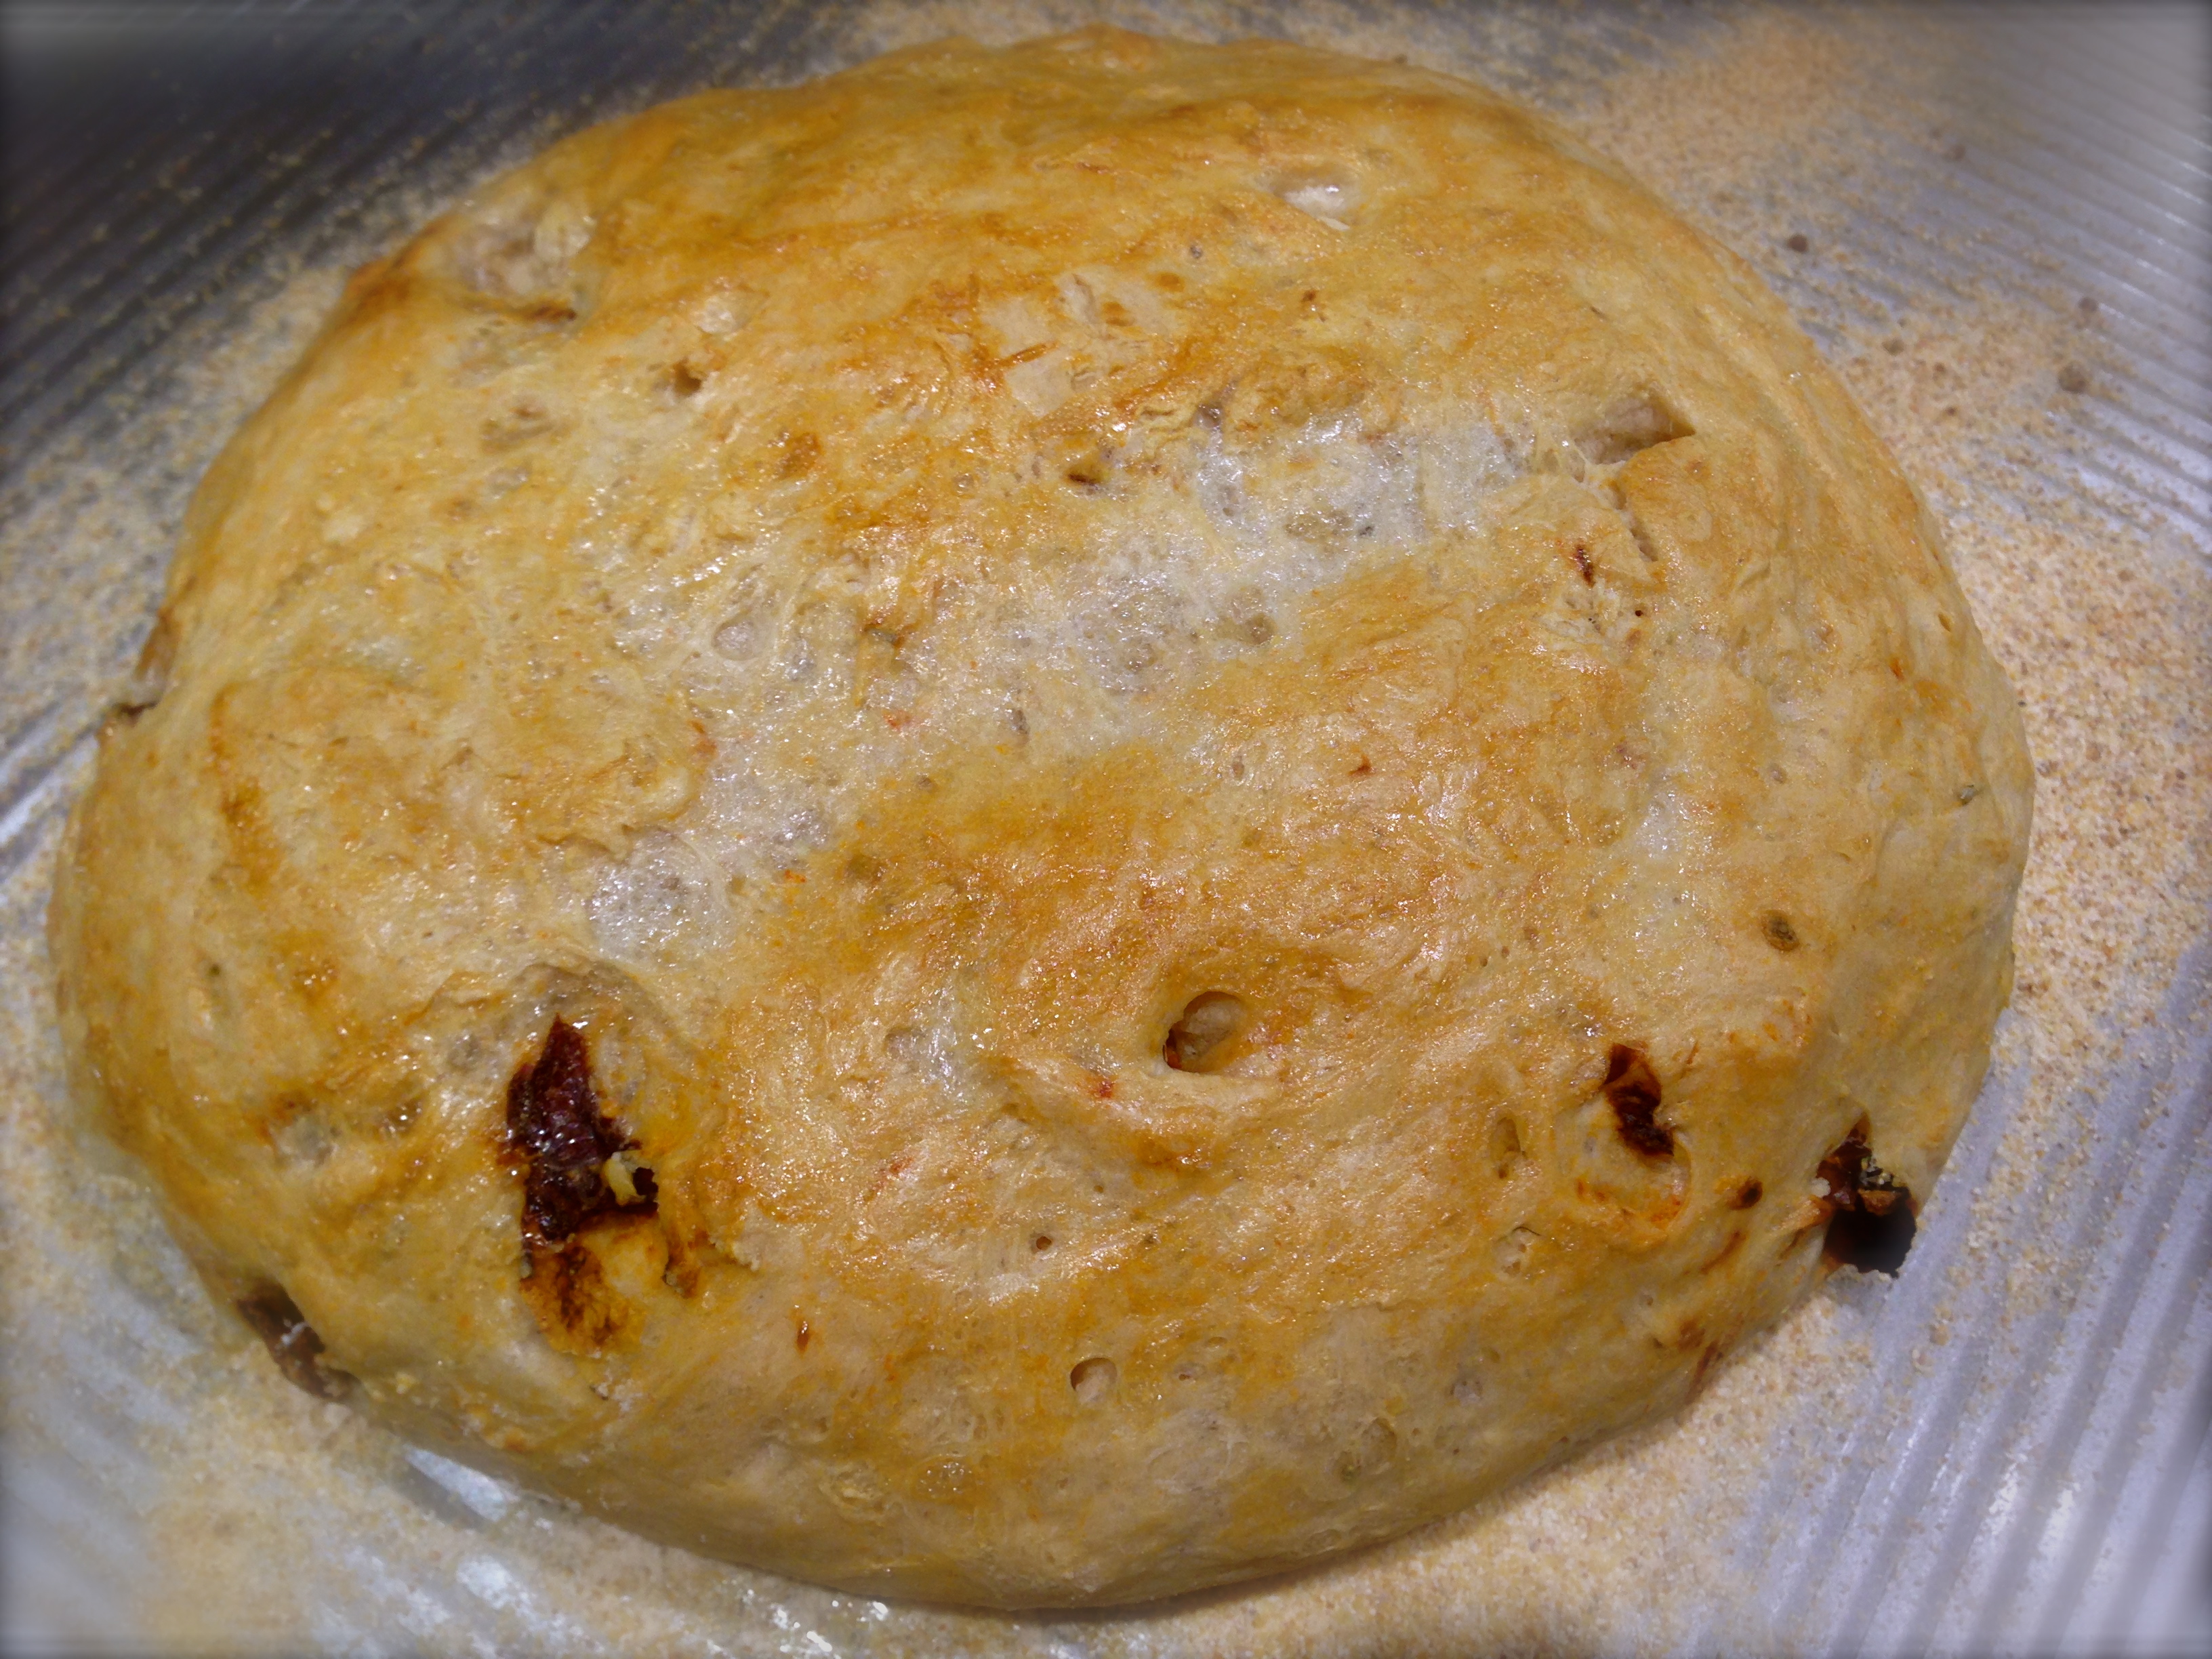
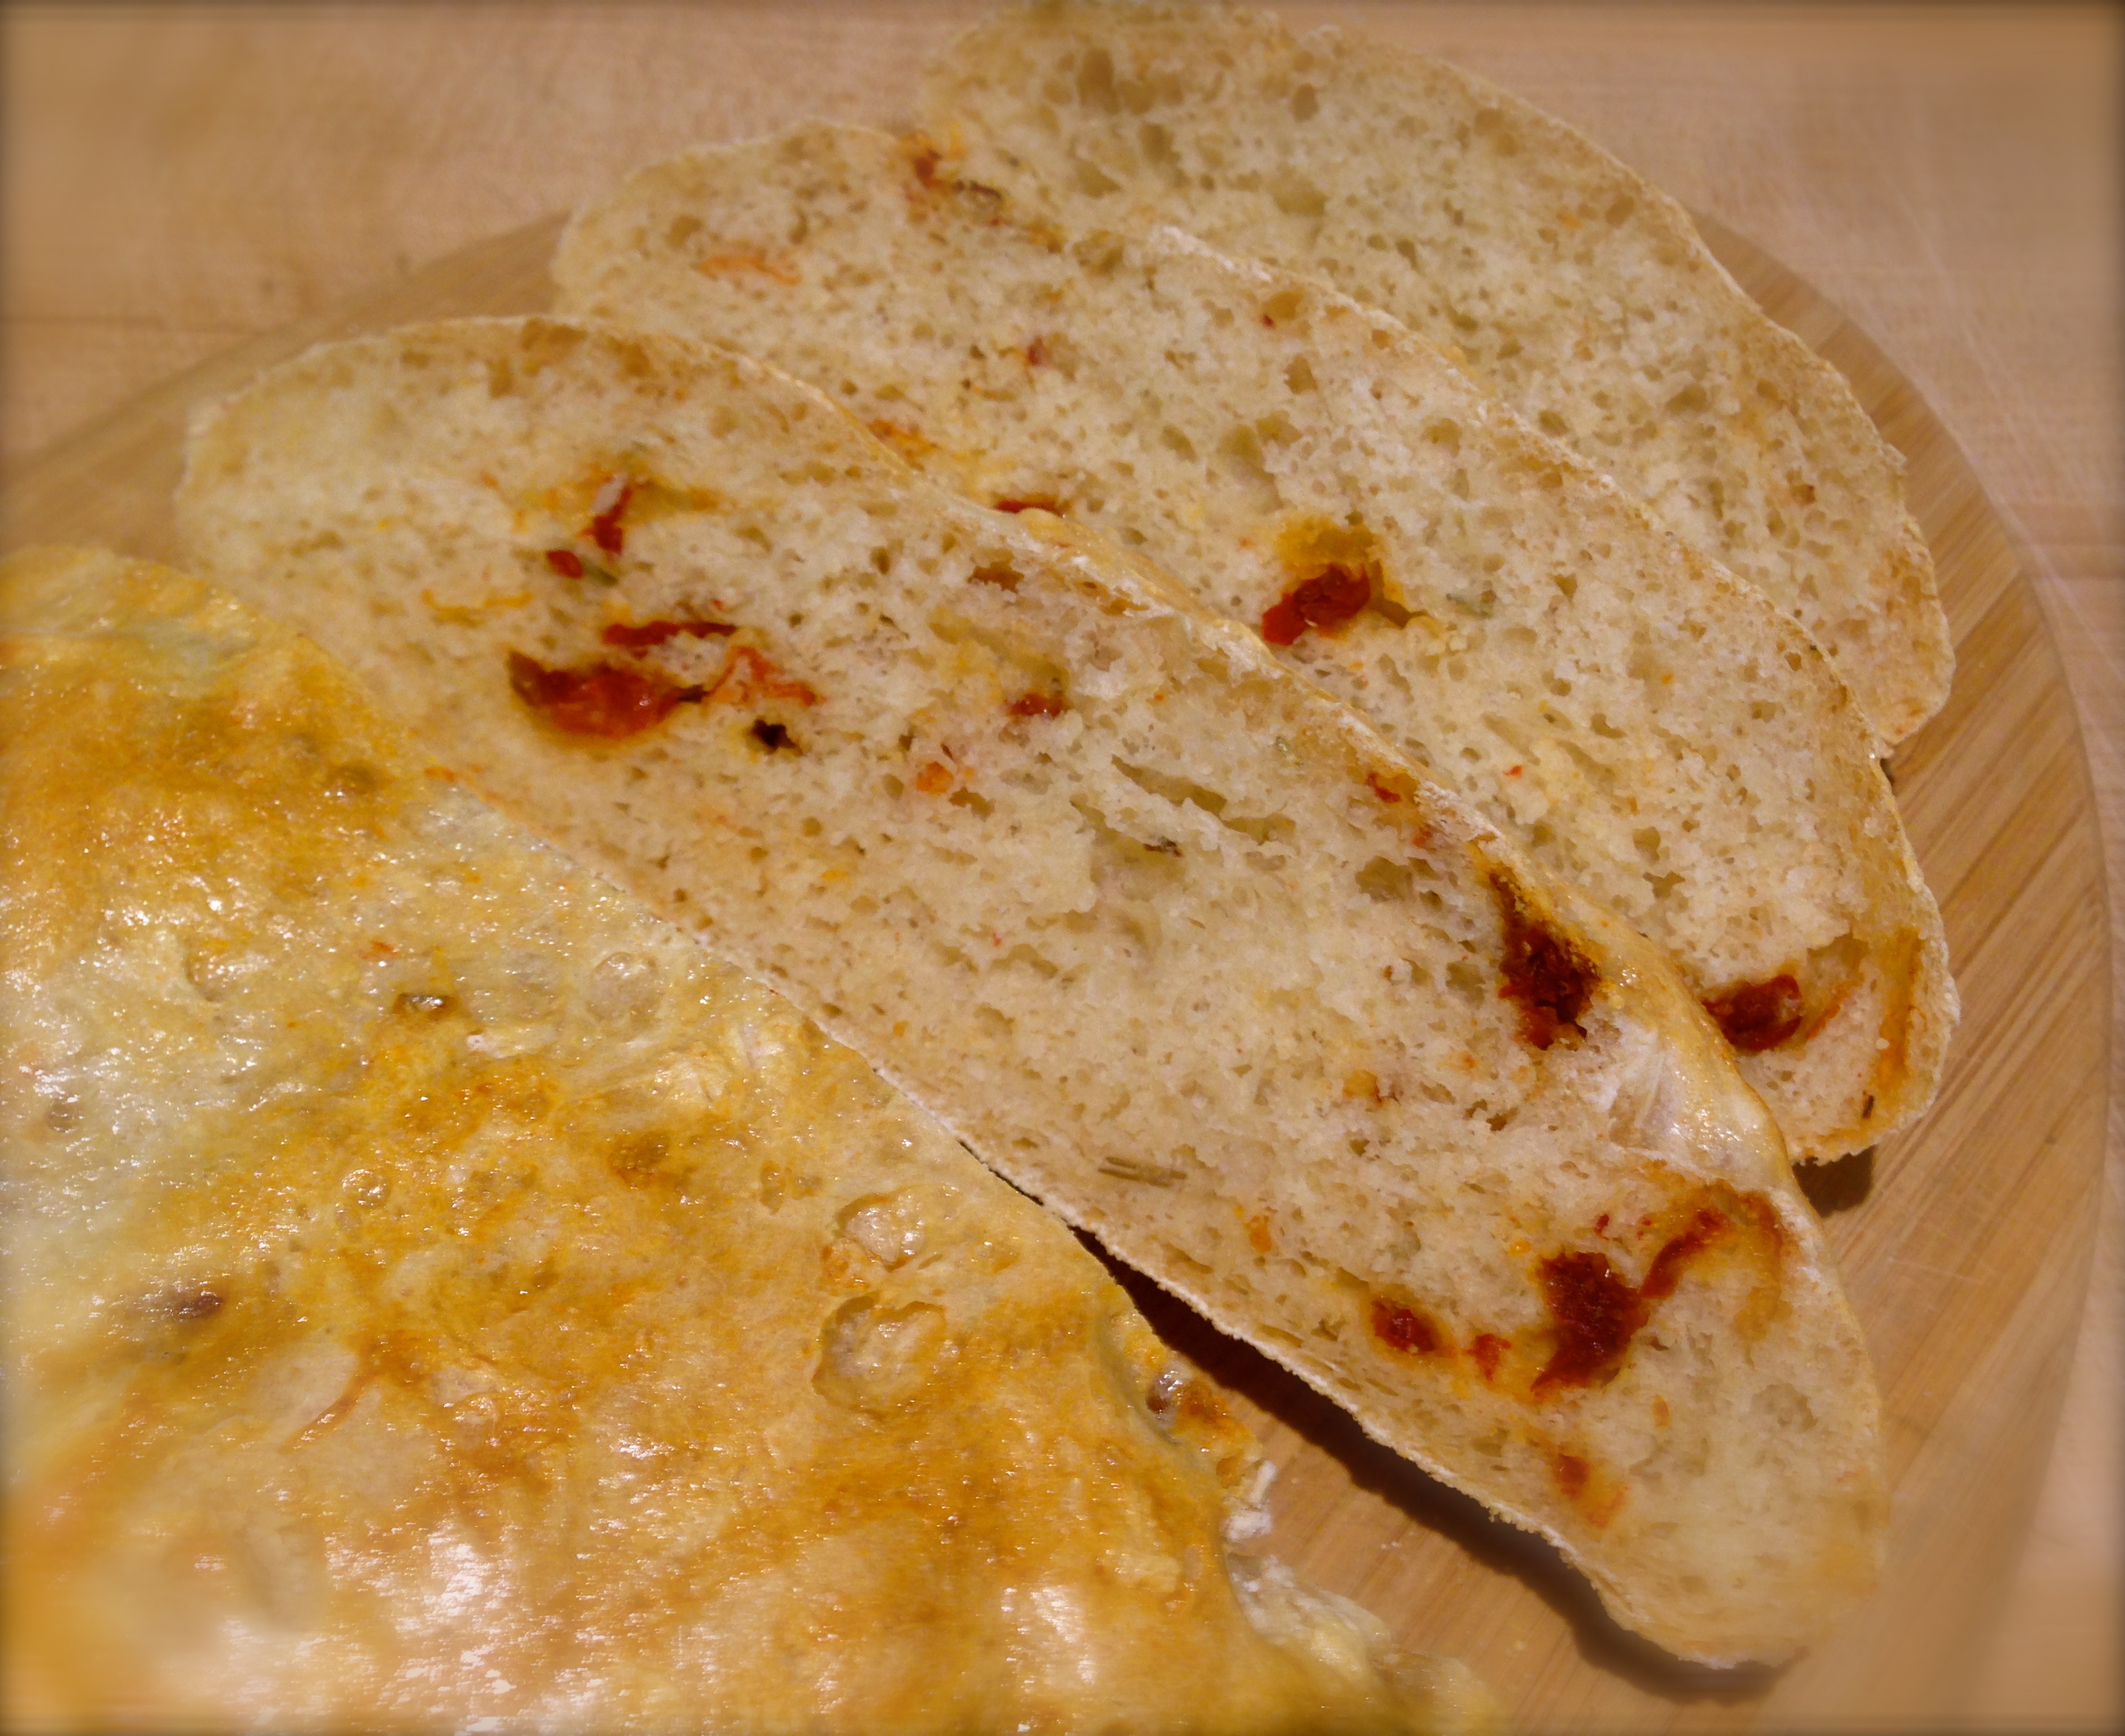
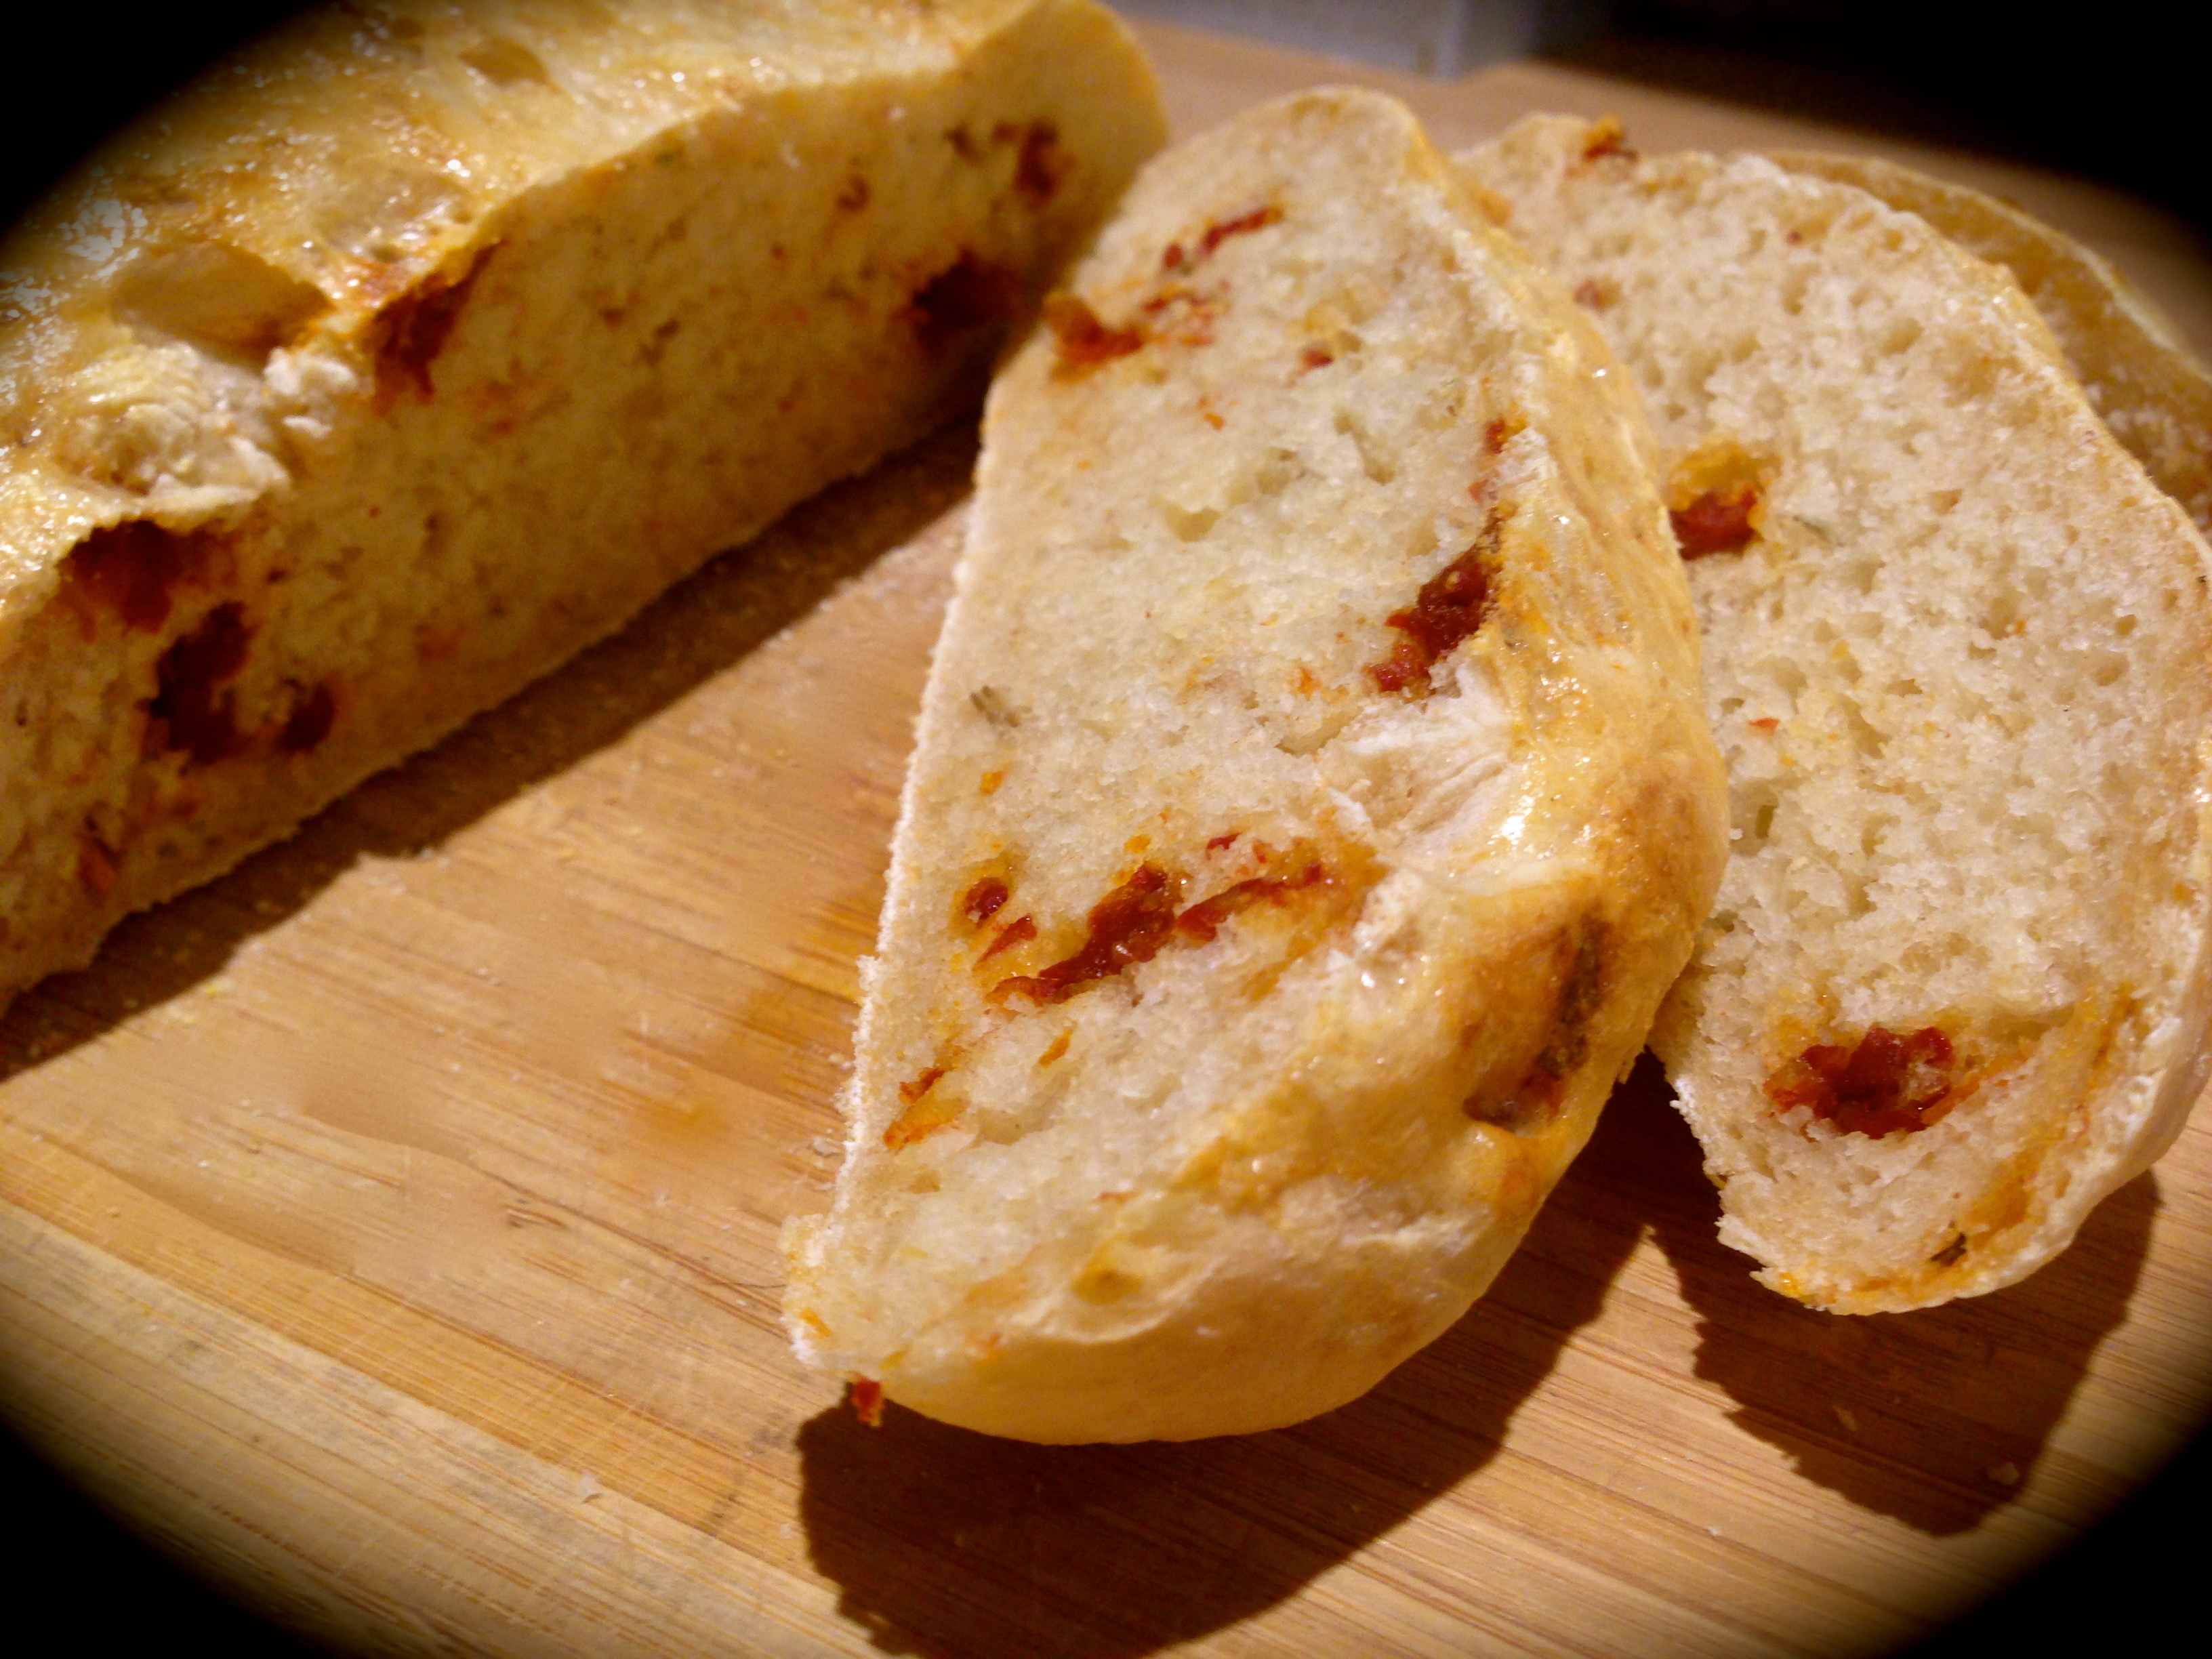
When I made the rosemary parmesan skillet bread I scored it in the center before I put it in the oven. It created a small crater in the middle of the bread as seen below. It didn’t hurt anything and the bread still turned out fine but I was looking for a more rounded look in the finished product.

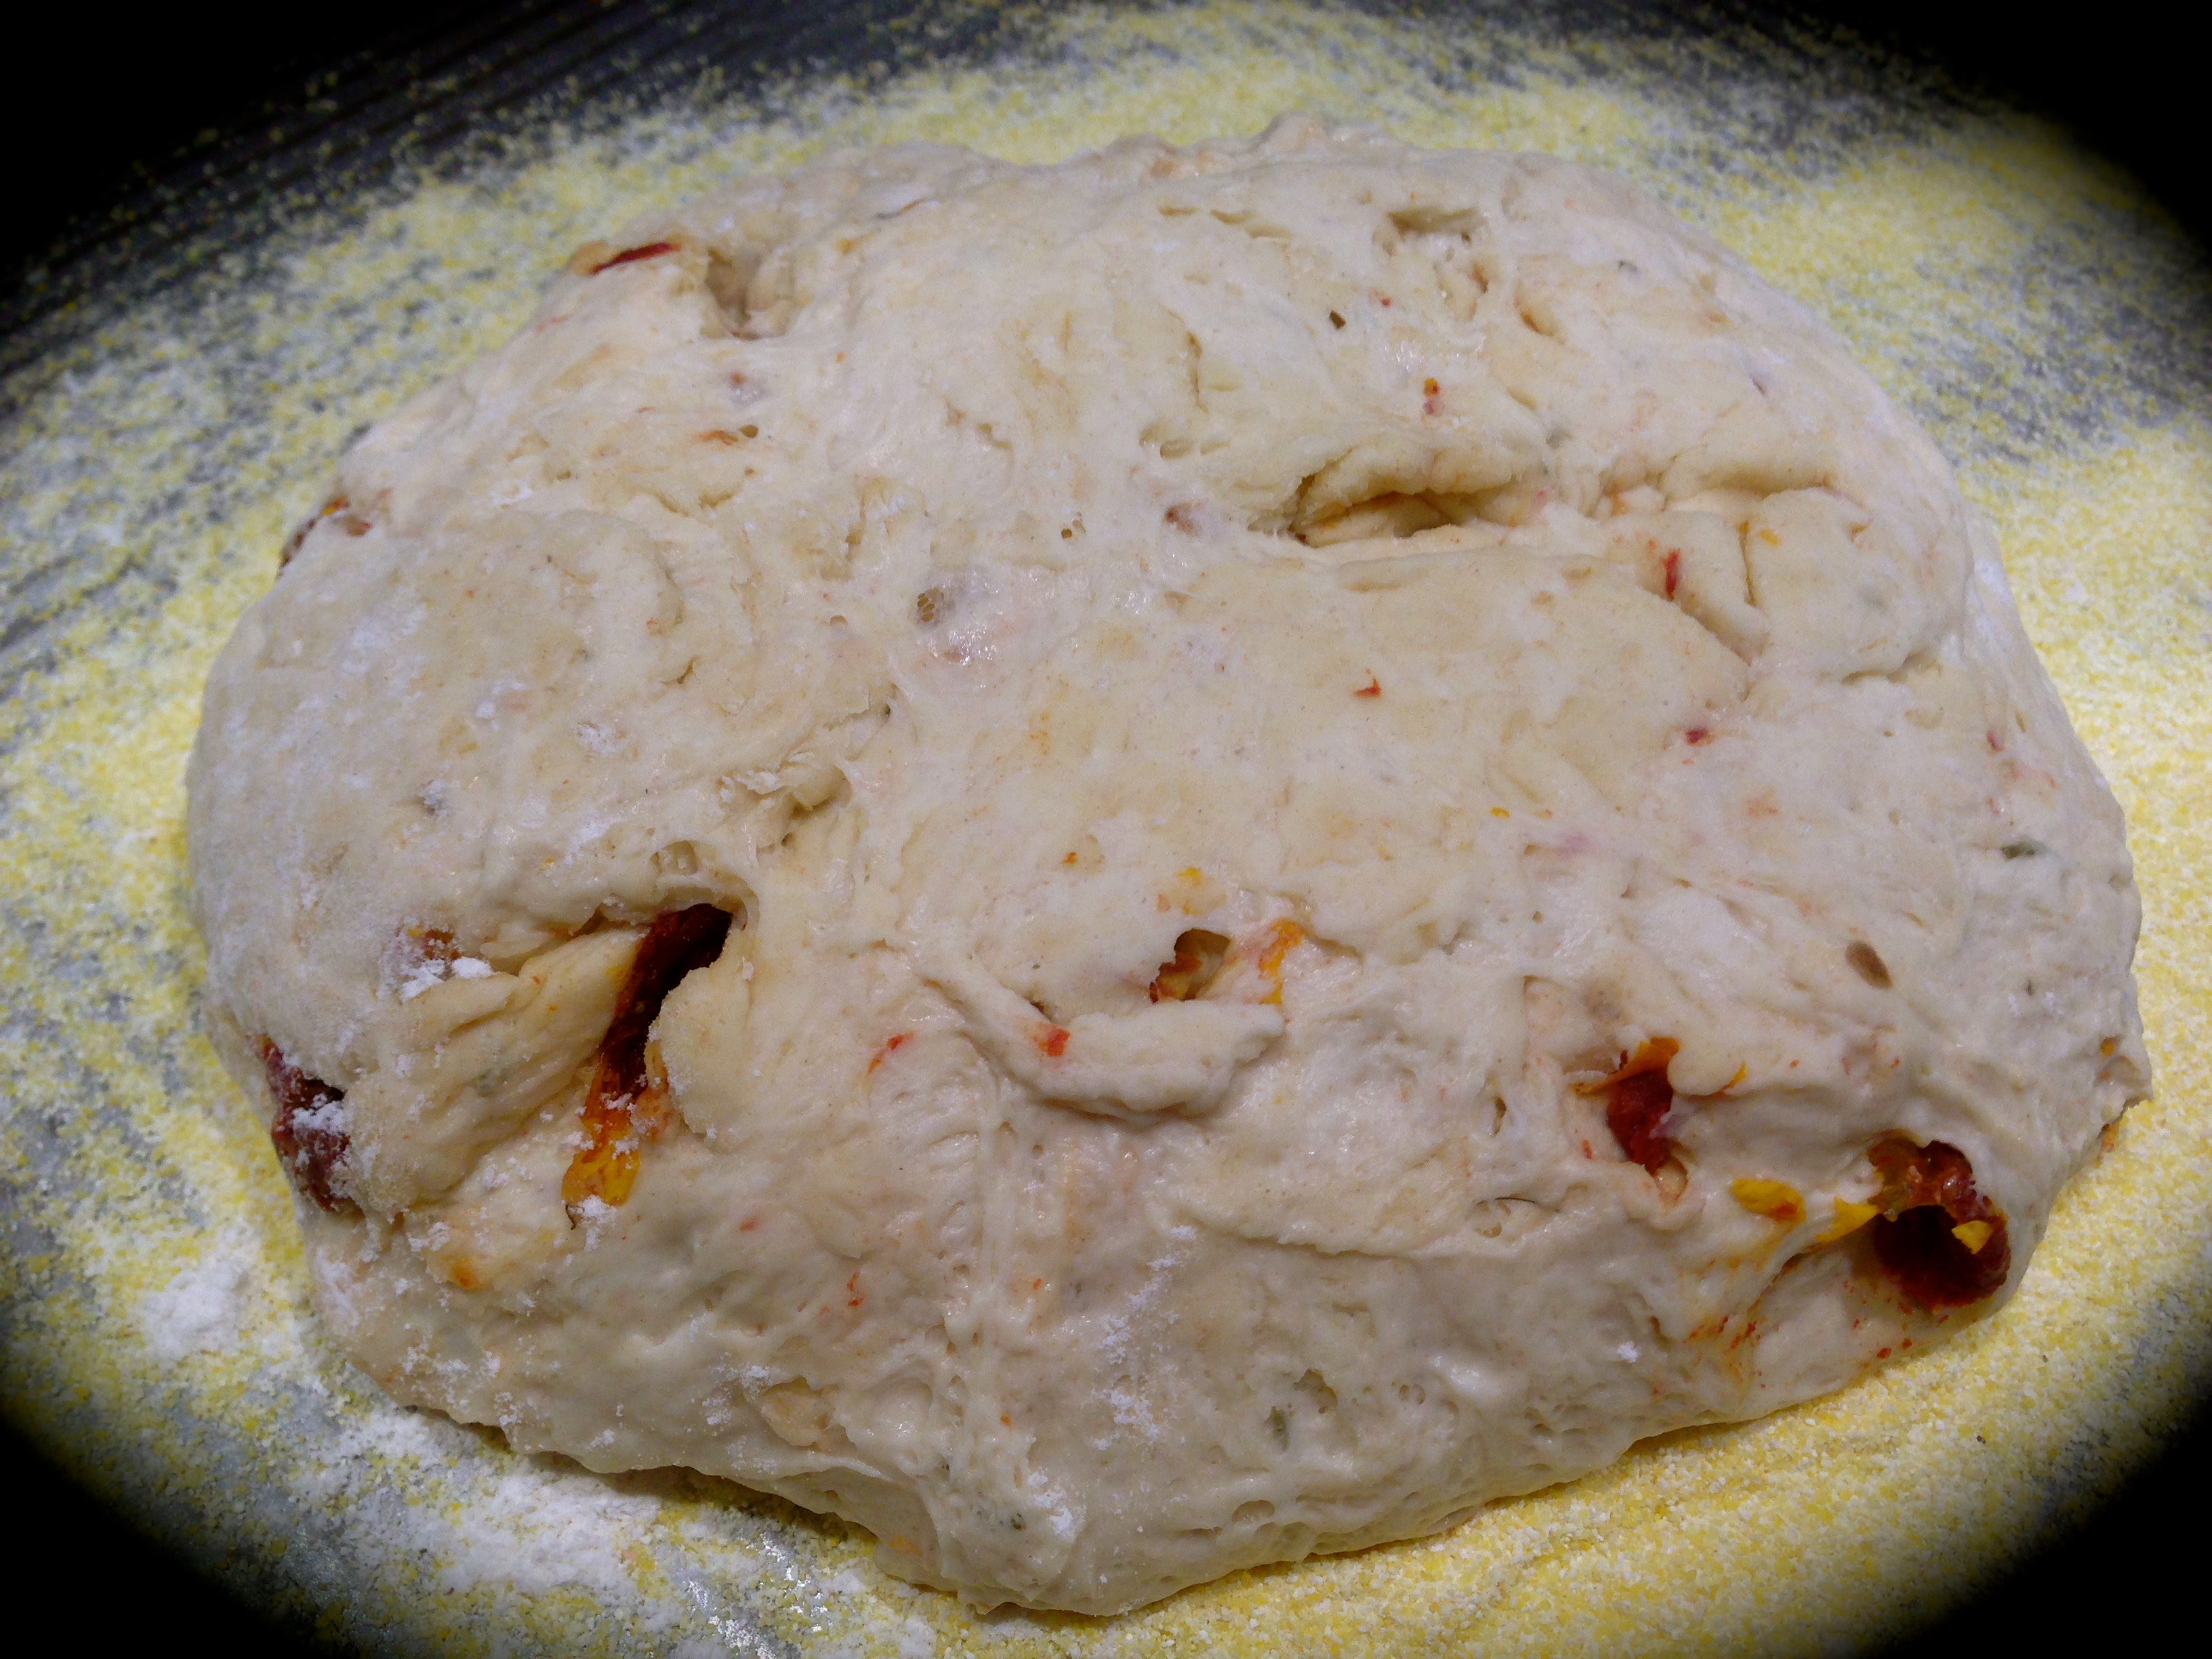
When I made the cranberry walnut bread I did not score it in the middle and got more of the rounded look I was wanting.

Lesson Learned 4 – The dough will be very sticky when you go to transfer it into the skillet: I’ve read many versions of how to make this type of bread and most recipes tell you to flour your hands and the dough to successfully transfer it to the skillet. I don’t find that works unless you use a lot of flour and I’m not a big fan of baking a lot of flour into my bread crust.
What I do is take a silicone spatula and work the dough to the edge of the bowl and then quickly move the spatula to get the dough into the skillet. The beauty of this type of bread is that it doesn’t need to look pristine. The more rustic looking the better. And after the dough rises for a half hour in the skillet, many of the imperfections have disappeared. So don’t angst over transferring the dough to the skillet. It’s really pretty simple if you use a silicone spatula.
I couldn’t believe how simple this was to make. The hardest part is letting the dough rise for an hour and a half – the rest is easy. And to me there is nothing like homemade bread. So try one or both of these recipes and let me know what you think…
Skillet Breads - Rosemary Parmesan or Cranberry Walnut...
INGREDIENTS:
BOTH BREADS:
1 package instant rapid rise yeast (2 1/4 tsp.)
2 cups warm water
4 1/2 cups all bread flour
1 1/2 tsp salt
Olive oil for the skillet
ROSEMARY PARMESAN BREAD ADDITIONAL INGREDIENTS:
3 Tbs. of chopped fresh rosemary, divided
1/4 cup grated parmesan cheese
CRANBERRY WALNUT BREAD ADDITIONAL INGREDIENTS:
1/2 cup dried cranberries
1/2 cup chopped walnuts
INSTRUCTIONS:
In a large mixing bowl combine the yeast and water. Add half the flour and mix together. Mix in the remaining flour along with either the rosemary or the cranberries and walnuts. If some of the flour is still dry add a little extra warm water until the dough is completely formed.
Cover the bowl securely with plastic wrap and let it rise until doubled in size, about an hour.
Brush some olive oil on the bottom and sides of a cast iron skillet using a silicone brush. Transfer the dough to the skillet and cover loosely with a kitchen towel. Let the dough rise for 30 minutes.
While the dough is rising, preheat the oven to 400 degrees.
After the dough has risen the second time put the skillet in the oven. If making the rosemary parmesan bread, sprinkle some chopped rosemary on the top of the bread before putting it in the oven. For rosemary parmesan bread, after 20 minutes remove the bread from the oven and sprinkle the top with the parmesan cheese. Let the bread bake an additional 20 minutes. For cranberry walnut bread, let the bread bake for 40 minutes straight.
Remove the bread from the oven. Using a spatula, transfer the bread from the skillet to a cooling rack. (This should be very easy but be careful because the skillet will be very hot). Slice and enjoy.
These breads can also be frozen. Cut them into two slice or more pieces. Cover securely with plastic wrap. Put pieces in a freezer bag. Close the bag while trying to eliminate as much air as possible from the bag. Your bread will stay fresh for one month.
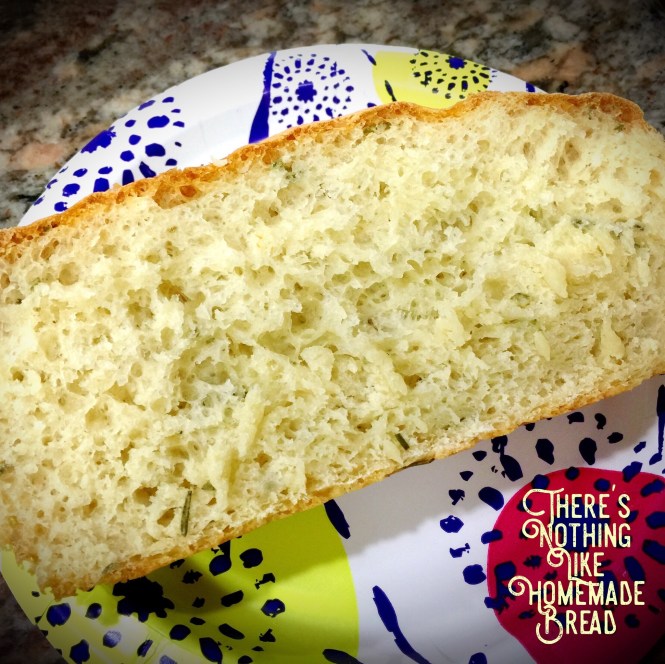
Rosemary Parmesan Skillet Bread