
Tomorrow I go to the doctor and I’m anticipating being released to drive, go back to my part-time job and in essence be unchained from my surgery mandated recuperative routine. That means a couple of things, namely less regular time baking and slightly greater intervals in between my blogs. I know, this breaks your heart, but I have to admit it’s been fun taking time to just “be” and pursue a passion of mine, perfecting my skills in the kitchen. But before the doctor’s verdict I thought I would go for one last hurrah in the form of an easy plum tart.
Once again I foraged through the boards on Pinterest in search of a recipe that was not only easy but also comprised of ingredients I already had in the house (driving by myself to the grocery store is still a no-no, and getting my husband to make daily trips is a little more difficult than it’s worth).
 After scrolling through at least 75 recipes I came upon one from the website makinghomebase.com called Easy Plum Tarte. I basically had all of the ingredients and probably the most time consuming part of the entire process was cutting up the plums and scooping out the pits. So once again I journeyed into the land of baking to see if I would have success making a plum tart. Lo and behold I did! I always love it when something comes out the way it’s supposed to the first time, it’s so affirming. And being the self-proclaimed Pinterest recipe critic that I am, I am including my rating of the recipe and lessons learned while making it.
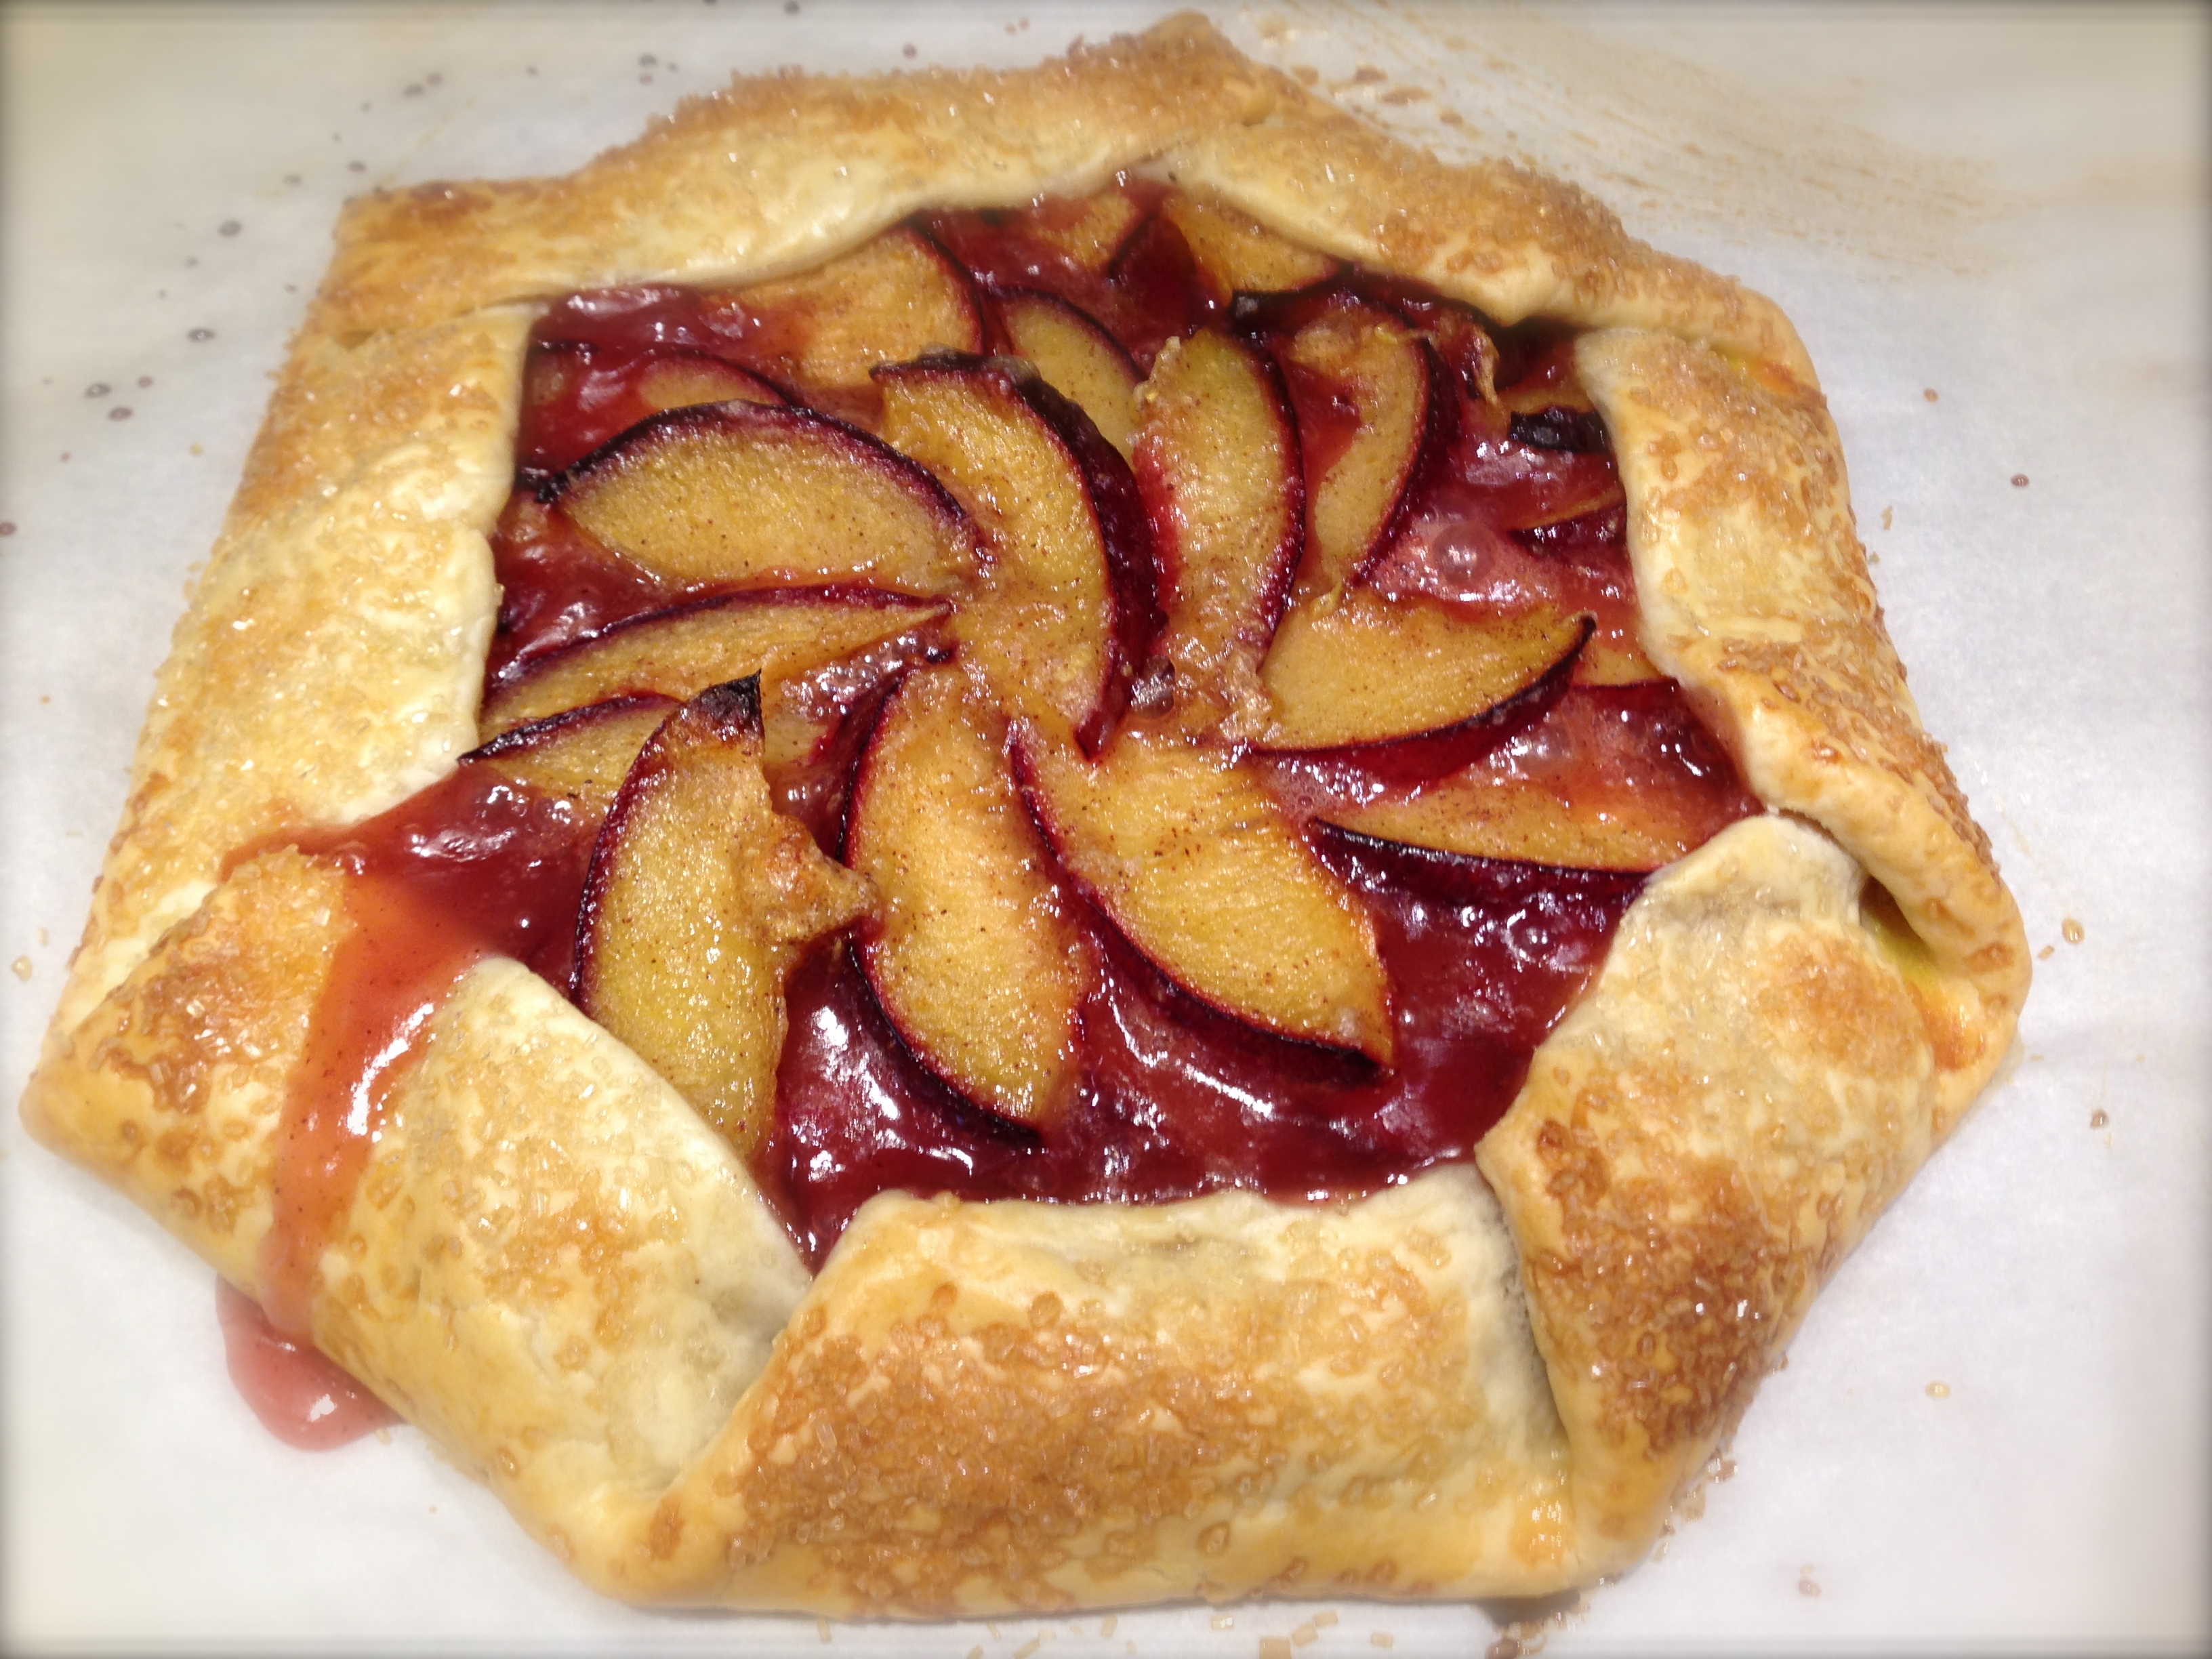
Rating: A – this recipe turned out exactly the way it was supposed to – the fruit was bubbly, the crust nice and browned and the taste was delicious – so quick and easy to make, perfect as a fresh baked dessert for a busy weeknight.
Lesson Learned 1: I’ve made tarts somewhat similar to this before but never put parchment paper on the baking sheet. Never again. The parchment paper makes it so easy to transfer the tart to a plate, why didn’t I think of this before?
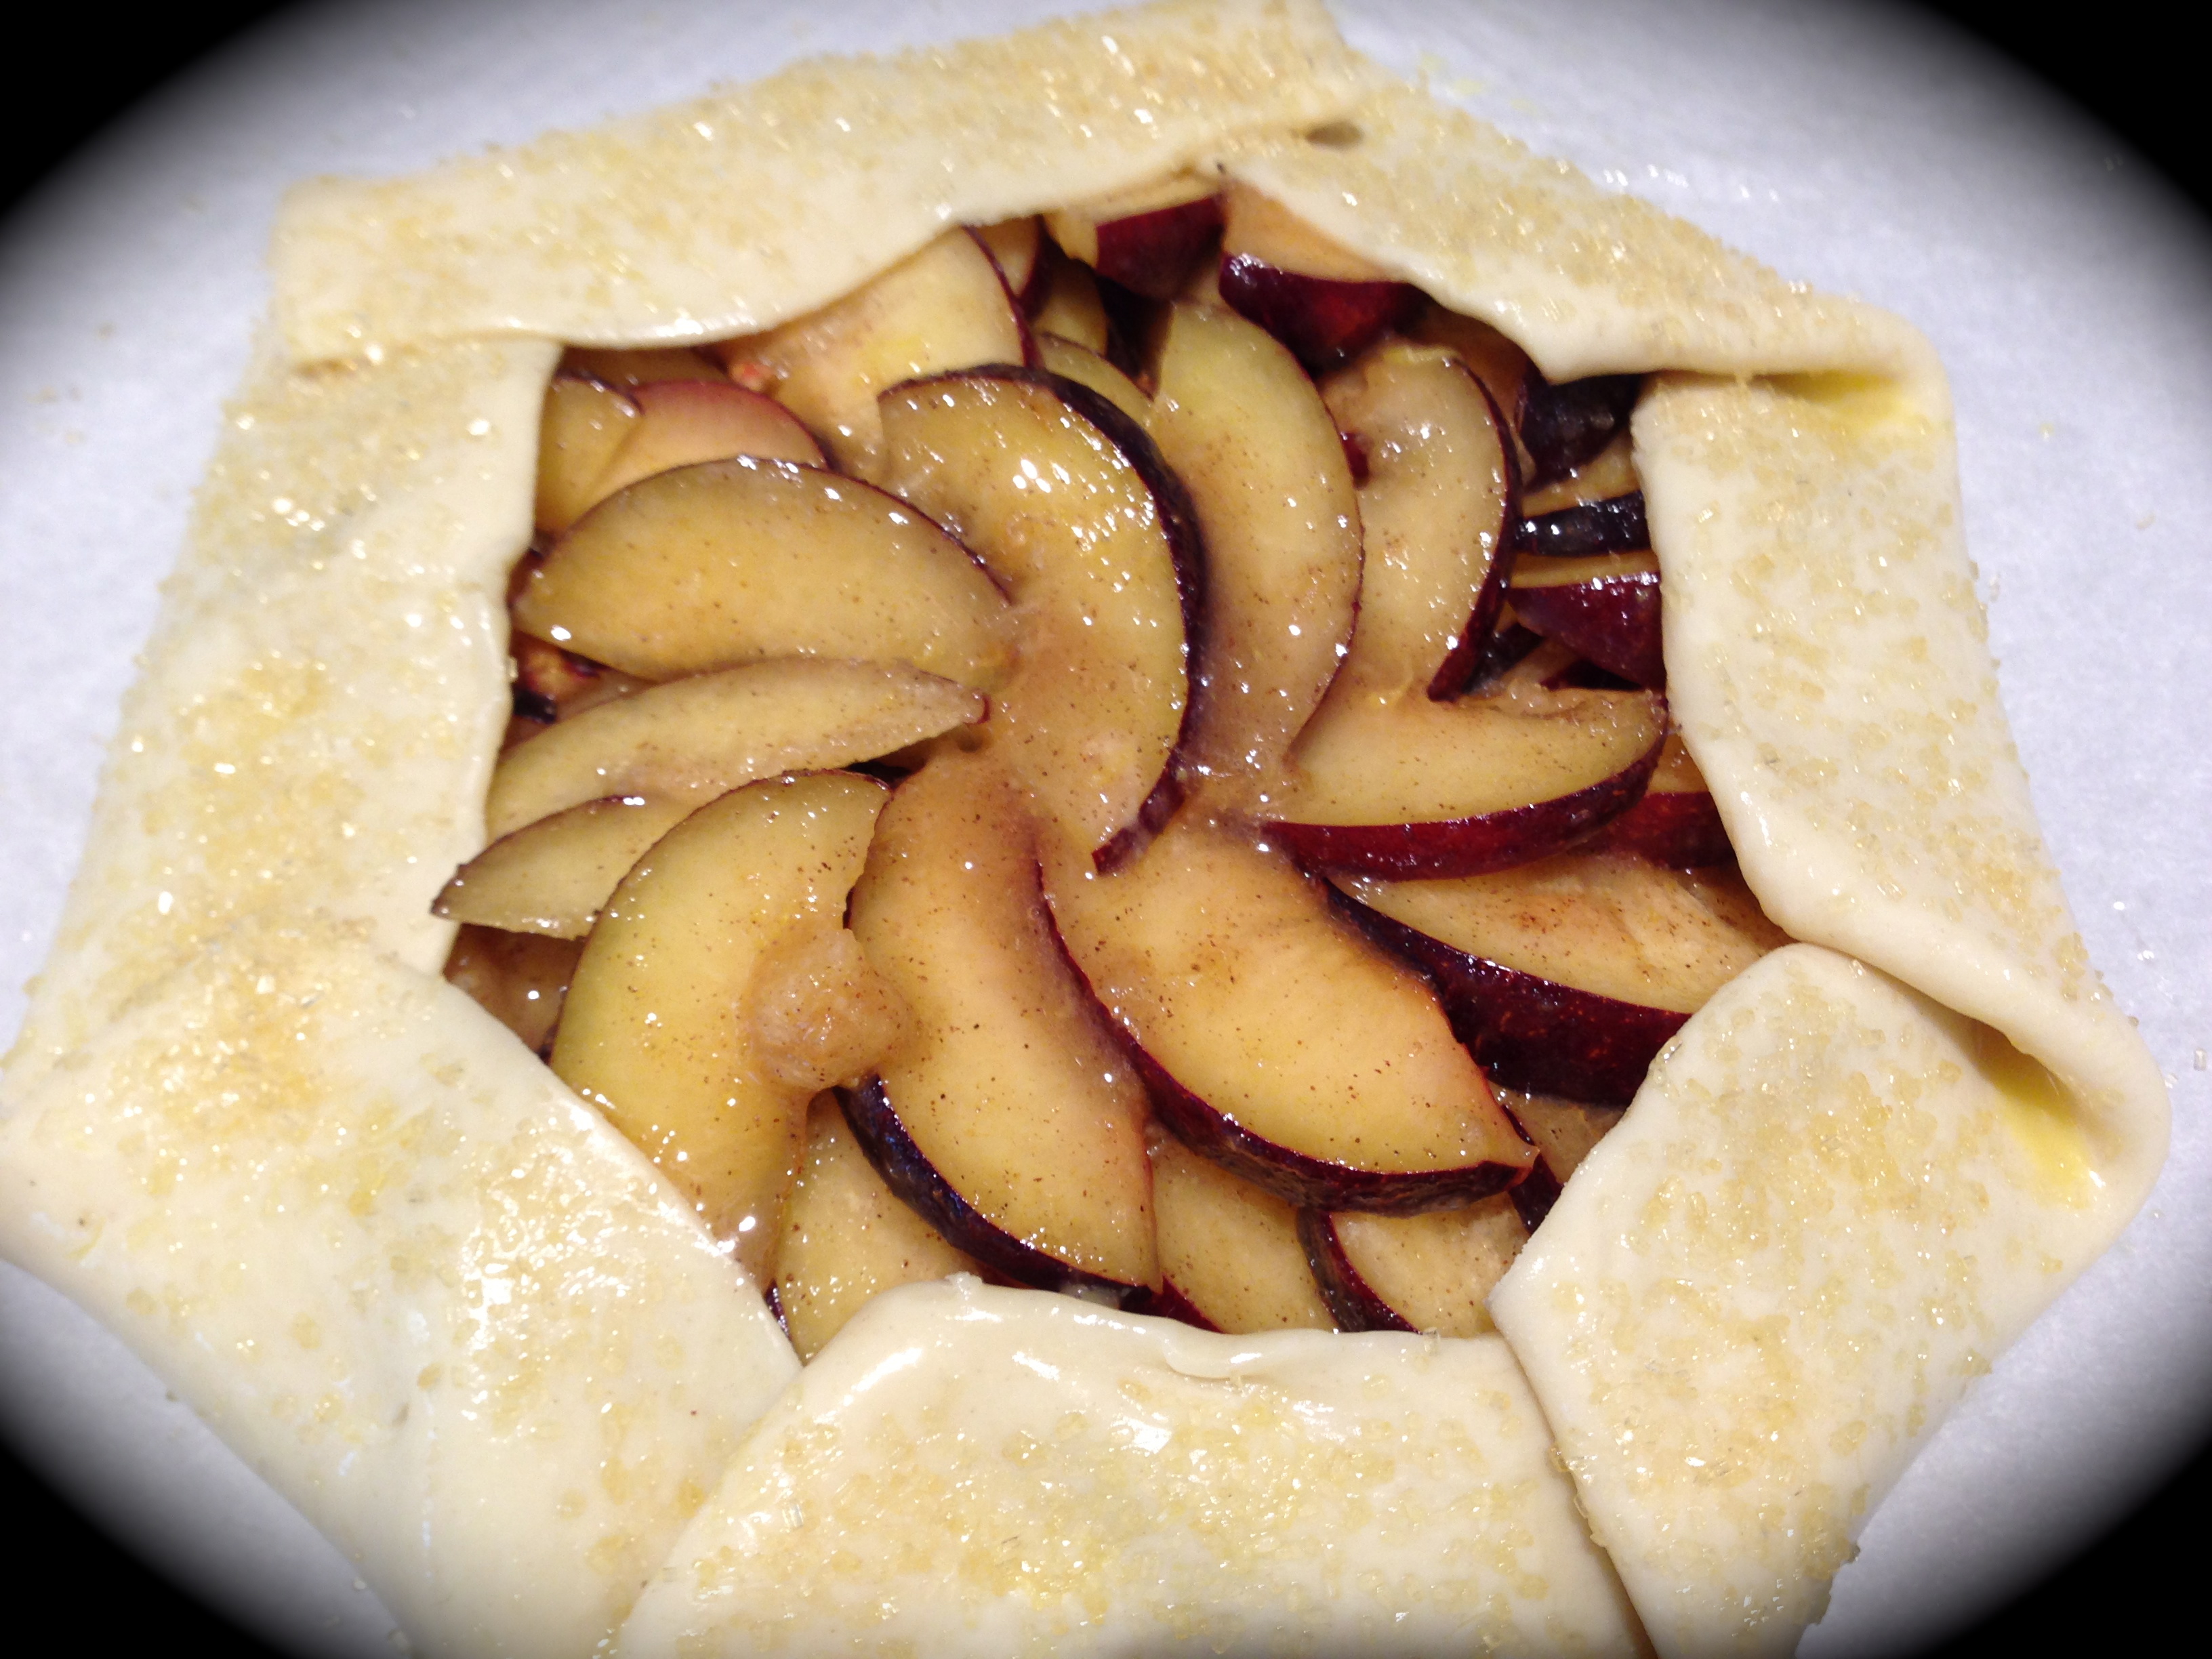
Ready To Go Into The Oven
Lesson Learned 2: The recipe called for almond extract. I didn’t have it (I really need to spend some time at the grocery store since I’m out of both almond and vanilla extract, that’s unheard of for me) so I substituted cinnamon extract. I also added a little bit of nutmeg as I did not want the flavor of the plums to be to “cinnamony” and it worked well.
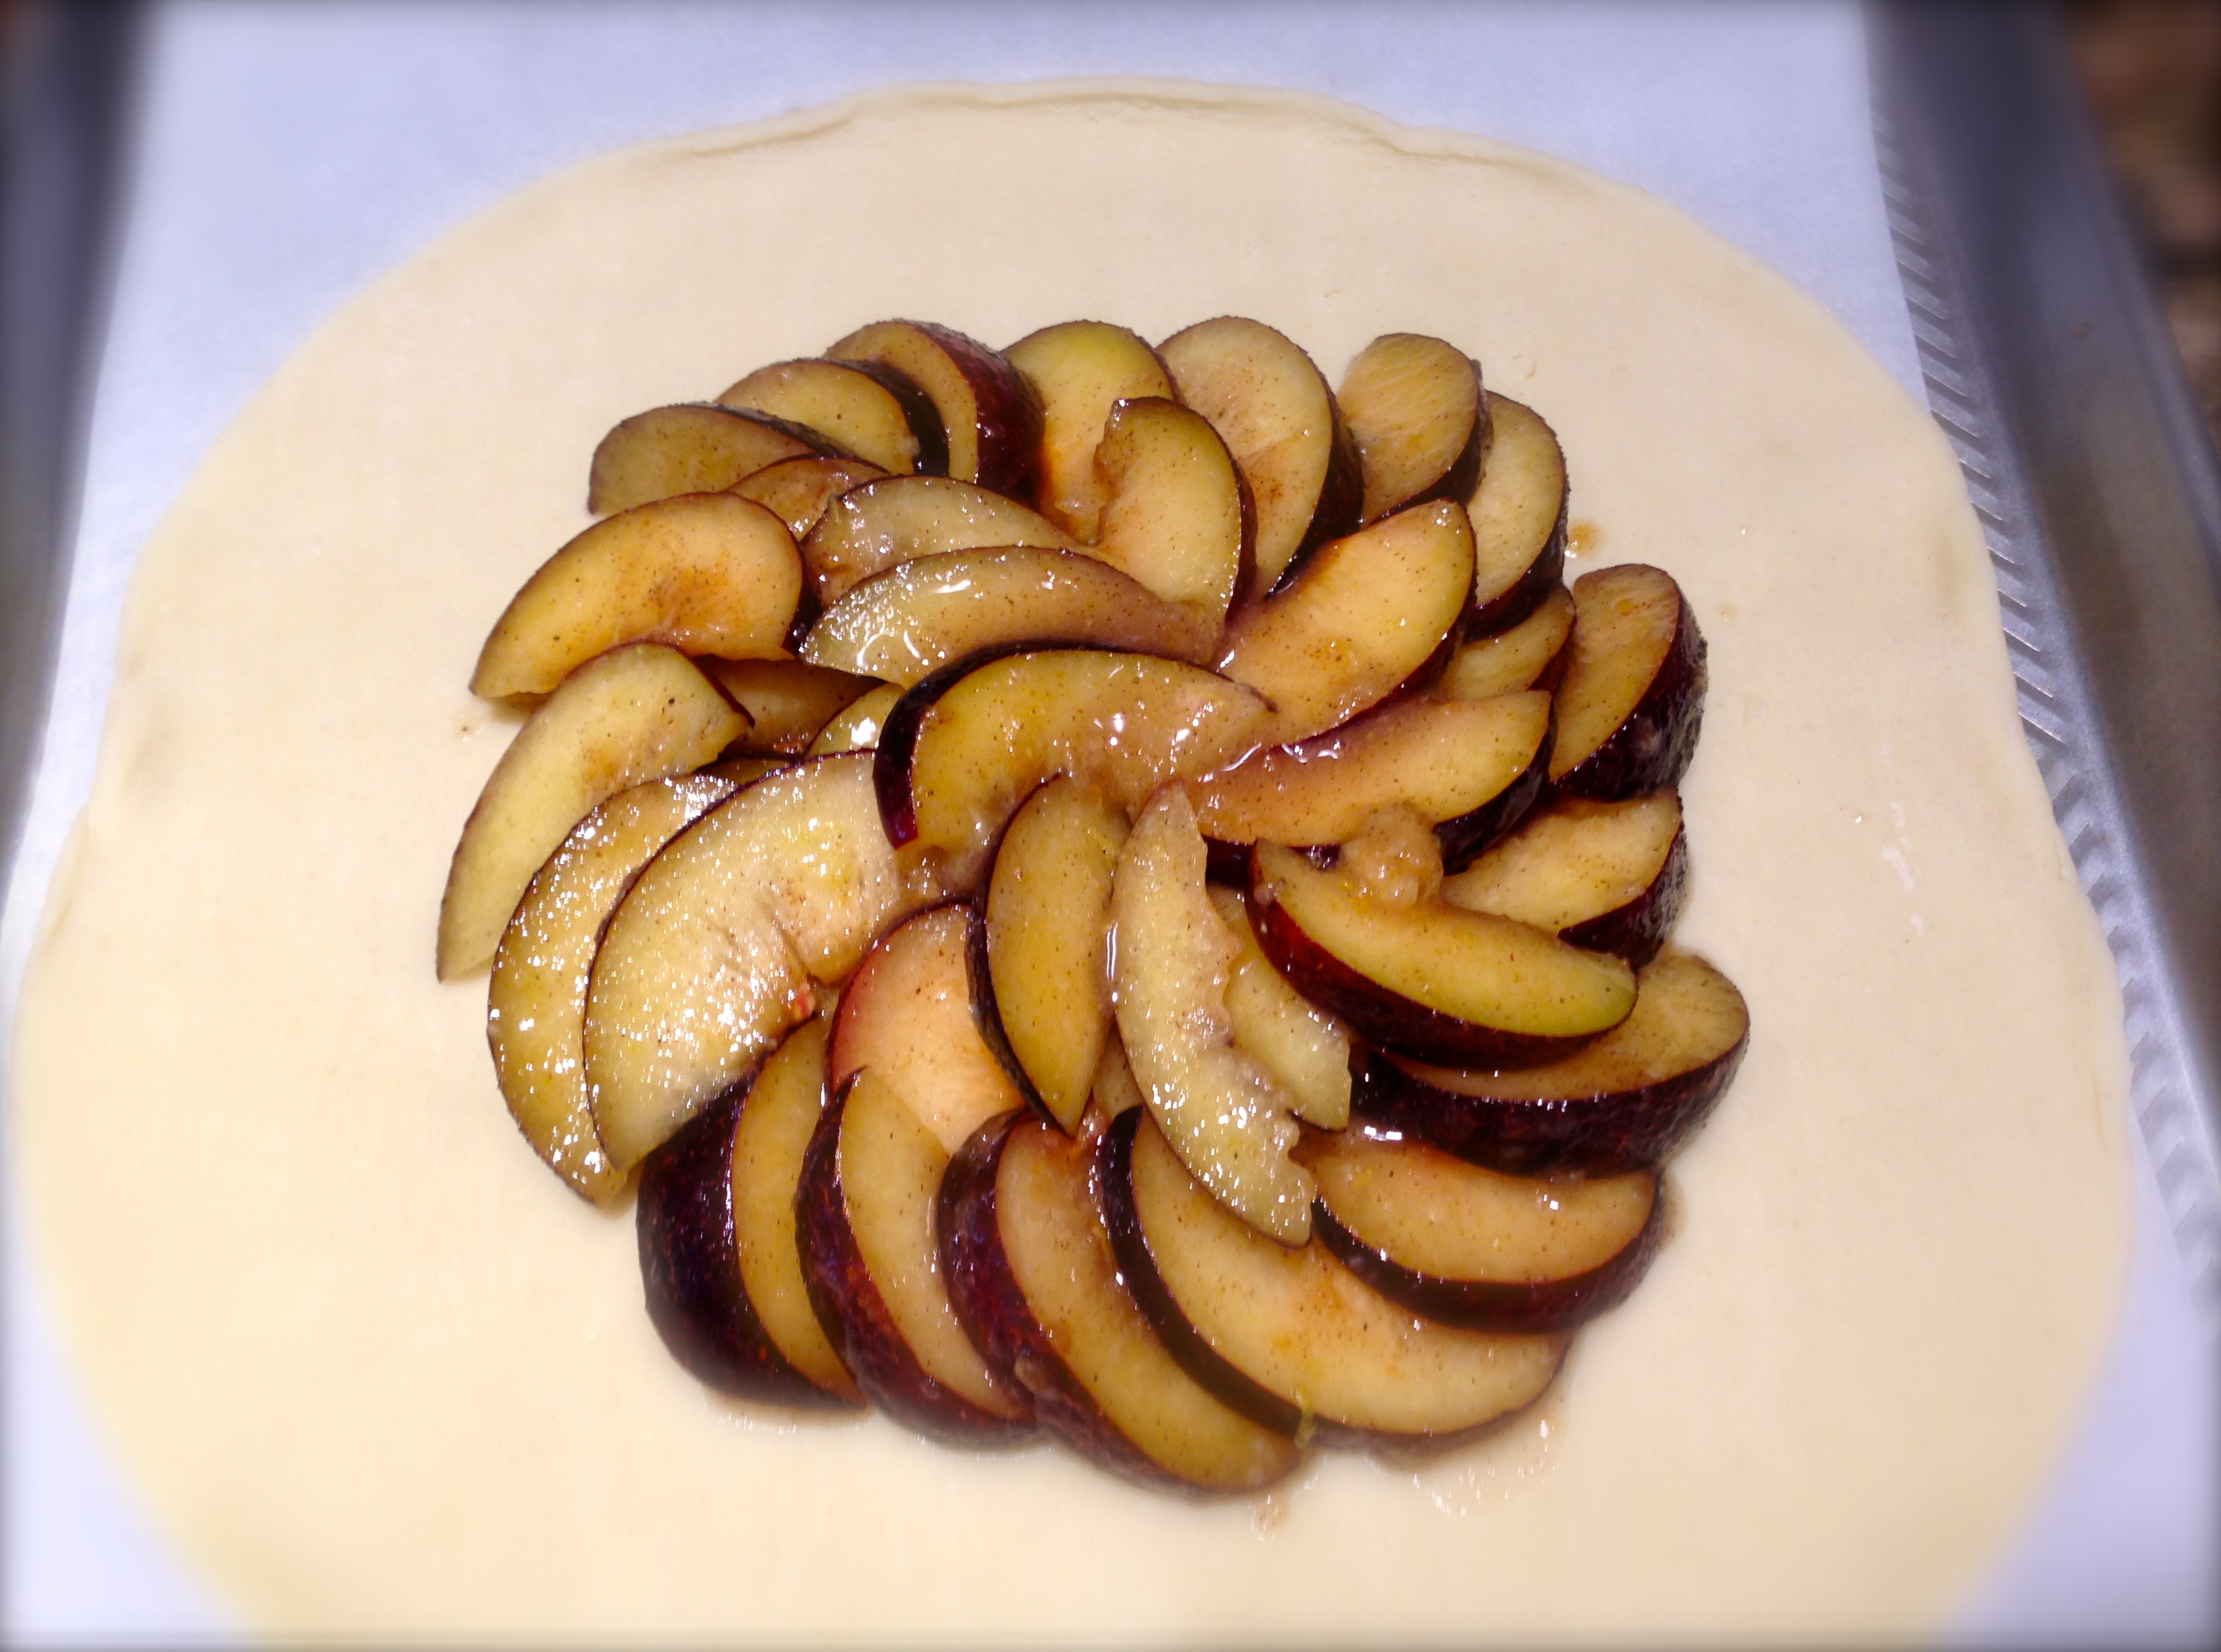
Lesson Learned 3. Take the time to arrange the fruit decoratively. In this case I made slices since the plums were big and I arranged them in a circular fashion. It looked good before and after it was baked. Remember you eat with your eyes first.
Lesson Learned 4: After brushing the pie crust dough with an egg wash I sprinkled it with some raw sugar. That gives the crust a little more of a professional look and adds some nice sweetness to the pie crust. The recipe did not call for that, but it’s a trick I learned a while back and it really adds to the flavor and appearance of the tart.
Lesson Learned 5: I always take 5 minutes off the recommended cooking time just to do a check-in. The recipe says to bake the tart for 40 minutes. I have a professional grade baking sheet and it tends to cook things a little faster so I checked the tart at 35 minutes and it was ready to come out of the oven. It helps to know your oven and to keep an eye on things. You can always keep it in longer but can’t go back once you’ve burned it.
Easy Plum Tarte
This one is definitely a keeper. I would make it right before dinner, let it cool slightly while you’re eating and then serve it warm with a scoop of ice cream on top. Yum! Enjoy!
Easy Plum Tarte
INGREDIENTS:
1 package store bought pie crust (I used Pillsbury)
8-10 plums (small to medium sized)
1/2 cup sugar
zest of one lemon
1 tsp. cinnamon
1 teaspoon almond extract
2 Tbs. flour
1 egg beaten with a tiny bit of water
raw sugar
DIRECTIONS:
Preheat the oven to 400 degrees. Slice and pit the plums and cut them into wedges. Toss the plums gently with the sugar, lemon zest, cinnamon, almond extract and flour.
Unroll a single pie crust on to a parchment paper lined baking sheet (the pie crust will unroll more easily if you let it sit on your counter for at least 30 minutes to an hour so that it gets close to room temperature). Arrange the wedges in a circular pattern starting from the outside and working your way to the center, leaving at least 2 inches of pie crust plain around the edges.
Fold the pie crust up and over the wedges all the way around. In a small bowl beat the egg with water. With a pastry brush, spread the egg wash all over the edges. Sprinkle raw sugar on the dough.
Bake for approximately 35- 40 minutes or until the fruit gets bubbly and the dough gets golden brown.
