Sour Cream Apple Bites…

I had a few apples lying around and I wanted to use them. This recipe is a great way to use “older” apples.  The bites come out so moist and tender you’ll be hard pressed to eat just one. You make this recipe in a 9 x 13  pan and that is way too much for me and my husband so I brought them to work the next day. I couldn’t believe how many compliments I got on them although my husband maintains you can put cardboard in a break room where you work and people will devour it. Part of me knows that’s true, but when people go out of their way to say how delicious it was you know you have something special.

Yes, something special, that’s how I would categorize this. And a great way to use apples that are not all that fresh anymore but still very good. So let’s talk sour cream apple bites…

Lesson Learned 1 – This is a pretty straightforward crumble-type recipe: The crust you make for the  base is the same crumble you put on top. This recipe gives you an ample amount for a nice crust and a substantive crumble. Use half of the mixture as the crust and the other half as the topping. Make sure you use all of it, don’t waste a bit.

Lesson Learned 2 – The food processor is your friend on this one: Make sure you use the food processor to shred the apples. If you’ve never used a food processor it’s worth your while to spend a little time familiarizing yourself with one and learning how to use it. It can be a great time saver. There are a plethora of videos on YouTube that can show you all you need to know about a food processor. Here is a handy little video about how to shred food using a food processor:

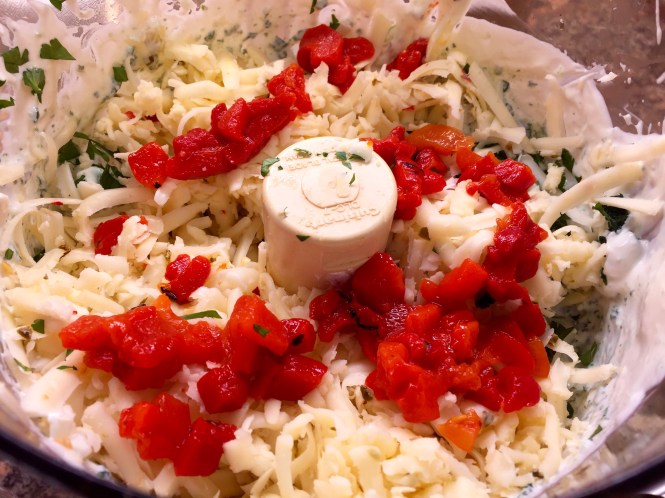
Remember when you shred the apples for this recipe, all you need do is cut out the core and seeds. You don’t need to peel them. I used gala apples for this recipe and you can see the little red fleck in the  shredded apples in the pictures below. You won’t even notice the peel when eating the bites and the red from the apples gives a nice little pop of color to the sour cream filling.

What I like about this recipe is not only is it insanely delicious but it also is simple to make. I guarantee you that when you make these bites they will disappear quickly. Enjoy this one!

Sour Cream Apple Bites...

  • Servings: Approximately 30 Bites
  • Difficulty: Easy
  • Print

INGREDIENTS:

Crust and Topping:

1 cup unsalted butter, room temperature

1 cup brown sugar, packed

2 cups quick cooking oats

1 cup flour

1 cup chopped walnuts

1 tsp. baking soda

1 1/2 tsp. cinnamon

1/4 tsp. allspice

Filling:

1 cup sour cream

3/4 cup sugar

2 Tbs. flour

1 large egg

2 medium apples shredded

DIRECTIONS:

Preheat oven to 350 degrees. Make the crust/topping first. Mix together butter and sugar until light and creamy. Add all of the remaining ingredients and mix well. Take half of the mixture and press it into the bottom of an ungreased 9 x 13 inch baking pan. Bake for 10 minutes or until the crust is a light golden brown.

While the crust is baking shred the apples in a food processor by removing the core and seeds but leaving on the skin. Combine all of the filling mixture ingredients together except the shredded apples until well blended. Fold in the shredded apples.

Pour the filling mixture over the crust (the crust can be still hot). Crumble the remaining crust/topping mixture over the filling and pat down lightly.

Bake for 40 minutes or until the top is golden brown and the center is set. Cool completely before cutting into bites. Store refrigerated.

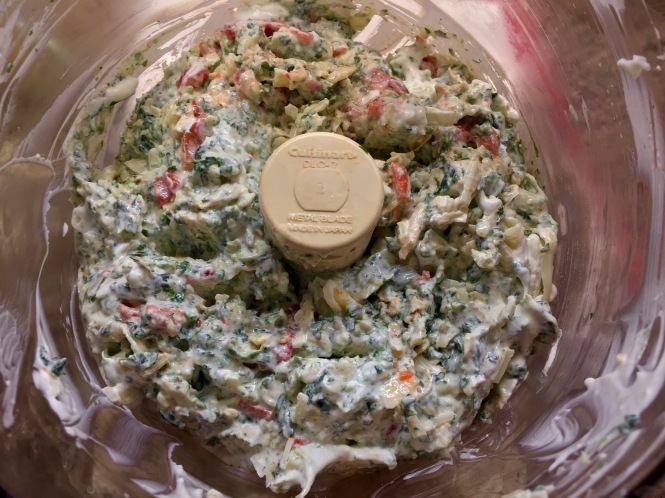
Sour Cream and Apple Mixture

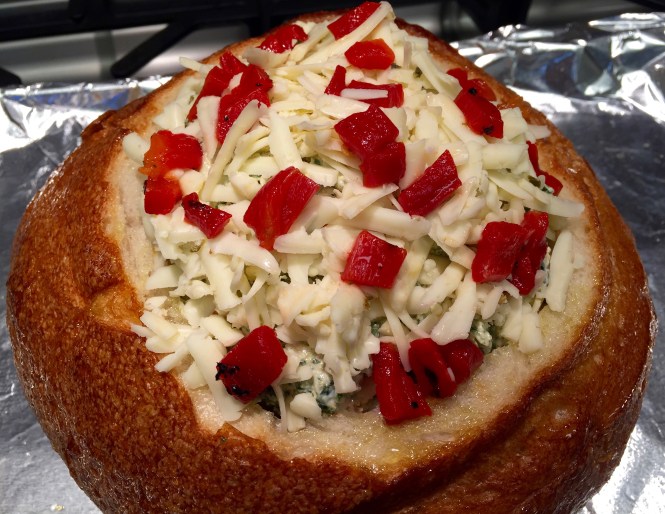
Ready To Go Into The Oven
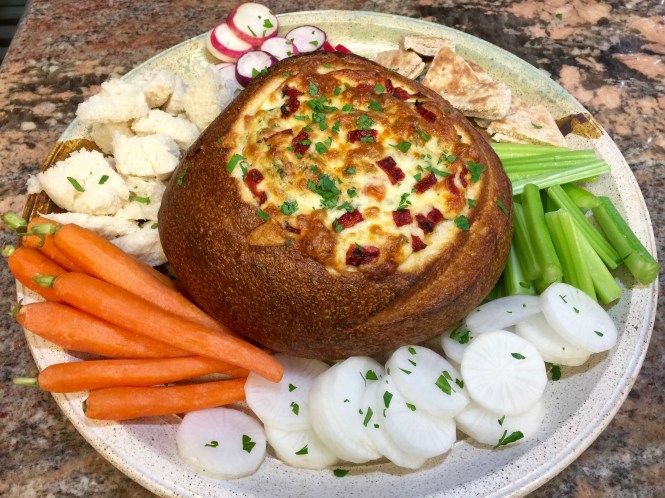
Out Of The Oven

Sour Cream Apple Bites


Slow Cooker Honey BBQ Pulled Chicken Sandwiches…

If you are looking for an easy, and I do mean easy, meal to prepare look no further. I served this meal a couple of times now and it always turns out perfectly and it’s always super delicious. I have to admit I was initially skeptical about how this would turn it, but it was absolutely fabulous. When you know you’re going to have a busy day and you still want to have a good meal at dinnertime, this recipe is the answer to that dilemma.

So let’s talk slow cooker honey bbq pulled chicken sandwiches…

Lesson Learned 1 – Try to use chicken breasts with the skin on: I normally buy chicken breasts with the skin on and rib portions attached. First they are cheaper when purchased that way and second it’s easy to remove the rib portion and you’re left with a skin-on breast. Chicken can dry out very easily in a slow cooker and often can get overcooked. With the skin on it gives the breast meat more moisture during the cooking process and that is what you’re looking for. But sometimes you just can’t find them that way and that’s ok as well. Both times I made this recipe I had skinless breasts in the freezer and so I used them. But in my experience with other recipes, skin on breasts are preferred when cooking them in a slow cooker.

It’s also important to season them as well. I seasoned mine with kosher salt, pepper and McCormick’s Perfect Pinch Rotisserie Chicken seasoning blend. I really like this blend as it gives the chicken a great rotisserie chicken flavor. Try it and I’m sure you’ll agree.

Lesson Learned 2 – Use a slow cooker liner for this recipe: The sugar and honey in the bbq sauce can cause a mess that is very hard to clean up if it burns into your ceramic crock. Personally I am not a fan of slow cooker liners but I use them for this recipe. If you use one, clean up is a breeze and you don’t wind up with burnt bbq sauce all over your crock.

Lesson Learned 3 – Don’t overcook the chicken: I know, easier said then done, but most people overcook chicken breasts no matter what cooking method they are using. Chicken breasts can be moist as well as cooked through but there is a fine line between when that occurs and dried out chicken.

My rule of thumb is I never cook half breasts (and the ones I used were quite large) for more than 6 hours on low in my slow cooker. A lot of recipes say to cook chicken between 6-8 hours. In my opinion a two hours difference in cooking times is huge. Whenever I’ve cooked chicken in a slow cooker for 8 hours it always turned out dry. But the other variable is your slow cooker. Not all slow cookers are created equal. Know your slow cooker and if for some reason you can cook chicken for 8 hours and it does not dry out that’s fine. But I bet if you cook it for only 6 hours you’ll get a much better result.

Lesson Learned 4 – You can cook a veggie with the chicken if you want to: The first time I made this recipe I only cooked the chicken in the bbq sauce mixture. The second time I added carrots. When it came time to shred the meat I just pulled out the carrots, put them on a baking sheet lined with foil and sprayed with cooking spray and kept them in a warm oven until dinner was served. Make sure you use cooking spray on the foil as the remnants of the bb sauce on the carrots will stick to the foil and you don’t want the carrots sticking. Also make sure you don’t use overly thick carrots – they won’t cook through in six hours.

Lesson Learned 5 – Serve the chicken on good sandwich rolls: The sandwich rolls are also important. I served my chicken on brioche buns. I found them at Whole Foods and I have to admit they were a little pricey, $4.99 for six rolls, but boy were they worth it. They were just the perfect compliment to the bbq chicken. I’m not saying you need to invest that much in dinner rolls, but make sure they are fresh and soft. It makes a difference. I served the sandwiches with cole slaw and sliced tomatoes and the meal was a hit!

An easier, more delicious recipe you’d be hard pressed to find. Try it and let me know what you think…

Slow Cooker Honey BBQ Pulled Chicken Sandwiches...

  • Servings: 6
  • Difficulty: Easy
  • Print

INGREDIENTS:

3 large chicken breasts, skin on preferred

1 18-ounce bottle of bbq sauce (I used Sweet Baby Ray’s)

1/2 cup Italian salad dressing

1/4 cup brown sugar

2 Tbs. Worcestershire sauce

1-2 Tbs. Perfect Pinch Rotisserie Chicken seasoning

2-3 large carrots, peeled and cut into 2 inch logs (optional)

Salt and Pepper to taste

DIRECTIONS:

Line the slow cooker with a slow cooker liner. Place chicken in slow cooker. (Place veggies in with the chicken). Season with salt, pepper and rotisserie chicken seasoning.

In a separate bowl combine bbq sauce, Italian dressing, brown sugar and Worcestershire sauce. Pour over chicken. Place lid back on top of the slow cooker.

Cook on low for 6 hours. If cooking veggies, remove them onto a foil lined baking sheet sprayed with cooking spray. Keep in a warm oven until serving.

Remove chicken, take off any skin and shred the breasts using two forks. Place shredded chicken back in the slow cooker and cook on high for 15 minutes to 1/2 hour. Serve on dinner rolls.

Spinach Artichoke Red Pepper Dip…

Let’s face it. Once the football season is over there is definitely a sports vacuum. Major league baseball is just starting to tune up at spring training, college basketball still has over a month before the NCAA tournament, the next major in tennis is not until May, and everything else just seems to be a bunch of noise. And during this time I think back to some of the major highlights of recent sporting events. In my mind, nothing can surpass what the Chicago Cubs did last year but this past Super Bowl was no slouch of a game either. Then I started thinking about my Super Bowl party this past year and what I served and I thought, wow, I never posted this recipe!

This recipe was so much fun. I wanted what I served to be easy and fun and allow me to spend time with my guests and not in the kitchen. I decided to serve this dip along with a hot crab dip for appetizers. Dinner consisted of slow cooker bbq pulled chicken sandwiches with cole slaw  and sliced tomatoes. The meal was a hit and this appetizer was the star of the show!

So let’s talk spinach artichoke red pepper dip…

Lesson Learned 1 – If you want to impress your guests, make this appetizer: This recipe couldn’t be any easier and boy does it impress. You basically combine the ingredients in stages in the food processor, put it in the carved-out bread bowl, bake it and the oven does all the rest. I was amazed at how great it looks and above and beyond that, it is absolutely delicious. It is a fabulous appetizer to serve at any party!

Lesson Learned 2 – Take your time when carving out the bread bowl: I used an artisan sour dough bread that I bought at the grocery store. You start out by cutting the opening on top of the bread. Make it large enough so you can stuff the bread but not too large that you cut off a lot of the bread. Then take a paring knife and begin cutting out the inside and under the sides. Take your time so that you don’t cut to close to the crust on any side. You want at least about 1 inch of bread at the bottom. You can do a little less than that on the sides. And make sure you save what you cut out. You can cut that into cubes and serve it as one of the sides with the warm dip. Yum!

Carved Out Bread Bowl

Carved Out Bread Bowl

Lesson Learned 3 – Combine your ingredients in stages in the food processor: Your food processor will be your best friend for this recipe. But don’t mix everything all at the same time. Some ingredients you will want mixed until smooth, other ingredients you will want chunky. Follow the process in the recipe and you will get the correct consistency for this dip.

The correct consistency for the dip

The correct consistency for the dip

Lesson Learned 3 – Garnish is your best kept secret: Are you always looking for ways to make your dish look more professional? Well look no further. Let garnish be your best friend. This appetizer baked in a bread bowl is pretty impressive on its own but what set the presentation over the top was cutting up some flat leaf parsley and garnishing the bread bowl and the accompaniments with the parsley once they were on the platter. You could also dice up some jalapeños and sprinkle them on top of the dip. Since I actually included them in the dip I chose not to use them as a garnish this time. But diced jalapeños are also an option. Garnish tends to make the colors in your food pop and in general makes every dish look more professional. So don’t forget the garnish.

Lesson Learned 4 – Did you ever hear of a Daikon? When looking at things I could serve with this dip, one recipe that I saw suggested daikon. I had never heard of daikon before. I googled it and found out that is part of the radish family. I’d never seen it at the store and so I thought if any store would have it, Whole Foods would. Well I was right. Whole Foods had it. Daikon sort of looks somewhat like a white carrot but they are not parsnips. Anyhow, they are a great side for this dip. Just cut them in rounds like you would a radish. And after I found them at Whole Foods I also found them at my local supermarket, so just look for them and try them.

Make this appetizer for your next party. I guarantee you it will be a hit! Enjoy.

Spinach Artichoke Red Pepper Dip...

  • Servings: 20-30
  • Difficulty: Easy
  • Print

INGREDIENTS:

Spinach Artichoke Red Pepper Dip1 large round sourdough bread

4 ounces cream cheese, room temperature

1/2 cup mayonnaise

1/2 cup sour cream

1 small jalapeño, seeded and chopped

1 clove garlic, chopped

1 10 ounce box of frozen spinach, thawed and squeezed dry in a towel

1 cup marinated artichokes, rinsed and drained

1/4 cup + 2 Tb. chopped Italian parsley

1/2 cup roasted red pepper, chopped and divided

1 1/2 cups pepper jack cheese, divided

Salt and pepper to taste

Garlic infused olive oil for brushing the bread

Crackers, baby carrots, red radishes, daikon, celery and bread cubes, for serving

DIRECTIONS:

Preheat the oven to 400 degrees. Cut a thin slice from the top of the bread. With a paring knife cut out the exposed inside to about 1 inch from the bottom and at least 1/2 inch from the sides. Cut the extracted bread into cubes and use for serving later.

Combine the cream cheese, mayo, sour cream, chopped jalapeños and garlic in the food processor and process until smooth. Add the spinach and artichokes and pulse until chunky. Add the parsley, all but 1 Tbs. of the red pepper, 1 1/4 cup cheese and salt and pepper and pulse until just combined.

Spoon the mixture into the bread bowl. Top with the remaining cheese and red pepper. Place the bread on a baking sheet. Brush the bread with olive oil. Bake 25-30 minutes.

Serve with crackers, veggies and crudités. Garnish with chopped flat leaf parsley.

Pulse for a chunky consistency

Pulse for a chunky consistency

Correct consistency of the dip

The correct consistency of the dip

Fill the bread bowl

Spoon into the bread bowl. Brush the bread with olive oil.

Garnish with cheese and red pepper

Add more cheese and roasted red pepper on top

Spinach Artichoke Red Pepper Dip

Serving Suggestion