Cinnamon Roasted Butternut Squash…

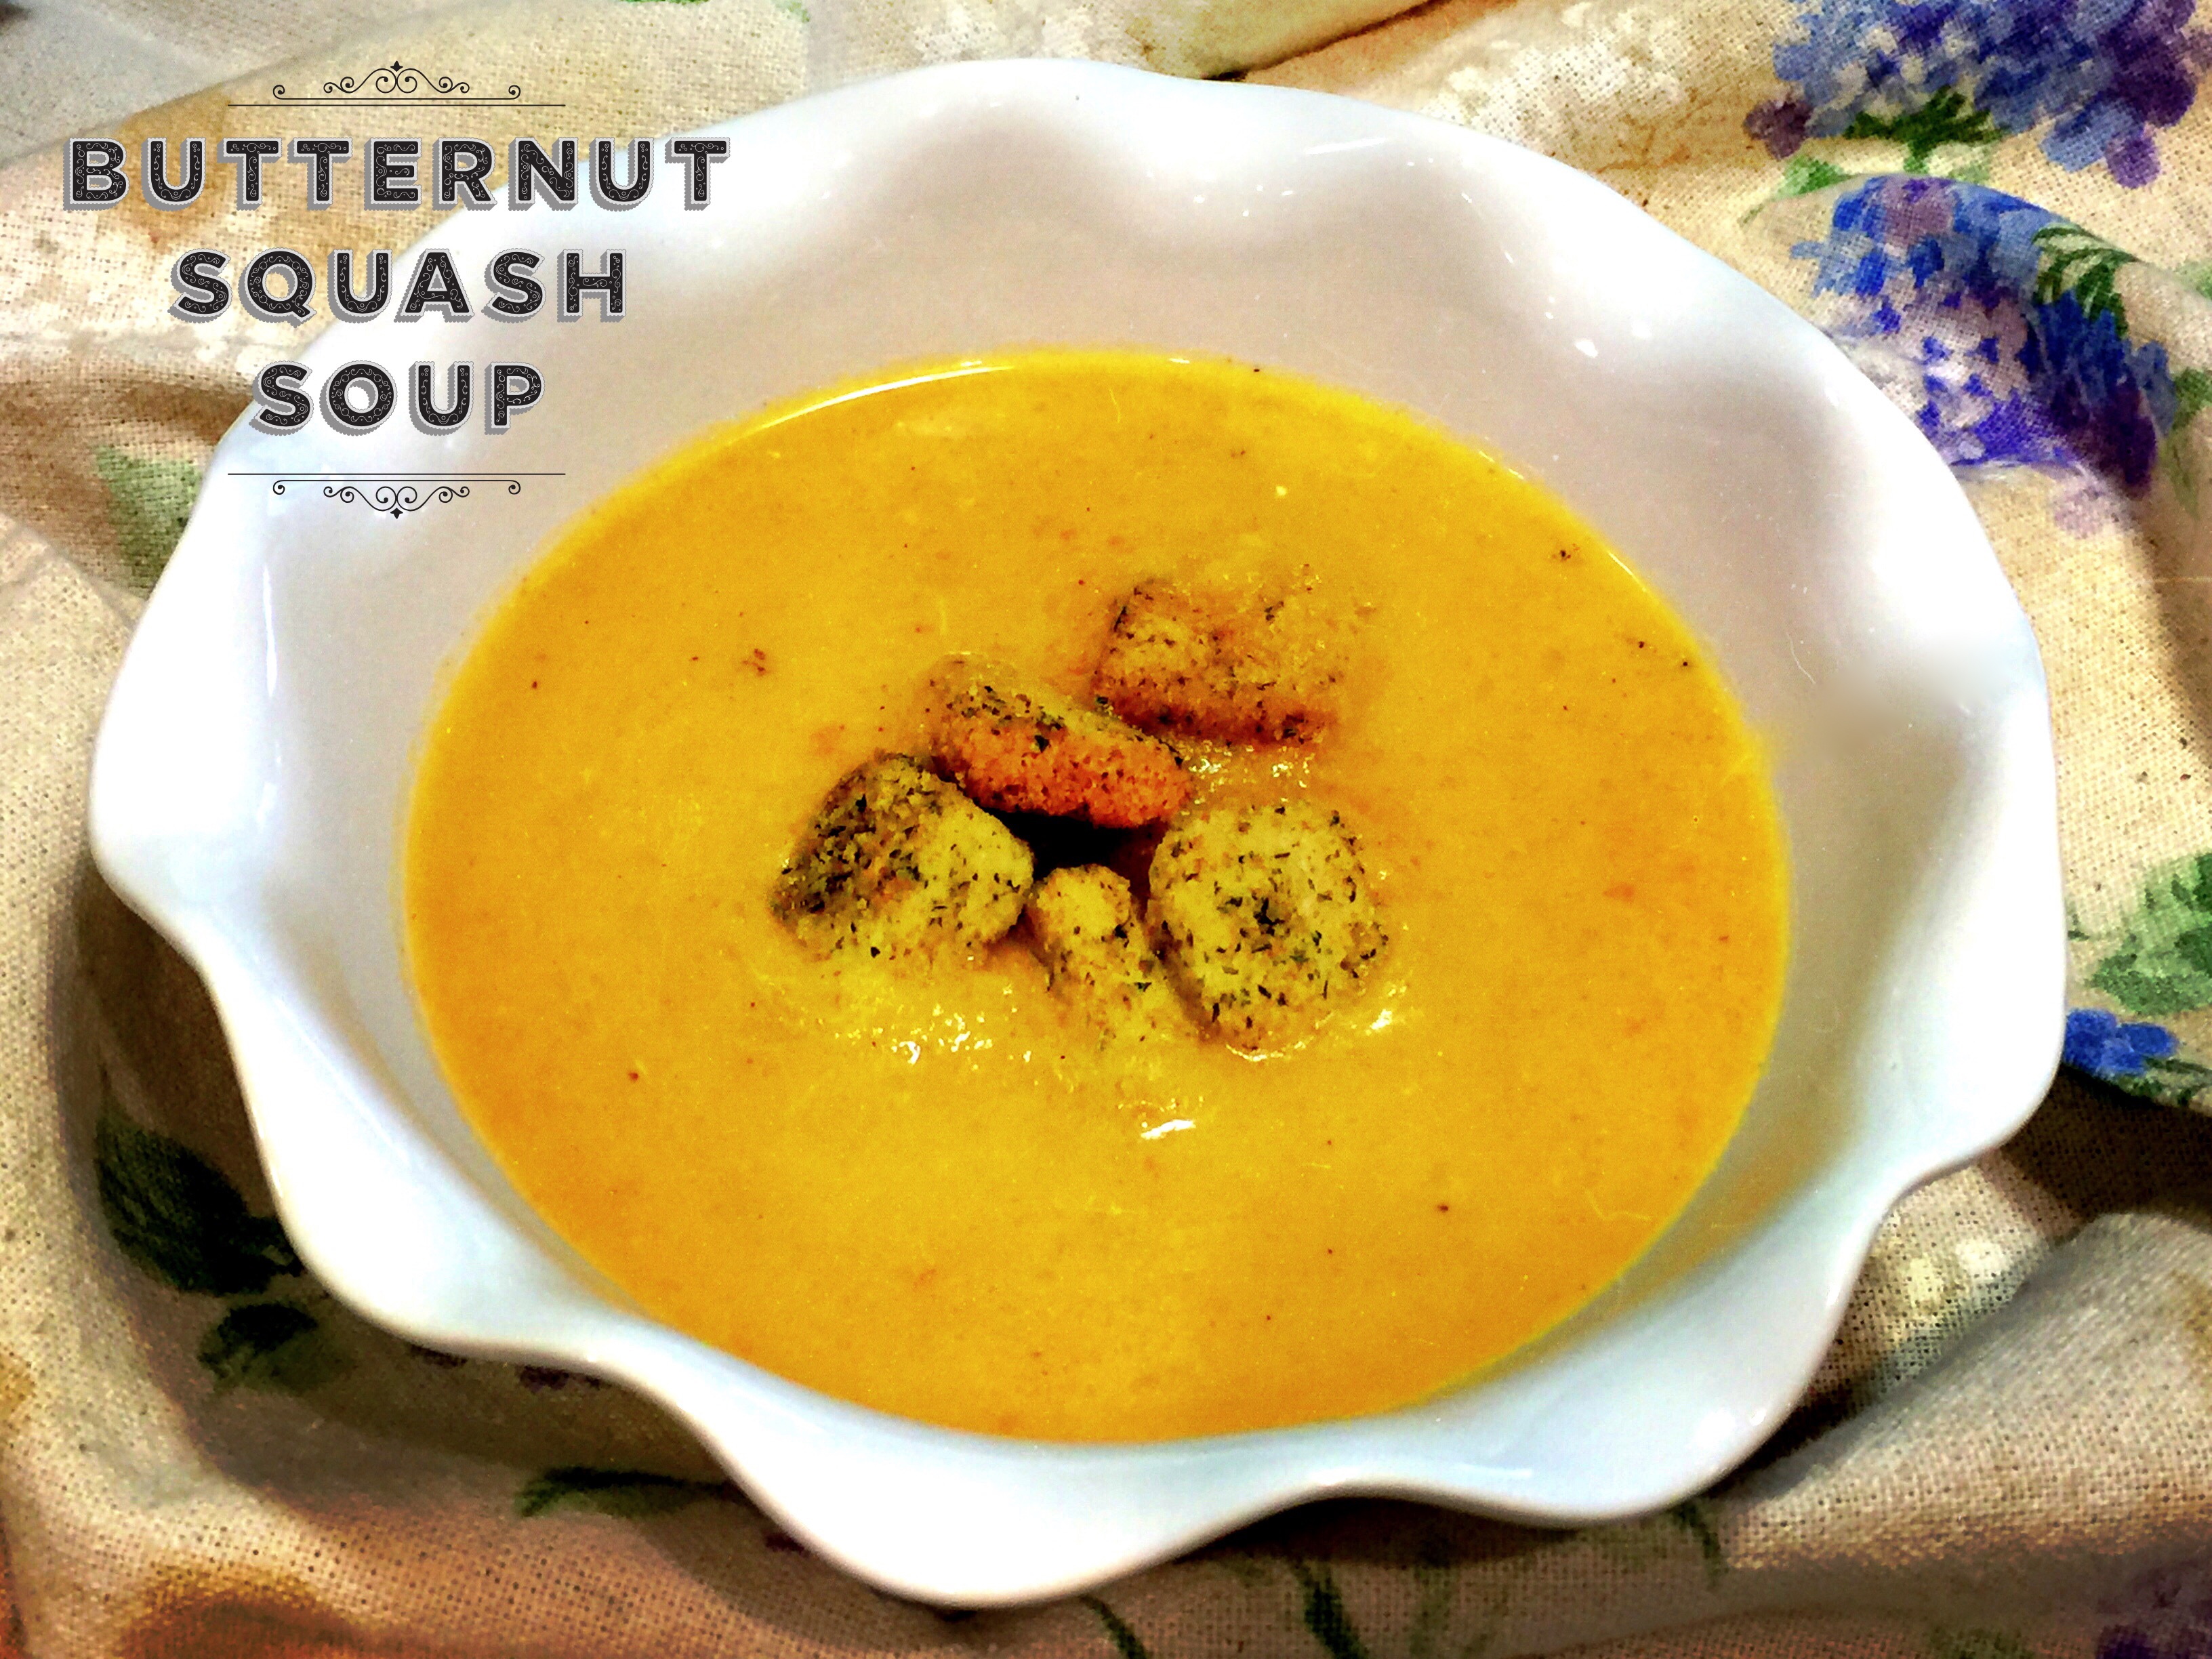
One of my favorite vegetables is butternut squash. It is a versatile vegetable capable of being made in a variety of ways but my favorite is roasted butternut squash (with a close second butternut squash soup).

I stumbled on a version of this recipe a while back and have been making my version regularly ever since. But it dawned on me that I never posted this recipe so I will now. There are only a few ingredients in this recipe but they compliment the squash so perfectly and give a gentle sweetness to its flavor.

So let’s talk cinnamon roasted butternut squash…

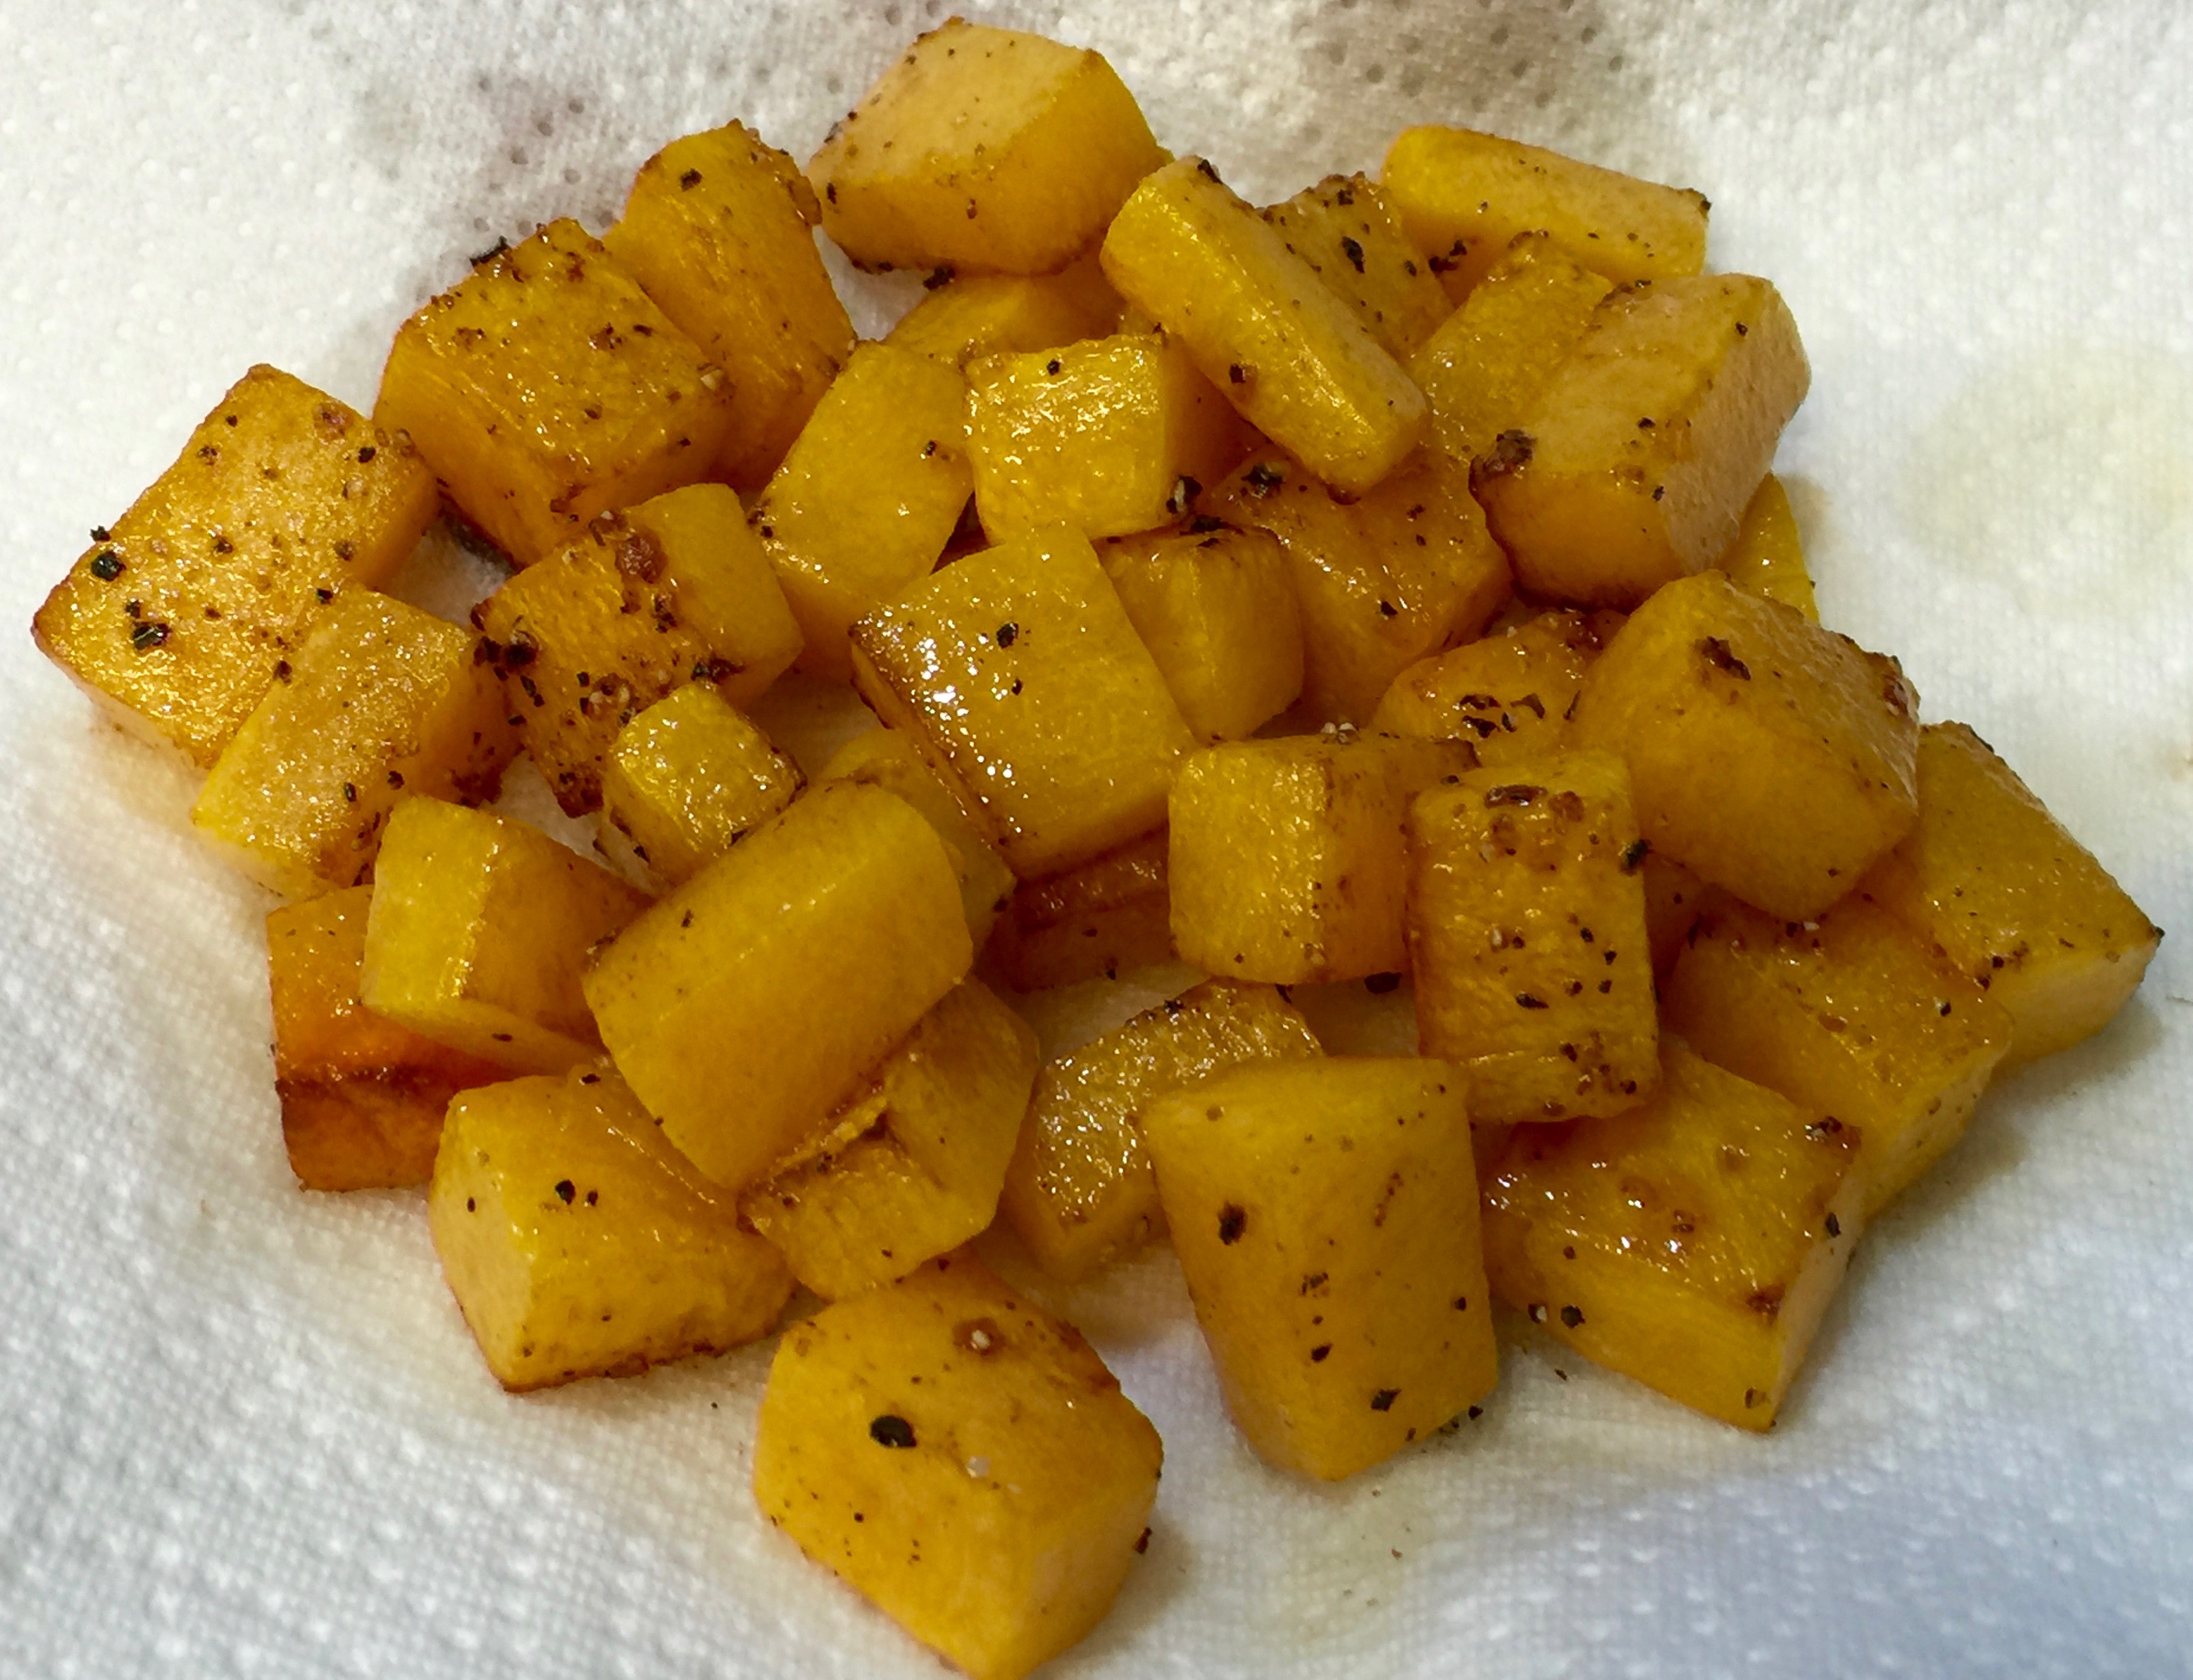
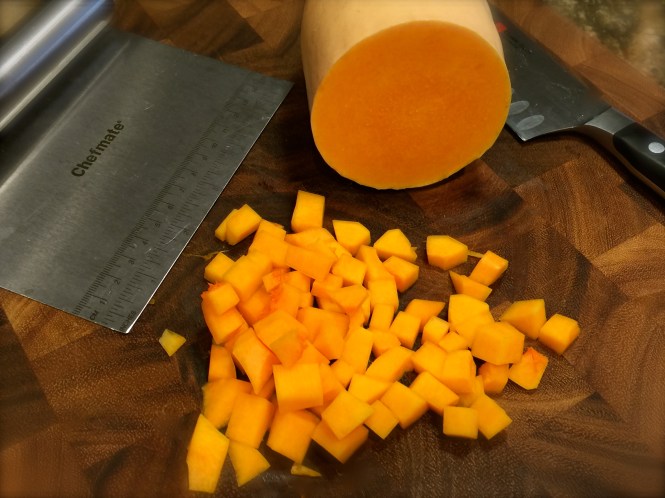
Lesson Learned 1 – The size of the squash pieces matters: If you cut the squash too large it will remain hard. Conversely if you cut it too small it will turn into mush. For this particular recipe you want to cut your squash into 3/4 – 1 inch thick pieces. I recommend that you cook the squash at 375 for 30-35 minutes. Cutting the squash into those sized chunks results in the pieces being cooked through without being overly mushy and with a nice caramelization on the outside. Don’t get worried if all your pieces are not exactly the same size. Make them close enough in size as you possibly can.

Lesson Learned 2 – Only use coconut oil in this recipe: If you use olive oil you simply will not get the same flavor. The coconut oil renders a subtle sweetness that, along with the cinnamon, makes the squash taste so good. Now, can you use olive oil if you don’t have coconut oil – of course you can. But I wouldn’t recommend using cinnamon with olive oil. I don’t think the flavors would compliment each other as much.

I’ve been roasting squash for years and my go-to recipe was using a garlic flavored olive oil with some dried thyme – and that’s a great combination as well. But I’ve found when I use coconut it not only enhances the flavor but the squash roasts more evenly, if that makes any sense. When I roasted the squash with olive oil sometimes I would get pieces that did not cook through and were somewhat hard even though the only major change was the oil I used. That never happens with coconut oil. Funny, isn’t it?

Lesson Learned 3 – Be careful how much cinnamon you add: In this recipe it is important for the oil and cinnamon to balance each other out in order to get the correct flavor and sweetness. For that to happen the correct proportions need to be used.

Cinnamon on its own without the benefit of sugar can be quite pungent and not very good tasting. Think about it, when do you ever see cinnamon used without some sort of sweetener? I wouldn’t add any more than a teaspoonful in order the get the correct mixture of both the oil and the cinnamon. If done correctly the combination is heavenly. If not, you’ll wind up throwing the squash out.

Lesson Learned 4 – Don’t crowd the pieces of squash when roasting them: Did you ever see the movie “Julie and Julia” about a woman from New York who blogged about cooking her way through Julia Childs’ cookbook? There is a scene in the movie where Amy Grant, who plays Julie, is cooking mushrooms on the stove and says that Julia noted in her book not to crowd the mushrooms – they won’t brown. Well the same thing applies to the squash. You want the squash to roast so you need to give the pieces room. If you don’t they’ll steam instead of roast and you won’t get the benefit of the wonderful caramelization that so enhances the flavor of the squash.

There could not be a recipe any simpler than this that produces such a flavorful, elegant side dish. I make this at least once a week now and can guarantee that you will make it often once you try it. Enjoy!

Cinnamon Roasted Butternut Squash...
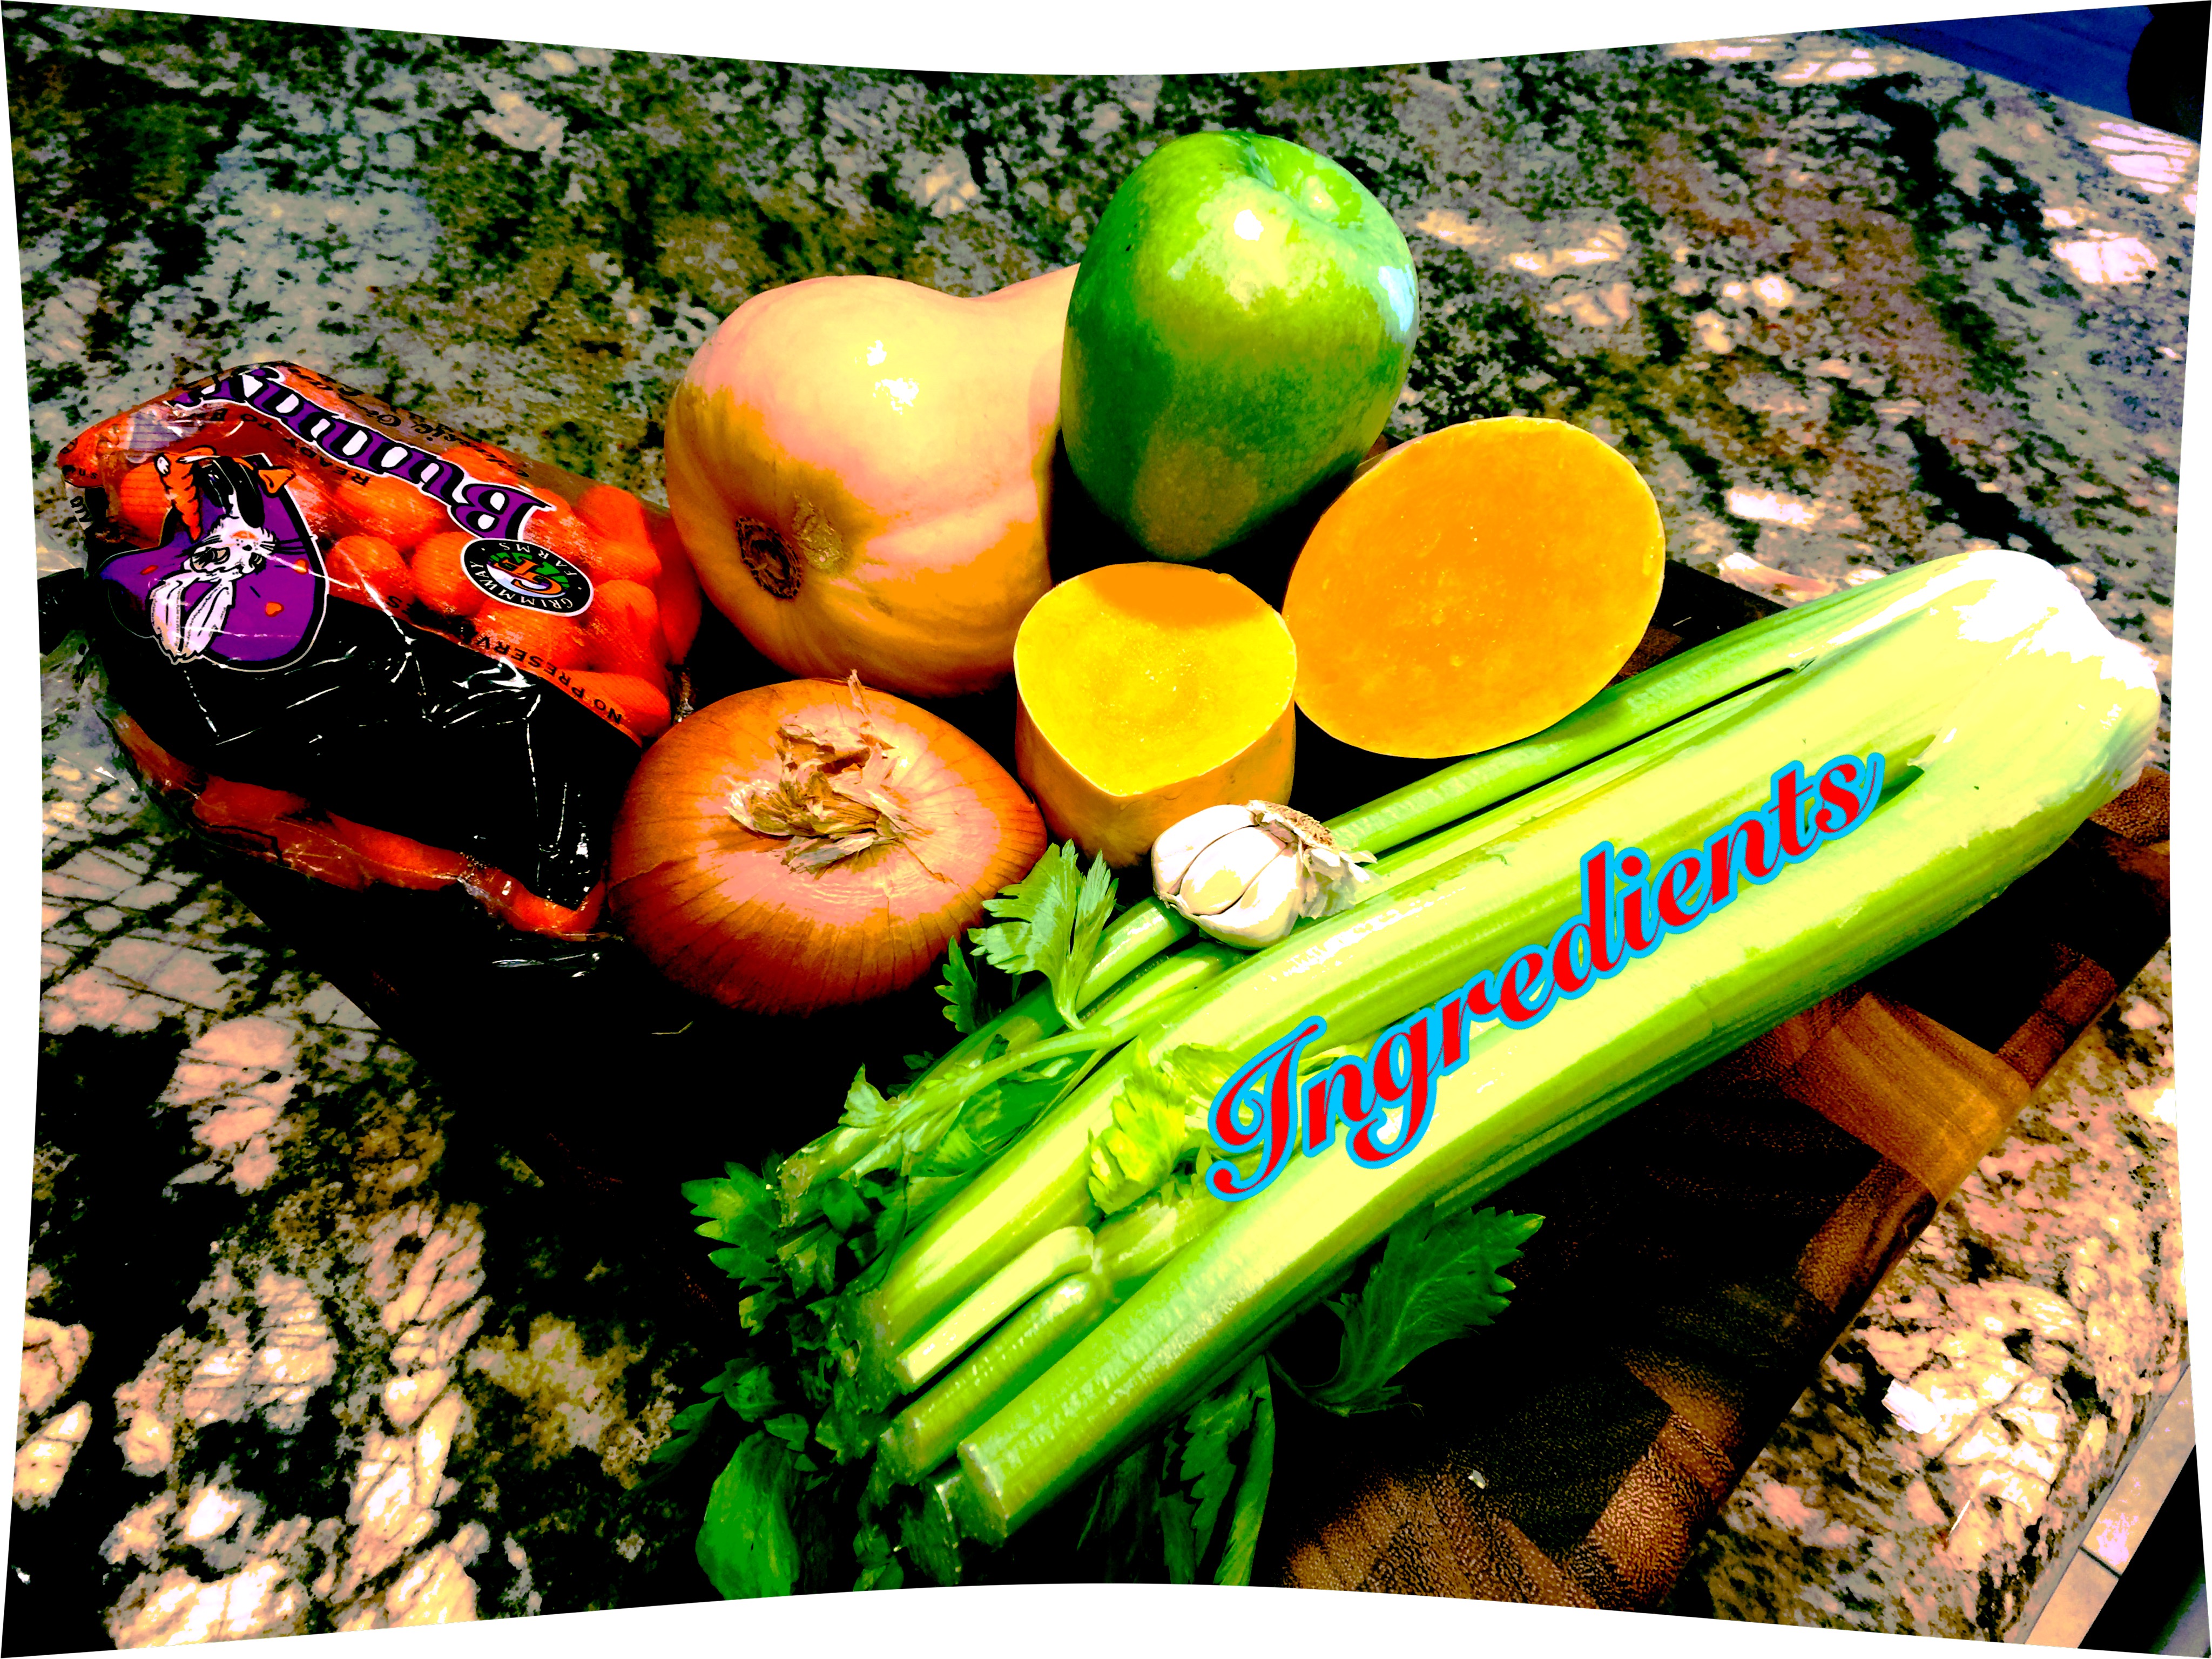
  • Servings: 4
  • Difficulty: Easy
  • Print

INGREDIENTS:

3 cups butternut squash cut into 3/4 – 1 inch pieces

1 Tbs. coconut oil, melted

1 tsp. cinnamon

Salt and pepper to taste

DIRECTIONS:

Preheat oven to 375 degrees. Cover a 9x 13 pan with foil. Set aside.

In a medium sized bowl combine the squash, coconut oil and cinnamon. Combine until all pieces are thoroughly coated.

Transfer the squash to the prepared pan making sure the pieces are not crowded in the pan. Salt and pepper to taste. (I’d go easy on both – you could always add more when you serve).

Roast for 30-35 minutes turning over the pieces of squash at the half way point. Serve.

Squash & Cinnamon

Thoroughly Combine Squash, Coconut Oil & Cinnamon

Don’t Crowd The Squash In The Pan


SaveSave

SaveSave

SaveSave

SaveSave

SaveSave

SaveSave

SaveSave

SaveSave

SaveSave

SaveSave

SaveSave

SaveSave

SaveSave

SaveSave

SaveSave

SaveSave

SaveSave

SaveSave

Salmon Casserole For Two…

No lie, my first taste of this casserole all I could say was “Oh My God”! It was unreal how good it was. My husband, who is a little less dramatic, said, “This is very good” which is high praise from him.

Over the years we’ve been eating more and more fish and so every once in a while I like to try to shake things up with my fish recipes. Well, I hit the jackpot this time. This is one of my best recipes ever and I don’t even hesitate to say that the non-fish lover in your home will like this as well. It’s a very versatile dish and can be amended in a variety of ways but for now I’ll share what I did and talk more about versatility in lessons learned.

One more note… from time to time I will also focus on making recipes for two. It’s just my husband and I that I cook for now unless we are having a party and sometimes I find if I make too much we either throw stuff out or eat leftovers. And some recipes are more conducive to leftovers than others. These days it is hard to cook for two since grocery stores seem to sell bigger portions. But I found this particular recipe can be adapted in many ways and one of them is the amount you make. So I am writing this recipe for two people but keep in mind you can increase the ingredients proportionally  to serve more.

So let’s talk salmon casserole…

(NOTE: All meals pictured in this video can be found in the recipe index on this site)

Lesson learned 1 – Choose your salmon wisely: I’ve found that the salmon filets you buy at the grocery store can vary in thickness. For this recipe you’re going to want to get the thickest piece you can find. Normally what you’ll see is a piece that is about one inch thick at its widest part. Since this cooks for about 35-40 minutes you’re going to want to have a thicker piece so the salmon doesn’t dry out.

Most if not all prepackaged salmon pieces still have the skin on. You’ll need to remove that as well. I cut the salmon into approximately one inch chunks. They turned out perfectly. So keep in mind the thicker the piece the better. But don’t be afraid to also use the thinner part of your salmon filet. Because it is cooked in cream the salmon does retain its moistness.

I only used an 8 ounce salmon filet. Normally that is about enough for both of us. If you want a little more in your casserole, don’t be afraid to add it.

Lesson Learned 2 – Adapting this recipe: I originally wanted to use some spinach in this recipe but didn’t have it on hand and didn’t feel like going to the grocery store to buy some. But I did have some flat leaf parsley and so I used that. If you use spinach just saute it with the onions and only use a couple of handfuls. The spinach should act as the accompaniment to the recipe and shouldn’t overpower it. The same applies to flat leaf parsley. I only used a little more than a tablespoon (and of course I used some for garnish), just enough to enhance the flavor.

I also added butternut squash. The key to using that is to make sure you cut the pieces small, otherwise they won’t cook. I cut mine into about 1/8 inch cubes. But even cutting it that small a couple of pieces turned out a little more al dente than I would have liked but all the rest were perfect.

You can easily add peas to this, or carrots. If you add carrots I suggest you precook them until they start getting soft. You can do that while sauteing the onions. If you want to add cauliflower then I would steam them until they start turning soft. Or you can simply add a frozen vegetable medley and it should cook through during that time period. I prefer adding fresh vegetables but it can work either way.

Lesson Learned 3 – Those tricky potatoes: I don’t know about you but, for me, potatoes are tricky when using them in a casserole, specifically sliced potatoes. I’ve experienced many instances where they were hard and not cooked through. This time they turned out perfectly. This is what I did. I used two medium sized yukon gold potatoes and boiled them with their skins on until I could easily stick a fork in them. Then I put them in a colander and let them cool. It is important to let them cool. If you try to cut them when they’re hot they’ll fall apart. Once they cool you can easily peel and slice them. Can you leave the peel on? Of course you can. My husband prefers them with the peel off. I sliced potatoes into half inch thick rounds and they were delicious. One of the first things my husband said when he took is first bite was, “the potatoes are good”. Success!!

You can boil your potatoes early in the day or even the night before and leave them with the skins on in the refrigerator until you’re ready to use them. It doesn’t have to be a big deal or overly time consuming.

Lesson Learned 4 – The seasoning is so important: This recipe doesn’t have a lot of ingredients so the seasoning is very important. Once again this part lends to the adaptability of this recipe. Once you layer the fish and squash make sure you salt and pepper them. Once you add the onions and parsley then sprinkle your fish seasoning on top. You can use any type of seasoning that works well with fish. I used a tuscan garlic seasoning blend that includes onion, garlic, red bell pepper and lemon peel. I use this seasoning a lot when I bake salmon filets so I knew it would work well with the salmon. Just be careful not to overdo the seasoning. About a quarter of a teaspoon should do the trick, at least for the first time you make this dish. You can adjust as you fine tune your dish.

I was so pleased with how this recipe turned out and will definitely make it again. Try it and and let me know what you think.

Salmon Casserole For Two...

  • Servings: 2
  • Difficulty: Easy
  • Print

INGREDIENTS

2 medium sized yukon gold potatoes, pre-boiled

1 Tbs. garlic infused olive oil

1/2 red onion, diced

1 generous Tbs. flat leaf parsley, minced

1 Tbs. flour

1 thick 6-8 ounce salmon filet, cubed

1 cup butternut squash, cubed small

1/4 tsp. tuscan garlic seasoning

3/4 cup heavy cream

1 cup shredded gruyere

kosher salt

freshly cracked pepper

olive oil cooking spray

DIRECTIONS:

Preheat oven to 375 degrees. Saute the onions in olive oil for about 5 minutes. Add the flat leaf parsley and cook for another minute. Stir in the flour and cook for 1 – 2 minutes. Set the mixture aside.

Slice the potatoes into 1/2 inch rounds. Spray a 1 quart casserole dish with cooking spray. Put a layer of potatoes on the bottom of the dish. Put the salmon and squash on top of the potato layer. Put the onion/parsley mixture on top of the salmon and squash. Season with salt, pepper and tuscan garlic seasoning.

Put another layer of potato rounds on top. Pour the cream over the top of the potatoes. Sprinkle the top with the gruyere cheese.

Bake for 35-40 minutes until golden and bubbly.

Ready To Go Into The Oven


SaveSave

SaveSave

SaveSave

SaveSave

SaveSave

SaveSave

SaveSave

SaveSave

SaveSave

SaveSave

SaveSave

SaveSave

SaveSave

SaveSave

SaveSaveSaveSaveSaveSave

SaveSave

SaveSave

SaveSaveSaveSave

SaveSave

SaveSave

SaveSave

SaveSave

SaveSave

SaveSave

SaveSave

SaveSave

SaveSave

Mustard Herb Salmon With Oven Roasted Butternut Squash…

Although this recipe may sound difficult it is incredibly simple to make. Even non-fish lovers will find this recipe hard to resist. Couple that with delectable butternut squash and being able to cook both at the same time – well the result is you have one heck of any unbelievably easy,  flavorful meal!

My husband and I have been trying to incorporate more fish into our diet and salmon is one of our favorites for a few reasons: 1.) It has a nice, mild, non-fishy flavor, 2.) Salmon is a reasonably priced fish, and 3.) Salmon can be made in a wide variety of ways. And what can I say about butternut squash? When you roast it the sides caramelize and give a nutty/sweet flavor to the squash. You definitely can’t beat that!

So, lets talk mustard herbed salmon with roasted butternut squash…

Lesson Learned 1 – Use a piece of salmon that is at least 1 1/2 to 2 inches thick at its widest part. A thinner piece will not stand up to this roasting time. You want the fish to flake but you don’t want it to dry out. My husband and I tend to opt for approximately 4 ounces each and you can go up to 6 ounces. Just make sure that the filet is not thicker than two inches at the widest part or thinner than 1 1/2 inches. The length of the piece does not matter.

Also keep in mind the cost of your filets will be less if you buy them with the skin on. For this recipe I remove the skin. As long as you have a sharp boning knife that should not be a problem whatsoever.

2. Choose any herb blend you think will work well with salmon: I used a Tuscan Garlic Seasoning Blend. It contains onion, garlic, spicy red pepper and lemon peel. I like it because it gives a gentle spicy kick to the salmon. If you’re not sure what to use read the label on the jar your considering. Quite often it will tell you whether it works best with meat, poultry or fish. Think of the herbs you enjoy and find a blend that resembles that. Or mix up a blend of your own.

When using herbs in any recipe always start from the standpoint that less is more. With the herb blend that I use if you add too much the salmon gets overpowered and the fish is too spicy, at least for us. I’ve found that as you repeatedly make a recipe you get a good feel for the amount of herbs to add. I lightly coat the mustard with the herbs and the combination of both gives a wonderful zing to the fish. So start out with less, you can always add more.

Lesson Learned 3 – Cut the butternut squash into 1 inch square pieces: Now I know that is easier said than done and there will be variances in your pieces but you want to make sure the pieces are large enough so the squash cooks through but does not become mushy. The beauty of this recipe is that you can roast both the fish and squash together, albeit you put the squash in the oven ten minutes prior to the fish. That way they are both ready to come out of the oven at the same time. Here’s at tip – check out any pre-prepared butternut squash you might find in your grocery store. I can get squash that is already peeled and cut into large chunks. I only have to do minimal prep when I buy my squash that way. Believe me, it saves a lot of time and effort.

I normally roast the fish on the middle rack of the oven on a foil lined baking sheet sprayed with cooking spray. I roast the squash on the lower rack, also on a foil lined baking sheet. Because I use olive oil in the prep of the squash there is no need to use cooking spray on that sheet pan.

Lesson Learned 4 – My secret for getting a nice caramelized squash – don’t flip it: So many recipes tell you to flip the squash half way through the roasting process. I found that if you don’t you get one side with a gorgeous caramelization, sort of like creating a crust on each piece. That caramelization provides a sweeter taste that permeates the entire piece. So be brave, don’t flip the squash. I guarantee you’ll love it!

As I mentioned earlier, the beauty of this recipe is that you can prep both the fish and squash and roast them together in the oven at the same temperature. How easy is that. This is one of my go-to week night meals and if you try it, I’m sure it’ll be one of yours as well. Enjoy!

Mustard Herb Salmon With Oven Roasted Butternut Squash

  • Servings: 2
  • Difficulty: Medium
  • Print

INGREDIENTS:

Mustard Herb Salmon:

2 four to six ounce salmon filets, skin removed

2 tsp. dijon mustard, I use Grey Poupon

1/2-1 tsp. herb blend, I used tuscan garlic blend

Olive oil cooking spray

Roasted Butternut Squash:

12 oz. butternut squash cut into 1 inch. cubes (I get mine pre -packaged and cut)

1 Tbs. dried thyme (you can use a little more if you need to evenly apply it to the squash)

Garlic infused olive oil

Kosher salt, to taste

Freshly cracked black pepper, to taste

DIRECTIONS:

Preheat oven to 400 degrees. Pat salmon dry and place it on a foil lined backing sheet sprayed with cooking spray. Dollop one tsp. of dijon mustard on each piece. Spread the mustard to coat the entire top of the salmon. Sprinkle the herb blend over the mustard. Set aside.

Place squash pieces on a foil lined baking sheet. Drizzle olive oil over the squash. With your hands mix the squash pieces to make sure all are covered with the olive oil. Spread the pieces apart so they do not touch. Sprinkle pieces with salt, pepper and thyme.

Place the squash on the bottom rack and roast for 10 minutes prior to putting the salmon in the oven. After 10 minutes put the salmon on the center rack in the oven and roast both the salmon and squash for and additional 20 minutes. Remove from oven and serve immediately.


SaveSave

SaveSave

SaveSave

SaveSave

SaveSave

SaveSave

SaveSave

SaveSave

SaveSave

SaveSave

SaveSave

SaveSave

SaveSave

SaveSaveSaveSave

SaveSave

SaveSave

SaveSave

SaveSave

SaveSave

SaveSave

SaveSave

SaveSave

SaveSave

SaveSave

Whatever You Like Quiche…

Quiche is a great way to clean out your refrigerator. It seems you can add whatever you like to a basic quiche recipe and get a fantastic entree. Whether it be meat, vegetables, herbs or  a combination of any or all of them, you can always come out with a great meal.

I’ve added many things to quiche like broccoli, carrots, peas, spinach, pearl onions, cauliflower, ham, chicken – it just seems the combinations are endless. So last week I looked in my refrigerator and I had some bacon, butternut squash cubes and chives and I thought, ok quiche!

There are a few things you need to think about in order to have a perfect quiche. But it’s not hard and once you figure it out your quiche will turn out perfect every time. I have a full proof recipe for the custard/egg part, it’s the crust and what you add to the filling that you need to think through. So, let’s talk about making quiche…

Beans used for blind baking a pie crustLesson Learned 1 – Whether you use a home made or store bought pie crust you need to blind bake it: Blind baking means you partially bake the pie crust before adding the custard mixture to it. That way the crust does not wind up soggy. The procedure is rather simple. Now I’ve mostly used store bought pie deep dish pie crusts. I take the crust out of the freezer and with a fork make some prick marks all over the bottom and sides of the crust being careful not to stick the fork all the way through the dough. This helps keep the dough from rising too much during the baking process. In order to ensure it stays flat I also cover the crust with parchment paper and weigh down the parchment paper with some uncooked beans I keep in mason jar in the pantry just for this purpose. You can also use pie weights. You can find those in most any store. Whatever you use, make sure the bottom and side are weighted down.

Bake the crust for about 20 minutes and then remove the parchment paper and weights and bake for another 10 – 15 minutes. If you use beans you may see a little moisture on the bottom of the crust after you remove the parchment paper. No worries, the moisture will be gone when you bake the crust for the additional 10-15 minutes. The blind baking process is done when the crust is just starting to turn brown.

If you use a home made crust you should set it up in a pie plate and then put it in the freezer for about 30 minutes before you do the blind baking. You want the dough to be a little stiff when it goes into the oven.

Cooked Butternut SquashLesson Learned 2 – To precook or not precook your ingredients before adding them to the egg/custard mixture: This is where you may have to learn by trial and error. Some ingredients you can just add but others need to either be cooked or partially cooked before you put them in the batter. I mentioned I decided to make a bacon, butternut squash and chive quiche. Bacon needs to be fully cooked, drained and cooled before adding it to the batter. The squash, if cut in small pieces about 1/2 inch square, can be cooked until the edges are just slightly turning soft and then drained and cooled before adding it to the batter. Chives you can just chop and drop in. I cooked the bacon first and then I cooked the squash in the bacon grease until it just started to soften. The result was perfectly cooked squash when the quiche was finished.

Bacon, cooked, drained and cooled

With cauliflower I found that if I cut the florets into bite-sized pieces I can just add them to the batter and I get perfect al dente pieces when the quiche is done. Carrots you will need to cook. I just add frozen pearl onions and they turn our perfectly. If you decide to use diced onion you will need to cook them. Ham is generally precooked so you can just cube it and add it. Spinach should be wilted and drained. Mushrooms should be cooked to release their moisture and drained. So you see, not one size fits all when it comes to adding ingredients to the egg/custard mix. But I know you’ll get the hang of it.  Just remember, you don’t want hot things or a lot of moisture going in to the egg/custard mixture.

Lesson Learned 3 – Let the quiche rest for about five minutes after you take it out of the oven: By doing this you give the custard a change to get a little firmer and the quiche will be easier to cut. Resist the temptation to cut it right away, no matter how great it looks!

Bacon, Butternut Squash and Chive Quiche

BACON, BUTTERNUT SQUASH AND CHIVE QUICHE...

  • Servings: 6
  • Difficulty: Easy
  • Print

INGREDIENTS:

1 nine inch frozen deep dish pie crust

2 cups filling ( I used 1 1/2 cups butternut squash, 1/2 cup bacon chopped and  2 Tbs minced chives)

2 cups good melting cheese, grated  (I used jarlsberg)

4 large eggs

1 cup milk

1/2 cup heavy cream

1/2 tsp. salt

DIRECTIONS:

Preheat the oven to 350. Prick the bottom and sides of the frozen crust with a fork. Cover with parchment paper and weigh down with beans or pie weights. Bake in the oven for 20 minutes. Remove from the oven, take off the parchment paper and weights and bake the crust for another 10-15 minutes or until it just starts to turn brown. Remove from oven and let cool.

Prepare the filling while blind baking the crust. Cook the bacon until crisp. Drain on paper towels and cut into pieces when cooled. Cut the squash into half inch squares and saute in the bacon grease. Remove the squash when it just starts to soften and drain on paper towels. Mince the chives.

In a large bowl crack 4 eggs and slightly whisk to break the yokes. Add the milk, cream and salt and whisk thoroughly. Add your filling and stir to combine.

Put half the cheese on the bottom of the pie crust. Pour in the filling. Put the other half of the cheese on top of the filling.  Place the dish on a foil lined baking sheet. Bake in the oven at 350 for 40-45 minutes. Let stand for five minutes. Slice and serve.

Bacon, Butternut Squash and Chive Quiche

 Bacon, Butternut Squash and Chive Quiche

Roast Chicken In A Cast Iron Skillet…

Anyway you slice it, I like chicken. I don’t think there’s a chicken recipe out there that I don’t love. And I’m always looking for new ways to prepare chicken. Never in a million years did I ever think I’d find a new way to roast chicken. But I’m always learning new things in the kitchen, and this roast chicken recipe has quickly become my go-to way of making chicken.

This recipe is so easy and I say this, without reservation, it produces the best roast chicken ever! The most time consuming part of the process is making the rub and cutting the vegetables. The rest of the work is done by the cast iron skillet. Amazing!

So let’s talk roast chicken in a cast iron skillet…

Roast Chicken In A Cast Iron SkilletLesson Learned 1 – Cut the butternut squash and russet potato into large pieces: This recipe is designed for two with plenty of chicken remaining for your favorite leftover recipes (I used my leftovers to make chicken salad). The thing to remember is the chicken will be roasting at a high temperature, 400 degrees, for an hour to an hour and a half. If you don’t cut your squash and potatoes into large chunks they will become mush. I cut my squash into squares a little less than an inch thick and they turned out perfectly. I cut the potato in half lengthwise and then in inch and a half sized half moons and again they were perfectly done.

Lesson Learned 2 – Resist the urge to baste the chicken: In the past I would baste my chicken all the time thinking it would create a crispy skin. In actuality it does quite the opposite. Because you roast the chicken at a high heat all you need to do is brush the skin with some melted butter before you put it in the oven. Then leave the chicken alone.

At the half way mark baste the squash and potatoes with the liquid in the pan. That worked well and helped to soak the bacon and chive seasoning I used into them. But remember to leave the chicken alone.

Lesson Learned 3 – Once the chicken has reached an internal temperature of 160 degrees, remove the skillet from the oven, cover it with foil and let is rest for 20 minutes: With chicken, turkey, steak, etc., it is so important to let it rest once the meat has reached its desired cooking temperature. That allows for all the juices to redistribute into the meat and not wind up running all over your plate. The chicken will carve easily if you let it rest.

I don’t think I will roast a small chicken using any other method than this one ever again. I was so amazed at how simple everything was and how delicious the chicken, squash and potatoes were. If you love chicken the way I love chicken, you simply have to try this recipe!

Roast Chicken In A Cast Iron Skillet…

  • Servings: 2 With Leftovers
  • Difficulty: Easy
  • Print

INGREDIENTS:

1 five pound roasting chicken (I roasted a 5 1/2 pound chicken)

1 1/2 tsp. garlic, minced

1 tsp. kosher salt

1/2 tsp. pepper

1/2 tsp. dried thyme (or you can used dried sage)

Butternut squash cut into large chunks (one small squash should be more than enough)

1 russet potato, halved and cut into 1 1/2 inch half moons

1 1/2 Tbs. bacon and chive seasoning

4 Tbs. melted butter, divided

1 tsp. garlic infused olive oil (you can use plain olive oil as well)

DIRECTIONS:

Preheat oven to 400 degrees. Clean and pat dry the chicken. Mix together the garlic, salt, pepper and thyme to use as a rub. Using your fingers, slide your hand between the breast skin and the chicken. Take the thyme mixture and rub it between the skin and the meat. Any remaining mixture can be rubbed onto the surface of the outer skin.

With a pastry brush lightly brush some melted butter on the bottom of a 10 or 12 inch cast iron skillet (I used a 10 inch skillet). Place the chicken in the skillet. Baste the top of the chicken with some butter.

In a large bowl cut up the squash and potatoes. Sprinkle them with olive oil and stir until the squash and potatoes are coated. Add the bacon and chive seasoning and stir until coated. Place the squash on one side of the chicken and the potatoes on the other. Pour the remaining melted butter over the squash and potatoes.

Roast for an hour to an hour and a half or until a meat thermometer stuck into the thickest area of the chicken between the breast and leg reads 160 degrees. (My chicken needed to roast for 1 1/2 hours. A smaller one should take about an hour). Half way through the roasting process baste the squash and potatoes with the juices that have accumulated in the skillet.

Once the chicken has reached an internal temperature of 160 degrees, remove the skillet from the oven, cover it with foil and let it rest for 20 minutes. Carve and serve.

Roast Chicken In A Cast Iron Skillet

Roast Chicken In A Cast Iron Skillet

Roast Chicken In A Cast Iron Skillet

Butternut Squash Soup…

Now that January has settled in and the holidays are firmly behind us, I began looking at various soup recipes so I could break in my new immersion blender. Honestly that was not the only reason. There’s nothing like a bowl of piping hot soup to melt the January chills away.

Last year I discovered the joy and ease of making homemade soups, and I can equivocally say if you haven’t tried making homemade soup you’re missing out on something special. And over the past several years I’ve grown to love making roasted butternut squash, so I decided that butternut squash soup would be my next venture.

Ingredients

I poured over a wide variety of recipes and then decided, as usual, to take the best concepts of several and create a recipe of my own. As with any soup I’ve made so far, the bulk of the work is in the preparation. Once you’ve got the ingredients prepared the process couldn’t be simpler. And if you’ve been following me for a while you know I find it very cathartic to chop, mince, dice and slice so this soup was absolutely perfect for how I like to cook.

So let’s talk about making butternut squash soup…

Lesson Learned 1 – You can prepare the squash in a couple of ways: Most recipes I read either called for the squash to be roasted in the oven first or merely just chopped and added to the pot to cook with the stock. I chose the latter and the soup was delicious. The next time I make this I’ll try roasting the squash first and see if that adds any additional dimension to the flavor of the soup. My base for the soup was the “trinity” of onions, celery and carrots along with garlic and that provided great depth of flavor.

Lesson Learned 2 – Be careful when adding the seasonings: This recipe calls for adding nutmeg, cinnamon and cayenne pepper along with salt and pepper. Nutmeg especially has a very strong flavor so just add a pinch to start. I recommend the same for the cayenne pepper. After I added a pinch of each at the end and tasted the soup, I added a second pinch of all of them. Both the nutmeg and cayenne provided a nice warmth and the cinnamon a touch of sweetness. Just remember the old tried and true rule – you can always add more, but you can’t take it out once you put it in.

Lesson Learned 3 – Be very careful when preparing the squash: I’ll be totally upfront with you – preparing the squash can be an arduous task. I recommend cutting the squash in half at the center and then with the flat edge down using a very sharp knife to remove the outer core. Start at the top and slide your knife downwards to peel the core to the bottom. Continue rotating around the squash using this process until the entire core has been removed.

The outer core is very hard, so if you try to cut it with a dull knife you can easily hurt yourself. Be careful and watch your fingers the entire time. When initially cutting the squash in half to create the flat bottoms, if your knife gets stuck mid way through, do what I do and pick up the knife with the squash stuck to it and pound it down hard on a strong cutting board or butcher block. The force of the blow(s) will get the knife completely through and your fingers are totally out of the way.

IMG_9244

If you’ve never peeled a butternut squash before, I recommend you take a few minutes and find a video on YouTube that shows you how. The key thing to remember is keeping your fingers away from the knife at all times. I’m not trying to scare you, I’m just trying to stress the importance of being safe during this process.

And if you don’t want to bother doing the cutting yourself, many grocery stores have prepared butternut squash that you can buy. The only thing I don’t like about the prepared squash is often I get some of the tough pith in with the squash pieces. I guarantee you the tough pith (any of the light orange colored part of the outer core) will not get tender. You only want to use the deep orange part of the squash.

The "Trinity" - onions, celery and carrrots

The “Trinity” – onions, celery and carrrots

Lesson Learned 4 – Using an immersion blender: One thing to remember when using an immersion blender is not to pull it up to high to the surface when you’re blending in the pot – you’ll have soup flying all around your kitchen if you do! Keep the base of the blender down low and only move it up half way through the liquid when blending. 

I personally guarantee that the work making this soup is totally worth it. This is a great soup for a cold January night and one you will make for years to come.

Butternut Squash Soup…

  • Servings: 12
  • Difficulty: Medium
  • Print

INGREDIENTS:

1 medium onion, diced

2 celery stalks, diced

3/4 cup carrots chopped small

2 cloves of garlic, minced

3 Tbs. butter

1 large or 2 small butternut squash, peeled and chopped with seeds removed

1 medium granny smith apple, peeled and diced

4 cups chicken stock (one 32 oz. box)

1 cup water

1 cup heavy cream

Pinches of cayenne, cinnamon and nutmeg (to taste – err on the side of less is more)

Salt and pepper to taste

DIRECTIONS:

In a 7 quart dutch oven melt the butter and add the onions, celery and carrots. Salt and pepper the mixture. Cook until the onions look translucent, about 5 minutes. Add the garlic and cook until the garlic is fragrant, about one minute.

Add the squash, apple, broth and water. Bring to a boil. Cover and simmer for 30 minutes or until the squash and carrots are tender.

With an immersion blender (or you can puree this in batches in a stand blender) puree the soup to your desired thickness (the more you puree the thinner the soup).

Add the cayenne, nutmeg and cinnamon. Stir and taste. Add more if desired. Salt and pepper to taste.

Once you’ve finished adding the seasoning, turn the heat off the soup and stir in one cup of heavy cream. Serve with croutons or with a dollop of sour cream.

Butternut Squash Soup

Butternut Squash Soup