Slow Cooker Italian Chicken With A Twist…

Every once in a while, a friend will email or text me and asks about a recipe or shares one of theirs.  Such was the case  the other day when a former student messaged me on Facebook and asked if I “crock pot.” Do I crock pot? Heck yes. I love my crock pot. As a matter of fact I am probably a crock pot snob because I tend to call it a slow cooker. But call it what you will, it is a tremendous tool in the kitchen for busy families. Set it and forget it – I like that mantra.

But the slow cooker can also be a challenge. For all it’s benefits it has its downsides, mostly based in producing flavorless overcooked meals for the sake of convenience. That’s why it’s important to know your slow cooker and to understand its low and high temperatures. Not all slow cookers are created equal and it seems that over the years, at least in my experience, the temperature for the low setting has gotten higher and higher to the point that in some slow cookers it actually boils food – and that produces disaster.

IMG_5722I have an All Clad 6.5 slow cooker with a ceramic insert. Good Housekeeping reviews tend to consistently rate it as one of their top choices, especially from the standpoint of not drying out food (which tends to be the result of too high temperatures combined with too long of a cooking time). I’ll warn you now, it is an expensive piece of equipment averaging about $180 but to me it was worth the investment. Rarely do I dry out food in my slow cooker unless I cook it too long. There are other more reasonably priced top rated slow cookers out there. I would suggest doing a little research and reading reviews to determine which one fits your lifestyle and budget.

Here’s the ultimate slow cooker challenge – figuring out the correct cooking time for a specific recipe. Don’t you just love recipes that say “cook on low for 6-8 hours.” Well, what is it, six hours, seven hours, eight hours? There is a big difference between cooking something for six or eight hours. But unfortunately more often than not that is for the cook to figure out.

I’ve also found that cooking chicken is probably the biggest challenge, especially white meat chicken as it has much less fat than dark meat and can dry out faster. I’ve learned over the years that less tends to mean more when it comes to cooking white meat chicken in the slow cooker. I never cook it for eight hours, NEVER. And depending on the size and thickness of the pieces it tends to be between 5-6 that I get my best results. Normally I have to try a recipe once and from there I make an educated estimate for the next try in the slow cooker.

And so it happened with the recipe that I’m sharing today. It came from my former student Jenny who I referenced earlier in this blog. It is a traditional slow cooker recipe that uses soup as the base for its liquid but the combination of ingredients gives a sauce that is to die for. This is definitely not a low calorie recipe, but a great go-to comfort food recipe to keep in your repertoire. Jenny’s sister Shelly joined in our recipe conversation the other day and made a few suggestions that I found helpful and that added depth to the recipe. I’m calling this recipe “Slow Cooker Italian Chicken with a Twist” as it does not look or taste like a traditional Italian dish that tends to be tomato based. There are no tomatoes in this recipe but it has huge flavor. So here’s my rating and lessons learned:

Rating: A – a great comfort food recipe and the sauce is to die for!

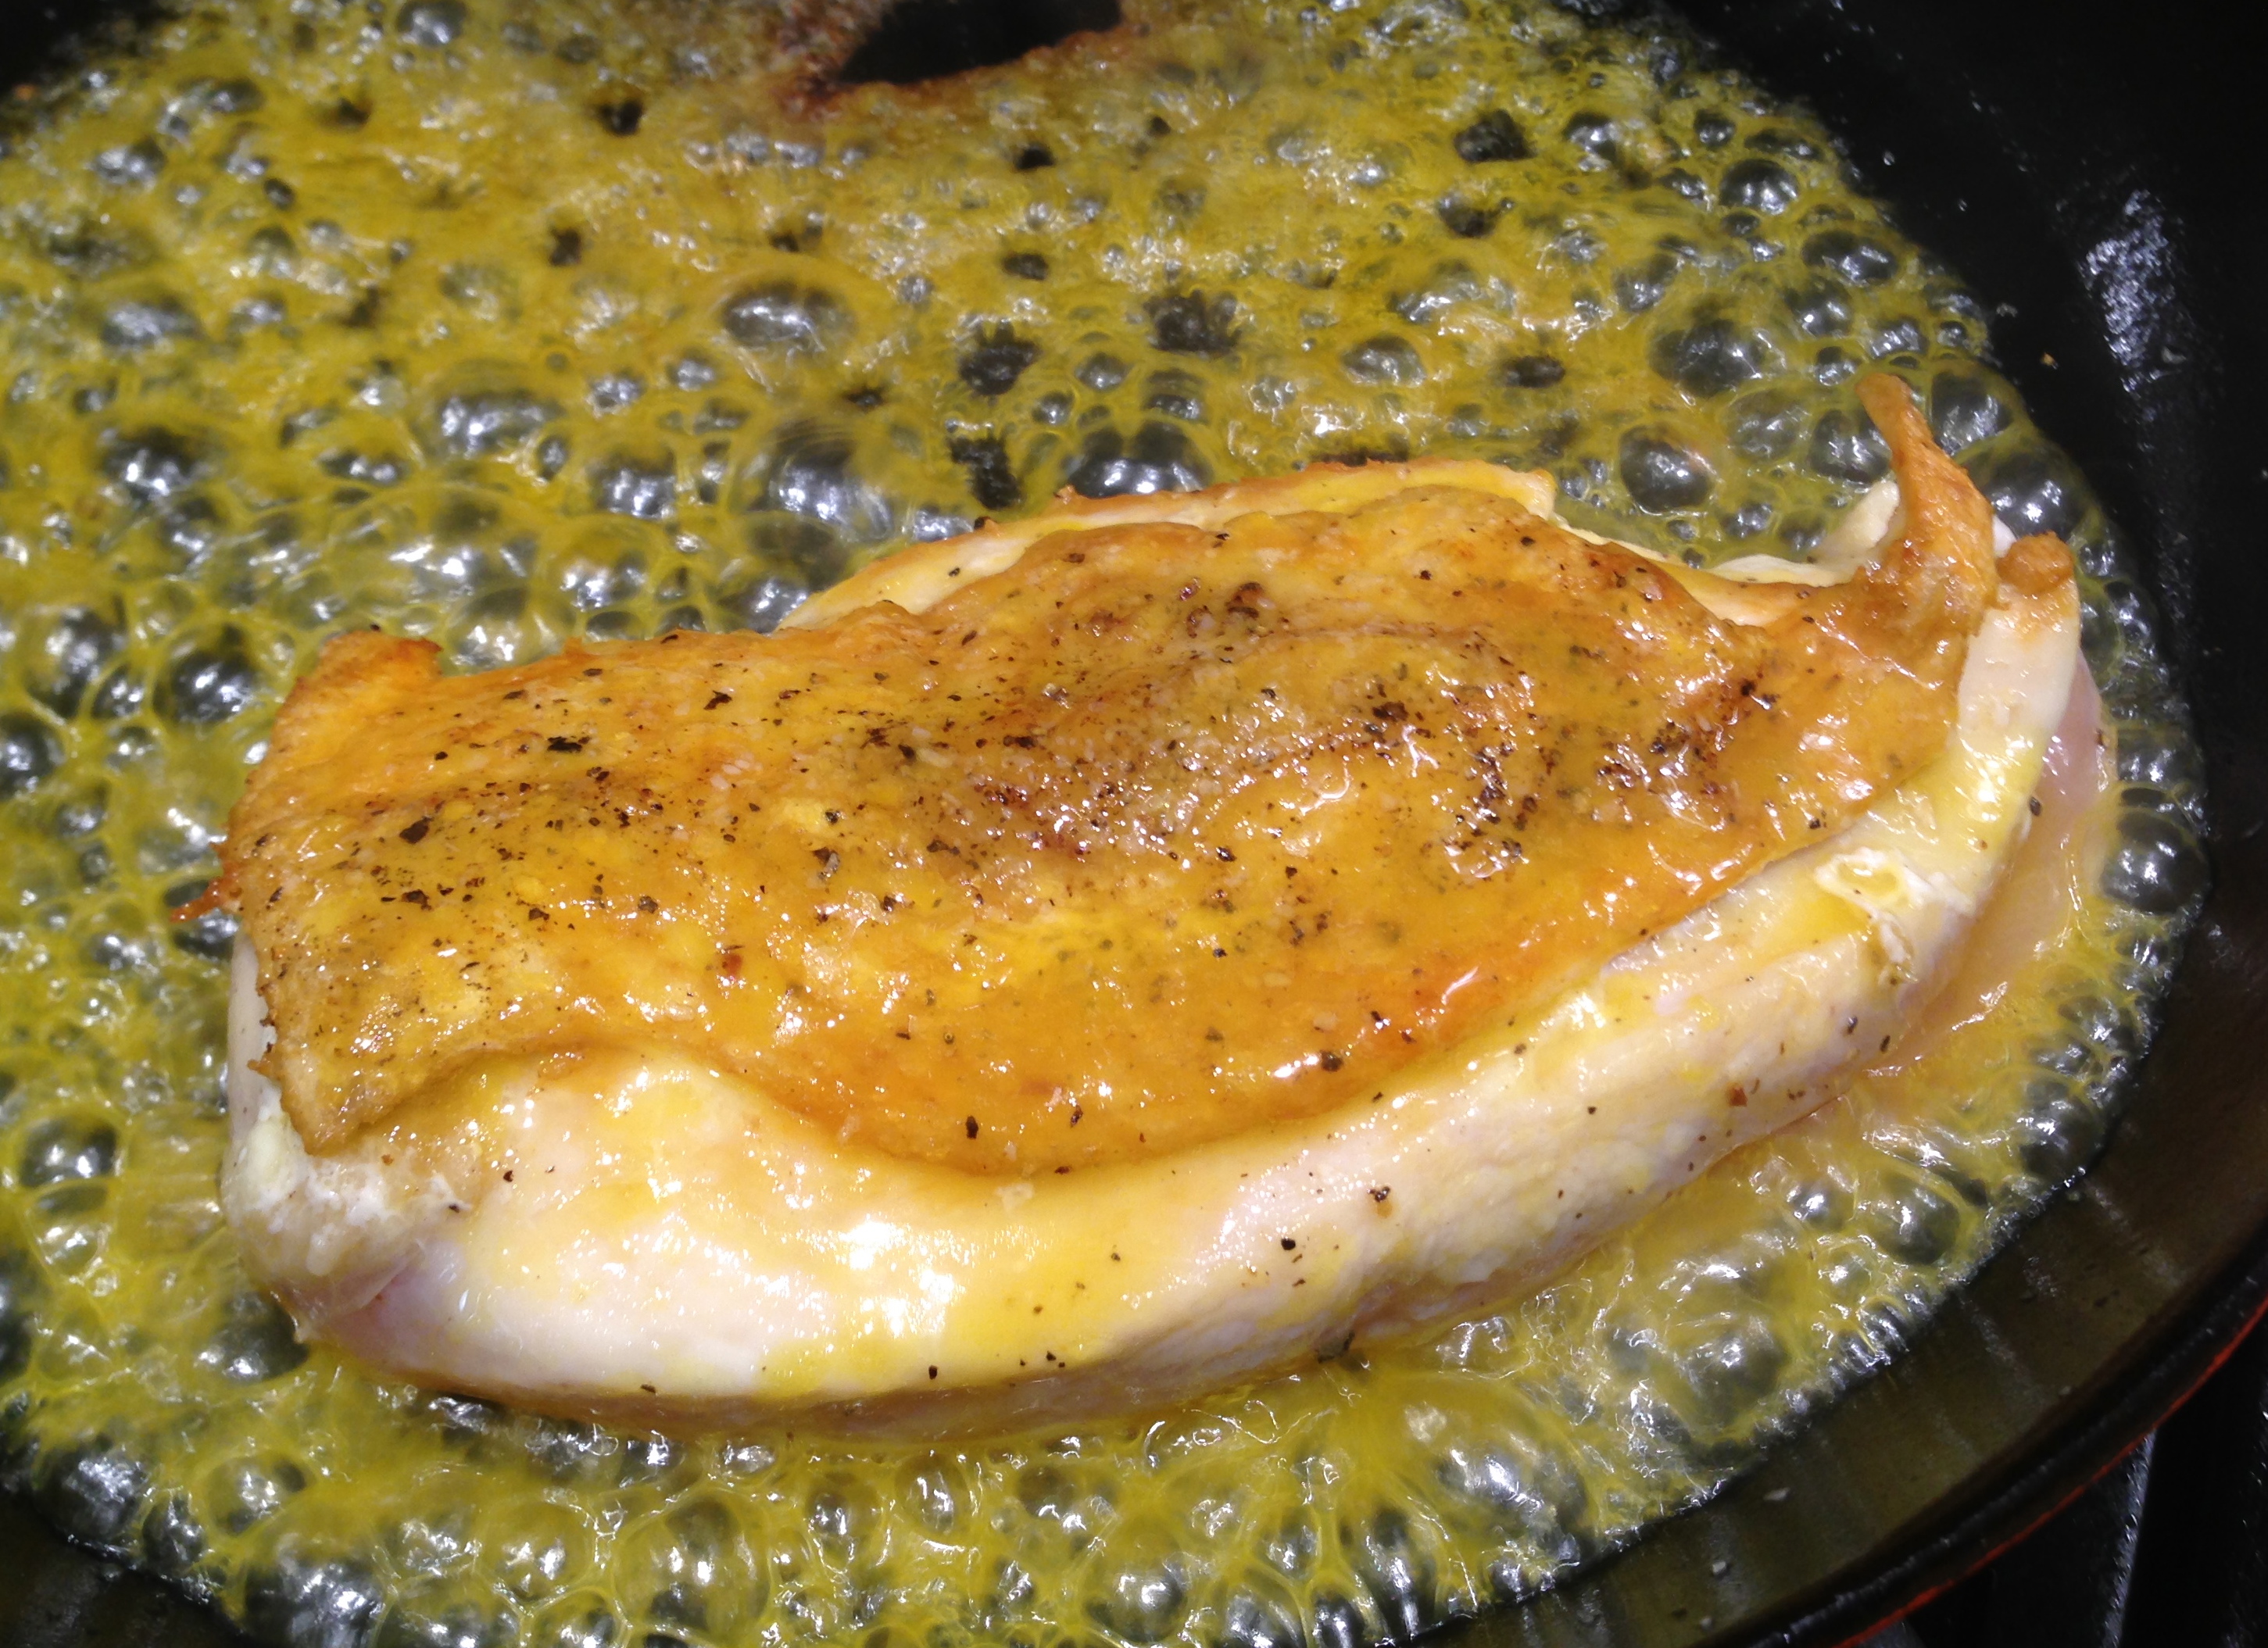
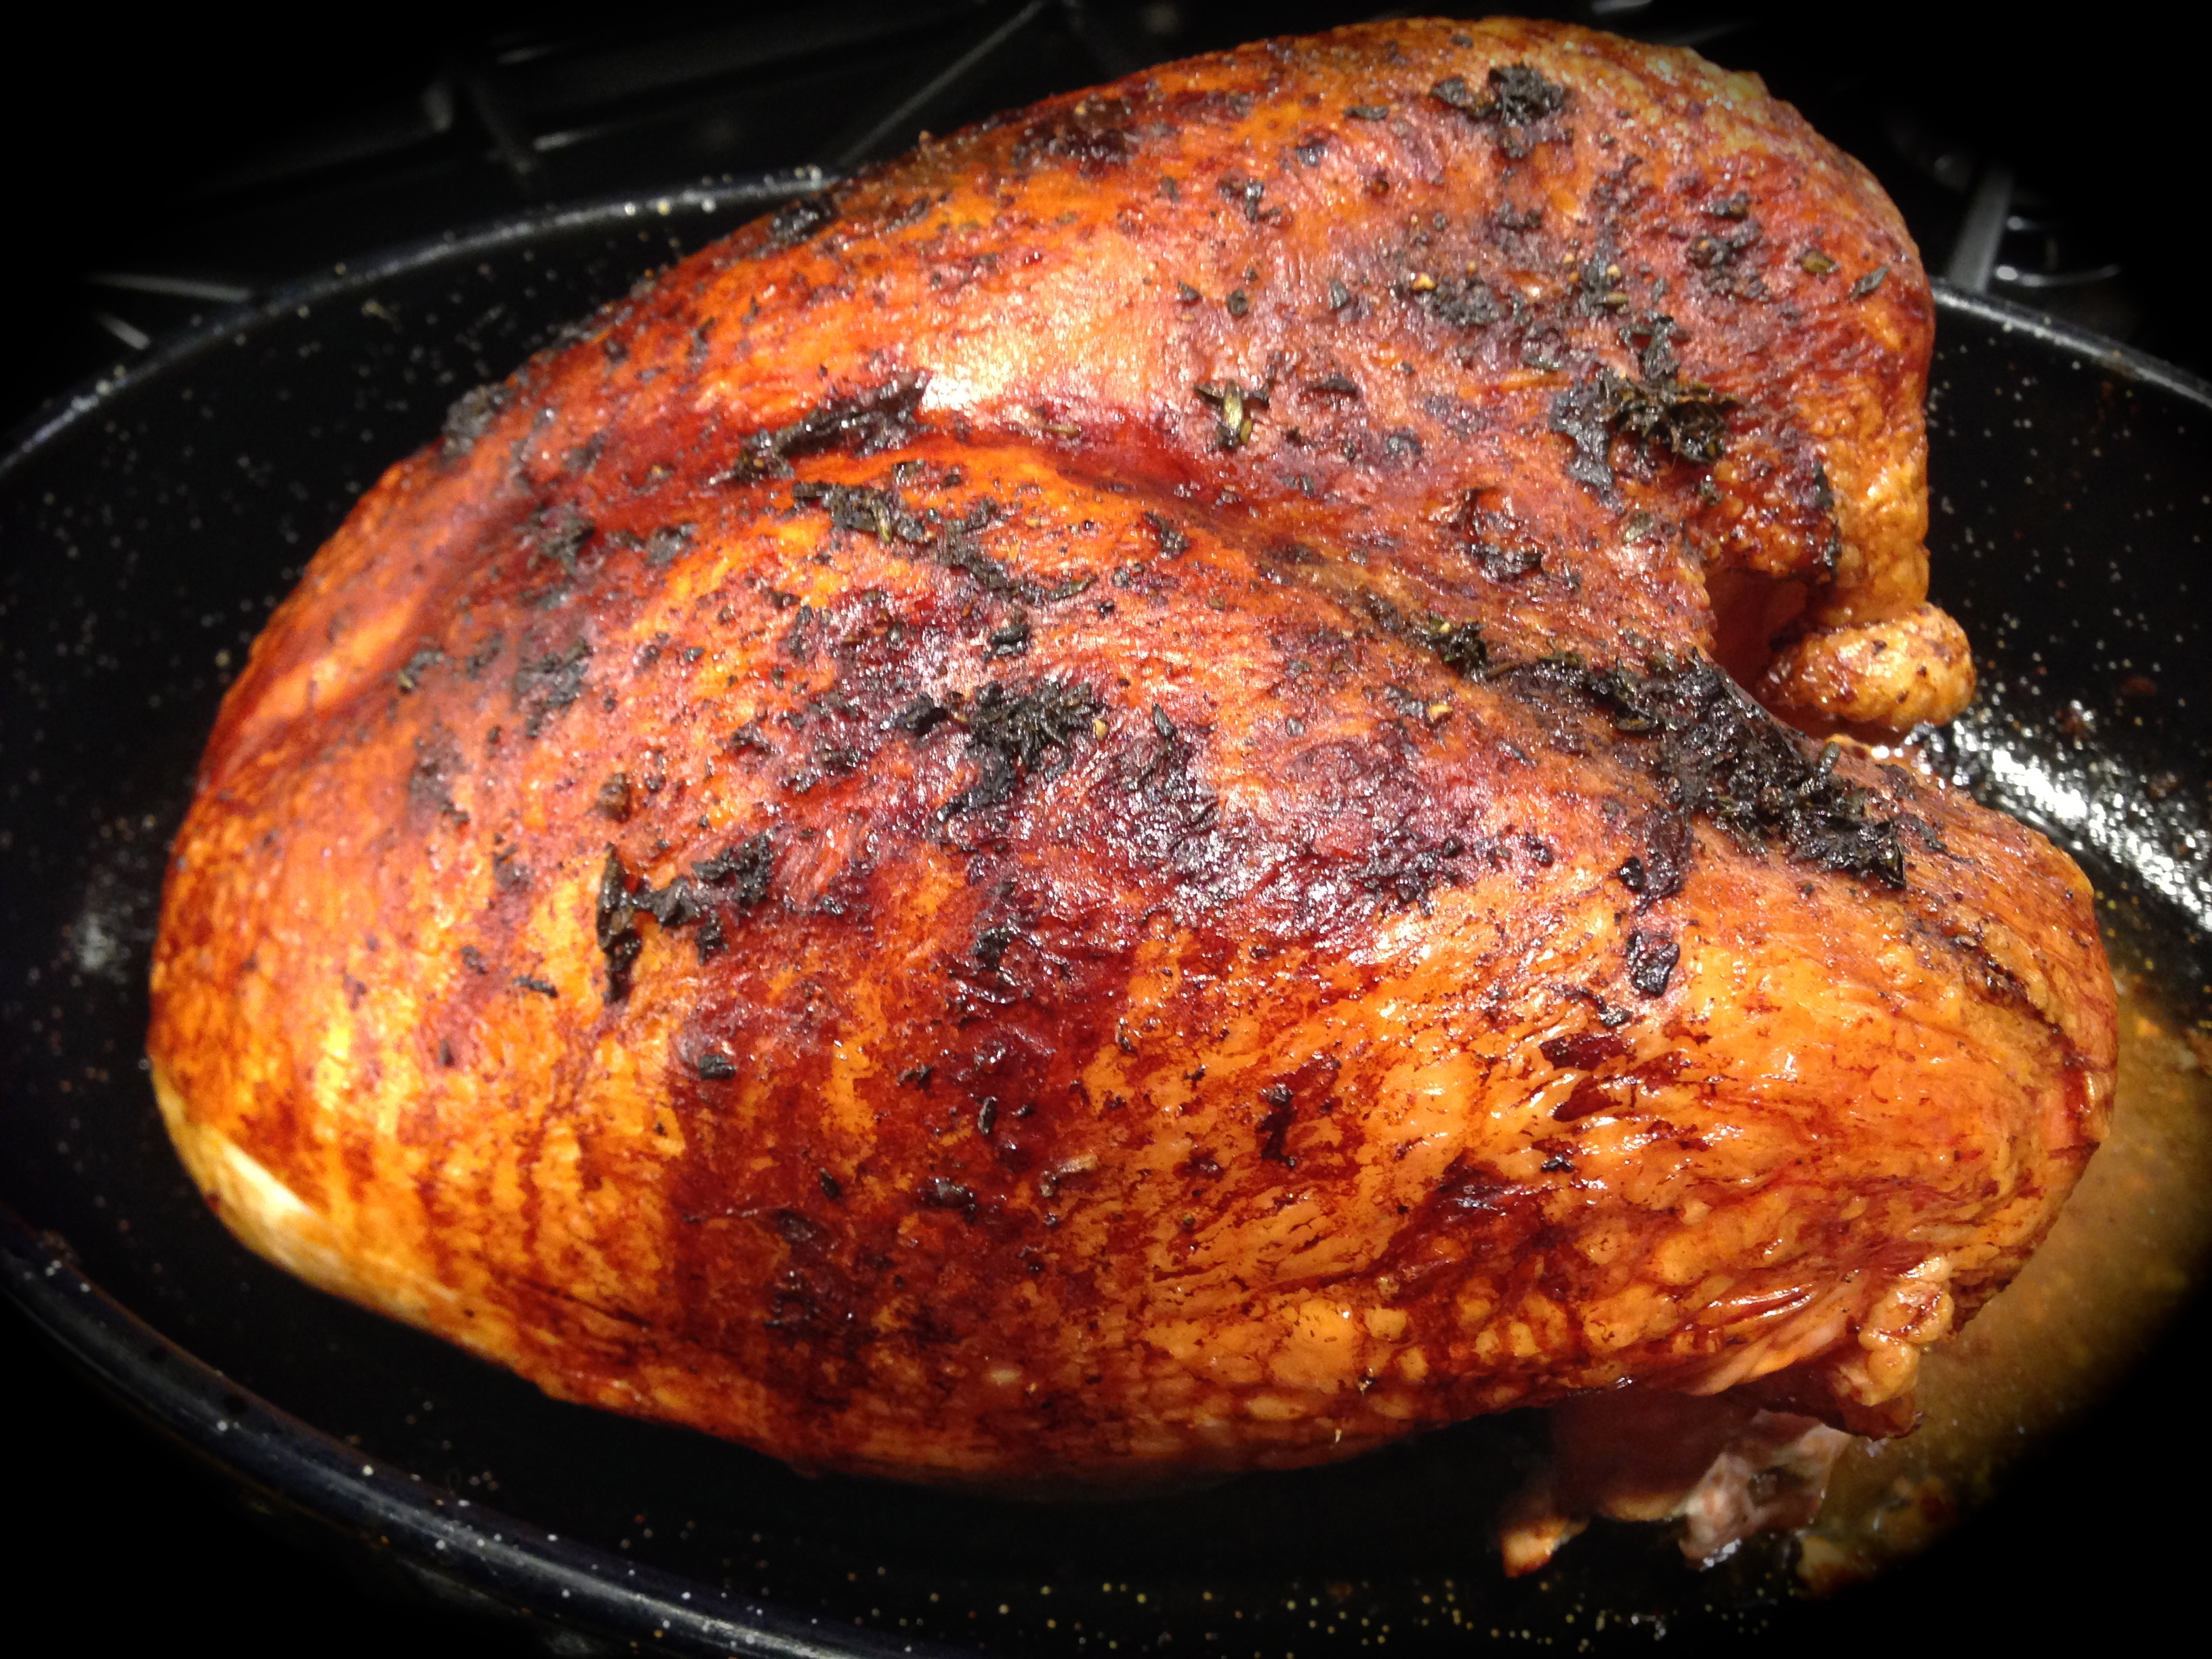
Lesson Learned 1: I cooked boneless skin-on breasts for 5 1/2 hours. Next time I will only cook them for 5. They were just on the borderline of being a little dry, but they were not dried out.  If I had used dark meat 5 1/2 hours would have been fine.

Lesson Learned 2: Either spray or grease the crock for this recipe. The creaminess of the sauce can cause some browning especially around the edges. I used a slight brush of olive oil in my ceramic crock and it cleaned up beautifully. I’m not a big fan of cooking sprays but I am sure they work as well.

Lesson Learned 3: This is a lesson in progress as I haven’t figured it out yet. In the picture below you can see little flecks of the chive and onion cream cheese – I would have preferred it to be completely melted and am not sure why it didn’t. Maybe it was the fact that I used a reduced fat cream cheese, but I’m not sure. It certainly did not affect the flavor at all but I’m not sure why it didn’t melt completely. (we figured it out – the butter, cream cheese and soup need to be melted together in a pot over a low heat before combining with the wine and italian dressing mixture – thanks Shelly).

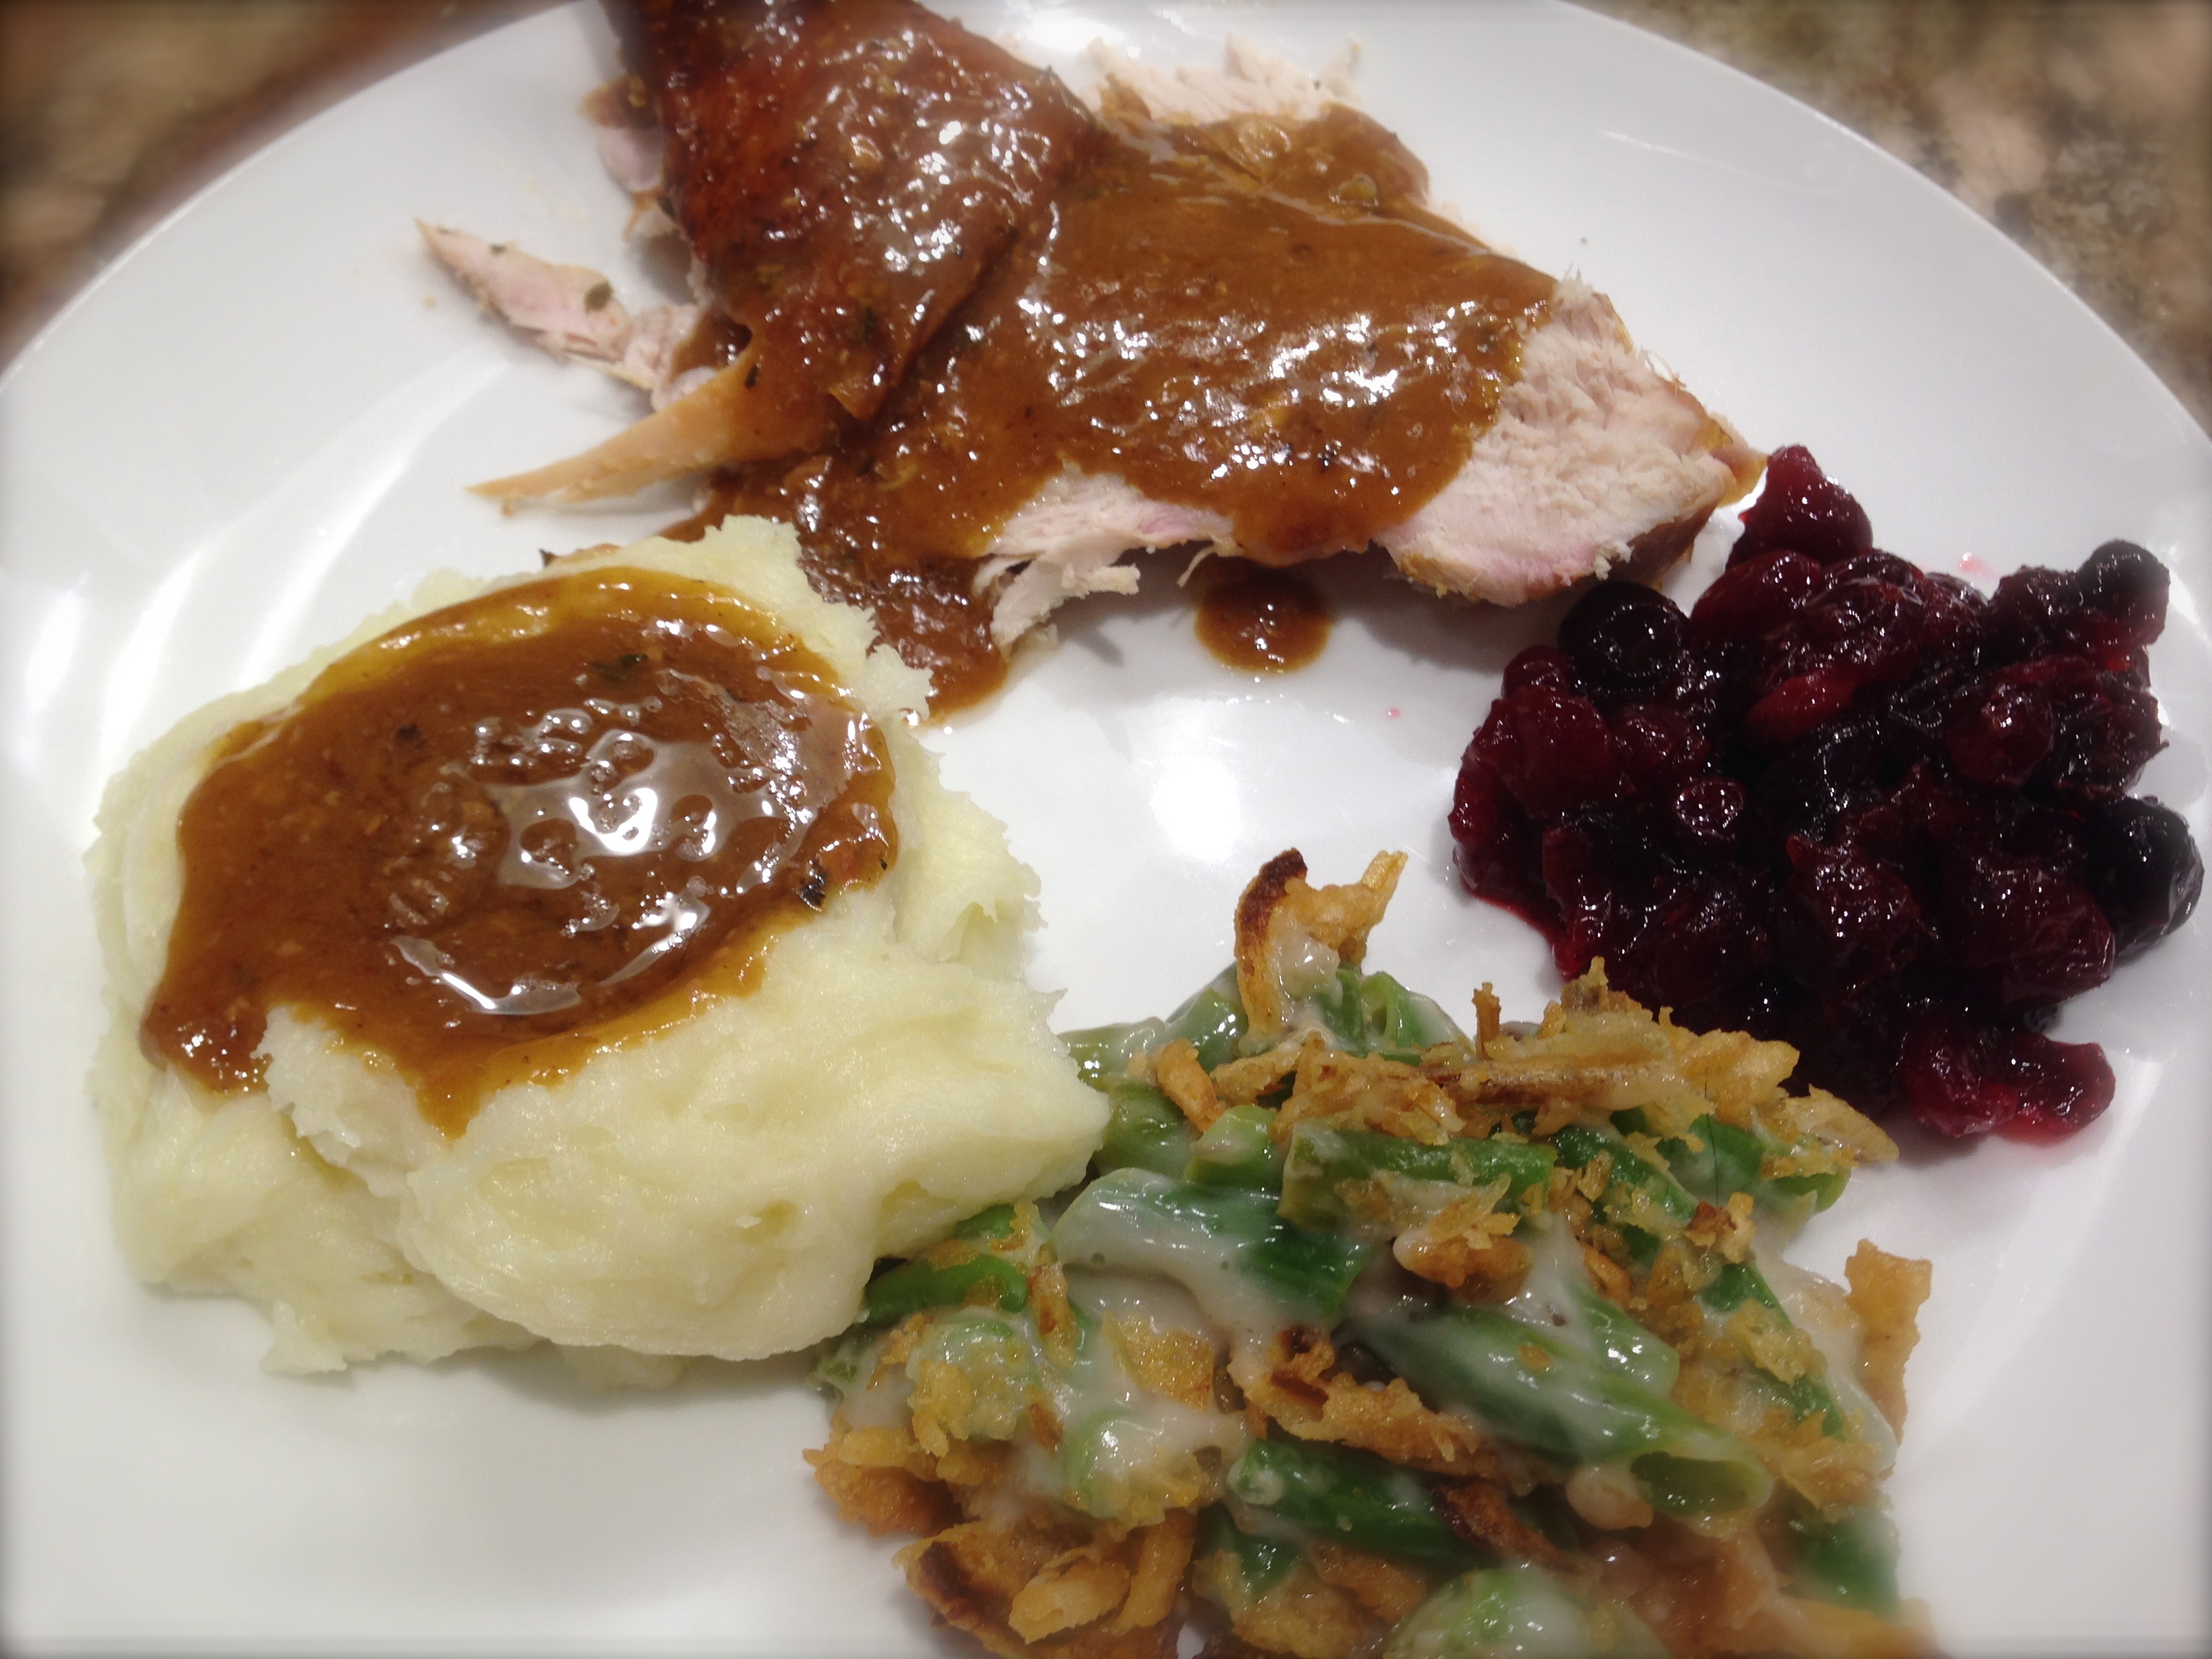
Lesson Learned 4: Shelly suggested serving this over rigatoni so that the creamy deliciousness of the sauce could permeate the inside and the outside of the pasta. I served it that way and I totally agree – use rigatoni.

Lesson Learned 5: I added some sliced baby portobello mushrooms during the last half hour of cooking. That way they cook but don’t disintegrate. I also served it with some sliced green onion on top for color, but you could use italian parsley as well. It needs a little color for serving.

ITALIAN CHICKEN WITH A TWIST RECIPE (courtesy of Jenny and Shelly)

Slow Cooker Italian Chicken With A Twist

  • Servings: 4-6
  • Difficulty: easy
  • Print

INGREDIENTS:

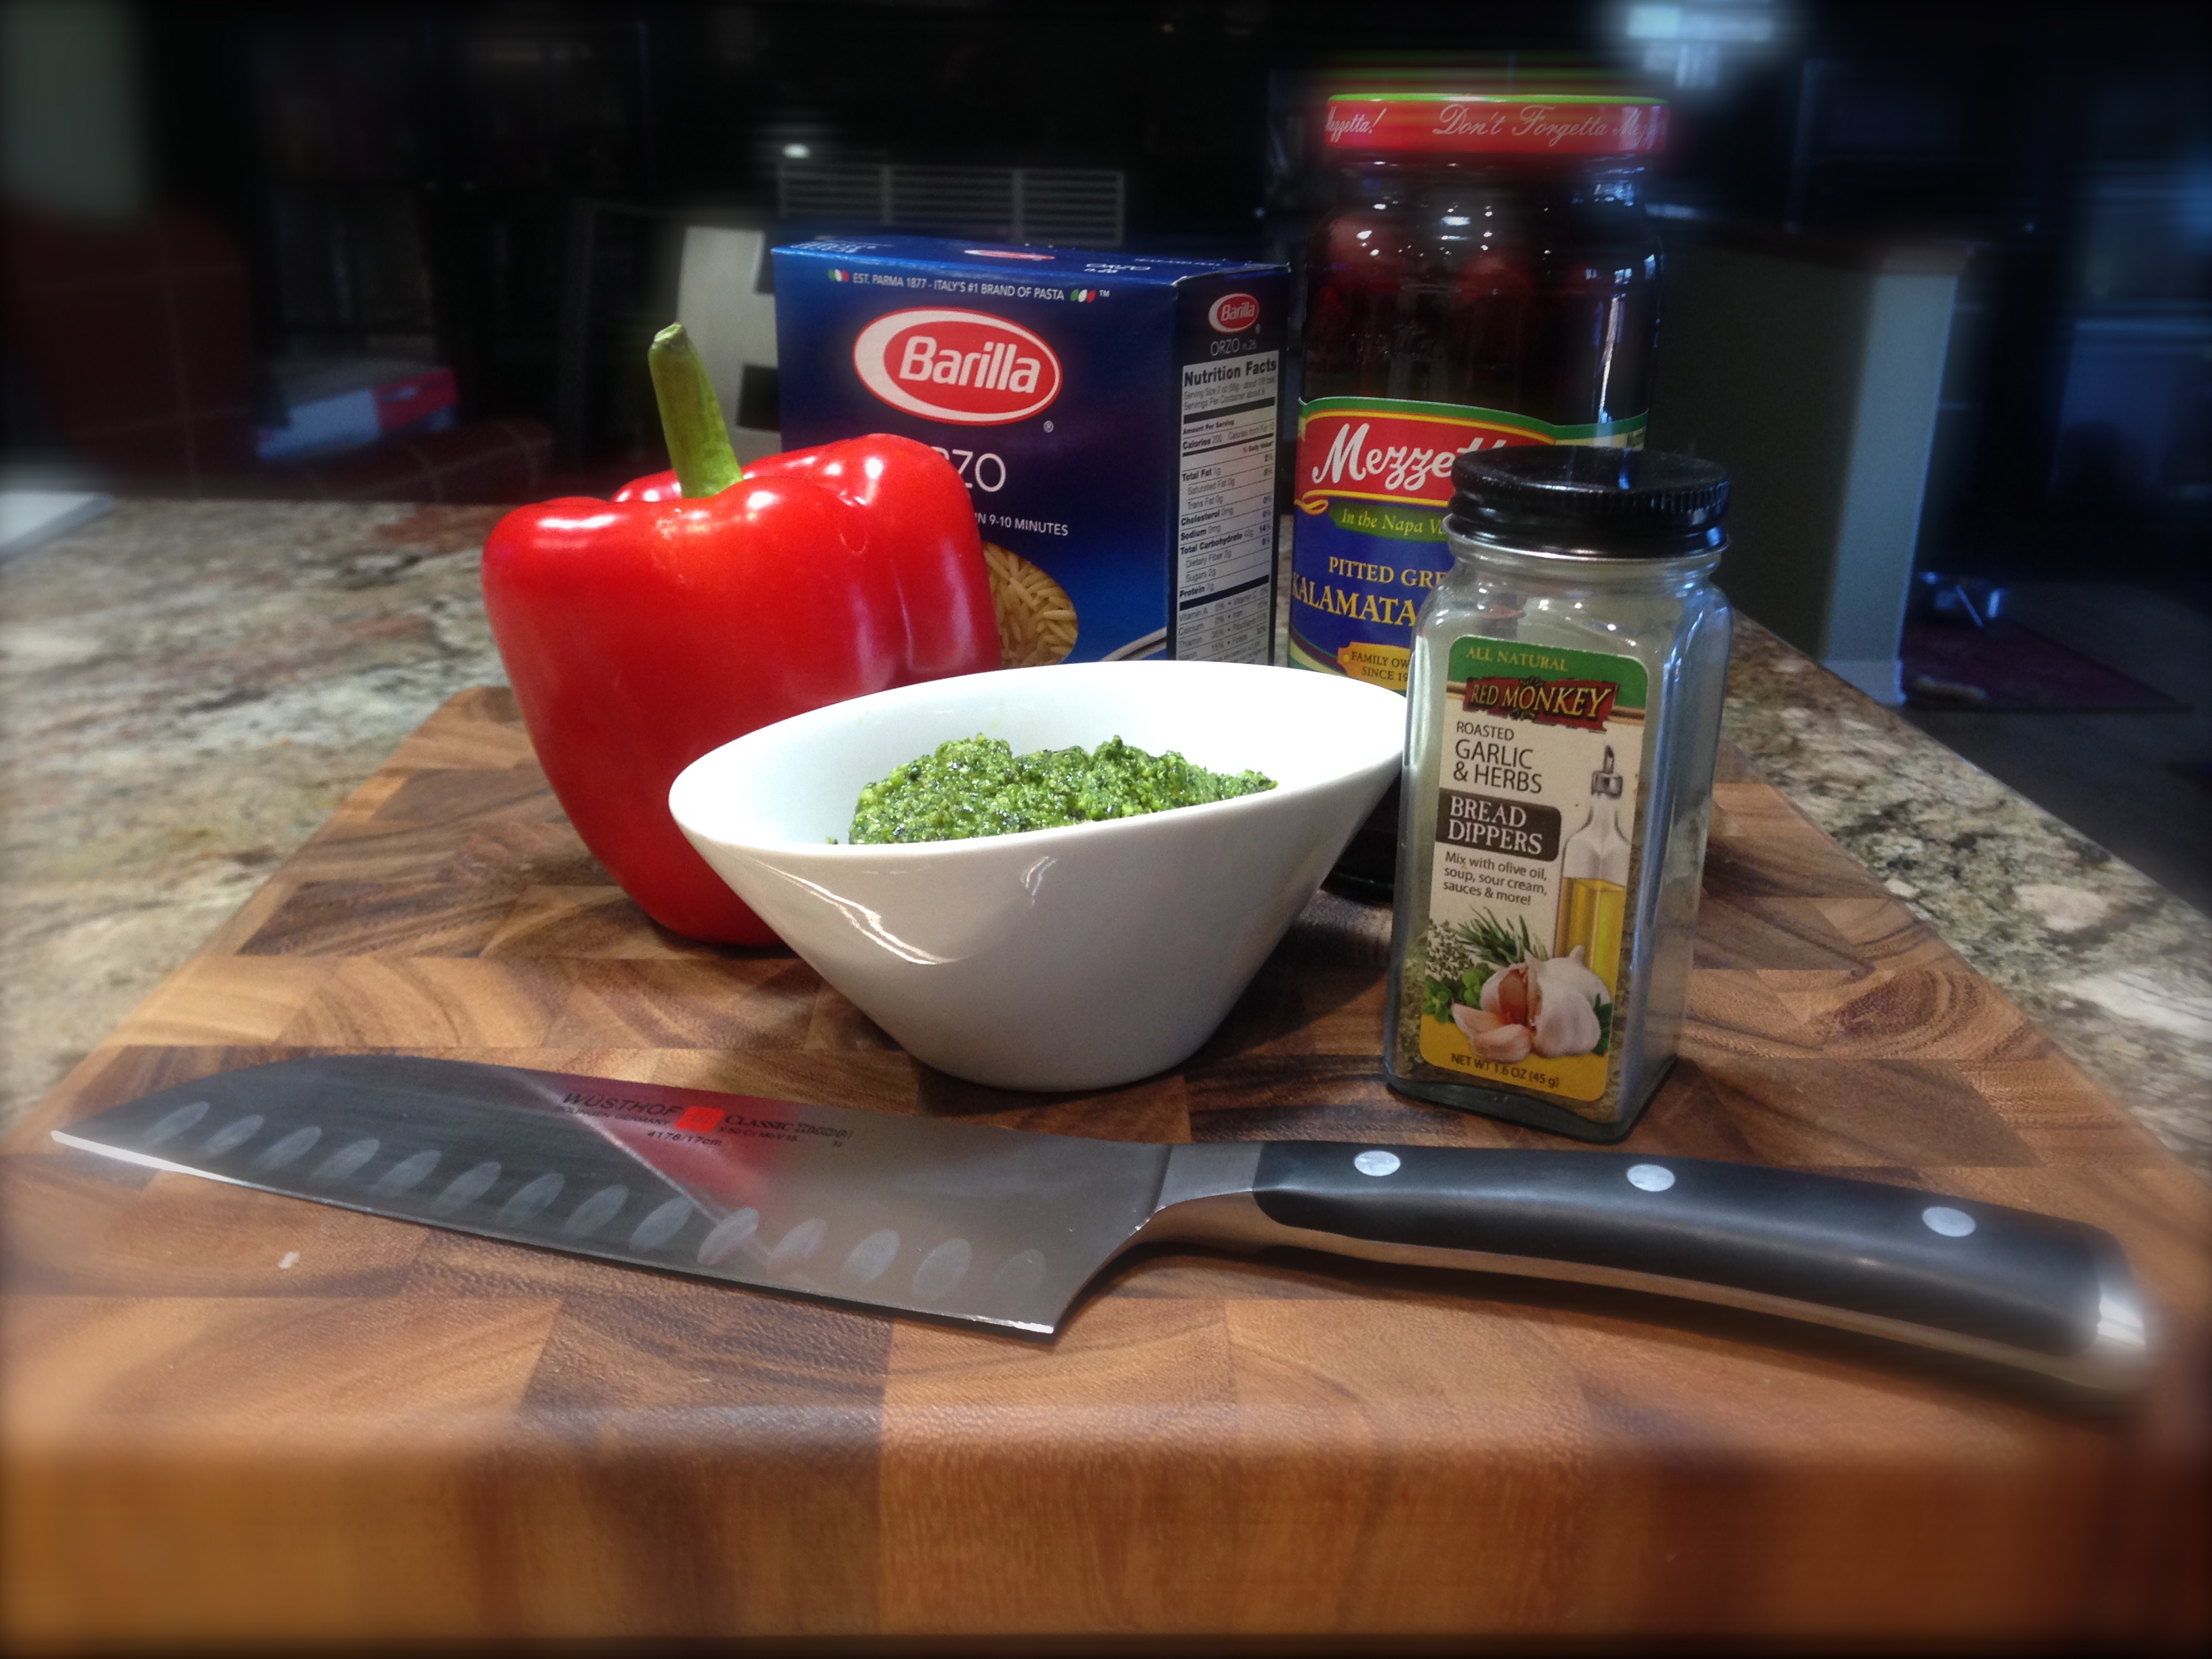
6 boneless chicken breasts

1 stick of butter at room temperature (I used a half stick and, in my opinion, it was more than enough)

2 packages of dry italian dressing mix

2 cans of GOLDEN mushroom soup

1 cup dry white wine

1 8 oz container of chive and onion cream cheese at room temperature

2 cups sliced baby portobello mushrooms

Cooked rigatoni pasta

Green onions or italian parsley for garnish

DIRECTIONS:

Mix together the wine and italian dressing mix. Combine butter, mushroom soup and cream cheese in a pot and heat slightly until melted. Add white wine and italian dressing mixture to soup mixture.  Lightly grease with olive oil or spray the crock with cooking spray before adding ingredients. Place the chicken breasts in the crock and cover with prepared sauce. Cover and cook on low for 5 hours. Add mushrooms and cook for an additional 30 minutes. Serve over rigatoni. Garnish with green onion or italian parsley.

NOTE: It’s best to cook this according to your slow cooker and its temperatures. The next time I make this recipe I will only cook it for 5 hours total. Each slow cooker can be different. And as always, resist the temptation to lift the lid. When you do that it slows down the cooking process and you need to add extra time to make up for your curiosity.

Slow Cooker Italian Chicken  With A Twist

Slow Cooker Italian Chicken With A Twist

Balsamic Parmesan Roasted Cauliflower

As I’ve mentioned may times before, I am a big fan of Pinterest especially as it comes to finding recipes. What I like about the site is one’s ability through “pins” to access websites that might not come to the top of a Google search, so you’re basically connecting with little known sites that you may never have found otherwise. And I have found these sites to be great resources for information and new ideas  for the kitchen.

So as I was browsing Pinterest the other day I came across the pin for a recipe called balsamic parmesan roasted cauliflower. It was pinned from the website http://www.kidneybuzz.com. Now doesn’t balsamic parmesan roasted cauliflower sound divine? And since I’m always looking for new ways to roast vegetables I just had to give the recipe a try.

When I evaluate recipes I look for a few simple things. First, are the directions clear – second, is it easy to prepare – third, can you be successful the very first time you make it, and fourth, did the recipe tell you everything you needed to know (as I find quite often recipes do not – especially where chefs-in-training are concerned). So here is my rating and lessons learned making this recipe:

Rating: C- with the potential for an A. I have never been so psyched to make a recipe and been so disappointed. I’m getting to the point though where I am starting to trust my own instincts versus just doing what is written. After some interesting lessons learned I would try this recipe again, as I do believe it has the potential to be an “A” rated recipe.

Balsamic Parmesan Roasted Cauliflower

Balsamic Parmesan Roasted Cauliflower

Lesson Learned 1: This recipe called for cooking the cauliflower from 20-30 minutes at 450. I will tell you right now if you do that you will have limp overcooked cauliflower. I’ve roasted cauliflower before and never over 400. But I thought, ok, I’ll compromise. I’ll roast it at 425. Big mistake!! The cauliflower came limp and overdone. I like my roasted vegetables to have some crispness to them. If you like them limp then cook them longer. In my opinion (and I roasted rather large florets) 15 – 20 minutes max at 400 is my recommendation.

Lesson Learned 2: This recipe does not tell you how to roast with balsamic vinegar, and that can be tricky. The proportions are perfectly fine, but you need to make sure that the cauliflower is primarily coated and not the pan. Otherwise you will have a sticky, gooey hard to clean mess because (unless this is different in high altitude) balsamic vinegar doesn’t evaporate as the recipe suggests, it burns especially in any concentrated amounts. That’s why I say make sure the cauliflower is covered in it and you don’t leave a puddle of it in your pan. If you do, clean up will be a nightmare (and in my opinion they should tell you these things in a recipe). I would also either spray your pan with cooking spray or line it with foil so that any balsamic that does not “evaporate” can be easily cleaned.

Lesson Learned 3: Tossing the cauliflower half-way through the cooking process is a must. That way you will get an even caramelization and the cauliflower won’t looked burnt. So, toss half-way through and don’t add the vinegar and cheese until the last five minutes.

Lesson Learned 4: Obviously this was not a recipe that turned out well the first time making it. I overcooked it and wound up with a gooey mess in my pan. That being said, it still had an interesting flavor, almost sweet. So I am definitely going to try this again as I think it has great potential.

I hope my lessons learned help you have more success the first time you try this recipe. I plan to continue to play with it until I get it right. When I do I will either update this blog or post a new one referencing this. I am a big fan of roasted vegetable but you have to get the cooking time and temperature just right, otherwise you have a limp burnt mess.

Easy Orange Chicken…

I will never forget that conversation. I was sitting at lunch with a colleague and she was telling me how she was a Food Network junkie. I laughed at her. I could not believe someone would actually enjoy watching a television program of someone cooking. So one Saturday morning, just for a lark, I decided to watch the Food Network. I’ve not been the same since.

What I liked about the Food Network, and especially the shows of a few years past, is that it educated me on various types of foods, taught me technique and challenged me to try new recipes and to experiment in the kitchen. The Food Network made me an accidental “foodie” and there’s not turning back now.

What the chicken skin looks like after the initial browning...

What the chicken skin looks like after the initial browning…

I used to really like Robin Miller’s show, but it’s no longer on the network. I’m a big fan of Ina and Giada and I also like Melissa D’Arabian. And it is my testing of one of Melissa’s recipes that is the subject of the blog today. She called the recipe “Crispy Chicken a l’Orange” and it is from her book Ten Dollar Dinners. I first saw the recipe on one of her shows, and it is listed on the Food Network website for free, so I’m pretty sure I’m not breaking any copyright laws by sharing this with you. I am always looking for different ways to make chicken and this recipe intrigued me, so I thought I’d try it. Here is my rating and lessons learned from making it.

Rating A-  the main reason I give it a minus is that the sauce is tricky. By that I mean it is a combination of frozen orange juice concentrate and honey. The tricky part is cooking this in the oven and not getting a pan that has burnt-on honey all over it, making it a nightmare to clean. I haven’t quite figured out how to avoid that. I make this recipe in a well seasoned cast iron skillet and I still have a difficult time cleaning my pan. Maybe it’s my fault. The recipe calls to brown the meat in a skillet and then transfer it to a baking dish. By using the cast iron pan I tried to do this as a one-stop shop and brown the meat and cook it all in one pot. Maybe next time I’ll try what the recipe recommends and see if that makes a difference with the clean up.

Drizzle the chicken with the orange juice and honey mixture and put into the oven

Drizzle the chicken with the orange juice and honey mixture and put into the oven

Lesson Learned 1: Brown the chicken skin side down for at least five minutes. Resist the temptation to move it around. Just let it stay in one place. After 5 minutes on medium-high heat you should have nicely browned skin and will continue to brown in the oven. (see the picture above).

Lesson Learned 2: Make sure the chicken is patted very dry before you begin to brown it. If it is moist it won’t brown.

Lesson Learned 3: It is very important to let the chicken rest for at least 10 minutes after cooking as called for in the recipe. The chicken comes out very juicy if you do it that way. Other than that there are really no other tips I can give you about this recipe. It is relatively easy to make. You get great flavor without a lot of work. The only challenge for me so far is the clean up.

When I get a thumbs up from my husband I know a recipe is a keeper. This got two thumbs up on this one. I served this with parmesan oven roasted asparagus and my pesto orzo with roasted red peppers and olives (pictured at the bottom). So try it, I’m sure you’ll find this recipe to be a keeper as well.

IMG_5517

CRISPY CHICKEN A L’ORANGE (EASY ORANGE CHICKEN)

Easy Orange Chicken

  • Difficulty: Easy
  • Print

INGREDIENTS:

Skin on chicken breast (the recipe calls for bone-in but I did mine boneless and it was delicious)

1 1/2 tsp. kosher salt

1/2 tsp. ground black pepper

1 TBS. vegetable oil

1/2 cup thawed orange juice concentrate

1/4 cup honey

DIRECTIONS:

Preheat oven to 375. Season chicken with salt and pepper. Heat oil in a skillet over medium-high heat and seat the chicken skin side down until brown and beginning to crisp – about 5 minutes.

In a small saucepan bring the orange juice concentrate honey and a dash of salt and pepper to a boil. Cook until syrupy (about 3 minutes).

Transfer chicken skin side up to a baking dish and drizzle with half of the orange juice mixture. Bake for approximately 35 minutes or until the internal temperature is between 160 and 170. After the chicken has been in the oven for about 15 minutes, drizzle the remaining orange juice mixture on it. When cooked, remove the chicken from the oven and let rest for about 10 minutes.

Serving suggestion: parmesan roasted asparagus and pesto orzo with roasted red peppers and olives

Serving suggestion: parmesan roasted asparagus and pesto orzo with roasted red peppers and olives

Pesto Orzo With Roasted Red Peppers and Olives…

Pesto Orzo Roasted Red Pepper Ingredients

Pesto Orzo Roasted Red Pepper Ingredients

I admit, I am not one for making up recipes – creativity in the kitchen is not yet one of my culinary skills. But this recipe is an invention of mine – totally made up on the spot (and I’m sure there is a similar recipe for this out there somewhere) and has now become a side dish staple in our house.

It really evolved from two things, that being a cooking class in which I learned the art of roasting a red pepper (no more store bought jars for me) and a huge crop of basil that forced me to figure out how to make pesto. From there the recipe took shape.  So let’s talk a little bit about home-made roasted red peppers and pesto. Once you’ve made them yourself you will seldom, unless time dictates, go back to buying it pre-prepared at the grocery store.

Flame Roasting A Red Pepper

Flame Roasting A Red Pepper

I first became aware of using roasted red peppers in recipes from watching the Food Network. It seemed that every chef I liked used them in a variety of different recipes but they mostly just got them out of a jar. Don’t get me wrong, the jarred roasted red peppers are great and are a real time saver, but if you want to control the flavor and minimize waste there is nothing like making it yourself. It’s so easy and I have to say rather fun as well.

The trick is you will need fire of some sort to do this, so a gas stove or other source of flame is necessary. All you do is put it on the fire and let it turn black, and I do mean black. Just keep an eye on it and when one side turns black rotate it until the entire pepper is black. That’s it. Then you put it in a container, cover it with plastic wrap and let it sit for at least 20 minutes. After that, you take a paring knife and scrape off the black matter and voila, you have a roasted red pepper! It can’t get simpler than that. I’ll put the complete recipe down below. Oil and herbs round out the flavor, but it is so easy and I like the fact that you control the amount you want to have versus buying a jar of peppers and having half of it sit in the refrigerator until you wind up throwing it out. This is easy and it has real cost savings as well.

The blackened pepper...

The blackened pepper…

The next part is the pesto. The prime ingredient in pesto is fresh basil. I like to grow mine in containers on my deck. Once you figure out how to grow basil you will get it prolifically, trust me. The first year I grew it I was not aware of cutting it back before it began to flower. That resulted in a very small basil crop. The second year I did a little research, did the appropriate trimming and I wound up with basil coming out of my ears. Using your basil to make pesto is a great way to have it year-round. I make mine and freeze it in batches and when I want some I just scoop what I need out of the container and let it thaw. I hear some people freeze it in ice cube trays and just pop cubes of pesto out when they want them. I had way too much basil to even try that. My freezer would’ve become nothing more than a haven for ice cube trays! Pesto freezes very well and every summer I wind up freezing a supply that takes me through to the following summer. I’ve included the pesto recipe below.

Homemade Pesto

Homemade Pesto

The rest is relatively simple, just a matter of cooking the pasta and combining the ingredients. My husband is a big rice fan and I’m not (being born and raised a potato girl) so I’m always looking for ways to either make a substitute for rice or jazzing up rice. Because of that I’ve become quite adept at risotto, my favorite form of rice, but that is for another blog. I found this recipe to be a great substitute for rice. As a matter of fact, my husband originally thought it was rice as orzo is a rice shaped pasta. Try this. I think you’ll really enjoy this one. Here is my recipe rating and lessons learned: Rating: A +++++ – now c’mon, you didn’t think I could rate a recipe made up by me any less than this, could you? But I bet if you try it you’ll agree. The combination of flavors is a perfect compliment to almost any dish. Lesson Learned 1: When I learned about roasting peppers on the stove I was told to let it sit covered for a minimum of 20 minutes before scraping off the burnt edges. I recommend waiting as long as you can. The longer you let it sit the easier it is to scrape it off. If you wait an hour or more it comes off in no time flat. Lesson Learned 2: When making the pesto recipe, initially add only half of the olive oil into the food processor. After that drizzle in the rest. You may find that adding all of the recommended amount may make the pesto too oily. I don’t like my pesto floating in oil, but some do. You can always add more olive oil but you can’t take it away once you’ve added it. Lesson Learned 3: The pesto recipe calls for a half of a clove of garlic. I like my garlicky and so I put in two cloves. Don’t throw them in whole. Just cut them in quarters – that way you will ensure they mix properly in the food processor. You don’t want to be chomping on raw garlic. Lesson Learned 4: The recipe calls for a 1/2 cup of cheese. You can add more to taste if you like. Lesson Learned 5: After you drain the pasta put it back in the pot you cooked it in and mix all the ingredients together under a very low flame. That way any residual liquid will evaporate so you won’t have a watery concoction.  

Pesto Orzo With Roasted Red Peppers and Olives

  • Servings: 4-6
  • Difficulty: Easy
  • Print
INGREDIENTS: 1 1/2 cups uncooked orzo pasta i large red bell pepper 1/4 cup of pesto olive oil (1-2 tsp.) 1/4 cup of kalamata olives chopped 1 TBS garlic and herb bread dipper seasoning DIRECTIONS: Place red pepper over open flame and blacken on all sides. Place in a heat resistant bowl, cover with plastic wrap and let sit for at least 20 minutes. Remove pepper from bowl and scrape off all of the black matter. Cut open, remove the seeds and yellowish veins and cut into lardons (lardons are simply small rectangular slices – see picture below). Add seasoning and desired amount of olive oil. Mix together and set aside. Chop the kalamata olives into small bite size pieces.

Lardons of red pepper mixed with olive oil and seasonings.

Lardons of red pepper mixed with olive oil and seasonings.

In a 3-4 quart saucepan cook pasta according to package directions. Once cooked, drain the pasta and put it back in the pot under a very low heat. Add the pesto (recipe below), roasted red pepper and olives. Stir to combine. Serve immediately.

Basic Basil Pesto

  • Servings: 12
  • Difficulty: Easy
  • Print
INGREDIENTS: 4 cups loosely packed basil leaves 2 cloves garlic 1 small shallot, cut into pieces 3 TBS. pine nuts 1/4 – 1/2 cup olive oil 1/2 cup grated romano or parmesan cheese salt, if desired DIRECTIONS: Wash basil leaves and remove excess water. Place the basil, shallot, pine nuts, cheese and 1/4 cup oil in a food processor. Process, stopping to scrape down the sides of the food processor at least once. Check the consistency of the pesto. If too thick, drizzle in more oil while processing until the pesto reaches the desired consistency. Use or freeze. If not using immediately, store in an airtight container in your refrigerator or freezer.

Mix all ingredients together under a low heat

Mix all ingredients together under a low heat

Orzo Pasta with Roasted Red Pepper and Olives

Orzo Pasta with Roasted Red Pepper and Olives

The Hiawatha Park Dance Company…

The Hiawatha Park Dance Company Logo

The Hiawatha Park Dance Company Logo

In recent days I’ve been spending time trying to organize this blog. I’ve been blogging for a couple of years now, and part of the challenge I face is that I don’t blog about one specific subject. That can be confusing to potential visitors who, I think, look to blogs for very specific information. Within the past year, the greater part of my blog had dealt with a growing passion of mine, cooking and baking, and writing about the recipes I’ve tried, my opinions of them, and lessons learned while making them. I am not a natural cook learning much of my technique from the school of hard knocks and some strategic cooking classes and my thought was that my journey may help others like me who did not have anyone to mentor them in the culinary arts when they were growing up.

Ok, so what does all of this have to do with the Hiawatha Park Dance Company? Well there are two trains of thought that brought me about to the dance company. The first being that, early on, I was so career obsessed and my job became my total focus – one of the reasons I never really learned how to cook and that is something I’ve been thinking about recently. And second, as I was organizing the blog it occurred to me that I have written several blogs about my general memories about Hiawatha Park but none specifically about the dance company. So it’s time for that special group of ladies to get their due.

Me and some of the members...

Me and some of the members…

I taught in after school programs at Hiawatha Park for 14 years. My title was drama instructor and my job was to teach drama and to produce children’s plays (along with directing and working at Theatre On The Lake, but that’s an entirely different blog in itself). It became apparent early on in my days at Hiawatha Park that both the students and the audience liked musicals so I decided to add a few dance numbers to some of the early shows I produced. That soon became the glue that made many of the students return. They loved to dance (and so did I) and dancing as a part of the program grew by leaps and bounds until it got to the point the productions were more about dancing and less about acting. Although we continued to do plays (it was a must every December) we branched off and started to do dance recitals every Spring. And those took off like wild fire. Soon I was mostly teaching dance classes, with one play production class and the numbers of students in my program got larger and larger.

Being the type-A personality that I am, I wanted to make sure my students had quality instruction. I had taken dance classes in college and had some good basic knowledge but I wanted to provide classes that could challenge the abilities of the students as they began to excel. So off to dance studios I went. At one point in time I was taking classes 3-4 times a week with various choreographers I had worked with as well as instructors from the Hubbard Street Dance company, a renowned Chicago dance company.

The dancers, and me with their mom's...

The dancers, and me with their mom’s…

Now, I am not your typical dancer – I am way too tall and had never been super lean, but I had innate ability that got me pretty adept in the principles of jazz dancing. From there, what I learned they learned – sometimes even down to the routines that I learned in my classes. I saw students struggle, I saw students fail, I saw students excel but I made sure that each and every one of them always knew that they were positively challenging their abilities, and that to me is the true meaning of success.

After some time it became apparent that, as in many cases, some students were simply much better than others. In my mind that did not make them better it just made them more adept at learning certain principles of dance. So as I began to notice varying levels of expertise it became a challenge to figure out how to keep all of my students motivated and interested. Then one day during a dance class it came to me. I was being instructed by a dancer from the Hubbard Street Dance Company and I thought dance company… dance company. What a great idea – form a dance company. Create a venue for the dancers that excel and provide a tangible goal for the aspiring up-and-coming dancers. The idea took off.

Membership was basically up to me, we did not have a formal audition process and I did not stay at Hiawatha Park long enough to develop one. Basically I think I based it on whether a dancer could do a double turn – some could do triples. They also had to be able to perform every element of the more complex routines. I will never forget their first official number, and their simple introduction: Ladies and Gentleman, The Hiawatha Park Dance Company  — the black jackets with the company’s name on the back –  their backs to the audience, the lights go up, the surrealistic intro to Prince’s song “You’ve Got the Look” and then BAM, they turn and begin their bump and grinds. All I could think of was how fortuitous it was for them to be dancing to that song as the words “Sho nuff do be cookin’ in my book” certainly applied to them at that moment. It was all I could do to not reduce myself to a blubbering idiot as I watched them. They were proud, confident young women who found an identity that separated them from the pack. They knew it and I knew it. They were the ones all the other dancers in the program aspired to be. It was so fabulous to see them shine. And shine they did. They learned everything I learned. They were dedicated, competitive. They wanted to be the best they could be. What life lessons they learned through that program, life lessons they didn’t even realize they were learning at the time and I didn’t realize I was teaching.

They developed a great reputation so much so that they were asked to perform at Chicago Park District city-wide events. They were the main event at the city’a annual Arbor Day Celebration for a couple of years, an event that brought the mayor and a host of other city dignitaries to Daley Bicentennial Plaza on Chicago’s Lakefront.

Woodsmoke Ranch Program

Woodsmoke Ranch Program

They performed at Woodsmoke Ranch, a private RV park, for a couple of years (one of the parent’s owned some property there) and of course they performed at Hiawatha Park dance recitals and Christmas parties. I even had to institute a number in all of our shows where all the other dancers would have one number with the dance company which, at it’s highpoint, included sixty kids on stage all-together weaving in and out of each other and performing different but coordinated routines. I always dreaded staging that one – it took one complete rehearsal just to get that down as they would all rehearse separately until production week. Sometimes I wonder how we ever even did it. But in the end it was worth it just to see the looks on their faces and the faces of their families and friends.

At the city-wide Arbor Day event

At the city-wide Arbor Day event

If there is one thing that I can point to as my shining accomplishment at Hiawatha Park it has to be the dance company. Not that the other parts of the program were less important, but once I established it I knew I had hit the programmatic jackpot.

I stayed at Hiawatha Park for 14 years. In my third year three young women came into the drama program, Michelle Steffen (Rouland) , Janine Herman (George), and Camille DeAngelis. A few years later their friend Denise Chyrsty (Redmond) joined and then all four of them stayed with the program, becoming the initial core of the company, through their senior year in high school. That last year they became affectionately knows as “The Seniors”. Talk about growing up together, boy did we ever. It was so important to me that they have their last year in the dance company that I turned down a promotion the year before so that I could stay at Hiawatha Park for them. I never told them that at the time and was offered another promotion immediately following their final performance. I took that one and the dance company became history.

The Seniors

“The Seniors” with their moms and me.

But if “The Seniors” were the elder statesmen, you can’t discount the other members of the group, Jenny Jarosz (Holcomb) – the heart and soul of all of us , Nicole Burns (Shamo) the dedicated professional, Heather Wronowski – “finger love” (and the members all know what that means), Michelle Kyrstek – our angel who died at the age of 13 from an unsuccessful organ transplant, Lydia Hlibchuck – who taught us all a thing or two about jazz turns, and April Balitewicz – the most flexible dancer of the entire bunch. Together they were a joy to work with and a joy to be with. To this day most of them are still in my life.

It has taken me this long to honor in writing this wonderful group of young girls who have all gone on to become inspiring women. And although the miles may separate us, the love binds us together. I love them all and will until the day I die. And so, with all the love in my heart it is my honor to introduce to you, ladies and gentleman, The Hiawatha Park Dance Company!

Dance Company

Don’t Chicken Out On Roast Turkey…

My husband and I went out to dinner this past Thanksgiving and I made a rib roast for Christmas so I knew eventually I would feel like I was cheated out of a traditional Thanksgiving meal. Luckily for me my local grocery store had a great manager’s special over the Christmas holiday pricing every single fresh turkey breast, regardless of weight, at $7.00. OK, I said to myself, I can’t afford to pass this up even though turkey was not on the Christmas menu. So into the freezer it went just waiting for the right time to resurrect Thanksgiving.

I used to be intimidated by cooking a turkey – I could never seem to get it right making it either over-done or, mostly in my experience, under-done. To me there is nothing worse than a dry turkey especially if you are just cooking an all-white meat turkey breast. Overcooking it means you eat sandpaper and when you spend that amount of time preparing a meal nothing can be more frustrating.

I can tell you right now, cooking a turkey is about trial-and-error, a firm resolve that it really is no big deal and a belief that you can actually be good at it. I’ve had numerous disasters over the years and only through the school of hard knocks have I become adept at roasting turkey. I very seldom cook a whole bird anymore as even a small one is way too much for me and my husband. But I find that with the right prep and know-how a turkey breast, whether half or whole, is equally as good and lends itself to being on the dinner menu more than once a year. At other times I don’t make all the traditional sides as the caloric intake is far too great, but this time I just had to opt for tradition – I mean you just gotta do it once a year, right?

Normally I critique recipes from Pinterest, Facebook or other foodie-type websites, but this is solely my recipe adapted from years of experience and variations of several recipes I’ve tried. So here are my lessons learned and rating.

7 pound turkey breast

7 pound turkey breast

Rating: Finally A+ – I say finally because this took a lot of practice on my part. For some reason the perfect roast turkey took a few years of trial and error. Thanks goodness I love turkey so much that failure did not weaken my resolve. What is great about when you master this is that you feel confident to make it any time of year. One of our local grocery stores often stocks fresh bone-in half breasts and that is plenty for my husband and me for a great meal and leftovers.

Lesson Learned 1: If the turkey is frozen, make sure it is completely thawed. This may sound rudimentary, but I can’t tell you how many times I thought the bird was thawed only to find out at the last minute that it was still frozen in the middle. The turkey breast in the picture above was a little over 7 pounds. I planned to make it on Sunday so I took it out of the freezer and put it in the fridge the Tuesday before. In my experience turkeys thaw very slowly in the fridge and I finally figured out that if I add a day on to what I think will be the right amount of time to get a perfectly thawed bird I tend to get it right. Even with putting the bird in the fridge on Tuesday I still took out frozen matter from the cavity on Sunday. But I did that very early in the day, cleaned and dried the turkey breast and put the bird back in the fridge after that so that when it was time to begin prepping it, it was completely thawed inside and out. This was perhaps the biggest difference in ensuring even cooking and determining the appropriate cooking time.

Lesson Learned 2: Prepare a butter rub and rub it under the skin as well as all over the outside of the bird. The nice brown color that you see in the picture is achieved by doing that. I normally make a mixture of butter, fresh thyme, salt and pepper. The darker pieces in the picture are not burned skin but darkened thyme. You can scrape that right off.

Lesson Learned 3: Forget about putting a bread stuffing in the cavity, instead stuff it with aromatics. With this particular bird I jammed a thyme bundle, large garlic clove, two sweet onion quarters and a half of a lemon into the cavity. You’ll be amazed at how this helps to flavor the meat. You can discard all of it before you start to carve it. It’s work is done by then.

Lesson Learned 4: Put some white wine in the bottom of the pan before you begin the roasting process. This provides a nice steam bath for the bird and enhances the juices that you can use to make homemade gravy. I never worry about having basting juices or a solid basis for my gravy anymore. This is a great trick. The gravy in the picture below was made from the wine and drippings mixture from the turkey breast.

Lesson Learned 5: Know your oven. I’ve said this in a few other recipes, but for turkey I think it is very important. I roast turkey at 350/twenty minutes per pound. Some recipes call to roast the bird at 325. I live in high altitude and so, on average, cooking times are longer and cooking temperatures need to be a little higher. After much trial and error I have found this to be the perfect roasting guideline for my circumstance. Also get a good meat thermometer and use it. That is the only way to ensure you meat is cooked to the desired doneness.

Lesson Learned 6: Let the turkey rest for at least 20 minutes to half-an-hour after roasting. The internal temperature should be 185. I normally take it out when it reaches between 175-180 as carry over cooking will occur while it is resting. Keep it covered in foil but make sure you let it rest. It will be much easier to carve that way and you will retain the natural juices in the meat.

Lesson Learned 7: Be prepared for failure, especially if you’re new to roasting turkey. It’s all part of the learning process and you can always make a turkey pot pie or turkey salad with the spoils.

So go ahead, jump into the deep end of the pool and make a roast turkey more often than just on Thanksgiving. Once you get the hang of it you’ll be surprised at exactly how easy it really is. I’m including for you my basic recipe for both a roast turkey and homemade cranberry sauce, also pictured below (forget store bought, this is sooo easy and sooo worth it).

Turkey and all the trimmings...

Turkey and all the trimmings…

Perfect Roast Turkey With HomeMade Cranberry Sauce

  • Servings: Varied
  • Difficulty: Easy
  • Print

Ingredients:

I whole turkey or a whole or half turkey breast, 7-12 pounds (you may need to adjust the cavity ingredients for a larger bird)

6 TBS. salted butter

Fresh thyme (enough to chop and mix with the butter and to put a bundle in the turkey cavity); you can also use turkey fresh herb blends sold in the grocery store that usually include sage, thyme, and rosemary.

1 sweet onion

1 large garlic clove

1-2 small lemons

2 cups dry white wine

Salt and Pepper

DIRECTIONS:

Make sure the turkey is completely thawed to ensure even cooking. Remove the turkey from its packaging, clean anything out of the cavity, rinse with cold water and pat dry. Cover with plastic wrap and refrigerate for at least an hour. Bring butter to room temperature. Mince approximately 2-3 TBS. of fresh herbs and combine with softened butter, salt and pepper. One half hour before putting the turkey in the oven take it out of the refrigerator, rinse again with cold water and dry off completely with paper towels. Use your hands to create a pocket between the turkey meat and the skin. Massage some of the butter mixture under the skin. Use the remaining butter mixture and massage the entire outside of the bird. Pour 2 cups of dry white wine into the bottom of the roasting pan and place the bird on a roasting rack inside the pan. Salt and pepper the outside of the bird. Let stand for at least 15 minutes.

Roast uncovered at 350 degrees, 20 minutes per pound, basting occasionally. Halfway through the cooking process check on the color of the skin. Once the skin reaches the desired color, tent the bird with foil to prevent the skin from getting too dark. Near the end of your estimated time, check the internal temperature of the bird at the thickest part of the thigh or breast. Poultry should be cooked to 185 degrees.  While the turkey is resting you can put the finishing touches on the other parts of your meal or make your homemade gravy.

THE BEST EVER HOMEMADE CRANBERRY SAUCE: (pictured on plate above)

Ingredients:

2/3 cup sugar

1 large or two small naval oranges (zest and 1/2 cup juice)

1/4 tsp. cinnamon

1/8 tsp. kosher salt

1 bag of fresh cranberries

DIRECTIONS:

Put the cranberries in a saucepan. Zest a large naval orange (or two small naval oranges) and juice the orange(s) – this should give you about 1/2 cup of fresh juice but if it does not just augment with bottled juice. Add sugar, zest, juice, cinnamon and salt. Stir until well mixed. Bring to a boil and then simmer for 15 minutes. Let cool and refrigerate. Make the day before serving to ensure all ingredients have sufficient time to meld. This is so easy and flavorful, you will never served canned cranberry sauce again.

Polar Vortex = Pot Roast

A friend of mine on Facebook said it pretty clearly, when was the last time, if ever, that you heard of a polar vortex? This is the first time for me but these two little words connote a nasty large band of sub zero temperatures that is currently enveloping a large portion of the country. And although our temps in Colorado today will be in the 40’s my home town, Chicago, is experiencing arctic cold the likes of which have not been seen for years.

Outside my window about 5 inches of snow rests on my deck, the sun struggling but not succeeding to show its face. It’s one of those days that a hot cup of Jo, a good book and a nice thick down comforter beckons. And when it finally comes time to think of sustenance, the only fitting thing that comes to mind is pot roast.

Just about everyone has their own pot roast recipe, so I will share mine. I’ve been making pot roast for years – on the stove, in the slow cooker, in the oven – and I think I finally found the way that bests suits us and also produces the tenderest meat. Pot roast can be tricky. There is nothing more savory and delicious than a good pot roast and there is nothing worse than a tough, dry one. My mother, bless her soul, had the theory that you cooked meat until it begged for mercy. Our special Sunday meal would be a pork and beef roast cooked together in the same roasting pan. Of course it never worked, you’re talking two very different types of meat and two very different cooking times, but we didn’t know any better and we chomped on the dried-out hunks and enjoyed them as if they were filet of beef.

Now that I am older and have a more refined pallet, I could never imagine doing something like that but can appreciate the challenge for taking a tough cut of meat and making it tender. The cooking shows would make you think the process is simple – just throw it in a slow cooker or oven and cook for hours on a low temperature. Been there, done that. With my slow cooker, and I have one of the top-rated ones, if I am not careful I can still dry out the meat, especially if there is not enough liquid in the crock and I cook it too long. So I now opt for enameled cast iron and the oven to do the trick.

I prefer enameled cast iron because of its ability to hold a consistent temperature. It does take a little longer to heat up, but once you get to the desired temperature it maintains it evenly which, I think, is the key to a tender savory pot roast. I’ve basically given up on having a tender pot roast and crusty oven browned potatoes all in one pot – to achieve the latter you tend to dry out the former. So if crusty oven browned potatoes are what you want, I suggest cooking them separately. But for me, nothing is better than having the meat, potatoes, carrots and onions slowly simmering away all in one pot. The end result is fabulous. So here is how I achieve it, my rating and lessons learned.

Rating: A – if you do it correctly. Although it may seem easy, I think achieving a perfect pot roast takes trial and error. Figuring out the perfect temperature and roasting time is important and in my experience one size does not fit all. But make this meal a mission – once your perfect it, it’s more than worth it. I also have the challenge of living in high altitude and because the air is drier cooking times tend to be longer. If you are at sea level times can be shorter. It is something you will need to determine.

Lesson Learned 1: Brown the meat. Take the time, about 4-5 minutes per side and give the roast a good sear. Searing is important in trapping natural juices which is key to any type of tender meat especially the tough cuts.

Browned Chuck Roast

Browned Chuck Roast

Lesson Learned 2: Use red wine in your braising liquid. I use a combination of both red wine and beef stock. It produces a much more flavorful gravy and creates a heavenly smell while the pot roast is cooking – and that is part of the joy of pot roast – the smells it produces in the kitchen. Make sure the liquid comes at least half way up the side of the roast for the best braising. Then pile on all the ingredients. Once that is done baste everything with the braising liquid.

Pot Roast Ingredients

Pot Roast Ingredients

Lesson Learned 3: Put the lid on and leave it alone. Resist the temptation to open the lid and constantly check on it. If you must, check on it once half way through the cooking time, but then take the roast and flip it over at that time. That way each side will have the benefit of being submerged in the braising liquid. This is not a necessary step but one I recommend if you have to take a peak at how it looks.

Lesson Learned 4: Relax and let it do its thing. The beauty of this type of meal, similar to my ravioli lasagna, is that most of the work goes into the prep. After that your oven does all of the heavy lifting.

Pot Roast and Vegetables

Pot Roast and Vegetables

Lesson Learned 5: Use the braising liquid to make homemade gravy. It will be out of this world, I promise.

Pot Roast and Gravy

Pot Roast and Gravy

My recipe is a compilation from many sources so I guess this one is my own. I also serve this with a homemade horseradish sauce and that truly complements all the flavors. Try this – I am sure you will enjoy it as much as we do!

Jan's Pot Roast With Zesty Horseradish Sauce

  • Servings: 4-6 people
  • Difficulty: Easy
  • Print

INGREDIENTS:

1  4 pound chuck roast

All purpose flour for dusting and for the roux

3 TBS. extra virgin olive oil

I large onion, peeled

2-3 garlic cloves, peeled (optional)

3-4 large carrots, peeled

3-4 medium sized potatoes (I use red potatoes, but Yukon Gold  potatoes are good as well – peeling them is optional)

1 cup dry red wine (whatever you drink is fine as long as it is a dry and not sweet wine)

1/2 – 1 cup beef broth

2 TBS worcestershire sauce

Thyme – you can use fresh twigs, bundle them and drop in braising liquid or 1/2 tsp. dried for braising liquid and 1/4 tsp. for flour mixture

2 bay leaves

DIRECTIONS:

Preheat the oven to 300. (next time I make this, I may even try 275 and add a little extra time). Trim some of the excess fat off of the roast if necessary. Mix flour with salt, pepper and dried thyme. Dredge the roast in the flour mixture. Heat olive oil in a skillet and sear the roast, 4-5 minutes on each side. (I also take my tongs and sear the edges for about 20 seconds on each edge). Peel the onion, carrots and potatoes. Cut the onion into quarters and carrots and potatoes into large chunks.

Combine wine, beef broth and worcestershire sauce. Pour into cast iron pot and add the thyme and bay leaves. (You could even drop a couple of garlic cloves into the braising liquid if you desire). Rest the roast in the braising liquid. Place the carrots and potatoes around the roast and the onions on top. Baste the vegetables with the braising liquid.

Cook in the oven for 3 hours. Mid-way through the cooking process turn the roast over. (this is optional but do it if you are one of those who just has to take a peak at it).

Using a baster, syphon braising liquid out of the pan. Put the cover back over the roast and vegetables to keep them warm. In a large skillet under medium high heat make a roux (equal parts flour and water – I use two TBS. each). Cook for a minute whisking continuously so that the “floury” taste is removed. Add the liquid and continue whisk. Initially the mixture will be very “liquidy” but it will thicken as you continue to cook.

Once the gravy has thickened, carve the meat and serve with the carrots and potatoes and a loaf of crusty bread.

HORSERADISH SAUCE:

2-3 TBS. of prepared or fresh horseradish

1 cup sour cream

1 TBS. dijon mustard

Combine all ingredients. Let chill for several hours so the flavors can meld. Serve with the pot roast.

BlackFish or Black Eye…

The conversation regarding the documentary film BlackFish seems to be swirling again fueled by a protest over a Sea World float that was part of this year’s Tournament of Roses Parade. I saw the documentary a few month’s ago when it was shown on CNN and I have to admit after I saw it I was very disturbed. And this is quite an admission coming from me, as this was the girl who for year’s said that it was her biggest dream to jump into the tank with Shamu and be a Sea World animal trainer!

At the heart of the documentary is the story of the Orca called Tilikum. He was snatched from the sea when he was two years old and has lived in captivity ever since. His treatment over the years, and specifically in the early years, was horrific and no doubt affected his behavior. He has killed three humans over the course of his life in captivity but the more recent death of Dawn Brancheau, a highly skilled Sea World trainer, has driven to the forefront his unfortunate saga fueling the public debate regarding Orcas in captivity.

Orca

Orca

The concept of captivity has a negative connotation, the idea of removing a species from its natural environment and keeping it “prisoner” in a fabricated world. And to some degree I cannot argue that point. But I think you need to dig a little deeper to form an opinion on the “appropriateness” of these fabricated environments we call zoos and aquariums, even those that are for-profit like Sea World. As a child and as an adult I’ve appreciated both. These venues provided knowledge that created a deep love in me of all creatures great and small. Over the years I’ve seen them transform from rows and rows of cages and tanks to sprawling areas designed to recreate to the best degree possible the animal’s natural habitat while also becoming increasingly concerned with the welfare and healthy stimulation of the animal as well as providing a venue for public education. I may have never been able to see the splendor of an Orca if I had not gone to Sea World. It is a majestic animal and having had the opportunity to see it only fueled my desire to support increased conservation efforts. That passion was initially created by seeing a majestic animal living in a prefabricated world. Good for me, not so good for the Orca. So at any given point in time I can see both pros and cons to this argument. Should these institutions even exist? In a perfect world would we need them? Probably not. But this is not a perfect world. What is right and what is wrong is not as simply defined as the black and white color of the Orca.

What I think upsets me the most is the relentless drive of some organizations to influence public opinion without providing a complete picture of the issue. Yes, it is unnatural for these animals to be living in these environments. Yes, wouldn’t it be great if they could all live in their natural habitat in a world that would respect them an allow them to flourish. But let’s get a foot in reality here. It is not a perfect world and these majestic wild creatures, not just the Orca alone, are in major danger of becoming extinct because man, who has put them in captivity, is also poaching the life out of them for profit. The African Elephant alone is in real danger of extinction because of the market for ivory. Our grandchildren may never be able to see a rhinoceros as they are being killed off in droves for their horns. And the stories of these animals can go on and on. In my mind there is no doubt that the root cause of the problem is man, and unless we can make some serious changes to our species others species may cease to exist and a lot sooner than we would like.

So let’s have that be at the basis of this discussion. Animals should be treated humanely whether in fabricated or natural environments, and if we can successfully deal with how they are treated in the wild, maybe our need for fabricated environments may not be as great. But until that day comes, if it ever comes, I think we need to figure out a happy medium and have a well rounded instead of one-sided discussion. There is a real value to public education and seeing these animals up close and personal is an experience that cannot be replicated by a book or a film. Some of these institutions are actually increasing the numbers of rare species. And what about the efforts of some of these organizations to rehabilitate and release these animals back into the wild?

I guess my point is that there is no easy answer here. But keep the discussion accurate by fulling examining all aspects of the issue. It’s unfortunate that the movie Blackfish did not examine the issue from both sides. Yes I know Sea World refused to participate in the film, and that is perhaps their fatal flaw. But the damning influence of Blackfish affects all institutions that care for these types of creatures and creates a public opinion that is not fully informed. I think it’s great we are having the conversation, but have the conversation based on all sides of the argument.