
I made this fudge over the holidays. Having never made fudge before I wasn’t quite sure what to expect. It was unbelievably easy and so delicious. As a matter of fact it was so good that my husband jokingly gave strict orders as to how much of it I could give away as gifts.
Probably the hardest part of this recipe is mixing together the chocolate and peanut butter mixtures but for something so pleasing to the eye and so yummy this couldn’t be simpler. So let’s talk chocolate peanut butter fudge…
Lesson Learned 1 – Of the two mixtures, the peanut butter one is a little trickier to handle: The peanut butter chip and condensed milk mixture takes a little longer to prepare and it’s much thicker than the chocolate mixture. As seen in the pictures below, the peanut butter part of the fudge gets quite thick before you even work to combine it with the chocolate. The key to working with the peanut butter mixture is to keep it as warm as possible when you combine it with the chocolate mixture and begin to swirl both together. The warmer that mixture the easier the swirling will be.


Lesson Learned 2 – The peanut butter mixture should act as your base: You will need to work with the peanut butter mixture first. Make sure the large dollops of the mixture cover most of the bottom of the pan. The chocolate mixture is not as thick and will not serve as a good base for the fudge. Below is an example of how you should distribute the mixtures in preparation for swirling them.

The next time I make this fudge I will make sure the peanut butter mixture is a more equally distributed. As you can see I had more at the bottom of the pan than the top. I needed to make the spaces in between the peanut butter dollops a little tighter but even so, I am being a perfectionist here. My fudge turned out wonderfully even with the distribution of the mixtures the way it was in this picture.
Lesson Learned 3 – Lining your pan with parchment paper: When you are preparing the fudge the ingredients are messy and sticky. You need to put the ingredients in a pan that is lined with parchment paper both on the bottom and up the sides. That way the fudge won’t stick and can be removed from the pan easily when done. Let me clue you in. Parchment paper has a mind of its own and even though you may tear off enough to line the pan it won’t easily stay in place on its own. It needs a little encouragement. A little trick I learned is to take some cans you have in your pantry, like soup or veggies, and place them on top of the parchment paper while preparing the fudge ingredients (as pictured below)…

The weight of the cans holds the parchment paper down in the shape you need it to be. By doing this, when it comes time to add the ingredients to the pan just remove the cans and the parchment paper will be hold the shape of the pan and be easy to handle.
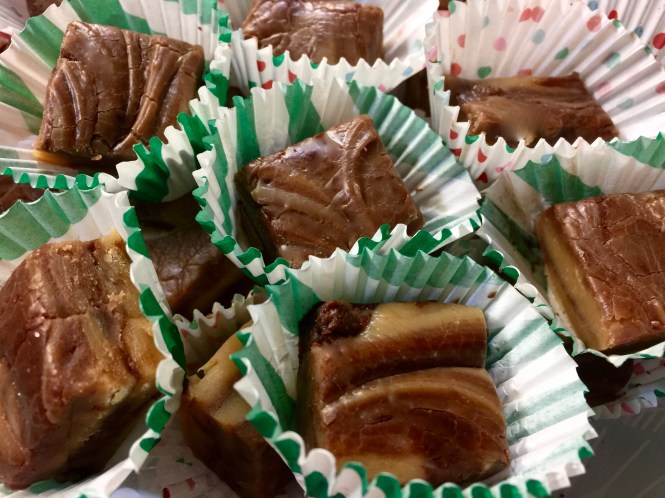
Lesson Learned 4 – For the best looking results don’t over combine the two mixtures: This is a very tasty fudge and part of the fun is to make it look inviting as well. By not over combining you let the beauty of both ingredients compliment each other and clearly shine through.
This recipe is so easy and the end result is divine. I hope you enjoy it!
Chocolate Peanut Butter Fudge
INGREDIENTS:
 1/2 cup semi sweet chocolate chips
1 14 oz. can sweetened condensed milk, divided
1/2 stick of butter cut into Tbs. size cubes
1 10 oz. bag of peanut butter chips
1/8 tsp. salt
DIRECTIONS:
Line an 8 inch square baking pan with parchment paper.
Melt the chocolate chips with 1/4 cup condensed milk and 1 Tbs. of butter over low heat stirring consistently until well combined, approximately 3 minutes. Turn off the heat, cover and keep warm.
In another pan melt the peanut butter chips, remaining condensed milk 3 Tbs. butter and salt. Stir constantly until smooth, approximately 5 minutes.
While still warm dollop large mounds of the peanut butter mixture all throughout the bottom of the prepared pan. Add small dollops of the chocolate mixture in several places on top. Combine both by swirling them together with a knife. Chill the fudge uncovered for at least an hour.
Take the fudge out of the pan by lifting up on the sides of the parchment paper and pulling it up. Peel away the parchment paper and cut the fudge into 1 inch squares.

Before Chilling The Fudge


It’s been years since I’ve made any fudge, maybe it’s time to try it again.
LikeLiked by 1 person
It’s really pretty easy. Try it and let me know what you think.
LikeLike