Fresh Pear Compote…

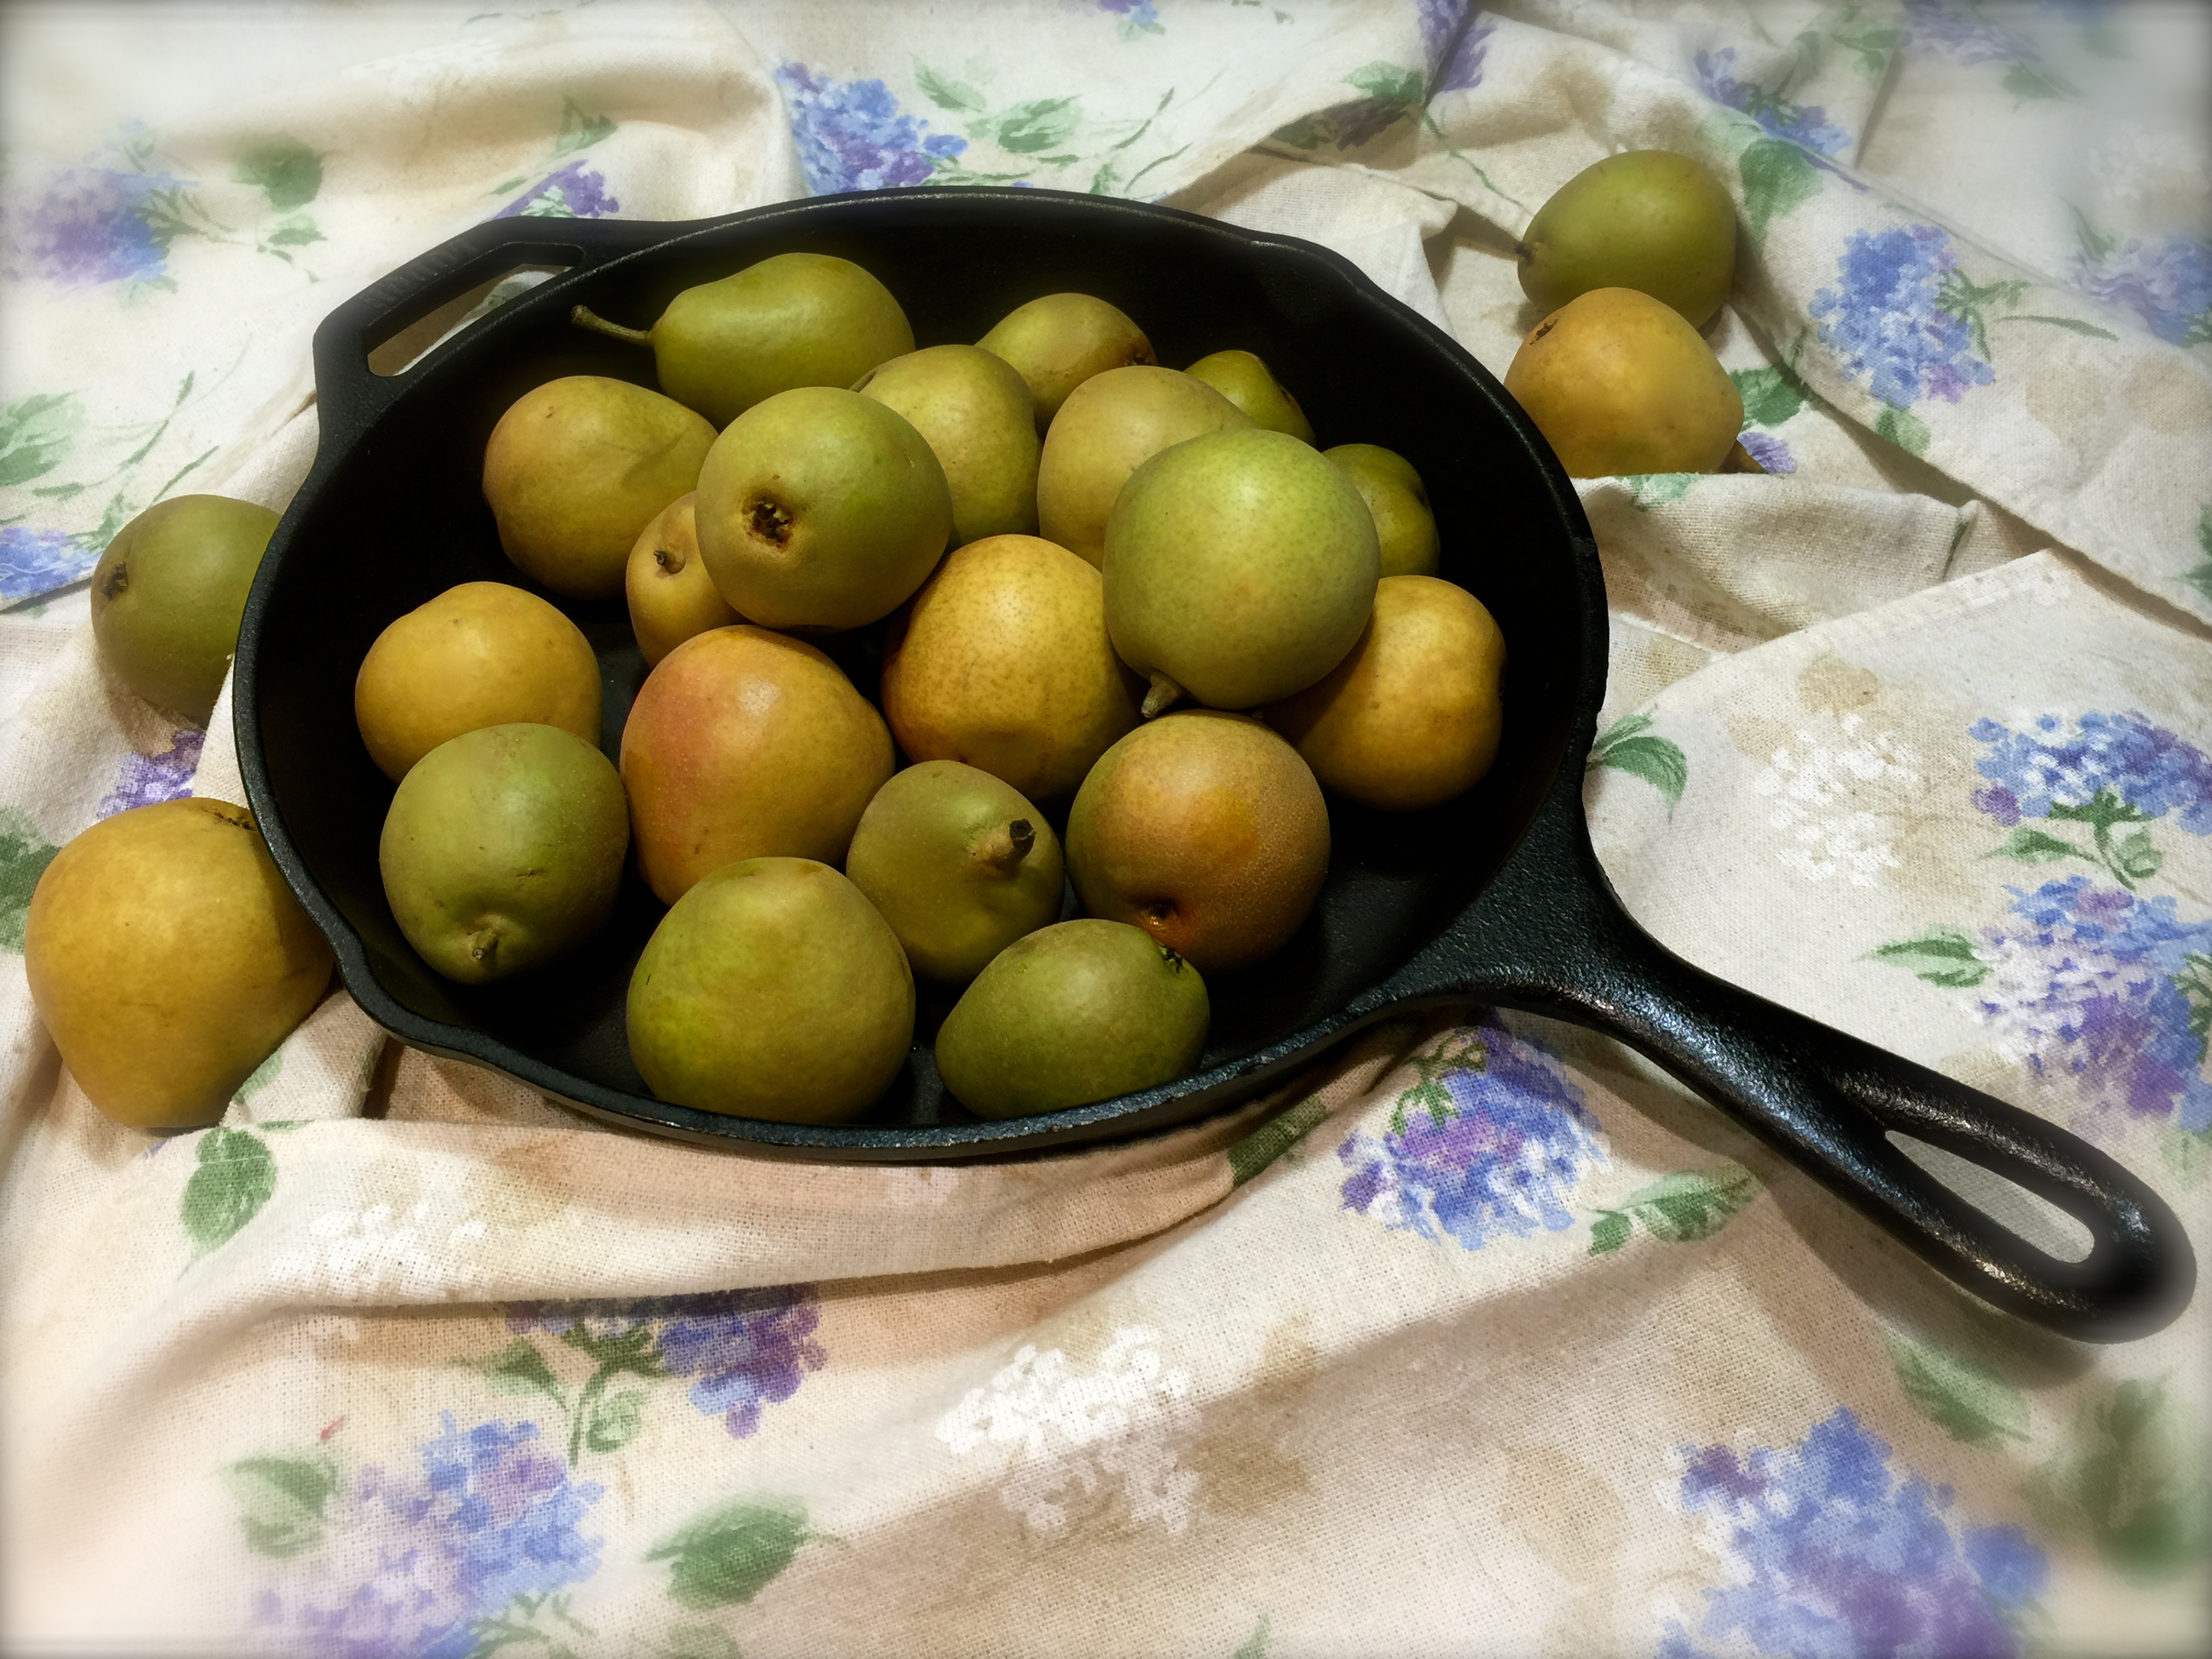
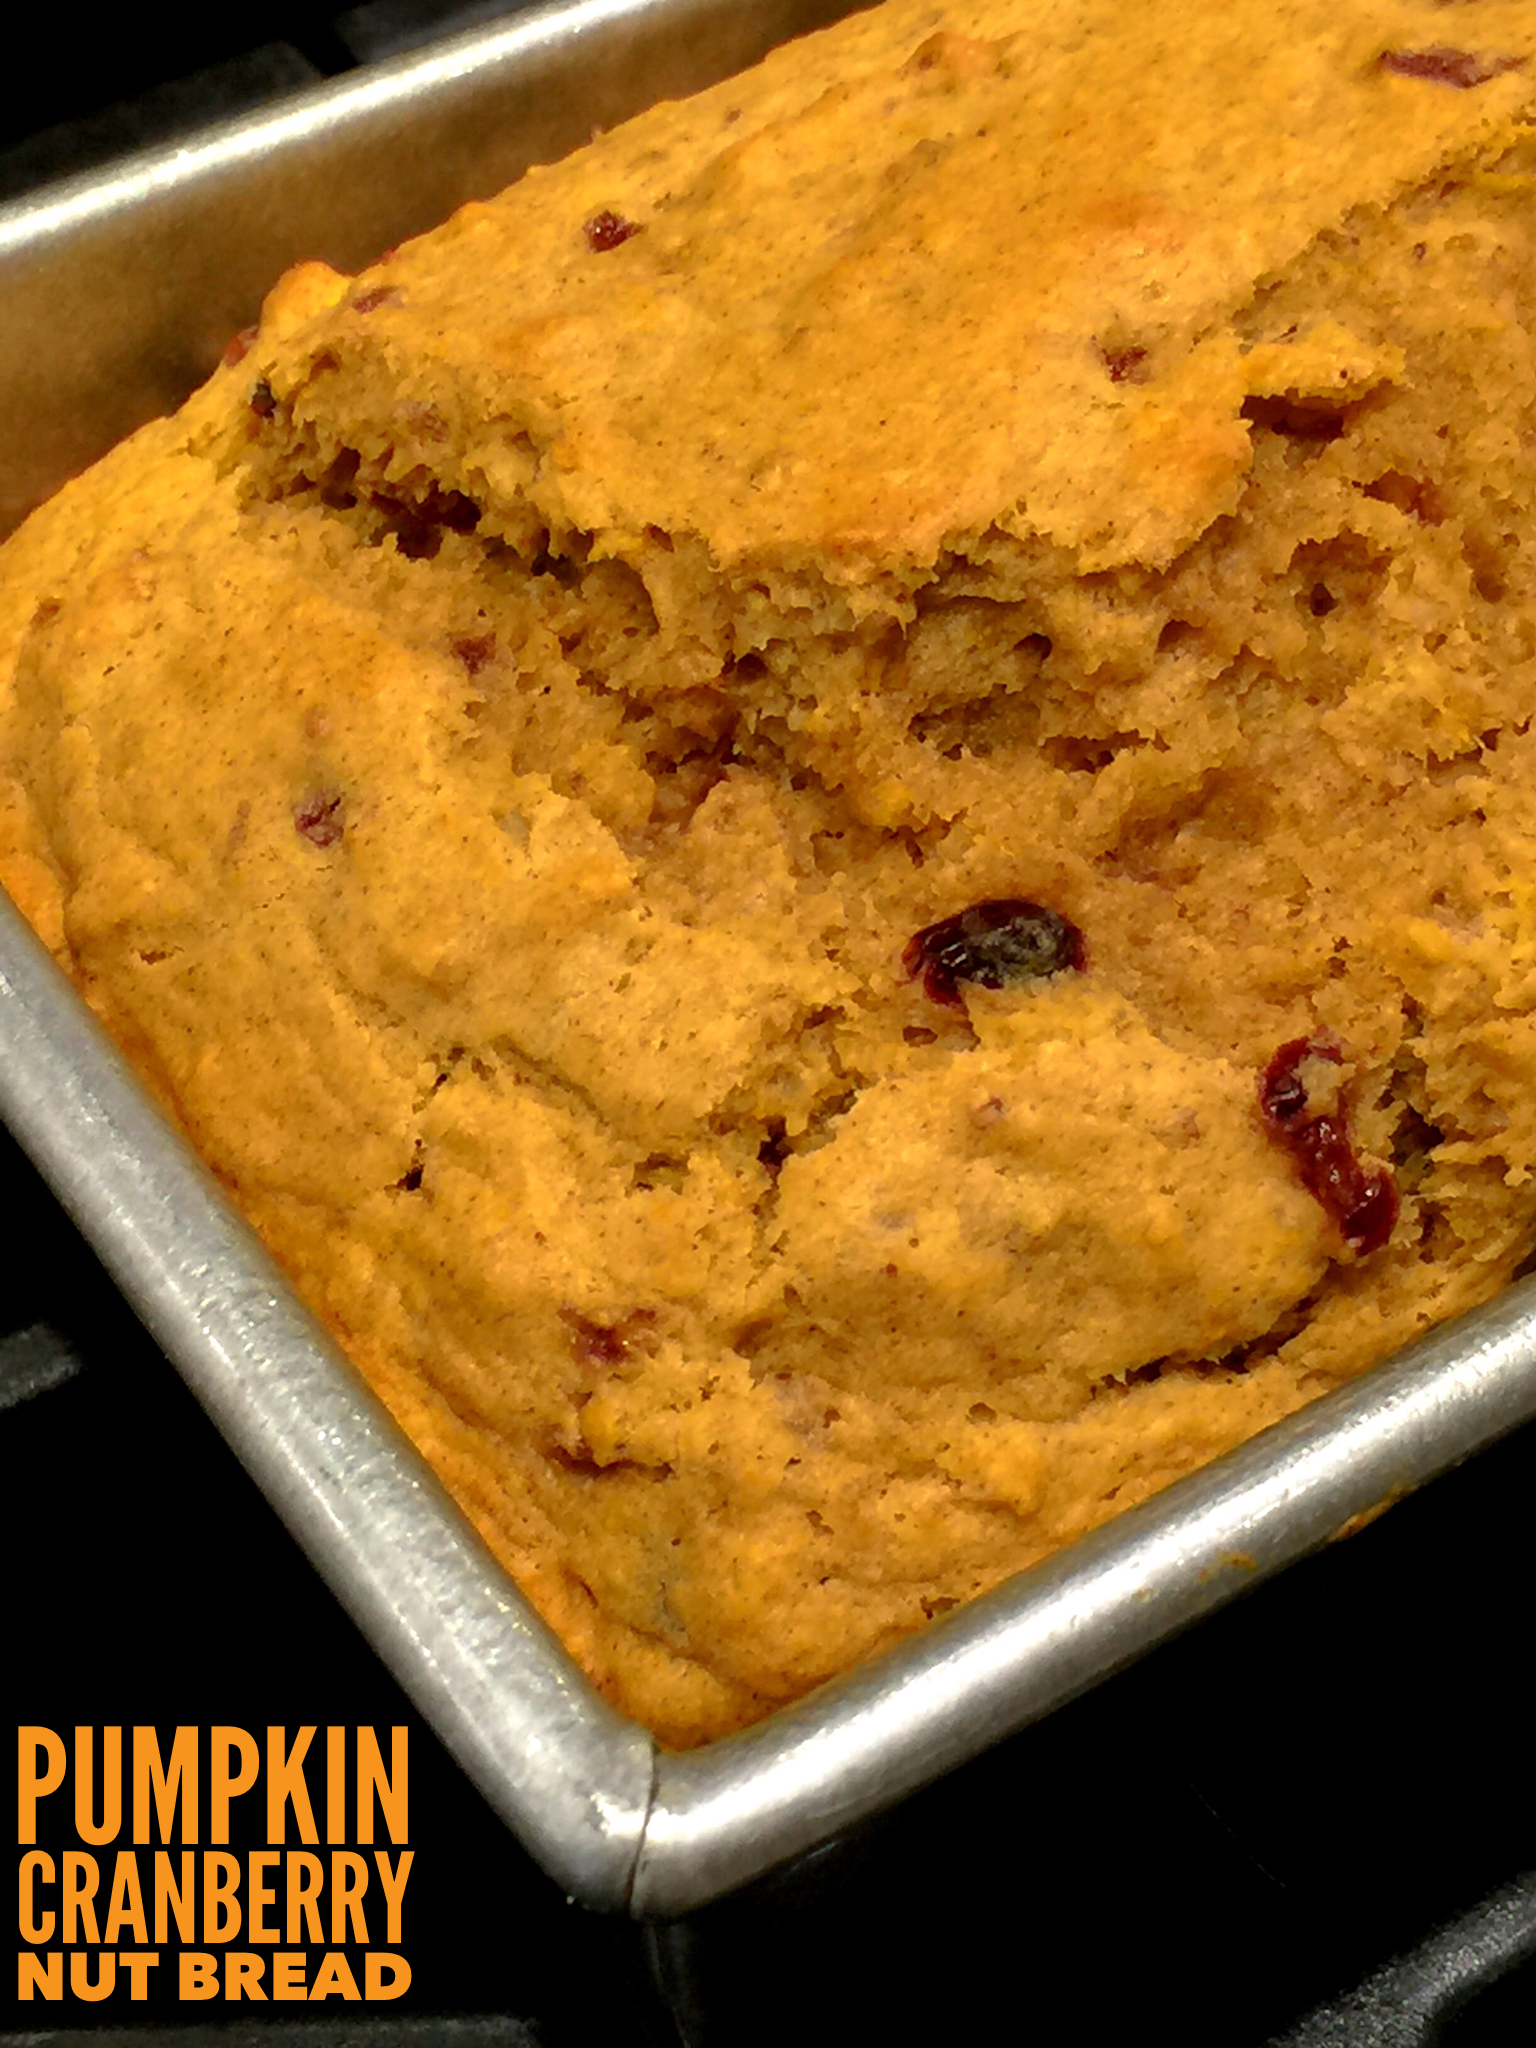
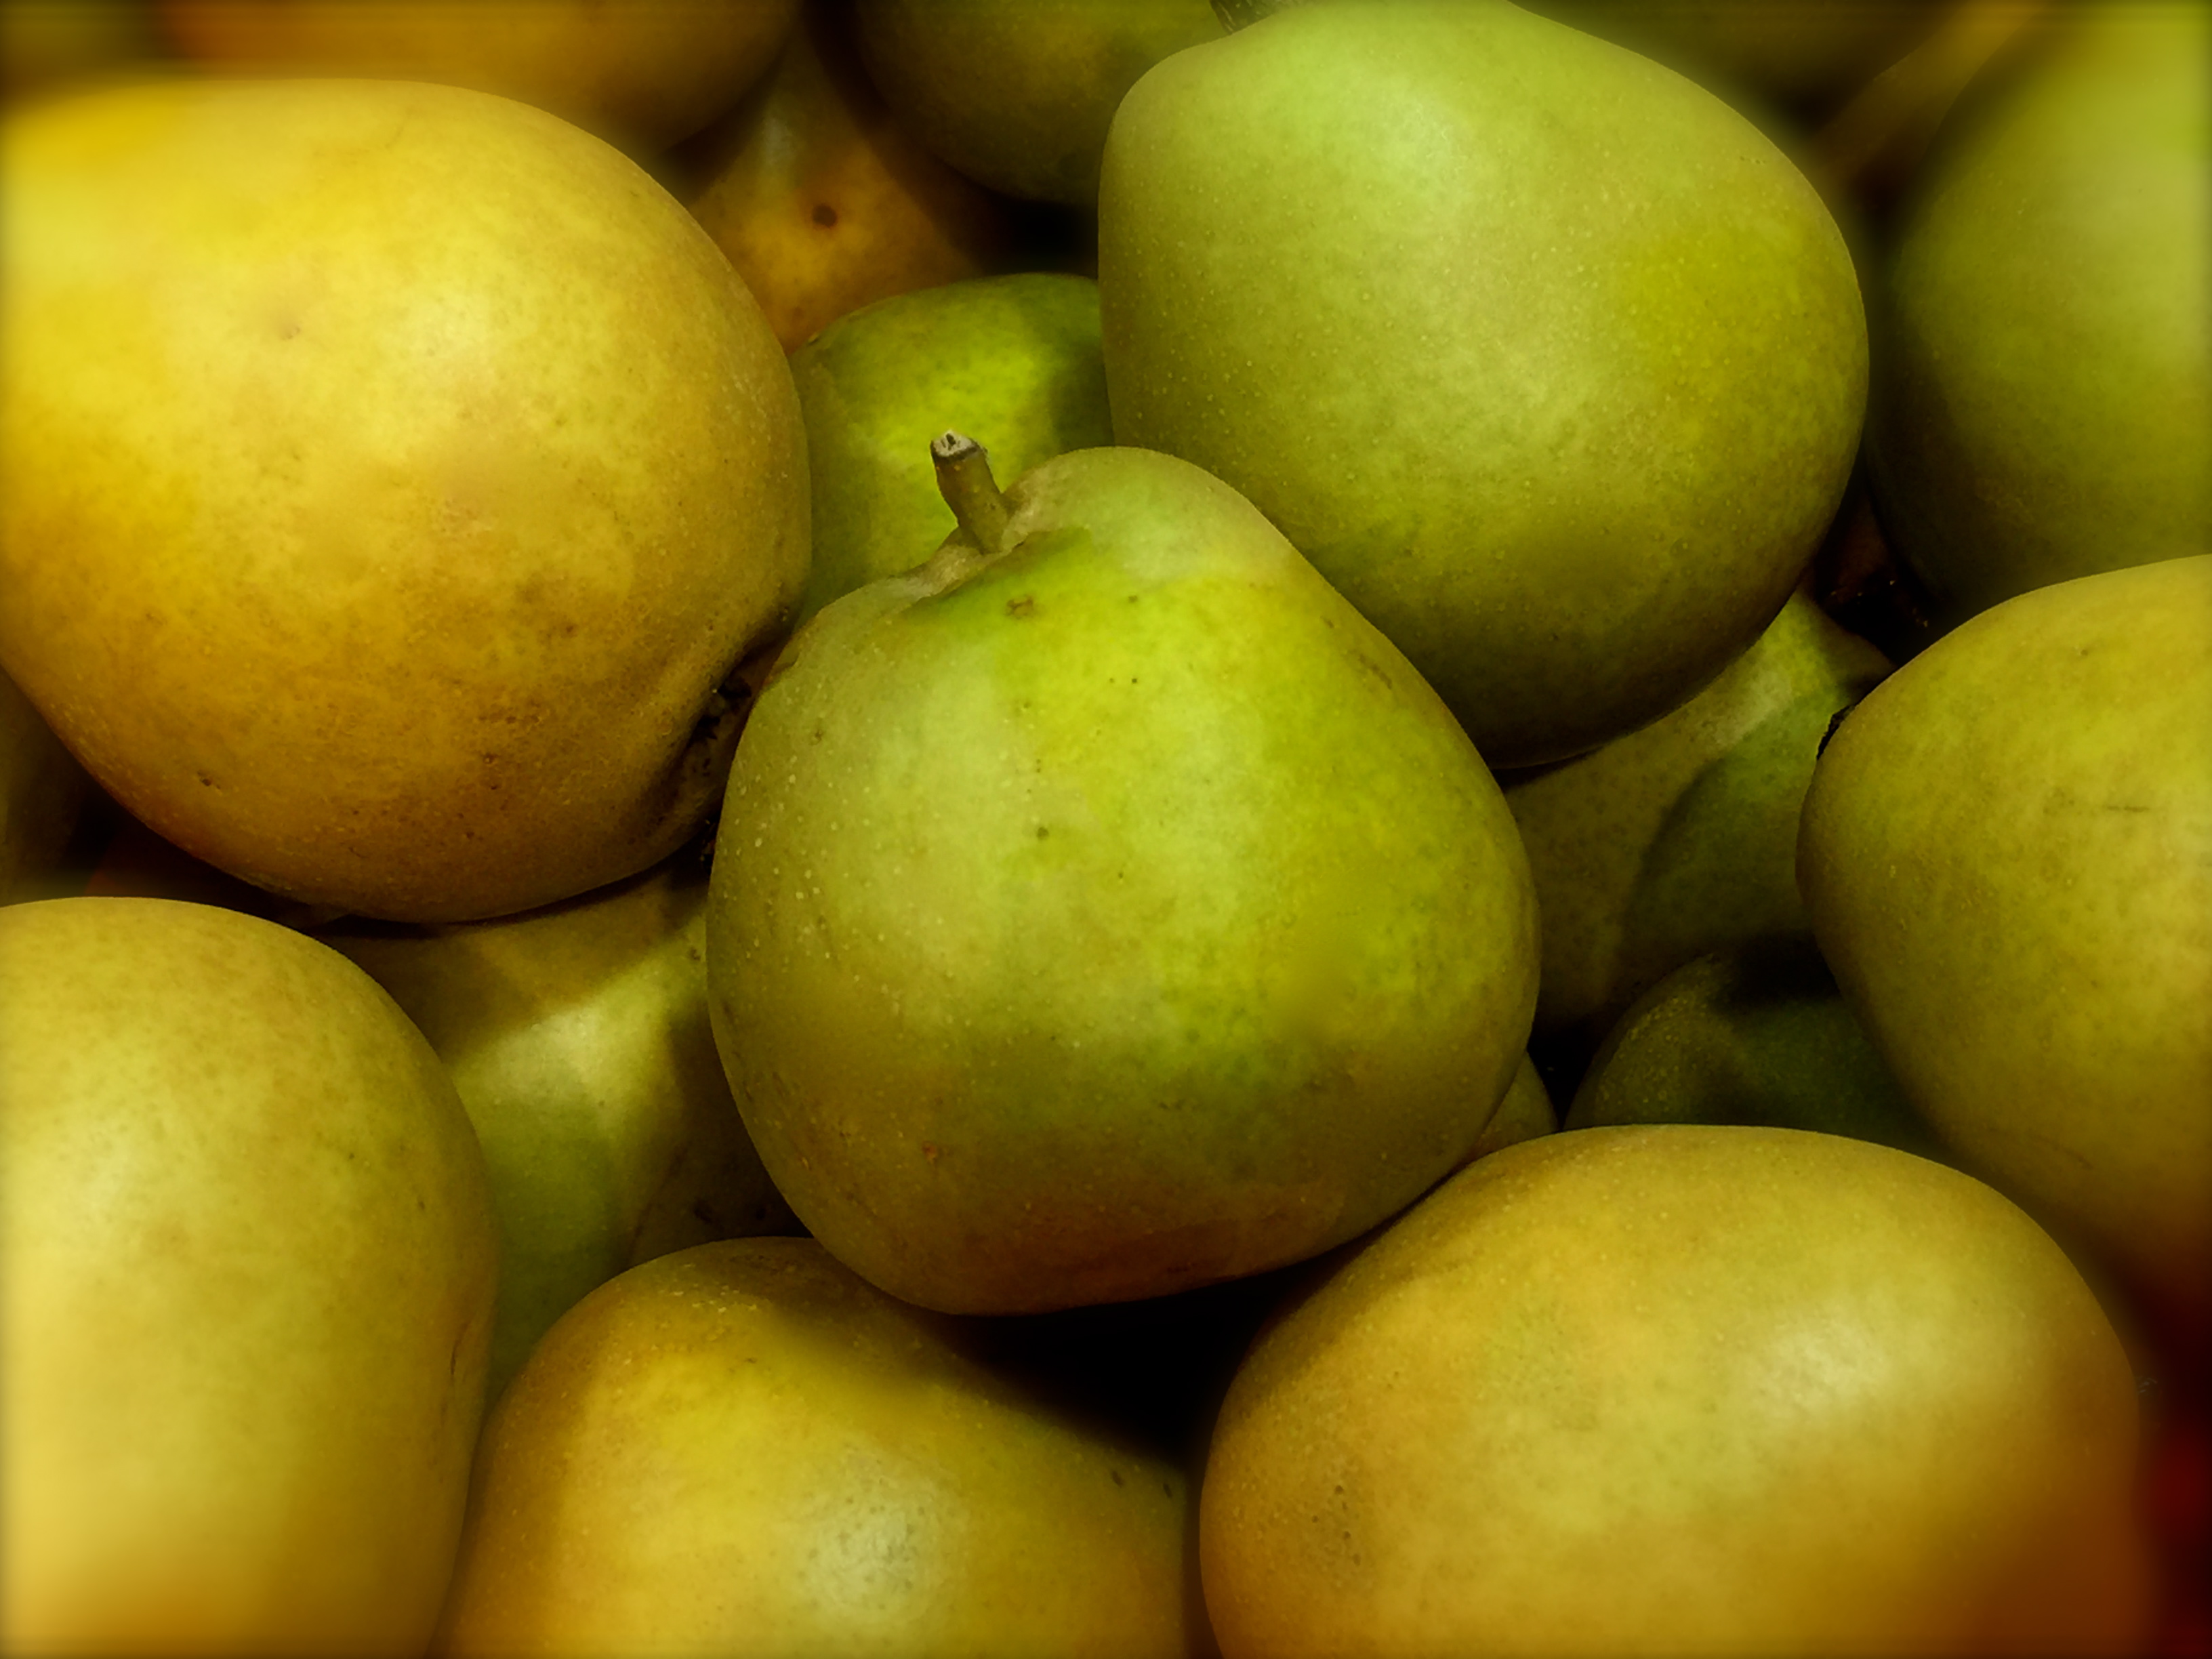
Last year my neighbor’s apple trees produced in abundance. This year it was the pear trees and so I eventually got a bushel of pears. Off I went in search of pear recipes I might adapt to my needs and tastes.

I’ve always been a big fan of warm fruit. There’s nothing better than a piece of hot apple or cherry pie with a big dollop of vanilla ice cream. This time, I was not in the mood to make a pie. I found a great recipe for making an upside down pear cake that I adapted and will post later. But what I really wanted to make was a pear compote.

Garden Pears

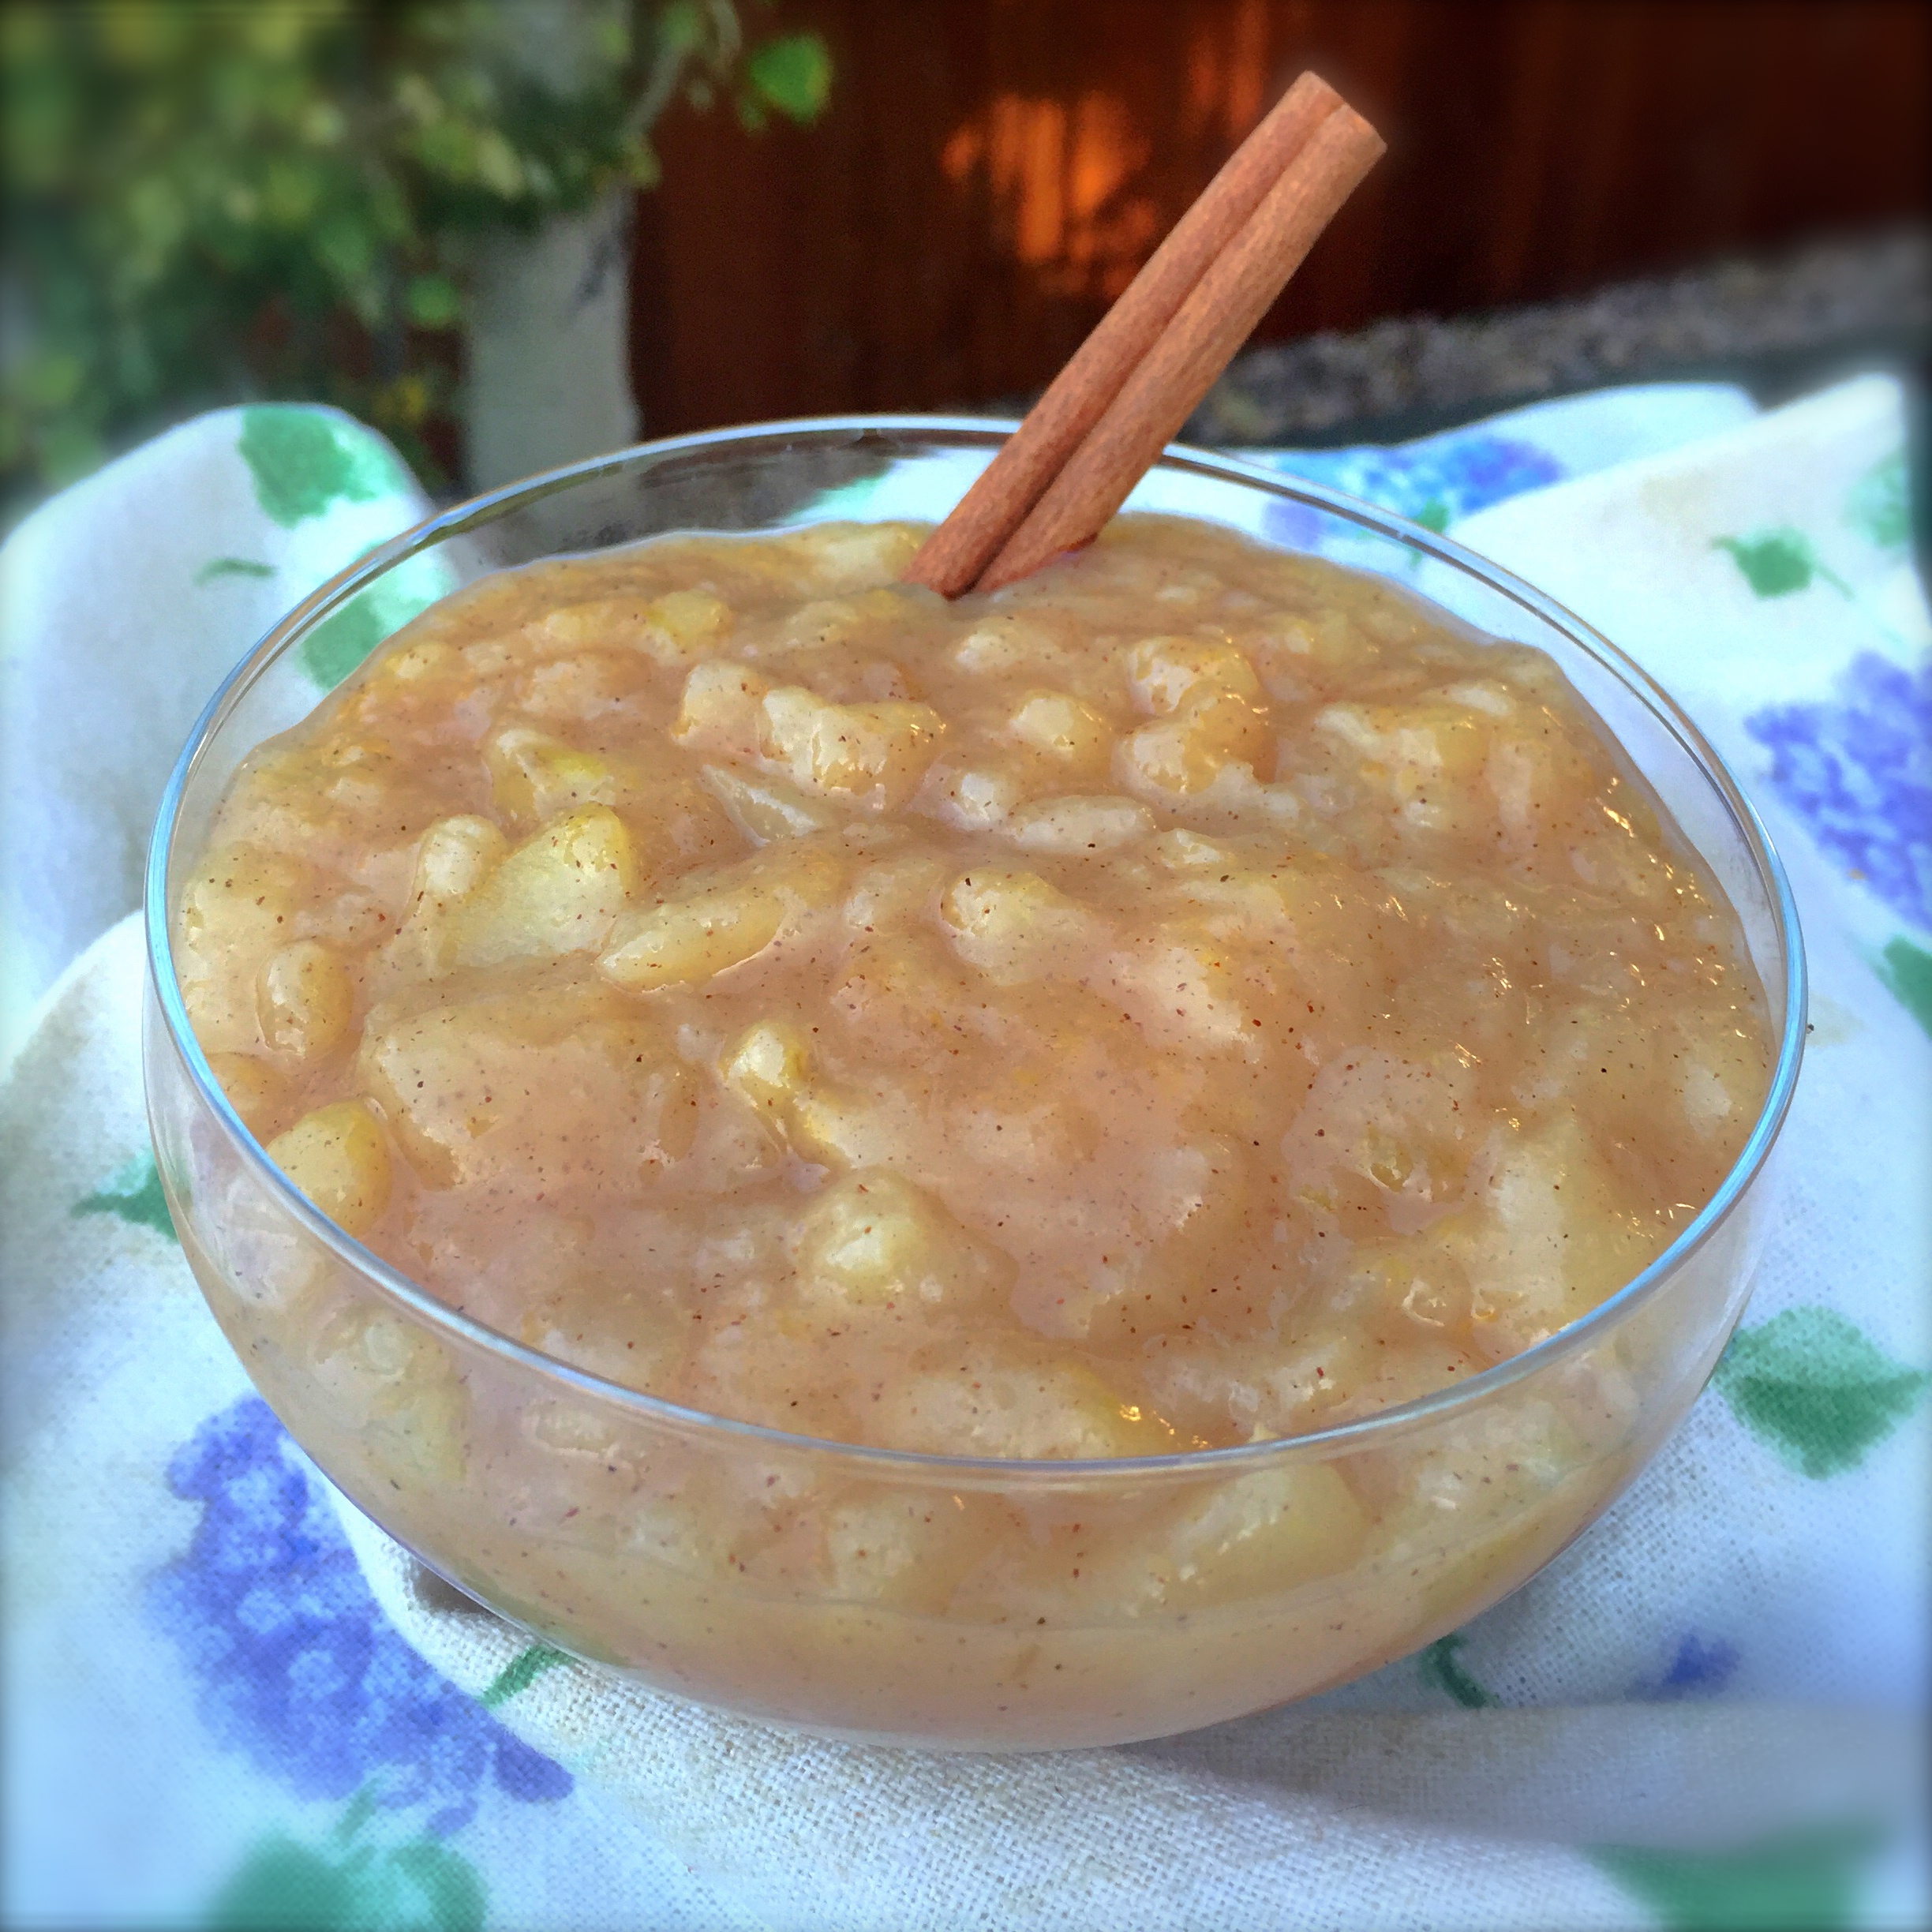
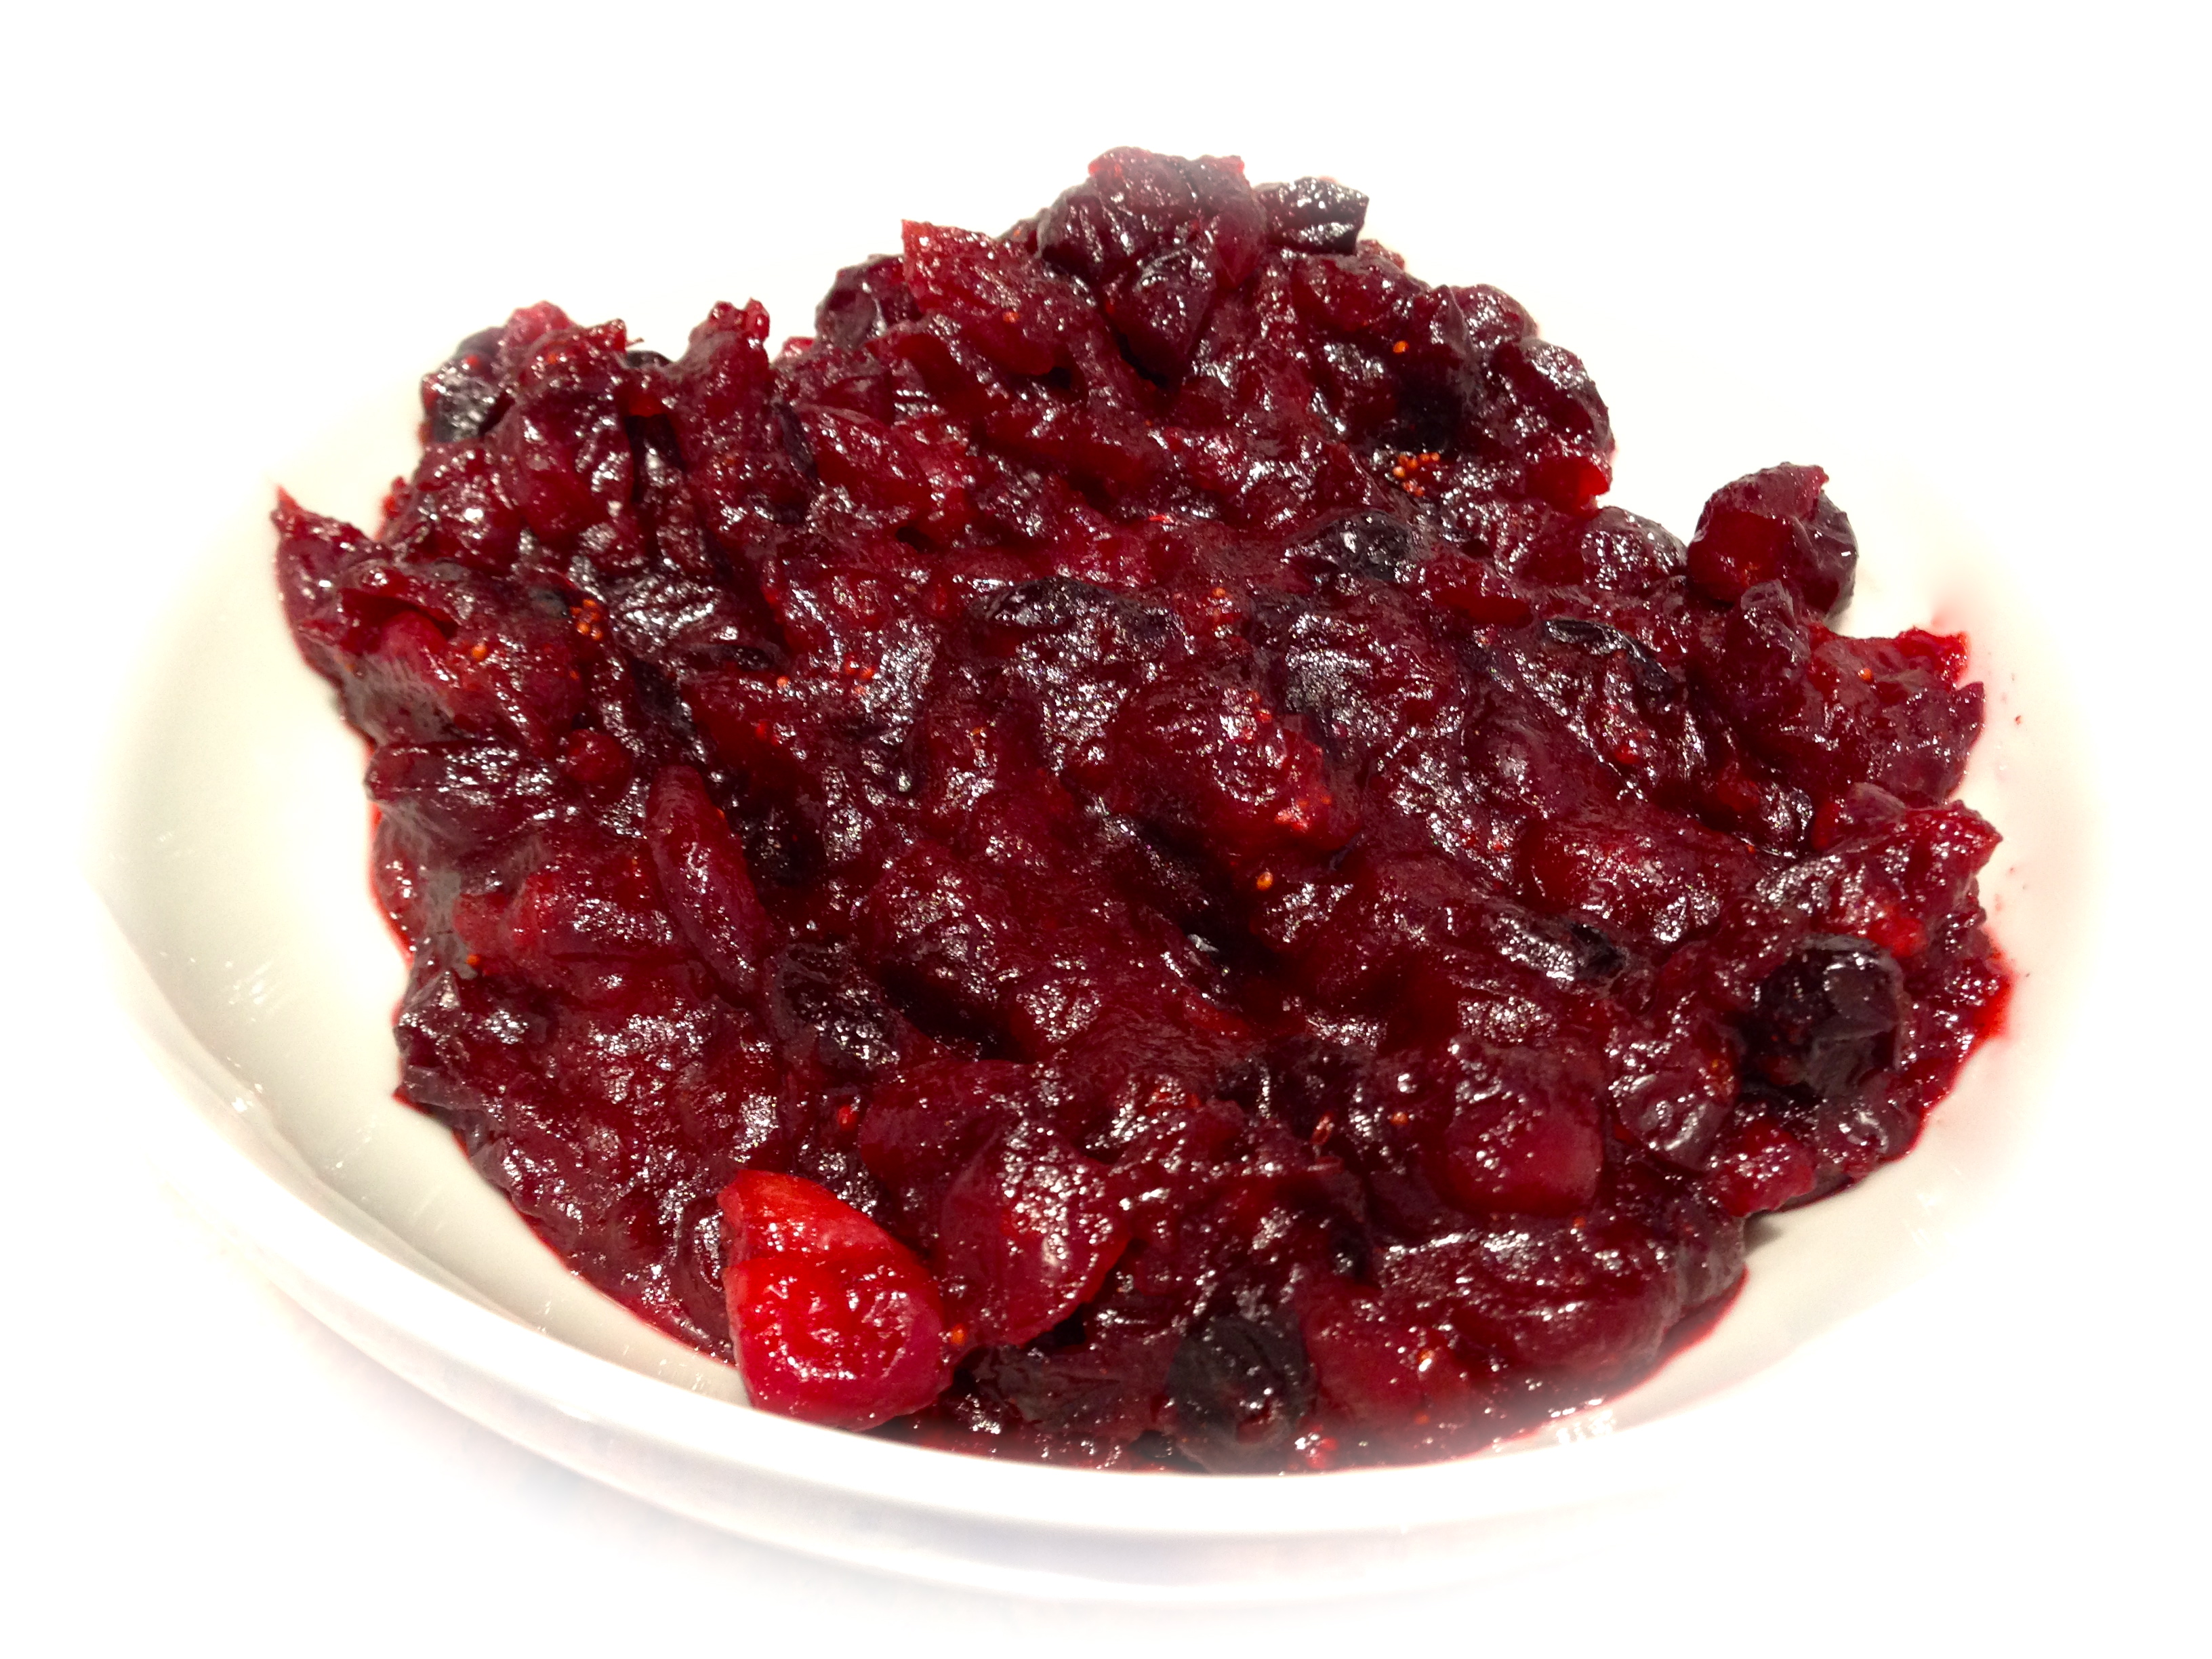
A compote is basically fruit cooked in water and spices. This particular compote is cooked in butter and lemon juice along with sugar and vanilla. Now doesn’t that sound good. So let’s talk fresh pear compote…

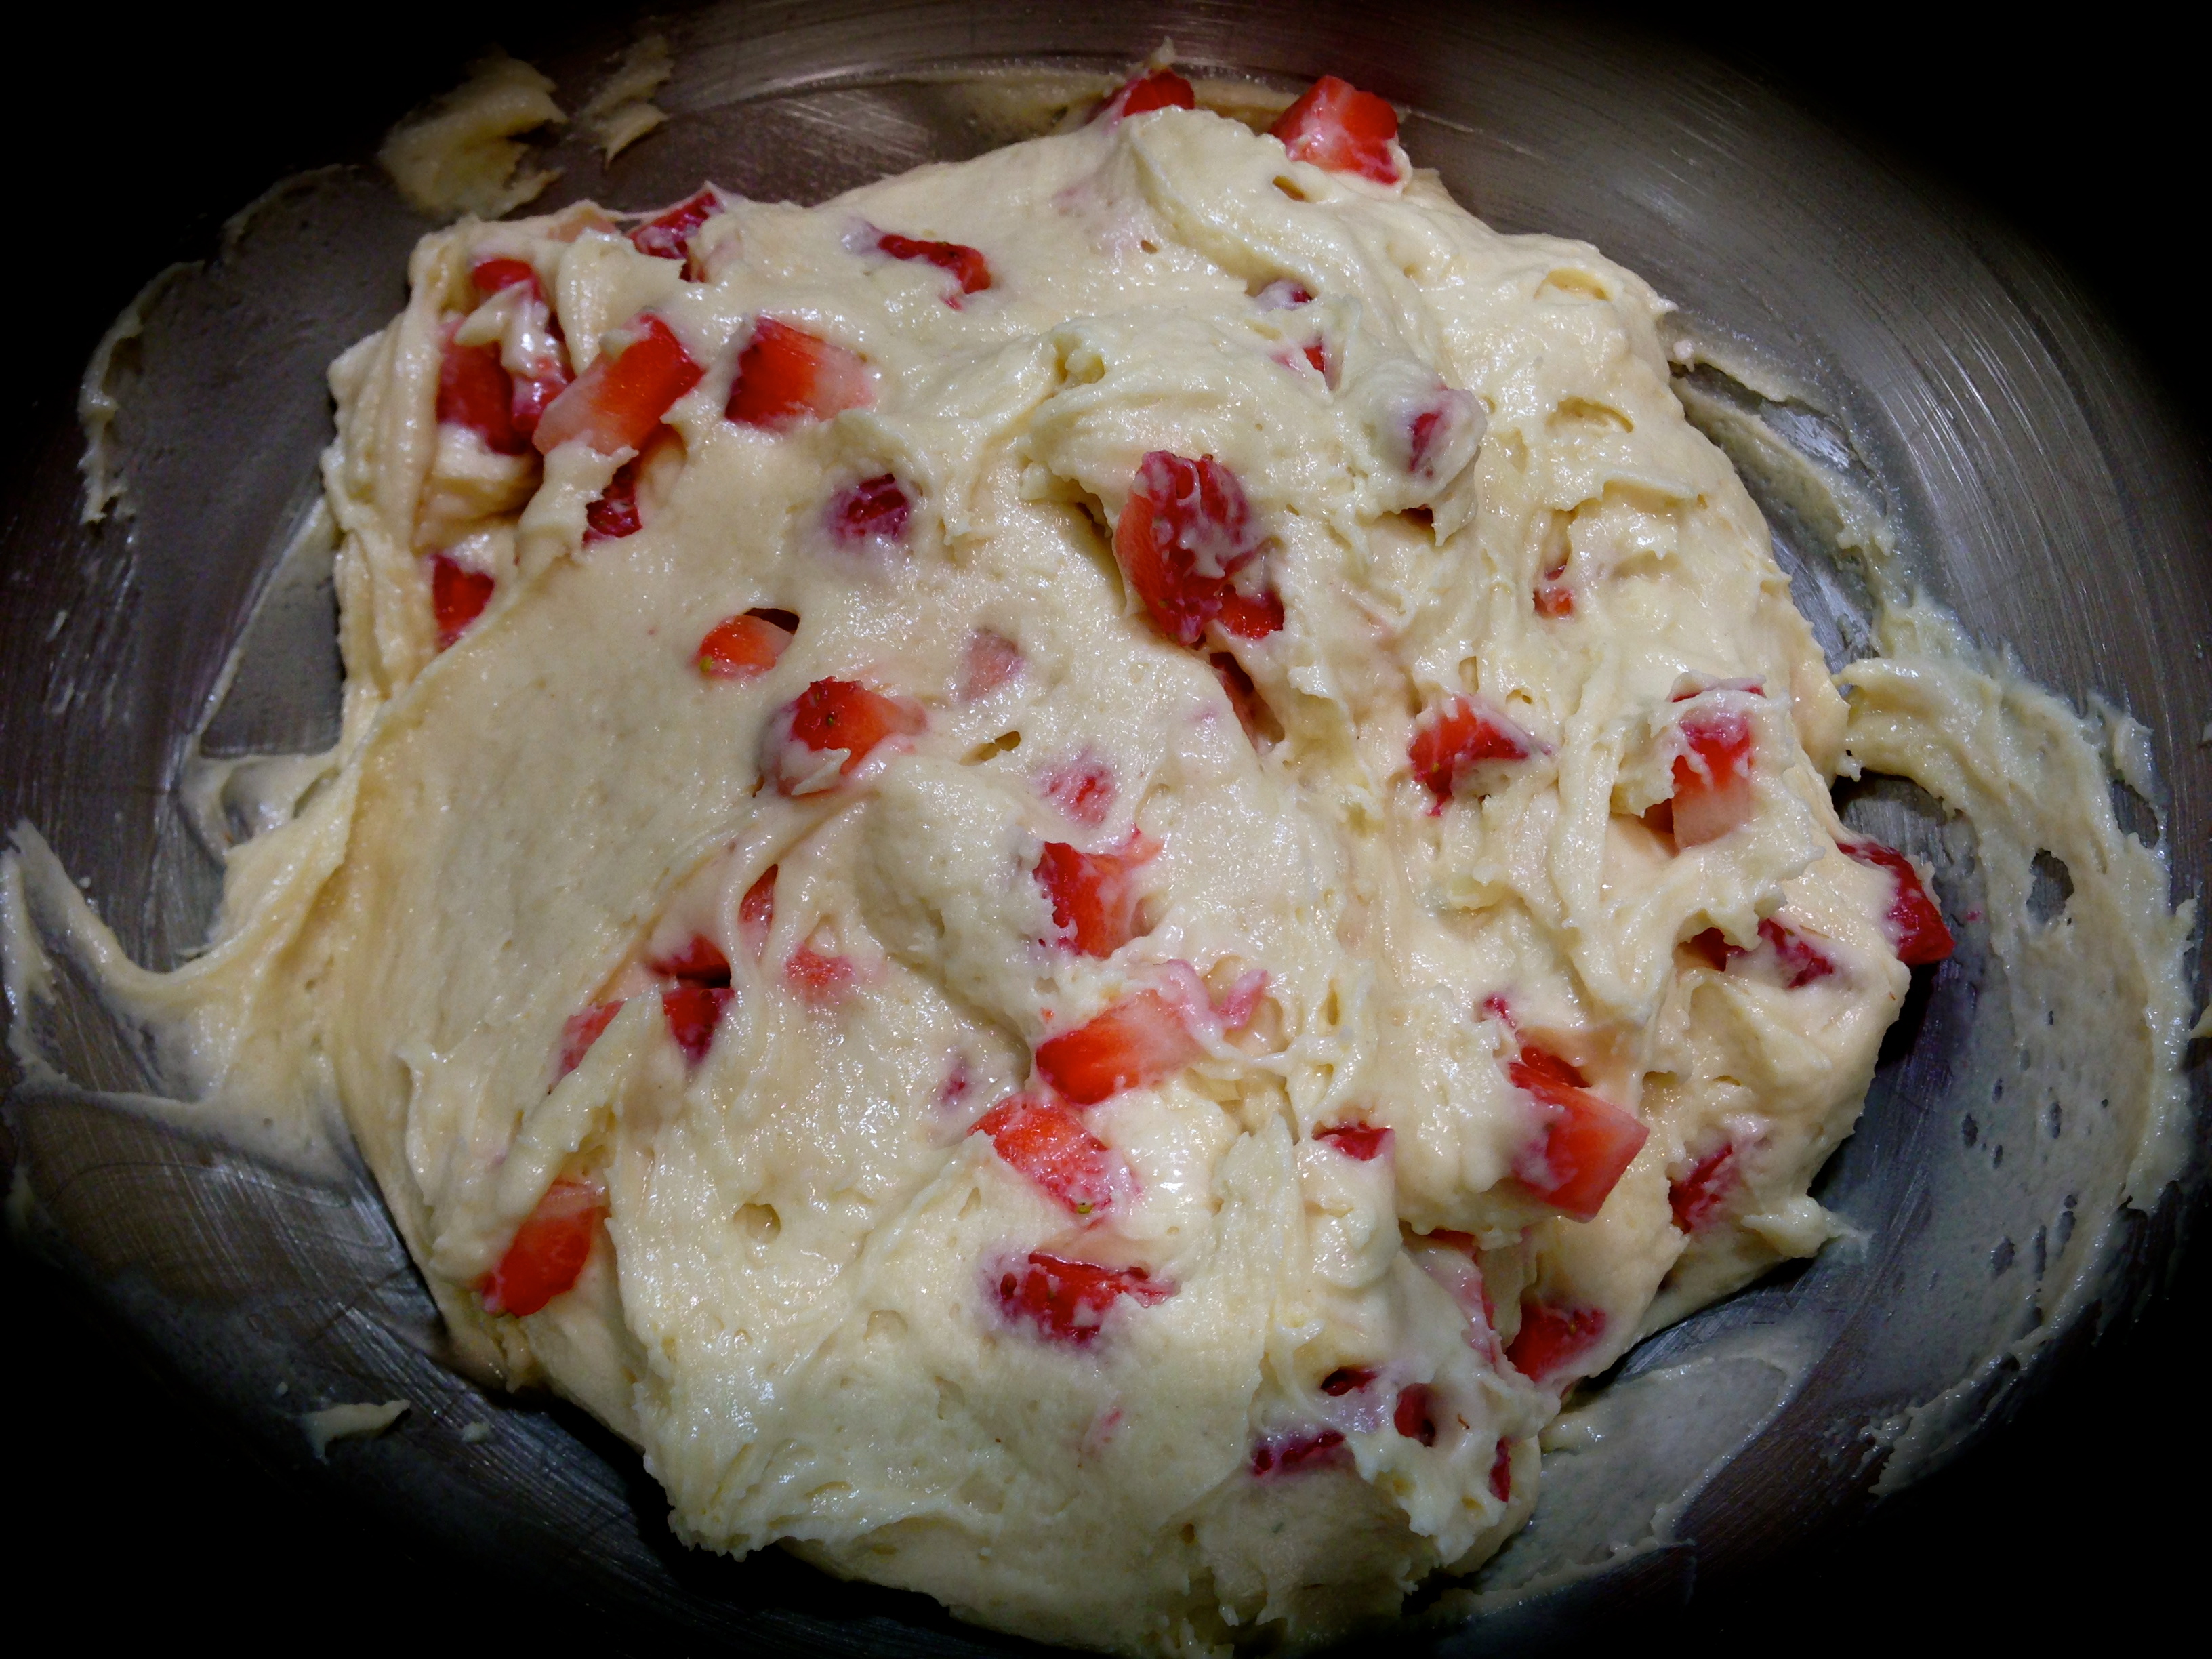
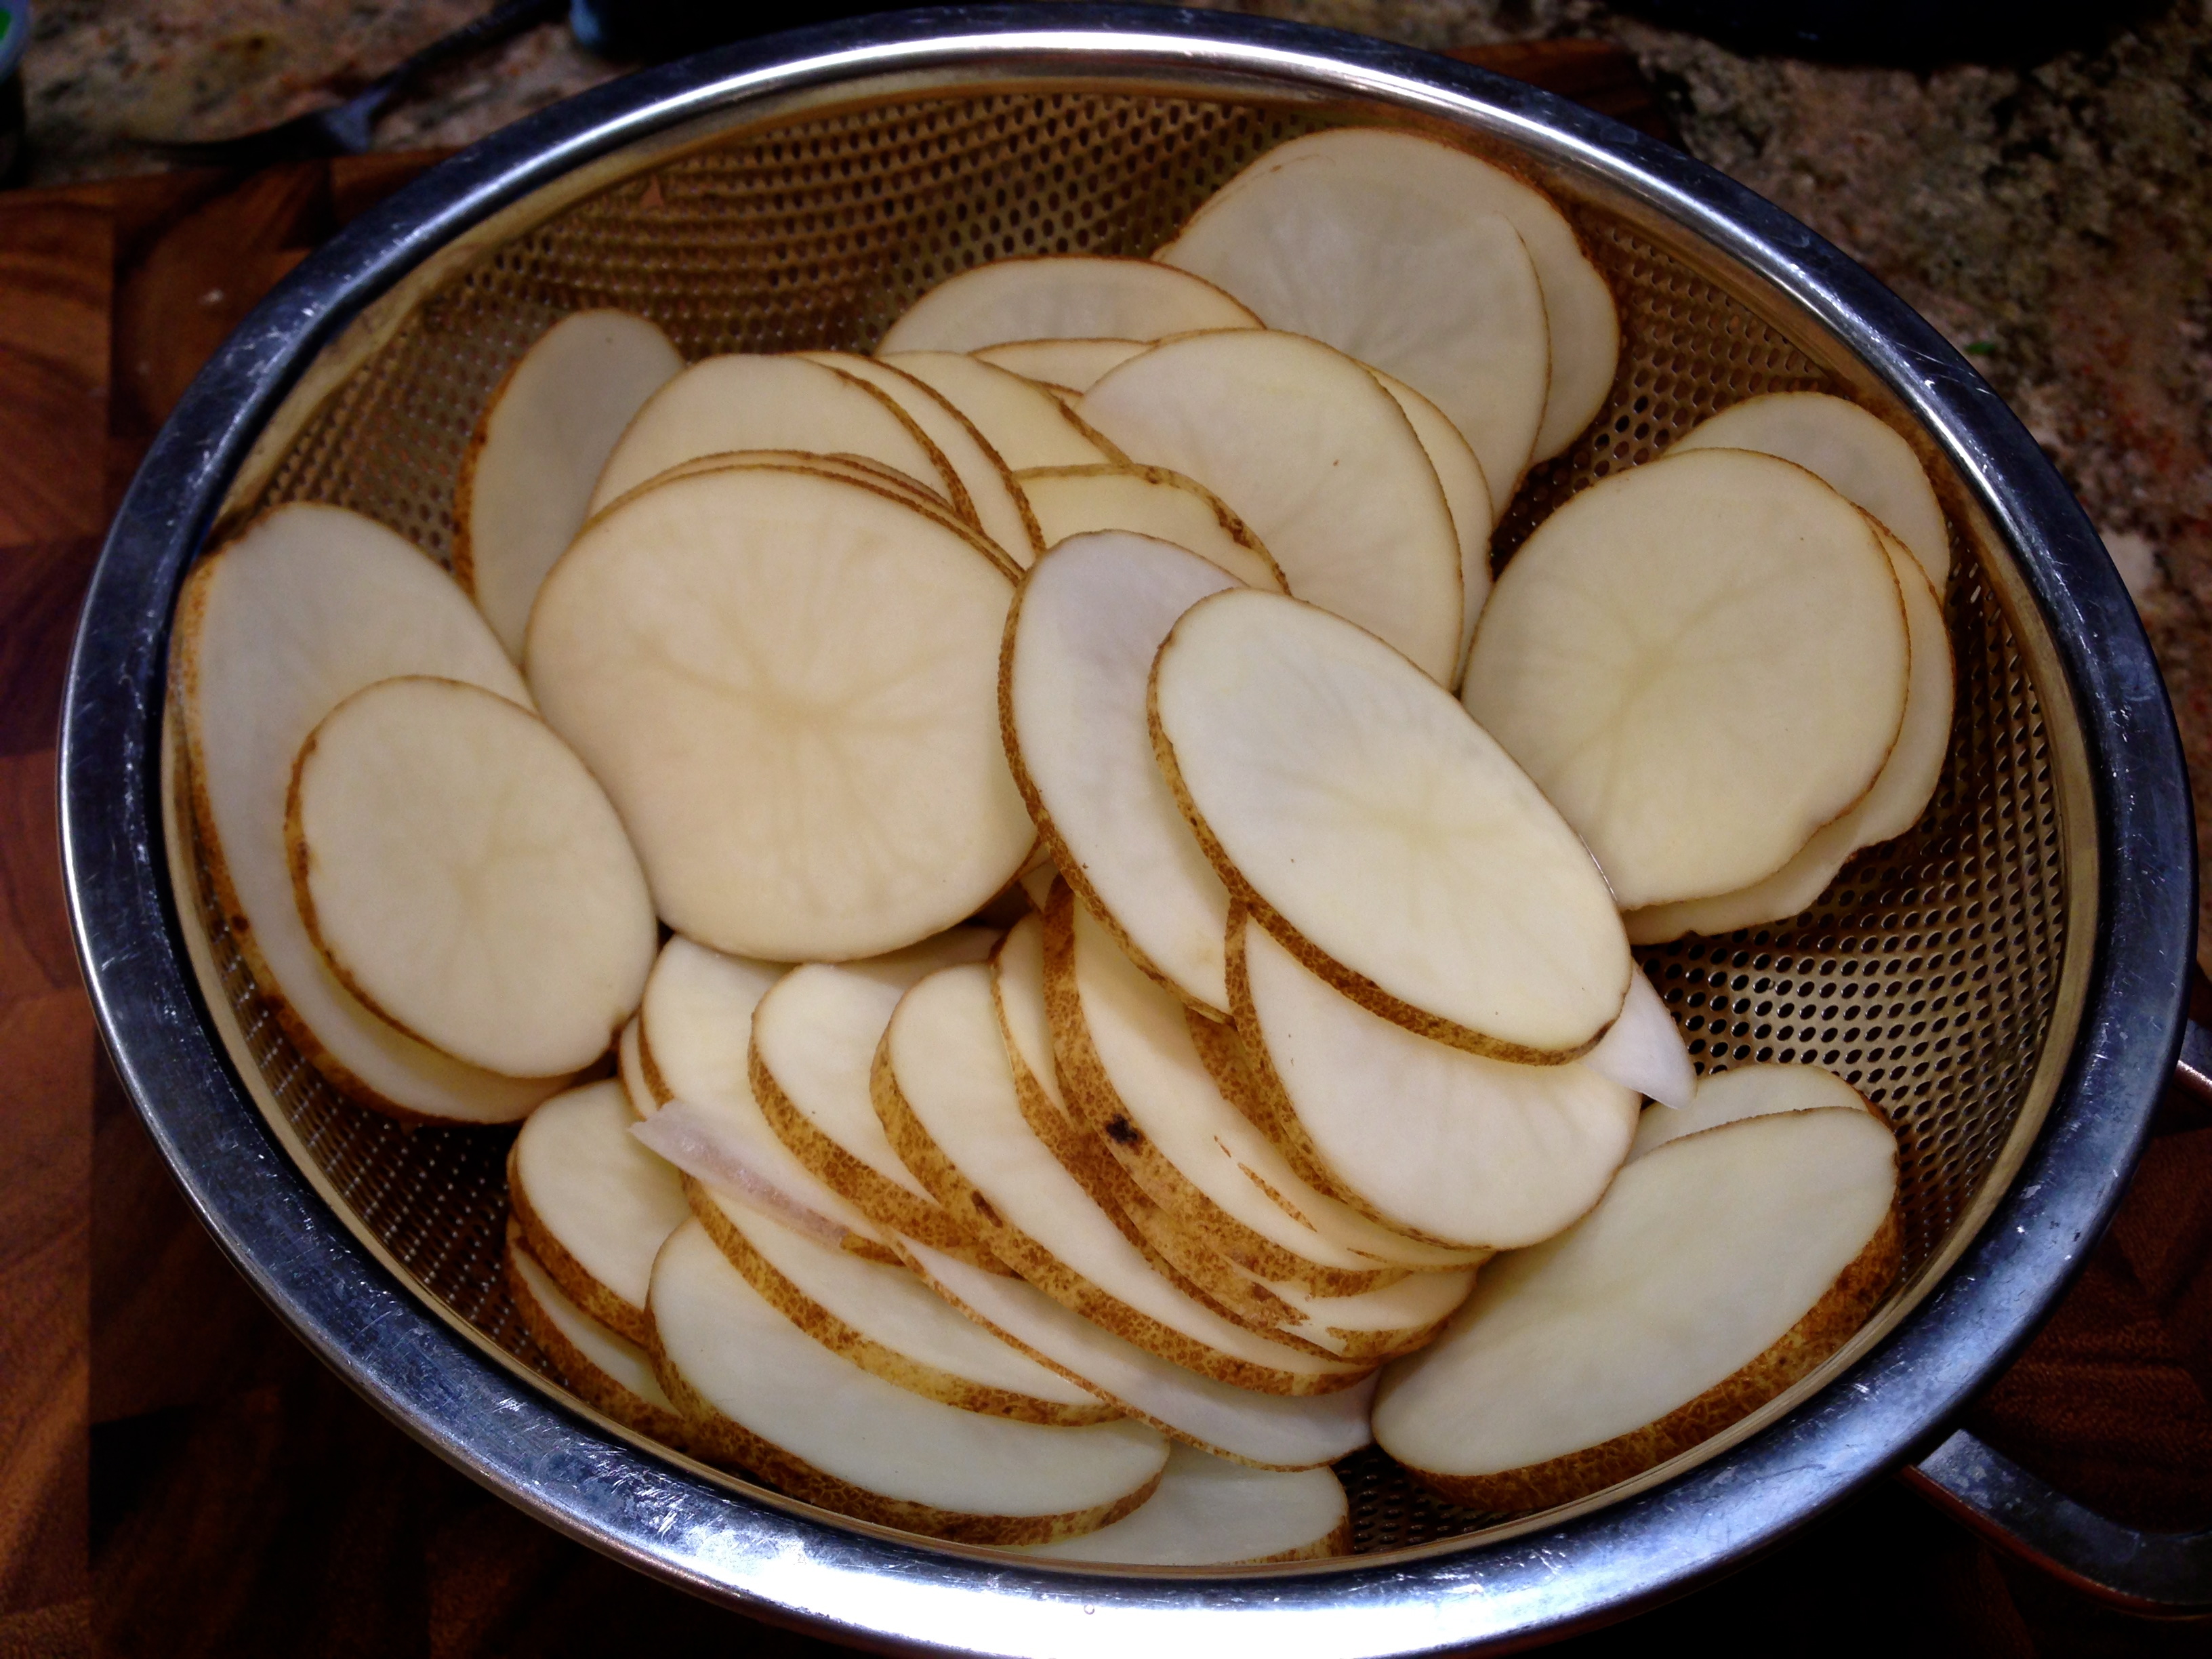
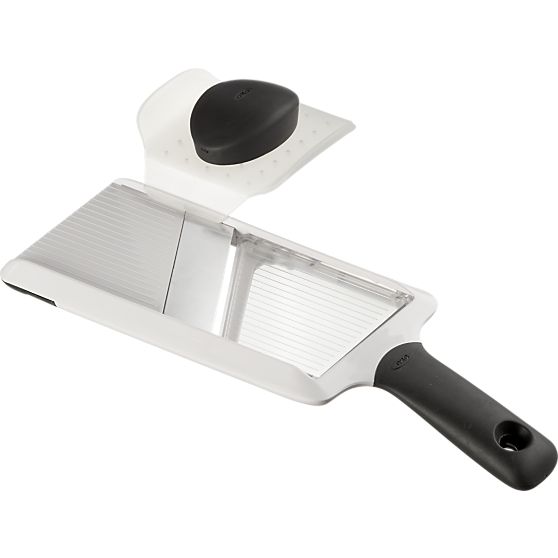
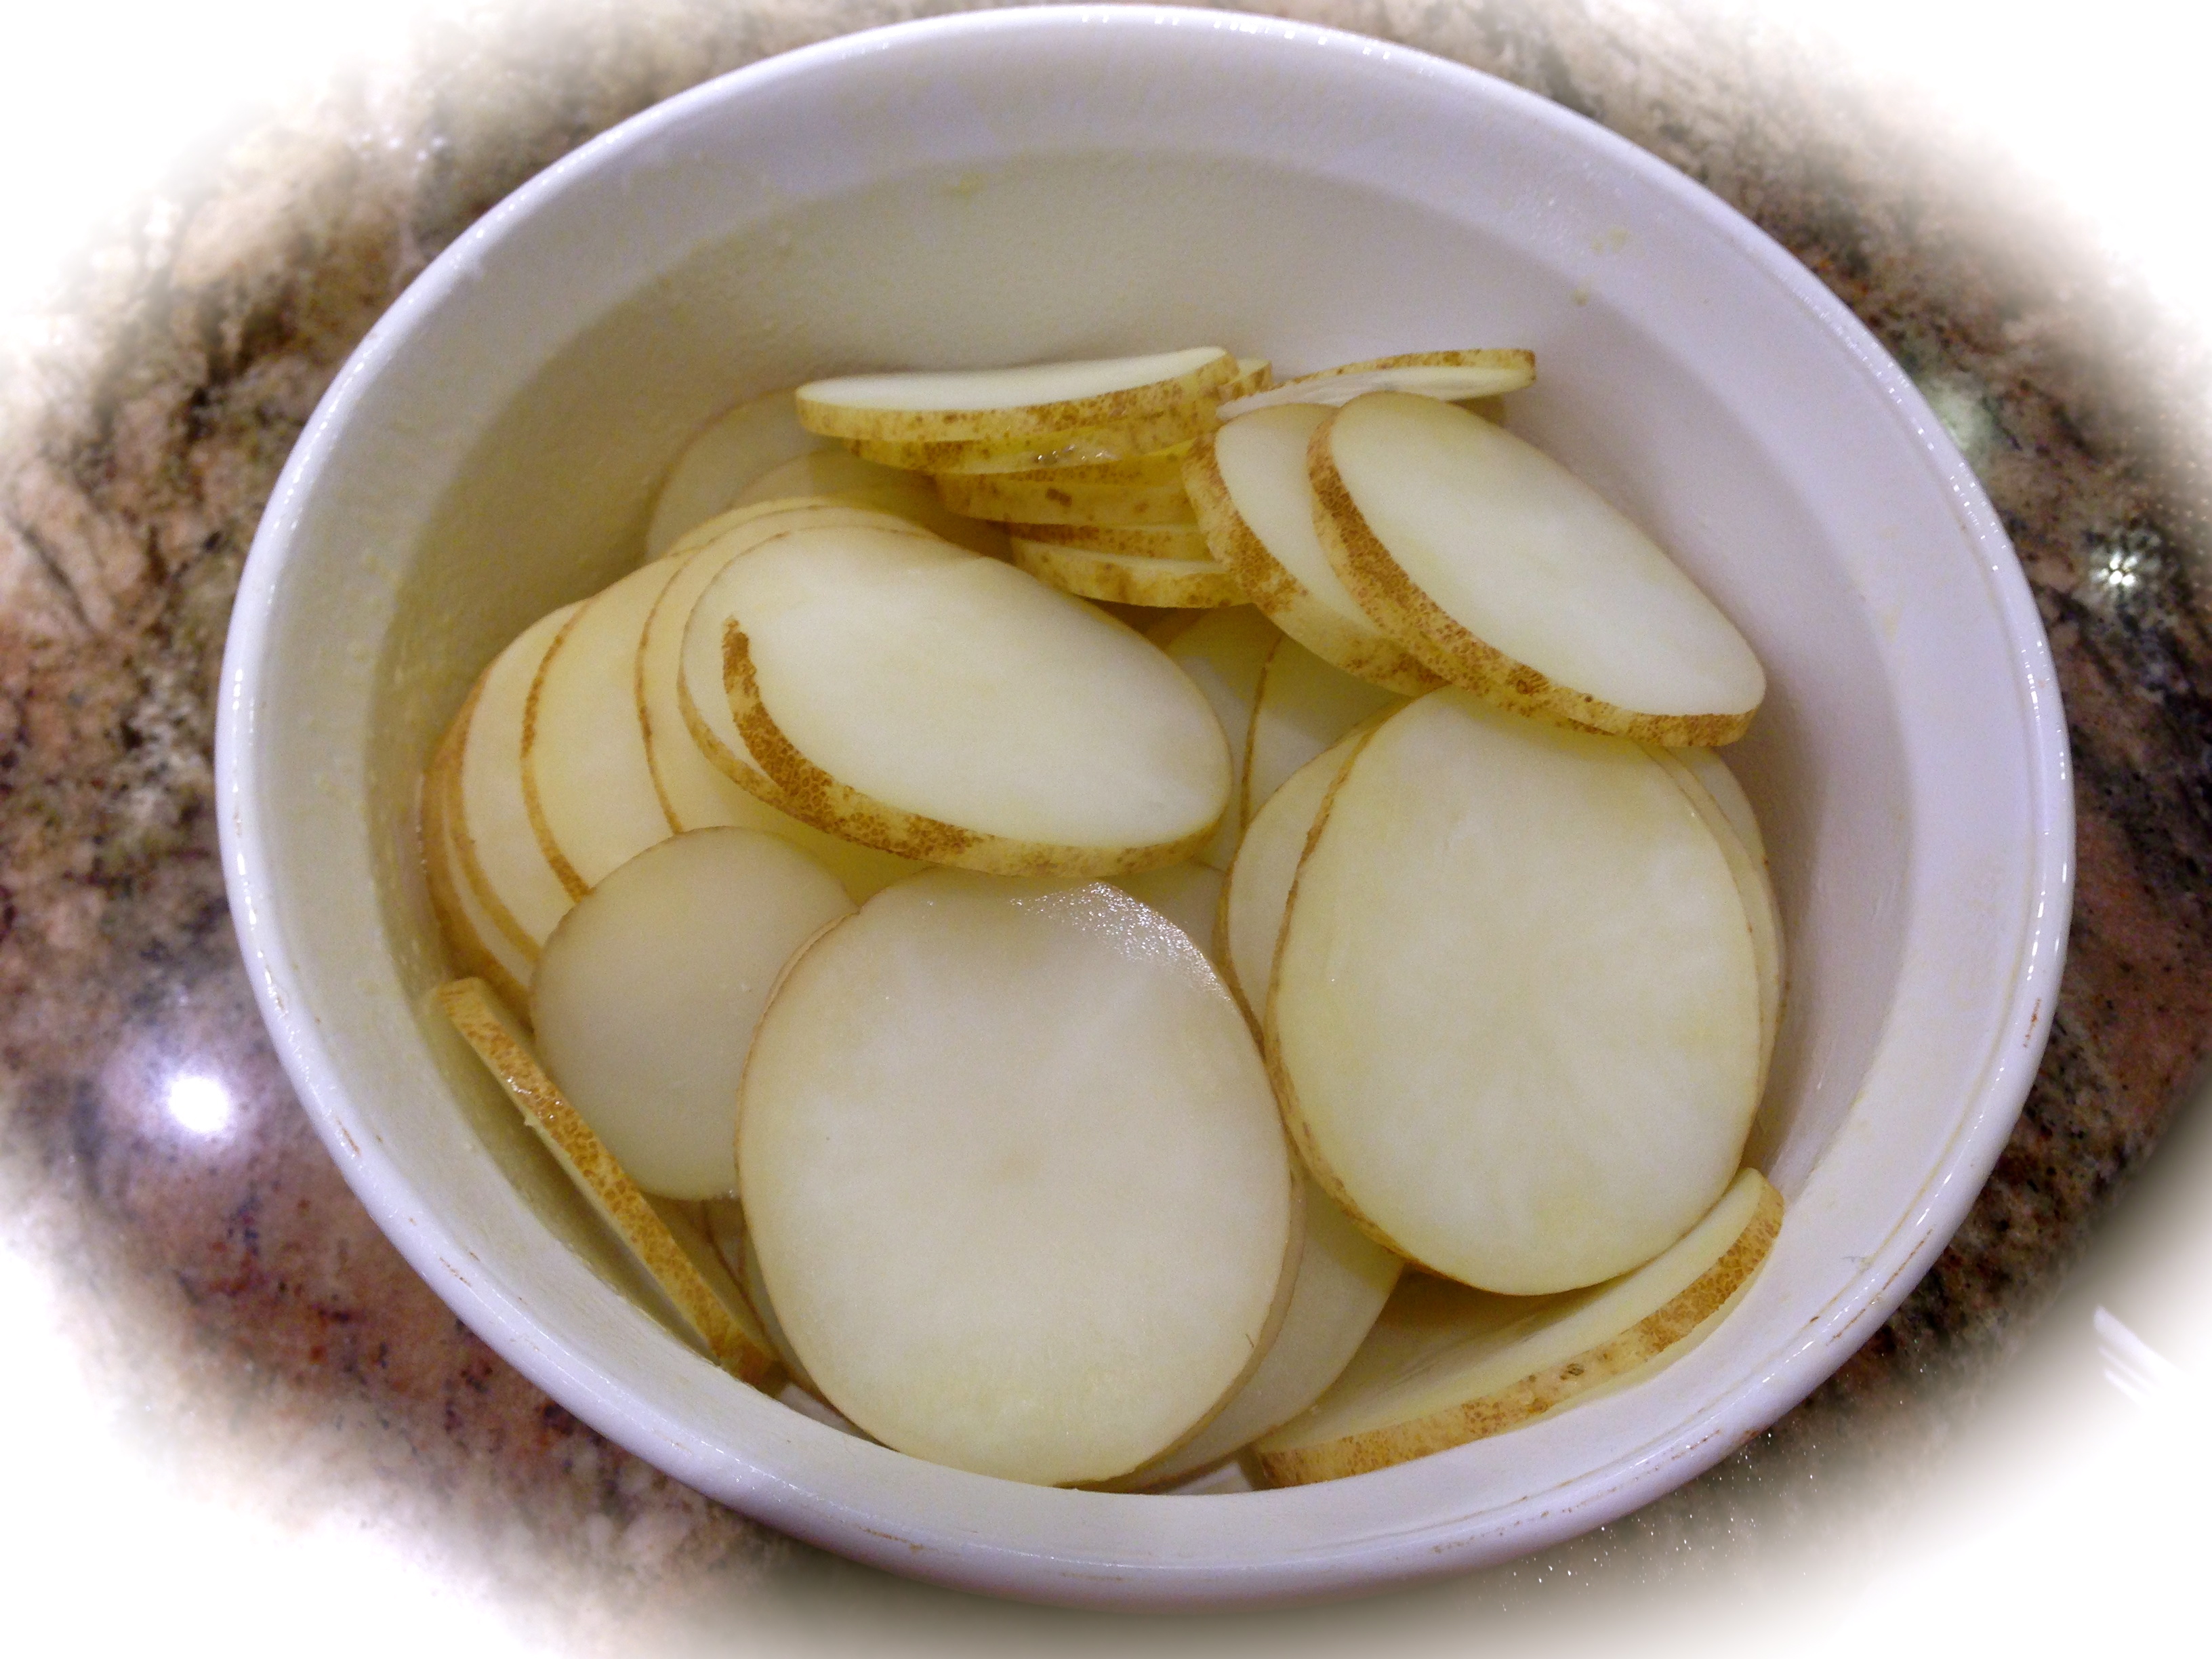
Lesson Learned 1 – All the tedious work is in the prep: To make this compote you need to peel and slice the pears. The pears I got from my neighbor were, on average, smaller than the ones you buy in the grocery store. So I had to spend more time peeling and slicing. Keep in mind that pears, like apples, will turn brown (oxidize) when peeled and exposed to air. To slow down that process until you’ve got everything prepped, just sprinkle a little lemon juice on the pears. That will prevent oxidation until you’re ready to cook them. Every time you slice another pear and drop it in the bowl use your hands to toss it in with the others so that some lemon juice gets on it. There’s no need to add additional lemon juice every time you add another sliced pear to the bowl, unless you’re doubling or tripling the recipe. You really need only a small amount of lemon juice, a tablespoon or so.

Also make sure you slice the pears thinly. They will cook more evenly and will mash thoroughly if you slice them thinly before you cook them.

Lesson Learned 2 – Don’t be afraid to add the ingredients to taste: My recipe requires very little sugar due to the sweetness of the fresh fruit  Most compote recipes I read called for less than one teaspoon of cinnamon. The beauty of this recipe is it’s very adaptable. Once you mix the ingredients, taste the pears before you cook them. If you feel you need to add more sugar or cinnamon, add it. I also love the taste of vanilla extract in the recipe but I found that a little vanilla goes a long way. But those are my tastes. Make this recipe work for you. Just remember to err on the safe side as you can always add more but you can’t take it away once you’ve added it.

Lesson Learned 3 – This compote can be served hot or cold: Although traditionally compote is designed to be served hot, this compote tastes divine hot or cold. I would make a bowl of hot oatmeal and put some chilled compote on top and it was an insanely delicious combination. You can serve this warm with a cheese platter, or put it on crusty bread. Anyway you choose to serve it, this recipe is a winner.

It’s amazing to me how simple this recipe is. After I made pear compote I used the same recipe to make apple compote and it was fabulous. I certainly hope that you try this one.

[recipe: title=”Fresh Pear Compote…” time=”45-50 Minutes” servings=”6-8″ difficulty=”Easy”]

INGREDIENTS:

6 large pears

1 medium sized lemon, juiced and zested (plus an additional tablespoon of juice to put on pears while slicing them)

2 tsp. sugar

1 tsp vanilla

1 tsp cinnamon (start with 1/2 and add more to taste)

1 Tbs. unsalted butter

1 tsp. cornstarch

DIRECTIONS:

Peel the pears and slice them thinly. (coat them with a little lemon juice to prevent oxidation before you’ve completed pealing all the pears). Once pealed, combine pears with all of the ingredients except the butter and cornstarch.

Melt the butter in a deep sauce pan. Add the pear mixture and cook for at least five minutes on medium high heat, or until the pears are tender and can be mashed.

Remove the pears from the heat. Mash them inside the same pot. After mashing them stir in the cornstarch. NOTE: Add the cornstarch a little at a time to avoid clumping.

Put the pears back on the stove and simmer covered for an additional 20 minutes. Serve warm or chilled.

[/recipe]

Pears

Fresh Pear Compote

Mom’s Chicken Soup With Dumplings…

Most of you know by now that my mom wasn’t much of a cook. She led a busy life raising two kids and working (and you have to remember, at that time women were staying home when they had children) and so her meals were pretty rudimentary – meat, potatoes, peas or corn – that was about it. But there was one meal she made that was over the top fabulous and that was chicken soup and kugelis. I’m sharing the chicken soup recipe today. As for the kugelis recipe (kugelis is a Lithuanian dish and basically a baked potato pudding) I’ll share another time. Whenever my mom would visit us I would always ask that she make this meal. No one could make it like my mom – but she did pass down those secrets to me.

For years this was the only homemade soup I made. This year I ventured into making some others (broccoli cheddar and creamy tomato soups) and I now find it hard to believe why anyone would not make homemade soup. It’s so easy and most of the work, besides the chopping and dicing, is done in the pot.

I guarantee you this recipe is a keeper. It’s not rocket science but it is so-o-o good – it was and still is a tradition in my family. So let’s talk mom’s chicken soup with dumplings…

Chicken in a large enameled cast iron potLesson Learned 1 – Use a very large stock pot: I have a 6 1/2 quart LeCreuset stock pot that I use whenever I make soup and there’s a reason why. You need a big enough pot to put in a whole chicken and still have plenty of room for liquid. I make this recipe using a 5-6 pound chicken and it can take up a lot of room.

I also like using an enameled cast iron pot when I make soup because of it’s ability to hold heat and provide even heat. There is no better way to cook than to use cast iron, but it has its drawbacks. Mainly it’s very heavy and it takes a little more time for it to heat up. But when you’re cooking something for a substantial amount of time, I find the way to get the best results is to use cast iron.

DumplingsLesson Learned 2 – Don’t be afraid to make dumplings: Some people say they have no luck making dumplings. There is a trick to making them that basically ensures success all the time. Once you’ve spooned the dumpling batter in the pot, put the lid on and keep it on for at least 20 minutes – NO PEEKING. The dumplings need time to solidify and they only way they do is if you keep that lid on and let the steam cook them through. Don’t worry, you’ll have plenty of time to view your dumpling prowess after they’ve fully cooked. If you don’t do this, they will fall apart. So don’t be like my husband who likes to lift the lid of the crock pot mid through the cooking time to see how things are going. Keep the lid on and you will be successful!

texture of dumpling doughThe texture of the dumpling batter should resemble a slightly moist sticky dough. I apologize in advance but this is a skill you learn with trial and error. Just remember that you don’t want the dough too runny nor do you want it to lack some moisture. Don’t worry, it’s not as hard as it sounds.  The picture on the left shows the dough just a little too moist but almost the desired consistency. I think I added another tablespoon of flour at this point and it turned out perfectly. Once you have combined all the ingredients in the recipe, if it looks a little dry add a little more buttermilk and if it looks a little too wet add a little more flour. The trick is to add the buttermilk or flour a little at a time at that point, so you don’t over mix but get the right consistency.

One more great dumpling making secret: Before you start spooning in the dough, place your teaspoon into the boiling soup. That way when you drop in the dough it will easily release from the teaspoon. Do that every time and you’ll never have to worry about a lot of dough sticking to your spoon.

That’s it. The rest is assembling and preparing the ingredients and letting the chicken and dutch oven do all of the work. This is a great recipe especially for this time of year. I hope you enjoy it!

Mom's Chicken Soup With Dumplings

  • Servings: 10
  • Difficulty: Easy
  • Print

INGREDIENTS:

Soup:

1 five to six pound chicken, thawed

5-6 medium sized carrots peeled and cut into 2 inch logs (or you can use baby carrots as well)

4 celery heart stalks

3 cloves of garlic peeled but left whole

2 bay leaves

2 thirty-two ounce boxes of unsalted chicken stock (half stock, half broth is best)

2 tsp. instant bouillon chicken granules or 2 Tbs. roasted chicken better than bouillon

water

chopped chives for garnish

salt and pepper

Dumplings:

1 cup flour

1 tsp. baking powder

1 tsp. salt

1 extra large egg, slightly beaten

1/4 cup buttermilk

1/8 cup melted butter (2 Tbs)

2 Tbs. chopped chives or 1/s tsp. poultry seasoning

DIRECTIONS:

Wash chicken, remove any material inside the cavity and pat dry. (if the chicken has any innards such as a neck, liver and heart throw that in the pot as well). Put the chicken in a 6 1/2 quart stock pot. Season the chicken with salt and pepper. Add the carrots, celery, garlic and bay leaves. Pour in the chicken broth and stock. Add the bouillon. Fill the remainder of the pot with water until the liquid is about an inch from the top of the pan. Cover the pot and cook for 60 minutes. (a six pound bird required 60 minutes on medium-high heat).

After 60 minutes, turn off the heat and carefully remove the chicken from the pot along with the bay leaves. The garlic cloves will basically disintegrate so you don’t need to worry about removing them. Allow chicken to cool slightly so that you can work with it. Remove all the meat from the chicken, being careful to discard any bones and skin. Chop the chicken meat into nice bite size pieces. Put the meat back in the pot, cover the pot and bring to a boil.

While the soup is coming back to a boil make the dumpling batter. Melt the butter and give it time to cool before adding it to the dumpling mixture. Combine all of the dry ingredients including the chives. Make a well in the dry ingredients and pour in the wet ingredients (it is important for the melted butter to be cool so that it doesn’t scramble the egg). Stir until combined. If the mixture is too dry add a little more buttermilk, if too moist add a little more flour.

Remove the cover from the pan. If the broth is boiling quickly drop the dumpling dough into the pan by the teaspoonful. Once all the dough is in the dutch oven, put the lid back on, lower the heat to medium and do not take the lid off the pan for at least 20 minutes.

All Ingredients With Stock

 Cook for at least 30-40 minutes

Cut up the chicken

Put dumpling dough into boiling soup

Mom's chicken soup with dumplings

Pumpkin Cranberry Nut Bread…

So after making my pumpkin cream cheese sweet bread I had some leftover pumpkin puree. Since  I didn’t want to waste it and the sweet bread was such a big hit I thought I’d try making another type of sweet bread using the leftovers.

What I like about this bread is it combines some of my favorite Fall flavors – pumpkin, cranberry and orange. Then you throw in a little chopped pecans and you’re in sweet bread heaven.

So let’s talk some pumpkin cranberry nut bread…

Cover the cranberries with orange juiceLesson Learned 1 –   Plump the dried cranberries for even more flavor: I had a bag of cooking and baking julienne sliced cranberries and I was able to give them an extra body and boost by soaking them in warm fresh orange juice. Yum!

In a microwavable bowl I just poured the juice of one large orange over a half cup of the cranberries, put plastic wrap over the bowl, slit the wrap to vent and heated the mixture for 45 seconds.  Then I let the mixture sit covered in the plastic wrap for at least 5 minutes and voila, plumped cranberries. You may have done this process before with raisins, and it works the same for dried cranberries. Plus it gives the cranberries an extra boost of orange flavor.

Lesson Learned 2 – I adapted this recipe from a muffin recipe: Almost any muffin recipe can be adapted into a sweet bread recipe. You just have to remember to bake it longer. I took the guess work out for you. I started checking the bread at 30 minutes and wound up baking it for an additional 15 minutes, checking the loaf every 5 minutes. My determination is, based on your oven and where you live, the bread should be baked for 40-45 minutes, or until a toothpick inserted in the center comes out clean.

Pour the wet ingredients into the dryLesson Learned 3 – You don’t need any mixer for this recipe:  Just combine the wet and dry ingredients in separate bowls, make a well in the dry ingredients and pour the wet ingredients into the dry. Mix until just combined – don’t over mix. It couldn’t be easier.

This bread is incredibly easy to make. So if you’re looking for a great Fall treat that’s full of flavor and requires hardly any effort on your part, this is the recipe for you! Enjoy!

Pumpkin Cranberry Nut Bread…

  • Servings: 14-16 slices
  • Difficulty: Easy
  • Print

INGREDIENTS:

1/2 cup dried cranberries (I used cooking and baking cranberries, julienned)

The juice of one large orange

2 cups flour, plus 1 Tbs. for high altitude

2/3 cup granulated sugar, measure slightly less for high altitude

1 Tbs. pumpkin spice blend

2 tsp. baking powder

1/2 cup chopped pecans

1/2 tsp. salt

1 stick unsalted butter, melted

1/2 cup canned pumpkin

1/2 cup milk, you can used reduced fat milk

2 extra large eggs

The zest of one large orange

DIRECTIONS:

Preheat your oven to 350. Zest the orange. Cut the orange and juice it. Place the cranberries in a microwavable bowl and pour the orange juice over them. Take plastic wrap and cover the top of the bowl, cutting a small slit in the center to vent the steam. Microwave for 45 seconds. Set aside and let the cranberries steep for at least 5 minutes.

In a large bowl sift together the flour, sugar, pumpkin spice blend, baking powder, and salt. Whisk in the chopped pecans. Drain the cranberries and put them in another large bowl. Add the somewhat cooled melted butter (you don’t want the eggs to scramble) the canned pumpkin, milk, eggs and orange zest. Stir until just combined.

Make a well in the dry ingredients and pour the wet ingredients into the bowl. Mix with a spoon or spatula until just combined.

Spray the bottom and sides of a 9 x 4 loaf pan with cooking spray. Pour the batter into the pan. Smooth the top of the batter with a spatula making sure the batter has reached into all corners and the top is even.

Bake for 40-45 minutes or until a toothpick inserted in the center comes out clean. Let the loaf rest in the loaf pan for 15 minutes then remove it to a wire rack. Cool completely.

Pumpkin Cranberry Nut Bread

 Pumpkin Cranberry Nut Bread

Pumpkin Cranberry Nut Bread

Pumpkin Cream Cheese Sweet Bread…

It’s that time of year, my favorite time of year – Fall. I love everything about Fall, the cooler crisp weather, the fabulous colors, the onset of professional football, but most of all I love the food of fall. Whether it be a good ole pot of chili, a pot roast filling the house with fabulous smells or just the thought of cranking up that oven and making something sweet or savory, Fall is definitely the best time of the year for food and fun in my opinion.

And when it comes to Fall, undeniably the most popular gourd of the season is the pumpkin. Not only is it great in recipes but it also serves as one of the primary decorations that signals the coming of Halloween. So as I was sitting on my deck the other day enjoying an early morning cup of coffee and enjoying the Fall weather, I decided to make something with pumpkin in it.

Breakfast Al Fresco

Now I am far from a purist. I had absolutely no intention of cutting up a pumpkin and processing it to get some pumpkin puree. I simply turned to the canned variety. The result was absolutely fabulous. This time I took my creation to work, and it was gone within 20 minutes, so I think you’re really going to like this one.

So let’s talk pumpkin cream cheese sweet bread…

Cream Cheese FillingLesson Learned 1 – Make the cream cheese filling first: With any recipe that has filling or an internal swirl, I find it easier to make the filling first. A lot of recipes have you make the batter and then the filling. I think once the batter’s done, it makes more sense to move on to assembling the bread versus making the filling and letting the batter sit. Just remember to make sure your cream cheese is room temperature before making the filling. That way you’ll have a silky smooth batter without lumps.

This recipe makes a generous amount for the filling. I really like that the cream cheese filling is a major part of the cake and the contrast between it and the dark pumpkin batter is pleasing to the eye. This sweet bread is not only delicious but delightful to look at as well.

The wet ingredientsLesson Learned 2 – You don’t need a stand mixer for this one: I made the pumpkin batter in a stand mixer and used a hand mixer for the filling. You really only need a hand mixer. The wet ingredients combine easily and you fold the dry ingredients into the wet ingredients by hand. So don’t pull out the stand mixer for this one.

Lesson Learned 3 – Dividing the batter: Normally recipes like this tell you to divide the batter into fourths or thirds with the larger percentage going on the bottom and the smaller on top of the filling. I think I divided it by three-quarters to one quarter and I was really nervous that I did not have enough batter to put on top of the filling. At one point I even pulled out a butter knife and meticulously kept moving batter from the center of the pan to the edges. I felt the amount of batter around the edges was dangerously thin and at one point I just thought, oh well, what will be will be.

To my surprise, and as is verified in the pictures, the amount I had on top was more than enough. I forgot the batter has leavening agents (baking powder and soda) and that made the batter on top rise higher than I ever expected.

My advice here is to be careful. I think I’d have felt more comfortable with a slightly larger amount of batter to spread on top. But if for some reason you find yourself in the same situation as I was, don’t worry. I probably had the least amount of batter you can have on top and the bread turned out beautifully.

Cream Cheese Pumpkin Sweet Bread

Lesson Learned 4 – The challenge of knowing when it is done: Because this sweet bread has a cream cheese layer, it can be difficult to determine when it is done. Inserting a toothpick and expecting it to come out clean can be misleading, since the cream cheese will not set in the same way as the batter.

Also, depending upon your oven, the top and the sides can cook faster than the center. So, here’s what I did. I checked the bread after 30 minutes. I felt that the top and sides were cooking faster and so I tented the bread with foil making sure the foil did not touch the batter. I baked it for another 20 minutes tented and then I took off the tent. The center still looked a little too jiggly for me and so I removed the foil and baked it for another 5 minutes and then took it out of the oven. The sweet bread turned out perfectly.

Remember everyone’s oven is different. I also live in high altitude and so things normally take a little longer to bake. Start your overall time at 50 minutes and go from there. If it looks too jiggly in the center, let it bake a little longer. It sounds harder than it actually is, but believe me the end result is worth it.

Pumpkin Cream Cheese Sweet Bread…

  • Servings: 10-12 Quarter Inch Slices
  • Difficulty: Easy-Medium
  • Print

INGREDIENTS:

Cream Cheese Filling

1 extra large egg, room temperature

4 ounces cream cheese, room temperature

1/4 cup sugar

3 Tbs. flour

Sweet Bread

1 extra large egg, room temperature

1 cup canned pumpkin

1/2 cup brown sugar, firmly packed

1/4 cup sugar (7/8 of a 1/4 cup for high altitude)

1/4 cup coconut oil (in its liquid state)

1/4 cup sour cream

2 tsp. vanilla

2 tsp. ground cinnamon

1 tsp. pumpkin pie spice

1/2 tsp. nutmeg

1 cup flour (plus 1 Tbs for high altitude)

1/2 tsp. baking soda

1/2 tsp. baking powder

DIRECTIONS:

Preheat oven to 350 degrees. Using a hand mixer, mix all the cream cheese filling ingredients until smooth. Set aside.

For the batter: In a large bowl sift together the flour, baking soda and baking powder. In another large bowl mix together (using a hand mixer) the remaining ingredients. Pour the dry ingredients into the wet ingredients and gently fold them in using a wooden spoon or spatula. Continue until just combined. Do no over mix.

Spray the bottom and sides of a 9 x 4 inch loaf pan with baking spray. Pour in 2/3 of the batter mixture. Using a spatula, smooth out the mixture making sure it has spread to all sides and corners.

Pour the filling mixture on top, smoothing it out to reach all sides and corners. Add the remaining batter mixture on top of the filling. With a round edge knife or frosting spreader, smooth the remaining batter over the filling, making sure it reaches all sides and corners and covers the filling.

Bake for 50-55 minutes until cake it set. Half way through the baking process if it appears the sides  and top are cooking faster than the center, tent the loaf pan for the remaining baking time.

Let the sweet bread cool in the pan for at least 15 minutes before removing it. Let it cool completely before slicing.

The Layering Process

Fresh Out Of The Oven

Fresh Out Of The Oven

Pumpkin Cream Cheese Sweet Bread

Pumpkin Cream Cheese Sweet Bread

Grilled Salmon In Foil Packets

It’s getting close to the time when grilling food will be less and oven prepared food will be more. Well, this recipe gives you that grilled look from being baked in the oven in a foil packet. What I like about this recipe is it’s so easy to prepare and cook, so even if your a novice at cooking fish this recipe will turn you into a pro!

So let’s talk about grilled salmon in foil packets…

Two Six Ounce Salmon Filets

Two Six Ounce Salmon Filets

Lesson Learned 1 – The portion size for salmon: I had a butcher tell me that the correct portion size for salmon is eight ounces. I don’t agree with that. I think it is six ounces. If you’re feeding big eaters get eight ounce portions, but for most six ounces is more than enough. Both six and eight ounce portions cook for approximately the same time, give or take a few minutes for the larger size portion. Stick with a 6 ounce portion and the cooking time in the recipe and the salmon will turn out perfectly every time. I have a wonderful grocery store nearby that always has large pieces of salmon in the meat case. I get the butcher to cut them fresh for me every time. I also ask the butcher to cut the piece from the center and not from the ends.

Lesson Learned 2 – Removing the skin from the salmon: This is probably the most time consuming part of the entire recipe. You need to remove the skin of the salmon before baking it. Now you can always ask a butcher to do that, but I prefer doing it myself as I like to make sure that I am removing the skin with the least amount of flesh attached to it. But if you’re afraid to do it or feel like you don’t have the time, just ask your butcher.

Removing the skin from the salmonTo remove the skin you need to work with a very sharp knife. I use a boning knife. Start at the thick end of the filet and see if, by hand, you can slightly lift up part of the skin. Normally you can. Then place the blade of the knife up against the skin and slowly begin to move the knife down the skin. While your moving your knife, try to get as much of your hand holding the skin and pull toward the thin end of the filet as you move the knife.

This process may take a little time and you want to make sure you are removing mostly skin and not flesh. That is why you need a very sharp knife for this. Otherwise you may sacrifice a lot of the salmon to the skin. Take your time and don’t get frustrated. Just continue to methodically move the knife down the skin will pulling the skin toward the thin side of the filet.

That grilled look from baking in the ovenLesson Learned 3 – Getting the grilled on the salmon filet by using a foil packet: Once the salmon has marinated you just put it in a foil packet on a baking sheet and roast it in the oven for 15 minutes. No need to prep the foil in any way. Since the marinade has brown sugar in it, the bottom of the salmon will slightly caramelize. When removing the salmon from the packet simply flip it over when you put it on the plate and the salmon will look like it was made on the grill. It’s so easy and such a neat trick!

This is my go to salmon recipe. I love it because it is quick and easy and, by the way, did I tell you it’s pretty darn delicious. So try this one and tell me what you think…

Grilled Salmon In Foil Packets…

  • Servings: 4
  • Difficulty: Easy
  • Print

INGREDIENTS:

4 six ounce salmon filets, skin removed

1/3 cup firmly packed brown sugar

1/3 cup soy sauce

1/3 cup water

half of a third of a cup of vegetable oil

2 medium-large garlic cloves, minced

1 Tbs. fresh thyme leaves, slightly chopped (I used lemony thyme)

1 tsp. lemon pepper

DIRECTIONS:

Put the brown sugar, soy sauce, water, oil, garlic, thyme and lemon pepper into a bowl. Whisk completely making sure to incorporate all of the brown sugar into the liquid.

Place the salmon filets into a resealable bag. Pour the marinade over the filets. NOTE:  You may need to use a spatula to get the residual brown sugar from the bottom of the bowl into the bag. It is important that as much brown sugar as possible is in the marinade mixture while the filets are marinating. Marinate the filets for 3-4 hours.

Preheat the oven to 425. Line a baking sheet with foil. Using a piece of additional foil for each filet, loosely wrap the filet in the foil folding the edges up at the ends to make a packet. Place all the packets on the foil lined pan.

Bake for 15 minutes. When removing the salmon from the foil, make sure to flip it over so the caramelized side is on the top when serving. Serve immediately.

The Marinade

The Marinade

Marinate Filets In A Resealable Bag For 4 Hours

Put the salmon and marinade into a resealable plastic bag…

A Foil Packet

Salmon in a foil packet…

Serving Suggestion: Grilled Salmon with Panko Crusted Tomatoes and Roasted Baby Red Potatoes...

Serving Suggestion: Grilled Salmon with Panko Crusted Tomatoes and Roasted Baby Red Potatoes…

Creamy Garden Tomato Soup…

I warned you about a plethora of tomato recipes as my tomato plants this year have been producing like they are on steroids. A co-work of mine suggested that the strains I’m growing, the indigo rose and tie-dye heirloom tomatoes (pictured below), would make a great tomato soup. I’ve never made home made tomato soup before, so I thought I would try. I really didn’t want to waste any of these great tomatoes and I knew making soup would use up a lot of them.

The Indigo Rose Heirloom Tomato

The Indigo Rose Heirloom Tomato

Tie-Die Heirloom Tomatoes

Tie-Die Heirloom Tomatoes

A while back I posted a recipe for home made Broccoli Cheddar Soup. That was only the second homemade soup I ever made. For years I have been making my mothers chicken and dumpling soup but never thought about trying other recipes. Now after having made this tomato soup I wonder why I waited so long to make a variety of different home made soups. I’m pretty sure I’ll be trying more soup recipes in the future. They are relatively easy to make and so much more flavorful than what you buy in a can. Plus you control the ingredients. And if you look at canned soup, they tend to have a lot of sodium. So take the extra time and try making home made soup. It’s truly worth it.

This recipe is based on a recipe by Ina Garten called Cream Of Fresh Tomato Soup. It’s a great recipe as is, but I made a few tweaks and loved what I got. I used less onion, more garlic, less sugar, more tomato paste, more basil and I finished it off with 1 Tbs. of butter to give it a nice shimmery, satiny look. Many of the reviews of her recipe said not to change a thing, that the soup was fabulous as is. But I know my tastes and I also can tell if I like how things are looking by eyeballing it. The changes that I made worked wonderfully, and I will chronicle in the recipe below what I did.

So let’s talk about making tomato soup…

Carrots and onionsLesson Learned 1 – Cut the carrots into small pieces: I think the carrots add a nice flavor to the soup, but recipes hardly ever tell you how to cut them. Carrots are dense and they take time to cook. And you are trying to soften them with chopped onions which by nature are less dense and can soften more quickly. So cut the carrots small. I cut the carrots in half lengthwise and then in half again lengthwise and then started chopping from there. The smaller pieces soften faster. Also remember to soften the onions and carrots on a medium heat. You’re not looking for the onions to caramelize, you just want them to soften. The carrots will soften slightly but not all the way. That’s perfectly fine as you will be simmering them for a long while and that will complete the softening process.

Lesson Learned 2 – To peel or not to peel the tomatoes: I did a lot of reading regarding whether you should peel your tomatoes when making the soup. I found a lot of different opinions but I chose to peel them. In Ina’s recipe, she tells you to cook the tomatoes with skin on. Later on in the process you take the soup mixture and process it through a food mill to remove any skin and seeds. I don’t have a food mill, so I decided to peel the tomatoes at the very beginning.

Peeled Tomatoes

Peeled Tomatoes

Lesson Learned 3 – How to peel a tomato: Peeling a tomato is really quite simple. All you need to do is to put it in boiling water for 30 seconds, remove it, and the skin will practically peel off by itself. I used this method and it worked like a charm.

Lesson Learned 4 – Using a blender to puree your soup: When using a blender to puree hot soup you need to do a few simple things to prevent having an explosion. First, never fill the blender completely full with hot liquid. Fill it up only to the half way point or even a little less. Second put a towel over the hole in the top of the blender to let steam escape while you’re pureeing your soup. Otherwise you may wind up with soup all over your walls. Or, an even easier way to puree your soup is to use an immersion blender. You stick it right into the hot pot and emulsify the soup right there. Currently I do not have an immersion blender but I am definitely going to invest in one. In the meantime, using a blender worked perfectly fine.

If you haven’t tried making homemade soup you really should. I was surprised at how easy and good it was. So go ahead, walk on the wild side and make some homemade soup…

[recipe: title=”Creamy Garden Tomato Soup…” time=”2 Hours Including Prep” Servings=”8-10″ difficulty=”Easy”]

INGREDIENTS:

3 Tbs. olive oil

1 medium sized red onion, chopped

2 medium carrots, unpeeled and chopped

4 cloves minced, garlic

8-10 garden tomatoes, medium to large in size

1 tsp. sugar

2-3 Tbs. tomato paste

1/3 cup loosely packed and chopped fresh basil leaves

3 cups unsalted chicken stock (preferably half broth and half stock)

2 Tbs. roasted chicken Better Than Bouillon

1 Tbs. salt (taste along the way and add more if desired)

1 tsp. freshly cracked black pepper

3/4 cup heavy cream

1 Tbs. butter

DIRECTIONS;

On the stove, bring a large pot of water to a boil. Once the water is boiling, place 2-3 tomatoes in the water and cover. After 30 seconds, take the tomatoes out of the water. Repeat this process with all the tomatoes. Once the tomatoes cool slightly, remove the skins with a paring knife. (the skins should come off easily).

Cut the tomatoes and remove and imperfections or gristle. Heat the olive oil in a large dutch oven. Add the onions and carrots and sauté until tender, 10-15 minutes. Add the garlic and cook until fragrant, approximately one minute.

Put all the remaining ingredients in the pot except the heavy cream and butter. Bring to a boil then lower the heat and simmer covered for 45 minutes or until the tomatoes are very tender. Puree the mixture using an immersion blender, blender or food mill. If using something other than an immersion blender, pour the pureed mixture back into the dutch oven. Over low heat add the heavy cream and stir to combine. Drop a tablespoon of butter into the pot and melt in right before serving.

Serve hot.

[/recipe]

The Ingredients Before Adding Stock

The Ingredients Before Adding Stock

Cook Ingredients in Stock for 45 minutes

Cook Ingredients In Stock For 45 Minutes

Creamy Garden Tomato Soup

Creamy Garden Tomato Soup

Cinnamon Roll Cake…

I like to dabble with baking, trying new and interesting ways of creating sweet delectable treats. And let me tell you, where that’s concerned this recipe takes the cake (pun intended)! Every bite of this cake tastes exactly like a cinnamon roll. It is unbelievably good. I took some of this to work and one of my co-workers said it was an absolutely wicked treat. You must try this one.

So let’s talk about making this cake..

Lesson Learned 1 – The ingredients for the cake are a bit untraditional: Most cake recipes use a combination of baking soda and baking powder, usually a teaspoonful or less of each, as leavening agents for the batter. This particular cake recipe uses 4 teaspoons of baking powder and no baking soda. It seems like a lot of baking powder, but what that amount actually does is create a yeasty bread-like quality for the cake. You can see in the picture below the bubbles created by using the large amount of baking powder. It was interesting to see its affect on the batter. And when you think about it, cinnamon rolls tend to have a texture that’s more like bread than cake, so using the larger amount of baking powder to create that consistency makes sense.

Bubbles In The Batter

Another somewhat non traditional aspect to making the batter is adding the melted butter. Once you’ve combined all the ingredients together, you slowly add the melted butter into the batter. It is important to add it slowly so that the butter fully incorporates. I poured a little in at a time, mixed it in, and repeated that process until all the melted butter was fully incorporated into the batter. It gave the batter the luxurious consistency you see below.

The Cake Batter

Before adding the melted butter the cake batter will look a little lumpy. As you slowly add the melted butter the lumps will disappear.

Lesson Learned 2 – The cinnamon topping will be thick in consistency: A lot of cinnamon cake recipes have more of a streusel-like mixture that you incorporate into cake batter. The topping for this cake is thicker and more frosting-like as you can see from the picture below.

The Cinnamon Topping

When preparing this mixture it’s very important the butter be as soft as possible without melting it. I put the butter in the microwave and kept nuking it in 10 second increments until it was slightly runny along the edges. You can see from the picture below how soft the butter was before I mixed it with the other topping ingredients.

The Topping Ingredients

Lesson Learned 3 – How to combine the cinnamon and cake batter: Many recipes similar to this require sprinkling the topping on the batter and using a knife to swirl it down into the cake. You don’t need to do that with this recipe. All you need to do is dollop the cinnamon mixture on top and use a knife and spread it around. The cinnamon will permeate the batter while it bakes. Try to spread the mixture as close to the edges as possible. That way the end pieces will have some cinnamon in them as well.
Swirled Cinnamon Mixture

Dollop The Cinnamon On Top Of The Batter

Lesson Learned 4 – Add the glaze when the cake is still warm: Most of the time you wait for a cake to cool before you add glaze. With this recipe you add the glaze while the cake is still slightly warm. That way it seeps into the cake as well as stays on top. I prefer to make thicker glazes for this type of recipe so I combine heavy cream and milk with the vanilla and powdered sugar to get a rich, thick glaze.

Thick Rich Glaze

I hope you decide to try this recipe. It is sinfully delicious and keeps well in an air tight container. I got two thumbs up on this on this one from my co-workers and my husband!

Cinnamon Roll Cake…

  • Servings: 20-24 Squares
  • Difficulty: Easy
  • Print

INGREDIENTS:
CAKE BATTER:

Cinnamon Roll Cake

3 cups flour (plus 2 Tbs. high altitude)

4 tsp. baking powder

1/2 tsp. salt

1 cup sugar (7/8 cup high altitude)

1 1/2 cups milk

3 tsp. vanilla extract

2 extra large eggs

1/2 cup butter, melted.

CINNAMON TOPPING MIXTURE:

1 cup firmly packed brown sugar

2 Tbs. flour

2 heaping Tbs. cinnamon

1 cup very soft butter

GLAZE:

2 cups powdered sugar

5 Tbs. heavy cream

2-3 Tbs. Milk

1 tsp. vanilla

DIRECTIONS:

Preheat the oven to 350 degrees. Mix together all of the ingredients for the cinnamon topping and set aside.

In a large mixing bowl, mix together all of the cake batter ingredients except the melted butter. After everything is combined, slowly add the melted butter in small amounts making sure it is thoroughly combined before adding more. Continue with this process until all of the melted butter is incorporated into the batter.

Spray a 9 x 13 dish with cooking spray. Add the batter to the dish and smooth until evenly distributed. Dollop portions of the cinnamon mixture on top of the batter. Using a smooth edged knife, swirl the cinnamon mixture all over the top of the batter getting the mixture as close to the edges of the pan as possible.

Bake for 45-50 minutes.

Mix together all of the glaze ingredients. While the cake is still slightly warm, pour the glaze all over the top of the cake. The cake keeps best when stored in an airtight container.

The Cake Right Out Of The Oven

The Cake Right Out Of The Oven

Cinnamon Roll Cake

Cinnamon Roll Cake

Simple Oven Roasted Tomatoes…

As I have chronicled in my past couple of blogs, this year has been the year of the tomatoes in my garden. Every day I seem to pick about 5-6 large tomatoes and at least a cupful of yellow grape tomatoes. And because of that I have been on a quest to let no tomato go to waste.

I can’t say it enough, the tomatoes in my garden have been nothing short of phenomenal (for a quick read on the heirloom tomatoes I am growing in my garden this year go to my tri-tomato salsa recipe). You just don’t get tomatoes like this in the grocery stores. When the inside of the tomato looks like the picture below, you know you’ve got a juicy, flavorful tomato. The inside of the tie-dyed tomato

I’m surprised my skin isn’t turning red from all of the tomatoes I’ve been eating lately. They are just so darn good and this recipe is a great way to enjoy them. It’s so simple to make and once it’s cooked you feel like you’re eating a decadently thick marinara sauce topped with gooey cheese.

Lesson Learned 1 – You can use different herbs to flavor the tomatoes: The first time I made this recipe I used some lemony thyme. I have a big pot of it growing on my deck. The second time I used fresh basil (also growing in a pot on my deck) and cut it into lardons before sprinkling it on the tomatoes.

Either the way the process couldn’t be simpler. Cut the tomato into half inch slices, sprinkle with herbs and top with mozzarella and shaved parmesan. You can sprinkle a little italian seasoning on the top or leave it plain, then bake and finish it off with a drizzle of good olive oil before you serve (I used white truffle olive oil).

Lesson Learned 2 – Cut the bottom of each end of the tomato to create a flat surface: Since the tomatoes are round, your end pieces will not lie flat on the baking sheet. That’s really no big deal except that if the tomato is too wobbly the melted cheese can fall right off of it onto the baking sheet. All you need to do is cut off a small portion of the round end and the tomato will lie flat.

I would also recommend spraying your baking sheet with a cooking spray so the tomatoes won’t stick to the pan. I actually line my pan with foil and then spray the foil.

Simple Oven Roasted Tomatoes...

  • Servings: 3 Slices Per Each Medium/Large Tomato
  • Difficulty: Easy
  • Print

INGREDIENTS:

Fresh tomatoes (1 tomato per person)

Fresh Herbs (I used lemony time or basil, chopped – 1 Tbs. per tomato)

Shredded Mozzarella

Shaved Parmesan (I think it melts better than grated parmesan)

Italian Seasoning, if desired

Good olive oil for finishing (I used white truffle olive oil)

DIRECTIONS:

Preheat the oven to 375 degrees. Wash the tomatoes and cut them into half inch slices. Cut a small portion off the bottom of the end slices so they lie flat on a baking sheet. Spray a baking sheet with cooking spray.

Place the tomato slices on the baking sheet. Sprinkle the herbs on top of each slice. Top each slice with mozzarella and shaved parmesan. Put the mozzarella on first and top with parmesan. The mozzarella will help the parmesan stick on top of the tomato. Sprinkle with italian seasoning, if desired.

Bake for 15-20 minutes or until the cheese starts to turn golden brown. Plate the tomatoes and drizzle with some good olive oil. Serve immediately.

Top Each Slice With Herbs

Top Each Slice With Herbs

Top With Mozzarella And Shaved Parmesan - Sprinkle With Italian Seasong

Top With Mozzarella And Shaved Parmesan – Sprinkle With Italian Seasoning

Simple Oven Roasted Tomatoes

Tri-Tomato Salsa…

It seems like every growing season one of my vegetable plants decides that it’s on steroids. Last year I had the zucchini plant that took over a greater portion of the garden and produced 2-3 zucchinis each day. This year my zucchini plant produced about 7-8 zucchinis total. But never fear, this time the garden decided it would be the year of the tomatoes!

This year I did something different with my tomato plants. I bought them from a co-worker who, with her son, raised several strains from seeds and then sold them (at a very reasonable price) to anyone who wanted to buy them. It was a way for her son to earn money to buy a dirt bike.

Salsa IngredientsThe tomatoes were strains designed specifically to thrive in this region of the country (I live in Colorado right outside of Boulder) and they were hardened off when she delivered them. I’ve lived here since 2001 and have had very little luck growing tomatoes. This year was totally different. All my tomato plants thrived and are producing like gang busters. That left me with the delightful dilemma of figuring out how I would use them and not waste a single one.

So obviously, some have been given to friends and neighbors. But I also want to be a little more creative and try to keep as many as I can here on the home front. So If you see a few more tomato recipes in the coming weeks you’ll know why.

This recipe was inspired by the three types of tomatoes I’m growing in my garden this year. Well, actually two are grown in my garden, one is growing on the deck. That particular plant I call the tomato plant that ate New York because it is as tall as me and is producing yellow grape tomatoes prolifically. Judge for yourself by the picture below…

The Tomato Plant That Ate New York

The first type of tomato I used in this recipe is a purple tomato called an Indigo Rose. A relatively new strain of heirloom tomato, it’s color comes from a high concentration of a compound called anthocyanin. In several studies anthocyanin was found to be preventative and therapeutic in a wide variety of human diseases such as coronary heart disease. It also was found to support visual acuity and circulatory health. Similar to studies done in France on people who regularly drink red wine and the proven effect the wine had on reducing heart disease, this particular strain of tomato has similar qualities and benefits.

What’s also interesting about this tomato is that only the parts of the tomato that are kissed by the sun get the purple color. When you turn the tomato over where it has been shaded, the bottom is red just like a regular tomato. The Indigo Rose tomato has fewer seeds and more flesh. It is a rich, flavorful tomato.

The Purple Tomato

Indigo Rose

The second type of tomato I used in this recipe is a strain called a tie-dyed tomato. Beautiful to look at with it’s mixture of green and red coloring, the tie-dyed tomato is very disease resistant and highly non-acidic. This tomato has a dark, rich flavor. The other day I roasted one with some mozzarella and parmesan cheese mixed with dried italian seasoning and it was a delight.

Tie-Dyed Tomatoes

Tie-Dye Tomatoes

The third type of tomato I used in the salsa was yellow grape tomatoes. These tomatoes actually get their color from a recessive gene in the tomatoes genetic makeup. They also have a very mild sweet flavor and are low in acidity.

Yellow Grape Tomatoes

Yellow Grape Tomatoes

The last thing I pulled from my garden to include in the salsa was jalapeño peppers. This plant I actually have growing on a pot on my deck as I’ve had very little luck growing peppers in my garden. Like the tomato plants, the jalapeño pepper plant is producing prolifically and I am being very creative about how to use them.

My Jalapeño Plant

Jalapeño Peppers

Chances are you will not be growing exactly the same types of tomatoes like these to make your salsa. The beauty is you can make salsa from just about any tomato you’re growing. The only challenge I had with these tomatoes is they hold a lot of water and initially my salsa had a lot of liquid in it. I like a chunky salsa and so once I processed everything, I put the mixture in a strainer to remove a good deal of the liquid. The result was a nice, chunky, flavorful salsa.

This is the first time I ever made salsa. Try it – it’s easy and oh so tasty!

Tri-Tomato Salsa

  • Servings: 20
  • Difficulty: Easy
  • Print

INGREDIENTS:

4 pounds of tomatoes (for more color use different varieties)

1 small red onion

2 jalapeño peppers

2 cloves of garlic, minced

1 handful of cilantro (err on the side of more versus less)

1 – 1 1/2 tsp. of red wine vinegar

1/2 of a lemon, juiced

Salt and pepper to taste

DIRECTIONS:

Roughly chop the tomatoes, onion and jalapeños and put into the food processor. Add all the other ingredients. Pulse until you get the desired consistency. If the salsa is too watery, put it in a strainer and strain some of the moisture out.  Store in an air tight container in the refrigerator.

Tri-Tomato Salsa

Tri-Tomato Salsa

Today's Harvest

Fresh Strawberry Yogurt Cake…

I’ve just been loving how plentiful the strawberries are this year. And the quality of them has been outstanding. I love to bake with strawberries, but they can be tricky. Strawberries, like blueberries, have what I call the exploding factor. They explode moisture during the baking process. So, if you use too many of them or if they overly ripe you cake will fall it on itself. After a few disasters I’ve learned out to outsmart the pesky fruit and now I bake with them quite frequently.

The flavor of strawberries in a cake like this is more subtle. A co-worker even asked me what kind of fruit was in this cake. Baking them this way gives them a slight tartness that compliments the sweetness of the cake batter – a great combination. So, let’s talk about fresh strawberry yogurt cake…

StrawberriesLesson Learned 1 – Ripe strawberries are not the best for baking: Because of the exploding factor I alluded to above, ripe strawberries are not the best to bake with simply because they hold more water. In baking it’s really best to use strawberries that are only somewhat ripe. That way they release less moisture, your cake will not fall in on itself and you’ll still get that great strawberry flavor. But if your strawberries are ripe, simply use less of them. Cut them in small pieces and discard any piece that may be overly soft. When I made this recipe my strawberries were pretty ripe so I only used about 8 ounces in the cake. If you have less ripe strawberries you can use as much as 12 ounces.

And don’t use frozen strawberries with this recipe. If you do, you can be sure your cake will be a gooey mess.

IMG_6028Lesson Learned 2 – Make sure your cake is completely cool before icing it: I don’t know about you but I’m always in a hurry to put the icing on the cake. I rationalize that if it’s only slightly warm it will be ok. Wrong – o! Even if the cake is slightly warm, the icing will melt into the cake. Now that’s not necessarily a bad thing, but if you want your icing visible be patient and wait until the cake has cooled. The cake will taste great and you will be awarded visually as well!

I took this cake to work and the slices were gone in less than one half hour. This is a very moist and flavorful cake. Try it and let me know what you think.

Fresh Strawberry Yogurt Cake...

  • Servings: 16
  • Difficulty: Easy
  • Print

INGREDIENTS:

2 1/4 cup flour, (add 1 Tbs. for high altitude)

1/2 tsp. baking soda

1/2 tsp. salt

1 cup butter, room temperature

1 cup sugar

1 1/2 Tbs. fresh lemon juice (you’ll need 2 lemons for this recipe)

1/2 tsp. lemon zest

3 large eggs, room temperature

8 oz. vanilla Greek yogurt

8 – 12 oz. fresh strawberries, sliced small (use lesser amount if strawberries are ripe)

Vegetable shortening and flour to prepare the Bundt pan

ICING:

1 cup powdered sugar

1 Tbs. fresh lemon juice

1 tsp. lemon zest (I used the zest of one small lemon)

DIRECTIONS:

Preheat oven to 375 degrees. Grease and flour a 12 cup Bundt pan. Set aside. Zest and juice the lemons. Set aside.

Whisk together the flour, baking soda and salt. Using a stand mixer, beat together the butter and sugar until light and fluffy, about five minutes. Add the eggs one at a time until each is thoroughly incorporated. Add the lemon juice and zest and beat for another minute.

Add the dry ingredients and yogurt to the mixture, starting out and ending with the dry ingredients. Mix until just combined. (Scrape the sides of the bowl and under the beater blade to make sure everything has been combined).

Gently fold in the strawberries. Pour into the prepared ban. Reduce the heat in the oven to 325 and bake for 60 minutes or until a toothpick inserted in the center comes out clean. Remove from oven and allow to cool for 20 minutes. Remove the cake from the Bundt pan and cool completely on a wire rack.

Combine the powdered sugar, lemon juice and zest. Drizzle over the cooled cake.

Fresh Strawberry Yogurt Cake

 Fresh Strawberry Yogurt Cake

Pork Medallions with Marsala Mushroom Sauce…

There’s almost nothing that beats a good pork tenderloin. I’ve mastered the art of cooking this very tender cut of meat and am always looking for new ways to prepare it. I made this recipe the other day and it hit the spot. It’s a shining example of what comfort food is all about.

You can easily find pork tenderloins in the grocery stores packaged in a variety of marinades or plain. For this recipe I chose a lemon pepper marinated loin. You can choose whatever you want. Just make sure whatever marinade you choose will blend nicely with the marsala mushroom sauce.

What’s also great about this dish is it’s pretty easy and quick to prepare, so instead of having the same old boring thing for dinner you can make this and get it on the table in half an hour. I served it over store bought pre-made mashed potatoes (I like the Bob Evans brand the best) with a side of marinated grilled zucchini. it was fabulous!

So lets talk pork medallions with marsala mushroom sauce…

Two Inch Thick Medallions...Lesson Learned 1 – Cut the tenderloin into 2 inch medallions: Two inches is the perfect thickness to cook in the allotted time. Remember pork tenderloin is just like a boneless, skinless chicken breast. Both can be extremely flavorful and tender but most people tend to overcook them. A slight pink in the center of the pork is perfectly fine. Overcooking a piece of meat that has minimal to no fat like this can be a little tricky. If you cut the medallions to two inches in thickness, three minutes on each side should do the trick (you will also simmer them in the sauce for a couple of minutes at the end).

Make sure you start with a hot pot. That is why you use a combination of both butter and oil in the pan. Butter has a lower smoke point and the oil offsets that so you can get the pan warmer without burning Nicely Seared Medallionthe butter while still getting the butter flavor. You want the pork to get a nice sear. At about three minutes you should easily be able to turn the medallion over without it sticking to the pan. If not, let it cook a little while longer. Don’t force the meat from the pan. When the meat is adequately seared it will automatically release itself from the pan and you will be able to turn it over easily. The picture on the left shows the type of sear you want to get on your medallions. Don’t worry, the pan will do all the work for you if you are patient. The second side should cook within 2 -3 minutes.

Simmer the medallions in the wine sauce for a few minutes before servingLesson Learned 2 – Don’t crowd the medallions while searing them: If you have to, cook the medallions in batches. If you overcrowd them in the pan they will steam instead of sear. Once you return the medallions to the sauce you will simmer them for a couple of minutes to complete the cooking process (picture to the right). Searing will insure that you keep all those wonderful juices in the meat.

Lesson Learned 3 – Shut off the heat and take the pan off the stove when adding the Marsala and white wine to the pan: Recipes quite often forget to mention this, and this is an important safety tip. Any type of alcohol added over a heat source can cause a fire flare up. You want to avoid burning yourself or setting the house on fire. So be on the safe side. Take the pan off the heat source, add the wine and then return the pan to the heat. It’s better to be safe than sorry.

I cut the entire tenderloin into medallions used six for this recipe and froze the rest. This recipe is designed to serve two bigger or three smaller appetites but you can easily increase the ingredients to serve more.

Pork Medallions With Marsala Mushroom Sauce

  • Servings: 2-3
  • Difficulty: Easy
  • Print

INGREDIENTS:Pork Medallions in a Marsala Mushroom Sauce

2 Tbs. unsalted butter

2 Tbs. olive oil

6 two inch thick pork medallions (I chose a lemon pepper marinated tenderloin)

1 large shallot, minced

1/2 cup Marsala wine

1/4 cup chicken stock

1/4 cup dry white wine (I used chardonnay)

2 Tbs. heavy cream

1 Tbs. cornstarch

Salt and pepper to taste

4 ounces baby bella mushrooms, sliced

DIRECTIONS:

Heat olive oil and butter over medium – high heat. Add pork medallions and brown on both sides – approximately three minutes on each side. Remove medallions from pan to a plate and cover with foil to keep them warm.

Add shallots and mushrooms to the pan and stir until coated with the pan drippings. After the mushrooms have slightly softened, remove the pan from the heat. Add the Marsala wine, chicken stock and white wine. Place back on the heat and continue to cook until the liquid has reduced by half. Combine heavy cream and cornstarch. Mix until thoroughly combined.

Add the cream mixture to the pan and whisk into the sauce until it starts to thicken. Taste the sauce to see if it needs salt and pepper. Season to taste. Return the pork medallions to the pan an simmer in the sauce for about 3 minutes. Serve immediately.

Serving Suggestion: Pork Medallions Over Mashed Potatoes With Grilled Zucchini

Serving Suggestion: Pork Medallions Over Mashed Potatoes With Grilled Zucchini…

Pork Medallions With Marsala Mushroom Sauce: so easy and great for any week night meal!

Lemon Crumb Cake…

Sometimes you just want something quick and easy. This is that kind of recipe. I don’t know about you but there are days when I just don’t want to drag out all the paraphernalia in order to make something that looks and tastes good. This particular recipe requires no stand mixer, food processor, or blender. Just a bowl for the dry and wet ingredients and a small pan to melt butter.

Let’s talk Lemon Crumb Cake…

Perfect Crumble ConsistencyLesson Learned 1 – The crumb topping: Only three ingredients make the topping – flour sugar and melted butter. I found the best result for making the topping is to add 1 additional tablespoon of flour to the 1/3 cup called for in the recipe. That way you get a nice crumble without the mixture being too moist. The crumb topping is easy to do. Just melt the butter and combine it with the flour and sugar. If the mixture looks too dry, add a tiny bit more melted butter. Make sure nothing is dry in the crumble. The picture here shows the perfect consistency.

Add Wet Ingredients To Dry IngredientsLesson Learned 2 – Mixing wet and dry ingredients: The rule of thumb when making a batter you mix by hand is to add the wet ingredients to the dry ingredients. Make a well in the center of the dry ingredients and pour in the wet ingredients. Take a wooden spoon or a spoon/spatula and mix until just combined. Make sure to check at the bottom center of the bowl – that’s were unincorporated ingredients tend to hang out. Once everything is combined, STOP. Over mixing will create a tough cake.

Lesson Learned 3 – Watch the time on this cake carefully: Ok, I’ll admit it – I had to make this cake twice to get it right. This cake, depending on your oven and what part of the country you live in, can bake from 50 minutes to 1 hour and 10 minutes. And let me tell you, it can go from moist to dry rather quickly. So keep an eye on it. I use a professional grade loaf pan and so my cake baked in 50 minutes. The time you need will depend on your oven and the bakeware you use. Keep an eye on it starting at 50 minutes.

Right Out Of The Oven

Lemon Crumb Cake…

  • Servings: 8-10
  • Difficulty: Easy
  • Print

INGREDIENTS:

Topping

1/3 cup plus 1 Tbs. Flour

1/3 cup sugar

2 Tbs. melted unsalted butter

Cake

1 1/2 cups flour

1 cup sugar

1 tsp. baking powder

1/2 tsp. salt

1 5 oz. can evaporated milk

1/3 cup vegetable oil

2 tsp. lemon zest

2 large eggs

Glaze (optional)

1/2 cup powdered sugar

3 tsp. lemon juice

1 tsp. lemon zest

DIRECTIONS:

Preheat oven to 350 degrees. Lightly grease and flour the bottom and sides of an 8 x 4 loaf pan (if using a nonstick pan you only need to prepare the bottom of the pan). In a small bowl mix together topping ingredients making sure all the flour is coated with the melted butter. Set aside.

In a large bowl, sift together the flour, baking powder and salt. In another bowl whisk together the eggs, evaporated milk, oil and lemon zest. Pour the egg mixture into the flour mixture and stir until just combined.

Pour the batter into the prepared loaf pan. Sprinkle the top evenly with the crumb mixture. Bake for 50 minutes to 1 hour 10 minutes or until a toothpick inserted in the center comes out clean. Check the cake at 50 minutes. You do not want to over bake this cake.

Cool the cake for 15 minutes in the loaf pan. Remove from loaf pan and let cool completely on a wire rack. The glaze is optional. The cake is delicious with or without the glaze.

Lemon Crumb Cake

 Lemon Crumb Cake

Broccoli Cheddar Soup…

Soup Ingredients...

Soup Ingredients…

Even though we are in the midst of summer I still get cravings for soup. Now I have to admit I normally only make a home made chicken and dumpling soup (my mom’s recipe that I’ll post in the Fall) but this time I decided to venture into trying something different. I researched various versions of broccoli soups and decided I wanted to do a broccoli and cheddar combination.

I like this recipe for a variety of reasons. First it is absolutely delicious – second, it’s so easy to make, and third it freezes well so you can have some now and save some for later. So let’s talk about making broccoli cheddar soup…

Slice VegetablesLesson Learned 1 – Use all of the broccoli but cut the pieces small: Most often people tend to discard the broccoli stalks and they actually provide great flavor especially when making the soup. So when you are cutting up the broccoli cut up the stalks as well. Be careful to cut the stalk into small pieces. They are obviously more dense than the florets and will take longer to cook if you leave them in large pieces. The smaller you cut them the less time you will have to cook them.

The same goes for the carrot. I took a pretty big thick carrot, halved it and then quartered it before slicing it. Carrots are also pretty dense and the smaller you cut them the faster they’ll cook. The nice thing about this recipe is you can chop everything up and put it in one big potl. You sauté everything at the same time and that makes it easy.

Lesson Learned 2 – You may have to use both flour and cornstarch to thicken the soup: I know it sounds strange – but it worked. Once the vegetables sautéed in butter for about 5 minutes I added the flour and cooked it down with the vegetables for about a minute. You need to do this for two reasons: 1 – so you remove the “floury” taste from the flour, and 2 – So you won’t have any lumps when you add the liquid.

Before Adding Cornstarch...

Before Adding Cornstarch…

After I cooked the flour with the vegetables I added the chicken broth (this was before I added the stock). As I was simmering everything the liquid seemed a little too light and runny as you can see from the picture on the right. So I added the stock and then systematically added some cornstarch mixed with stock to the soup to thicken it. I wound up using 3 tablespoons of each but added them in three separated batches. That way I could control how thick the soup was getting. You may find you are happy with the consistency you get by just using the flour. But if not, you can always added the cornstarch in small doses until you get your desire consistency. I would make sure to add some stock. I found that by adding one cup it gave the soup a richer color and enhanced the flavor.

A couple of tips: Give the first cornstarch and stock mixture a little time to thicken the soup before you add more. The heat of the soup activates the cornstarch, but it takes a couple of minutes. Be patient. If after a couple of minutes you are not happy with the thickness add a little more. And, just remember, do not add cornstarch to the pot all by itself. You have to mix it with liquid and then add it in liquid form. Otherwise you’ll get lumps. I found a 1:1 ratio of cornstarch to liquid works best. Just make sure the cornstarch is completely mixed into the liquid before you add it (I stick my finger in and swish it around to make sure there’s not a pile of cornstarch on the bottom of the measuring cup). I could have mixed the cornstarch with water but since I had the stock, why not continue to add more flavor.

After Adding Cornstarch...

After Adding Stock And Cornstarch…

Lesson Learned 3 – Use an immersion blender to puree the soup: Unfortunately I do not have an immersion blender (but I think it will be on my shopping list), so I used my blender to puree the soup. You can also use a food processor as well. I had to puree the soup in several batches using the blender. An immersion blender allows you to puree in the pot you’re cooking in and that’s much more convenient. But if you don’t have one, a blender or food processor will do the trick. They just require a little more effort.

So here’s the recipe. I hope you enjoy it!

Broccoli Cheddar Soup…

  • Servings: 6-8
  • Difficulty: Easy
  • Print

INGREDIENTS:

4 Tbs. Butter

1 1/2 – 2 pounds fresh broccoli, cut into small pieces including the stems

1 large onion chopped

2 large cloves of garlic, minced

1 carrot, diced

4 Tbs. flour

3 cups of chicken broth

1 cup of chicken stock

1/2 cup heavy cream

2 cups shredded sharp cheddar cheese

Kosher salt and freshly ground black pepper, to taste

3 Tbs. cornstarch mixed with 3 Tbs. stock, used as needed or not at all

DIRECTIONS:

Melt the butter in a large pot over medium high heat. Add the broccoli, onion, and carrot. Add some salt and pepper. While vegetables are cooking mince the garlic over the pot using a zester and combine with the vegetables. Cook until the onions start to look translucent, approximately 5-7 minutes.

Add the flour to the vegetables and stir for about a minute or until the flour begins to look blonde in color. Add the broth and stock and bring to a boil. Reduce the heat and simmer uncovered until the vegetables are tender, about 20-25 minutes. Check the consistency of the soup during this time. If it appears too runny pour in 1 Tbs. of cornstarch thoroughly mixed with 1 Tbs. of stock. Add more if needed. It should take no more than 3 Tbs. of each to reach a nice thick consistency. Simmer until all the vegetables are tender.

Using an immersion blender, puree the soup. Add the cream and cheddar cheese. Stir until the cheese has completely melted.

Broccoli Cheddar Soup

Basic Basil Pesto…

If you grow herbs like I do, by about now you have a boat load of basil. Basil is one of my favorite herbs to grow. There’s just something so satisfying about growing it – I just can’t explain it. But when you get massive amounts, what’s the best way to use it? The answer it simple – make pesto!

I’m sure most of you have a favorite pesto recipe. Mine is pretty basic but I’ve found that by keeping it that way I can be more creative when I actually use it. From pizza to pasta to sandwiches and the like, basil pesto is an excellent accompaniment to just about any dish. So here’s my lessons learned and recipe – would love if you would share yours!

Basil LeavesLesson Learned 1 – The hardest part of making pesto is preparing the basil leaves: Picking them off the plant and washing and drying them are probably the most labor intensive part of making pesto. If you have a salad spinner, I recommend using that to remove the excess water once the leaves are washed. Unfortunately I don’t have one so I have to lightly squeeze them between paper towels. You don’t want to have a lot of water in your pesto so it is important to remove the excess. And make sure you CHECK FOR BUGS! We are not the only species that likes basil. Once when I was cleaning my leaves I found a “thousand legger” in with the leaves. So make sure you check. I don’t think you’ll want to put a bug in the food processor!

All Ingredients In the Food ProcessorLesson Learned 2 – The amount of garlic and olive oil you use is strictly personal preference: I like my pesto garlicky and thick. Some only like a hint of garlic and a runnier pesto. Determine what you like by easing into it. I use two whole cloves of garlic for 4 cups of leaves. Start with one clove if you’re not sure. With the olive oil, only put half the amount or 1/4 cup in the food processor to start. You can drizzle in more as the leaves are processing until you get the desire consistency. Only once did I use the full 1/2 cup of oil. That was the first time I made pesto, and I found it to be too runny. Now I start with 1/4 cup and drizzle some olive oil into the processor until I reach my desired consistency depicted in the picture below.

Lesson Learned 3 – Be careful about adding salt: Romano and Parmesan cheese are naturally salty. I would taste the pesto before you add any salt. I seldom add salt because the cheese seems to provide the flavor I want.

Lesson Learned 4 – Pesto freezes very well: I’ve heard that some people take ice cube trays and fill them with pesto so they can have individual servings whenever they need them. I tend to put mine in a few small containers and freeze them. That way I can chop off what I need at the time and put the rest back in the freezer or use it up all at once. I’ve had pesto in airtight containers last up to a year in my freezer.

Basil Pesto

Basic Basil Pesto

  • Servings: 12-20
  • Difficulty: Easy
  • Print

INGREDIENTS:

4 cups loosely packed basil leaves

2 cloves garlic

1 small shallot, cut into pieces

3 TBS. pine nuts

1/4 – 1/2 cup olive oil

1/2 cup grated romano or parmesan cheese

salt, if desired

DIRECTIONS:

Wash basil leaves and remove excess water. Place the basil, shallot, pine nuts, cheese and 1/4 cup oil in a food processor. Process, stopping to scrape down the sides of the food processor at least once. Check the consistency of the pesto. If too thick, drizzle in more oil while processing until the pesto reaches the desired consistency.

Use or freeze. If not using immediately, store in an airtight container in your refrigerator or freezer.

Basic Basil Pesto

Grilled Marinated Zucchini…

It’s that time of year again when zucchini plants start to produce like gang busters. Last year was an epic year for zucchinis in my garden. I was taking two to three zucchinis off the plant daily. This year my plant is not doing as well, but I anticipate getting at least a few. And even if you don’t grow them yourself, there’s a good chance your neighbors will be ringing your doorbell asking you to take a few off their hands. So whether you grow them, share them or simply get them at a farmer’s market, zucchinis are versatile and can be used in both savory and sweet recipes.

The recipe I am going to share today is simple but produces a very flavorful grilled zucchini.

Zucchini MarinadeLesson Learned 1 – Patience is key: The hardest part about this recipe is making sure you marinate the zucchini for a minimum of 3 hours. You can even marinate the zucchini overnight if you like. Just put the zucchini in a plastic bag, pour the marinade over it, close the bag and refrigerate. I turned the bag over every hour or so just to redistribute the marinade. I grilled my zucchini after it had been marinating for 4 hours and it was delicious. 

Lesson Learned 2 – Don’t eliminate the sugar in the marinade: I know we all are trying to limit our intake of sugar these days, but don’t skip it here. When I tasted the marinade before I put some sugar in it was too tart. The sugar balances out the tartness of the vinegars and lemon and gives you a nice well rounded flavor.

Marinate In A Plastic BagLesson Learned 3 – Shallot verus onion: I recommend using a shallot in this marinade because it’s milder but still gives you that infusion of onion flavor. You’ll appreciate that especially when you finish off the grilled zucchini with a drizzle of the marinade.

Lesson Learned 4 – Grill or grill pan: The beauty of this recipe is that it can be done either on an outdoor grill or on a grill pan on top of the stove. Either way you’ll get those gorgeous grill marks and the same wonderful flavor. This time I cooked them on my gas grill, but I’ve also made these on top of the stove as well. This recipe is quick, easy and a great way to use that summer zucchini bounty!

Zucchini Cooking On The Grill

[recipe: title=”Grilled Marinated Zucchini” servings=”4″ time=”4 1/2 Hours Including Prep” difficulty=”Easy”]

INGREDIENTS:

1 Tbs. red wine vinegar

2 Tbs. white wine vinegar

1/2 tsp. lemon zest

2 Tbs. fresh lemon juice

1 tsp sugar

1 large garlic clove, minced

1 shallot, minced

1 Tbs. chopped fresh thyme leaves (I used a strain called lemony thyme)

1/3 -1/2 cup olive oil (I used garlic infused olive oil), taste after using 1/3 cup and add a little more if necessary

2 medium zucchini trimmed and sliced diagonally

Salt and pepper to taste

DIRECTIONS:

Whisk the vinegars, lemon zest and juice, sugar, garlic, shallot and thyme in a bowl. Gradually mix in the oil. Salt and pepper to taste. Spoon a couple of tablespoons of the marinade into a small dish, cover and refrigerate.

Slice the zucchini diagonally and put it in a gallon size plastic bag. Add the rest if the marinade and gently squeeze the bag to distribute the marinade evenly over the zucchini. Close the bag and refrigerate for at least 3 hours, turning the bag over occasionally in the refrigerator during the marinating process.

Place zucchini on the grill over medium high heat. Turn after 4 minutes. Keep the zucchini on the grill for an additional 4 minutes. Transfer the zucchini to a serving dish. Drizzle with the remaining marinade and serve hot.

[/recipe]

Check out two of my other favorite zucchini recipes on this site: Double Chocolate Zucchini Bread and Zucchini Mushroom Gratin. Enjoy those zucchinis!

Grilled Marinated Zucchini

Herb Roasted New Potatoes…

As you can imagine, I check out a lot of food blogs to see what others are making. I am impressed by the skill and creativity I see in a lot of them. And I say to myself, why can’t I be like that? But I am who I am, and what I make is based on my upbringing, my tastes, and sometimes even an adventurous spirit. But by and large, I am a pretty simple cook who likes to make simple things and be very successful at doing so.

Don’t get me wrong, my palate has matured over the years and I now enjoy many things I never would have dreamed of eating when I was younger. But when push comes to shove I’m basically a meat and potatoes girl (as is reflected by my recipes). So this recipe will come as no surprise.

Herb Roasted New PotatoesI like this recipe both for it’s simplicity and its flavor. Plus during the summer months I grow a lot of herbs and am always looking for ways use my fresh herbs in recipes. So this one fits the bill. I used my flat leaf parsley and lemon thyme as well as garlic to provide the aromatics. I love the added boost of the lemon thyme, but if you don’t have it or can’t find it, you can achieve the same affect by adding some lemon wedges to the roasting process. All in all, the hardest part of this recipe was making sure I didn’t slice the potatoes all the way through but just deep enough so they would fan out slightly. The rest was a breeze.

Lesson Learned 1 – Know your oven: I researched similar recipes to mine and many of them suggested baking the potatoes for an hour at 350. That would never work for me. At high altitude you often have to set your oven temperature higher and cook things longer. I set my oven temperature at 375 and for the last ten minutes cranked it up to 400. Next time I make this recipe I will start at 400 degrees and check the potatoes after 45 minutes. For me, I am thinking that 400 degrees for an hour will be optimum. At sea level, I would suggest starting at 375 and checking the potatoes for doneness at 45 minutes. If they are not done, make a decision from there whether to cook them longer at the same temperature or to crank up the oven.  Keep in mind the size of the potatoes matter. New potatoes are small but can still vary in size and that will affect the roasting time. The larger the new potatoes the longer the roasting time. Check your potatoes at 45 minutes and plan for at least an hour. That way you won’t go wrong.

Sliced New PotatoesLesson Learned 2 – Don’t throw out the garlic: I recommend using a full head of garlic when roasting the potatoes (you can even use more if you like). You don’t need to peel it, just cut off a small portion of the top. It will not only provide a delightful aromatic during the roasting process, but will also give you sweet soft garlic cloves that you can either spread directly on bread or use with butter to make a garlic herb butter that’s great for making garlic bread. You get that extra added benefit with this recipe.

If you  like rich, creamy potatoes infused with an herb and garlic flavor, this recipe is for you. Let me know what you think about the recipe after you make it.

Herb Roasted New Potatoes…

  • Servings: 4
  • Difficulty: Easy
  • Print

INGREDIENTS:

2 pounds new potatoes, scrubbed

1/4 cup olive oil (I used garlic infused olive oil)

2 Tbs. melted butter

1 Large head of garlic, top trimmed

1 – 2 Tbs. chopped flat leaf parsley

4 – 6 sprigs lemon thyme (if using regular thyme cut up half a lemon into wedges and add)

Salt and freshly cracked black pepper

DIRECTIONS:

Preheat oven to 375 (for high altitude 400 degrees). Melt the butter and add the olive oil to it. Cut slits into the potatoes being careful not to slice them all the way through. Place the potatoes in a roasting pan (I lined my with foil, but that is discretionary). Put the garlic head in the middle of the potatoes. Baste the potatoes and garlic with half of the butter/olive oil mixture. Sprinkle the potatoes with the chopped parsley and place the thyme sprigs in between the potatoes. Sprinkle with salt and pepper.

Half way through the roasting process baste the potatoes with the remaining butter/olive oil mixture. Check the potatoes for doneness at 45 minutes. If they do not appear to be almost fork tender raise the temperature of the oven to 400 degrees and roast at least an additional 15 minutes or until the potatoes are fork tender. Serve immediately.

Ready To Go Into The Oven

Herb Roasted New Potatoes

Herb Roasted New Potatoes

Oven Baked BBQ Ribs…

The Fourth of July is less than a week away and that normally means outdoor parties and lots of barbecuing – hamburgers, hot dogs, chicken wings and ribs. And quite often if Mother Nature decides to rain on your parade, you’re left with a conundrum of how to get that great barbecue taste without using the grill –  especially for those ribs. Fear no more. I have a great recipe that can be made all year round. This recipe provides great barbecue flavor without the use of a grill (if you so choose).

My oven baked barbecue ribs are made in the oven and finished off either on a stove top grill, broiler or outdoor grill. I guarantee you, you’ll think these cooked on the grill the whole time. The trick to getting that barbecue flavor without cooking on the grill is pretty simple, liquid smoke. And cooking the ribs low and slow in the oven keeps them moist and tender. Try this recipe and you’ll enjoy barbecue ribs all year long!

Rub Ingredients

Rub Ingredients

Lesson Learned 1 – Less is more with liquid smoke: Liquid smoke is what gives the rub for these ribs that barbecue flavor. But be careful because it can be an overpowering ingredient. I get pretty heavy handed with it because I love a heartier flavor and smell, but be aware that might not be your preference. I would try 2-3 drops initially with the rub ingredients. After mixing all the ingredients together take a test whiff. If you cannot smell smokiness or you want more smokiness then add a little more. I use about 6-8 drops but I would not recommend it for everyone initially, especially if you’ve never used liquid smoke before. You can always add more.

You can also brush the ribs with liquid smoke before applying the rub. This will give them an even deeper smoky flavor. Either way be careful until you are comfortable with the amount of liquid smoke that is right for you to use.

Lesson Learned 2 – Peel off the tough membrane that covers the bony side of the ribs: You may not readily see it but you will know it’s there when you try to eat the ribs. I am referring to the tough membrane that covers the bones. I’ll warn you up front, it can be a challenge to remove it. For me, there are times it comes off easily and other times I have to fight with it. Take a sharp paring knife and start at the large end of the bones. Insert the paring knife between the membrane and the bones working it back and forth until you get enough membrane that you can easily grab. You can also use the end of a spoon or kitchen sheers to loosen the membrane. First try and loosen the membrane all the way across the top. Then begin pulling it downwards over the bones until you’ve removed it.

If you buy your ribs at a butcher shop you can ask the butcher to do this for you. Some butcher shops do this automatically before putting the ribs in the meat case. Make sure you ask the butcher if the membrane has been removed. If it hasn’t have the butcher do it for you. That should be an expected service. If you buy your ribs prepackaged you’ll have to do this yourself. Can you leave it on? Certainly, but you will get a crispy tasteless substance on the bottom of your ribs. If you encounter a stubborn membrane just leave it on. You don’t have to eat it. It’s just a slight nuisance when you’re eating your ribs.

IMG_5753Lesson Learned 3 – Foil is your best friend while making this recipe: Besides making the foil packet for the ribs I recommend you also line the jelly roll pan you bake them on with foil. That way if any liquid leaks out of the packet it will not burn into your pan. Remember you are working with a brown sugar rub, and if the brown sugar leaks out it will create a baked on nightmare. If you line your pan with foil clean up is a breeze.

Lesson Learned 4 – You have three ways to finish off this recipe: Once you remove the ribs from the oven you can either finish them off on a grill, under the broiler or on a stove top grill. I always finish mine off on the grill because I have a gas grill and it’s easy to use on short notice. If you finish them off under the broiler or on a stove top grill remember to protect your pans. Either use foil (if you’re finishing them off under the broiler) or cooking spray if you’re finishing them off on a stove top grill. At clean up time you’ll be glad you did.

Oven Baked BBQ Ribs…

  • Servings: 6
  • Difficulty: Easy
  • Print

INGREDIENTS:

4 lbs. of pork ribs

3/4 cup brown sugar

Liquid Smoke, to taste (I use 6-8 drops)

1 Tbs. paprika

1 Tbs. garlic powder

Your favorite barbecue sauce

DIRECTIONS:

Preheat the oven to 300 degrees. Peel the tough membrane off the back side of the ribs (see lessons learned above). Mix together the brown sugar, liquid smoke, paprika and garlic powder. Apply the rub to both sides of the ribs.

Lay ribs on a sheet of foil (with substantial overlay) shiny side out and meat side down. Lay another layer of foil on the top of the ribs. Join the top and bottom pieces of foil together and crimp. Crimp the edges all the way around the ribs facing up. Line a jelly roll pan with foil. Place the ribs packet(s) on the foil lined pan.

Bake for 2 – 2 1/2 hours or until the meat starts to shrink away from the bone. Remove from oven. If using a grill, during the last half hour of oven baking light your grill and get it up to a temperature not exceeding 375 degrees. (If using a grill you might leave the ribs on for a little less time than if using a broiler. You don’t want the ribs to burn). If using a broiler, set it on high with the oven rack a good 10 – 12 inches from the heat source.

Place ribs on the grill bony side up. Brush on the sauce. Cook for a couple of minutes. Turn the ribs over. Brush on sauce. Cook for another couple of minutes. Take off the grill and serve.

The Ribs Right Out Of The Oven

The Ribs Right Out Of The Oven

Oven Baked BBQ Ribs

Oven Baked BBQ Ribs

Cheesecake With Strawberry Sauce…

I promise I haven’t gone all cheese-cakey on you but every once in a while I find a recipe that I post that is not my own, nor have I adapted that is absolutely fabulous. This is one of them. It is is so good and so easy that I just had to share and give credit where credit is due.

I’ve mentioned before that over the years I’ve become a Food Network junkie. I have to admit I was more enamored with the programming several years ago, but there are still some shows that I like to watch. Trisha Yearwood’s show is one of them. I’ve tried several of her recipes and enjoyed them, but this one is just over the top.

Cheesecake With Graham Cracker CrustI happened to be watching her show recently right after I made my Lemon Raspberry Cheesecake Bars. On the show she was making a cheesecake. It has been years since I made a cheesecake and for some reason I had it in my mind that it was labor intensive and hard to make. Well, nothing could be further from the truth. After I watched her show I decided try it again.

All I can say is that it was surprisingly easy and turned out perfectly the very first time. How often can you say that about the recipe? And if you look at my pictures and the pictures on the Food Network site, the cake looks exactly the same. Perfection!

I’ll write out the recipe for you here, but will also include a link to it on the Food Network site because I need to give credit where credit is due. But I did have a couple of good lessons learned while making this, and these I will share. Enjoy this one.

Line the outside of the pan with foilLesson Learned 1 – The importance of the water bath: What do I mean by a water bath? In order to avoid having cracks in the top of your cheesecake you need to bake it in a water bath. Once you prepare a springform pan, create a bed of foil around the bottom of the pan as shown in the picture to the right. After you’ve filled the spring form pan with the cheesecake mixture, place it either in a lipped jelly roll pan or any lipped pan that is bigger than the spring form pan. Carefully add about a half inch of water to the lipped pan and cook the cheese cake in that water bath. The foil will prevent any water from getting into the cheesecake and the water will prevent any cracks from occurring on the top of the cake.

The top of the cheesecake with no cracksI used a lipped jelly roll pan that I filled with water half way up the side and found that about three quarters of the way through the baking process process the water had entirely evaporated. I added a little more making sure the pan had water for the entire baking time. It worked beautifully.

I recently had a conversation with a woman who was bemoaning the fact that she could never make a cheese cake that wasn’t all cracked on the top. She’d never heard of a water bath. When I showed her pictures of my cake and told her this was the first time I made one in years she was sold. I promise the water bath does the trick, and my pictures prove it!

Strawberry Sauce Ingredients

Strawberry Sauce Ingredients

Lesson Learned 2 – Definitely make the strawberry sauce: The cheesecake on its own is divine but I think it needs a little extra added something. The strawberry sauce in this recipe is a perfect accompaniment to the cheese cake. I especially like using lime zest in the sauce. I felt it really brought out the flavor of the strawberries. Of course this is not the only thing you can use to add to the cake, but this sauce took very little effort and was divine, that’s why I like it.

I just used my mini food processor and mixed all the ingredients together. You don’t need to strain the sauce as you would if you were using raspberries. The sauce is best served cold so make sure you refrigerate it for at least an hour before serving.

Keep the cheesecake in a cooling oven for an hour

Lesson Learned 3 – Keep the cheesecake in the oven for an hour after it’s done baking: Once the cheesecake is done baking, turn off the heat and leave it in the oven for an hour with the oven door partially open. This helps to finish it off and is necessary for the cheesecake to set. So don’t be over anxious and take your beautiful cheesecake out of the oven right away.

As I mentioned earlier, I did not have to change a thing in this recipe nor did I have to adapt it to high altitude (and what a joy that was!). So here is the recipe and I’ve also provided a link to it on the Food Network site below. Enjoy!

Cheesecake With Fresh Strawberry Sauce...

  • Servings: 12
  • Difficulty: Medium
  • Print

INGREDIENTS:

Graham Cracker Crust

1 1/2 cups finely crushed graham cracker crumbs (about 9 sheets)

1/4 cup sugar

1/4 cup non-salted butter, melted

Cheesecake Filling

32 oz. (four 8 oz. packages) room temperature cream cheese

2 cups sour cream (you can use light sour cream)

4 large eggs, room temperature

1 1/4 cups sugar

2 1/2 Tbs. cornstarch

2 tsp. vanilla

Strawberry Sauce

1 1/4 cup fresh strawberries, halved

1/4 cup sugar

1 small lime, zested

DIRECTIONS:

Preheat oven to 375 degrees. Make a parchment paper cutout for the bottom of a 10 inch round springform pan. Take foil and wrap it entirely around the base and slightly up the sides of the pan. Spray the bottom of the pan with cooking spray. Put the parchment paper in the pan and spray it as well. Set aside. (I did this at the very end and prepared the crust and filling and then put it all together at once).

In a food processor, combine the the graham crackers and sugar. Pulse and then process until thoroughly combined and the crackers have a consistency of fine crumbs. Pour in a bowl and set aside.

Using a stand mixer, beat the room temperature cream cheese and sour cream for about 5 minutes. Add the eggs one at a time and beat each time until thoroughly combined. (Make sure you check the bottom of the bowl occasionally to scrape up anything that may have collected down at the bottom to make sure it is all combined). Add the sugar, cornstarch and vanilla and beat until smooth.

Melt the butter. Add the melted butter to the graham cracker crumbs and mix until the crumbs take on the consistency of wet sand. Press the graham cracker mixture firmly into the bottom of the pan and up the sides.

Pour the filling into the prepared crust. Set the foil wrapped pan into a large lipped pan and carefully pour about 1/2 inch warm water into the large pan to create the water bath. Place in the oven and bake for one hour. Turn off the oven, open the door and let the cheesecake stand in the opened oven for one hour. Remove from the oven and refrigerate for 2 hours or overnight. (I refrigerated mine overnight).

For the sauce, put the strawberries, sugar and lime zest into a small food processor and process until smooth. Refrigerate for at least one hour before serving.

Here is the link to the recipe on the Food Network site: http://www.foodnetwork.com/recipes/trisha-yearwood/joes-say-cheese-cheesecake-with-fresh-strawberry-sauce.html

The Graham Cracker Crust

The Graham Cracker Crust

Pour In The Filling

Pour In The Filling

The Cheesecake

The Cheesecake

The Inside of the Cheesecake

The Inside Of The Cheesecake

Cheesecake With Fresh Strawberry Sauce

Cheesecake With Fresh Strawberry Sauce

Lemon Raspberry Cheesecake Bars…

If you want a truly delicious and decadent sweet treat, this one’s for you. I haven’t made anything like a cheesecake for a long time, and I didn’t want to do the full blown thing, so I decided to make cheesecake bars and and am I ever glad I did. Plain and simple, this recipe is divine! There are few recipes I have on this blog that I think outshine the rest. For example, my recipe for Chicago Style Deep Dish Pizza, or my Best Ever Meatballs, or my Iced Cinnamon Chip Cookies… (actually there are many more, but I don’t want to bore you with a long list). But this one goes straight to the top!

Not only is this insanely delicious, it is gorgeous to look at and simple to make. You can’t beat that. And so, without further adieu, here are a few lessons learned and the recipe.

IMG_5396Lesson Learned 1: Tips about the raspberry swirl: It couldn’t be easier to make the swirl. Just pop the raspberries and sugar in a food processor and voila, you have it. Be aware that you don’t need a lot for the top of the cheesecake. Less is more in creating a beautiful design. You can easily get away with only a 1/3 cup raspberries to create the design on top. I used 1/2 cup so I would have some extra to drizzle on the plate when I served the cheesecake.

IMG_5418Since you only need a small amount, don’t use a blender for this. If you have a mini blender or food processor, use that. Also you will want to strain the raspberry sauce.  There are tons of seeds that you will not want to have in your cheese cake. Use a spatula and press the juice through the strainer. It is a little bit of work but you get an incredibly smooth glistening sauce that you can use not only for the top of the bars but for serving as well.

Once you’ve made the cheesecake filling, all you have to do is dot the top with a little of the raspberry sauce as shown in the picture below. Take a sharp knife and gently swirl the sauce into the cheesecake mixture. It’s that simple. You can easily create a gorgeous design with no effort at all.

IMG_5421

IMG_5429

Lesson Learned 2 – Line your pan with parchment paper: I am not a big fan of using cooking spray on my good pans. I find it leaves a residue that bakes on the pan and after a while can ruin the finish. I prefer greasing and flouring pans or using parchment paper. This time I chose parchment paper. I lined the bottom and left some hanging over the side. Doing that gave me handles to pull out the cheesecake once it set. (I had to use a knife on the sides that did not have parchment paper to loosen them slightly before I lifted the cheesecake out of the pan).

IMG_5380Lesson Learned 3 – Graham Cracker Crusts: They couldn’t be easier to make. The consistency of the crust should look like wet sand as seen in the picture. Spread it evenly on the bottom of the pan and press it down flat. Also, after it is baked, make sure it’s cooled completely before pouring the cheesecake mixture on top of it.

Lesson Learned 4 – The cream cheese must be at room temperature and beat it longer than you think: You will get a lumpy cheesecake if the cream cheese is not room temperature when you beat it. And beat it for a long time. I beat the cream cheese for at least five minutes. And after that as I added each individual ingredient I beat it some more. That’s the only way you’ll get a smooth consistency to the batter.

That’s it! The hardest part of making this is the clean up. I used both my small and large food processors as well as my stand mixer so that wound up being most of the work. But was the work ever worth it. I still can’t get over how good this one is. My husband says this recipe is insanely good. Enjoy!

Raspberry Lemon Cheesecake Bars…

  • Servings: 12-14
  • Difficulty: Easy
  • Print

IMG_5449INGREDIENTS:

Crust:

9 graham cracker sheets (1 – 1 1/4 cups)

4 Tbs. butter, melted

2 Tbs. sugar

The Filling:

2 eight ounce packages of cream cheese, room temperature

2 large eggs, room temperature

1/2 cup sugar

2 small lemons, juiced and zested

Raspberry Swirl

1/2 cup fresh raspberries

1 Tbs. sugar

DIRECTIONS:

Preheat the oven to 325 degrees. Line bottom of 8 x 8 pan with parchment paper, using enough paper so it can hang over the sides. (You can also use baking spray). Set aside.

Put graham crackers into a food processor. Process until you have fine crumbs. Add the sugar to the cracker crumbs. Melt the butter and add it to the mixture, stirring until the mixture resembles coarse wet sand. Take the crumbs and spread them out evenly across the bottom of the pan. Press firmly. Bake for 10 minutes. Set aside and let cool.

Place the raspberries and sugar into a small processor and beat until smooth. Put mixture into a strainer and strain until the raspberry seeds are removed from the juice. Set aside.

Using a stand mixer, beat the cream cheese until smooth, at least 5 minutes. Add in the sugar and beat until combined. Add in one egg at a time and beat until completely incorporated. Add the lemon juice and zest and continue to beat until completely incorporated.

Pour the cheesecake filling on top of the cooled graham cracker crust. Using a spatula, make sure it is spread evenly over the crust. (You might even want to take the pan and, raising it up slightly, drop it back down on a hard surface to ensure the batter is evenly distributed). Spoon the raspberry mixture in dots over the top of the cheesecake mixture. Use a sharp knife to make swirls all over the top of the batter.

Bake for 35 minutes. Let the cake cool completely and refrigerate for at least three hours or over night. Cut into squares and serve.

IMG_5437

The Desired Texture Of The Cheesecake…

IMG_5462

Apple Cream Cheese Cake…

I know it’s not apple season but I had the desire to bake something with apples in it and decided to make this cake. It has a combination of some warm spices, namely nutmeg and allspice, and a heavenly cream cheese filling that compliments the flavor of the cake. And if that isn’t enough for you, once the cake is cooled you drizzle on a thick and luscious praline frosting. That’s more than enough to satisfy anyone’s sweet tooth!

Cake ingredients...

Cake ingredients…

Lesson Learned 1 – Make sure the eggs are room temperature: This recipe produces a very thick batter that is mixed by hand. You can use a mixer for the cream cheese filling but I highly recommend mixing the batter by hand. That way you are less likely to over mix and wind up with a tough cake. Room temperature eggs incorporate themselves more completely into a batter and you’ll want to ensure that when mixing by hand. Also for ease of mixing, the eggs should also be slightly beaten before putting them into the batter.

Lesson Learned 2 – After you chop the apples sprinkle a little lemon juice on them to avoid browning: I am amazed how many recipes I come across that require chopped apples and don’t address what can happen to an apple once it’s peeled and cut. When an apple is cut open, an enzyme called polyphenol oxidase is released from the cells of the apple and reacts with the oxygen in the air causing the fruit to brown. Lemon juice helps keep apples from browning because it’s full of ascorbic acid and it has a low pH level. Ascorbic acid works because oxygen will react with it before it will react with the polyphenol oxidase. I know this may sound like chemistry class but it helps to explain why you need to used a little lemon juice to keep the chopped apples looking fresh until you add them into the batter. If you chop the apples right before adding them to the batter you may not need lemon juice, but I would err on the side of caution.

I used two gala apples in this recipe. That produced 3 cups of chopped apples. It takes some time to peel, core and chop the apples. Even if you plan on adding them immediately, the first pieces you chopped may still start to turn brown. The browning process can happen rather quickly. Better to sprinkle a little lemon juice over the apples so you don’t have to worry. Besides lemon juice, lime juice or cranberry juice can also generally be used to stop browning. But be aware of the flavors you might be adding into your cake. For this recipe lemon juice is the best flavor choice.

Also be aware that sprinkling lemon juice on apples will not eliminate the browning process completely. Once the lemon juice has evaporated, the apples will begin to brown as the oxygen will then begin to work on the enzymes the apple produces once it is cut. Adding a little lemon juice is designed to be a short term but very effective fix. (I used about half the juice from half a small lemon on the chopped apples).

cakecollage

Lesson Learned 3 – Do not make the frosting until the cake is completely cooled: I have to admit this is very delicious frosting. It’s really more of a thick glaze. The downside is the frosting sets very quickly. So, don’t make the frosting until you are ready to immediately drizzle it over the cooled cake. That way the frosting won’t set and too quickly you’ll get the results you see in the picture below.

IMG_5250

Lesson Learned 4 – For more flavor, you can toast the pecans before adding them to the batter and on top of the cake: Just place them in a non stick pan on the stove and heat them. Remember, nuts can burn quickly so as soon as you smell them take them off of the heat.

My husband almost single handedly ate this entire cake. He loved this one. Try it and let me know what you think…

Apple Cream Cheese Cake…

  • Servings: 12=14
  • Difficulty: Easy
  • Print

INGREDIENTS:IMG_5284

Cream Cheese Filling

1/4 cup unsalted butter, room temperature

1/2 cup granulated sugar

1 large egg, room temperature

8 oz. cream cheese, room temperature

2 Tbs. flour

1 tsp. vanilla

Cake

1 cup finely chopped pecans, plus some for garnish

3 cups flour, plus 2-3 Tbs. to dust the pan

1 cup sugar

1 cup firmly packed brown sugar

2 tsp. cinnamon

1 tsp. salt

1 tsp. baking soda

1 tsp. nutmeg

1/2 tsp. allspice

3 large eggs, room temperature and slightly beaten

3/4 cup canola oil

3/4 cup unsweetened applesauce

1 tsp. vanilla

3 cups finely chopped apples (gala or granny smith)

1 tsp shortening to grease the pan

1/2 lemon squeezed for its juice to put on the chopped apple pieces

Praline Frosting

1/2 cup firmly packed brown sugar

1/4 cup unsalted butter

3 Tbs. milk

1 tsp. vanilla

1 cup powdered sugar

DIRECTIONS:

Preheat oven to 350 degrees. Grease and flour a 12 cup bundt pan. Set aside. Peel core and chop the apples into small pieces. Squeeze the lemon juice over the apples as you put them in a bowl. Stir to redistribute the lemon juice every time you add more chopped apples to the bowl. Set aside.

Using a non stick pan, heat the pecans on the stove until they become fragrant. Take off the heat and set aside.

To make the filling: Beat together the cream cheese, butter and sugar until well combined. Add the egg, flour and vanilla and beat until just combined. Set aside.

In a large bowl whisk together the flour, sugar, brown sugar, cinnamon, salt, baking soda, nutmeg and allspice. Make a well in the center of the dry ingredients. Add the eggs, oil, applesauce and vanilla. Stir just until combined (the batter will be thick). Fold in the pecans and apples.

Spoon half the batter into the prepared bundt pan, evenly distributing the batter around the pan. Top with the cream cheese filling, leaving an inch border around the edge of the pan. Top with the remaining batter.

Bake for 60 minutes or until a toothpick inserted in the center of the cake comes out clean. Cool the pan on a wire rack for 15 minutes. After 15 minutes, invert the cake onto the wire rack and allow to cool completely.

To make the frosting: Combine the brown sugar, butter and milk in a saucepan. Over medium heat bring the mixture to a boil whisking continuously. Boil for 1 minute (keep whisking). Remove from the heat and stir in the vanilla. Whisk the powdered sugar in a little at a time until the frosting is smooth. Immediately drizzle over cooled cake. Garnish with pecans.

IMG_5284

IMG_5317

Sweet Potato Casserole…

For the longest time I associated sweet potato dishes with the holidays. Turns out I was missing something wonderful and nutritious all year long. That being said, I’d like to share with you a recipe that certainly can be made over the holidays but is wonderful with any meal any time of year.

I like this recipe because it’s designed to serve four (or two very large appetites) so you can either finish it off at one meal or have one serving of leftovers. It reheats beautifully. It’s simple to prepare, a colorful addition to any plate, flavorful and good for you. So throw away your preconceived notions of sweet potato casseroles being something only relegated to the holidays and enjoy them all year round!

IMG_4412Lesson Learned 1 – Cut the sweet potato into evenly sized chunks: This is very important for the cooking time. You don’t want some pieces to be mushy while other pieces are hard. I cut mine into one inch chunks. Also keep in mind sweet potatoes cook faster than russet or red potatoes. So be aware of that and start checking them for doneness at about 10 minutes. You want them to be fork tender, not mushy.

Lesson Learned 2 – To mash or not to mash in the same pot you cook them in: I am a student of the game and so I do a lot of research into cooking methods. There is a train of though out there that suggests once you’ve drained the sweet potatoes it’s best to mash them in the same pot you boiled them in. That way any excess water left on the potatoes will evaporate from the heat of the pan. That’s all well and good, but I find if I do that my potato masher scratches the heck out of the bottom of my pan, and I have some really high quality pans. IMG_4415So I’ll leave this up to you. You can certainly mash them in the same pan, but I wanted to warn you about what might happen if you did. This is what I do. Once I’ve drained the sweet potatoes, I prefer to mash them in a bowl. After I do that (and they mash quite quickly) I put them back in the pot they were boiled in and just stir them around for about a half of a minute or so (you can even use some low heat while you’re doing this). That way I get the same effect without playing havoc with the finish on my pans.

Lesson Learned 3 – You can make this recipe in individual serving sizes: Another way to prepare this dish is to divide it up equally into four ramekins and bake it off. That way your guests can have their own individual portions. This recipe adapts well in that regard and the individual ramekins are pretty cute. You can also use ramekins even when there are only two of you. Just cook two of them off for one meal and refrigerate the other two for another meal. Just make sure if you refrigerate some ramekins, or if you have leftovers in a one quart casserole, that you take the dishes out of the refrigerator and let them sit on your counter for about an hour before reheating them. That way you’ll take the chill off and the cooking time will be shorter. Also if just reheating, cover the casserole in foil. Since it’s already been cooked once you can burn the pecans if you don’t cover them.

My husband just loves this recipe. He asks me to make it all the time. Try it. I’m sure it could easily become on of your go-to potato recipes!

Sweet Potato Casserole…

  • Servings: 2-4
  • Difficulty: Easy
  • Print

INGREDIENTS:

2 large sweet potatoes, peeled and cubed

3 Tbs. butter, divided (2 Tbs. cut into cubes)

1 Tbs. maple syrup

2 Tbsp. orange juice

1/4 tsp. salt

1/2 tsp. ground cinnamon

1/2 cup pastry flour

1/2 cup chopped pecans

1/4 cup light brown sugar

1 Tbs. vegetable oil

1/2 tsp. shortening, to grease the casserole dish

DIRECTIONS:

Preheat oven to 375 degrees. Lightly grease a 1 quart casserole dish. (I use an enameled cast iron dish for this recipe). Set the dish aside.

Place cubed sweet potatoes in a saucepan and cover with water by about an inch. Bring to a boil, reduce the heat slightly and continue to cook until the sweet potatoes are fork tender (10-15 minutes). Drain the sweet potatoes and put them in a bowl (or back in the saucepan if you prefer – see lessons learned above). Add 1 Tbs. butter, the maple syrup, orange juice, salt and cinnamon. Mash until you reach your desired consistency. (At this point, if you mash in a bowl, you can put the potatoes back in the pot the cooked in, turn on a low heat and stir for about a minute to remove any excess water). Put the mashed sweet potatoes into the greased casserole dish.

In a small bowl whisk together the flour, pecans and brown sugar. Cut the butter into the flour mixture until it resembles course sand. Add the vegetable oil and mix until well combined. Sprinkle this mixture evenly over the mashed sweet potatoes.

Bake for 20 – 30 minutes or until the potatoes are hot and the top is golden brown.

Ready To Go Into The Oven...

Ready To Go Into The Oven…

Makes Enough For 2-4 People...

Makes Enough For 2-4 People…

Image

Blueberry Cinnamon Streusel Coffee Cake…

I needed something quick and easy that would use the blueberries I recently purchased. How about a coffee cake? I looked through various recipes in search of what I could adapt and found one that used ingredients I already had in the house. As with most baking recipes, I had to adapt the ingredients for high altitude (and I will include that in the recipe) but I also decided to add a cinnamon streusel topping to the coffee cake, and I can tell you that was the best accompaniment to the recipe. This coffee cake takes no time to put together and judging by how it was devoured when I took it to work, it’s a great way to have something homemade, sweet and delicious without a lot of fuss.

Here are my lessons learned when making this:

The correct consistency of the batter...

The correct consistency of the batter…

Lesson Learned 1 – Don’t be afraid to trust your gut: As I mentioned earlier, I adapted this from a recipe I found in a Taste Of Home magazine. I new I would have to adapt the recipe for high altitude, but I also think there may have been a misprint in the recipe as it did not, in my estimation, include enough milk. The original recipe called for 1/2 cup of milk. When I added that, along with the butter and egg mixture, the batter was still very dry and even slightly powdery. I knew that wasn’t right. So I began adding more milk and testing the consistency of the batter. I suggest at sea level you start with 3/4 cup of milk and check the consistency of the batter. You can always add a little more but you can’t take it away.

Because I added 4 additional tablespoons of flour (2 for each cup, a standard high altitude adjustment) I knew I might have to add a little more milk. As it was I had to double the amount of milk (I used 1 cup) and that shouldn’t be the case. So I am writing the recipe with the suggestion of using 3/4 – 1 cup of milk. As you can see the cake turned out beautifully, but would not have if I didn’t make the adjustment and trust my gut. So don’t be afraid to adjust the milk if you think the batter doesn’t look right.

IMG_5071

The butter, sugar and egg mixture…

Lesson Learned 2 – The egg, milk and butter mixture will look lumpy, and that’s ok: I am including a picture of what the egg, milk and butter mixture looks like before you add it to the dry ingredients. It looks lumpy and that’s the butter. Don’t let that bother you. It is supposed to look that way. If you don’t want to drag out your hand mixer, you can actually combine all of these ingredients at one time by hand using a whisk, which is what I did. Just make sure the butter is at room temperature before you combine all of them. It won’t work if the butter is not soft. If you choose to use a hand mixer, beat the butter and egg together first and then add the milk. Either process will work.

The consistency of the streusel

The consistency of the streusel…

Lesson Learned 3 – Making a streusel: I’ve always struggled with making a streusel. Most recipes say to either use a pastry cutter and cut the cold butter into the flour, or use two knives and do the same thing. I’ve never mastered it with knives and it seemed that every time I used the pastry cutter the butter would just stick to the blades. What I learned this time is, with patience, (what a concept) the pastry cutter actually works. The first few times I had to scrape the butter off the blades, but after a short while the butter became more incorporated into the flour and soon I was cutting the butter into the flour and got the desired pea-sized consistency necessary for a good streusel. So be patient. It actually works.

If you want something sweet that is quick and easy to make this is the recipe for you. Enjoy!

Blueberry Cinnamon Streusel Coffee Cake

  • Servings: 12
  • Difficulty: Easy
  • Print

INGREDIENTS: 

2 cups flour (plus 4 Tbs. for high altitude)

3/4 cup sugar (2/3 cup for high altitude)

2 Tbs. baking powder (1 Tbs. for high altitude)

1/4 tsp. salt

1 extra large or jumbo egg, room temperature

3/4 – 1 cup milk (start with smaller amount and add more if needed)

1/2 cup butter, room temperature

2/3 cup fresh blueberries (if using frozen add to batter frozen)

2/3 cup pecans, chopped

Vegetable shortening to grease the pan

1/2 tsp. flour for dusting the blueberries (if using fresh blueberries)

CINNAMON STREUSEL TOPPING:

1/2 cup sugar

2 Tbs. ground cinnamon

1/3 cup flour

1/4 cup cold butter, cubed.

DIRECTIONS:

Preheat the oven to 375. Grease a 9 x 9 baking pan with shortening. Set aside.

In a large bowl, combine flour, sugar, baking powder and salt. Whisk to combine. In another bowl, whisk together the milk, egg and butter. Make a well in the center of the dry ingredients. Add the wet ingredients and stir to combine. Slowly add small portions of additional milk to the batter if the the consistency of the batter appears too dry.

Dust the fresh blueberries with a small amount of flour and stir until the berries are slightly coated. Fold the blueberries and pecans into the batter. Spread batter into the prepared pan.

For the streusel, combine sugar, flour and cinnamon into a bowl. Cube the cold butter and cut it into the flour/sugar mixture until the mixture reaches a pea-sized consistency. Sprinkle the streusel over the batter.

Bake 35 – 40 minutes or until a toothpick inserted in the center comes out clean. Cool in the pan for at least one half hour. Cut and serve.

Coming out of the oven...

Coming out of the oven…

Blueberry Cinnamon Streusel Coffee Cake...

Blueberry Cinnamon Streusel Coffee Cake…

Servings suggestion: With a dollop of whipped cream dusted with cinnamon sugar...

Servings suggestion: With a dollop of whipped cream dusted with cinnamon sugar…

Ground Beef and Crispy Potato Casserole…

Lately I have been posting a lot of baking recipes so I thought this time I’d go for something savory. I had some ground beef in the refrigerator and I started to think about how I could prepare it in ways other than more traditional faire like burgers, meatloaf or tacos. Then I thought about Shepherd’s Pie. I’ve made Shepherd’s Pie with left over pot roast (the traditional recipe) and I’ve also made a Turkey Style Shepherd’s Pie but I didn’t have any left over mashed potatoes and didn’t feel like making some.

What I did have was a bag of frozen diced potatoes and a bag of frozen vegetables and the recipe grew out of that. I also had a hodgepodge of shredded cheeses in my refrigerator and I decided to try to incorporate that – sort of a clean out your fridge and freezer type of recipe. I never could have imagined how tasty this would be. After we had this for dinner my husband was already looking forward to eating the leftovers.

The most time consuming part of this recipe is assembling the ingredients but once that’s done, like any other casserole, all you do is pop it in the oven and wait for it to do its thing. This recipe requires using two pots and a casserole dish but believe me the end result is worth it. Try it out and see what you think!

IMG_4961Lesson Learned 1 – There is some prep to this recipe: But tell me now, what from scratch recipe does not require some prep. You brown the onions, add the meat and seasonings, add the veggies and cook thru till warm while in another pot you make the homemade cheese sauce. But at least this way you know every ingredient that is going into the recipe and that’s the beauty of making it from scratch – you control all of the ingredients.   There are ways you can shorten the prep time by perhaps using a prepared cheese sauce but  now that I’ve mastered making my own sauces and gravies I very seldom, if ever, revert to buying them packaged or jarred. And really, you have to admit, homemade tastes so much better. So take the time to do the prep – it’s worth it.

kicproductimage-120658Lesson Learned 2 – It’s easy to adapt this to a meatless recipe: Quite often I post on my Facebook page a picture of the next recipe I will blog as a teaser for what’s to come. This time when I posted a picture for this dish I got two very specific comments. The first was that I should write a recipe book and I am seriously thinking about doing an ebook. (Have any of you done that – would love to hear your story). The second was that you could substitute veggie crumbles for the ground beef in this recipe. To be honest, I had never heard of veggie crumbles before and I wondered why you would substitute the meat for veggies when veggies are already included in the recipe. But I was thankful to learn about this. A few of my friends who are not carnivores say they use these crumbles when making chili or tacos and they tell me it’s a great substitute. So I wanted to offer that piece of information here. This is definitely the kind of recipe that could use the crumbles as a substitute for the ground beef. I am not recommending any particular brand. Both MorningStar Farms and Boca make the crumbles. I just wanted to give you an example of what you might consider.

Lesson Learned 3 – Any frozen vegetables will do: I had some frozen broccoli, cauliflower and carrots and I add them to the recipe. You can also use frozen mixed vegetables (peas, carrots, green beans and corn). Just remember to make sure the pieces are not too large. I found I had very large cauliflower pieces so I cut them in half to make sure they would cook. You can also add fresh vegetables. I would cook them until slightly softened and then put them in the casserole. I think I am going to try fresh vegetables the next time I make this. Regardless, my husband told me that this recipe is definitely a keeper!

IMG_5019Lesson Learned 4 – This recipe makes great leftovers: The recipe as written serves 6 and my husband and I could not eat the whole thing the first time. We had it two days later as leftovers and it tasted equally as delicious as when it was first made. The best way to reheat this is to first take the casserole out of the refrigerator and let it sit on the kitchen counter for an hour. That takes the chill off. Then reheat at 375 for 45 minutes. (maybe 30 minutes at sea level). Make sure you reheat it covered in foil as the cheese will burn if you don’t. The ends result is piping hot and just as delicious as the first time around. This recipe is a winner out of the gate and as leftovers.

Ground Beef And Crispy Potato Casserole…

  • Servings: 6
  • Difficulty: Easy
  • Print

INGREDIENTS:

1 1/2 pounds ground beef

1/2 large onion, diced

1/2 tsp. oregano

salt and pepper to taste

2 cloves garlic, minced

1 1/2 – 2 cups frozen vegetables

3 Tbs. butter, divided

2 Tbs. flour

2 cups milk

1 cup shredded cheese (I had a white cheddar and gruyere blend)

1/c cup sour cream

1/4 cup fresh chives, chopped

Frozen, diced potatoes (enough to cover the top – not quite a full 32 oz. bag)

Flat leaf parsley, chopped for garnish (optional)

DIRECTIONS:

Preheat the oven to 400 degrees. Spray a 10 x 10 casserole dish with cooking spray. Set aside.

In a large skillet heat 1 Tbs. of butter. Add the onions and cook until they start to become translucent (about 5 minutes). Salt and pepper the onions during this process. Add the ground beef and oregano. Cook until the meat is mostly cooked through. Add the garlic and vegetables and cook until the vegetables are slightly heated. Taste the mixture and add salt and pepper if needed. Once the vegetables are slightly heated, remove the mixture from the heat and set aside.

In another skillet melt the remaining 2 Tbs. of butter. Add the flour and whisk for about a minute. Add the milk and continue to whisk so the mixture stays smooth. Once the milk heats it will start to thicken. When the milk reaches a desired thick consistency (this takes about 5 minutes), turn off the heat and add the cheese. Whisk until the cheese melts. Once the cheese is incorporated into the milk mixture add the chives and stir to combine. Taste the cheese mixture and add salt and pepper, if needed.

Add the sour cream to the meat mixture and stir to combine (You need to do this when the meat has slightly cooled so the sour cream does not curdle). Spread the meat mixture into the bottom of the prepared baking dish. Cover the meat mixture evenly with the frozen diced potatoes. Pour the cheese mixture over the potatoes.

Bake for 45 – 60 minutes. For the first 20 minutes cover the casserole with foil, then remove the foil and bake for the remaining time. Remove the casserole from the oven and let it rest for 5 minutes before serving.

Add the sour cream to the meat mixture and spread in the bottom of the dish...

Add the sour cream to the meat mixture and spread in the bottom of the dish…

Arrange an even layer of frozen potatoes over the meat...

Arrange an even layer of frozen potatoes over the meat…

Pour the cheese sauce over the potatoes...

Pour the cheese sauce over the potatoes…

Fresh out of the oven...

Fresh out of the oven…

Ground Beef and Crispy Potato Casserole...

Ground Beef and Crispy Potato Casserole…

Chocolate Chocolate Chip Bundt Cake…

Ok, I promise I won’t inundate you with bundt cake recipes, but since I’ve not had a bundt cake pan for years and just recently bought one I simply had to have one more go at it right away. This time I tried to make a chocolate cake, not only to test the pan again but to also foray into the world of making chocolate ganache. I learned some really interesting things along the way making this recipe and I want to share them with you.

Bundt pan dusted with cocoa powder...

Bundt pan dusted with cocoa powder…

Lesson Learned 1: Dusting the bundt pan with cocoa powder instead of flour: As I mentioned in a previous post, it is imperative to take the time to grease and flour a bundt cake pan in order for the cake to come out cleanly and beautifully. You cannot skimp on this step. When I grease a bundt pan I use unsalted vegetable shortening but this time instead of dusting it with flour I dusted the pan with cocoa powder. To be honest, I’m not sure I would do it again for a couple of reasons.  First, I found it very difficult to remove the excess cocoa powder from the pan much more so than removing excess flour. It seemed like not matter how hard I tapped the pan or slightly dropped it on my butcher block the cocoa powder would not dislodge to the degree I wanted. It definitely left a heavier coating in the pan. That’s not necessarily bad, but remember cocoa powder on its own has a bitter taste and that dusting will somewhat remain on the outside of the baked cake. If you dust the pan with cocoa powder you should frost the cake. That way none of the taste of raw cocoa powder will come through. If you decide to finish off your cake by sprinkling the top with powdered sugar then dust the bundt pan with flour.

Baked cake from pan dusted with cocoa powder...

Baked cake from pan dusted with cocoa powder…

Second, I’m not sure I liked the look of the cake when I removed it from a pan dusted with cocoa powder. As you can see from the picture, the cake had, at least it seemed to me, an odd sort of matted look. I’m thinking that if I dusted the pan with flour, the cake would have looked more chocolatey brown versus looking like it had been sprayed with a light dulling lacquer. Also when I touched the cake, a darkish film would come off on my finger – I’m thinking that was a result of the combination of shortening and cocoa powder. I was not too fond of that. But, don’t get me wrong, none of this affected the tasted of the cake. The frosted cake was delicious and you could not taste the cocoa powder in anyway. I just thought I would try something a little more out of the ordinary, and though I was not 100% delighted with dusting the pan with cocoa powder, I still think this was one of the best chocolate bundt cakes I ever made!

Lesson Learned 2 – This recipe makes a lot of batter: This recipe is designed for a 15 cup bundt pan so be prepared for that. If you don’t have that large of a pan (mine is a 12 cup pan) then you will need to think of other ways to use the remaining batter. Because this recipe uses 5 eggs it rises a lot, so don’t fill your pan more than three quarters full or the batter will drip over the sides. You can do a couple of things with the rest of the batter. You can make cupcakes or you can make a small loaf cake. I chose to make a small loaf cake putting the remaining batter in a 5 x 3 x 1 mini loaf pan. I just sprayed that pan with baking spray and baked it with the bundt cake. The cake took 70 minutes to bake (remember I am at high altitude so it takes longer sometimes – at sea level you can probably bake it for 60-65 minutes) and the loaf pan took 45 minutes.

IMG_4871Lesson Learned 3 – Making chocolate ganache: This was my first attempt ever at making chocolate ganache and I have to admit I should have researched it a little more before I made it. I found a process in one recipe and used it. And although the ganache turned out ok, it was not as silky as I would have wanted it. Then someone suggested I check out YouTube and I found a process I thought was better. I made my ganache over a double boiler, melting the chocolate and butter together and then adding heavy cream that has almost come to a boil and then combining the ingredients. The result is what you see in the pictures.

The Ganache...

The Ganache…

Next time I make ganache I will use the process I learned on YouTube. It is very simple. Just put your chocolate in a bowl and heat heavy cream until it’s just about ready to boil. Pour the heavy cream over the chocolate and let the chocolate and cream sit for two minutes. Do not touch it. After 2 minutes stir to combine. Then add about a tablespoon of butter and a pinch of salt. Stir and then frost. I think the texture will be smoother and silkier making the ganache that way.  I think my ganache was a little too thick but considering it was the first time I ever made it I think I did ok. It tasted wonderful, I just wanted it to be more glaze-like and smooth. And if you have any ideas on how to make the perfect ganache, I am all ears!

Lesson Learned 4 – Never quit trying: I almost didn’t post this recipe because I was not pleased with the way the ganache turned out. And then I thought, wait a minute, isn’t this blog not only about recipe successes but also things I learned along the way while making recipes? From my experience, the only way you learn is by trying. I don’t know of any cook or baker who has not had failures in the kitchen. And although the ganache wasn’t exactly a failure, it wasn’t what I wanted it to be. But hopefully what I am sharing when I post recipes will help minimize any slips ups you have when trying them and get you to success a lot quicker. To me, that is the purpose of this blog – to help those, like me, who never had anyone to mentor them and had to learn many things in the kitchen the hard way. And I have a feeling there are a lot of people like us out there, but just afraid to admit it.

Since I made two bundt cakes within the timeframe of one week I had a lot of cake around the house. So I brought most of this cake to work yesterday. Within a couple of hours it was gone. Only a few chocolate crumbs remained on the plate in the break room. So no matter if your ganache is beautiful or not, in the end the only thing that really matters is the taste. And I’ll clue you in on a little secret – this cake tastes divine!

Here is the recipe as well as the adjustments I had to make for high altitude. Enjoy!

Chocolate Chocolate Chip Bundt Cake…

  • Servings: 12-16
  • Difficulty: Easy
  • Print

INGREDIENTS:

Cake:

1 cup cocoa powder, (more if you dust the pan with it – otherwise use 1 Tbs. of flour)

1 Tbs. unsalted vegetable shortening for greasing the cake pan

7 ounces semisweet baking chocolate, chopped finely

1 cup boiling water

2 1/4 cups flour (plus 4 Tbs. for high altitude)

1 1/2 tsp. baking soda (1 tsp. for high altitude)

1 1/4 tsp kosher salt

2 1/2 sticks unsalted butter, room temperature

2 1/2 cups firmly packed brown sugar (2 1/8 cups for high altitude)

5 eggs, room temperature and slightly beaten

1 Tbs. prepared coffee, room temperature

4 tsp. vanilla

1 1/2 cups sour cream

1 1/2 cups semisweet chocolate chips (1 cup high altitude)

1/8 cup flour for coating the chocolate chips

Ganache:

6 oz. semisweet chocolate chips

1 Tbs. butter

1/2 cup heavy cream

A pinch of salt

DIRECTIONS:

Preheat oven to 325 degrees. Grease and flour the bundt pan. Set aside.

Combine the cocoa powder and chocolate. Add the boiling water and whisk until blended and smooth. Set aside.

Sift together the flour, baking soda and salt. Set aside.

With an electric mixer, beat the butter until smooth and creamy (at least one minute). Add the brown sugar and beat until blended. Increase the mixer speed and beat until light and fluffy (about 5 minutes). Add the eggs one at a time and beat until each is incorporated. Add the vanilla and coffee and beat until combined.

Reduce the speed of the mixer and add the flour and sour cream in three additions beginning and ending with the flour. Pour in the chocolate, cocoa mixture and beat until the there is no light color in the batter. Combine the flour and chocolate chips and, by hand, fold the chocolate chips into the batter.

Pour the batter into the pan being careful not to fill it more than 3/4 full. Bake for 60-70 minutes (70 minutes high altitude) or until a toothpick inserted in the center comes out clean. Transfer the pan to a wire rack and let cool for 15 – 20 minutes (I cooled mine for 20 minutes). Invert the pan onto the wire rack and lift off the pan.

Let the cake cool for at least 1 hour before frosting.

FROSTING:

Put the chocolate chips into a heat resistant bowl. Heat the heavy cream until almost boiling. Pour the heavy cream over the chips and let that mixture stand without touching it for two minutes. After two minutes stir the mixture until the chocolate and cream are combined and smooth. Add the butter and salt and stir to combine. Immediately pour over the cooled cake.

The cake batter...

The cake batter…

The cake right out of the oven...

The cake right out of the oven…

Chocolate Chocolate Chip Bundt Cake...

Chocolate Chocolate Chip Bundt Cake…

Cherry Vanilla Yogurt Bundt Cake…

I haven’t made a bundt cake in a long, long time. Every time I think of a bundt cake, I remember the scene from “My Big Fat Greek Wedding” when the Millers bring a bundt cake to the Portocalus family dinner and Toula’s mother Maria doesn’t have a clue what “bundt” means. That was some pretty funny stuff.

https://www.youtube.com/watch?v=WPvO53JHnmY

IMG_4659What I like about bundt cake molds are their artistry. They give a professional look to any recipe with very little effort. In recent years they’ve gotten fancy with bundt molds, from rose designs to vertical swirls, to picture cut outs that can define the top of the cake. I personally prefer the traditional bundt mold as its designed to allow glaze to fall down the sides of the cake in beautiful uniformity. With the newer molds if you glaze them you basically cover up the design. So all you can put on them and still see the design is powdered sugar. Dusting a cake with powdered sugar is fine, but I like to have a couple of options for decorating rather than being held to just one. 

This recipe is adapted from one I found on Pinterest. I had to adapt it to high altitude (and I’ll include both sea level and high altitude instructions). I also used frozen cherries instead of fresh (as cherries are not in season yet) and will explain what I discovered about doing that in my lessons learned. I have to admit I was surprised at how beautiful the cake turned out. I haven’t made a bundt cake in a long time. But I will definitely be making more in the future. Try this one, I think you will really enjoy it!

IMG_4577Lesson Learned 1 – What to think about when using frozen fruit: I’ve used frozen fruit before in recipes and normally if they’re smaller in size, like blueberries, I add them frozen. That way you don’t have to mix them with flour to ensure they will evenly distribute throughout the batter. But this particular recipe originally called for fresh cherries pitted and diced. Cherries are not in season now so all I had to work with were frozen ones. If you use frozen cherries, dice thaw and drain them first. Otherwise you will have huge pieces in the cake. Make sure you drain them well as they give off a lot of moisture. I would do this about an hour or so before making the cake to ensure you are getting out as much moisture as possible before putting them into the batter. Dice them while they are frozen and let them drain after that. It worked great as you can see by the pictures.

Lesson Learned 2 – Adapting for high altitude: This may not apply to many of you, but living in an area over 5,000 feet I’ve learned a few tricks, out of necessity, to make sure baked goods turn out as intended. In high altitude the air pressure is lower. The lower pressure causes baked goods to rise more easily and liquids to evaporate more quickly. If adjustments are not made to recipes, cakes can turn out dry or fall in on themselves due to the cell walls of the cake stretching (due to the lower pressure) until they burst. I can tell you from experience, I’ve had many, many disasters related to baking in high altitude.

In high altitude, flour acts as a strengthener in cakes. So I normally use only high altitude flour and add 1 – 2 tablespoons of additional flour per cup. In this recipe I only had to use 2 additional tablespoons of flour total. Sugars and fats act as tenderizers and need to be slightly reduced in recipes. Normally I reduce sugar by 1 – 2 tablespoons per cup, which I did in this case. And I always use extra large to jumbo sized eggs as they add strength to the batter. Sounds complicated I know, but once you’re faced with doing it on a regular basis you get use to it and to the point where you can eyeball a good batter consistency.  This particular cake turned out beautifully by adding 2 additional tablespoons of flour and reducing the sugar by 2 tablespoons per cup.

IMG_4601Lesson Learned 3 – The importance of greasing and flouring the bundt pan: Take the time needed to thoroughly grease and flour the bundt pan. This is a little more time consuming than it might look as there are more nooks and crannies than you may think. But take the time, make sure every area is well coated with grease (I used unsalted vegetable shortening), wipe away the excess and flour the bottom, walls and inside flute completely (as seen in the picture). Once I finished I took the pan and held it about an inch over my butcher block and dropped it. I repeated this process a couple of times. By doing this I was able to dislodge and discard any large amounts of flour remaining resulting in a nice even coating of shortening and flour. The cake dislodged beautifully (and easily) as you can see. This is a very important step so don’t skimp on this process.

Lesson Learned 4 – Using heavy cream in a glaze: Many glaze recipes are made with milk, water or juice. I like to add some heavy cream to the glaze. I find it gives the glaze a richer consistency. With this glaze I used 2 tablespoons of heavy cream and 2 tablespoons of milk. That may sound like a lot, but the heavy cream does not dilute the sugar in the same way as milk. I needed to add a little more milk the get the consistency I desired. Start out by using only 1 tablespoon of milk and check the consistency of the glaze before you add more.

I was so pleased with how this cake turned out. It not only tasted good but looked like it had been made by a professional baker. So if you want a great cake and want to impress your friends as well, this is definitely the one to make!

IMG_4695

Cherry Vanilla Yogurt Bundt Cake…

  • Servings: 12
  • Difficulty: Easy
  • Print

INGREDIENTS:

2 1/2 cups of flour, divided (add 2 additional Tbs. for high altitude)

1/2 tsp. baking soda

1/2 tsp. salt

1 cup unsalted butter, room temperature

3 cups sugar (reduce by 2 Tbs. per cup for high altitude)

3 extra large to jumbo eggs, room temperature

1 Tbs. vanilla

8 ounces vanilla Greek yogurt

8 ounces frozen cherries, diced, thawed and drained

ALMOND TOPPING:

1/2 cup sliced almonds

2 tsp. sugar

1 Tbs. unsalted butter, melted

GLAZE:

1 cup confectioners sugar

1/2 tsp. vanilla

2 Tbs. heavy cream

1 Tbs. milk (may need more depending on consistency)


DIRECTIONS:

Preheat the oven to 325 degrees. Generously grease and flour a 10-12 cup bundt cake pan. Set aside.

Sift together 2 1/2 cup flour, baking soda and salt. Using a stand mixer beat together the butter and sugar until creamy. Add eggs one at a time and incorporate completely. Beat in the vanilla.

Alternate adding the flour and yogurt to the butter mixture, starting and ending with adding flour. Do not over mix. Take cherries and toss with 1/4 cup flour. Gently fold the cherries into the cake batter until evenly distributed.

In another small bowl, stir together the almonds, sugar and melted butter. Scatter this mixture evenly on the bottom of the bundt pan. Pour the cake batter over the almond mixture dispersing it evenly in the pan. Bake for 60 minutes or until a toothpick inserted in the center of the cake comes out clean.

Cool the cake for 15 minutes. Transfer the cake to a wire rack and cool completely.

Mix together the glaze ingredients until smooth and drizzle the glaze over the top of the cake.

The Consistency Of The Batter With The Frozen Cherries Incorporated...

The Consistency Of The Batter With The Frozen Cherries Incorporated…

Put The Almond Mixture Evenly In The Bottom Of The Pan...

Put The Almond Mixture Evenly In The Bottom Of The Pan…

Distribute The Batter Evenly In The Cake Pan...

Distribute The Batter Evenly In The Cake Pan…

Cool Completely Before Glazing...

Cool Completely Before Glazing…

design

Strawberry & Raspberry Crumb Cake…

I am loving the fact that I’m at the point where I’m not afraid to experiment with recipes or afraid to make changes in them if something just doesn’t look right. And that is the story of this recipe.

I had some strawberries that were in my refrigerator for a while and I wanted to use them before they went bad. So I started researching recipes and found one for strawberry crumb bars. I basically had all of the ingredients so I decided to try the recipe.

The original recipe called for 4 cups of chopped strawberries. After chopping up what I had I found I only had 3 cups. My initial thought was to go to the store to get more strawberries. Then I remembered I had a container of raspberries in the refrigerator as well. So I thought, maybe I’ll just chop those up and combine the two berries.

Image

Now this may sound silly, but this was a big leap for me. In the past I’ve not been one to stray from recipes or tweak them in any way. But I thought, what the heck. I cooked with raspberries before. What harm could it do to combine the two. And so I did.

The original recipe also called for only one beaten egg when making the crust/crumble. When I added one beaten egg, the dry mixture still resembled dry dusty flour. I knew the consistency of crust/crumbles should be dough-like and should somewhat hold together when you squeeze it in your hand. No such luck with only using one egg. So I added another beaten egg and the consistency still wasn’t right. I added a third and finally got the correct consistency. Doing this was huge for me. In the past I would just have gone along with the recipe and wound up with a baking disaster. This time I followed my gut and my baking knowledge and wound up with a great result. So here are my lessons learned on this fabulous recipe:

Lesson Learned 1 – Trust Your Gut: As I mentioned earlier I would always follow recipes to the letter and never deviate even if something did not look right. Now I have to put in a big caveat here. Baking is very different from cooking. Your chances of making a mistake when playing around with the ingredients when baking are much higher but in this case, especially with the crust/crumble, I knew that if the dough did not somewhat stick together when I squeezed it, it would not produce the desired results. But I was also careful. I only added in one beaten egg at a time and with the third egg I put it in a little at a time just to make sure that I wasn’t adding too much. My advice on this recipe is to use two extra large to jumbo sized eggs or three regular sized eggs. Don’t dump them in all together. Put them in one at a time and check the consistency of the dough before you add more. Once the dough somewhat sticks together when you squeeze it, you’re done.

Lesson Learned 2 – This Recipe Can Be Made With Various Berry Combinations: In my case it was strawberries and raspberries but you can make this with raspberries and blueberries or strawberries and blueberries or blackberries and strawberries or whatever combination of berries you have on hand that can be baked. Just make sure you have four cups of berries because you’ll need that amount to adequately cover the top of the cake. Also make sure to try to cut the berries into equal sized pieces. And use caution when combining them with the sugar and cornstarch. Use a folding technique rather than a stirring technique so you don’t overly bruise or rip apart the berries.

IMG_4480Lesson Learned 3 – The Importance of Using Cold Butter: In order to get a flaky crumb crust/crumble the butter needs to be very cold when mixing it with the dry ingredients. Many recipes will tell you to use a pastry cutter or two knives and cut the butter into the dry mixture until the butter is a pea-shaped size. I never seem to have any luck with that process so what I did was put the dry ingredients in a food processor add the cold butter pieces and pulse all of it together to get the consistency you see in the picture to the right. Two things to keep in mind – 1: Cut the butter the very first thing and put it back into the refrigerator while you prepare the berries and dry ingredients. That way the butter will be as cold as it can possibly be when you cut it into the dry ingredients. 2: If using a food processor to incorporate the butter, hold a towel over the opening so that as you pulse you don’t get a cloud of flour coming out the top of your food processor.

Other than these few lessons learned this recipe couldn’t be easier to make and the end result is one truly delicious crumb cake. Enjoy!

Strawberry & Raspberry Crumb Cake…

  • Servings: 16
  • Difficulty: Easy
  • Print

INGREDIENTS:

1 cup sugar for the dough

1 tsp. baking powder

1/4 tsp. salt

3 cups all purpose flour

1 cup cold butter cut into pieces

2-3 beaten eggs (extra large or jumbo size start with 2)

4 cups berries cut in evenly sized pieces (I used 3 cups strawberries & 1 cup raspberries)

1/3 cup sugar for berries

4 tsp. corn starch

DIRECTIONS:

Preheat the oven to 375. Grease  9 x 13 pan and set aside. Put the flour, sugar, baking powder and salt into a food processor. Hold a towel over the opening of the processor and pulse to combine. Add the cold butter pieces and pulse the mixture until the butter is the size of peas. Remove the mixture from the food processor and put into a large bowl. Add a beaten egg one at a time and stir it into the mixture. (If the consistency is correct after adding two eggs, don’t add a third). The dough is of the right consistency if it sticks together when you take a handful and squeeze it.

Take half of the dough and put it in the bottom of the prepared pan and pat it down. Carefully fold together the berries, sugar and cornstarch. Spread berries on top of the dough. Crumble the remaining dough on top of the berries.

Bake for 45 – 50 minutes. Let cake cool before slicing.

Cut The Berries Into Evenly Sized Pieces...

Cut The Berries Into Evenly Sized Pieces…

Press Dough Into The Bottom Of The Pan...

Press Dough Into The Bottom Of The Pan…

Spread The Berry Mixture Over The Dough...

Spread The Berry Mixture Over The Dough…

Crumble The Remaining Dough Over The Berries...

Crumble The Remaining Dough Over The Berries…

Bake And Enjoy...

Bake And Enjoy…

Pan Seared Halibut With Sweet Pepper and Mushroom Relish…

I never thought the day would come when I became more adept at cooking fish, but it has and there’s no one happier about it than me. The challenge now is to find a variety of ways to make fish more interesting. And I think this recipe does the trick.

Cooking any kind of fish can be tricky because there is a fine line between the fish being underdone and overdone. It takes time and experience to get a feel for cooking fish but it is a skill that is well worth the energy. We try to have fish a couple of times a week now and I am constantly researching creative but easy ways to serve it. I really like this particular recipe for its flavor, and the relish is easy to prepare and can accompany just about any kind of mild white fish (or even grilled chicken).

IMG_4276Lesson Learned 1 – When pan searing fish, use a combination of butter and olive oil to cook the fish: You use this combination for a reason. Olive oil has a higher smoke point than butter and by combining them you can cook the fish at a higher temperature without burning the butter and you’ll still be getting that rich butter flavor. For this particular recipe I had pieces of halibut that were 1 inch thick and about 2 inches by 1 1/2 inches in length and width. Obviously the thicker the piece of fish the longer the cooking time. These particular pieces took between 9 – 10 minutes to cook.

IMG_4266Lesson Learned 2 – You can be creative with the relish ingredients: I chose a relish that was a combination of a yellow sweet pepper, Roma tomato, shallots, baby crimini mushrooms and minced garlic. I liked the combination of flavors and colors. But really you can make it out of anything you have on hand. I decided to cook the relish and the fish in two separate pans versus cooking the fish and keeping it warm in foil while I made the relish in the same pan as the fish. This particular relish took about 10 minutes to cook so it closely matched the cooking time of the fish filets. I started out sautéing the peppers and mushrooms for about 4 – 5 minutes. Then I added the shallots and garlic and last the tomatoes. I was able to time it so that the fish and the relish were done almost at the same time. The trick is to know your relish ingredients and how long they take to cook so you can cook them in the proper time and order. If for some reason you can’t time them to be done closely together, my recommendation would be to cook the relish and keep it warm and cook the fish so that it can be served immediately.

If you think you’re not a fish lover then you definitely have to try this recipe. I’ve written this recipe to serve two but you can certainly adapt it for more servings. The relish is a great enhancement to the fish and will make you think differently about serving fish regularly. Give it a try and tell me what you think!

Pan Seared Halibut With Sweet Pepper and Mushroom Relish…

  • Servings: 2
  • Difficulty: Medium
  • Print

INGREDIENTS:

2 (6 ounce) halibut filets

3 Tbs. olive oil, divided

1 Tbs. butter

1/2 cup all purpose flour

1 -2 tsp. garlic powder

1 – 2 tsp. Old Bay Seasoning

salt and pepper (to taste)

1 shallot, sliced

1 – 2 cloves of garlic, minced (again to taste)

1/2 cup sweet pepper, any color

5-6 medium sized baby crimini mushrooms, sliced

1 medium – large size Roma tomato, seeded and chopped

1 Tbs. sherry cooking wine

1 Tbs. flat leaf parsley, chopped

DIRECTIONS:

Combine flour, garlic powder and Old Bay Seasoning. Dredge the fish filets on both sides in the flour, shaking off any excess. Set aside.

Heat 2 Tbs. of olive oil in a pan. Add peppers and mushrooms and sauté for approximately 3-5 minutes. Once you’ve started cooking the peppers and mushrooms, heat the remaining olive oil and butter in another pan until the butter is melted. Season the fish filets with salt and pepper and add them to this pan seasoned side down (I also added a touch of Old Bay Seasoning on top along with the salt and pepper). Season the other side of the filets with salt and pepper (and Old Bay, if desired). Let the filters cook for approximately 4-5 minutes before turning. Cook on the second side until the fish flakes easily when tested with a fork (approximately another 4- 5 minutes). Keep in mind that the thickness of the filet will determine the cooking time, obviously the thicker the filet the longer the time.

Once the peppers and mushrooms in the other pan have softened add the shallots and garlic and cook for an additional 2- 3 minutes. Add the tomatoes and sherry cooking wine and cooking for another couple of minutes. Turn off the heat, stir in the parsley and serve over the fish filets.

IMG_4297

IMG_4283

Deli Style Tuna Salad…

Sometimes I get so consumed with trying new things in the kitchen that I forget a simple meal like soup and a sandwich can be just what the doctor ordered. And so it was the other night. My husband purchased some gourmet soup at our local grocery store, New England clam chowder to be exact, and every night he kept saying, “Let’s have something to go along with that soup.”

For some reason I was hard pressed to think of something and so I held off for a couple of days. When he asked once again and I told him I was struggling with an accompaniment he said, “How about a tuna salad sandwich.” Bingo. It’s like those words just hit the spot. So off I went researching various tuna salad recipes until I figured out what bits and pieces of various recipes might work for us.

Tuna salad

I have to tell you it was a very satisfying meal. No frills, no fuss, just store bought soup and home made tuna salad on white sandwich bread. Sometimes all the bells and whistles just can’t compare to the simple pleasures of life. But even simple dinner fare can produce some lessons learned. Here are mine:

Lesson Learned 1 – Make the tuna ahead of time and let the flavors get acquainted: There is a big difference when the flavors have the chance to meld. I recommend making this and letting it sit in the refrigerator for at least 4 hours. Overnight is even better.

Lesson Learned 2 – Use a combination of tunas: For this recipe I used a combination of solid white and light tuna. What’s the difference you ask? Solid white is almost like a large flaked tuna filet. It is very full bodied but dry. Light tuna has almost a shaved consistency. It is slightly darker but more moist. The combination of the two gives the perfect consistency for tuna salad.

Lesson Learned 3 – Not all white breads are alike: I really wanted to serve the tuna salad “old school” and so I decided to serve it on plain white sandwich bread. Have you ever read the ingredients on packages of plain white sandwich bread? More and more I am shying away from processed foods made from names I cannot pronounce, names that sound like they should be in a beaker in a laboratory and not an ingredient in my food.  So I chose a more expensive organic white bread, Rudi’s country morning white to be exact. The ingredients in the bread were all organic and I could pronounce them all (I knew what all the ingredients were as well). I guess if I was really trying to eat cleaner I would have made some home made bread. I just didn’t have the time. I know how difficult it is to eliminate all kinds of processed foods from your life, but being diligent and making smart choices more often than not has to be better for your overall health, right?

Lesson Learned 4 – Once you make the tuna salad the possibilities are endless: I chose a more traditional way to serve the tuna salad. But you make a tuna melt, a tuna stuffed tomato, tuna salad lettuce wraps, tuna pasta salad, an avocado and tuna salad wrap, or tuna salad mixed with your favorite greens and veggies. The sky’s the limit on this one.

The next time you want to have something simple but satisfying make some tuna salad and experiment with various ways to serve it. But let me tell you, a plain tuna salad sandwich on white bread with some sliced tomato, lettuce and pickles really hit the spot the other night!

IMG_4255

Deli Style Tuna Salad…

  • Servings: 4
  • Difficulty: Easy
  • Print

INGREDIENTS:

2 (5 ounce) cans of solid white tuna packed in water, drained

2 (5 ounce) cans of light tuna packed in water, drained

1/2 cup mayonnaise

1/2 tsp. seasoning salt

1 tsp. Old Bay seasoning

1/4 cup celery, minced

1/4 tsp. dried dill weed

1 Tbs. fresh flat leaf parsley, minced

1 – 2 Tbs. fresh lemon juice

4 green onions, white parts only, chopped

Freshly cracked black pepper

Tabasco sauce (to taste, optional)

DIRECTIONS:

Combine all the ingredients in a bowl. Start out with only 1/4 cup mayo and add more to taste. Adjust salt, pepper, tabasco and lemon to taste. (I only used 1 Tbs. of lemon and found it added flavor but did not overpower the tuna).

Cover and refrigerate overnight or for a minimum of 4 hours. Serve on white bread with some sliced tomatoes, leaf lettuce and sandwich pickles.

IMG_4251

Banana Bread With Cream Cheese Frosting…

There’s nothing as comforting as the smell of banana bread baking in the oven. I love banana bread and have tried various recipes that produced marginal results. But now I think I’ve found my go-to recipe and I want to share it.

One of the problems I’ve had with banana bread is wanting to make it but not planning on having ripe bananas on hand to do so. C’mon, how many of you actually plan on having ripe bananas on hand? Quite often banana bread is an after thought when you have ripe bananas and don’t know what to do with them. Personally I am not a big banana fan. I’ll eat them in banana bread or a banana split but that’s about it. So normally I do not intentionally have bananas around the house.

But I’ve discovered over many years of making banana bread that ripe bananas actually make a huge difference in the flavor of the bread. When bananas get ripe, they release their natural sugars which intensifies their flavor. It’s actually amazing. Try making this recipe with unripe bananas and then with ripe bananas. You will be amazed at the difference! But what do you do when you want to make banana bread but can’t find ripe bananas at the store (and I’ll clue you in, you probably never will). I solved that dilemma in a very simple way which I will share in my lessons learned.

IMG_4103Lesson Learned 1 – You can always have ripe bananas on hand: It’s really rather simple. Just preheat your oven to 350 degrees. Place the bananas on a baking sheet and keep them in the oven for 5-10 minutes. Start checking them after 5 minutes. You want the skins to be nice and dark like in the picture to the left. I checked my bananas at 5 minutes and they just had a couple of brown spots on them. I checked them again 3 minutes later and they were almost there and finally after an additional 2 minutes they were the perfect dark color. The amount of time you’ll need to get the bananas to brown as shown in these pictures will depend on your oven and altitude.

IMG_4110

I can’t stress enough the difference this makes in the flavor of the bread. It only takes a few minutes but the end result is so worth it. The picture above shows what the banana looks like after this process. Simply peel the bananas, put them all in a bowl and mash them. It will take no effort to do so as the bananas will be delightfully soft and perfectly ripe.

Lesson Learned 2 – The basics for any moist sweet bread (or cake): I know I’ve shared this before but it bears repeating. When making a sweet bread or a cake there are a few basic keys to success: 1. Take the time needed to cream the butter and sugar. I’ve found most cooks short change this step and it’s essential for having a moist sweet bread. It can take 5-7 minutes to cream the butter and sugar properly. The end result should be a light color and the mixture should look fluffy and creamy. 2. Use room temperature eggs. Room temperature eggs mix more thoroughly into a batter. Forgot to take your eggs out of the refrigerator before baking? No worries – click on “this link” for a down and dirty trick to get room temperature eggs in just 5 minutes. 3. Don’t over mix the batter. Once you put the dry and wet ingredients together, just combine them. Once they are fully incorporated into one another, STOP! Do these 3 simple steps and you will have a moist sweet bread every single time.

bananabread

This bread would be delightful on it’s own but it goes over the top when frosted with my cream cheese frosting. Either way, you will have a great go-to banana bread recipe that is quick, easy and every so flavorful. Enjoy!

Banana Bread With Cream Cheese Frosting…

  • Servings: 8-10
  • Difficulty: Easy
  • Print

INGREDIENTS:

Sweet Bread:

1/2 cup room temperature butter

1 cup sugar

2 eggs, room temperature

4 ripe bananas, mashed

1 1/2 cups flour

1 tsp. baking soda

1 tsp. cinnamon

1/2 tsp. salt

1 tsp vanilla

Frosting:

1/2 cup butter softened,

1 8 ounce package of cream cheese, room temperature

3 1/2 cups confectioners sugar

1-2 tsp. vanilla (to taste)

DIRECTIONS:

Preheat the oven to 350 degrees. Grease and flour (or you can use non-stick organic cooking spray) an 8 x 4 inch loaf pan and set aside. Cream butter and sugar together until light and fluffy (5-7 minutes). Add eggs one at a time and beat until combined. Beat in vanilla. Stir in the mashed bananas until combined.

Sift together flour, baking soda and salt. Make a well in the center of the dry ingredients and add the wet ingredients. Stir only until combined. Pour into prepared loaf pan.

Bake at 350 for 45 – 50 minutes or until a toothpick inserted into the center of the bread comes out clean. Let cool in the pan for 15 minutes before removing it. Let cool completely before frosting.

FROSTING:

Cream butter and cream cheese until smooth. Beat in vanilla. Add confectioners sugar and beat on a low speed until combined and then on a high speed until smooth. Spread on cooled bread.

 IMG_4228

Mashed Potato Cakes…

Give me my druthers and my carb of choice for any meal will always be mashed potatoes. I love potatoes any which way you can make them but when it comes to deciding how to prepare them, mashed potatoes is on the top of the list.

That being said, I obviously make a lot of mashed potatoes and because of that I normally have a fair amount left over. Leftover reheated mashed potatoes are fine, but I wanted to make something with a little more flair. So the other evening I ventured into making mashed potato cakes.

Lesson Learned 1 – Determining the correct consistency can be tricky. Everyone likes their mashed potatoes prepared a certain way. I like mine with a little more body, stiffer and less runny. Some people like their’s softer and “wetter”.  The key to creating a mashed potato cake you can work with is to make sure the consistency of the cake is not overly soft. So you may have to play with the amount of the ingredients a little until you get it right. For me, I beat one egg but only added a little bit at a time. I wound up using about 1/2 of a beaten egg to the potatoes. The same thing with flour. I probably used between 1/6 and 1/8 cup of flour. I added it gradually to make sure I got a good consistency but I also wanted to make sure the flour would not overpower the flavor.

potcakes

Lesson Learned 2 – Once you get them in the pan leave them alone: You will need the help of a hardened crust on the bottom to help you flip the cakes over. I fried mine over medium high heat for four minutes before flipping them. That could vary for you depending upon your stove and heat source. The good thing is you will be able to see the browning occurring. Give it at least four minutes before you try to flip them over. Then flip them quickly as the top part will be much softer than the bottom.

I think there are basically two specific things to keep in mind when making this recipe. First is getting the correct consistency for the cakes. Second is making sure you have a good crust on the bottom and flipping them quickly. But even if they don’t come out picture perfect, I can attest to the fact they are damned delicious!

Mashed Potato Cakes…

  • Servings: 4 Cakes - 2 Servings
  • Difficulty: Medium
  • Print

INGREDIENTS:

3 cups leftover mashed potatoes

1 egg, beaten and added gradually (you may not need the entire amount)

3 Tbs. chopped chives (or more if you like)

1/8 cup flour added gradually (you may not need the entire amount)

4 Tbs. butter

Salt and pepper to taste

Flour for dredging

DIRECTIONS:

Combine mashed potatoes and chives. Slowly add some of the beaten egg, continually checking the consistency of the potatoes to make sure they do not become too runny. Add the flour gradually and mix until the potatoes have a somewhat firm consistency (they will be soft, but you don’t want them runny – they need to be firm enough to hold the shape of a rounded cake).

Form the potatoes into 4 equal sized cakes (about 2 inches in diameter). Put some flour on a plate and dredge the cakes in the flour. Shake off the excess. In a medium size skillet melt the butter over medium high heat. Place the cakes in the skillet and cook for approximately 4 minutes on each side. Serve immediately.

IMG_3827

IMG_3819

Lasagna Roll Ups

I recently came across a recipe for lasagna roll ups. The recipe intrigued me because one of the go-to recipes I regularly make and really enjoy is chicken roll ups, so I thought making a lasagna version might be interesting. I particularly liked the idea of rolling the noodles with a ricotta mixture instead of layering them flat as in traditional lasagna. The original version of this recipe was for veggie lasagna which I knew would probably not be a big hit with my husband so I decided to work with the concept and create a recipe that would appeal to the carnivores of the world. But you can certainly make this a veggie dish and it will be fabulous.

Lesson Learned 1 – There is a lot of prep work to this recipe: If you’re not a prep person, this might not be the recipe for you. I find it cathartic to chop, mince, slice and dice but not everyone feels that way. You also have to cook the lasagna noodles ahead of time and arrange them individually on wax or parchment paper so they remain straight and don’t stick together before you roll them up with the cheese. The key to this recipe is making sure everything is prepped up front, including cooking and separating the noodles. If you do that, assembling it is a breeze. All I can say is that regardless of the work, this recipe is worth it.

IMG_3630Lesson Learned 2 – Cut all the veggies for the sauce to a similar size: This is important so that you don’t overcook or undercook any of them. Don’t throw them all in at the same time. Saute the onions, peppers and mushrooms first, then add the garlic followed by the squash. By the time the squash is crisp tender everything else will be ready as well.

Lesson Learned 3 – Use fresh mozzarella and shred it yourself: I think fresh mozzarella tastes better and it definitely melts better giving you that gooey consistency that we all love. It takes a little extra time but it’s worth it. Then again, if you don’t have the time or want to shorten the prep process you can always use shredded mozzarella.

Lesson Learned 4 – Establish a process for assembling this: You can organize cooking and assembling this recipe any way you want but the key is to be organized when you make it. Think through what process might work the best for you before making this dish. That way you won’t feel overwhelmed by all of the various steps.

Lasagnajpg

Lasagna Roll Ups

This recipe is enough to serve six. And although the lasagna noodles look small when you take them out of the package, they plump substantially when you cook them. One noodle roll up is more than enough for the average appetite.

The original recipe was designed to be frozen once assembled and baked off frozen at a later time. You can certainly do that but if you do make sure to use a meat thermometer to test the temperature of the center of the lasagna to ensure it’s heated all the way through.

My husband REALLY liked this recipe. In order to make it more carnivore friendly I added my homemade meatballs on top when I served it. I cooked the meatballs separately and just heated them through before I served them on top of the lasagna. If you don’t have time to make meatballs you can add partially cooked ground italian sausage to the sauce or just do what I did and use a sauce that already had sausage in it. Or you can simply leave it as a veggie dish. Any way you adapt this recipe, I know you will like it.

Lasagna Roll Ups…

  • Servings: 6
  • Difficulty: Medium
  • Print

INGREDIENTS:

PASTA:

6 lasagna noodles cooked according to packaged instructions

SAUCE:

2 Tbs. olive oil

2 cloves of garlic, minced

1 small onion, diced

1 small sweet pepper, diced

4-6 large cremini mushrooms, chopped small

1/2 medium size zucchini, diced

1/2 cup white wine

1 24 ounce jar of pasta sauce (I used Classico with sausage)

1 6 oz. can of tomato paste

16 oz. shredded mozzarella cheese

Grated parmesan for sprinkling on top

2 tsp. Italian seasoning

Salt and pepper to taste

RICOTTA FILLING:

16 oz. ricotta cheese

1/4 cup grated parmesan

1 egg

1 TBS. flat leaf parsley, chopped

Salt and pepper to taste

DIRECTIONS:

Preheat the oven to 375 degrees. Cook the noodles according to the package instructions. Drain them and place them flat on a wax or parchment paper lined sheet pan. Make layers of individual noodles as needed separating each layer with a sheet of wax or parchment paper. Set aside.

In a large skillet heat the olive oil. Saute the onions, mushrooms and peppers for about 2 minutes. Add the garlic and cook until fragrant (about 30 seconds to a minute). Add the zucchini and cook for a few minutes. Pour in the wine and salt and pepper the mixture to taste. Pour in the jarred sauce. Add a can of tomato paste. Stir until combined and warmed through. Turn off the heat and set aside.

Combine all of the ingredients for the ricotta filling. Taste before adding salt and pepper as the parmesan is salty. Salt and pepper to taste. Line up the flat lasagna noodles and divide the ricotta mixture into six equal portions. Spread the mixture over each flat noodle. Roll each noodle tightly with the filling.

Pour 1/3 of the sauce on the bottom of a 2 quart casserole dish. Sprinkle some mozzarella and parmesan over the sauce and top with a teaspoon of Italian seasoning. Place the rolled lasagna noodles on top making two rows of three each. Pour the remaining sauce over the noodles. Generously top with mozzarella and parmesan. Sprinkle the remaining Italian seasoning on top of the cheese.

Tent the casserole dish with foil and bake for 45 – 50 minutes. Remove foil and bake for additional 5 minutes or until the cheese on top is browned and bubbly. You can also turn on the broiler for the last 3 – 5 minutes and put the casserole dish under the broiler. If using the broiler, keep an eye on the casserole so as not to burn the cheese on top.

Let sit for 5 minutes and serve.

IMG_3724

The Best Ever Meatballs…

You know how some recipes catapult from being just something you try to a family and friends favorite that spans generations? Well this I can assure you is one of them. I first started making this recipe when I was in my twenties. At that time I could barely cook myself out of a paper bag. But I needed to make an appetizer for a family gathering and I decided to make meatballs.

Almost everyone I know has their tried and true meatball recipe and quite a few say to me that theirs is alright but not particularly special. Well search no more. This one is special and it’s been passed down from family to friends and friends of friends for decades. Every time I serve it at least one or more people ask me how to make it. This recipe is now multi-generational!

The first time I made this I was not very adept in the kitchen. I wasn’t learned about certain ingredients, proportions, substitutions, doneness – you name it, I didn’t have a clue. But my naiveté was the factor in making a mistake that kicked this recipe to the next level and made it ever so popular.

IMG_3579The original recipe came from a grocery store bought book, you know the ones you always see at the checkout counter. This one was called Pillsbury’s Cookbook of Family Favorites. You can see how old it is just by looking at the price, $1.25. When was the last time you spent that small of an amount of money on a book or magazine?

When I first read the ingredients there were two things that I did not have on hand. One was cracker crumbs and my husband suggested using bread crumbs instead. The second was sweet pepper flakes. I thought to myself hmm…, that shouldn’t be too hard to find. So off to the store I trudged in search of them.

When I got to the store, lo and behold, there were no sweet pepper flakes to be found. I endlessly looked and looked at the spices and herbs and the only thing I saw with “flakes” labeled on it was red pepper flakes. So I thought to myself, “well green peppers and red peppers are considered sweet peppers so that must be it” (you see what I mean). I bought the red pepper flakes and used them in the recipe.

Now I grew up in a household where very bland food was served. My father was not one for any kind of spices, he totally shied away from garlic and onions, and any kind of “heat” was never put in what we ate. But my husband’s family loves food with a kick, the more heat the better. So little naive me went on to make this recipe substituting red pepper flakes for sweet pepper flakes and it became a huge hit. The first time I made it I used two tablespoons of red pepper flakes and that produced some spicy meatballs, let me tell you. Since then I’ve toned it down to one tablespoon which gives a very nice kick and doesn’t leave you running for something cold to drink. But if you really like to bring on the heat use two tablespoons. It won’t hurt the meatballs that’s for sure.

Meatballs

I’ve been trying to think if I could share any lessons learned in making this recipe but it’s very straightforward even for the novice chef. Just follow the directions and you’ll be able to serve meatballs that will always be a big hit.

The technique is easy. All you need to do is mix the ingredients for the meatballs, form them into one inch rounds and bake them for 30 minutes. Then you put them in a casserole dish, add the sauce, cover and bake them for another hour. Now what’s easier than that?

I know in other blogs I’ve said that you just have to try this recipe, but you really must make this. It’s been tried and true over decades and its popularity came about because I, the cook who never could, made the most advantageous mistake I’ve ever made in the kitchen. Enjoy this one and share it with all of your friends!

The Best Ever Meatballs…

  • Servings: 2-2 1/2 dozen
  • Difficulty: Easy
  • Print

INGREDIENTS:

MEATBALLS:

1 lb. ground beef (I use 85% lean)

2 eggs, slightly beaten

2/3 – 3/4 cup bread crumbs (use a smaller amount and first and see if you will need more)

2 Tbs. organic minced onion flakes

1 Tbs. red pepper flakes (for really spicy meatballs add 2 Tbs)

9 drops Tabasco Sauce (you can add more if you like)

Dash of salt

SAUCE:

3/4 cup catsup

1/2 cup water

1/4 cup white vinegar

1/3 cup light brown sugar, firmly packed

1 1/2 Tbs. organic minced onion flakes

1 tsp. prepared mustard (I use Grey Poupon but you can use yellow mustard)

1 1/2 tsp. kosher salt

4 tsp. Worcestershire Sauce

6 drops Tabasco Sauce (you can use more if you like)

DIRECTIONS:

Preheat the oven to 325 degrees. Mix all of the ingredients for the meatballs. Shape them into one inch balls and layer them in an ungreased jelly roll pan. (You need a sheet pan with a lip on it so the grease does not run off). Bake at 325 for 30 minutes.

Combine all of the ingredients for the sauce. Place the meatballs in a casserole dish that you can cover. Pour the sauce over the meatballs, cover and bake for 1 hour. Enjoy!

IMG_3590

IMG_3610

Serving Suggestion: sprinkle with parsley and parmesan cheese…

Chicken Parmesan For Two…

Once again this young girl’s fancy turns to a chicken recipe, and this time with an Italian flair. What can you say about chicken parmesan that doesn’t scream delicious. Breaded chicken, marinara sauce, fresh basil leaves, provolone and parmesan cheeses. Sounds like a killer combo to me. And I like my little twist on this recipe, incorporating whole basil leaves under the provolone. This one got a two thumbs up from my husband, so you know it’s got to be good.

Lesson Learned 1 – You need to be organized for this recipe: This recipe has several different steps that can either work like a charm or throw you for a loop. Make sure you prep everything ahead and the process will be a breeze. Preheat the oven, set up the dredging station, grate the parmesan, lay out the basil leaves and provolone slices, have pans ready for the excess marinara and frying the breasts and so on. The key to success here is not only in the ingredients but also in the preparation.

Lesson Learned 2 – Grate fresh parmesan and don’t use the canned stuff: There is a difference. Grated fresh parmesan has a fuller, more robust flavor. It also melts better and tastes less salty. And it’s not that hard to do. I cut small pieces off a brick and put them in my mini food processor. I pulse the processor a few times just to get it started and once it appears the pieces have been broken down I just let the processor go. I guarantee you it’s worth the effort.

IMG_3349IMG_3360


Lesson Learned 3 – Use less marinara sauce than you think: You want to make sure the chicken doesn’t get too soggy. Use only a little bit of marinara in the bottom of the pan and spoon only about a tablespoon on top of it before adding the basil and provolone. Keep the leftover sauce warm on the stove and you can add more to the chicken when you serve it if you like. Or you can do what I did and use it to top a side of spaghetti.

IMG_3398

Lesson Learned 4 – Use fresh basil leaves if at all possible: The fresh basil leaves provide great flavor to the chicken. You can sprinkle the chicken with dried basil if that’s all you have, but fresh is so much better. Top the basil with a slice of provolone and you’re ready to go.

IMG_3404

IMG_3414

Lesson Learned 5 – You can use just one chicken breast for this recipe: I only used one large chicken breast for this recipe. I buy breasts whole with the bone and ribs attached and bone them myself. I halved one of the breasts and it left me with two perfect portions that were 1/2 inch thick. If you have thicker breast meat you’ll need to pound it down to 1/2 inch thick in order for the chicken to cook in the allotted time. Many people shy away from boneless skinless breasts because they think they’re too dry when in actuality they overcook them. Boneless chicken breasts can be very tender and juicy if cooked properly. Follow the allotted time in the recipe and you’ll have great results.

parmcollage

While I was making this my husband said, “Wow, that’s a lot of work.” For someone who enjoys the prep part of preparing a meal, I didn’t find that to be the case. But as I mentioned earlier, you definitely have to be organized when you make this recipe. Get everything ready up front so that all you’ll have to do is move seamlessly between each step of the process.

I’ve written this recipe for two people but it can be easily adaptable to 4 or more. You’ve got to try this and let me know what you think. It’s definitely worth it!

Chicken Parmesan For Two…

  • Servings: 2
  • Difficulty: Medium
  • Print

INGREDIENTS:

1 large boneless chicken breast, halved and pounded to 1/2 inch thick (if needed)

1 cup of flour

1 cup of bread crumbs, plain or seasoned

1 Tbs. italian seasoning

1 Tbs. garlic powder

1 cup of grated parmesan, halved

1 egg

Splash of milk

1 small jar of marinara sauce

4 large basil leaves

2 slices of thinly sliced provolone

Canola oil

DIRECTIONS:

Preheat the oven to 350 degrees. Set up a dredging station for the chicken with 3 separate dishes (I use paper plates for two of them and that works just fine). Combine the flour, garlic powder and italian seasoning on one plate. In a rimmed dish, beat the egg and milk together. Combine the bread crumbs and half the grated parmesan on another plate.

Dredge both sides of a chicken breast in the flour. Dip the breast into the egg mixture coating both sides. Dredge the breast in the bread crumb mixture and set aside. Follow the same process with the second chicken breast.

In a large skillet heat the canola oil until it looks shimmery. Use enough canola oil so that when the chicken is added it sizzles around the chicken. Add the chicken breasts and cook for 3 minutes on each side. Once done on both sides, place the chicken breasts on paper towels to absorb the excess oil.

Lightly coat the bottom of a baking dish with marinara sauce. Arrange the chicken on top of the sauce. Put a tablespoon of marinara over the each breast. Sprinkle the remaining grated parmesan on top of both breasts. Top each breast with two large basil leaves and place a provolone slice over the basil.

Bake the chicken for 15-20 minutes. Serve.

IMG_3446

IMG_3443

Serving Suggestion: chicken parmesan with garlic roasted asparagus and spaghetti


Strawberry Cream Cheese Loaf…

Now we’re seeing more and more strawberries in the grocery stores – the season is vastly approaching (and thank goodness because we’re all getting tired of snow). Yesterday I wanted to make something quick and sweet and decided on this particular loaf. This recipe is one that differs slightly from sea level to high altitude and I’ll write out both versions so you can successfully make it wherever you live. Regardless, this loaf is a sure winner. It is moist and not overly sweet – great for snacking or for dessert.

strawbread2

Lesson Learned 1 – Don’t over mix the batter: In order to keep this loaf moist you only need to incorporate the ingredients. Once they are, quit mixing! Loafs like this will get tough quickly if they’re over mixed.

IMG_3266Lesson Learned 2 – Cut the strawberries into small pieces: After removing the hull I cut the strawberries in half and sliced them. If the strawberry was larger, I cut it in half twice before I sliced it. Strawberries tend to be like blueberries when you bake them, they have a tendency to explode (as I like to call it) in the batter. If they’re too large when they explode your loaf will sink in on itself. In this recipe I used only 1 1/4 cups of strawberries, but you could easily use only 1 cup and still have a great loaf.

IMG_3286Lesson Learned 3 – Fold the strawberries gently into the batter: Strawberries break apart rather easily so you need to be careful when adding them. Fold them in as if you’re folding egg whites into a batter. That way you will have nice marbling and not a strawberry explosion.

Lesson Learned 4 – You may have to use an extra pan for all of the batter: This batter rises rather high. I filled a 9 x 5 loaf pan about two thirds of the way up and put the excess batter in a 3″ x 5″ mini foil loaf pan. If I hadn’t done that, the batter would have risen over the side of the larger pan. What’s nice about doing this is I had a small loaf that I could give as a gift to a neighbor and still had the larger loaf for my family. I recommend not putting all of the batter in one pan, but if you’re brave go ahead. I think you’ll find that if you do, it will run over the sides. If you put some batter in a small loaf pan, it only needs to bake for 30 minutes. The larger loaf takes 50 – 60 minutes.

For as easy and quick as this is to make, it’s a delicious sweet treat. Next time you’re in a pinch for time but want to make something fresh, this would be the loaf to make. Enjoy!

Strawberry Cream Cheese Loaf...

  • Servings: 12
  • Difficulty: Easy
  • Print

INGREDIENTS:

1/2 cup unsalted butter, softened

1 cup sugar (slightly less for high altitude)

4 ounces of cream cheese, softened

2 eggs, room temperature

1 tsp. vanilla

2 cups all purpose flour

2 tsp. baking powder (1 tsp for high altitude)

1/2 tsp. baking soda (1/4 for high altitude)

1/2 tsp. kosher salt

1/2 cup buttermilk

1 – 1 1/4 cups strawberries, diced small

DIRECTIONS:

Preheat oven to 350 degrees. Grease and flour (you can use an organic cooking spray as well) a 9 x 5 loaf pan and a 3″ x 5″ inch mini foil loaf pan. In a medium size bowl, mix flour, baking powder, baking soda and salt. Stir to combine. Set aside.

Using a electric stand mixer (or hand mixer) cream butter, sugar and cream cheese until soft. Add eggs one at a time. Mix in the vanilla.

Add the flour mixture to the butter mixture and mix until just blended. Add the buttermilk until combined. Do not over mix.

Carefully fold in the strawberries (the dough will be thick). Bake the small loaf for 30 minutes and the large loaf for 50 – 60 minutes or until a toothpick inserted in the center of the loaf comes out clean.

Let the loaf cool for at least 15 minutes in the pan before removing it.

IMG_3313

 IMG_3336

IMG_3459

Loaded Baked Potato Casserole…

I LOVE potatoes. As a friend of mine once said, “I never met a carb I did’t like.” That’s so true, but these days we know you need to balance your carb intake in order to stay healthy. Not an easy task for someone who was raised on meat and potatoes. But I’m trying.

I wanted to try a recipe like this for a while, so I justified it by serving it with baked cod and oven roasted asparagus. It turned out great and I was careful not to over indulge. So for all of my carb lovin’ friends out there, here’s one that you can add to your arsenal of recipes.

IMG_3125Lesson Learned 1 – Give the potatoes a head start: I know this and I still didn’t do it. It’s always best when making a potato casserole to cook the potatoes for about five minutes in boiling water. That takes the edge off of them. Because you cook this casserole for an hour and three quarters I didn’t think I would need to do that. Wrong. The potatoes were done but not as tender as I would have liked. So remember, give your sliced potatoes a bath in boiling water just until they start to soften slightly (no more than 5 minutes). Then drain them, being careful not to break them, and then put together your casserole. You’ll get great results.

IMG_3116Lesson Learned 2 – There can never be too much cheese: Originally I though this recipe would need two cups of cheese (1 of each type). Once I began to put together the layers I added even more (1/2 cup each). Make sure you get a good melting cheese like gruyere, havarti or monterey jack and generously cover the potatoes. You can combine that with some sort of cheddar or better yet be your own chef and experiment. I used a white cheddar gruyere blend combined with a marbled cheddar. It was delish.  I am writing the recipe from what I used, but you can certainly make substitutions.

This recipe is so easy and so good. It’s a great way to get the flavors of a loaded backed potato in casserole form. The leftovers are great as well. Just heat them in the microwave and serve. Enjoy!

Loaded Baked Potato Casserole 2

Loaded Baked Potato Casserole…

  • Servings: 4-6
  • Difficulty: Easy
  • Print

INGREDIENTS:

All natural cooking spray for the dish

2 large russet potatoes, sliced

1 large clove of garlic minced

3 green onions sliced diagonally

1 1/2 cup gruyer/cheddar blend, shredded

1 1/2 cup marbled cheddar cheese, shredded

6 slices hickory smoked bacon – cooked, drained and crumbled

1 cup whole milk

1 large egg

Salt and pepper to taste

2 tsp. fresh parsley

DIRECTIONS:

Preheat the oven to 375 degrees. Cook, drain and crumble the bacon. Slice the potatoes to 1/4 inch thick (use a mandolin slicer for the best results). But potatoes in a pan with cold water. Bring to a boil and cook for no longer than 5 minutes. Drain the potatoes immediately being careful not to break them.

Spray a stoneware tart pan with all natural cooking spray. Layer the potatoes in the dish, overlapping slightly. Sprinkle half the onions and garlic on top and season with salt and pepper. Cover the potatoes with half the cheese and sprinkle the top with half the bacon. Repeat with another layer.

In a separate bowl whisk the milk and egg. Add some salt and pepper. Pour the mixture over the potatoes. Sprinkle with parsley.

Cover and back for 75- 90 minutes or until the custard is cooked. Uncover and cook for an additional 10-15 minutes. Let rest for a few minutes before serving.

IMG_3172 2

 IMG_3184

Cream Cheese, Spinach, Bacon and Scallion Pinwheels…

I know, I know, this is a pretty rudimentary recipe but I’m sharing it because the flavor is divine. I’ve eaten many varieties of these pinwheels at parties and such and I have to say I like this version the best. It is simple, easy to make and oh so delicious!

Pinwheel Ingredients...

Pinwheel Ingredients…

For those of you who’ve never made these before, (and I’m sure there has to be a few out there), there are a couple of tricks to making these that you really don’t think about the first time you make them – or at least I never did. So for the burgeoning cooks who want to avoid some of my pitfalls, here are a couple of tricks to keep in mind for making delicious and good looking pinwheels.

Lesson Learned 1 – The cream cheese must be room temperatureI think this is where many err the first time they make these. Keep in mind that you are spreading this mixture on a flour tortilla. If the cream cheese is not room temperature you will rip the tortilla to shreds. I took my cream cheese out of the refrigerator before I went to bed and then made the pinwheels first thing in the morning. When the cream cheese is room temperature it not only spreads better but mixes better with the other ingredients. Make sure you give the cream cheese enough time to get to room temperature.

Pinwheel ingredients...

Pinwheel ingredients…

Lesson Learned 2 – Heat the tortillas for 20-30 seconds in the microwave before spreading on the filling: Even though they are flour tortillas they can crack and split when you spread the filling on them and roll them up. Cover your tortillas with a damp paper towel and heat them slightly in the microwave. Only work with one tortilla at a time. Keep the others covered with the damp towel until you are ready to use them. Make sure the tortilla is not warm. Once you take it out from under the paper towel it will only take a few seconds for the warmth to dissipate but the tortilla will still be nice and pliable.

IMG_2906

Pinwheel ingredients combined…

I found that if you press your finger down on the top part of the tortilla while spreading the mixture, the process is easier and you don’t have the tortilla jumping around. Spread the mixture to within  a quarter of an inch around the edge of the tortilla and even closer to edge that will be the end of your roll. That way you will have some mixture at the very end to act as a glue holding the tortilla closed.

Lesson Learned 3 – Don’t put the mixture on too thick: If you put the mixture on too thick you’ll have a bunch coming out the ends. A nice even layer will do. I’ve found this particular recipe makes three large flour tortilla rolls. That may sound like a small amount but you get between 24-30 one inch rounds with this recipe. Keep in mind that the mixture is rolled onto itself so that creates the thickness you are looking for. You don’t need to create the thickness by overloading the tortilla.

Lesson Learned 4 – Roll the tortillas tight: Start with a very tight roll and keep it that way throughout the rolling process. Once the tortilla is rolled, I recommend squeezing it lightly from top to bottom just to solidify the tight roll. You don’t want gaps in the filling when you cut them.

IMG_2911

IMG_2916

Lesson Learned 5 – This is the most important tip of all – put the filled tortillas back in the refrigerator and let them chill for a few hours before you cut them: The first time I made these I cut the tortillas right after rolling them. Big mistake! Remember I said you have to work with room temperature cream cheese? Well room temperature pinwheels do not cut easily. In fact they become a gloppy mess when you try to cut them. You need to let the cream cheese chill again to get cleaner cuts in the pinwheels. Plus it’s also good to let these flavors meld for awhile. Believe me, the mixture tastes great when you first make it, but it tastes even better when all the ingredients have time to get better acquainted.

IMG_2926

Wrap in plastic wrap and chill for 3-4 hours…

Lesson Learned 6 – When the tortillas have sufficiently chilled, use a very sharp knife to cut them: This is also important because the tortillas can still squish a little on you if you don’t use a sharp knife. You will find that you’ll have to cut a small portion off the ends of each tortilla and discard them. You just can’t get every bit of the tortilla filled. No worries, they make tasty morsels if you just want to pop them in your mouth. Also it is important to wipe off the blade of the knife with a paper towel when more than a small amount of cream cheese builds up on it. That way you will get nice clean cuts throughout.

IMG_2928

Cut with a very sharp knife…


These are so easy to make and so worth it. My husband never had them before and he told me if any were left over after our party to be sure not to throw them out because he would eat them. “These are really good” was all I needed to hear from him to know I’d produced a hit.

You can go online and find many different ways to make these. Hopefully these few lessons learned will help you avoid my mistakes when I first tried to make them.

Cream Cheese, Spinach, Bacon and Scallion Pinwheels

  • Servings: 24-30 One Inch Rounds
  • Difficulty: Very Easy
  • Print

INGREDIENTS:

8 oz. of softened cream cheese

4 scallions finely chopped, including the green parts

1 handful of baby spinach

6-8 slices of bacon cooked, drained and cooled

1/2 package ranch dressing mix

3 large flour tortillas

DIRECTIONS:

Make sure the cream cheese is a room temperature. Put the first five ingredients in a large bowl. Mix well with an electric hand mixer. Place the tortillas on a microwave safe plate and cover them with a damp paper towel. Microwave the tortillas for approximately 20 seconds or until they fell very pliable.

Work with one tortilla at a time. Keep the others covered with the damp paper towel until you are ready to use them. Make sure the tortilla is not hot. Spread one third of the mixture on the tortilla making sure to come within a quarter inch on all edges and very near the edge that will be the end of the roll. Roll the tortilla as tight as you can. When finished rolling, gently squeeze the tortilla up and down the shaft of the roll to ensure the mixture is evenly distributed inside the roll. Place the finished rolled tortillas in a plastic bag and refrigerate them for at least 3-4 hours.

When tortillas are sufficiently chilled, remove them from the bag and using a very sharp knife slice them into one inch rounds. Serve and enjoy!

IMG_2939

pinwheels2

IMG_2945

Tips ‘N Tricks: Making A Juicy Pork Tenderloin

I’ve always loved pork ever since I was a kid. My mother, who was not the cook (nor was she ever really interested in it), would often make it for Sunday dinner. The problem with that is she would make a pork and beef roast together in the same pan, roasting them both for the same amount of time. I know, I know, it boggles the mind doesn’t it. But I did say my mother wasn’t the cook now didn’t I (all apologies to my wonderful mother).

I never really had a flavorful, juicy pork tenderloin roast until I was much older and that only came about through trial and error in learning how to roast it. Pork can be fabulous when it is roasted properly or it can taste like the Sahara Desert – there really is no in between.

Pork tenderloin roasts are easy to find. You see them all the time in the grocery store wrapped in vacuum packaging. You can get them plain or pre-marinated. I find most people shy away from these roasts because they hardly have any fat. You may find a thin layer of skin on one side, but all in all it is very lean meat almost reminiscent of boneless skinless chicken breasts (which most people tend to overcook as well).

My mother believed that meat needed to be completely cooked through. And some people like their meat that way. Not me. Don’t get me wrong, I don’t want my meat raw but I’ve found, especially with pork tenderloin, that many cooks think the pork is done when the meat is white completely throughout. Nothing could be further from the truth. Pork tenderloin can be slightly pink in the middle and the meat is still thoroughly cooked. The internal temperature should be between 140 – 145 degrees in the thickest part of the meat when you take it out of the oven. Don’t forget some carry over cooking will occur when the meat is resting.

With the technique I use I don’t even need a meat thermometer. As a matter of fact, I haven’t used one to test the doneness of these roasts in years. I simply roast the pork tenderloin at 375 degrees for one hour. Period. After an hour I take it out of the pan, cover it with foil and let it rest for 10 minutes. Then I slice and serve it. That’s all. It comes out perfectly every single time!

I prep the roast by taking it out of the vacuum packaging and drying it thoroughly with paper towels. There is a lot of gel-like substance in the package and I want to make sure the roast is completely clean and free of it. Then I season it, skin side up, with salt and pepper, brush it lightly with some olive oil (I mostly used garlic infused olive oil) and then add some sort of dry herb that goes well with pork. The herb in the picture below is dried thyme.  I place the roast on a rack in a small roasting pan and roast it for an hour, and voila – I get a juicy roast every single time.

I haven’t had a dry pork tenderloin in years. This technique is so easy to do and yet, as you can see by the picture, the roast looks so elegant and good (and juicy). So follow my little trick for these small tenderloin roasts and you will be successful every single time!

Juicy Pork Tenderoin

Juicy Pork Tenderoin


Rosemary And Sun Dried Tomato Artisan Bread…

My husband is a bread lover and consequently bread is part of every dinner at our house. Carbs aren’t a factor for him, he’s as thin as a rail.  He just loves to have a couple of slices of bread warmed in the toaster oven to accompany his meal. It is one of life’s simple pleasures for him.

Over the past year I’ve experimented with making bread in various ways. When I was growing up homemade bread was a special event, especially since it took nearly all day to make with lots of arduous kneading and several hours of rising time. Now we’ve figured out how to make bread more simply, calling it artisan bread and using various methods to produce loafs that don’t challenge your muscles in the process. Last year I published a blog about Artisan No-Knead Bread and if you haven’t tried that particular method I suggest you do. It makes wonderful bread. The only challenge with that recipe is you have to let the dough rest and rise for a minimum of 18 hours, so if you forget to mix the dough the night before you’re out of luck.

IMG_2809This particular recipe mimics the packaged bread mixes that are out there that promise to give a loaf of “homemade” bread in less than an hour. All you have to do is add water. And that’s great. I’m not sure of the last time I had homemade bread that included azodicar-bonamide or mononitrate. And in my quest to lessen the amount of processed foods in my life I am trying more and more to make things from scratch and not from out of boxes with hard to pronounce ingredients. But you have to admit it is tempting to use these products in order to make fresh bread quickly. And I think I have a recipe that can give you a great loaf of bread in as short of a period of time as possible without all of the processed food additives we want less of in our lives.

This recipe is simple and straightforward. It does call for allowing for the dough to rise twice, first for an hour and then for a half hour. But that’s nothing. The ingredients are so easy to assemble that you can be doing a lot of other things while the bread is rising. Thirty minutes in the oven completes the process and you have great tasting, non-processed artisan bread. Even the novice cook can be successful the first time making this bread.

Lesson Learned 1 – Let the yeast bloom: You need to make sure the yeast is activated in order for this bread to work. Take 2 Tbs. of active dry yeast (slightly less than one pouch) pour it into a bowl, add one cup of very warm water and then whisk the two ingredients together until combined. Let the mixture sit for 3-5 minutes. You will see some bubbling action on the water and then you will see the yeast bloom (almost like mini chalky volcanic eruptions on the surface of the water). Once that happens you know the yeast has been activated and can add the rest of the ingredients.

Lesson Learned 2 – All that’s left is combining the remaining ingredients: It couldn’t be any simpler. Combine all of the remaining ingredients and let the yeast do its work.

pro-line-nonstick-baking-sheetLesson Learned 3 – Prepping the baking sheet: I use a professional grade baking sheet (picture on the left). I have to include a disclaimer that I work at Crate and Barrel which carries this particular baking sheet. I am not trying to sell this, but have found that if you invest in good housewares i.e., cookware, bakeware, gadgets, etc. it will pay dividends in the kitchen. This particular baking sheet is a non-stick baking sheet. It does not have a traditional non-stick surface but notice the groves throughout the bottom of the pan. That allows for heat to circulate underneath whatever is on the sheet and consequently it does not stick. To make this particular bread all I had to do was dust the pan with some cornmeal. When I took the bread out of the oven, I simply lifted it off the sheet with a silicone spatula. The bread did not stick. If you don’t have a pan similar to this you will need to grease a baking sheet with some vegetable oil and then dust it with cornmeal.

I guarantee if you try this recipe you will impress your family and friends. The end result is exquisite and no one will ever believe how easy it was to make. So throw away the box and say good-bye to processed bread mixes. You are now a “from-scratch” bread maker!

Rosemary And Sun Dried Tomato Artisan Bread

  • Servings: 1 Loaf
  • Difficulty: Easy
  • Print

IMG_2779INGREDIENTS:

2 tsp. active dry yeast

1 cup warm water

1/3 cup chopped sun dried tomatoes

1 tsp. dried rosemary, crushed

1 tsp. kosher salt

2 cups flour

cornmeal for dusting

vegetable oil for baking sheet prep

1 egg white (for an wash on the top of the bread)

1 Tbs. milk (for a wash on top of the bread)

DIRECTIONS:

In a medium sized bowl combine yeast and warm water. Whisk to combine. Let the mixture sit for 3-5 minutes until the yeast starts to expand and bloom. Add the tomatoes, rosemary, salt and flour all at once. Use a wooden spoon to combine. If dough is too sticky add a little more flour. If the dough feels too dry add a little more water. The dough should be a bit sticky but capable of being formed into a ball. Cover the dough and let it rise for 1 hour.

After an hour either dust a non-stick baking sheet with cornmeal or, if not using non-stick, brush the sheet with some vegetable oil and dust with cornmeal. Shape the dough into a ball with your hands (or you can use a heavy duty silicone scraper to shape into a ball) and put it on the prepared baking sheet. Cover the dough with a dishtowel and let it rise for and additional 30 minutes.

While the dough is rising, preheat the oven to 400 degrees. After 30 minutes, bake the dough for 20 minutes. Remove the bread from the oven and brush lightly with the whisked egg white and milk mixture. Put the bread back into the oven for an additional 5-10 minutes or until the outer crust turns a nice light golden brown.

Bread Dough Ready To Rise On Prepared Baking Sheet...

Bread Dough Ready To Rise On Prepared Baking Sheet…

IMG_2779

Fresh Out Of The Oven…

IMG_2789


IMG_2797

Rosemary and Sun Dried Tomato Artisan Bread…


Old Fashioned Pot Roast…

Was there ever a comfort food that will chase away the blues on a cold, snowy Winter day better than a simple pot roast? Making a pot roast reminds me of home, with great smells in the kitchen and the anticipation of that roasted goodness that only comes from cooking something low and slow.

le-creuset-signature-7.25-qt.-flame-round-french-ovenThere are various ways to cook a pot roast. Although I’ve made them several times in a slow cooker, I prefer to use an enameled cast iron pot (I use Le Creuset but there are many different varieties out there). I find that enameled cast iron provides an even, controlled heat and I think that consistently  allows for a more tender pot roast.

I also find enameled cast iron to be easy to clean, especially after something has been cooking for a long period of time. The main drawback with enameled cast iron is that it is heavy. I mean after all, it is cast iron. So just be prepared to flex your muscles a little bit and you will be fine. Enameled cast iron can be expensive, but I’ve had some of my pots for over 20 years and although the enamel may be slightly stained, they still work like a charm. In the end, you only get what you pay for…

The beauty of making pot roast is that it is so simple to make and your entire meal winds up being in one pot. The oven does all of the work and you are rewarded for your patience with one of the best comfort food meals of all time. So, here are some lessons learned that will make you a master at making the perfect pot roast:

IMG_2702Lesson Learned 1 – Brown the meat and veggies before putting them in the pot: The cooking method used for making pot roast is called braising. When you braise something you cook it for a long period of time in liquid. In the end, this technique does not provide eye pleasing color although it renders deliciously moist meat and vegetables. Taking a few minutes to brown the meat on all sides and to brown the vegetables will provide something that not only tastes divine but is also eye pleasing. It is worth the time to do it. Remember, you eat with your eyes first.

IMG_2711Lesson Learned 2 – Cut the veggies into big chunks: Regardless of the size of the pot roast, you will be braising the dish for several hours. You don’t want your veggies to fall apart in the process. Make sure you cut them into big chunks. That way the will stand up to the braising time.

Lesson Learned 3 – THE ONLY WAY IS LOW AND SLOW: The only way to wind up with a tender, moist pot roast is to cook it low and slow. Pot roasts are tough cuts of meat (I used a chuck roast in this recipe) and if you don’t take the time to slowly break down the fibers in the meat you will wind up with a tough, uneatable meal. Most recipes that I researched called for cooking a 4-5 pound roast for four hours. I’ve also seen cooking temperatures vary from 275 to 325. I live in high altitude and I’ve learned the hard way that everything takes longer to cook here. I cooked my pot roast for 4 hours at 275 and the last hour I raised the temperature to 300. The pot roast texture turned out perfectly.

The pot roast will tell you when it is done. If you go into the pan and stick your fork in the roast and it does not go in and out easily, the pot roast is not done. I tried this trick after 4 hours of cooking and the fork did not go into the meat easily. After 5 hours the fork went into the meat like the meat was butter. At that point I knew it was done.

I prefer cooking the roast at 275 and cooking it a little longer. I find the lower temperature and the longer braising time does not annihilate the vegetables. Everything turns beautifully.

Lesson Learned 4 – Braise with red wine and beef stock: Once again I’ve seen various suggestions on the type of braising liquid to use with pot roast. I can tell you from experience that nothing beats a combination of red wine and beef stock. This combination not only gives you fabulous drippings from which you can make a homemade gravy, but it also fills the house with the most delightful smells during the cooking process. Part of the comfort of making a pot roast are the smells you get while the roast is braising. Use red wind and beef stock and you won’t regret it.

When you braise a roast you fill the pan with liquid until it reaches half way up the sides of the meat. Don’t cover the meat completely with liquid. If you do, you will poach the roast and not braise it. You don’t want to do that.

potroast2

All of these tips will help you make the most delicious pot roast you’ve ever tasted. If you’ve never made a pot roast before, try to be a little flexible in your cooking time until you figure out the time and temperature that works for you. I highly recommend you keep your oven temperature at 275. If you live at sea level, a 4-5 pound roast may only take 4 hours to braise. That did not work for me in high altitude. I will include both of these recommendations in the recipe.

Try this one the next time you are in need of some old fashioned comfort food. It truly hits the spot!

Old Fashioned Pot Roast

  • Servings: 6-8
  • Difficulty: Easy
  • Print

IMG_2731INGREDIENTS:

1 4-5 pound pot roast

1 large sweet onion peeled and cut into quarters

4 carrots peeled and sliced into 2-3 inch pieces

4 parsnips peeled and sliced into 2-3 inch pieces

3-4 red potatoes (depending on size) washed and cut into large pieces

1 cup dry red wine

3 cups beef broth

2-3 Tbs. of olive oil (I used garlic infused olive oil)

Salt and pepper, to taste

3 sprigs of fresh thyme

dried (or fresh rosemary) 1 tsp. or 2 sprigs

DIRECTIONS:

Preheat the oven to 275 degrees. Heat a large cast iron dutch oven over medium-high heat. Salt and pepper the pot roast. Once the dutch oven has heated, add the oil and make sure the bottom of the pan is completely coated. Sear the roast on all sides for about a minute or two. Remove the roast from the pan and set aside.

Add more oil to the pan if needed. Add the carrots and parsnips to the pan and sear until lightly browned on both sides, about a minute or two. Remove and set aside. Add the potatoes to the pan, flat side down and sear for a couple of minute until tops are lightly browned and slightly crisped. Remove from the pan and set aside.

Add the wine to the pan. Stir with a whisk to remove all of the bits from the bottoms of the pan. Once that is done add the roast back to the pan. If using dried herbs instead of fresh, add to the beef stock and combine.  Pour in the beef stock into the pan making sure that the liquid only goes half way up the sides of the meat. Arrange the carrots, parsnips and potatoes on the side of the roast. Place the onions on top of the roast.

Cover and roast for 4 hours (if high altitude roast at 4 hours at 275 and one more hour at 300).  The roast is ready when it is fall apart tender and a fork inserted into the meat goes in and out easily.

IMG_2728

Browned and ready to go into the oven…

IMG_2731

A beautifully braised pot roast…

IMG_2740

Serving suggestion…

Tips ‘N Tricks Brussels Sprouts…

Recently I posted a recipe for Brussels Sprouts with Pancetta. I have to admit I am not a big fan of brussels sprouts but my husband is, so I am always looking for ways to punch up the flavor. So here are a couple of tips I recently learned that can add even more flavor to that recipe:

lodge-cast-iron-skillet1. Use a cast iron skillet: I got myself a plain old cast iron skillet for the holidays and it is amazing how evenly it cooks everything. After I boiled the brussels sprouts until they just started to become tender, I sautéed  them with some garlic infused olive oil in the cast iron skillet and the brussels sprouts not only finished cooking but were also evenly browned with the edges wonderfully caramelized.

A cast iron skillet is relatively inexpensive and is one of the best sources for cooking with even heat. Just make sure you season the skillet according to the manufacturers instructions before you use it for the first time. A good seasoned cast iron pan can last for generations if you use it properly.

Also, be aware that cast iron heats up slowly. Give the skillet a little extra time to heat up. Once a cast iron pan is heated it holds the heat beautifully throughout the entire cooking process.

2. Add some shallots to boost the flavor: This time I caramelized some shallots in the skillet (two medium sized ones, sliced) and then took them out while I browned and continued to cook the brussels sprouts and pancetta (and btw, if you don’t have or can’t afford pancetta, bacon works just as well). I added them back in at the end with the sun-dried tomatoes (see next tip) so they would not overcook during the process. Worked like a charm.

3. Add some sun-dried tomatoes at the very end: I saw this in another recipe and thought I’d try it. It was fabulous and really boosted the overall flavor of the dish. I used sun-dried tomatoes packed in oil, drained them, chopped them, added them at the very end and just let them warm through . All I can say is – delicious! The result – the best tasting brussels sprouts to date! This was actually the first time ever that I enjoyed eating brussels sprouts! 

IMG_2640

Lemon Chicken With Garlic And Capers…

If you happen to glance at my recipe page and notice a plethora of chicken recipes there’s a reason for that. I simply love chicken, no two ways about it. A lot of people blog a wide variety of recipes. I simply blog recipes that I like. If my recipes don’t fit the bill for you, no worries. There are so many websites to choose from these days so I’m sure you’ll find what you’re looking for if it’s not here.

Not only do I blog recipes that I like, but also ones that are simple but can challenge you in some regard to move yourself out of your comfort zone. My goal is to be your test kitchen by doing the work up front and giving you insights on how to be successful. I wished for a long time that I had someone who would do that for me. It can get frustrating when you fail to get things right time after time. So hopefully I can demystify a few things for you, and I hope I can learn some things from you as well.

So back to this chicken recipe. It’s relatively simple. What takes the most time is the prep. But I love to prep. Chopping, mincing, dicing, slicing – it’s therapeutic for me. Don’t let the prep make you shy away from making this. So much can be done ahead and then once it’s time to cook, everything goes relatively quickly. I made this with a brussels sprouts, pancetta and sun-dried tomato side and it was a little tricky balancing the steps between both. But it was all worth it when my husband kept saying, “This dinner is really good.” Enjoy this recipe and my lessons learned…

IMG_2614Lesson Learned 1 – Cooking with lemon slices: First you need to slice the lemon into even-sized thin rounds. The best way to do this is with a mandolin slicer. In a past recipe I spent quite a bit of time talking about how great a mandolin slicer can be and also how dangerous it can be to use. Just be careful when you use one. But as you can see from the picture, the mandolin will give you even-sized thin rounds.

IMG_2625In the recipe you actually sauté the lemon rounds. It gives the chicken and sauce a delightful flavor and also serves as a garnish for the chicken when you serve it. The trick is to cook them quickly, no longer than about 45 seconds. Once you notice the lemons starting to turn brown, as you can see in the picture to the right, remove them from the pan. You want them to be slightly browned but you don’t want them to loose their shape or too much of their sections.

Lesson Learned 2 – Make sure the chicken breasts are no thicker than 3/4 inch: The thin breasts cook quickly, about 4 minutes per side. I took regular chicken breasts and with a sharp knife cut them in half. That gave me 3/4 inch pieces. You can also take a breast and pound it out to that thickness and then cut it into portion size pieces. Whatever is easier.

10-piece-2.25-10.25-glass-bowl-setLesson Learned 3 – Be organized when making this recipe: I like this recipe not only because it’s flavorful, and believe me it is, but because once you’re done with the prep, the rest is a breeze and goes quite quickly. But the trick is to be organized and have everything prepped up front. I systematically go through the list of ingredients and see what needs to be done with each. Then I put each ingredient into little prep bowls and set them aside until it’s time to use them. Just be careful, you don’t want to prep some things too far ahead. Something like flat leaf parsley that you use for a garnish is best prepped right before you want to use it. If I’m not sure about something I prep it, cover it with plastic wrap and put it in the refrigerator until it’s time to start cooking. I am not suggesting doing your prep hours in advance. I normally start, depending upon the requirements of the recipe, about an hour before I plan on cooking it. The key is to have everything chopped, diced, sliced, etc., before you start. You will have no time to do this work once you start the cooking process.

Now that I come to think of it, this really applies to any recipe. It is so important to understand it and stick to the process, especially when you’re learning to maneuver your way around a kitchen. Ready recipes thoroughly (at least twice all the way through), understand the terminology, prep ahead and go through the process as designed. This will help to ensure your success with any recipe.

I really like this recipe and will definitely make it often. I hope you try it and let me know what you think.

Lemon Chicken With Garlic And Capers

  • Servings: 4
  • Difficulty: Easy
  • Print

INGREDIENTS:

2 small lemons cut into thin rounds

1 1/2 tsp. of sugar

4 cloves of garlic, halved

4 boneless skinless chicken breasts 3/4 of an inch thick

2-3  Tbs. olive oil (I used garlic infused olive oil)

2 Tbs. butter

2 tsp. grated shallot

1/2 tsp. grated garlic

1/2 tsp. dried oregano (use can use 1 fresh spring as well)

1 fresh thyme sprig (you can use dried – I preferred to have at least one herb fresh)

1/2 cup dry white wine

1 cup unsalted chicken stock

1 tsp. flour

1 Tbs. capers, drained and rinsed

flat leaf parsley for garnish, optional

Salt and pepper to taste

DIRECTIONS:

Slice the lemons and combine in a bowl with the sugar and garlic. Set aside. Season chicken with salt and pepper. In a large skillet over medium high heat add the oil. Swirl to coat the pan. Add the chicken to the pan and cook about 4 minutes each side. Remove the chicken front the pan, put on a plate and cover with foil to keep warm.

If needed, add some oil to the pan and add the lemon mixture. Cook stirring occasionally until the lemons start to turn a light brown. Remove the mixture from the pan and set aside.

Add 1 1/2 tsp. butter to the pan and once melted add the grated shallots, grated garlic and herbs. Cook for about a minute. Add the wine and deglaze the bottom of the pan. Continue to cook until the wine is almost completely evaporated. Season with salt and pepper. Add the flour and stir for about a minute, just to remove any floury taste. Add the chicken stock and whisk while bringing the mixture to a boil. Reduce the heat and continue to whisk until the liquid has thickened and reduced by a third. Remove herb sprig(s) from pan. Add a remaining butter and capers. Stir until the sauce gets shiny. Add the chicken and lemons back into the pan. Cover the chicken with the sauce, cover the pan and cook for and additional 2-3 minutes. Serve garnished with flat leaf parsley.

IMG_2649

IMG_2670

IMG_2681

IMG_2663

The Best Holiday Stuffing…

I know both Christmas and New Years are over and it’s time to move on to non-holiday recipes. But I just have to blog this one, mainly because I want to make sure I chronicle the recipe for my future use. Most people are pretty fussy about stuffing. My mom made a stuffing that I just loved but did I ever write down the recipe – well of course not. And try as I may I could never replicate it. So for years I have tried various recipes without much success. I just wasn’t satisfied with what I made. This year it was different. I actually put together a stuffing recipe that I loved and although it is not my mom’s it will be the recipe that I use.

The stuffing is a delightful combination of “the trinity”, which is onions, celery and carrots along with sage breakfast sausage, egg bread and herbs. It was a hit at the dinner table and made great leftovers. The guests at my holiday dinner asked if they could have some to take home. Now that is the mark of a good stuffing recipe. I was so happy to finally create a stuffing that I actually enjoyed and will make again. And I learned a few lessons while making it…

Lesson Learned 1 – Make it the day before: I will share a secret with you. When I first made it and tasted it I thought, ugh… this one’s not going to thrill me. But I made it a day ahead of time and let it sit the refrigerator until the following day. When I tasted it the next day it was unbelievably good. I would not recommend making this stuffing the day of your holiday feast. The flavors in this recipe need time to get fully acquainted. It makes all the difference. And, if you are planning a holiday feast, how good is it to be able to make something in advance so that you are not scrambling around on the big day. With this recipe you put it all together, let it sit over night, and then take it out and let it get to room temperature before baking it in the oven.

I also like this recipe because it bakes at 350. I do not have a double oven and so I planned my holiday dinner with dishes that could all be made at the same temperature, including the turkey. This stuffing recipe made my meal preparation easier. I was able to make it a day ahead and bake it in the oven with the turkey. You can’t beat that!

IMG_2542Lesson Learned 2 – Use a good quality egg bread: Like anything else, the quality of what you put into a recipe will determine the quality of what comes out of it. Most recipes call for just plain white bread. I used a egg bread, called a shepherds bread, and it was divine. But if all you have is white bread, use it. I had some extra white bread that I also cubed and I didn’t think it toasted as well as the egg bread. As a matter of fact, the crust burned on many of the pieces. I wound up picking them out and discarding them.

But please, don’t use the prepackage stuffing cubes you find in bags at the grocery store. I’ve never had any luck with those, and who knows what they put in them to get them to last as long as they do. It takes no time to cut the bread into cubes and toast them in the oven.  And the result is so much better.

Lesson Learned 3 – Dice the trinity into equal size pieces: Make sure to finely dice your onions, celery and carrots. If you do, it should take about 8 minutes for them to start to soften and begin to brown. Otherwise it will take a lot longer and chances are by the time your carrots are done your celery and onions will be overcooked.

Lesson Learned 4 – Use fresh herbs in the recipe: I use dried herbs all the time but I think fresh herbs do more to enhance the flavor of this recipe. If you can’t get them, you can use dried. Just remember that with dried herbs you always use less as their flavor is much more concentrated. If you use dried herbs, press the herbs into the palm of your hand with your fingers or slightly crush them with a mortar and pestle to release some of the oil in the herbs before you add them to the recipe. That being said, I still would opt for fresh herbs if at all possible.

Lesson Learned 5 – Cover the stuffing with foil for the first half of the baking process: This is more a matter of taste. I’ve always preferred a softer stuffing while some people prefer a crispy stuffing. I found that by covering the stuffing for the first half hour of baking you get a moist stuffing with just the right amount of crispiness on top. But if you like crispy stuffing, bake it uncovered for the entire hour. Just be sure that if you make this the day before you let the stuffing get to room temperature before baking it off in the oven. I took the stuffing out of the refrigerator and let it sit on the counter for 2 hours before I put it in the oven. The end result was perfect.

This recipe is not difficult to make and only tastes better the more time the ingredients meld. I’m so glad to have finally concocted a stuffing recipe that I like. Keep this one in your file for next year. You won’t be disappointed.

The trinity mixed with breakfast sausage...

The trinity mixed with breakfast sausage…

The Best Holiday Stuffing

  • Servings: 16
  • Difficulty: Easy
  • Print

INGREDIENTS:

1 stick of butter, plus a little extra to coat the baking dish

16 cups of good quality egg bread, cut into 1 inch cubes

4 celery stalks finely diced

2 large carrots, peeled and finely diced

1 medium size sweet onion, finely diced

1 pound sage breakfast sausage

2 Tbs. chopped fresh sage

2 Tbs. chopped fresh thyme

2 – 3 cups unsalted stock (if you can find turkey stock use that. If not substitute chicken stock)

Salt and pepper to taste

DIRECTIONS:

Preheat the oven to 350. Cut the bread into 1 inch cubes and spread out on a baking sheet. Toast for 20-25 minutes stirring occasionally until lightly browned and crisp. Set aside to cool.

Finely dice the celery, carrots and onion. In a large deep skillet melt the butter. Once the butter is melted, pour half of it into a dish and set aside. Add the celery, carrots and onions to the pan and cook over medium high heat until they soften and begin to turn brown. Scrap the vegetables into a bowl and set aside. Add the sausage into the skillet, breaking it up into pieces. Cook until lightly browned and cooked through.

While the sausage is cooking, chop the sage and thyme and set aside. Grease a large 9 x 13 baking dish with butter and set aside. When the sausage is done cooking, add back the vegetables, sage and thyme. Cook for about 1 minute to incorporate the herbs. Add 1 cup of the broth and deglaze the bottom of the pan. Cook until the broth is nearly evaporated, approximately 5 minutes.

Scrape the sausage mixture into a large bowl. Add the toasted bread cubes and remaining stock. Stir until the bread is moistened. Season with salt and pepper. Spread into the prepared baking dish and brush the top with the reserved melted butter.

(Here is where you stop if you are making this ahead. Cover the pan with foil and refrigerate. Take the pan out of the refrigerator at least two hours before baking it in the oven. Remove the foil and cover with plastic wrap while it is coming to room temperature).

Cover the stuffing with foil and bake for 30 minutes. Remove the foil and continue to bake for an additional 30 minutes or until the stuffing is heated through and browned. Let the stuffing stand for 10 minutes before serving.

Add fresh sage and thyme...

Add fresh sage and thyme…

IMG_2573

IMG_2576

Cheesy Potato and Green Onion Casserole…

For years I bought boxed potatoes to make potato casseroles to accompany a meal. The boxes contain a sleeve of freeze dried potatoes that look like petrified potato chips with a pouch of powdered cheese and flavorings, depending upon what kind you purchased (scalloped, au gratin, sour cream and onion, etc). To that you add some butter, water and milk, mix the conglomeration together and bake it in the oven. I never really thought about it, I just did it for the convenience of it all. NEVER AGAIN!

In previous blogs I’ve mentioned how over time I’ve begun to realize that there are many things you can easily make from scratch versus buying them pre-prepared at the grocery store. Things like applesauce, cranberry sauce, rouxs, pickles, soups, gravies, macaroni and cheese – the list can go on and on. The point is when you make something from scratch you control what goes into it. You control the sugars and sodium. You control the color naturally versus using dyes to achieve the desired affect. I’ve never made anything from scratch that included ingredients I could not pronounce much less spell, but I see them all the time on the packages at the grocery store.

I think we’ve come to believe that in the name of convenience it is ok to use prepackaged pre-prepared foods. And I am not one to point a finger at them, I’ve used them all my life. I guess what I’m trying to say here is that as I’ve become more adept in the kitchen I realize how easy it is to make things from scratch and in the end how much better that is for you. Don’t worry, I am not a purist. I’m sure in the name of convenience I will use a pre-prepared item myself from time to time. But more and more I’ve moved away from them and haven’t noticed a big difference in the time it takes to make certain things. Hence this recipe I am about to share.

oxo-hand-held-mandolineWhat makes this recipe so easy to make is a simple tool known as a mandolin slicer. There are tons of varieties out there, and the one in the picture to the right is what I use. When I publish something like this I always have to use the disclaimer that I work at Crate and Barrel. We carry a few varieties of mandolin slicers and this one is pretty affordable. I like it because it gives you a couple of different slicing widths, works well and it has the hand protector. But you can get a mandolin slicer just about anywhere and they can range in price from being extremely cheap to very expensive. If you invest in one, just make sure you at least get one that has some sort of hand protector.

One thing I have to stress here – if not used properly a mandolin slicer can be VERY DANGEROUS. You can slice a piece of your finger off just as easily as a piece of potato if you are not careful. Even with a hand guard you have to be very mindful when using one. The blades on these slicers are very sharp and before you know it, if you are not careful, you can really hurt yourself. So always use a mandolin slicer with the utmost care.

That being said, it is a great tool for quickly slicing things like potatoes, carrots, onions, etc. and getting even slices all the time. The key to success in this potato casserole recipe is the thin evenness of the potato slices. A mandolin slicer can give you that in no time flat (see the picture below). It would take much longer to do this by hand and the discs would not be nearly as precise in width.  So let’s talk a little bit about the lessons I learned developing this recipe.

IMG_2270

Lesson Learned 1 – Always use the mandolin slicer with the utmost care: I can’t help it, this just bares repeating. You won’t believe how easy it is to hack off a chunk of skin with this device. Please be careful using it. But when you use it safely, you will be amazed at how quickly you can produce nice even sized pieces of whatever you are slicing.

Lesson Learned 2 – This recipe is adaptable to a wide variety of cheeses: Normally some sort of cheddar cheese is a staple for this recipe. But over the holidays I had a disc of brie that I’d bought to make a holiday appetizer and I just mixed some of the remaining brie with the cheddar. Divine is all I can say about that. Gruyere is also a good cheese to use as well. Any good melting cheese or combination of compatible melting cheeses will do.

And speaking of melting cheese, don’t use prepackaged grated cheese. Those cheeses have an ingredient in them that keeps the grated pieces from sticking together. That ingredient also makes those cheeses difficult to melt. Grate the cheese yourself. You’ll get a much better consistency and much better flavor

The consistency of a roux

The consistency of a roux

Lesson Learned 3 – The formula for making any roux: Making a roux is the key to almost any homemade sauce or gravy. And you won’t believe how easy it is. All you have to do is remember one simple formula: equal parts butter and flour. This particular recipe uses three tablespoons of butter and 3 tablespoons of flour to create the roux. The amount you use can vary based on the size of the recipe. But remember it is always equal parts of each. The picture on the left shows what the consistency should look like, almost that of a thick, creamy paste.

I could not believe how simple this was to make and so much better than the boxed varieties. Play around with this one to see if you can create the flavor of cheese sauce you prefer the most. Right now I’m a cheddar and brie girl so that is how I am writing the recipe. But don’t be afraid to experiment with this one. I promise anything you do will be so much better than the boxed version of what you make. Enjoy!

Ready to pop into the oven...

Ready to pop into the oven…

Cheesy Potato and Green Onion Casserole…

  • Servings: 4
  • Difficulty: Easy
  • Print

INGREDIENTS:

2-3 large white russet potatoes, unpeeled

3 Tbs. butter

3 Tbs. flour

3-4 green onions, diced (use the green parts of the onion as well)

2 cloves garlic

1 tsp garlic powder

1 1/2 cups milk

1 cup grated cheddar cheese

1/2 cup brie cheese, cut into small pieces

Salt and pepper to taste

DIRECTIONS:

Preheat the oven to 375. Remove the skins from two cloves of garlic and drop them in a pot of cold water. Bring the pot of water to a boil on the stove, making sure the water is well salted. While the water is heating, cut the russet potatoes into 1/8 inch slices and put them in a bowl of cold water so they do not begin to brown. Slice the green onions and set aside. Grate the cheddar cheese and cut the brie into small pieces. Set both of them aside.

Once the water is boiling, put the potato slices in the water and cook them for about 5 minutes or until they just begin to soften.  When the potatoes begin to soften, gently remove them from the pan, drain them and pat them dry removing as much excess water as possible. Remove the discard the garlic cloves.

In a saucepan under medium heat, melt the butter. Add the flour and stir for about a minute until the mixture becomes a creamy paste (make sure to cook for about a minute so that there will be no flour taste). Add the milk and raise the heat to medium high. Once the milk begins to bubble you will notice it starting to thicken. Keep stirring the milk until it becomes thick. Once it thickens, add the garlic powder and cheeses. Stir until the cheeses are completely melted. Add the green onions and combine. Taste the mixture and add salt and pepper as needed. Remove the mixture from the heat.

Place the potatoes in a 1 1/2 quart casserole dish that was sprayed with cooking spray. Pour the cheese mixture over the potatoes. Bake at 375 for 50-55 minutes or until the potatoes are cooked through. For a finishing touch, at the end place the casserole dish under the broiler for a minute or two to brown the cheese.

IMG_2291

IMG_2308

Turkey Pot Pie…

For some reason I am not a big fan of having turkey on Thanksgiving but I LOVE having turkey  on  Christmas Day. This year we had three guests for Christmas dinner and that precipitated making a whole turkey versus just a turkey breast. I had plenty of practice over this past year making bone-in turkey breasts but I never really had a lot of luck making a whole turkey, that is until this year…

I found two tricks that finally rendered me a perfectly cooked bird. One, making sure that the bird was completely defrosted (and I found it takes longer than what is written which is one day in the refrigerator for every four pounds –  plus the importance of removing the guts as soon as possible so you don’t harbor an ice ball in the cavity) and second to roast it at 350 when conventional wisdom says to roast the bird at 325. Needless to say, my bird turned out perfectly this year – the very first time I’ve ever done a whole turkey the right way. So if you are struggling with making a whole turkey, have faith. It only took me several years to finally get it right!

But, this blog is not about roasting a turkey. It’s about what you can do with the leftovers. And for me, one of the best comfort food recipes you can make with leftover turkey is turkey pot pie. And believe me, you will have greater success making this than learning how to roast the perfect turkey.

IMG_2584


I like this recipe because you can use just about anything you have leftover in it. I had some mushrooms that I cut up and sautéed and had a bag of frozen vegetables that had green beans, corn, peas, carrots and celery. But you can use frozen peas and carrots, or a broccoli cauliflower medley – really any bag of frozen veggies you have will do the trick. It really takes no time to put together the filling and within 25 minutes after that you have a delicious meat pie that no one will ever consider a leftover. Here are some lessons I learned while making this recipe:

Image 1Lesson Learned 1 – Don’t take the easy way out and use canned soup for the filling: Have you ever read the labels of many canned soups? The amount of sodium in them is unbelievable. Don’t get me wrong, I am not a proponent of no salt, but when you use processed foods sodium is used as a preservative as well as a seasoning. It is so easy to make the filling from scratch and you can use unsalted chicken stock which has only 5% sodium in it versus the 36% sodium you get in a canned soup! That’s a big difference.

One thing I learned as I became more adept in the kitchen is how easy certain things are to make that I had been, out of habit and lack of knowledge, using previously as pre-prepared or processed. True sometimes they can be very convenient, but when you look at what you may be putting into your system on a regular basis it makes you take pause. Making a simple roux and using unsalted chicken stock creates the same creaminess and flavor as a canned soup, and I would venture to say it gives even greater flavor. I also know that time is a factor for most people and therefore convenience is important. But believe me, in this case, making a simple roux and using unsalted chicken stock takes no time and in the end is much better for you.

IMG_2498

Lesson Learned 2 – If you really want convenience, use prepackaged pie crusts: I am still in the process of mastering the homemade pie crust but must admit that part of my reluctance to do so is based on the fact that the ones you can by pre-made are so darn good. If you are a purist, then make your own pie crust. There are tons of recipes out there to choose from. But for me, I like the convenience of the pre-made dough. The trick is to let the dough come to room temperature before using it. Don’t just let it sit in the fridge and then pull it out and use it. Let it sit on the counter for about an hour and the dough will not only be easier to work with but also will give you the best results.

Lesson Learned 3 – Working with pie crust dough: I unrolled the pie crust dough and put my pie dish on top of it.  I used small individual pie plates six inches in diameter and 1 1/2 inches deep (I had to use both pieces of dough), and cut out a piece of dough that was one inch longer than each dish all the way around. Don’t be fooled into thinking your pie crust needs to look pretty. Once you have the filling in the dish, put the pie crust on top, fold the edges under and crimp them. Cut a couple of slits in the center to let out the steam. Be prepared, you will probably have some mixture dripping out of the sides while it cooks. That is the beauty of the pot pie. What I did to mitigate the mess was to put both dishes on a foil lined baking sheet that was sprayed with cooking spray. That way any dripping during the cooking process did not stick to the baking sheet or prevent me from removing the dishes from the baking sheet.

This is a pretty basic recipe and one most cooks, even the novice ones, can master the first time around. And it is so darn good. I like the idea of making individual pot pies, but you can also adapt this recipe by putting it all into a 10 inch cast iron skillet and topping the skillet with the pie crust. Then you’ll have one big pie that you can proportion out.

IMG_2510

Turkey Pot Pie…

  • Servings: 2
  • Difficulty: easy
  • Print

INGREDIENTS:

3 cups diced cooked turkey

1/2 tsp. dried sage or poultry seasoning

1 tsp. sweet paprika

3 – 4 Tbs. butter

3 – 4 Tbs. flour

I 16 ounce bag of frozen vegetables, a vegetable medley preferred

1 cup pearl onions, frozen or jarred

2 cloves garlic, minced

2 cups low sodium chicken broth

1 cup heavy cream

I package store bought pie crusts

1 egg, slightly beaten with a dash of water

Salt and freshly cracked black pepper to taste

DIRECTIONS:

Preheat the oven to 375 degrees. In a large deep pan melt 3 tablespoons of butter. Add the pearl onions and frozen vegetables and cook until tender, about 3 minutes. Add the garlic, paprika and sage. Cook until fragrant, about 1 minute. (At this point look at the amount of butter you have in the pan. If there is hardly any, add another tablespoon and melt it. Just make sure you use equal parts of butter and flour). Sprinkle the flour all throughout the pan and whisk it with the vegetable mixture for about a minute. Add the chicken stock and stir until it starts to thicken. (You will notice it thickening once it begins to get hot and bubbly. If it does not thicken, you can always add an additional amount of a little flour and water whisked together to get it to thicken). Once it has thickened, add the heavy cream and turkey and stir to combine. Season with salt and pepper as needed. Take the mixture off of the heat.

Lightly flour your counter and unfold one pie crust disc. Place a 6 x 1 1/2 inch individual glass pie pan on the crust. Cut the crust so that the edges are 1 inch longer than the outer edges of the pan. Repeat this process with the second piece of dough and pie pan.

Spoon the prepared filling into each pie pan. Place the dough over the top of each pan, tucking the excess edges under themselves. Crimp the edges with your fingers.  Whisk together the egg and water and brush the crusts evenly with the egg wash. Using a sharp knife cut two vents in the center of the crust.

Place the pie plates on a baking sheet that is lined with foil and sprayed with non-stick cooking spray.  Bake for 25-30 minutes or until the inside mixture is bubbly and the crust is golden brown.

IMG_2501

IMG_2521

IMG_2508

IMG_2533

Oatmeal Cream Cheese Butterscotch Bars…

I have a goal every holiday season of making at least one new cookie recipe. This year I was adventurous and I made two new varieties. One new cookie was peppermint twist kisses and the other, which quickly has become my husband’s favorite, was oatmeal cream cheese butterscotch bars. The past few years I’ve ventured away from some of the more traditional holiday faire and tried more unique types of cookies. Last year, my iced cinnamon chip cookies became a big hit replacing the more traditional chocolate chip cookie in look and flavor. This year my peppermint twist kisses not only gave the look of the holiday but also provided the flavor combination of peppermint and chocolate. Yum!

This recipe is a great melding of oatmeal, cream cheese and butterscotch. It’s not all that difficult to make and it tastes divine. I found I had to buy two bags of butterscotch chips as my husband attacked the first bag when it was in the refrigerator leaving me barely enough to make the bars. Beware those elves that steal the chips before the cookies are made!

For about a year I have been chronicling recipes I’ve made and giving them my rating and lessons learned. As I look back on these recipes there’s hardly a one that has a rating below an A minus. So I’ve decided not to do recipe ratings anymore as I promise to bring you only A and A plus recipes. I will definitely continue my lessons learned, as I know how appreciative I am to learn tips and tricks ahead of time that will make me more successful in the kitchen, especially when trying a recipe for the first time.

Line the pan with foil and let it overlap the sides to create handles...

Line the pan with foil and let it overlap the sides to create handles…

Lesson Learned 1 – Preparation is key to this recipe: Prepping the pan appropriately is key to the success of this recipe. You need to line a 9 x 13 inch pan with a couple of pieces of foil. Make sure the foil overlaps on the long sides of the pan to serve as handles when you lift out the bars. Grease the foil lightly, and wait until the pan is completely cool before lifting the bars out and cutting them (more on that below). If you do that, you will have absolutely no problem removing them from the pan.

Lesson Learned 2 – You don’t need a stand mixer to make these cookies: For those of you that don’t have a stand mixer, never fear – you don’t need one to make this recipe. The bottom of the bars and the crumb topping are one in the same mixture and are made in a food processor. IMG_2403The filling can be made with a hand mixer. Personally I preferred making the crumb mixture in the food processor. I think the pulsing action of the food processor blends the butter with the sugars more completely creating a perfect crumble. The texture should resemble what you see in the picture to the right. I would not recommend trying to make the crumble by hand. I also have to admit it felt weird not using my stand mixer to make the bars, but it was a delightful departure from the usual way of making cookies.

Lesson Learned 3 – Let the pan cool and chill the bars before attempting to cut them: This is critical. The ingredients need to completely set before cutting and the only way to do that is to let them cool. Once the pan was slightly cool I covered it loosely with foil and put it out in the garage. The winter temperatures here in Colorado make it easy to use the garage as a cooling station. I don’t recommend this for warmer climates. If you live in one, let the pan cool on a cooling rack in the kitchen and then put it in the refrigerator once the pan is cool to the touch. Leave the pan in the refrigerator until the bars have completely cooled.

Although this recipe may look difficult it is really quite easy, and definitely worth it. This recipe has become my husband’s new holiday favorite. I think you will enjoy it too!

Oatmeal Cream Cheese Butterscotch Bars…

  • Servings: 36
  • Difficulty: Easy
  • Print

INGREDIENTS:

2 sticks room temperature butter cut into small pieces

2 cups flour

1 1/2 cups quick cooking oats

3/4 cup firmly packed brown sugar

1 tsp. cinnamon

1 bag butterscotch chips (11 ounces)

I package cream cheese, softened (8 ounces)

1 can sweetened condensed milk (14 ounces)

1 lemon zested and juiced

1 tsp. vanilla extract

DIRECTIONS:

Preheat oven to 350 degrees. Line a 9 x 13 pan with foil making sure the foil overlaps the side of the pan to create handles for easy removal. Grease the foil lightly.

Combine flour, oats, and brown sugar in a food processor. Pulse to combine. Add the butter, cinnamon and butterscotch chips. Pulse until the mixture clumps when pressed between your fingers. Press half of the mixture in an even layer into the bottom of the prepared pan.  Bake until slightly golden and set approximately 12 – 15 minutes.

With a hand mixer beat until smooth the cream cheese, condensed milk, lemon juice and zest and vanilla. Spread the mixture evenly over the cooled oatmeal mixture. Sprinkle the remaining oatmeal mixture on the top. Bake until top is golden, approximately 40 minutes.

Cool and chill before cutting. Use the foil handles to remove the bars from the pan and place on a cutting board. Cut into squares.

IMG_2432 2

IMG_2438

Peppermint Twist Kisses…

For many, many years the holidays have meant cookie baking time for me. And over the years I’ve made a wide range of cookies. About five years ago I established a goal of making at least one new cookie recipe each holiday season. The result has been a definite shift in the tried and true cookies I make each year. And it’s nice to see an evolution in my cookie baking.

This blog is dedicated to one of the two new cookie recipes I made this year. Being that I work part time at Crate and Barrel I’ve been really challenged in making my goal of one new post a week during the holiday season. The other recipe (a recipe for oatmeal butterscotch cream cheese bars – also an excellent one) I will try to get posted within the next few days, especially for my readers who may not have started their baking yet.

This blog will also serve as a one stop shop for some of my other favorite cooke recipes. I’ll provide a picture, name and the link to each below since I’ve blogged about them already. Look through them and see what might work for you. I guarantee you, they are all delicious.

I made the peppermint twist cookies this year because I decided not to make spritz cookies and I wanted something on my cookie plates that had the colors of the holiday season. This is a delightful cookie and the combination of peppermint and chocolate truly is indicative of the holidays. It’s easy to make, colorful and delicious. Need I say more.

Recipe Rating – A: This is a flavorful, colorful cookie that will brighten up your holiday cookie platter. Just make sure your family doesn’t raid the bag of kisses before you bake the cookies like my husband did. They are a necessary part of making this cookie special.

Lesson Learned 1 – Rolling out the cookies: This is definitely the most intricate part of making the cookies. Keep in mind that you will be combining to logs of dough into one so make sure the logs are thin enough. Once you have divided the dough and colored half of it with red food coloring, you need to chill the dough for at least an hour. Then divide each half of the dough into 4 equal parts and roll one of each color into a log 9 inch log. I have a silicone baking mat that was great to use in this process as it had measurements in inches on the top of the mat that helped guide me through rolling out the logs into the appropriate length.

Roll each color of dough into 9 inch logs...

Roll each color of dough into 9 inch logs…

Once you do that, you need to loosely braid them together and roll them into a single log. This will elongate the log about an inch or two. Remember you want the circumference of the combined log to be as thick as each individual log.

IMG_2228

Once you’ve rolled both pieces into a single log cut them into pieces approximately 1 1/8 inches thick. (Once I cut the first piece I used it as a guide for cutting the others)

IMG_2237


Take each individual piece and roll it into a ball and place on a cookie sheet.

IMG_2224


You will need to flatten each ball slightly with the bottom of a glass before putting them into the oven. That is definitely the hardest part of making these cookies.

Lesson Learned 2- Make sure you unwrap the chocolate kisses ahead of time. You only have a short window of opportunity to place the kisses on the cookies once they come out of the oven. Make sure you have them unwrapped so that you can get them on quickly. Then DON’T TOUCH THEM. The warm cookie will cause the kisses to get very soft and they need to reset to retain their shape.  Once the cookies have cooled slightly I put them on a baking sheet and stick them in the freezer for a few minutes to get the chocolate to set a little quicker.

These cookies are fun to make, colorful, flavorful and will brighten up any holiday cookie tray. Enjoy!

IMG_2245


Peppermint Twist Kisses…

  • Servings: 3 Dozen Cookies
  • Difficulty: Easy
  • Print

INGREDIENTS:

1 cup unsalted butter at room temperature

2/3 cup sugar

2 egg yolks

1 tsp. peppermint extract

1 tsp vanilla extract

2 1/2 cups flour

1/2 tsp. salt

Red food coloring

36 chocolate kisses (1 bag will give you more than enough)

DIRECTIONS:

In a large mixing bowl cream butter and sugar. Add the egg yolks one at a time and blend. Add the extracts and mix well. Combine the flour and salt. Gradually add the dry ingredients to the wet ingredients. Mix well but do not over mix. Divide the dough in half. Tint one half of the dough with the red food coloring. Wrap both halves individually in plastic wrap and refrigerate for at least one hour.

Preheat the oven to 350 degrees. Divide each half of each dough into four equal portions. Shape each portion into a 9 inch log. Place one red log next to one white log and gently twist them together to create on swirled log. (see picture above). Gently roll both together to create one log. Cut each log into pieces approx. 1 1/8 inches thick. Roll each segment into a ball and place on an ungreased cookie sheet. Flatten each ball slightly with the bottom of a glass.

Bake at 350 for 10-12 minutes or until the edges are lightly browned. Press chocolate kisses into the center of each warm cookie. Remove to a wire rack and let cool. (once slightly cooled you can put the cookie on a flat sheet into the freezer for a few minutes to help the kisses set faster).

IMG_2250


QUICK GUIDE TO OTHER HOLIDAY COOKIES: (just click on the title underneath the picture)


Chicago Style Deep Dish Pizza…

I was born and raised in Chicago. In fact, I spent most of my life there. And I know that quite often if someone says they are from Chicago you eventually find out they lived in one of the adjoining suburbs. But not me. I was born on the South Side, raised in Brighton Park went to college in Illinois and moved to the North side when I got my job with the Chicago Park District. I lived on the North Side in the Lake View area until we moved from Chicago in 1999.

I live right outside of Boulder, Colorado now and although this is God’s country there are certain things I will always miss about Chicago. I miss the various modes of transportation in Chicago, especially cabs. I miss the diversity of Chicago, it doesn’t really exist here to the same degree. And I miss the food in Chicago – the restaurants are beyond compare and often within walking distance of where you live.

I think two of the hallmark foods associated with Chicago are hot dogs and pizza. There are strict rules you must follow when preparing and eating these culinary delights and are they ever worth it. Every once in a while I get such a taste for a Chicago-style hot dog or some deep dish pizza. You just can’t find anything comparable here.

IMG_1958

Pizza Ingredients…

So it was to our delight when a friend of ours emailed us and said he saw online the recipe for deep dish pizza from one of the most renowned pizza parlors in Chicago. The recipe was published by a disgruntled employee. It’s my understanding that it was only online for a short time, but time enough for some to grab hold of it. Our friend was one of them and he emailed the recipe to us.

We’ve made this several times and each time we get better at it. And beyond compare, this tastes exactly like the pizza we used to get in Chicago. So it is my pleasure to share it with you and also to give you my lessons learned after making it for several years.

RECIPE RATING: A++++++ If you love Chicago style deep dish pizza you will LOVE this. We could not believe how good it was when we first made it. Nor could we believe how it tasted exactly like the pizza we used to get at one of the most well known pizza establishments in Chicago. I won’t name it so that I can share the recipe with you. This pizza is to die for! You simply must try it.

IMG_1953Lesson Learned 1 – Invest in a deep dish pizza pan: We use a pizza pan that is twelve inches in diameter by 2 1/2 inches tall. It is the perfect size for this recipe, crust and all. When you get it, make sure you season it before you use it. If the pan does not come with seasoning instructions, just go online and look up how to season a pizza pan. Our pan is so well seasoned that the pizza pops right out. This type of pan is a must for this pizza recipe.

IMG_2454Lesson Learned 2 – Follow the recipe down to the letter: If you want the pizza to taste like Chicago style pizza, you cannot stray from the basic ingredients. The only culinary license you have are the “toppings” so to speak. By that I mean will it be only a cheese pizza, sausage and mushroom, will you add green peppers or olives? That you can choose. But the basics must remain the same. One of the key ingredients is the sauce (or gravy as the true Italians call it). There is a very specific brand of sauce you must use and, at least out here in Colorado, it is not available in local grocery stores. It is called 6 & 1 All Purpose Ground Tomatoes with added extra heavy puree. For those of you living in Colorado you can find it at Valentes Italian Deli in Westminster. For my Chicago friends, I am sure if you have an Italian Deli near your home they will have it. The owner of Valentes told me that people drive from four different states to pick up cases of this stuff. And you must use only this. Otherwise you will not get the consistency or flavor that you want. Regular canned tomatoes from the grocery store are too watery for this recipe. 

Lesson Learned 3 – Be patient: you may find that it will take a couple of times to master this recipe. Our challenge was the crust and getting it so that it wasn’t too thick. Eventually we figured out how to roll it out so that we had very little adjusting to do when fitting it into the pan. For us, making the dough was easy but getting it to fit in the pan and not be too thick was the challenge. All I can say is that this recipe is definitely worth the trial and error for putting it together, especially if you love Chicago style deep dish pizza.

Anyone who has ever lived in Chicago or loves Chicago style deep dish pizza will love this recipe. Feel free to pass it on. It’s a great way to get great Chicago pizza no matter where you live. Enjoy, and I’d love to hear from you once you’ve made this!

Chicago Style Deep Dish Pizza

  • Servings: 8
  • Difficulty: Medium/Hard
  • Print

INGREDIENTS:

1 cup water

1/3 cup oil (80% corn oil/20% extra virgin olive oil)

1 packet quick rise yeast (only if using the dough the same day, otherwise regular yeast)

1 Tbs. sugar

1/4 tsp. cream of tartar

3 cups bread flour

1/4 cup corn flour or corn meal (if using cornmeal sift before combining with bread flour) plus extra to sprinkle on the bottom of the pizza pan

1/2 tsp. garlic salt

1/2 tsp. dried oregano

1/2 tsp. dried basil

Sliced mozzarella, enough to cover the bottom of the pizza (do not used packaged grated mozzarella)

1 28 oz. can of 6 & 1 All Purpose Ground Tomatoes (see picture above)

Grated Romano and Parmesan blend (enough to cover the top of the pizza)

Other pizza ingredients: (if using sausage or pepperoni precook until 75% done – ingredients like green peppers, mushrooms, etc., cook and add as dry as possible so as not to make the crust soggy)

DIRECTIONS:

In a large bowl combine water (temp. no higher than 115 degrees for quick rise yeast), yeast, sugar and cream of tartar. Whisk until dissolved. Stir in oil. Combine flour and cornmeal and mix with yeast until consistency of dough is no longer sticky. Remove from bowl and knead. (I use my stand mixer with the dough hook and knead for about 4 minutes – if you don’t have a stand mixer knead by hand for about 10 minutes). Roll the dough into a ball and very lightly coat the outside of the dough with oil. Place the dough in a large bowl, cover with plastic wrap and a dishtowel and let rise for a minimum of 4 hours (or overnight if not using quick rise yeast).

Preheat oven to 450 degrees. Coat a 12 inch by 2 1/2 inch pizza pan with butter and sprinkle lightly with cornmeal. Punch down dough (it will rise quite a bit) and roll it out on a lightly floured surface to allow for 1/4 inch of dough all over the pan including the walls of the pan. Arrange the dough in the pizza pan. Place dough in the oven for 5 minutes. Remove the pan from the oven and cover the dough with mozzarella slices. Top with other ingredients (sausage, mushrooms, etc.) and top with the ground tomatoes. Lightly sprinkle with oregano, garlic salt and basil. Top with the Romano/Parmesan blend. Place back in the oven and continue baking for about 25 minutes.

Turn off the oven. Remove the pan from the oven and let rest for 5 minutes on the stove and then put the pan back in the cooling oven for about 5 minutes. (this is necessary for the pizza to set).

Slice and enjoy!

The dough will rise quite high...

The dough will rise quite high…

The pizza dough...

The pizza dough…

Roll out the dough to a quarter of an inch to cover the bottom and sides...

Roll out the dough to a quarter of an inch to cover the bottom and sides…

Dust the bottom of the pan with cornmeal...

Grease the pan with butter and dust the bottom with cornmeal…

Arrange the dough in the pan (it doesn't have to be pretty)...

Arrange the dough in the pan (it doesn’t have to be pretty) and cook for 5 minutes…

After baking crust for 5 minutes, top with mozzarella slices...

After baking crust for 5 minutes, top with mozzarella slices…

Add your preferred ingredients (we used sausage and mushrooms)

Add your preferred ingredients (we used sausage and mushrooms)

Top with sauce, seasonings and parmesan/romano mixture...

Top with sauce, seasonings and parmesan/romano mixture…

Chicago-style deep dish pizza

Chicago-style deep dish pizza

Chicago style deep dish pizza

Enjoy a slice tonight…

Happy Thanksgiving Leftovers…

Happy Thanksgiving to all. And as you begin to wonder what you’ll do with the mound of turkey leftovers you’ll soon have in the refrigerator, think about making Shepherd’s Pie Turkey style(click on the red colored link for the recipe and lessons learned). 

Shepherds Pie Turkey Style...

Shepherds Pie Turkey Style…

I am thankful for everyone who takes the time to read this blog. Hopefully my lessons learned have helped you become more adept in the kitchen. Have a great Thanksgiving Day and thanks again for following this blog. It means a lot!

Soon I will venture into my holiday cookie baking ritual. Much more to come. Please feel free to share your favorite holiday recipes with me. I’d love to try some of them. Happy Thanksgiving!

And don’t forget:

cooking


Cranberry Brie Puff Pastry Bites…

In case you haven’t noticed the holidays are coming and with them the conundrums of what to make for those holiday parties. Last year I created a recipe for a fabulous crab dip that was a hit all season long. The only challenge with making that appetizer was the cost, $11 for a can of crab claw meat and that was the least expensive one I could find.

This year I wanted to make something different. I decided to venture into the realm of puff pastry as I’ve had some successes with it in the past, specifically making a salmon en croute. In researching various recipe options I came upon several recipes for combining brie cheese with cranberry sauce and puff pastry. That sounded divine. So I went about borrowing dribs and drabs of various recipes to create my own puff pastry appetizer. Here’s my rating and lessons learned:

Recipe rating: B+ with the potential to be an A+: I had never made anything like this before and I learned some valuable lessons while making it. This is a great appetizer but with some specific caveats you should follow in order to make them the best they can possibly be.

IMG_1859Lesson Learned 1 – You only need a small amount of brie: Having never made these before I was unsure as to how much brie to put into each puff pastry shell. I used the small side of a melon baller to portion out the brie. Next time I will use half that amount. The first batch I made the brie ran over the sides of the puff pastry and not much was left inside. The second batch I made I used a little less (I could have even used less) and the outcome was much better. (I found a wheel of brie at Costco for a little over $7.00. I had more than enough for the appetizers with plenty left over.) You want to make sure that the brie and cranberry sauce meld together and not just have cranberry sauce with a hint of brie, which was what I had. Anyway, a valuable lesson learned for the next time I make them.

The same applies to the cranberry sauce as well. Use only a small amount as you don’t want it to overpower the brie. Err on the side of less is more, especially since the pastry puffs up so much in the oven.

Lesson Learned 2 – Getting the desired result when baking puff pastry: In my mind there are two tried and true rules for successfully making puff pastry – one, a very hot oven and two, applying an egg wash. Most of the recipes I read said to bake these bites at 375 for 15 minutes. I should know better. The puff pastry was nowhere near done by that time. When I make my salmon on croute I bake it at 400 for 20 minutes and the puff pastry comes out perfectly. Why should this be any different. Needless to say at 15 minutes the puff pastry was nowhere near browned and I wound up having to keep them in the oven for an additional 10 minutes. Next time I will bake these at 400 and check them at 15 minutes. Lesson learned – follow my instincts and not necessarily what is suggested in any given recipe.

IMG_1848The recipe is made in a mini muffin pan. I found that cutting the puff pastry in thirds and then into twelve equal squares still gave me a little too much puff pastry per appetizer. I wound up cutting off about 1/8 inch off the sides so that the squares would not abut each other in the pan. You could probably fold the pastry more in the muffin cup to prevent this as well. I try to work with the pastry as little as possible so as not to get it too warm. You may have to play with this a little until you figure out what works for you.

Also no recipe I researched said anything about using an egg wash to enhance the browning of the puff pastry. To me this is elementary but you cannot assume that everyone knows this. An egg wash on puff pastry or pie dough gives the dough a gorgeous color that it cannot get on its own within the baking time allotted. So always brush on an egg wash when using puff pastry to get a nice golden brown color.

IMG_1841Lesson Learned 3 – Make your own homemade cranberry sauce: To me, making your own cranberry sauce is like making your own apple sauce – store bought simply can never compare. And it is so easy to make. If you don’t have your own recipe – just click on “cranberry sauce” and you can make my recipe. It is so easy and so flavorful. You’ll never buy canned again. Plus you will have some delightful left overs to serve as a side dish or even as a spread on sandwiches. Divine!

Lesson Learned 4 – Serve them warm: I read many different versions of this type of recipe and many of them said in the comments that you can serve these warm or cold. I made these and then brought them to a party by which time they were no longer warm. I can guarantee you that although they tasted ok they were divine when they were warm. So if you’re looking for a cold appetizer to bring to a holiday gathering, bring my crab dip and not this one. But if you have the ability to serve a warm appetizer, this is the one. I cannot attest to how these would reheat in a microwave. I’m thinking that a microwave and puff pastry just don’t mix. If you have any tips regarding that, please feel free to comment. But trust me, these are much much better served warm.

I am definitely trying this recipe again. Even with the few slip ups I had the taste was fabulous. It seems you just can’t go wrong when puff pastry is involved. Try this one and let me know what you think!

Image copy

Cranberry Brie Puff Pastry Bites…

  • Servings: 24 Individual Pastries
  • Difficulty: Medium
  • Print

INGREDIENTS:

1 package frozen puff pastry

1/2 pound brie (maybe even a little less)

1/2 cup cranberry sauce

1 egg

Splash of water

DIRECTIONS:

Let puff pastry sheets thaw for at least 2-3 hours in the refrigerator or overnight. Preheat the oven to 400 degrees. With a sharp knife or pizza cutter, cut the puff pastry along the folded lines. Cut each strip into four equal size squares. Using a mini muffin pan, press the puff pastry into each muffin cavity.

Put a small amount of brie in the cavity and top it with a small amount of cranberry sauce. Whisk the egg and water in a small bowl and brush the edges of the puff pastry with the egg wash. Bake for 15 minutes or until the puff pastry turns gold brown.

Remove from muffin pan and let cool for approximately 5 minutes before serving.

IMG_1869

IMG_1899

IMG_1907

IMG_1910

Pan Fried Cod With Lemon Butter Sauce…

My husband and I have gotten into eating more fish lately and so I’ve become a student of preparing fish. Baking, broiling, grilling – you name it, I’ve been trying it. I will be the first to admit fish is tricky and the only advice I can give is to keep making it until it becomes more intuitive. Don’t be afraid to flip it back on the heat if you find it is not cooked through. I would much rather do that than serve overcooked fish. You can’t take that back. Preparing fish in an art that comes about from trial and error. But I guarantee its worth the blood, sweat and tears.

Lately I’ve made a lot of fish filets, mostly pan frying them and I think I’ve got it to the point where I’ve learned how to judge when the fish is cooked. Normally I try to buy a filet that is between a 1/4 and 1/2 inch thick. That way I know that about 3 – 4  minutes on each side under medium high heat will do the trick.

What’s great is grocery stores are now stocking more fish both fresh and flash frozen. The filets I’ve been buying are flash frozen and shrink wrapped and I find they thaw and cook beautifully. The only fish that I’ve tried a fews times that doesn’t seem to hold up well in this process is swordfish. Regardless of what I do it always seem to turn out tough. So if I plan on serving swordfish I buy it fresh. Otherwise fish like, grouper, salmon, cod, flounder, halibut and the like all seem to hold up well being flash frozen. It’s a great convenience when you decide at the last minute that you want to make fish for dinner, which was the case with me last night.

Recipe Rating – A: I’ll clue you in, the first few times I tried recipes like this the results were not nearly as good. As I mentioned earlier, preparing fish is something of a acquired skill. The only thing I will tell you is to err on the side of undercooking versus overcooking. That way you can always flip it back in the pan if need be. I would also advise that if you are not a seasoned cook to avoid serving fish at a dinner party. Be patient. Wait until you’ve mastered the skill of preparing fish before you venture into doing that. Don’t set yourself up for failure. And don’t let what I’m saying make you shy away from fish. It is definitely worth it to master this skill!

IMG_1715Lesson Learned 1 – Preparing the fish: This recipe has a very simple preparation for the fish. After the fish thawed and I removed it from its shrink wrap, I took paper towels and dried the fish thoroughly. Then I dusted the fish with flour on both sides and seasoned it. This time I used a Penzy’s seasoned blend called “Forward”. The blend consists of black pepper, onion, paprika, garlic, turmeric and spice extracts of celery, rosemary, thyme and basil. Although it sounds like seasoning overload, the blend actually created a nice all-purpose seasoning and it worked well with the fish. Don’t be afraid to experiment here. What I do is open my seasoning blends and smell them. I can tell by the smell what might overpower the fish. A nice all purpose blend works well to compliment the taste of the fish, as it did in this case.

Shallot and Garlic Sauted in White Wine and Lemon Juice...

Shallot and Garlic Sauted in White Wine and Lemon Juice…

Lesson Learned 2 – Making the butter sauce: I have to admit making this sauce was rather easy. I discovered that starting it about 15 – 20 minutes before serving works well. I found it interesting that you sauté the shallots, and garlic in wine and lemon juice without using any oil or fat. You add heavy cream and butter near the end. At one point you are making the sauce while simultaneously cooking the fish, but at that point you’re only doing the finishing touch of adding the butter to the sauce, so it’s easy to multi-task. You can also make it ahead, just make sure to keep it warm on a very low flame. This is a very rich sauce. Be careful. You only want to add a little to the fish. You don’t want the taste of the fish to be lost in the sauce. Add just a little and you will have a decadent delight. The recipe below is more than enough for two people. You can easily double it if you plan to serve more people.

The Finished Butter Sauce...

The Finished Butter Sauce…

Lesson Learned 3 – The power of garnish: I’ve said this before but it’s worth repeating. You eat with your eyes first. I can’t tell you how many times I get comments like, “that looks delicious!” Now I can understand how something tastes delicious but I’m not sure how delicious can be determined by your eyes. But in reality it is, and I’ve found one of the best way to dress up a dish is to garnish it with parsley or chives. Just that pop of color adds to the “looks delicious” factor. Adding garnish is so easy and creates a visual excitement before the dish is ever tasted.

IMG_1742

I served steamed broccoli and cauliflower along with Trader Joe’s chicken fried rice with the cod (BTW, that chicken fried rice is very good and easy to prepare).  The meal was a hit. A friend of mine posted on Facebook that cod has a bad rap and I tend to agree. I’m not sure why. It is a mild white fish that can be prepared in a variety of ways, is complimented by a variety of seasonings and is relatively inexpensive compared to other fish. So, don’t shy away from it. This recipe will work well for any white fish like halibut or grouper. Just make sure you don’t overcook the fish. You want the fish moist, tender and flaky. And when you add that butter sauce, well all I can say is it’s to die for!

Pan Fried Cod With Lemon Butter Sauce

  • Servings: 2
  • Difficulty: Medium
  • Print

INGREDIENTS:

Lemon Butter Sauce:

1/2 cup dry white wine

1/4 cup fresh squeezed lemon juice

1 shallot. chopped

1 large clove garlic, minced

1 large dash of Worcestershire sauce

1/4 cup heavy cream

1 stick of butter

Salt and pepper to taste

A dash of hot sauce, if desired

For The Fish:

2 cod filets between 1/4 and 1/2 inches thick

1/4 cup all purpose flour

Spice Blend of Choice (I used Penzy’s spice blend called “Forward” – see reference in blog)

1 Tbs. olive oil

1 Tbs. butter

Salt and pepper

Fresh parsley or chives for garnish

DIRECTIONS:

Begin by preparing the butter sauce. Heat a sauce pan over medium high heat. Add the wine, lemon juice, garlic and shallots. Cook for about three minutes or until the shallots turn translucent. Add the Worcestershire (and hot sauce if desired – I did not add hot sauce) and simmer until the mixture becomes syrupy.

Stir in the cream and cook for about 1 minute. Whisk in the butter a few pats at a time until it becomes fully incorporated. Serve immediately or keep warm until ready to serve.

In a large skillet melt the butter and olive oil. On a plate mix the flour with some salt and pepper. Pat the fish dry with paper towels. Dredge both sides of the fish in flour. Shake off the excess. Sprinkle the spice blend on top of the filets. Once the skillet is heated and the butter melted add the fish seasoned side down. Season the other side with the season blend. Cook the fish for 3-4 minutes on each side.

Pour a little bit of the sauce on the bottom of the plate. Put the fish on top and pour a small portion of the sauce over the filet. Garnish and serve immediately.

IMG_1736

Pan Fried Cod With Lemon Butter Sauce...

Pan Fried Cod With Lemon Butter Sauce…

Pan Fried Cod With Steamed Vegetables and Chicken Fried Rice...

Pan Fried Cod With Steamed Vegetables and Chicken Fried Rice…