Mashed Potato Cakes…

Give me my druthers and my carb of choice for any meal will always be mashed potatoes. I love potatoes any which way you can make them but when it comes to deciding how to prepare them, mashed potatoes is on the top of the list.

That being said, I obviously make a lot of mashed potatoes and because of that I normally have a fair amount left over. Leftover reheated mashed potatoes are fine, but I wanted to make something with a little more flair. So the other evening I ventured into making mashed potato cakes.

Lesson Learned 1 – Determining the correct consistency can be tricky. Everyone likes their mashed potatoes prepared a certain way. I like mine with a little more body, stiffer and less runny. Some people like their’s softer and “wetter”.  The key to creating a mashed potato cake you can work with is to make sure the consistency of the cake is not overly soft. So you may have to play with the amount of the ingredients a little until you get it right. For me, I beat one egg but only added a little bit at a time. I wound up using about 1/2 of a beaten egg to the potatoes. The same thing with flour. I probably used between 1/6 and 1/8 cup of flour. I added it gradually to make sure I got a good consistency but I also wanted to make sure the flour would not overpower the flavor.

potcakes

Lesson Learned 2 – Once you get them in the pan leave them alone: You will need the help of a hardened crust on the bottom to help you flip the cakes over. I fried mine over medium high heat for four minutes before flipping them. That could vary for you depending upon your stove and heat source. The good thing is you will be able to see the browning occurring. Give it at least four minutes before you try to flip them over. Then flip them quickly as the top part will be much softer than the bottom.

I think there are basically two specific things to keep in mind when making this recipe. First is getting the correct consistency for the cakes. Second is making sure you have a good crust on the bottom and flipping them quickly. But even if they don’t come out picture perfect, I can attest to the fact they are damned delicious!

Mashed Potato Cakes…

  • Servings: 4 Cakes - 2 Servings
  • Difficulty: Medium
  • Print

INGREDIENTS:

3 cups leftover mashed potatoes

1 egg, beaten and added gradually (you may not need the entire amount)

3 Tbs. chopped chives (or more if you like)

1/8 cup flour added gradually (you may not need the entire amount)

4 Tbs. butter

Salt and pepper to taste

Flour for dredging

DIRECTIONS:

Combine mashed potatoes and chives. Slowly add some of the beaten egg, continually checking the consistency of the potatoes to make sure they do not become too runny. Add the flour gradually and mix until the potatoes have a somewhat firm consistency (they will be soft, but you don’t want them runny – they need to be firm enough to hold the shape of a rounded cake).

Form the potatoes into 4 equal sized cakes (about 2 inches in diameter). Put some flour on a plate and dredge the cakes in the flour. Shake off the excess. In a medium size skillet melt the butter over medium high heat. Place the cakes in the skillet and cook for approximately 4 minutes on each side. Serve immediately.

IMG_3827

IMG_3819

Lasagna Roll Ups

I recently came across a recipe for lasagna roll ups. The recipe intrigued me because one of the go-to recipes I regularly make and really enjoy is chicken roll ups, so I thought making a lasagna version might be interesting. I particularly liked the idea of rolling the noodles with a ricotta mixture instead of layering them flat as in traditional lasagna. The original version of this recipe was for veggie lasagna which I knew would probably not be a big hit with my husband so I decided to work with the concept and create a recipe that would appeal to the carnivores of the world. But you can certainly make this a veggie dish and it will be fabulous.

Lesson Learned 1 – There is a lot of prep work to this recipe: If you’re not a prep person, this might not be the recipe for you. I find it cathartic to chop, mince, slice and dice but not everyone feels that way. You also have to cook the lasagna noodles ahead of time and arrange them individually on wax or parchment paper so they remain straight and don’t stick together before you roll them up with the cheese. The key to this recipe is making sure everything is prepped up front, including cooking and separating the noodles. If you do that, assembling it is a breeze. All I can say is that regardless of the work, this recipe is worth it.

IMG_3630Lesson Learned 2 – Cut all the veggies for the sauce to a similar size: This is important so that you don’t overcook or undercook any of them. Don’t throw them all in at the same time. Saute the onions, peppers and mushrooms first, then add the garlic followed by the squash. By the time the squash is crisp tender everything else will be ready as well.

Lesson Learned 3 – Use fresh mozzarella and shred it yourself: I think fresh mozzarella tastes better and it definitely melts better giving you that gooey consistency that we all love. It takes a little extra time but it’s worth it. Then again, if you don’t have the time or want to shorten the prep process you can always use shredded mozzarella.

Lesson Learned 4 – Establish a process for assembling this: You can organize cooking and assembling this recipe any way you want but the key is to be organized when you make it. Think through what process might work the best for you before making this dish. That way you won’t feel overwhelmed by all of the various steps.

Lasagnajpg

Lasagna Roll Ups

This recipe is enough to serve six. And although the lasagna noodles look small when you take them out of the package, they plump substantially when you cook them. One noodle roll up is more than enough for the average appetite.

The original recipe was designed to be frozen once assembled and baked off frozen at a later time. You can certainly do that but if you do make sure to use a meat thermometer to test the temperature of the center of the lasagna to ensure it’s heated all the way through.

My husband REALLY liked this recipe. In order to make it more carnivore friendly I added my homemade meatballs on top when I served it. I cooked the meatballs separately and just heated them through before I served them on top of the lasagna. If you don’t have time to make meatballs you can add partially cooked ground italian sausage to the sauce or just do what I did and use a sauce that already had sausage in it. Or you can simply leave it as a veggie dish. Any way you adapt this recipe, I know you will like it.

Lasagna Roll Ups…

  • Servings: 6
  • Difficulty: Medium
  • Print

INGREDIENTS:

PASTA:

6 lasagna noodles cooked according to packaged instructions

SAUCE:

2 Tbs. olive oil

2 cloves of garlic, minced

1 small onion, diced

1 small sweet pepper, diced

4-6 large cremini mushrooms, chopped small

1/2 medium size zucchini, diced

1/2 cup white wine

1 24 ounce jar of pasta sauce (I used Classico with sausage)

1 6 oz. can of tomato paste

16 oz. shredded mozzarella cheese

Grated parmesan for sprinkling on top

2 tsp. Italian seasoning

Salt and pepper to taste

RICOTTA FILLING:

16 oz. ricotta cheese

1/4 cup grated parmesan

1 egg

1 TBS. flat leaf parsley, chopped

Salt and pepper to taste

DIRECTIONS:

Preheat the oven to 375 degrees. Cook the noodles according to the package instructions. Drain them and place them flat on a wax or parchment paper lined sheet pan. Make layers of individual noodles as needed separating each layer with a sheet of wax or parchment paper. Set aside.

In a large skillet heat the olive oil. Saute the onions, mushrooms and peppers for about 2 minutes. Add the garlic and cook until fragrant (about 30 seconds to a minute). Add the zucchini and cook for a few minutes. Pour in the wine and salt and pepper the mixture to taste. Pour in the jarred sauce. Add a can of tomato paste. Stir until combined and warmed through. Turn off the heat and set aside.

Combine all of the ingredients for the ricotta filling. Taste before adding salt and pepper as the parmesan is salty. Salt and pepper to taste. Line up the flat lasagna noodles and divide the ricotta mixture into six equal portions. Spread the mixture over each flat noodle. Roll each noodle tightly with the filling.

Pour 1/3 of the sauce on the bottom of a 2 quart casserole dish. Sprinkle some mozzarella and parmesan over the sauce and top with a teaspoon of Italian seasoning. Place the rolled lasagna noodles on top making two rows of three each. Pour the remaining sauce over the noodles. Generously top with mozzarella and parmesan. Sprinkle the remaining Italian seasoning on top of the cheese.

Tent the casserole dish with foil and bake for 45 – 50 minutes. Remove foil and bake for additional 5 minutes or until the cheese on top is browned and bubbly. You can also turn on the broiler for the last 3 – 5 minutes and put the casserole dish under the broiler. If using the broiler, keep an eye on the casserole so as not to burn the cheese on top.

Let sit for 5 minutes and serve.

IMG_3724

The Best Ever Meatballs…

You know how some recipes catapult from being just something you try to a family and friends favorite that spans generations? Well this I can assure you is one of them. I first started making this recipe when I was in my twenties. At that time I could barely cook myself out of a paper bag. But I needed to make an appetizer for a family gathering and I decided to make meatballs.

Almost everyone I know has their tried and true meatball recipe and quite a few say to me that theirs is alright but not particularly special. Well search no more. This one is special and it’s been passed down from family to friends and friends of friends for decades. Every time I serve it at least one or more people ask me how to make it. This recipe is now multi-generational!

The first time I made this I was not very adept in the kitchen. I wasn’t learned about certain ingredients, proportions, substitutions, doneness – you name it, I didn’t have a clue. But my naiveté was the factor in making a mistake that kicked this recipe to the next level and made it ever so popular.

IMG_3579The original recipe came from a grocery store bought book, you know the ones you always see at the checkout counter. This one was called Pillsbury’s Cookbook of Family Favorites. You can see how old it is just by looking at the price, $1.25. When was the last time you spent that small of an amount of money on a book or magazine?

When I first read the ingredients there were two things that I did not have on hand. One was cracker crumbs and my husband suggested using bread crumbs instead. The second was sweet pepper flakes. I thought to myself hmm…, that shouldn’t be too hard to find. So off to the store I trudged in search of them.

When I got to the store, lo and behold, there were no sweet pepper flakes to be found. I endlessly looked and looked at the spices and herbs and the only thing I saw with “flakes” labeled on it was red pepper flakes. So I thought to myself, “well green peppers and red peppers are considered sweet peppers so that must be it” (you see what I mean). I bought the red pepper flakes and used them in the recipe.

Now I grew up in a household where very bland food was served. My father was not one for any kind of spices, he totally shied away from garlic and onions, and any kind of “heat” was never put in what we ate. But my husband’s family loves food with a kick, the more heat the better. So little naive me went on to make this recipe substituting red pepper flakes for sweet pepper flakes and it became a huge hit. The first time I made it I used two tablespoons of red pepper flakes and that produced some spicy meatballs, let me tell you. Since then I’ve toned it down to one tablespoon which gives a very nice kick and doesn’t leave you running for something cold to drink. But if you really like to bring on the heat use two tablespoons. It won’t hurt the meatballs that’s for sure.

Meatballs

I’ve been trying to think if I could share any lessons learned in making this recipe but it’s very straightforward even for the novice chef. Just follow the directions and you’ll be able to serve meatballs that will always be a big hit.

The technique is easy. All you need to do is mix the ingredients for the meatballs, form them into one inch rounds and bake them for 30 minutes. Then you put them in a casserole dish, add the sauce, cover and bake them for another hour. Now what’s easier than that?

I know in other blogs I’ve said that you just have to try this recipe, but you really must make this. It’s been tried and true over decades and its popularity came about because I, the cook who never could, made the most advantageous mistake I’ve ever made in the kitchen. Enjoy this one and share it with all of your friends!

The Best Ever Meatballs…

  • Servings: 2-2 1/2 dozen
  • Difficulty: Easy
  • Print

INGREDIENTS:

MEATBALLS:

1 lb. ground beef (I use 85% lean)

2 eggs, slightly beaten

2/3 – 3/4 cup bread crumbs (use a smaller amount and first and see if you will need more)

2 Tbs. organic minced onion flakes

1 Tbs. red pepper flakes (for really spicy meatballs add 2 Tbs)

9 drops Tabasco Sauce (you can add more if you like)

Dash of salt

SAUCE:

3/4 cup catsup

1/2 cup water

1/4 cup white vinegar

1/3 cup light brown sugar, firmly packed

1 1/2 Tbs. organic minced onion flakes

1 tsp. prepared mustard (I use Grey Poupon but you can use yellow mustard)

1 1/2 tsp. kosher salt

4 tsp. Worcestershire Sauce

6 drops Tabasco Sauce (you can use more if you like)

DIRECTIONS:

Preheat the oven to 325 degrees. Mix all of the ingredients for the meatballs. Shape them into one inch balls and layer them in an ungreased jelly roll pan. (You need a sheet pan with a lip on it so the grease does not run off). Bake at 325 for 30 minutes.

Combine all of the ingredients for the sauce. Place the meatballs in a casserole dish that you can cover. Pour the sauce over the meatballs, cover and bake for 1 hour. Enjoy!

IMG_3590

IMG_3610

Serving Suggestion: sprinkle with parsley and parmesan cheese…

Chicken Parmesan For Two…

Once again this young girl’s fancy turns to a chicken recipe, and this time with an Italian flair. What can you say about chicken parmesan that doesn’t scream delicious. Breaded chicken, marinara sauce, fresh basil leaves, provolone and parmesan cheeses. Sounds like a killer combo to me. And I like my little twist on this recipe, incorporating whole basil leaves under the provolone. This one got a two thumbs up from my husband, so you know it’s got to be good.

Lesson Learned 1 – You need to be organized for this recipe: This recipe has several different steps that can either work like a charm or throw you for a loop. Make sure you prep everything ahead and the process will be a breeze. Preheat the oven, set up the dredging station, grate the parmesan, lay out the basil leaves and provolone slices, have pans ready for the excess marinara and frying the breasts and so on. The key to success here is not only in the ingredients but also in the preparation.

Lesson Learned 2 – Grate fresh parmesan and don’t use the canned stuff: There is a difference. Grated fresh parmesan has a fuller, more robust flavor. It also melts better and tastes less salty. And it’s not that hard to do. I cut small pieces off a brick and put them in my mini food processor. I pulse the processor a few times just to get it started and once it appears the pieces have been broken down I just let the processor go. I guarantee you it’s worth the effort.

IMG_3349IMG_3360


Lesson Learned 3 – Use less marinara sauce than you think: You want to make sure the chicken doesn’t get too soggy. Use only a little bit of marinara in the bottom of the pan and spoon only about a tablespoon on top of it before adding the basil and provolone. Keep the leftover sauce warm on the stove and you can add more to the chicken when you serve it if you like. Or you can do what I did and use it to top a side of spaghetti.

IMG_3398

Lesson Learned 4 – Use fresh basil leaves if at all possible: The fresh basil leaves provide great flavor to the chicken. You can sprinkle the chicken with dried basil if that’s all you have, but fresh is so much better. Top the basil with a slice of provolone and you’re ready to go.

IMG_3404

IMG_3414

Lesson Learned 5 – You can use just one chicken breast for this recipe: I only used one large chicken breast for this recipe. I buy breasts whole with the bone and ribs attached and bone them myself. I halved one of the breasts and it left me with two perfect portions that were 1/2 inch thick. If you have thicker breast meat you’ll need to pound it down to 1/2 inch thick in order for the chicken to cook in the allotted time. Many people shy away from boneless skinless breasts because they think they’re too dry when in actuality they overcook them. Boneless chicken breasts can be very tender and juicy if cooked properly. Follow the allotted time in the recipe and you’ll have great results.

parmcollage

While I was making this my husband said, “Wow, that’s a lot of work.” For someone who enjoys the prep part of preparing a meal, I didn’t find that to be the case. But as I mentioned earlier, you definitely have to be organized when you make this recipe. Get everything ready up front so that all you’ll have to do is move seamlessly between each step of the process.

I’ve written this recipe for two people but it can be easily adaptable to 4 or more. You’ve got to try this and let me know what you think. It’s definitely worth it!

Chicken Parmesan For Two…

  • Servings: 2
  • Difficulty: Medium
  • Print

INGREDIENTS:

1 large boneless chicken breast, halved and pounded to 1/2 inch thick (if needed)

1 cup of flour

1 cup of bread crumbs, plain or seasoned

1 Tbs. italian seasoning

1 Tbs. garlic powder

1 cup of grated parmesan, halved

1 egg

Splash of milk

1 small jar of marinara sauce

4 large basil leaves

2 slices of thinly sliced provolone

Canola oil

DIRECTIONS:

Preheat the oven to 350 degrees. Set up a dredging station for the chicken with 3 separate dishes (I use paper plates for two of them and that works just fine). Combine the flour, garlic powder and italian seasoning on one plate. In a rimmed dish, beat the egg and milk together. Combine the bread crumbs and half the grated parmesan on another plate.

Dredge both sides of a chicken breast in the flour. Dip the breast into the egg mixture coating both sides. Dredge the breast in the bread crumb mixture and set aside. Follow the same process with the second chicken breast.

In a large skillet heat the canola oil until it looks shimmery. Use enough canola oil so that when the chicken is added it sizzles around the chicken. Add the chicken breasts and cook for 3 minutes on each side. Once done on both sides, place the chicken breasts on paper towels to absorb the excess oil.

Lightly coat the bottom of a baking dish with marinara sauce. Arrange the chicken on top of the sauce. Put a tablespoon of marinara over the each breast. Sprinkle the remaining grated parmesan on top of both breasts. Top each breast with two large basil leaves and place a provolone slice over the basil.

Bake the chicken for 15-20 minutes. Serve.

IMG_3446

IMG_3443

Serving Suggestion: chicken parmesan with garlic roasted asparagus and spaghetti


Strawberry Cream Cheese Loaf…

Now we’re seeing more and more strawberries in the grocery stores – the season is vastly approaching (and thank goodness because we’re all getting tired of snow). Yesterday I wanted to make something quick and sweet and decided on this particular loaf. This recipe is one that differs slightly from sea level to high altitude and I’ll write out both versions so you can successfully make it wherever you live. Regardless, this loaf is a sure winner. It is moist and not overly sweet – great for snacking or for dessert.

strawbread2

Lesson Learned 1 – Don’t over mix the batter: In order to keep this loaf moist you only need to incorporate the ingredients. Once they are, quit mixing! Loafs like this will get tough quickly if they’re over mixed.

IMG_3266Lesson Learned 2 – Cut the strawberries into small pieces: After removing the hull I cut the strawberries in half and sliced them. If the strawberry was larger, I cut it in half twice before I sliced it. Strawberries tend to be like blueberries when you bake them, they have a tendency to explode (as I like to call it) in the batter. If they’re too large when they explode your loaf will sink in on itself. In this recipe I used only 1 1/4 cups of strawberries, but you could easily use only 1 cup and still have a great loaf.

IMG_3286Lesson Learned 3 – Fold the strawberries gently into the batter: Strawberries break apart rather easily so you need to be careful when adding them. Fold them in as if you’re folding egg whites into a batter. That way you will have nice marbling and not a strawberry explosion.

Lesson Learned 4 – You may have to use an extra pan for all of the batter: This batter rises rather high. I filled a 9 x 5 loaf pan about two thirds of the way up and put the excess batter in a 3″ x 5″ mini foil loaf pan. If I hadn’t done that, the batter would have risen over the side of the larger pan. What’s nice about doing this is I had a small loaf that I could give as a gift to a neighbor and still had the larger loaf for my family. I recommend not putting all of the batter in one pan, but if you’re brave go ahead. I think you’ll find that if you do, it will run over the sides. If you put some batter in a small loaf pan, it only needs to bake for 30 minutes. The larger loaf takes 50 – 60 minutes.

For as easy and quick as this is to make, it’s a delicious sweet treat. Next time you’re in a pinch for time but want to make something fresh, this would be the loaf to make. Enjoy!

Strawberry Cream Cheese Loaf...

  • Servings: 12
  • Difficulty: Easy
  • Print

INGREDIENTS:

1/2 cup unsalted butter, softened

1 cup sugar (slightly less for high altitude)

4 ounces of cream cheese, softened

2 eggs, room temperature

1 tsp. vanilla

2 cups all purpose flour

2 tsp. baking powder (1 tsp for high altitude)

1/2 tsp. baking soda (1/4 for high altitude)

1/2 tsp. kosher salt

1/2 cup buttermilk

1 – 1 1/4 cups strawberries, diced small

DIRECTIONS:

Preheat oven to 350 degrees. Grease and flour (you can use an organic cooking spray as well) a 9 x 5 loaf pan and a 3″ x 5″ inch mini foil loaf pan. In a medium size bowl, mix flour, baking powder, baking soda and salt. Stir to combine. Set aside.

Using a electric stand mixer (or hand mixer) cream butter, sugar and cream cheese until soft. Add eggs one at a time. Mix in the vanilla.

Add the flour mixture to the butter mixture and mix until just blended. Add the buttermilk until combined. Do not over mix.

Carefully fold in the strawberries (the dough will be thick). Bake the small loaf for 30 minutes and the large loaf for 50 – 60 minutes or until a toothpick inserted in the center of the loaf comes out clean.

Let the loaf cool for at least 15 minutes in the pan before removing it.

IMG_3313

 IMG_3336

IMG_3459

Loaded Baked Potato Casserole…

I LOVE potatoes. As a friend of mine once said, “I never met a carb I did’t like.” That’s so true, but these days we know you need to balance your carb intake in order to stay healthy. Not an easy task for someone who was raised on meat and potatoes. But I’m trying.

I wanted to try a recipe like this for a while, so I justified it by serving it with baked cod and oven roasted asparagus. It turned out great and I was careful not to over indulge. So for all of my carb lovin’ friends out there, here’s one that you can add to your arsenal of recipes.

IMG_3125Lesson Learned 1 – Give the potatoes a head start: I know this and I still didn’t do it. It’s always best when making a potato casserole to cook the potatoes for about five minutes in boiling water. That takes the edge off of them. Because you cook this casserole for an hour and three quarters I didn’t think I would need to do that. Wrong. The potatoes were done but not as tender as I would have liked. So remember, give your sliced potatoes a bath in boiling water just until they start to soften slightly (no more than 5 minutes). Then drain them, being careful not to break them, and then put together your casserole. You’ll get great results.

IMG_3116Lesson Learned 2 – There can never be too much cheese: Originally I though this recipe would need two cups of cheese (1 of each type). Once I began to put together the layers I added even more (1/2 cup each). Make sure you get a good melting cheese like gruyere, havarti or monterey jack and generously cover the potatoes. You can combine that with some sort of cheddar or better yet be your own chef and experiment. I used a white cheddar gruyere blend combined with a marbled cheddar. It was delish.  I am writing the recipe from what I used, but you can certainly make substitutions.

This recipe is so easy and so good. It’s a great way to get the flavors of a loaded backed potato in casserole form. The leftovers are great as well. Just heat them in the microwave and serve. Enjoy!

Loaded Baked Potato Casserole 2

Loaded Baked Potato Casserole…

  • Servings: 4-6
  • Difficulty: Easy
  • Print

INGREDIENTS:

All natural cooking spray for the dish

2 large russet potatoes, sliced

1 large clove of garlic minced

3 green onions sliced diagonally

1 1/2 cup gruyer/cheddar blend, shredded

1 1/2 cup marbled cheddar cheese, shredded

6 slices hickory smoked bacon – cooked, drained and crumbled

1 cup whole milk

1 large egg

Salt and pepper to taste

2 tsp. fresh parsley

DIRECTIONS:

Preheat the oven to 375 degrees. Cook, drain and crumble the bacon. Slice the potatoes to 1/4 inch thick (use a mandolin slicer for the best results). But potatoes in a pan with cold water. Bring to a boil and cook for no longer than 5 minutes. Drain the potatoes immediately being careful not to break them.

Spray a stoneware tart pan with all natural cooking spray. Layer the potatoes in the dish, overlapping slightly. Sprinkle half the onions and garlic on top and season with salt and pepper. Cover the potatoes with half the cheese and sprinkle the top with half the bacon. Repeat with another layer.

In a separate bowl whisk the milk and egg. Add some salt and pepper. Pour the mixture over the potatoes. Sprinkle with parsley.

Cover and back for 75- 90 minutes or until the custard is cooked. Uncover and cook for an additional 10-15 minutes. Let rest for a few minutes before serving.

IMG_3172 2

 IMG_3184

Tips N’ Tricks: Knives

I’ve learned a lot about knives in the last few years. Knives are one of the most important tools in the kitchen. They can be your best friend or your worst enemy. And they can cost a lot of money. Knives, in my opinion, are an important investment for any cook but you need to know their uses, their construction and determine exactly what it is that you need and don’t need before making any decisions on what knives you should have. Again I need to add the disclaimer here that I work at Crate and Barrel. I learned a lot about knives by working there but I am not advocating for them or their products.

There are a wide variety of knife manufacturers out there and I am not recommending any brand. What I can tell you is there are certain characteristics common to all knives and you need to be aware of them in order to make informed decisions on what to buy and what to use.

The basics for all knives include:

  • The type of steel that is used
  • The concentration of steel in the knife
  • The angle to which the blade is honed
  • The types of knife/knives you need for your lifestyle and how you cook
  • The way to care for knives

THE TYPE OF STEEL:

German Steel

German Steel

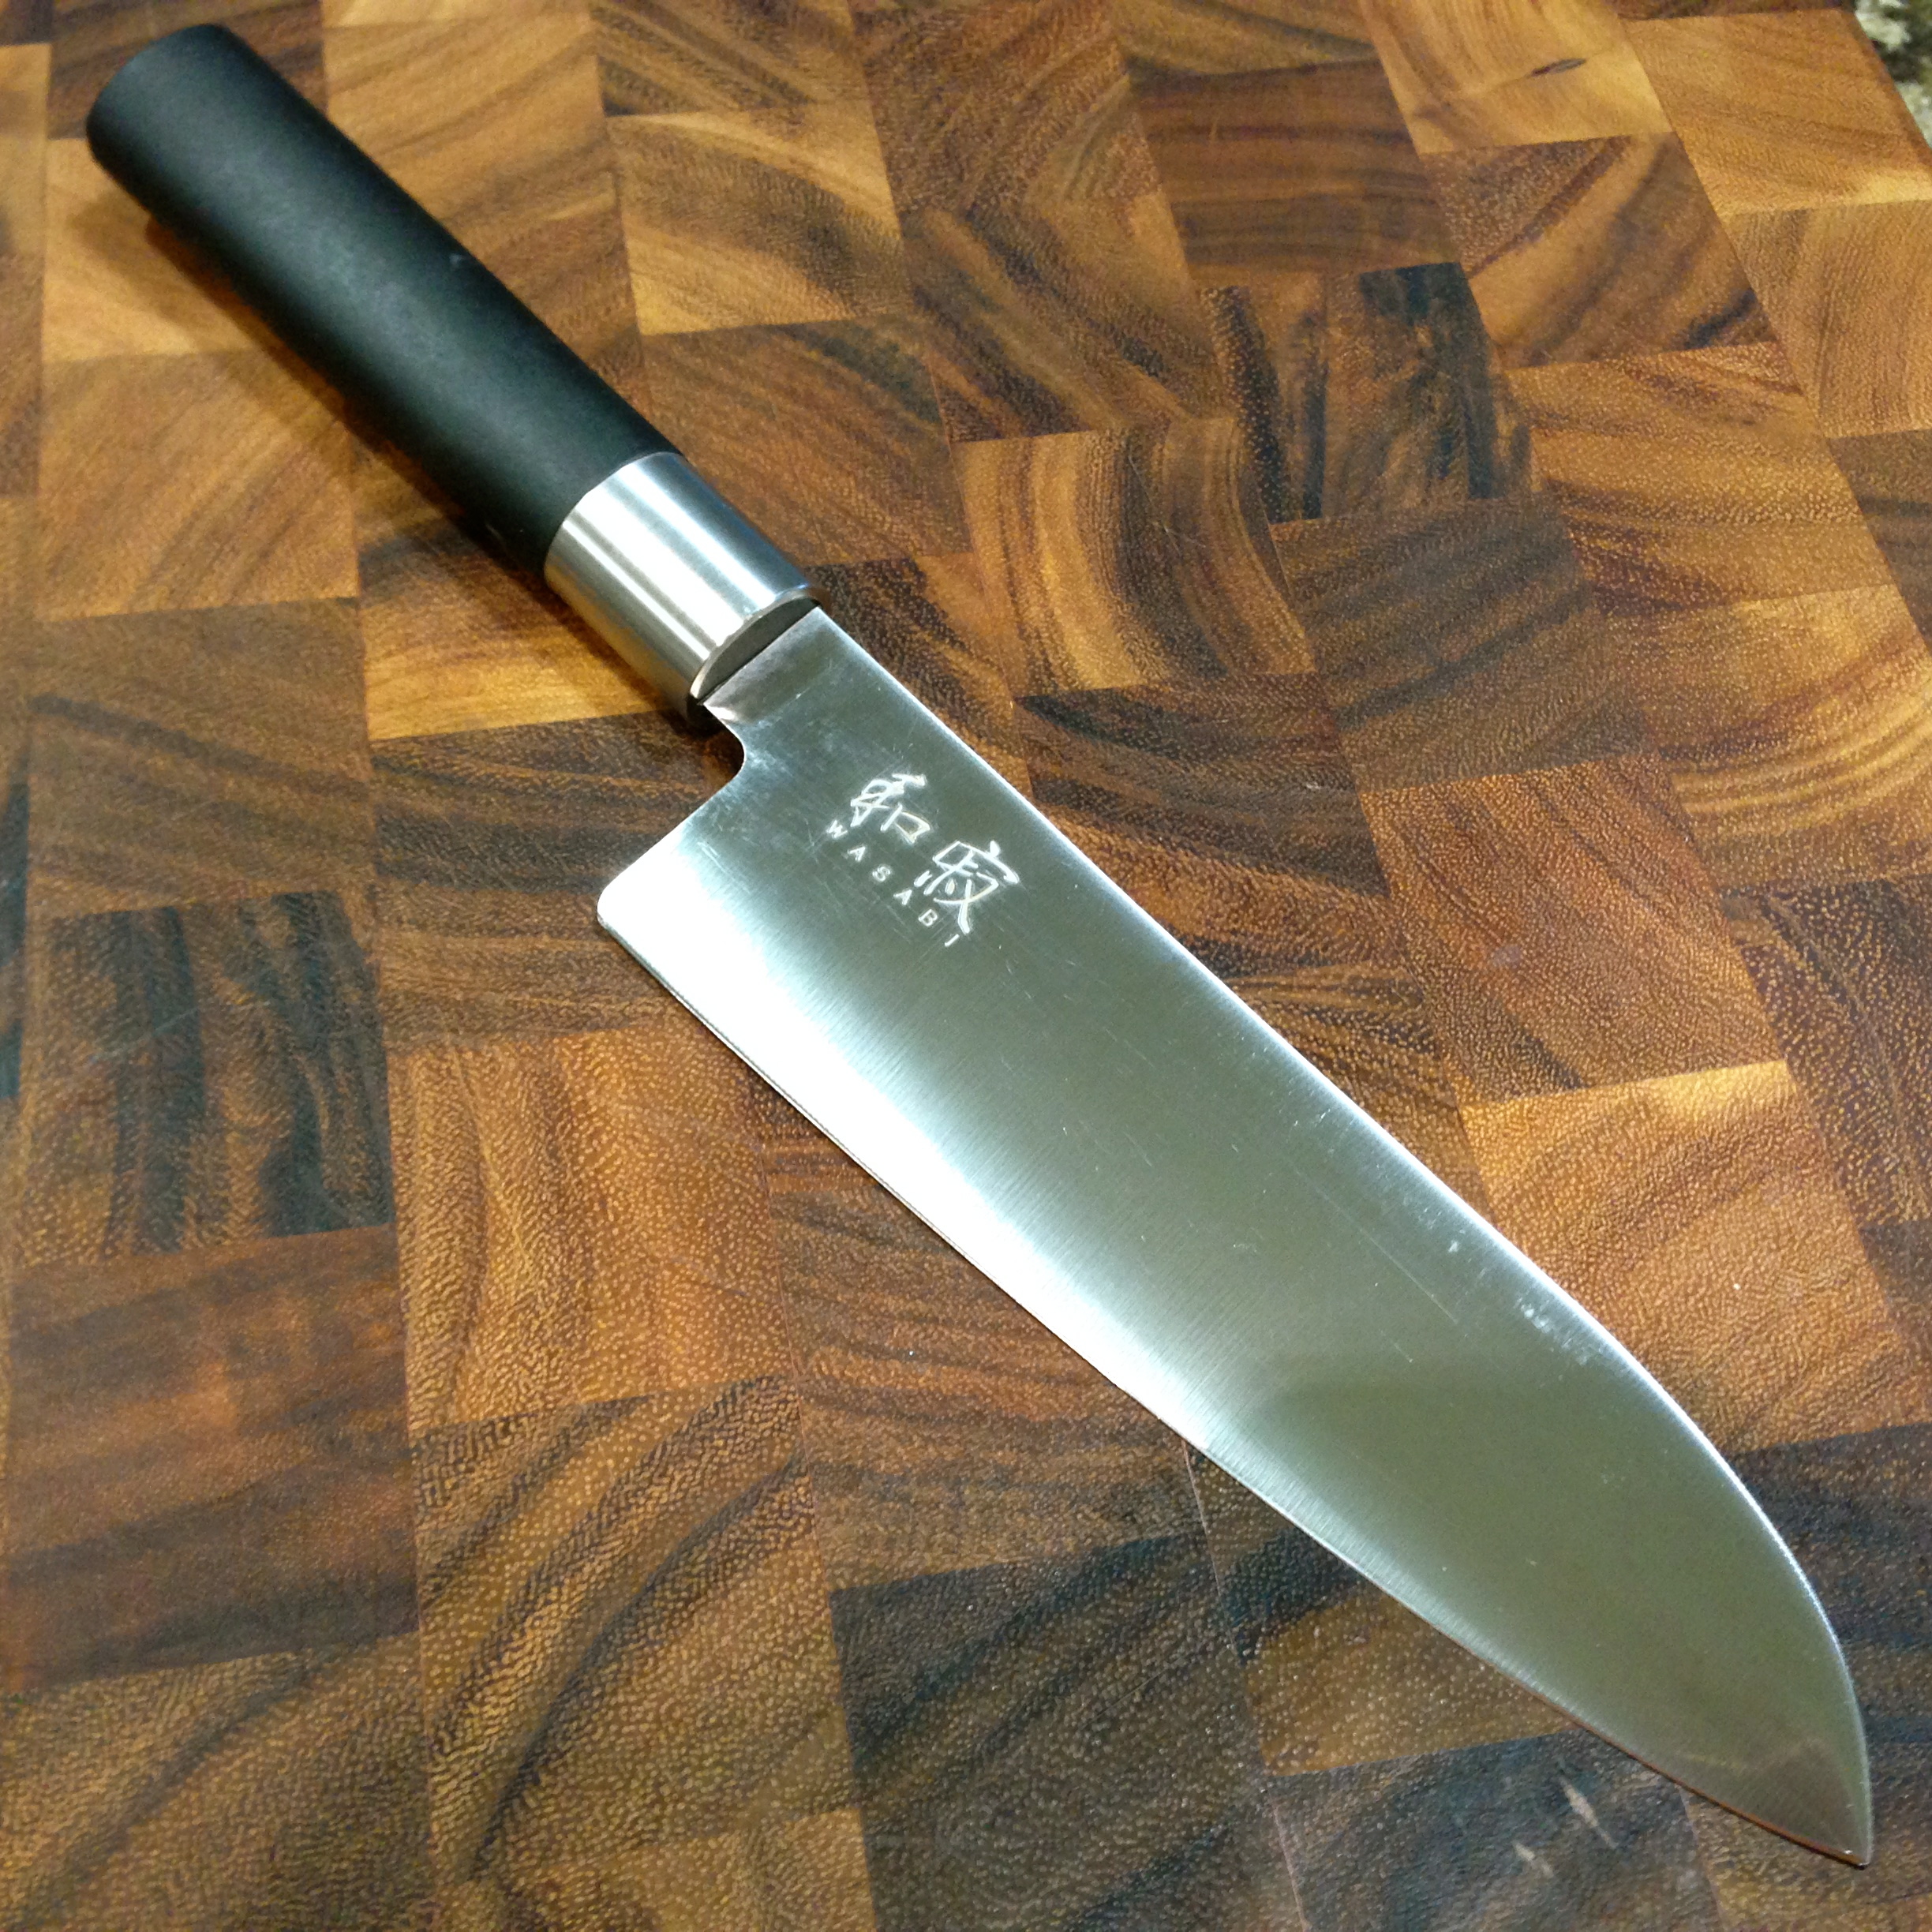
Basically there are two types of steel used in knife blades, standard and Asian. Standard steel,  sometimes called German steel, is a thicker heavier steel.  Asian steel is thinner. Looking at these pictures it is difficult to tell them apart, but when you see them and use them you will understand the difference immediately. So, why do you need to know this? For the burgeoning cook I personally would not recommend working with Asian steel knives. Because Asian steel is thinner if it’s not used properly it can pit or even break at the edge of the blade. Not that standard steel is exempt from pitting or breaking if not used properly, I just feel you have to be more careful with an Asian steel blade. Most cooks who are in a learning phase can tend to be a little heavy handed with their knives. Unless you really know what you are doing I would recommend, at least initially, staying away from knives made of Asian steel. They are very expensive and totally worth the money, but the edges can break easily if not used or cared for properly.

Asian Steel

Asian Steel

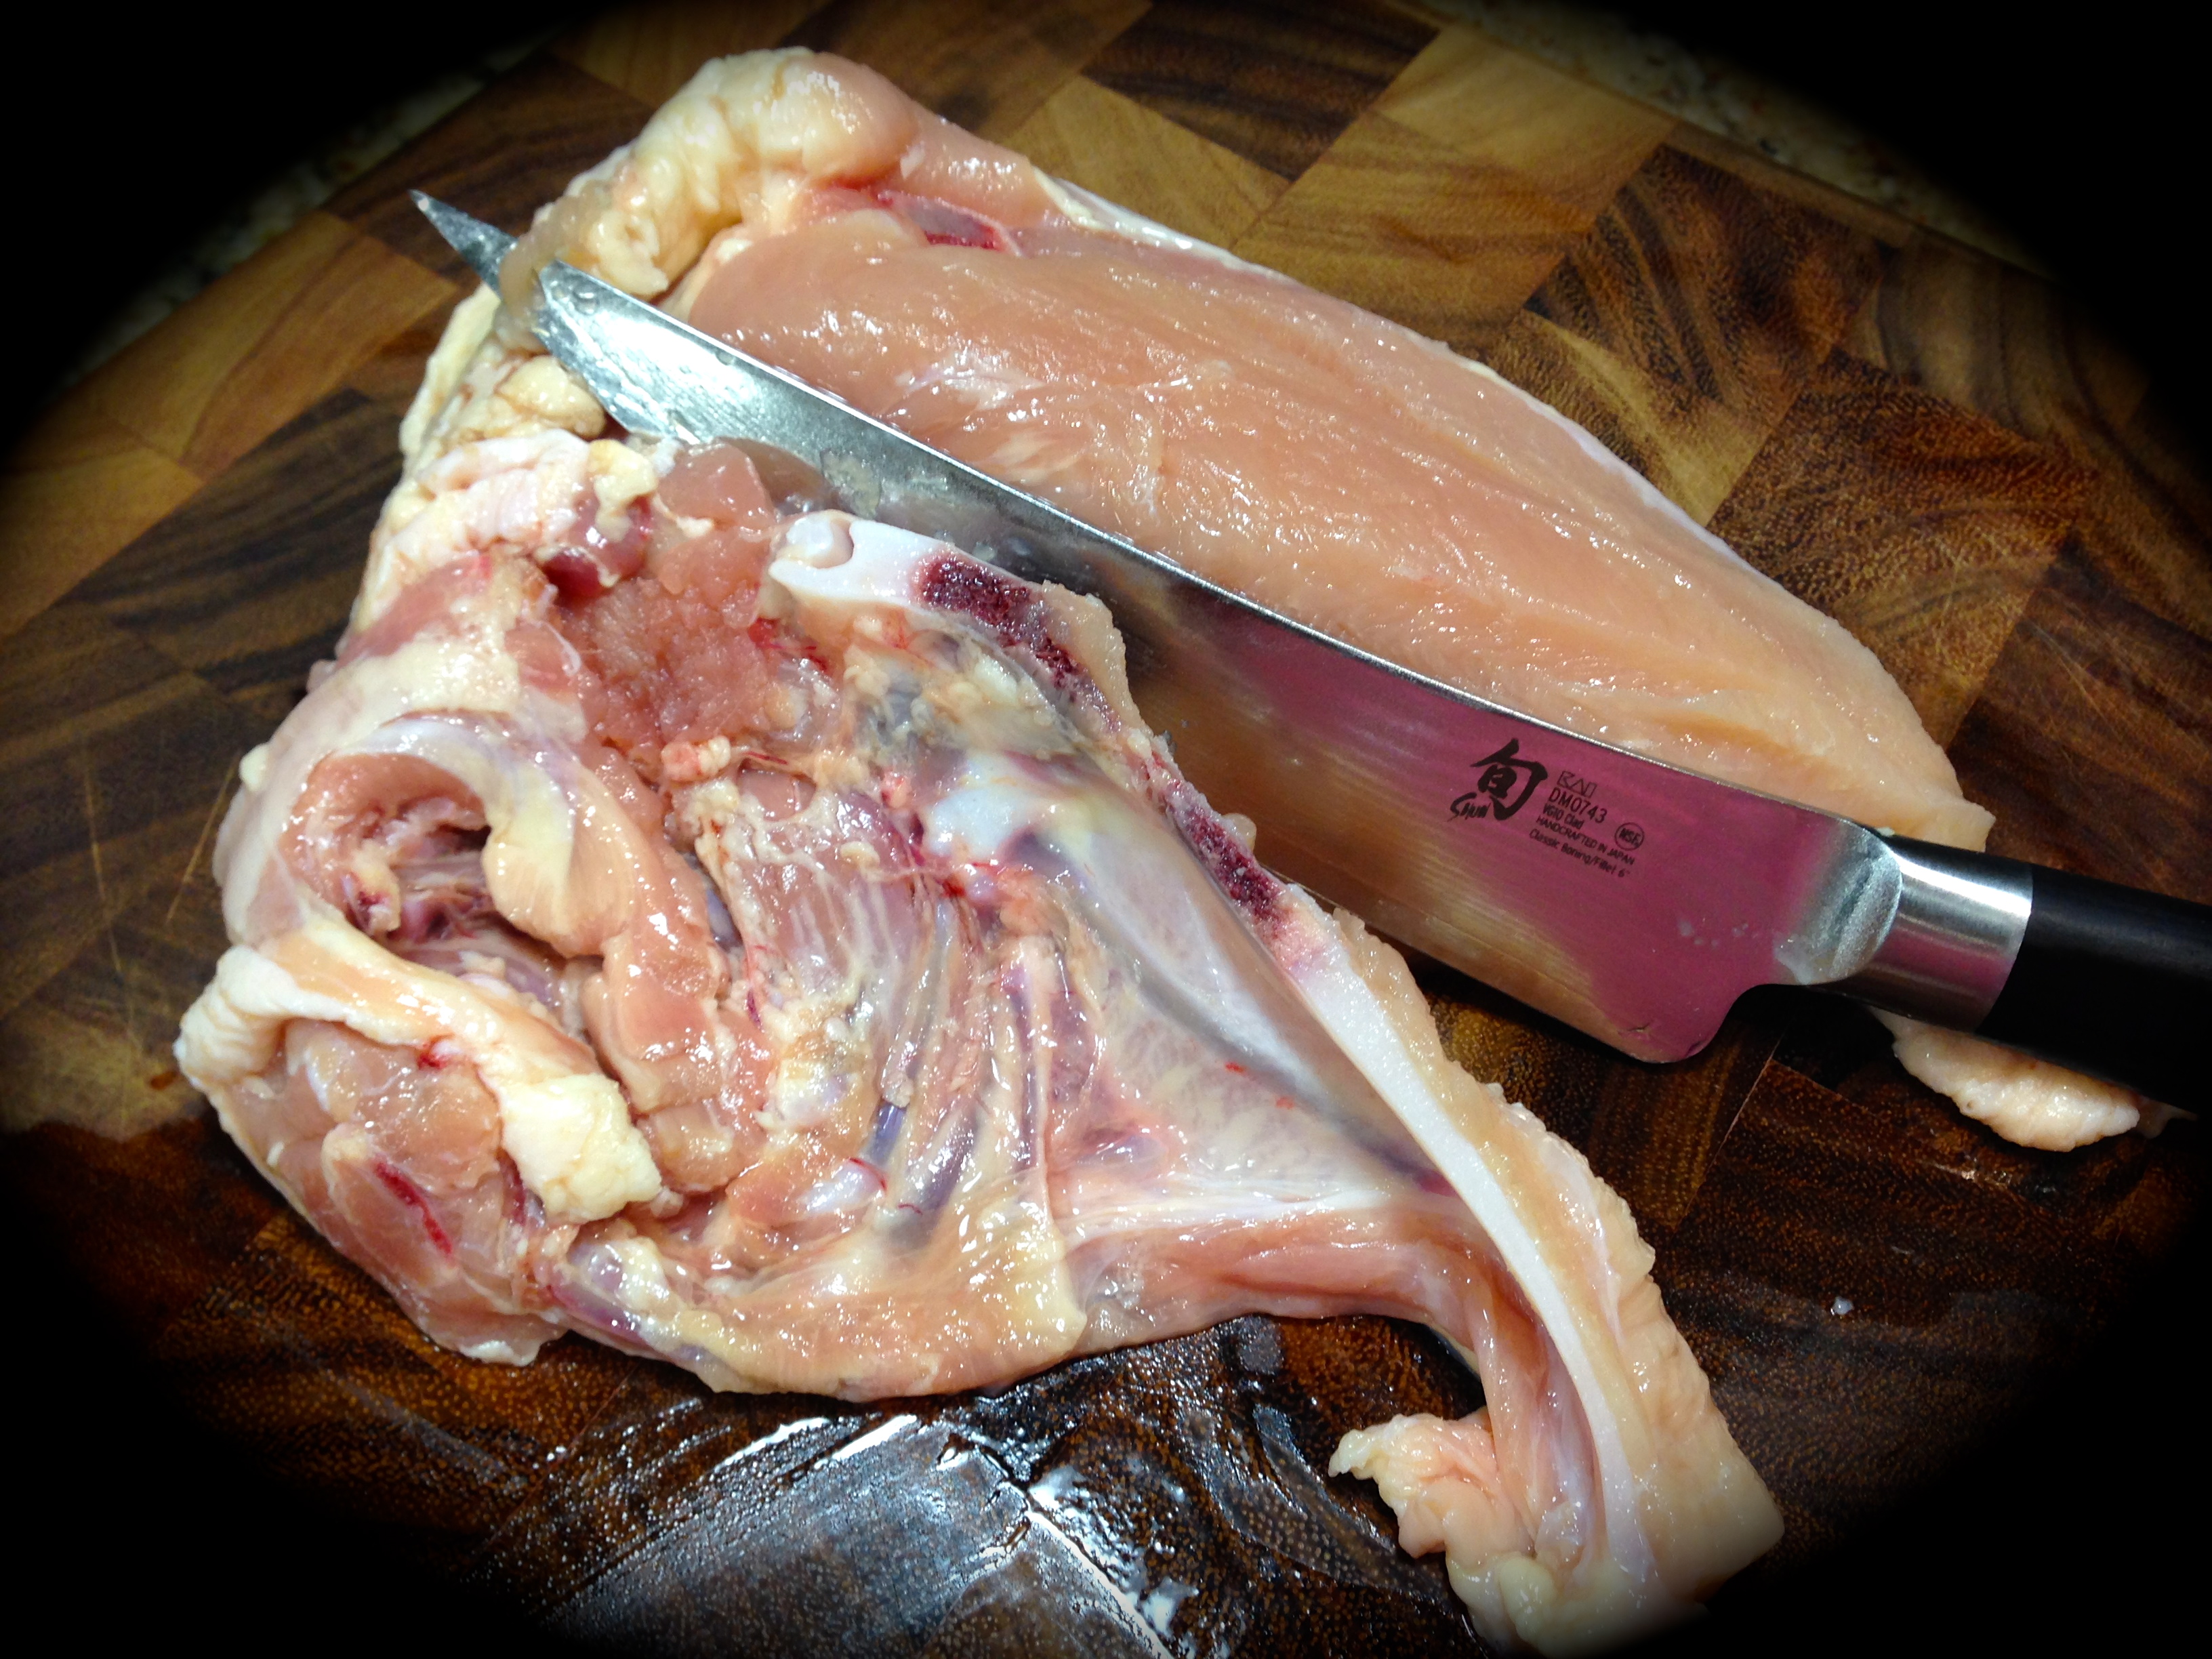
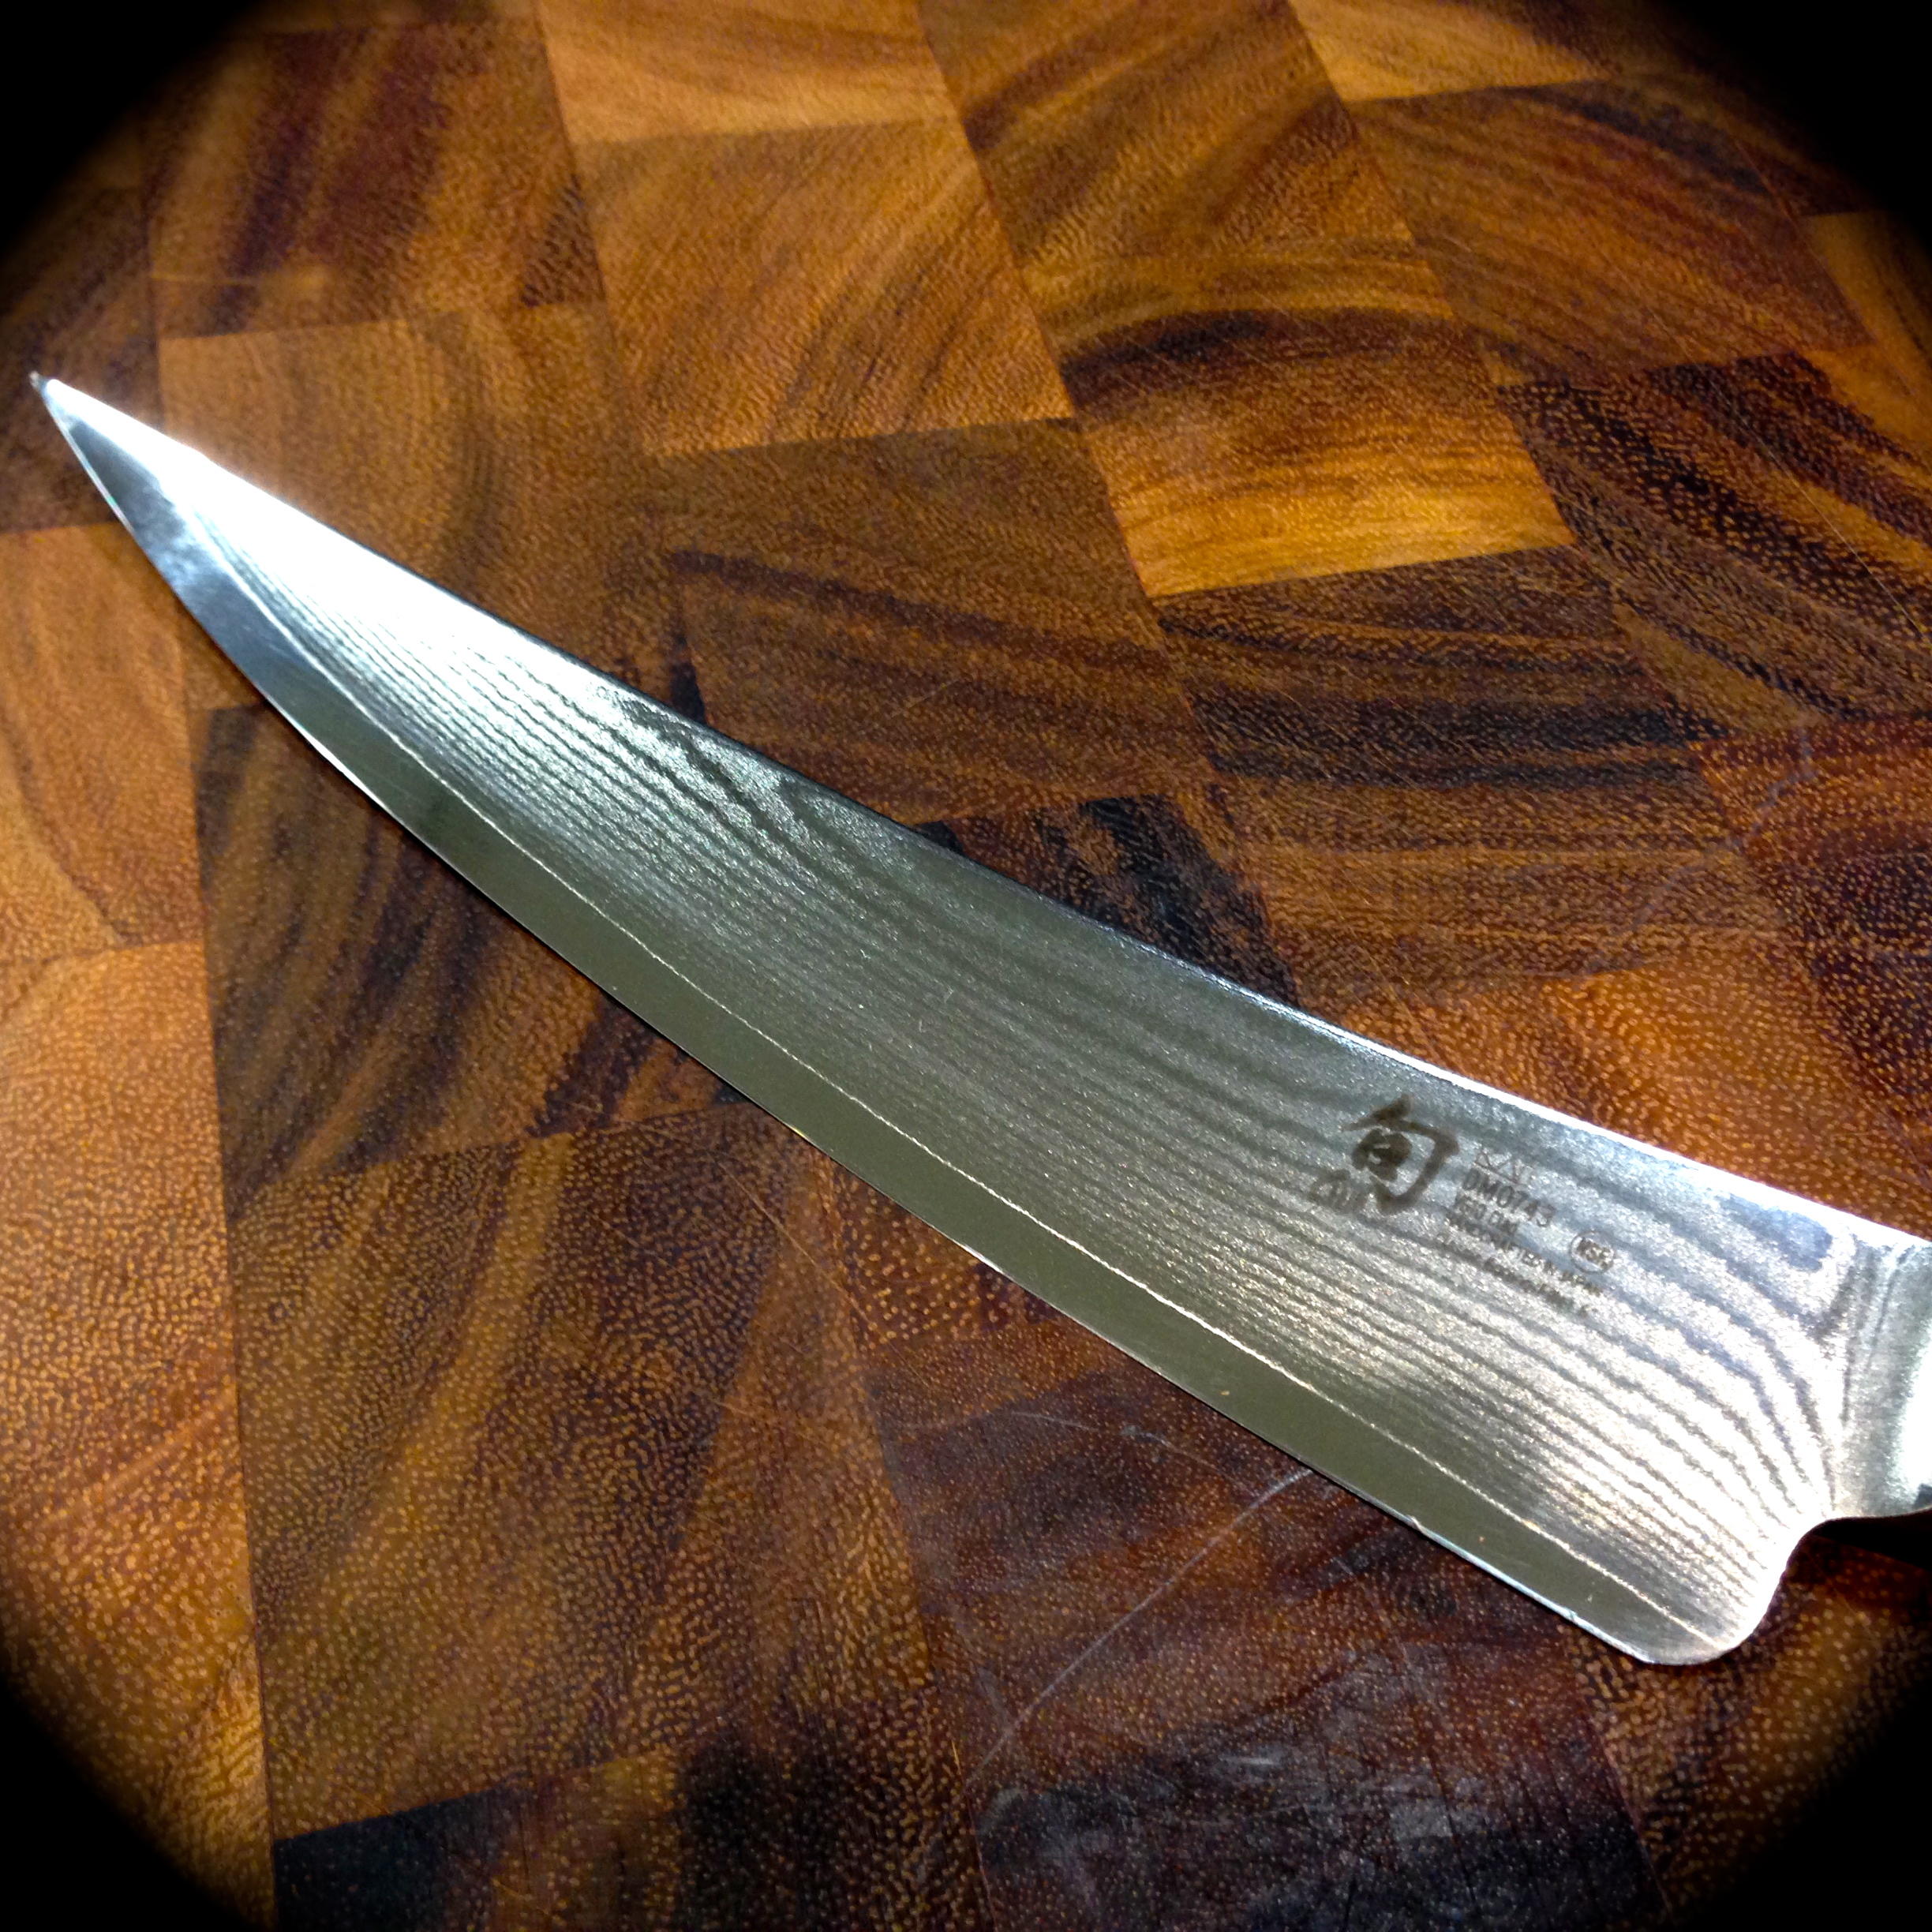
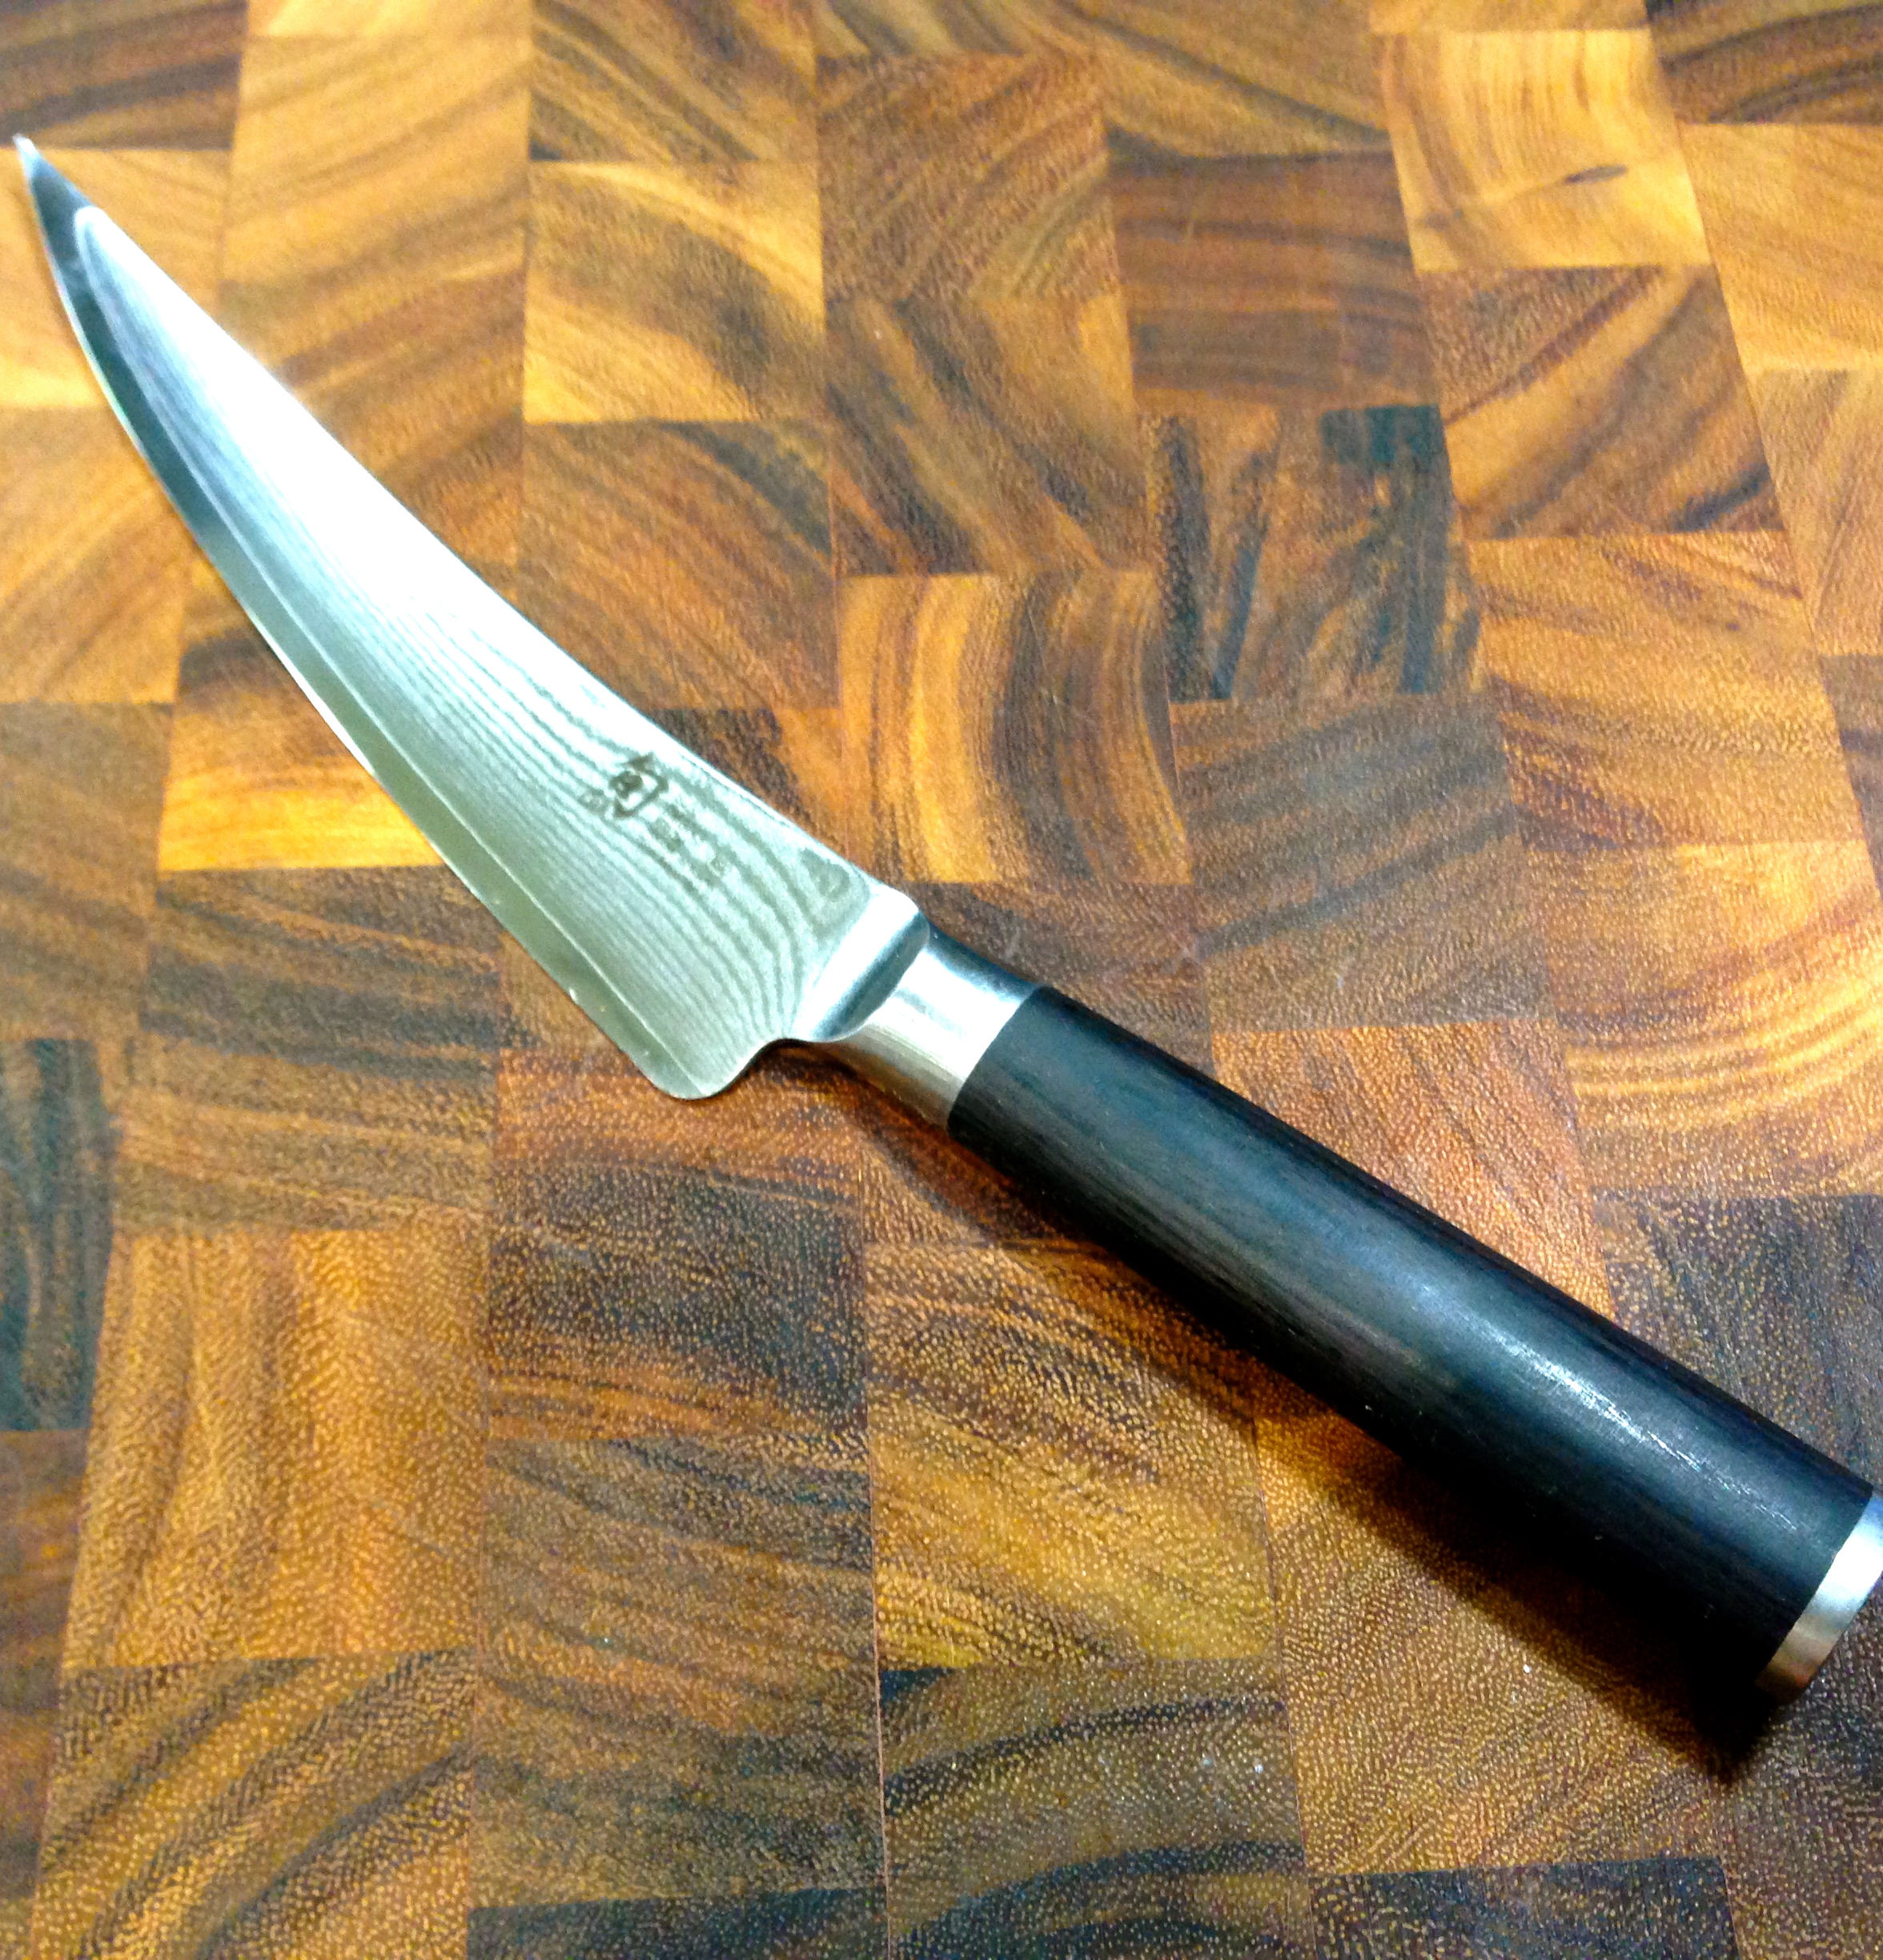
Even though I feel I know my way around the kitchen, I prefer German steel knives. This is simply my preference and has nothing to do with the quality or usefulness of either type. I know many cooks who prefer Asian steel knives. I like the feel of standard steel, it feels more substantive in my hand, and it works beautifully for how I cook and what I need. I will say, I do have a few Asian steel knives, namely a santoku and a boning knife. All santokus, whether German or Asian steel, are ground to the same fine edge (16 degrees). So I can choose whether I want the heavier feel of the German steel or the lighter feel of the Asian steel when I use a santoku (my knife of choice) and still have the finer ground edge. For boning I prefer the asian steel as I like the lighter feel and finer edge when I bone chickens and the like. Otherwise all the other knives in my arsenal are made of German Steel. The picture below is the blade of my boning knife. It is Asian steel, and even with the great care I give it you can still see some small pits in the edge of the blade. I hone it regularly (which I will get to in a minute) and use it carefully. The tip is also slightly bent. It still works beautifully but it reinforces my point of having to be very careful, or at least I do, using knives made of Asian steel. One thing I will tell you is the professional chefs I know tend to favor the Asian steel knives because of the lighter feel and the sharper edge. So don’t shy away from them if that is what you really want. Just remember not to hack with them and take good care of them.

Blade of my boning knife, Asian steel.

Blade of my boning knife, Asian steel.

Knowing the difference between the two, the other thing I recommend before buying knives is to go to a store where you can hold them in your hand. Everyone has a personal preference and you want to make sure the knife feels balanced in your hand and the weight and size of it works for you, especially if you plan to make a significant investment in cutlery.

THE CONCENTRATION OF STEEL:

This is so important and something that I did not learn until a few years ago. Inspect your knives carefully and look to see how much steel is in them. The price of knives is determined by two simple factors: the manufacturing process and the concentration of steel. If a knife is forged it will be more expensive than if it is pressed. A knife with a larger concentration of steel will be more expensive than one with a smaller concentration. Simple enough.

So why is this important? The amount of steel in a knife actually helps to balance it when it’s in your hand. There are some knives that only have steel in the visible blade and the entire handle is some sort of synthetic material like plastic. Those knives, although useful, will not be balanced in your hand as the weight of the blade is heavier than the weight of the handle. On the other hand, those knives will also be more affordably priced.

If you are looking to invest in some quality cutlery you need to look for a knife that has what is called a “full tang”. A full tang means that there is steel not only in the blade but also through the handle of the knife. There are various concentrations of steel in a full tang, but if a knife has a full tang, the way it balances in your hand will be significantly different than if there is no steel or only a little steel in the handle.

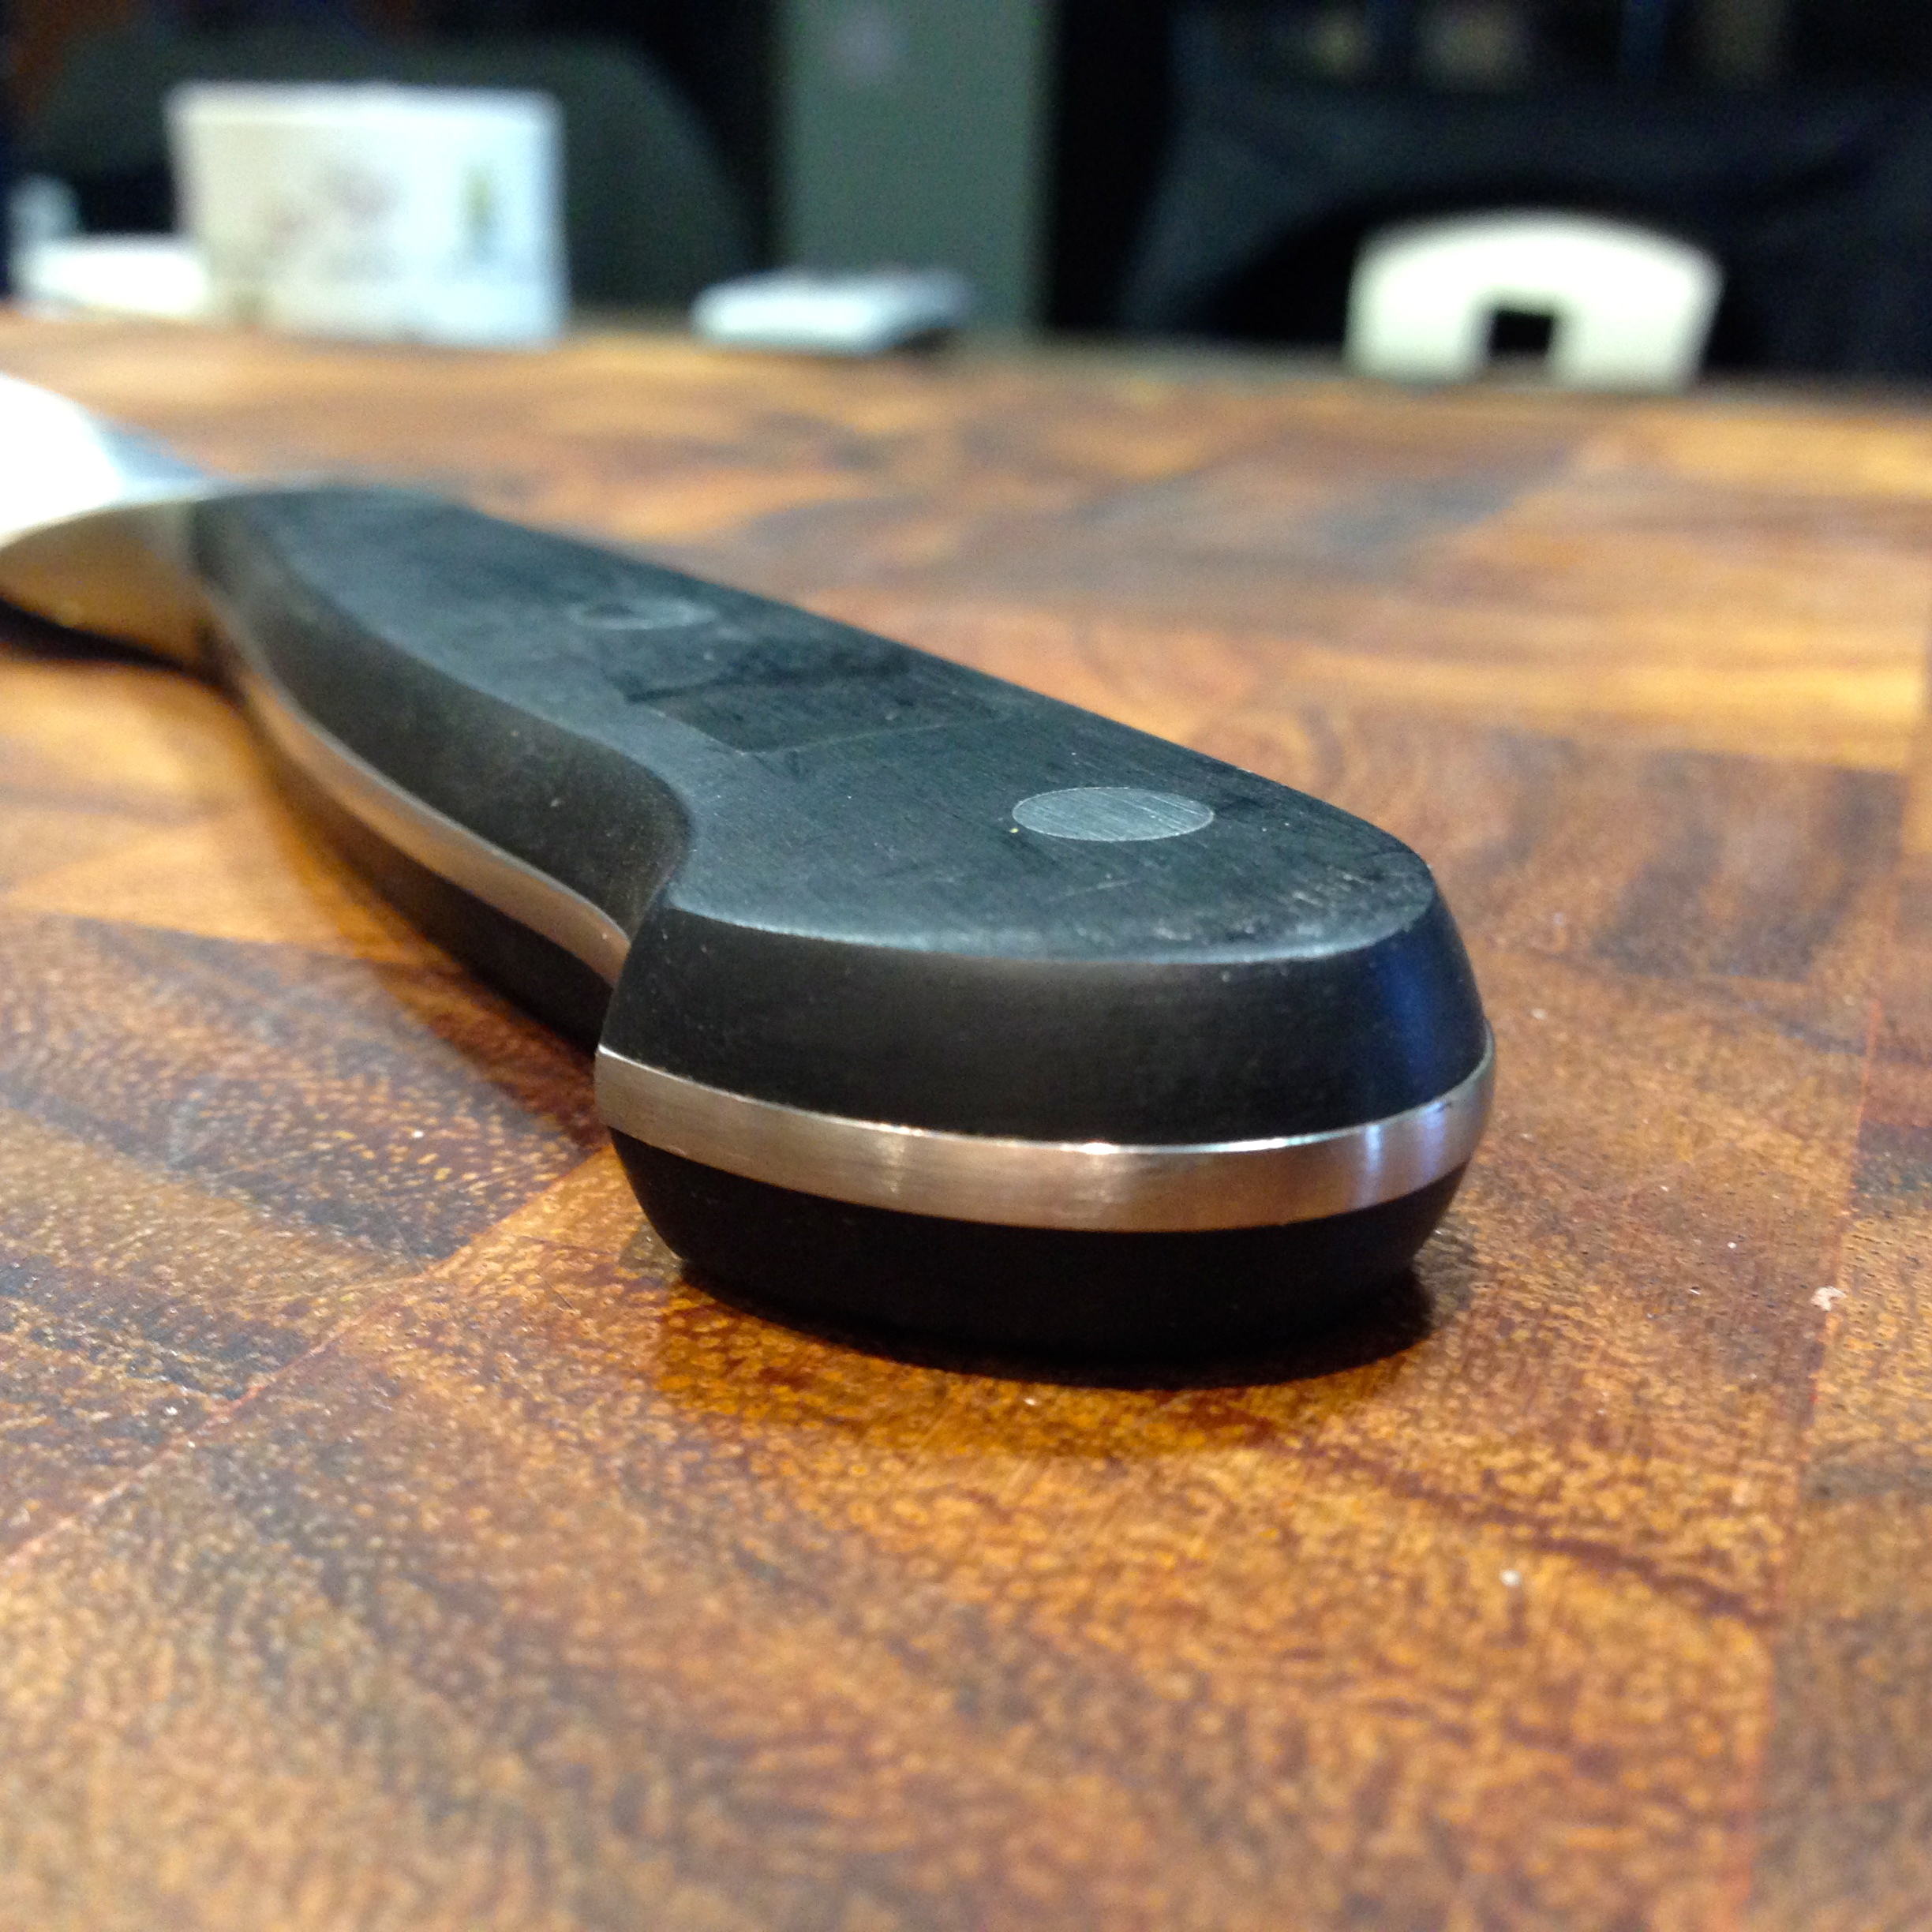
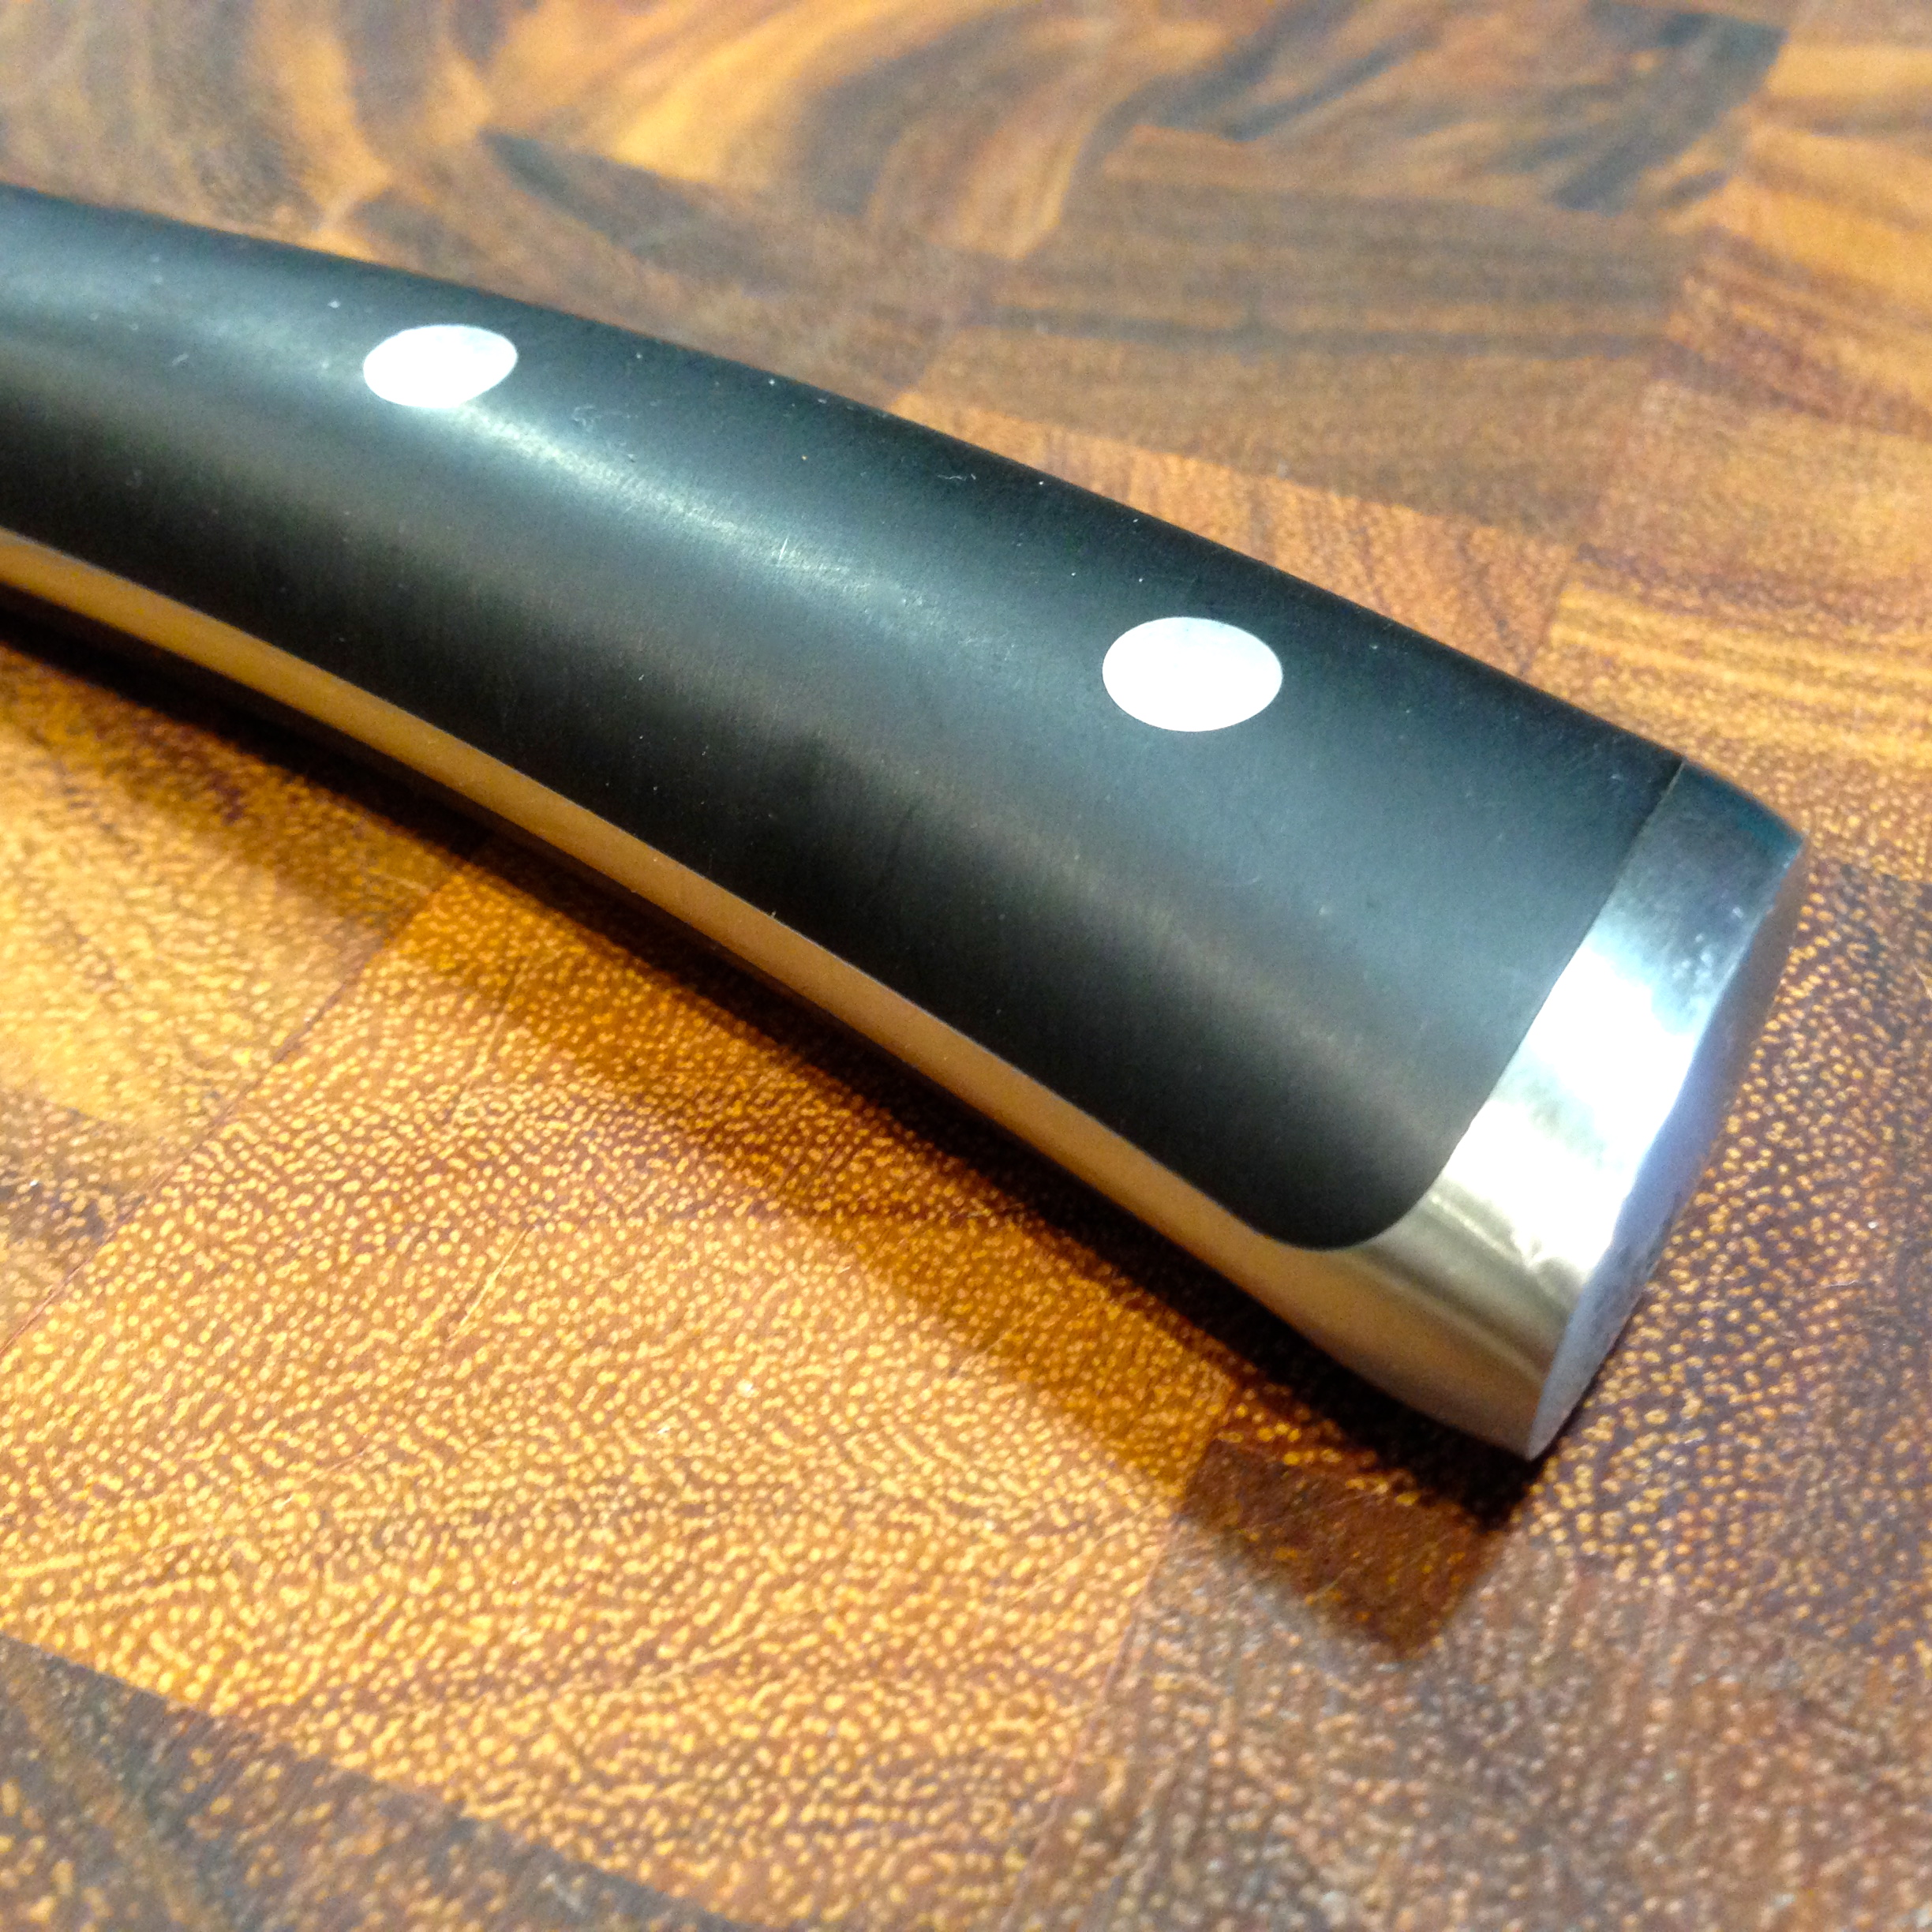
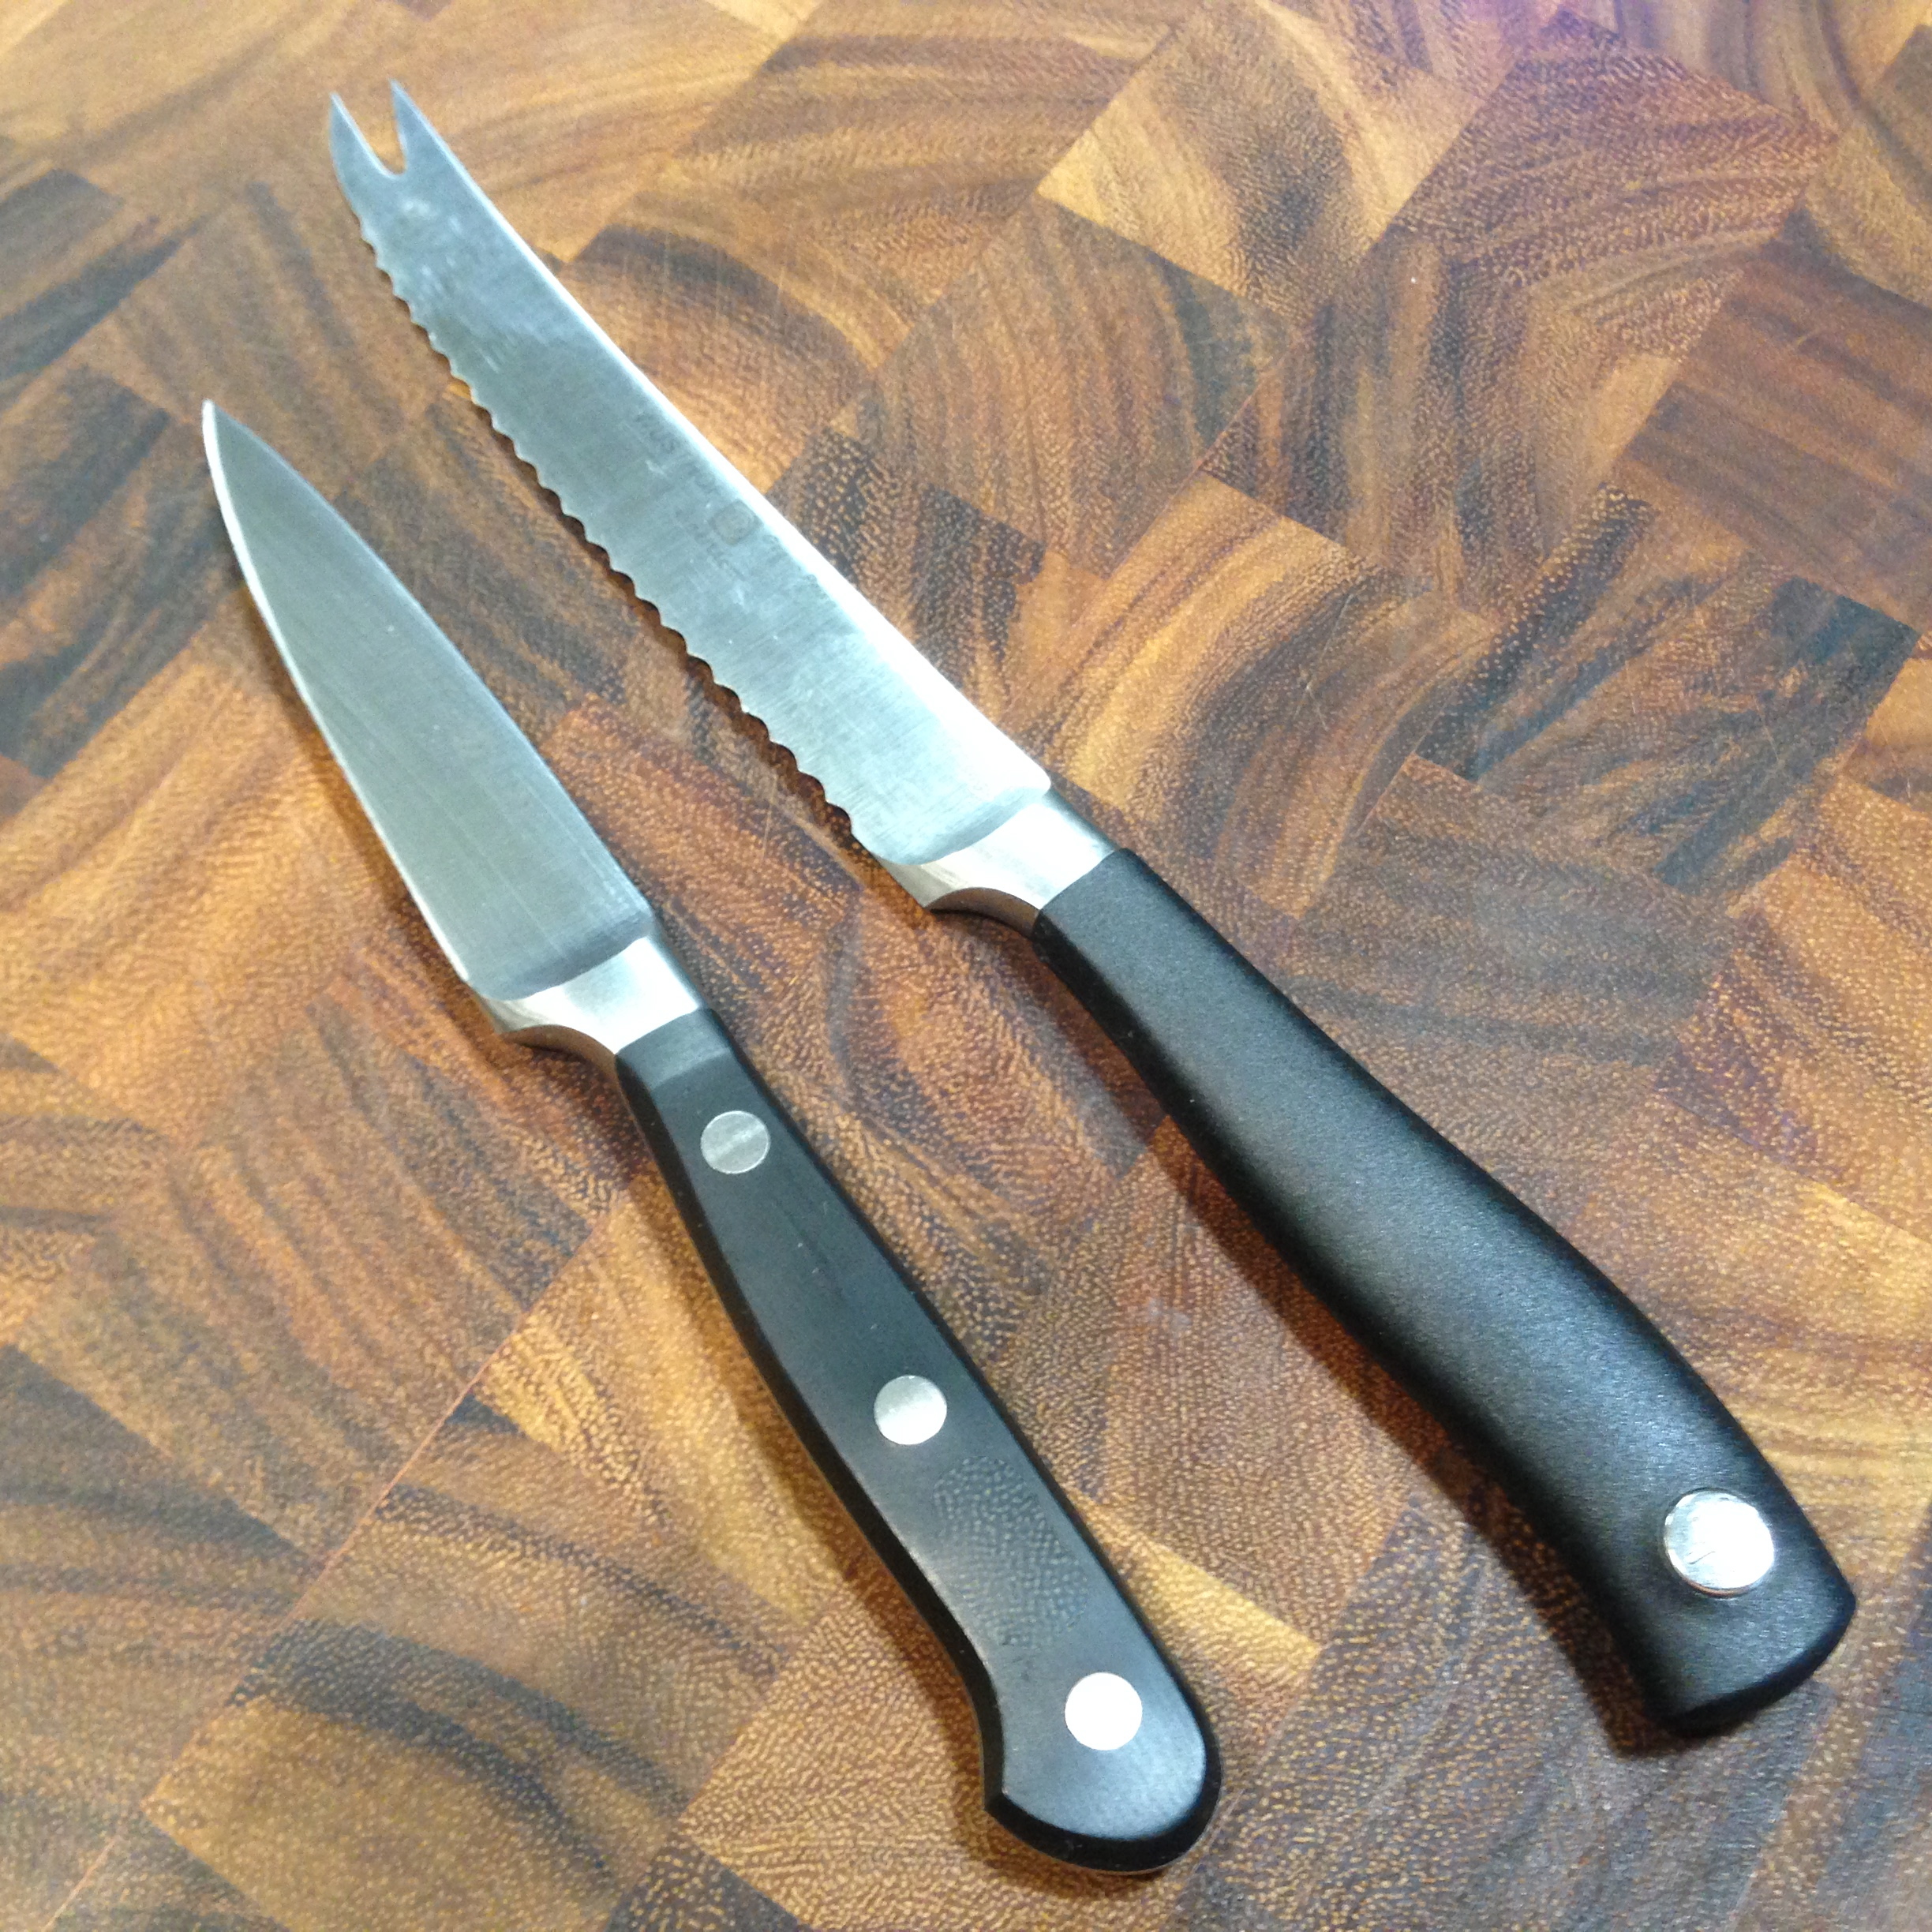
Knives should function as an extension of your hand and should ideally be balanced from the handle to the tip. The amount of steel in the tang will affect the balance you feel when the knife is in your hand. Below are two pictures that illustrate the concept of tang:

IMG_3037

 IMG_3039

Both of these knives are exhibiting what is called a full tang – but you can easily see the difference of concentration of the steel in the tang. What you see in the picture to the left is steel that goes all the way through the handle, top to bottom. The synthetic material in the handle is riveted to the steel. The steel in the handle counter balances the steel of the blade resulting in a more balanced feel in your hand compared to a knife that does not have a full tang.

Now compare that to the knife on the right which also exhibits a full tang but with a much larger concentration of steel at the tip. That extra steel creates a perfect balance between blade and handle. The knife on the right is more expensive than the knife on the left. A burgeoning chef may not need a knife to be perfectly balanced in their hands but it’s good to know the difference. The knife to the right is my santoku. It is my go-to knife and so I felt it important to make the investment in this particular knife. All my other knives are like the one on the left, sturdy and nicely counter balanced.

THE ANGLE OF THE BLADE:

Standard steel is generally ground to a 20 degree angle, except for santokus made of standard steel. They are ground to the finer 16 degree angle. Asian steel blades are generally all ground to the finer angle of 16 degrees. For me, the angle to which a blade is honed really makes no difference. It tends to make a big difference for professional chefs who tell me they prefer the finer angle.

For me, the finer angle is prone to more blade issues like denting or pitting, especially the way I cook and how I work with knives. Just be aware of this before you make any decisions. The Asian steel knives may well be your preference and they are fabulous knives. What you really need to think about it how you cook and what you need. Most everyday cooks hardly notice any difference between the two angles of blades common in all knives.

WHAT KNIVES DO YOU REALLY NEED:

I am a big proponent of investing in knives that you really need and not necessarily buying a set of knives that look great on your counter but have knives in them that you never use. Let me show you what I have which I find suits my needs to a tee.
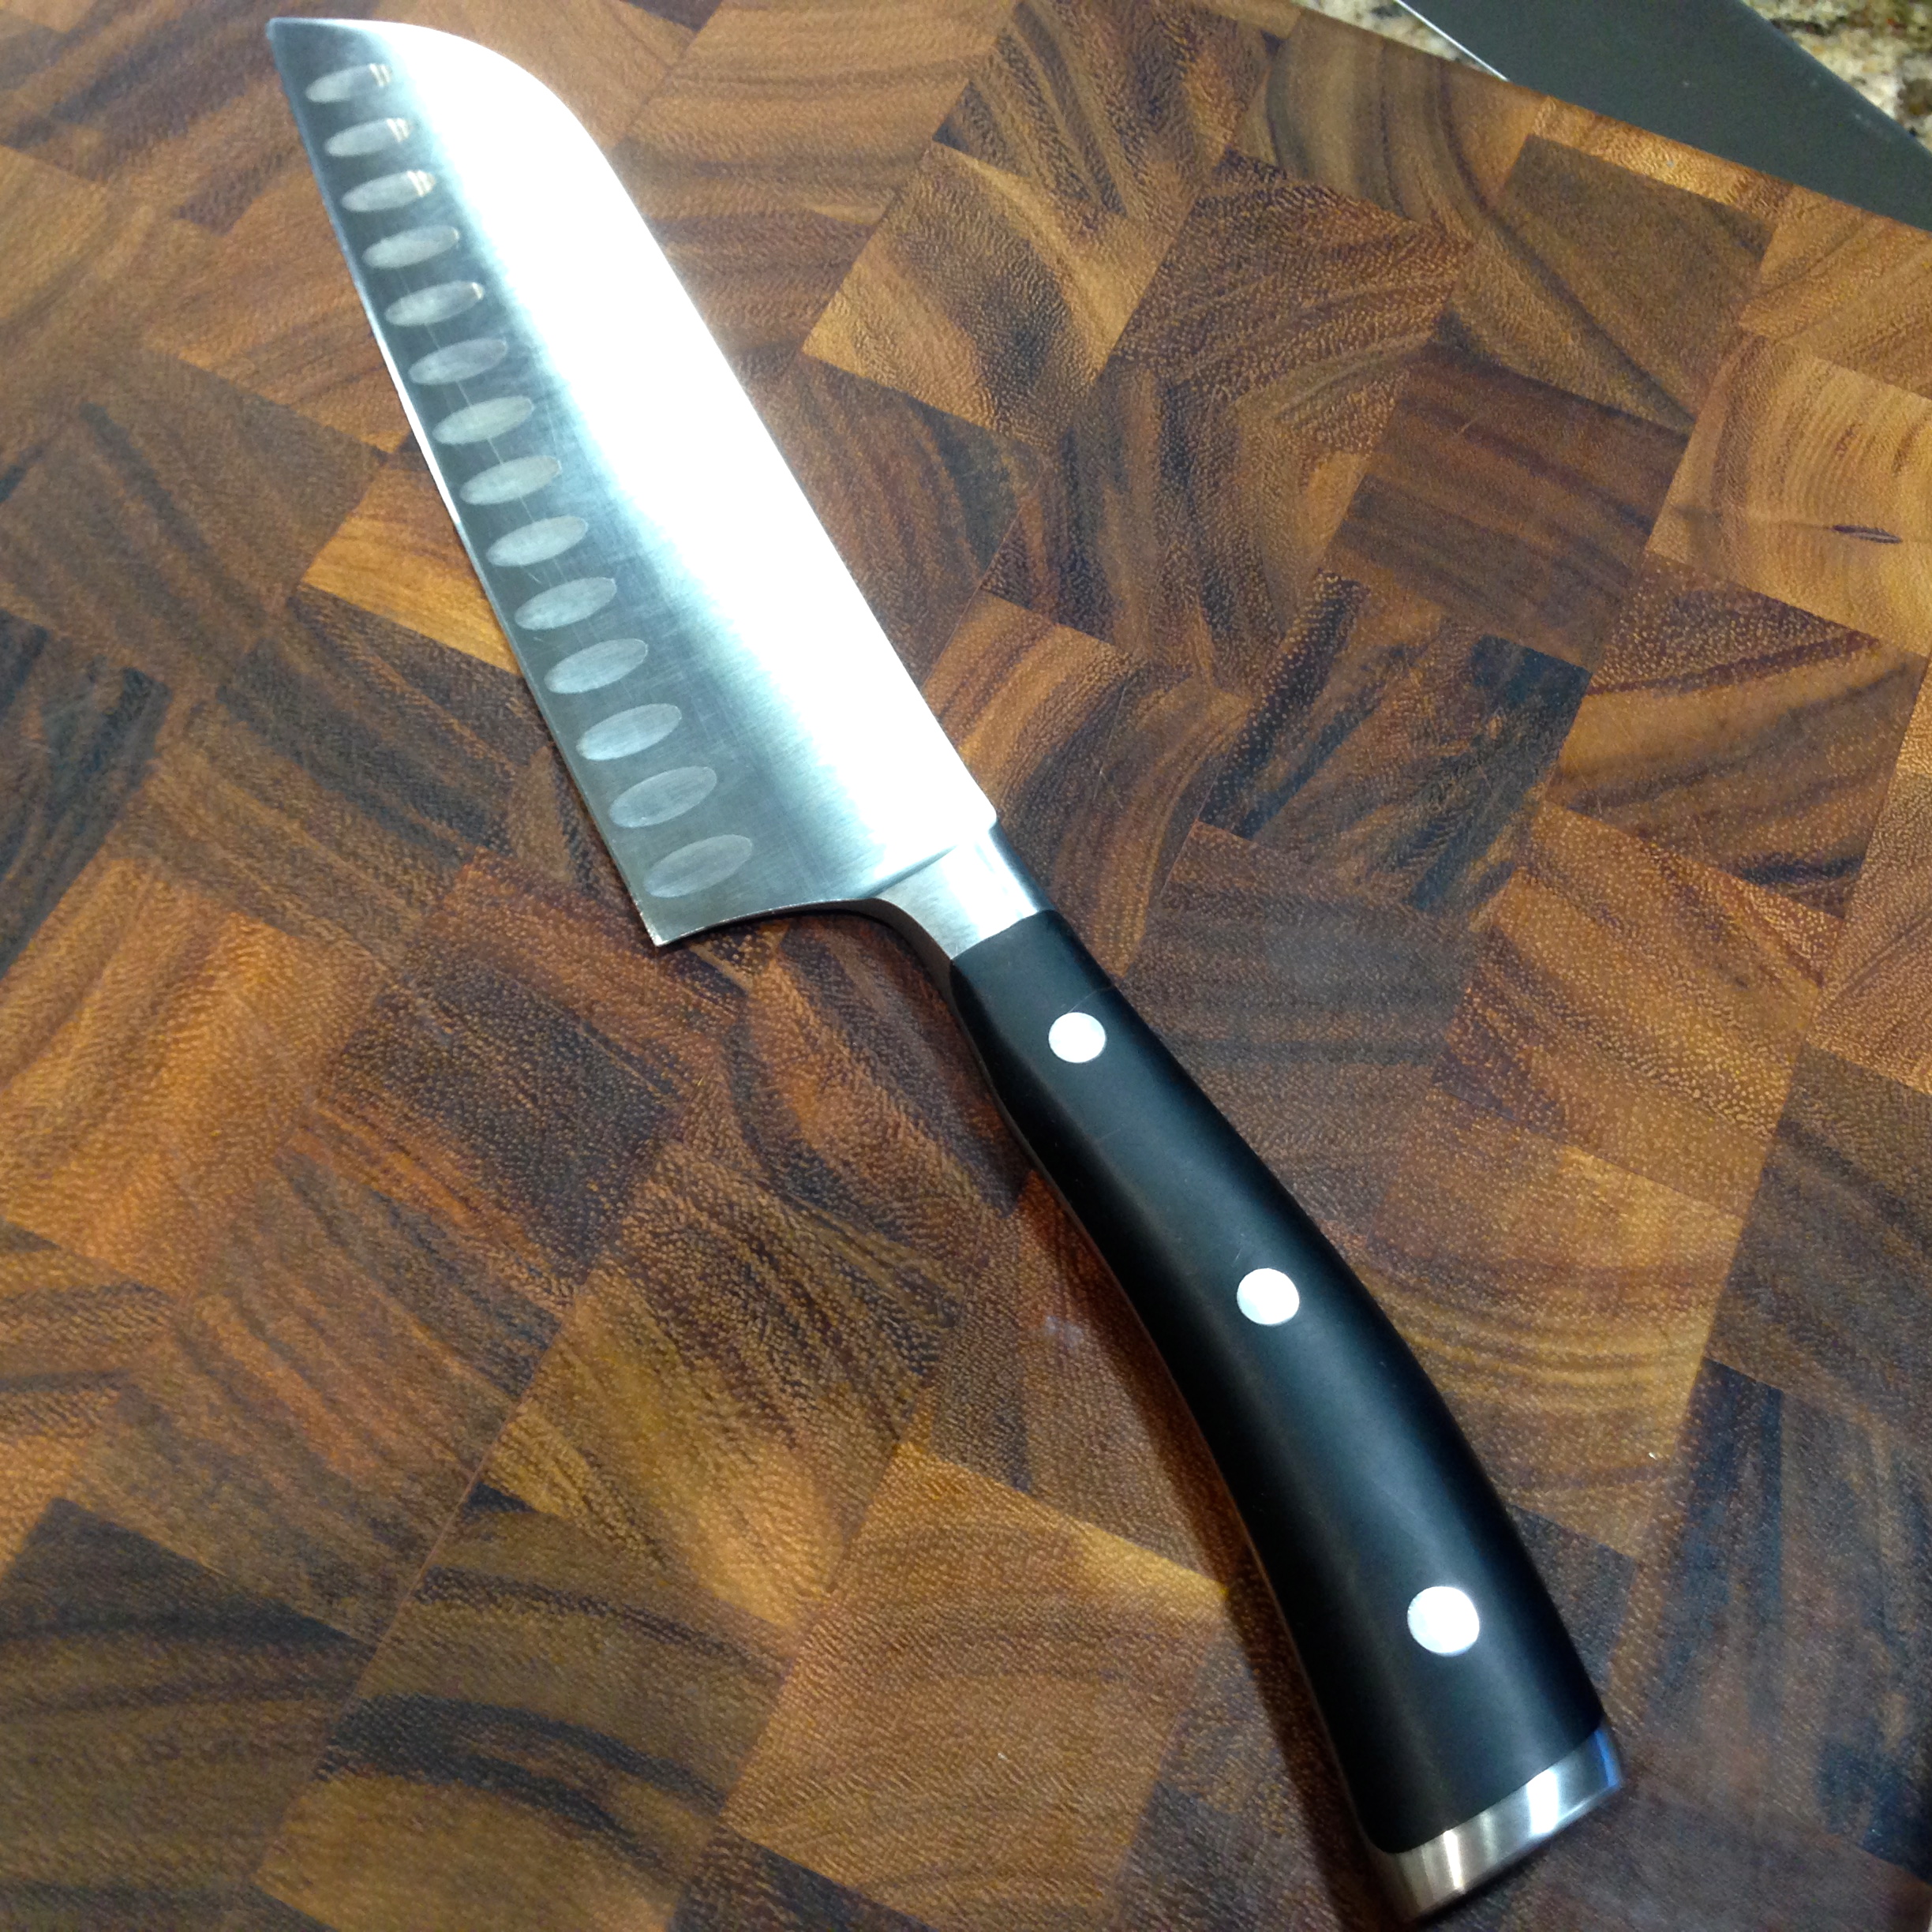
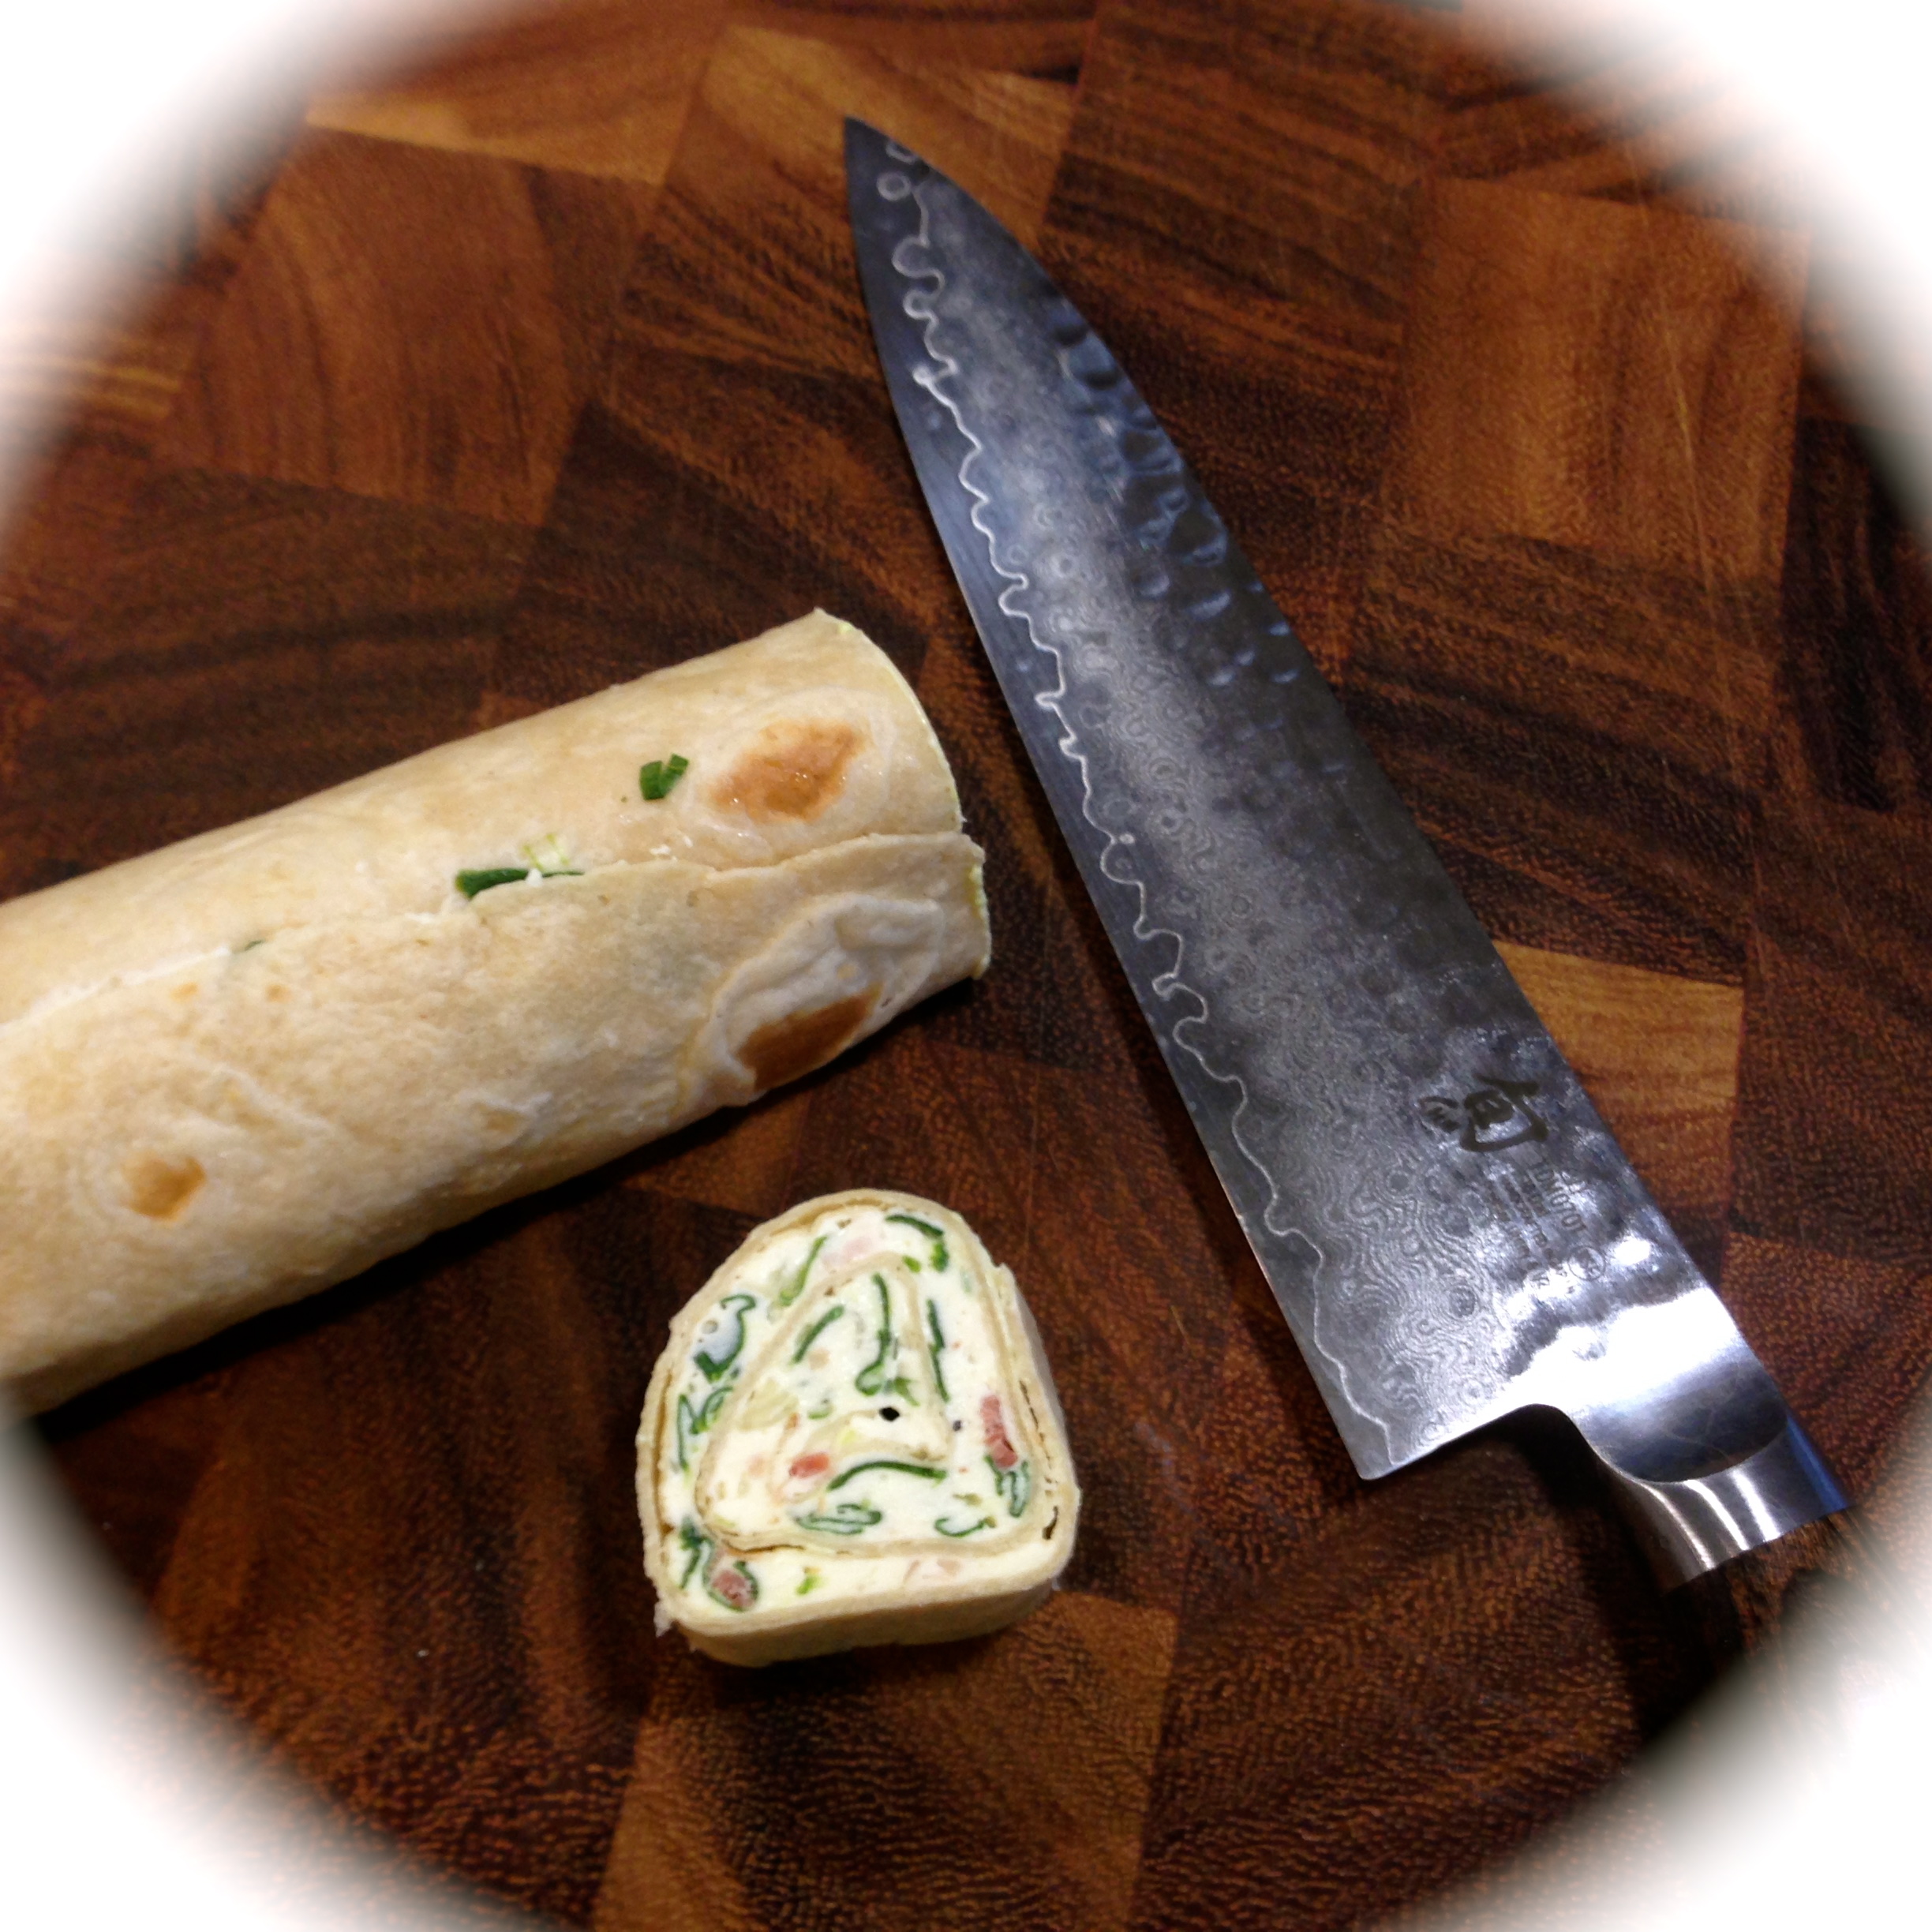
THE SANTOKU:

German Steel

As I mentioned earlier, this is my go-to knife. A santoku is basically another version of a chef’s knife. This is my chop, mince, dice, slice knife. I use this knife more than any other to do a myriad of prep chores for my recipes. This particular knife is called a hollow ground santoku because of the scallops you can see about the edge. Those scallops help to easily loosen starchy things like potatoes from the blade. I prefer this to a santoku that is not hollow ground.
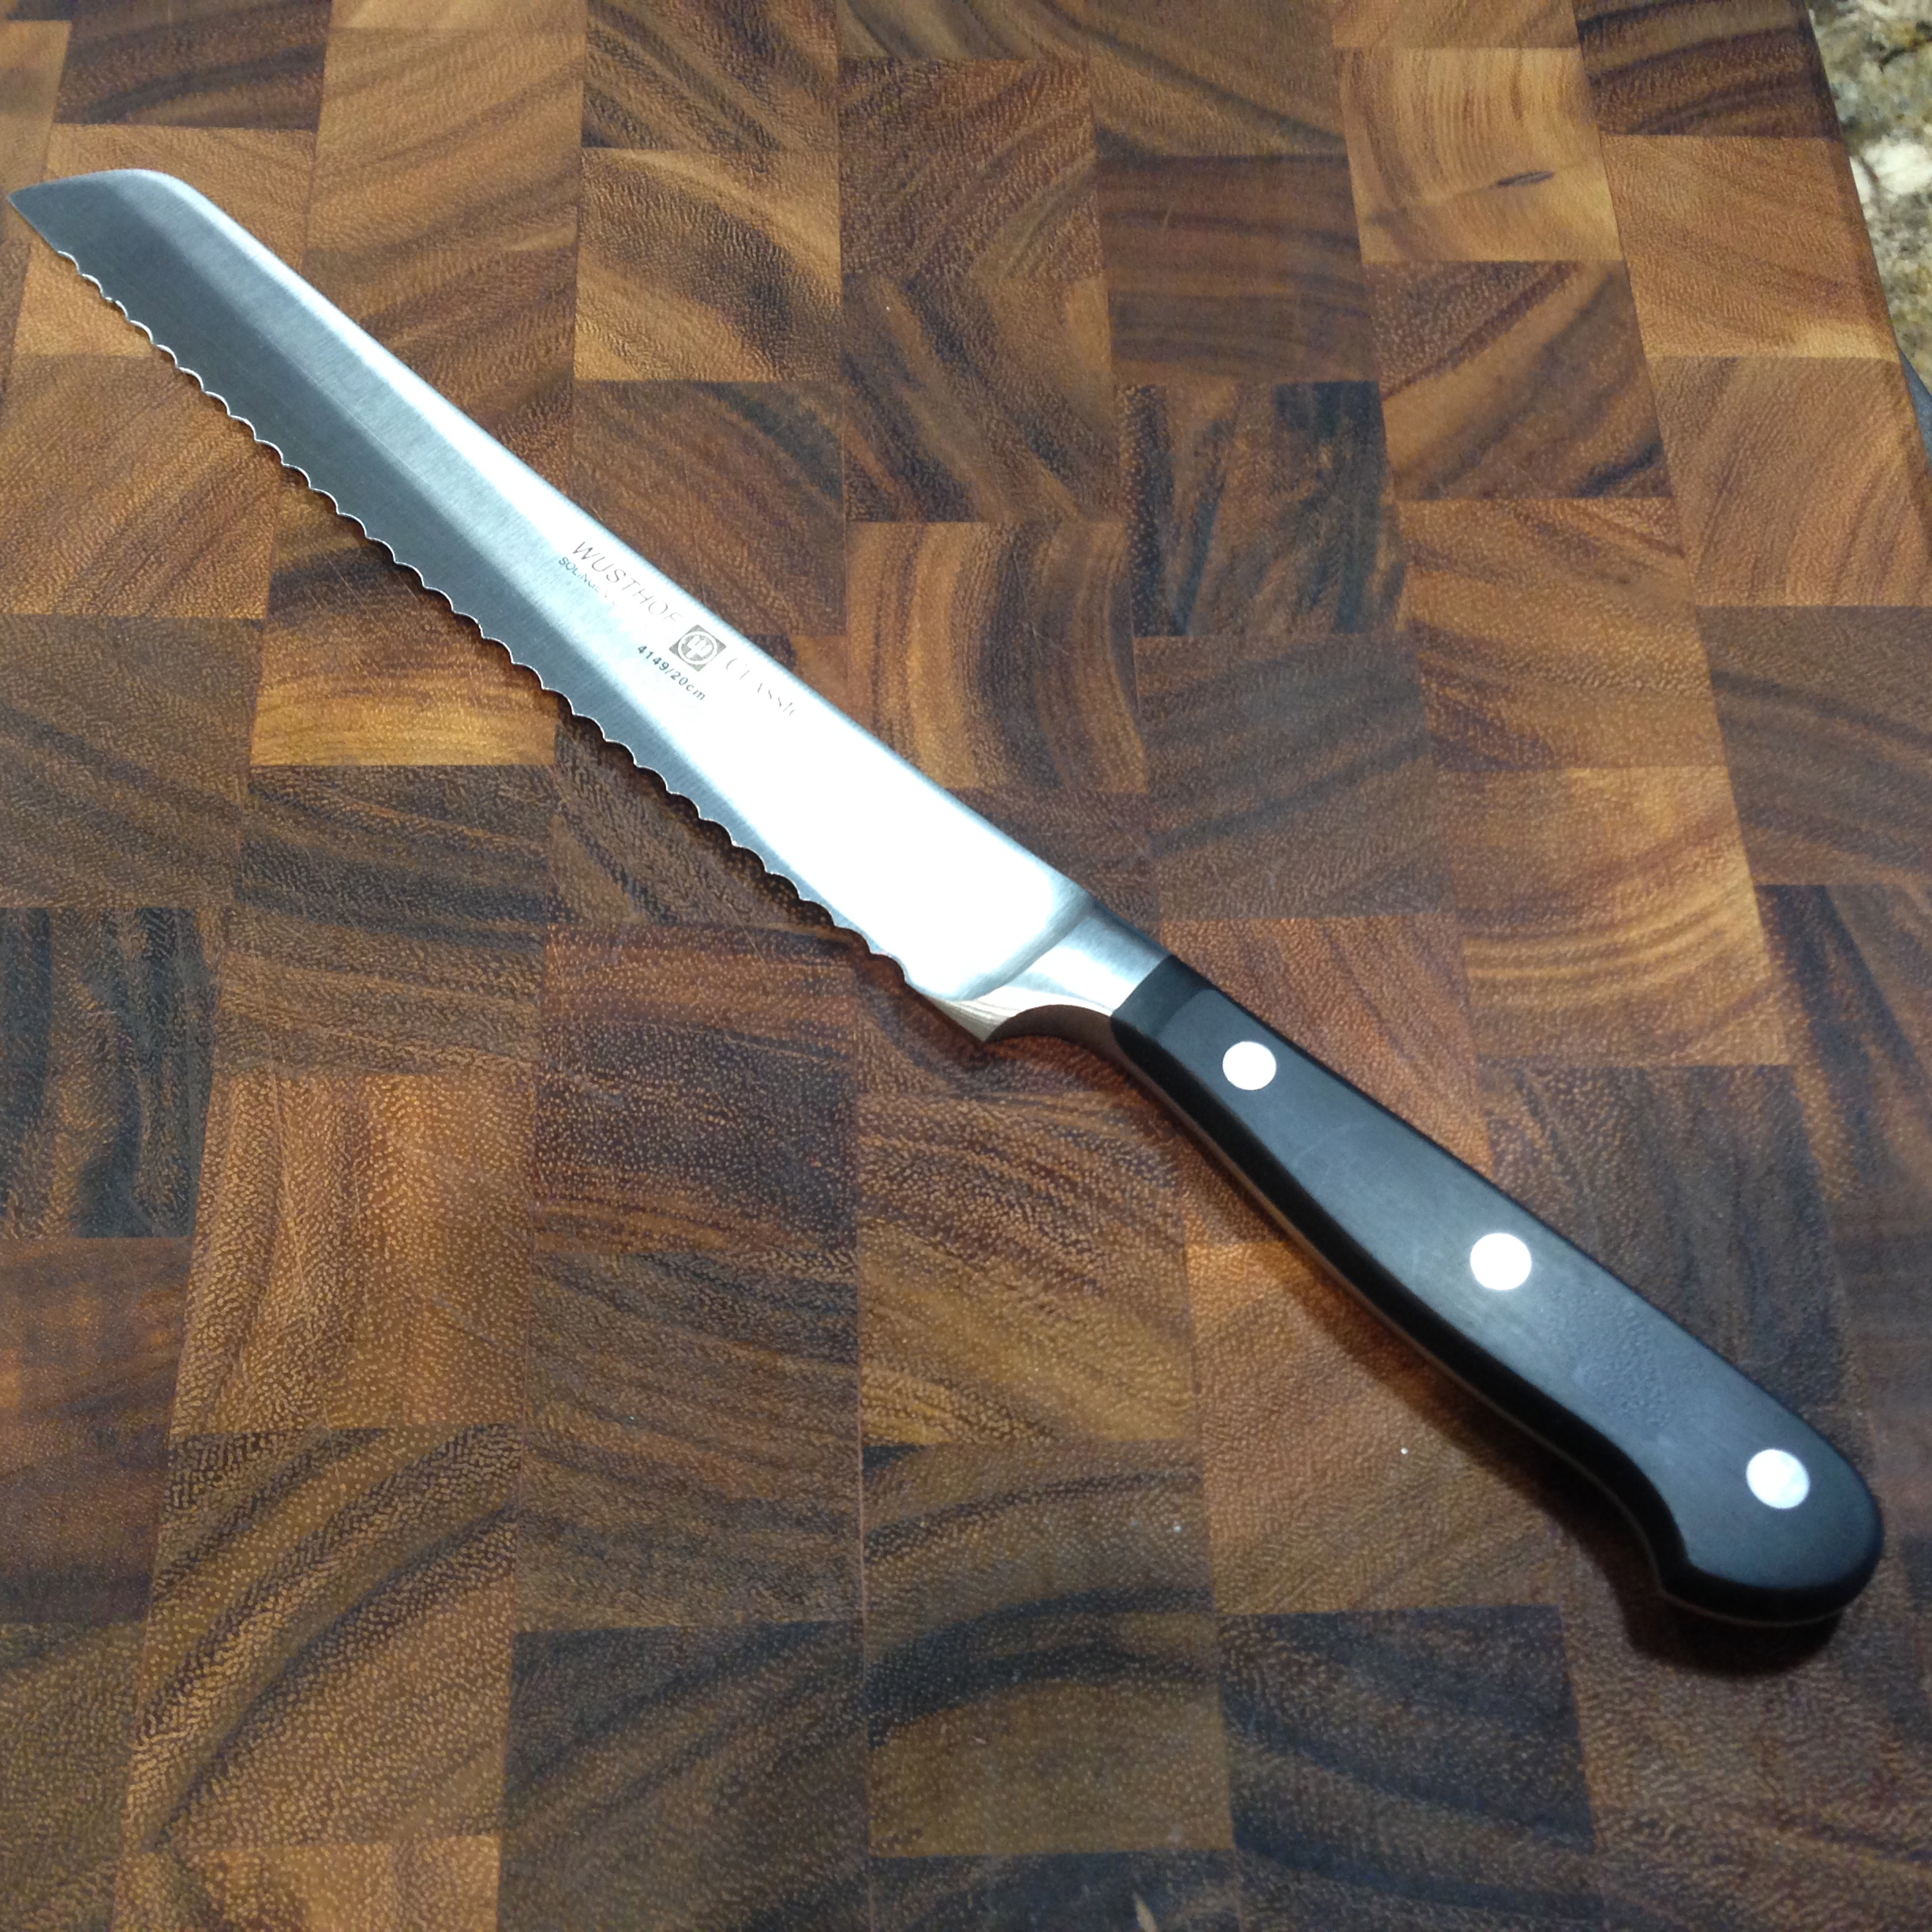
THE BREAD KNIFE:

IMG_3023

Now who doesn’t need a bread knife? The scalloped edges of the blade helps to cut even the softest bread without ripping it apart. One thing to know about a bread knife is that you can get it in a right handed, left handed or both handed blade. Mine is a right handed blade. That means when you hold the knife the right hand side of the blade exhibits a noticeable grind to the edge that is not on the left side. If you want a left handed or full grind, ask for it when you’re buying knives. They do exist but may have to be ordered.
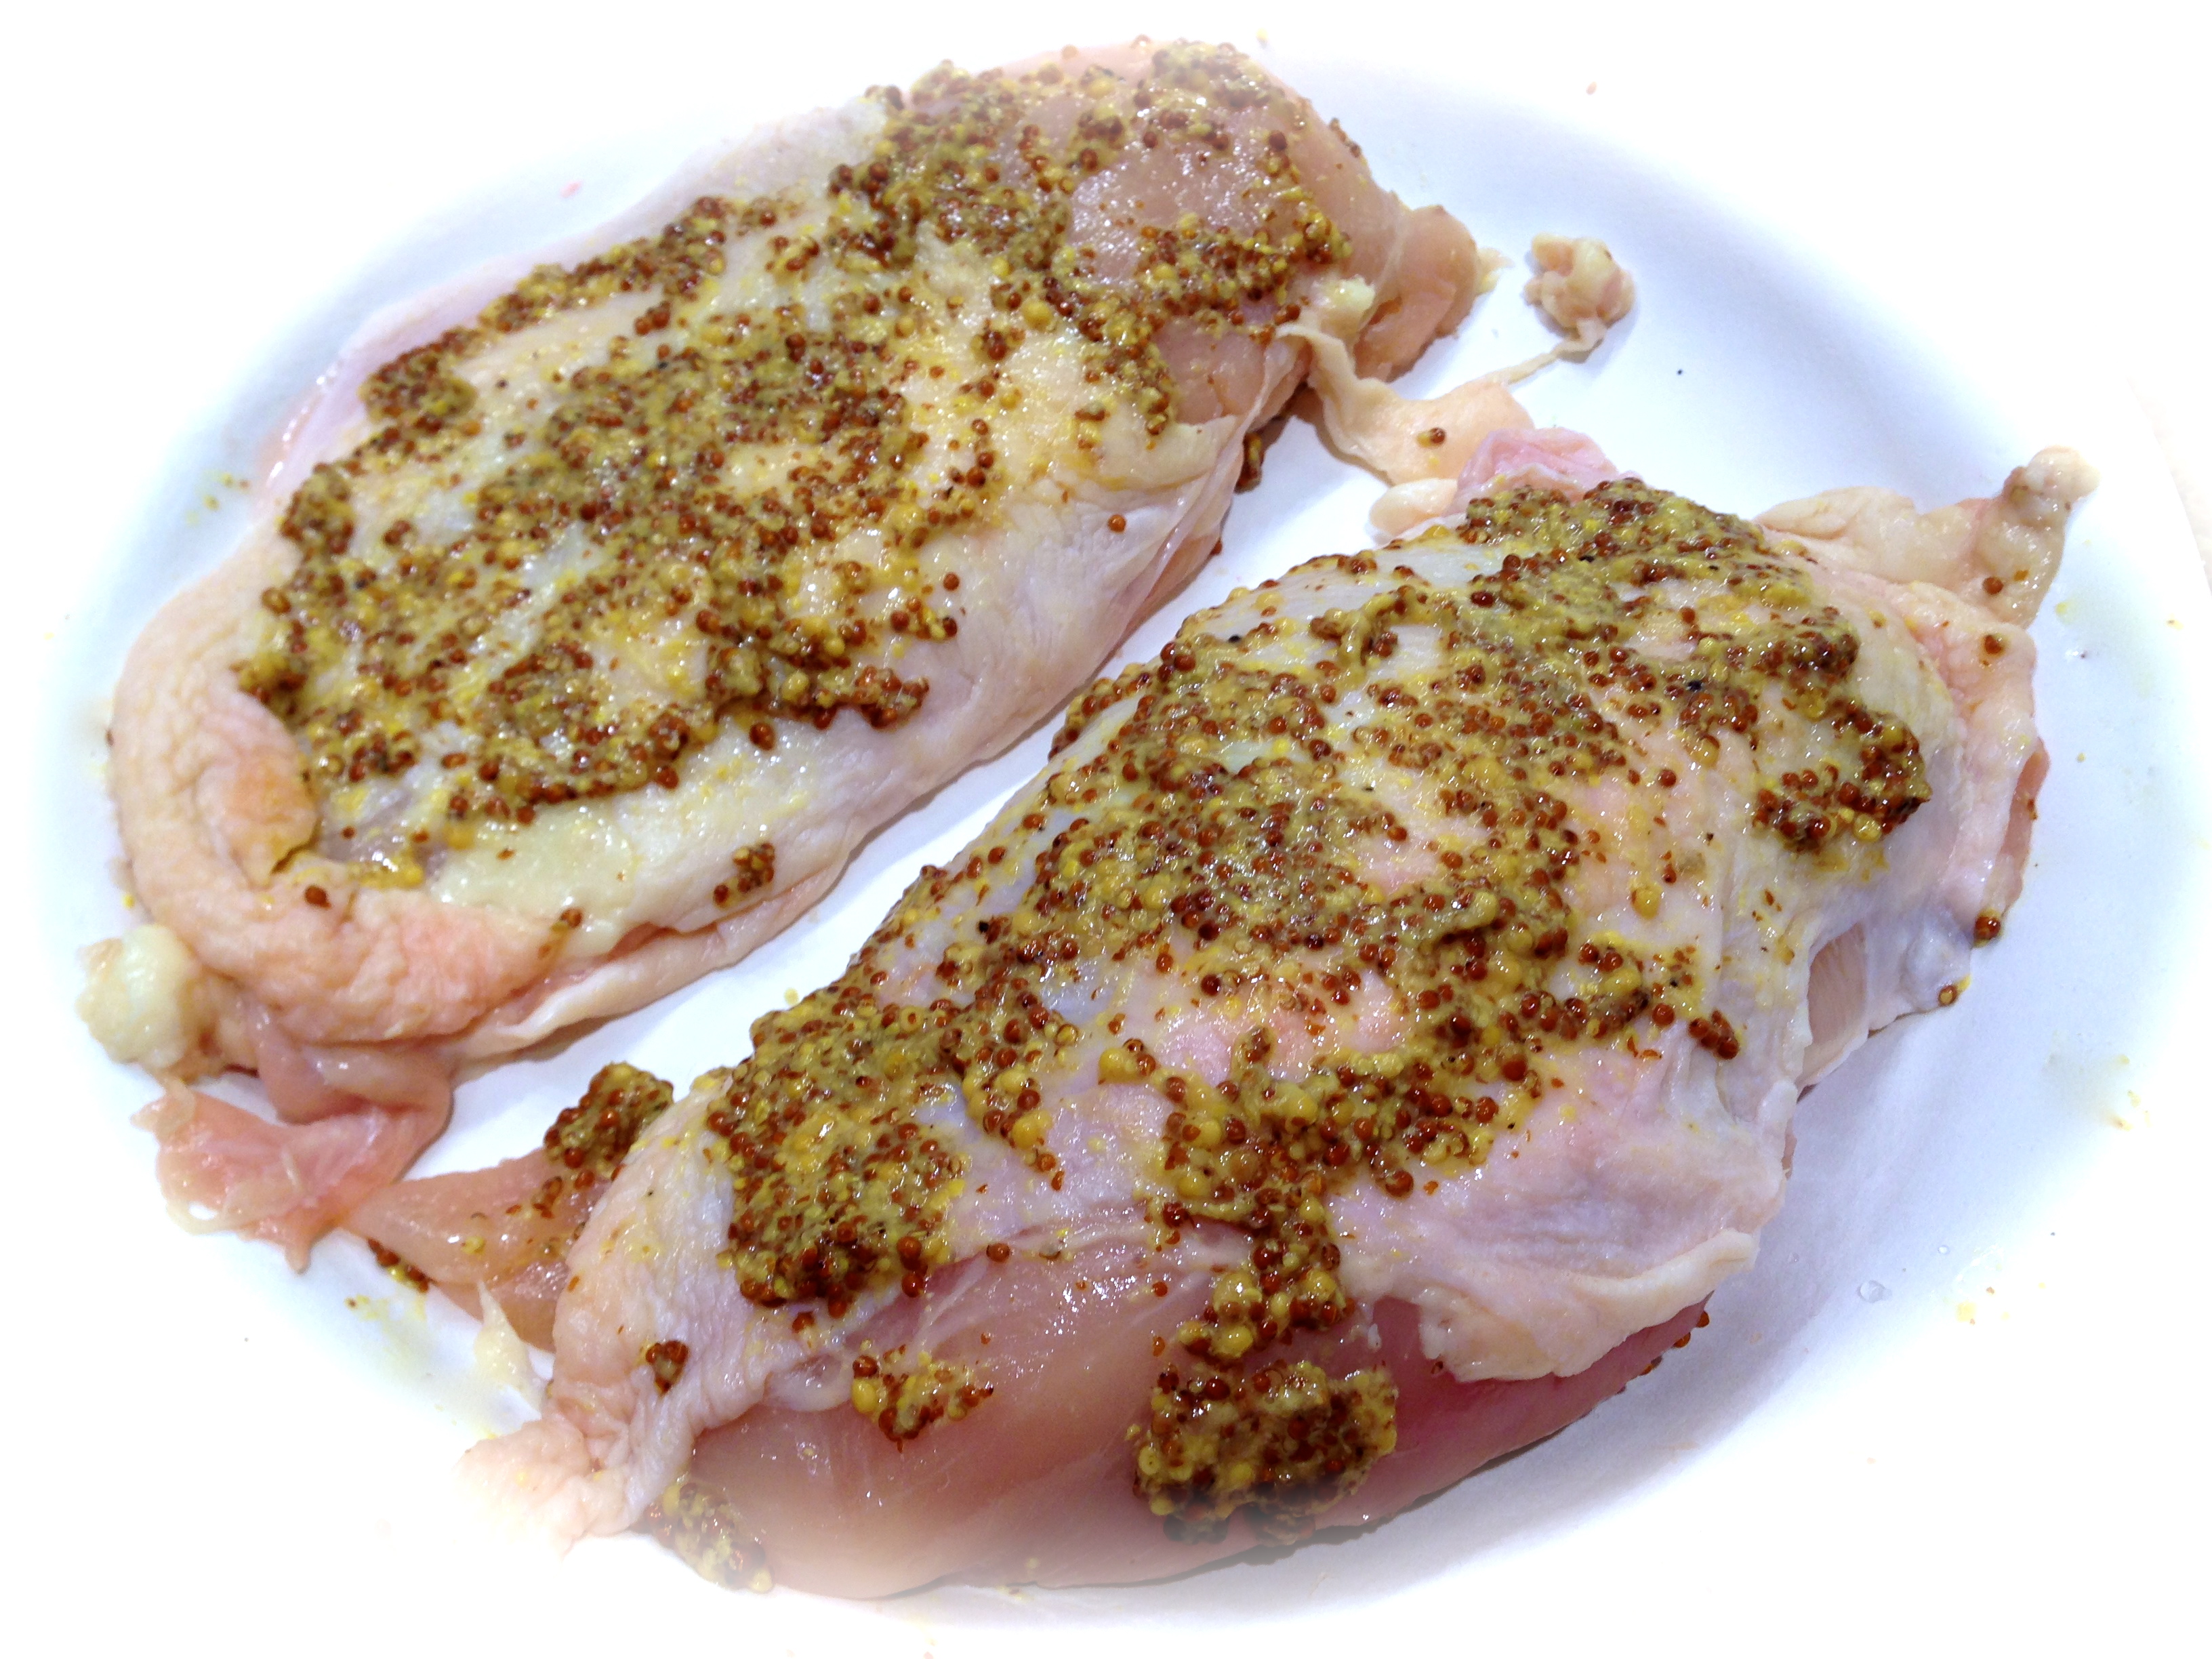
THE BONING KNIFE:

IMG_3028

From my recipes in this blog you can see I prepare a lot of chicken. It’s less expensive to buy whole chickens or breasts with rib meat than to buy them prepared for you. I use my boning knife for this purpose. I also use my boning knife to remove the skin from fish. It is light weight and extremely sharp and with simple strokes this knife makes those jobs much easier.
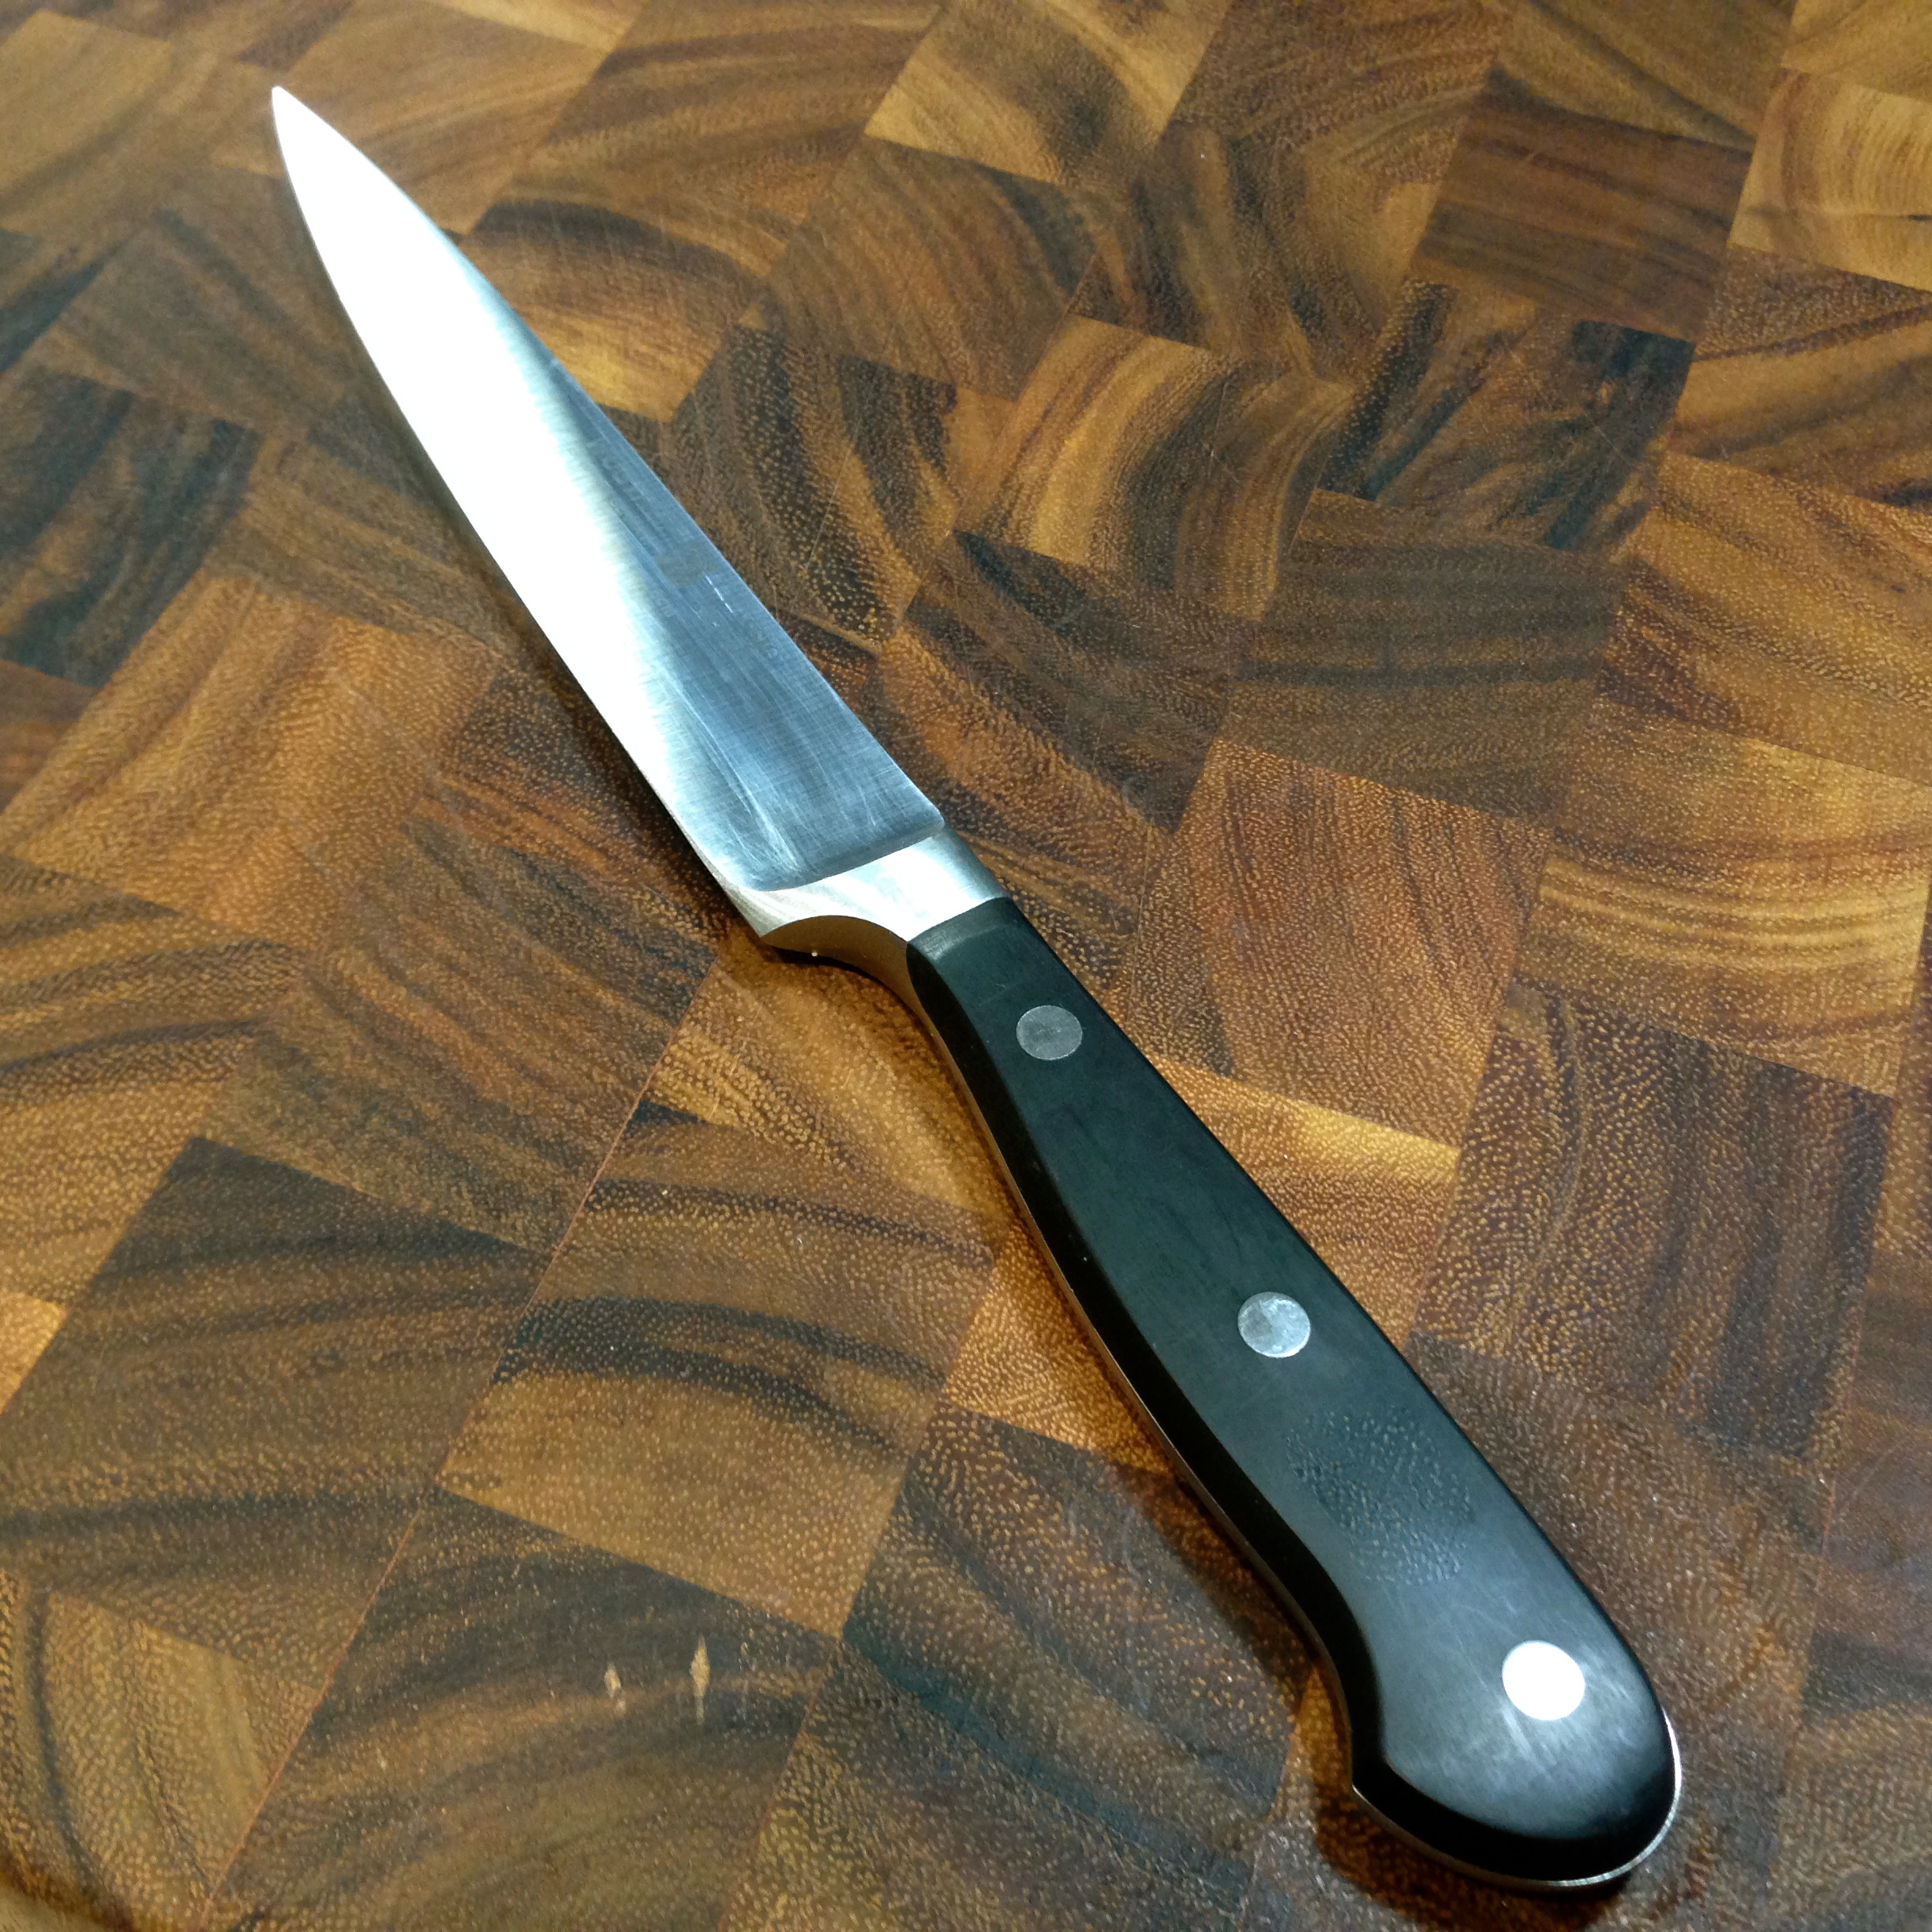
THE UTILITY KNIFE:

IMG_3034

I use this knife especially for carving meats and poultry before serving. You can also use this knife for some of the more basic kitchen duties, especially for slicing. I tend to use this knife the least but it is my go-to carving knife.

THE TOMATO AND PARING KNIVES:

IMG_3042

The knife with the serrated edge is the tomato knife. It functions somewhat like a bread knife in that it’s designed to cut softer fruits and vegetables without tearing them. The other knife is a paring knife. This knife is designed for chores that require more agility in knife handling. I use my paring knife for deveining shrimp, cutting the skin off of apples, taking out the seeds of peppers and like kitchen prep chores. I use my paring knife almost as much as I use my santoku.

These are my knives. I made conscious choices to have knives that fit my needs and how I cook. There are a lot of different types of knives out there. I would recommend investing in the knives you will use versus buying a bunch and only using a few of them. Learn each knife’s primary function and determine if you really need that in your kitchen.

KNIFE CARE:

If there is only one tidbit of information you take away from the blog let it be this – never, never put a good knife in a dishwasher. First of all I will guarantee you it will annihilate an asian steel knife and even a standard steel if bumped and jostled will pit and break off at the edge. The best way to ensure that you will ruin your knives is to put them in the dishwasher.

wüsthof-sharpening-steel

It is also important to regularly hone your knives. By that I mean giving some tender loving care to the blade surface. It does not mean sharpening them. When it comes time to sharpen them, take them to a professional. I am not a big fan of electric sharpeners as you can wind up taking off more steel from the blade than you really want. If you pay good money for a knife, invest in maintaining it and you can have it for a lifetime.

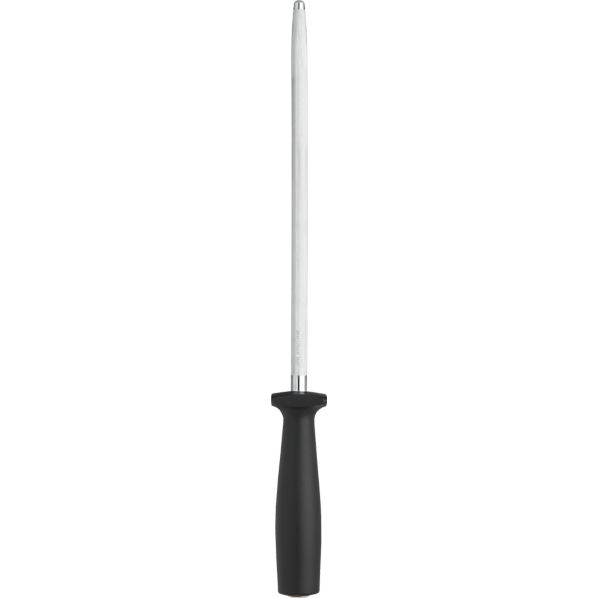
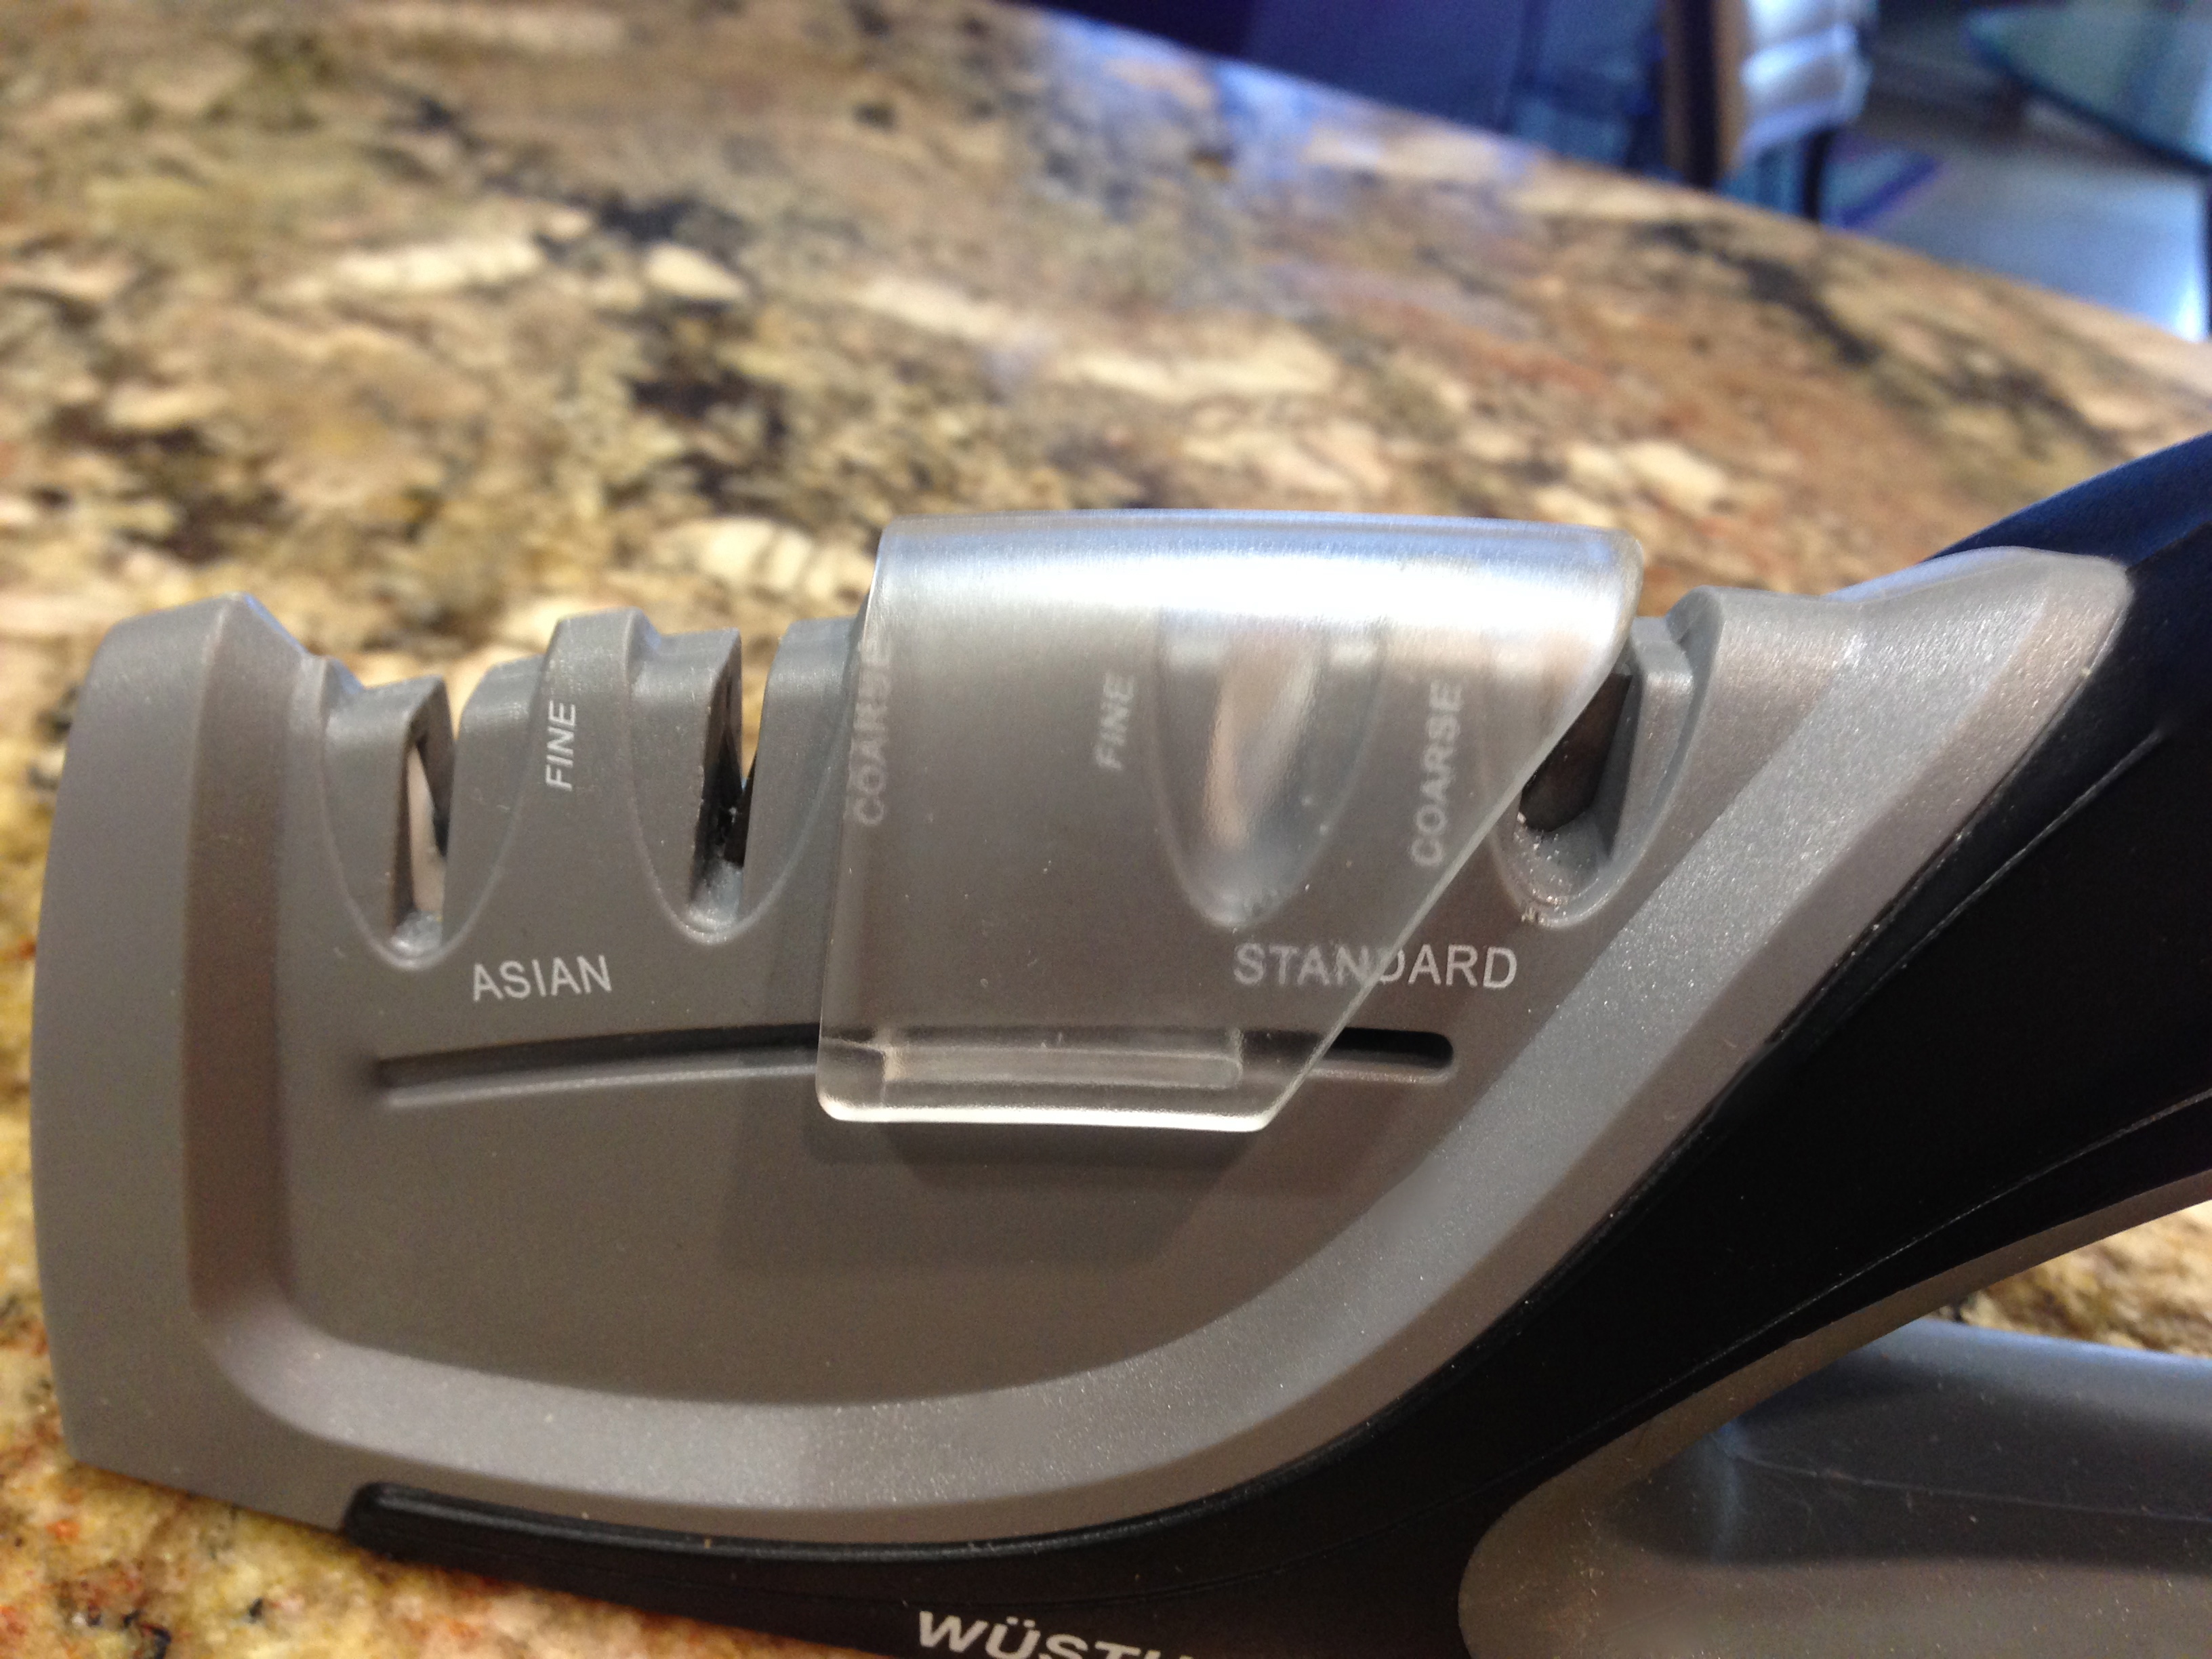
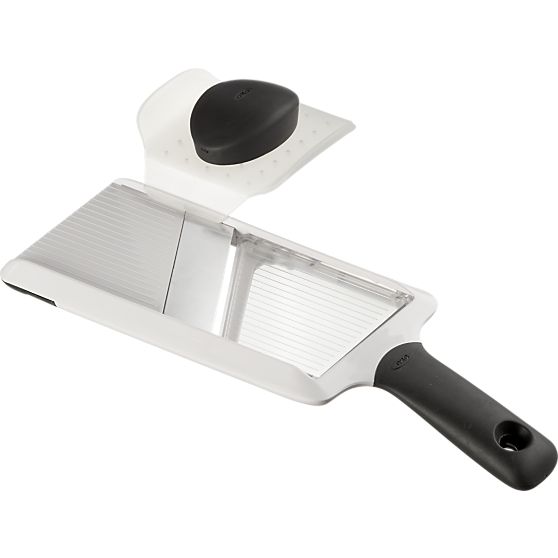
Honing is a process of realigning the edge of the blade. When a blade is ground there are tiny steel fibers that run all up and down the edge. You can’t see them but they are there. When a knife seems to be a little dull it’s due to the fact that the fibers have separated, which happens naturally as you use a knife. Honing realigns those fibers so that you have a smoother edge resulting in cleaner cut. You can hone your blade with a honing steel like the one pictured above. Honing steels tend to come with knife sets or you can purchase them separately. I am not a big fan of a honing steel and here’s why. In order to use a honing steel properly you have to hold your knife at the correct angle of the blade (16 or 20 degrees) as you move the knife up and down the steel. Now I don’t know about you but I cannot perfectly eyeball 16 or 20 degrees or hold a knife perfectly at that angle the entire time I am honing it.  I prefer a honing device like the one pictured below (which is mine).

IMG_3058

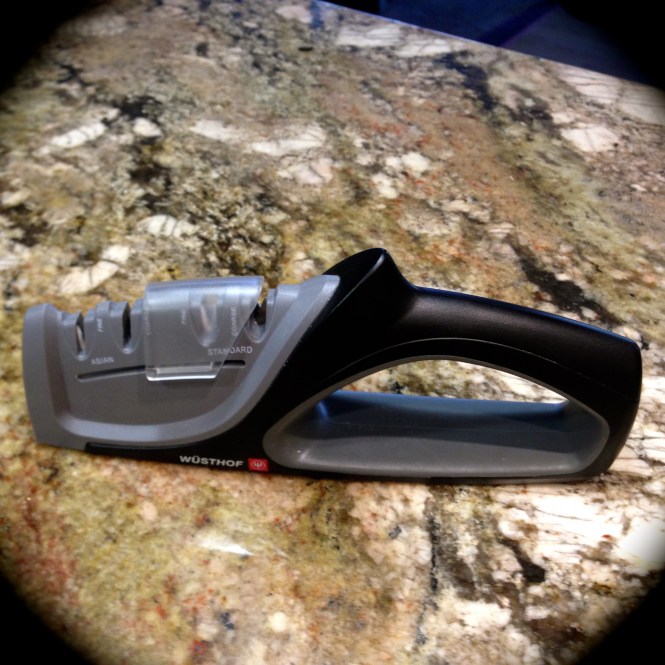
I call this device the knife honer for dummies. If you look carefully at the choices, you can hone an Asian or a standard blade. Each notch is positioned to the exact angle for the steel in those knives. All you have to do is run your knife through one of the notches a couple of times and voila, your knife is honed to the exact angle.

In the picture below you will notice there are two honing choices for each type of steel, fine and course. Fine is for simple honing. Coarse actually takes a little steel off the blade when you use it. Look closely at the coarse notch for standard knives. You can actually see some steel shavings in the notch. When using a tool like this, primarily use the fine notches. I only use the coarse notches maybe once every couple of months. I used the fine notch after I use my knife about every 3 or 4 times. I find it keeps the blade edge nice and clean. I’ve had some of my knives for almost two years and using this maintenance tool I have not had to sharpen them yet. The rule of thumb here – use the fine notch after every 3-4 uses of the knife. Run the blade completely through 3-5 times and you’re done. The course notch use sparingly and when you do, run it through the same amount of times. You will keep your knives sharper must longer by maintaining them this way.

IMG_3062

It’s also important to store your knives properly. I knife block is a great tool. I keep my knives in their original boxes in my knife drawer. I protect them so that they never jostle against anything else.

Many people are afraid of sharp knives. Actually sharp knives are much safer than dull ones. There are more accidents in the home with dull knives than sharp ones. Sharp knives are easier to work with but you still need to be careful when using them.

I hope you found this blog helpful in giving you the tools to make some informed choices regarding knives. They are definitely your best friend in the kitchen and can last forever if you know how to use them and take care of them.

knives2

Cream Cheese, Spinach, Bacon and Scallion Pinwheels…

I know, I know, this is a pretty rudimentary recipe but I’m sharing it because the flavor is divine. I’ve eaten many varieties of these pinwheels at parties and such and I have to say I like this version the best. It is simple, easy to make and oh so delicious!

Pinwheel Ingredients...

Pinwheel Ingredients…

For those of you who’ve never made these before, (and I’m sure there has to be a few out there), there are a couple of tricks to making these that you really don’t think about the first time you make them – or at least I never did. So for the burgeoning cooks who want to avoid some of my pitfalls, here are a couple of tricks to keep in mind for making delicious and good looking pinwheels.

Lesson Learned 1 – The cream cheese must be room temperatureI think this is where many err the first time they make these. Keep in mind that you are spreading this mixture on a flour tortilla. If the cream cheese is not room temperature you will rip the tortilla to shreds. I took my cream cheese out of the refrigerator before I went to bed and then made the pinwheels first thing in the morning. When the cream cheese is room temperature it not only spreads better but mixes better with the other ingredients. Make sure you give the cream cheese enough time to get to room temperature.

Pinwheel ingredients...

Pinwheel ingredients…

Lesson Learned 2 – Heat the tortillas for 20-30 seconds in the microwave before spreading on the filling: Even though they are flour tortillas they can crack and split when you spread the filling on them and roll them up. Cover your tortillas with a damp paper towel and heat them slightly in the microwave. Only work with one tortilla at a time. Keep the others covered with the damp towel until you are ready to use them. Make sure the tortilla is not warm. Once you take it out from under the paper towel it will only take a few seconds for the warmth to dissipate but the tortilla will still be nice and pliable.

IMG_2906

Pinwheel ingredients combined…

I found that if you press your finger down on the top part of the tortilla while spreading the mixture, the process is easier and you don’t have the tortilla jumping around. Spread the mixture to within  a quarter of an inch around the edge of the tortilla and even closer to edge that will be the end of your roll. That way you will have some mixture at the very end to act as a glue holding the tortilla closed.

Lesson Learned 3 – Don’t put the mixture on too thick: If you put the mixture on too thick you’ll have a bunch coming out the ends. A nice even layer will do. I’ve found this particular recipe makes three large flour tortilla rolls. That may sound like a small amount but you get between 24-30 one inch rounds with this recipe. Keep in mind that the mixture is rolled onto itself so that creates the thickness you are looking for. You don’t need to create the thickness by overloading the tortilla.

Lesson Learned 4 – Roll the tortillas tight: Start with a very tight roll and keep it that way throughout the rolling process. Once the tortilla is rolled, I recommend squeezing it lightly from top to bottom just to solidify the tight roll. You don’t want gaps in the filling when you cut them.

IMG_2911

IMG_2916

Lesson Learned 5 – This is the most important tip of all – put the filled tortillas back in the refrigerator and let them chill for a few hours before you cut them: The first time I made these I cut the tortillas right after rolling them. Big mistake! Remember I said you have to work with room temperature cream cheese? Well room temperature pinwheels do not cut easily. In fact they become a gloppy mess when you try to cut them. You need to let the cream cheese chill again to get cleaner cuts in the pinwheels. Plus it’s also good to let these flavors meld for awhile. Believe me, the mixture tastes great when you first make it, but it tastes even better when all the ingredients have time to get better acquainted.

IMG_2926

Wrap in plastic wrap and chill for 3-4 hours…

Lesson Learned 6 – When the tortillas have sufficiently chilled, use a very sharp knife to cut them: This is also important because the tortillas can still squish a little on you if you don’t use a sharp knife. You will find that you’ll have to cut a small portion off the ends of each tortilla and discard them. You just can’t get every bit of the tortilla filled. No worries, they make tasty morsels if you just want to pop them in your mouth. Also it is important to wipe off the blade of the knife with a paper towel when more than a small amount of cream cheese builds up on it. That way you will get nice clean cuts throughout.

IMG_2928

Cut with a very sharp knife…


These are so easy to make and so worth it. My husband never had them before and he told me if any were left over after our party to be sure not to throw them out because he would eat them. “These are really good” was all I needed to hear from him to know I’d produced a hit.

You can go online and find many different ways to make these. Hopefully these few lessons learned will help you avoid my mistakes when I first tried to make them.

Cream Cheese, Spinach, Bacon and Scallion Pinwheels

  • Servings: 24-30 One Inch Rounds
  • Difficulty: Very Easy
  • Print

INGREDIENTS:

8 oz. of softened cream cheese

4 scallions finely chopped, including the green parts

1 handful of baby spinach

6-8 slices of bacon cooked, drained and cooled

1/2 package ranch dressing mix

3 large flour tortillas

DIRECTIONS:

Make sure the cream cheese is a room temperature. Put the first five ingredients in a large bowl. Mix well with an electric hand mixer. Place the tortillas on a microwave safe plate and cover them with a damp paper towel. Microwave the tortillas for approximately 20 seconds or until they fell very pliable.

Work with one tortilla at a time. Keep the others covered with the damp paper towel until you are ready to use them. Make sure the tortilla is not hot. Spread one third of the mixture on the tortilla making sure to come within a quarter inch on all edges and very near the edge that will be the end of the roll. Roll the tortilla as tight as you can. When finished rolling, gently squeeze the tortilla up and down the shaft of the roll to ensure the mixture is evenly distributed inside the roll. Place the finished rolled tortillas in a plastic bag and refrigerate them for at least 3-4 hours.

When tortillas are sufficiently chilled, remove them from the bag and using a very sharp knife slice them into one inch rounds. Serve and enjoy!

IMG_2939

pinwheels2

IMG_2945

Tips ‘N Tricks: Making A Juicy Pork Tenderloin

I’ve always loved pork ever since I was a kid. My mother, who was not the cook (nor was she ever really interested in it), would often make it for Sunday dinner. The problem with that is she would make a pork and beef roast together in the same pan, roasting them both for the same amount of time. I know, I know, it boggles the mind doesn’t it. But I did say my mother wasn’t the cook now didn’t I (all apologies to my wonderful mother).

I never really had a flavorful, juicy pork tenderloin roast until I was much older and that only came about through trial and error in learning how to roast it. Pork can be fabulous when it is roasted properly or it can taste like the Sahara Desert – there really is no in between.

Pork tenderloin roasts are easy to find. You see them all the time in the grocery store wrapped in vacuum packaging. You can get them plain or pre-marinated. I find most people shy away from these roasts because they hardly have any fat. You may find a thin layer of skin on one side, but all in all it is very lean meat almost reminiscent of boneless skinless chicken breasts (which most people tend to overcook as well).

My mother believed that meat needed to be completely cooked through. And some people like their meat that way. Not me. Don’t get me wrong, I don’t want my meat raw but I’ve found, especially with pork tenderloin, that many cooks think the pork is done when the meat is white completely throughout. Nothing could be further from the truth. Pork tenderloin can be slightly pink in the middle and the meat is still thoroughly cooked. The internal temperature should be between 140 – 145 degrees in the thickest part of the meat when you take it out of the oven. Don’t forget some carry over cooking will occur when the meat is resting.

With the technique I use I don’t even need a meat thermometer. As a matter of fact, I haven’t used one to test the doneness of these roasts in years. I simply roast the pork tenderloin at 375 degrees for one hour. Period. After an hour I take it out of the pan, cover it with foil and let it rest for 10 minutes. Then I slice and serve it. That’s all. It comes out perfectly every single time!

I prep the roast by taking it out of the vacuum packaging and drying it thoroughly with paper towels. There is a lot of gel-like substance in the package and I want to make sure the roast is completely clean and free of it. Then I season it, skin side up, with salt and pepper, brush it lightly with some olive oil (I mostly used garlic infused olive oil) and then add some sort of dry herb that goes well with pork. The herb in the picture below is dried thyme.  I place the roast on a rack in a small roasting pan and roast it for an hour, and voila – I get a juicy roast every single time.

I haven’t had a dry pork tenderloin in years. This technique is so easy to do and yet, as you can see by the picture, the roast looks so elegant and good (and juicy). So follow my little trick for these small tenderloin roasts and you will be successful every single time!

Juicy Pork Tenderoin

Juicy Pork Tenderoin


Rosemary And Sun Dried Tomato Artisan Bread…

My husband is a bread lover and consequently bread is part of every dinner at our house. Carbs aren’t a factor for him, he’s as thin as a rail.  He just loves to have a couple of slices of bread warmed in the toaster oven to accompany his meal. It is one of life’s simple pleasures for him.

Over the past year I’ve experimented with making bread in various ways. When I was growing up homemade bread was a special event, especially since it took nearly all day to make with lots of arduous kneading and several hours of rising time. Now we’ve figured out how to make bread more simply, calling it artisan bread and using various methods to produce loafs that don’t challenge your muscles in the process. Last year I published a blog about Artisan No-Knead Bread and if you haven’t tried that particular method I suggest you do. It makes wonderful bread. The only challenge with that recipe is you have to let the dough rest and rise for a minimum of 18 hours, so if you forget to mix the dough the night before you’re out of luck.

IMG_2809This particular recipe mimics the packaged bread mixes that are out there that promise to give a loaf of “homemade” bread in less than an hour. All you have to do is add water. And that’s great. I’m not sure of the last time I had homemade bread that included azodicar-bonamide or mononitrate. And in my quest to lessen the amount of processed foods in my life I am trying more and more to make things from scratch and not from out of boxes with hard to pronounce ingredients. But you have to admit it is tempting to use these products in order to make fresh bread quickly. And I think I have a recipe that can give you a great loaf of bread in as short of a period of time as possible without all of the processed food additives we want less of in our lives.

This recipe is simple and straightforward. It does call for allowing for the dough to rise twice, first for an hour and then for a half hour. But that’s nothing. The ingredients are so easy to assemble that you can be doing a lot of other things while the bread is rising. Thirty minutes in the oven completes the process and you have great tasting, non-processed artisan bread. Even the novice cook can be successful the first time making this bread.

Lesson Learned 1 – Let the yeast bloom: You need to make sure the yeast is activated in order for this bread to work. Take 2 Tbs. of active dry yeast (slightly less than one pouch) pour it into a bowl, add one cup of very warm water and then whisk the two ingredients together until combined. Let the mixture sit for 3-5 minutes. You will see some bubbling action on the water and then you will see the yeast bloom (almost like mini chalky volcanic eruptions on the surface of the water). Once that happens you know the yeast has been activated and can add the rest of the ingredients.

Lesson Learned 2 – All that’s left is combining the remaining ingredients: It couldn’t be any simpler. Combine all of the remaining ingredients and let the yeast do its work.

pro-line-nonstick-baking-sheetLesson Learned 3 – Prepping the baking sheet: I use a professional grade baking sheet (picture on the left). I have to include a disclaimer that I work at Crate and Barrel which carries this particular baking sheet. I am not trying to sell this, but have found that if you invest in good housewares i.e., cookware, bakeware, gadgets, etc. it will pay dividends in the kitchen. This particular baking sheet is a non-stick baking sheet. It does not have a traditional non-stick surface but notice the groves throughout the bottom of the pan. That allows for heat to circulate underneath whatever is on the sheet and consequently it does not stick. To make this particular bread all I had to do was dust the pan with some cornmeal. When I took the bread out of the oven, I simply lifted it off the sheet with a silicone spatula. The bread did not stick. If you don’t have a pan similar to this you will need to grease a baking sheet with some vegetable oil and then dust it with cornmeal.

I guarantee if you try this recipe you will impress your family and friends. The end result is exquisite and no one will ever believe how easy it was to make. So throw away the box and say good-bye to processed bread mixes. You are now a “from-scratch” bread maker!

Rosemary And Sun Dried Tomato Artisan Bread

  • Servings: 1 Loaf
  • Difficulty: Easy
  • Print

IMG_2779INGREDIENTS:

2 tsp. active dry yeast

1 cup warm water

1/3 cup chopped sun dried tomatoes

1 tsp. dried rosemary, crushed

1 tsp. kosher salt

2 cups flour

cornmeal for dusting

vegetable oil for baking sheet prep

1 egg white (for an wash on the top of the bread)

1 Tbs. milk (for a wash on top of the bread)

DIRECTIONS:

In a medium sized bowl combine yeast and warm water. Whisk to combine. Let the mixture sit for 3-5 minutes until the yeast starts to expand and bloom. Add the tomatoes, rosemary, salt and flour all at once. Use a wooden spoon to combine. If dough is too sticky add a little more flour. If the dough feels too dry add a little more water. The dough should be a bit sticky but capable of being formed into a ball. Cover the dough and let it rise for 1 hour.

After an hour either dust a non-stick baking sheet with cornmeal or, if not using non-stick, brush the sheet with some vegetable oil and dust with cornmeal. Shape the dough into a ball with your hands (or you can use a heavy duty silicone scraper to shape into a ball) and put it on the prepared baking sheet. Cover the dough with a dishtowel and let it rise for and additional 30 minutes.

While the dough is rising, preheat the oven to 400 degrees. After 30 minutes, bake the dough for 20 minutes. Remove the bread from the oven and brush lightly with the whisked egg white and milk mixture. Put the bread back into the oven for an additional 5-10 minutes or until the outer crust turns a nice light golden brown.

Bread Dough Ready To Rise On Prepared Baking Sheet...

Bread Dough Ready To Rise On Prepared Baking Sheet…

IMG_2779

Fresh Out Of The Oven…

IMG_2789


IMG_2797

Rosemary and Sun Dried Tomato Artisan Bread…


Old Fashioned Pot Roast…

Was there ever a comfort food that will chase away the blues on a cold, snowy Winter day better than a simple pot roast? Making a pot roast reminds me of home, with great smells in the kitchen and the anticipation of that roasted goodness that only comes from cooking something low and slow.

le-creuset-signature-7.25-qt.-flame-round-french-ovenThere are various ways to cook a pot roast. Although I’ve made them several times in a slow cooker, I prefer to use an enameled cast iron pot (I use Le Creuset but there are many different varieties out there). I find that enameled cast iron provides an even, controlled heat and I think that consistently  allows for a more tender pot roast.

I also find enameled cast iron to be easy to clean, especially after something has been cooking for a long period of time. The main drawback with enameled cast iron is that it is heavy. I mean after all, it is cast iron. So just be prepared to flex your muscles a little bit and you will be fine. Enameled cast iron can be expensive, but I’ve had some of my pots for over 20 years and although the enamel may be slightly stained, they still work like a charm. In the end, you only get what you pay for…

The beauty of making pot roast is that it is so simple to make and your entire meal winds up being in one pot. The oven does all of the work and you are rewarded for your patience with one of the best comfort food meals of all time. So, here are some lessons learned that will make you a master at making the perfect pot roast:

IMG_2702Lesson Learned 1 – Brown the meat and veggies before putting them in the pot: The cooking method used for making pot roast is called braising. When you braise something you cook it for a long period of time in liquid. In the end, this technique does not provide eye pleasing color although it renders deliciously moist meat and vegetables. Taking a few minutes to brown the meat on all sides and to brown the vegetables will provide something that not only tastes divine but is also eye pleasing. It is worth the time to do it. Remember, you eat with your eyes first.

IMG_2711Lesson Learned 2 – Cut the veggies into big chunks: Regardless of the size of the pot roast, you will be braising the dish for several hours. You don’t want your veggies to fall apart in the process. Make sure you cut them into big chunks. That way the will stand up to the braising time.

Lesson Learned 3 – THE ONLY WAY IS LOW AND SLOW: The only way to wind up with a tender, moist pot roast is to cook it low and slow. Pot roasts are tough cuts of meat (I used a chuck roast in this recipe) and if you don’t take the time to slowly break down the fibers in the meat you will wind up with a tough, uneatable meal. Most recipes that I researched called for cooking a 4-5 pound roast for four hours. I’ve also seen cooking temperatures vary from 275 to 325. I live in high altitude and I’ve learned the hard way that everything takes longer to cook here. I cooked my pot roast for 4 hours at 275 and the last hour I raised the temperature to 300. The pot roast texture turned out perfectly.

The pot roast will tell you when it is done. If you go into the pan and stick your fork in the roast and it does not go in and out easily, the pot roast is not done. I tried this trick after 4 hours of cooking and the fork did not go into the meat easily. After 5 hours the fork went into the meat like the meat was butter. At that point I knew it was done.

I prefer cooking the roast at 275 and cooking it a little longer. I find the lower temperature and the longer braising time does not annihilate the vegetables. Everything turns beautifully.

Lesson Learned 4 – Braise with red wine and beef stock: Once again I’ve seen various suggestions on the type of braising liquid to use with pot roast. I can tell you from experience that nothing beats a combination of red wine and beef stock. This combination not only gives you fabulous drippings from which you can make a homemade gravy, but it also fills the house with the most delightful smells during the cooking process. Part of the comfort of making a pot roast are the smells you get while the roast is braising. Use red wind and beef stock and you won’t regret it.

When you braise a roast you fill the pan with liquid until it reaches half way up the sides of the meat. Don’t cover the meat completely with liquid. If you do, you will poach the roast and not braise it. You don’t want to do that.

potroast2

All of these tips will help you make the most delicious pot roast you’ve ever tasted. If you’ve never made a pot roast before, try to be a little flexible in your cooking time until you figure out the time and temperature that works for you. I highly recommend you keep your oven temperature at 275. If you live at sea level, a 4-5 pound roast may only take 4 hours to braise. That did not work for me in high altitude. I will include both of these recommendations in the recipe.

Try this one the next time you are in need of some old fashioned comfort food. It truly hits the spot!

Old Fashioned Pot Roast

  • Servings: 6-8
  • Difficulty: Easy
  • Print

IMG_2731INGREDIENTS:

1 4-5 pound pot roast

1 large sweet onion peeled and cut into quarters

4 carrots peeled and sliced into 2-3 inch pieces

4 parsnips peeled and sliced into 2-3 inch pieces

3-4 red potatoes (depending on size) washed and cut into large pieces

1 cup dry red wine

3 cups beef broth

2-3 Tbs. of olive oil (I used garlic infused olive oil)

Salt and pepper, to taste

3 sprigs of fresh thyme

dried (or fresh rosemary) 1 tsp. or 2 sprigs

DIRECTIONS:

Preheat the oven to 275 degrees. Heat a large cast iron dutch oven over medium-high heat. Salt and pepper the pot roast. Once the dutch oven has heated, add the oil and make sure the bottom of the pan is completely coated. Sear the roast on all sides for about a minute or two. Remove the roast from the pan and set aside.

Add more oil to the pan if needed. Add the carrots and parsnips to the pan and sear until lightly browned on both sides, about a minute or two. Remove and set aside. Add the potatoes to the pan, flat side down and sear for a couple of minute until tops are lightly browned and slightly crisped. Remove from the pan and set aside.

Add the wine to the pan. Stir with a whisk to remove all of the bits from the bottoms of the pan. Once that is done add the roast back to the pan. If using dried herbs instead of fresh, add to the beef stock and combine.  Pour in the beef stock into the pan making sure that the liquid only goes half way up the sides of the meat. Arrange the carrots, parsnips and potatoes on the side of the roast. Place the onions on top of the roast.

Cover and roast for 4 hours (if high altitude roast at 4 hours at 275 and one more hour at 300).  The roast is ready when it is fall apart tender and a fork inserted into the meat goes in and out easily.

IMG_2728

Browned and ready to go into the oven…

IMG_2731

A beautifully braised pot roast…

IMG_2740

Serving suggestion…

Tips ‘N Tricks Brussels Sprouts…

Recently I posted a recipe for Brussels Sprouts with Pancetta. I have to admit I am not a big fan of brussels sprouts but my husband is, so I am always looking for ways to punch up the flavor. So here are a couple of tips I recently learned that can add even more flavor to that recipe:

lodge-cast-iron-skillet1. Use a cast iron skillet: I got myself a plain old cast iron skillet for the holidays and it is amazing how evenly it cooks everything. After I boiled the brussels sprouts until they just started to become tender, I sautéed  them with some garlic infused olive oil in the cast iron skillet and the brussels sprouts not only finished cooking but were also evenly browned with the edges wonderfully caramelized.

A cast iron skillet is relatively inexpensive and is one of the best sources for cooking with even heat. Just make sure you season the skillet according to the manufacturers instructions before you use it for the first time. A good seasoned cast iron pan can last for generations if you use it properly.

Also, be aware that cast iron heats up slowly. Give the skillet a little extra time to heat up. Once a cast iron pan is heated it holds the heat beautifully throughout the entire cooking process.

2. Add some shallots to boost the flavor: This time I caramelized some shallots in the skillet (two medium sized ones, sliced) and then took them out while I browned and continued to cook the brussels sprouts and pancetta (and btw, if you don’t have or can’t afford pancetta, bacon works just as well). I added them back in at the end with the sun-dried tomatoes (see next tip) so they would not overcook during the process. Worked like a charm.

3. Add some sun-dried tomatoes at the very end: I saw this in another recipe and thought I’d try it. It was fabulous and really boosted the overall flavor of the dish. I used sun-dried tomatoes packed in oil, drained them, chopped them, added them at the very end and just let them warm through . All I can say is – delicious! The result – the best tasting brussels sprouts to date! This was actually the first time ever that I enjoyed eating brussels sprouts! 

IMG_2640

Lemon Chicken With Garlic And Capers…

If you happen to glance at my recipe page and notice a plethora of chicken recipes there’s a reason for that. I simply love chicken, no two ways about it. A lot of people blog a wide variety of recipes. I simply blog recipes that I like. If my recipes don’t fit the bill for you, no worries. There are so many websites to choose from these days so I’m sure you’ll find what you’re looking for if it’s not here.

Not only do I blog recipes that I like, but also ones that are simple but can challenge you in some regard to move yourself out of your comfort zone. My goal is to be your test kitchen by doing the work up front and giving you insights on how to be successful. I wished for a long time that I had someone who would do that for me. It can get frustrating when you fail to get things right time after time. So hopefully I can demystify a few things for you, and I hope I can learn some things from you as well.

So back to this chicken recipe. It’s relatively simple. What takes the most time is the prep. But I love to prep. Chopping, mincing, dicing, slicing – it’s therapeutic for me. Don’t let the prep make you shy away from making this. So much can be done ahead and then once it’s time to cook, everything goes relatively quickly. I made this with a brussels sprouts, pancetta and sun-dried tomato side and it was a little tricky balancing the steps between both. But it was all worth it when my husband kept saying, “This dinner is really good.” Enjoy this recipe and my lessons learned…

IMG_2614Lesson Learned 1 – Cooking with lemon slices: First you need to slice the lemon into even-sized thin rounds. The best way to do this is with a mandolin slicer. In a past recipe I spent quite a bit of time talking about how great a mandolin slicer can be and also how dangerous it can be to use. Just be careful when you use one. But as you can see from the picture, the mandolin will give you even-sized thin rounds.

IMG_2625In the recipe you actually sauté the lemon rounds. It gives the chicken and sauce a delightful flavor and also serves as a garnish for the chicken when you serve it. The trick is to cook them quickly, no longer than about 45 seconds. Once you notice the lemons starting to turn brown, as you can see in the picture to the right, remove them from the pan. You want them to be slightly browned but you don’t want them to loose their shape or too much of their sections.

Lesson Learned 2 – Make sure the chicken breasts are no thicker than 3/4 inch: The thin breasts cook quickly, about 4 minutes per side. I took regular chicken breasts and with a sharp knife cut them in half. That gave me 3/4 inch pieces. You can also take a breast and pound it out to that thickness and then cut it into portion size pieces. Whatever is easier.

10-piece-2.25-10.25-glass-bowl-setLesson Learned 3 – Be organized when making this recipe: I like this recipe not only because it’s flavorful, and believe me it is, but because once you’re done with the prep, the rest is a breeze and goes quite quickly. But the trick is to be organized and have everything prepped up front. I systematically go through the list of ingredients and see what needs to be done with each. Then I put each ingredient into little prep bowls and set them aside until it’s time to use them. Just be careful, you don’t want to prep some things too far ahead. Something like flat leaf parsley that you use for a garnish is best prepped right before you want to use it. If I’m not sure about something I prep it, cover it with plastic wrap and put it in the refrigerator until it’s time to start cooking. I am not suggesting doing your prep hours in advance. I normally start, depending upon the requirements of the recipe, about an hour before I plan on cooking it. The key is to have everything chopped, diced, sliced, etc., before you start. You will have no time to do this work once you start the cooking process.

Now that I come to think of it, this really applies to any recipe. It is so important to understand it and stick to the process, especially when you’re learning to maneuver your way around a kitchen. Ready recipes thoroughly (at least twice all the way through), understand the terminology, prep ahead and go through the process as designed. This will help to ensure your success with any recipe.

I really like this recipe and will definitely make it often. I hope you try it and let me know what you think.

Lemon Chicken With Garlic And Capers

  • Servings: 4
  • Difficulty: Easy
  • Print

INGREDIENTS:

2 small lemons cut into thin rounds

1 1/2 tsp. of sugar

4 cloves of garlic, halved

4 boneless skinless chicken breasts 3/4 of an inch thick

2-3  Tbs. olive oil (I used garlic infused olive oil)

2 Tbs. butter

2 tsp. grated shallot

1/2 tsp. grated garlic

1/2 tsp. dried oregano (use can use 1 fresh spring as well)

1 fresh thyme sprig (you can use dried – I preferred to have at least one herb fresh)

1/2 cup dry white wine

1 cup unsalted chicken stock

1 tsp. flour

1 Tbs. capers, drained and rinsed

flat leaf parsley for garnish, optional

Salt and pepper to taste

DIRECTIONS:

Slice the lemons and combine in a bowl with the sugar and garlic. Set aside. Season chicken with salt and pepper. In a large skillet over medium high heat add the oil. Swirl to coat the pan. Add the chicken to the pan and cook about 4 minutes each side. Remove the chicken front the pan, put on a plate and cover with foil to keep warm.

If needed, add some oil to the pan and add the lemon mixture. Cook stirring occasionally until the lemons start to turn a light brown. Remove the mixture from the pan and set aside.

Add 1 1/2 tsp. butter to the pan and once melted add the grated shallots, grated garlic and herbs. Cook for about a minute. Add the wine and deglaze the bottom of the pan. Continue to cook until the wine is almost completely evaporated. Season with salt and pepper. Add the flour and stir for about a minute, just to remove any floury taste. Add the chicken stock and whisk while bringing the mixture to a boil. Reduce the heat and continue to whisk until the liquid has thickened and reduced by a third. Remove herb sprig(s) from pan. Add a remaining butter and capers. Stir until the sauce gets shiny. Add the chicken and lemons back into the pan. Cover the chicken with the sauce, cover the pan and cook for and additional 2-3 minutes. Serve garnished with flat leaf parsley.

IMG_2649

IMG_2670

IMG_2681

IMG_2663

2014 in review

The WordPress.com stats helpers prepared a 2014 annual report for the “You Betcha Can Make This” blog. Not bad for someone who is relatively new at blogging and does it for the joy of learning and sharing information and not for stats. Enjoy!

Here’s an excerpt:

A New York City subway train holds 1,200 people. This blog was viewed about 5,000 times in 2014. If it were a NYC subway train, it would take about 4 trips to carry that many people.

Click here to see the complete report.

The Best Holiday Stuffing…

I know both Christmas and New Years are over and it’s time to move on to non-holiday recipes. But I just have to blog this one, mainly because I want to make sure I chronicle the recipe for my future use. Most people are pretty fussy about stuffing. My mom made a stuffing that I just loved but did I ever write down the recipe – well of course not. And try as I may I could never replicate it. So for years I have tried various recipes without much success. I just wasn’t satisfied with what I made. This year it was different. I actually put together a stuffing recipe that I loved and although it is not my mom’s it will be the recipe that I use.

The stuffing is a delightful combination of “the trinity”, which is onions, celery and carrots along with sage breakfast sausage, egg bread and herbs. It was a hit at the dinner table and made great leftovers. The guests at my holiday dinner asked if they could have some to take home. Now that is the mark of a good stuffing recipe. I was so happy to finally create a stuffing that I actually enjoyed and will make again. And I learned a few lessons while making it…

Lesson Learned 1 – Make it the day before: I will share a secret with you. When I first made it and tasted it I thought, ugh… this one’s not going to thrill me. But I made it a day ahead of time and let it sit the refrigerator until the following day. When I tasted it the next day it was unbelievably good. I would not recommend making this stuffing the day of your holiday feast. The flavors in this recipe need time to get fully acquainted. It makes all the difference. And, if you are planning a holiday feast, how good is it to be able to make something in advance so that you are not scrambling around on the big day. With this recipe you put it all together, let it sit over night, and then take it out and let it get to room temperature before baking it in the oven.

I also like this recipe because it bakes at 350. I do not have a double oven and so I planned my holiday dinner with dishes that could all be made at the same temperature, including the turkey. This stuffing recipe made my meal preparation easier. I was able to make it a day ahead and bake it in the oven with the turkey. You can’t beat that!

IMG_2542Lesson Learned 2 – Use a good quality egg bread: Like anything else, the quality of what you put into a recipe will determine the quality of what comes out of it. Most recipes call for just plain white bread. I used a egg bread, called a shepherds bread, and it was divine. But if all you have is white bread, use it. I had some extra white bread that I also cubed and I didn’t think it toasted as well as the egg bread. As a matter of fact, the crust burned on many of the pieces. I wound up picking them out and discarding them.

But please, don’t use the prepackage stuffing cubes you find in bags at the grocery store. I’ve never had any luck with those, and who knows what they put in them to get them to last as long as they do. It takes no time to cut the bread into cubes and toast them in the oven.  And the result is so much better.

Lesson Learned 3 – Dice the trinity into equal size pieces: Make sure to finely dice your onions, celery and carrots. If you do, it should take about 8 minutes for them to start to soften and begin to brown. Otherwise it will take a lot longer and chances are by the time your carrots are done your celery and onions will be overcooked.

Lesson Learned 4 – Use fresh herbs in the recipe: I use dried herbs all the time but I think fresh herbs do more to enhance the flavor of this recipe. If you can’t get them, you can use dried. Just remember that with dried herbs you always use less as their flavor is much more concentrated. If you use dried herbs, press the herbs into the palm of your hand with your fingers or slightly crush them with a mortar and pestle to release some of the oil in the herbs before you add them to the recipe. That being said, I still would opt for fresh herbs if at all possible.

Lesson Learned 5 – Cover the stuffing with foil for the first half of the baking process: This is more a matter of taste. I’ve always preferred a softer stuffing while some people prefer a crispy stuffing. I found that by covering the stuffing for the first half hour of baking you get a moist stuffing with just the right amount of crispiness on top. But if you like crispy stuffing, bake it uncovered for the entire hour. Just be sure that if you make this the day before you let the stuffing get to room temperature before baking it off in the oven. I took the stuffing out of the refrigerator and let it sit on the counter for 2 hours before I put it in the oven. The end result was perfect.

This recipe is not difficult to make and only tastes better the more time the ingredients meld. I’m so glad to have finally concocted a stuffing recipe that I like. Keep this one in your file for next year. You won’t be disappointed.

The trinity mixed with breakfast sausage...

The trinity mixed with breakfast sausage…

The Best Holiday Stuffing

  • Servings: 16
  • Difficulty: Easy
  • Print

INGREDIENTS:

1 stick of butter, plus a little extra to coat the baking dish

16 cups of good quality egg bread, cut into 1 inch cubes

4 celery stalks finely diced

2 large carrots, peeled and finely diced

1 medium size sweet onion, finely diced

1 pound sage breakfast sausage

2 Tbs. chopped fresh sage

2 Tbs. chopped fresh thyme

2 – 3 cups unsalted stock (if you can find turkey stock use that. If not substitute chicken stock)

Salt and pepper to taste

DIRECTIONS:

Preheat the oven to 350. Cut the bread into 1 inch cubes and spread out on a baking sheet. Toast for 20-25 minutes stirring occasionally until lightly browned and crisp. Set aside to cool.

Finely dice the celery, carrots and onion. In a large deep skillet melt the butter. Once the butter is melted, pour half of it into a dish and set aside. Add the celery, carrots and onions to the pan and cook over medium high heat until they soften and begin to turn brown. Scrap the vegetables into a bowl and set aside. Add the sausage into the skillet, breaking it up into pieces. Cook until lightly browned and cooked through.

While the sausage is cooking, chop the sage and thyme and set aside. Grease a large 9 x 13 baking dish with butter and set aside. When the sausage is done cooking, add back the vegetables, sage and thyme. Cook for about 1 minute to incorporate the herbs. Add 1 cup of the broth and deglaze the bottom of the pan. Cook until the broth is nearly evaporated, approximately 5 minutes.

Scrape the sausage mixture into a large bowl. Add the toasted bread cubes and remaining stock. Stir until the bread is moistened. Season with salt and pepper. Spread into the prepared baking dish and brush the top with the reserved melted butter.

(Here is where you stop if you are making this ahead. Cover the pan with foil and refrigerate. Take the pan out of the refrigerator at least two hours before baking it in the oven. Remove the foil and cover with plastic wrap while it is coming to room temperature).

Cover the stuffing with foil and bake for 30 minutes. Remove the foil and continue to bake for an additional 30 minutes or until the stuffing is heated through and browned. Let the stuffing stand for 10 minutes before serving.

Add fresh sage and thyme...

Add fresh sage and thyme…

IMG_2573

IMG_2576

Cheesy Potato and Green Onion Casserole…

For years I bought boxed potatoes to make potato casseroles to accompany a meal. The boxes contain a sleeve of freeze dried potatoes that look like petrified potato chips with a pouch of powdered cheese and flavorings, depending upon what kind you purchased (scalloped, au gratin, sour cream and onion, etc). To that you add some butter, water and milk, mix the conglomeration together and bake it in the oven. I never really thought about it, I just did it for the convenience of it all. NEVER AGAIN!

In previous blogs I’ve mentioned how over time I’ve begun to realize that there are many things you can easily make from scratch versus buying them pre-prepared at the grocery store. Things like applesauce, cranberry sauce, rouxs, pickles, soups, gravies, macaroni and cheese – the list can go on and on. The point is when you make something from scratch you control what goes into it. You control the sugars and sodium. You control the color naturally versus using dyes to achieve the desired affect. I’ve never made anything from scratch that included ingredients I could not pronounce much less spell, but I see them all the time on the packages at the grocery store.

I think we’ve come to believe that in the name of convenience it is ok to use prepackaged pre-prepared foods. And I am not one to point a finger at them, I’ve used them all my life. I guess what I’m trying to say here is that as I’ve become more adept in the kitchen I realize how easy it is to make things from scratch and in the end how much better that is for you. Don’t worry, I am not a purist. I’m sure in the name of convenience I will use a pre-prepared item myself from time to time. But more and more I’ve moved away from them and haven’t noticed a big difference in the time it takes to make certain things. Hence this recipe I am about to share.

oxo-hand-held-mandolineWhat makes this recipe so easy to make is a simple tool known as a mandolin slicer. There are tons of varieties out there, and the one in the picture to the right is what I use. When I publish something like this I always have to use the disclaimer that I work at Crate and Barrel. We carry a few varieties of mandolin slicers and this one is pretty affordable. I like it because it gives you a couple of different slicing widths, works well and it has the hand protector. But you can get a mandolin slicer just about anywhere and they can range in price from being extremely cheap to very expensive. If you invest in one, just make sure you at least get one that has some sort of hand protector.

One thing I have to stress here – if not used properly a mandolin slicer can be VERY DANGEROUS. You can slice a piece of your finger off just as easily as a piece of potato if you are not careful. Even with a hand guard you have to be very mindful when using one. The blades on these slicers are very sharp and before you know it, if you are not careful, you can really hurt yourself. So always use a mandolin slicer with the utmost care.

That being said, it is a great tool for quickly slicing things like potatoes, carrots, onions, etc. and getting even slices all the time. The key to success in this potato casserole recipe is the thin evenness of the potato slices. A mandolin slicer can give you that in no time flat (see the picture below). It would take much longer to do this by hand and the discs would not be nearly as precise in width.  So let’s talk a little bit about the lessons I learned developing this recipe.

IMG_2270

Lesson Learned 1 – Always use the mandolin slicer with the utmost care: I can’t help it, this just bares repeating. You won’t believe how easy it is to hack off a chunk of skin with this device. Please be careful using it. But when you use it safely, you will be amazed at how quickly you can produce nice even sized pieces of whatever you are slicing.

Lesson Learned 2 – This recipe is adaptable to a wide variety of cheeses: Normally some sort of cheddar cheese is a staple for this recipe. But over the holidays I had a disc of brie that I’d bought to make a holiday appetizer and I just mixed some of the remaining brie with the cheddar. Divine is all I can say about that. Gruyere is also a good cheese to use as well. Any good melting cheese or combination of compatible melting cheeses will do.

And speaking of melting cheese, don’t use prepackaged grated cheese. Those cheeses have an ingredient in them that keeps the grated pieces from sticking together. That ingredient also makes those cheeses difficult to melt. Grate the cheese yourself. You’ll get a much better consistency and much better flavor

The consistency of a roux

The consistency of a roux

Lesson Learned 3 – The formula for making any roux: Making a roux is the key to almost any homemade sauce or gravy. And you won’t believe how easy it is. All you have to do is remember one simple formula: equal parts butter and flour. This particular recipe uses three tablespoons of butter and 3 tablespoons of flour to create the roux. The amount you use can vary based on the size of the recipe. But remember it is always equal parts of each. The picture on the left shows what the consistency should look like, almost that of a thick, creamy paste.

I could not believe how simple this was to make and so much better than the boxed varieties. Play around with this one to see if you can create the flavor of cheese sauce you prefer the most. Right now I’m a cheddar and brie girl so that is how I am writing the recipe. But don’t be afraid to experiment with this one. I promise anything you do will be so much better than the boxed version of what you make. Enjoy!

Ready to pop into the oven...

Ready to pop into the oven…

Cheesy Potato and Green Onion Casserole…

  • Servings: 4
  • Difficulty: Easy
  • Print

INGREDIENTS:

2-3 large white russet potatoes, unpeeled

3 Tbs. butter

3 Tbs. flour

3-4 green onions, diced (use the green parts of the onion as well)

2 cloves garlic

1 tsp garlic powder

1 1/2 cups milk

1 cup grated cheddar cheese

1/2 cup brie cheese, cut into small pieces

Salt and pepper to taste

DIRECTIONS:

Preheat the oven to 375. Remove the skins from two cloves of garlic and drop them in a pot of cold water. Bring the pot of water to a boil on the stove, making sure the water is well salted. While the water is heating, cut the russet potatoes into 1/8 inch slices and put them in a bowl of cold water so they do not begin to brown. Slice the green onions and set aside. Grate the cheddar cheese and cut the brie into small pieces. Set both of them aside.

Once the water is boiling, put the potato slices in the water and cook them for about 5 minutes or until they just begin to soften.  When the potatoes begin to soften, gently remove them from the pan, drain them and pat them dry removing as much excess water as possible. Remove the discard the garlic cloves.

In a saucepan under medium heat, melt the butter. Add the flour and stir for about a minute until the mixture becomes a creamy paste (make sure to cook for about a minute so that there will be no flour taste). Add the milk and raise the heat to medium high. Once the milk begins to bubble you will notice it starting to thicken. Keep stirring the milk until it becomes thick. Once it thickens, add the garlic powder and cheeses. Stir until the cheeses are completely melted. Add the green onions and combine. Taste the mixture and add salt and pepper as needed. Remove the mixture from the heat.

Place the potatoes in a 1 1/2 quart casserole dish that was sprayed with cooking spray. Pour the cheese mixture over the potatoes. Bake at 375 for 50-55 minutes or until the potatoes are cooked through. For a finishing touch, at the end place the casserole dish under the broiler for a minute or two to brown the cheese.

IMG_2291

IMG_2308

Turkey Pot Pie…

For some reason I am not a big fan of having turkey on Thanksgiving but I LOVE having turkey  on  Christmas Day. This year we had three guests for Christmas dinner and that precipitated making a whole turkey versus just a turkey breast. I had plenty of practice over this past year making bone-in turkey breasts but I never really had a lot of luck making a whole turkey, that is until this year…

I found two tricks that finally rendered me a perfectly cooked bird. One, making sure that the bird was completely defrosted (and I found it takes longer than what is written which is one day in the refrigerator for every four pounds –  plus the importance of removing the guts as soon as possible so you don’t harbor an ice ball in the cavity) and second to roast it at 350 when conventional wisdom says to roast the bird at 325. Needless to say, my bird turned out perfectly this year – the very first time I’ve ever done a whole turkey the right way. So if you are struggling with making a whole turkey, have faith. It only took me several years to finally get it right!

But, this blog is not about roasting a turkey. It’s about what you can do with the leftovers. And for me, one of the best comfort food recipes you can make with leftover turkey is turkey pot pie. And believe me, you will have greater success making this than learning how to roast the perfect turkey.

IMG_2584


I like this recipe because you can use just about anything you have leftover in it. I had some mushrooms that I cut up and sautéed and had a bag of frozen vegetables that had green beans, corn, peas, carrots and celery. But you can use frozen peas and carrots, or a broccoli cauliflower medley – really any bag of frozen veggies you have will do the trick. It really takes no time to put together the filling and within 25 minutes after that you have a delicious meat pie that no one will ever consider a leftover. Here are some lessons I learned while making this recipe:

Image 1Lesson Learned 1 – Don’t take the easy way out and use canned soup for the filling: Have you ever read the labels of many canned soups? The amount of sodium in them is unbelievable. Don’t get me wrong, I am not a proponent of no salt, but when you use processed foods sodium is used as a preservative as well as a seasoning. It is so easy to make the filling from scratch and you can use unsalted chicken stock which has only 5% sodium in it versus the 36% sodium you get in a canned soup! That’s a big difference.

One thing I learned as I became more adept in the kitchen is how easy certain things are to make that I had been, out of habit and lack of knowledge, using previously as pre-prepared or processed. True sometimes they can be very convenient, but when you look at what you may be putting into your system on a regular basis it makes you take pause. Making a simple roux and using unsalted chicken stock creates the same creaminess and flavor as a canned soup, and I would venture to say it gives even greater flavor. I also know that time is a factor for most people and therefore convenience is important. But believe me, in this case, making a simple roux and using unsalted chicken stock takes no time and in the end is much better for you.

IMG_2498

Lesson Learned 2 – If you really want convenience, use prepackaged pie crusts: I am still in the process of mastering the homemade pie crust but must admit that part of my reluctance to do so is based on the fact that the ones you can by pre-made are so darn good. If you are a purist, then make your own pie crust. There are tons of recipes out there to choose from. But for me, I like the convenience of the pre-made dough. The trick is to let the dough come to room temperature before using it. Don’t just let it sit in the fridge and then pull it out and use it. Let it sit on the counter for about an hour and the dough will not only be easier to work with but also will give you the best results.

Lesson Learned 3 – Working with pie crust dough: I unrolled the pie crust dough and put my pie dish on top of it.  I used small individual pie plates six inches in diameter and 1 1/2 inches deep (I had to use both pieces of dough), and cut out a piece of dough that was one inch longer than each dish all the way around. Don’t be fooled into thinking your pie crust needs to look pretty. Once you have the filling in the dish, put the pie crust on top, fold the edges under and crimp them. Cut a couple of slits in the center to let out the steam. Be prepared, you will probably have some mixture dripping out of the sides while it cooks. That is the beauty of the pot pie. What I did to mitigate the mess was to put both dishes on a foil lined baking sheet that was sprayed with cooking spray. That way any dripping during the cooking process did not stick to the baking sheet or prevent me from removing the dishes from the baking sheet.

This is a pretty basic recipe and one most cooks, even the novice ones, can master the first time around. And it is so darn good. I like the idea of making individual pot pies, but you can also adapt this recipe by putting it all into a 10 inch cast iron skillet and topping the skillet with the pie crust. Then you’ll have one big pie that you can proportion out.

IMG_2510

Turkey Pot Pie…

  • Servings: 2
  • Difficulty: easy
  • Print

INGREDIENTS:

3 cups diced cooked turkey

1/2 tsp. dried sage or poultry seasoning

1 tsp. sweet paprika

3 – 4 Tbs. butter

3 – 4 Tbs. flour

I 16 ounce bag of frozen vegetables, a vegetable medley preferred

1 cup pearl onions, frozen or jarred

2 cloves garlic, minced

2 cups low sodium chicken broth

1 cup heavy cream

I package store bought pie crusts

1 egg, slightly beaten with a dash of water

Salt and freshly cracked black pepper to taste

DIRECTIONS:

Preheat the oven to 375 degrees. In a large deep pan melt 3 tablespoons of butter. Add the pearl onions and frozen vegetables and cook until tender, about 3 minutes. Add the garlic, paprika and sage. Cook until fragrant, about 1 minute. (At this point look at the amount of butter you have in the pan. If there is hardly any, add another tablespoon and melt it. Just make sure you use equal parts of butter and flour). Sprinkle the flour all throughout the pan and whisk it with the vegetable mixture for about a minute. Add the chicken stock and stir until it starts to thicken. (You will notice it thickening once it begins to get hot and bubbly. If it does not thicken, you can always add an additional amount of a little flour and water whisked together to get it to thicken). Once it has thickened, add the heavy cream and turkey and stir to combine. Season with salt and pepper as needed. Take the mixture off of the heat.

Lightly flour your counter and unfold one pie crust disc. Place a 6 x 1 1/2 inch individual glass pie pan on the crust. Cut the crust so that the edges are 1 inch longer than the outer edges of the pan. Repeat this process with the second piece of dough and pie pan.

Spoon the prepared filling into each pie pan. Place the dough over the top of each pan, tucking the excess edges under themselves. Crimp the edges with your fingers.  Whisk together the egg and water and brush the crusts evenly with the egg wash. Using a sharp knife cut two vents in the center of the crust.

Place the pie plates on a baking sheet that is lined with foil and sprayed with non-stick cooking spray.  Bake for 25-30 minutes or until the inside mixture is bubbly and the crust is golden brown.

IMG_2501

IMG_2521

IMG_2508

IMG_2533

Oatmeal Cream Cheese Butterscotch Bars…

I have a goal every holiday season of making at least one new cookie recipe. This year I was adventurous and I made two new varieties. One new cookie was peppermint twist kisses and the other, which quickly has become my husband’s favorite, was oatmeal cream cheese butterscotch bars. The past few years I’ve ventured away from some of the more traditional holiday faire and tried more unique types of cookies. Last year, my iced cinnamon chip cookies became a big hit replacing the more traditional chocolate chip cookie in look and flavor. This year my peppermint twist kisses not only gave the look of the holiday but also provided the flavor combination of peppermint and chocolate. Yum!

This recipe is a great melding of oatmeal, cream cheese and butterscotch. It’s not all that difficult to make and it tastes divine. I found I had to buy two bags of butterscotch chips as my husband attacked the first bag when it was in the refrigerator leaving me barely enough to make the bars. Beware those elves that steal the chips before the cookies are made!

For about a year I have been chronicling recipes I’ve made and giving them my rating and lessons learned. As I look back on these recipes there’s hardly a one that has a rating below an A minus. So I’ve decided not to do recipe ratings anymore as I promise to bring you only A and A plus recipes. I will definitely continue my lessons learned, as I know how appreciative I am to learn tips and tricks ahead of time that will make me more successful in the kitchen, especially when trying a recipe for the first time.

Line the pan with foil and let it overlap the sides to create handles...

Line the pan with foil and let it overlap the sides to create handles…

Lesson Learned 1 – Preparation is key to this recipe: Prepping the pan appropriately is key to the success of this recipe. You need to line a 9 x 13 inch pan with a couple of pieces of foil. Make sure the foil overlaps on the long sides of the pan to serve as handles when you lift out the bars. Grease the foil lightly, and wait until the pan is completely cool before lifting the bars out and cutting them (more on that below). If you do that, you will have absolutely no problem removing them from the pan.

Lesson Learned 2 – You don’t need a stand mixer to make these cookies: For those of you that don’t have a stand mixer, never fear – you don’t need one to make this recipe. The bottom of the bars and the crumb topping are one in the same mixture and are made in a food processor. IMG_2403The filling can be made with a hand mixer. Personally I preferred making the crumb mixture in the food processor. I think the pulsing action of the food processor blends the butter with the sugars more completely creating a perfect crumble. The texture should resemble what you see in the picture to the right. I would not recommend trying to make the crumble by hand. I also have to admit it felt weird not using my stand mixer to make the bars, but it was a delightful departure from the usual way of making cookies.

Lesson Learned 3 – Let the pan cool and chill the bars before attempting to cut them: This is critical. The ingredients need to completely set before cutting and the only way to do that is to let them cool. Once the pan was slightly cool I covered it loosely with foil and put it out in the garage. The winter temperatures here in Colorado make it easy to use the garage as a cooling station. I don’t recommend this for warmer climates. If you live in one, let the pan cool on a cooling rack in the kitchen and then put it in the refrigerator once the pan is cool to the touch. Leave the pan in the refrigerator until the bars have completely cooled.

Although this recipe may look difficult it is really quite easy, and definitely worth it. This recipe has become my husband’s new holiday favorite. I think you will enjoy it too!

Oatmeal Cream Cheese Butterscotch Bars…

  • Servings: 36
  • Difficulty: Easy
  • Print

INGREDIENTS:

2 sticks room temperature butter cut into small pieces

2 cups flour

1 1/2 cups quick cooking oats

3/4 cup firmly packed brown sugar

1 tsp. cinnamon

1 bag butterscotch chips (11 ounces)

I package cream cheese, softened (8 ounces)

1 can sweetened condensed milk (14 ounces)

1 lemon zested and juiced

1 tsp. vanilla extract

DIRECTIONS:

Preheat oven to 350 degrees. Line a 9 x 13 pan with foil making sure the foil overlaps the side of the pan to create handles for easy removal. Grease the foil lightly.

Combine flour, oats, and brown sugar in a food processor. Pulse to combine. Add the butter, cinnamon and butterscotch chips. Pulse until the mixture clumps when pressed between your fingers. Press half of the mixture in an even layer into the bottom of the prepared pan.  Bake until slightly golden and set approximately 12 – 15 minutes.

With a hand mixer beat until smooth the cream cheese, condensed milk, lemon juice and zest and vanilla. Spread the mixture evenly over the cooled oatmeal mixture. Sprinkle the remaining oatmeal mixture on the top. Bake until top is golden, approximately 40 minutes.

Cool and chill before cutting. Use the foil handles to remove the bars from the pan and place on a cutting board. Cut into squares.

IMG_2432 2

IMG_2438

Peppermint Twist Kisses…

For many, many years the holidays have meant cookie baking time for me. And over the years I’ve made a wide range of cookies. About five years ago I established a goal of making at least one new cookie recipe each holiday season. The result has been a definite shift in the tried and true cookies I make each year. And it’s nice to see an evolution in my cookie baking.

This blog is dedicated to one of the two new cookie recipes I made this year. Being that I work part time at Crate and Barrel I’ve been really challenged in making my goal of one new post a week during the holiday season. The other recipe (a recipe for oatmeal butterscotch cream cheese bars – also an excellent one) I will try to get posted within the next few days, especially for my readers who may not have started their baking yet.

This blog will also serve as a one stop shop for some of my other favorite cooke recipes. I’ll provide a picture, name and the link to each below since I’ve blogged about them already. Look through them and see what might work for you. I guarantee you, they are all delicious.

I made the peppermint twist cookies this year because I decided not to make spritz cookies and I wanted something on my cookie plates that had the colors of the holiday season. This is a delightful cookie and the combination of peppermint and chocolate truly is indicative of the holidays. It’s easy to make, colorful and delicious. Need I say more.

Recipe Rating – A: This is a flavorful, colorful cookie that will brighten up your holiday cookie platter. Just make sure your family doesn’t raid the bag of kisses before you bake the cookies like my husband did. They are a necessary part of making this cookie special.

Lesson Learned 1 – Rolling out the cookies: This is definitely the most intricate part of making the cookies. Keep in mind that you will be combining to logs of dough into one so make sure the logs are thin enough. Once you have divided the dough and colored half of it with red food coloring, you need to chill the dough for at least an hour. Then divide each half of the dough into 4 equal parts and roll one of each color into a log 9 inch log. I have a silicone baking mat that was great to use in this process as it had measurements in inches on the top of the mat that helped guide me through rolling out the logs into the appropriate length.

Roll each color of dough into 9 inch logs...

Roll each color of dough into 9 inch logs…

Once you do that, you need to loosely braid them together and roll them into a single log. This will elongate the log about an inch or two. Remember you want the circumference of the combined log to be as thick as each individual log.

IMG_2228

Once you’ve rolled both pieces into a single log cut them into pieces approximately 1 1/8 inches thick. (Once I cut the first piece I used it as a guide for cutting the others)

IMG_2237


Take each individual piece and roll it into a ball and place on a cookie sheet.

IMG_2224


You will need to flatten each ball slightly with the bottom of a glass before putting them into the oven. That is definitely the hardest part of making these cookies.

Lesson Learned 2- Make sure you unwrap the chocolate kisses ahead of time. You only have a short window of opportunity to place the kisses on the cookies once they come out of the oven. Make sure you have them unwrapped so that you can get them on quickly. Then DON’T TOUCH THEM. The warm cookie will cause the kisses to get very soft and they need to reset to retain their shape.  Once the cookies have cooled slightly I put them on a baking sheet and stick them in the freezer for a few minutes to get the chocolate to set a little quicker.

These cookies are fun to make, colorful, flavorful and will brighten up any holiday cookie tray. Enjoy!

IMG_2245


Peppermint Twist Kisses…

  • Servings: 3 Dozen Cookies
  • Difficulty: Easy
  • Print

INGREDIENTS:

1 cup unsalted butter at room temperature

2/3 cup sugar

2 egg yolks

1 tsp. peppermint extract

1 tsp vanilla extract

2 1/2 cups flour

1/2 tsp. salt

Red food coloring

36 chocolate kisses (1 bag will give you more than enough)

DIRECTIONS:

In a large mixing bowl cream butter and sugar. Add the egg yolks one at a time and blend. Add the extracts and mix well. Combine the flour and salt. Gradually add the dry ingredients to the wet ingredients. Mix well but do not over mix. Divide the dough in half. Tint one half of the dough with the red food coloring. Wrap both halves individually in plastic wrap and refrigerate for at least one hour.

Preheat the oven to 350 degrees. Divide each half of each dough into four equal portions. Shape each portion into a 9 inch log. Place one red log next to one white log and gently twist them together to create on swirled log. (see picture above). Gently roll both together to create one log. Cut each log into pieces approx. 1 1/8 inches thick. Roll each segment into a ball and place on an ungreased cookie sheet. Flatten each ball slightly with the bottom of a glass.

Bake at 350 for 10-12 minutes or until the edges are lightly browned. Press chocolate kisses into the center of each warm cookie. Remove to a wire rack and let cool. (once slightly cooled you can put the cookie on a flat sheet into the freezer for a few minutes to help the kisses set faster).

IMG_2250


QUICK GUIDE TO OTHER HOLIDAY COOKIES: (just click on the title underneath the picture)


Chicago Style Deep Dish Pizza…

I was born and raised in Chicago. In fact, I spent most of my life there. And I know that quite often if someone says they are from Chicago you eventually find out they lived in one of the adjoining suburbs. But not me. I was born on the South Side, raised in Brighton Park went to college in Illinois and moved to the North side when I got my job with the Chicago Park District. I lived on the North Side in the Lake View area until we moved from Chicago in 1999.

I live right outside of Boulder, Colorado now and although this is God’s country there are certain things I will always miss about Chicago. I miss the various modes of transportation in Chicago, especially cabs. I miss the diversity of Chicago, it doesn’t really exist here to the same degree. And I miss the food in Chicago – the restaurants are beyond compare and often within walking distance of where you live.

I think two of the hallmark foods associated with Chicago are hot dogs and pizza. There are strict rules you must follow when preparing and eating these culinary delights and are they ever worth it. Every once in a while I get such a taste for a Chicago-style hot dog or some deep dish pizza. You just can’t find anything comparable here.

IMG_1958

Pizza Ingredients…

So it was to our delight when a friend of ours emailed us and said he saw online the recipe for deep dish pizza from one of the most renowned pizza parlors in Chicago. The recipe was published by a disgruntled employee. It’s my understanding that it was only online for a short time, but time enough for some to grab hold of it. Our friend was one of them and he emailed the recipe to us.

We’ve made this several times and each time we get better at it. And beyond compare, this tastes exactly like the pizza we used to get in Chicago. So it is my pleasure to share it with you and also to give you my lessons learned after making it for several years.

RECIPE RATING: A++++++ If you love Chicago style deep dish pizza you will LOVE this. We could not believe how good it was when we first made it. Nor could we believe how it tasted exactly like the pizza we used to get at one of the most well known pizza establishments in Chicago. I won’t name it so that I can share the recipe with you. This pizza is to die for! You simply must try it.

IMG_1953Lesson Learned 1 – Invest in a deep dish pizza pan: We use a pizza pan that is twelve inches in diameter by 2 1/2 inches tall. It is the perfect size for this recipe, crust and all. When you get it, make sure you season it before you use it. If the pan does not come with seasoning instructions, just go online and look up how to season a pizza pan. Our pan is so well seasoned that the pizza pops right out. This type of pan is a must for this pizza recipe.

IMG_2454Lesson Learned 2 – Follow the recipe down to the letter: If you want the pizza to taste like Chicago style pizza, you cannot stray from the basic ingredients. The only culinary license you have are the “toppings” so to speak. By that I mean will it be only a cheese pizza, sausage and mushroom, will you add green peppers or olives? That you can choose. But the basics must remain the same. One of the key ingredients is the sauce (or gravy as the true Italians call it). There is a very specific brand of sauce you must use and, at least out here in Colorado, it is not available in local grocery stores. It is called 6 & 1 All Purpose Ground Tomatoes with added extra heavy puree. For those of you living in Colorado you can find it at Valentes Italian Deli in Westminster. For my Chicago friends, I am sure if you have an Italian Deli near your home they will have it. The owner of Valentes told me that people drive from four different states to pick up cases of this stuff. And you must use only this. Otherwise you will not get the consistency or flavor that you want. Regular canned tomatoes from the grocery store are too watery for this recipe. 

Lesson Learned 3 – Be patient: you may find that it will take a couple of times to master this recipe. Our challenge was the crust and getting it so that it wasn’t too thick. Eventually we figured out how to roll it out so that we had very little adjusting to do when fitting it into the pan. For us, making the dough was easy but getting it to fit in the pan and not be too thick was the challenge. All I can say is that this recipe is definitely worth the trial and error for putting it together, especially if you love Chicago style deep dish pizza.

Anyone who has ever lived in Chicago or loves Chicago style deep dish pizza will love this recipe. Feel free to pass it on. It’s a great way to get great Chicago pizza no matter where you live. Enjoy, and I’d love to hear from you once you’ve made this!

Chicago Style Deep Dish Pizza

  • Servings: 8
  • Difficulty: Medium/Hard
  • Print

INGREDIENTS:

1 cup water

1/3 cup oil (80% corn oil/20% extra virgin olive oil)

1 packet quick rise yeast (only if using the dough the same day, otherwise regular yeast)

1 Tbs. sugar

1/4 tsp. cream of tartar

3 cups bread flour

1/4 cup corn flour or corn meal (if using cornmeal sift before combining with bread flour) plus extra to sprinkle on the bottom of the pizza pan

1/2 tsp. garlic salt

1/2 tsp. dried oregano

1/2 tsp. dried basil

Sliced mozzarella, enough to cover the bottom of the pizza (do not used packaged grated mozzarella)

1 28 oz. can of 6 & 1 All Purpose Ground Tomatoes (see picture above)

Grated Romano and Parmesan blend (enough to cover the top of the pizza)

Other pizza ingredients: (if using sausage or pepperoni precook until 75% done – ingredients like green peppers, mushrooms, etc., cook and add as dry as possible so as not to make the crust soggy)

DIRECTIONS:

In a large bowl combine water (temp. no higher than 115 degrees for quick rise yeast), yeast, sugar and cream of tartar. Whisk until dissolved. Stir in oil. Combine flour and cornmeal and mix with yeast until consistency of dough is no longer sticky. Remove from bowl and knead. (I use my stand mixer with the dough hook and knead for about 4 minutes – if you don’t have a stand mixer knead by hand for about 10 minutes). Roll the dough into a ball and very lightly coat the outside of the dough with oil. Place the dough in a large bowl, cover with plastic wrap and a dishtowel and let rise for a minimum of 4 hours (or overnight if not using quick rise yeast).

Preheat oven to 450 degrees. Coat a 12 inch by 2 1/2 inch pizza pan with butter and sprinkle lightly with cornmeal. Punch down dough (it will rise quite a bit) and roll it out on a lightly floured surface to allow for 1/4 inch of dough all over the pan including the walls of the pan. Arrange the dough in the pizza pan. Place dough in the oven for 5 minutes. Remove the pan from the oven and cover the dough with mozzarella slices. Top with other ingredients (sausage, mushrooms, etc.) and top with the ground tomatoes. Lightly sprinkle with oregano, garlic salt and basil. Top with the Romano/Parmesan blend. Place back in the oven and continue baking for about 25 minutes.

Turn off the oven. Remove the pan from the oven and let rest for 5 minutes on the stove and then put the pan back in the cooling oven for about 5 minutes. (this is necessary for the pizza to set).

Slice and enjoy!

The dough will rise quite high...

The dough will rise quite high…

The pizza dough...

The pizza dough…

Roll out the dough to a quarter of an inch to cover the bottom and sides...

Roll out the dough to a quarter of an inch to cover the bottom and sides…

Dust the bottom of the pan with cornmeal...

Grease the pan with butter and dust the bottom with cornmeal…

Arrange the dough in the pan (it doesn't have to be pretty)...

Arrange the dough in the pan (it doesn’t have to be pretty) and cook for 5 minutes…

After baking crust for 5 minutes, top with mozzarella slices...

After baking crust for 5 minutes, top with mozzarella slices…

Add your preferred ingredients (we used sausage and mushrooms)

Add your preferred ingredients (we used sausage and mushrooms)

Top with sauce, seasonings and parmesan/romano mixture...

Top with sauce, seasonings and parmesan/romano mixture…

Chicago-style deep dish pizza

Chicago-style deep dish pizza

Chicago style deep dish pizza

Enjoy a slice tonight…

Happy Thanksgiving Leftovers…

Happy Thanksgiving to all. And as you begin to wonder what you’ll do with the mound of turkey leftovers you’ll soon have in the refrigerator, think about making Shepherd’s Pie Turkey style(click on the red colored link for the recipe and lessons learned). 

Shepherds Pie Turkey Style...

Shepherds Pie Turkey Style…

I am thankful for everyone who takes the time to read this blog. Hopefully my lessons learned have helped you become more adept in the kitchen. Have a great Thanksgiving Day and thanks again for following this blog. It means a lot!

Soon I will venture into my holiday cookie baking ritual. Much more to come. Please feel free to share your favorite holiday recipes with me. I’d love to try some of them. Happy Thanksgiving!

And don’t forget:

cooking


Cranberry Brie Puff Pastry Bites…

In case you haven’t noticed the holidays are coming and with them the conundrums of what to make for those holiday parties. Last year I created a recipe for a fabulous crab dip that was a hit all season long. The only challenge with making that appetizer was the cost, $11 for a can of crab claw meat and that was the least expensive one I could find.

This year I wanted to make something different. I decided to venture into the realm of puff pastry as I’ve had some successes with it in the past, specifically making a salmon en croute. In researching various recipe options I came upon several recipes for combining brie cheese with cranberry sauce and puff pastry. That sounded divine. So I went about borrowing dribs and drabs of various recipes to create my own puff pastry appetizer. Here’s my rating and lessons learned:

Recipe rating: B+ with the potential to be an A+: I had never made anything like this before and I learned some valuable lessons while making it. This is a great appetizer but with some specific caveats you should follow in order to make them the best they can possibly be.

IMG_1859Lesson Learned 1 – You only need a small amount of brie: Having never made these before I was unsure as to how much brie to put into each puff pastry shell. I used the small side of a melon baller to portion out the brie. Next time I will use half that amount. The first batch I made the brie ran over the sides of the puff pastry and not much was left inside. The second batch I made I used a little less (I could have even used less) and the outcome was much better. (I found a wheel of brie at Costco for a little over $7.00. I had more than enough for the appetizers with plenty left over.) You want to make sure that the brie and cranberry sauce meld together and not just have cranberry sauce with a hint of brie, which was what I had. Anyway, a valuable lesson learned for the next time I make them.

The same applies to the cranberry sauce as well. Use only a small amount as you don’t want it to overpower the brie. Err on the side of less is more, especially since the pastry puffs up so much in the oven.

Lesson Learned 2 – Getting the desired result when baking puff pastry: In my mind there are two tried and true rules for successfully making puff pastry – one, a very hot oven and two, applying an egg wash. Most of the recipes I read said to bake these bites at 375 for 15 minutes. I should know better. The puff pastry was nowhere near done by that time. When I make my salmon on croute I bake it at 400 for 20 minutes and the puff pastry comes out perfectly. Why should this be any different. Needless to say at 15 minutes the puff pastry was nowhere near browned and I wound up having to keep them in the oven for an additional 10 minutes. Next time I will bake these at 400 and check them at 15 minutes. Lesson learned – follow my instincts and not necessarily what is suggested in any given recipe.

IMG_1848The recipe is made in a mini muffin pan. I found that cutting the puff pastry in thirds and then into twelve equal squares still gave me a little too much puff pastry per appetizer. I wound up cutting off about 1/8 inch off the sides so that the squares would not abut each other in the pan. You could probably fold the pastry more in the muffin cup to prevent this as well. I try to work with the pastry as little as possible so as not to get it too warm. You may have to play with this a little until you figure out what works for you.

Also no recipe I researched said anything about using an egg wash to enhance the browning of the puff pastry. To me this is elementary but you cannot assume that everyone knows this. An egg wash on puff pastry or pie dough gives the dough a gorgeous color that it cannot get on its own within the baking time allotted. So always brush on an egg wash when using puff pastry to get a nice golden brown color.

IMG_1841Lesson Learned 3 – Make your own homemade cranberry sauce: To me, making your own cranberry sauce is like making your own apple sauce – store bought simply can never compare. And it is so easy to make. If you don’t have your own recipe – just click on “cranberry sauce” and you can make my recipe. It is so easy and so flavorful. You’ll never buy canned again. Plus you will have some delightful left overs to serve as a side dish or even as a spread on sandwiches. Divine!

Lesson Learned 4 – Serve them warm: I read many different versions of this type of recipe and many of them said in the comments that you can serve these warm or cold. I made these and then brought them to a party by which time they were no longer warm. I can guarantee you that although they tasted ok they were divine when they were warm. So if you’re looking for a cold appetizer to bring to a holiday gathering, bring my crab dip and not this one. But if you have the ability to serve a warm appetizer, this is the one. I cannot attest to how these would reheat in a microwave. I’m thinking that a microwave and puff pastry just don’t mix. If you have any tips regarding that, please feel free to comment. But trust me, these are much much better served warm.

I am definitely trying this recipe again. Even with the few slip ups I had the taste was fabulous. It seems you just can’t go wrong when puff pastry is involved. Try this one and let me know what you think!

Image copy

Cranberry Brie Puff Pastry Bites…

  • Servings: 24 Individual Pastries
  • Difficulty: Medium
  • Print

INGREDIENTS:

1 package frozen puff pastry

1/2 pound brie (maybe even a little less)

1/2 cup cranberry sauce

1 egg

Splash of water

DIRECTIONS:

Let puff pastry sheets thaw for at least 2-3 hours in the refrigerator or overnight. Preheat the oven to 400 degrees. With a sharp knife or pizza cutter, cut the puff pastry along the folded lines. Cut each strip into four equal size squares. Using a mini muffin pan, press the puff pastry into each muffin cavity.

Put a small amount of brie in the cavity and top it with a small amount of cranberry sauce. Whisk the egg and water in a small bowl and brush the edges of the puff pastry with the egg wash. Bake for 15 minutes or until the puff pastry turns gold brown.

Remove from muffin pan and let cool for approximately 5 minutes before serving.

IMG_1869

IMG_1899

IMG_1907

IMG_1910

Pan Fried Cod With Lemon Butter Sauce…

My husband and I have gotten into eating more fish lately and so I’ve become a student of preparing fish. Baking, broiling, grilling – you name it, I’ve been trying it. I will be the first to admit fish is tricky and the only advice I can give is to keep making it until it becomes more intuitive. Don’t be afraid to flip it back on the heat if you find it is not cooked through. I would much rather do that than serve overcooked fish. You can’t take that back. Preparing fish in an art that comes about from trial and error. But I guarantee its worth the blood, sweat and tears.

Lately I’ve made a lot of fish filets, mostly pan frying them and I think I’ve got it to the point where I’ve learned how to judge when the fish is cooked. Normally I try to buy a filet that is between a 1/4 and 1/2 inch thick. That way I know that about 3 – 4  minutes on each side under medium high heat will do the trick.

What’s great is grocery stores are now stocking more fish both fresh and flash frozen. The filets I’ve been buying are flash frozen and shrink wrapped and I find they thaw and cook beautifully. The only fish that I’ve tried a fews times that doesn’t seem to hold up well in this process is swordfish. Regardless of what I do it always seem to turn out tough. So if I plan on serving swordfish I buy it fresh. Otherwise fish like, grouper, salmon, cod, flounder, halibut and the like all seem to hold up well being flash frozen. It’s a great convenience when you decide at the last minute that you want to make fish for dinner, which was the case with me last night.

Recipe Rating – A: I’ll clue you in, the first few times I tried recipes like this the results were not nearly as good. As I mentioned earlier, preparing fish is something of a acquired skill. The only thing I will tell you is to err on the side of undercooking versus overcooking. That way you can always flip it back in the pan if need be. I would also advise that if you are not a seasoned cook to avoid serving fish at a dinner party. Be patient. Wait until you’ve mastered the skill of preparing fish before you venture into doing that. Don’t set yourself up for failure. And don’t let what I’m saying make you shy away from fish. It is definitely worth it to master this skill!

IMG_1715Lesson Learned 1 – Preparing the fish: This recipe has a very simple preparation for the fish. After the fish thawed and I removed it from its shrink wrap, I took paper towels and dried the fish thoroughly. Then I dusted the fish with flour on both sides and seasoned it. This time I used a Penzy’s seasoned blend called “Forward”. The blend consists of black pepper, onion, paprika, garlic, turmeric and spice extracts of celery, rosemary, thyme and basil. Although it sounds like seasoning overload, the blend actually created a nice all-purpose seasoning and it worked well with the fish. Don’t be afraid to experiment here. What I do is open my seasoning blends and smell them. I can tell by the smell what might overpower the fish. A nice all purpose blend works well to compliment the taste of the fish, as it did in this case.

Shallot and Garlic Sauted in White Wine and Lemon Juice...

Shallot and Garlic Sauted in White Wine and Lemon Juice…

Lesson Learned 2 – Making the butter sauce: I have to admit making this sauce was rather easy. I discovered that starting it about 15 – 20 minutes before serving works well. I found it interesting that you sauté the shallots, and garlic in wine and lemon juice without using any oil or fat. You add heavy cream and butter near the end. At one point you are making the sauce while simultaneously cooking the fish, but at that point you’re only doing the finishing touch of adding the butter to the sauce, so it’s easy to multi-task. You can also make it ahead, just make sure to keep it warm on a very low flame. This is a very rich sauce. Be careful. You only want to add a little to the fish. You don’t want the taste of the fish to be lost in the sauce. Add just a little and you will have a decadent delight. The recipe below is more than enough for two people. You can easily double it if you plan to serve more people.

The Finished Butter Sauce...

The Finished Butter Sauce…

Lesson Learned 3 – The power of garnish: I’ve said this before but it’s worth repeating. You eat with your eyes first. I can’t tell you how many times I get comments like, “that looks delicious!” Now I can understand how something tastes delicious but I’m not sure how delicious can be determined by your eyes. But in reality it is, and I’ve found one of the best way to dress up a dish is to garnish it with parsley or chives. Just that pop of color adds to the “looks delicious” factor. Adding garnish is so easy and creates a visual excitement before the dish is ever tasted.

IMG_1742

I served steamed broccoli and cauliflower along with Trader Joe’s chicken fried rice with the cod (BTW, that chicken fried rice is very good and easy to prepare).  The meal was a hit. A friend of mine posted on Facebook that cod has a bad rap and I tend to agree. I’m not sure why. It is a mild white fish that can be prepared in a variety of ways, is complimented by a variety of seasonings and is relatively inexpensive compared to other fish. So, don’t shy away from it. This recipe will work well for any white fish like halibut or grouper. Just make sure you don’t overcook the fish. You want the fish moist, tender and flaky. And when you add that butter sauce, well all I can say is it’s to die for!

Pan Fried Cod With Lemon Butter Sauce

  • Servings: 2
  • Difficulty: Medium
  • Print

INGREDIENTS:

Lemon Butter Sauce:

1/2 cup dry white wine

1/4 cup fresh squeezed lemon juice

1 shallot. chopped

1 large clove garlic, minced

1 large dash of Worcestershire sauce

1/4 cup heavy cream

1 stick of butter

Salt and pepper to taste

A dash of hot sauce, if desired

For The Fish:

2 cod filets between 1/4 and 1/2 inches thick

1/4 cup all purpose flour

Spice Blend of Choice (I used Penzy’s spice blend called “Forward” – see reference in blog)

1 Tbs. olive oil

1 Tbs. butter

Salt and pepper

Fresh parsley or chives for garnish

DIRECTIONS:

Begin by preparing the butter sauce. Heat a sauce pan over medium high heat. Add the wine, lemon juice, garlic and shallots. Cook for about three minutes or until the shallots turn translucent. Add the Worcestershire (and hot sauce if desired – I did not add hot sauce) and simmer until the mixture becomes syrupy.

Stir in the cream and cook for about 1 minute. Whisk in the butter a few pats at a time until it becomes fully incorporated. Serve immediately or keep warm until ready to serve.

In a large skillet melt the butter and olive oil. On a plate mix the flour with some salt and pepper. Pat the fish dry with paper towels. Dredge both sides of the fish in flour. Shake off the excess. Sprinkle the spice blend on top of the filets. Once the skillet is heated and the butter melted add the fish seasoned side down. Season the other side with the season blend. Cook the fish for 3-4 minutes on each side.

Pour a little bit of the sauce on the bottom of the plate. Put the fish on top and pour a small portion of the sauce over the filet. Garnish and serve immediately.

IMG_1736

Pan Fried Cod With Lemon Butter Sauce...

Pan Fried Cod With Lemon Butter Sauce…

Pan Fried Cod With Steamed Vegetables and Chicken Fried Rice...

Pan Fried Cod With Steamed Vegetables and Chicken Fried Rice…

Brussels Sprouts With Pancetta…

I’ve never been a big fan of brussels sprouts. Cooked cabbage of any kind doesn’t do anything for me. The meal I dread the most is corned beef and cabbage (sorry to any of my readers that love CB&C) – I could just gag. But my husband loves brussels sprouts and has often asked me not only to eat them but also make them. I now can empathize a little more with my mother who was not a great cook. She had a limited palate and she refused to make anything she didn’t like. I get it now. It’s hard to get excited about making something you don’t like. But if you know me, you know I like a good challenge. Was there a brussels sprouts recipe out there that could actually get me to eat and enjoy them? I had my doubts.  And so my research began…

I looked at a wide variety of recipes and came across a couple of combinations that sounded interesting. One involved cranberries, feta cheese and nuts (and that will be a future blog) and one involved pancetta. Making brussels sprouts with pancetta is a little less involved so I thought I would try it. The results were quite interesting…

Image 2

Recipe Rating: A – I even had to admit that the results, for me, were very palatable and for my husband, who is a brussels sprouts lover, it was phenomenal. The combination of the pancetta, garlic and chicken stock infused the brussels sprouts with flavor. I actually made this recipe twice (as I had a lot of brussels sprouts and extra pancetta) and enjoyed it. Don’t get me wrong, I didn’t kid myself into thinking that brussels sprouts will now become my vegetable of choice, but at least I know there is a way to prepare them that I can live with and that brussels sprouts lovers truly enjoy!

IMG_1491Lesson Learned 1 – The difference between pancetta and bacon: Both pancetta and bacon are made from pork bellies. The difference is how they are prepared. Bacon is brined and smoked. Pancetta is seasoned with a lot of salt and pepper then rolled and wrapped in a casing to keep its shape. Pancetta is cured but not smoked. You can easily substitute bacon for pancetta in any recipe. I cut the pancetta into lardons just like I would bacon and added the brussels sprouts once the pancetta began to crisp. What I learned in making this recipe is, if you use pancetta, wait until the very end to add any salt to the sprouts. The nice thing about brussels sprouts is they highly absorb the flavors they are cooked with, and in this case they absorb the salt and pepper from the pancetta. I found it best to use unsalted chicken stock as well and to taste the sprouts at the very end to see if they needed any additional salt or pepper. I found that I needed very little salt at the end, much less than I would have added originally. So be careful. You can always add more salt, but you can’t take it away. You don’t want the brussels sprouts to be too salty.

IMG_1617Lesson Learned 2 – Boiling the sprouts before putting them in the skillet: You need to do this otherwise the sprouts will not cook all the way through in the time allotted for the recipe. I found putting them in boiling water and letting them cook for 5-7 minutes is the best way to get the desired end result. The remaining time they cook (approx. 25 minutes) in the skillet will then be sufficient to produce tender sprouts.  Also it is important to try to make the sprouts of equal size. If some of them are too big, cut them in half or in quarters. That way they will all cook evenly.

This recipe is easy to prepare and if can be enjoyed by someone who is not the biggest fan of brussels sprouts, imagine how good it will be for someone who loves them. I can now say that I have eaten brussels sprouts and enjoyed them – something I thought would never have come out of my mouth!

Brussels Sprouts With Pancetta…

  • Servings: 2
  • Difficulty: Easy
  • Print

INGREDIENTS:

1/2 pound fresh brussels sprouts, trimmed

2 Tbs. olive oil (I used garlic infused olive oil)

2-3 ounces of very thinly sliced pancetta cut into lardons

2 cloves garlic, minced

3/4 cup unsalted chicken stock

DIRECTIONS:

Start a pot of water boiling on the stove (do not add any salt to the water at this time). Once the water comes to a boil put in the brussels sprouts and cook for 5-7 minutes.  Drain the brussels sprouts and set aside.

Add olive oil to a hot pan. Add the pancetta and cook until the edges start to crisp. Add the garlic and cook for 30-60 seconds until the garlic becomes fragrant. Add the brussels sprouts to the pan and cook until they begin to brown. Turn them over and allow them to cook a little longer or until the second side begins to brown. Add the chicken stock, scrape any bits off the bottom of the pan and cook until the broth reduces to the point that it is just coating the sprouts. Serve immediately.

IMG_1639


IMG_1656


Cranberry Christmas Cake…

I know we still have three weeks until Thanksgiving, but I am already testing some recipes for the holidays. I was intrigued by tIMG_1508
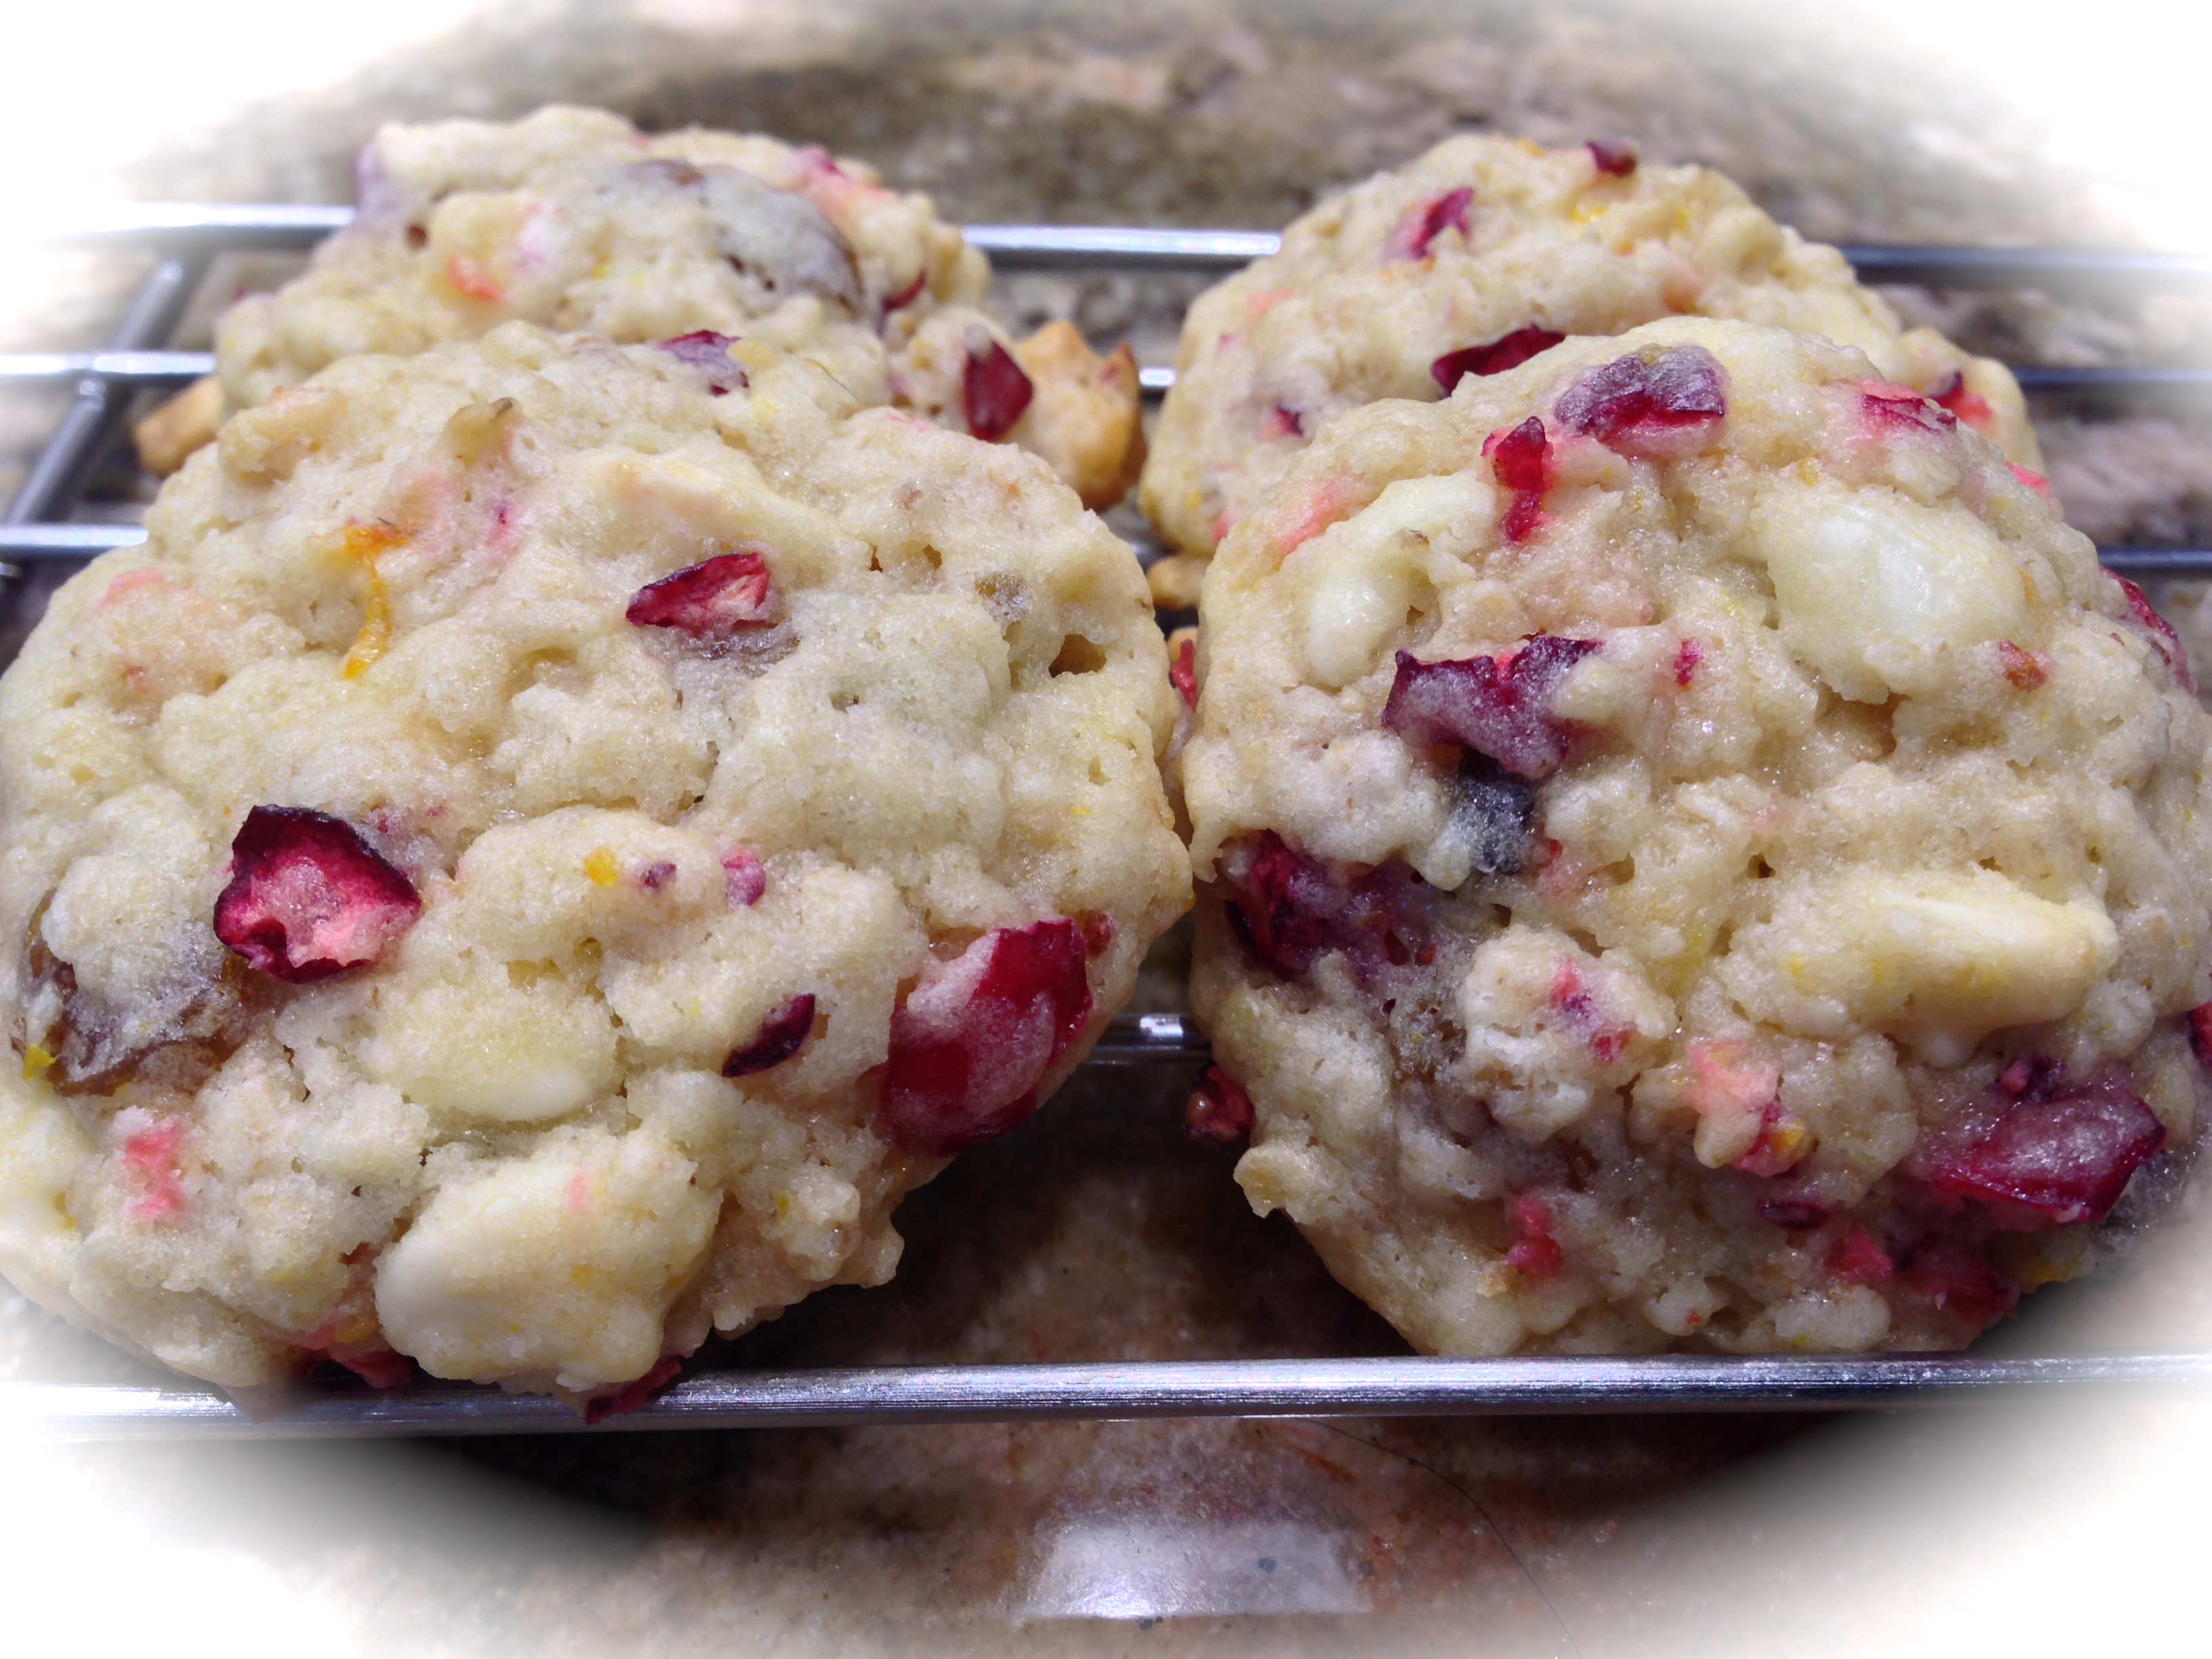
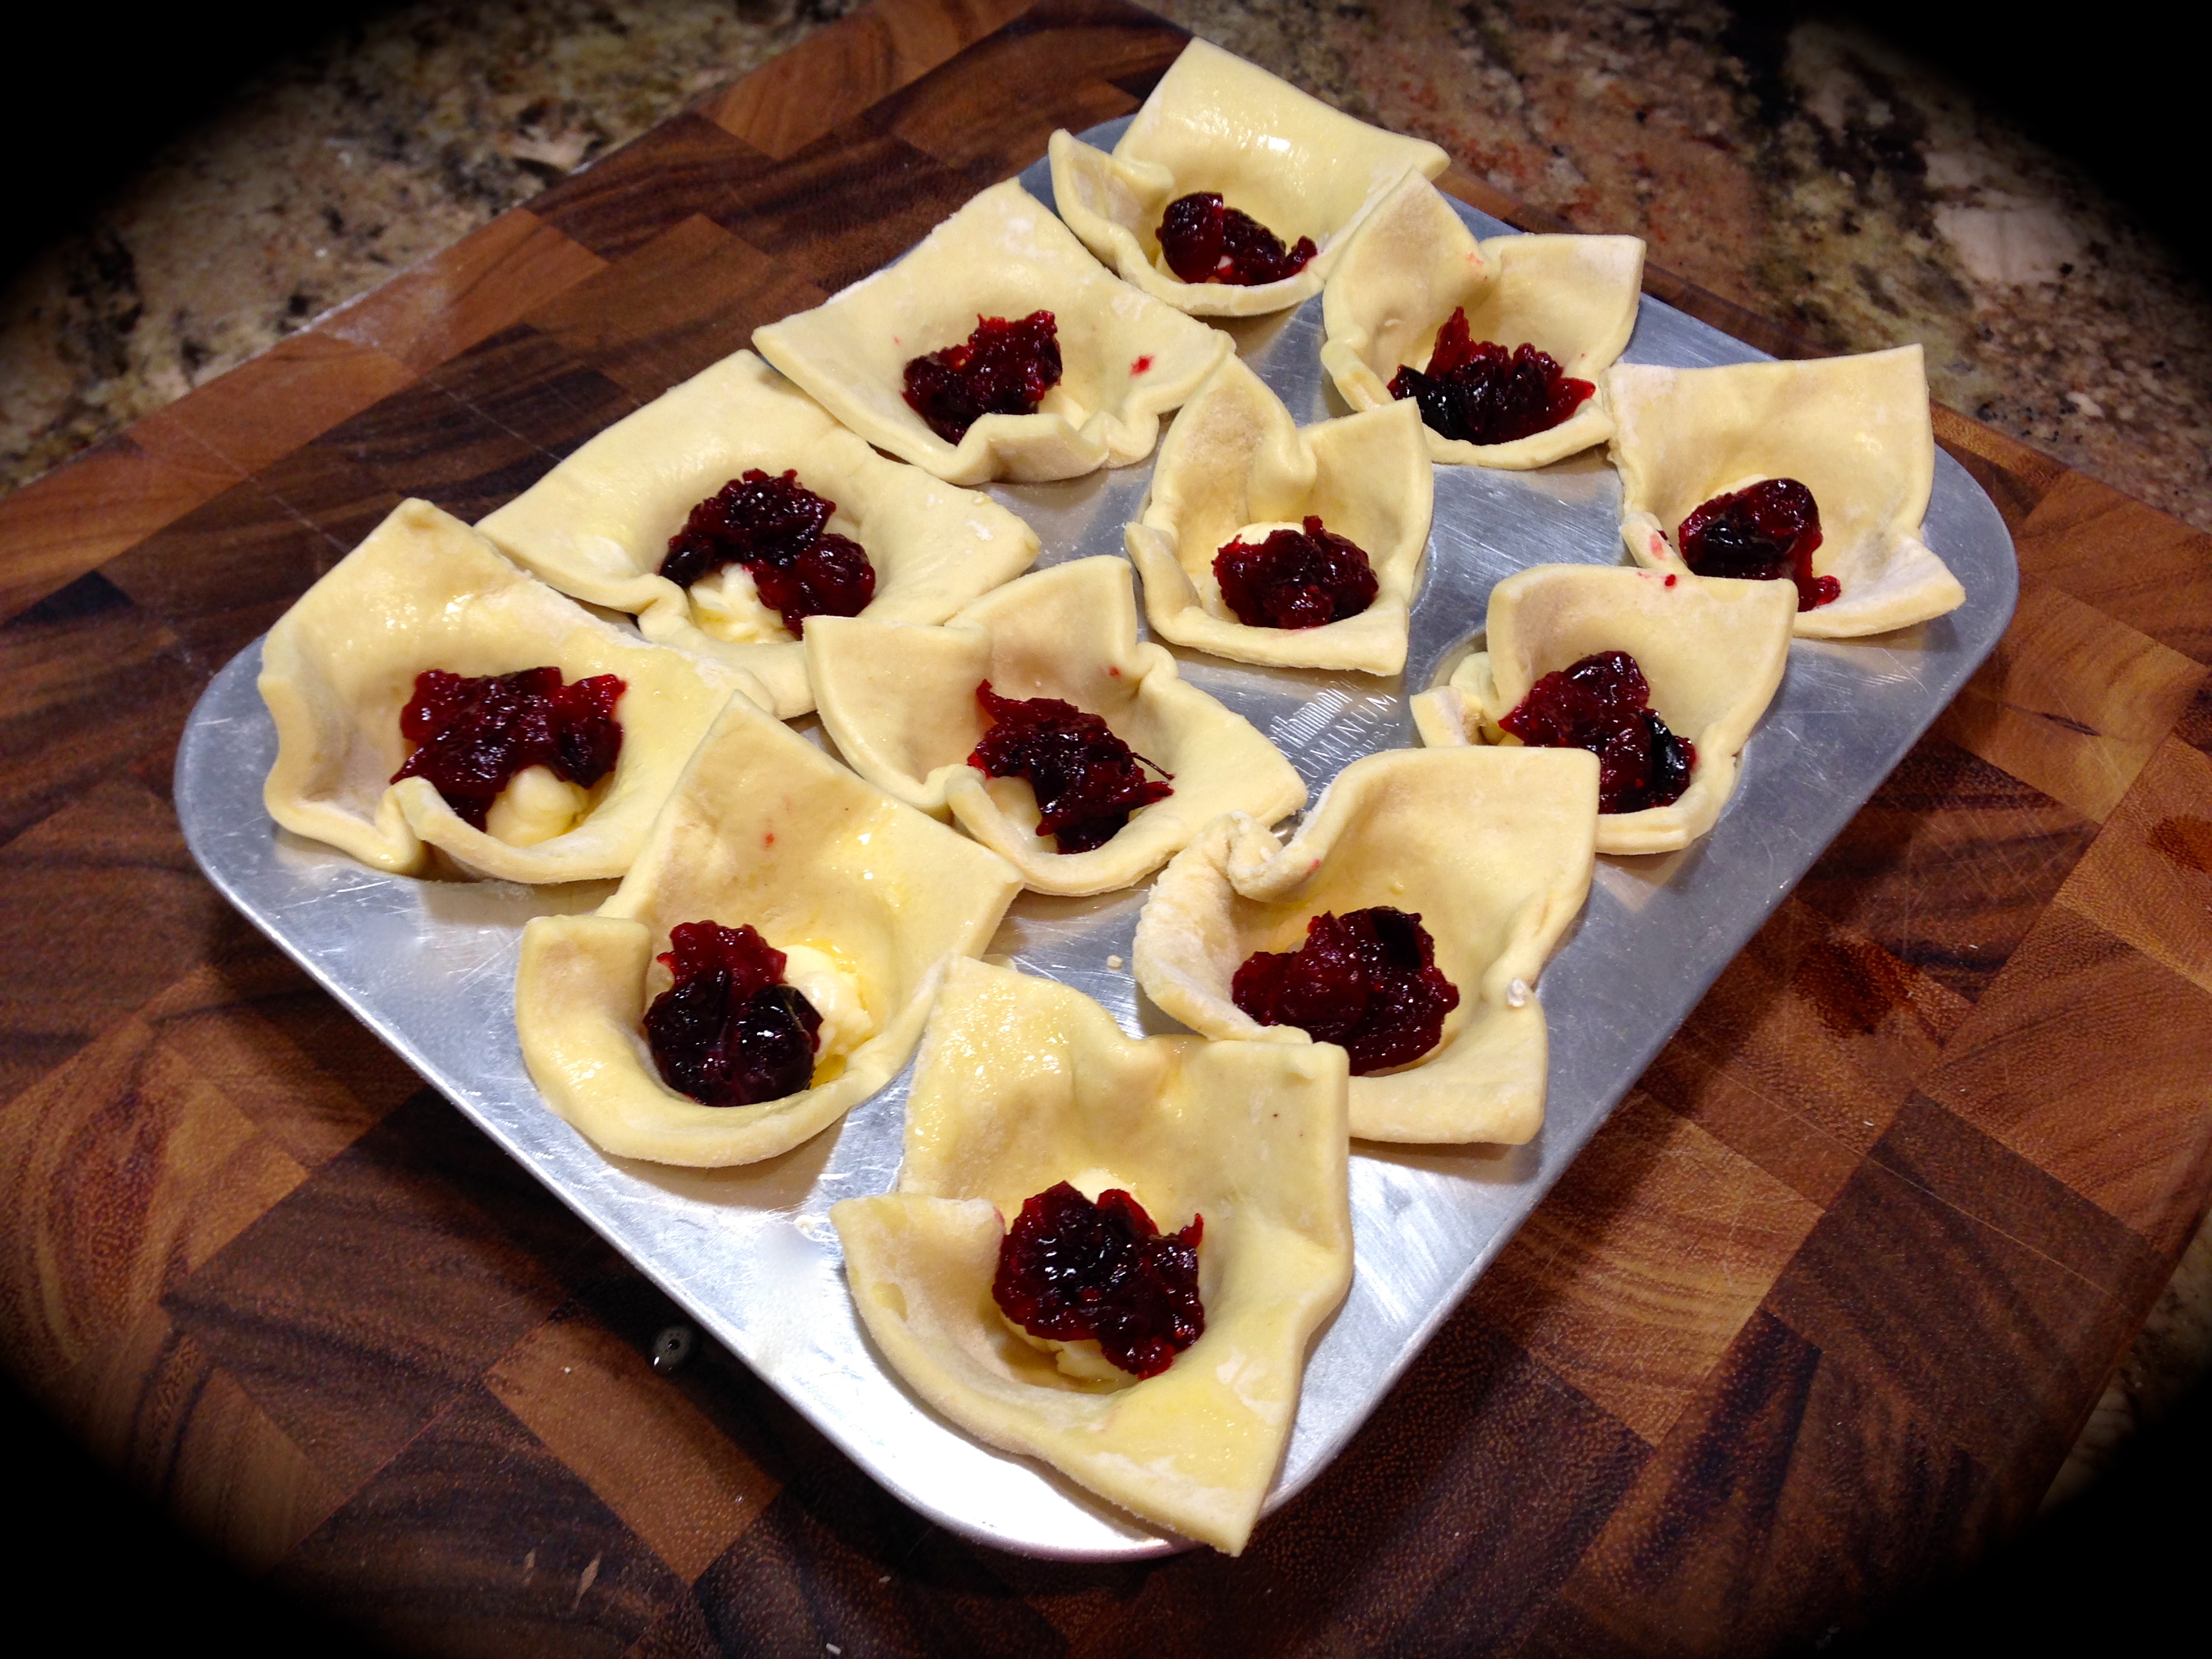
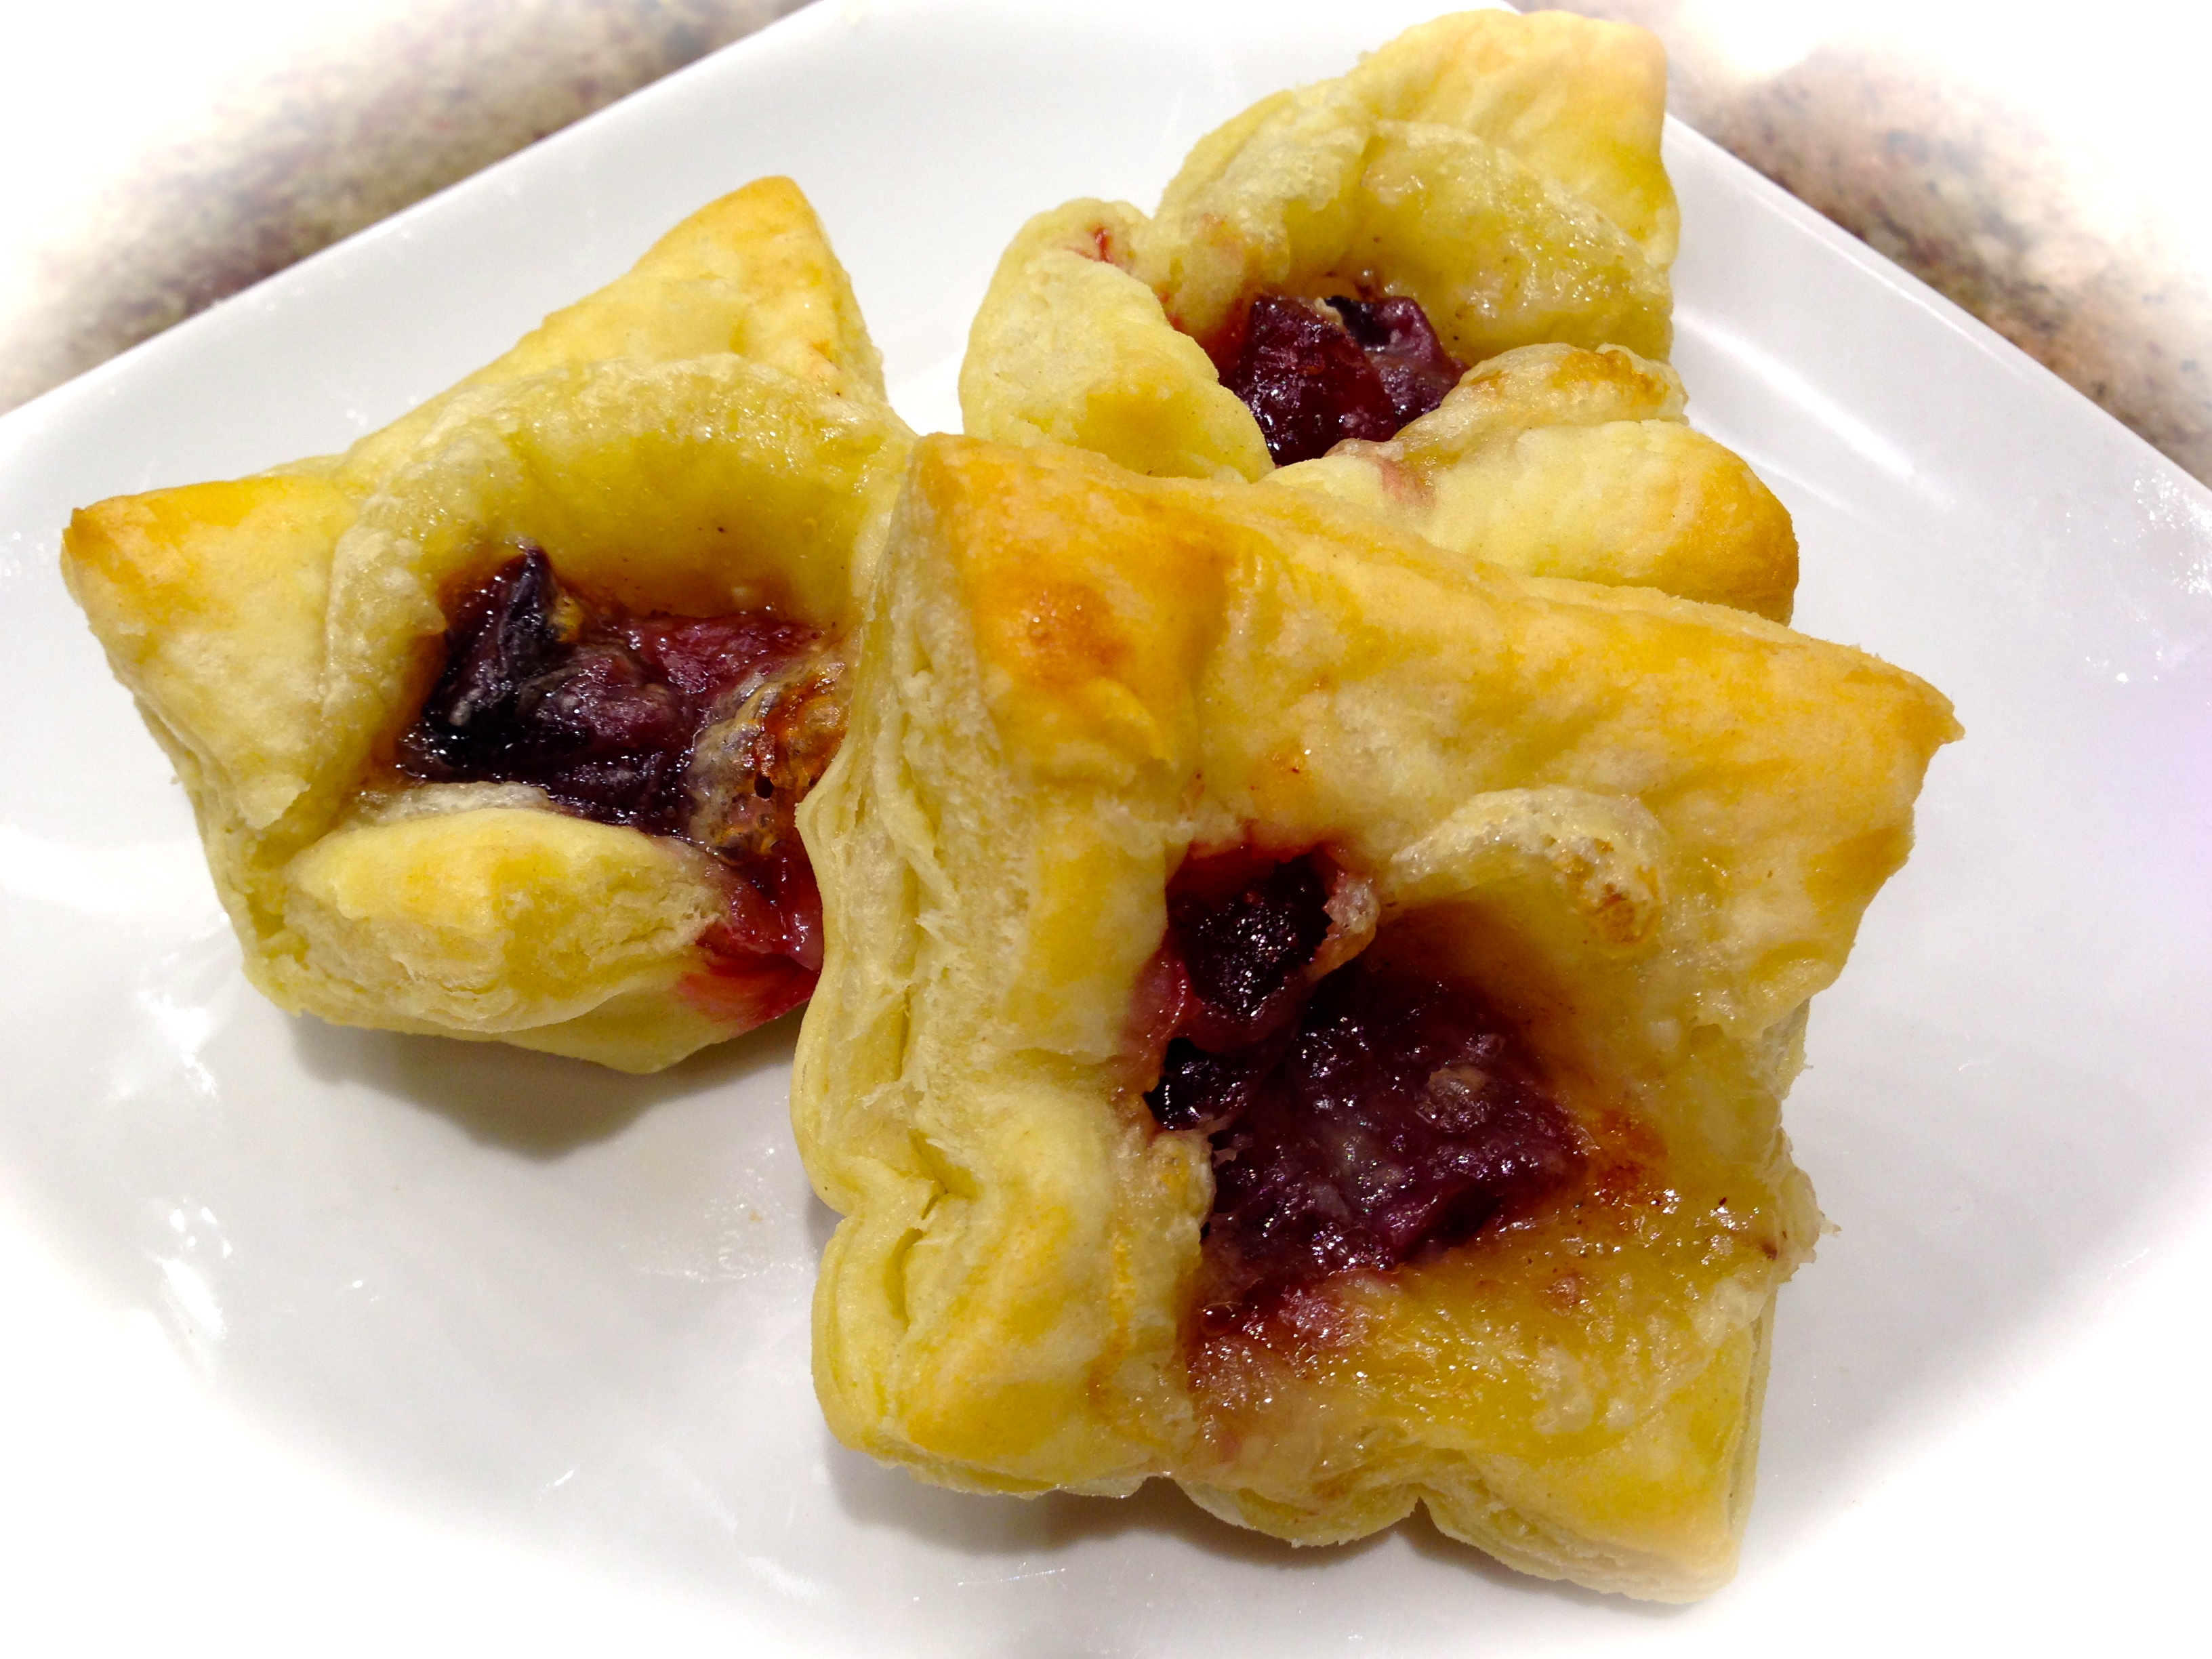
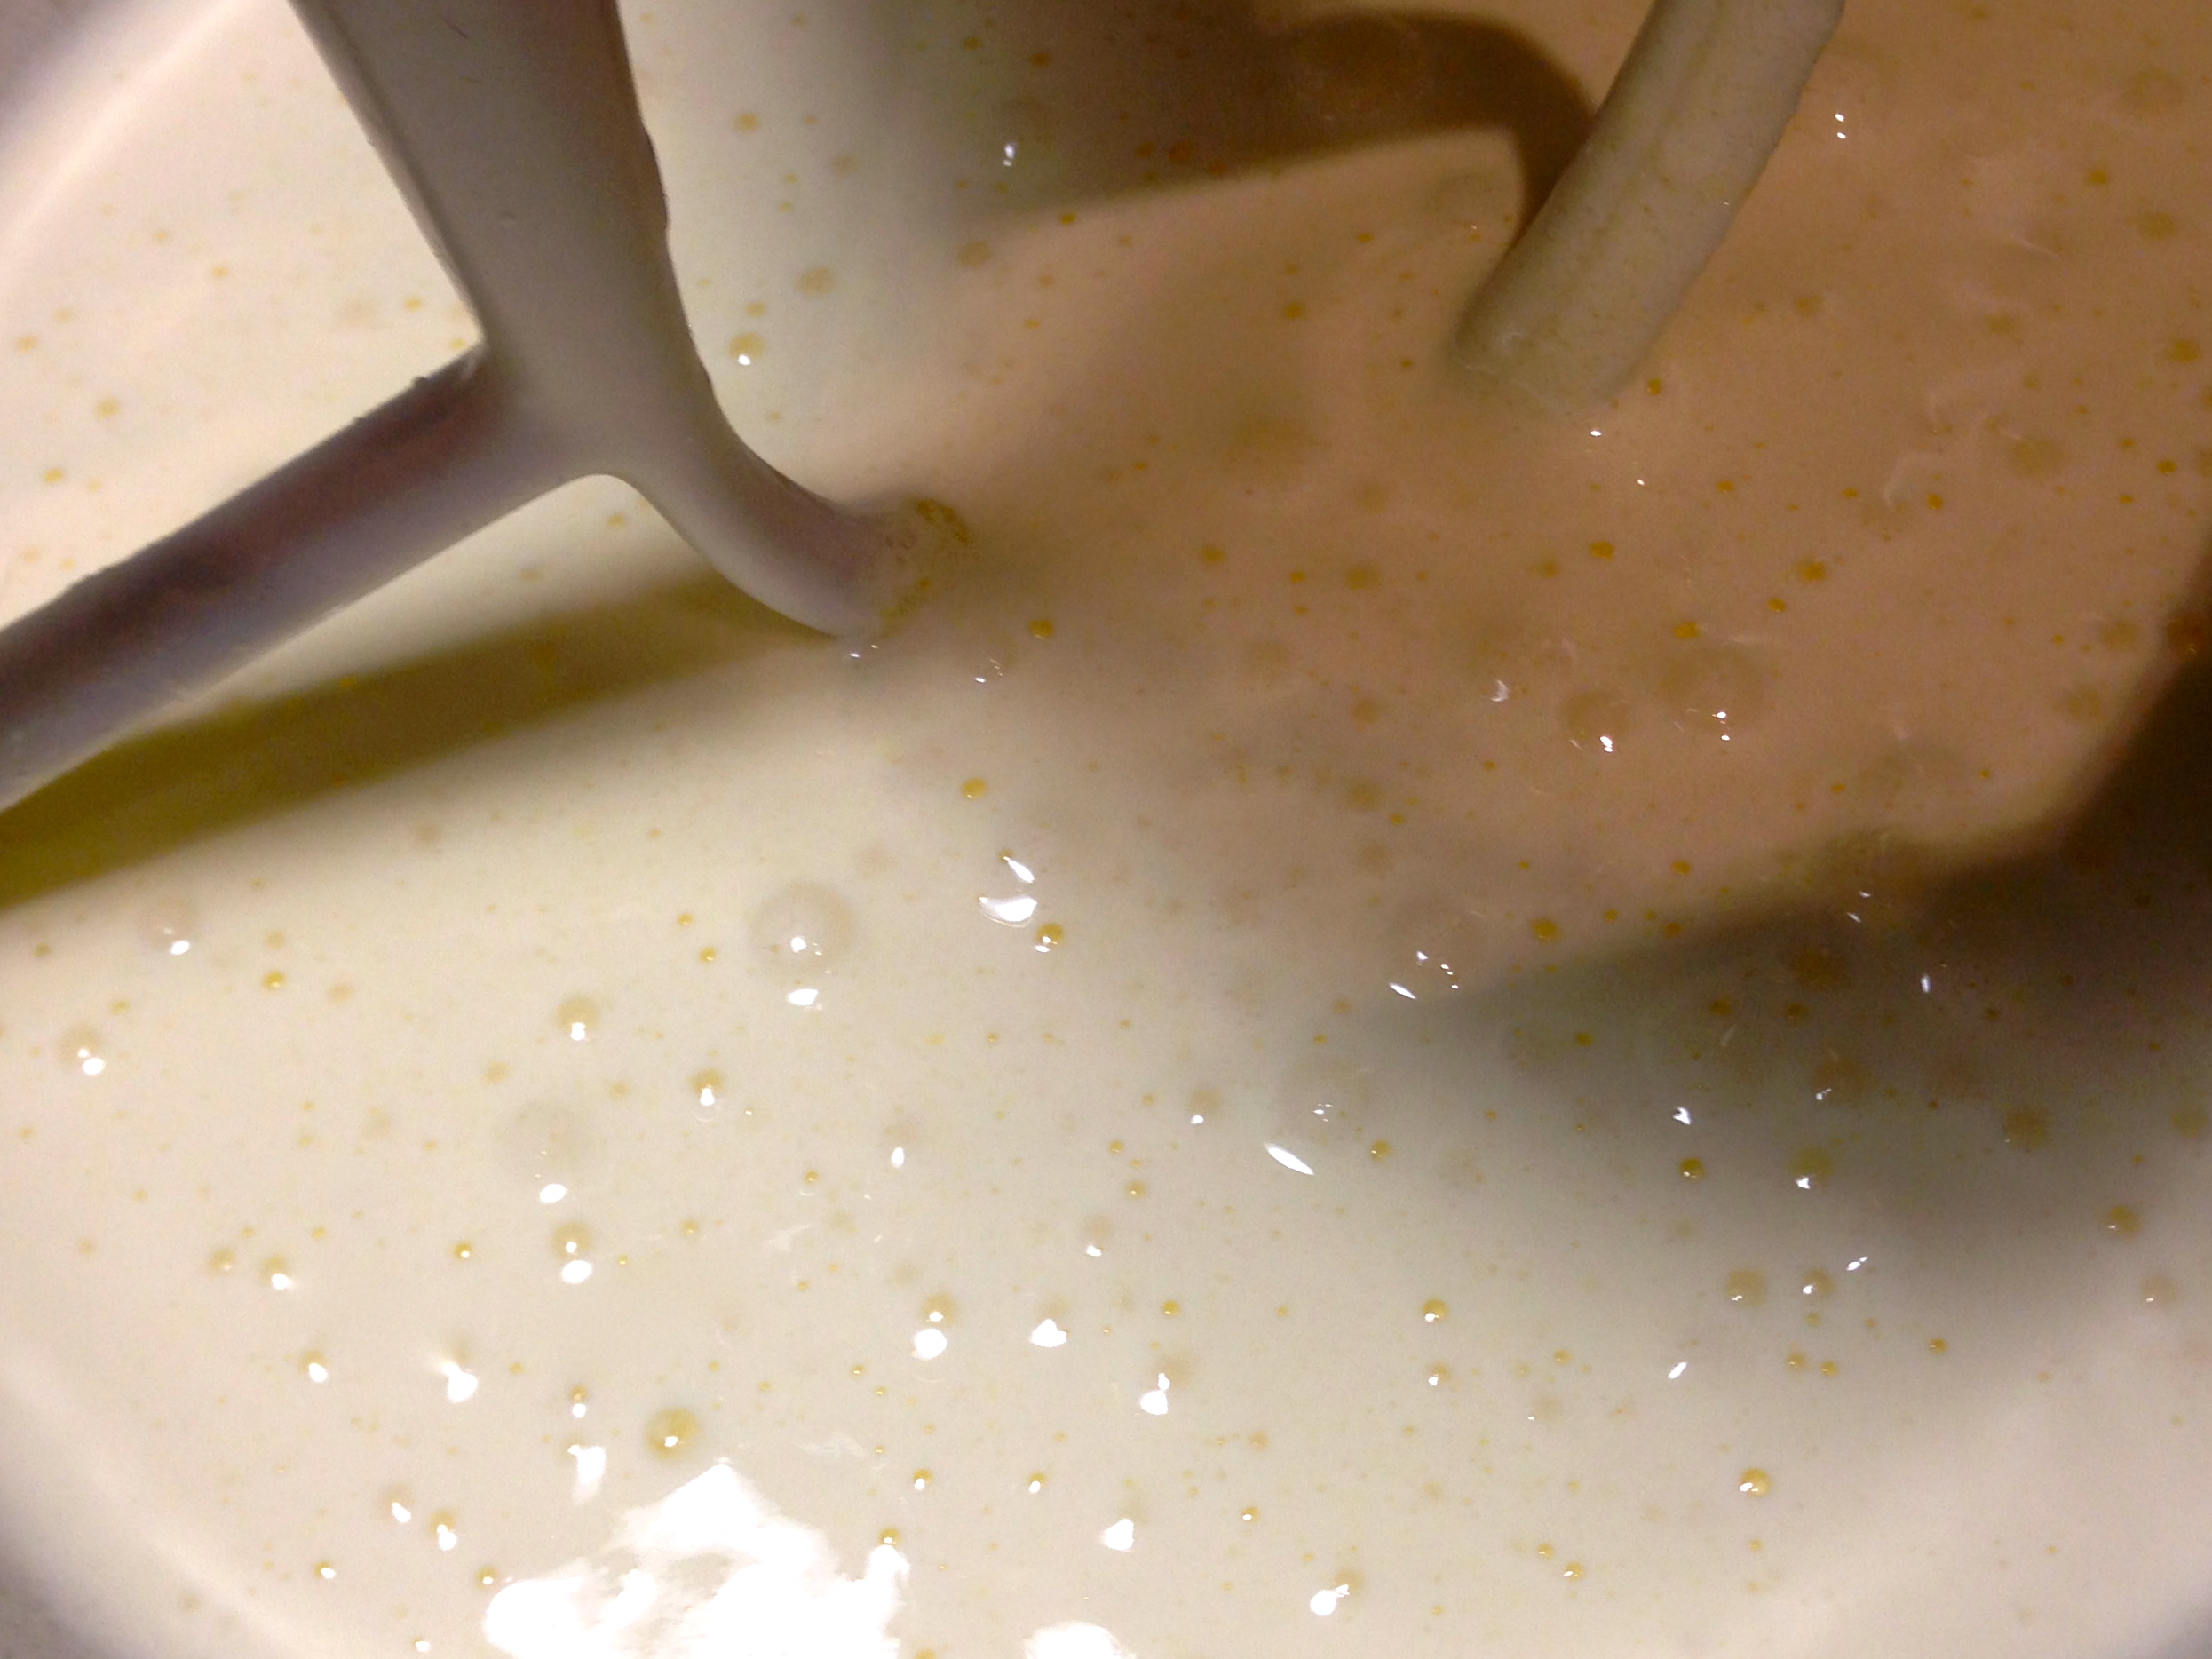
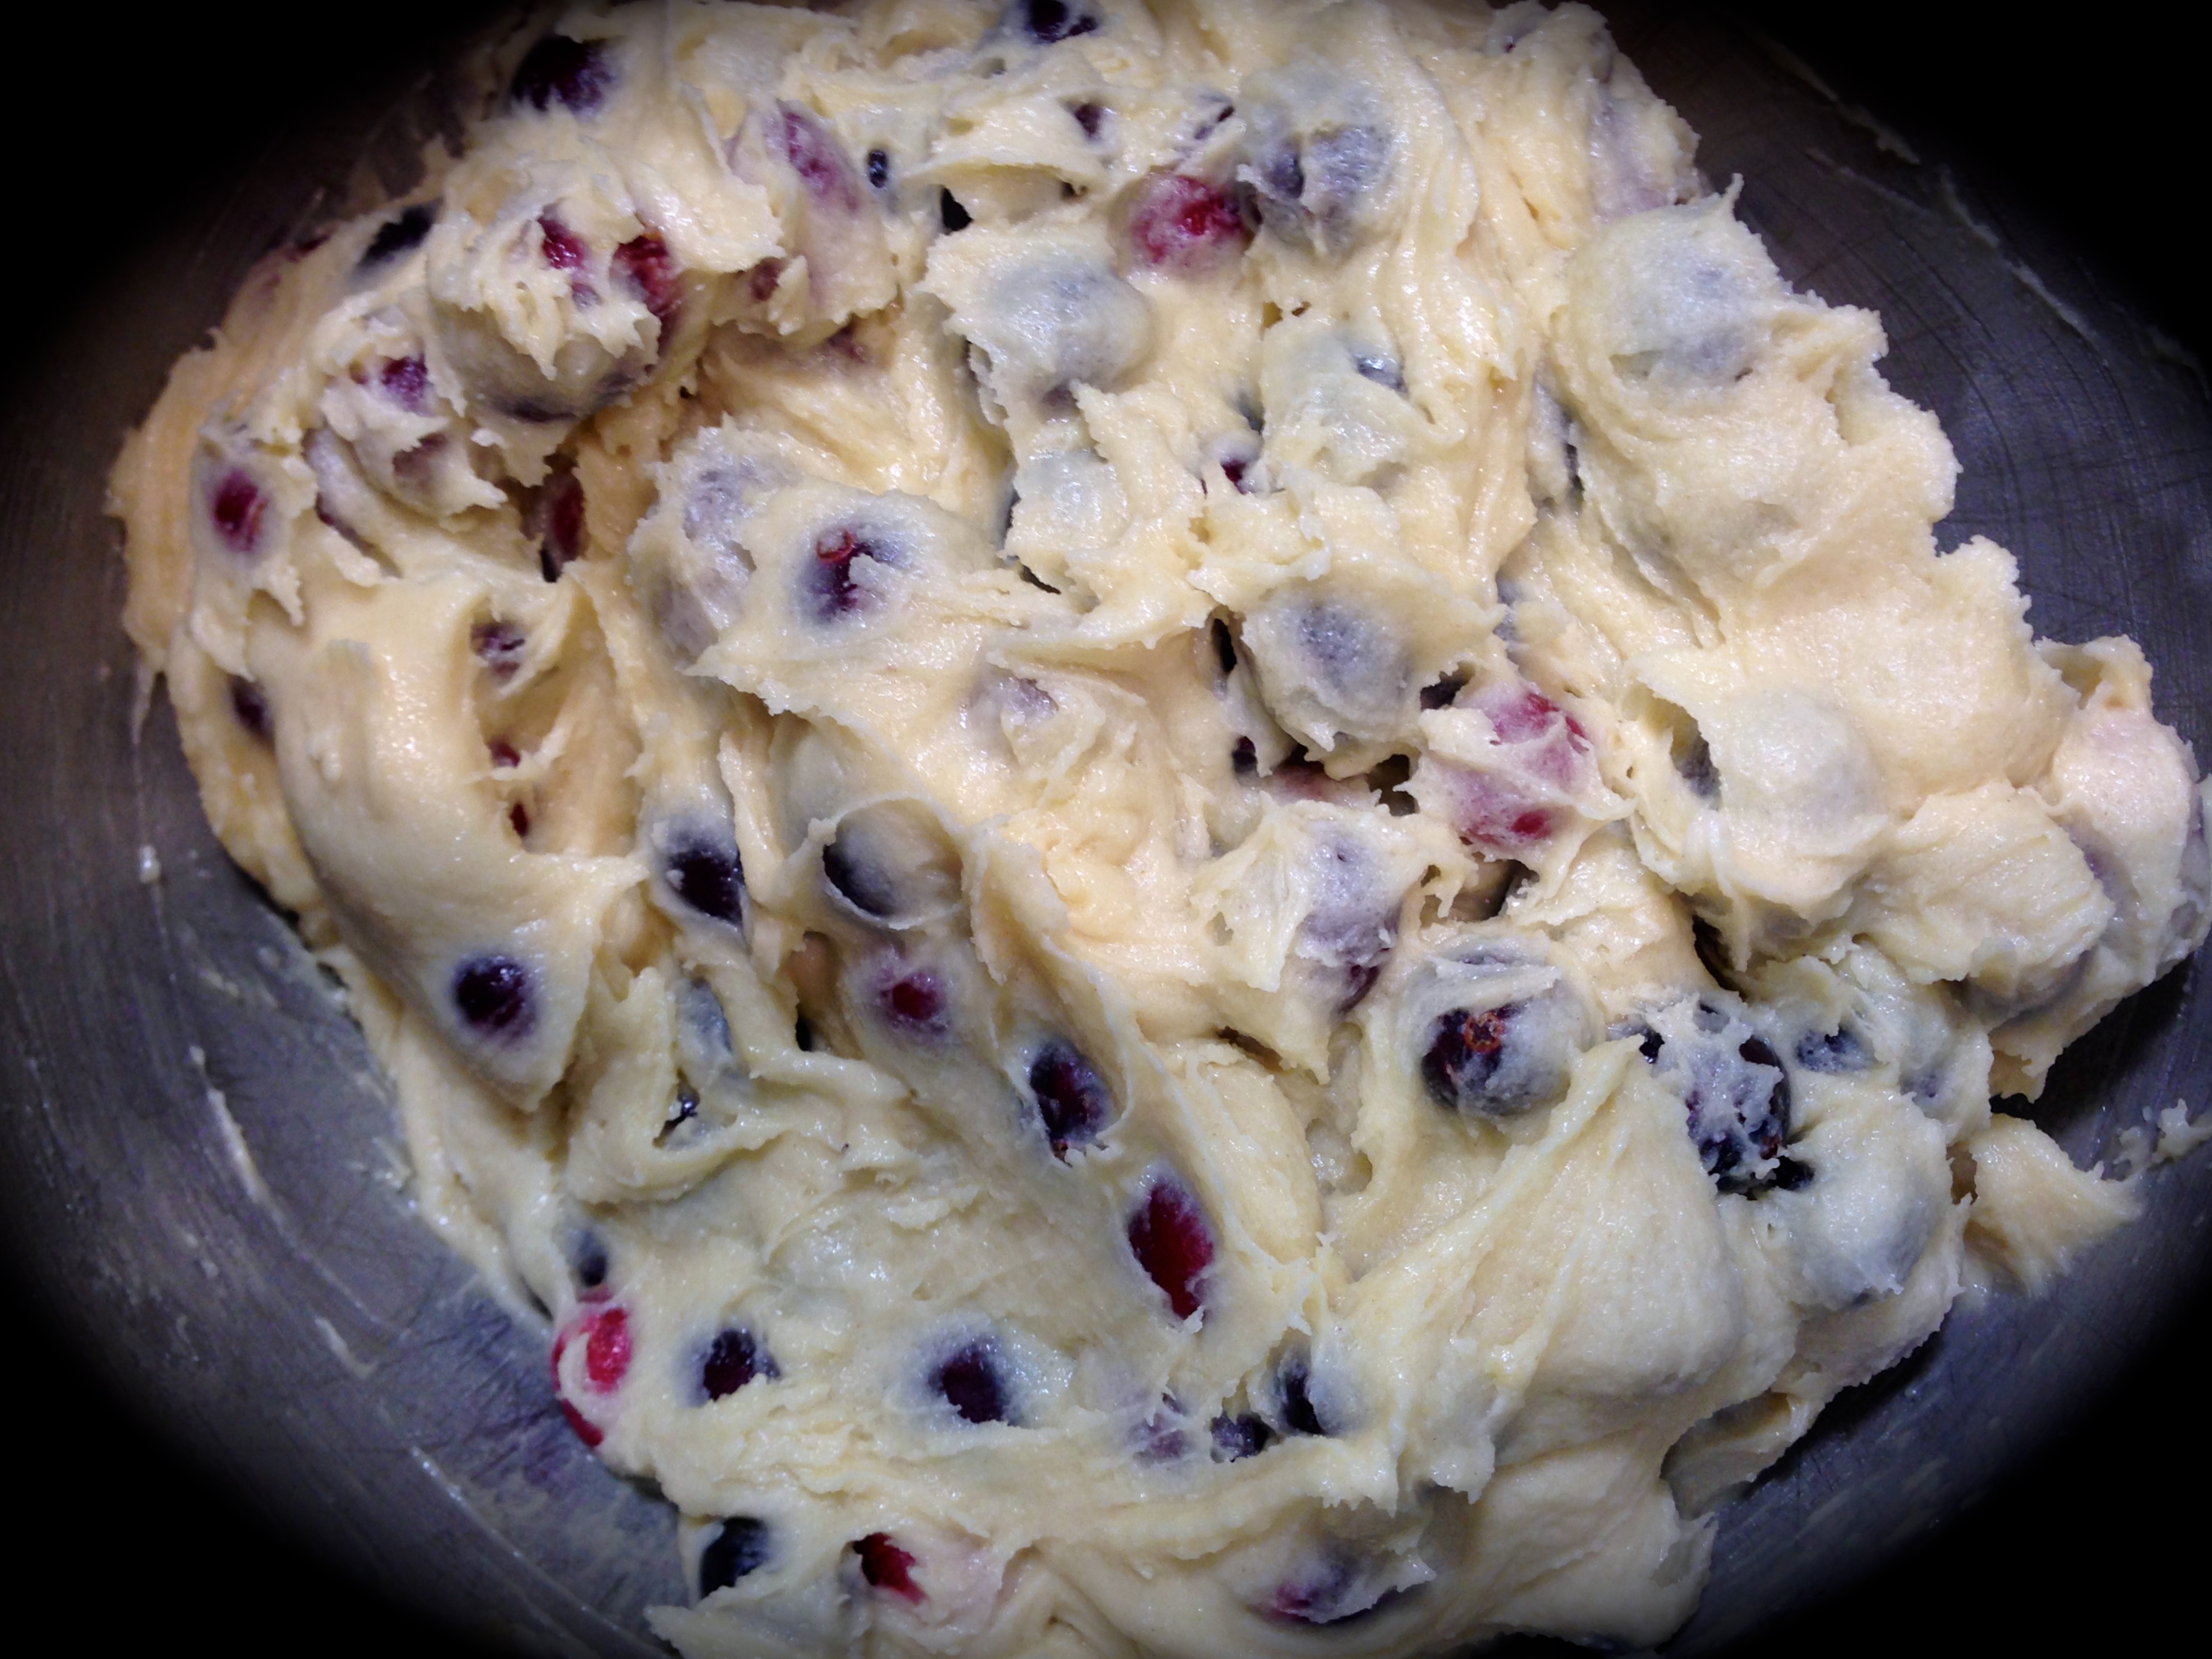
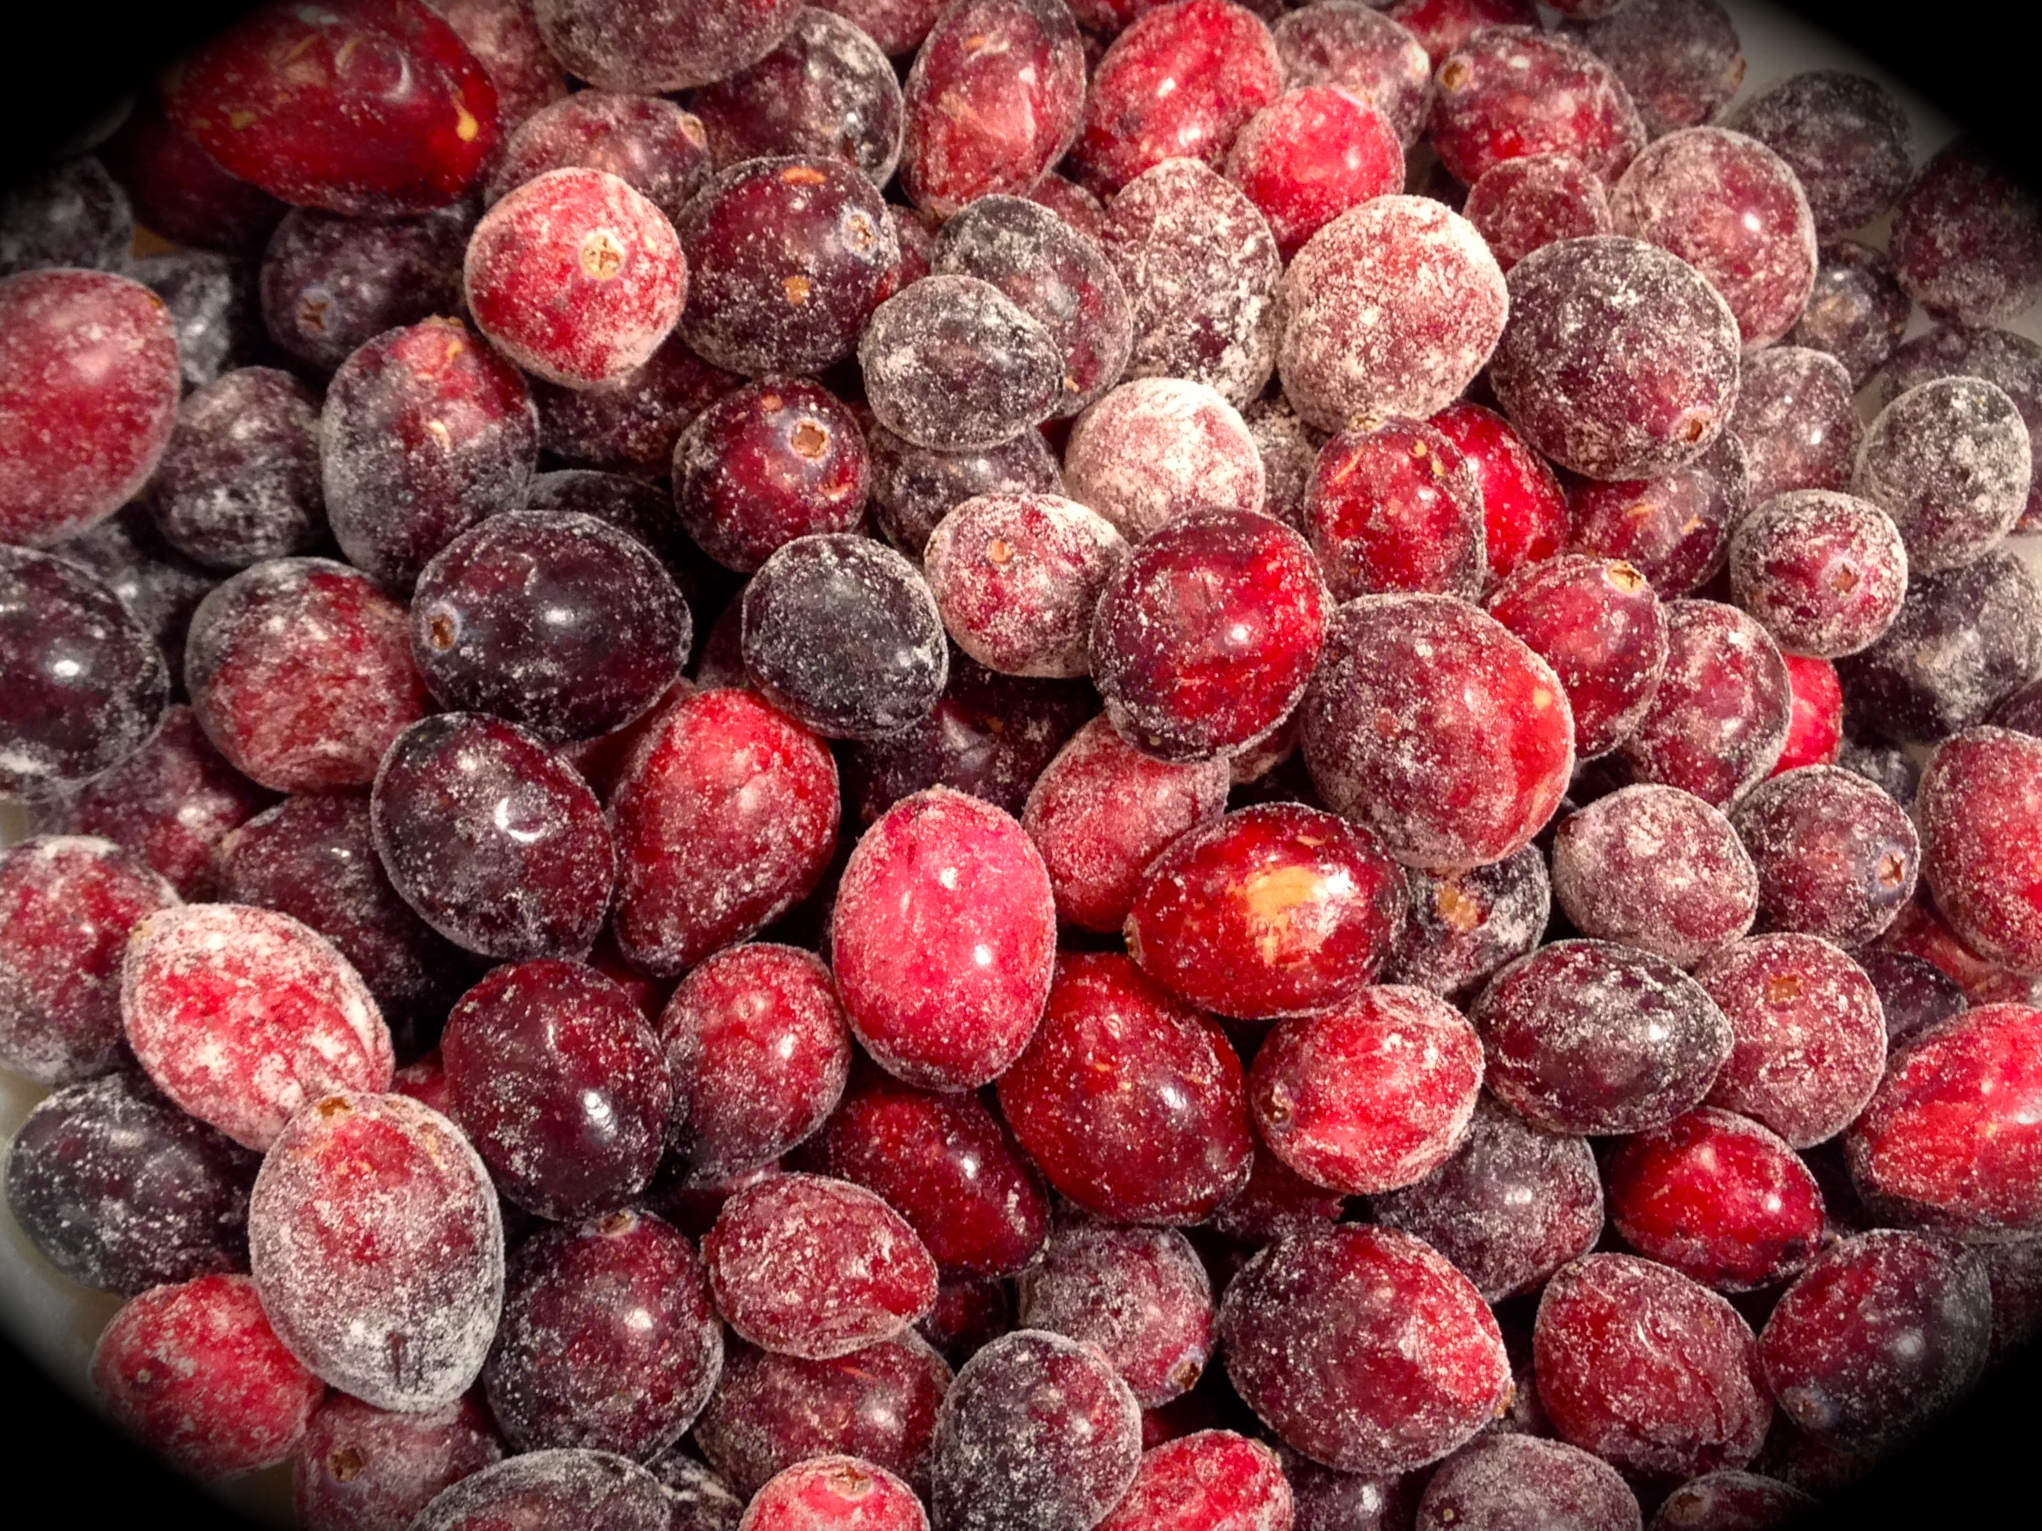
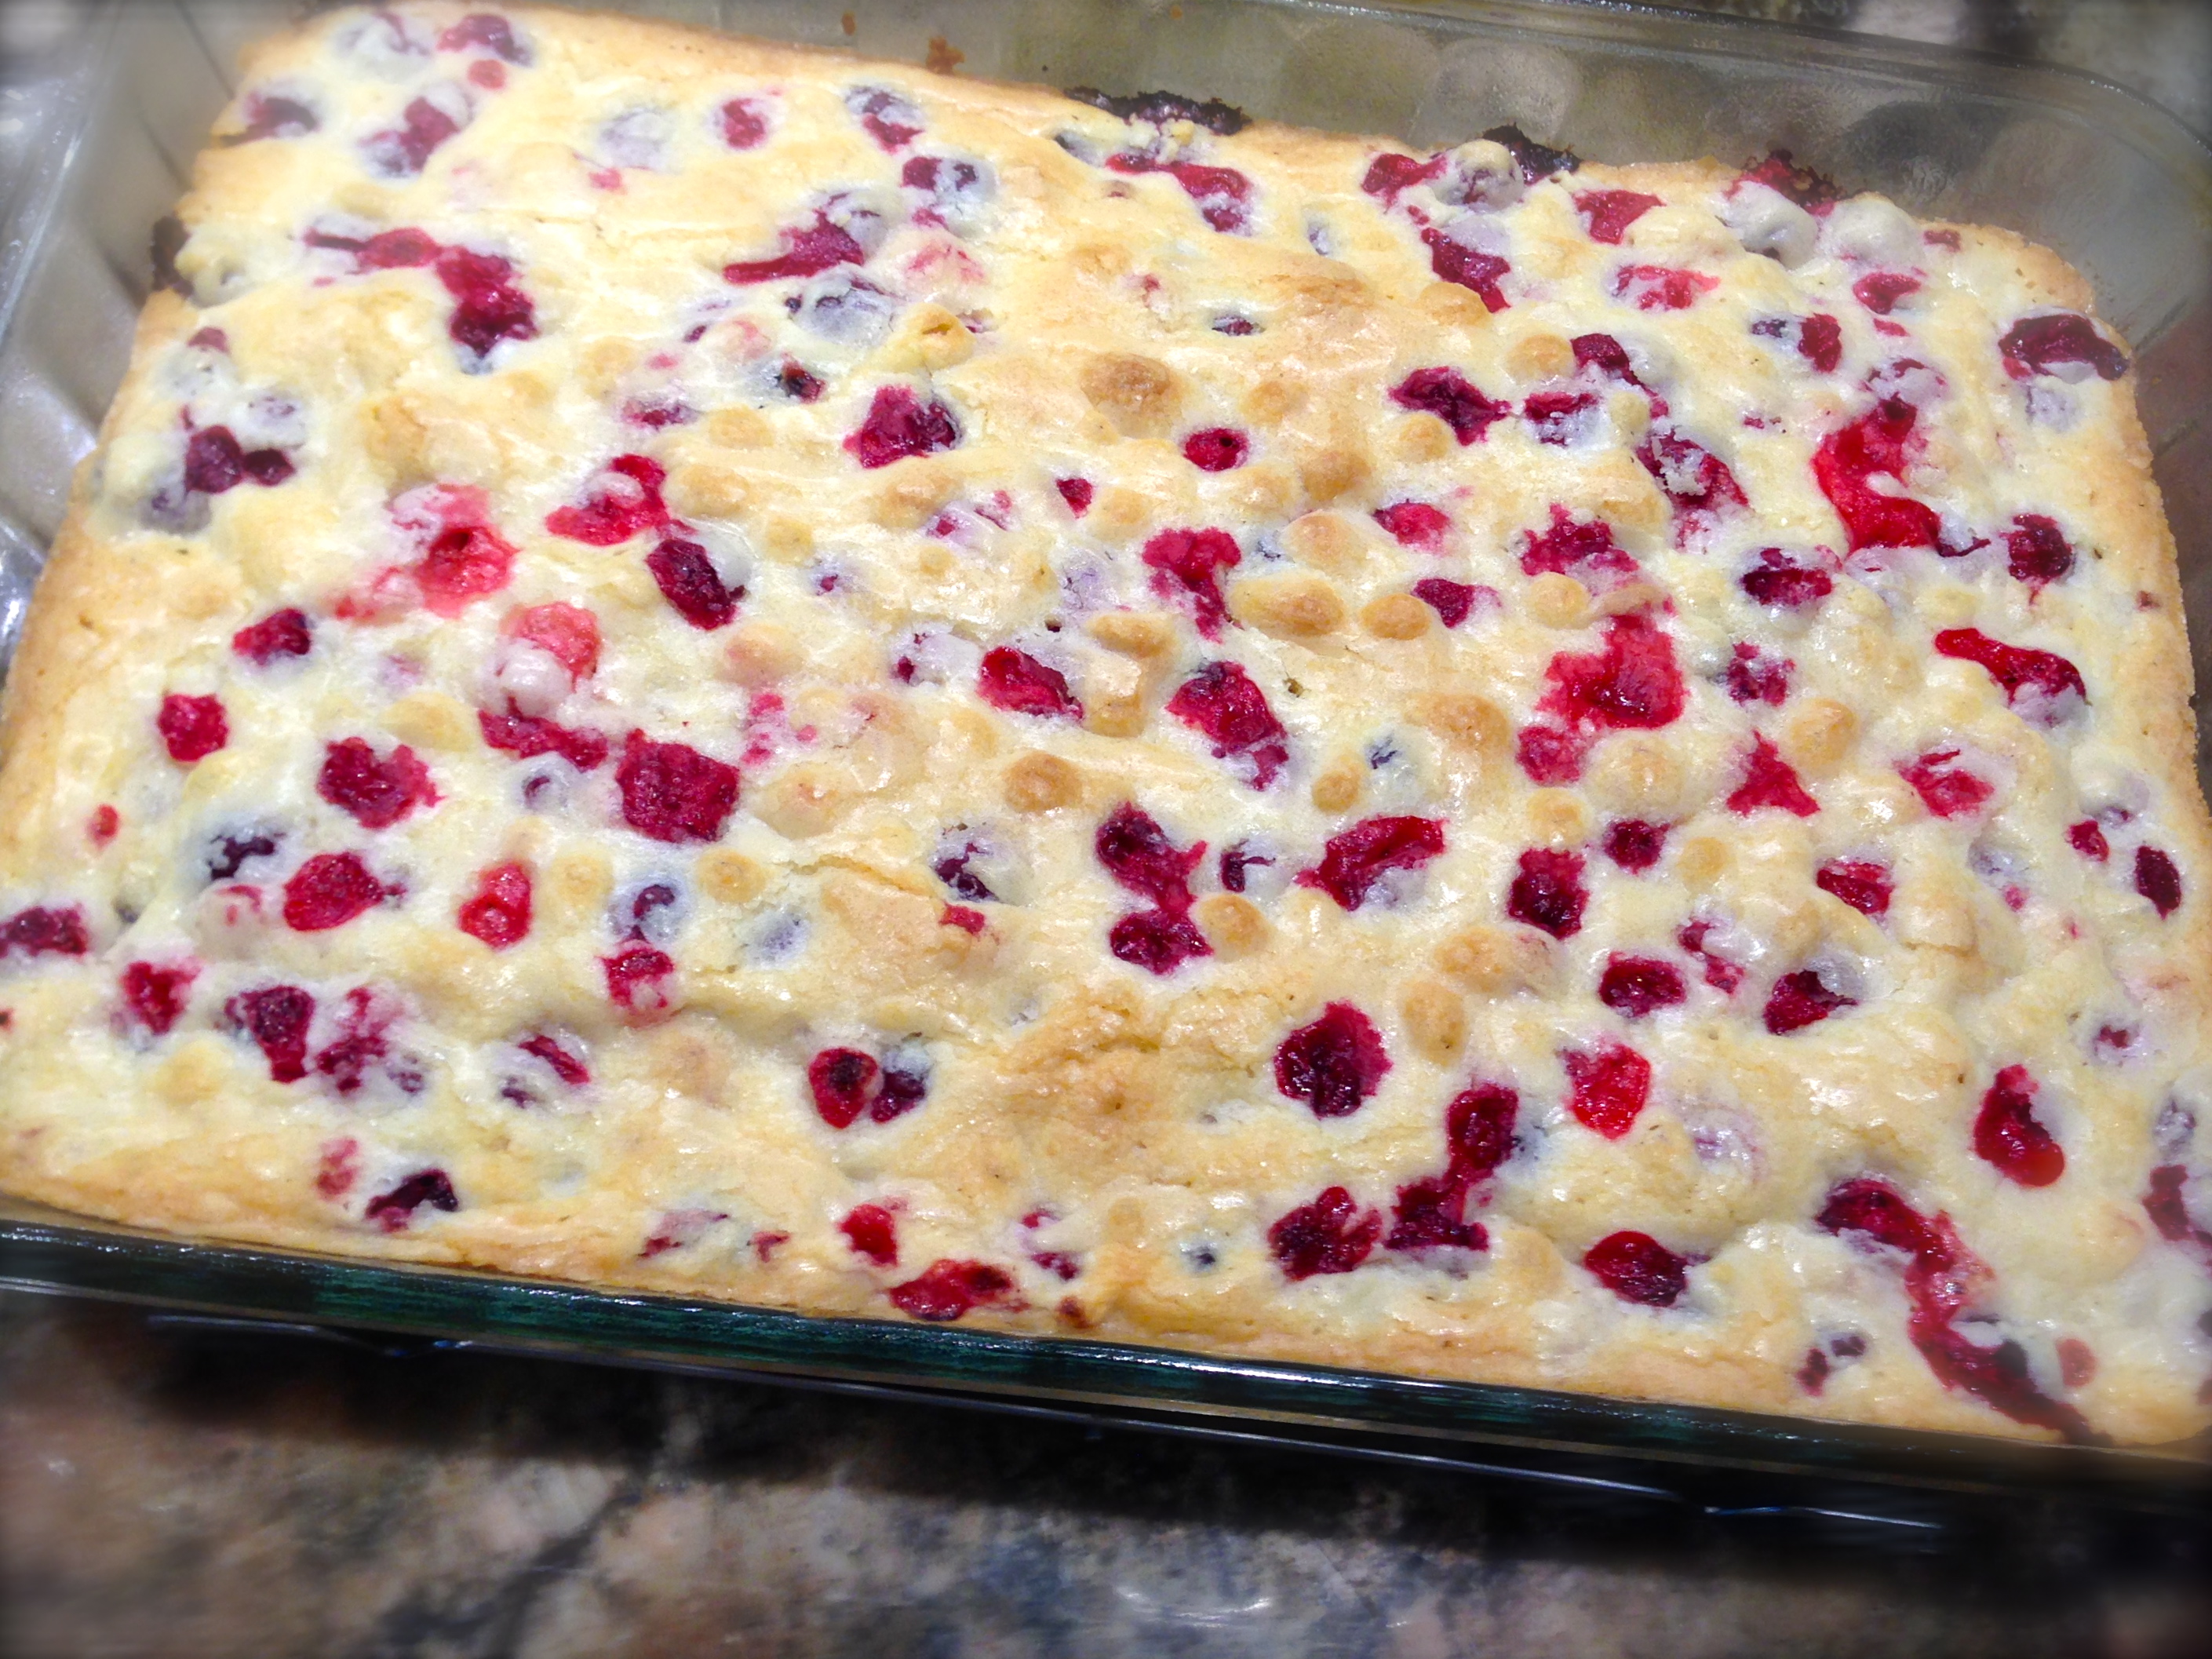
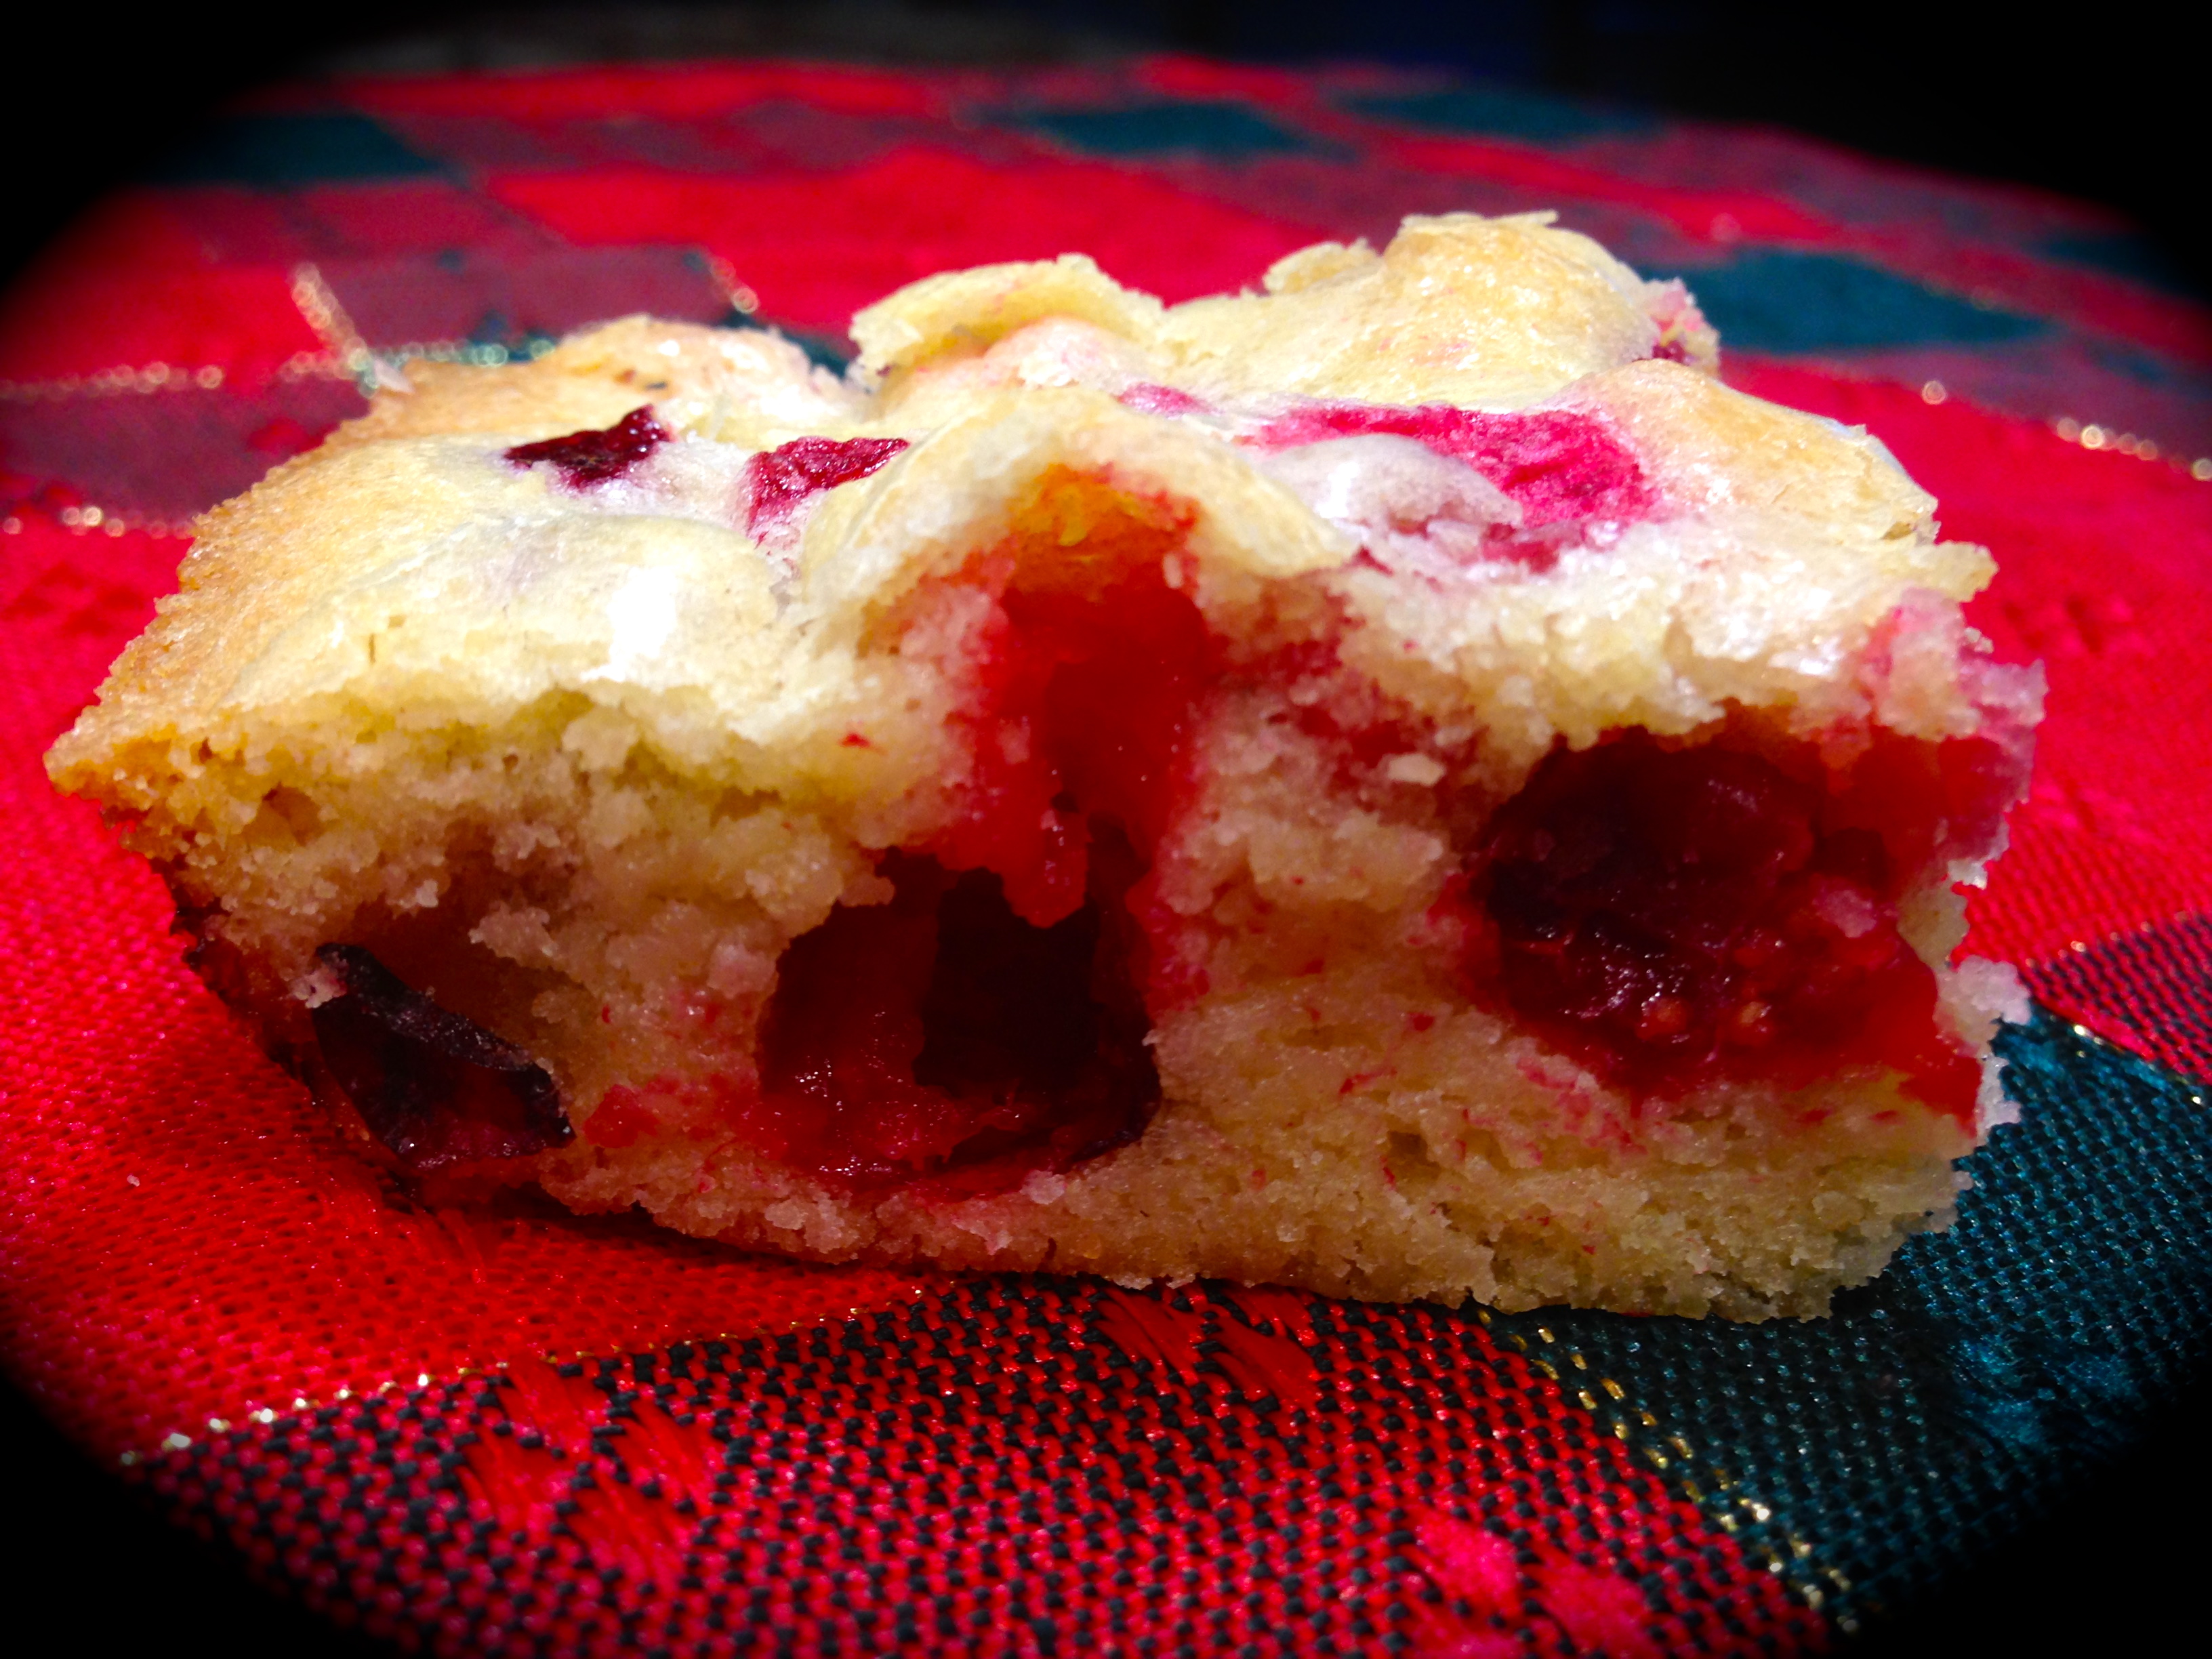
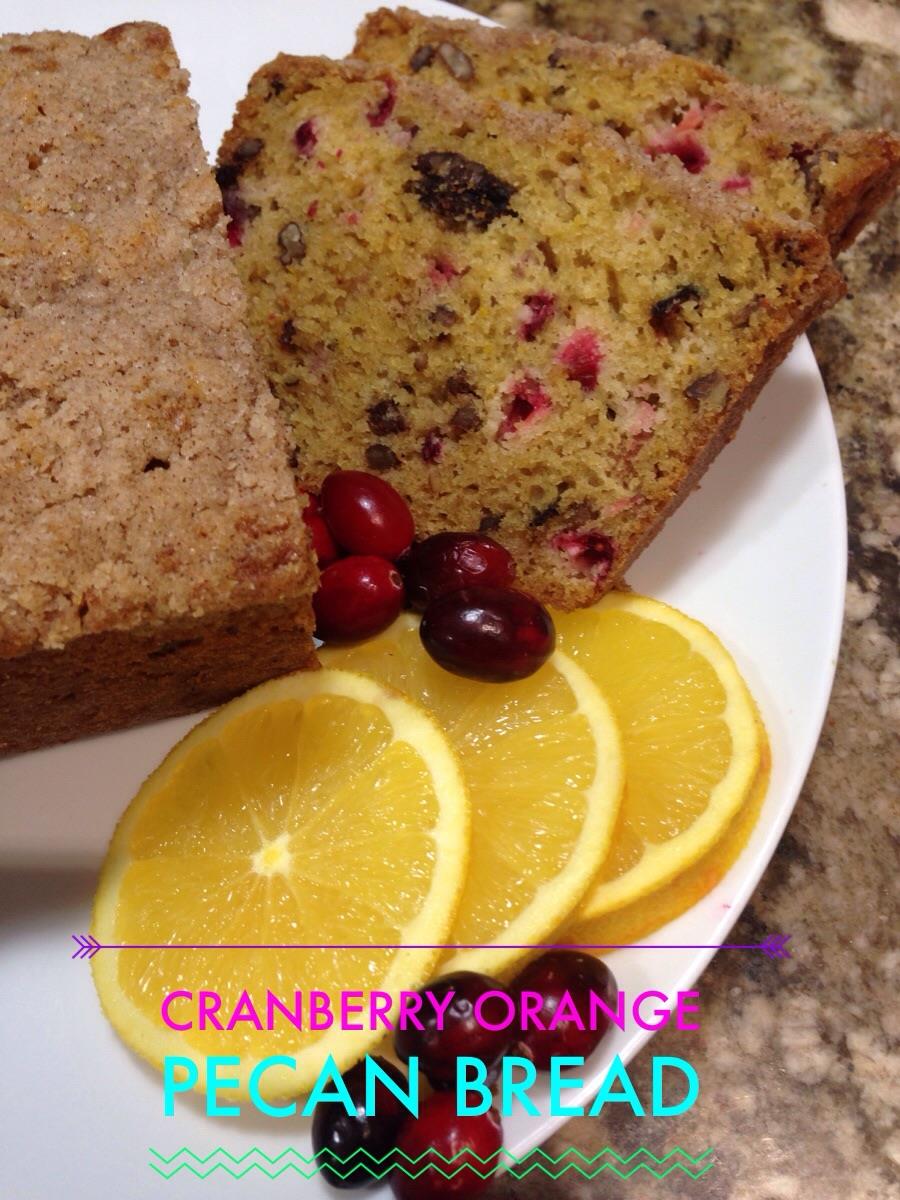
his one because it only has 6 ingredients and the most labor intensive part of making it is beating the eggs and sugar for 5-7 minutes. I can handle that. Plus the cake uses one of my all-time favorite holiday ingredients, cranberries. This recipe is perfect for the novice baker who may not have confidence in the kitchen but wants to make a lasting impression with his/her confection creating skills. You can’t fail with this one, trust me!

Recipe Rating: A+ This recipe is so easy to make and so delicious. It reminds me of a cranberry coffee cake. I actually was going to take the entire 9 x 13 pan with me to work, but my husband wouldn’t hear of it. He suggested that I only take such a small portion of it that I decided just to keep the whole cake at home. Needless to say, half of it was gone in the first day and I didn’t have one bite. It must have been those darn Christmas elves raiding the kitchen again!

The consistency of the sugar and eggs...

The consistency of the sugar and eggs…

Lesson Learned 1- Beat the sugar and eggs for 5-7 minutes: Don’t skimp on the time – this step is very important. You will notice that there are no “traditional” leavening agents in the ingredients. In this recipe the eggs act as the leavening agent so it is important to beat them with the sugar for a long time. I actually thought I got the desired consistency at about 6 minutes but I let the mixer run for an additional minute just to make sure. The mixture should actually double in size and form ribbons when you lift the paddle out of it.

Lesson Learned 2 – Weighing the flour: One cup of flour is 125 grams. I have taken to weighing flour in my baking as I’ve found that I use too much when I don’t, even if I aerate it before I scoop it out. If you don’t have a kitchen scale just make sure you at least aerate the flour before you scoop it. Flour can compact when it settles and if you don’t weigh or aerate it you will wind up using far too much resulting in a tough cake. For this recipe I used the high altitude trick of adding two additional tablespoons of flour to the called-for amount. The batter baked perfectly. If you are not at high altitude, don’t add the additional flour.

The Finished Batter

The Finished Batter

Lesson Learned 3 – The batter will be thick: The consistency of the batter will be quite thick making it slightly challenging to spread evenly throughout the 9 x 13 pan. Once you’ve spread it, take the pan over a hard surface (I used my wooden butcher block for this – if you don’t have a wooden surface you should consider using a dishtowel over another hard surface to soften the impact so as not to crack your dish) and lift it up about a half inch (not any more – you don’t want to break the pan) and drop it. Do this a couple of times. This will help the batter settle and even out any areas that you may have missed.

Lesson Learned 4 – Dust the cranberries with a little bit of flour: Even though this cake isn’t very thick, you still want to dust the cranberries with a little bit of flour before putting them in the batter. Doing this helps the berries to distribute evenly in the baking process versus all of them falling to the very bottom. Just take about a tablespoon of flour and put it on top of the cranberries. Then with your hands mix the flour throughout. You will wind up with some flour on the bottom of the bowl. No need to add that into the cake. Just make sure all the cranberries have a light dusting. If you use frozen cranberries you can skip this step. Just don’t thaw them before adding them to the batter.

IMG_1539

In my estimation this is the perfect holiday recipe. Not only does it exude the colors of the season it is so simple to make. You don’t even have to cut up the cranberries. The longest part of the preparation is beating the eggs and sugar. And with little effort you get a delightfully delicious cake. You can certainly make this any time during the year, but for me this one screams Christmas. ‘Tis the season! Enjoy.

IMG_1662

Cranberry Christmas Cake

  • Servings: 24 Small Squares
  • Difficulty: Easy
  • Print

INGREDIENTS:

3 large eggs, room temperature

2 cups of sugar (slightly less for high altitude)

3/4 cup unsalted butter, softened

2 cups (250 grams) of flour (plus 2 Tbs. for high altitude)

1 tsp. vanilla

1 12oz package of fresh cranberries (if using frozen cranberries do not thaw)

DIRECTIONS:

Preheat the oven to 350. With a mixer beat the eggs and sugar for 5-7 minutes until slightly thickened and light in color. (the mixture should almost double in size). Add the butter and vanilla and mix for another 2 minutes. (It is important to try to get the butter to blend as smoothly as possible. There may be some very small lumps and that is ok but beat out the large ones (this is why it is so important to have the butter completely softened before doing this part of the process).

By hand, stir in the flour until just combined. Add the cranberries and stir until they are dispersed throughout the batter.

Spray a 9 x 13 pan with baking spray. Spread the batter into the prepared pan. Bake for 40-50 minutes or until a toothpick inserted in the center comes out clean and the cake is lightly browned.  Cool completely before slicing.

Right Out Of The Oven...

Right Out Of The Oven…

 IMG_1590

IMG_1609

Holiday Stove Top Potpourri…


Whenever the holidays roll around I look to fill my house with the scents of the season. There is nothing like a candle filling a room with the aromatic scent of balsam or pine. I love scented candles but with a young cat in the house I worry about what might happen while he prowls the upper reaches of the cabinets and countertops. So until I can break him of his curiosity, no scented candles this holiday season. Bummer…

I began to research something I could do to create those holiday smells in a way that I was able to provide more controlled monitoring. Low and behold on Facebook, of all places, I found a “recipe” for holiday smells I could simmer on my stove while doing my many hours of holiday baking.

I tried this yesterday and with a few tweaks it worked like a charm. I used water in the mixture yesterday, but next time I will substitute apple cider for water. The “recipe” couldn’t be easier and provides hour upon hour of warm, inviting holiday smells. Enjoy this little trick for the upcoming season!

Holiday Stove Top Potpourri…

1 small pot

1 orange, cut up in chunks

1 cup fresh cranberries

1/8 cup cloves

3 large or six small sticks of cinnamon, broken in half

2 tsp. nutmeg

Cover ingredients with water or apple cider – liquid should cover the dry ingredients and be about 1 inch from the top of the pot

Simmer on stove for hours of wonderful holiday smells

IMG_1439

IMG_1447

Cranberry Orange Pecan Sweet Bread…

It’s cranberry time of year again! I so love cranberries. Not only do I make a simple but killer homemade cranberry sauce  for the holidays, but I enjoy baking with cranberries – they have a tartness that lend themselves well to making delicious breads, pies and cookies. So this past week when I saw my first bag of cranberries at the grocery store I just had to buy them and bake something.

IMG_1318Years ago I used to buy box mixes to make cranberry bread. No more. It is so easy to make it yourself and I like the fact that you control what goes into it. Box mixes have become a thing of the past for me. If I can’t make it fresh, I don’t make it.

This particular recipe I did not find on Pinterest. This time I did a Google search and looked at various cranberry sweet bread recipes and their ingredients. A couple of things intrigued me about the recipe I chose. First, it used buttermilk in the batter and I’ve found that buttermilk tends to give you moister cakes/breads. Second, you don’t need a mixer for this recipe so no need to drag out the heavy KitchenAid, and I was loving that. The original recipe called for the bread to be glazed. I did not glaze my bread but I will include the glaze recipe in case you want to try it.

Recipe Rating: A+ This recipe is easy to make, and the combination of ingredients brings out the full flavor of the cranberries, pecans and orange zest – a killer combo in my estimation.

IMG_1415Lesson Learned 1 – Weighing Ingredients: I’ve read so many recipes where the author spoke of the importance of weighing ingredients, specifically flour. I never thought much off it. Normally I make sure my flour is aerated in the canister (swirling a knife in it does the trick) and then scoop out what I need and level it off. This recipe calls for 2 cups of flour or 250g. I recently purchased a kitchen scale and thought I’d try measuring the flour instead. I was surprised at how much “extra” flour I had in my measuring cup when I weighed it. It was eye opening. If you can, invest in a kitchen scale and use it when a recipe lists grams. You’ll be amazed at how much extra you may be putting into your recipe.

I did not weigh the sugar because I know how to adjust that measurement for high altitude so the bread will not fall in on itself. I do that adjustment by sight, but I will include the grams measurement for the sugar and flour in the recipe for those who do not live in high altitude. Use those measurements when at all possible. It really does make a difference

IMG_1310Lesson Learned 2 – Mixing the streusel: I don’t know about you but I have a difficult making streusel even with a pastry cutter. The butter always seems to collect on my pastry cutter and not fall off. This time I cut the cold butter (and it needs to be cold) into small cubes and just mixed it with my hands. I pretty much got the desired consistency. Next time I think I will mix it in my small food processor and see how it turns out. I am including a picture of the consistency of the streusel that worked well on top of the cake.

I’ve made many different versions of cranberry nut breads over the years but I have to say that so far this one is my favorite. The tartness of the cranberries, the hint of orange from the zest combined with the pecans is heavenly. Next time I make this (and this will be made at least one time if not more this holiday season) I will try adding the glaze. But I can assure you, even without the glaze this is a fabulous sweet bread!

Cranberry Orange Pecan Sweet Bread…

  • Servings: 12
  • Difficulty: Easy
  • Print

INGREDIENTS:

Streusel:

1/4 cup (31g) flour

2 Tbs. (30g) sugar

1 tsp. cinnamon

3 Tbs. (45g) cold, unsalted butter

Bread:

2 cups (250g) flour

1 tsp. baking soda

1/2 tsp. salt

1 cup (110g) chopped fresh cranberries (you can also use unthawed frozen cranberries)

1/2 cup (65g) chopped pecans or walnuts (I used pecans)

1 large room temperature egg

1/2 cup (105g) light brown sugar (loosely packed for high altitude)

1/2 cup (100g) sugar (slightly less for high altitude)

1 cup (240ml) buttermilk (no substitutions)

1/3 cup (80ml) vegetable oil (or melted coconut oil – I used vegetable oil)

1 tsp. vanilla extract

2 Tbs. orange zest

Glaze:

1 cup (120g) confectioners sugar

1 -2 TBS orange juice

Orange zest to taste

DIRECTIONS:

Preheat oven to 350. Spray an 8×4 pan with cooking spray. (I use a professional grade non-stick pan and do not have to do this. Invest in one if you can – it’s worth it).

First make the streusel by tossing the flour, sugar and cinnamon together. Cut in the cold butter with a pastry cutter or food processor until you get a crumbly looking mixture. Set aside.

In a large bowl mix the flour, baking soda, salt cranberries and nuts together. Set aside. In another bowl whisk the egg and sugars until well combined with no lumps. Whisk in the buttermilk, oil, vanilla and orange zest.

Make a well in the center of the dry ingredients and pour in the wet ingredients. Stir together until combined being careful not to over mix. Pour the batter into the prepared pan. Add the streusel on top and press it gently into the batter.

Bake for 50-60 minutes or until a toothpick inserted in the center comes out clean. Cool in the pan for 15 minutes and then remove the bread from the pan.

This bread is great without the glaze. If you choose to glaze it, mix all of the glaze ingredients together and pour on top once the bread has completely cooled.

cranb IMG_1361

IMG_1380

Apple Walnut Cake…

Well, apple season is just about over for me. By that I mean I am no longer getting bags and bags of apples from my neighbor. All in all it’s been a great season. During it I finally made a decent apple pie, ventured into making my first batch of homemade applesauce, and had fun experimenting with some different apple desserts.

My final apple recipe for the season is an apple walnut cake. I found a basic recipe that I edited for my tastes and wound up with a delightful loaf cake.

The batter...

The batter…

Recipe rating: A- This is a very flavorful cake. I gave it a minus because I had to adjust the baking time to two times longer than what was called for in the original recipe. I read some of the reviews of the original recipe online and decided, as one person mentioned, to bake this in an 8×4 versus a 9×5 pan. There was no mention that doing this significantly changed the baking time. The person writing the review said she wanted a more compact loaf that would give taller slices. That’s what I wanted as well. The only other adjustments I made was adding some additional cinnamon and some walnuts. I was really surprised that it took so long to bake (an hour). Just keep that in mind if you decide to make this. Is it worth the baking time? Definitely, yes!

Lesson Learned 1- Cut the apples into small chunks: This recipe calls for only one apple so make sure you either get a decent sized one or you can use two small apples. I used a medium/large granny smith apple when making this recipe and I had more than enough. You want to cut the apple into small chunks so they will cook completely. I drizzled a little bit of lemon juice over my apple chunks to keep them from turning brown before I could add them to the cake batter.

IMG_1204Lesson Learned 2 – Get down and dirty when you swirl the batter: The process for making this recipe is similar to any boxed sweet bread you buy, that being you add half the mixture to the bottom of the pan, add the apples and brown sugar mixture, add the rest of the batter and put the remaining apple and brown sugar mixture on top. Then you’re supposed to either swirl the batter with a knife or your finger. Forget the knife – it will not do the trick. Stick your finger (clean of course) down deep into the batter and really swirl it around. The apples require a little elbow grease to move them. I have struggled with this swirling technique with many cakes and finally using my finger, going deep into the batter and using a little bit of strength I finally got the results I wanted. Don’t waste your time with a knife. Use your finger and don’t be afraid to really get down into the batter and swirl it.

Lesson Learned 3 – Don’t be afraid to adjust the amount of cinnamon: I really like the flavor of apples and cinnamon and I really like the cinnamon flavor to be pronounced. The original recipe called for 1 teaspoon of cinnamon. I used two and it tasted divine. You wind up swirling the cinnamon and brown sugar through the cake at the end. I just don’t think 1 teaspoon is enough to get a nice blend of cinnamon throughout the entire cake.

This is another great Fall apple recipe. It is very easy to mix – just be aware that it may take longer to bake then anticipated. As with any other cake, it is done when a toothpick inserted in the center comes out clean. Enjoy this one!

Apple Walnut Cake

  • Servings: 12
  • Difficulty: Easy
  • Print

INGREDIENTS:

1/3 cup brown sugar

2 tsp. cinnamon

2/3 cup sugar

1/2 cup butter, room temperature

2 extra large room temperature eggs

2 tsp. vanilla extract

1 1/2 cups flour

1 3/4 tsp. baking powder

1/2 cup milk

1 large apple peeled and chopped

3/4 cup chopped walnuts

1/2 tsp. lemon juice

DIRECTIONS:

Preheat oven to 350. Grease and flour an 8 x 4 loaf pan. (If using a professional grade non-stick pan like I do there is no need to do this). Mix brown sugar and cinnamon and set aside. Peel and core the apple. Chop into small pieces. Drizzle pieces with a small amount of lemon juice and stir to make sure all pieces are coated. Set aside.

Beat sugar and butter together until creamy. Beat in the eggs one at a time. Beat in vanilla extract.

Sift together flour and baking powder. Stir into butter mixture. Add the milk and mix until the batter is smooth. Stir in the chopped walnuts.

Pour half the batter into the prepared pan. Put half of the apple pieces on top and pat them into the batter. Sprinkle with half of the brown sugar mixture. Pour in the remaining batter and top with the rest of the apples and brown sugar mixture. Using your finger, swirl the apples and brown sugar mixture throughout the batter making sure to go deep into the pan.

Bake for 50-60 minutes or until a toothpick inserted in the center of the cake comes out clean.

 IMG_1247

acake

Homemade Applesauce – Nothing Like It…

I’m including this under Tips ‘N Tricks and not under recipes because I can’t believe I never made homemade applesauce before and I also can’t believe how easy it is to make. There is absolutely no comparison to store bought applesauce. Homemade is far superior, hands down. So if you’ve never tried making applesauce, now’s the time to change that.

This is a great way to use a lot of apples. I used between 4 and 5 pounds of apples and it filled one large mason jar with applesauce. So if you get a windfall of apples, like I did this year, and you’re not sure what to do with them – make applesauce. You won’t regret it.

The procedure is simple. Just peel and slice up apples – (I did 4 -5 pounds but you can do more). Add 1/2 cup apple juice or cider, the juice of a small lemon, 1/2 cup brown sugar, cinnamon to taste and just a pinch of nutmeg. There are a whole bunch of recipes out there so I recommend doing a little research – and there is no limit to the spices you can add – you can really add any spices you want like allspice, or maple syrup or even a little butter. Just be careful with some of the more robust spices like allspice and nutmeg – they can take over the flavor. Be careful not to add too much cider or juice because it will not cook down well. Err on the side of less is more.

IMG_1071

Pour it all into a pot and cook it uncovered for about 25 minutes until everything is reduced down.  The mixture should look somewhat like the picture below.

IMG_1083

After that, just dump the mixture into a food processor and process. I like my apple sauce a little chunky so I pulsed the mixture. You can also just let it go to get a smooth consistency. The choice is up to you.

IMG_1091

I was bowled over by how easy this was. I can tell you this, if I have the choice, I will never buy store bought applesauce again!

IMG_1097


IMG_1110

To Die For Honey Mustard Chicken…

For those of you who have read my blog you know that chicken is my favorite. I cannot think of any way you can make chicken that I wouldn’t like. And since my husband is eating less and less red meat these days, my new recipes tend to center around chicken, turkey, fish, pasta and ground beef. You won’t hear me complain.

So I am always on the lookout for new chicken recipes and I found one on, yes you know, Pinterest and thought I’d try it. I’ve experimented with various honey mustard chicken recipes in the past but I liked this one because it suggested doing a honey mustard rub on the chicken as well as baking it in a honey mustard sauce. Needless to say, when my husband says “this one’s a keeper” I know this has been the best recipe yet.

Recipe Rating – A++ – this recipe is so flavorful and the sauce is just divine, great for crusty bread dipping. It isn’t difficult to make and is now one of my all time favorite ways of making chicken.

Lesson Learned 1 – Chicken thighs or breasts: The original recipe called for using chicken thighs. My husband is not a big fan of chicken thighs (I know, he’s probably the only one in the world). So I decided to make this with boneless breasts. It turned out perfectly. Most people shy away from cooking with chicken breasts. They think they are too dry. But the problem really is that most people cook chicken breasts far too long. I cooked mine at 375 for 25 minutes and they were moist and tender (I also kept the skin on the breasts). Chicken breasts lend themselves well to this recipe as the sauce gives them tremendous flavor. So don’t shy away from using chicken breasts – just be careful not to over cook them.

IMG_1123Lesson Learned 2: Buy chicken breasts with the rib meat attached and bone them yourself: I’ve found that I can save money buy purchasing chicken breasts with the ribs attached and bone them myself. It is a little bit of work but I think it’s worth it. Plus it’s getting harder and harder to find boneless chicken breasts with the skin still on them. I like to cook them with the skin on as I think that adds moistness and flavor. You don’t have to eat the skin, but I think it’s a great flavor enhancer in the cooking process. Just be careful when boning the breast. You want to finish with all of your fingers. The main thing is to use a very sharp boning knife. If you don’t have one then don’t do this. You’ll wind up either cutting yourself of getting frustrated because the process is taking to long. Sections of the ribs lie very close to the meat and you need to have a knife that can easily slice between the marrow and meat. Believe me, the only way to do this is with a high quality, very sharp boning knife.

IMG_1137Lesson Learned 3 – Let the meat marinate with the mustard rub on it for at least an hour: The skin and breast meet will be slippery so the rub will slide around on you. Get as much as you can on both sides and then cover it with plastic wrap and let it marinate in the refrigerator for at least an hour. As soon as you brown the meat the rub will come off. Don’t worry, it’s just more flavoring for the sauce.

Lesson Learned 4: The best sauce ever: I’ve made different versions of honey mustard sauces but I have to say I prefer this one. I like it because it has a nice balance of mustard and honey and also uses a little chicken stock. The stock tempers the sauce thickening process.  A sauce made with IMG_1131honey that is not diluted in this manner can stick to the pan and cause a baked-on mess. This sauce is so good that you’ll want to eat it with a spoon or dunk your bread in it. I also recommend using a seasoned cast iron pan when making this for a variety of reasons. First, cast iron is one of the best conductors of even heat. It takes cast iron a little longer to heat up but it holds heat well and it provides even heat. Second, a well seasoned cast iron pan is even better than a non-stick pan and that’s a plus when cooking with a honey based sauce. Third, cast iron moves seamlessly from stove to oven and I really like that. Some people treasure their cast iron pans so much they hand them down through generations. Yes, the pans are heavy, but they are relatively inexpensive (unless you invest in enameled cast iron like Le Creuset) and are oh so worth it!

I know I will be making this recipe often, it’s that good. This time I served it with rice and a steamed vegetable medley, but this would also be great with a baked potato and a vegetable of your choice. I can’t wait to make this again. I really hope you try it!

To Die For Honey Mustard Chicken

  • Servings: 2
  • Difficulty: Easy
  • Print

IMG_1147INGREDIENTS:

2 boneless chicken breasts, skin on preferred (you can use chicken thighs)

3 Tbs. Dijon mustard

3 Tbs. whole grain mustard

3 Tbs. honey or more to taste

3 Tbs. chicken stock

1 Tbs. olive oil

2-3 rosemary sprigs

INGREDIENTS FOR THE RUB:

1 Tbs. olive oil

1 Tbs. whole grain mustard

salt and pepper to taste

DIRECTIONS:

Mix together ingredients for the rub. Rub both side of the chicken breast with the mixture. Cover with plastic wrap and let the chicken marinate in the refrigerator for at least one hour.

Preheat oven to 375. In a large bowl whisk together the mustards, honey and chicken stock. Add additional chicken stock to taste and until the sauce reaches the desired consistency. Set aside.

Heat a cast iron pan. Add oil and sear both sides of the chicken breast until golden brown, approximately 2-3 minutes per side. Add mustard sauce, sprinkle with rosemary. Place in oven and roast until the chicken is cooked through – approximately 25 – 30 minutes.

Spoon sauce over chicken when serving.

Ready To Go Into The Oven...

Ready To Go Into The Oven…

Fresh Out Of The Oven...

Fresh Out Of The Oven…

Succulent Chicken Breast With Honey Mustard Sauce...

Succulent Chicken Breast With Honey Mustard Sauce…

Serving Suggestion" With Rice and Steamed Vegetables...

Serving Suggestion” With Rice and Steamed Vegetables…


Italian Sausage Tortellini Bake…

When I start to feel that Fall nip in the air I tend to think casserole. There’s just something about taking a bunch of ingredients mixing them together, sprinkling them with cheese and baking them off until they’re golden brown and bubbly. That says Fall to me.

IMG_0723I’m fond of this particular casserole for a variety of reasons. It’s one that helps you empty out the refrigerator, it’s easy to prepare and it also makes great leftovers. It started out with a package of cheese tortellini that I needed to use and then I morphed it into a dish that added a sautéed vegetable trinity, mushrooms, Italian sausage and a variety of cheeses. Needless to say that for a refrigerator clearing recipe it turned out mighty fine. And as with any casserole, all the work is in the prep. Once you’ve got it all together the oven does the rest.

Recipe Rating: A – easy to make, tons of great flavor – a stick to your ribs kind of dish.

IMG_0740Lesson Learned 1 – The beauty of this recipe is its adaptability: The basis for this recipe is tortellini, spaghetti sauce, mozzarella and parmesan cheese. You can do a down and dirty quick casserole with just those ingredients. Cook the tortellini according the packaged instructions, combine with sauce, top with cheeses and bake at 375 for 30 minutes. That’s it.  I had some celery, red pepper and mushrooms that I wanted to use. And I alway like to include onions and garlic whenever I can. To give the casserole more protein I added some italian sausage and I wound up with a “souped-up” casserole.

IMG_0748Lesson Learned 2 – The importance of deglazing: I prepped the ingredients for this casserole in the same pot in stages. I cooked the Italian sausage, browned the mushrooms, sautéed the onions, celery and pepper along with the garlic and at this point I had some lovely crusty bits on the bottom of the pan. I’ve learned over time that you never neglect those crusty bits. I’ll fill you in on a secret – that’s where all the flavor resides! I took a small amount of red wine (maybe one turn around the pan’s worth) and this nice cloud of smoke arose. After that I grabbed my trusty wooden spoon and voila – the crusty bits easily came off the bottom of the pan and combined with the other ingredients. Heaven!

IMG_0743Lesson Learned 3 – All ovens are not created equal: The cooking time in this recipe is based on my oven. When I researched similar recipes they said to bake this in the oven anywhere from 10 minutes to 30 minutes. I baked mine for 50 minutes and it turned out nicely browned, bubbly and hot all the way through. Get to know your oven and adjust the baking times accordingly. Since I live in high altitude I know that just about anything I cook in the oven will take longer than what is written in most recipes. So check your casserole at about 30 minutes and go from there.

This is a great fall supper. I served with with some roasted asparagus and crusty bread and it was a hit. Enjoy!


[recipe: title=”Sausage and Tortellini Bake…” servings=”6-8″ time=”1 1/2 Hrs. Including Prep” difficulty=”easy”]

Fresh out of the oven...

INGREDIENTS:

1 lb. ground Italian sausage, cooked – drained on paper towels

1 9 oz. package of tortellini, cooked according to packaged instructions and drained

1 medium sized onion chopped

3 medium sized celery stalks diced

1 sweet pepper, chopped

1-2 cloves of garlic, chopped

1 8 oz. package baby bella mushrooms, sliced

1-2 cups shredded mozzarella (half queso mozzarella preferred)

1/4 cup grated parmesan cheese or half parmesan, half romano

1 24 oz. jar of spaghetti sauce

Olive oil

1/8 cup dry red wine

Salt and pepper to taste

DIRECTIONS:

Preheat oven to 375. Cook tortellini according to packaged instructions. While the water is coming to a boil for the tortellini, add 1 Tbs. of olive oil to a hot pan. Cook Italian sausage until there is hardly any pink left in the meat. Drain sausage on paper towels and set aside.

In the same pan saute the mushrooms until lightly golden. Remove from pan and drain on paper towels. In the same pan add a little more olive oil and sauté the onions, celery and garlic. Salt and pepper to taste. Once slightly soft and translucent, add the chopped garlic and cook until fragrant – about 1 minute or less. Add the red wine and deglaze the pan. Add back the Italian sausage and mushrooms and heat through.

Drain the tortellini. In a large bowl combine the tortellini and sausage mixture until well combined. Pour mixture into a 3 quart casserole dish. Top with mozzarella cheese and then with grated parmesan (I used a grated parmesan and romano mixture as I had both cheeses in the refrigerator) Bake at 375 for 50 minutes (depending on where you live you may want to start checking this at 30 minutes) or until casserole is browned and bubbly.

[/recipe]


Ready to pop into the oven...

Ready to pop into the oven…

Fresh out of the oven...

Fresh out of the oven…

IMG_0806


IMG_0814


Easy Apple Pie…

Over the years I haven’t had a lot of luck making apple pies. I’m not sure of the exact reason but I would wind up with a variety of issues such as a burnt crust, a gooey crust, hard uncooked apples, lack of flavor in the filling and on and on and on… So when my neighbor across the street gave us a whole bunch of apples from his backyard and after numerous hints from my husband saying, “What are you going to do with them – make a pie?” I thought I would take another stab at it.

I know there are certain apples that better lend themselves to being baked in a pie, but I had no idea what type of apples I was given. I even asked my neighbor if he knew but he didn’t. I washed one, cut a piece of it, ate it and thought it might do well in a pie. So I put my cooking ego aside and decided to once again give it the old college try.

IMG_0821

I combed through a variety of recipes, reading different tips and techniques and looking at the various ingredients I could potentially use. I was surprised to find that some use heavy cream in the filling and others mixed the apples with some flour. After reading a bunch of different recipes I decided on one that I thought would give me a traditional apple pie, by that I mean one like my grandmother used to make. And from there my adventure began…

Recipe Rating A+++ – Color me surprised. It turned out great! I used a very basic recipe but added some ingredients and used different techniques I picked up looking at other recipes and the combination worked beautifully. I told my husband I thought that this was the best apple pie I ever made. He agreed!

IMG_0608Lesson Learned 1 – Invest in an apple corer: Since the apples I was using were smaller and had imperfections that I needed to work around I needed to peel and core a lot of them. When I made an apple cake recently I just used my knife to cut the core out of the apples. That took a lot of time. I invested in a simple apple corer and I was able to peel, core and cut up the apples a lot more quickly. And I also did not waste as much of the apple. It was well worth the money spent.

Lesson Learned 2 – Use lemon juice on your sliced apples to keep them from browning: I was working with some small to medium sized apples and had to use a lot of them. It took time to peel, core and slice them. If I did not sprinkle some fresh lemon juice on them periodically, some of the slices would have turned brown by the time I was ready to put them in the pie. Lemon juice prevents oxidation from occurring and that’s what turns peeled apples brown. By using lemon juice the apples looked gorgeous when I was ready to mix the filling and put them in the pie.

IMG_0618Lesson Learned 3 – Don’t slice the apples too thick and pile them high: If you slice the apples too thick they won’t cook. I sliced mine about a quarter of an inch thick and they cooked perfectly. Don’t be afraid the pile the apples into a big mound in the pie plate. They will shrink down in the cooking process and you want to make sure you still have a nicely rounded pie once it’s cooked.

Lesson Learned 4 – Prick the bottom layer of crust with a fork and sprinkle a little flour on it:  One recipe that I read included this tip. What I liked about the tip was the blogger said her grandmother always did this technique and she had no idea why but since her grandmother did it, she does it too. Well, if it’s good enough for grandma, it’s good enough for me so I did the same thing. I think the trick actually helped to cook the bottom crust as this was the first time ever that I was pleased with how the bottom crust turned out. Thanks grandma!

IMG_0615

Lesson Learned 5 – Never underestimate the power of packaged refrigerated pie crusts: As I mentioned earlier, to date I’ve not had a lot of success making apple pies. Because of that I decided to concentrate on the filling first before venturing into the realm of making a homemade pie crust. I used Pillsbury refrigerated pie crust dough in this recipe and the crust turned out amazingly well. The trick is to let the dough sit out and get to room temperature (and that takes only about 15 minutes – about the same amount of time it took to prepare the apples). That way it is much more malleable and less prone to cracking when you work with it. I brushed the top crust with an egg wash consisting of one egg yolk and a tiny splash of milk and it browned beautifully. I may venture into a homemade crust the next time, or if I want to have a great pie a little more quickly, I’ll use the prepackaged ones again. They are really surprisingly good.

IMG_0625

Lesson Learned 6 – Taste the apple mixture and adjust spices if necessary: After I mixed the apples with the flour, sugars, cinnamon and nutmeg I tasted the apples and the nutmeg seemed to be the predominant spice. I wanted the nutmeg to enhance in the background but the cinnamon to be the dominant spice. I added an extra teaspoon of cinnamon and the filling was perfect. I am writing the recipe with 2 teaspoons of cinnamon instead of one, but if you are skeptical, try it with one teaspoon first and go from there.

Lesson Learned 7 – Adjusting your oven temperature during the pie baking process: When I made this pie I started the oven at 425 and baked it at that temperature for 15 minutes. Then I reduced the temperature to 350 and continue to bake it for another 45 minutes. I’d never done this before and I think this helped not only to cook the filling all the way through but also not burn the crust. I did not have to protect the edges of the crust at all during the entire baking process.

Lesson Learned 8 – Brush the crust with an egg wash to make it brown in the oven: All you need to do is to take one egg (I’ve seen it recommended as just the yolk or the entire egg – either way it works) whisk it with the smallest splash of milk and brush the mixture on top of the pie crust. You will have way more than you need so don’t put the whole amount on. Once it is lighted coated pop the pie in the oven and the rest is magic. You’re left with a beautifully browned crust.

IMG_0646

Lesson Learned 8 – Put a baking sheet lined with foil on a rack below the pie to catch drippings: I thought about this just as I was putting the pie in the oven and immediately grabbed a baking pan, lined it with foil and put it on a rack below the pie. Even though you vent the pie and crimp the edges of the crust it always seems like some filling manages to leak out. I was so glad I did this. I did get some drippings on the foil but it was so much easier to clean up that way.

I could not be more pleased with this recipe. I always wanted to make an apple pie like my grandmother used to make and I finally figured out how to do it. We got another batch of apples from our neighbor yesterday and the first thing my husband said was, “Are you going to bake another pie?” I think I am going to try out an apple cake recipe that I found in the newspaper first, but I do think I’ll still have enough apples to make a pie. And now I’m not afraid to make one anymore. I just know you will enjoy this recipe. Try it and let me know how it turns out.

Easy Apple Pie...

  • Servings: 10-12
  • Difficulty: Medium
  • Print

INGREDIENTS

1 box refrigerated pie crust, Pillsbury pie crust recommended

8 cups of baking apples – peeled, cored and sliced – approx. 3 lbs. (Granny Smith, Cortland, Jonathan)

Lemon juice – approx. 2 Tbs., fresh or bottled

3/4 cup sugar

1/4 cup brown sugar

1/4 cup flour, plus a 1/2 teaspoon for dusting the lower crust

2 tsp. cinnamon – start with 1 tsp. and add from there if needed

1/4 tsp. nutmeg

2 Tbs. butter, cut in small cubes

1 egg yolk

Splash of milk

DIRECTIONS

Preheat oven to 425 degrees. Take box of pie crust dough out of the refrigerator and bring to room temperature. Core, peel and slice the apples. Sprinkle a small amount of lemon juice over the apples as you slice them. Stir to coat the apples with the lemon juice. (This process only needs to be repeated two or three times while slicing the apples or you can do a little more if you notice the apples are browning)

Combine flour, sugars and spices. Pour over the apples and stir to combine. Taste the mixture to ensure the correct amount of spices have been used. (don’t be afraid to add a little more cinnamon if necessary).

Line a 9 inch pie plate with one of the pie crusts. Prick the crust several times with a fork and dust with flour. Fill crust with the apple mixture. Dot the apple mixture with the butter cubes. Place the second crust on top of the pie filling. Seal the edges crimping by hand or using a fork. Cut a slit in the center of the pie to vent. Whisk together the egg and milk. Brush the top crust with the egg mixture.

Bake at 425 for 15 minutes. Lower the oven to 350 and bake for an additional 45 minutes, or until the crust is golden and the filling is bubbly.

IMG_0661


IMG_0667


Chicken Cutlets with Thyme Mustard Sauce…

I’m always looking for a quick and easy dinner recipe and I’m always on the hunt for new ways with chicken. This particular recipe definitely fits the bill in both areas. I like this recipe for a variety of reasons but mostly because it’s so easy and so flavorful. If you’re a chicken fan like I am, this recipe will become one of your favorites.

Recipe Rating – A+: This recipe is so good and easy to prepare that even I was a little amazed. My husband, who normally just gives me either a thumbs up or thumbs down on a new dish, felt compelled to comment. He must have said at least three times, “this chicken is really good.” That in itself is super validation for this particular recipe.

IMG_0548Lessons Learned 1 – Never underestimated the power of having a glass of wine while preparing a new recipe: I just had to put this in here. Usually I am a little nervous when trying out a new dish. Those few sips while I’m cooking away make the experience pleasurable. Add a little music to the mix and I begin to feel like Julia Child’s got nothing on me. I know I’m being slightly tongue and cheek here, but the idea is to do whatever you can to make the experience a good one. Anything that helps you enjoy the process is worth it. Have fun in the kitchen. I know I do.

Lesson Learned 2 – Prepping ahead always makes it easier: A couple of years ago my husband got me a Christmas gift of some cooking classes. One of the things that really stuck with me from those classes was the importance of prepping all of your ingredients first. Cooking time should be cooking time and not prepping time. So mince your shallots, slice your mushrooms, chop your garlic and thyme, measure out any ingredients that you don’t feel comfortable eyeballing, such as the sour cream, wine and mustard, and have everything set and ready to go before you start the cooking process. You’ll find it will help keep your kitchen cleaner and more organized and that will also make the experience better.

IMG_0544Lesson Learned 3: Don’t be afraid to substitute herbs: I used thyme in this recipe because I have it growing in my garden, but fresh tarragon would also work very well. My only caution would be not to substitute dried herbs for fresh ones. I think using fresh thyme provided more depth of flavor, especially with the short cooking time in this recipe.

Lesson Learned 4 – Cooking with chicken cutlets can be tricky: By chicken cutlets I mean boneless skinless breasts that either have been cut or pounded to about 1/4 inch thick. I actually found them at my local grocery store so that made it even easier. Chicken cutlets take no time to cook at all and you can easily make them taste like leather if your overcook them. I cooked mine for 3 minutes on each side before taking them out of the pan and preparing the sauce. I kept them on the plate covered with foil which resulted in some minimal carry over cooking. Once the sauce was made I put them back in the pan and let them simmer in the sauce for no more than two minutes. They came out juicy and tender.

IMG_0553

This is a great recipe for the burgeoning chef. The only area I would caution you on is to make sure not to overcook the cutlets. Because they are so thin they cook in no time flat. There is not a lot to prep for this recipe and within 20 minutes, including prep, this chicken is ready to plate. I served it with roasted butternut squash and balsamic roasted potato wedges and it was a big hit. Try this one. I know you will like it.

IMG_0569

Chicken Cutlets with Thyme-Mustard Sauce…

  • Difficulty: Easy
  • Print

INGREDIENTS:IMG_0597

2 TBS. extra virgin olive oil

1 pound chicken cutlets, 3-4 pieces

6 ounces baby bella mushrooms, optional

1/2 tsp. salt

1/4 tsp. freshly cracked black pepper

1 medium size shallot

I clove garlic, minced

1 tsp. flour (for the sauce – additional needed to dust cutlets)

1/2 cup dry white wine

1/4 cup sour cream, light preferred

1 TBS. dijon mustard

2 TBS. chopped fresh thyme leaves

DIRECTIONS:

Do all prep work first. Chop the shallots, mince the garlic, chop the thyme and measure out any remaining ingredients that you do not feel comfortable eyeballing.

Heat a large skillet over medium heat. Dust cutlets lightly with some flour. Sprinkle cutlets on both sides with salt and pepper. Add oil to the pan. Place the cutlets in the oil and cook for 3 minutes on each side. Remove cutlets from pan to a plate and cover with foil.

Add some additional olive oil to the pan. Saute mushroom until lightly brown. Add shallots and cook for about 1 minute. Add garlic and cook until fragrant, approximately 30 seconds to 1 minute. Sprinkle flour over shallots and mushrooms and cook for an additional minute stirring constantly. Add wine and bring liquid to a boil. Stir with a spoon to loosen all the brown bits in the pan.

Lower heat. Add mustard, sour cream and thyme. Stir until combined. Add chicken back to the mixture and let simmer for a couple of minutes. Add some additional thyme as garnish when serving.

IMG_0575

IMG_0583

IMG_0597

Serving Suggestion: Chicken with Roasted Butternut Squash and Balsamic Roasted Potato Wedges

Serving Suggestion: Chicken with Roasted Butternut Squash and Balsamic Roasted Potato Wedges

Baked Ziti With Sausage and Pancetta…

The weather is starting to turn. The temperatures are dropping and you can definitely feel Fall in the air. And for me Fall means cranking up the oven. I love grilling and I love dining al fresco but there is nothing like the smell of a pot roast slowing cooking in the oven. The aromas throughout the house make you want to curl up in front of the fire place with a glass of wine and just be glad you’re alive. I guess that’s why so many of these Fall dishes are called comfort food. They make you feel warm and cozy inside, even while they’re roasting away in the oven.

And this time of year I am also scrambling to figure out how to use my tomato crop. I never know from year to year how my tomato plants will fare but this year, due to the great growing conditions, I got a bumper crop. I was also fortunate this year. Just as the zucchini production began to wane the tomato production came into full force. And there are only so many salads you can make. So with all of these tomatoes I was on the hunt for a recipe that would not only warm the house but help me use a bunch of them. When I saw that this recipe called for 28 ounces of crushed tomatoes I thought to myself, heck – no need to buy a can, I can cut up what I have and that will do the trick. And did it ever. I got a delicious casserole and was able to use quite a few of my tomatoes in the bargain.

IMG_0031

I will say I was a little surprised at how long it took to assemble this casserole. But I think the main reason was that I hand chopped all of the tomatoes and that took the bulk of the time. I was also able to use some of my remaining fresh basil so that was a plus. I substituted bacon for pancetta (our local grocery store was out of it) and that worked well too. So all in all, a flavorful recipe that helped me use some of my garden bounty. Here is my recipe rating and lessons learned:

Recipe Rating: A- Great comfort food recipe: This a such a good recipe on a variety of levels – not only does it taste great but being able to use garden tomatoes and basil was definitely a plus. If you don’t have the tomatoes or the time to chop them just use a 28 ounce can of crushed tomatoes. That will work equally as well and will be much quicker.

IMG_0383Lesson Learned 1- You can substitute bacon for pancetta: You probably know already that when you don’t have or can’t find pancetta you can use bacon as a substitute. But did you know the difference between them? Both are made from pork belly and both are cured for a length of time. The major difference is that bacon is smoked after it’s cured and pancetta is not. So using bacon as a substitute will add a slightly smokier flavor to the dish. Needless to say, I used bacon and it turned out great. And I will definitely try this using pancetta to see if can discern a noticeable difference.

Lesson Learned 2 – How to perfectly align the stovetop cooking time: I found that if you start out by boiling the water for the ziti and then start the other ingredients right after you put the ziti into boiling water you can align the cooking times of all the ingredients. Keep in mind that this means that all the chopping and non-cooking prep is done prior to this, but once that’s done both the non-pasta and pasta ingredients cook within a similar timeframe. That allows you to do the final casserole assembly easily.

IMG_0404Lesson Learned 3 – The fresher the ingredients the better: Granted this is the first time I tried this recipe but I think the garden fresh tomatoes and basil made the flavor superb. I realize that having garden tomatoes in most areas is a once a year treat. If you have to use canned tomatoes I would recommend San Marzano tomatoes as they are known for their sweet flavor. At least don’t substitute dried basil for fresh basil in this recipe. If you don’t have basil in your garden buy some fresh at the grocery store. It will make a difference.

Lesson Learned 4 – The wonder of queso mozzarella: In the grocery store with the ethnic cheeses I found something called queso mozzarella. Using it I found it gives a creamier texture to recipes calling for mozzarella cheese. What I do is blend half queso and half regular shredded mozzarella when recipes calls for mozzarella. I think it melts better. And keep in mind, any prepackaged shredded cheese has an ingredient in it that keeps the shredded cheese from sticking together. That same ingredient also prevents it from melting as thoroughly as freshly shredded cheese. So the queso mozzarella helps to combat that. It’s very soft and takes no time whatsoever to grate.

Ready to pour into the casserole...

Ready to pour into the casserole…

Lesson Learned 5 – Take the time to grate fresh parmesan: We all love the convenience of pre grated parmesan cheese. I’ve used it over and over again in recipes, that is until I discovered the difference between packaged and freshly grated parmesan cheese. Freshly grated parmesan melts better and is bolder in flavor. And it is very easy to do, especially if your have a mini-prep processor like I do. All you have to do is cut the parmesan into small pieces, put it in the mini-prep and process it until is is grated. If you haven’t  tried it you really should. It makes a noticeable difference.

Lesson Learned 6 – Using a garnish: Garnishes are just that, something that dresses up the look of a dish but not essential to the recipe. I love Italian parsley for this purpose. I grew Italian parsley in a container on my deck this summer and it grew like a weed. I loved being able to go and snip off a bunch when I needed to.  That way I could control the amount I had versus buying a big bunch at the grocery store and throwing half of it away. Italian parsley is great as a garnish. Simply chop a little and sprinkle it on top of a dish and voila, it looks like the work of a professional chef. Never underestimate the power of a garnish. It can make a dish look fancy with no effort at all!

Ready to pop into the oven...

Ready to pop into the oven…

If you’re like me and you like casseroles you will love this dish. It’s also reheats well and is great for leftovers. Warm your house up with this one. You won’t regret it!

Baked Ziti With Sausage and Pancetta

  • Servings: 6-8
  • Difficulty: Easy
  • Print

INGREDIENTS:

12 ounces of ziti pasta

4 ounces pancetta or bacon, diced

1 large onion, diced

2-3 cloves of garlic (to taste)

1 pound ground Italian sausage

1 cup dry red wine

1 can of diced tomatoes (28 ounces), or diced garden tomatoes

Generous handful of fresh basil (approx. 1/2 cup)

1/2 tsp. kosher salt

1/2 tsp. crushed red pepper flakes (optional)

1 cup ricotta cheese

1 cup mozzarella cheese, divided  (1/2 cup queso and 1/2 cup shredded preferred)

1/2 cup freshly grated parmesan cheese

1 Tbs. Italian seasoning

Italian parsley for garnish

DIRECTIONS:

Preheat oven to 350 degrees. Do all the prep work first: slice the bacon into lardons, chop the onion, mince the garlic, and grate the parmesan and mozzarella cheeses.

Bring a large pot of water to a boil. Add the ziti and cook according to the package directions. Meanwhile in a large pan cook the pancetta for about 3 minutes (you don’t want to crisp it). Add the onion and sauté for an additional 3 minutes. Add the garlic and sauté until fragrant (30 seconds to 1 minute). Add the sausage and cook until the meat is no longer pink. Add the wine and cook for approximately 3 minutes. Use the wine to deglaze the pan.  Stir in the tomatoes and basil. Reduce the heat and cook for only a couple of minutes.

Drain the pasta and add it to the pan. Stir in the ricotta and half of mozzarella. Put into a 9×13 baking dish. Sprinkle the top with the remaining mozzarella and parmesan. Sprinkle Italian seasoning on top of the cheese.

Bake at 350 for 25 to 30 minutes or until the casserole is bubbly and the cheese is nicely browned.

Straight Out Of The Oven...

Straight Out Of The Oven…

Baked Ziti With Sausage and Pancetta

Baked Ziti With Sausage and Pancetta

Serving Suggestion: Baked Ziti with Garlic Bread...

Serving Suggestion: Baked Ziti with Garlic Bread…


Apple Cake With Cream Cheese Frosting

The other day I opened my front door and lo and behold a bag of apples magically appeared on my porch. My neighbor across the street has apple trees in his backyard and was nice enough to share a bag of them with us. I had no idea what type of apples they were but when I tasted one I knew it would lend itself to baking. But what to make – applesauce, apple crisps, apple streusel – the possibilities were endless.

IMG_0273I decided to make an apple cake that is really a combination of two recipes that I found on Pinterest. One intrigued me because of the spices and the other because it included pecans. So why not just take the best out of both recipes and make a new one, right? Well, surprisingly it worked out even better than I thought it would.

RECIPE RATING: A+ The cake came out great. The apples were moist but not mushy and the spices complimented the apples perfectly. The next time I make this I may add a little more cinnamon but as written it is still a fabulous cake. I took most of it to work and it was gone in less than an hour. The cream cheese frosting was a great compliment to the cake.

It’s Fall, there are plenty of apples out there – so don’t wait – you’ve just got to try this one!

LESSON LEARNED 1- Don’t be afraid to experiment: I say this with a caveat. Remember that baking is not like cooking. The amounts need to be relatively exact for the end result to be good. Eyeballing it is simply not recommended for baking. You must measure your ingredients. Experiment wisely.

That being said, when I was searching for recipes I found two apple cake recipes that basically had the same proportions for the main ingredients (flour, sugar, oil) but had different spices. I decided to used the main ingredients from one (it used two eggs instead of three) and I also added the spices from the other (cinnamon and allspice). One of the recipes only had vanilla as a spice and I just could not imagine baking apples without cinnamon and allspice. So I borrowed the spices from one recipe and incorporated it into the other while eliminating the vanilla (although I imagine you could put that in as well). It worked like a charm.

IMG_0277LESSON LEARNED 2 – Cut the apples into small pieces: I learned this lesson the hard way a few years ago. If you cut the pieces too big they won’t cook and the cake won’t taste as good. Cut them into nice small pieces and they will cook beautifully, moist but not mushy, within the allotted time. Also, make sure you peel the apples. Tough apple peels in a cake just don’t cut it in my estimation.

LESSON LEARNED 3: Use lemon juice to keep your apples from turning brown: This recipe calls for three cups of diced apples which takes a little time to prepare. During that time if you don’t sprinkle them with some lemon juice they will begin to turn brown. In order to avoid that take either some fresh or bottled lemon juice and sprinkle it sparingly on top of the apples. Stir the apples so that the lemon juice is incorporated thoroughly. You may have to do this process a couple of times because of the amount of apples but you need just a little lemon juice to keep the apples from browning.

LESSON LEARNED 4: Keep your nuts fresh by putting them in the freezer: Let’s face it nuts are expensive. Rarely do I finish a package of nuts in a recipe. I used to keep the leftover package in my pantry until the next time I needed them and then wondered why they tasted funky when I went to use them. I found out along the way that nuts have oil in them and if you don’t freeze them they will become rancid. Freezing leftover nuts makes them last much longer. And because they are frozen you don’t have to be dust them with flour in order to incorporate them throughout the batter.

IMG_0291LESSON LEARNED 5 – The batter will be thick:  I was actually surprised to see the thickness of this batter. You will need to spread it to fill a 9×13 pan. Make sure you spread it evenly and get it into all the corners.

This is a perfect Fall recipe. The cake is moist and flavorful and the cream cheese frosting is to die for. One of my co-workers said that he could just eat the frosting it was that good. If you try this one I’m sure it will become a Fall staple in your home.

A friend of mine also gave me a recipe for apple chips. I think I may try that as well. What is your favorite apple recipe?


[recipe: title=”Apple Cake With Cream Cheese Frosting” servings=”16-20″ time=”75 Minutes Including Prep” difficulty=”Easy”]

CAKE INGREDIENTS:

1 1/2 cups vegetable oil

2 cups sugar

2 eggs, room temperature

3 cups flour

1 1/2 tsp. baking soda

1/2 tsp. salt

1 tsp. cinnamon

1/4 tsp. allspice

3 cups chopped apples

1 cup chopped pecans

1 tsp. vanilla (optional)

lemon juice to coat the diced apples

FROSTING:

1 package cream cheese

4 cups powdered sugar, sifted

1 tsp. vanilla

dash of heavy cream (you can substitute with milk)

DIRECTIONS:

Preheat oven to 350 degrees. Grease a 9×13 pan (you can also use cooking spray). Peel and dice apples. Put a dash of lemon juice on them to prevent browning. Combine oil and sugar. Add eggs one at a time and mix thoroughly. Add vanilla if desired. Combine flour, baking soda, salt, cinnamon and allspice. Add dry ingredients incrementally into wet ingredients until combined.

Fold in pecans and apples. Spread in prepared pan and bake for 45-50 minutes or until a toothpick inserted in the center comes out clean. Cool completely before adding frosting. (about 2 hours).

For the frosting: Sift powdered sugar. Beat sugar and cream cheese until combined. Add dashes of heavy cream until you get your desired consistency. (I prefer heavy cream to milk and I feel it gives a thicker, more lush frosting). Spread on top of cake. Enjoy!

[/recipe]

IMG_0362


Baking With Flour and Eggs…

It occurred to me that I added a new category to my website called tips and trick and have yet to write a post under it. That ends today. The purpose of this category is to share some tips and tricks that I’ve learned along the way that make cooking and baking easier and better. I am hoping that my readers will also join in with their tips and tricks since I know I’ve still got a lot to learn.

My initial post covers two of my favorite tips, ones that have made a big difference in my baking. I call them knife aerated flour and quick and easy room temperature eggs.

KNIFE AERATED FLOUR:

I’ve often mentioned that my mother wasn’t a very good cook. She simply wasn’t interested in it. But when she did, she was not intuitive and she often made mistakes that affected the outcome of a recipe. One of her big mistakes was how to measure flour. Baking purists will tell you that the only way to measure flour is by weighing it. That may be the case, but I hardly find any recipes that include the weight of the flour in the ingredients. Normally it is listed in cups.

But not all cups are created equal. What my mother used to do is put flour in a measuring cup and then shake it so that the flour would settle. She would continue that process until she got the amount called for in the recipe. Basically she was using packed down flour as her measurement. Not good…

I found the best way to measure flour without weighing it is to use the knife aerator technique. Before I scoop my flour out of my canister into a measuring cup, I take a knife and stir it in the canister to aerate it. Then I put my cup in my canister and scoop out a heaping amount. After that I take my knife and level the measuring cup and voila, I have an amount that parallels weighing it. Easy, quick and recipes tend to work out well using this technique. The only time they don’t is if I need to do a high altitude adjustment. Then I add one to two additional tablespoons of flour and that usually does the trick. If you don’t live in high altitude you don’t need to worry about that.

So next time you measure flour, aerate it and level it in your measuring cup using a knife. You’ll get a much more accurate amount that way.

Use a knife to level off the flour...

Use a knife to level off the flour…

EASY ROOM TEMPERATURE EGGS:

From watching a lot of professional chefs I’ve learned that using room temperature eggs when baking makes the eggs blend more thoroughly in the batter. The problem is, who ever remembers to take the eggs out of the refrigerator in enough time to render them room temperature. Not me, that’s for sure.

But I recently learned a great little trick that in 5 minutes gives you room temperature eggs. Just put some very warm water in a cup deep enough to cover the eggs (I normally use my 2 cup measuring cup) and let them sit on the counter for 5 minutes. Voila, you have room temperature eggs. I do this all the time when I am baking now. It’s a great little trick and it hardly takes any time at all.

IMG_9778

WHAT ARE SOME OF YOUR FAVORITE BAKING TIPS N’ TRICKS?

I know there are a lot of tips that can make for better results or are amazing time savers. I would love to hear some of yours. Feel free to share and we can all learn from each other! Enjoy!


Lemon Raspberry Loaf Cake

August was quite a busy month with a lot of traveling and so I wasn’t able to make my goal of one new recipe a week last month. Now things have settled down a bit and I’m back in the saddle. This recipe I found on (you guessed it) Pinterest and it intrigued me especially since our local grocery store had quite the deal on fresh raspberries. The combination of lemon and raspberries is killer in my estimation and that made the choice even easier. So here is my recipe rating for a lemon raspberry loaf cake and lessons I learned while making it.

IMG_0135Recipe Rating – I’m conflicted so I will give it a range of B+ to A+. I know it’s a strange rating but I had to make this twice in order to get it right. The reason for the range is that I am just not sure whether the issue is how the recipe was written or the the challenges related to baking in high altitude. I will explain in my lessons learned.

Lesson Learned 1 – The flavor of this cake is awesome! The loaf fell in on me the first time I made it but I was determined to perfect the recipe because of the flavor. The cake is super delicious and I’m not kidding. If you love the flavors of raspberries and lemon you have to try this one. It is to die for!

The first try produced a caved in cake...

The first try produced a caved in cake…

Lesson Learned 2 – Cooking with raspberries (and blueberries for that matter) is tricky: I’m not sure whether this is a high altitude or a berry thing but with this recipe (and also with my lemon blueberry pound cake recipe), when I used the amount of berries called for in the recipe my cake either became a mushy mess or sunk in in the middle. Both times I had to reduce the amount of berries in order for the cake to turn out perfectly. Both types of berries tend to get wetter and mushier when you bake them so I am thinking that the proportion of berry to batter is really important in order for the cake to hold its shape and not cave in. If any of my readers have any insights on this, I would certainly appreciate it. The first time I made this cake I used one cup of raspberries as called for in the recipe and the cake fell apart in the middle. The second time I used 3/4 cup and the cake did not cave in. Hmmm……

Lesson Learned 3 – Adding some additional flour: When I use box mixes (which has become less and less these days) I always add two tablespoons of flour to adjust the mixture for high altitude. I did the same for this recipe and I think that along with adding slightly less raspberries prevented the cake from falling in.

Lightly flour the raspberries to prevent them from all falling to the bottom

Lightly flour the raspberries to prevent them from all falling to the bottom

Lesson Learned 4 – Flouring the raspberries: Shame on the original recipe. It did not tell you that you have to slightly flour fresh raspberries in order for them to evenly distribute themselves in a batter. If you don’t they’ll all sink to the bottom. If you use frozen raspberries you don’t need to flour them, but it is a must with fresh berries. This was the only flaw in this recipe but the flavor of the cake more than made up for it.

Lesson Learned 5 – Adjusting batter for the size of the loaf pan: Maybe part of my problem was that I used my 8×4 loaf pan when the original recipe called for using a 9×5 pan. I googled the adjustments and it was suggested that the 8×4 pan only have 4 cups of batter put into it a opposed to 6 cups of batter for a 9×5 pan. This recipe makes 4 cups of batter so I’m not sure the amount of the batter was an issue in this case. I definitely had to bake the loaf longer, an additional 15 minutes to be exact. The additional baking time did not hurt it and produced a nicely browned top.

IMG_0153Lesson Learned 6 – The wonder of lemon zest: Zest is one of the best ways to add flavor to a recipe. Lemon zest happens to be my favorite. Not only does it produce a rich lemony flavor but also a great lemony smell. Just make sure you are careful not to zest the lemon down to the white part, the pith, as that will give you a sour zest. To avoid that just move your zester two or three times over an area of the rind and then move on to another yellow part of the rind. Continue until you zest the entire lemon. In this recipe lemon zest provides flavor not only to the cake but to the glaze as well.

Lesson Learned 7 – The technique of folding: This recipe calls for folding in the greek yogurt and then gently folding in the raspberries. Folding is a technique whereby you use a large spoon (I use a wooden spoon) and gently turn over the batter from the bottom to the top, continuing that process in a circular motion until you’ve combined the ingredient(s) you need to fold into the batter. The purpose of folding is to gently combine ingredients and in some cases not to deflate the air out of an ingredient (such as a whipped cream or meringue). If you are not gentle with the raspberries they will break apart and you will wind up having a pink cake versus a white cake dotted with raspberries. Be careful at this point not to break up the raspberries but make sure they are evenly distributed throughout the batter before pouring the batter into the baking pan.

Even though this recipe took me two tries I would highly recommend it. The combination of lemons and raspberries produces a fabulous flavor and the use of lemon zest in the glaze punctuates it. Just beware it may not turn out right the first time and be comfortable with that.  I guarantee you, the flavor is worth getting it right. Let me know how yours turned out and any adjustments you needed to make to get it right. Enjoy!

Lemon Raspberry Loaf Cake

  • Servings: 8-10
  • Difficulty: Easy
  • Print

INGREDIENTS:

IMG_0225Loaf Cake:

1 1/2 cup flour (plus two heaping TBS. for high altitude)

1 1/2 tsp. baking powder (reduce to 1 tsp for high altitude)

1/2 tsp. salt

1 1/2 cup sugar (reduce by 1/8 cup for high altitude)

1 1/2 sticks of butter, softened

2 eggs, room temperature

3 TBS. lemon juice (you will need 2-3 lemons for this recipe depending on size)

1 heaping TBS. lemon rind

1/2 cup greek yogurt

3/4 cup fresh raspberries

Glaze:

1 1/2 cup powdered sugar, sifted

3 TBS. lemon juice

1 tsp. lemon rind

A splash of heavy cream (you can use milk as a substitute)

DIRECTIONS:

Preheat the oven to 350. Grease an 8×4 loaf pan and set aside.

In a bowl combine the flour, baking powder and salt. Set aside.

Using an electric mixer, combine the butter and sugar for at least 3-4 minutes. Add eggs one at a time and beat until fully incorporated. Mix in lemon rind and lemon juice.

By hand, mix in the dry ingredients (do not use the electric mixer for this). Once combined, fold in the greek yogurt. After that, gently fold in the raspberries.

Bake in the oven for 55-60 minutes or until a toothpick inserted in the center of the cake comes out clean. Let cake stand in pan for 15 minutes. Remove from pan and cool completely.

Combine powdered sugar, lemon rind, lemon juice, and heavy cream to make the glaze. Drizzle on top of cooled cake.

IMG_0237


Lemon Raspberry Loaf Cake

Lemon Raspberry Loaf Cake


A Life Well Spent…

For a long time I didn’t get it. I didn’t understand it, I couldn’t accept it, I rebelled against it. Who would ever choose to live their live that way? A life of complete servitude, a life that strips you of your individuality, a life solely based in hardship and hard work – it made absolutely no sense to me. No woman in her right mind would leave her family and home at the age of 16 and enter a convent. No woman in her right mine would vow to a life of poverty, chastity and obedience. No woman in her right mind would dress up in a wedding gown march down the aisle and pledge her life not to a man but to the Lord. Why would any woman do this? It just made no sense to me… that is until a few days ago…

The Motherhouse grounds...

The Motherhouse grounds…

This past weekend I spent a few days in my hometown of Chicago attending the 75th jubilee of my aunt Sister Teresita Miksas. My aunt was celebrating 75 years of being a nun in the religious order of the Sisters of Saint Casimir. Seventy-five years of anything is in itself a milestone but 75 years of being a nun is an remarkable achievement. I definitely wanted to be there for her. I fully understood the significance of it. But I was conflicted. Being there would almost certainly take me back to a place and time in my life that was not very happy, to memories that I did not want to revisit and to a time that I would sooner forget than relive – that being my high school years. But I ultimately knew that this was not about me. I owed it to her to take this journey. She deserved it. She earned it. And surprisingly enough, it was through this journey that I began to understand.

The Motherhouse grounds...

The Motherhouse grounds…

Growing up I struggled accepting the traditional roles women were expected to play.  I never saw myself being fulfilled as a housewife. I didn’t relish the idea of being expected to cook and clean for a man. If you want a chef and a housekeeper just hire one. I wanted to be independent, self sufficient not reliant on anyone or anything for my well being or happiness. Because I felt that way I resented women that I perceived to be the opposite. And so when I began to understand the concept of life as a nun I rebelled against it. Thinking back now I’m not sure whether my feelings were that of anger or sadness, maybe a combination of both. But the idea of being a nun, being taught by nuns, being influenced by nuns especially in my most formative years was distasteful to me. I guess I never thought these woman had a foot in reality. I viewed them as uninformed and out of touch. And when I was finally out from under their influence I went wild. I was free from feeling my development had been stifled, believing I was ill prepared to function in the real world. I was determined never to look back or focus on what I believed to be years of indoctrination in a lifestyle I could not accept. I was finally rid of the influences that were trying to make me into something I was not.


The Motherhouse grounds...

The Motherhouse grounds…

But now I realize nothing could be further from the truth. After my experience this past weekend I know it was all part of a process, a journey that has thankfully taken me full circle. My experience made me realize that although you can never go home again there are valuable lessons to learn from trying. This past weekend I was afforded the opportunity to learn about these women, their history, their achievements and their current struggles. It is a story of leadership against the odds, servitude, accomplishment and loss. It is a story that needs to be told.

The order of the Sisters of Saint Casimir was founded by Mother Maria Kaupas in 1907. Born Casimira Kaupas, she emigrated to the United States at the age of 17 to work as a housekeeper for her brother the Reverend Anthony Kaupas. In her late twenties she founded the congregation of The Sisters of Saint Casimir and in 1911, at the age of 31, her order established the motherhouse that I recently visited (at the age of 31 I was still trying to figure out what I wanted to be when I grew up). The Sisters began to staff schools in Lithuanian parishes in Chicago. By 1928 they were teaching in parishes across the United States and also began their health care ministry with the opening of Holy Cross Hospital.

Mother Maria's death mask...

Mother Maria’s death mask…

All these monumental accomplishments occurred at a time in our society when women were not afforded the same privileges we have today. The original wing of the Motherhouse was built in 1911, nine years before women even had the right to vote. Holy Cross Hospital was built in 1928, thirty-five years before women were afforded the right to equal pay for equal work and forty-one years before women were allowed to attend prestigious universities such as Harvard and Princeton. Mother Maria Kaupas formed a ministry, engaged countless other women to follow God’s calling, built schools, staffed hospitals and provided thousands of immigrant children and families the education and health care they were lacking all the while combatting a society that believed women were not equal to men. When you think about it, she was an entrepreneur with leadership skills that rival those of a Steve Jobs or a Mark Zuckerberg. This was not a woman who was uninformed and out of touch. She was driven by a personal mission of establishing a faith based ministry to benefit those in need. And she succeeded brilliantly.

The phonograph purchased to teach the Sisters English...

The phonograph purchased to teach the Sisters English…

All weekend long I was immersed in the epic history of the Sisters of Saint Casimir. Initially times were hard and the rules were stringent. The nuns wore habits that showed the outside world only their faces below the eyebrows and their hands. I remember as a kid wondering if they even had hair on their heads. Early on (before the dress code became more relaxed in the 1960’s) they were required every day – summer or winter – to wear long underwear, two underskirts, and a camisole type garment all underneath a wool floor length tunic with long sleeves and adorned at the waist by a rosary cinch. A bib made of hard white material went around their necks and down their chests. On their heads they wore a wimple that covered their hair and concealed their necks topped off with a headdress that consisted of a veil and a hard white forehead crown that appeared to rest on their eyebrows.  Since the tunics were wool they could not be cleaned regularly so in those days a nun had to wash her myriad of undergarments frequently so as not to offend others with her body odor. The garments were stifling and the crown on the veils chaffed their foreheads. As one Sister so aptly put it, “If you could survive the days of wearing those habits you knew you were truly a nun!”  Today their dress is more secular, simple and understated. You know they’re nuns but you can also see them as human beings.

IMG_9969

Mother Maria's room...

Mother Maria’s room…

I was afforded the opportunity to take a tour of their Motherhouse, a place that I had never seen before. In the old wing (a new wing was added in the 1970’s) is the room of their founder Mother Maria Kaupas. Kept as a living memorial to her, it still contains her furniture, typewriter and even the bed she died in. In the corner stands a bust of her image fashioned after a death mask that she agreed to have done when she was still alive. In 1996 the Vatican agreed to proceed with the beatification process of Mother Maria (the process that can result in sainthood) and in 1999 her remains were removed from Saint Casimir’s cemetery and placed in a white marble sarcophagus in the Motherhouse chapel.

Mother Maria's typewriter...

Mother Maria’s typewriter…

The chapel is undoubtedly the cornerstone of the Motherhouse. Although they call it a chapel, it truly is a mini-basilica with an enormous altar featuring massive marble statues. Two side altars abut the main altar. Numerous breathtaking stained glass windows adorn the walls. And in the back behind Mother Maria’s sarcophagus is an exquisite tile mural featuring an image of her. Most churches built today cannot even come close to replicating the splendor of this chapel’s architecture and artistry. It would simply be too cost prohibitive.

The old wing housed a library, a small chapel, and an ornate rotunda at its core with a circular wooden staircase and massive wall statues depicting the crucifixion of Christ. Standing near the rotunda stairs you can almost hear the faint laughter of the children who once climbed them or the footsteps of the postulants who ran down them only to be caught by a bemused Mother Maria. Stain glass windows adorn the entrance doors, a mini museum adjacent to the rotunda contains personal artifacts of Mother Maria, an old phonograph used to teach the Sisters the English language and a pictorial history of the many Sisters who served the order and those who have passed away.

The crucifix hanging in the rotunda...

The crucifix hanging in the rotunda…

There was also a large auditorium with a stage that is now used for special functions. On the back wall of the stage is a mural painted by Sister M. Mercedes. Completed in 1973 it depicts the history of the Sisters of Saint Casimir from their roots in Lithuania to their ministry in the United States. I stood there in awe of it. The artistry, attention to detail, the use of color and light. It was amazing. I felt the need to touch it and to revel in the work of a great artist. In its heyday, the Motherhouse walls were adorned with many pieces of her artwork, some currently valued at approximately $3,000 each. A gifted artist who shared her talents not only to provide joy but also to pay homage to the rich history of the women in this holy order. I was rendered speechless.

The center of Sister Mercede's mural

The center of Sister Mercede’s mural


Sister's Mercede's mural on the back wall of the auditorium

Sister’s Mercede’s mural on the back wall of the auditorium


The signed mural...

The signed mural…

So on and on the stories went. Women who were accomplished artists, musicians, educators, health care providers all dedicated to a higher calling and the common good. The fruits of their labors permeate the buildings and grounds. Their past is palpable throughout – you sense it, you feel it – but unfortunately it’s now accompanied by an ever present deafening silence of a lifestyle that has slowly become a way of the past.  Walking down the halls you see a vast array of empty sleeping rooms, an infirmary on the fourth floor completely shut down with furniture removed and walls stripped, the library dismantled with its contents shipped to a university in Lithuania – room upon empty room echoing the sounds of a rich past and an uncertain future. And slowly you begin to realize the heartbreaking reality that things will never be what they use to be.

The old chapel...

The old chapel…


The current chapel...

The current chapel…

The order of the Sisters of Saint Casimir was established at a time when social services were the exception and not the norm. During those bygone days, if religious orders did not provide these types of services they simply did not exist. Today these services can be provided without having to make the same sacrifices the Sisters made. People can easily live a secular lifestyle and still serve the common good. Unfortunately these societal changes created tragic results. Systematically convents have been shutting down, private schools are being sold and hospitals are being privatized. No longer do people want to make such huge personal sacrifices in order to serve. No longer are women aspiring to a religious life in numbers that can sustain these historic communities. Such is the plight of the Sisters of Saint Casimir.

Mother Maria's sarcophagus at the rear of the chapel...

Mother Maria’s sarcophagus at the rear of the chapel…


The mural behind the sarcophagus...

The mural behind the sarcophagus…

Currently the order is looking to sell the Motherhouse and grounds. A two block square piece of property on the Southwest Side of Chicago, it served as the center for the work of these women for over one hundred years. The grounds are immaculately manicured, the building stands as a testament to their history – the only home that those remaining have ever known. They expected to live there. They expected to die there. But it has just become too expensive to own and operate.

The ornate ceiling in the rotunda...

The ornate ceiling in the rotunda…

I know in my heart of hearts that Mother Maria, being the business woman that she was, would say this must be done. In reality it has to be done. But what struck me was the grief these women were experiencing during this change process. At first I didn’t get it. It’s just business. I understand having to make a business decision. It’s the way of the world. But after spending a weekend with them, I began to see them in a totally different light. And through that process came respect and admiration for who they are, what they have accomplished and what they are losing.

As I walked the grounds of the property I could not help but be overcome with sadness. I stood at the grotto that existed when my aunt was young. I held a picture of her taken several decades earlier at that very same grotto standing behind a kneeler between her mother and father. I touched the top of the same kneeler that my grandmother and grandfather touched. I felt them. I felt their joy of having a daughter who entered the religious life. I felt their presence and the presence of so many others who sought peace and solace on those grounds. I cried for them and for all who would be losing that special place. And it was there that I finally came to understand and appreciate the history and the ministry of the Sisters of Saint Casimir.

My grandparents and aunt at the grotto circa 1945

My grandparents and aunt at the grotto circa 1945


The grotto today...

The grotto today…

Now systematically they are all being moved to a continuum of care facility on the South Side of Chicago. Only the able bodied remain at the Motherhouse to continue the process of phasing it out. The others will have wonderful accommodations and great care but it will never be the same. As I stood on the grounds I couldn’t help thinking what will become of Mother Maria’s sarcophagus? What will become of the grounds? What will become of the grotto? What will become of Sister Mercede’s mural? What will become of that gorgeous chapel? And I know these questions are running through the minds of each and every one of them. They are questions still remaining to be answered.

But although there are still so many unanswered questions one truth is and will always remain constant. No one will ever be able to strip from them the incredible legacy that they, along with Mother Maria, built. It will remain forever in the hearts, minds and souls of all they touched. It will remain in my heart, mind and soul for as long as I live.  Finally I understand…

And so, after 75 years of being a nun, I say to my aunt and to all of these wonderful women – thank you and may God bless you.  Be brave. Stand tall and be proud! It has been a life well spent.

Happy 75th Anniversary, Auntie! (in the wheelchair)

Happy 75th Anniversary, Auntie! (in the wheelchair)


Baked Salmon and Cremini Mushroom Duxelle En Croute…

My husband and I have taken to eating more fish these days and so I’m experimenting with different ways of preparing it. I’ll admit it up front, fish can be tricky. You can’t eat it if it’s underdone and it tastes like the Sahara Desert if it’s overdone – and there is a very fine line of cooking time that separates fish from either one. But my job in this blog is to try to save you some of that uncertainty by my trial and error and not yours.

Duxelle Ingredients...

Duxelle Ingredients…

This fish recipe turned out very well the first time I made it, amazingly enough, and there is only one simple thing I would change from the original recipe and that would be the cooking time. The name of the dish sounds fancy but don’t let the terms en croute and duxelle frighten you. En croute simply means in a crust and a duxelle is merely mushrooms, shallots and herbs sautéed in butter and reduced to a paste. This particular duxelle also adds some vermouth and a tad of heavy cream to the paste just to make it extra decadent. As for the puff pastry, hardly anyone tries to make it from scratch anymore as the process is tedious and time consuming. Frozen puff pastry is just fine and adds to the mystique of the recipe with hardly any work on the part of the chef. The beauty of this recipe is that it really isn’t that hard to put together. So I’ll share my recipe rating and lessons learned in the hopes that you’ll give this one a try.

Recipe Rating- A-: The minus in the rating is really for the cooking time listed in the original recipe. I find it hard to believe that the salmon would be moist considering the amount of time the recipe suggested to cook it. But other than that, this recipe is very good and I think even someone who is not a big fan of mushrooms might like the flavor of the duxelle, which nicely compliments the flavor of the salmon.

Lesson Learned 1 – You can always put the fish back in the oven: I like to perfect fish recipes with just me and my husband as the guinea pigs before considering serving them to guests. That way I’m less worried about the presentation and more about perfecting the cooking time. So, if for some reason the fish is not done to your liking, just pop it back in the oven for a few more minutes (even if it is primarily encased in puff pastry). The original recipe called for baking the salmon at 400 degrees for 15 minutes and then lowering the temperature to 325 and baking it for an additional 15-20 minus. I simply could not imagine moist salmon being the end result of that process. My filets were 6 ounces each but only about 1/2 inch or slightly less thick. I am glad I followed my gut instinct and cooked them at 400 for 25 minutes. Even then the salmon was on the verge of being dried out but not bad (as a matter of fact those who like their salmon well done should bake it this way) – the next time I make it, I’ll bake the salmon at 400 degrees for 20 minutes and that should be perfect. You need the time and higher temps to cook the puff pastry so you need to be careful to bake a piece of salmon that is at least 6 ounces in order for it to withstand the cooking time. Any less than 20 minutes and I don’t think the puff pastry will bake to its full potential.

Finely chop the mushrooms for the duxelle...

Finely chop the mushrooms for the duxelle…

Lesson Learned 2 – To make the mushroom paste you need to finely chop the mushrooms: The duxelle consistency will not be achieved if you do not finely chop the mushrooms. As a matter of fact I don’t even recommend chopping them by hand. I would put them into a food processor and pulse them until they are finely chopped. I used my mini food processor for this and got the desired results without having to drag out the large food processor. I imagine this would be quite labor intensive if you tried to do this by hand.

Lesson Learned 3 – Remove the skin from the fish: I purchased wild caught salmon for this dish and was surprised at how thick and tough the skin was when I was removing it. You don’t want to battle with that while you’re eating so my advice is to invest in a good boning knife and remove the skin from the fish before preparing it.

Lesson Learned 4 – Working with puff pastry: Don’t be intimated. Working with puff pastry can actually be quite simple if you know a few things. First you’ll want to thaw a sheet in the refrigerator for about 3 hours before working with it. Lightly dust your prep station with flour, carefully unfold the pastry sheet (it’s folded in thirds) and roll it out to form more of a square shape. (Don’t roll it out too thin and be careful when lifting it if you need to add a little more flour to the surface). Don’t be afraid to adjust the salmon (scrunching it a little) to fit neatly into a folded pocket of puff pastry. For two filets you should only need one sheet of puff pastry. There will be two sheets in the box when you buy it. Keep the other sheet frozen and use it at a later time.

Lesson Learned 5 – An egg wash is puff pastry’s best friend: In order to enhance the color of your puff pastry, beat an egg with just a splash of water in a dish and then brush it all over the top of the puff pastry. The egg wash will help produce a beautiful golden color on the pastry. Once you’ve applied it, make a one inch slit in the center of the pastry to allow steam to escape during the baking process.

I know this recipe may look a little intimidating but really it isn’t. These salmon pockets can actually be made a couple of hours ahead of time and left in the refrigerator until they’re ready to be baked off. The original recipe states that these can also be frozen and then baked frozen but additional cooking time is necessary (not sure what that means but if you’re adventurous, try it). I can assure you this tastes delicious and is worth the little bit of extra time to put together. Enjoy!

IMG_9704

The duxelle paste…

Layer the duxelle and salmon on to the puff pastry...

Layer the duxelle and salmon on to the puff pastry…

Make the pastry pocket and crimp the sides with a fork...

Make the pastry pocket and crimp the sides with a fork…

Brush the pastry with an egg wash and cut a slit in the center to release steam

Brush the pastry with an egg wash and cut a slit in the center to release steam

Baked Salmon and Cremini Mushroom Duxelle En Croute

  • Servings: 2
  • Difficulty: Medium
  • Print

INGREDIENTS:

2 six ounce salmon filets, skin removed

1/2 cup mushroom duxelle

1 sheet of puff pastry, thawed

1 egg 1 tsp. water

(FOR THE DUXELLE)

6 ounces cremini mushrooms

2 TBS. butter

1/4 cup finely chopped shallots

1 TBS. vermouth (or dry white wine)

1/4 – 1/2 tsp. fresh thyme

3 TBS. heavy cream

salt and pepper to taste

DIRECTIONS: Thaw the puff pastry in the refrigerator for at least three hours. Preheat the oven to 400 degrees. Using a damp paper towel, wipe off any residue on the mushrooms. Don’t wash them directly under water as they can absorb too much moisture if you do that.

Put mushrooms in a food processor and pulse until they are finely minced. Mince the shallots and chop the thyme. Melt the butter and sauté the shallots until soft. Stir in the mushrooms and simmer for 7-10 minutes, stirring occasionally until their moisture evaporates. Add the wine, thyme and salt and pepper. Simmer for about another 5 minutes. Remove from the heat and add the whipping cream. Use immediately or refrigerate until ready to use.

Remove the skin from the salmon. On a lightly floured surface, open the puff pastry and gently roll it into the shape of a square. Cut the puff pastry into four equal squares to create an upper and lower portion of the pocket (I cut mine in half and just folded the pastry over the salmon – I had to scrunch the salmon a little to get it to fit in the pocket but it worked out just fine). Spread the duxelle on the puff pastry up to an inch from the edges of the pastry.

Place the salmon on top of the duxelle and fold over the pastry to create a pocket. Use a fork to crimp the edges shut. Beat egg with water and brush the top of the puff pastry pocket with the egg wash. Slit a hole in the center of the pastry pocket (about a inch) to allow steam to escape. Line a baking sheet with foil and spray lightly with non-stick spray. Place the salmon pockets on the baking dish and bake for 20 minutes. Serve immediately.

Pastry Pocket Right Out Of The Oven...

Pastry Pocket Right Out Of The Oven…

Salmon and Cremini Mushroom Duxelle En Croute...

Salmon and Cremini Mushroom Duxelle En Croute…

Cheesy Zucchini Mushroom Bake…

I guess at this point you can probably tell that I’ve been a little fixated on zucchini recipes and with good reason. The zucchinis just keep coming and coming. Every day it seems I’m harvesting two to three new zucchinis. Last year my zucchini plant (I only have one as I have limited space in my garden) hardly produced anything. This year my plant is producing prolifically. Go figure. Mind you, I am not complaining. The challenge is to determine ways to use all this zucchini as I won’t let any go to waste. I know I can give them away if I need to, but most of my neighbors are looking to give their zucchini away as well. Some have even gone to the lengths of just leaving them on neighbor’s door steps. The whole neighborhood must be over run. So my challenge – how can I not only use my zucchini but also make it exciting when having it several times a week.

IMG_9540The latest recipe I tried was a side dish.  Those are probably the easiest recipes to find. This recipe came off of a website that featured 35 different zucchini recipes and I always like to one stop shop. This one seemed relatively easy and so I thought I’d try it. The original recipe called for paring zucchini with yellow squash and I think that would have been perfectly fine, but I had so much zucchini that I wanted to use and so I just skipped the yellow squash. I did add some mushrooms that I had and that worked very well (I always seem to have mushrooms in my refrigerator). My point is that this recipe is adaptable and I am all for adaptable. Bottom line, this is an easy recipe to prepare and it’s actually quite good. I had some issues with how the recipe was written and I will share those in my lessons learned.

Recipe rating: B+ – most of my issues came from how the recipe was written as I am a stickler for detail and how to achieve success the first time you make something. In my experience even the best of recipes are seldom tried again if they can’t be done well the very first time. These days everyone is so busy that recipe success the first time around is just about a given for making a recipe again. This one had one critical piece of information missing that, in my estimation, made the dish look great as well as taste great.

IMG_9550Lesson Learned 1 – prepping ahead: The beauty of this recipe is that it can be prepped ahead and put into the oven when needed. I prepped all of the ingredients about an hour ahead of time and simply covered them in plastic wrap and put them into the refrigerator. The only other thing I did was to take it out of the fridge about 15 minutes before putting it into the oven to take the chill off. Right before putting it in the oven I topped it with some additional cheese. I am thinking this is something that can be prepped in the morning and then finished off when you get home from work – a nice little advantage especially for a busy day.

Lesson Learned 2 – use fresh herbs whenever possible: The original recipe called for 1/2 teaspoon of dried thyme. I have thyme growing in my garden and I used that. You always need to add more of an herb if it is fresh, so I substituted 1 teaspoon of fresh thyme and I felt it gave the side dish a great flavor boost.

Ready to go into the oven

Ready to go into the oven

Lesson Learned 3 – you eat with your eyes first: How often have you heard someone say, “Oh that looks delicious!” When you think about it, it’s really a sort of oxymoron since something can only taste and not look delicious. But the truth of the matter is we eat with our eyes first. If something looks great, we automatically assume it will taste great. And this is probably my biggest bug-a-boo with the original recipe. That recipe called for baking the ingredients uncovered for 25-30 minutes then adding the remaining cheese and baking it for an additional 10-15 minutes. I would never have gotten the rich color on the cheese by doing that. What I wound up doing is putting the dish under the broiler for the last 5 minutes thereby getting those nice brown bits of color on the cheese. If I had not done that, the top would’ve just looked gooey white. Getting the browning from the broiler, in my estimation, makes the dish look much more inviting. Believe me, it did not look nearly as inviting when I followed the directions in the original version of the recipe. At 350 degrees you would have to cook the cheese much longer to get it to brown on top.

I realize that my rant about using the broiler may be very picky, and it probably is. Don’t let that deter you from trying this recipe. It’s a great way to use up some of that extra zucchini and I’m pretty sure it will be a family pleaser as well.

Right Out Of The Oven

Right Out Of The Oven

Cheesy Zucchini Mushroom Bake

  • Servings: 6
  • Difficulty: Easy
  • Print

INGREDIENTS:

4 medium zucchini

4-6 ounces of baby portobella mushrooms sliced

3 Tbs. chopped fresh basil (this can be adjusted depending upon personal taste)

2 green onion spears thinly sliced (white and green parts)

1 tsp. fresh thyme chopped (1/2 tsp. dried thyme)

3/4 tsp. garlic powder

1 cup cheese, divided (I used a combination of mozzarella and pizza cheese – you can use more cheese if you like, I think I actually used 1 1/2 cups of these cheeses all total)

1/2 cup parmesan, divided

salt and pepper to taste

DIRECTIONS:

Preheat the oven to 350 degrees. Wash and cut the zucchini into half moons. Slice the mushrooms into thick slices. Finely chop the basil. Thinly slice the green onions. Chop the fresh thyme.

Combine the sliced squash, mushrooms, basil, onion, thyme garlic powder and half of each of the cheeses. Stir carefully to combine all of the ingredients making sure that the cheese and herbs are well distributed. Season with salt and pepper. Put the mixture in an 8 x 8 baking dish that has been sprayed with cooking spray. (At this point I added a little more cheese on the top). Bake uncovered for 25 minutes.

Take the dish out of the oven and sprinkle with the remaining cheese. Let bake for an additional 5 – 10 minutes then place casserole under the broiler for the last 5 minutes. Let stand for a few minutes and serve.

Cheesy Zucchini Mushroom Bake

Cheesy Zucchini Mushroom Bake

Serving Suggestion: With Grilled Chicken Breast and Oven Baked Potato Chips

Serving Suggestion: With Grilled Chicken Breast and Oven Baked Potato Chips

How Do You Solve A Problem Like Zucchini…

I am in the midst of selling and buying a house so I have not had time in the kitchen to try out recipes. I should be back doing my regular schtick by the end of July. In the interim enjoy some of my reposts. See you soon!

[Note: A version of this post published a few years go has been my most successful blog to date. I get at least one hit on it every day and often more. I’m not sure if it’s the title or the content, but it’s had amazing success. I have updated it with some additional thoughts since I’ve made this recipe dozens of times since first posting it, have definitely perfected it and can provide some additional lessons learned. This is the ideal post for this time of year, especially if you’re like me and have tons of zucchini and are running out of ideas on how to use them. Of all my zucchini recipes, savory or sweet, this is by far my absolutely favorite!]


I love to grow vegetables in my garden. It’s not only fun it’s also very satisfying. And I’ve learned over the years, just like anything else in life, that less is more. So I’ve finally come to terms with having blank space in my garden knowing that as the summer progresses the vegetable plants will fill them in. They’re also much happier and produce more because now they have the room to grow and don’t have to compete with other plants for space and water. What a concept. I wish I’d figured that out a lot sooner.

Zucchini Flowers...

Zucchini Flowers…

And for some reason my gardening prowess seems to be growing zucchini. Once the onslaught begins it never seems to end. I love grilled zucchini and I have a great recipe for Zucchini and Mushroom Gratin (thanks in part to Ina Garten) but I’ve struggled with using zucchini to make zucchini bread. The usual recipes seemed too dry and too bland to me. I was searching for the perfect recipe and happened to stumble upon it last year thanks to Pinterest and my friend Kelly Brown who originally pinned it. It is a recipe for double chocolate zucchini bread and I am not kidding when I say it is to die for! I can’t take credit for the original version of the recipe, it is from King Arthur’s Flour, but I love my version for several reasons. So let’s rate the recipe and talk about some lessons learned by making it several times over the past year.

Recipe Rating: A+ to the moon and back (my highest rating ever)! This is by far the best recipe recipe I’ve found to use zucchini, sweet or savory. It is easy to make and uniquely flavorful. I guarantee if you try this, it will become one of your staple recipes.

My very happy zucchini plant...

My very happy zucchini plant…

Lesson Learned 1 – You don’t need butter and white sugar to make a cake sweet: There is no butter or white sugar in this recipe. The substitutes for them are vegetable oil, honey and chocolate chips. This produces a cake/bread that tastes like a flourless chocolate cake with just the right amount of sweetness without being sickeningly sweet. We are so used to a lot of sugar in recipes that the first time I tasted this I wasn’t sure if I liked it. After a few bites I was hooked and now I prefer it to the sweeter versions of zucchini breads.

Lesson Learned 2 – Zucchini enhances the moistness of the bread: This recipe uses a good quantity of zucchini, two cups patted down (that translates into about two 8-9 inch long zucchinis). As with other types of zucchini breads, you really don’t taste the zucchini but it gives the bread a wonderful moistness. Plus it is a great way to use up a bumper crop of zucchini which I tend to get just about every year.

IMG_9519Lesson Learned 3 – Coffee enhances the flavor of chocolate: The original recipe calls for 1/2 teaspoon espresso powder used as a flavor enhancer. I couldn’t find espresso powder at my local grocery store so I just used plain ole’ brewed coffee as a substitute, 2 tablespoons to be exact. It’s amazing how much more robust coffee makes the flavor of chocolate! Plus we make coffee everyday and don’t drink espresso so I didn’t have to spend money on something that would wind up taking up shelf space in the pantry and only used for a few recipes.

Lesson Learned 4 – Add frozen chocolate chips: When adding ingredients like fruit or baking chips you normally have to coat them in flour so they don’t all fall to the bottom of the bread. If you freeze your chips and then add them at the very end right before pouring the mixture into the pan, they will distribute evenly in the bread without having to flour them.

This recipe is simple to make and is so killer delicious you won’t believe what you are tasting. Try it and let me know what you think. Also, I am always on the lookout for zucchini recipes so please if you have a favorite, share it and I will try to make it. I am determined to use all of the zucchini my garden produces and so variety is key to getting that accomplished! Enjoy this one!

Double Chocolate Zucchini Bread

  • Servings: 1 loaf
  • Difficulty: easy
  • Print

INGREDIENTS:

2 large eggs, at room temperature

1/3 cup honey

1/2 cup vegetable oil

1/2 cup brown sugar

1 tsp. vanilla extract

1 tsp. salt

1/2 tsp. baking powder

1/2 teaspoon baking soda

2 TBS. brewed coffee (or 1/2 tsp. espresso powder)

1/3 cup baking cocoa

1 2/3 cup flour

2 cups shredded unpeeled zucchini, gently pressed

1 cup frozen chocolate chips (I use dark chocolate chips)

DIRECTIONS:

1. Preheat oven to 350 degrees, lightly grease an 8 1/2 x 4 1/2 inch loaf pan. Grate two 8-9 inch zucchinis. Set aside.

2. In a large mixing bowl, beat the eggs, honey, oil, brown sugar, vanilla and coffee until smooth.

3. In a separate bowl combine the salt, baking soda, baking powder, cocoa and flour whisking until well combined. (if using espresso powder add it to the dry ingredients). Gradually add the dry ingredients to the wet ingredients. Do not over mix.

4. Stir in the zucchini until combined. Add the frozen chocolate chips.

5. Pour the batter into the prepared pan.

6. Bake the bread for 65-75 minutes. Test for doneness (a toothpick or cake tester inserted into the center will come out clean save for perhaps a light smear of chocolate from the melted chips).

7. Remove the bread from the oven and let it cool for 15 minutes before taking it out of the pan.

8. Cool completely before slicing (although slightly warm is delectable as well). Store well wrapped at room temperature.


Double Chocolate Zucchini Bread

Double Chocolate Zucchini Bread

Serving suggestion: with strawberries and a dollop of whipped cream...

Serving suggestion: with strawberries and a dollop of whipped cream…


The Saga of the Lemon Blueberry Pound Cake…

Let me start off by saying that even the most proficient of cooks isn’t always successful when trying new recipes. In this blog I prefer to post my recipe successes but there have been failures along the way, more than I can count I assure you. So I thought I’d dedicate this blog to a recent failure that eventually turned to triumph.

IMG_9293The nice thing about honing your skills as a cook is that your successes come more frequently. But every once in a while an attempt at making something is botched and you recognize it’s never good to get too smug about your culinary skills. Just this past week I botched a recipe – BIG TIME – and thought I would share that escapade with you. I call it the saga of the lemon pound cake.

It all began simply enough with my usual quest for that one new recipe I would make this week. Flipping through the various posts on (you guessed it) Pinterest I came across a recipe for lemon blueberry pound cake. I already have a recipe on this site for a lemon blueberry yogurt loaf  but thought I’d try this one as I had never made a pound cake before. The recipe seemed simple enough, the only difference being that it was written to make two loafs instead of one. Great, I thought, I can have one loaf for home and give one as a gift to an unsuspecting neighbor. I liked that idea. I had to purchase some disposable foil pans as I don’t have two professional grade loaf pans. No biggie, they’re certainly cheap enough. This should be a no brainer. WRONG!!!

The blueberry disaster...

The blueberry disaster…

OMG – that’s all I can say. The end result was awful on so many levels. My husband suggested that I take a picture of the disaster and post it in the blog for all to see. So here it is to the left – can you even believe it? It looks like a blueberry explosion! Of course in the picture the cake is upside down, but right side up it was no prize either. The cake never fully cooked, the blueberries took over the entire cake and to add insult to injury they all congregated at the bottom.  On top the cake had risen onto itself and created what I call a lap over effect on the edges as can be seen in the picture below . I’m not sure what causes that but I never get that effect when I use my good loaf pan. It must have something to do with the evenness of the temperature during the cooking process and the quality of the pan.

The distorted top with the cake folding over itself on the top and bottom edges

The distorted top with the cake folding over itself on the top and bottom edges

Needless to say, it was a total disaster. I haven’t had one this bad in a long time – just enough to keep me from getting too smug regarding my baking skills. I wound up having the throw both cakes away – they just were not salvageable. So why, you might ask, would I even try this recipe again? To be honest, although it looked bad and did not cook all the way through the part that did cook actually tasted pretty good. So I thought this actually could be a keeper recipe but it definitely needed an overhaul. I guess I wanted to see if I could fix what obviously was a broken mess. So the next day I put my delicate baking ego on the line and tried my hand at making the pound cake once again.

The second time I was successful but it took some manipulation of the recipe to achieve what was intended. In deference to the author of the recipe I will not mention the site where I found it. The recipe as originally written was horrific and, regardless of altitude considerations, I find it hard to believe that the proportions as written are correct (especially where the blueberries were concerned). What I decided to do was adjust the proportions to make one pound cake instead of two. I also significantly adjusted the amount of blueberries used in the loaf and the end result is I think what the author had intended when writing the recipe. So here are my lessons learned and recipe rating.

Recipe Rating: I have two ratings for this recipe, one for the original version and one for the version I created. The original version gets an F+. Although the overall flavor combinations were very good (meriting the + in the grade) there were far too many blueberries called for in the recipe. Blueberries expand and burst during the cooking process and the original amount created a blueberry nightmare (as can be seen in the picture above). My version created a cake that was nicely integrated with blueberries but was still primarily a cake and not a blueberry compote. My version gets an A.

Lesson Learned 1 – You only get what you pay for: My advice to anyone wanting to be successful in the kitchen is to use good kitchen equipment. From pots and pans to knives to baking sheets and loaf pans, I can tell you from experience you only get what you pay for. Professional grade equipment consistently produces professional results. My professional grade loaf pan cooks cake batter evenly, does not produce a batter layover effect and generally cooks in the allotted time or slightly less than the allotted time. I don’t have to use sprays or worry about greasing and flouring the pan, the cake always comes out cleanly after it has rested for 15 minutes. Do yourself a favor and invest in good kitchen equipment, it’s worth it!

IMG_9475Lesson Learned 2 – How to bake with blueberries: As I mentioned earlier, the original recipe for this pound cake called for way too many blueberries – 3 cups for two loafs to be exact. When I was measuring it I thought it was a lot, but I know that baking requires precision in order to be successful and so I followed the recipe as written. Big mistake. The cakes became 95% blueberries and 5% cake – the blueberries just took over.

And even though I dusted the blueberries with flour to keep them from sinking to the bottom of the cake, they still did. I think the amount of blueberries contributed to that. There simply was too many of them. Just keep in mind when baking with any fruit like blueberries, you need to coat them with flour so they evenly distribute themselves and don’t all sink the the bottom of the cake. I also read that if you use frozen blueberries (which in this case I did not) and incorporate them at the very end right out of the freezer they will evenly distribute as well without the use of flour. I’ll have to try that sometime and see if it works.

In this case, the smaller amount of blueberries dusted with flour before incorporating them into the batter did the trick. In my second attempt, the blueberries evenly distributed in the pound cake. The last tip with baking with blueberries or other fruit is to make sure you add them at the very end, right before putting the batter in the pan. Fold them in gently so that they don’t burst and create a blue cake. If you follow these simple tips you will be just fine.

Lesson Learned 3 – Creaming the butter and sugar – a common baking mistake: Most people do not cream the butter and sugar when baking, they simple combine them. Creaming takes a little more time than you would think and the end result is a mixture that is light in color and very soft and fluffy. Doing creaming correctly allows for all the added ingredients to incorporate themselves more completely and also creates a fluffier, moister cake. So next time spend an extra few minutes and do the creaming process correctly.

Creaming butter and sugar should produce this consistency...

Creaming butter and sugar should produce this consistency…

Lesson Learned 4 – The glaze: I’m not a big fan of glazes. For some reason they just don’t do it for me. But I like the glaze in this recipe. It complimented the cake and did not overpower it. I also felt the use of lemon zest as well as lemon juice made the flavor richer.

Even though the initial attempt to make this cake was a disaster, the second version was a big hit. After a few days there was absolutely none left. So try my version and see what you think. You can always double it to make two loaves, but be I would be careful about doubling the amount of blueberries. I would err on the side of caution and use less instead of more. You certainly don’t want to be left with a blueberry explosion!

Lemon Blueberry Pound Cake

  • Servings: 10-12
  • Difficulty: Easy
  • Print

INGREDIENTS:IMG_9458

1/2 cup unsalted butter at room temperature

3/4 cup sugar

zest of half a lemon

1 extra large egg at room temperature

1/4 tsp. vanilla

1/3 cup buttermilk

3/4 cup fresh or frozen blueberries

1 1/4 cup flour + 1 tsp. to dust the blueberries

1 tsp. baking powder

1 tsp. salt

LEMON GLAZE:

1 1/2 cup powdered sugar

1 Tbs. fresh lemon juice

1 Tbs. lemon zest

1 Tbs. milk

1/4 tsp. vanilla

DIRECTIONS:

Preheat oven to 350 degrees. In a large bowl cream the butter, sugar and lemon zest. (3-5 minutes). Add egg and vanilla and beat an additional minute.

In a separate bowl whisk together all of the dry ingredients.  Add dry ingredients alternately with buttermilk to the butter mixture. Start and end with the dry ingredients and combine each addition thoroughly. Dust the blueberries with flour. Fold them into the batter until incorporated.

Grease and flour an 8 inch loaf pan if the pan is not non-stick. Pour in batter and smooth the top with a spatula.  Bake for 45 minutes or until a toothpick inserted in the center comes out clean (there may be some blueberry moisture on the toothpick). Let the loaf cool for 15 minutes and then remove it from the pan. Cool completely before adding the glaze.

To make the glaze: whisk all ingredients together until smooth.

Right Out Of The Oven

Right Out Of The Oven (notice no fold-overs)

Lemon Blueberry Pound Cake

Lemon Blueberry Pound Cake


Zucchini Mushroom Gratin…

It’s that time of year again. I’ve already harvested five zucchinis from my one zucchini plant and by the looks of things there are plenty more to come. This is the time of year that I start scrambling to locate as many zucchini recipes as I can find so that I don’t waste one precious home-grown squash. And although I am always on the lookout for new recipes, I also have some tried and true ones that I look forward to making every year at this time as well.

A zucchini from my garden...

A zucchini from my garden…

One of my all time favorites is a version of a recipe from Ina Garten. I’ve mentioned Ina several times in this blog. She is a cook that inspired me not only to make new and different things but to believe that I can and be successful at it.

I’d never heard the term gratin before I made this recipe and it’s a term that I found is not in most fledgling cooks’ vocabularies. A gratin originated in French cuisine and it simply means a dish that is topped with a browned crust achieved either through a baking or broiling process. You can make a gratin out of just about anything, potatoes, artichokes, cauliflower – you name it. I especially like to make a zucchini gratin since it is not only delicious but also another recipe in my arsenal to deal with the onslaught of zucchini I get at this time of year.

My very happy zucchini plant...

My very happy zucchini plant…

I saw Ina make her recipe on a Food Network episode and I’ve been making it ever since. I have amended it to appeal to my personal tastes but the basis of the recipe is Ina’s (if you want to see her recipe it is on the Food Network site). So I will rate her recipe and then include my version of it for you to try.

Recipe Rating: A++++++++ This is definitely one of the best recipes ever. It is easy to make and a great accompaniment to any meal. A hint of nutmeg gives wonderful flavor to this recipe. I highly recommend trying this one!

Saute the zucchini and mushrooms gently...

Saute the zucchini and mushrooms gently…

Lesson Learned 1- Sautee the zucchini and mushrooms gently: Ina’s recipe calls for cooking the zucchini covered for about 10 minutes before making the white sauce. In my experience, cooking the zucchini for that amount of time made it limp before you even put it in the oven. I cook my zucchini and mushrooms for five minutes just to take the “edge” off of them and let the oven do the rest. That way when you serve the gratin the vegetables still have some body.

Lesson Learned 2- Making a white sauce: This recipe includes making a simple white sauce for the zucchini and mushrooms to simmer in. The first step is to add flour to the zucchini/mushroom mixture. Make sure you cook that flour for at least a minute before you add the milk. It will create a whitish looking goo on the vegetables but don’t worry about that. Just keep stirring until it’s time to add the milk. The reason you cook it for a minute is to get rid of any floury taste. You certainly don’t want your white sauce to taste like flour. Once you add the milk the whitish goo will begin to disappear right before your eyes and you will wind up with a rich, thick white sauce.

Cook until the sauce becomes rich and thick...

Cook until the sauce becomes rich and thick…

Lesson Learned 3 – Bread crumbs versus croutons: Last week I made a hash brown casserole that called for a crushed crouton topping. I loved it so much on that recipe that I tried it on this one and it turned out perfectly. The original recipe stipulates to cover the top with bread crumbs mixed with grated Gruyere cheese. Maybe if you made home made bread crumbs the end result would be similar to that of using croutons, but I thought the croutons added a greater crunch and more flavor. You can try topping it either way but at this point I prefer the crushed croutons.

Lesson Learned 4 – A little nutmeg goes a long way: I’d never cooked with nutmeg before I made this recipe and I can tell you it adds a great depth to the gratin but you need to be careful when you use it. A little bit of nutmeg goes a long way and it can easily overpower a dish if you use too much. My advice is to use exactly what the recipe recommends. Then in subsequent bakings try to vary the proportion. My guess is that if you choose to vary it, it will be for a lesser rather than a greater amount.

Lesson Learned 5 – Oven times vary: This seems to be a regular “lesson learned” in my recent posts but rarely does a dish come out of my oven the way it is supposed to in the time written in a recipe. I assume that part of the issue is living in high altitude and the other is how my oven is calibrated. The original recipe says to bake the gratin in the oven for 20 minutes. In order for me to get a nice bubbly casserole I have to bake mine for 40-45 minutes. This is where it can get somewhat frustrating for the fledgling cook. But never fear, in time you will learn the ins and outs of your oven and be able to plan accordingly.

Place the croutons in a bag and crush with a rolling pin...

Place the croutons in a bag and crush with a rolling pin…

The beauty of this recipe is that it’s not difficult to make but tastes like you slaved all day in the kitchen. Over time, because the directions are so true to form, I’ve not gleaned a lot of lessons learned making it and I view that as the beauty of the recipe. It is the kind where you can be successful making it the first time and every time. If you’re like me at this time of year, desperately searching for various ways to cook my zucchini crop, this recipe is a must. Try it – I know you’ll like it as much as I do.

Zucchini Mushroom Gratin

  • Servings: 4-6
  • Difficulty: Easy
  • Print

Brown and bubbly out of the oven...

Brown and bubbly out of the oven…

INGREDIENTS:

3 Tbs. butter (plus some for on top of the crushed croutons)

1 medium size onion, diced

2-3 medium zucchini cut in to 1/4 inch rounds

4-6 ounces of portobella mushrooms cut in thick slices

1/8 tsp. nutmeg

2 Tbs. flour

1 cup warm milk

3/4 cup crushed croutons or bread crumbs

1 cup grated Gruyere cheese, divided

Salt and pepper to taste

Flat leaf parsley for garnish

DIRECTIONS:

Preheat the oven to 400 degrees. Pour the milk into a saucepan and warm under a very low heat (you don’t want the milk to boil, you just want to get the chill out of it). Grate the Gruyere, dice the onions and slice the zucchini and mushrooms and set aside. Put the croutons in a plastic bag, seal the bag and crush them with a rolling pin. Set the bag aside.

Melt the butter in a large sauté pan. Add the onions and cook under low to medium heat until translucent (about 5-7 minutes). Add the zucchini and mushrooms, cover the pan and cook for about 5 minutes (you do not want the zucchini to be limp). Uncover, salt and pepper to taste and add the nutmeg.

Stir in the flour. Cook for at least one minute. Add the warm milk and 1/4 cup grated Gruyere cheese and cook over a low heat until the sauce thickens. Pour the mixture into a 1 1/2 – 2 quart baking dish.

Combine the croutons (or bread crumbs) with the remaining Gruyere and sprinkle on top of the zucchini mixture. Dot with small amounts of butter and bake until bubbly and browned. (the original recipe called for the casserole to bake for 20 minutes, I had to bake mine for 40-45 minutes).

Let sit for 5 minutes, garnish with chopped flat leaf parsley and serve.


Ready to go into the oven...

Ready to go into the oven…


Brown and bubbly out of the oven...

Brown and bubbly out of the oven…

Serving Suggestion: garnish with flat leaf parsley...

Serving Suggestion: garnish with flat leaf parsley…

Hashbrown Casserole…

Pasta is ok, rice really does nothing for me but give me potatoes and I’m all over it. There is no way that you can cook a potato that I won’t like. Potatoes were a staple at just about every meal I had growing up and my so my love affair with this root (yes it is neither a fruit nor a vegetable but a root) has spanned my entire life. So when I find a potato recipe that intrigues me, I have to try it.

The original recipe from which I’ve based my version in this blog comes from a website called thefrugalgirls.com. I liked the recipe concept because it appeared easy to prepare and was a different way of making potatoes than the traditional ways of baking them, mashing them or grilling them. Coupled with the fact that I already had most of the ingredients plus I needed to fulfill my goal of one new recipe a week, this became no brainer – I had to make this casserole and blog about it. So without further adieu, here is my recipe rating, lessons learned and my version of the recipe.

Hash Brown Casserole Ingredients...

Hash Brown Casserole Ingredients…

Rating A+ – not only is this very easy to make but it smells heavenly when it’s baking in the oven. Anything that combines flavorful potatoes and good kitchen smells is always a hit with me. You really have to try this one.

Lesson Learned 1 – This recipe adapts easily: The original recipe filled a 13 x 9 baking dish. Cutting it in half allowed me to put it in an 8 inch square dish which was just enough for me and my husband with leftovers for an additional meal. But if you have a large family to feed just double everything in the recipe and use the larger pan.

Lesson Learned 2 – Topping a casserole with crushed croutons: Recipes like this are quite often topped with bread crumbs. This recipe called for topping the casserole with crushed croutons. I LOVED IT! The croutons gave a perfect crispiness to the top of the hash browns, just as if the potatoes had been browned in a frying pan. I found the crushed croutons had a much crispier texture than bread crumbs. I am definitely going to try topping other casseroles with crushed croutons instead of bread crumbs. I think it made a big difference.

Lesson Learned 3 – Use fresh garlic: The original recipe called for 1/8 teaspoon salt and 1/8 teaspoon of garlic salt. I didn’t like the idea of adding that much salt so I substituted one minced garlic clove for the garlic salt. It was fabulous. I figured if the potatoes needed more salt you can always salt them at the table while you’re eating versus adding a lot in the recipe itself.

Lesson Learned 4 – Shred the cheese by hand: The recipe called for shredded cheddar cheese. I’ve recently learned that the shredded cheese bags you buy at the grocery store have an additive in them that is designed to prevent the cheese from clumping together. But that additive also prevents the cheese from melting smoothly. Plus it is an additive and the more you can eliminate additives from your life the better. So take the few extra minutes buy a hunk of good cheddar cheese and use a grater to shred it yourself. The result is so much better in the recipe and better for you as well.

Ready To Go Into The Oven

Ready To Go Into The Oven

Lesson Learned 5 – Make caloric adjustments where you can: This is a very rich recipe so any places where you can make adjustments to lessen the fat or salt will still produce a great casserole that is full of flavor while also having less calories. I used light sour cream, fat free milk, low sodium soup and substituted fresh garlic for garlic salt. The recipe turned out perfectly.

Lesson Learned 6 – Use butter and not a butter substitute or margarine: I know this may seem to go against what I just said in the previous lesson learned, but just take a minute to look at the ingredients in butter and then compare them to the ingredients in margarine or any butter substitute. Tell me if you can pronounce some of the ingredients in the substitutes. It’s scary to think about what you might be eating. If you have to use a fat, use the one that has the purist of ingredients which in this case is none other than good old fashioned butter.

Lesson Learned 7 – Not all baking times are created equal: The original recipe called for baking the casserole at 350 degrees for 35-45 minutes. My long standing experience with high altitude made me leery of not only the timeframe but also the temperature. I will include in the recipe below the original cooking instructions but will tell you that I had to crank my oven up to 375 and cook this for an hour and it turned out perfectly. What I’m basically saying here is you may have to adjust your cooking time based on your oven and where you live. Just be aware of that.

Lesson Learned 8 – The leftovers are fabulous: The leftovers are equally as good if not better than when it was fresh out of the oven. Just reheat them covered in foil in a 375 degree oven for 30 minutes. The flavors have had some time to meld and the top and ends get even crispier. Can’t beat that!

Right Out Of The Oven

Right Out Of The Oven

Once again, the real work in this recipe is preparing it. Once you get the mixture together, all you have to do is pop it in the oven and let it do the rest of the work for you. This is a great accompaniment to almost any meal so try it. I know you’ll like it!

Hasbrown Casserole

  • Servings: 4
  • Difficulty: Easy
  • Print

INGREDIENTS:

1/2 pkg. frozen shredded hasbrowns (package size usually 1 lb. 14 oz.)

8 oz. light sour cream

1/2 can cream of mushroom soup (low sodium preferred)

4 oz. shredded cheddar cheese (freshly grated not packaged preferred)

1/8 cup milk (fat free or low fat preferred)

1/2 small onion, chopped

1/2 stick of butter, melted

1/8 tsp. salt

1/8 tsp. pepper

1 clove garlic, minced

1 cup seasoned croutons crushed

DIRECTIONS:

Preheat the oven to 375. (*The original recipe called for the oven to be set at 350 and to cook the casserole for 35-45 minutes. I live in high altitude so everything takes a little longer to cook and at a higher temperatures. Use what you think will fit your needs but I think keeping it in the oven a little longer gives it an even crispier crust). Thaw hashbrowns slightly for easier mixing. Crush the croutons (the easiest way to do this is to put them in a plastic bag and mash with a rolling pin or meat mallet). Set the croutons aside.

Combine the hashbrowns, soup, cheese, milk, onion, garlic, salt and half the melted butter. Grease a 8 x 8 pan with a very light coating of butter. Place the hashbrown mixture in the prepared dish. Spread croutons evenly over the top and drizzle them with the remaining butter.

Bake at 375 degrees for 45 minutes to an hour (*see notes at beginning of recipe). The casserole should be bubbly and the top should be golden and crisp. Let stand for a few minutes and serve.

Hashbrown Casserole

Hashbrown Casserole

Broiled Salmon with Herb Mustard Glaze…

I’ve always been a big fan of salmon. It’s a mild fish that can be prepared in a variety of ways and, in my estimation, easier to cook than other types of fish. So this past weekend when a new high-end grocery store opened in our area, I decided to try some of their fresh fish. The salmon looked superb, as you can see from the photos, and that prompted me to look for an easy but flavorful salmon recipe.

Herb Mustard Glaze Ingredients

Herb Mustard Glaze Ingredients

I found a great recipe on, you guessed it…, The Food Network Site (thought I was going to say Pinterest didn’t you?) The basis for this is Giada’s recipe of the same name. I adapted it for my own needs and tastes. So here is my rating of the original recipe and lessons I learned when making it:

RECIPE RATING A. This is a very easy recipe, the glaze is easy to make and the flavors of the glaze provide a delightful compliment to the salmon. The only things I would have expounded on in the recipe is the reason why you put the glaze on after you’ve cooked the salmon for a couple of minutes and a more detailed reference to variations in cooking times for fish. I’ll explain in my lessons learned.

Lesson Learned 1 – Not all fish are created equal: This is true especially when it comes to cooking time. I am still trying to perfect the art of cooking fish to perfect doneness. The challenge is that fish can be expensive and you hate to pay good money for something and then ruin it. The beauty of salmon is that is can be prepared in various stages of doneness. Some like their salmon a little less done, sort of medium rare, will others like their salmon well done. It’s a little easier to work with salmon because of this. When I made this recipe I used two salmon filets that weighed between 6-8 ounces just as written in the recipe. Giada advised to cook the salmon for 7 minutes total. I cooked mine for 8 and my filet, as it was a little thicker, was medium rare to medium. My husband’s filet was thinner and his turned out medium. So just be aware that your forays into cooking fish may take several trials and also be aware that cooking time is so dependent on not only the weight but also the thickness of the fish. In my case, my filet was thicker than the one I served to my husband, ergo the difference in doneness. But don’t give up. Mastering the art of cooking fish will be something that, in the end, will provide you with some extraordinary meals.

Salmon Filets

Salmon Filets

Lesson Learned 2 – There is a reason you don’t glaze the fish before you put it under the broiler: This is where I wished the recipe would have been more specific. Granted I have become more adept in the kitchen but there are still some things that are not intuitive to me. The glaze will burn if you keep it on too long. If I had known that up front I probably would have applied the glaze at the three minute juncture instead of the two. As it was, I had a nicely browned glaze but I think I just made it before it started to burn. So keep that in mind. If you think you need more cooking time than the 7 minutes called for in the recipe, put your glaze on a little later.

Lesson Learned 3Remove the skin from the salmon: If there is skin on one side of the salmon filet remove it. The skin is tough and you won’t eat it. I find the filets cook more evenly with the skin removed. I use a very sharp knife, a Shun boning knife, and just run it up and down the edge of the skin until I can peel a little of it away. Then I hold the skin taught and keep moving the knife up and down close to where the skin meets the flesh, gently pulling on the skin as I go until all the skin as been removed. This will take a few minutes, but it’s worth it.

Herb Mustard Glaze

Herb Mustard Glaze

Lesson Learned 4 – The glaze is fabulous: I really liked the flavor of this glaze both on the fish and on its own. I imagine with a little bit of ingenuity it could be used on other things. The combination of the dijon and whole-grain mustard along with the herbs provides great depth of flavor and would probably taste good on chicken too.

I would highly recommend trying this recipe. Don’t be afraid to cook fish. If you’re concerned, err on the side of caution and take it out sooner rather than later. You can always throw it back on the cooking source but you can’t undo overcooking. Let me know what you think of this one.

Broiled Salmon with Herb Mustard Glaze

  • Servings: 4
  • Difficulty: Medium
  • Print

Ingredients:

2 cloves of garlic

3/4 tsp. finely chopped fresh rosemary

3/4 tsp. finely chopped fresh thyme

1 Tbs. dry white wine

1 Tbs. olive oil

2 Tbs. dijon mustard

2 Tbs. whole grain mustard

4 (6-8 ounce) salmon filets, skin removed

Salt and pepper

Directions:

Preheat the broiler (if you have an option of low or high, choose high). Place oven rack to be approximately 8-10 inches away from the broiler flame.

In a mini food processor combine garlic, rosemary, thyme, wine, oil, dijon mustard and 1 Tbs. of the whole grain mustard. Pulse until well combined. Transfer to a small bowl and stir in the remaining 1 Tbs. of whole grain mustard. Set aside.

Line a broiler pan with aluminum foil and spray with non-stick cooking spray. Arrange the salmon on the broiler pan (I arrange them vertically so that they nest completely under the broiler flames). Salt and pepper to taste. Broil for 2-3 minutes (depending on the thickness of the filets). Remove broiler pan from oven and spread the mustard glaze on top of the salmon filets. Put pan back in oven and continue to broil for about 5 minutes. Serve immediately.

Serving Suggestion: Salmon with Mushroom Risotto and Steamed Vegetables

Serving Suggestion: Salmon with Mushroom Risotto and Steamed Vegetables

design


Salted Caramel Brownies…

Doesn’t salted caramel seem to be all the rage right now? Maybe it’s just me but I’m seeing this flavor trend just about everywhere these days – salted caramel pretzels, salted caramel ice cream, salted caramel peanuts – it just seems to be “the thing.” So as I looked for my next new weekly recipe, it didn’t surprise me that I found one for salted caramel brownies.

IMG_8658

Unsweetened chocolate and butter mixture…

I found a version of this recipe on a website called mybakingaddiction.com. I thought this would be great to make for my husband especially because he’s been in the doldrums since Haagen Dazs discontinued their test market salted caramel truffle ice cream. I thought this might make a good substitute for him, and I have to admit the recipe intrigued me.

I normally don’t do this but I made this particular recipe twice before blogging about it. I will explain why in my lessons learned.

Recipe Rating: B+ There are many reasons why I like this recipe and one very important reason why I think it still may need something. It’s easy to make, not overly sweet (which I like a lot) but the salted caramel taste was not as pronounced as I thought it should be. I’m not quite sure what can be done to enhance the salted caramel flavor.  That being said, it’s still a great brownie and you should try it and see if you agree with me.

LESSON LEARNED 1 – Use the ingredients called for in the recipe: I know you’re probably saying, c’mon Jan everybody knows that! And that’s true. But when I first made the recipe I thought to myself, “I’ve got a bunch of walnuts in the freezer – I’ll just use those instead of the Planter’s Salted Caramel Peanuts called for in the recipe”. Then as I’m eating the brownies I’m wondering why I’m not getting more of a salted caramel flavor. Well, last time I checked walnuts did not have a natural salted caramel flavor all on their own. So you see, I told you I can be challenged in the kitchen. I even had to laugh at myself over this one.

Chocolate squares and peanuts layered in the center of the batter

Chocolate squares and peanuts layered in the center of the batter

And that’s why I made the recipe twice. I had to see how different the flavor of the brownies would be with the salted caramel peanuts. Lo and behold, to my surprise they really didn’t make a huge difference. But I knew I had to make it with the ingredients called for in the recipe before I could talk about the flavor of the brownies. I expected there to be a much stronger caramel flavor using both the Ghirardelli Chocolate and Sea Salt Caramel Squares and the salted caramel peanuts. Using the Planter’s Peanuts changed the flavor somewhat, but not to the degree that I expected. So if you don’t have them or can’t find them you can use any kind of nuts you have on hand. It won’t make that much difference. Personally I had a very difficult time finding them in our local grocery stores but I eventually prevailed. The peanuts had a very strong salted caramel flavor right out of the can. That flavor seemed to get lost a little in the chocolate during the baking process but that’s not necessarily a bad thing.

LESSON LEARNED 2 – Unsweetened chocolate is really unsweetened: The recipe calls for melting in the microwave 4 ounces of unsweetened chocolate with 3/4 cup of unsalted butter. I’ve done this process before when making my triple chocolate brownie cookies but for some reason the chocolate looks so rich and good (as you can see by the picture near the beginning of the blog) that I’m always tempted to dip my finger in the chocolate and lick it. DON’T. Although it looks divine it does not taste good at all – so resist the temptation. You’ll be glad you did.

LESSON LEARNED 3 – Room temperature eggs: The reason cooks tell you to use room temperature eggs is they blend more thoroughly into a batter than cold eggs. The challenge is to remember to set them out so that they can become room temperature. Never fear – I have a neat little trick for you. Take whatever number of eggs called for in your recipe and put them in a container of warm water and let them sit for 5 minutes. Voila! you have room temperature eggs. No need to make the water overly hot, just warm feeling to the back of your hand will do. This is a great trick for people like me who never remember to take the eggs out ahead of time.

Brownie batter

Brownie batter

LESSON LEARNED 4 – Cooking with eggs: Eggs can be tricky. They can be bad without you knowing it until you crack them open. That’s why I always crack my eggs individually in a small dish before adding them to a batter. That way if I have a bad egg I’m not ruining a perfectly good batter. It’s only one additional dish and can save you a lot of time if you happen to have a bad egg.

Also, I break my eggs up with a fork before adding them to a batter, especially if it is a batter that you mix by hand (which this recipe is). That way I’m not counting on a silicone whisk to break up the eggs. The job has already been done.

Lesson Learned 5 – Do not over mix: This is easier said than done but it is very important for achieving a cake or cookie that is not tough. With this recipe it’s relatively simple. The last thing you do is mix in the flour until just combined. Not seeing the white of the flour is very easy to eyeball in this recipe. Just make sure you stop as soon as the flour has been completely incorporated.

Lesson Learned 6 – Working with Ghirardelli filled chocolate squares: Be careful when handling the chocolate squares. If you break them the caramel will ooze out. The caramel center is not solid like the chocolate. You want the caramel to ooze out in the baking process and not all over your hands. If you break them you will wind up with a sticky mess.

Lesson Learned 7 – Adding coffee to the batter: I can’t take credit for this trick. I learned it from watching Ina Garten on the Food Network. If you want to enhance the flavor of chocolate in any recipe, just add some fresh brewed coffee. You don’t have to add a lot. For this recipe I added 2 teaspoons of coffee. If you try the same chocolate recipe both with and without the coffee you will be amazed at the difference. The original recipe did not call for adding coffee, but my version of the recipe does.

Lesson Learned 8 – Storing the brownies in the refrigerator: My husband came up with this trick. He wanted to give our garbage men a little treat during their route so he cut a couple of brownies and put them in the refrigerator until he saw the garbage truck. There was only one man in the truck this week so he had an extra cold brownie. He decided to eat it himself and he told me he liked how it tasted cold. I tried it and had to agree. The brownie had almost an ice-cream like consistency when it was cold. But room temperature or cold, either way this is a good brownie recipe. If you want to be even more decadent, you can frost the brownies and sprinkle the top with some additional nuts. That would definitely be a killer brownie!

I recommend that you try this recipe and tell me what you think. It is a very good basic brownie recipe and more and more as I become less willing to make things from a box, I look to these types of recipes to give me the ability to make baked goods with fresh ingredients. I’d be very interested to hear your impressions on this one. Enjoy!

scb3

Salted Caramel Brownies…

  • Servings: 12
  • Difficulty: Easy
  • Print

INGREDIENTS:

4 ounces unsweetened chocolate coarsely chopped

3/4 cup unsalted butter cubed

1 cup sugar

3 large room temperature eggs

1 teaspoon vanilla extract

2 teaspoons brewed coffee

1/2 teaspoon kosher salt

9 Ghirardelli Dark Chocolate and Sea Salt Caramel Squares (1 package)

1/2 cup Planters Salted Caramel Peanuts, chopped

1 TBS. powdered sugar

DIRECTIONS:

Preheat the oven to 350 degrees. Line an 8×8 baking dish with foil and spray lightly with nonstick spray. Microwave unsweetened chocolate and butter for 2-3 minutes or until butter is melted at 50% power (I stopped at each minute interval and stirred the mixture). Stir until chocolate is fully melted. Whisk in eggs, vanilla, coffee and salt. Gradually add flour until just combined.

Spread half the batter into the prepared pan. Add a layer of the chocolate squares and sprinkle peanuts over the entire layer. Cover with the remaining batter.

Bake for 30-35 minutes – do not over bake. (It took me 35 minutes)

Cool for 15 minutes then remove brownies in the foil and set on a cooling rack. Let cool completely, remove the foil and dust with powdered sugar. Cut into squares and serve. (You could also serve these brownies with a dollop of caramel flavored whipped cream or a scoop of vanilla ice-cream).

scb5

Portabella Mushroom And Sweet Onion Risotto…

The first time I ever heard the term risotto or saw it being made was on an episode of 30 Minute Meals with Rachel Ray on the Food Network. I remember distinctly her saying that many people think making risotto is difficult to master and labor intensive. I’d never tried making risotto and personally am not a big fan of rice to begin with, but it looked like a creamy style rice and I thought I could live with that. Plus my husband is a huge rice fan and I’m always looking for ways to satisfy his need for rice with something that I find palatable as well.

Sautee Onions In Butter And Olive Oil

Sautee Onions In Butter And Olive Oil

After watching several episodes where she made different variations of risotto I thought I might give it a go. And over the past year after having made it several times I think I have the process down pat. The base recipe that I use is my own and I’ve found with a little ingenuity (and a need to use up various types of vegetables in my refrigerator) you can make just about any kind of risotto you’d like.

At first, the thought of making risotto was daunting, especially for a non-intuitive cook like me. I found out quickly that although Rachel Ray could seemingly make it in 30 minutes it takes much longer than that for me. Maybe living in high altitude has an affect on the cooking time, but after several attempts I know that it takes me 1 hour to get creamy rice. So that’s what I plan for now and it always turns out perfectly.

Since the recipe is mine, I’m not going to take the time to rate it. What I will say is that it did take several attempts before I got the risotto to its desired consistency. So let me share with you my lessons learned regarding making basic risotto and my recipe for portabella and sweet onion mushroom risotto.

Image

Lesson Learned 1 – USE CHICKEN STOCK: Some recipes call for chicken broth, some for chicken stock, you can also use a combination of broth or stock and some wine, but my advice is always use chicken stock instead of chicken broth. Chicken stock is richer and adds more depth of flavor. There is no contest here – always use chicken stock. I find it takes me one full box of stock to make my risotto. (You can also use vegetable stock if you want to make this as a vegetarian dish).

Lesson Learned 2 – MAKE SURE THE CHICKEN STOCK IS WARM: A warm liquid helps the arborio rice (and that’s what risotto is, arborio rice) release more of its starches. Those starches are what creates the creaminess. About 5 minutes or so before I begin the process I put the stock in a pot on the stove and warm it under a very, very low flame. No need to boil or even simmer. I put my gas stove on its lowest possible setting where you can barely see a flame and keep it there the during the entire cooking process. It keeps the stock warm to the touch and that is really all you need.

Stir Regularly

Stir Regularly

Lesson Learned 3 – COOK THE RISOTTO SLOWLY UNDER A LOW FLAME: Face it, risotto takes time and there is no getting around that. The more you nurture it during the cooking process the better the end result. At any given point in time the risotto should barely bubble.

Lessons Learned 4 – SYSTEMATICALLY ADD WARM STOCK AND STIR: I think this may be the part where most people say forget it, I don’t have time for this. But it really isn’t that bad. I’ve gotten to the point where I check my risotto about every 5 minutes and if the stock has mostly cooked away I add another soup ladle full of stock, stir the risotto and then leave it for another 5 minutes. Remember stirring also helps the rice release its starches.

Lesson Learned 5 – IT MAY TAKE A FEW TRIES TO TIME IT RIGHT: As I mentioned earlier, when watching Rachel Ray cook risotto, it supposedly only took her 30 minutes. I’ve never even come close to that time. It takes me a full hour to get the risotto to its desired creaminess. Now I am not sure that high altitude has an effect on it, but I know that if I want to have risotto with a meal I need to start it an hour ahead of time. Depending upon where you live, the time may very. Unfortunately, this is something that you will need to discover on your own.  But take my word for it – IT’S WORTH IT. I am not a big fan of rice but I love risotto.

Lesson Learned 6 – ADAPTABILITY: You can add just about anything you like to risotto and serve it either as a side dish or the main course. I like to add portabello mushrooms that have been sautéed in butter and garlic. But I’ve also added roasted butternut squash or asparagus. Just remember that whatever you add should be pre-cooked and added during the last 5 minute or so. Top it off with some chopped scallions or chives and you’ve got something very special.

Lesson Learned 7 – SIZE OF POT & THE AMOUNT OF RICE: My recipe calls for one cup of arborio rice. Don’t be fooled into thinking that is not enough. One cup of rice becomes three cups of risotto so depending on how many you will be serving this could well be enough for one meal and leftovers. And make sure to use a high sided pot when making risotto as it will grow right in front of your eyes. You’ll want to have a pot that can handle the end result.

Portabella Mushroom And Sweet Onion Risotto…

  • Servings: 4-6
  • Difficulty: Medium
  • Print

INGREDIENTS:

8 ounces of Portabella Mushrooms, sliced

1/2 cup sweet onion, diced

1 clove garlic, minced

1 box (32 oz.) low sodium chicken stock

3 TBS. butter

3 TBS. olive oil

1 cup arborio rice

DIRECTIONS:

Pour stock into a pot and heat on the stove under the lowest possible flame (just enough to keep it warm). In a sauté pan, heat 1TBS. oil and butter. Add garlic and cook until fragrant (30 seconds to 1 minute). Add mushrooms and sauté until slightly softened. Set aside.

In a high-sided pot under medium heat, heat 2 TBS. of butter and olive oil. Add onions and cook until translucent. Add arborio rice and cook with the onions for 1 minute. Turn heat to low and add a soup ladle full of chicken stock. Stir to combine. After approximately five minutes (or until you see the chicken stock has almost been completely incorporated) add another ladle full of stock and stir. Repeat this process until all of the chicken stock has been used and the rice is thick and creamy (for me, that was approximately 1 hour). DO NOT LET THE RICE MIXTURE DRY OUT DURING THE COOKING PROCESS. There should always be a little moisture left when adding the next ladle full of stock.

During the last five minutes of the cooking process, add the mushrooms to the mixture. Garnish with chives or scallions and serve.

Portabella Mushroom Risotto

Portabella Mushroom And Sweet Onion Risotto

Summer Pasta Salad

I like a good pasta salad any time of year, but especially during the summer when dishes that are cool and crisp seem to meld well with the hot summer weather. I used to just get the boxed pasta salad mixes but as I become pickier about what I put in my mouth I tend to shy away from prepackaged foods with ingredients that I cannot pronounce. Plus chopping and dicing is very therapeutic for me and the end result is always better than something that came out of a box.

The pasta salad recipe I’m sharing today came from, where else, Pinterest and a website called barefeetinthekitchen.com. A colleague of mine pinned it and when I saw the pin it intrigued me. I decided to make it with a couple of changes from the original recipe (mostly based on what I already had in the house) and I’ll share my adaptation below.

Ingredients

Ingredients

RECIPE RATING: A – simple to make, very flavorful and adaptable. The only thing preventing me from giving it an A+ is I didn’t think the proportion of broccoli to pasta was substantive enough. The original recipe called for 8 ounces of pasta and a cup of tiny broccoli florets. I added about a 1/2 cup more of broccoli florets because as I was eyeballing it I thought there wasn’t enough. I would have liked an even better ratio in the salad than that, so I am recommending adding two cups of tiny broccoli florets.

LESSON LEARNED 1 – ANY PASTA WILL DO:  The original recipe called for “salad macaroni”. The pasta pictured on the website looked like ditalini. I used a pasta called “radiatore” which, as you can see in the pictures, has wavy edges. I thought this pasta would hold the dressing better and it also creates an interesting look. So, knowing that we eat with our eyes even before we even put anything in our mouths, I opted for the radiatore. But in reality any small shaped pasta will do like small shells or even elbow macaroni.

LESSON LEARNED 2 – PARBOILING THE BROCCOLI FLORETS: This was a great tip in the recipe. You have to cook the florets slightly or else they will be too hard when in actuality you want them to be crisp tender. The original recipe called for putting the florets in with the pasta for the last 30 seconds of cooking time and then draining and rinsing both with cold water. I kept the florets in for 45 seconds and I think they came out perfectly. It is important to rinse them immediately in cold water to stop the cooking process. Let the cold water run for at least a minute and shake the colander every once in a while to make the cold water is reaching all of the pasta and the broccoli.

Image

LESSON LEARNED 3 – USE WHAT YOU HAVE AT HOME: The original recipe called for black olives. I’m not a big fan of black olives but I love kalamata olives and I always have them on hand. I used them and that was just fine. The recipe also called for the mayo to be mixed with either 2 teaspoons of white wine or just plain vinegar. I split the difference and used 2 teaspoons of white wine vinegar and again, it turned out just fine.

Rinse the pasta and broccoli immediately in cold water

Rinse the pasta and broccoli immediately in cold water

LESSON LEARNED 4 – SERVING TIPS: I decided not to add tomatoes to the mix because the pasta was already mixed with diced cucumber and I was afraid the pasta would get too watery. What I wound up doing is cutting up a couple of cherry tomatoes and adding them when I was serving the pasta. I also sprinkled the top of the pasta with bacon bits when I served it so the bacon would not get too mushy in the dressing. It was fabulous!

LESSON LEARNED 5: USING CUCUMBER IN PASTA SALAD: I’ve never used cucumber before in a pasta salad and I liked it. It’s not over powering and gives the salad a cool crispness that has you wondering what exactly that flavor is that is brightening up the salad. Before I diced up the cucumber I cut it in half lengthwise and removed the seeds. That way only the cucumber flesh was in the salad and the salad did not become soggy.

LESSON LEARNED 6 – SUGAR IN THE DRESSING: The dressing recipe called for 1/2 teaspoon of sugar. I’d never put sugar into a dressing and so I had my concerns. I can tell you now, don’t worry about it and use the sugar. It balances out the tartness of the vinegar perfectly.

LESSON LEARNED 7 – MAKE THIS AHEAD OF TIME: What I’ve found over the years with making pasta salads and potato salads is that they even taste better if they’ve had time to sit and let the ingredients get well acquainted. If at all possible, make this early in the day and then let it sit in the refrigerator for a few hours before serving. You’ll find that the flavors have become even more robust. But if you can’t, no worries, the pasta salad will still taste wonderful.

Once again, the greater amount of time spent making this recipe involves the chopping and dicing, which I love to do! This pasta salad has great flavor, is highly adaptable and I guarantee you that you can pronounce all of the ingredients used in the recipe. Try it and let me know what you think or how you adapted it.

Summer Pasta Salad…

  • Servings: 16-18
  • Difficulty: Easy
  • Print

pasta4INGREDIENTS:

8 ounces of a smaller type of pasta (I used radiatore)

2 cups tiny broccoli florets (use fresh if at all possible)

1/2 cup diced cucumber, peeled and seeded

1/2 cup finely diced red pepper

1/2 cup olives (I used kalamata olives, the original recipe called for black olives)

1/3 cup finely diced green onion

DRESSING INGREDIENTS:

1/2 cup mayonnaise

2 tsp. white wine or plain vinegar (I used white wine vinegar)

1/2 tsp. kosher salt

1/2 tsp. freshly ground black pepper

1/2 tsp. sugar

DIRECTIONS:

Cook the pasta according to the package instructions, adding a generous pinch of salt to the boiling water before putting in the pasta. Just before the pasta is done cooking at the broccoli florets to the pot and boil for about 30-45 seconds. Drain the pot immediately into a colander and rinse well with cold water.

While the pasta is cooking, dice the cucumber, red pepper, olives and green onion and set aside. Mix together all of the dressing ingredients and set aside. In a large bowl pour in the dressing. Add the cooked pasta and broccoli to the bowl and stir well to coat. Add the remaining ingredients and stir again. Taste and adjust any seasonings as necessary (I found I need just a little more salt). Cover and refrigerate until ready to serve. Stir before serving. Garnish with cherry tomatoes and bacon bits if desired.

pasta

Meatloaf For Two…

Just about every family has their version of how to make meatloaf. I think meatloaf may have been with us since the dawn of time. And although my vegetarian friends may cringe at the thought, I still enjoy eating meat every now and then but now I try to balance my diet so that I am not solely relying on red meat as my main protein. But every once in a while I need some good old comfort food and I turn to things like roast chicken, pot roast or some good old meatloaf.

As I’ve mentioned before, I grew up in a meat and potatoes household. So today’s blog takes me back to my childhood where meals like these were often the family faire for dinner. And if you’re not a beef fan, you can skip this recipe as my goal is to try a wide variety of recipes and I’m sure at some point I will post something that will pique your interest.

This is one of my husband’s favorite meals from when he was a child – meatloaf, mashed potatoes and peas. Meatloaf was something his mother didn’t totally annihilate in the oven and the art of scooping up a bunch of peas with a wad of mashed potatoes is a skill he has well honed over the years. As a matter of fact, no other vegetable will do for him in this meal – it has to be peas and of course there must also be mashed potatoes. My husband is one of those that does not like to combine his food and eats one thing on his plate till he’s finished with it and then moves on to something else. But for this meal the combination of meatloaf, mashed potatoes and peas compels him to break his habit and mix them all together. We all have our little idiosyncrasies don’t we?

This recipe comes from a book my husband got back in the 1970’s called The Complete Family Cook Book. It was a cook book that was offered by a chain grocery store to its customers. On your first visit to the store you got the recipe book binder and chapter 1. Every week after that, if you spent “x” amount of dollars you received an additional chapter. That continued every week until the book was complete. You could also purchase a chapter if your grocery bill was not large enough to warrant a free chapter. The book is so old now that the back of the binder is held together with duct tape, but it is an amazing book with so many recipes that we’ve used many times over the years. This one has to be our all time favorite from that book. I’ll share my rating and lessons learned over many, many years of making this recipe.

RATING: A+ what can I say, we’ve made this recipe for years and it continues to be our favorite. It’s simple, straightforward and very satisfying. You’ve simply got to try this one. And being it’s only recently that I’ve improved my cooking skills, I guarantee you this recipe can be made by even the worst cook and still turn out great. I can also tell you that from many years of experience!

Mini Loaf Pan

Mini Loaf Pan

LESSON LEARNED 1: MAKING MEATLOAF FOR TWO – The recipe as I will share it makes a very big meatloaf that serves 6. Since it is only me and my husband I wanted to figure out a way to eliminate as much waste as possible and still enjoy this meatloaf recipe. A local grocery store used to sell meatloafs in mini loaf pans (3.25 W x 2″D x 5.75L). I got the idea of trying to see how this recipe might translate into filling mini loaf pans. Well, it worked beautifully – this recipe will make 3 complete mini meatloafs. So when I want meatloaf for dinner I make the recipe, fill the mini pans, freeze two of them for a later date and cook one of them that evening. There you have it  – meatloaf for today and two others for future dinners. The mini pan gives you 3 good sized slices so you can each have one slice for dinner and if you don’t take seconds have a slice leftover to make a meatloaf sandwich the next day (remember those?).

LESSON LEARNED 2: FREEZING THE LOAFS – If you plan on having your loafs “live” in the freezer for a while I recommend first wrapping the loaf pan in plastic wrap and then wrapping them with aluminum foil. That tends to hold off freezer burn for quite some time. The mini loaf will thaw in a couple of hours so you can take it out of the freezer and put it in your refrigerator in the morning, take it out when you come home from work and just pop it in the oven. Take off the aluminum foil when you place it in the refrigerator from the freezer – the foil tends help maintain the cold and you want the loaf to thaw. I also recommend minimally letting the loaf stand on the counter at least while you preheat the oven. Any chill you can reduce will assist with the cooking time.

LESSON LEARND 3: MILK OR CANNED TOMATOES – The recipe says you can use 3/4 cup milk or 3/4 cup canned tomatoes. I’ve tried this recipe both ways and prefer making it with milk versus canned tomatoes. I think the flavor is richer and more full bodied with milk. I think the tomatoes tend to take over as the dominant flavor and I prefer the dominant flavor to be the meat itself.

IMG_8195

LESSON LEARNED 4: PREPARING THE MEATLOAF – the recipe in itself is pretty self explanatory. The one thing I’ve learned over the years is to resist the urge to over mix. Mix all the ingredients until just combined and then STOP! Mixing a meatloaf is like mixing cake batter – the more you do it the tougher the end product. Be careful not to over mix.

LESSON LEARNED 5: BREAD CRUMBS – although the recipe calls for 3/4 cup of bread crumbs, I only add 1/2 cup to begin with and then add more if I think it’s needed. It just seems sometimes the mixture is drier than others and I would rather err on the side of caution and not add all the bread crumbs at the beginning to ensure getting a moister mixture than just dumping it in all at once and being stuck with what I’ve got. This was something learned over many years of practice.

IMG_8160LESSON LEARNED 6: DRAIN THE GREASE – Once you take the meatloaf out of the oven make sure you drain the grease before slicing and serving. I tend to use the leanest ground beef I can find and I still have grease in the pan. There’s nothing worse than serving a greasy slice of meatloaf.

LESSON LEARNED 7: MAKE IT IN YOUR TOASTER OVEN – With a mini loaf you don’t have to use your oven. Cook this in your toaster oven at 350 for 1 hour and voila, you’ll have meatloaf! And you can have meatloaf any time of year, including the summer, without heating up your house.

This is definitely not a difficult recipe to master. Give it a try and tell me what you think. This has been our go-to meatloaf recipe for a long time and I hope you will enjoy it. If you’ve got a family favorite meatloaf recipe – please share it. Would love to try it and compare the two. Enjoy this one!

Meatloaf For Two…

  • Servings: 2-6
  • Difficulty: Easy
  • Print

(This recipe, with it’s noted adjustments can be made to serve two or serve 6)

INGREDIENTS:

1 1/2 lbs. ground beef

1/2 lb. ground pork

1/3 cup finely chopped onion

3 Tbs. celery (two small stalks)

3 Tbs. italian parsley (or you can chop the leaves from the celery stalk)

1-2 cloves minced garlic (personal preference)

3/4 cup bread crumbs

3/4 cup milk or canned tomatoes

1 beaten egg

1 1/2 tsp salt

1/2 tsp pepper

1/2 tsp poultry seasoning

DIRECTIONS:

Mix all ingredients together until fully blended. If making one loaf, shape in a 9×5 inch loaf pan and bake at 350 for 1 1/2 hours. If making mini loafs, divide mixture into 3 mini loaf pans. Bake at 350 for 1 hour. Take out of the oven and remove the grease from the pan. Cover with foil and let sit for 5 minutes. Serve with mashed potatoes and peas.

IMG_8176

IMG_8182

Artisan No-Knead Bread…

Over a year ago I wrote a blog about making no-knead bread in an enameled cast iron pot. Although it is a great blog, I felt the “knead” to rewrite it because of a significant lesson I’ve learned since I initially published the blog.

The original recipe came from a website called simplysogood.com and although I basically use that recipe there are many others out there that have slightly different variations and still produce this wonderful, easy to make bread. The key to success in this recipe is not the mixing (that is by far the easy part) but rather the handling of the dough, getting it prepped and into a screaming hot enameled cast iron pot. So I am going to revisit this recipe, rate it and give you my lessons learned. Hopefully these lessons will help you get your desired result much quicker than I did.

What I use to bake the bread - a LeCreuset 6 quart dutch oven...

What I use to bake the bread – a LeCreuset 6 quart dutch oven…

RECIPE RATING: A for the pictures and step-by-step instructions, C-for advice on how to prep the dough. If you go to the website and search for the recipe you will find wonderfully detailed pictures of the process for making the bread and I like that. The thing that I feel is misleading is the information on the dough prep right before putting it into the oven and I will address that in my lessons learned.

LESSON LEARNED 1 – MIXING THE DOUGH: In my mind there is nothing easier than the initial mixing of the dough in this recipe. It requires only 4 simple ingredients and time. By time I mean a minimum of 12 hours to let the dough cure and the longer the better, even up to 18 hours. As stated on the website, this recipe is very forgiving so if you make the bread after 11 hours of curing or even after 24 hours you will still get a great bread. From a mixing standpoint there is little if anything you can do to ruin the dough.

When the dough is mixed it is sticky...

When the dough is mixed it is sticky…

LESSON LEARNED 2 – TO FLOUR OR NOT TO FLOUR: This is perhaps where I disagree the most with the original recipe. In that recipe it calls for you to “flour the heck” out of the surface that you place the dough on after initially removing it from the bowl. One thing is for sure, the dough is very, very sticky and you need something to help you manage it. But in my experience the dough is also much looser than what you see in the pictures and all the flour in the world does not get it to form as round of a ball as depicted on the website. What tends to happen as you try to get some shape to the dough is it rolls back over on itself trapping small pockets of flour on the bottom of the loaf and I can tell you from much experience that they do not magically disappear when the bread is baking. Your slices wind up having pockets of flour packed into the bottom crust.  There were may times I had to cut off about a 1/4 inch off the bottom of the loaf just to remove those baked-in flour pockets.

Try as I may, whenever I tried to shape the dough on a floured surface (and I tried all amounts of flour to see what might be the right combination), it would roll over on itself and create the flour pockets. And because the dough is loose, it also is a challenge to transfer it from one surface to another without creating additional pockets. The original recipe states that after you’ve formed the loaf to let it rest covered in plastic wrap while the enameled cast iron pot is heating in the oven.  Then you can either just put the dough in the heated enamel pot or line the pot with parchment paper and put the dough on the parchment paper and into the pot. Either way, once cooked the dough will not stick to either surface and the parchment paper will not burn. That is true. But trying to move the dough from one surface to another was almost an impossible task, especially when dealing with a cast iron pot that has been in the oven for a half hour at 450 degrees. Over and over I kept trying to make this recipe work as written until I realized I was flirting with the definition of insanity, that being doing the same thing over and over again and expecting different results. I became very frustrated with the recipe and almost gave up on it but then I came up with an ingenious idea.

Image 1

(upper left: dough after 18 hours – upper right: laying out the parchment paper mold – lower left: – dough resting in parchment paper – lower right: dough right out of the oven before removed from the pot)

Here is how I solved the flour dilemma. Before I heat the cast iron pot I measure the amount of parchment paper I need to line the inside of the pot and cut the mold. Then I place the parchment paper mold into a high rimmed bowl. I take the other bowl with the dough, use a spatula and systematically scrape the dough into a ball and move the ball toward the rim of the bowl. Once I have it near the rim of the bowl I scrape it into the bowl with the parchment paper mold and voila I have my rounded loaf resting in parchment paper. I cover that bowl with plastic wrap and let it sit for 30 minutes while the cast iron pot is preheating in the oven.  When it comes time to put the dough into the prepared enameled cast iron pot I just pick up the dough up by the edges of the parchment paper and transfer it quickly and without drama into the cast iron pan. It couldn’t be easier and I did not have to use one bit of flour. I no longer have any flour pockets on the bottom of my baked artisan bread!

I highly encourage you to try this recipe. It really is easy and makes perfect bread every time. My challenge was simply to eliminate the flour pockets in my otherwise perfect bread. I will write the recipe with the original instructions and with my recommendations. Try it both ways and see what works for you. And if you have an answer to the flour dilemma other than mine, I’d love to hear it. Also if your dough is not as loose as mine please let me know how you achieved that. Most recipes for making artisan bread that I’ve researched do not vary greatly in the ingredients and instructions, and most say that the dough will be loose and sticky so I’m thinking the flour on the bottom of the dough will continue to be a challenge. Let me know your thoughts or suggestions – I’d love to hear them.

Artisan No-Knead Bread…

  • Servings: 8-10
  • Difficulty: Medium
  • Print

INGREDIENTS:

3 cups unbleached flour

1 3/4 tsp. kosher salt

1/2 tsp. rapid rise yeast

1 1/2 cup water

(You can add a variety of herbs and fruits to this basic recipe. See picture below of cranberry walnut artisan bread. Just add 1/3 cup dried cranberries and 1/3 cup walnuts when making the dough)

DIRECTIONS:

In a large bowl whisk together flour, salt and yeast. Add water and mix until combined. Cover the bowl with plastic wrap and set aside for 12-18 hours. (overnight is the best).

Heat oven to 450 degrees. While oven is preheating, line your enameled cast iron pot with parchment paper and press the down the center, sides and top to form a clear outline of the pot. Cut the parchment paper along the edges (so that when you eventually place it back in the pot it won’t be hanging over the sides) and place the paper mold into a bowl that has a circumference close to the desired shape of a nicely rounded loaf.  The recipe is very forgiving so don’t spend too much time worrying about the size bowl to put it in. When the oven is heated, place your enameled cast iron pot with lid into the oven and heat for 30 minutes.

Meanwhile take the dough that has been curing overnight and scrape it into a loosely formed ball inside the bowl its in and then drop it into the other bowl with the parchment paper mold. Cover the dough with plastic wrap and let it rest until the enameled cast iron pot is done heating. (The original recipe calls for you to put the dough on a heavily floured surface, shape into a ball and cover it with plastic wrap to rest while the pot is warming in the oven. You can try it this way if you want, but I found that I get pockets of flour that get baked into the bottom of the bread when I do it that way).

Once the pot is heated, quickly transfer the dough into the pot, cover and put back in the oven. (If you use the parchment paper method, just grab the paper on opposite sides and drop into the pot. Just make sure to remember that the pot is very hot. (If you don’t use the parchment paper method just drop the dough into the pot, cover and put in the oven.) You do not need to prepare the pot in any way. The dough will not stick to the surface nor will it stick to the parchment paper.

Bake for 30 minutes. Then remove the lid from the pot and bake for 10-15 minutes more. (I find that 10 minutes gives me the nice golden color you see in the picture at the beginning of this blog).  Remove the bread from the oven and place on a cooling rack to cool.


Artisan No-Knead Bread

Artisan No-Knead Bread


IMG_9215

Cranberry Walnut Artisan Bread