Want something quick and easy to bring to your next get together? This recipe is the one for you. I like this recipe for a wide variety of reasons. First, it is very easy to assemble. Second, and this is perhaps my favorite reason, it’s small enough to minimize waste but large enough so that everyone can have some of it.
I think that has been my bug-a-boo about most cheese balls. A lot of recipes make a cheese ball that is big enough to feed an army. And what always seems to happen is a lot left overs. So, with good intentions you wrap it up and put it back in the fridge. The problem is I don’t know a lot of people who eat cheese balls outside of a party venue. So the remainder sits in your refrigerator until you wind up throwing it away. But not with this one. It’s just the right size. And if you need a bigger cheese ball, just double the recipe. But my experience has been that when there are lot of appetizers to choose from, making an appetizer that is smaller in size eliminates a great deal of waste.
So let’s talk cheddar bacon ranch cheese ball…
Lesson Learned 1: I found a great shortcut for adding bacon to recipes. The last time I was at the grocery store I noticed a package of Boar’s Head fully cooked bacon. It comes in a box and is not refrigerated. Inside there are two vacuumed sealed packages of cooked bacon with approximately 6 pieces per pack. One pack was perfect for this recipe. I avoided all of the grease and clean up associated with cooking bacon. Since then I’ve used it on salads and in other recipes. I love the taste and convenience of it. You may want to try some. It really makes putting together this cheese ball a snap.
Lesson Learned 2 – Grate your own cheese versus using the packaged kind. Although I just touted the convenience of using precooked bacon, I don’t recommend using the grated cheese you get in a bag in any recipe. It may take a few seconds more to grate your own cheese but for flavor and health reasons I strongly recommend it.
First, grating your own cheese is less wasteful less expensive and it tastes so much better. But the main reason I grate my own cheese is an additive put in bags of grated cheese know as cellulose. Cellulose is actually derived from wood pulp, yes wood pulp, and is added to packages of grated cheese to prevent the cheese from clumping together. Now I don’t know about you, but I’m not a big fan of adding wood pulp to my diet if I can avoid it. So next time, take the couple of extra seconds and grate your own cheese. Your body will thank you for it.
This recipe couldn’t be any easier, is perfect in size and is tasty as all get out. So try it and let me know what you think…
1- 8 ounce package of cream cheese, room temperature
1/2 cup sharp cheddar cheese, shredded
5-6 pieces of cooked bacon, chopped
1/2 package of ranch dressing mix (you can add more to taste if you like)
1/8 cup fresh chives, chopped
1 cup chopped pecans
DIRECTIONS:
In a medium bowl combine all of the ingredients except the chopped pecans. Mix well and form into a ball.
Roll the cheese ball in the chopped pecans until the ball is completely covered. Cover the ball with plastic wrap and refrigerate for at least 1 hour before serving.
Mixed Ingredients
Roll Into A Ball And Place On Top Of Chopped Pecans
Those of you who followed my blog over the years know that early on in my cooking/baking days I was heavily influenced by the Food Network. The early shows they produced were more about learning to cook and less about cooking contests and road shows. I miss those days. Remember Semi-Homemade with Sandra Lee? I really liked that show. I felt Sandra showed people how to take a few simple ingredients, add it to something store bought and make it into something special without all the muss and fuss. In today’s world that is such a gift for the busy cook.
Well, that is what this recipe is all about. I wish I could take credit for this but I can’t. I was at the grocery store looking for something to make, like a quick bread or muffins and I picked up this box of Krusteaz Cranberry Orange Muffin Mix. I looked on the back of the box to see if I could use this to make a quick bread and lo and behold on the bottom right hand corner was the recipe for this cake. All it required was a few extra ingredients, namely almond extract and fresh plums. The picture of the cake looked so good I just had to try it. Needless to say, it was fabulous and very easy to make so I felt I had to share it with all of you. Nobody has to know that this cake is semi-homemade.
So let’s talk Cranberry Orange Cake Topped With Fresh Plums…
Lesson Learned 1 – Pick plums that are not overly ripe: You want plums that are hard. Hard plums are easier to slice and cook beautifully in the oven. It’s very difficult to get good slices with soft plums, even if you have a very sharp knife. The pieces tend to get mushy. So be aware of that.
Also when you cut the plums, cut them like you would an avocado. I found it very hard to get the stones out of the plums. But if you cut the plum all around at the center and twist the two halves in the opposite direction, just like you do with an avocado, the plum halves will separate easily. You may have to dig a little with a sharp knife to get the stone out of the one half (be careful) but the harder the plum the easier that will be.
Lesson Learned 2 – Create the plum arrangement you want on top of the cake on a paper plate first: I found I had to play with the plums a little to create the arrangement I wanted. You don’t want to be doing that on top of the batter. I took a dinner size paper plate and created my plum arrangement on that. When it came time to put the plums on top of the batter I simply moved them from the plate to the cake just like I arranged them. It was a piece of cake, no pun intended!
Lesson Learned 3 – You could also add chopped nuts to this recipe: I did not make it with nuts this time but you could add 1/2 cup chopped nuts to this cake as well. It’s all up to you!
And the rest is easy. Just follow the directions on the box. I’ll write out the recipe here just in case the packaging gets changed. This is a quick, impressive and delicious semi-homemade recipe. I will definitely make this one again. Enjoy!
There are many reasons why Fall is my favorite time of year. First, I love the crisp Fall air with its milder temperatures. Second, I love the spectacular bursts of colors the trees and bushes provide. And third, I love Fall cooking and baking. The aromas in the kitchen at this time of year are like no other, from the smell of the first pot roast braising in the oven to the sweet smell of baked apples providing that warm feeling of comfort and home. Fall is definitely the best season of the year.
So let’s start out the season by focusing on Fall baking! I chose this particular recipe because it embodies everything I love about Fall – apples, cinnamon, cream cheese, vanilla… need I go any further. The ingredients scream Fall and the smell of this cake when it’s baking in the oven beats any apples and cinnamon air freshener you could ever buy.
So let’s talk apple cake with praline glaze…
Lesson Learned 1 – Be organized when you make this recipe. This recipe has several components and the best way to make it is to be organized. First, that means reading the recipe thoroughly. Second, and I know this may sound silly, is to create a strategy for putting everything together. When I made this I did things in stages to stay on track and to keep the kitchen from being turned upside down.
The first thing I did was shred the carrots. (If you can find carrots already shredded at your local store you can certainly use them). I used my food processor for that. Make sure you used the shredding disc as shown below.
Cut the carrots and put them into the processor’s feeding tube.
With the processor on, push the carrots down the feeding tube using the round plastic tool that comes with the processor. You will wind up with shredded carrots as seen below.
I am going into such detail about this for a couple of reasons. First to show the correct disc to use to get shredded carrots. You don’t want to use the processor’s main blade for this. Second because this step takes up time and space. I found the best way to stay organized when making a recipe is to see if there are any components that require a machine other than a mixer and determine how using that machine may affect your work space.
Once I shredded the carrots I put them in a bowl, washed my food processor and put it away. If you’ve ever worked with a food processor you know it’s comprised of several pieces and all those pieces needed to be washed. Washing them, reassembling the food processor and putting it away freed up a lot of work space for me – space that I could use to comfortably assemble the other components of the cake.
After using the food processor I put together the cream cheese filling and set it aside, assembled the wet and dry ingredients, greased and floured the bundt cake pan, measured out the pecans (I purchased pecan pieces so I didn’t have to worry about chopping them) and lastly I cut up the apples. I saved the apples for last because I wanted as short of a period of time between when they were chopped and when they were incorporated into the batter. Apples, when cut, will oxidize meaning they will start to turn brown the longer they are exposed to the open air. By cutting them last I still had nice light green apple pieces to put into the batter. There are altogether seven major components of this cake and so the more organized you are the smoother the process of making the cake will go.
The Seven Major Components Of The Apple Cake
Lesson Learned 2 – Check each egg before putting it into the batter: There are four eggs in this recipe and each one should be checked separately by cracking it into a small dish before adding it to the batter. You don’t want to add them all at once just to find you have one bad egg and then have to throw out all the batter. It only takes a few seconds to ensure that all the eggs you’re using are good.
Lesson Learned 3 – For high altitude baking decrease the baking powder by 1/4 teaspoon. The baking soda amount can stay the same.
The major point to consider when making this recipe is being organized. Otherwise everything is relatively simple. I can assure you this cake is delicious. I gave some to a neighbor who said it was so delicious that she wanted the recipe. I’m sure you’ll want to print this recipe and keep it as part of your Fall lineup of baking…
2 cups green apples, peeled and chopped (2 medium size granny smith apples)
1 cup shredded carrots (2 large carrots)
1/2 cup chopped pecans
PRALINE GLAZE
1/2 cup brown sugar, packed
1/4 cup butter, cubed
2 Tbs. milk
1/2 cup confectioners sugar
1/2 tsp. vanilla
1/4 cup chopped pecans
DIRECTIONS:
Preheat the oven to 350. Grease and flour a 10 inch fluted bundt pan. Set aside.
In a small bowl beat the cream cheese and 1/4 cup of sugar until smooth. Beat in 1 egg. Set aside.
In a medium bowl combine the flour, baking powder, cinnamon, salt and baking soda. Whisk together until thoroughly combined. Set aside.
In a large bowl beat together the oil with the remaining sugar and eggs until well blended. Gradually beat the flour mixture into the oil mixture until blended. Fold in the apples, carrots, and pecans.
Put half of the better evenly around the bundt pan. Put the cream cheese mixture on top. Add the remaining batter on top of the cream cheese mixture.
Bake 50-60 minutes or until a toothpick inserted in the center comes out clean. Cool 10 minutes in the bundt pan before removing the cake from the pan.
To make the glaze – in a large saucepan bring the brown sugar, butter and milk to a boil. Cook and stir for 1 minute. Remove from the heat and whisk in the confectioners sugar and vanilla until smooth. Drizzle over cooled cake. Sprinkle with pecans.
Fall is just about here. I can already see the difference in the angle of the sun that brings about darkness much earlier. You can feel the change in the air. But there’s still some time to fire up the old grill and have a late Summer party with great appetizers and good ole BBQ.
I’ve had a lot of practice making appetizers this Summer as my condo association hosts a happy hour every Thursday and although you’re not obligated to bring anything I like to use it as my recipe tester event. So last Thursday I made this dip and it was a hit.
Nothing very difficult about this one. It’s super easy, has tons of flavor and goes well with cocktails. So let’s talk tangy bacon cheddar yogurt dip…
Lesson Learned 1: Make this as tangy as you like. In my experience light heat is the most effective when making a recipe for a crowd. You can never judge the heat quotient of your guests so it’s best to give it just a little zip to a recipe so the greater majority of people will eat it. But if you know you’ve got a group that loves spicy, feel free to add as much heat as you like. It’s all up to you.
Lesson Learned 2: Used precooked bacon as a shortcut. I found a package of Boar’s Head precooked bacon and I used it when I made this recipe. It is a great time saver, you eliminate the grease and mess you get cooking bacon and the flavor is just the same. So if you’re really looking to cut your prep time, try that. If not, cooking bacon the old fashioned way is perfectly fine.
Lesson Learned 3: Serve this with veggie straws. I’m not sure how I got the idea to use veggie straws but they were the perfect compliment to the dip. I think people just get tired of the usual potato or nacho chips and this was a welcome change. They also lend themselves well to scooping some dip on the straw which makes this appetizer great finger food.
Lesson Learned 4: As with any dip, make it ahead of time. I know I’ve said this time and time again, but dips, cheese balls and the like always taste better when you give the ingredients time to get acquainted. So make this dip a few hours ahead of time and let it chill in the refrigerator before serving. The dip always tastes better a few hours after its had time to chill.
What I like about this appetizer is it’s quick and easy. You don’t have to spend a lot of time on this one and your guests will love it. Try it at your next get together. Enjoy!
In a medium bowl combine yogurt, sour cream and garlic salt. Add hot sauce to taste. Stir in cheese and 1 1/2 Tbs. of chives. Add all but about 1 Tbs. of crumbled bacon. Stir to combine.
Transfer the dip to a serving bowl. Cover and chill for at least 1 hour. To serve garnish with reserved bacon crumbles and chives. Serve with veggie straws.
This time of year brings an abundance of fresh fruits and vegetables to your table. Sometimes its hard to pass them up, especially when the prices are low and the quality is high. And because of that, sometimes I find I buy more than I can actually use. Or sometimes I’m positive I don’t have what I want at home only to find after I buy it I have more than enough in the refrigerator already.
Such was the case the other day when I looked in my refrigerator and found and I had pints of blueberries – way too much for me to use by myself before they spoiled. My solution was to make frosted blueberry muffins…
I have to say I really like this recipe. The muffins are just the right texture and the cream cheese frosting is the perfect compliment to the tart blueberries. So let’s not waste any time and start talking about blueberry muffins…
Muffin Ingredients
Lesson Learned 1 – This recipe make A LOT of muffins: If you’re making muffins for a crowd or have large family the proportions in this recipe will be perfect for you. This recipe can make anywhere from 36-40 muffins, which for me with only two people in my household, was way too much. I didn’t realize how much the recipe made until I started filling the muffin cups. OOOPS!
But the good news is you can easily cut the recipe in half and have a more manageable amount of muffins for a smaller family. Either way, they will still come out tasting delicious.
Lesson Learned 2 – This recipe would also be good using fresh cherries: I chose blueberries for this recipe because they are more readily available during the course of a year and I had some I need to use. But you could also use fresh cherries. All you would need to do is make sure the cherries are pitted and chopped. For the full recipe I would add 4 cups of cherries.
Lesson Learned 3 – I recommend frosting these muffins: The frosting is a great compliment to the tartness of the blueberries. And although you can leave them plain the frosting, in my opinion, takes them over the top.
Lesson Learned 4 – You can also make jumbo muffins: If you’re worried about the amount of muffins this recipe makes try making jumbo muffins. You can make approximately 18-24 jumbo muffins from this recipe. The only difference will be in the baking time. Bake the jumbo muffins for approximately 25-30 minutes.
Other than that this recipe is pretty standard in terms of how it is structured. As always you need to use less leavening for high altitude (cut the baking powder by 1/2 Tbs.) but other than that you mix the ingredients, fill the muffin cups three quarters full and bake.
Since I had so many of these I brought some to hour community happy hour that we have each week. People raved about them. One person told me she only took one home with her and in retrospect she wished she had taken many more. I guarantee this will be a hit when you serve it. Or better yet, just keep them to yourself as a guilty pleasure. Enjoy!
2 Tbs. baking powder (1 1/2 Tbs. for high altitude)
1/2 tsp. salt
1 1/4 cups sugar
3/4 cup butter, room temperature
4 eggs
1/2 tsp. vanilla extract
1/2 tsp. almond extract
Zest of 1 lemon
2 Tbs. fresh lemon juice
3/4 cups milk
2 cups sour cream
1 cup chopped walnuts
1 pint fresh blueberries, washed and drained
Frosting:
1/2 cup butter, room temperature
1 – 8 oz. package of cream cheese, room temperature
1 tsp. vanilla
2 cups confectioners sugar
DIRECTIONS:
Preheat the oven to 375. Put paper liners into the muffin tins.
Combine the flour, baking powder, salt and sugar. Whisk until combined. Set aside.
Put butter, eggs, vanilla and almond extracts, lemon zest, lemon juice, milk and sour cream into a mixing bowl. Beat on medium speed until blended. (You can use a hand mixer for this).
Add the dry ingredients and mix by hand until combined. Fold in the nuts and blueberries. Do not over mix.
Spoon the batter into the muffin cups filling them 3/4 full. Bake for 15 – 18 minutes or until lightly browned on top. Let muffins cool on a rack before frosting.
To make the frosting, combine the butter, cream cheese and vanilla in a mixing bowl. Beat until smooth. Gradually add the sugar beating until smooth.
I know, I know, by now everyone has their own zucchini bread recipe. I mean, it’s a must especially if you grow zucchini or have access to a farmers market. It is definitely zucchini time of year, that glorious time when you are so grateful to have your first harvest but by the end of the season are looking for ways either to use them or get rid of them.
Fortunately (or unfortunately) for me, now that I live in a condo I can’t grow zucchini so I can control the amount of zucchini I am willing to use. So last week when I went to the farmers market I got a couple of them and used one as a vegetable side dish and the other to make a couple of loaves of zucchini bread.
So what makes this recipe better than most. A secret ingredient that I use to up the flavor factor. So let’s talk luscious zucchini bread…
Lesson Learned 1 – The secret ingredient is vanilla bean caviar: Most zucchini bread recipes call for vanilla, as does mine. But I decided to try adding the caviar from the inside of a vanilla bean to try to enhance the flavor. And let me tell you, it really ramped up the taste factor. That’s why I call this zucchini bread luscious.
These days you can buy vanilla beans at your local grocery store but not so long ago you had to go to a specialty spice store to get them. The picture below shows you what a vanilla bean looks like.
Step 1: The shaft of the bean is quite small and kind of hard so you’ll need a very sharp knife to extract the caviar from the pod. First you need to straighten out the pod.
Step 2: Using a sharp knife, cut a slit all the way up and down the bean pod
Step 3: Pry the slit open with your hands and scrape the tip of the knife up and down the open shaft of the pod making sure to get as much of the caviar out of the inside as you can.
A whole vanilla bean will give you the equivalent of approximately one teaspoon of vanilla extract. Adding this to the two teaspoons of vanilla already in the recipe and it gives a wonderful but not over powering vanilla flavor to the zucchini bread. And that’s what makes it so luscious.
Now can you make this without the caviar? Of course… but I compare this to adding some espresso powder to a chocolate recipe. The recipe would be good without it but with it there is a fuller, richer flavor. Now I will warn you, vanilla beans are expensive, but they are worth it.
Lesson Learned 2 – Use a food processor to shred the zucchini: Although you can use a box grater, a food processor is a faster and easier way to shred the zucchini for this recipe. One medium to medium-large size zucchini will give you the two cups needed to make the bread. The food processor shreds the zucchini to just the right size so there are small strands in the bread. You don’t want to the zucchini shreds to be too big. They are designed to add moisture to the cake without providing any noticeable flavor. Also, make sure to pat down the zucchini shreds in your measuring cup. You want them slightly compacted.
Lesson Learned 3 – You can use shredded carrots in this recipe as well: I chose not to use carrots this time but you can add them as well. Just substitute one cup of shredded zucchini for one cup of shredded carrots. You can also add one cup of semi-sweet chocolate chips to this recipe. Try it a variety of ways and see what you think.
Try this version of zucchini bread and compare it to yours. I’d love to know what you think!
1 tsp. vanilla bean caviar (the caviar from one pod)
2 tsp. vanilla
3 cups flour
2 cups sugar
5 tsp. ground cinnamon
1 1/4 tsp. baking powder (1 tsp. for high altitude)
1/2 tsp. baking soda (1/4 high altitude)
1 tsp. salt
2 cups shredded zucchini, lightly packed
1 cup chopped pecans, optional
Cooking spray
DIRECTIONS:
Preheat oven to 350. In a large bowel combine orange juice, oil, applesauce, eggs, vanilla extract and vanilla caviar. In another bowl combine flour, sugar, cinnamon, baking powder, baking soda and salt. Mix to combine. Fold the wet ingredients into the dry ingredients. Stir to combine. Do not over mix.
Fold in the zucchini and pecans.
Pour the mixture into two 8 x 4 inch loaf pan coating with cooking spray. Check loaves at 45 minutes. Depending on your oven they may need to bake anywhere from 45 – 55 minutes. Loaves are done when a toothpick inserted in the center of a loaf comes out clean.
Let cool in the loaf pan for 15 minutes. Remove loaves from the pans and let cool on a wire rack.
It’s been really hot here recently, averaging temperatures in the upper eighties and lower nineties. The one good thing about living in this part of the country is there is relatively little humidity so even though the days are hot the mornings and evenings tend to be gorgeous. But even with that I find that often I look for ways to make things that won’t heat up the kitchen or the house.
As I’ve mentioned in previous blogs, we have a group of residents that get together every Thursday for happy hour. We meet in our outdoor pavilion, bring what we want to drink and many people bring appetizers or finger food. We drink, eat, talk and have a grand old time.
I try to bring some kind of new nibble for people to enjoy each week. I have to admit there are times when I just don’t have the energy to make something and so I’ll buy some chips and salsa or something like that. But there are also times I like to try something new and see if it works so that I can blog about it. This particular recipe came into my mind out of the blue and it went over very very well.
With weather this hot you really don’t want to be eating anything too hot, especially when you’re eating outdoors. It just doesn’t seem to work. But even in the hot sticky weather you still get a taste for something like pizza. You just don’t want to heat up your house making it. So how to you get around that?
Most people like cold pizza, right? It’s the combination of flavors and not necessarily the melting cheese that makes a pizza special. So I put together an appetizer that brings together all the flavors of pizza without being hot and all on a bite size cracker. I knew I succeeded when a little girl ate one of them and said, “Wow, pizza!”
And making these couldn’t be any easier. So let’s talk no bake pizza bites…
Lesson Learned 1 – Go ahead and be creative with this recipe: I had some leftover pepperoni in the refrigerator that I wanted to use. The rest I put together as I walked through the specialty cheese section of my grocery store. You can vary the meat (or not use it at all), the cheese, the crackers – whatever you want. You’ll still come up with a great little appetizer.
Lesson Learned 2 – I used pre-made roasted tomatoes: In the specialty cheese section I found some roasted tomatoes marinated in garlic olive oil. Bingo! The package had about 7 ounces of roasted tomatoes that I diced up and put on top of the pepperoni. It was fabulous. If you can’t find them pre-made you can roast tomatoes yourself and then let them marinate in some olive oil. You’ll still get the same result. But this was a whole lot less work and gave the bites a great flavor!
Lesson Learned 3 – I used a specialty feta cheese: You can certainly use plain feta cheese but I found a roasted pepper and basil feta cheese and I decided to use that. What I liked about this choice was that it added the flavor of basil to the appetizer without having to use basil leaves. You could certainly use basil leaves as well. If you do I would put the basil leaf on top of the pepperoni and then put the tomatoes on top of that. That way the leaf is secured. The great thing about this appetizer is that you can be creative and it will still be fabulous!
Lesson Learned 4 – Right before serving drizzle the bites with some garlic infused olive oil: This is the finishing touch that adds so much. You don’t need a lot, just a slight drizzle over them and the olive oil just adds that special touch that rounds out all the flavors. You can also use the oil that the roasted tomatoes were packed in, but that may not be enough for all the rounds. I had to use both the oil from the tomatoes and some garlic olive oil to drizzle over all the rounds.
And that’s it. Layer the ingredients, drizzle them with some olive oil before serving and watch them disappear. Enjoy!
1 box crackers, preferably round and not overly thin
Pepperoni, pre-packaged or a log you can cut into rounds
1 container of fire roasted tomatoes approx. 7 ounces
Feta cheese (I used a roasted red pepper and basil feta)
Garlic infused olive oil, for drizzling.
DIRECTIONS:
Dice the fire roasted tomatoes into small pieces. Lay out the crackers on a large plate or 9 x 13 baking sheet. Place a slice of pepperoni on each cracker. Top the pepperoni with some of the fire roasted tomatoes. Crumble the feta cheese and sprinkle pieces over each round.
Right before serving drizzle with oil. You could used the oil that was used to pack the tomatoes. If that is not enough, drizzle the remaining with the garlic infused olive oil.
Cover Each Cracker With A Piece Of Pepperoni
Put Some Diced Roasted Tomatoes Over The Pepperoni
It was so much fun at the Farmers Market this past weekend. It’s that time of year when you start to get a lot of great things there like fresh herbs, green beans, early girl tomatoes and of course cucumbers and zucchini.
I stopped at a stand that offered a deal of $10 per bag, fill it with what you want (and a fairly large bag I might add). Needless to say I loaded up. Since I don’t have the space to grow zucchini anymore I got a couple of them so that I could make my Double Chocolate Zucchini Bread. They had some fabulous fresh green beans and I got some of them as well – great for steaming. They also had some Yukon gold potatoes that I couldn’t resist. And they also had some great looking pickling cucumbers and so I thought I’d try my hand at that.
Pickling is a rather easy process and if you decide not to can for preserving purposes the pickling process is even easier. I really had no idea how many little cucumbers I should get as I wanted to try to fill two pint jars, so I guessed at four and I happened to be right (this time).
So let’s talk making homemade garlic dill pickles…
Lesson Learned 1 – Make the cucumber slices of equal thickness: Best to use a mandolin slicer for this job. I set my slicer to 3/16 of an inch (use whatever setting you have that is close to 1/4 inch) and all the slices came out perfectly proportioned. Of course you can use a knife and if some of the slices are not the same thickness it won’t harm the process but I think this is a perfect thickness for the pickle slices. They’re pretty much the same size as you buy in jars at the store. And as I like to always remind you, be very careful using a mandolin slicer and use the finger protector so you still have them once you’re done slicing!
Lesson Learned 2 – Pack the jars as firmly as you can without crushing the slices: You want all the slices to be able to soak up the pickling brine and once you add the brine they will tend to separate from each other a little. Four cucumber pickles, medium sized, for two pint jars should be sufficient for what you need to have the pickles layered firmly in the jar and still be able to close the lid.
Pack the jars tightly without crushing the slices
Lesson Learned 3 – Once the jars are filled and sealed turn them over a couple of times: I like to see that the pickling spices are sitting throughout the jar and not just stuck on the bottom. I’ve not read anywhere that you have to do that, but I think it creates better all around pickling.
Lesson Learned 4 – Leave the refrigerated jars of pickles alone for at least 48 hours: I know you will be tempted to see what they taste like long before that, but you want to give the pickling spices and brine plenty of time to get acquainted with the cucumber slices. And if you can leave them alone for 72, well that’s even better. Believe me, it’ll be worth the wait.
Other than measuring out the spices and boiling the vinegar water and salt, that’s basically it. It couldn’t be easier and you control the ingredients. So much better than buying jars at the store.
You will need two wide-mouth mason jars with lids for this recipe. Make sure the jars and lids are clean.
Wash and dry the cucumbers. Make sure any blossoms or remnants of blossoms are removed. Cut the cucumbers into 3/16 inch coins. Divide the garlic, dill seed and red pepper flakes in half. Put equal amounts into the bottom of each jar. Pack the cucumbers into the jars as much as you can without crushing any of them and so the lid of the jar can be closed and sealed.
Bring the pickling brine (apple cider vinegar, water and salt) to a rolling ball, whisking it until the salt is incorporated into the liquid.
Pour the hot liquid into the jars, filling each to about 1/2 inch from the top. (I found I used all the brine but depending how you pack your pickles you may not use all of it). Gently tap the jars on the side to remove any air pockets and add more brine if necessary.
Place the lids on top of the jar and screw on the rings until tight. Let the jars stand until they reach room temperature. Refrigerate the jars for a minimum of 48 hours. Refrigerate the jars after opening.
I’ve been offline for a little bit. I was having technology issues and found out that my trusted Mac has now become so old that it cannot support html 5 which is the platform now used by WordPress. Oh well… but I’ve developed some work arounds and should be fine now.
Summer is in full swing, and that includes those warm summer temperatures. During Summer I like to grill but not every day. But what do you do when it is so hot and you don’t want to heat up the house when making dinner? That’s when I rely on my trusty slow cooker. You can have a great meal and never create more heat in the house.
I am a big fan of pork loin. Like beef tenderloin, it is the the most tender, flavorful and versatile cut of pork. Cooking it in the slow cooker is so easy, but you need to pay attention not to overcook it. So let’s talk pork loin with vegetables and apple butter gravy…
Lesson Learned 1 – Brown the pork and potatoes before putting them into the slow cooker: The slow cooker cooks food but doesn’t create crust or color. If that is not a big deal for you than you can skip this step. But I’ve always espoused that you eat with your eyes first and so I like to provide that extra step to make the meal even more pleasurable.
I put a little canola oil in a cast iron skillet and browned the pork loin – about 4-5 minutes on each side. Doing that gives it a nice brown crust as you can see from the picture above. I also brown the potatoes a little. I don’t brown the carrots. I don’t think that’s really necessary. The potatoes also take about 4-5 minutes per side and I usually do two sides just enough to give it great color.
Lesson Learned 2 – Cut your carrots small or use baby carrots: This recipe will only cook for 6 hours on low so you need to consider how tender you want your carrots. If you want them crisp tender you can cut them in larger pieces. If you want them fork tender you will need to cut the pieces small or use baby carrots. I like to use the larger sized carrots and I buy only what I need for the recipe, about 3 carrots. If the carrot has a thick base, I cut it into a log and then I cut the log in half down the middle. That way I minimize the thickness and the carrots come out fork tender. When you come down to it, it all depends on how you like your carrots.
Lesson Learned 3 – Do not cook this for more than 6 hours on low: That is plenty of time to cook the pork loin without drying it out. And the sauce made with apple butter is a great accompaniment to the pork.
This is a great meal that is easy to prepare and will not heat up your kitchen on these warm Summer days. Try this recipe and let me know what you think.
Slow Cooker Pork Loin With Vegetables And Apple Butter Gravy
4 yukon gold potatoes, peeled and sliced into chunks
3 large carrots, cut into small chunks (you can use baby carrots as well)
I medium size yellow onion, peeled and cut into large chunks
3 large garlic cloves, minced
1 9.5 ounce jar of apple butter
1/3 cup dijon mustard (you can mix dijon with seeded mustard)
1/3 cup low sodium soy sauce
1 cup beef broth
1-2 Tbs. canola oil
Non-stick cooking spray
Salt and pepper to taste
DIRECTIONS:
Heat a large cast iron skillet. Add 1 Tbs canola oil. Salt and pepper the pork loin and put that side down in the hot skillet. Salt and pepper the other side of the pork loin. Let the pork loin sear for 4-5 minutes. Turn it over and sear it on the other side. Remove from the pan and set aside.
Check to see if the skillet needs more oil and add it if it does. Place potatoes in the pan being careful not to crowd them. Let them sear for 5 minutes and flip them to another side. Let them sear for an additional 5 minutes and remove them from the pan.
Spray the crock of the slow cooker with non-stick spray. Add the onions, potatoes and carrots into the crock. Place the pork loin on top of the vegetables.
In a small bowl whisk to together the garlic, apple butter, mustard, soy sauce and beef broth. Pour the mixture over the pork and vegetables.
Cook on low for six hours. Remove the pork and vegetables from the crock. Slice the pork and plate it with the vegetables. Taste the gravy in the crock and add more salt and pepper if needed. Pour the gravy over the pork.
I’ve always loved home made bread. Who doesn’t? I was never good at making it. And just when I thought I was getting the hang of it we moved to Colorado and altitude. Yuck. Altitude and bread do not mix. Well actually they do, but altitude can add some additional problems. Just what I wanted.
So I decided to take a braided bread cooking class. Am I glad I did. The class itself was a little slow in the participation area, but I came away with one nugget of information that’s changed the whole ball game. So now I’m working on making bread again.
So let’s talk homemade challah…
Lesson Learned 1 – Learning how to know when the glutens in the dough have been developed properly: This was the biggest take away for me from the cooking class I attended. I learned you can underdeveloped, develop and overdevelop the glutens in your dough. Underdeveloped glutens will give you a heavy dense dough that may fall in on you when you bake your bread. Overdeveloped and your bread will be too dry.
So how do you tell? Simple. Just take a small piece of dough in your hand and begin to pinch it and spread it with your fingers. You should be able to work the dough so that it is smooth and paper tin without the dough tearing or breaking.
That was a big breakthrough learning for me especially since I live in high altitude and its tougher to make bread in my climate.
Lesson Learned 2 – Pay attention to the humidity the day you make bread: The higher the humidity the less moisture you’ll need in your dough. I know it sounds like a lot of work, but if you pay attention to these two factors, gluten development and humidity, soon you will just be able to tell if your dough is of the correct consistency or not.
Lesson Learned 3 – Most people don’t knead their dough enough: Once I mixed all of the ingredients together I used the dough hook on my machine and kneaded the dough for five minutes. That, on average, is a good time to test the dough for gluten development. If the dough falls apart it will need more moisture, if it is too gloppy (technical term) it will need a little more flour. Once you think you have the correct consistency do the gluten test I refer to above. Chances are you’ll be right on the money.
Lesson Learned 4 – If your dough is completely stuck on your dough hook, stop your mixer and scrape the dough off: Some people think that if the dough is on the dough hook it is kneading the dough. That’s not true. The dough hook as to be working it’s way through the dough in order to be kneading it. Be mindful that you’re just not having your dough spin around in a circle without actually being kneaded.
Lesson Learned 5 – You can separate your dough into as many strands as you want for braiding: I did a traditional 3 strand braid. You braid it just like you braid hair. The picture to the right shows my strands. In hindsight I should have made the bottom one thinner and all the strands more even in size. In the end it really didn’t hurt anything as you leave the braided bread to rest on a parchment paper lined cookie sheet for at least an hour and the dough rises and sort of fills itself in.
I will admit that this recipe is a little more challenging than what I normally post, but hopefully as a fledgling cook you are confident enough in yourself to try something a little more difficult. This was the very first time I ever made challah and it turned out magnificently. But if you’re does not, go back and try it again because once you master the art of making home made bread, you’ll never turn back.
3 -6 Tbs. sugar, depending how sweet you want your bread
1 Tbs. vanilla extract
3 3/4 cup flour
1 1/4 tsp. salt
1 Tbs. water for the egg wash
DIRECTIONS:
Combine the water and yeast in a mixing bowl, whisk and let sit for a couple of minutes. Add the 5 eggs, oil, sugar and vanilla and whisk to break up and incorporate the eggs. Add the flour and salt. If using a stand mixer use the paddle attachment and mix for about 2 minutes. Let the dough rest in the bowl for 5 minutes.
Switch to a dough hook and mix on low speed for 5 minutes (my mixer particularly specifies that whenever using the dough hook do not go above speed level #2. You may want check the directions that came with your mixture to see what they recommend. The speed should not go above medium low).
Use a bowl scraper and scrape the dough onto a floured surface and continue kneading the dough by hand for about 2 minutes. Form the dough into a ball and place it in a clean, lightly oiled bowl. Cover the dough with plastic wrap and let it rise until it doubles in size, approximately 2 hours.
After the dough has risen, transfer it to a lightly floured surface and cut it into the desired number of pieces you will need for your braids – I made 3 braids of 10-14 inches in length. It is important that the braids are all the same length.
Braid the pieces of dough together and transfer the loaf to a parchment lined sheet pan. Make an egg wash by combining the last egg (you can do the whole egg or the yolk) and the water. Brush the entire surface of the loaf, including the sides with the egg wash. Refrigerate the remaining egg wash. Let the loaf stand uncovered for about 1 hour.
About 20 minutes before baking time preheat the over to 350. Brush the bread one more time with the egg wash. Bake the bread for 20 minutes, then rotate the pan and bake for an additional 15-30 minutes (I only needed an additional 15 minutes).
Let cool on a wire rack and enjoy the beauty of homemade bread!
Sorry I’m a little off my game this week. I was waylaid by a bug bite that gave me an allergic reaction and I’ve been fighting this itching rash. Needless to say I’ve not been a happy camper. The meds I take for itching make me groggy and so it’s been hard to sit down at my computer and crank out my blog. But I’m thinking I’m on the mend, although still not itch free after almost 5 days. But I have noticed improvement and so that’s what I’m focusing on.
This weeks recipe is so darn simple and great for your backyard parties. In the warmer weather, the last thing you want to do is heat up the kitchen. Dishes that are cooler like potato salad and cole slaw seem to be more in demand. Also finger foods are more popular, especially when eating outdoors. You don’t have to mess around with a lot of utensils, just take the food and pop it in your mouth. Which is exactly what this recipe is all about.
So let’s talk skewered Italian bites…
Lesson Learned 1 – This is a great way to use some of the homemade pesto you’ve made from growing basil: pesto is what adds zip to this recipe and homemade pesto is the best. If you don’t have your favorite go-to pesto recipe feel free to use mine. But pesto gives these morsels just the kick they need.
Some things to keep in mind when dredging the mozzarella balls in pesto – my mozzarella balls were in a small plastic container stored in liquid. I bought a small container that had about 20 balls. I put the balls in a strainer and drained the liquid into another dish (just in case I had some balls leftover, I wanted to store them back in the same liquid). I then drained the balls on a paper towel.
This time I did not have fresh pesto on hand so I bought a small 6 oz. jar of traditional pesto. I spooned half to it into a small wide rimmed bowl and dropped some of the balls in the pesto. I rolled them around with a spoon and then skewered them on my decorative pics. Couldn’t be easier.
Lesson Learned 2 – If you want to serve these standing up versus lying down you will need to cut a flat surface on the bottom of each mozzarella ball: I learned this lesson the hard way. I started assembling the skewers and found that they would not stand straight. The round bottom of the ball prevented them from doing so. I tried pushing the bottom flat but that didn’t seem to work so I started cutting the bottoms off the balls and then figured out that I liked the presentation of the skewers better with the skewers lying on their sides. So I opted to serve them lying on one side versus standing up. There is no right way to serve these, but I found that serving them on their side created quite an impressive looking appetizer as you can see from the picture below…
And that’s it really. As I’ve said many times before sometimes the simplest of recipes are the most impressive. This will be a great recipe to use when you harvest your basil and cherry tomatoes. It’s an easy, pop in your mouth bite that will disappear off your party table in no time.
1 – 4 oz. package of sliced pepperoni (you will have some leftovers)
1 – 12 oz. container of mozzarella balls
Garlic infused olive oil
decorative picks for skewers
DIRECTIONS:
Put the basil pesto in a wide rimmed bowl. If using jarred pesto, start with half the jar and add more as needed to the bowl.
Strain the mozzarella balls making sure to save the liquid in case you need to store any leftover balls. Place a few mozzarella balls in the pesto and roll them around with a spoon until they are covered with pesto (you will need to repeat this process a few times).
Assemble the skewers in the following manner – first skewer the tomatoes. Then add a pepperoni slice to each skewer. Lastly add the basil covered mozzarella ball and plate the skewers.
Store tightly wrapped in the refrigerator for a couple of hours or serve immediately. Drizzle with garlic infused olive oil right before serving.
Graduation parties and summer cookouts boast of fun and food. And if you’re in the position to be hosting one, you’re probably thinking about what you can do that is delicious but easy to make. That way you can spend more time with your guests and less time in the kitchen.
This recipe fits the bill. It’s a really easy dip that takes no time to make and is loaded with flavor. Serve it with a combination of chips, pretzels and crackers for an appetizer that looks casual but tastes decadent.
So let’s talk shrimp dip…
Lesson Learned 1 – Use LOTS of shrimp: I used a 12 oz. bag of frozen cooked and deveined shrimp. I thawed the shrimp in the refrigerator overnight and then chopped it up into small bite sized pieces. I kept a couple of shrimp to garnish the top of the dip (of course you don’t have to do that) and all the rest went into the dip. My point being this is a shrimp dip – the more shrimp the better.
If you’re lucky like I was you can catch the shrimp on sale. The twelve ounce bag only cost me $7.99 so I got a deal. Keep a look out for sales on the frozen shrimp if you’re looking to keep the cost down on this dip. I already had all the other ingredients in my refrigerator and pantry except the celery so I was able to splurge a little with the shrimp.
Lesson Learned 2 – If your celery stalks still have the green leaves on them use them as well: For this particular recipe all you really need is one medium sized celery stalk chopped. Normally you can buy individual stalks at the grocery store instead of buying a whole head of celery. When I only need a little celery I always try to buy a stalk that has some leaves on it. Those leaves chopped up and put into the dip add additional depth of flavor. So don’t be afraid to use them as well.
Lesson Learned 3 – If you can, make this recipe the day before: Like almost any dish, the more the ingredients are acquainted directly relates to upping the wow factor of the flavor. So it is with this dish. It is such an easy dish to make that it shouldn’t be too difficult to make it the day before and let it sit overnight in the refrigerator. But if you’re in a rush and need something quick, you can serve this the same day and it will still be very good.
The recipe itself is very straightforward so there’s not a lot of lessons learned to share with it. Just follow the directions, use some creativity in your presentation (you can dress it up with a combination of chips, pretzels and crackers) and watch it disappear. This one is a no brainer. Try it and tell me what you think.
1 – 8 oz. package of cream cheese, room temperature
1 – 12 oz. package of frozen cooked and deveined medium sized shrimp, thawed and chopped
1/2 cup mayonnaise
1/4 tsp. garlic fleur de sel (you can substitute garlic salt)
juice of 1/2 lemon
1 lemon slice for garnish, optional
1/4 cup celery, chopped (one medium sized stalk)
1/4 cup scallions, chopped
1/8 tsp. paprika, for garnish, optional (you can also use some sprigs of fresh herbs like thyme)
Crackers, potato chips and/or pretzels for serving
DIRECTIONS:
With an electric mixer, beat the cream cheese until fluffy. Add the mayo, lemon juice and fleur de sel. Mix to thoroughly combine. With a wooden spoon stir in the shrimp, celery and scallions.
Place mixture in a serving dish. Garnish with paprika and a lemon slice or some sprigs of lemon thyme. Serve with pretzels, chips and/or crackers. (If making the day before wait to garnish the dip until you’re ready to serve.)
cut shrimp into small bite sized chunks
serving suggestion with fresh thyme sprigs as garnish
There’s no doubt about it, the recipes that are handed down from generation to generation are the best. And sometimes that’s an impossible task as the old fashioned cooks would simply say, “Oh I just eyeballed what I needed and used a pinch of this and a little of that” leaving you to try to assimilate the exact ingredients to recreate the recipe.
This recipe is one of those handed down gems. A neighbor of mine served it at her St. Patrick’s Day party and the rest is history. I remember looking at all the wonderful things she laid out on her table but only eating the soda bread with some fresh Irish butter. It was heaven. I found out later it was her Mother’s recipe and she had been making this for years!
I’ve tasted many iterations of soda bread over the years and, to be honest, most of them were less than stellar. There was only one other time that I can remember having fabulous soda bread. That was when I was working at the Chicago Park District and one of my co-workers, Carol Diver, brought some to work. Carol was Irish through and through with an infectious laugh and a heart as big as all outdoors. And her soda bread was to die for. Unfortunately Carol is not longer with us and I’d never asked her for her soda bread recipe. But from then on, her soda bread was the standard to which I held all others. As time went on none would ever compare, until now.
So this time I made sure to get the recipe and with permission I am sharing it with you. I made it the other night and it was just as fabulous as I remember, moist with just the right amount of sweetness. I hope you enjoy this recipe and make it often.
So let’s talk Irish Soda Bread…
The dough did not reach the sides of a 10 inch skillet
Lesson Learned 1 – The size cast iron skillet you use is important: The recipe I got said it made two loaves and my neighbor said she used a 10 inch skillet to bake the bread. But once I made the dough and put it in my 10 inch cast iron skillet I knew that couldn’t be the case. The only way there would be enough dough for two loaves is if you used a smaller cast iron skillet – probably an 8 inch skillet. With a 10 inch skillet there is only enough dough for one loaf.
With using a larger skillet it will take longer to cook, approximately 1 1/4 to 1 1/2 hours. If you use a smaller skillet I would begin checking it at 45 minutes. You want a nice gold brown on the top. Once you see that you know the bread is done.
Don’t get me wrong, the bread turned out beautifully and was so delicious as you can see from the pictures in this blog. I just think the directions I got were for a smaller pan than what I used.
Lesson Learned 2 – Do not use self rising flour in this recipe: The second time I made this I decided to experiment and use self rising flour – BIG MISTAKE! The bread did not rise and the top of it looked like a battle had been fought on it, all lumpy and messy looking. And although I baked it for the correct amount of time, it did not cook through and was gooey inside. So take a tip from me, stick with regular flour and you’ll be just fine.
That’s the only advice I have for making this as the recipe is pretty straightforward. And let me reiterate, this is the best Irish Soda bread I have ever tasted since I had my friend’s, Carol Diver’s, bread all those years ago. I know you will enjoy this one!
1 1/2 cup buttermilk (you may need to add a little more)
Shortening, to grease the skillet
DIRECTIONS:
Preheat oven to 325.
Whisk together the flour, sugar salt and baking soda until well combined. Cut in the butter. Add raisins and buttermilk and mix until moist. (You may need to add more buttermilk. I found I needed to add about a 1/4 cup more to get all the ingredients moist).
Lightly grease a cast iron skillet with shortening (use a 10 inch skillet for one large loaf or an 8 inch skillet for two loaves). Transfer dough to the skillet. Brush the top of the dough with a light coating of buttermilk. If desired, cut a cross on the dough.
Bake for 45 minutes for the smaller loaves and 75 minutes for a large loaf. Check the loaves at 45 minutes and 60 minutes respectively to see if you need to add extra time.
Let bread sit in skillet for about 5 minutes after taking it out of the oven. Remove the bread from the skillet and let it cool on a wire rack.
My husband has an incurable sweet tooth. The other day he informed me we had nothing sweet in the house to eat and I was not in the mood to whip up something from scratch. I looked in the pantry and found a box of Duncan Hines decadent chocolate cake mix and told him I would make that. Unfortunately I opened my mouth before carefully reading the outside of the box. Staring me right in the face in clear letters on the front of the box were the words “frosting not included”. Now what… Luckily I thought I might have the ingredients for making chocolate ganache (which I did) so I thought ok, now’s the time to tackle your fears and make it. I had not other choice.
I’m not quite sure why I was afraid to make ganache but I always thought it was difficult and tricky. To my surprise it was unbelievably easy. So I thought I would dedicate this blog to a very simple way of making ganache that turns out silky, luscious and ever so decadent looking, not to mention absolutely incredibly delicious.
So let’s talk making chocolate ganache…
Lesson Learned 1 – There are many ways to make ganache: I am going to share with you the simplest way. The ratio is easy to remember 1:1. Use as many ounces of heavy cream as semi-sweet chocolate. It couldn’t be easier.
Lesson Learned 2 – Cut the chocolate squares into very small pieces: I used a 4 ounce box of Bakers semi-sweet chocolate. With my chef’s knife I cut off pieces and chopped them into small bits. If you decide to go the chip route, I would use the mini semi-sweet chips. You need the hot cream to melt the chocolate and if the pieces are too big that won’t happen.
Chocolate Covered In Hot Heavy Cream
Lesson Learned 2 – You can warm your heavy cream in the microwave: In order to get the desired consistency of the ganache, the cream has to melt the chocolate. So you have to get the cream hot enough to do that but you don’t want to scald the cream. That won’t work either.
Many recipes that I looked at recommended warming the cream on the stove. You can certainly do that especially since it gives you slightly more control in determining when the cream is hot enough. And you can certainly do that with this recipe, although I didn’t. I heated my cream (4 ounces) in the microwave for 45 seconds. After that time I found it still wasn’t hot enough. I heated it for an additional 15 seconds and it was bubbling. I was worried that I’d scalded the cream but I think what happened was the cream had just started to bubble, so I was still ok. The next time I think I’ll just nuke it for 50 seconds straight and go from there.
If you use a larger 1:1 ratio you will need to nuke the cream for a longer period of time. With this you’ll simply have to keep checking it. With 4 ounces I recommend 50 seconds. For larger amounts I would start checking at 1 minute and go from there.
Lesson Learned 3 – Let the chocolate and heavy cream sit for at least 3 minutes: Once you add the hot heavy cream you may be tempted to start whisking the mixture right away. Don’t. The cream has to melt the chocolate in order for you to get the desired consistency of the ganache. Be patient and let the cream do it’s work. I guarantee you it’s worth it.
This recipe makes enough to generously frost one bundt cake, one 9 x 13 sheet cake or one 9 inch round layer cake. So next time you need some frosting try this instead of buying the canned stuff. It looks impressive and it tastes divine!
4 ounces semi-sweet chocolate squares cut into small pieces
4 ounces heavy cream, heated
DIRECTIONS
Chop up the chocolate into very small pieces. Heat the heavy cream in a microwave safe dish for approximately 50 seconds. Test with your finger to make sure it is sufficiently hot to melt the chocolate. If not, microwave at additional 5 second intervals until cream is hot but not scalded.
Pour cream over chocolate pieces. Let the hot mixture sit for at least 3 minutes. Whisk mixture until cream is incorporated and the chocolate is dark and smooth. Drizzle the chocolate over the top of your bundt cake. Let ganache set for at least 15 minutes before serving.
I love my cast iron skillet. It only cost me about $20 and it’s one of the best skillets I have. But there’s a reason for that. Cast iron produces even, sustained heat and that’s the best for cooking just about anything. The only drawback to cast iron is it’s so darn heavy. But I just think of it as an upper body workout and move on from there.
This recipe uses the features of a cast iron skillet to produce the tastiest home fries. And making home fries is not all that complicated. The flavor of homemade sure beats the taste of the frozen kind.
So without further adieu, let’s talk home fries…
Lesson Learned 1 – Make sure to cut the potatoes to the correct size: For the purposes of this recipe you need to keep the pieces close in size (approx. 3/4 inch pieces). Here’s a little trick to help you achieve that. Using your chef’s knife cut a thin slice off of one of the longer sides of a peeled potato. Set the potato on the cut side and slice crosswise into even planks. Stack several planks and cut crosswise. Then rotate and cut crosswise again. This will give you evenly sliced potatoes.
Lesson Learned 2 – You can cook the pieces of potatoes two different ways, on the stovetop or in the microwave: (I will include both methods in the recipe printout). I chose to cook them on the stove. The process is not much different than making mashed potatoes. The only difference is you want to monitor the potatoes as they boil to make sure they don’t get overly soft, otherwise they’ll break apart. You want them to hold their shape. I would boil them for about 7-10 minutes and check their consistency. If they are still hard, check every couple of minutes until they are just becoming fork tender.
Lesson Learned 3 – If you choose to boil your potatoes first, let them cool a little in the strainer so they are as dry as possible when you put them in the cast iron skillet: In order to get your potatoes nice and brown you want them to be as free from water as possible. I would boil the potatoes first, strain them and let them sit in the strainer while you saute the onions and garlic. That way most of the moisture will drain off before you put them in the skillet.
Lesson Learned 4 – Once you saute the onions and garlic remove them from the pan and set them aside. The first time I made this recipe I kept them in the cast iron pan while I was browning the potatoes. Big mistake! They didn’t stand up very well through the browning process and wound up getting burned. Once you saute the mixture remove it from the pan and add it back in at the last minute just to get it warmed through again. That way you won’t get browned potatoes and blackened onions and garlic. Lessons learned from the cook who never could…
Lesson Learned 5 – Don’t continuously move the potatoes once they are in the skillet: In order to get the potatoes nice and brown you have to let them sit for a while in the skillet. The whole browning process can take about 20 minutes and you don’t want to be flipping the potatoes continuously during that time. If you want to check to see if they are ready to flip, turn one of the pieces or look on the sides of the pieces to see if the bottoms have started to to turn color. You’ll get a much better result if you are patient during the browning process.
And that’s it, couldn’t be any easier. I like these so much better than the frozen kind. Try them and see if you agree!
2 large russet potatoes, peeled and sliced into 3/4 inch cubes
2 – 3 Tbs. vegetable oil
1 small-medium size onion, chopped
2 garlic cloves, minced
1 Tbs. fresh chives
Salt and pepper, to taste
DIRECTIONS:
In a high rimmed pot, boil the potatoes until they just fork tender. Drain the potatoes and set aside. (NOTE: you can also microwave the potatoes. Put 1 Tbs. oil, 1/2 tsp. salt and 1/2 tsp. pepper in a covered microwave safe bowl along with the potatoes. Stir. Cook 7-10 minutes stirring occasionally. Drain the potatoes well).
Heat a cast iron skillet over medium heat for about 3-4 minutes. Start with 2 Tbs. of oil (you may or may not need to add more later) added to the skillet and heated until shimmering. Add the onions and cook until lightly browned. Salt and pepper the onions. Add the garlic and cook until fragrant. Remove the mixture from the pan and set aside.
If needed, add the remaining oil to the pan. Add the potatoes and gently pack them into the skillet using the back end of a spatula. Cook, without moving for 7-10 minutes or until they begin to brown.
Flip the potatoes and lightly repack them into the skillet. (check to see if you need to add oil during this process). Continue flipping process until the potatoes are browned on all sides. Add the onions and garlic back to the pan, mix with the potatoes and heat until warmed through.
Season with salt and pepper, garnish with chives and serve immediately.
Last Saturday I visited our local farmers market. I love going there on Saturday mornings. Our famers market has a wide variety of vendors selling vegetables, meats and baked goods. There is also a guy who sharpens knives (I love that) and food and crafts vendors. It’s easy to spend a couple of hours meandering the site, sampling the goodies, listening to live music and going home with in season farm-to-table goodies.
This week the farmers stands were inundated with chives and asparagus. There was asparagus as far as the eye could see. I couldn’t resist buying some (along with some cranberry walnut bread and some cheddar brats). I’ve had a craving for soup lately and thought I’d try my hand at making some asparagus soup. And the rest is history… I could’t believe how easy it was to make but even better than that how delicious it was. I’ll probably head back next Saturday for another batch.
But let’s talk asparagus soup…
Lesson Learned 1 – Learn what parts of the asparagus spears you can use: Quite often you’ll see on television the way to trim asparagus is to bend it and where it breaks off is where you should trim your bunch. I’ve found that sometimes that wastes too much asparagus especially if you’re making soup. I learned early on that even with a very sharp knife, there can be a part of the spear that will very hard to cut – you almost always have to use two hands pressing down on the knife to cut it. That is the part you want to throw out. That still leaves some of the tougher parts of the asparagus, but as long as a knife will go through it without a lot of force you can use it in the soup. Keep in mind that soup is designed to use as much of the asparagus spear as you possibly can so don’t be afraid to use some of the tougher parts of the spear. As long as you can cut through it without a lot of force it will be perfectly fine for the soup.
Lesson Learned 2 – Be careful when using an immersion blender: I recommend using an immersion blender for this recipe. Some recipes have you blend the soup in batches in a regular blender. That’s a lot more work than is actually necessary. But, be careful when you use an immersion blender. If you lift the blade up over the top of the soup you’ll have soup splattered all over the place. (I know, I’ve done this!) Move the blender around slowly in the soup and don’t lift if above the top of the soup. If you have to lift it up higher, turn it off first. Just a little tip to save you a lot of aggravation.
Lesson Learned 3 – You can make this soup and store it: This soup will keep it’s freshness for a couple of days. If you decide not to serve it immediately hold off on stirring in the last tablespoon of butter and lemon juice. I made my soup in the morning, refrigerated it and served it for dinner. Right before I served it I stirred in the butter and lemon juice. It gives the soup that that final finishing touch and freshness.
This recipe is so simple and easy. Most of the work is in the prep of the ingredients. I also like this recipe because it makes a manageable amount of soup, servings for four. That way you don’t have a lot of waste. But if you want more, just double the recipe and it’ll turn out just as good.
This recipe is so good I plan on going to the farmers market again this Saturday and buying more asparagus to make some more soup. It’s so much better than the canned stuff. Enjoy!
3 cups low sodium chicken broth (you can use vegetable broth as well)
1/4 cup creme fraiche (you can use sour cream)
1/2 lemon, juiced
salt and pepper to taste
DIRECTIONS:
Take the tough bottoms off the asparagus spears. Remove a couple asparagus tips and set aside for garnish. (you can slightly steam them or leave them as is for a bit of crunch). Cut spears into 1/2 inch pieces. Place in a small bowl and set aside.
In a medium size high sided pot melt 2 Tbs. of butter. Add the onions and cook until translucent, approximately 5 minutes. Salt and pepper the onions while cooking.
Add the asparagus pieces to the onions and cook over low/medium heat for five minutes. Salt and pepper the asparagus. Add the garlic and cook until the garlic is fragrant, approximately 1 minute. Sprinkle the flour over the asparagus, stir and cook for about 2 minutes.
Add the chicken stock and bring the mixture to a low boil. Turn down the heat, cover and simmer for 25-30 minutes.
Turn off the heat. Use an immersion blender to blend the asparagus into the soup. Continue until there are no evidence of remaining spears. After a few minutes, if any parts of spears remain remove them – they are probably too tough to be broken down. Add the creme fraiche and stir to thoroughly combine.
At this point you can cool the soup and store it for a couple of days if you like. If you plan to serve it immediately stir in the remaining tablespoon of butter and the juice from the lemon. If you plan on serving it later, warm the soup and at that time and add the butter and lemon juice right before you serve.
One of my favorite vegetables is butternut squash. It is a versatile vegetable capable of being made in a variety of ways but my favorite is roasted butternut squash (with a close second butternut squash soup).
I stumbled on a version of this recipe a while back and have been making my version regularly ever since. But it dawned on me that I never posted this recipe so I will now. There are only a few ingredients in this recipe but they compliment the squash so perfectly and give a gentle sweetness to its flavor.
So let’s talk cinnamon roasted butternut squash…
Lesson Learned 1 – The size of the squash pieces matters: If you cut the squash too large it will remain hard. Conversely if you cut it too small it will turn into mush. For this particular recipe you want to cut your squash into 3/4 – 1 inch thick pieces. I recommend that you cook the squash at 375 for 30-35 minutes. Cutting the squash into those sized chunks results in the pieces being cooked through without being overly mushy and with a nice caramelization on the outside. Don’t get worried if all your pieces are not exactly the same size. Make them close enough in size as you possibly can.
Lesson Learned 2 – Only use coconut oil in this recipe: If you use olive oil you simply will not get the same flavor. The coconut oil renders a subtle sweetness that, along with the cinnamon, makes the squash taste so good. Now, can you use olive oil if you don’t have coconut oil – of course you can. But I wouldn’t recommend using cinnamon with olive oil. I don’t think the flavors would compliment each other as much.
I’ve been roasting squash for years and my go-to recipe was using a garlic flavored olive oil with some dried thyme – and that’s a great combination as well. But I’ve found when I use coconut it not only enhances the flavor but the squash roasts more evenly, if that makes any sense. When I roasted the squash with olive oil sometimes I would get pieces that did not cook through and were somewhat hard even though the only major change was the oil I used. That never happens with coconut oil. Funny, isn’t it?
Lesson Learned 3 – Be careful how much cinnamon you add: In this recipe it is important for the oil and cinnamon to balance each other out in order to get the correct flavor and sweetness. For that to happen the correct proportions need to be used.
Cinnamon on its own without the benefit of sugar can be quite pungent and not very good tasting. Think about it, when do you ever see cinnamon used without some sort of sweetener? I wouldn’t add any more than a teaspoonful in order the get the correct mixture of both the oil and the cinnamon. If done correctly the combination is heavenly. If not, you’ll wind up throwing the squash out.
Lesson Learned 4 – Don’t crowd the pieces of squash when roasting them: Did you ever see the movie “Julie and Julia” about a woman from New York who blogged about cooking her way through Julia Childs’ cookbook? There is a scene in the movie where Amy Grant, who plays Julie, is cooking mushrooms on the stove and says that Julia noted in her book not to crowd the mushrooms – they won’t brown. Well the same thing applies to the squash. You want the squash to roast so you need to give the pieces room. If you don’t they’ll steam instead of roast and you won’t get the benefit of the wonderful caramelization that so enhances the flavor of the squash.
There could not be a recipe any simpler than this that produces such a flavorful, elegant side dish. I make this at least once a week now and can guarantee that you will make it often once you try it. Enjoy!
3 cups butternut squash cut into 3/4 – 1 inch pieces
1 Tbs. coconut oil, melted
1 tsp. cinnamon
Salt and pepper to taste
DIRECTIONS:
Preheat oven to 375 degrees. Cover a 9x 13 pan with foil. Set aside.
In a medium sized bowl combine the squash, coconut oil and cinnamon. Combine until all pieces are thoroughly coated.
Transfer the squash to the prepared pan making sure the pieces are not crowded in the pan. Salt and pepper to taste. (I’d go easy on both – you could always add more when you serve).
Roast for 30-35 minutes turning over the pieces of squash at the half way point. Serve.
The saga of the kitchen, dining room, living room and den flooring projects continues and prevents me from posting some new recipes. I’ve lived through this many times before and even recognize the many ebbs and flows of this type of process. We are definitely in the “frustrated” stage of the project. The whole house is in disarray and will be for a few more weeks (the hardwood floor goes down next week) and it’s at this stage that you long for a clean, organized home.
I liken these types of projects to giving birth. Once the baby arrives you forget about all the pain and rejoice in the outcome. I am so waiting for that time. Before I go into some of my favorite slow cooker recipes I thought I’d share a few pictures of my kitchen to give you some perspective of what I am currently going through.
The picture below gives you somewhat of an idea of what the kitchen looked like when we moved in. Not bad you might say, but there were definitely some challenges. The gas cook top was not what was originally there. When buying a condo I told my husband I would not even consider one that did not have a gas stove. I’ve been a gas girl all my life and know that most if not all professional chefs cook with gas so there was no room for negotiation there.
We took out the cooktop you see in the picture below to install the gas cooktop in the picture above (the gas cooktop was the one the builder took out and replaced with the electric cooktop when doing the remodel). Our condo had been previously owned but purchased back by the builder and converted to the model for the development. (the development was done in two phases and our condo was in one of the first phase buildings). “Upgraded” appliances were installed as part of the conversion. I say upgraded in parenthesis because the new appliances were actually not very good and my husband and I wound up replacing all of them except the refrigerator. I also found it interesting that the electric cooktop they originally installed looked like Mickey Mouse, my bizarre sense of humor.
The original electric cooktop that was in our kitchen
The original kitchen design called for the cooktop and oven to be separate. You can see a small portion of the original oven on the far right of the very first picture above (note the stainless outline at the bottom far right of the picture). The problem with having the oven located there was the thermostat for our heating and cooling system was on the wall directly opposite the oven. Using the oven had a direct effect on the thermostat and we certainly didn’t want that. So we decided to eliminate the cooktop and separate oven combination and get a stove with an oven (see the picture below), install it in the space where the cooktop was (requiring removing the cabinets underneath) and adding cabinet space where the oven had been. It worked out great.
After that, the final problem we wanted to resolve was the engineered wood flooring (you can see it on the bottom of the first picture above). It really doesn’t look that bad in the picture but it was cheap stuff, scratched easily and was hard to clean. Both my husband and I have had wood floors in our previous kitchens and always wound up replacing them with tile. Tile is more durable and easily stands up to the wear and tear of work done in a kitchen. Just be careful not to drop your wine glasses, though. Tile is not forgiving in that regard.
So at this point the tile is laid and setting for a day before doing the grout. My husband does excellent work and is a perfectionist so the work sometimes is painstakingly slow. In the end I know I will be so pleased but in the interim living in a war zone has its ups and downs.
Where my stove/oven used to be
waiting for grout
The one thing we’ve already noticed is the tile is brightening up the kitchen. With the dark cabinets and the dark floor the kitchen was a pretty dark place. The tile is changing all that and brightening it up considerably.
And so, because of all this, once again I do not have a new recipe to share this week. But the good news is I have so many recipes amassed from the many years of doing this blog that I can share some of my recipes that have not seen the light of day for quite some time.
This week I decided to focus on some of my personal favorite slow cooker recipes. Over the years I’ve learned that slow cookers are actually very versatile. Years ago when I would make something in a slow cooker (or crock pots as we used to call it then) my food would come out bland and overcooked. Now I’ve mastered some techniques that have helped me create some wonderful slow cooker dishes. Those are the ones I want to share with you today.
So let’s talk slow cooker favorites…
I’ve chosen these particular recipes because they are easy, impressive and your guests (or family for that matter) will never think they were made in a slow cooker.
SLOW COOKER GROUND BEEF STEW: I really like this recipe because the end result is a thick and luscious stew. The secret is using a large amount of tomato paste. For a 15 ounce can of tomato sauce I recommend using an entire 6 ounce can of tomato paste. For this recipe you want the sauce to be really thick before the stew starts to cook. If the sauce still looks a little thin after mixing the sauce and paste I recommend adding more tomato paste. Don’t be afraid if you think it’s too thick. The residual fat from the browned ground beef will loosen up the sauce in the cooking process but not to the point of making it runny. The consistency of this stew is similar to a nice thick chili. And the flavor of this stew is fabulous. I assure you, this recipe can easily become a family staple.
2. CREAMY MEATBALL AND TORTELLINI SOUP: Years ago I never would have thought of making soup in a slow cooker. But actually it is a perfect tool for making soup. This was the recipe where I learned I can vary my temperatures during the cooking process versus just cooking a recipe on low or high all the time. I made sausage meatballs for this recipe but if you don’t want to take the time to remove the casings and shape the meatballs you can just cut the sausage up in links and throw it in that way. This is a great dish for a chilly night. Serve with a salad and some crusty bread and you have one heck of a meal that takes virtually no effort at all to make.
SaveSave
SaveSave
SaveSave
SaveSave
SaveSave
SaveSave
SaveSave
SaveSave
SaveSave
SaveSave
SaveSave
SaveSave
SaveSave
SaveSave
SaveSave
SaveSave
SaveSave
SaveSave
SaveSave
SaveSave
SaveSave
SaveSave
3. SLOW COOKER TURKEY AND DUMPLINGS: Remember when you only used to have turkey around the holidays? I happen to love turkey and so I try to find as many ways of serving it all year round. I used turkey tenderloins in this recipe, cooking them whole and then shredding them. The surprise ingredient is refrigerated biscuits that I cut up and used as the dumplings. This is a flavorful and hearty dish and a great way to incorporate turkey more routinely into your meal plans.
4. JAMBALAYA: This was my breakthrough recipe using a slow cooker. From past experience, this was the first time that I made something in the slow cooker that didn’t look or taste like mush. If you are inclined to try any of these recipes, I would start with this one. This is a traditional chop and drop slow cooker recipe. The difference is you don’t add all of the ingredients at once so everything is cooked properly but not overcooked. My husband and I absolutely love this recipe and I am sure you will too.
5. SLOW COOKER COUNTRY STYLE PORK RIBS: I have been making this recipe for years. It is definitely a recipe for someone who is just learning to cook as it is, if you follow the instructions, absolutely foolproof. The sauce is rich and thick and the pork is fall-off-the-bone delicious. You can serve this with rice or potatoes and a vegetable of your choice and have a superb meal. If you want a great recipe that is a complete no brainer, this is the one for you.
And there you have it – the saga of my kitchen remodel coupled with my favorite slow cooker recipes. I’m not sure if I will be able to post a new recipe next week, but I certainly hope to. If not, I will share some of my former recipes that have not surfaced for a long time and probably something sweet versus savory. We’ll just have to see how it goes. Thanks for hanging in there with me. Next stop, doing the grout and the hardwood floor installation in the rest of the condo!
No lie, my first taste of this casserole all I could say was “Oh My God”! It was unreal how good it was. My husband, who is a little less dramatic, said, “This is very good” which is high praise from him.
Over the years we’ve been eating more and more fish and so every once in a while I like to try to shake things up with my fish recipes. Well, I hit the jackpot this time. This is one of my best recipes ever and I don’t even hesitate to say that the non-fish lover in your home will like this as well. It’s a very versatile dish and can be amended in a variety of ways but for now I’ll share what I did and talk more about versatility in lessons learned.
One more note… from time to time I will also focus on making recipes for two. It’s just my husband and I that I cook for now unless we are having a party and sometimes I find if I make too much we either throw stuff out or eat leftovers. And some recipes are more conducive to leftovers than others. These days it is hard to cook for two since grocery stores seem to sell bigger portions. But I found this particular recipe can be adapted in many ways and one of them is the amount you make. So I am writing this recipe for two people but keep in mind you can increase the ingredients proportionally to serve more.
So let’s talk salmon casserole…
(NOTE: All meals pictured in this video can be found in the recipe index on this site)
Lesson learned 1 – Choose your salmon wisely: I’ve found that the salmon filets you buy at the grocery store can vary in thickness. For this recipe you’re going to want to get the thickest piece you can find. Normally what you’ll see is a piece that is about one inch thick at its widest part. Since this cooks for about 35-40 minutes you’re going to want to have a thicker piece so the salmon doesn’t dry out.
Most if not all prepackaged salmon pieces still have the skin on. You’ll need to remove that as well. I cut the salmon into approximately one inch chunks. They turned out perfectly. So keep in mind the thicker the piece the better. But don’t be afraid to also use the thinner part of your salmon filet. Because it is cooked in cream the salmon does retain its moistness.
I only used an 8 ounce salmon filet. Normally that is about enough for both of us. If you want a little more in your casserole, don’t be afraid to add it.
Lesson Learned 2 – Adapting this recipe: I originally wanted to use some spinach in this recipe but didn’t have it on hand and didn’t feel like going to the grocery store to buy some. But I did have some flat leaf parsley and so I used that. If you use spinach just saute it with the onions and only use a couple of handfuls. The spinach should act as the accompaniment to the recipe and shouldn’t overpower it. The same applies to flat leaf parsley. I only used a little more than a tablespoon (and of course I used some for garnish), just enough to enhance the flavor.
I also added butternut squash. The key to using that is to make sure you cut the pieces small, otherwise they won’t cook. I cut mine into about 1/8 inch cubes. But even cutting it that small a couple of pieces turned out a little more al dente than I would have liked but all the rest were perfect.
You can easily add peas to this, or carrots. If you add carrots I suggest you precook them until they start getting soft. You can do that while sauteing the onions. If you want to add cauliflower then I would steam them until they start turning soft. Or you can simply add a frozen vegetable medley and it should cook through during that time period. I prefer adding fresh vegetables but it can work either way.
Lesson Learned 3 – Those tricky potatoes: I don’t know about you but, for me, potatoes are tricky when using them in a casserole, specifically sliced potatoes. I’ve experienced many instances where they were hard and not cooked through. This time they turned out perfectly. This is what I did. I used two medium sized yukon gold potatoes and boiled them with their skins on until I could easily stick a fork in them. Then I put them in a colander and let them cool. It is important to let them cool. If you try to cut them when they’re hot they’ll fall apart. Once they cool you can easily peel and slice them. Can you leave the peel on? Of course you can. My husband prefers them with the peel off. I sliced potatoes into half inch thick rounds and they were delicious. One of the first things my husband said when he took is first bite was, “the potatoes are good”. Success!!
You can boil your potatoes early in the day or even the night before and leave them with the skins on in the refrigerator until you’re ready to use them. It doesn’t have to be a big deal or overly time consuming.
Lesson Learned 4 – The seasoning is so important: This recipe doesn’t have a lot of ingredients so the seasoning is very important. Once again this part lends to the adaptability of this recipe. Once you layer the fish and squash make sure you salt and pepper them. Once you add the onions and parsley then sprinkle your fish seasoning on top. You can use any type of seasoning that works well with fish. I used a tuscan garlic seasoning blend that includes onion, garlic, red bell pepper and lemon peel. I use this seasoning a lot when I bake salmon filets so I knew it would work well with the salmon. Just be careful not to overdo the seasoning. About a quarter of a teaspoon should do the trick, at least for the first time you make this dish. You can adjust as you fine tune your dish.
I was so pleased with how this recipe turned out and will definitely make it again. Try it and and let me know what you think.
Preheat oven to 375 degrees. Saute the onions in olive oil for about 5 minutes. Add the flat leaf parsley and cook for another minute. Stir in the flour and cook for 1 – 2 minutes. Set the mixture aside.
Slice the potatoes into 1/2 inch rounds. Spray a 1 quart casserole dish with cooking spray. Put a layer of potatoes on the bottom of the dish. Put the salmon and squash on top of the potato layer. Put the onion/parsley mixture on top of the salmon and squash. Season with salt, pepper and tuscan garlic seasoning.
Put another layer of potato rounds on top. Pour the cream over the top of the potatoes. Sprinkle the top with the gruyere cheese.
This recipe was born out of leftovers I had from making my Chocolate Cherry Cream Cheese Cake. I still had some of the cream cheese mixture and cherry pie filling leftover and really didn’t want to just throw them out. I searched online to see if I could get some ideas and found something similar to this and thought, I’ll make some mini cheese danishes.
Apparently a lot of people are using refrigerated dough to makes these types of recipes. I was surprised to find crescent dough “rounds”. I’d never seen them before. I was thinking I might have to take the traditional crescent dough and pinch the seams in order to get the rounds I needed. I was delighted that I did not have to do that work, that it was already done for me.
So let’s talk mini cherry cheese danishes…
Lesson Learned 1 – Working with the refrigerator dough: Using this kind of dough is very convenient but you do have to work it a little bit. I cut the pieces along the pre-perforated edges as best I could (I wound up with 9 rounds and I should have only had 8 if I followed the perforations exactly – oh well…) and rolled each piece into a ball. I flattened each piece with my hand and then used my thumbs to create a crater inside the dough. The crater is important because that’s where you put the cream cheese and cherries. Making the crater as deep as possible helps to prevent the cherries from falling off. But don’t worry, if they do once you pull them out of the oven just use a small spoon to push them back on top. Once they cool they will stay put.
Lesson Learned 2 – The cream cheese filling: This recipe was inspired by the cream cheese filling and canned cherries I had left over from making a Chocolate Cherry Cream Cheese Cake. After I made the cake I had enough filling and cherries left over that I really didn’t want to just throw out. This recipe is designed for that type of leftover. You can make the filling for this recipe versus using leftovers, and I will include the the recipe for the filling I used, but any type of cream cheese filling will do. Plus if you make the filling from scratch you will definitely have too much filling. There have been many times I’ve had filling like this left over and I just trashed it. But even if I didn’t have any leftover canned cherries, another type of fruit could be substituted, like left over apple sauce or apple pie filling. This recipe is a very easy way to use your baking leftovers.
Lesson Learned 3 – The Glaze: As I’ve shared before the formula for glaze is quite simple – a cup of confectioners sugar and 1 – 2 tbs. of liquid (water, milk, heavy cream) and a little flavoring like an extract, juice, and/or zest. For this recipe I used 1/8 tsp. of almond extract and the glaze was perfect.
My husband really liked these tasty little bites. Cover them with plastic wrap or put them in an air tight container and they’ll stay fresh for 3 days, if they even last that long. I know mine didn’t. Enjoy!
Leftover cream cheese filling (note recipe below was the filling I used but if made from scratch is too much for this recipe)
2 – 8oz. packages cream cheese, softened
1/2 cup + 2 Tbsp. sugar
1 tsp. vanilla extract
3 Tbs. flour
1 egg, room temperature
Leftover fruit – I used leftover canned cherry pie filling
GLAZE:
I cup confectioners sugar
1 – 2 tsp milk
1/8 tsp almond extract
DIRECTIONS:
Preheat oven to 375. Line a 9 x 13 pan with parchment paper and set aside.
Open the can of refrigerator dough and cut the dough rounds using the perforations as a guide. Roll each into a ball. Flatten each ball with the palm of your hands and create a crater in the center of each with your thumbs.
Place a half teaspoon of cream cheese filling and 2-3 cherries inside each crater.
Bake for 10 – 12 minutes.
Remove each danish onto a wire rack and let cool. If any cherries have fallen off during the baking process, spoon them back on top before placing on the wire rack.
Once cooled, make the glaze and drizzle over the danishes. Serve or place in an air tight container. Danishes will stay fresh for approximately 3 days.
What can I say about this one. It is simply over the top. Not only does it taste divine but it’s gorgeous. What more can you ask for from a cake? Now I’ll admit this cake takes a little more work than most but the result is breathtaking. This is possibly the most professional looking cake I’ve ever made. And we know looks are important but bottom line it has to taste good. Well let me tell you in the taste department I would consider this to be divine. I mean what’s not to love – chocolate, flavorful cream cheese, cherry pie filling, vanilla glaze – it just doesn’t get much better than that.
So let’s talk chocolate cherry cream cheese cake…
Lesson Learned 1 – Be organized when you make this cake: Really you should be organized when you make any cake but this one has so many components to it that your experience making it will be so much more delightful if you plan this out before you make it. Think about this one in stages.
Get everything out in plenty of time that needs to be room temperature. In this recipe that means the eggs and sour cream. No need to worry about the butter because you melt that.
Get the oven preheating. I believe it is better for your oven not only to be preheated but to be at the desired temperature for at least 5-10 minutes so that once you pop the cake pan in you can count on the oven truly being the correct temperature all throughout.
Put together the dry ingredients (flour, sugar, kosher salt and baking soda) and set them aside.
Measure out all of the remaining ingredients. I use little bowls to organize what needs to be measured. That way when you come to a certain juncture in the process you are all ready to go. This includes opening up the can of cherry pie filling and measuring out the amount needed. As you do that, try to opt for more cherries than filling as some fillings tend to be more juice and less cherries.
Count out, drain and rinse your maraschino cherries. For my pan I needed 16 cherries, so a small jar of cherries will work just fine.
Assemble the chocolate mixture.
Make the batter by combining the chocolate mixture with the dry ingredients. Now you’re ready to go.
Wait to spray your bundt pan until the very end. For this recipe I recommend using a baking spray with flour. Coat the bundt pan liberally. You want it to be glistening all over before you begin assembling the cake.
Because there are so many components to this recipe I guarantee you will be a lot happier and have more fun making this cake if you organize yourself.
Lesson Learned 2 – Making the glaze: Making glaze for any type of cake or pastry couldn’t be easier. All it requires is some confectioners sugar, some liquid and perhaps some sort of additional flavoring. You can use water, milk, or heavy cream for your liquid and you can use a little extract, juice or zest to enhance the flavor of the glaze. More often than not I use milk as the liquid and in this particular recipe I used a little vanilla extract to enhance the flavor.
Keep in mind you need very little liquid to create a glaze. Normally it works out to about 1 cup of confectioners sugar to about a tablespoon or so of liquid and then, if using a liquid extract, only about 1/8 teaspoon of that. But don’t get bogged down in the measurements. If your glaze is too thick just add a little more liquid to thin it out. If it becomes too runny, add a little more confectioners sugar. Glaze is very forgiving and can be made to the correct consistency with some easy minor adjustments.
One caveat – don’t use the additional flavoring to thin out a glaze. The flavor can become overpowering if you do that. And lastly, I don’t always have heavy cream around the house, but when I do I use it as my liquid. That is when you get the richest flavor. I just can’t convince myself to buy a pint of heavy cream for the needed tablespoon I will use in a glaze. But it’s all up to you.
This cake is so good and so worth the effort. Try it – I just know you will like it!
Preheat oven to 350 degrees. Make the cream cheese filling by beating together the cream cheese, sugar and vanilla until fluffy. Add the flour and egg and beat until smooth. Set aside.
In a large bowl combine the flour, sugar, salt and baking soda. Whisk until thoroughly blended. Set aside.
In a saucepan melt the 3/4 cup butter. Add the water and stir to blend. Add the cocoa and espresso powder and whisk until there are not lumps. Add the chips and stir until they are completely melted and the mixture is smooth.
Add the chocolate mixture to the dry mixture and whisk until combined. Blend in the sour cream. Add the eggs and vanilla and mix until combined.
Spray a 10-12 cup bundt pan thoroughly with baking spray with flour. Melt the 1 1/2 tsp of butter and pour it evenly into the bottom of the pan. Evenly sprinkle the brown sugar on top of the melted butter. Place two cherries on top of the brown sugar in each of the larger grooves of the bundt pan.
Fill the bundt pan with half the chocolate batter. Spoon in the cream cheese filling on top making sure not to have the filling touch the sides. Spoon the cherry pie filling on top of the cream cheese, making sure the filling does not touch the sides of the pan. (You may have some leftover cream cheese and cherry pie filling). Pour the remaining batter evenly on top making sure to cover the cream cheese and the cherry pie filling completely.
Bake for 50-60 minutes or until a toothpick inserted in the center comes out clean. Cool the cake in the pan on a wire rack for 10 minutes. Put a plate over the bottom of the pan and flip the cake out of the pan onto the plate and let cool completely.
Mix together all of the ingredients for the glaze. Drizzle the glaze over the cooled cake.
I love this recipe not only because it produces a moist, flavorful cake but also because it’s a ton of fun to make. And the finished product looks as good as it tastes.
I like experimenting with different cakes and when I read about the process for this one I thought I’d give it a try. I’ve made swirl cakes before where you basically have one little cinnamon swirl going through the cake but this way of making a swirl cake is much more dramatic. You create the dramatic swirls by dividing the batter and making one half chocolate and keeping the other half as is. Then you spoon in the batter alternating the colors and use a knife or another similar object and swirl them together. It was great fun (I know I need to get a life…). And the result, as you can see from the many pictures in this blog is a more dramatic density of swirls. It is a fun cake to make and eat.
So let’s talk marble pound cake…
Lesson Learned 1 – The easy way to grease and flour a bundt cake pan: If you’re like me you love the way a bundt cake looks but you dread greasing and flouring the pan. Well I’ve found a way to make that process somewhat easier. First there’s no getting around it you need to grease the pan and pay attention to getting the grease into the many crevices. I usually use shortening to do that. I think I actually use less grease with shortening than I do with butter.
Then comes the flouring part and that was always a challenge because you need to get the flour up as high as you can and with the wide opening of the pan you can get flour all over the place if you’re not careful. Well, no more. All you need do is take some good cling wrap (and I mean the stuff that really clings – we buy ours at Costco and it is restaurant quality grade). Cover the top of the pan as shown in the picture below.
Once you do this you can turn the pan completely upside down and shake it all around and spread the flour easily throughout the entire pan. See for yourself…
After that you simply turn the pan upside down on the counter and tap the sides of the pan with a wooden spoon all the way around. I would do that a couple of times. Then remove the cling wrap from the sides of the pan, lift the pan up and you’ll be left with all the excess flour all on the cling wrap as seen in the picture below…
Then all you need to do is fold up the edges of the cling wrap and toss it with the flour inside. Believe me, this little trick saves a lot of time and mess. You’ll love it.
Lesson Learned 2 – Add the eggs individually and beat each of them for a long time: There is no leavening in this recipe (baking powder, soda). Leavening is traditionally used to make a cake rise in the oven. The only leavening agent in this recipe is the eggs.
Think of an egg as basically having three qualities – fat, foam and fat & foam. The fat is the yolk which primarily serves as a binder. It helps to make batters smooth and moist. The foam is the whites. Beat them into submission on their own and you get light stiff peaks that can be used for airiness in a recipe or to make a meringue.
The particular recipe relies on the fat and the foam. When mixed with sugar (like in a cake or cookie batter), eggs help trap and hold air — not quite as well as whipped egg whites, but enough to give the finished product some lightness and lift. And that’s what you are needing in this recipe. That is why it is important to make sure each egg is blended thoroughly. Do not add all the eggs in at the same time. It never mixes as well as you think and could affect the cakes ability to rise.
Also don’t crack the eggs directly into the batter. Since you are using so many eggs you don’t want to get to the fifth or sixth one and then find out you have a bad one as it drops in. Your batter will be ruined. In order to prevent this, crack each egg into a small dish before you add it to the batter. That way you can make sure you’re not adding a bad egg. I’ve only had this happen to me a couple of times, and it’s not fun. Believe me you don’t want to put yourself into a position of having to toss out all of those ingredients and start all over because you had one bad egg.
Lesson Learned 3 – Alternating the batters in the pan: I think I had the most fun with this part of the process. Once you create the two batters you alternate them by large spoonfuls in the pan.
After that you swirl the batters together being careful not to touch the edges or the bottom of the pan. I used a skewer that I used to grill vegetables. It was long enough and thin enough to give me control and to create some great swirls. Judge for yourself…
You add another layer of alternating batters, swirl again and you’re ready to pop the cake into the oven.
Lesson Learned 4 – Use instant espresso powder to enhance the flavor of the chocolate: In any recipe that includes chocolate I’d recommend adding at least a quarter teaspoon of espresso powder. It brings out the chocolate flavor so much more. Try making a chocolate recipe without it and then make the same recipe with it. You’ll be amazed at how much it enhances the flavor of the chocolate.
What I really like about this cake is it looks as good as it tastes. And I found it fun to make. I loved making the swirls! So try this one and tell me what you think. I just know you’ll love it.
Preheat the oven to 350. Grease and flour a 10 cup bundt pan. Set aside.
Cream the butter, cream cheese and sugar for approximately 5 minutes. The mixture should be light and fluffy.
Add in the eggs one at a time and combine each thoroughly. Add the vanilla and combine.
Mix together the flour and the salt. Add the flour a few large spoonfuls to the batter at a time until combined.
Whisk together the cocoa, espresso powder and hot water. Take half of the cake batter and stir it into the cocoa mixture.
Drop dollops of batter into the bundt pan alternating the chocolate and vanilla batters. Swirl the batters together being careful not to scrape the bottom or sides of the pan. Repeat the same process. (You should get two layers of alternating batter).
Bake for 70 minutes or until a toothpick inserted into the thickest part of the cake comes out clean.
Cool for 30 minutes before inverting the cake onto a serving plate. Dust the top with powdered sugar.
Lately I think I’ve become the queen of the appetizers. But as I mentioned in a previous blog my condo community hosts “happy hour” every Thursday and a bunch of us get together to eat some appetizers and drink some wine. It’s been a hoot. I promise I won’t solely be blogging about appetizers but I have to include this one. I’ve been wanting to make this for some time now and was so glad I did. It was so yummy and a nice departure from the usual varieties of chips and dips.
This appetizer is not only tasty but so colorful it brightens up any table. And a lot of it can be prepared ahead of time, which I did. That way the assembly doesn’t seem quite so overwhelming. So let’s talk vegetable pizza.
Lesson Learned 1 – Chop the veggies ahead of time: I found that to be a lifesaver. I chopped the veggies and put them in refrigerator bags. Then when it came time to assemble the pizza I just opened the bags and sprinkled them on the crust. It was a snap.
Lesson Learned 2 – This is a great refrigerator cleaning appetizer: I had a bunch of left over veggies in my refrigerator and so I decided to use them. I had a bag of carrot coins that I put into my mini food processor and pulsed to shred them. I had a couple of pieces of different kinds of peppers and I just diced those up. And I had a jar with some roasted red pepper marinated in olive oil and garlic and I chopped some of that up. It was great.
Lesson Learned 3 – To the best of your ability, pinch together the perforations in the crescent roll dough: This recipe uses refrigerated crescent roll dough as the crust. Do not separate the dough into pieces. Roll the dough out and pinch together the perforations to form as flat of a continuous base as possible. You can still see the faint outline of the individual pieces, as seen in the picture below, but that won’t matter once you apply the toppings.
The rest is easy. Just mix the cream cheese “sauce” and apply it to the dough, sprinkle on the toppings, cut and serve. I know you’ll enjoy this one!
Preheat the oven to 375. Roll out the crescent roll dough onto a 9/13 pan covered with parchment paper. Pinch together the perforations to form one continuous crust. Bake for 12 minutes and cool for 15 minutes.
Mix together the cream cheese, dressing mix and mayonnaise. Spread the mixture over the cooled crust leaving a small amount of room around the edges. Sprinkle with scallions, carrots, tomatoes, peppers, broccoli, roasted red pepper and cheddar cheese. Sprinkle the flour de sel lightly on top.
Using a pizza cutter, cut into squares. Plate and serve.
Nothing in this world compares to home made bread. There is something so comforting about it, it creates that feeling of “there’s no place like home” every time you smell it baking in the oven. And bread baking has progressed over the years from a process that took hours to much quicker and easier methods. To date I have made bread the traditional way (letting it rise over and over for hours and baking in a loaf pan), to making bread in an enameled cast iron dutch oven and now this third way of making it in a plain old cast iron skillet.
I’ve made this recipe a few times before I felt I perfected it and I’ll go through all of that in my lessons learned. But bottom line, even with the few blips I encountered I still wound up with wonderful homemade bread. The two versions I’m going to talk about in this blog are Cranberry Walnut Skillet Bread and Rosemary Parmesan Skillet Bread. Two very different varieties but two wonderful breads.
So let’s talk skillet breads…
Lesson Learned 1 – Use rapid rise yeast and make sure it is fresh: I had a jar of rapid rise yeast in my refrigerator and used it the first time I tried to make this bread. It never rose the way it was supposed to (the jar had been in the fridge for quite some time) and the bread wound up “doughy” as if it didn’t have enough air in it. The second time I made the bread I used fresh yeast and their was a marked difference in how much the dough had risen. Also make sure that you use warm but not scolding water when you activate the yeast. Scolding water will kill the yeast but very warm water will activate it.
The picture on the left shows the newly mixed dough. The one on the right shows what the dough will look like after it had risen in the bowl for one hour.
Skillet bread requires the dough to rise twice, once for an hour in the bowl and once for a half hour in the skillet. The picture above shows what the dough should look like after it has risen in the skillet for a half hour.
Lesson Learned 2 – Use only a small amount of olive oil to season the skillet and use good olive oil: What I really like about making bread this way is the crust you get from the cast iron skillet. Take a silicone brush and lightly coat the bottom and sides of the skillet. You really don’t want a lot of oil sitting on the bottom. That will give you a greasy crust. And make sure you use a good quality olive oil. I used a garlic infused olive oil when I made the rosemary parmesan bread and a mild flavored premium olive oil for the cranberry walnut bread. If you don’t overdo the oil the crust will have just the right amount of crispiness and will taste heavenly. Just make sure you use a good olive oil. I prefer the crust in this method compared to the crust you get when using an enameled cast iron dutch oven (in the process you do not oil the pan). That crust, to me, is a little tougher. But don’t get me wrong, both methods produce wonderful bread.
Lesson Learned 3 – Some recipes tell you to cut an “X” in the center (called scoring) of the dough before you put it in the oven – for this recipe DON’T: I truly don’t think you need to score the bread using this method. When you put bread in the oven it continues to rise and a tension begins to exist between the top formed layer and the softer dough beneath. Scoring is done to assist with the bread rising consistently and predictably during this process.
When I made the rosemary parmesan skillet bread I scored it in the center before I put it in the oven. It created a small crater in the middle of the bread as seen below. It didn’t hurt anything and the bread still turned out fine but I was looking for a more rounded look in the finished product.
When I made the cranberry walnut bread I did not score it in the middle and got more of the rounded look I was wanting.
Lesson Learned 4 – The dough will be very sticky when you go to transfer it into the skillet: I’ve read many versions of how to make this type of bread and most recipes tell you to flour your hands and the dough to successfully transfer it to the skillet. I don’t find that works unless you use a lot of flour and I’m not a big fan of baking a lot of flour into my bread crust.
What I do is take a silicone spatula and work the dough to the edge of the bowl and then quickly move the spatula to get the dough into the skillet. The beauty of this type of bread is that it doesn’t need to look pristine. The more rustic looking the better. And after the dough rises for a half hour in the skillet, many of the imperfections have disappeared. So don’t angst over transferring the dough to the skillet. It’s really pretty simple if you use a silicone spatula.
I couldn’t believe how simple this was to make. The hardest part is letting the dough rise for an hour and a half – the rest is easy. And to me there is nothing like homemade bread. So try one or both of these recipes and let me know what you think…
Skillet Breads - Rosemary Parmesan or Cranberry Walnut...
In a large mixing bowl combine the yeast and water. Add half the flour and mix together. Mix in the remaining flour along with either the rosemary or the cranberries and walnuts. If some of the flour is still dry add a little extra warm water until the dough is completely formed.
Cover the bowl securely with plastic wrap and let it rise until doubled in size, about an hour.
Brush some olive oil on the bottom and sides of a cast iron skillet using a silicone brush. Transfer the dough to the skillet and cover loosely with a kitchen towel. Let the dough rise for 30 minutes.
While the dough is rising, preheat the oven to 400 degrees.
After the dough has risen the second time put the skillet in the oven. If making the rosemary parmesan bread, sprinkle some chopped rosemary on the top of the bread before putting it in the oven. For rosemary parmesan bread, after 20 minutes remove the bread from the oven and sprinkle the top with the parmesan cheese. Let the bread bake an additional 20 minutes. For cranberry walnut bread, let the bread bake for 40 minutes straight.
Remove the bread from the oven. Using a spatula, transfer the bread from the skillet to a cooling rack. (This should be very easy but be careful because the skillet will be very hot). Slice and enjoy.
These breads can also be frozen. Cut them into two slice or more pieces. Cover securely with plastic wrap. Put pieces in a freezer bag. Close the bag while trying to eliminate as much air as possible from the bag. Your bread will stay fresh for one month.
A bunch of residents in my condo association have taken to meeting every Thursday for “happy hour”. It started last summer when the outdoor pavilion was finally constructed on our grounds and spilled over to the winter months with various residents opening up their condos to host. It’s a great way to get together and chit chat over a glass of wine and appetizers. Everything is BYO and it has evolved over time to quite the weekly thing to do.
So the challenge is what to make for an appetizer every week. No one is expected to bring anything but you know how that works. Someone in the group always brings cooked shrimp, someone always brings jalapeño poppers (frozen and made in the oven), various dips make appearances, the usual various kinds of chips, and one guy even brings 3 different bottles of good red wine (he is a wine aficionado and has a large free standing wine cellar in his garage loaded with various wines – he loves to share them). Now I’m not one to go to something like this empty handed, as you may well imagine, so each week I try to think of something I can do that will be different from the usual stuff that shows up at these events. (I will admit there have been a couple of times when I was not in the mood and I just opted for some store bought guacamole or a good quality unusual kind of dip). I’ve brought my Cream Cheese, Spinach, Scallion and Bacon Pinwheels and my Basic Bruschetta, and this time I wanted something easy to make, easy to pick up and eat and interesting to look at. Hence my hard salami roll ups…
I based this recipe on something I saw online but wanted to add a little more zip to the cream cheese filling. I opted to add a few scallions and season the mixture with garlic Fleur de Sel and that took the filling over the top. Fleur de Sel is French sea salt. It’s grains are courser in texture than kosher salt and is typically used to brighten up a dish once it has been prepared. It was the perfect addition to the filling.
Needless to say these tasty little morsels were gobbled up pretty quickly so I knew I had a hit on my hands. They are a little time consuming to make but the end result is a tasty little morsel that your guests can just pop in their mouths. Everyone loved them.
So lets talk hard salami roll ups…
Lesson Learned 1 – Buy good salami: I used Boars Head salami sliced fresh from the deli. You want to make sure you use good salami as it is a key flavor ingredient in this recipe. Although it may be a little more expensive remember the old saying – garbage in, garbage out. You want the salami sliced thin but not paper thin. If you cut it almost like a shaving it will be very difficult to work with.
Lesson Learned 2 – the process for making these is just the same as making any type of tortilla roll up: In order to do roll ups you have to master the technique of how to apply the filling and learn how to perfect the roll. It’s really very simple and there only a few things to remember.
First is how to apply the filling on the roll up. You don’t want to put the filling on too thick. The picture below gives you an idea of how to do the filling. It is important to leave open edges all the way around so you don’t have filling oozing out of the sides or end seam when you roll up the salami. The thickness of the filling comes from how it spreads inside the salami during the rolling process so you don’t have to worry about that.
Second is how to do the rolling. Whether it’s salami, a tortilla or whatever you are using as the base of the roll up the process is the same. Think of the roll up in terms of top, bottom and two sides. First you want to take a small amount of the two sides and and fold them in toward the center. Then you take the bottom and begin rolling the salami onto itself. The picture below clearly shows how the sides have been folded in and the rolling process started at the bottom.
Continue rolling until you have created a log as pictured below.
I use this technique when making my pinwheels or when making enchiladas, it’s always the same. If you are careful in terms of how you put in your filling and master the folding and rolling, it becomes a breeze!
Lesson Learned 3 – What if you don’t have garlic Fleur de Sel: The answer is simple – just use garlic salt. But be careful. Garlic salt has a much finer consistency so you may want to cut the recipe portion in half at first, mix it in and then taste the filling to make sure it isn’t too salty. Remember the olive garnish will be salty as well so you don’t want the filling to negatively add to that.
Lesson Learned 4 – Make sure you chill the rolls after you make them: You create the filling by getting the cream cheese softened to room temperature and mixing it with the other ingredients. Once you create your rolls the cream cheese is too soft to cut the rolls into pieces without creating a big squishy mess. You need to chill the rolls for at least an hour so the cream cheese can harden again. (I put them altogether in a refrigerator bag as seen in the picture below). That will make the pieces much easier to cut. Also be sure to use a very sharp knife when cutting the pieces to avoid squashing the rolls.
Lesson Learned 5 – For a smaller appetizer just cut the recipe in half: Cutting the recipe in half also makes plenty of roll ups as well. You will have some cream cheese mixture left over but you can use it on a bagel for breakfast or on a baked potato at dinner. I’m sure the remainder won’t go to waste. Think about how many people will be at your gathering and plan from there.
I had a lot of fun making these and it was the perfect appetizer finger food. I found some colorful cocktail forks and all the guests had to do was pick one up, pop it in their mouth and dispose of the fork. It was fun to make and easy to eat. Try it and let me know what you think.
1/2 pound of good hard salami, sliced thin but not paper thin
1 8 oz. package of cream cheese, softened to room temperature
3-4 scallions, chopped
1/4 tsp. garlic Fleur de Sel
1 24oz jar of green olives stuffed with pimento
Decorative cocktail forks
INSTRUCTIONS:
Beat together the softened cream cheese and scallions until well combined. Add the Fleur de Sel and stir to combine.
Place a small amount of the cream cheese mixture on a piece of salami, making sure to leave room all around the edges. Take the two sides and fold them in slightly toward the center. Begin rolling the salami from the bottom all the way to the top making sure the sides stay folded in during the rolling process. Repeat the same process with the other slices of salami. Place the rolls in a refrigerator bag and chill for at least one hour.
Remove the rolls from the bag and cut into bite-sized pieces (approximately 3 slices per piece of salami). Pierce an olive with a cocktail fork and push it in to the top of the roll up. Serve.
I belong to a book club in our condo community and at the last meeting I came across this recipe. The hostess served this cake but I didn’t eat any of it. As I was leaving she asked if I would like to bring a piece to my husband. I said sure. Well my husband raved over it so much I had to get the recipe and make it myself. OMG this has to be one of the lightest, moistest and most delicious coffee cakes you’ll ever make. I actually think this recipe is foolproof as I didn’t even need to adjust it to high altitude.
I think the cake gets its moistness from the 2 cups of sour cream you add to the batter. Regardless it is one of the best coffee cakes I’ve ever made. So let’s talk sour cream coffee cake…
Lesson Learned 1 – You need a specific cake pan for this recipe: When I got a copy of this recipe it called for it to be made in a 10 cup flute pan (angel food cake pan). I did not have that but I had a 10 cup bundt pan so I used that. It worked just fine. The only difference is if you want your cinnamon and nut mixture to be on the top of your cake use a flute pan. If you use a bundt pan it will be on the bottom of your cake – I’m not sure that really matters one way or the other. It still tastes great!
If you use a flute pan you only need to grease the sides and the bottom of the pan due to its flat surfaces. If you use a bundt pan I would recommend both greasing and flouring the pan. That way the cake will release easily from all of the crevices in a bundt pan.
Lesson Learned 2 – Be systematic in how you prepare this cake: I’ve found whether in cooking or baking your results are much better if you systematically approach the recipe and organize yourself. Here’s what I recommend (and this applies to almost all baking):
Take your eggs and butter out of the refrigerator at least a couple of hours before you begin making the cake to get them to room temperature
Make sure you dust your cake pan and your mixing bowl(s) with a cloth before your begin anything – they are not immune to attracting dust and you certainly don’t want dust on your cake or in your batter
Take the time to thoroughly grease and flour your pan – if using a bundt pan make sure to get the flour in all the crevices but also make sure you remove as much excess flour as possible – I normally do that by holding the pan over the garbage can and banging it all over with a wooden spoon to remove the excess
Preheat your oven first thing – it’s always better to have your oven sit at the desired temperature for a while versus putting the cake in just as it reaches the correct temperature
Put together the dry ingredients and either sift them together or combine them with a whisk
Put together the ingredients for the topping and set them aside
Don’t be afraid to take some time to combine the butter and sugar (4 – 5 minutes) – the fluffier that mixture the better your cake batter will be
Make sure you mix your eggs in one by one – they will not combine thoroughly if you put them all in at the same time; the same applies to your dry ingredients – don’t add them all at once but in stages – this will ensure everything is thoroughly combined
Lesson Learned 3 – This cake freezes beautifully: This recipe produces a large cake that really only stays fresh for a couple of days. If you’re not making it for a party or to bring to work I suggest you take what you don’t think you’ll eat in a couple of days and freeze it. I wrapped mine in 2-slice portions. Make sure you wrap the pieces tightly in plastic wrap and then put them in a freezer bag(s). Let as much air out of the freezer bag as you possibly can. By doing this you’ll have fresh moist cake for a month!
I’m not kidding when I say I think this cake is foolproof. It is one of the few recipes that I did not have to adjust for high altitude. My husband loves this cake and I know you will too!
Preheat oven to 350 degrees. In a small bowl combine the walnuts, cinnamon and 3/4 cups sugar. Set aside.
Grease a 10 cup tube pan or grease and flour a 10 cup bundt pan. Set aside. Sift together the dry ingredients (flour, baking powder and soda) and set aside.
Using a stand mixture, mix together the butter and 1 3/4 cup sugar until light and fluffy. Beat the eggs in one at a time. Add the sour cream and vanilla and beat to combine.
Add the dry ingredients in portions and beat until well combined.
Pour half the batter into the prepared pan. Sprinkle half of the nut mixture on top of the batter. Add the remaining batter on top. Sprinkle with the remaining nut mixture.
Bake for 60 minutes or until the cake pulls away from the side of the pan. Cool the cake in the pan for about 15 minutes and then remove the cake from the pan and cool completely on a wire rack.
One thing I’ve learned over the years is that the most simple or basic recipe can be the most impressive. I remember making my Cream Cheese, Spinach, Bacon and Scallion Pinwheels and almost not publishing that recipe because I thought it was too remedial and people would laugh. To this day it is one of the most popular recipes on my blog. I will never second guess a recipe again.
This recipe came out of my desire to finally tackle making bruschetta and my need to bring an appetizer to a community event. Since I’d never made it before I decided to start out with a basic recipe that included only tomatoes, onion, sautéed garlic, garlic infused olive oil, some fresh lemon juice and fresh basil. It was divine! You can tell your appetizer is a hit when it’s completely gone while others still remain. This one was eaten up quickly.
The process for making bruschetta is relatively simple. You spend most of your time chopping and dicing, which I love. It can be a little more labor intensive than other appetizers, but the result is so worth it. This particular recipe is bright, fresh and natural, a killer combination for an appetizer.
So let’s talk basic bruschetta…
Lesson Learned 1 – Finding fresh basil at the grocery store: This probably sounds silly but I had a hard time finding fresh basil at the grocery store. Now I know it’s Winter, but fresh basil is pretty much a staple that’s available almost any time of year. So there I was looking through the refrigerated packages of various herbs and bemoaning the fact that the store did not have basil. I got so frustrated I went to the service desk to ask if there was a reason why the store had no fresh basil. The associate called someone in produce and they told her where it was located. It was not with the other refrigerated herbs.
BUT, what I found out and didn’t know is that basil does not do well with refrigerationand is better kept at room temperature and that’s why it’s not kept with the other refrigerated herbs. That was news to me. I decided to test that hypothesis and sure enough, when I looked for basil at other grocery stores it was kept at room temperature and not with the refrigerated herbs. Since I planned on using most of the basil right away I didn’t refrigerate it when I got home.
I did a little research on keeping basil fresh and here’s what I found. To keep basil fresh, trim the stems and place them in a glass or jar of water, just like cut flowers. Loosely cover the basil with a plastic bag and leave it on the counter. Although certain herbs, such as parsley and cilantro, can be stored this way in the fridge basil does better at room temperature. Live and learn, right?
Lesson Learned 2 – Browning the garlic: You use a lot of garlic in this recipe and it’s a key flavor component. But garlic can be tricky and easy to burn. Saute your chopped garlic in some olive oil until it has a light golden brown color (see the picture below). Stir the garlic regularly while it is sautéing to prevent any burning. Remove it from the heat and immediately put it in a bowl so carry over cooking is minimal. Make sure to include the oil from the pan with the garlic as you need to add that to the tomato mixture as well.
I’m often asked if using prepared cloves of garlic from a jar is ok. Yes it is, but be aware that those cloves are not as potent as fresh garlic so you may need to use more of them for a good garlic flavor. The jarred cloves are very convenient, but I prefer using fresh garlic whenever I can.
Lesson Learned 3 – The tomatoes used in this recipe are very important: Using the wrong kind of tomatoes can make your bruschetta soggy. You need a tomato that is ripe but firm. Any tomato will be watery so you want to minimize that as much as you possibly can.
I used small campari tomatoes. You can also use vine ripe tomatoes that are more firm. Stay away from over-ripe soft tomatoes. You will wind up with a mixture of mush if you use them. Once you put together the tomato mixture let it chill in the refrigerator for at least a half hour. That way the ingredients get better acquainted and some of the water drains out of the tomatoes. I drained the water from the mixture when I took it out of the refrigerator and used a slotted spoon when I was putting the tomato mixture on the bread to eliminate as much moisture as I could. Doing this also prevents the baguette from getting soggy.
Lesson Learned 4 – Use a good olive oil: I used a garlic infused olive oil in this recipe. I’ve also seen basil infused olive oils and that would be good as well. Olive oil is also a key ingredient in bruschetta so you want to make sure it’s flavorful and not bitter.
The real work in this recipe is chopping up the ingredients in the tomato mixture, slicing and baking the baguette. Once that’s done, the assembly goes pretty quickly. This is such a good looking, refreshing and healthy appetizer. It will make a great impression at your next gathering. Try it and let me know what you think.
1 6oz. French baguette loaf, sliced in 1/4 inch slices
Garlic infused olive oil (approx. 3 Tbs. plus some for drizzling)
2 large vine ripe tomatoes or about 10 small campari tomatoes, diced
4 cloves of garlic, minced
1 small white onion, diced
2-3 Tbs. fresh basil, chopped plus some for garnish
1/2 small lemon, juiced
Kosher salt and freshly cracked pepper, to taste
Shredded romano cheese for topping
DIRECTIONS:
Preheat the oven to 350 degrees.
Saute garlic in 1 Tbs. olive oil until fragrant and golden brown. Remove from heat and set aside.
Combine tomatoes, onion and basil in a mixing bowl. Add the garlic along with the olive oil from the pan. Add the lemon juice and season with salt and pepper. Mix well. Chill in the refrigerator.
In a small bowl season 2 Tbs. of olive oil with salt and pepper. Lay baguette slices on a parchment paper lined baking sheet. Using a silicone basting brush baste the slices with the olive oil mixture. Bake for 8-10 minutes or until the edges are slightly browned.
Remove the tomato mixture from the refrigerator and drain any liquid from it. Using a slotted spoon put some of the tomato mixture on all the baguette slices. Top with a small sprinkle of shredded romano cheese. Add some additional chopped basil for garnish. Drizzle a small amount of olive oil on all the slices. Place slices on a decorative platter and serve.
I have to admit I’ve not cooked a lot of eggplant over the years. If memory serves me right I think I may have dabbled into making eggplant parmesan once but the result was less than memorable. But I happened to be at the market the other day and they had the most gorgeous display of eggplant I’ve seen in a long time. All black and shiny and firm. I couldn’t resist getting one. And I vowed I would not let it spoil in my vegetable bin but do something that would make me want to have eggplant again. And boy did I ever!
I decided to make eggplant fries, but by baking them in the oven versus frying them in oil. I was really jumping into the deep end of the pool on this one as I’d never attempted something like this before with eggplant. But I thought, what the heck – what do I have to lose, right? Now in retrospect I am so glad I did because I guarantee you I will make these often. They are s-o-o-o-o good!
So let’s talk about baked eggplant fries…
Lesson Learned 1 – After you cut the eggplant make sure you salt it and let it rest for 20-30 minutes. The first step of the process is to cut the eggplant into 1 inch rounds.
The picture above shows you the amount of 1 inch rounds you get from a small-medium sized eggplant. It is very important to salt both sides of the rounds and then let them rest. The salt will “sweat” out the eggplant and remove any bitterness. After 20-30 minutes you will be surprised at how much clear liquid is on each slice. Wipe them off with a paper towel and you are ready to go.
Lesson Learned 2 – Cutting the fries. It’s hard to believe but the rounds pictured above produced close to 40 fries. The secret is to first cut about 4 per each round. Then because the rounds are so thick you take each “fry” turn it on its side and vertically cut it once again. That gives you 8 fries per round. I also trimmed some of the skin off on the fries that were cut from the end of the rounds. A small-medium sized eggplant can easily serve 4 people.
Lesson Learned 3 – The secret to dredging. This recipe calls for a traditional dredging station consisting of flour, beaten eggs and bread crumbs. What I’ve found is the most important way to ensure a nice coating on your eggplant is to make sure you don’t over-flour them. The eggplant has a degree of moisture that will automatically allow the flour to cling to it. Once you dredge the fries in the flour, tap them lightly against the palm of your hand to remove any access or areas that have too much flour. I’ve found if an area has too much flour the egg wash does not cling to it. With the nice light dusting of flour, the egg clings beautifully which then makes the bread crumbs adhere well to the fries.
Dredged Fries Before Baking
Lesson Learned 4 – Set up a sheet pan with a wire rack for the fries: This can be a messy recipe so I advise that you line your sheet pan with foil before you put the wire rack on top of it. That way any baked on drippings will be easy to clean up. And make sure you spray the wire rack with olive oil cooking spray before placing the fries on the rack. You don’t want them to stick.
Lesson Learned 5 – You can use regular or panko bread crumbs: I’ve made this recipe both ways and both ways are delicious. The panko bread crumbs will provide even more of a crunch to the fries but regular bread crumbs work just as well and seem to brown a little better. I really don’t have a preference so use whatever you have on hand. At the bottom of the post I have pictures that show a batch with bread crumbs and then a batch with panko.
That’s it! The rest of the work is done by the oven. These fries come out crispy and flavorful. Pair them up with some Tzatziki or warm marinara sauce and your tastebuds will think they’ve died and gone to heaven. Enjoy this one – it’s a keeper!
1 small-medium eggplant (big enough to produce a minimum of five 1 inch rounds)
3/4 cup flour
2 eggs, beaten
1 cup bread crumbs (I used roasted garlic bread crumbs)
1 tsp. garlic powder
1 tsp. dried oregano
A pinch of salt and pepper
Olive oil cooking spray
DIRECTIONS
Preheat the oven to 425
Slice the eggplant into 1 inch rounds. Sprinkle both sides of the rounds with salt and set aside on a paper towel for about 20-30 minutes. Cover a 9 x 13 baking sheet with foil. Put a wire rack on top and set aside.
Mix together the bread crumbs, garlic powder, oregano, salt and pepper. Prepare a dredging station consisting of beaten eggs, flour and bread crumb mixture.
Pat the eggplant rounds dry. Slice each round into 4 slices. Turn each slice on its slide and slice in half vertically.
Dredge the fries first in the flour, then the egg mixture and then the bread crumbs. Spray the wire rack with some olive oil cooking spray and set the fries on the rack. Spray all the dredged fries lightly with the olive oil cooking spray. Bake for 10-15 minutes or until the fries are golden and crisp.
I don’t know about you but it seems after the holidays I always have at least one bag of fresh cranberries that I haven’t used. In the past the bag would jut sit in the refrigerator until I threw it out. I always felt it was such a waste as you can only get fresh cranberries around the holidays. But I finally discovered how to use those cranberries in a way I never considered before. That is, to make a wonderful jam. I tried it on my morning toast the other day and just loved it!
There are only a few ingredients, cranberries, brown sugar and water. No need to add any pectin to this recipe as cranberries are a natural source of it. Pectin is a starch that occurs naturally in the cell walls of fruits and vegetables. When these fruits and vegetables are cooked to a high temperature in combination with acid and sugar, a gel is formed. This is what gives jams and jellies their set when they cool. Pectin by itself can be used in other dishes that require food to gel or thicken. It’s also used as a fat substitute in some baked goods. But the cranberries naturally release pectin when they are boiled. That pop, pop you hear is the cranberry splitting open and releasing the pectin.
Now I realize you probably have already either used your remaining cranberries or thrown them out (like I used to do) but this is a good recipe to have in your back pocket for next holiday season. I promise I’ll remind you of it then so don’t worry.
So let’s talk cranberry jam
Lesson Learned 1 – You can control the sweetness of the jam: The recipe uses brown sugar. I suggest using the least amount and tasting the mixture before you reduce the heat and begin the stirring process. You can always add more sugar. I liked this recipe on the tangy side so I only added the least amount of brown sugar.
Lesson Learned 2 – For the last 10-15 minutes you need to stir the mixture constantly: You need to make the cranberries release the maximum amount of pectin. You also need to break down the berries for the jam. Cooking them the last 10-15 minutes accomplishes that. As I was stirring I was also taking some of the larger berries and pressing them against the side of the pan with a wooden spoon. That helped to break the berries down as well. After a while you will see a noticeable difference in the texture of the mixture – more jam-like. That is when you can stop.
Lesson Learned 3 – You can adjust this recipe: Depending on how much cranberries you have left you can adjust this recipe to that amount. So if you have a little or a lot, you can still make this wonderful jam.
I’m so pleased to know that I no longer need to waste any fresh cranberries after Christmas. This recipe makes a delightful unique jam that you will enjoy or toast, pancakes, or in any other way you use jam.
Bring the cranberries, sugar and water to a boil. Reduce the heat and let cook for 10 minutes stirring occasionally. At this point taste the mixture to see if it needs more sugar. Add more if necessary.
Reduce heat to a very low setting. Cook for an additional 10-15 minutes, stirring constantly. Break apart larger cranberries against the side of the pan with a spoon if necessary.
Cool in the pan for about 30 minutes. Transfer the mixture to a mason jar, cover and chill.
It seems that lately I’ve been obsessed with my slow cooker. You have to admit it is a major convenience, especially when you have a busy day planned. Which was the case with me last week. But even when my calendar is full I still want to have something good and home made for dinner (unless I’m so exhausted I suggest we just go out to eat). The beauty of the slow cooker is that you get it ready early in the day when you have energy so that later in the day you go home to amazing smells and a dinner that is ready to serve without a lot of time and effort on your part. I just love my slow cooker!
I’m always experimenting with basic ingredients and I’ve really never used ground beef as the main protein in one of my slow cooker meals before. So I thought, what the heck, why not give it a try. And I have to say I really, really liked this meal. It’s hearty, flavorful and all you need do is serve it with some crusty bread, or corn bread or a salad and you’re done.
So let’s talk slow cooker ground beef stew…
Lesson Learned 1 – Use a lower fat ground beef in this recipe: I used 93% lean ground sirloin for this recipe. There are some recipes that I prefer a larger fat content but for this one you don’t. You don’t want the crock to be swimming in grease when it’s done. Believe me, it’s worth it to go higher end on the ground beef for something that is cooking for 7 hours.
Lesson Learned 2 – Partially cook the ground beef before putting it in the slow cooker: Many times I’ve talked about the importance of browning meat before you put it in the slow cooker. Slow cookers do not brown meats and so your meat can wind up looking grayish if you don’t brown it first. If that doesn’t bother you then just dump the meat in. But I say you eat with your eyes first and so you want the dish to look pleasing as well. Just cook the meat so there’s only a little pink left. The slow cooker can then handle the rest.
Lesson Learned 3 – Cut your veggies and potatoes into large chunks: I know I’ve said this over and over but it’s worth repeating. If you don’t you cut your veggies into large chunks they will turn into mush. Think about it. The veggies are cooking for 7 hours. Unless they are of substantial size they will break down. Below is the picture of my potatoes and veggies before I added the meat. You can see they are nice and chunky and that’s what you need in order for them to stand up to the cooking process.
Lesson Learned 4 – You can use any kind of potato you like: When I made this I used yukon gold potatoes. Yukon golds have a very thin skin so you don’t have to peel them. I always peel them because my husband has a hard time with the skins. Whether you do or not is totally your preference. You can use red potatoes or russets. I would suggest peeling either one of those if you decide to use them.
Lesson Learned 5 – Seasoning is very important when using a slow cooker: If you don’t season the ingredients well your food can turn out bland. You’ll want to salt and pepper the ground beef when you’re browning it. You’ll want to salt and pepper the onions, carrots and potatoes after you put them in the slow cooker. After you mince the garlic sprinkle it over the veggies and potato. Add the oregano to the tomato sauce. Making sure you season this way will give you a flavorful result.
I will admit I wasn’t too sure about this recipe and I was very pleasantly surprised at how it turned out. Plus it provided some delightful smells in the kitchen will it was cooking. For a simple, no fuss, easy meal the recipe more than fits the bill. Try it and let me know what you think.
2 large potatoes, peeled and sliced in large chunks
3 large carrots, cut in chunks
I medium yellow onion, sliced in chunks
2 garlic cloves, minced
1- 6 oz. can of tomato paste
1 15 ounce can tomato sauce
2 Tbs. Worcestershire sauce
1 tsp. dried oregano
Kosher salt to taste
Freshly cracked black pepper
Olive oil cooking spray
DIRECTIONS:
In a medium skillet, brown the ground beef until there is only a slight bit of pink left in the meat. Set aside. In a large bowl combine the tomato paste and sauce. Stir until completely combined and smooth. (This should give you a nice thick sauce). Add the Worcestershire sauce and oregano and stir to combine.
Spray the inside of the crock with cooking spray. Add the potatoes, carrots and onions. Season with salt and pepper. Sprinkle the minced garlic over the vegetables and potatoes. Add the meat on top. Pour the tomato sauce over the meat. Stir to combine.
Cover and cook on high for 7 hours. Do not lift the lid during the cooking process. Serve with a salad and some crusty bread.
I don’t know about you but after the holidays I crave eating light. My body just wants to go back to a more reasonable routine and dictates that my diet consist of mostly feel good food. And after a few days I feel back on track. Does that happen to you?
Quite often that change in diet consists of revisiting what I call “free” foods. By free foods I mean those that technically have no calories. Don’t get me wrong, all food has calories, but free foods are the kind that take more calories to digest than what they have resulting in a negative balance of calories. And one of my all-time favorite free foods is cucumber.
There are many ways you can serve cucumber that ramps up the calories, but this particular recipe, even though it does contain some sugar (and only if you feel you need it), keeps it down to a dull roar. This recipe is so easy to make and if you like tangy foods like I do, it will easily become your go-to salad option.
So let’s talk easy, tangy cucumber salad…
Lesson Learned 1 – Yes the dressing has sugar in it, but you can regulate that: After pouring through several variations of this kind of recipe I found that the amount of sugar used to offset the tartness of the vinegar can vary. Personally I like tart. I can eat a lemon like a piece of fruit. So I do not find apple cider vinegar to be over the top in terms of tartness. So here is my suggestion. Start with a light teaspoon of sugar (or maybe even no sugar at all). If after you taste the mixture you think it is too tart, add a little more. I would not go any higher than two teaspoons. After all this recipe is designed to be tangy.
Dressing Mixture
Lesson Learned 2 – Use a mandolin slicer to get nice thin, even slices: Nothing replaces a mandolin slicer for consistency in slicing. The main drawback of the mandolin slicer is the potential for slicing your skin as well, especially if you aren’t paying attention. Always use a mandolin slicer with caution, but use it to get the best results in slicing.
Lesson Learned 3 – This dish is not meant to be eaten immediately: This recipe tastes much better after it has a little time to sit so the cucumbers and dressing can get well acquainted. I would let it sit a minimum of 1 hour before serving. It’s even better if you let it sit for about 4 hours.
Lesson Learned 4 – This recipe is best if eaten with 2 days: Make only enough so that you will either finish it at one meal or for have it only for a couple of days. After that the cucumbers get lose their freshness and get too limp.
Quick, easy and flavorful. That’s what this recipe is all about. Try serving this as a replacement for a side salad or use it as a bed for a nice piece of roasted salmon as pictured below. You will love it, I guarantee it!
1-2 English Cucumbers (depending on size) sliced into 1/8 inch slices
1/4 cup apple cider vinegar
2 Tbs. olive oil
1-2 tsp. sugar (start out with none or a light teaspoon, taste and go from there)
1 tsp. kosher salt (add more if needed)
1/2 tsp. freshly cracked pepper
2 Tbs. fresh chopped chives
DIRECTIONS:
In a medium bowl mix the vinegar, olive oil, sugar, salt and pepper. Mix well. Slice the cucumbers and chop the chives. Add the cucumber and chives to the dressing mixture. Stir till well combined. Cover and let sit in the refrigerator for at least an hour. Serve as a salad or as an accompaniment to a meal (see roast salmon suggestion above).
Happy New Year! Here’s to another year of great recipe sharing and the many lessons learned along the road to cooking and baking successes.
More and more I’ve been using my slow cooker and have become increasingly pleased with my results. The slow cooker is such a handy dandy tool and I like some of the things that I’m learning I can do with it.
I love this recipe for a couple of reasons. First, it’s really delicious. Second, it makes a large batch so you can have it as a main dish for a party or freeze a bunch of meals for those nights went you want something good but easy. With a recipe like this, all you need add is a small salad and some crusty bread and you have one heck of a meal.
So let’s talk slow cooker Penne Chicken Parmesan
Lesson Learned 1 – The process for making this meal could not be any easier: The steps to the process are pretty basic.
Prepare the sauce…
Sauce Ingredients
2. Pour a little of the sauce on the bottom of the slow cooker. Add the chicken breasts. Season them with salt and pepper.
Seasoned Chicken Breasts
3. Pour the remaining sauce on top of the chicken breasts and cook on low for 4 hours.
Cook on low for 4 hours
4. Cook the pasta according to package instructions. Remove the chicken breasts from the sauce and shred. Add pasta and shredded chicken back to the sauce and cook for an additional 30 minutes.
Shred the chicken
5. Add parmesan and mozzarella and cook for an additional 30 minutes.
Lesson Learned 2 – The dish makes the best leftovers: I took the leftovers and froze them in meal sized packages. When I wanted to make it I thawed a package and put it in a casserole dish. I added some more parmesan and mozzarella on top and and some Italian seasoning and baked it covered with foil for 45 minutes at 375 degrees. I removed the foil and baked for an additional 5-10 minutes or until the cheese started to turn a nice golden brown. The picture below is how I served the leftovers. The leftovers tasted divine and from the look of them you would never have guessed they were leftovers.
This is an easy, versatile meal – perfect for this time of year when you’re busy trying to manage the holidays. You’ll feel pampered without a lot of work, and who doesn’t like that. Try this and let me know what you think!
2 Tbs. fresh italian parsley, chopped for garnish, optional
Cooking spray
DIRECTIONS:
In a large bowl, combine the crushed tomatoes, tomato paste, onion, mushrooms, basil, oregano, and parsley. Stir to combine.
Spray the inside of a 6 qt. slow cooker with cooking spray. Take one cup of the tomato mixture and spread it on the bottom of the crock. Place chicken breasts on top of the sauce. Salt and pepper the chicken breasts. Cover the chicken breasts with the remaining tomato sauce. Cover and cook on low for 4 hours.
Prepare the penne pasta according to package directions. (this step can be done ahead of time and the pasta put into the refrigerator. About 1/2 hour before adding the pasta to the sauce, take it out of the refrigerator to remove the chill – see lessons learned above).
Remove the chicken from the slow cooker and shred using two forks. Add the chicken and pasta back to the slow cooker, cover and cook on low for another half hour. Add the parmesan and mozzarella on top, cover and cook for another 30 minutes.
Serve immediately and garnish with fresh chopped parsley, if desired.
Ever since I can remember I’ve made cookies for the holidays. My mother started me out when I was in high school (I think she wanted to transition the job to someone else) and the rest is history. As you can imagine I’ve had many successes and failures over the years but I’ve also developed a short list of my all-time favorite cookie recipes. And that is what this blog is all about – sharing my favorites with you. Just click on the pictures and they will link you to my recipes. I hope you enjoy them and make all of them. I guarantee you, they will all be a big hit.
The first cookie I’ve made for as long as I can remember and it’s stayed tried and true through several decades – the Nestle Toll House Chocolate Chip Cookie recipe. There is no better chocolate chip cookie recipe and I’ve tried a lot of them. I was having coffee with a friend the other day and we both agreed that if you’re going to make chocolate chip cookies this is the only recipe to use. And every year it has been my tradition to begin holiday baking by making these cookies. The cookie dough is divine (admit it, you eat this cookie dough), the cookie is to die for and they freeze beautifully so you can enjoy them for several weeks. I’m including the link to this recipe below the picture. Making Toll House Chocolate Chip Cookies means Christmas to me.
I love all of the cookies in this blog but I definitely have my favorite. In my estimation nothing beats my iced cinnamon chip cookie. The tartness of the cinnamon combined with the sweetness of the cookie topped with a cinnamon cream cheese frosting is as good as it gets. The challenge with making these cookies is finding cinnamon chips. My local grocery stores used to carry them but not anymore, so I have to order them online. But they’re so good it’s totally worth it. If you try any of these recipes, try this one. It is my absolute favorite!
Cinnamon Chip Cookie
Iced Cinnamon Chip Cookie
The iced cinnamon cookie recipe displaced my next cookie recipe as my all time favorite. For many years it was my triple chocolate brownie cookie. If you love chocolate, this is definitely the cookie for you. The three kinds of chocolate, the brownie-like consistency of the cookie and the semi-sweet chocolate drizzle are simply to die for. I make this cookie every year and it’s alway a hit.
Triple Chocolate Brownie Cookie
I also love my iced cranberry orange walnut cookies. The combination of cranberry and orange just screams the holidays to me. I love the tartness of fresh cranberries combined with the flavor of orange and the sweetness of the cookie dough. Add some walnuts and you have a killer combo! These cookies look festive and are easy to make. Drizzle them with some glaze and you have a holiday delight!
Iced Cranberry Orange Walnut Cookies
No respectable holiday cookie compilation would be complete without something that looks and tastes like peppermint. These cookies fit the bill. My peppermint twist kisses cookies not only boast the holiday colors but also bring together that great holiday combination of peppermint and chocolate. These cookies tastes divine and dress up any holiday cookie tray.
Peppermint Twist Kisses Cookie
And my last favorite is technically not a cookie, it’s fudge. I tried making fudge last year and could not believe how easy it was. This fudge brings together the classic combination of chocolate and peanut butter for a delightful holiday treat.
Chocolate Peanut Butter Fudge
Home made cookies make great holiday gifts. Just put a few of them into a holiday bag, tie with some festive ribbon, and you’ve got a gift that’s better than most anything you can buy. Enjoy making them, enjoy eating them, enjoy sharing them.
I’d like to take this opportunity to thank everyone who checks out my blog. I hope the recipes are fun and the information helpful. I wish you, your family and all of your friends a very Merry Christmas and a Happy New Year! And in the immortal words of Tiny Tim, “God Bless Us, Everyone!”
Yahoo – the holidays are here. And with them come the parties and the food, and the singing and the making merry and bright. And you can’t deny food is definitely a key part of making holiday gatherings memorable.
I’ve been doing this blog for several years now and have posted a wide variety of recipes. Undoubtedly some of the more popular ones I’ve posted are the appetizers. And what’s a holiday party without appetizers. So this blog is dedicated to putting in one place all of my most popular appetizer recipes. Make one or make them all but I guarantee you anyone one of them will be a hit at your holiday parties.
This recipe is perhaps on of the most popular recipes I’ve ever posted. I almost didn’t post it because it’s so rudimentary I thought people would think I was selling out. Much to my surprise it was and continues to be a big hit. The most difficult part of making this recipe is choosing your favorite kind of tortilla. The rest is so easy you won’t believe. A former colleague of mine called the recipe “red neck sushi”. Call it what you like, it’s fabulous and will always be a hit!
Cream Cheese, Bacon, Spinach and Scallion Pinwheels.
Lately I’ve experimented with making cheese balls. Once again I was certain cheese ball recipes would not be popular with my readers. I was wrong. Seems like people still like them. A friend told me one of her husband’s favorite sayings is “the party does not end until the cheese ball is gone”. This particular recipe is special as it can double as an appetizer or a dessert. And the drizzle of caramel sauce on the top gives it a special festive touch for any holiday party.
When I say BEST EVER, I mean BEST EVER! The recipe was actually an accident. I found a recipe for meatballs that called for vegetable flakes. In my naiveté I used red pepper flakes, because after all a red pepper is a vegetable, right? (those were the days when I was mostly lost in the kitchen). Well, the rest was history. I’ve been making this recipe for years and it has been passed down to family and friends many times over. I know you’ll just love these meatballs and they will be a big hit at your holiday party!
This particular recipe is my holiday staple. It’s so special and so flavorful it dresses up any holiday gathering. I’ve actually had people ask me to pack leftovers of this one. I’ve also used leftovers to make a quick sandwich. Just toast up some bread and away you go. I guarantee you will enjoy this one.
I love this particular recipe not only because it tastes so good but it looks so festive when put in a bread bowl. Remember you eat first with your eyes, and my serving suggestion for this one plays right into that. This is a great vegetable dipper recipe that will keep them coming back for little bites over and over again. I served this one for New Year’s Eve last year and it was a huge hit!
I had never made candied pecans until last year. I guess I thought they’d be hard to make. Boy was I wrong. And they are so yummy, you’ll wonder why you never made them before. These are good not only as an appetizer but also as a gift. Just put some in a mason jar and add a festive bow and you have a great gift. You simply have to try this one.
My last recipe is another cheese ball. This is a savory cheese ball and has killer flavor. I brought it to a pot luck at work and it got devoured in no time. The key to this one is letting the ingredients meld overnight. What I like about this cheese ball is that it looks so professional but is so easy to make. It will be a hit at a holiday party or any gathering you have during the year. Enjoy!
Cheese Ball
I hope you’ve found this appetizer compilation helpful. Make any of them, make all of them. They are all fabulous!
If you’re like me you have a taste for turkey and stuffing far beyond Thanksgiving. But who wants to buy a big old bird all the time and roast it in the oven? There’s got to be a better way. Guess what, I found it!
More and more I am becoming adept at using a slow cooker. That means I’m not using it simply to drop something in and cook it until it’s beaten into submission. A slow cooker is a valuable tool but if you don’t use it properly it can create meals that are virtually tasteless.
This recipe, I guarantee you, has tons of flavor. It also has its traditional aspects and its unique aspects and I will discuss those in my lessons learned. I started out by using a bone in turkey breast for this recipe and decided the next time I made it I would try a boneless pork roast. Guess what? Both ways it was fabulous! So let’s talk slow cooker turkey or pork roast and stuffing…
Lesson Learned 1 – How to prepare the stuffing: I used a box of stove stop stuffing for these recipes (one designed to be used with turkey and one designed for pork) so it already had the seasonings I needed in it but you can also use just a plain stuffing mix. If so, you will need to add some poultry seasoning and dried sage. I also added some sliced onions, sliced mushrooms and diced celery to boost the flavor of the stuffing mix when I made the turkey and substituted sliced apples for the mushrooms when making the pork, but you don’t have to. I’ll put both versions in the recipe below and you can chose whatever method suits you.
The first time I made this most of the stuffing was soft except for the very bottom. I stirred everything together after it was all cooked and it turned out ok. The second time I made this I added a cup of chicken broth to the stuffing mix and it turned out perfectly. Since you put the soup/gravy mixture on top of the meat, it does not totally reach all of the stuffing. And since a turkey breast doesn’t have a lot of fat to begin with you need the moistness of the chicken broth to get the desired consistency of the stuffing. I also added carrots on top of the stuffing in both recipes and they turned out perfectly. The pork roast had a little more fat so that also helped to keep the stuffing moist.
Onions And Celery Added To The Stuffing
Stuffing With Mushrooms And Carrots For The Turkey
Carrots and Apples for the Pork Roast
Lesson Learned 2 – Spray the crock with cooking spray: After the long hours of slow cooking the stuffing will stick to the crock if you don’t spray it. Make sure you spray the crock with cooking spray before adding the stuffing. You’ll be glad you did at both serving and clean up time.
Season Each Layer
Lesson Learned – Season each layer: Slow cooking requires careful seasoning so food does not come out tasting bland. Remember to season each layer with salt and pepper as you prepare the slow cooker.
Lesson Learned 4 – What kind of turkey to use: I am fortunate to have a grocery store that cuts half turkey breasts on the bone and sells them fresh. This works so well in this recipe. When I first made it I was surprised at the moistness of the turkey breast. My husband loved it.
You can use a boneless breast as well. You really shouldn’t use more than a 3 pound turkey breast for this recipe. If you do, you will need to cook it longer. If you buy the breast frozen be sure to thaw it before putting it in the slow cooker. For 4 people, 2 1/2 – 3 pounds is perfect. You may even have some leftovers. The breast pictured below is on the bone and 2 1/2 pounds.
Lesson Learned 5 – What kind of pork roast to use: I used a 2 1/4 pound boneless pork roast for this recipe. Make sure when you put it in the slow cooker you put it fat side up. That way the fat will drip down onto the stuffing and vegetables. I also seasoned the pork roast with fresh lemon thyme. I didn’t need to do that when I made this recipe with a turkey breast.
Lesson Learned 6 – Combine turkey gravy or pork gravy and mushroom soup for a delightful sauce: I found combining gravies with the soup created a surprisingly flavorful sauce to put over the meat. When I made the turkey I used a cream of mushroom soup. When I made the pork I used a cremini mushroom bisque soup. Both were great, although in hindsight I preferred the mushroom bisque over the cream of mushroom.
Gravy/Soup Mixture
I started out by making a packet of McCormick gravy on the stove and combined it with a can of mushroom soup. You can used jarred gravy as well. The combination tasted divine and gave flavorful moisture to the meat as it cooked.
If I was having a small gathering at Thanksgiving I would consider either one of these for dinner. They were unbelievably good and super simple to make. This is also a great recipe for having turkey and stuffing whenever you want it. Turkey is not just for Thanksgiving anymore.
Lesson Learned 7 – Both versions of this recipe results in super moist and tender meat: I have to say I was surprised at how moist and tender both the turkey and the pork tasted. I cooked both for 5 hours on low and both turned out perfectly. Once again I want to make it clear that you need to know your slow cooker. Also, to ensure the turkey and pork are cooked, you need to adhere to the weights I have given you. If you choose to cook something a little larger you will want to add a little more time to the cooking process.
Try this recipe combo and let me know what you think. They are becoming staples in our home!
1 – 2 1/4 – 2 1/2 pound turkey breast, bone in preferable or,
1 – 2 1/4 – 2 1/2 boneless pork roast
I – 6 oz. box of Stove Top Stuffing (chicken or pork variety)
I cup cremini mushrooms, sliced thick (can use for either chicken or pork)
1 large stalk of celery, diced
1 small onion, diced
1 small granny smith apple peeled and sliced (for a pork roast)
4 carrots, peeled and sliced into 2 inch logs
1 cup chicken broth
2 Tbs butter, melted
I packet McCormick turkey or pork gravy
1 10.75 oz. can of mushroom bisque soup
Kosher Salt
Freshly Cracked Black Pepper
Fresh Lemon Thyme (pork roast)
Cooking Spray
DIRECTIONS:
Prepare gravy mix according to package instructions. Once the gravy has somewhat cooled add the mushroom soup to the gravy and stir until combined. Set aside.
Spray the crock of the slow cooker with cooking spray. Mix onion, celery, dressing mix, chicken broth and butter until combined. Spread on the bottom of the slow cooker. Add the mushrooms, carrots and apple (pork roast recipe) on top of the stuffing.
Place the turkey or pork roast on top of the stuffing and vegetables. Season with salt and pepper. If making the pork roast, strip lemon thyme leaves from the stalks and season the top of the pork roast. (You can add remaining stalks around the pork to season the stuffing and veggies – just remember to pull them out before serving).
Pour the gravy/soup mixture over the meat. Cover and cook for 5 hours on low.
I know it was just recently I posted a cheeseball recipe. And frankly I didn’t think that post would get much of a response as I thought cheese balls were a thing of the past when it comes to party appetizers. Boy was I wrong. That post was quite popular.
So when we had the first meeting of our book group in my condo community I thought what a great time to experiment with another type of cheese ball. This time with a little salted caramel flare. And once again it was a huge hit!
My renewed love of cheese balls stems from the fact that it’s one heck of an easy way to bring a great appetizer to an event. Mostly it’s just mixing everything together, chilling and serving. Plus cheese balls are so portable you can easily bring them anywhere.
So let’s talk salted caramel cheese balls…
Lesson Learned 1 – This cheese ball can be an appetizer or dessert: You have a great combination of sweet and savory going on with this cheese ball. The combination of the tartness of the apples and cinnamon, along with the savory of the sharp cheddar cheese and the sweetness of the caramel sauce all meld into a killer combo making this cheeseball more versatile than most.
Lesson Learned 2 – Leave the skin on the apple and dice it into small pieces: I always love when recipes state “dice the apple into 1/4 inch pieces. Do people really expect cooks to stand with a ruler measuring the size of the pieces they cut up? (ok, I’ll admit it I’ve done it in the past but no more)… The key here is to keep the pieces slightly smaller than bite size. Trust your instincts. You want the apple pieces to blend in and not overpower the look and taste of the cheese ball.
Also only use a granny smith apple for this recipe. The granny smith apple has that wonderful tartness that compliments the savory cheddar cheese and sweet caramel sauce. Now if you have another apple on hand do you need to run out to the grocery store to get a granny smith? No. But believe me when I say the best flavor combination is achieved when you use a granny smith apple in this recipe.
Lesson Learned 3 – As with any cheese ball, the longer you chill it and let the flavors combine the better: I like this cheese ball because you can chill it for only a short time and it’s still wonderfully flavorful. But if you have the time, letting the cheese ball flavors marry overnight is always preferable but not altogether necessary.
The holidays are fast approaching and if you’re thinking of entertaining this recipe is flavorful, impressive looking and a guaranteed hit! It will make a wonderful addition to your holiday table. Try it and tell me what you think!
1/4 cup salted caramel sauce, plus approx. 1/8 cup caramel for drizzle
1 Tbs. fresh squeezed lemon juice
pinch of kosher salt
1 tsp. cinnamon
1 cup freshly grated sharp cheddar cheese
1 medium granny smith apple, chopped (leave the peal on)
2 cups pecan pieces
Crackers for serving
DIRECTIONS:
Shred the cheddar cheese and set aside. Remove the core from the apple and dice into small pieces, leaving the peal on. Set aside.
In a medium sized bowl, using a hand mixer, mix together the softened cream cheese, caramel sauce, lemon juice, salt and cinnamon. By hand, fold in the cheddar cheese and apple. Place on a sheet of plastic wrap and roll into a ball. Place in the freezer and chill for 1/2 hour.
Place the pecan pieces on a large plate. Remove the cheeseball from the plastic wrap and roll it in the pecans until the ball is completely covered. Wrap the ball in plastic wrap and chill until ready to serve.
Drizzle the caramel sauce on the cheese ball right before serving.
This time of year with all of the Fall/Winter holidays approaching just screams to me cranberry and orange. As a matter of fact I love that flavor combination so much this is the second variety of cranberry orange coffee cake that I’ve posted on this site. To see the original post just click on “recipe”.
There are slight variations to the two of them and both are equally delicious. One you make in a spring form pan with the traditional leavening agents of baking powder and soda and that produces a taller, airier cake. This particular recipe does not use any type of leavening. Rather the eggs and sugars are beaten for an extensive period of time to create a mixture that doubles in size and provides the needed lift for the cake. This particular cake is denser and moister.
Both cakes are equally good, although my husband liked this particular recipe better. Whenever he monitors how much of a finished product I bring to work and how much I leave at home, I know the recipe is a hit. This time he made me bring much less of the cake to work than usual.
So let’s talk Cranberry Orange Coffee Cake Pt. 2…
Lesson Learned 1 – Be organized when you bake: I found the experience of baking much more pleasurable if I do it in an organized fashion. By that I first get out any ingredients that need to be room temperature in plenty of time for them to reach that desired state. Then I read the entire recipe to see what I’m up against. I preheat the oven and prep any pans that require prep. After that I figure out how to organize the assembly process (as in this recipe I recommend making the crumb topping first as you will read below). Then I get all my ingredients out and ready. That usually means getting the dry ingredients together and combined and then moving on to the wet ingredients. After that, everything seems to fall into place.
What you are trying to avoid is stopping to find things and taking time to mix things while other mixtures sit and wait for a long period of time. Think about how making the recipe can flow and organize yourself to make the process go that way.
Lesson Learned 2 – The importance of beating the eggs and sugar for a long time: As mentioned above this recipe does not use traditional leavening agents like baking powder or soda so you need something to provide the lift to the batter. That lift is produced by beating eggs and sugar into submission. By submission I mean you need to beat them for at least 5-7 minutes. That’s why I recommend using a stand mixer for this recipe so you’re not left with holding a hand mixer for that length of time.
I would also time the process and not leave it up to your memory. You will actually see the mixture double in size and become more thick when you beat it for that length of time. That’s what you’re looking for. Be careful. Don’t try to shortcut this part of the process. If you do you will be left with a somewhat flat coffee cake.
Lesson Learned 3 – This cake may need to bake for much longer than the recipe suggests: I was originally thinking this would take between 45-50 minutes. It actually took me 65 minutes, but then again I live in high altitude where everything takes longer to make. The key with this cake, as with all cakes, is having a toothpick inserted in the middle come out clean. If you have some redness from the cranberries on your toothpick that’s ok. But it should be clean of everything else.
Lesson Learned 4 – Make the crumb topping first: I found the entire process of making this cake went much more smoothly if you made the crumb topping first. Other than beating the eggs, this is the most labor intensive part of the recipe. If you make the topping first than everything else seems to go like clockwork.
As with making any type of crumb topping, use very cold butter and a pastry cutter to cut the butter into flour and sugar. The desired result is coarse crumbs as seen in the picture below.
The Desired Consistency Of The Crumb Topping
Lesson Learned 5 – The importance of room temperature eggs: In my baking recipes you will see that I always call for room temperature eggs. Why? The answer is simple. Room temperature eggs blend much more thoroughly into the batter. And that is the ideal. Quite often I hear the reason one doesn’t use room temperature eggs is they don’t have the time to get them to room temperature. Never fear, I have a quick and easy trick for you so you will always have room temperature eggs when you need them. Just click on “tips”.
Otherwise every other step of the process is what you normally expect when you make a cake. This cake, although delicious anytime, is a great recipe for the Holidays. And I guarantee you it won’t be around your kitchen for very long. Enjoy!
Zest of 1 large orange, divided into 3/4 and 1/4 portions
GLAZE:
1 cup powdered sugar
Juice from 1 orange (approx. 4 Tbs)
1/4 of the orange zest already grated for the cake
DIRECTIONS:
Preheat oven to 350 degrees.
In a small bowl combine all the topping ingredients. Use a pastry cutter to cut the butter into the flour and sugar until the mixture forms into coarse crumbs. Set aside.
In a stand mixer, beat the eggs and sugars for about 5-7 minutes until thick and doubled in size. Add the butter and vanilla and mix for an additional 2 minutes. Stir in the flour until just combined. Fold in the cranberries and the 3/4 portion of the orange zest.
Put the batter into a greased 13 x 9 pan. Spread the crumb topping on top of the batter.
Bake 45 – 50 minutes or until the top is golden brown and a toothpick inserted into the center of the cake comes out clean.
Let cool completely.
Combine glaze ingredients and drizzle over the cake.
There are certain meals that just become necessary to make once the weather gets cooler – pot roast, beef stew, roast chicken… And one of my all time favorite cooler weather meals has to be chili. It is so easy to make and I serve it with shredded cheddar cheese and diced sweet onion and boy or boy, does it ever stick to your ribs! Chili is the ultimate in comfort food on a crisp Fall evening.
What I like about chili is it’s so easy to make. There are a couple of hints to making a chili that suits our needs that I will share. But bottom line, the chili pot is your canvas and you can make chili basically any way you want. I will share with you my go-to recipe.
So let’s talk chili…
Chili Ingredients
Lesson Learned 1 – The onions: I use a large sweet onion when I make my chili. I dice the onion and use about three quarters of it in the chili itself. The rest I set aside and use as a raw topping when I serve the chili. I’ve found the best way to use these onions to enhance the flavor of the chili is to caramelize them. That takes a little time. The pictures below show how I dice the onions and the onions when they first become translucent. The photo below them shows when they are caramelized. Technically you can use them either way but I’ve found if you take the extra time and let them caramelize they add more flavor to the chili.
The challenge when you caramelize onions is the extra time. Normally I can get them the way I want them (as pictured below in the bottom photo) in about 15 minutes. If you want to cook your chili faster that may not be an option. But if you can take your time with this first step you will definitely taste the benefits of doing so.
Lesson Learned 2 – The importance of seasoning during the initial stages: I find if I season the onions and the meat with salt and pepper each time during the first two steps the flavor of the chili is greatly enhanced. Besides is their anything better than the smell of onions seasoned with salt and pepper cooking on the stove? So after I season the onions and let them caramelize I add the meat and season the meat with salt and pepper as well. It may seem like a lot of seasoning but it actually is not.
After that I don’t add any more salt and pepper until the very end after all the ingredients have been added and combined. At that time I taste the chili to see if it needs anymore salt and pepper. Very seldom do I have to add any at the end. Seasoning the first two layers and then adding the other seasonings makes a big difference in the end result. Don’t forget to do this.
Lesson Learned 3 – When to add the garlic: I’ve tried adding the garlic a couple of different ways and have landed on a preferred choice when I make chili. You can always add the garlic once you caramelized the onions but I prefer adding them to the ground beef just before I start adding the other ingredients. I allow them to cook in the meat for a minute or so until fragrant and then I continue adding the rest of the ingredients. I find this totally prevents the garlic from burning and better infuses the garlic into the chili.
Lesson Learned 4 – Chopping the green pepper: I guess I don’t actually chop the green pepper – it’s more like dicing. I like the pieces small so that they add flavor to the chili but aren’t necessarily highly visible. The green pepper flavor, in my estimation, balances some of the heat of the chili and adds a nice freshness to it. The pictures below show how I prepare the green pepper:
Lesson Learned 5 – Chili seasoning: I’ve experimented with a lot of different ways to season my chili and finally chose my preferred method. I use McCormick Mild Chili Seasoning Mix because we prefer our chili on the mild side but you can make it has hot as you like. McCormick has a few varieties of seasonings and if you can’t find a seasoning mix that gets you the heat you crave you can always add red pepper flakes. This seasoning mix contains a blend of chili pepper, paprika, cumin, onion salt and garlic. I also add about a teaspoon of chili powder and this combination of seasonings gives us the kind of chili we prefer.
Lesson Learned 6 – The mushrooms: I am a big fan of fresh mushrooms especially now when you can buy them in bulk. This time I had a jar of canned mushrooms in the pantry that I wanted to use so I went that route. Either way, add the mushrooms at the very end so that they don’t overcook. Generally I add fresh sliced mushrooms to my chili.
Lesson Learned 7 – A little bit of tomato paste helps thicken the sauce: Here’s a handy dandy little trick. Add about a tablespoon of tomato paste to the ground beef before you add the seasonings. This will help thicken the sauce. Look for tomato paste that’s sold in a tube. That way you’ll have no waste and can use it whenever you need versus wasting a whole small can.
Lesson Learned 8 – Simmering the chili: I’ve found the best way to meld all the flavors in the chili is to let it simmer for about an hour. Put your heat on very low and stir the chili occasionally making sure none burns on the bottom of the pan. Then the chili is ready to serve. And, of course, if you have the luxury, you can always let it sit overnight to let the flavors meld.
So that’s basically it. Once you’ve browned the ground beef and added the seasonings it’s just drop in and stir from there…
Stir in the diced tomatoes
Drop in the beans
Add the mushrooms and green pepper
Stir and simmer for about an hour and you’re done. I serve this chili over rice, my husband’s preference, or over elbow macaroni, my preference. Or you can serve it plain. I add shredded cheddar and raw diced onion to mine, but you can top it with sour cream, guacamole, diced jalapeños, or whatever you like. I’ve been making this recipe for years and have it down to a science. It is unbelievably easy to make and so good. Try it. I know you’ll love it!
Toppings can include: Shredded cheese, raw onion, sour cream, guacamole, sliced jalapeño peppers, or whatever your preference
DIRECTIONS:
In a 5.5 quart dutch oven melt the butter. On a medium heat add the onions and cook until caramelized, approximately 15 minutes. Season the onions with salt and pepper while cooking. Push the onions to the side and add the ground beef. Layer the cooked onions on top of the beef. Break up the ground beef with a spoon and cook through, seasoning the ground beef at the beginning with salt and pepper. Once cooked, stir in the garlic and cook until fragrant, approximately 1 minute.
Stir in the tomato paste and thoroughly combine. Stir in the chili seasoning and chili powder. Add the diced tomatoes. Stir to combine. Add the chili beans. Stir to combine. Cook for about a minute. Add the mushrooms and the green pepper. Gently stir to combine. Taste to see if any additional salt and pepper is needed.
Cover and simmer for one hour. Serve with desired accompaniments.
Ok, admit it, when was the last time you actually made a cheese ball? I hadn’t made one for ages but was faced with an upcoming potluck at work with little time to make anything. And after thumbing through a very old cookbook I noticed a recipe for a cheese ball and thought, I should make that. And, as with any recipe, I added my own personal touches.
The ingredients for this recipe are not all that complicated, cream cheese, scallions, cheddar cheese, parmesan cheese, worcestershire sauce, mayo, spices and some almonds. Easy enough.
My major concern was I thought people would think this was too much of an “old school” kind of appetizer and turn up their noses at it. To my surprise, quite the opposite. It wound up being the perfect compliment to the other things people brought to the potluck and it disappeared in record time. Being that this was a potluck at work, people not only enjoyed the taste of the cheeseball but the fact they could go into the break room, put a dollop of the cheeseball on a cracker and be off on their merry way. Once again this shows how one’s perceptions regarding food can be so off the mark. I was so glad everyone enjoyed it and would definitely consider making this again. It was that much of a hit.
So let’s talk cheese ball…
Lesson Learned 1 – Taste the mixture before forming it into a ball and adding the almonds: When I did that I knew the cheese ball needed some salt. So instead of just using garlic powder, I used both garlic powder and some garlic salt. That little addition made a big difference.
Lesson Learned 2 – Use shredded parmesan versus grated parmesan: Shredded parmesan cheese gives a richer much more noticeable flavor to the cheese ball. Grated parmesan seems to get lost in the shuffle.
Lesson Learned 3 – Make the cheese ball the day before your event: When I initially tasted the cheese ball I thought it was ok, but the next day after the ingredients really got acquainted in the refrigerator, the cheese ball tasted fabulous! I was not prepared for the difference in the flavor. Everyone raved at how delicious it was. This is definitely a recipe that tastes markedly different the second day.
Not too many lessons learned on this one. It really is just a recipe where you mix everything together all at once, roll it into a ball, cover it with sliced almonds and refrigerate it overnight. And with the holidays and holiday parties not too far in the distant future, this is a great little recipe to have in your hip pocket.
If you want something that looks impressive and tastes divine, make this one and bring it to your next party. I guarantee you it will be gone before you know it!
2 (8 oz.) packages of cream cheese, room temperature
1/4 cup mayonnaise
1/3 cup shredded parmesan cheese
1/2 cup shredded medium sharp cheddar cheese
1/4 cup green onions, minced
1/2 tsp. worcestershire sauce
1/4 tsp. garlic powder
1/2 tsp. garlic salt
1 cup sliced almonds
crackers and fruit (grapes, sliced apples, etc., optional) for serving
DIRECTIONS:
Combine softened cream cheese and mayo until smooth. Add remaining ingredients except the almonds. Stir until well combined.
Spread almonds out on wax paper. Form the mixture into a ball (it will be soft and sticky) and roll the ball in the almonds until the ball is completely covered with the almonds. Transfer the ball onto some plastic wrap, wrap tightly and refrigerate overnight.
Unwrap and plate the cheese ball. Serve with crackers and fruit.
Although this recipe may sound difficult it is incredibly simple to make. Even non-fish lovers will find this recipe hard to resist. Couple that with delectable butternut squash and being able to cook both at the same time – well the result is you have one heck of any unbelievably easy, flavorful meal!
My husband and I have been trying to incorporate more fish into our diet and salmon is one of our favorites for a few reasons: 1.) It has a nice, mild, non-fishy flavor, 2.) Salmon is a reasonably priced fish, and 3.) Salmon can be made in a wide variety of ways. And what can I say about butternut squash? When you roast it the sides caramelize and give a nutty/sweet flavor to the squash. You definitely can’t beat that!
So, lets talk mustard herbed salmon with roasted butternut squash…
Lesson Learned 1 – Use a piece of salmon that is at least 1 1/2 to 2 inches thick at its widest part. A thinner piece will not stand up to this roasting time. You want the fish to flake but you don’t want it to dry out. My husband and I tend to opt for approximately 4 ounces each and you can go up to 6 ounces. Just make sure that the filet is not thicker than two inches at the widest part or thinner than 1 1/2 inches. The length of the piece does not matter.
Also keep in mind the cost of your filets will be less if you buy them with the skin on. For this recipe I remove the skin. As long as you have a sharp boning knife that should not be a problem whatsoever.
2. Choose any herb blend you think will work well with salmon: I used a Tuscan Garlic Seasoning Blend. It contains onion, garlic, spicy red pepper and lemon peel. I like it because it gives a gentle spicy kick to the salmon. If you’re not sure what to use read the label on the jar your considering. Quite often it will tell you whether it works best with meat, poultry or fish. Think of the herbs you enjoy and find a blend that resembles that. Or mix up a blend of your own.
When using herbs in any recipe always start from the standpoint that less is more. With the herb blend that I use if you add too much the salmon gets overpowered and the fish is too spicy, at least for us. I’ve found that as you repeatedly make a recipe you get a good feel for the amount of herbs to add. I lightly coat the mustard with the herbs and the combination of both gives a wonderful zing to the fish. So start out with less, you can always add more.
Lesson Learned 3 – Cut the butternut squash into 1 inch square pieces: Now I know that is easier said than done and there will be variances in your pieces but you want to make sure the pieces are large enough so the squash cooks through but does not become mushy. The beauty of this recipe is that you can roast both the fish and squash together, albeit you put the squash in the oven ten minutes prior to the fish. That way they are both ready to come out of the oven at the same time. Here’s at tip – check out any pre-prepared butternut squash you might find in your grocery store. I can get squash that is already peeled and cut into large chunks. I only have to do minimal prep when I buy my squash that way. Believe me, it saves a lot of time and effort.
I normally roast the fish on the middle rack of the oven on a foil lined baking sheet sprayed with cooking spray. I roast the squash on the lower rack, also on a foil lined baking sheet. Because I use olive oil in the prep of the squash there is no need to use cooking spray on that sheet pan.
Lesson Learned 4 – My secret for getting a nice caramelized squash – don’t flip it: So many recipes tell you to flip the squash half way through the roasting process. I found that if you don’t you get one side with a gorgeous caramelization, sort of like creating a crust on each piece. That caramelization provides a sweeter taste that permeates the entire piece. So be brave, don’t flip the squash. I guarantee you’ll love it!
As I mentioned earlier, the beauty of this recipe is that you can prep both the fish and squash and roast them together in the oven at the same temperature. How easy is that. This is one of my go-to week night meals and if you try it, I’m sure it’ll be one of yours as well. Enjoy!
Mustard Herb Salmon With Oven Roasted Butternut Squash
12 oz. butternut squash cut into 1 inch. cubes (I get mine pre -packaged and cut)
1 Tbs. dried thyme (you can use a little more if you need to evenly apply it to the squash)
Garlic infused olive oil
Kosher salt, to taste
Freshly cracked black pepper, to taste
DIRECTIONS:
Preheat oven to 400 degrees. Pat salmon dry and place it on a foil lined backing sheet sprayed with cooking spray. Dollop one tsp. of dijon mustard on each piece. Spread the mustard to coat the entire top of the salmon. Sprinkle the herb blend over the mustard. Set aside.
Place squash pieces on a foil lined baking sheet. Drizzle olive oil over the squash. With your hands mix the squash pieces to make sure all are covered with the olive oil. Spread the pieces apart so they do not touch. Sprinkle pieces with salt, pepper and thyme.
Place the squash on the bottom rack and roast for 10 minutes prior to putting the salmon in the oven. After 10 minutes put the salmon on the center rack in the oven and roast both the salmon and squash for and additional 20 minutes. Remove from oven and serve immediately.
Have you ever heard of Ronde de Nice Squash? I hadn’t, that is until I went to our local farmers market last Saturday.
I love our local farmers market especially this time of year. What an array of fresh fruits and vegetables that are available. It seems like every time I go I learn something new. This last time I was introduced to a wonderful member of the squash family called Ronde de Nice Squash.
Ronde de Nice Squash looks a lot like acorn squash but slightly smaller in size. I asked the farmer to tell me what it tastes like and how to cook it. She told me that it’s very similar to zucchini. She said I could grill it or I could scoop some of it out and add ingredients such as ground beef, rice and chopped vegetables and bake it. Another shopper heard my question and suggested that I marinate it and grill it. Ultimately that’s what I decided to do.
I always get excited when I learn a new cooking technique or try a new food. I was pleasantly surprised with this member of the squash family. So let’s talk Ronde de Nice Squash.
Lesson Learned 1 – This squash is much easier to cut than an acorn squash: I was not prepared for how easy this squash was to cut. I thought it would be hard like an acorn squash but the skin is much thinner on this squash. When you cut into it, the flesh looks very similar so zucchini as you can see from the picture below.
There is no need to seed it – the seeds are very small and quite soft just like a newly ripened small zucchini. I removed the stem on top and cut each half into half and then cut slices that were approximately 1/2 inch thick. I found that using this thickness made the squash stand up beautifully to the grilling process.
Lesson Learned 2 – Marinate the slices for at least 2 hours: You can use any type of marinade you like with this squash. I chose a simple Italian dressing marinade. Marinate the squash for at least two hours in the refrigerator, turning the squash over at regular intervals to make sure all pieces are evenly marinated. I kept my squash marinating for 4 hours and the flavor really came through when it was grilled.
Lesson Learned 3 – Your grilling time may vary: Your grilling time will depend on how you like your squash, crisp tender or soft. I wanted mine crisp tender and so I grilled my squash for 15 minutes. As with ovens, no two grills are alike. Know your grill and determine your best cooking time from there. I use a gas grill but if you use a charcoal grill I would recommend putting these slices outside of the hottest areas on the grill. Otherwise you may burn them before you cook them.
I love it when I try new foods and it turns out great. Go ahead, be adventurous. It doesn’t take much. And try this recipe. I know you’ll love it!
Cut squash in half. Remove the stem and cut the halves into half. Cut 1/2 inch slices from the quarter pieces.
Place pieces in a plastic bag. Pour the marinade over the squash. Seal the bag and turn it several times to ensure the marinade is reaching all of the pieces. Place on a flat surface in the refrigerator. Marinate the squash for a minimum of 2 hours regularly turning the bag over so all pieces are evenly marinated.
Heat your grill to medium heat (on a gas grill the heat was between 350-400). Place slices on the grill. Turn slices over halfway through the cooking time (for crisp tender the cooking time is 15 minutes). Do not move the slices until they are ready to be turned.
Remove the slices from the grill. Serve immediately.
Lately I have been getting more traffic on my blog and I am very happy about that. And it’s always interesting to see what recipes people all over the world are looking at. Over the years there have been a few that consistently get the most number of hits. It’s amazing how many people gravitate to these recipes. So instead of posting a new recipe today, I’ve decided to do a compilation post of my top 3 “highest clicked on” recipes.
Looking at my stats over the years, I’d have to say there is a virtual tie for first place. It actually depends on the time of year. One of them gets significantly high clicks around the Christmas holidays or any other holidays during the year where people tend to plan parties. I’ll focus on that one first.
The funny thing about this particular recipe is I almost didn’t post it. I thought it was too simple and rudimentary and not something a lot of people would be interested in. Boy was I wrong. From day one this recipe got a ton of hits and when it comes to party times throughout the year the hits can go through the roof. I have to admit it is a pretty tasty appetizer. You’ve got to try my Cream Cheese, Spinach, Bacon and Scallion Pinwheels.
Cream Cheese, Spinach, Bacon and Scallion Pinwheels.
The other recipe that ties for first place on my “hit” list is a recipe that takes a relatively inexpensive fish and creates a dish that is simple but elegant and oh so flavorful. Once again I never anticipated this recipe to be so popular but it consistently gets multiple hits every day of the week. It’s my recipe forPan Fried Cod With Lemon Butter Sauce.
I think more people are looking for ways to add fish their diets and this recipe takes an inexpensive fish like cod and makes it taste like a million bucks. I’ve gotten a lot of feedback that this recipe not only creates divinely tasting cod but it’s also an easy, elegant serve. You can’t beat that. Try it and tell me what you think!
Pan Fried Cod With Lemon Butter Sauce
And last but certainly not least is my Double Chocolate Zucchini Bread. This recipe, I kid you not, is to die for. It is one of the best ways to take oversized zucchinis that we all get from time to time and are not really good to serve as a vegetable and use them to make the most fabulous zucchini bread you will ever taste.
What I especially love about this recipe is the bread is not overly sweet. You use a combination of honey and brown sugar to sweeten the batter. The zucchini provides an unbelievable moistness and the combination of cocoa powder, chocolate chips and a little espresso powder creates a chocoholics fantasy.
This recipe gets a ton of hits this time of year when home gardeners have more zucchini than they can handle. This is the best zucchini bread recipe I’ve ever made bar none and if you try it I know you will say the same thing. Enjoy my recipe for Double Chocolate Zucchini Bread!
Double Chocolate Zucchini Bread
And there you have it – the stars of my blog. Don’t get me wrong, there are plenty of other recipes that get lots of hits – it’s just that these three seem to have been stars from the day they were first published.
Coming soon I’m going to publish a recipe for mustard herbed salmon with roasted butternut squash, but today let’s just enjoy the stars of You Betcha Can Make This!
Are you ready for a little Summer melt in your mouth goodness? Well here’s something that fits the bill. During the dogs days of summer you want something light, cool, refreshing… and these tasty morsels are like have a glass of lemonade in a cookie.
The ingredients in the recipe are a little unusual. For instance, you don’t use any eggs just butter and lemon juice – you use powdered sugar in place of granulated sugar – and you mix the flour with cornstarch. Sounds a little strange but the result is what, as a child, I called sand cookies. And although sand cookies doesn’t sound very appetizing, it was my term for cookies that literally melt in your mouth. The combination of ingredients in this recipe creates a melt in your mouth consistency that is amplified when you ice them with the lemon frosting. All I can say is yummo!
So let’s talk iced lemon cookies…
Lesson Learned 1 – Make sure you chill the dough: The consistency of the dough is not like most cookies – it will be softer and stickier. It’s important for the dough to chill in order to form the cookies and bake them off. Divide the dough in half and make two eight inch logs. Cover the logs in plastic wrap and refrigerate for up to two hours. My dough was nice and firm after an hour and a half, so check your dough at that point to see if it is ready to go.
These cookies do not have a lot of binding ingredients (there is some butter but no eggs) and so they are more delicate than others. Basically that is what gives them their melt in your mouth consistency. So when they are still warm they can easily break apart. Be very careful when removing them from the baking sheet to the cooling rack. Also be careful when icing them. You can have a love-hate relationship with these cookies. You love the consistency as they flake apart in your mouth but they can also do that in your hand if they are not handled with care. Just take your time with them. These cookies are worth all the care you can give!
Lesson Learned 3 – Chill the cookies once you’re done: I found the best way to enjoy these cookies is when they have a slight chill. The flavor is so light and with the chill it creates a cooling Summertime treat sensation. You’ll find that you can’t eat only one of these flavorful bite size morsels. I guarantee they will be a hit!
Lesson Learned 4 – I used yellow food coloring in the frosting: I used yellow food coloring in the frosting but it’s not necessary. I found it gave the cookies that special look and we all know we eat with our eyes first. I used 3 drops and it created this beautiful lemony color!
In a medium bowl beat together the butter and sugar until combined. Beat in the lemon juice. In another bowl whisk together the flour and corn starch. Gradually beat the flour mixture into the butter/sugar mixture until combined.
Divide the dough in half and shape into two 8 inch logs. Cover the dough with plastic wrap and refrigerate until firm – approximately 1 1/2 – 2 hours.
Preheat the oven to 350 degrees.
Unwrap the dough and cut it into 1/4 inch slices. Place slices 1 inch apart on an ungreased cookie sheet. Bake for approximately 10-12 minutes.
Gently remove the cookies from the pan onto a cooling rack. Cool completely.
For the frosting, beat together all of the ingredients. Spread over the cookies. Chill and serve.
I know I haven’t published in a while. It just seems when Summer arrives I find so many things to do outside of the kitchen that I become a little lax in my posting goals. But even though I haven’t posted for some time I think this recipe is well worth the wait.
If you’ve never baked with strawberries before, you’re in for quite a treat. Strawberries have a wonderful light tartness to them when they’re baked that beautifully offsets the sugar in a recipe. Combine that with a hint of lemon zest and juice and you have an incredible balance of flavors.
These muffins require very little effort to make and are decadently delicious. You must try them. So let’s talk about strawberry lemon muffins…
Lesson Learned 1 – Don’t cut the strawberries in too large of chunks: Strawberries give off a lot of moisture when they’re baked so you don’t want large chunks of strawberries in your muffins. That will make the muffins soggy. I cut the strawberries in half and then in half again. After that I cut the remaining pieces in thirds. The picture below gives you somewhat of a perspective on size. Just to the right of center and near the bottom is a strawberry cut in half from top to bottom. You can see the other pieces are smaller by comparison. You want to cut the strawberries into these smaller sized pieces.
It is also very important to make sure the strawberries are evenly distributed in the batter at the very end. Otherwise you might have soggy pockets in your muffins. Take the time to fold them into the batter completely before filling your muffin cups.
Lesson Learned 2 – The batter will be thicker than you think: I was surprised at how thick the batter was in this recipe. But the combination of a thick batter and strawberries creates the perfect balance for a moist and flavorful muffin. All the magic happens in the oven, so don’t worry about how thick the batter is.
Lesson Learned 3 – Fill the muffin cups almost to the top: Many times, especially when making cupcakes, recipes will say to fill the cups about 3/4 full. With these muffins fill the cups almost to the top. The muffins will rise in the oven but not dramatically so don’t worry about spillover.
Lesson Learned 4 – Tips for glazing and storing the muffins: Make sure the muffins are completely cooled before glazing them. I used a “home-made” pastry piping bag to glaze my muffins. I simply put the glaze in a sealable sandwich bag, twist the bag to get all the glaze in one corner and snip the corner squeezing the glaze over the muffins. The result is very professional looking and the process could not be any easier. Below are pictures of my “home-made” pastry bag and the muffins after they’ve been glazed.
These muffins can be stored in an air tight container for up to 5 days. They also freeze nicely. Try them and let me know what you think!
Zest and juice of 1 medium sized lemon (2-3 Tbs. of juice)
DIRECTIONS:
Preheat the oven to 350 degrees. Line a muffin pan with muffin cups and set aside.
Whisk together the flour, sugar, baking powder, soda and salt. Set aside.
Whisk together the egg, vanilla, vegetable oil, yogurt, lemon juice and zest. Pour the wet ingredients into the dry ingredients and mix until combined. Gently fold in the strawberries.
Fill the muffin cups almost to the top. Bake for 18-20 minutes or until a toothpick inserted in the center comes out clean. Cool in the pan for about 5 minutes then transfer the muffins to a cooling rack. Cool completely.
Mix the glaze ingredients together and drizzle over the cooled muffins. Store muffins in an airtight container or freeze them.
My last blog was about my favorite carb “taters”. This blog is about my favorite protein, chicken! I kid you not, I could eat chicken every single night of the week. Nothing tops it in my book. So, as with “taters”, I am always on the lookout for new chicken recipes and the easier the better.
Let me tell you, nothing can be easier than this one. It is pretty much a retro classic and so good to make when you have little time to prepare something. The only glitch is it takes 2 1/2 hours to roast in the oven, but it’s one of those recipes where you prep it and forget it.
This recipe relies on canned soup, cream of chicken and cream of celery, and with a little water, rice, poultry seasoning and carrots you have an entire meal in one pan ready to serve all at the same time. Plus it creates a fabulous aroma in your kitchen. You can’t beat that.
So let’s talk slow roasted chicken and rice…
Lesson Learned 1 – Buy chicken breasts with skin and ribs and debone the chicken yourself: You want to do this for a couple of reasons. First it is much less expensive to buy chicken this way. Second by leaving the skin on it keeps the breast nice and moist during the slow roasting process. Invest in a good boning knife and regularly maintain it with a hand sharpening tool like the one pictured to the left. It is surprisingly inexpensive and will keep your knife nice and sharp for a long time and boning the chicken breasts will be a breeze. These days it’s pretty hard to find boneless breasts with the skin still on so this may be the only way to do it.
Lesson Learned 2 – Use a rice mixture for an extra flavor boost: Go ahead, be adventurous and use a rice mixture instead of just plain white rice. You can use wild rice, basmati rice or the mixture that I use which is a combination of white, brown, wild and red rice and pictured to the right. You’ll be amazed at how it punches up the flavor volume and makes the dish even more interesting.
Lesson Learned 3 – If you use thick carrots cut them in half lengthwise: I found the best way to make sure that the carrots are soft roasted is to cut them in half lengthwise if they are an inch or more thick. If they’re thick and you simply cut them in chunks they will not be as tender. If you like a little more body to your carrots you can certainly roast them without cutting them in half. With this recipe I prefer the carrots soft roasted and found the best way to achieve that is cut any that are overly thick. The decision is totally yours.
There are not a lot of lessons learned to share on this one as it is so darn easy to make. I love this recipe because it is a great blend of convenience and good flavor and cooks in one pan. Try this one and I know it will become a staple in your home…
Preheat oven to 350 degrees. In a medium sized bowl combine the soups, water, rice and poultry seasoning. Chop carrots into chunks.
Spray a 9 x 13 pan with non-stick cooking spray. Spread the soup mixture across the bottom of the pan. Place chicken breasts on top of soup mixture. Arrange carrots around the chicken breasts. Sprinkle the top of the chicken breasts with the rotisserie chicken seasoning.
Cover with foil and roast in the oven for 2 1/2 hours. Do not remove the foil during the entire roasting process. Remove from the oven and uncover. If using large breasts, cut them in half before serving. Serve immediately.
No matter what you call them, how you prepare them or how you serve them I love taters! Yes I know about carbs and yes there are some great alternatives but nothing in my mind compliments a meal like some delicious taters! Basically they are good for you, it’s all the stuff we put on them that causes the problems. But taters are one of my top guilty pleasures in life and that is not likely to change.
So I thought with this particular blog I’d try something a little different – basically suggest a tater exchange. I will give you a recipe that I’ve recently perfected and just love with the hopes that in the comments of my blog you share your favorite potato recipe. Then this blog can be a clearing house for a variety of great potato recipes – and what is better than that? Plus it will give me some new tater recipes to try.
So my recipe is for Greek Lemon Potatoes. These potatoes slow roast in the oven and the aroma of the garlic, oregano and lemon fill the air with a wonderful homey smell. So let’s talk Greek Lemon Potatoes
Lesson Learned 1 – How you cut the potatoes is important: I use Yukon Gold potatoes for this recipe and I actually peel them although it’s not necessary. Yukon Golds have a very thin skin and you can roast them either way. I try to pick out ones that are about the same size and thickness (not more than about 4 inches thick). I slice the potatoes in half and then I slice them down the middle lengthwise and into about six equal sized pieces widthwise. The picture below shows how I cut them.
Lesson Learned 2 – Be careful how much oil you use: When I originally tried this recipe I used 1/2 cup of olive oil. I found the potatoes came out too greasy. I’ve cut the amount down to a little over 1/4 cup but I found the amount of oil you use depends on the pan you roast the potatoes in. In a smaller high sided pan you will need less oil. In a larger pan where the potatoes are more spread out you’ll need more. Just make sure you’ve got at least 1/8 in of oil on the bottom. You may have to play around with the amount of oil. If you think the potatoes are coming out too greasy, just put them on paper towels for a couple of seconds before you serve them and you should be just fine.
Lesson Learned 3 – Your roasting time may vary depending on your oven: Once again I live in high altitude so the roasting process always takes a little longer. This recipe works well for me at 400 degrees for 1 1/2 hours but you may find your roasting time will be a little shorter. Keep in mind you’re cutting your potatoes into somewhat larger chunks so you will need some time to roast them completely.
Lesson Learned 4 – Salt the warm potatoes before you serve them: I’ve found that sprinkling a little bit of kosher salt on these potatoes right before you serve them gives them a little touch that really boosts the flavor. The warmth of the potatoes seems to incorporate the salt more fully. Try it and see what you think. These are not difficult at all to prepare and require very little monitoring but the end result c’est manifique… (I know that’s French and not Greek). Try these and share your favorite potato recipe with me. I’m always on the look out for a new way to make taters!
1/4 cup olive oil (may need to adjust according to the size you use)
Kosher salt and pepper to taste
DIRECTIONS:
Preheat oven to 400 degrees. Slice potatoes into medium sized chunks and place in a bowl. In a separate bowl combine all of the other ingredients and mix thoroughly. Pour this mixture over the potatoes and thoroughly combine.
Spray a medium sized casserole dish (2 quarts or larger) with cooking spray. Put the potato mixture into the prepared pan, using a spatula to get all of the olive oil mixture out of the bowl. Cover with foil and roast for an hour, stirring the potatoes at the half hour mark.
Uncover the potatoes, stir them once again and roast for another half hour. Sprinkle with kosher salt and serve immediately.
I’LL START OFF THE RECIPE EXCHANGE!
And since I am suggesting the tater recipe exchange, I will start the process – here is a great cheesy potato recipe that I know you will just love Cheesy Potato and Green Onion Casserole
Lately I seem to be on a “sweets” kick with my posted recipes and even though I do have some savory ones in the queue I moved this one to the top simply because it it just too good. Many of you know that I bake a variety of cookies at Christmas time so normally during the year I don’t venture a lot into cookie making. But I had to try this one and it was so good that my husband would not even let me give any away. I had to freeze them so he could eat them all.
When I make cookies over the holidays I have an unwritten rule that I try one new recipe every year and phase out one recipe. That way I always experiment and I keep the cookie making manageable. I am definitely adding this recipe to the 2017 list but will still have to find another recipe to be the “new” one since technically this one is no longer new. But I am really excited about the recipe.
The thing that I love the most about this cookie is how the tartness of the blueberries balances out the sweetness of the cookie. I also like how simple this recipe is to make, you can do it with a hand mixer and a wooden spoon. But there are some specific things you need to be aware of when you make them that will help you be successful so let’s get right into my lessons learned…
Lesson Learned 1 – Be gentle when mixing the blueberries into the dough: You don’t want the blueberries to break. If they do you will wind up with blue cookies. So be careful when folding them into the dough. Do that at the very end. I also suggest adding the blueberries in a couple of batches. The dough is pretty dense and if you pour the blueberries in all at once chances are you won’t get them incorporated into all of the dough and wind up with some cookies without blueberries. Fold them in carefully and in a couple of batches and you should be just fine.
The Cookie Dough
Lesson Learned 2 – These cookies really spread: Don’t roll the dough in too big of a ball as these cookies really spread. And make sure you have enough room between each one so they don’t bake on top of one another. I would roll them into about a 1 inch ball and put two inches between each ball on the baking sheet.
Give the cookies room to spread
Lesson Learned 3 – Remember blueberries stain: Blueberries are wonderful but they will stain and when they do it is virtually impossible to get rid of the stain. So here are a couple of tips to prevent any staining. First line your baking sheet with parchment paper. That helps in two ways. These cookies are very gooey and will stick to your baking sheet. Not a problem with parchment paper. Also when blueberries bake they pop and the parchment paper prevents them from staining your baking sheet.
Also be careful when you are cooling the cookies and the blueberries may still be “leaking”. I cooled mine on a wire rack and then transferred them to a paper plate. That way I didn’t have to worry about staining any dishes as well.
Lesson Learned 4 – These cookies take a long time to bake: On average these cookies take about 14 minutes to bake depending upon how big you make them. In my first batch I rolled the dough into somewhat larger balls and that batch took about 20 minutes to bake (keep in mind I also live in high altitude and everything takes longer to cook here). Once I got the size of the balls down pat it took anywhere from 14-16 minutes, which is a lot for a cookie. You know the cookie is done when you see it begin to lightly brown around the edges. The center of the cookie may still look pale, but that’s ok. Don’t over bake this cookie. If you do you the cookies will be way too crunchy.
Lesson Learned 5 – Let the cookies somewhat cool on the baking sheet: These cookies will be very loose when you take them out of the oven. If you immediately try to put them on a cooling rack the cookies will break apart. Give them about 4-5 minutes to cool on the baking sheet before you put them on the cooling rack. The cookies will need to set a little before you can move them. Don’t worry about doing this. Since your baking sheet will be lined with parchment paper the cookies won’t stick and will transfer easily to the cooling rack once they’ve had a chance to set.
I can’t say enough about how delicious these cookies are. I know if you make them they will become a household staple. You’ve got to try these cookies. And as always, please let me know how they turned out for you. Enjoy!
Preheat the oven to 350 degrees. Line your baking sheets with parchment paper and set aside.
Whisk together the flour, baking powder and salt. Set aside. In a large bowl cream together the butter and sugars. Beat thoroughly until very creamy. Beat in eggs one at a time. Beat in the vanilla.
With a wooden spoon add the flour mixture to the butter mixture and stir to combine. Add the oats and stir to combine. Last fold in the blueberries in a couple of batches being careful not to break the blueberries.
Roll the dough into one inch balls and place on the baking sheet, leaving approximately two inches between each ball.
Bake for 14 minutes or until the edges start to turn brown (the center of the cookie may still look light and that is ok). Remove the cookies from the oven and let them set on the baking sheet for 4-5 minutes. Remove the cookies from the baking sheet to a wire rack to finish the cooling process.
Combine the ingredients for the glaze. You may find you need a little more powdered sugar depending on how thick you want the glaze. If the glaze is too thick add a little more lemon juice until you get the desired consistency. Drizzle the glaze over completely cooled cookies and let the glaze harden. Store cookies in an air tight container or freeze them.
One of the great things I love about the holidays is all the recipes you can make with cranberries. And when you pair them with orange juice, zest or both, well you have what I call a killer combo! But thanks to the frozen food isle, cranberries are not just for Christmas anymore. You can make great cranberry recipes all year long. And this is definitely one of them.
This recipe is a little time consuming as you basically have three separate components to prepare in order to assemble the coffee cake. But believe me, it’s worth it. Normally I give most of my baking to neighbors or co-workers, but this time my husband ate the bulk of it. He absolutely loved it, and so will you.
So let’s talk cranberry orange coffee cake…
Lesson Learned 1 – Prepare all three components first and then assemble the cake: I found this the easiest way to make this coffee cake and once all three components, the cake, the filling and the topping are made, assembling the cake is a breeze. I made the cake part first, then the topping and finished by making the cream cheese filling. I chose that order because both the cake and the topping take a little bit more time to assemble but the cream cheese filling can be made in a snap.
The cake mixture
The topping mixture
The cream cheese filling
Lesson Learned 2 – Cube the butter first and put it back into the refrigerator: The topping needs really cold butter to create the crumble and even if you start out cubing it when it’s cold it will start to warm up. I found that if you cube the butter and then put it back into the refrigerator until you need it you will have nice cold butter when it comes time to make the topping.
Lesson Learned 3 – Be patient when making the topping mixture: This is a traditional crumble topping mixture that requires you to cut cold butter into flour and sugar. I have a pastry cutter and I’m always struggling, at least initially, with the butter sticking to the pastry cutter. I find myself constantly scraping the butter off of the cutter. But don’t worry, as the butter starts to become more incorporated with the flour you will not have to do that anymore. It just takes a little time, so be patient and scrape the butter when necessary.
Lesson Learned 4 – All ovens are not created equal: I’ve said this many times but it bears repeating. For me living in a high altitude environment I find things always take longer to bake. That might not be the case for you. So normally I post sea-level cooking times, but keep in mind that this is just a gauge. Start looking at your cake at 70 – 75 minutes. The important thing is to make sure the cream cheese filling has set. If it is too jiggly the cake is not done. If you touch the center and it feels firm but slightly jiggly, you are good to go. (Do you love how technical this is?!)
Right Out Of The Oven
I think you will find this coffee cake is more than worth the work involved. And don’t let me scare you away from this, the work really isn’t that much or that complicated. Try it and let me know what you think…
Preheat the oven to 350. In a large bowl whisk together the flour sugar baking powder and soda. Set aside. In another bowl whisk together the egg, orange zest, orange juice, melted butter and vanilla until blended. Pour this mixture into the flour mixture and stir until just moistened. Fold in the cranberries and set aside.
For the topping mix the flour and sugar in a small bowl. With a pastry cutter or two knives cut the butter into this mixture until the mixture looks crumbly. Set aside.
For the cream cheese layer, beat the cream cheese and sugar with a hand mixer until smooth. Add the egg and vanilla and beat on a low speed until just blended.
Transfer the coffee cake mixture into a greased or sprayed 9 inch springform pan. Pour the cream cheese mixture over the top and spread it out evenly. Sprinkle the toping mixture all over the top.
Place the pan on a baking sheet lined with foil. Bake for 70-75 minutes (in high altitude it can take up to 15 minutes more) or until the top is golden brown and the cream cheese mixture set.
Cool in the springform pan for 15 minutes before removing the coffee cake. Refrigerate any leftovers.
I had a few apples lying around and I wanted to use them. This recipe is a great way to use “older” apples. The bites come out so moist and tender you’ll be hard pressed to eat just one. You make this recipe in a 9 x 13 pan and that is way too much for me and my husband so I brought them to work the next day. I couldn’t believe how many compliments I got on them although my husband maintains you can put cardboard in a break room where you work and people will devour it. Part of me knows that’s true, but when people go out of their way to say how delicious it was you know you have something special.
Yes, something special, that’s how I would categorize this. And a great way to use apples that are not all that fresh anymore but still very good. So let’s talk sour cream apple bites…
Lesson Learned 1 – This is a pretty straightforward crumble-type recipe: The crust you make for the base is the same crumble you put on top. This recipe gives you an ample amount for a nice crust and a substantive crumble. Use half of the mixture as the crust and the other half as the topping. Make sure you use all of it, don’t waste a bit.
Lesson Learned 2 – The food processor is your friend on this one: Make sure you use the food processor to shred the apples. If you’ve never used a food processor it’s worth your while to spend a little time familiarizing yourself with one and learning how to use it. It can be a great time saver. There are a plethora of videos on YouTube that can show you all you need to know about a food processor. Here is a handy little video about how to shred food using a food processor:
Remember when you shred the apples for this recipe, all you need do is cut out the core and seeds. You don’t need to peel them. I used gala apples for this recipe and you can see the little red fleck in the shredded apples in the pictures below. You won’t even notice the peel when eating the bites and the red from the apples gives a nice little pop of color to the sour cream filling.
What I like about this recipe is not only is it insanely delicious but it also is simple to make. I guarantee you that when you make these bites they will disappear quickly. Enjoy this one!
Preheat oven to 350 degrees. Make the crust/topping first. Mix together butter and sugar until light and creamy. Add all of the remaining ingredients and mix well. Take half of the mixture and press it into the bottom of an ungreased 9 x 13 inch baking pan. Bake for 10 minutes or until the crust is a light golden brown.
While the crust is baking shred the apples in a food processor by removing the core and seeds but leaving on the skin. Combine all of the filling mixture ingredients together except the shredded apples until well blended. Fold in the shredded apples.
Pour the filling mixture over the crust (the crust can be still hot). Crumble the remaining crust/topping mixture over the filling and pat down lightly.
Bake for 40 minutes or until the top is golden brown and the center is set. Cool completely before cutting into bites. Store refrigerated.
If you are looking for an easy, and I do mean easy, meal to prepare look no further. I served this meal a couple of times now and it always turns out perfectly and it’s always super delicious. I have to admit I was initially skeptical about how this would turn it, but it was absolutely fabulous. When you know you’re going to have a busy day and you still want to have a good meal at dinnertime, this recipe is the answer to that dilemma.
So let’s talk slow cooker honey bbq pulled chicken sandwiches…
Lesson Learned 1 – Try to use chicken breasts with the skin on: I normally buy chicken breasts with the skin on and rib portions attached. First they are cheaper when purchased that way and second it’s easy to remove the rib portion and you’re left with a skin-on breast. Chicken can dry out very easily in a slow cooker and often can get overcooked. With the skin on it gives the breast meat more moisture during the cooking process and that is what you’re looking for. But sometimes you just can’t find them that way and that’s ok as well. Both times I made this recipe I had skinless breasts in the freezer and so I used them. But in my experience with other recipes, skin on breasts are preferred when cooking them in a slow cooker.
It’s also important to season them as well. I seasoned mine with kosher salt, pepper and McCormick’s Perfect Pinch Rotisserie Chicken seasoning blend. I really like this blend as it gives the chicken a great rotisserie chicken flavor. Try it and I’m sure you’ll agree.
Lesson Learned 2 – Use a slow cooker liner for this recipe: The sugar and honey in the bbq sauce can cause a mess that is very hard to clean up if it burns into your ceramic crock. Personally I am not a fan of slow cooker liners but I use them for this recipe. If you use one, clean up is a breeze and you don’t wind up with burnt bbq sauce all over your crock.
Lesson Learned 3 – Don’t overcook the chicken: I know, easier said then done, but most people overcook chicken breasts no matter what cooking method they are using. Chicken breasts can be moist as well as cooked through but there is a fine line between when that occurs and dried out chicken.
My rule of thumb is I never cook half breasts (and the ones I used were quite large) for more than 6 hours on low in my slow cooker. A lot of recipes say to cook chicken between 6-8 hours. In my opinion a two hours difference in cooking times is huge. Whenever I’ve cooked chicken in a slow cooker for 8 hours it always turned out dry. But the other variable is your slow cooker. Not all slow cookers are created equal. Know your slow cooker and if for some reason you can cook chicken for 8 hours and it does not dry out that’s fine. But I bet if you cook it for only 6 hours you’ll get a much better result.
Lesson Learned 4 – You can cook a veggie with the chicken if you want to: The first time I made this recipe I only cooked the chicken in the bbq sauce mixture. The second time I added carrots. When it came time to shred the meat I just pulled out the carrots, put them on a baking sheet lined with foil and sprayed with cooking spray and kept them in a warm oven until dinner was served. Make sure you use cooking spray on the foil as the remnants of the bb sauce on the carrots will stick to the foil and you don’t want the carrots sticking. Also make sure you don’t use overly thick carrots – they won’t cook through in six hours.
Lesson Learned 5 – Serve the chicken on good sandwich rolls: The sandwich rolls are also important. I served my chicken on brioche buns. I found them at Whole Foods and I have to admit they were a little pricey, $4.99 for six rolls, but boy were they worth it. They were just the perfect compliment to the bbq chicken. I’m not saying you need to invest that much in dinner rolls, but make sure they are fresh and soft. It makes a difference. I served the sandwiches with cole slaw and sliced tomatoes and the meal was a hit!
An easier, more delicious recipe you’d be hard pressed to find. Try it and let me know what you think…
2-3 large carrots, peeled and cut into 2 inch logs (optional)
Salt and Pepper to taste
DIRECTIONS:
Line the slow cooker with a slow cooker liner. Place chicken in slow cooker. (Place veggies in with the chicken). Season with salt, pepper and rotisserie chicken seasoning.
In a separate bowl combine bbq sauce, Italian dressing, brown sugar and Worcestershire sauce. Pour over chicken. Place lid back on top of the slow cooker.
Cook on low for 6 hours. If cooking veggies, remove them onto a foil lined baking sheet sprayed with cooking spray. Keep in a warm oven until serving.
Remove chicken, take off any skin and shred the breasts using two forks. Place shredded chicken back in the slow cooker and cook on high for 15 minutes to 1/2 hour. Serve on dinner rolls.

 Lesson Learned 1: I found a great shortcut for adding bacon to recipes. The last time I was at the grocery store I noticed a package of Boar’s Head fully cooked bacon. It comes in a box and is not refrigerated. Inside there are two vacuumed sealed packages of cooked bacon with approximately 6 pieces per pack. One pack was perfect for this recipe. I avoided all of the grease and clean up associated with cooking bacon. Since then I’ve used it on salads and in other recipes. I love the taste and convenience of it. You may want to try some. It really makes putting together this cheese ball a snap.
 Lesson Learned 2 – Grate your own cheese versus using the packaged kind. Although I just touted the convenience of using precooked bacon, I don’t recommend using the grated cheese you get in a bag in any recipe. It may take a few seconds more to grate your own cheese but for flavor and health reasons I strongly recommend it.
 1- 8 ounce package of cream cheese, room temperature


 Well, that is what this recipe is all about. I wish I could take credit for this but I can’t. I was at the grocery store looking for something to make, like a quick bread or muffins and I picked up this box of Krusteaz Cranberry Orange Muffin Mix. I looked on the back of the box to see if I could use this to make a quick bread and lo and behold on the bottom right hand corner was the recipe for this cake. All it required was a few extra ingredients, namely almond extract and fresh plums. The picture of the cake looked so good I just had to try it. Needless to say, it was fabulous and very easy to make so I felt I had to share it with all of you. Nobody has to know that this cake is semi-homemade.
 Lesson Learned 2 – Create the plum arrangement you want on top of the cake on a paper plate first: I found I had to play with the plums a little to create the arrangement I wanted. You don’t want to be doing that on top of the batter. I took a dinner size paper plate and created my plum arrangement on that. When it came time to put the plums on top of the batter I simply moved them from the plate to the cake just like I arranged them. It was a piece of cake, no pun intended!
 1 box Krusteaz Cranberry Orange Muffin Mix


 1 8 oz. package of cream cheese, room temperature


 I’ve had a lot of practice making appetizers this Summer as my condo association hosts a happy hour every Thursday and although you’re not obligated to bring anything I like to use it as my recipe tester event. So last Thursday I made this dip and it was a hit.
 Lesson Learned 3: Serve this with veggie straws. I’m not sure how I got the idea to use veggie straws but they were the perfect compliment to the dip. I think people just get tired of the usual potato or nacho chips and this was a welcome change. They also lend themselves well to scooping some dip on the straw which makes this appetizer great finger food.


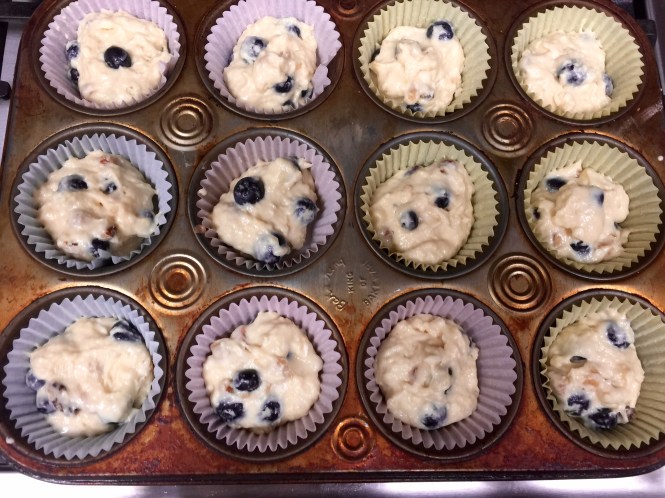


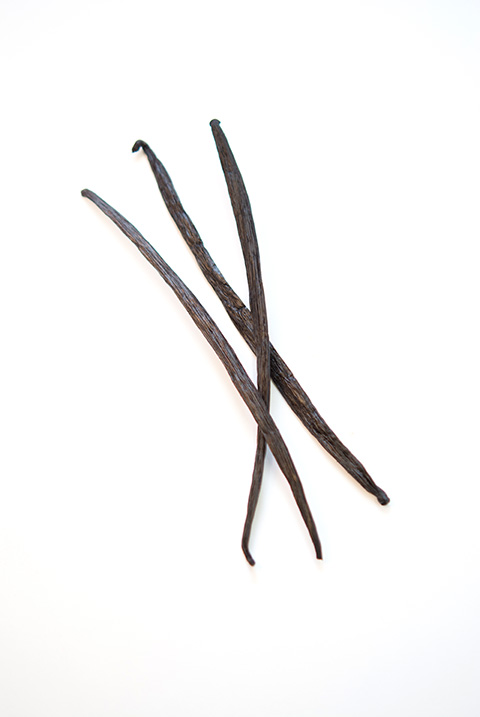
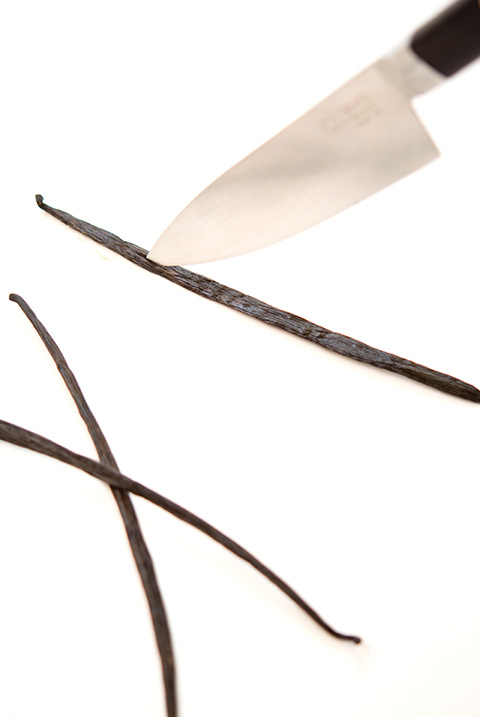
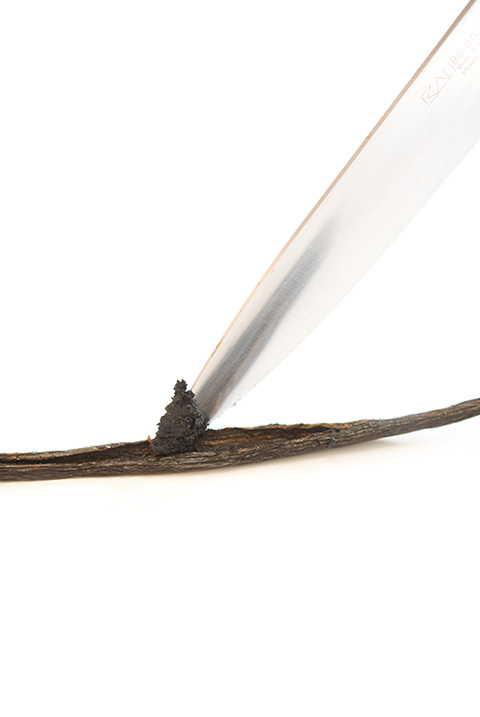 A whole vanilla bean will give you the equivalent of approximately one teaspoon of vanilla extract. Adding this to the two teaspoons of vanilla already in the recipe and it gives a wonderful but not over powering vanilla flavor to the zucchini bread. And that’s what makes it so luscious.
 Lesson Learned 2 – Use a food processor to shred the zucchini: Although you can use a box grater, a food processor is a faster and easier way to shred the zucchini for this recipe. One medium to medium-large size zucchini will give you the two cups needed to make the bread. The food processor shreds the zucchini to just the right size so there are small strands in the bread. You don’t want to the zucchini shreds to be too big. They are designed to add moisture to the cake without providing any noticeable flavor. Also, make sure to pat down the zucchini shreds in your measuring cup. You want them slightly compacted.


 Lesson Learned 2 – I used pre-made roasted tomatoes: In the specialty cheese section I found some roasted tomatoes marinated in garlic olive oil. Bingo! The package had about 7 ounces of roasted tomatoes that I diced up and put on top of the pepperoni. It was fabulous. If you can’t find them pre-made you can roast tomatoes yourself and then let them marinate in some olive oil. You’ll still get the same result. But this was a whole lot less work and gave the bites a great flavor!
 Lesson Learned 3 – I used a specialty feta cheese: You can certainly use plain feta cheese but I found a roasted pepper and basil feta cheese and I decided to use that. What I liked about this choice was that it added the flavor of basil to the appetizer without having to use basil leaves. You could certainly use basil leaves as well. If you do I would put the basil leaf on top of the pepperoni and then put the tomatoes on top of that. That way the leaf is secured. The great thing about this appetizer is that you can be creative and it will still be fabulous!


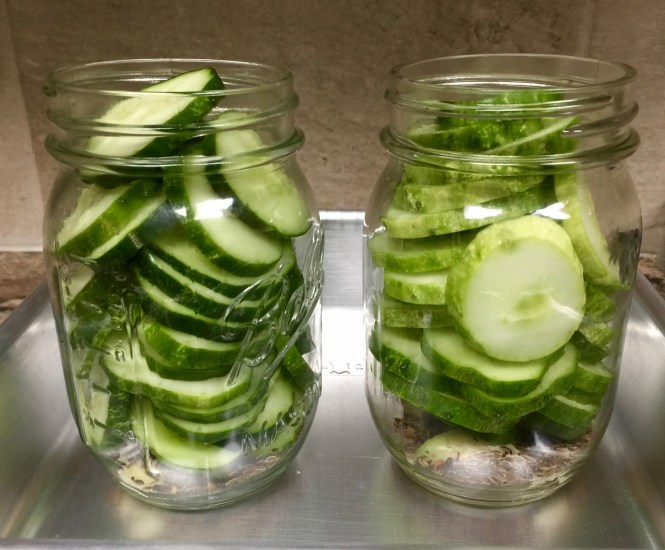


 Lesson Learned 1 – Learning how to know when the glutens in the dough have been developed properly: This was the biggest take away for me from the cooking class I attended. I learned you can underdeveloped, develop and overdevelop the glutens in your dough. Underdeveloped glutens will give you a heavy dense dough that may fall in on you when you bake your bread. Overdeveloped and your bread will be too dry.
 Lesson Learned 5 – You can separate your dough into as many strands as you want for braiding: I did a traditional 3 strand braid. You braid it just like you braid hair. The picture to the right shows my strands. In hindsight I should have made the bottom one thinner and all the strands more even in size. In the end it really didn’t hurt anything as you leave the braided bread to rest on a parchment paper lined cookie sheet for at least an hour and the dough rises and sort of fills itself in.


 Lesson Learned 1 – This is a great way to use some of the homemade pesto you’ve made from growing basil: pesto is what adds zip to this recipe and homemade pesto is the best. If you don’t have your favorite
 Lesson Learned 2 – If you want to serve these standing up versus lying down you will need to cut a flat surface on the bottom of each mozzarella ball: I learned this lesson the hard way. I started assembling the skewers and found that they would not stand straight. The round bottom of the ball prevented them from doing so. I tried pushing the bottom flat but that didn’t seem to work so I started cutting the bottoms off the balls and then figured out that I liked the presentation of the skewers better with the skewers lying on their sides. So I opted to serve them lying on one side versus standing up. There is no right way to serve these, but I found that serving them on their side created quite an impressive looking appetizer as you can see from the picture below…
 1 small container of cherry tomatoes


 Lesson Learned 1 – Use LOTS of shrimp: I used a 12 oz. bag of frozen cooked and deveined shrimp. I thawed the shrimp in the refrigerator overnight and then chopped it up into small bite sized pieces. I kept a couple of shrimp to garnish the top of the dip (of course you don’t have to do that) and all the rest went into the dip. My point being this is a shrimp dip – the more shrimp the better.
 Lesson Learned 3 – If you can, make this recipe the day before: Like almost any dish, the more the ingredients are acquainted directly relates to upping the wow factor of the flavor. So it is with this dish. It is such an easy dish to make that it shouldn’t be too difficult to make it the day before and let it sit overnight in the refrigerator. But if you’re in a rush and need something quick, you can serve this the same day and it will still be very good.
 1 – 8 oz. package of cream cheese, room temperature


 I’ve tasted many iterations of soda bread over the years and, to be honest, most of them were less than stellar. There was only one other time that I can remember having fabulous soda bread. That was when I was working at the Chicago Park District and one of my co-workers, Carol Diver, brought some to work. Carol was Irish through and through with an infectious laugh and a heart as big as all outdoors. And her soda bread was to die for. Unfortunately Carol is not longer with us and I’d never asked her for her soda bread recipe. But from then on, her soda bread was the standard to which I held all others. As time went on none would ever compare, until now.


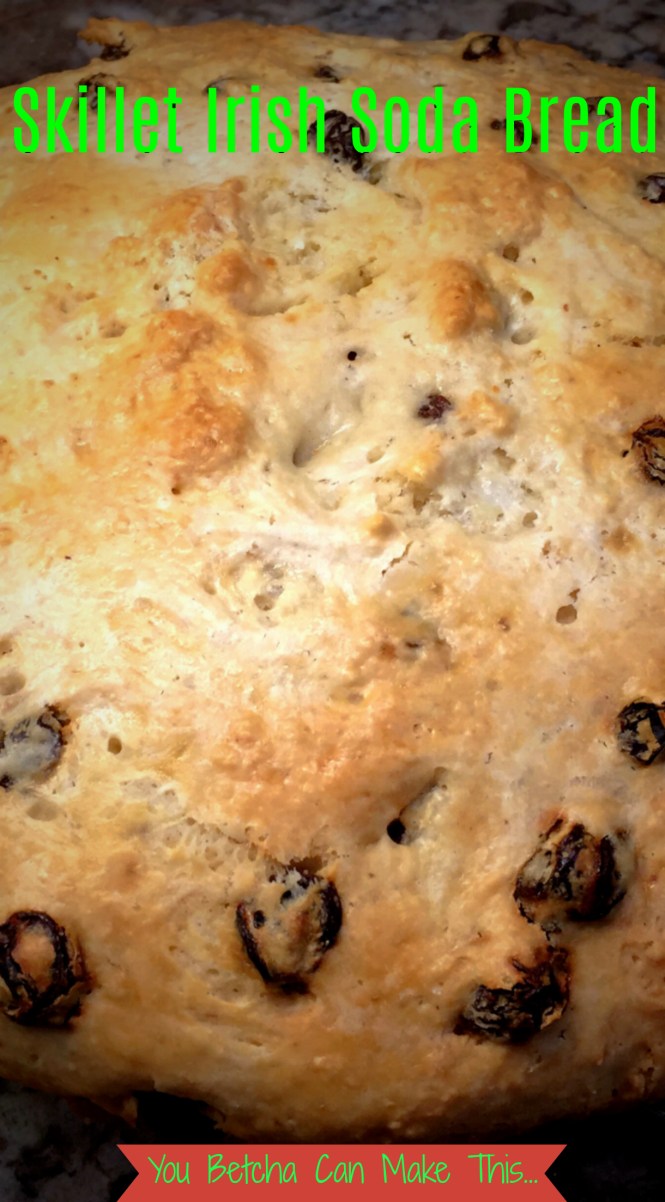

 Lesson Learned 1 – There are many ways to make ganache: I am going to share with you the simplest way. The ratio is easy to remember 1:1. Use as many ounces of heavy cream as semi-sweet chocolate. It couldn’t be easier.
 4 ounces semi-sweet chocolate squares cut into small pieces

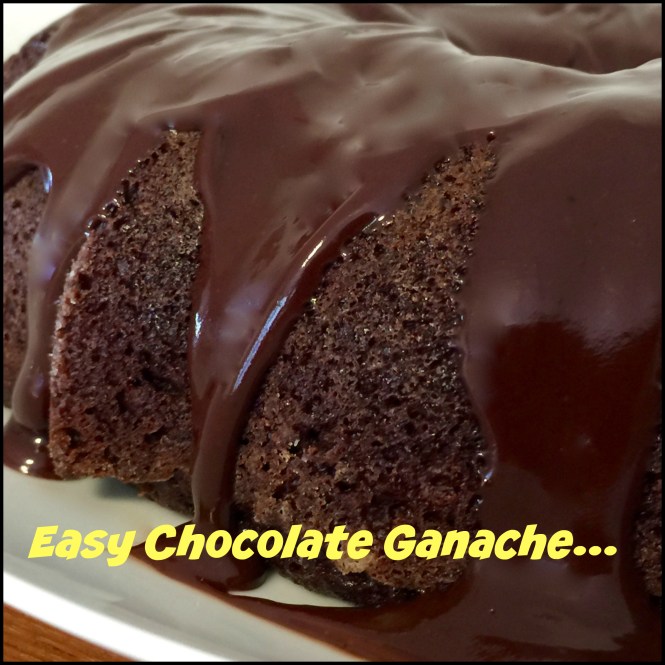

 Lesson Learned 1 – Make sure to cut the potatoes to the correct size: For the purposes of this recipe you need to keep the pieces close in size (approx. 3/4 inch pieces). Here’s a little trick to help you achieve that. Using your chef’s knife cut a thin slice off of one of the longer sides of a peeled potato. Set the potato on the cut side and slice crosswise into even planks. Stack several planks and cut crosswise. Then rotate and cut crosswise again. This will give you evenly sliced potatoes.
 Lesson Learned 2 – You can cook the pieces of potatoes two different ways, on the stovetop or in the microwave: (I will include both methods in the recipe printout). I chose to cook them on the stove. The process is not much different than making mashed potatoes. The only difference is you want to monitor the potatoes as they boil to make sure they don’t get overly soft, otherwise they’ll break apart. You want them to hold their shape. I would boil them for about 7-10 minutes and check their consistency. If they are still hard, check every couple of minutes until they are just becoming fork tender.
 Lesson Learned 5 – Don’t continuously move the potatoes once they are in the skillet: In order to get the potatoes nice and brown you have to let them sit for a while in the skillet. The whole browning process can take about 20 minutes and you don’t want to be flipping the potatoes continuously during that time. If you want to check to see if they are ready to flip, turn one of the pieces or look on the sides of the pieces to see if the bottoms have started to to turn color. You’ll get a much better result if you are patient during the browning process.
 2 large russet potatoes, peeled and sliced into 3/4 inch cubes


 Lesson Learned 1 – Learn what parts of the asparagus spears you can use: Quite often you’ll see on television the way to trim asparagus is to bend it and where it breaks off is where you should trim your bunch. I’ve found that sometimes that wastes too much asparagus especially if you’re making soup. I learned early on that even with a very sharp knife, there can be a part of the spear that will very hard to cut – you almost always have to use two hands pressing down on the knife to cut it. That is the part you want to throw out. That still leaves some of the tougher parts of the asparagus, but as long as a knife will go through it without a lot of force you can use it in the soup. Keep in mind that soup is designed to use as much of the asparagus spear as you possibly can so don’t be afraid to use some of the tougher parts of the spear. As long as you can cut through it without a lot of force it will be perfectly fine for the soup.
 3 Tbs. butter, separated


 Lesson Learned 2 – Only use coconut oil in this recipe: If you use olive oil you simply will not get the same flavor. The coconut oil renders a subtle sweetness that, along with the cinnamon, makes the squash taste so good. Now, can you use olive oil if you don’t have coconut oil – of course you can. But I wouldn’t recommend using cinnamon with olive oil. I don’t think the flavors would compliment each other as much.
 Lesson Learned 3 – Be careful how much cinnamon you add: In this recipe it is important for the oil and cinnamon to balance each other out in order to get the correct flavor and sweetness. For that to happen the correct proportions need to be used.


 One more note… from time to time I will also focus on making recipes for two. It’s just my husband and I that I cook for now unless we are having a party and sometimes I find if I make too much we either throw stuff out or eat leftovers. And some recipes are more conducive to leftovers than others. These days it is hard to cook for two since grocery stores seem to sell bigger portions. But I found this particular recipe can be adapted in many ways and one of them is the amount you make. So I am writing this recipe for two people but keep in mind you can increase the ingredients proportionally to serve more.
 Lesson Learned 2 – Adapting this recipe: I originally wanted to use some spinach in this recipe but didn’t have it on hand and didn’t feel like going to the grocery store to buy some. But I did have some flat leaf parsley and so I used that. If you use spinach just saute it with the onions and only use a couple of handfuls. The spinach should act as the accompaniment to the recipe and shouldn’t overpower it. The same applies to flat leaf parsley. I only used a little more than a tablespoon (and of course I used some for garnish), just enough to enhance the flavor.
 Lesson Learned 3 – Those tricky potatoes: I don’t know about you but, for me, potatoes are tricky when using them in a casserole, specifically sliced potatoes. I’ve experienced many instances where they were hard and not cooked through. This time they turned out perfectly. This is what I did. I used two medium sized yukon gold potatoes and boiled them with their skins on until I could easily stick a fork in them. Then I put them in a colander and let them cool. It is important to let them cool. If you try to cut them when they’re hot they’ll fall apart. Once they cool you can easily peel and slice them. Can you leave the peel on? Of course you can. My husband prefers them with the peel off. I sliced potatoes into half inch thick rounds and they were delicious. One of the first things my husband said when he took is first bite was, “the potatoes are good”. Success!!
 2 medium sized yukon gold potatoes, pre-boiled

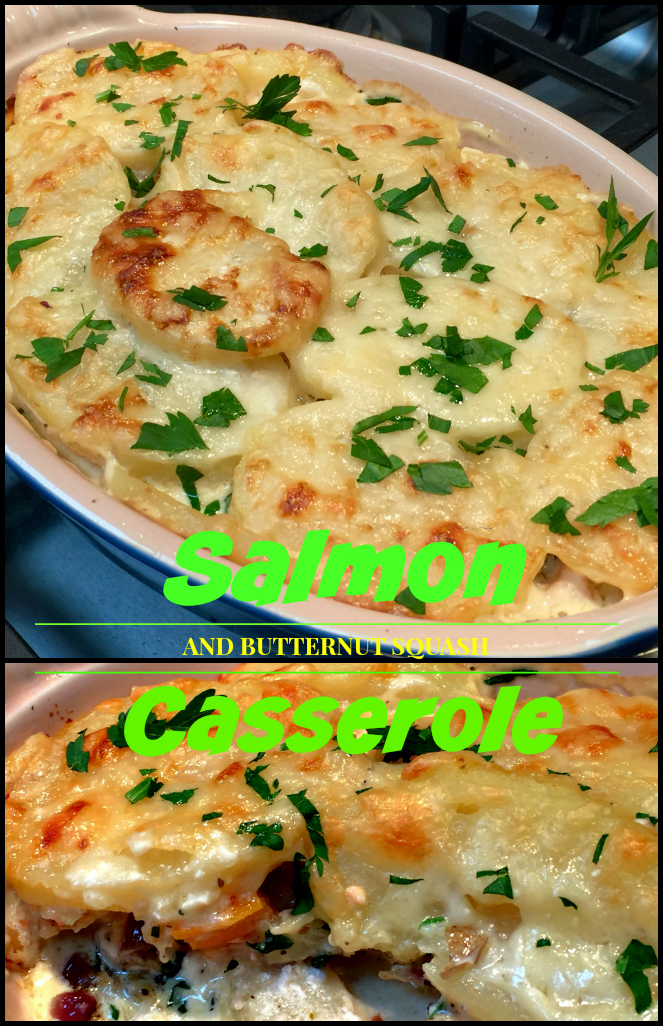

 Lesson Learned 1 – Working with the refrigerator dough: Using this kind of dough is very convenient but you do have to work it a little bit. I cut the pieces along the pre-perforated edges as best I could (I wound up with 9 rounds and I should have only had 8 if I followed the perforations exactly – oh well…) and rolled each piece into a ball. I flattened each piece with my hand and then used my thumbs to create a crater inside the dough. The crater is important because that’s where you put the cream cheese and cherries. Making the crater as deep as possible helps to prevent the cherries from falling off. But don’t worry, if they do once you pull them out of the oven just use a small spoon to push them back on top. Once they cool they will stay put.


 Lesson Learned 2 – Making the glaze: Making glaze for any type of cake or pastry couldn’t be easier. All it requires is some confectioners sugar, some liquid and perhaps some sort of additional flavoring. You can use water, milk, or heavy cream for your liquid and you can use a little extract, juice or zest to enhance the flavor of the glaze. More often than not I use milk as the liquid and in this particular recipe I used a little vanilla extract to enhance the flavor.


 Lesson Learned 4 – Use instant espresso powder to enhance the flavor of the chocolate: In any recipe that includes chocolate I’d recommend adding at least a quarter teaspoon of espresso powder. It brings out the chocolate flavor so much more. Try making a chocolate recipe without it and then make the same recipe with it. You’ll be amazed at how much it enhances the flavor of the chocolate.
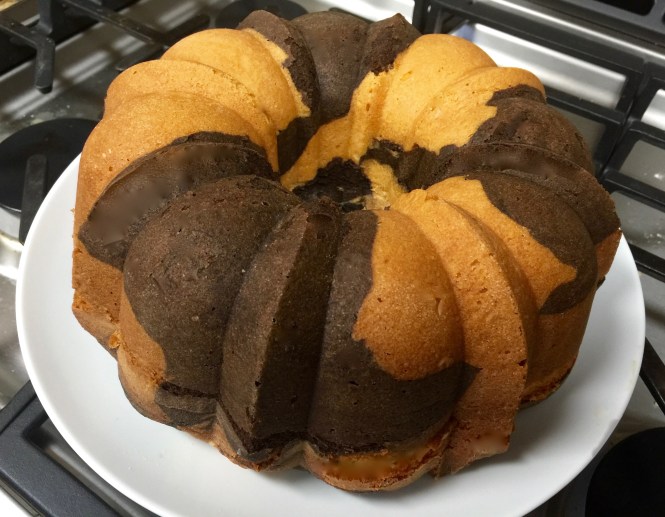


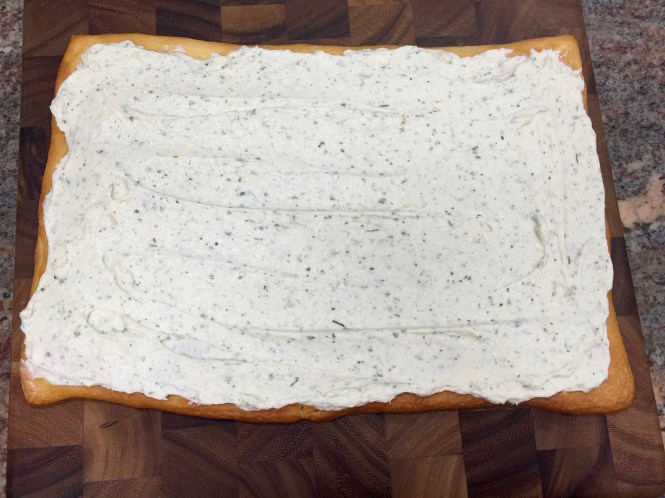

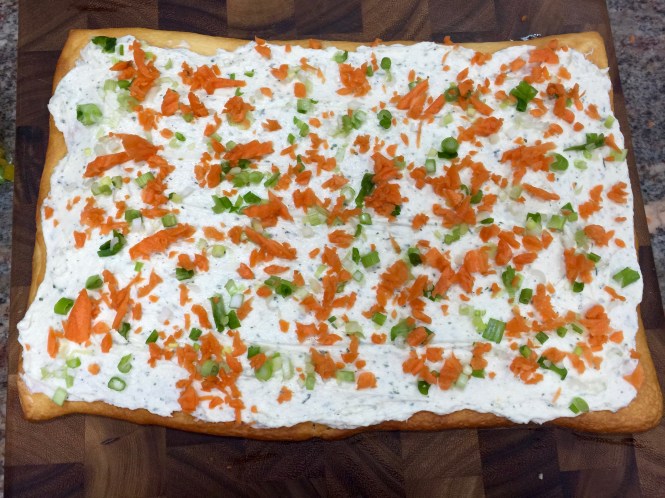
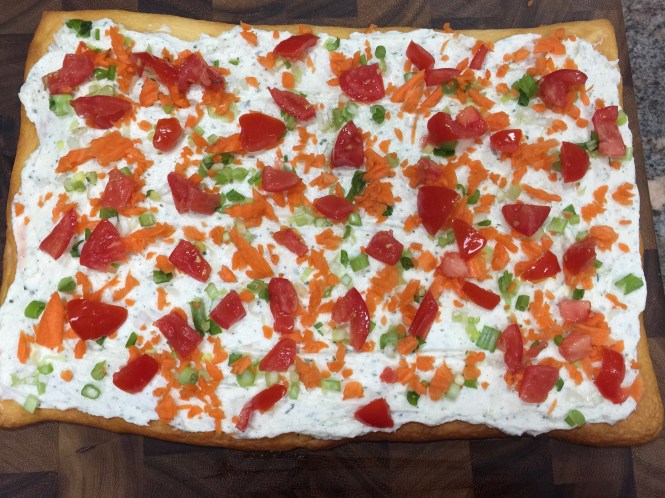
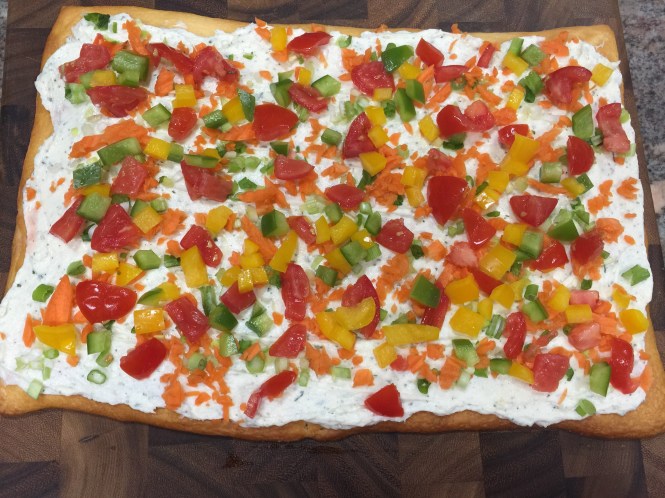
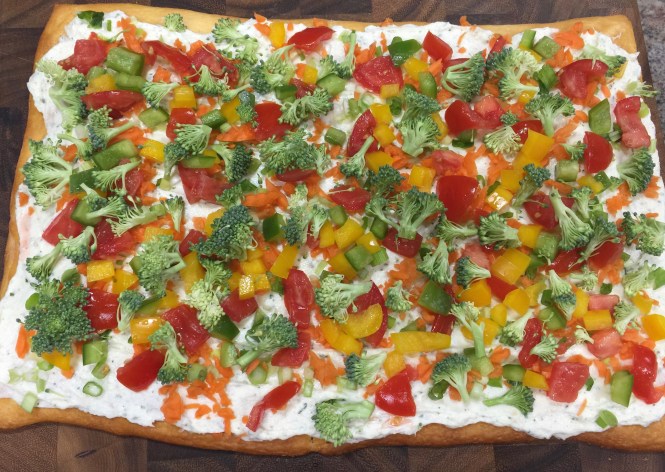
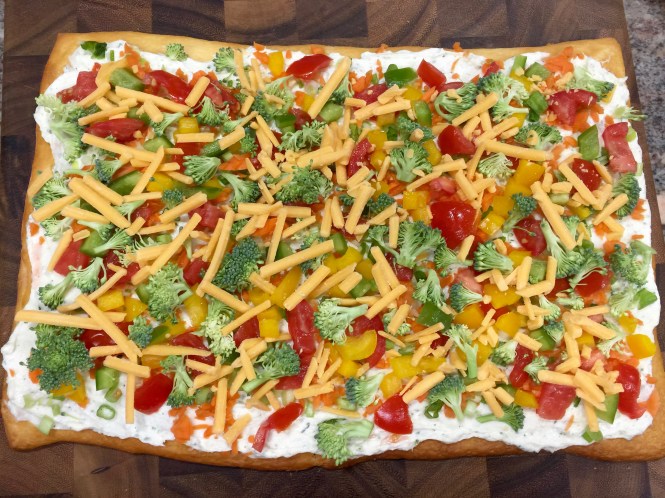


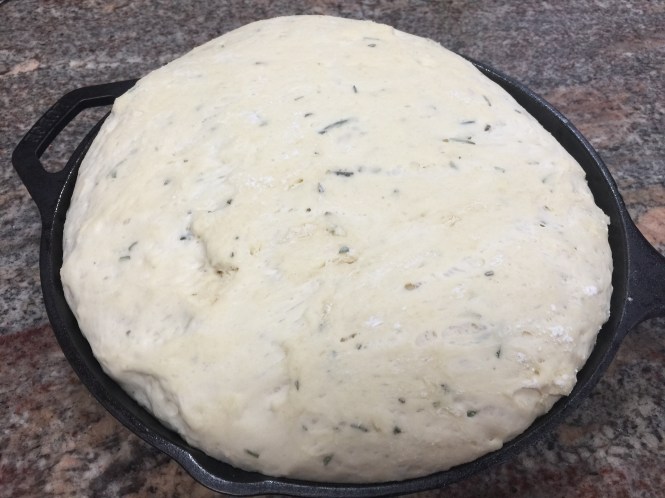
 Take a silicone brush and lightly coat the bottom and sides of the skillet. You really don’t want a lot of oil sitting on the bottom. That will give you a greasy crust. And make sure you use a good quality olive oil. I used a garlic infused olive oil when I made the rosemary parmesan bread and a mild flavored premium olive oil for the cranberry walnut bread. If you don’t overdo the oil the crust will have just the right amount of crispiness and will taste heavenly. Just make sure you use a good olive oil. I prefer the crust in this method compared to the crust you get when using an enameled cast iron dutch oven (in the process you do not oil the pan). That crust, to me, is a little tougher. But don’t get me wrong, both methods produce wonderful bread.

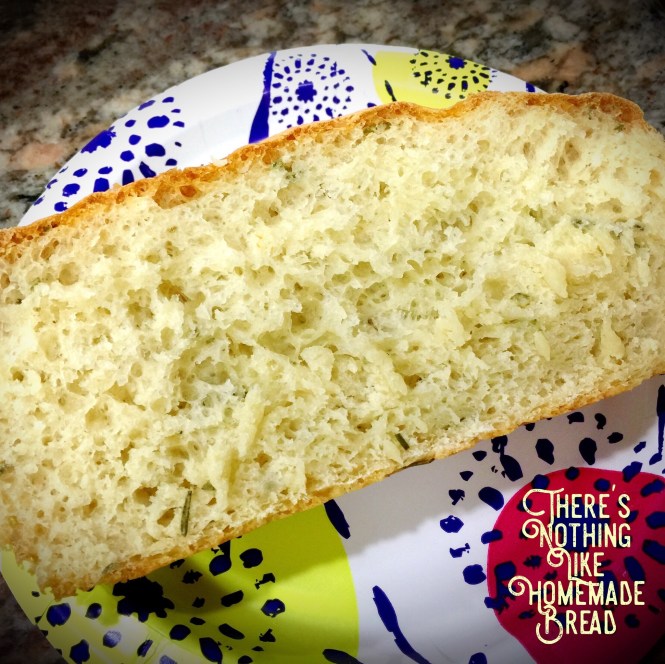


 Lesson Learned 3 – This cake freezes beautifully: This recipe produces a large cake that really only stays fresh for a couple of days. If you’re not making it for a party or to bring to work I suggest you take what you don’t think you’ll eat in a couple of days and freeze it. I wrapped mine in 2-slice portions. Make sure you wrap the pieces tightly in plastic wrap and then put them in a freezer bag(s). Let as much air out of the freezer bag as you possibly can. By doing this you’ll have fresh moist cake for a month!
 3/4 cup chopped walnuts


 This recipe came out of my desire to finally tackle making bruschetta and my need to bring an appetizer to a community event. Since I’d never made it before I decided to start out with a basic recipe that included only tomatoes, onion, sautéed garlic, garlic infused olive oil, some fresh lemon juice and fresh basil. It was divine! You can tell your appetizer is a hit when it’s completely gone while others still remain. This one was eaten up quickly.


 1 6oz. French baguette loaf, sliced in 1/4 inch slices


 The picture above shows you the amount of 1 inch rounds you get from a small-medium sized eggplant. It is very important to salt both sides of the rounds and then let them rest. The salt will “sweat” out the eggplant and remove any bitterness. After 20-30 minutes you will be surprised at how much clear liquid is on each slice. Wipe them off with a paper towel and you are ready to go.


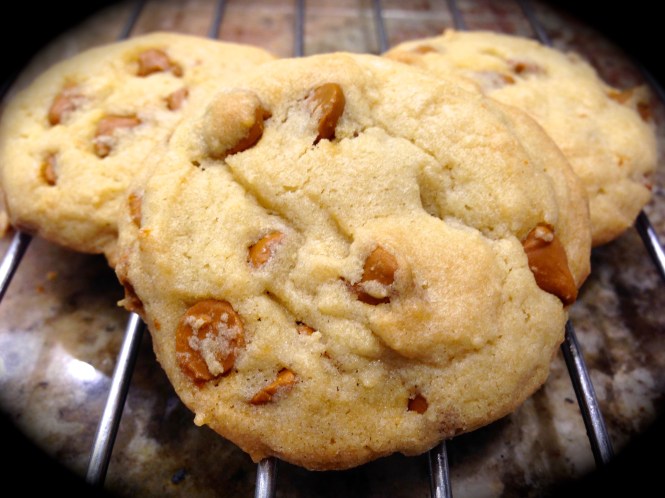
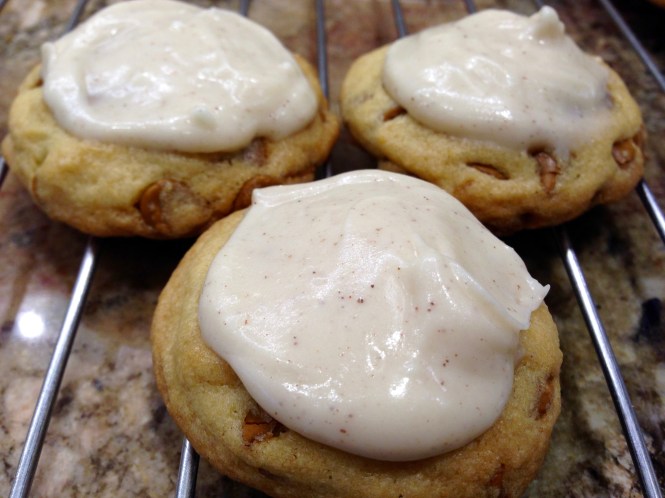
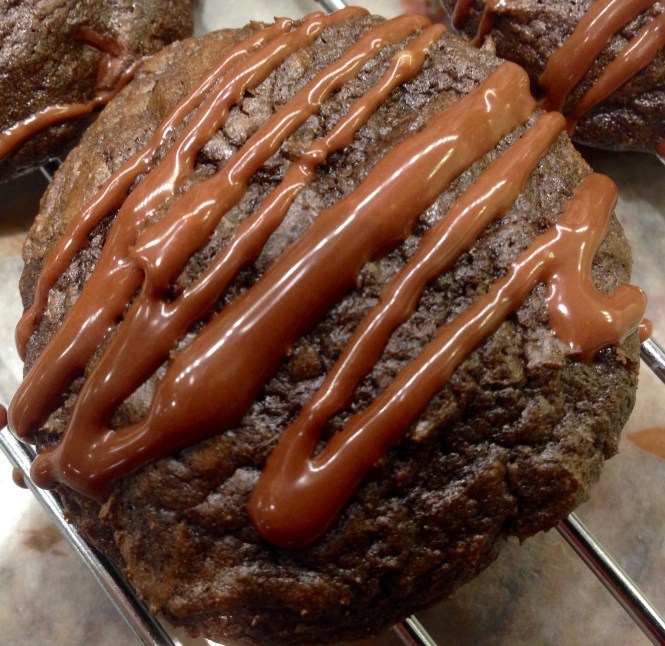


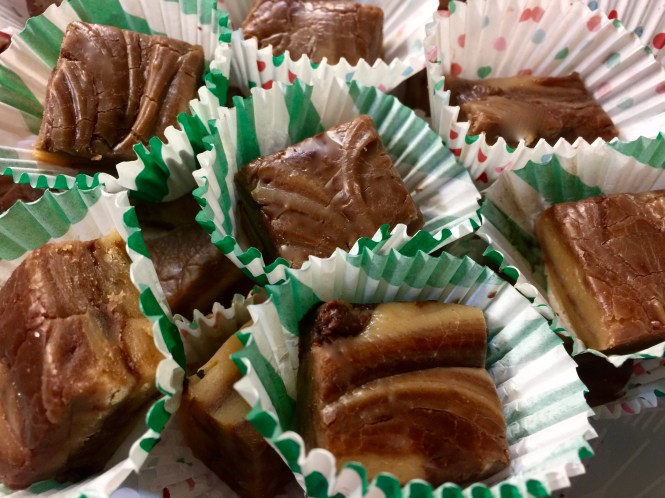


 So when we had the first meeting of our book group in my condo community I thought what a great time to experiment with another type of cheese ball. This time with a little salted caramel flare. And once again it was a huge hit!
 2 – 8 oz. packages of cream cheese, softened


 I would also time the process and not leave it up to your memory. You will actually see the mixture double in size and become more thick when you beat it for that length of time. That’s what you’re looking for. Be careful. Don’t try to shortcut this part of the process. If you do you will be left with a somewhat flat coffee cake.
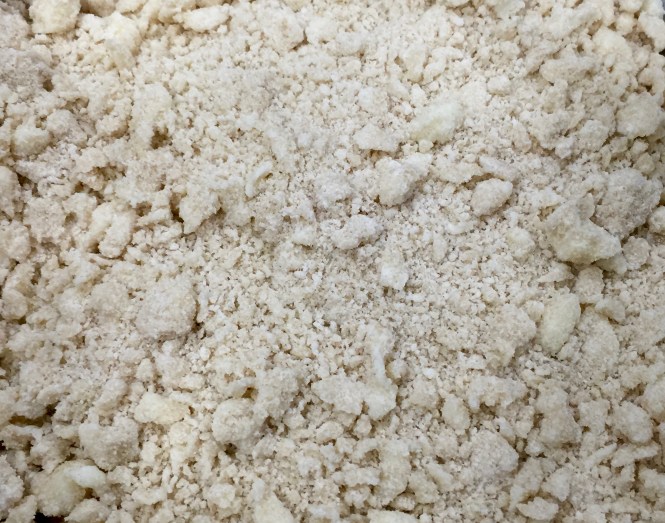


 but you can make it has hot as you like. McCormick has a few varieties of seasonings and if you can’t find a seasoning mix that gets you the heat you crave you can always add red pepper flakes. This seasoning mix contains a blend of chili pepper, paprika, cumin, onion salt and garlic. I also add about a teaspoon of chili powder and this combination of seasonings gives us the kind of chili we prefer.


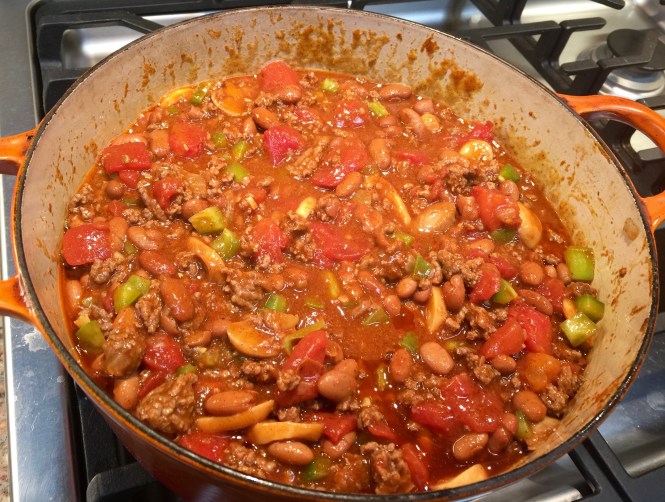


 The ingredients for this recipe are not all that complicated, cream cheese, scallions, cheddar cheese, parmesan cheese, worcestershire sauce, mayo, spices and some almonds. Easy enough.


 2. Choose any herb blend you think will work well with salmon: I used a Tuscan Garlic Seasoning Blend. It contains onion, garlic, spicy red pepper and lemon peel. I like it because it gives a gentle spicy kick to the salmon. If you’re not sure what to use read the label on the jar your considering. Quite often it will tell you whether it works best with meat, poultry or fish. Think of the herbs you enjoy and find a blend that resembles that. Or mix up a blend of your own.


 The ingredients in the recipe are a little unusual. For instance, you don’t use any eggs just butter and lemon juice – you use powdered sugar in place of granulated sugar – and you mix the flour with cornstarch. Sounds a little strange but the result is what, as a child, I called sand cookies. And although sand cookies doesn’t sound very appetizing, it was my term for cookies that literally melt in your mouth. The combination of ingredients in this recipe creates a melt in your mouth consistency that is amplified when you ice them with the lemon frosting. All I can say is yummo!
 Lesson Learned 1 – Make sure you chill the dough: The consistency of the dough is not like most cookies – it will be softer and stickier. It’s important for the dough to chill in order to form the cookies and bake them off. Divide the dough in half and make two eight inch logs. Cover the logs in plastic wrap and refrigerate for up to two hours. My dough was nice and firm after an hour and a half, so check your dough at that point to see if it is ready to go.
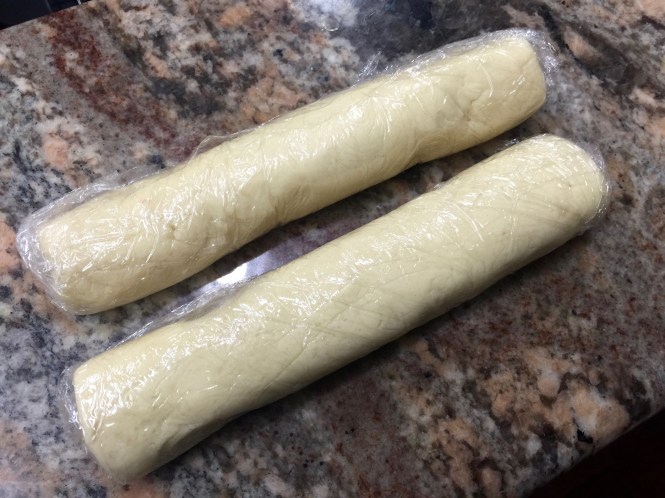


 Lesson Learned 2 – The batter will be thicker than you think: I was surprised at how thick the batter was in this recipe. But the combination of a thick batter and strawberries creates the perfect balance for a moist and flavorful muffin. All the magic happens in the oven, so don’t worry about how thick the batter is.


 2 cups flour


 Lesson Learned 1 – Buy chicken breasts with skin and ribs and debone the chicken yourself: You want to do this for a couple of reasons. First it is much less expensive to buy chicken this way. Second by leaving the skin on it keeps the breast nice and moist during the slow roasting process. Invest in a good boning knife and regularly maintain it with a hand sharpening tool like the one pictured to the left. It is surprisingly inexpensive and will keep your knife nice and sharp for a long time and boning the chicken breasts will be a breeze. These days it’s pretty hard to find boneless breasts with the skin still on so this may be the only way to do it.
 Lesson Learned 2 – Use a rice mixture for an extra flavor boost: Go ahead, be adventurous and use a rice mixture instead of just plain white rice. You can use wild rice, basmati rice or the mixture that I use which is a combination of white, brown, wild and red rice and pictured to the right. You’ll be amazed at how it punches up the flavor volume and makes the dish even more interesting.


 INGREDIENTS:


 Lesson Learned 1 – Try to use chicken breasts with the skin on: I normally buy chicken breasts with the skin on and rib portions attached. First they are cheaper when purchased that way and second it’s easy to remove the rib portion and you’re left with a skin-on breast. Chicken can dry out very easily in a slow cooker and often can get overcooked. With the skin on it gives the breast meat more moisture during the cooking process and that is what you’re looking for. But sometimes you just can’t find them that way and that’s ok as well. Both times I made this recipe I had skinless breasts in the freezer and so I used them. But in my experience with other recipes, skin on breasts are preferred when cooking them in a slow cooker.
 Lesson Learned 3 – Don’t overcook the chicken: I know, easier said then done, but most people overcook chicken breasts no matter what cooking method they are using. Chicken breasts can be moist as well as cooked through but there is a fine line between when that occurs and dried out chicken.
 Lesson Learned 4 – You can cook a veggie with the chicken if you want to: The first time I made this recipe I only cooked the chicken in the bbq sauce mixture. The second time I added carrots. When it came time to shred the meat I just pulled out the carrots, put them on a baking sheet lined with foil and sprayed with cooking spray and kept them in a warm oven until dinner was served. Make sure you use cooking spray on the foil as the remnants of the bb sauce on the carrots will stick to the foil and you don’t want the carrots sticking. Also make sure you don’t use overly thick carrots – they won’t cook through in six hours.
 3 large chicken breasts, skin on preferred


